The bubble ponytail has become a beloved go-to hairstyle across the community, and for good reason. This playful, voluminous style transforms a simple ponytail into something that feels intentional, glamorous, and full of personality. Whether you’re heading to work, a social event, or just want to elevate your everyday look, the bubble ponytail offers endless possibilities for customization and creativity. The beauty of this style lies in its versatility — it works beautifully with different hair textures, lengths, and styling preferences, making it accessible to almost everyone.
What makes bubble ponytails particularly special is how they work with natural texture and protective styling principles. The segmented, bubble-like sections add dimension and visual interest while keeping hair off the face and neck. You can create this look with your own hair, extensions, or a combination of both, depending on your styling goals and hair health priorities. The key is understanding the foundational technique and then making it your own with variations that suit your lifestyle, hair type, and aesthetic.
This style has earned its place as a staple partly because it’s surprisingly low-maintenance once you understand the proper technique. Unlike styles that fall flat by the end of the day, a well-executed bubble ponytail tends to hold its shape and even look better as the day goes on. The technique is forgiving enough for beginners to attempt but offers enough room for advanced styling tricks that even seasoned professionals keep discovering new approaches. Let’s explore ten distinct bubble ponytail styles that showcase just how versatile and stunning this look can be.
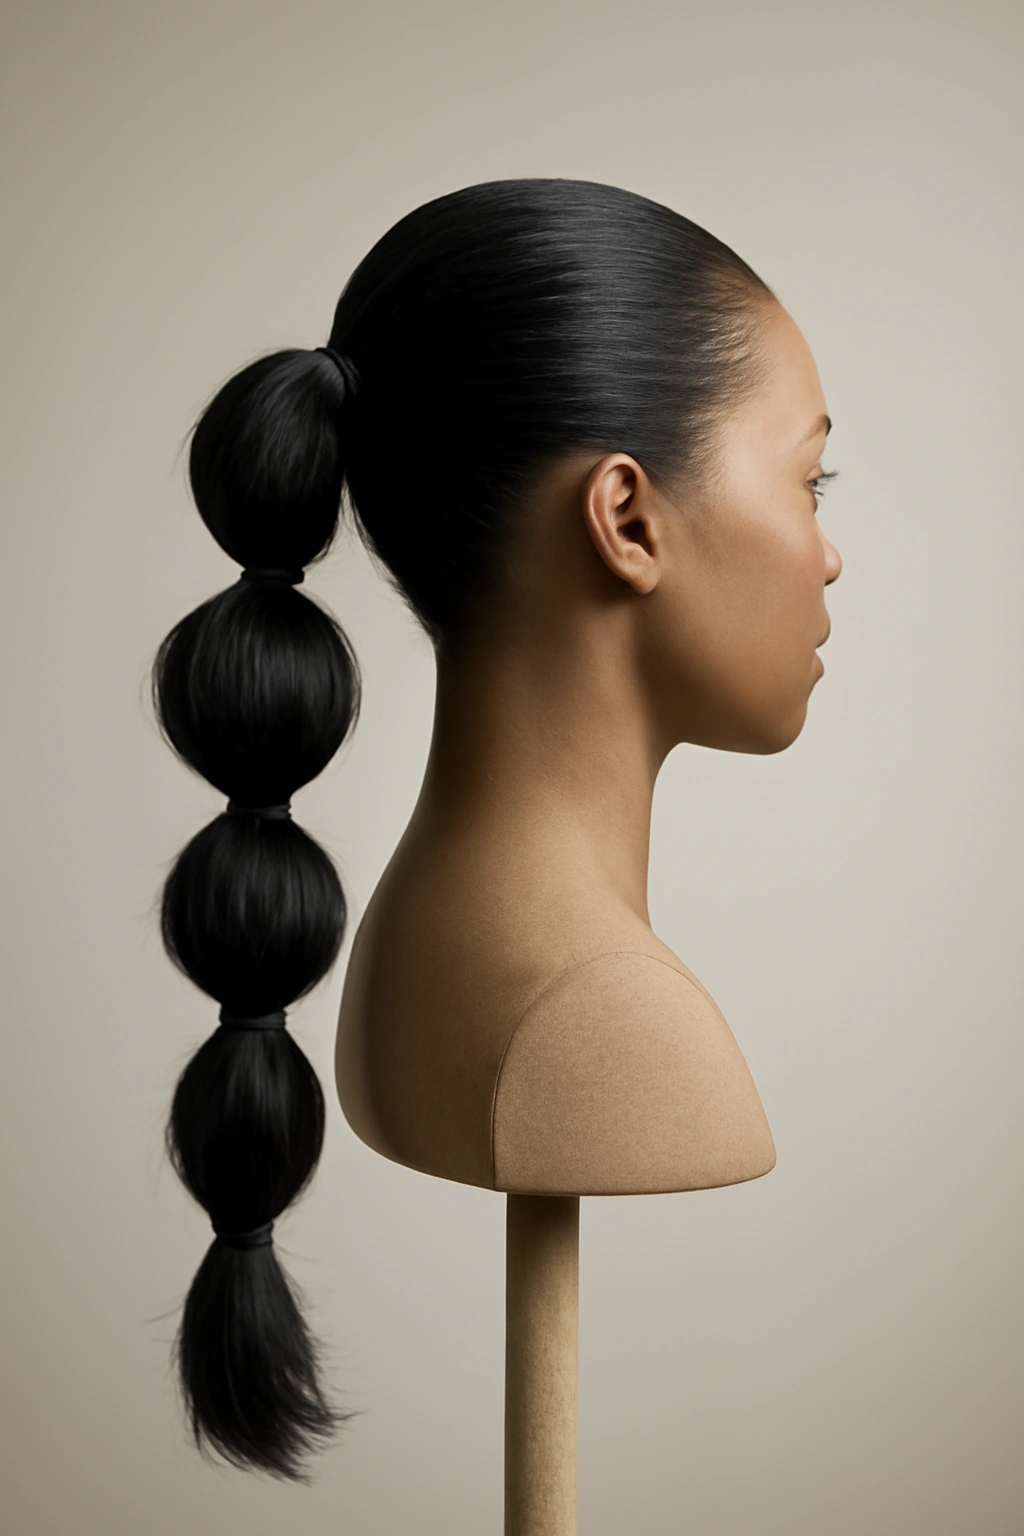
1. The Sleek High Bubble Ponytail
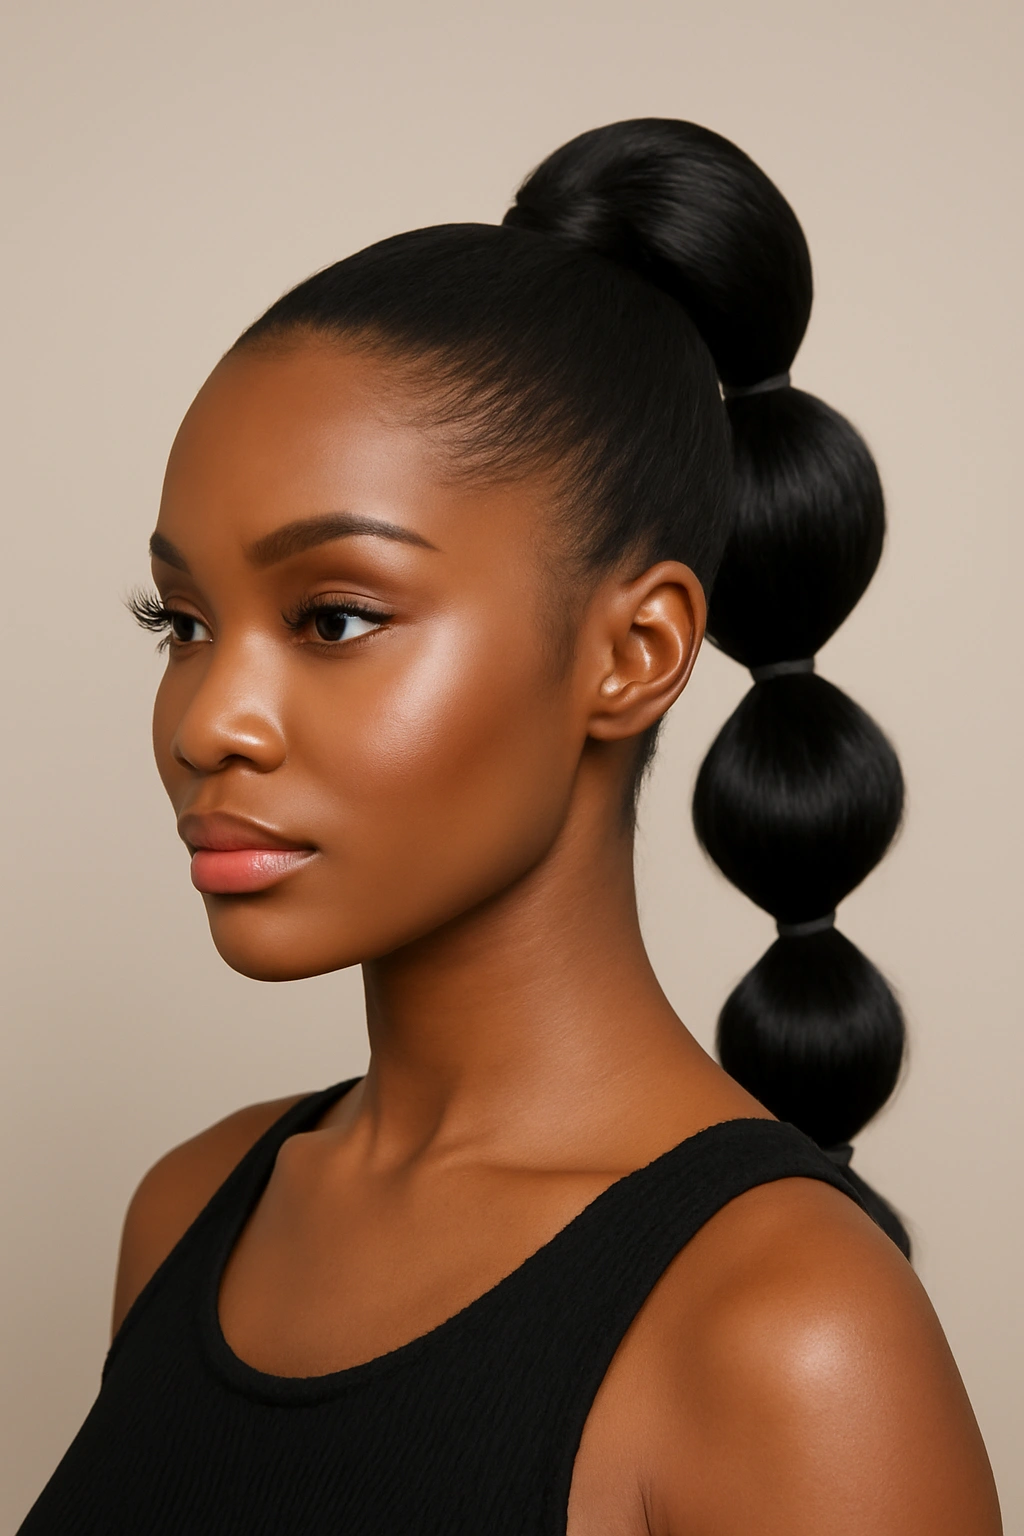
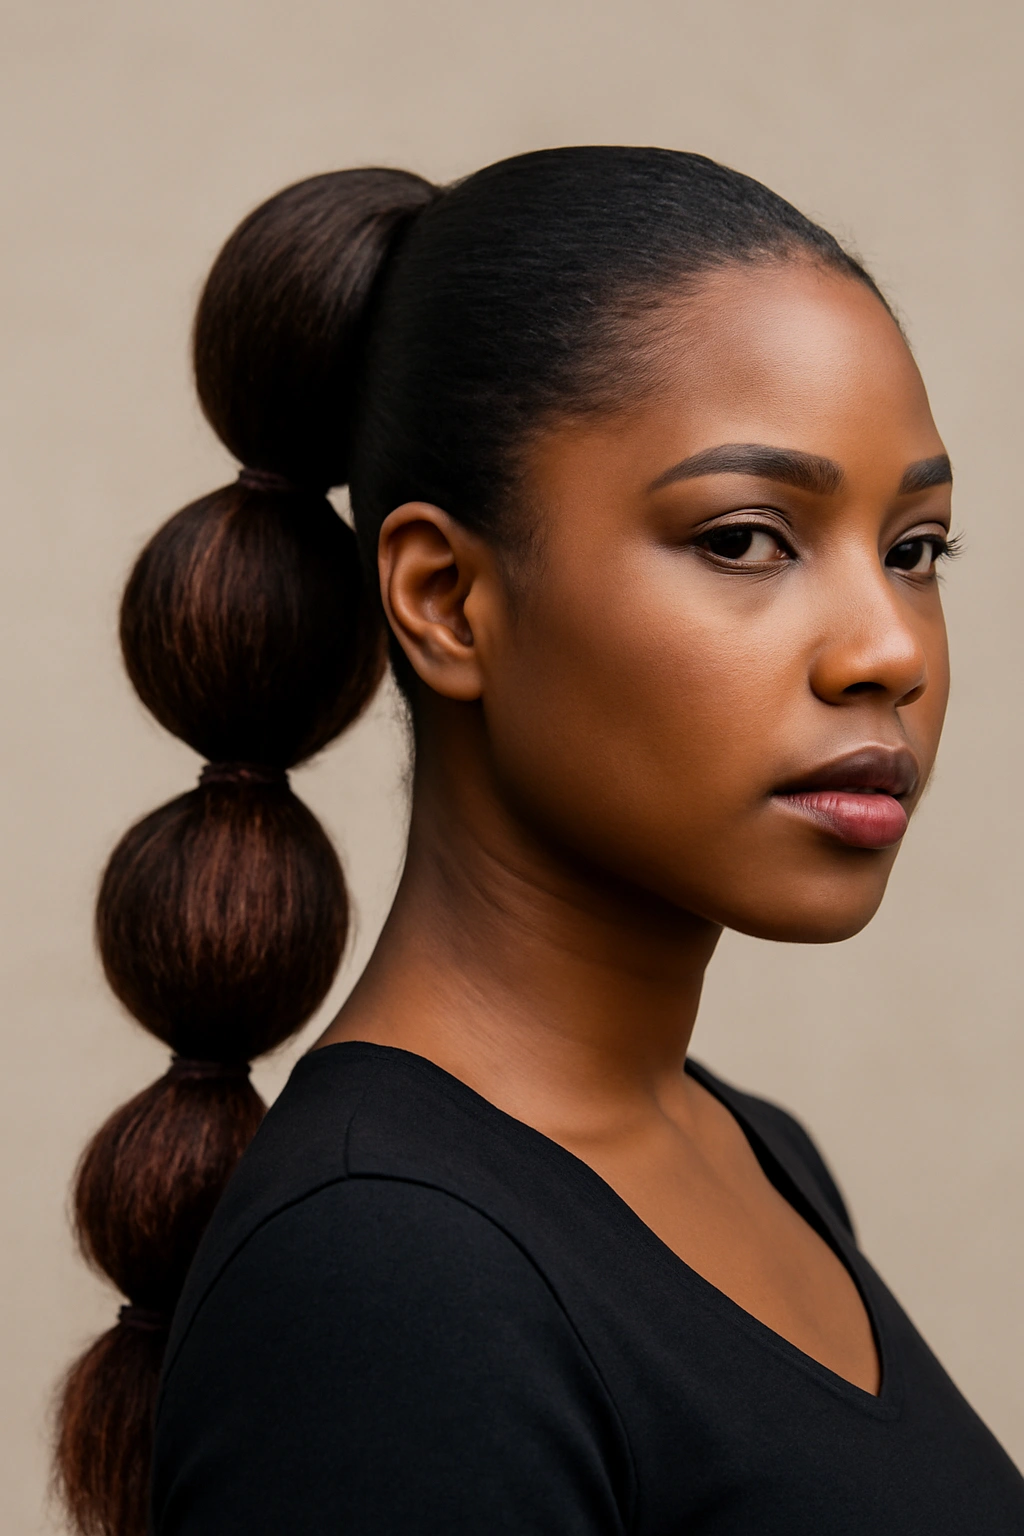
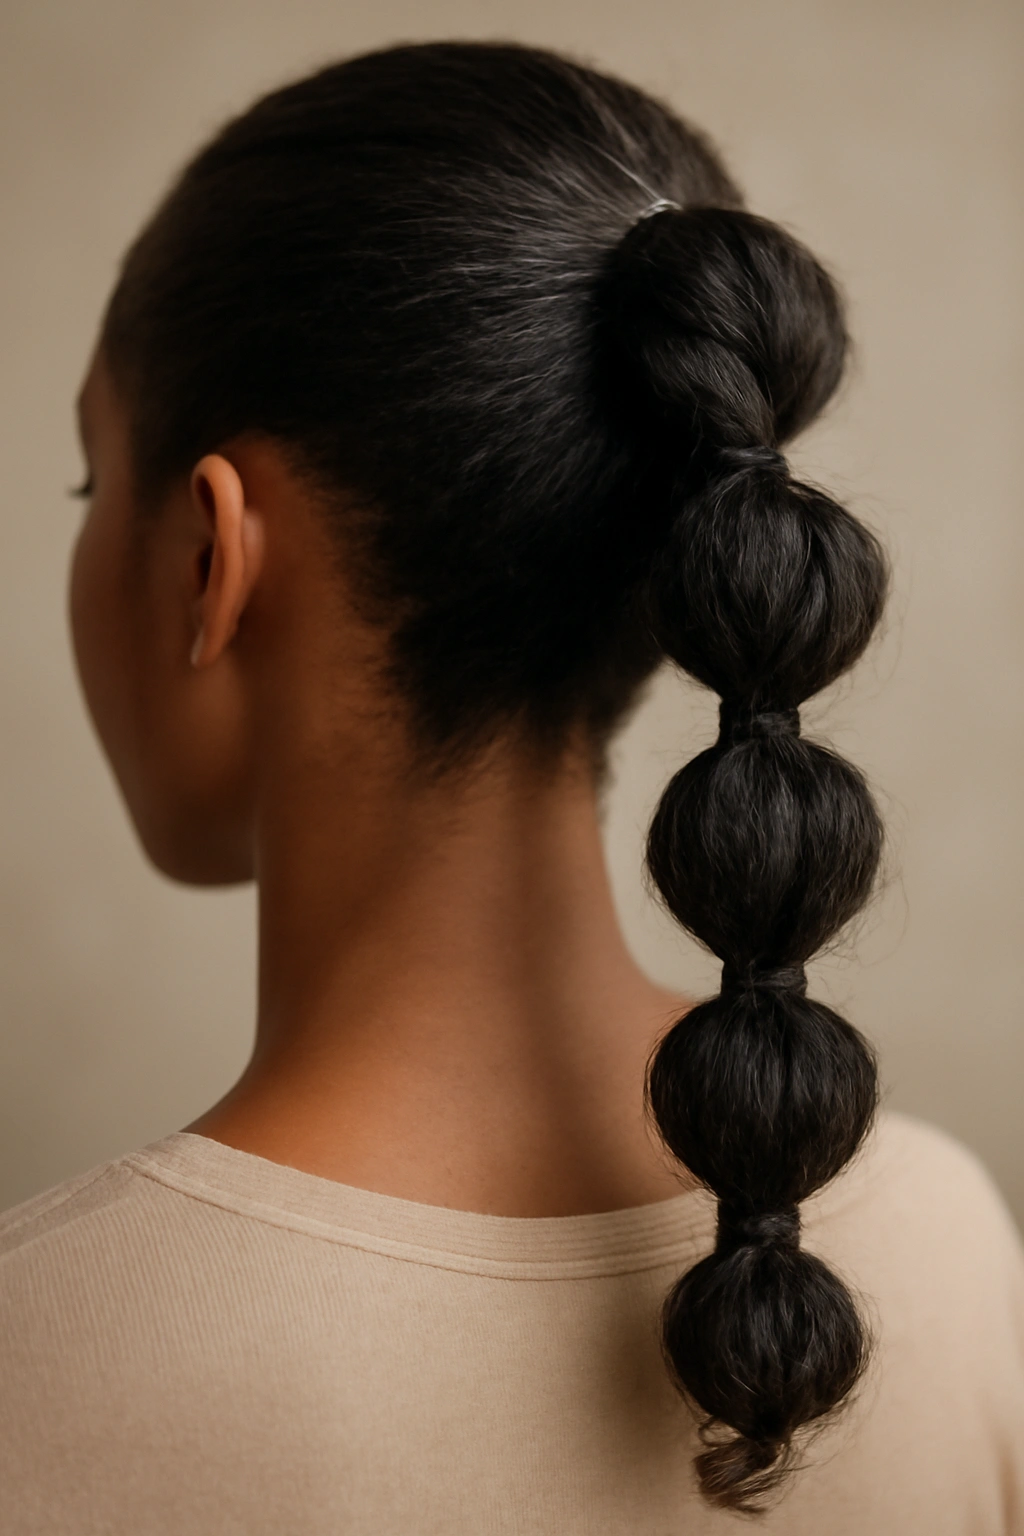
The sleek high bubble ponytail is the most recognizable version of this style and serves as the perfect foundation if you’re new to creating bubbles. This variation features a tightly gathered ponytail at the crown with three to four pronounced bubbles created by securing sections with clear elastics. The hair between elastics puffs out dramatically, creating that signature bubble effect that makes the style instantly recognizable.
Why This Style Works So Well
The high placement draws attention upward and elongates the face, making it flattering for most face shapes. Because the foundation is sleek, it photographs beautifully and photographs well in different lighting — no flyaways or texture inconsistencies to detract from the clean lines. The elastics holding each bubble create defined sections that read clearly from any angle, which is why this style became popular on social media and why it remains a consistent favorite. The sleekness also means you can wear this to professional settings, formal events, or casual outings without it feeling out of place.
How to Perfect the Base and Bubble Technique
Start by applying a smoothing cream or gel to damp hair, then blow-dry your hair completely straight or use a flat iron to ensure a polished finish. Gather the hair into a high ponytail at the crown and secure it tightly with an elastic. The tightness here matters — a loose foundation won’t hold the bubbles effectively. Once your base ponytail is secure, take the first section of ponytail hair and use your fingers to gently pull and fluff it outward above your elastic, creating a rounded bubble shape. Secure this first bubble with another elastic placed about two inches down from the ponytail base, then repeat the process for each additional bubble down the length of your ponytail.
Pro Styling Tips
Use clear elastics throughout so they disappear visually and don’t interrupt the clean lines of the style. For extra hold and a more pronounced bubble effect, apply a light hairspray or texturizing spray after creating each bubble — this helps the hair maintain its rounded shape throughout the day. If your hair is thinner or finer, backcomb very gently at the base of each bubble before securing the elastic; this creates a gripping point that holds the bubble more securely without requiring excessive tension that could stress your hair.
2. The Textured Bubble Ponytail with Waves
This version brings movement and dimension to the bubble ponytail by starting with wavy or curly hair instead of a sleek foundation. Rather than smoothing the hair completely straight, you work with your natural texture or create waves throughout, then build the bubble sections on top of that textured base. The result is a style that feels effortless, romantic, and has more visual texture and interest than the sleek version.
Why Texture Transforms the Look
Textured bubbles catch light differently and create a softer, less rigid aesthetic that many find more approachable than the ultra-sleek version. The waves or curls add fullness to each bubble naturally, so you don’t have to work as hard to create pronounced puffing — the texture does some of that work for you. This approach also works beautifully with Black hair’s natural texture and movement, allowing you to celebrate curl patterns rather than working against them. The softer overall vibe makes this version perfect for occasions where you want to look polished but not overly formal.
Creating Waves for Maximum Bubble Effect
If you’re starting with natural curls, apply your curl-defining product and allow your hair to air-dry or diffuse-dry to maintain your curl pattern. If you prefer waves, use a curling iron or wave-creating tool on damp hair after applying heat protectant. Once you’ve created your textured base and it’s completely dry, gather the hair into your ponytail at your chosen height. The technique for creating the bubbles remains the same, but because you have texture, the bubbles will appear fuller and softer than a sleek version without additional fluffing.
Maintenance During the Day
Textured bubble ponytails can shed more obviously than sleek versions because the texture movement can loosen individual hairs. Use bobby pins strategically placed under your base ponytail elastic to anchor any loose strands. Refresh the texture midday if needed with a light misting of water and some finger-scrunching to re-activate curl patterns. This version typically lasts well throughout the day because the texture itself holds the bubble shape, unlike sleek styles that may need a mid-day hair spray refresh.
3. The Bubble Ponytail with Braided Section
This style cleverly combines two techniques by incorporating a thin braid into the bubble ponytail structure. Some variations braid the entire ponytail before creating bubbles, while others weave the braid through the sections between bubbles for a more integrated look. Either approach adds an elegant, intricate element that elevates the style beyond the basic bubble.
The Visual Impact of Braiding
A braid catches light and draws the eye downward along the length of the ponytail, creating a focal point that makes the style feel more intentional and styled. Braiding also adds a dimension of craftsmanship that signals this is a purposefully created look rather than something thrown together. The contrast between the rounded bubbles and the linear geometry of the braid creates visual interest that keeps people engaged when they’re looking at your hair. This combination feels both playful and sophisticated, which is partly why it’s become increasingly popular.
Two Approaches to Braiding
The first approach involves braiding the entire ponytail before creating your bubble sections — you’d gather your hair into a ponytail, create a three-strand braid or fishtail braid with the ponytail hair, then use elastics to section the braid into bubbles. This creates a unified look where the braid is the dominant pattern. The second approach is to create bubble sections first, then weave a thin accent braid through the hair between bubbles — this is more delicate and works especially well if you want the bubbles to remain the dominant feature with the braid as a supporting detail.
Securing Everything Effectively
When you’re braiding and then creating bubbles, ensure your base ponytail is extremely secure because you’re adding complexity on top of it. Use a strong elastic and consider using bobby pins anchored underneath to prevent any slipping. If you’re weaving a braid through existing bubbles, work slowly and carefully so you don’t accidentally pull on the bubble sections you’ve already created. This style requires a bit more time than basic bubbles, so plan accordingly and practice the braid pattern a few times before committing to it for an important occasion.
4. The Low Bubble Ponytail with Side Placement
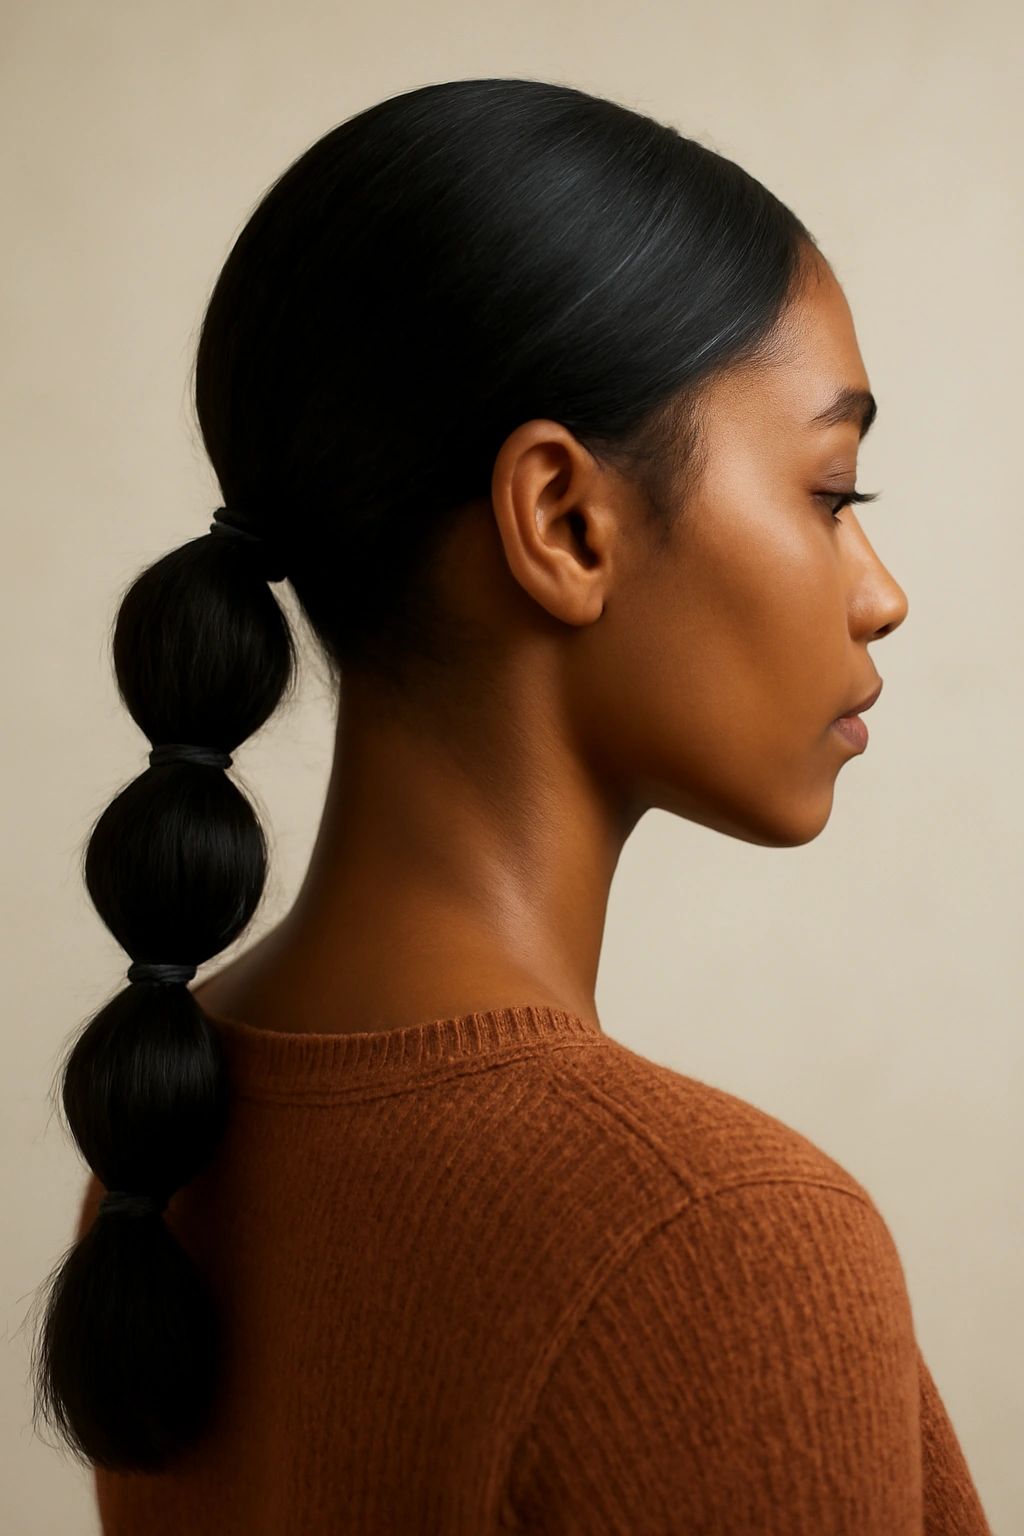
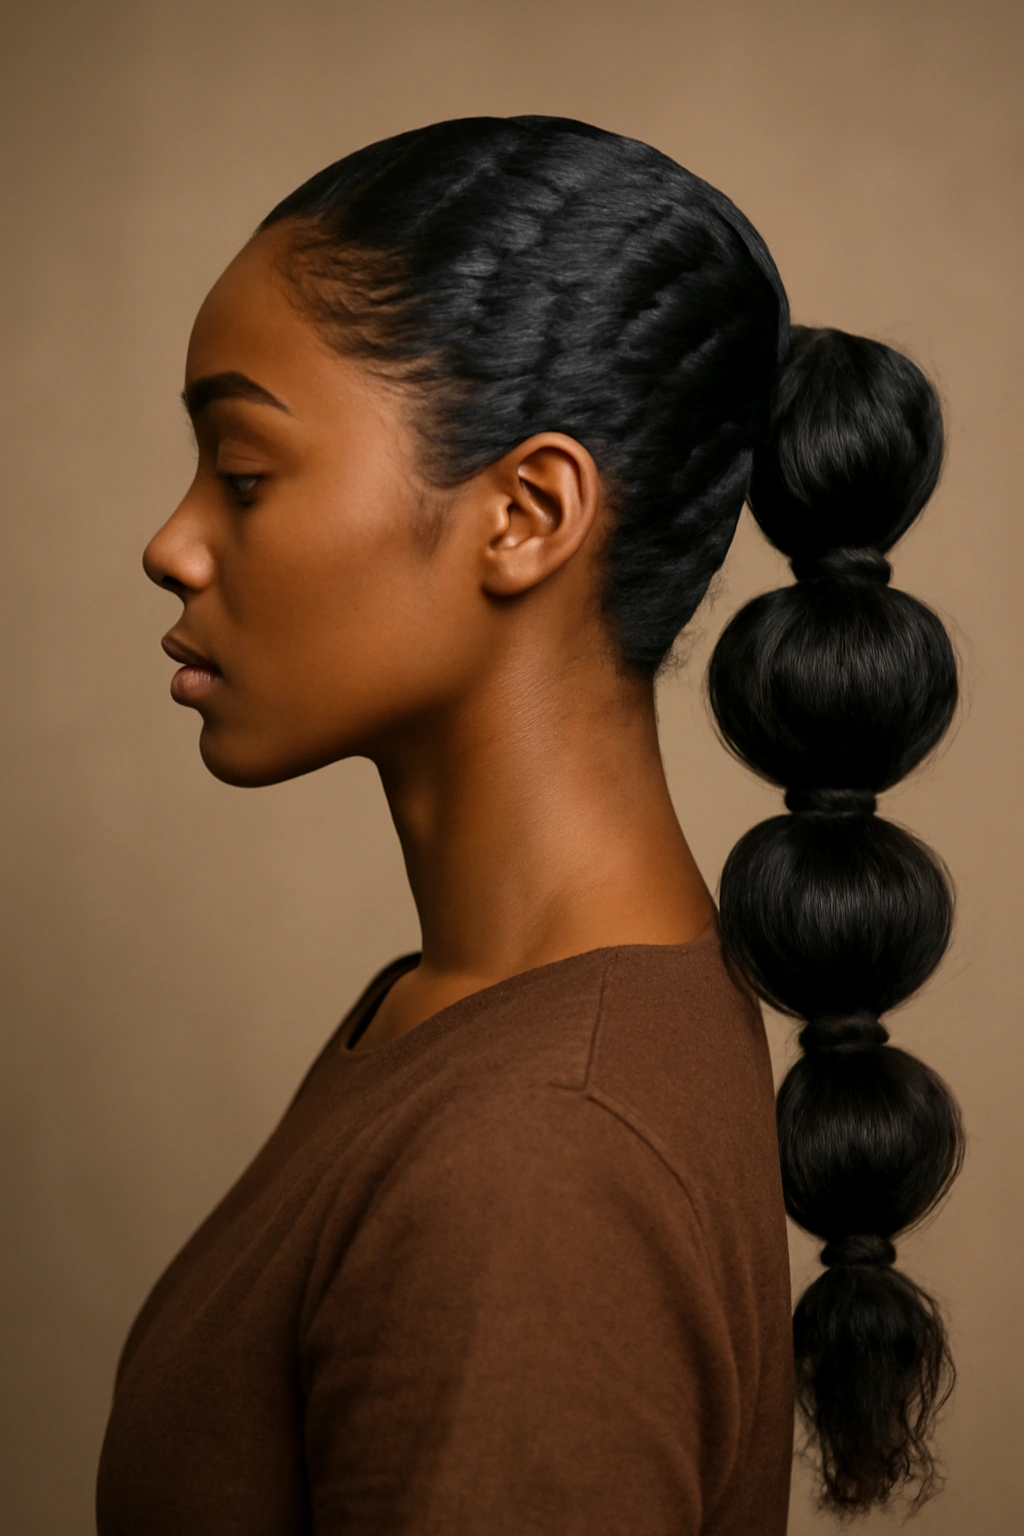
Instead of gathering hair at the crown, this variation places the base ponytail lower, either at the nape of the neck or in the middle of the back of the head. Often, the ponytail is positioned slightly to one side, creating an asymmetrical look that feels modern and interesting. This placement changes the entire vibe compared to high bubble ponytails and offers a completely different aesthetic appeal.
Why Low Placement Changes the Vibe
A low bubble ponytail feels more laid-back and approachable than its high-placement counterpart, making it excellent for casual settings, creative workplaces, or social gatherings where you want to look polished but not formal. The side placement adds an element of asymmetry that many find more visually interesting than a centered style. This placement also works beautifully for anyone who prefers to keep their forehead and face more covered, or who wants the emphasis on the back of their hair rather than the front of their face.
Creating a Flattering Low Bubble
The key to making a low bubble ponytail look intentional rather than accidental is precision in the placement and thoughtfulness in how you style the hair that remains down around your face and neck. Leave some face-framing pieces down if you want a softer look, or smooth everything back if you prefer a cleaner aesthetic. The side placement should look deliberate — your ponytail sits clearly to one side of center, not just slightly off-center by accident. Create your bubble sections using the same technique as high bubbles, but because the placement is lower, each bubble will have a different visual weight and proportion.
Styling for Comfort and Hold
A low bubble ponytail needs to be secure because you’re working against gravity more — the weight of the ponytail and the bubble sections pulls downward, so your base elastic and any bobby pins need to work harder. Position your elastic over the top of your base ponytail section and also underneath, crisscrossing bobby pins for extra security. This might sound like overkill, but it’s the difference between a style that holds perfectly all day and one that gradually slips lower and loses its shape.
5. The Bubble Ponytail with Ribbon or Hair Accessory Weave
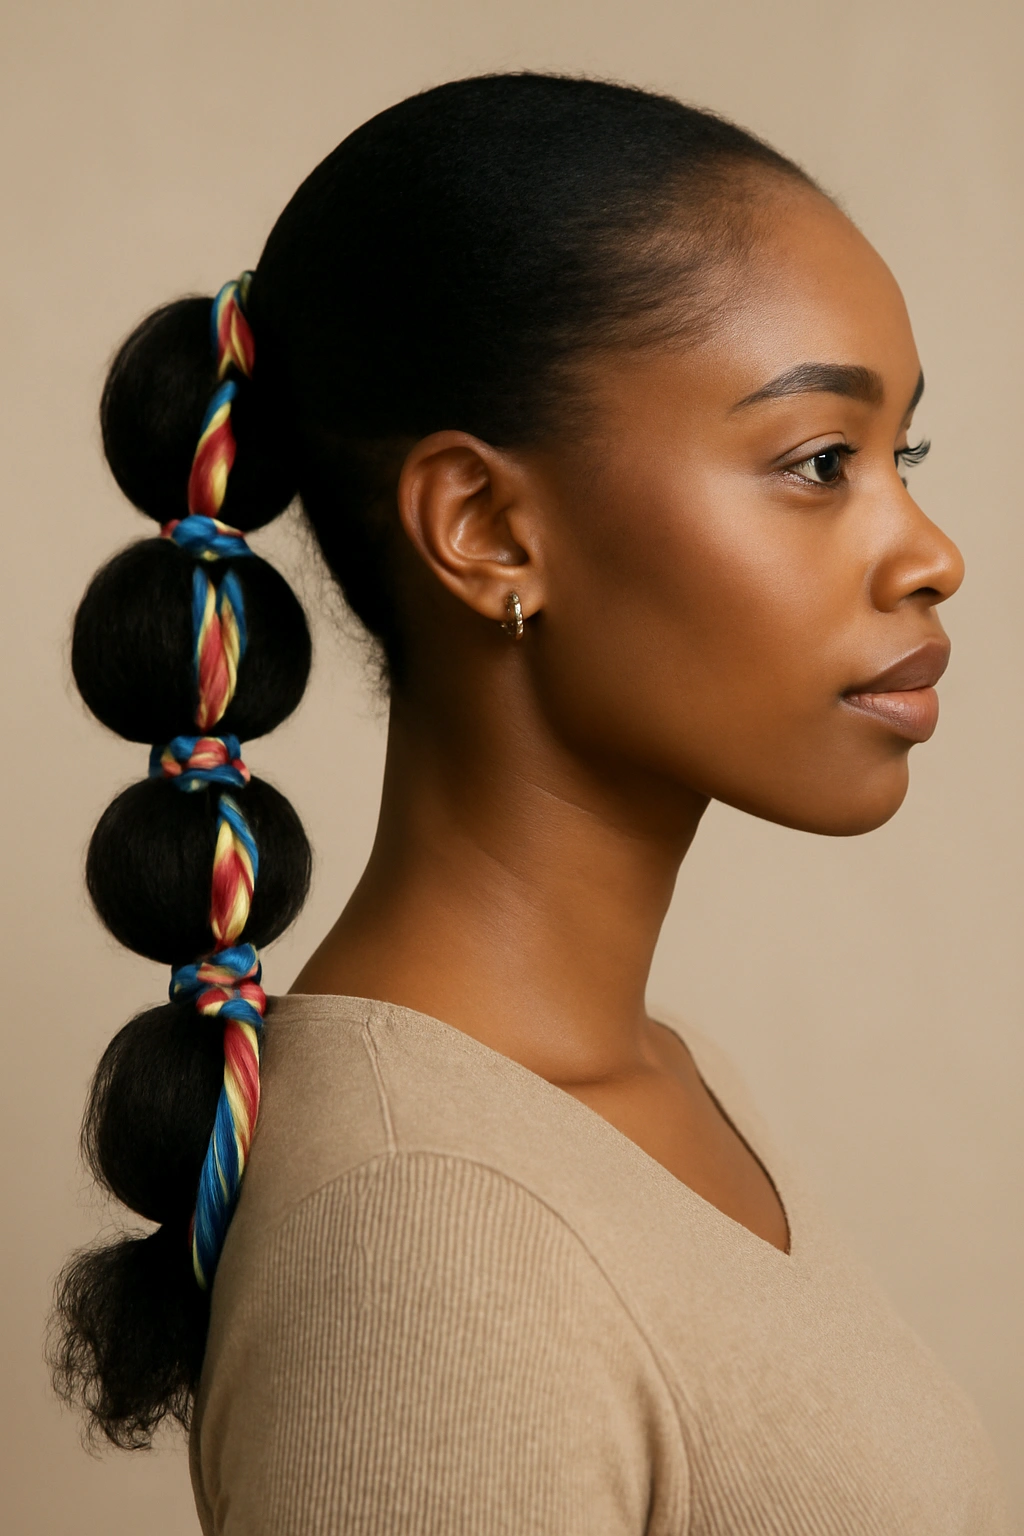
This creative variation incorporates a ribbon, silk scarf strip, beaded hair jewelry, or other linear accessory woven through the bubble sections. The accessory runs vertically down the center of the ponytail or spirals around the bubble sections, adding color, texture, and personality to the base style. This approach allows for serious customization and seasonal variation without changing your actual hairstyle technique.
Choosing the Right Accessory
Silk ribbons add elegance and can be matched to your outfit or chosen to pop against your hair color. Beaded accessories or chains add a glamorous, eye-catching element that works beautifully for evening events or creative occasions. Scarf strips in complementary prints or colors tie the style into a larger aesthetic statement. The accessory you choose completely transforms the vibe of the bubble ponytail without changing any of the technical work. This is one of the easiest ways to create multiple different looks from one basic technique.
Weaving Techniques for Different Effects
For a simple woven effect, secure your ribbon or scarf strip at the base of your ponytail with the elastic, then wrap it spirally around each bubble section as you move down the ponytail. For a more integrated look, weave the ribbon or accessory in and out through the hair of each bubble, creating a pattern that intertwines with the hair itself. Some people secure the accessory at the base and let it hang freely down the center of the ponytail, creating a linear accent line. Experiment with different approaches to see which creates the look you’re envisioning.
Making It Last Through the Day
Secure your accessory at the very base with a strong elastic, and if you’re weaving it through, anchor it with a few strategic bobby pins along the length so it doesn’t shift or loosen as you move throughout the day. Silk accessories have the advantage of being gentle on your hair, and they’re less likely to cause visible dents or creases compared to some other materials. If your accessory is beaded or has other details, take care when wearing it that you’re not catching it on things that could pull it loose or damage both the accessory and your hair.
6. The Bubble Ponytail with Hidden Layers
This sophisticated variation uses hidden layers of different colored hair or different textured extensions beneath your base ponytail, creating depth and dimension that emerges in each bubble. As you puff out each bubble, the hidden layers peek through, adding subtle visual complexity. This approach works beautifully with colored hair, ombré effects, or when layering natural hair with lighter or darker-toned extensions.
Creating Visual Depth with Color
If you’re using extensions or colored hair sections, place them underneath your base section so they’re hidden until you create the bubbles. As you puff out each bubble, the colored or textured hair underneath becomes visible, creating a reveal effect that’s visually interesting. This technique allows you to experiment with bold colors or contrasting tones without committing to having them visible all the time — you can show them when you want and keep them tucked away when you prefer a simpler look.
Managing Multiple Hair Textures or Colors
Ensure all your hair sections are secure and well-integrated at the base so you’re not creating multiple distinct ponytails that might separate. Use a strong elastic and consider a hair cuff or decorative band to really anchor everything together. When creating your bubbles, be intentional about how much you puff out each section — you want to reveal enough of the hidden layers to make the color or texture visible but not so much that it looks like you have wild, uncontrolled hair.
Practical Considerations for Layered Looks
This style requires a bit more planning upfront but creates a really impressive finished look that reads as much more complex than the effort required. If you’re using extensions, make sure they’re well-blended and that any color transitions are thoughtfully placed so they create the effect you want rather than looking disconnected. This variation is perfect for anyone who loves intricate styling and wants to create a statement look that has depth and nuance.
7. The Bubble Ponytail with Bended or Twisted Strands
Rather than simple bubble sections, this version incorporates bends, twists, or kinks in the hair between elastic sections, creating a more textured and visually dynamic look. Instead of smooth, rounded bubbles, each section has built-in movement and dimension that makes the style feel more playful and energetic. This approach works especially well with textured or natural hair.
Creating Intentional Bends and Twists
After you’ve created your base ponytail, twist or gently bend sections of the ponytail hair before securing each elastic. The twist or bend creates texture within each bubble that makes the overall style feel less formal and more creative. You can twist the entire section around itself before securing, or create multiple smaller twists within each bubble section. This technique adds visual movement without requiring you to puff out the bubbles as dramatically.
Why This Works for Different Hair Textures
On naturally textured hair, these twists and bends integrate beautifully with your existing curl pattern, creating a cohesive look rather than fighting against your natural texture. On straighter hair, the twists and bends add dimension that might not be as apparent with simple puffed-out bubbles. This version is particularly effective if you have finer hair that doesn’t create dramatic bubbles with puffing alone — the twists and texture create visual interest through a different mechanism.
Maintaining Twists and Bends Throughout the Day
Twists and bends hold better than puffed bubbles in many cases because they’re actively kinked into the hair structure rather than relying on the elastics to maintain the rounded shape. Use a light texturizing spray to help preserve the twists, and avoid running your fingers through the ponytail (which you should do anyway, but it’s especially important here). This style actually benefits from a bit of settling in — it often looks better by evening than it does immediately after styling, as the twists relax slightly into a more natural shape.
8. The Jumbo Bubble Ponytail for Maximum Impact
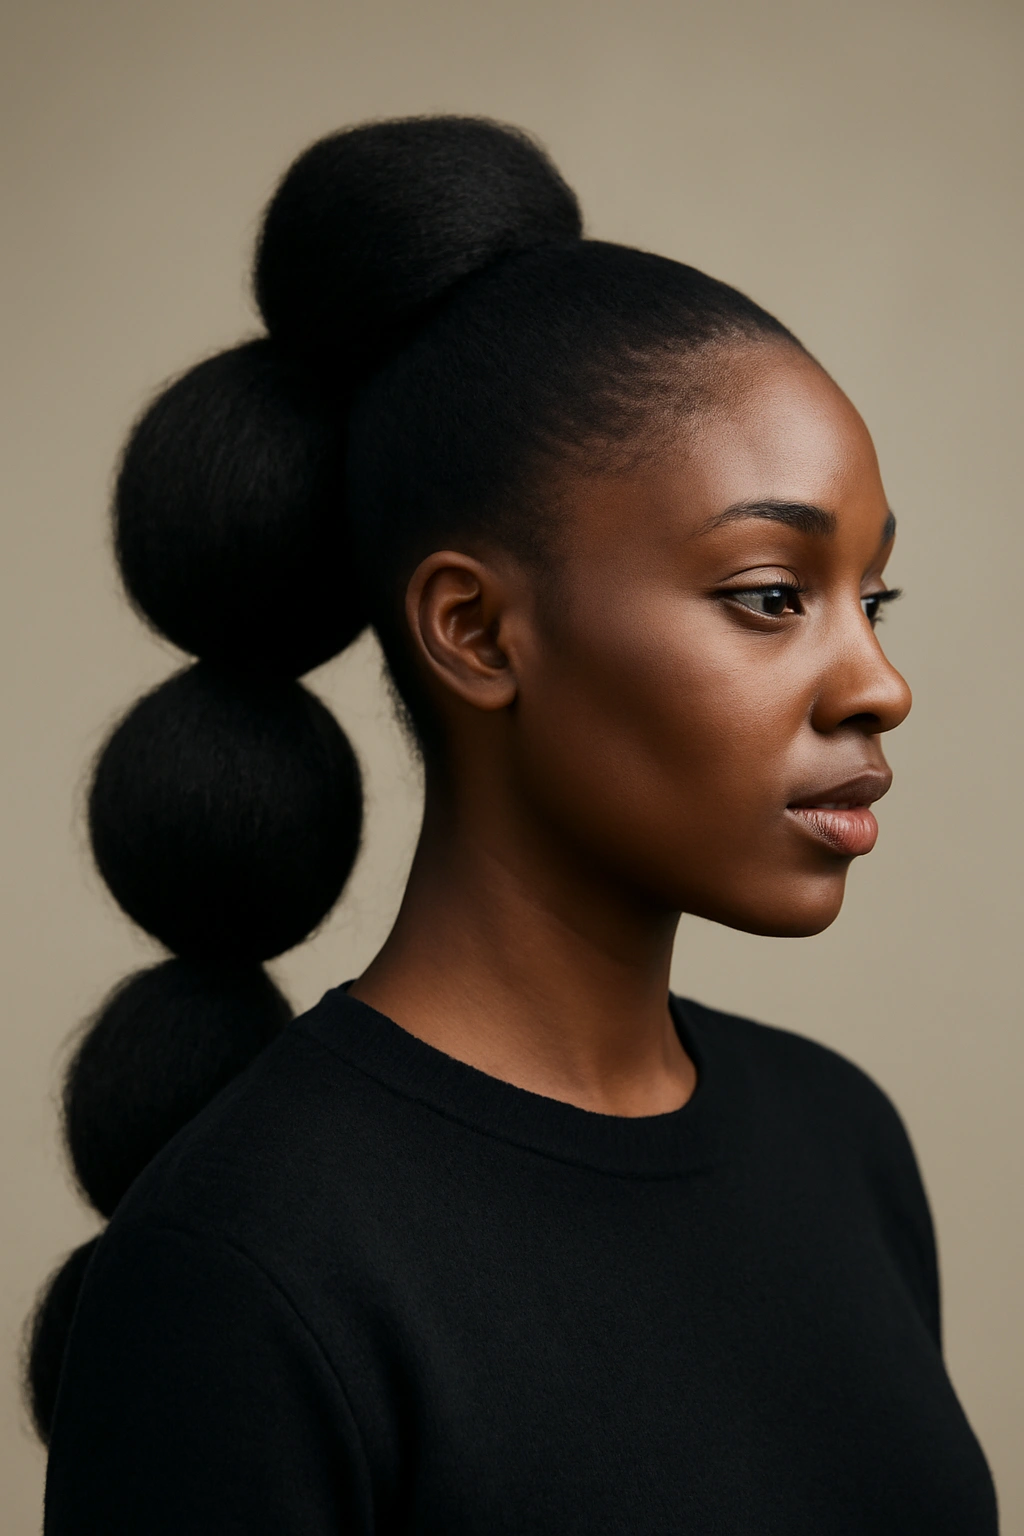
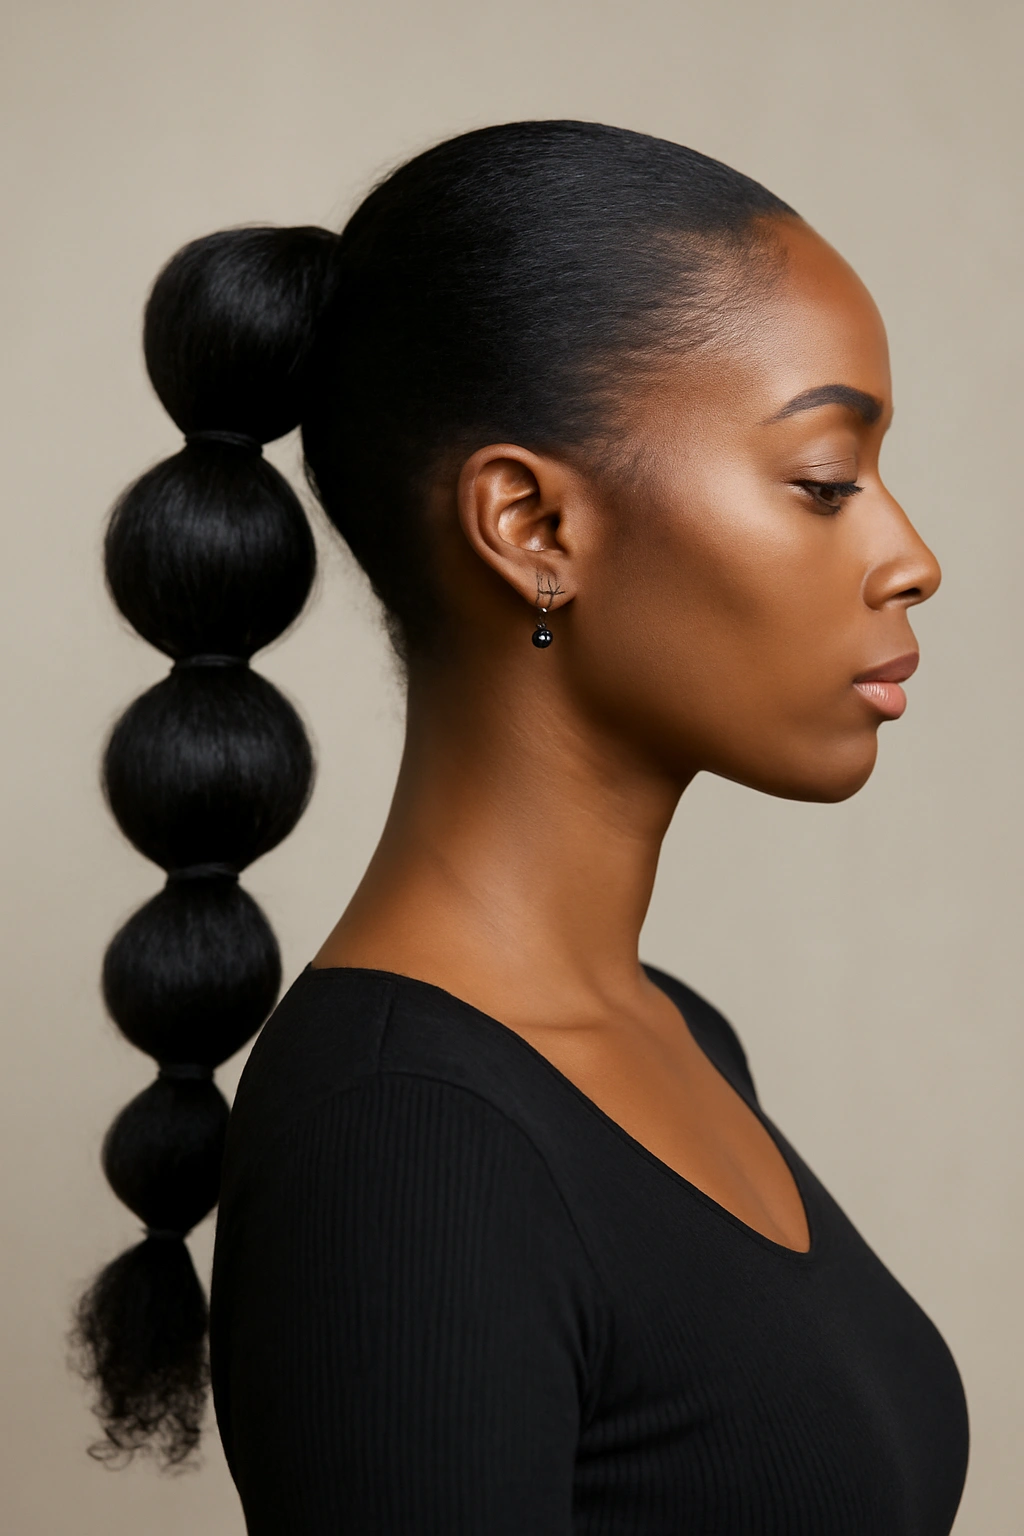
This variation features fewer, larger bubble sections instead of multiple small ones, creating a bolder, more dramatic look. You might create only two to three enormous bubbles rather than five or six small ones, which changes the entire visual impact and creates a statement-making style. This approach is perfect for anyone who wants something really eye-catching and isn’t concerned about subtlety.
Why Fewer, Larger Sections Create Impact
Jumbo bubbles draw more attention and create a look that’s inherently more dramatic and fashionable. The larger sections have more visual weight and presence, so even from a distance, people immediately recognize this as an intentionally styled look. This version works beautifully for events, performances, or any occasion where you want your hair to be a feature of your overall appearance rather than a supporting element.
Technical Considerations for Large Bubbles
Creating truly large bubbles requires more hair length — you need enough hair in each section to create a bubble that’s proportionally large. A short or medium ponytail might only accommodate two jumbo bubbles before the ponytail ends, while longer hair gives you room for three to four. Make sure your base ponytail is extremely secure because each bubble has more weight and stress on the elastic. Space your elastics further apart — maybe four to six inches — to give each bubble room to expand dramatically.
Styling to Make Jumbo Bubbles Stand Out
Use a volumizing or texturizing spray generously throughout the ponytail before creating the bubbles — this helps the hair hold the bubble shape more prominently. When you’re puffing out each bubble, spend extra time working the hair to create as much volume as possible. You might even use your fingers or a small teasing brush to gently backcomb inside each bubble before securing the elastic, which helps the hair hold its expanded shape even more dramatically.
9. The Bubble Ponytail with Decorative Hair Cuff or Band
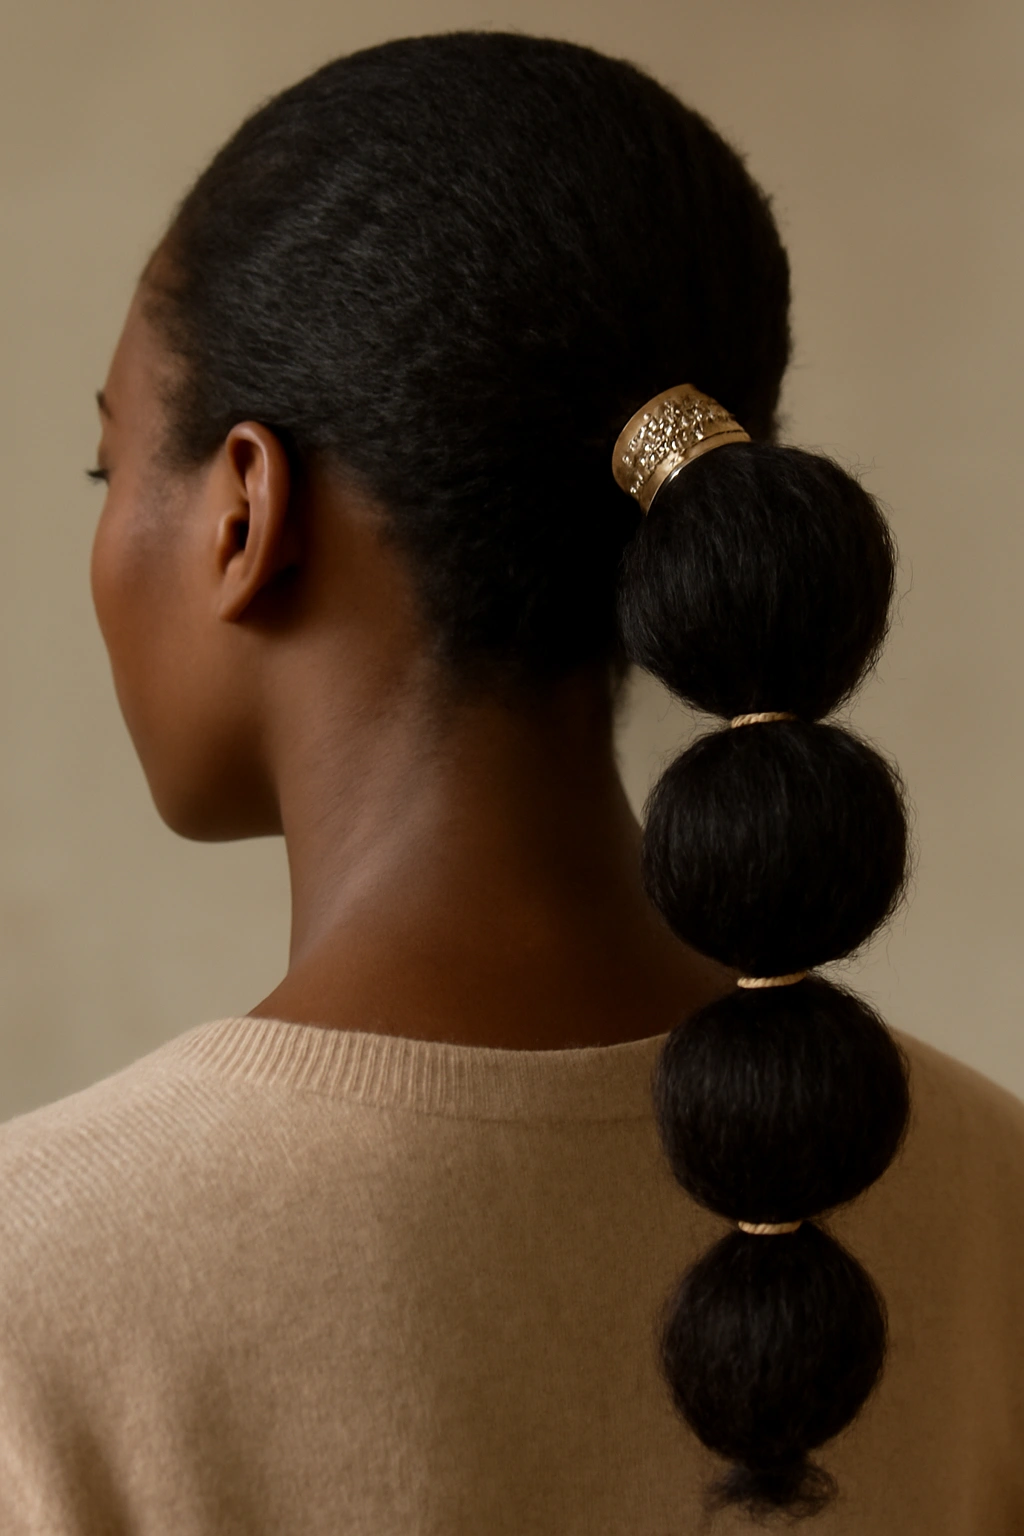
This elegant variation incorporates a decorative cuff, metal band, or fabric band worn around the base of the ponytail, creating a finished, polished look. The cuff can be hidden just above your first bubble elastic for a seamless integrated look, or placed visibly at the base to serve as a style feature. This approach feels more finished than a simple elastic and works beautifully for both casual and formal settings.
Choosing and Placing Your Cuff
Hair cuffs come in countless styles — from sleek metal cuffs to decorative beaded designs to fabric wraps in silk or other materials. The cuff you choose should complement your overall aesthetic and the occasion. If you’re wearing it for a formal event, a simple metal or pearl cuff often works best. For creative settings or casual occasions, you can choose more decorative or playful designs. The placement of the cuff changes the visual impact — hiding it just above the first bubble creates a seamless integrated look, while placing it visibly at the very base makes it a featured element of the style.
Securing the Cuff Effectively
Most hair cuffs slip over your ponytail and sit where you position them, but to keep them from shifting, you can anchor them with bobby pins placed underneath (hidden beneath the cuff) or use a small clear elastic underneath the cuff to keep it in place. Make sure the cuff isn’t so tight that it creates tension on your hair or causes discomfort. If you’re wearing the cuff for an extended period, check it periodically to ensure it hasn’t shifted or caused any pulling.
Combining Cuffs with Other Techniques
You can combine a cuff with any of the bubble ponytail variations — try a decorative cuff with textured bubbles, or a simple metal cuff with a braided variation. The cuff adds a finishing detail that elevates the entire look, making it feel intentional and polished. This is an easy way to make your bubble ponytail feel more designer or special without complicated technical work.
10. The Bubble Ponytail with Face-Framing Details

This final variation strategically leaves some hair down around the face while creating bubble sections with the majority of the ponytail, combining the structure of the bubble style with the softness of face-framing pieces. A few pieces frame the face on each side while the back and crown are secured into bubbles, creating a balanced, flattering look that works beautifully for almost any face shape.
Why Face-Framing Works
Face-framing pieces soften a style and create a romantic, approachable feeling even with a structured bubble ponytail. The pieces also help to flatter different face shapes — if you have a rounder face, longer face-framing pieces draw the eye vertically; if you have a wider face, shorter pieces can be more flattering. The combination of structure (the bubbles) and softness (the face frames) creates visual interest and helps you achieve a look that’s both polished and approachable.
Creating and Styling Face Frames
Leave about an inch or so of hair on each side of your face before you gather your ponytail, or remove pieces from your base ponytail once you’ve created it. The face-framing pieces should be left down naturally or can be waved, curled, or straightened depending on your desired look. Style these pieces to complement your overall aesthetic — they can be sleek and smooth for a polished look, or wavy and textured for a softer appearance.
Keeping Face Frames in Place
Since these pieces are left down, you might find them moving around more than the rest of your hair throughout the day. Use a light hairspray to help them hold their shape, or secure them behind your ears with bobby pins if you prefer. Some people use small clips or bobby pins to keep them in place during the day and remove them for a softer evening look. The flexibility of this version is part of its appeal — you can adjust the face frames as your day progresses or as you transition between different settings.
Final Thoughts
The bubble ponytail offers something for nearly every styling preference, occasion, and hair type. Whether you prefer the sleek, polished look of a classic high bubble ponytail, the textured romance of waves-and-bubbles combination, or the bold statement of jumbo bubbles with decorative cuffs, this versatile style adapts to whatever you’re envisioning. The beauty of mastering this technique is that once you understand the foundational method — gathering a secure base ponytail and sectioning it with elastics — you have endless room for personalization and creativity.
The key to a successful bubble ponytail is taking time with your base ponytail and being consistent with your elastic placement. A loose, unraveling foundation will undermine even the most beautifully crafted bubbles, while a secure, thoughtfully placed base sets you up for a style that holds throughout your entire day. Start with the classic version if you’re new to the technique, then experiment with variations that appeal to you — texture, braids, accessories, and placement changes all offer new directions to explore.
Hair care remains important even when you’re styling, so remember to be gentle when creating your ponytail, use appropriate elastics that won’t damage your hair, and give yourself regular breaks from styled looks to keep your hair healthy. A bubble ponytail should enhance your natural beauty and make you feel confident and comfortable, not cause tension or stress. Once you’ve found your favorite variation — or your favorite few — you’ll likely find yourself returning to this style repeatedly because it genuinely delivers on the promise of looking effortlessly put-together while actually being quite achievable with practice.