Black hair offers an incredible canvas for creating sophisticated, polished low bun styles that work across face shapes, hair textures, and occasions. Whether you’re heading to a professional meeting, a wedding, or a casual day out, a well-executed low bun can elevate your entire look with minimal fuss and maximum elegance. The beauty of low buns is their versatility—they work with natural texture, braided hair, twists, and every stage of your hair growth journey, making them an endlessly customizable option that grows with your style preferences.
Low buns hold a special place in Black hair culture as protective styles that celebrate both the health and beauty of textured hair. Unlike styles that rely on heat or tension that could compromise hair integrity, many low bun variations work with your hair’s natural texture, allowing you to maintain strong, resilient lengths while looking polished and intentional. The styles that follow aren’t just about looking put-together—they’re about finding approaches that let your hair thrive while giving you sophisticated options that feel genuine to who you are.
What makes a low bun truly elegant comes down to the details. It’s the precision of your edges, the texture you build into the foundation, the way you wrap or secure the bun so it sits smoothly, and the final touches that transform a simple style into something intentional and refined. The styles in this guide range from sleek and minimalist to richly textured and dimensional, giving you options depending on your mood, your schedule, and what your hair needs on any given day.
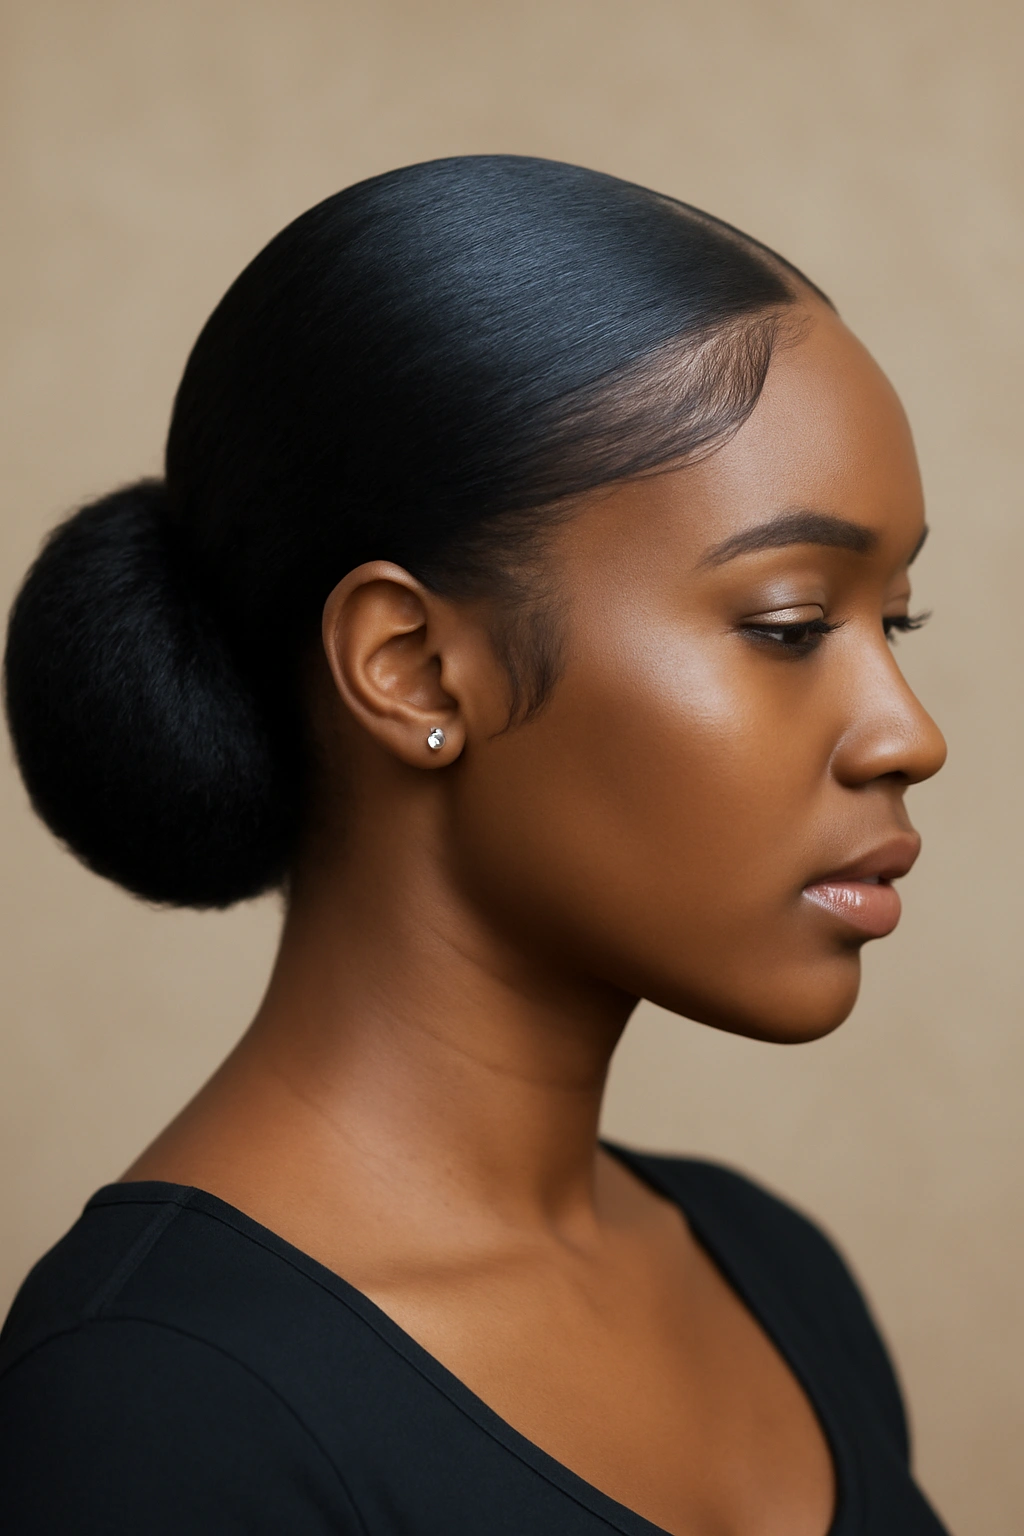
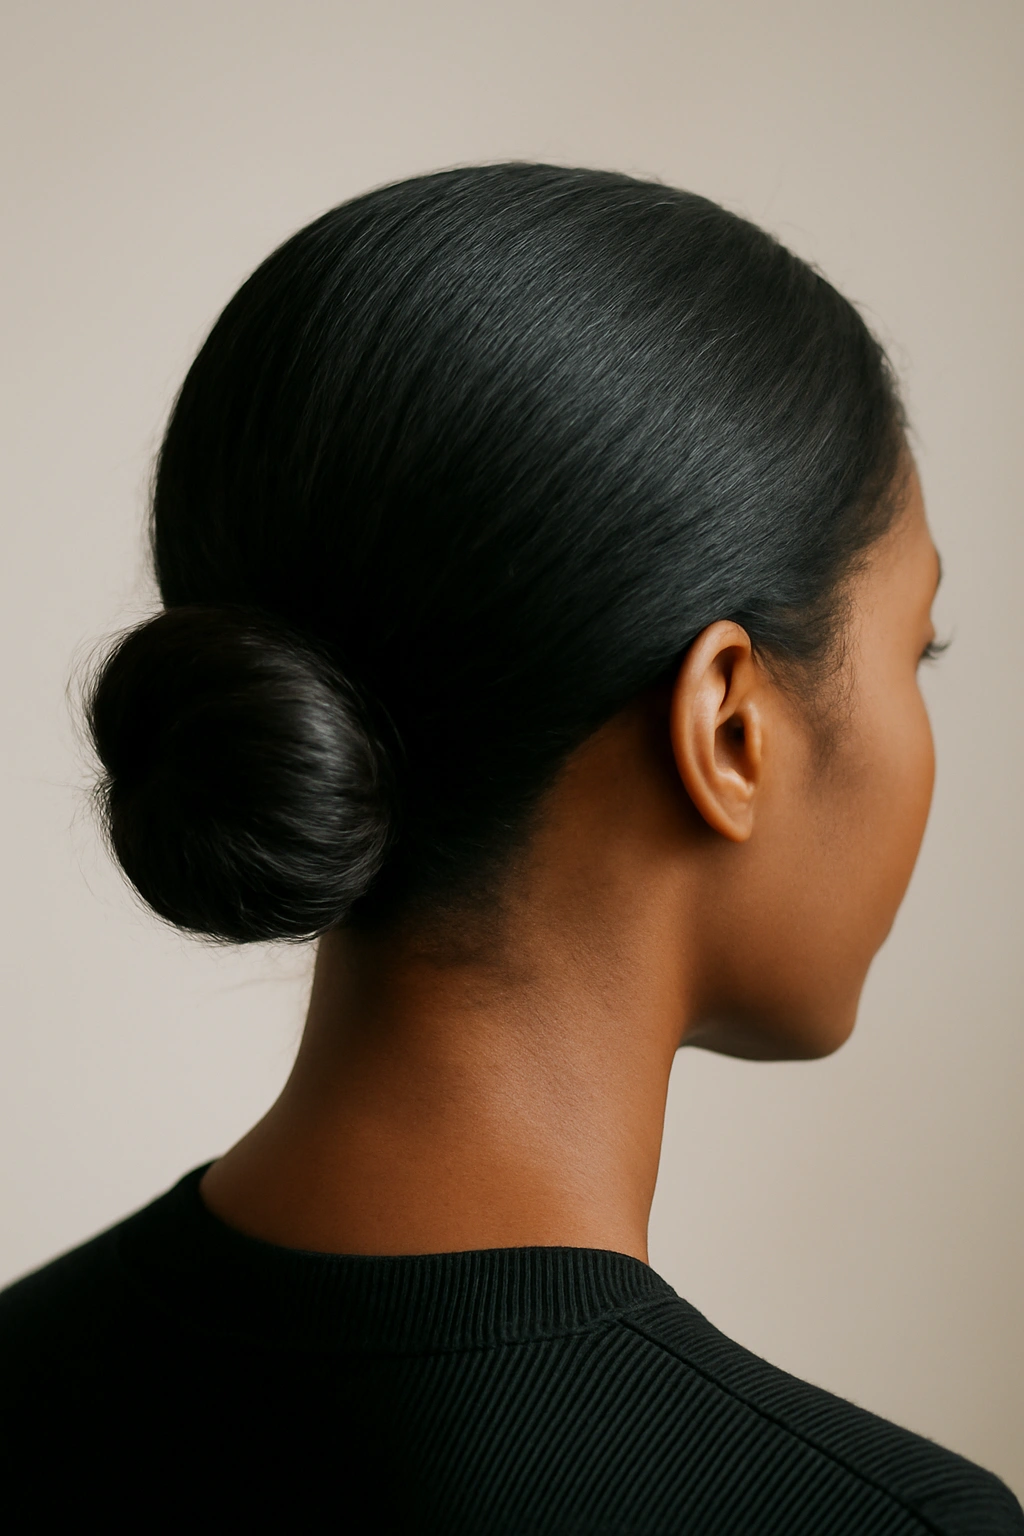
1. Sleek Low Bun with Curved Edge
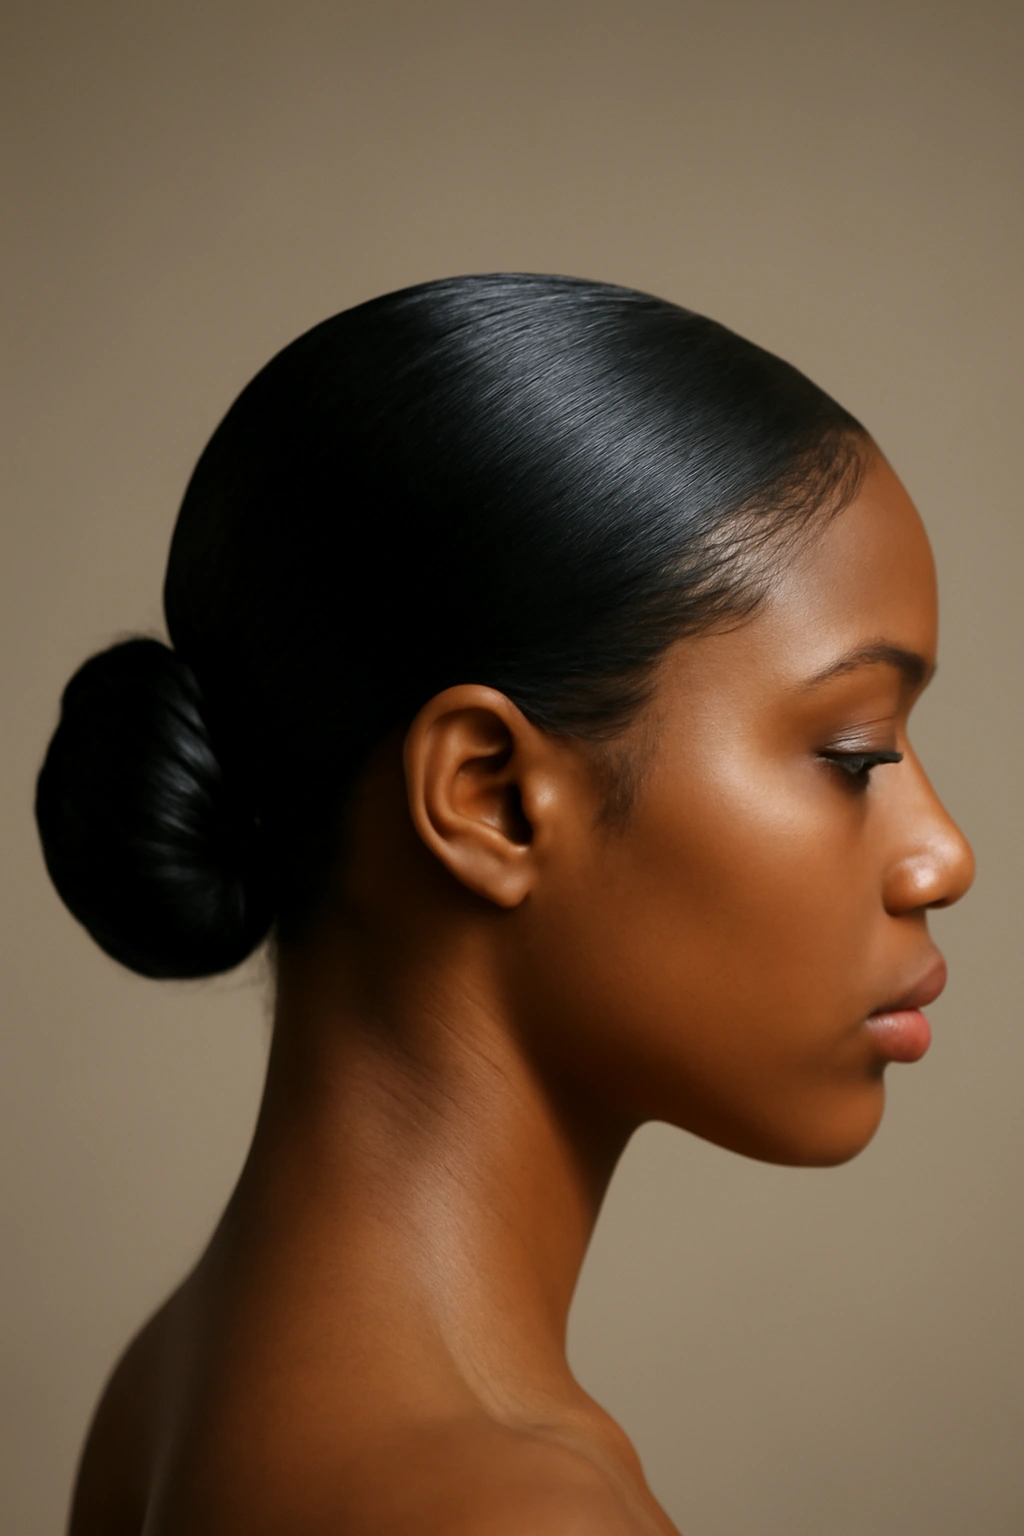
A sleek low bun with perfectly curved edges is the definition of polished elegance. This style relies on smooth, tightly gathered hair at the nape of your neck, secured into a compact bun with every strand in place. The curved edge detail—where your hairline is smoothed into a precise arch—elevates this from basic to refined, creating a sophisticated frame for your face that feels intentional and controlled.
Why This Style Delivers Professional Sophistication
The sleek low bun works because of its simplicity and precision. When edges are laid smooth and the bun sits at the base of your neck, you create clean lines that elongate your neck and draw attention upward to your face and eyes. The compact nature of the bun means it won’t shift throughout your day—it’s secure, it’s stable, and it feels as polished at 5 p.m. as it did at 9 a.m. This style works beautifully with textured hair that’s been smoothed with a creamy gel or pomade, allowing you to celebrate your natural curl pattern while achieving that sleek finish.
How to Create Flawless Curved Edges
- Smooth all edges using a combination of gel and a fine-tooth comb or edge brush—work in the direction you want the hair to lay
- Use a firm-hold gel rather than a light one; the structure you build now is what holds the entire style together
- Lay edges down the sides of your face first, creating a gentle curve that frames your cheekbones, then work toward the back of your neck
- Create the curve using small downward strokes with your brush, following the natural curve of your hairline
- Allow the gel to set for a few minutes before gathering hair into your bun so your edge pattern stays in place
Pro tip: Apply your gel to the brush rather than directly to your hair—you’ll get more control and less product buildup on your scalp.
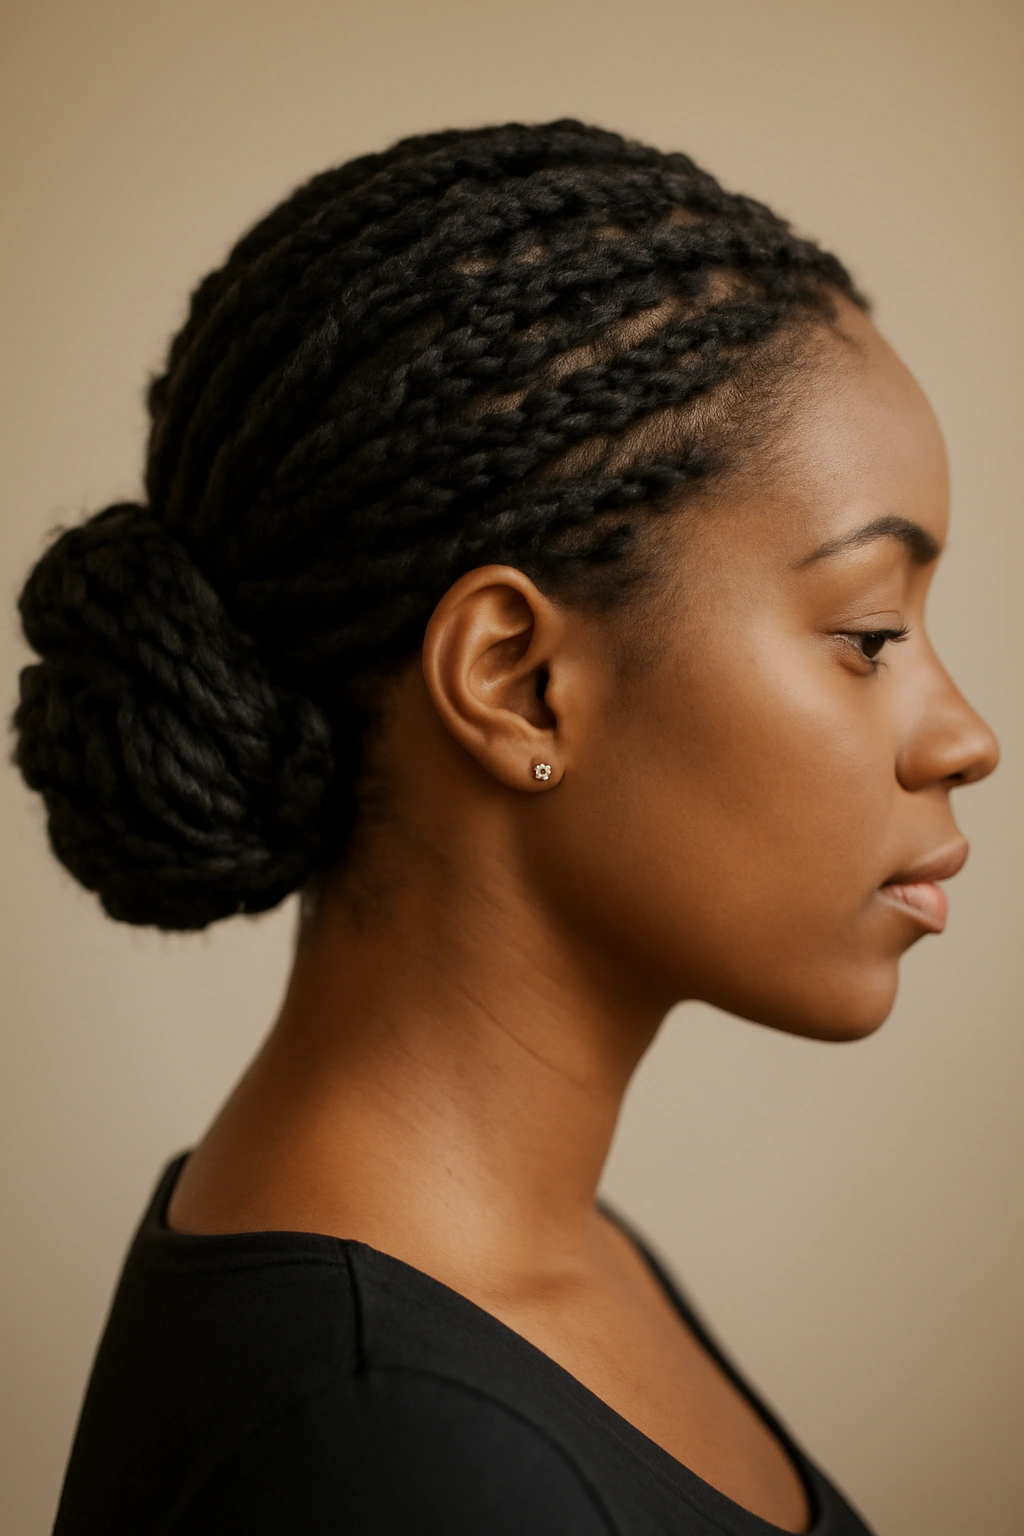
2. Braided Low Bun
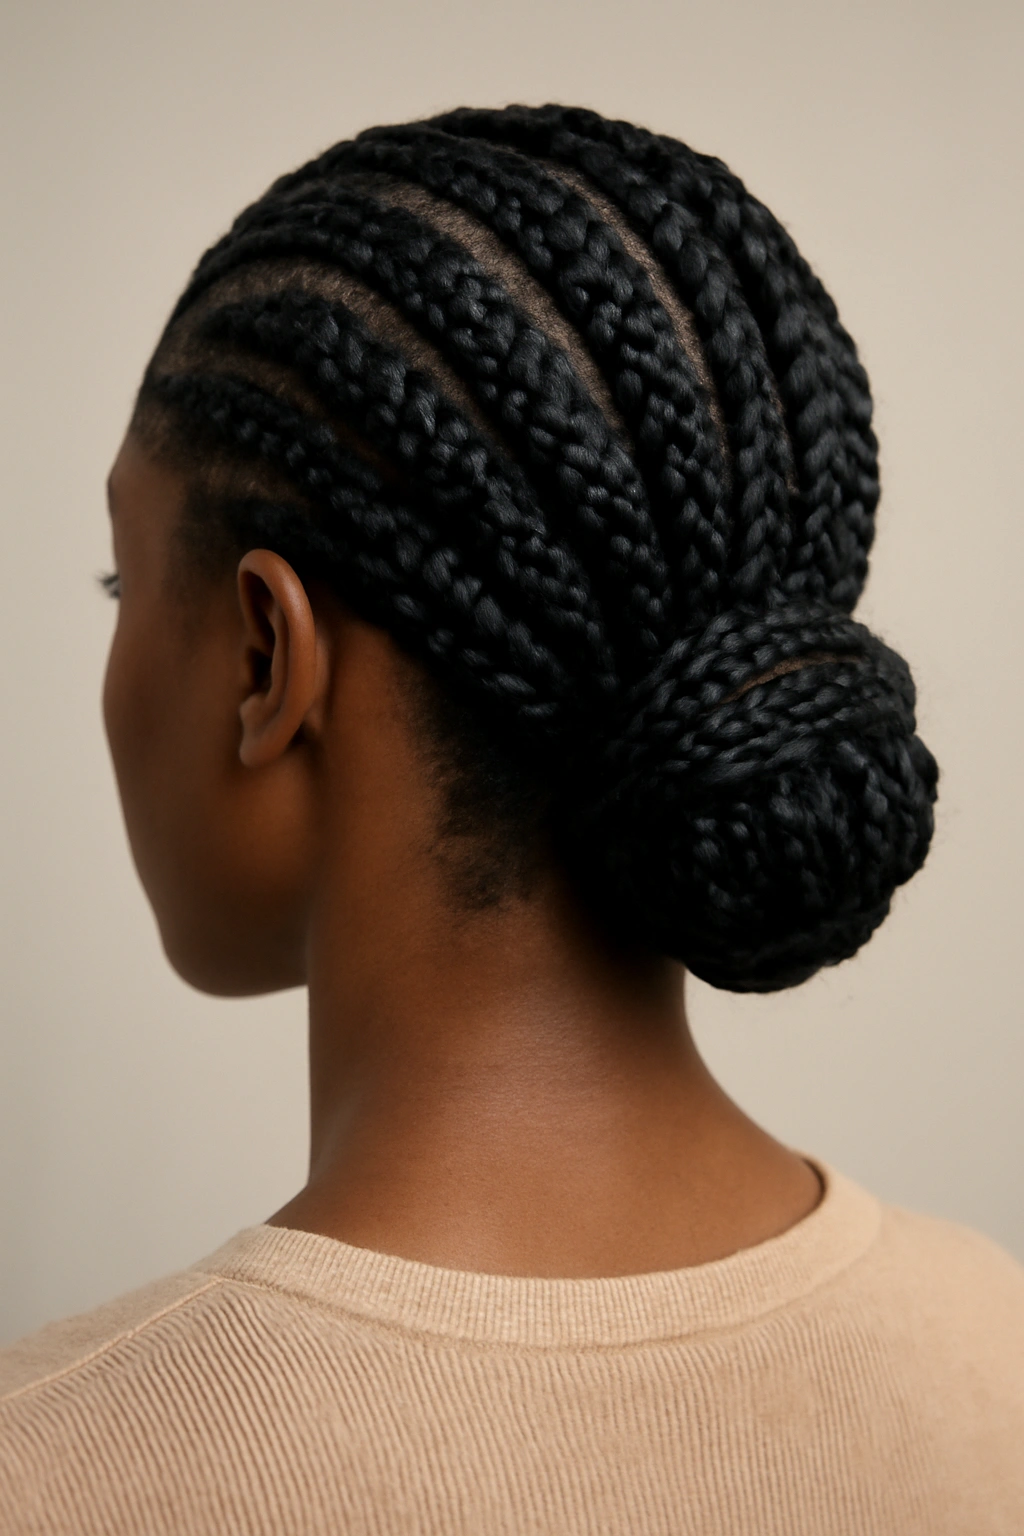
A low bun built on a foundation of box braids, cornrows, or faux locs creates texture, dimension, and a style that can last for weeks. By gathering your braids at the nape of your neck and coiling them into a low bun, you achieve an elegant look that celebrates the craft and artistry of braiding while giving you a finished, put-together appearance. This approach works whether your braids are fresh or a few weeks in, making it perfect for extending the life of your protective style.
The Versatility and Protection of Braided Foundations
Braided low buns are a gift if you’re looking for styles that protect your hair while keeping you looking intentional and chic. The braids do the styling work for you—they hold texture, they hold shape, and they add visual interest automatically. When you coil them into a low bun, you’re creating a style that reads as polished without requiring daily heat styling or manipulation. The bun sits securely at the nape of your neck, meaning minimal tension on your hairline while still keeping hair completely off your face and neck.
Tips for Braids That Bun Beautifully
- Braid sections slightly looser than you normally would—overly tight braids can crack and break when you’re coiling them into a bun
- Gather your braids when they’re fresh (within the first week) so they still have definition and they coil smoothly without kinking
- Secure the bun using bobby pins that match your braid color or use a flexible hair tie in a coordinating shade for a seamless look
- Keep the bun round and voluminous rather than compressing it—full, textured buns read as more intentional and elegant
- Add decorative elements like gold cuffs, beads, or hair jewelry to the coiled braids for extra dimension
Worth knowing: This style lasts best if you refresh your edges every 7-10 days, but the braids themselves maintain their structure for 3-4 weeks.
3. Twisted Low Bun with Face-Framing Texture
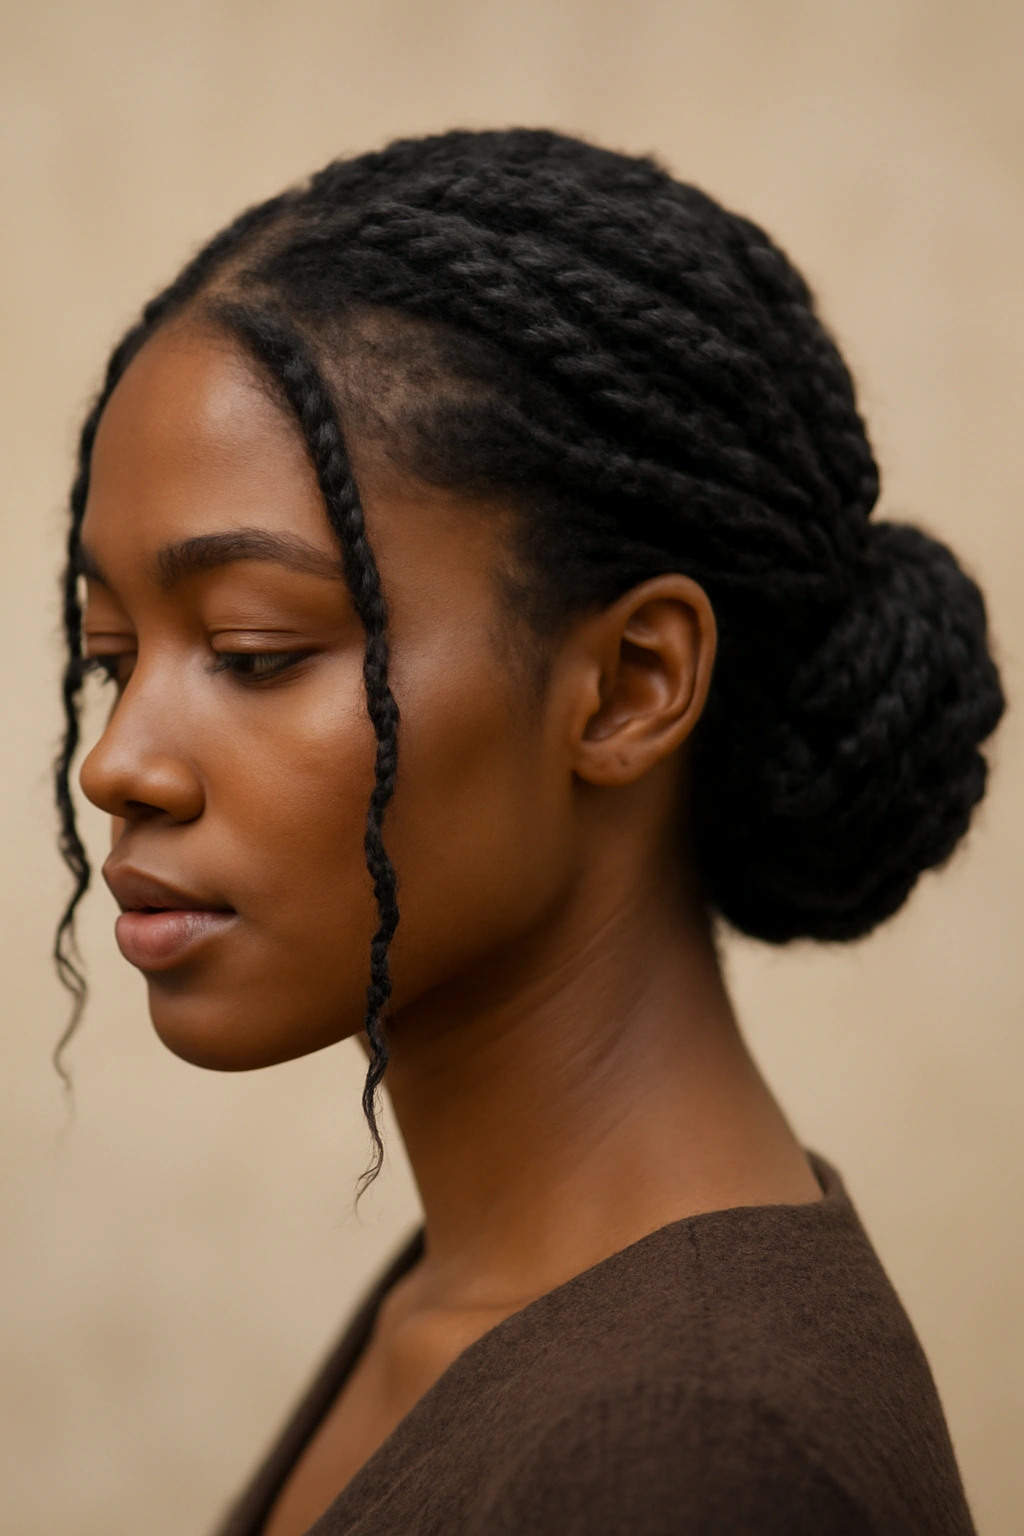
Two-strand twists gathered into a low bun create dimension and visual interest while maintaining an undeniably polished appearance. The key to making this elegant rather than casual is creating strategic face-framing texture—leaving one or two twists loose around your face rather than pulling every strand back completely. This softens the look while keeping your style intentional and refined.
Building Softness Into an Otherwise Structured Style
Most formal low buns read as austere, but a twisted bun with face-framing pieces captures elegance without austerity. Those loose twists create movement and softness that prevents your style from looking severe, and they frame your face in a way that feels flattering and deliberate. The twists themselves add texture and visual depth that a simple gathered bun can’t quite achieve, making this style feel more dimensional and artistic.
Creating the Perfect Face-Frame
- Create your twists using the damp-twist method: dampen sections, apply styling cream or gel, and twist from root to end in the direction you want movement
- Twist two sections that start near your temples and allow these to hang softly in front of your shoulders while the rest of your twists are gathered into the bun
- Secure the bulk of your twists into a low ponytail first using a flexible hair tie that matches your hair color
- Coil this ponytail into a compact bun and secure it with bobby pins
- Gently manipulate the face-framing twists so they curve slightly and catch light—you want them to look intentionally placed, not accidentally loose
Insider note: This style holds longest if you twist on damp hair rather than soaking wet—damp hair sets the twist pattern without requiring hours of drying time.
4. Wrapped Low Bun with Silk or Satin Scarf
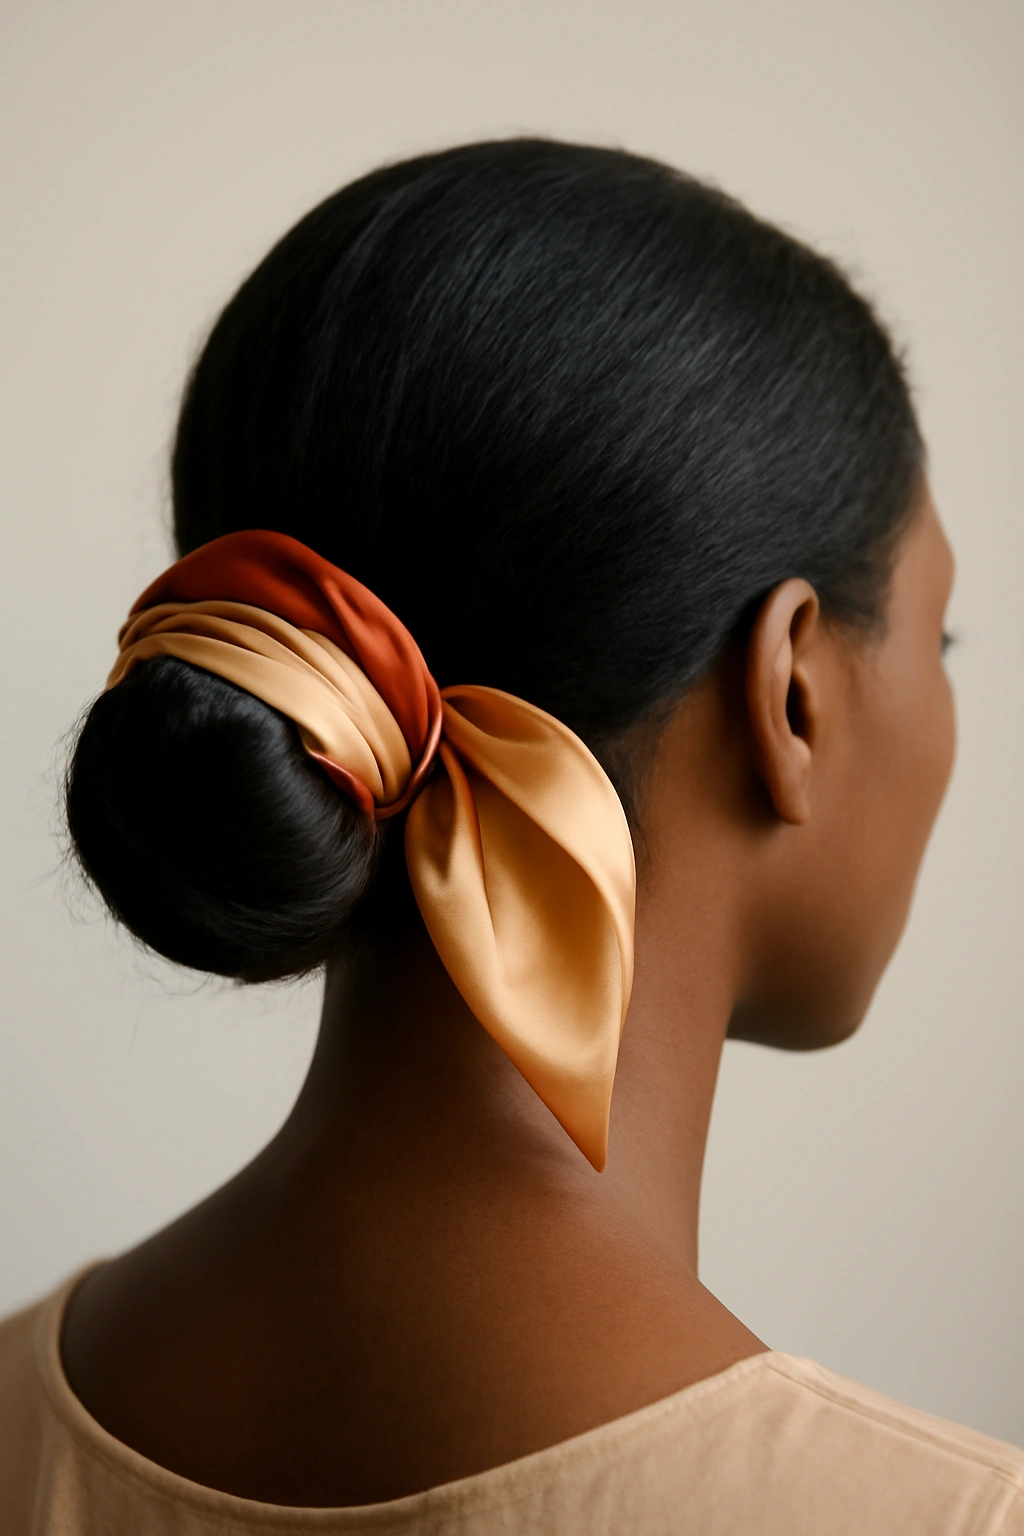
A low bun wrapped with a coordinating silk or satin scarf is as much about aesthetics as it is about protecting your hair. The wrap adds a finished, intentional quality to your bun while the smooth material prevents friction that could cause breakage or frizz. This style bridges the gap between protective styling and elegant presentation, making it perfect for occasions where you want your hair to be both beautiful and cared for.
Why the Wrap Matters More Than Just Decoration
Wrapping your bun with silk or satin does more than look sophisticated—it’s genuinely beneficial for your hair. The smooth surface prevents the friction that cotton or regular fabric creates, reducing frizz and breakage at the back of your neck where your bun sits against clothing or a chair. The wrap also helps your bun maintain its shape throughout the day, and it adds a deliberate, finished quality that transforms a basic bun into something that feels styled and intentional.
How to Wrap a Bun So It Stays Secure and Looks Polished
- Start with a formed, secured low bun using bobby pins that match your hair color
- Cut a piece of silk or satin scarf approximately 3-4 inches wide and 18-24 inches long (adjust based on your bun size)
- Position the scarf at the center of your bun and begin wrapping it around the base in a circular motion, tucking the scarf under itself as you go
- Overlap the wraps slightly so you completely cover the base and secured bobby pins—this is where the polish comes from
- Tuck the end of the scarf under the final wrap and secure with a bobby pin if needed, or tie the ends of the scarf into a soft knot
- Let the ends hang gracefully down the back of your neck or tuck them into the wrapped section
Pro tip: Use a scarf in a color that contrasts with your bun—a rich jewel tone or metallic wraps a dark bun beautifully and makes the style feel intentionally accessorized.
5. Two-Strand Twist Low Bun
Two-strand twists created throughout your hair and then gathered into a low bun deliver a style that’s equally at home at a professional event, a wedding, or a casual brunch. The twists create inherent texture and visual interest, and the bun formation reads as deliberate and polished. Unlike some low buns that require significant edge work or product to feel finished, a twisted bun looks complete because the twists themselves are the design.
The Textured Appeal of Twist-Based Styling
Two-strand twists celebrate your natural texture in a way that many formal styles don’t. The spiraled pattern of each twist catches light beautifully, creating dimension that keeps your style from looking flat or one-note. When you gather these twists into a low bun, you’re building a style that feels rich with texture while remaining completely polished and professional. This is an excellent option if you’re looking for protective styling that doesn’t require you to downplay your hair’s natural characteristics.
Creating Twists That Coil Into an Elegant Bun
- Apply styling cream or gel to damp hair in sections—work with one section at a time so hair stays manageable
- Divide each section into two strands and twist them around each other from root to end, keeping consistent tension so twists look uniform
- Twist in the direction that creates the most visually appealing result—some people prefer twists that spiral away from the face, others prefer toward it
- Allow twists to air dry or sit under a bonnet for several hours so the pattern sets before you gather them into a bun
- Gather all twists at the nape of your neck and secure with a flexible hair tie
- Coil the gathered twists into a compact bun shape and secure with bobby pins, leaving the bun round and voluminous
Worth knowing: Two-strand twists last 2-3 weeks before they start to unravel, but you can refresh them every 7-10 days by re-twisting just the roots and allowing the existing twists to stay in place.
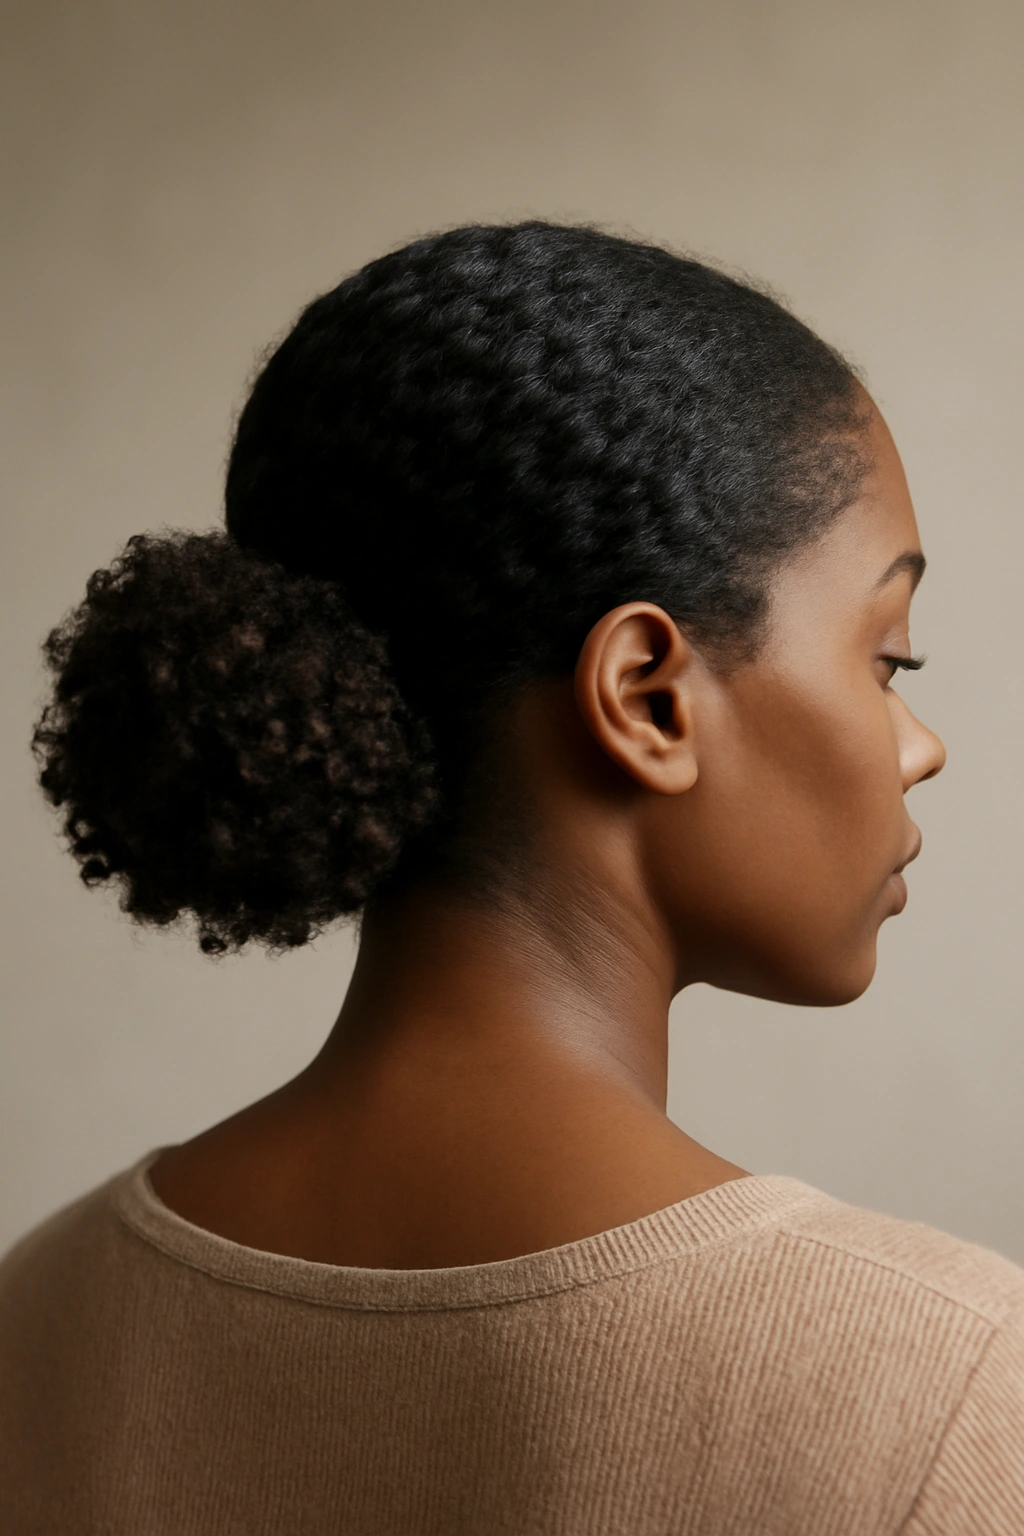
6. Textured Puffed Low Bun
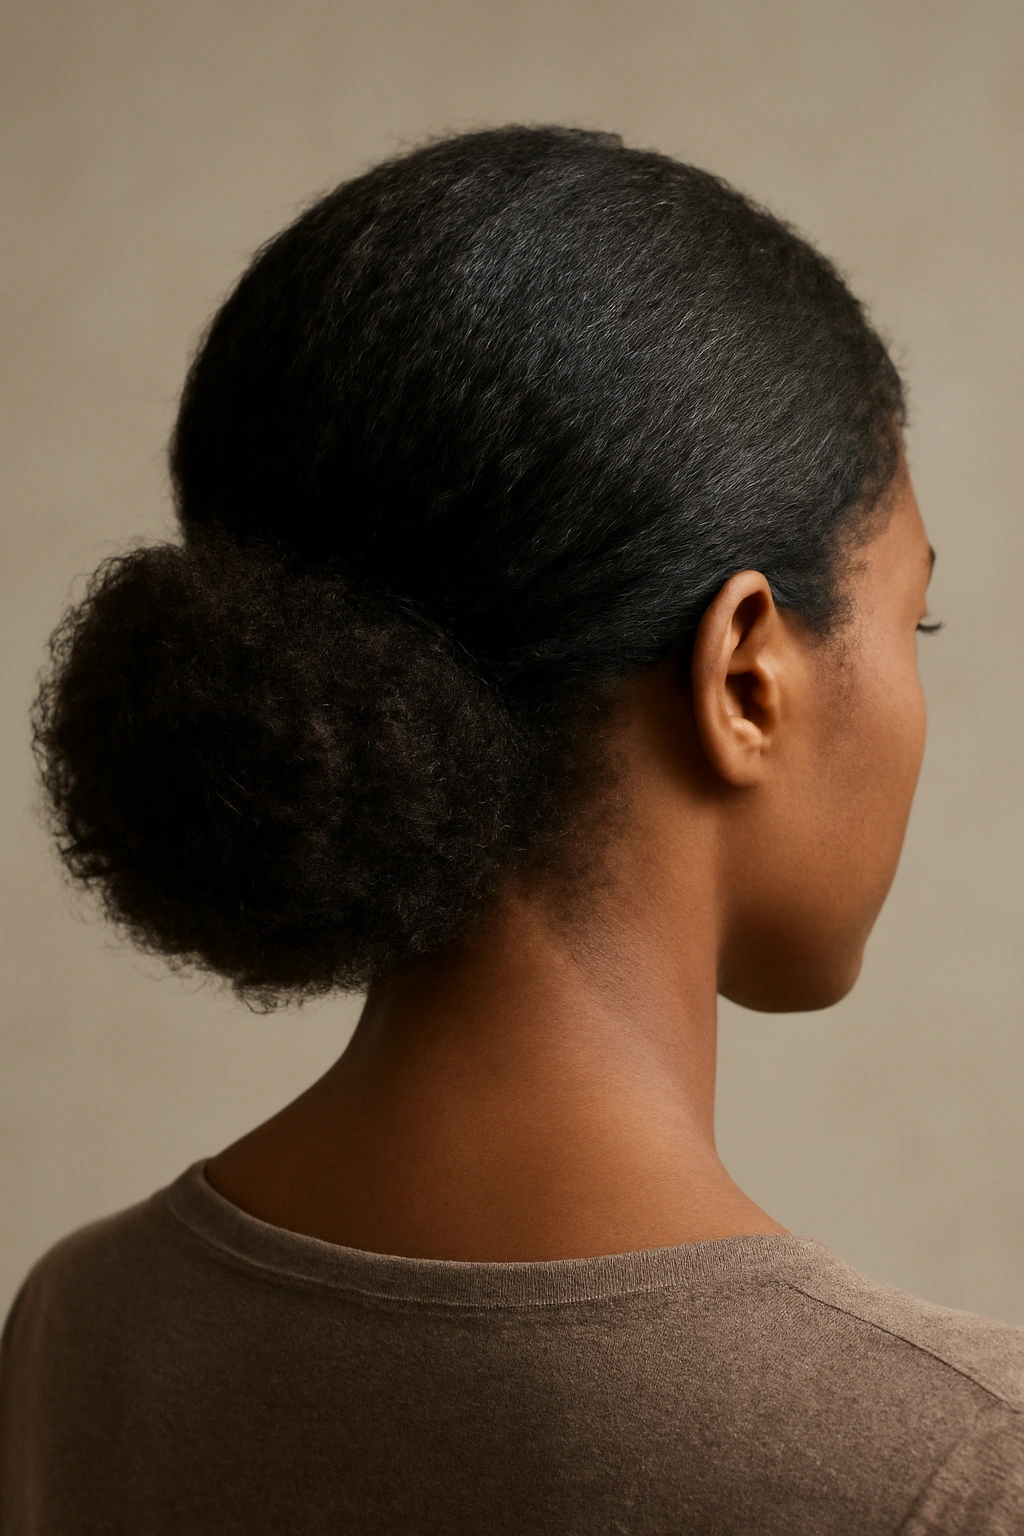
A puffed low bun celebrates volume and your hair’s natural texture in a way that feels sophisticated rather than casual. Instead of compressing your bun tightly, you create a rounded, voluminous shape that sits at the nape of your neck. This style works beautifully with natural hair that has curl or coil pattern, and it reads as intentionally textured rather than undone.
Embracing Volume as an Elegant Design Element
The puffed low bun challenges the assumption that elegant styles have to be sleek and compact. Volume and texture, when intentional and well-executed, are absolutely sophisticated. A round, full bun at the base of your neck creates beautiful lines and silhouette, and it allows your hair’s natural pattern to be the design element rather than something to smooth down or minimize. This style particularly suits people with medium to thick hair density and tight to coily curl patterns.
Techniques for Creating a Full, Intentionally Textured Bun
- Gather your hair at the nape of your neck and secure loosely with a flexible hair tie—you want to start with less tension than you’d use for a sleek bun
- Take sections of your ponytail and gently tease them with a fine-tooth comb to create fullness and texture throughout
- Coil the teased sections around the base of your ponytail, allowing them to sit naturally without compressing
- Secure the shape using bobby pins inserted horizontally and at angles so they grip the textured hair effectively
- Use a light-hold spray to set the style without weighing it down—you want your texture to show, not disappear under product
Pro tip: Create the puff on damp or slightly damp hair rather than completely dry hair—damp hair holds shape better and your texture reads more intentionally.
7. Curved Bun with Laid Edges
A curved low bun combines the sleekness of laid edges with a voluminous, rounded bun shape, creating a style that feels both refined and modern. The curved edges frame your face and create elegant lines, while the bun itself has presence and dimension. This is the style that photographs beautifully and works across multiple occasions without requiring adjustment throughout the day.
The Modern Elegance of Layered Sleekness and Volume
Curved edges were elevated to an art form in Black hair culture, and when paired with a full, rounded bun, they create a style that’s both deeply rooted in Black beauty traditions and completely contemporary. The curve doesn’t read as severe—instead, it frames your face softly while the full bun at the back creates a beautiful silhouette. This combination works because you’re balancing precision in one area with intentional volume in another.
Building a Bun That Keeps Its Shape While Edges Stay Laid
- Start by smoothing your edges with a firm-hold gel, working the curve down the sides of your face and around your hairline with an edge brush
- While your gel is setting slightly, gather the rest of your hair into a low ponytail at the nape of your neck
- Create the bun by coiling your ponytail around itself, building a round shape rather than a flat disc
- Secure the bun structure with bobby pins, then go back and strategically place additional bobby pins to maintain the round shape
- Once your bun is secure, go back to your edges and reinforce the curve with a final application of gel if needed
- Let everything set for 5-10 minutes before you style any face-framing pieces
Worth knowing: Your edges will stay laid longest if you use a pomade or gel with a firm hold rather than a liquid gel that tends to reactivate with moisture throughout the day.
8. Low Bun with Decorative Pins or Cuffs
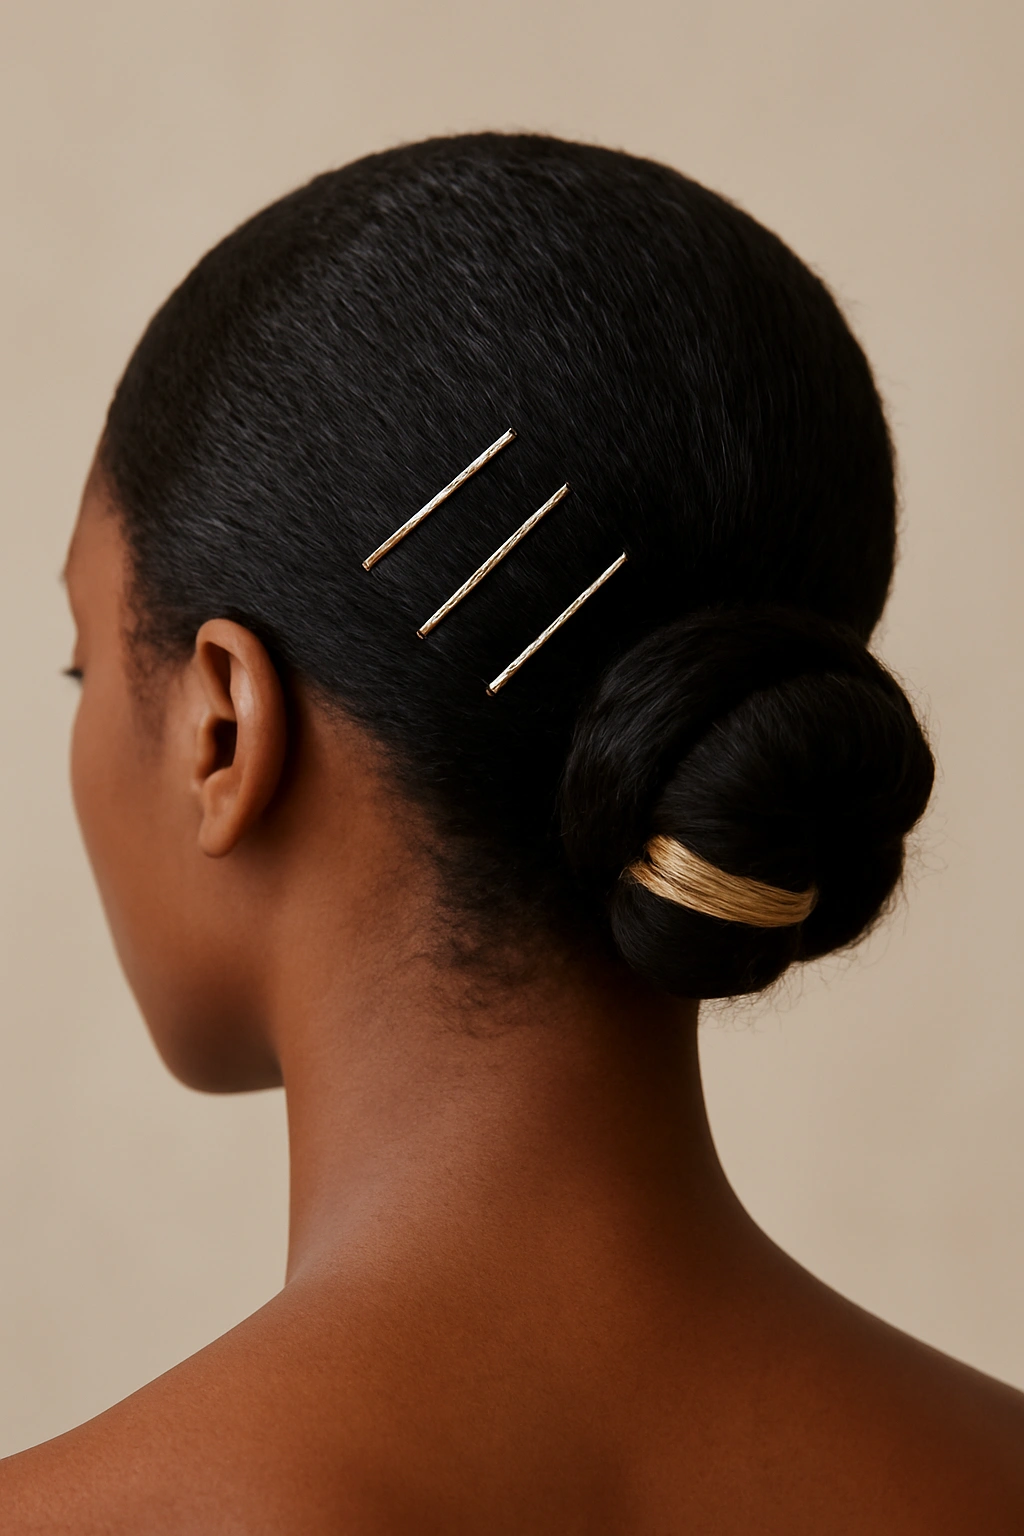
Elevate a simple low bun into a statement style by adding decorative elements like gold bobby pins, vintage hair cuffs, or jeweled hair sticks. These accessories aren’t just pretty—they serve as intentional design elements that transform your bun from basic to sophisticated. The addition of metal hardware, pearls, or crystals signals that your style is deliberate and styled with intention.
Using Accessories to Amplify Your Bun’s Impact
Accessories in your hair are a form of self-expression and styling authority. When you deliberately choose decorative pins or cuffs that coordinate with your outfit or your personal aesthetic, you’re signaling that your style is intentional. A bun adorned with gold hardware reads differently than a plain bun—it feels styled, finished, and clearly deliberate. This approach also gives you the power to transform a basic bun style into different looks by simply changing your accessories.
Ideas for Accessorizing Your Low Bun Beautifully
- Gold bobby pins placed strategically across your bun create a cohesive look if you’re wearing warm-toned jewelry elsewhere
- Vintage hair cuffs in silver or gold can encircle your bun base, creating a finished, formal look
- Pearl or crystal hair sticks can pierce through your bun horizontally, creating a statement detail that’s both decorative and functional
- Beaded bobby pins scattered throughout your bun create texture and catch light beautifully
- Silk scarves tied around your bun base can incorporate color, pattern, or texture into your style while protecting your hair
- Metal hair coils wrapped around your bun create dimension and a deliberately styled appearance
Pro tip: Mix metals strategically—if your other jewelry is gold, stick with gold accessories in your hair, or if your look incorporates both warm and cool tones, choose one metal as your dominant hair accessory.
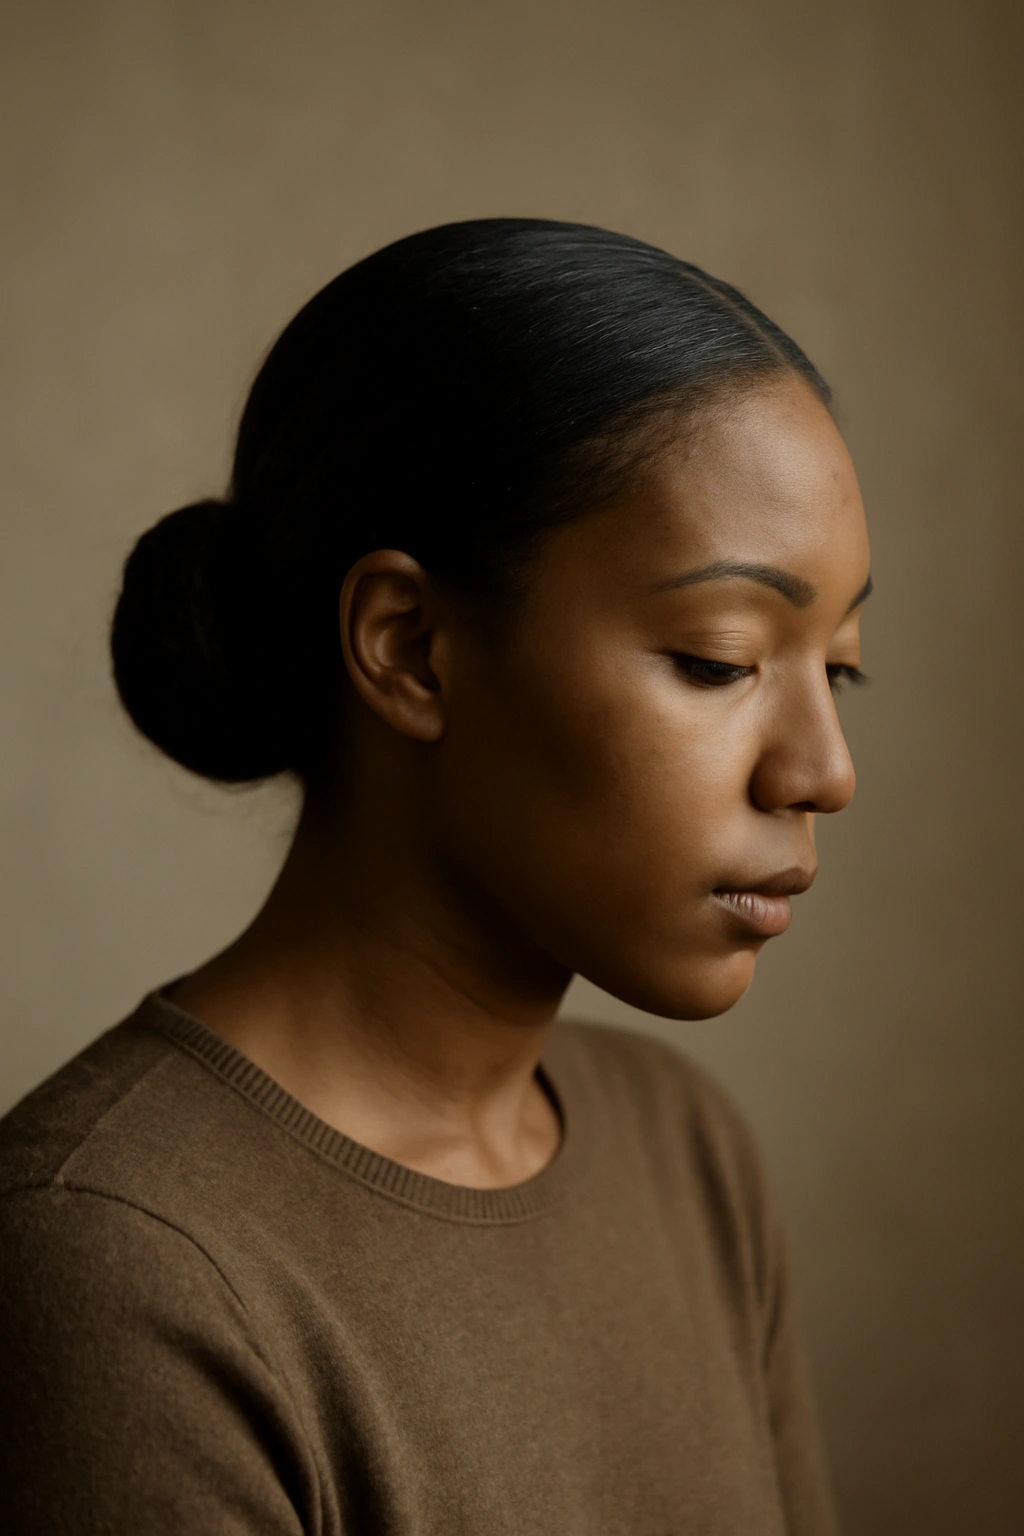
9. Underbun or Reverse Low Bun
An underbun, where the bulk of your bun sits beneath rather than on top of your gathered hair, creates a modern, unexpected elegance. The style reveals the back of your neck while maintaining a sophisticated, polished appearance. This approach works beautifully for occasions where you want something different from the traditional low bun, and it photographs remarkably well from the back.
The Modern Appeal of a Hidden Bun
The underbun represents a subtle shift from conventional low bun styling. Instead of creating a bun that sits openly at the nape of your neck, you coil it underneath so it’s largely concealed by your gathered hair. The effect is sleek, modern, and creates beautiful lines—your hair appears to be simply gathered, but there’s intentional shaping underneath. This style particularly suits people who want their hair off their neck but prefer a minimalist aesthetic.
Technique for Creating a Secure, Invisible Underbun
- Gather your hair into a low ponytail at the nape of your neck using a clear elastic or band that matches your hair color
- Divide your ponytail into sections and create the bun underneath the gathered hair by coiling and securing with bobby pins
- The coiling should happen below the base of your ponytail, creating a compact bun shape that sits under your gathered hair
- Once the underbun is secure, smooth over the top layer of gathered hair so it sits flat and conceals the bun beneath
- Secure the top layer in place with additional bobby pins or a second elastic if needed
- Style your edges and any face-framing pieces so the focus is on the clean, polished appearance of your gathered hair
Insider note: This style reads best on medium to thick hair density—finer hair can sometimes show the underlying bun shape, compromising the illusion.
10. Curly Puff Low Bun
A curly puff low bun brings together the best of both styling worlds: the protected, healthy approach of a puffed style with the polished, intentional appearance of a gathered bun. Your natural curls maintain their pattern and movement while being gathered into an elegant shape at the base of your neck. This is an excellent option if you want a protective style that looks styled and intentional rather than rushed or undone.
Celebrating Curl Pattern in a Formal Style Context
The curly puff low bun allows your natural curl pattern to be the star of your style. Rather than smoothing, stretching, or altering your texture, you’re gathering it and allowing those curls to sit naturally in a bun formation. This style works across curl types—from loose waves through tight coils—because the approach celebrates whatever pattern your hair has. The bun shape creates structure and polish while your curls do the textural heavy lifting.
Creating a Curly Puff Bun That Holds Its Shape All Day
- Refresh your curls using a curling cream or gel spray to reactivate the curl pattern the morning of your style
- Gather your curls at the nape of your neck and secure with a flexible hair tie—avoid overtightening, which can disrupt your curl pattern
- Take sections of your gathered curls and arrange them around the hair tie base, building a rounded bun shape
- Secure the bun using bobby pins that match your hair color, inserting them at angles so they grip your curls effectively
- Avoid compressing the bun—you want your curls to maintain their individual pattern and dimension
- Apply a medium-hold curl-defining spray to set everything in place without creating crunch
Pro tip: This style holds best if you do it on hair that’s at least one full day post-wash—second-day curls have more texture and grip, making them hold a bun shape much more effectively than freshly washed, softer curls.
Final Thoughts
A beautiful low bun is about more than just the technique—it’s about choosing an approach that works with your hair’s natural characteristics and your personal style preferences. Whether you’re drawn to sleek precision, textured dimension, decorative elements, or volume that celebrates your curl pattern, there’s an elegant low bun style that fits who you are and how you move through the world.
The real sophistication in low bun styling comes from the details you invest in: the precision of your edges, the quality of the products you use to hold your style, the way you secure your bun so it moves as one unified shape rather than shifts throughout your day. These details separate a bun that looks polished from one that looks like you grabbed your hair up in a rush. Invest time in learning which technique works best for your specific hair texture and density, and you’ll find that creating elegant low buns becomes a reliable, satisfying part of your styling routine.
Your hair is diverse, capable of holding multiple style approaches, and worthy of the intentionality you invest in it. Whether you wear your low bun to work, a formal event, or a casual gathering, make it yours by choosing an approach that feels authentic and that celebrates your hair exactly as it is.