Short hair is having a major moment on wedding days, and Black brides with cropped, textured, and close-cut styles have endless possibilities for looking absolutely stunning. Whether you’re wearing a fade with clean lines, embracing natural coils and twists, or rocking a bold cut with shaved details, your wedding day hair can be anything but predictable. The beauty of short hair is that it showcases your face, your jewelry, and your confidence—and with the right styling, you can create looks that are just as show-stopping and intricate as any long-style updo.
What makes short hair styling particularly powerful for Black brides is the way it celebrates natural texture and artistry. You get to play with dimension, detail work, and precision in ways that longer styles sometimes can’t achieve. A short cut can go from edgy and modern to romantic and adorned, depending on how you style it. The key is choosing a style that complements your face shape, honors your personal aesthetic, and makes you feel absolutely like yourself on your wedding day—because that confidence is what’s really going to shine in your photos.
The options below range from ultra-sleek and minimalist to richly detailed with braids, twists, and embellishments. Some work best if you start with a fresh cut or shape-up a few days before the wedding, while others are designed to work with your natural texture and growth. All of them are tested, gorgeous, and completely doable with the right stylist and a bit of planning. Let’s dive in.
1. Tapered Fade with Geometric Design Details
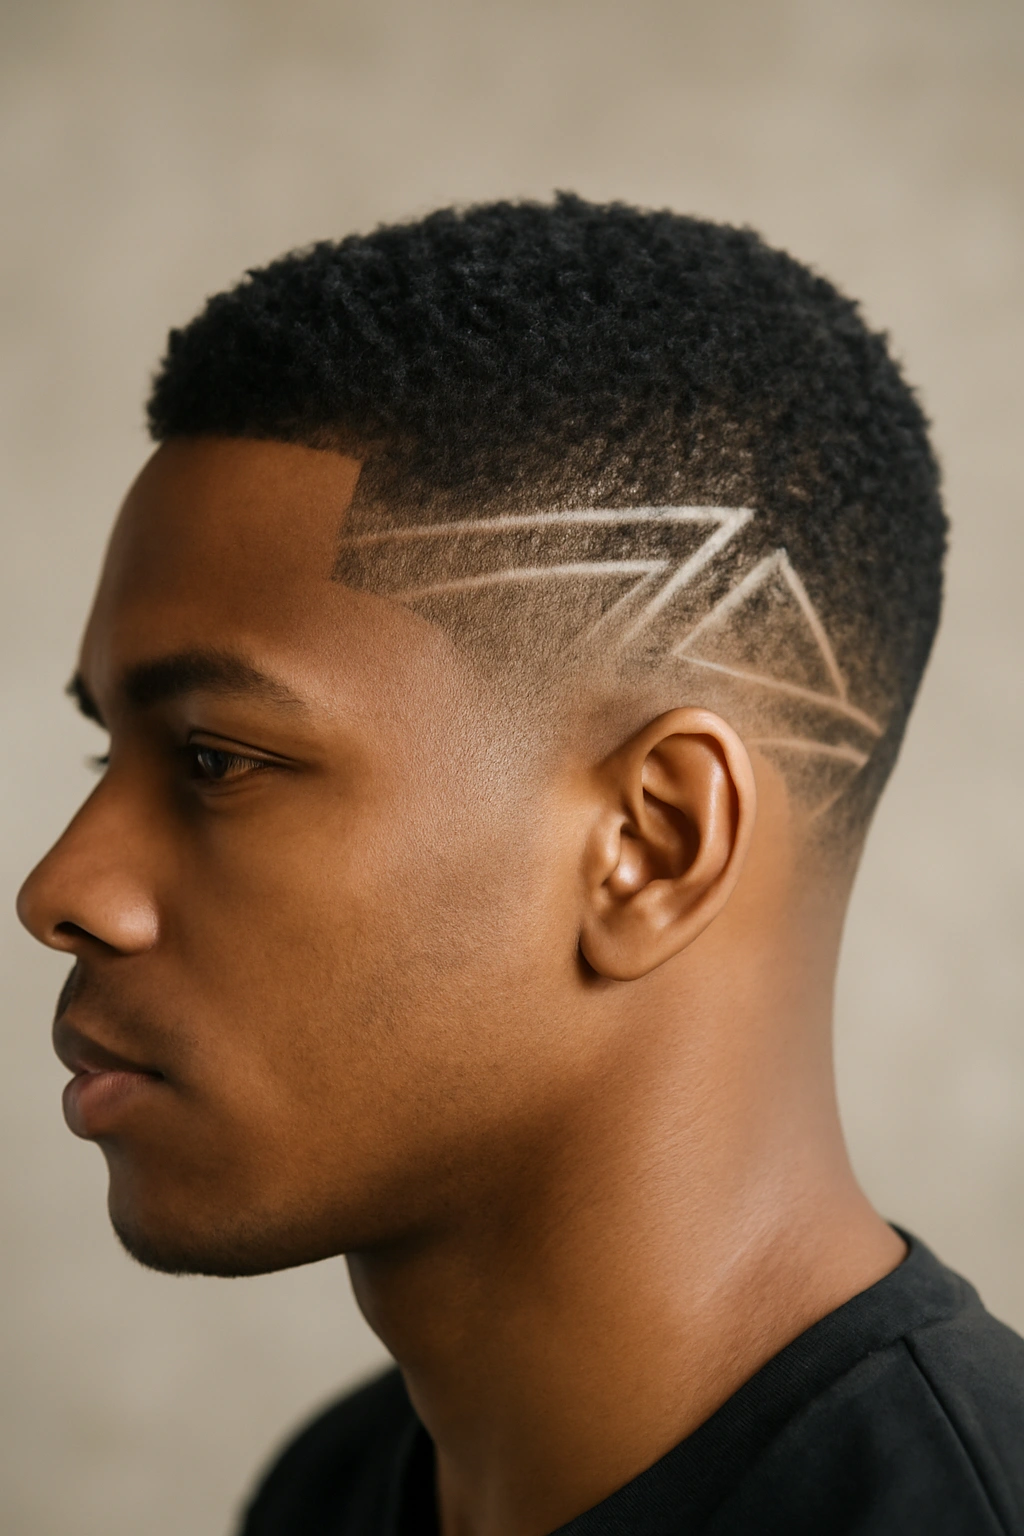
A perfectly executed fade creates a clean, modern canvas that reads as incredibly polished without looking overly fussy. The tapered sides and back—whether razor-sharp or softly blended—frame your face beautifully and draw attention upward to any embellishments you add on top. On your wedding day, this foundation becomes the stage for exactly the level of detail you want: minimal if you prefer understated elegance, or richly adorned if you love intricate work.
Why It Works for Wedding Day
A fade is timeless, flattering, and reads as intentional and chic. The clean lines show off your jawline, neck, and any jewelry you’re wearing, while also giving you a blank slate to add whatever styling elements feel right for your vision. Whether paired with a slicked finish, a shiny oil, or left with natural texture on top, this style photographs beautifully and lasts all day without frizz or movement issues.
Design Details to Consider
- Geometric etching along the sides or back—think triangles, lines, waves, or custom patterns that match your dress, your jewelry, or your personal style
- Crisp edge work around your hairline and sideburns that makes the whole style look intentional and groomed
- Shiny products (a light oil, gel, or smoothing cream) to highlight the design work and create visual interest
- Subtle color accents if you want them—a thin line of color, a temporary glitter or gem detail, or highlights that show the depth of the fade
Pro tip: Schedule your fade cut 3-5 days before the wedding so the lines are crisp but the hair has regrown just slightly, giving you texture to hold product and keep the design sharp throughout the day.
2. Sleek Pixie with Decorative Elements
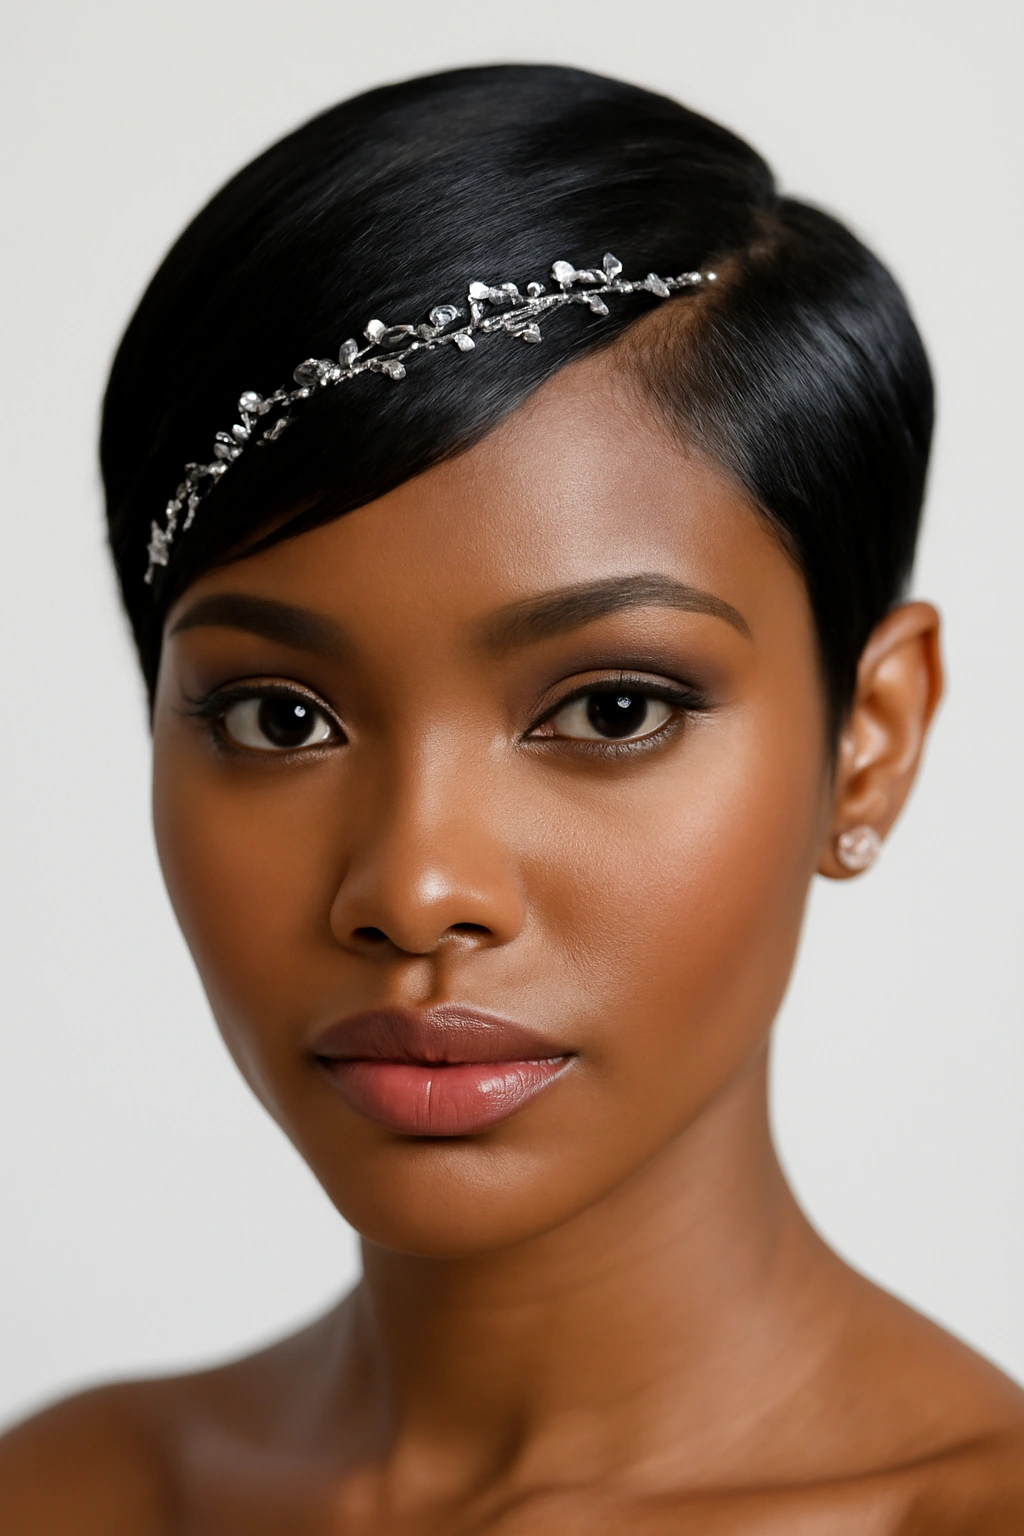
A sleek, close-cropped pixie cut is impossibly chic, and it becomes even more dramatic when you add wedding-day sparkle. This style keeps the focus on your face, your makeup, and your overall bridal look while the decorative elements—pins, clips, jeweled barrettes, or a delicate hair vine—add personality and glamour. The short length means you’re not fighting with volume or movement; instead, you’re working with precision and shine.
Why It Stands Out
A pixie cut exudes confidence and modern femininity in a way that longer styles sometimes struggle to achieve. It’s bold without being edgy (unless you want it to be), elegant without being boring, and it keeps attention on your face and expression rather than your hair. On your wedding day, this means the focus stays on you—your smile, your eyes, your joy—not on whether your hair is holding up or moving in the wind.
Styling Approaches
- Ultra-slicked finish with a smoothing gel or cream, creating an almost wet-look effect that’s sleek and reflective
- Textured top with sculpted sides, leaving more volume where you want movement and keeping the edges clean and defined
- Decorative accessories placed strategically—a jeweled clip on one side, a thin hair vine tracing the top, or a subtle spray of baby’s breath pinned into the texture
- Subtle shine from a product that catches light without making the hair look wet or stiff
What to Know
This cut requires a stylist who truly understands Black hair texture and how to shape a pixie so it flatters your face and hair type. Not all pixies work the same way on different textures, so bring reference photos of pixies specifically cut on Black women with your hair type.
Worth knowing: If you’ve never worn a pixie, try growing into this style a few months before your wedding rather than cutting it all off right before the big day. This gives you time to figure out what you actually like, how you want to style it, and whether this is truly the vibe you want for your photos.
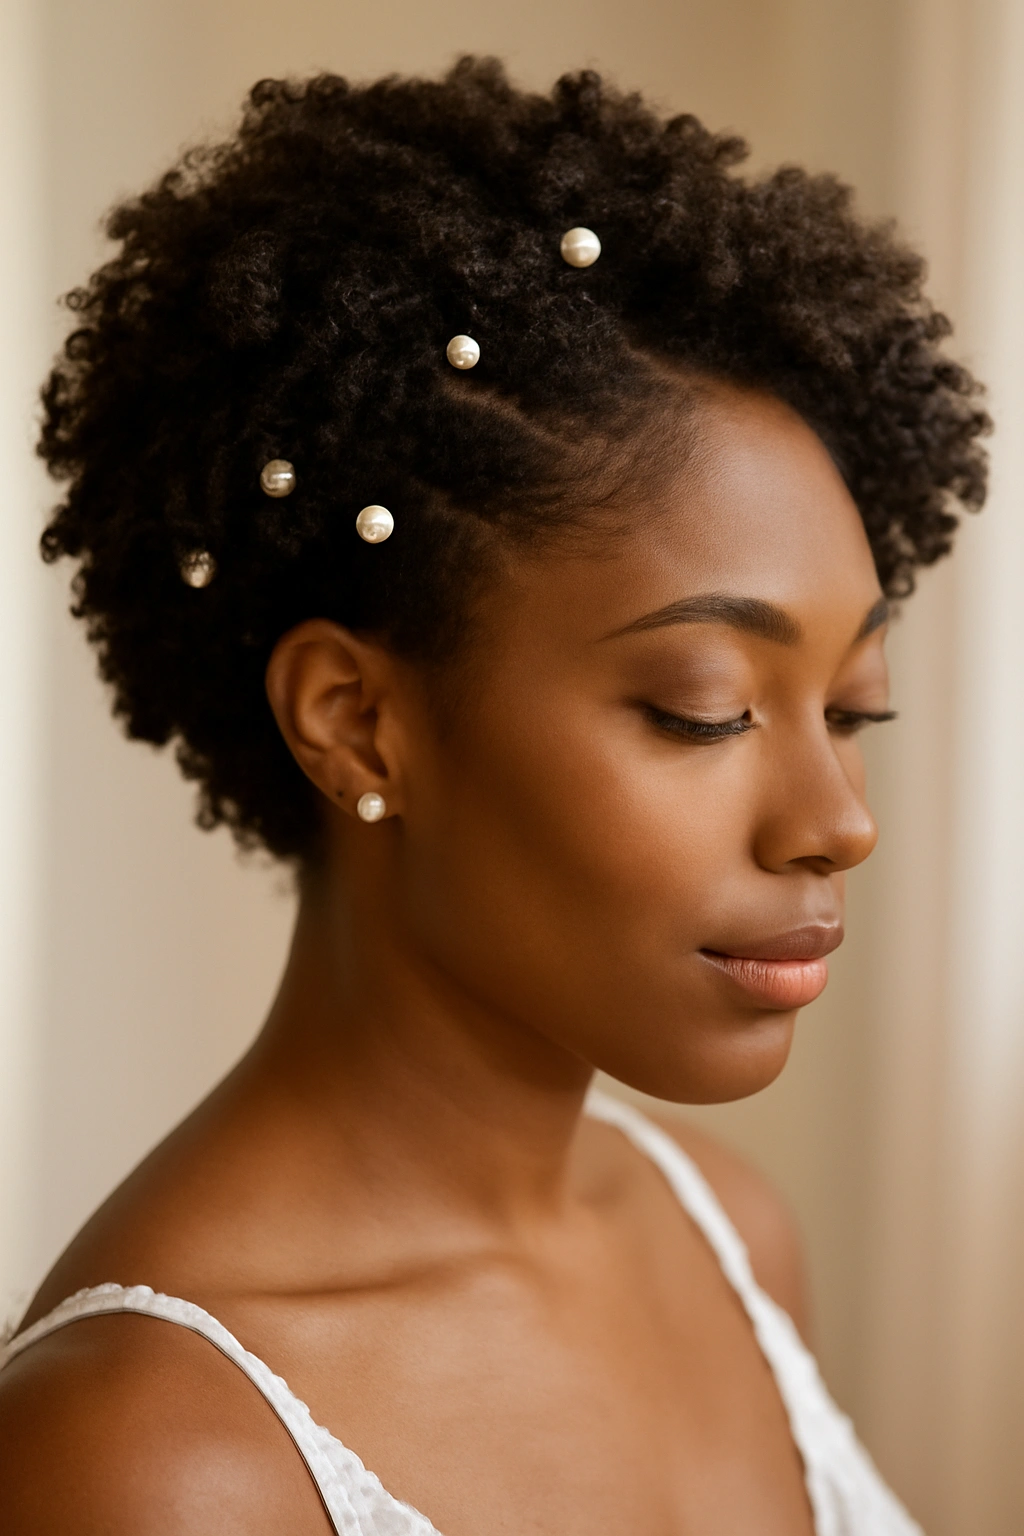
3. Braided Crown on Short Hair
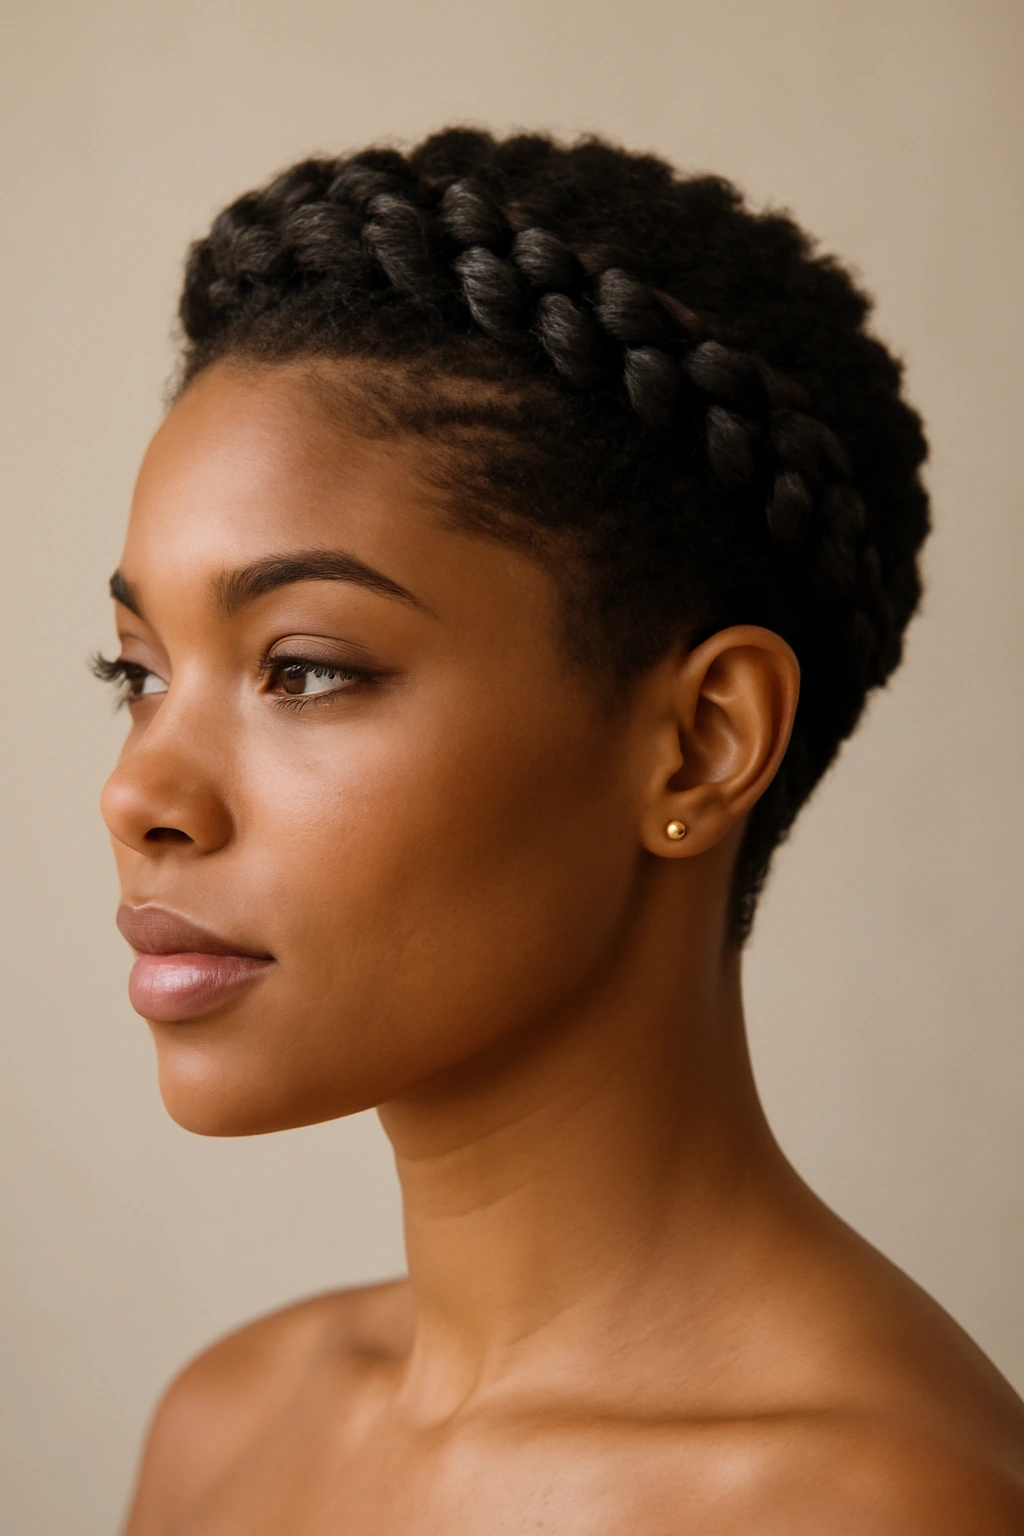
A braided crown is romantic, intricate, and creates the feeling of an ornate updo even though your hair is short. Whether you choose cornrows, twist braids, or micro-braids woven around the top and sides of your head, this style adds visual interest and dimension while still showcasing the shape of your cut. The braids can be thin and delicate or thicker and more bold, depending on your aesthetic.
Why It’s a Stunning Choice
Braids instantly elevate a short style by adding movement, texture, and a handcrafted element that feels special and intentional. A braided crown frames your face beautifully, draws the eye upward, and photograph incredibly well—the pattern and dimension show up beautifully in images. Plus, braids are protective (great if you have natural texture you want to preserve), long-lasting, and they genuinely feel like a hairstyle rather than just a cut.
Crown Braid Styles
- Cornrow crown that starts at one ear, traces around the crown of your head, and ends at the other ear, leaving the nape and sides loose or faded
- Double twist braids framing the face on either side, meeting in the back or each pinned to the opposite side
- Thin, delicate braids placed just across the crown for a subtle touch, or multiplied across the entire head for a more dramatic effect
- Mixed texture combining braids with loose coils, twists, or defined curls in the areas left unbraided
Details Worth Adding
Jeweled clips, golden cuffs placed on the braids, baby’s breath woven between plaits, or small pearl pins that catch light as you move. These touches take the style from beautiful to bridal without overwhelming it.
Pro tip: Start your braids slightly lower than you think you need to—they’ll pull upward as you go about your day, so planning for that natural shift keeps them looking intentional and placed rather than droopy by the reception.
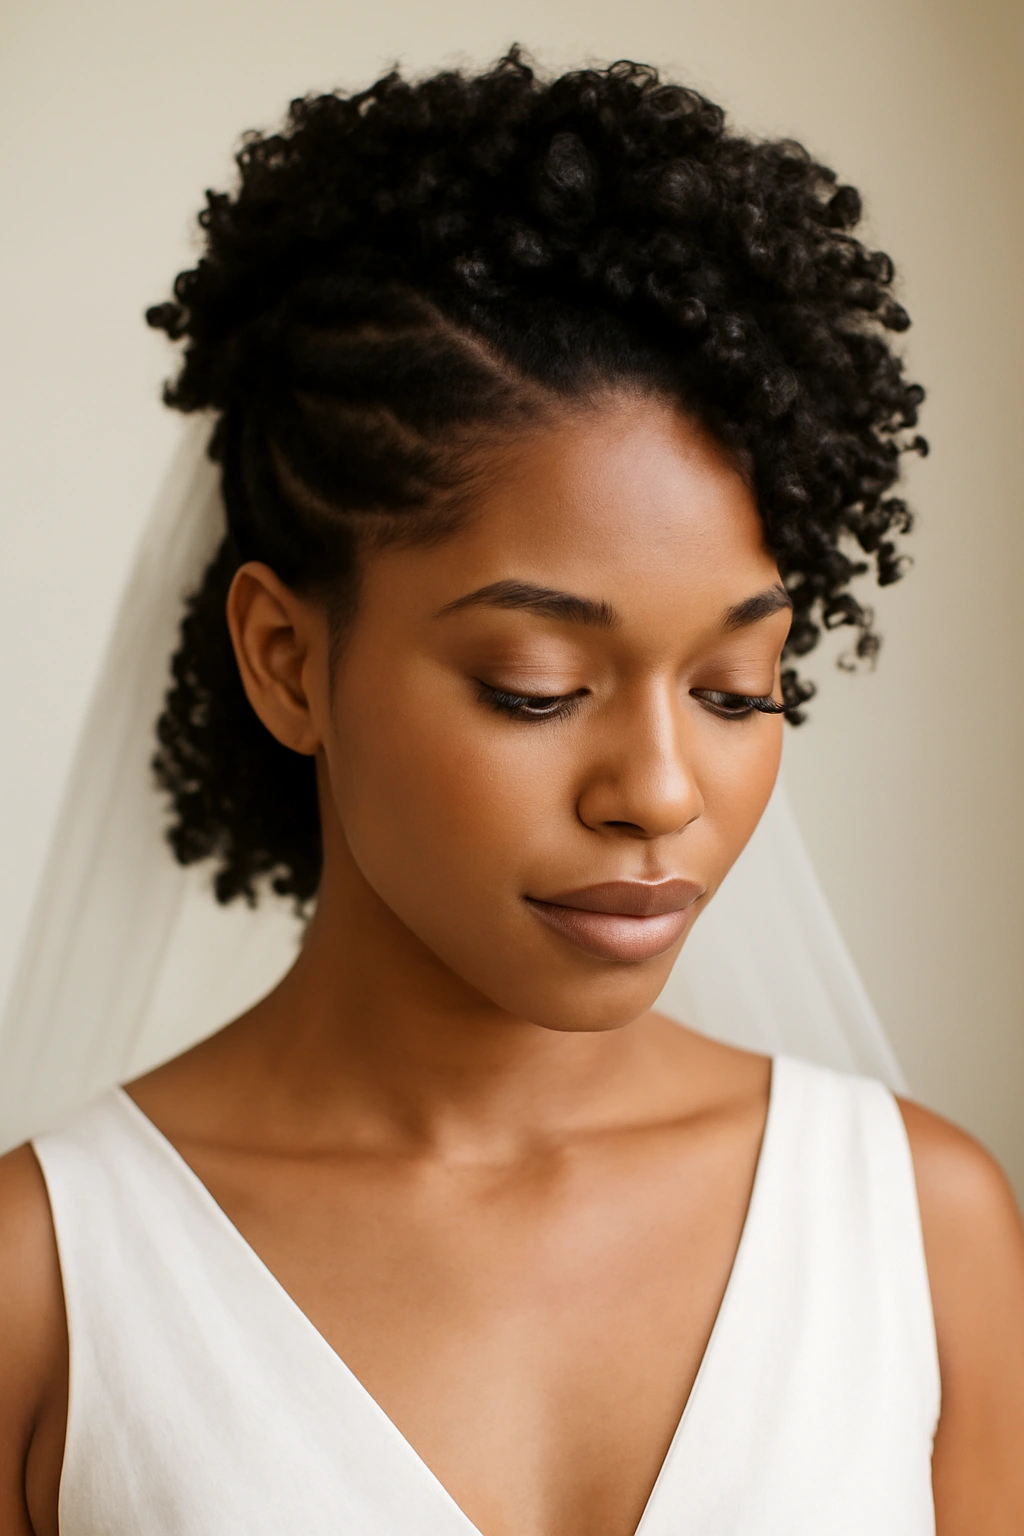
4. Textured Twist-Out Updo
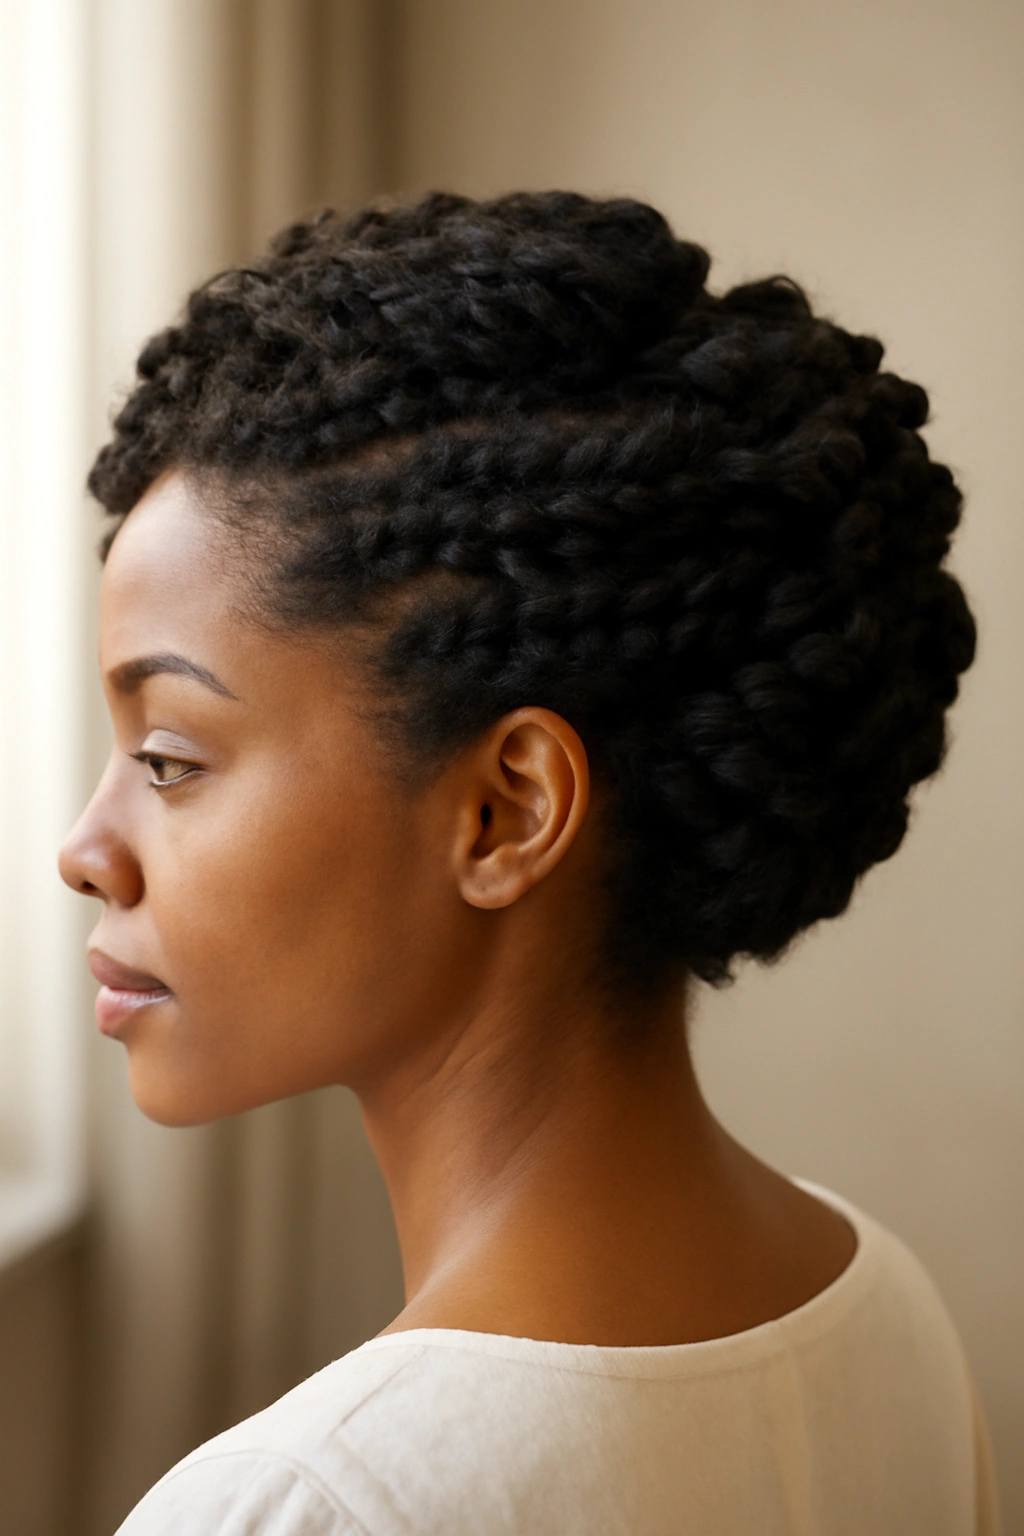
A twist-out takes your natural texture and creates a soft, sculptural look that’s dimensional, romantic, and completely stunning. Two-strand twists unraveled slightly create the illusion of loose waves and curls on short hair, and when you pin them into an updo at the crown or back of your head, you get volume and visual interest that reads as bridal elegance. This style celebrates natural hair texture in the most gorgeous way.
What Makes This Style Special
A twist-out updo is the perfect middle ground between “I’m wearing my natural hair” and “I did something special for my wedding.” The texture is defined and intentional, the styling is clearly deliberate, but the hair still looks and feels like you. It’s also incredibly versatile—you can make it loose and romantic, tight and sculptural, asymmetrical and modern, or perfectly symmetrical and classic.
How to Execute It
- Create two-strand twists throughout your short hair (or just in sections, depending on length and style), using a styling cream or gel to keep them defined
- Let them set for at least 24 hours so the pattern truly sets into your hair
- Unravel them gently starting from the bottom of each twist, leaving them slightly twisted or completely unraveled depending on how much texture you want
- Pin the resulting soft waves and curls into a low updo, side-swept style, or crown arrangement using bobby pins and a light-hold styling cream to keep pieces in place
Styling Products to Use
A curl-defining cream or gel during the twisting phase, then a light hold spray or edge control on the finished style. You want the definition to show but the whole thing to move slightly—not stiff or crunchy.
Real talk: This style is best done by a stylist who specializes in natural hair and understands how to work with your specific curl pattern and hair density. The difference between a gorgeous twist-out and a frizzy, undefined one comes down to technique and product knowledge.
5. Styled Short Locs with Jeweled Accessories
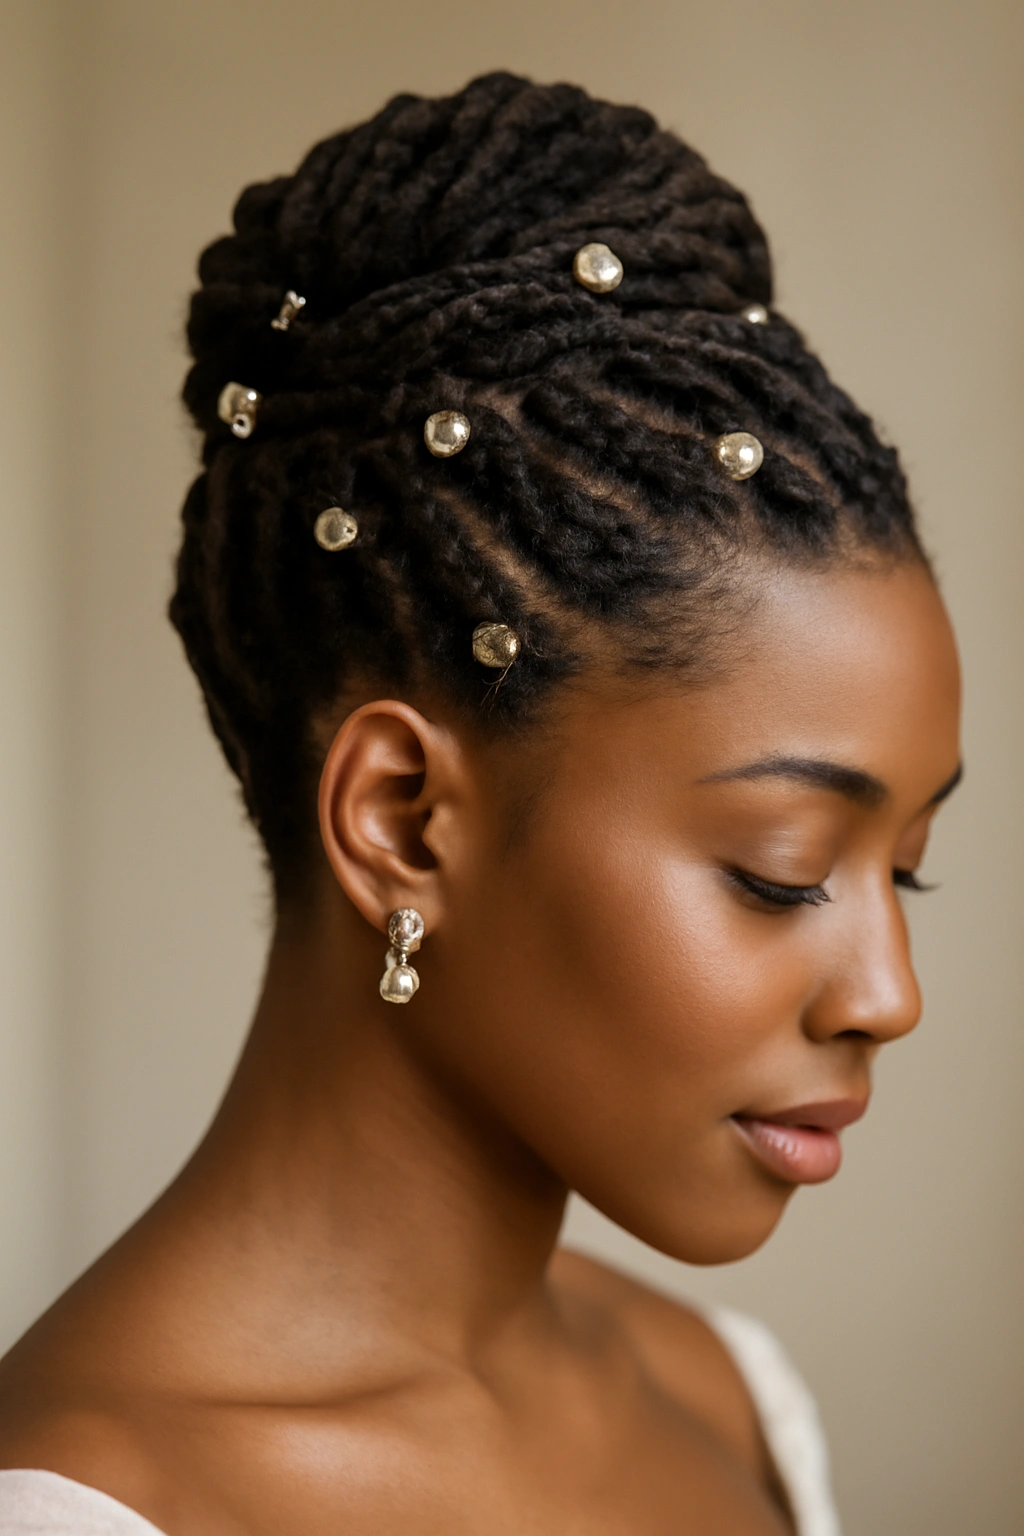
If you’ve been growing locs, your wedding day is the perfect occasion to style them beautifully. Short locs offer incredible versatility—you can sweep them to one side, pin them into a high bun or crown arrangement, decorate them with cuffs and beads, or let them fall naturally while adding jeweled barrettes that catch light. Locs photograph beautifully because they have natural dimension and movement, and they last all day without frizzing or losing definition.
Why Locs Are Perfect for Weddings
Locs are a long-term commitment and a beautiful expression of natural hair. On your wedding day, they’re already strong, defined, and gorgeous—you’re not fighting with them to hold a shape or maintain a style. Instead, you’re simply arranging them in a way that feels bridal and special. The fact that they’re locs, and that you’ve been tending them as part of your regular life, makes the entire look feel authentic and personal.
Styling Options
- High bun or crown knot created by sweeping all your locs up and wrapping them around each other at the crown, secured with bobby pins and decorated with a jeweled cuff or hair ring
- Half-up arrangement with some locs pinned up and some falling, creating a soft, romantic silhouette
- Swept to one side in a deep side part, pinned or tucked on the opposite side for an asymmetrical, elegant look
- Locs laid back and decorated with multiple jeweled cuffs, thin chains, or beaded details threaded through them for a rich, adorned effect
Accessory Ideas
Solid gold or silver cuffs that match your jewelry, jeweled hair rings in colors that coordinate with your bouquet or dress, delicate chain drapes threaded between locs, or small pearl pins placed throughout. The key is choosing pieces that feel cohesive with your overall bridal aesthetic.
Pro tip: Get your locs freshly twisted or retwisted about a week before your wedding so they look full, defined, and polished without looking brand-new. That week of wear settles them into a more natural-looking fullness.
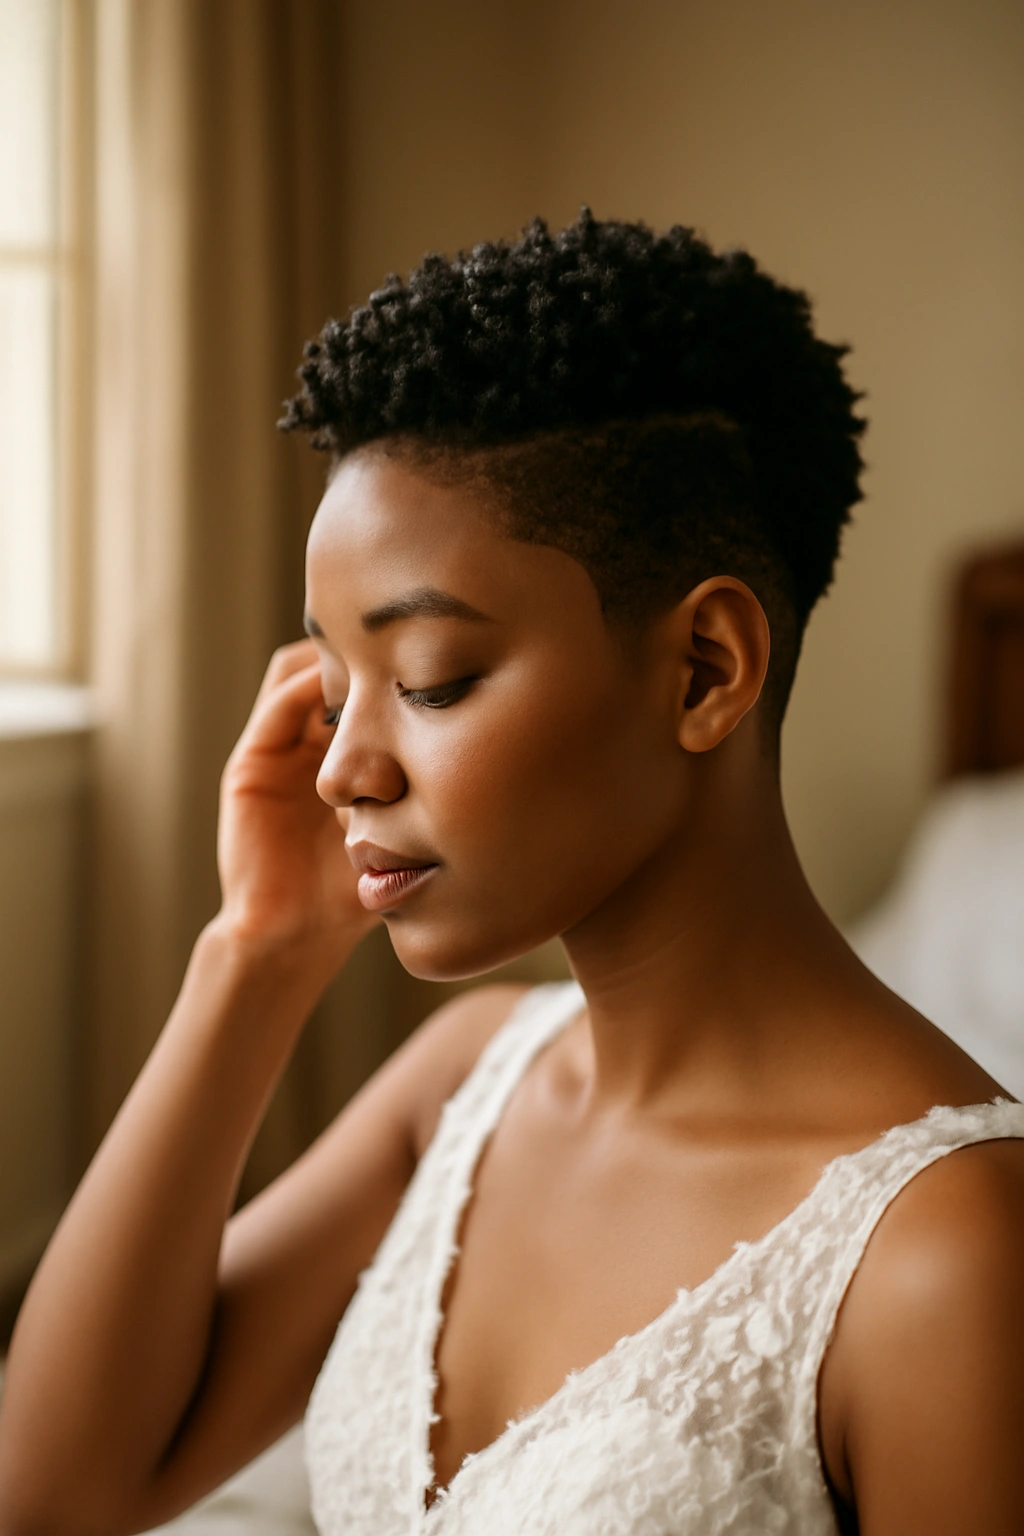
6. Shaved Sides with Voluminous Crown
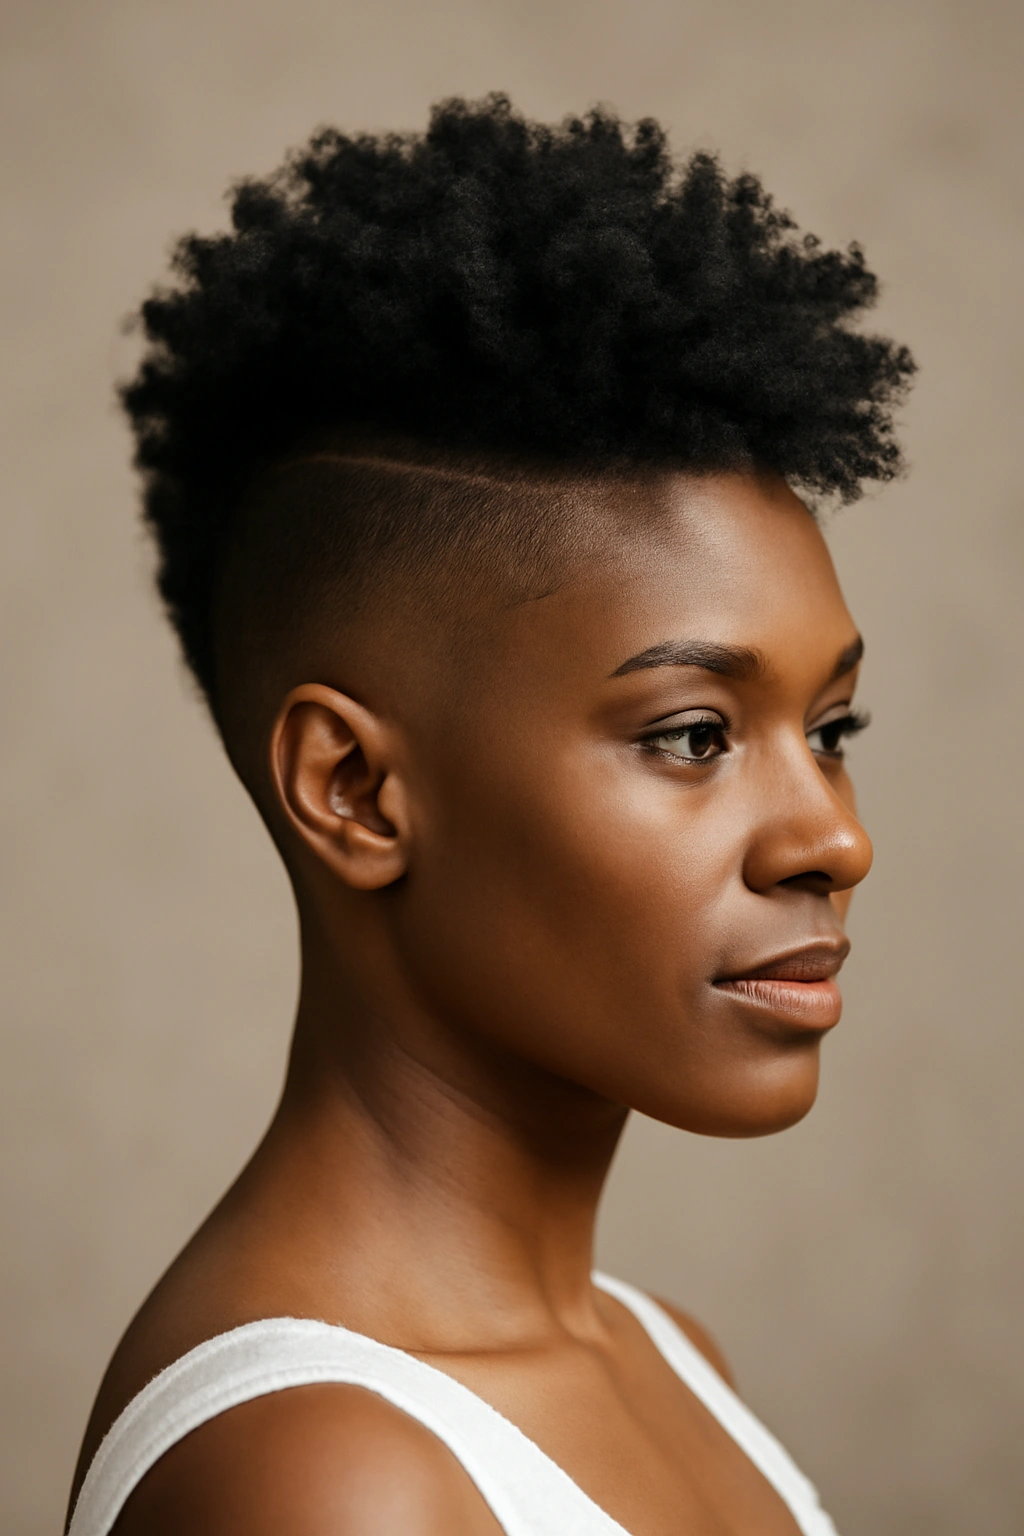
This style is for brides who love contrast, edge, and drama. Sharply faded or completely shaved sides create clean, bold lines, while the crown remains full, textured, and voluminous. You get the sophisticated polish of a fade combined with the boldness of a statement style. The shaved sides draw attention to your face and collarbone, and the volume on top makes a genuine impact—it’s not a subtle style, and it’s perfect if you want to make a statement.
Why It’s Striking
The contrast between shaved or faded sides and a full crown is inherently architectural and modern. It’s a style that reads as intentional, confident, and artistic. Photographically, it’s incredibly dynamic—the clean lines of the shaved sections and the dimension of the crown create visual interest from every angle. On your wedding day, this style says that you’re not here to blend in.
Crown Styling Ideas
- Braided crown with the braids sitting on top of natural texture or coils for added dimension
- Defined coils or twists piled loosely on top and secured with bobby pins for a naturally voluminous look
- Slicked-back crown using gel to smooth the top section back and upward while leaving the crown loose and textured
- Decorative pieces or accessories placed throughout the crown to catch light and add glamour
- Asymmetrical styling where one side has more volume or a specific arrangement while the other is clean and defined
Making It Wedding-Appropriate
You might worry that shaved sides feel too edgy for a wedding, but styling them with intention—adding jewels, decorative pins, or pairing them with classic bridal jewelry—instantly elevates the look. The key is making sure the overall presentation reads as intentional bridal styling, not just an everyday edge cut.
Worth knowing: This style requires a fresh shape-up the day of or day before your wedding to keep the sides crisp and defined. Schedule your barber or stylist accordingly.
7. Twist and Coils Half-Up Style
A half-up style works beautifully on short hair when you combine different textures and techniques. Twists framing the face, coils pinned up at the crown, and loose defined curls falling—all of this together creates a look that’s romantic, intricate, and completely wearable. You get the illusion of long, styled hair while actually rocking a short cut that’s easy to manage and photograph beautifully.
What Makes This Style Versatile
A half-up, half-down arrangement gives you the best of both worlds: the face-framing of a crown or updo combined with the soft, romantic feel of wearing your hair down. On short hair, this means you’re creating height and interest on top while letting your beautiful face and neck remain the focus. It’s sophisticated without being formal, playful without being casual.
How to Build This Style
- Create defined twists on both sides of your face, starting at the temple and twisting back toward the crown
- Smooth or define coils throughout the crown area, adding texture and dimension
- Pin the twists and coils upward at the crown, securing them with bobby pins and a light-hold product
- Leave the back and lower sections loose, creating the half-down effect
- Soften the overall look by gently pulling a few pieces around your face or allowing some texture to fall freely
Adding Romantic Details
A delicate hair vine or piece of greenery threaded through the twist sections, jeweled clips placed where the twists are pinned, or a subtle dusting of temporary glitter on the crown area. Keep it elegant and intentional—you want details that add to the style, not overwhelm it.
Pro tip: Practice this style at least twice before your wedding day. The balance between “pinned up” and “falling loosely” is about precision, and you want to know exactly how much product you need and how tightly to secure the twists so they last all day but don’t look stiff.
8. Slicked Back with Detailed Baby Braids
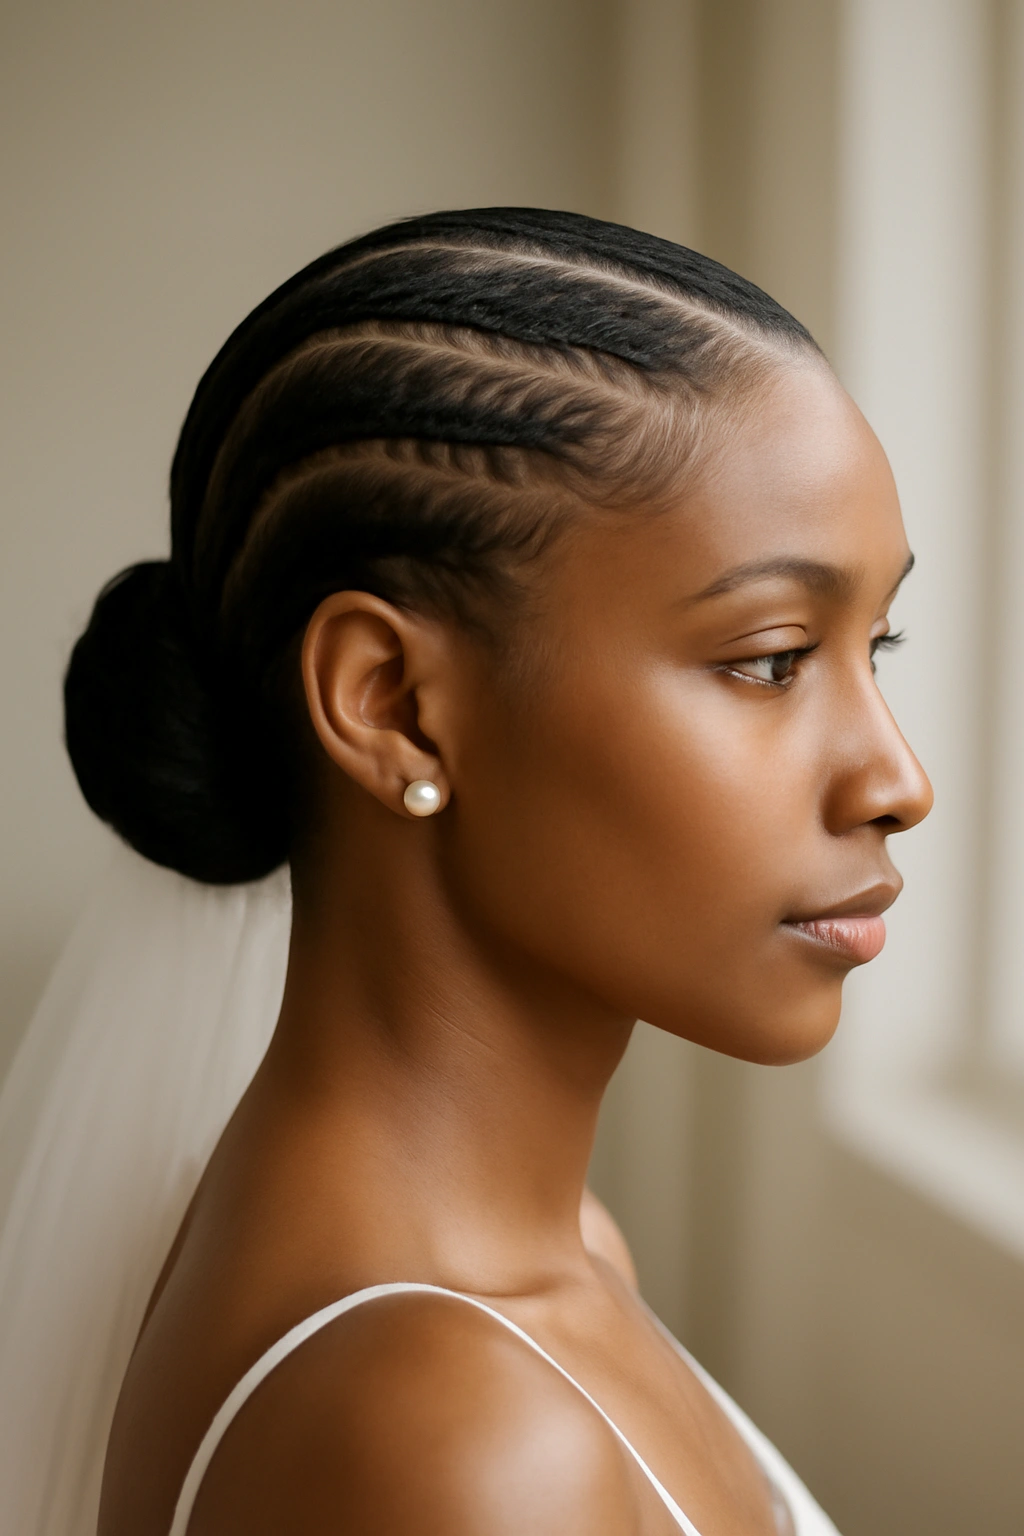
This is an ultra-chic, low-maintenance style that looks intentional and polished. Smoothing the hair back sleekly while adding thin baby braids—either scattered throughout or placed strategically—creates visual interest and dimension without looking fussy. The smooth finish is modern and elegant, while the braids add a handcrafted, artisanal touch. It’s the perfect style if you want to look effortlessly put-together.
Why This Is Deceptively Sophisticated
Slicked-back styling reads as incredibly polished and intentional. It shows off your face, your bone structure, and your jewelry completely. Adding baby braids transforms it from minimal to detailed—you’ve clearly spent time on this style, but it doesn’t look overdone. The combination is genuinely elegant and works for any wedding aesthetic, from minimalist modern to romantic garden wedding.
Execution Details
- Smooth the hair back using a gel, mousse, or pomade that provides hold without flaking or looking shiny in an unflattering way
- Create thin, tight baby braids throughout—you might do three or four braids, or many more depending on how much detail you want
- Place the braids strategically: some starting at the temple and moving backward, some placed along one side, or scattered throughout for an all-over detailed effect
- Secure everything with bobby pins and set with a light-hold hairspray
- Define your edges with edge control for a polished, intentional finish
Product Choices Matter
Use a gel or mousse that’s specifically formulated for Black hair—this ensures it holds without flaking or drying your hair out. Test it before your wedding day to make sure you like how it looks and feels.
Real talk: This style requires a stylist who’s truly skilled with baby braids and who understands how to work with your hair texture. The braids should be tight enough to last all day but not so tight that they cause tension or discomfort.
9. Coil-Out with Strategic Decorative Pins
A coil-out creates beautifully defined, bouncy curls and coils from your natural texture, and when you add strategic decorative pins—pearl, gold, jeweled, or delicate designs—you transform it instantly into bridal elegance. The pins catch light as you move, add visual interest, and read as intentional styling. The coils themselves provide all the texture and dimension you need, so you’re not fighting with your hair or relying on complicated techniques.
Why This Celebrates Your Natural Hair
A coil-out is one of the most direct ways to wear your natural hair texture on your wedding day. It’s beautiful, defined, and completely yours. Adding decoration doesn’t change your hair or force it into an unnatural shape—it simply highlights what’s already gorgeous. This style says clearly that your natural texture is worthy of celebration, and it often photographs even better than you’d expect because the coils have natural dimension and movement.
Creating the Perfect Coil-Out
- Apply a curl-defining cream or gel to clean, damp hair
- Coil sections of hair by wrapping them around your finger or a tool, leaving them to set overnight or for several hours
- Unravel gently in the morning to reveal defined coils
- Arrange and pin the coils using bobby pins hidden underneath, creating a style that feels intentional rather than just “coils falling where they will”
- Add decorative pins once the arrangement is complete
Styling for Height and Interest
You might create a high coil-out that’s piled loosely on top for volume, a side-swept arrangement, or a style that’s more evenly distributed around your head. The pins become part of the visual design—place them where they’ll catch light and be visible in photos.
Pro tip: Your coil-out will be at its best definition the night you create it or the next morning. Schedule your styling so that your coils are freshest right before you need to be photographed.
10. Undercut with Sculptural Top Knot Bun
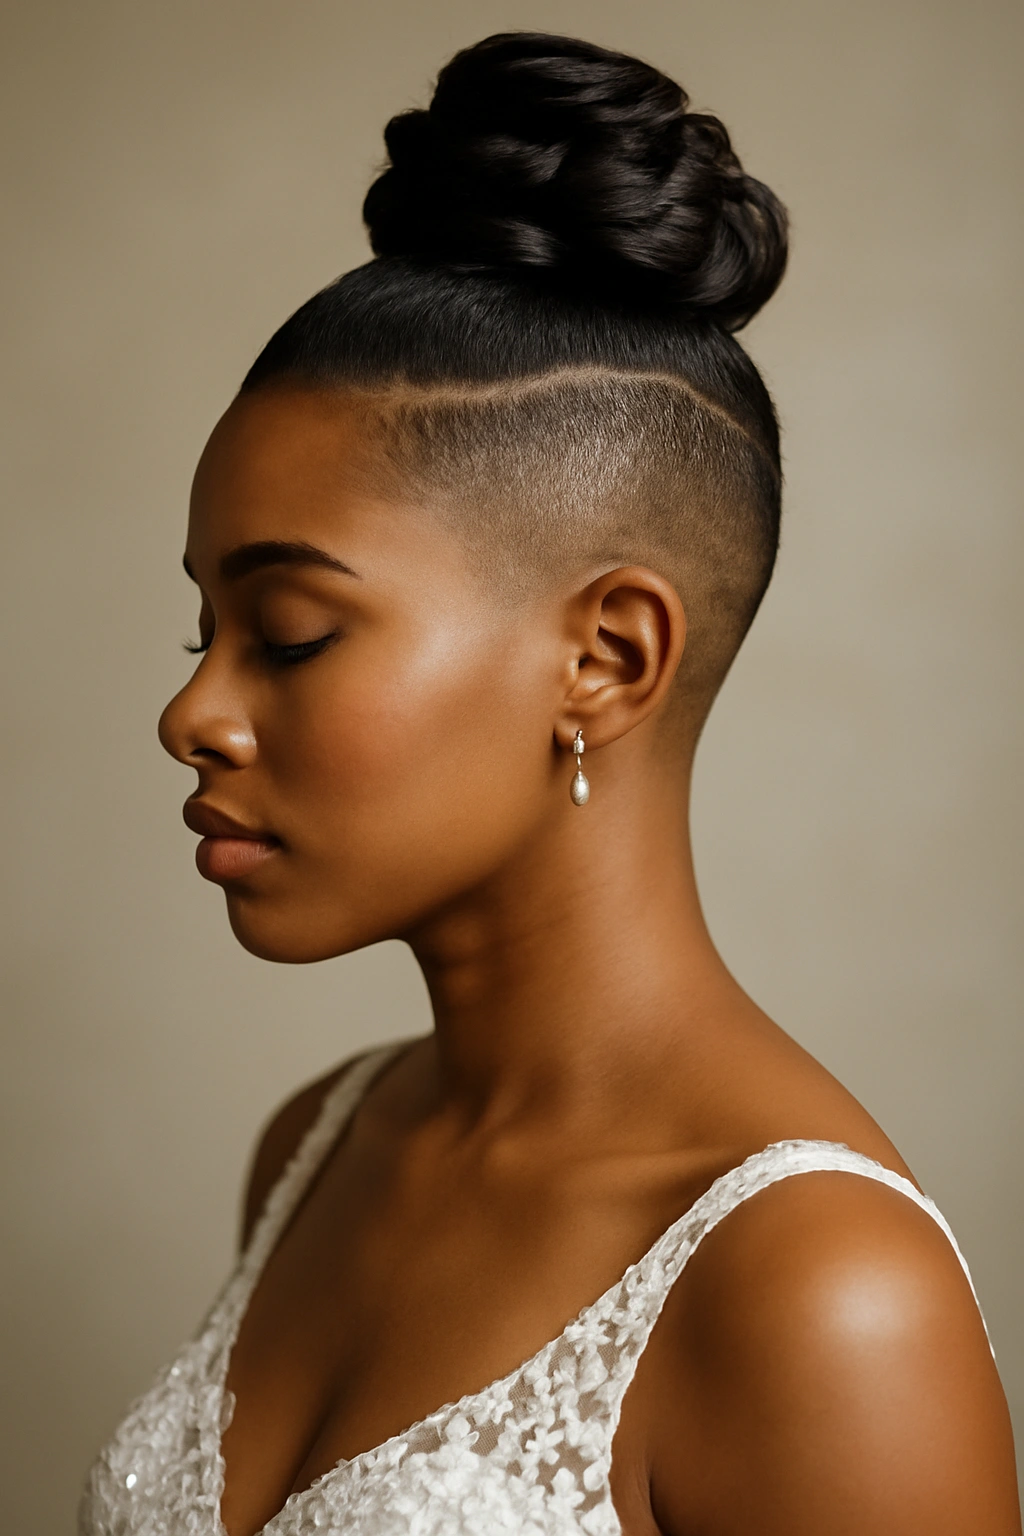
An undercut—where the sides and back are faded or shaved while the top is longer—gives you incredible styling flexibility. On your wedding day, gather that longer top section into a sculptural, carefully arranged top knot bun. You get the modern edge of an undercut combined with the romantic impact of a bun. The result is a style that’s uniquely yours and absolutely stunning.
What Makes This Style Work
An undercut with a top knot bun is the definition of modern bridal style. The clean lines of the undercut are contemporary and bold, while the gathered-up bun reads as intentional and romantic. Together, they create a look that’s neither too edgy nor too traditional—it’s exactly in the middle of cool and elegant. The style also shows off your face completely, meaning your makeup and expression are front and center.
Creating the Perfect Top Knot Bun
- Gather the longer hair from your top section at the crown or slightly off-center, depending on whether you want symmetry or asymmetry
- Create texture by lightly twisting or braiding the section before you wrap it up, or by using a curl-defining product to create coils or waves
- Wrap and secure the gathered section into a bun shape, using bobby pins and a light-hold product to keep it in place
- Leave intentional pieces loose around your face if you want a softer effect, or keep it sleek for a more modern look
- Decorate if desired with pins, cuffs, or a delicate accessory
Variations in Approach
- Smooth, polished bun using gel for a very modern, minimalist look
- Textured, slightly undone bun that shows dimension and movement
- Asymmetrical bun placed off to one side for a contemporary feel
- Bun with braided detail where you braid the section before wrapping it, creating pattern and visual interest
Worth knowing: The relationship between your undercut and your bun is what makes this style sing. Make sure your undercut is fresh (shaped up within a few days of your wedding) so the contrast is sharp and clean, and make sure your bun is secure enough to last all day but arranged in a way that feels intentional and beautiful rather than just “hair pulled up.”
Final Thoughts
Choosing a short hair wedding style is about finding something that makes you feel absolutely yourself—confident, beautiful, and ready to celebrate. Whether you go for sleek and minimal, braided and detailed, textured and romantic, or bold and statement-making, your short hair is a canvas for a look that’s entirely your own. The styles above are tested, gorgeous, and absolutely doable with the right stylist and a bit of planning.
Schedule a consultation with a stylist who specializes in Black hair and who has experience with wedding styling. Bring photos of the specific styles that appeal to you, discuss your hair type and texture honestly, and talk through how much maintenance you want on the day itself. Most importantly, choose a style that genuinely excites you—the one that makes you smile when you see it in reference photos. That excitement and confidence will shine through in every photograph, and that’s what really makes a wedding day style unforgettable.
Your hair is part of your story, and your wedding day is the perfect moment to style it in a way that honors who you are. Short, textured, artistic, bold, romantic, or minimal—whatever you choose, wear it with complete confidence. That’s the real bridal glow.