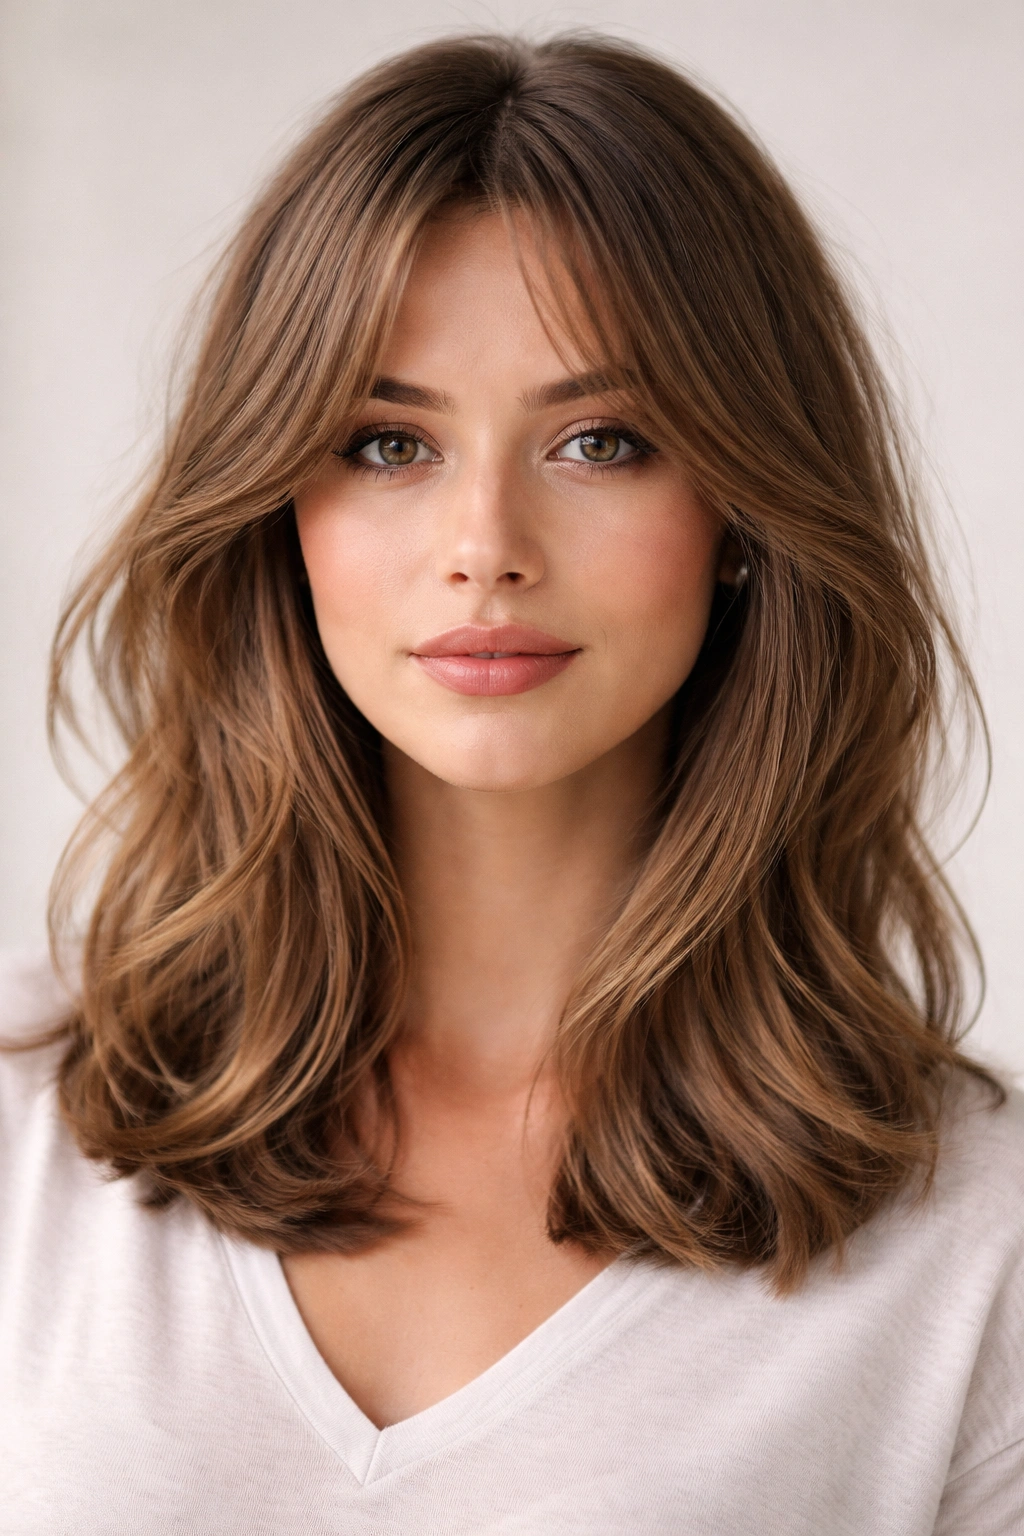
That awkward phase when your hair is too short to style one way but not quite long enough for something else? It’s a real styling dilemma, and most people approach it all wrong. Instead of waiting it out or making a drastic cut in frustration, the truth is that in-between lengths can actually be a goldmine of creative styling opportunities if you know how to work with them.
The key is understanding that hair in the transition phase doesn’t need to look unfinished or temporary. With the right cut, texture, and styling approach, those in-between lengths can become intentional, flattering styles that work beautifully with your face shape and lifestyle. This is where strategic layering, thoughtful styling products, and confidence in the awkward phase transform what many people see as a styling obstacle into something genuinely wearable.
What makes these in-between hairstyles work is their hybrid nature. They borrow from both shorter and longer hair aesthetics, giving you flexibility that a fully committed cut or length doesn’t offer. You can style them sleek or textured, tuck them into an updo or wear them down, dress them up for an event or throw them in a bun for a casual day. The styling options are actually wider than you might think—you just need to know which cuts and techniques make the most of those in-between lengths.
1. The Textured Lob with Choppy Layers
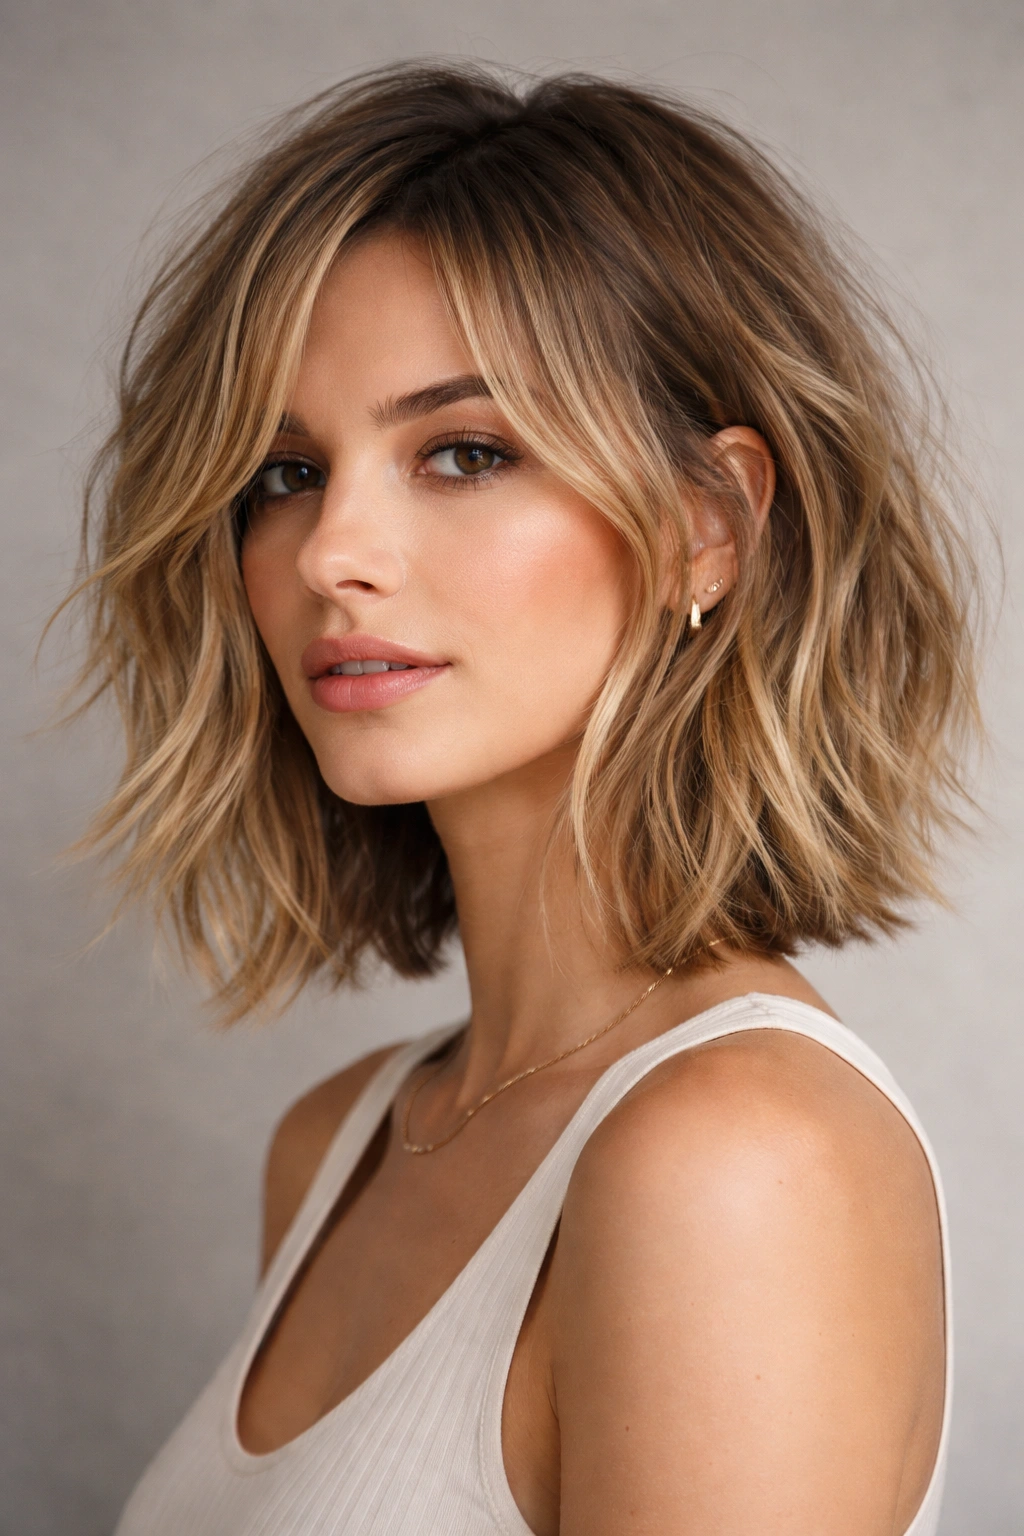
A textured lob sits right at chin length or just below—that tricky zone where hair is too short to pull into a secure ponytail but long enough that it’s not quite a traditional bob. The magic happens when you add choppy, disconnected layers that create movement and break up any heaviness. These layers give the cut intentional dimension instead of looking like it’s just stuck in limbo.
Why This Cut Owns the In-Between Phase
This style works because the choppy texture disguises how in-between the length actually is. The shorter pieces on top and around the face create a modern, editorial vibe that looks completely deliberate and trendy, even though you’re technically in that transition zone. The layers also reduce bulk, so the cut feels fresh and light rather than awkward and grown-out.
Styling and Maintenance Essentials
- Use a texturizing spray or sea salt spray before blow-drying to enhance the choppy dimension and create that effortless, piece-y texture
- Style with a round brush for movement, or finger-dry for a more undone, lived-in look
- Trim every 6-8 weeks to maintain the choppy texture and prevent the cut from looking scraggly
- A texturizing paste or pomade applied to damp roots helps maximize volume and makes the layers pop
- Sleep in loose braids or a silk pillowcase to preserve the texture and reduce frizz between styling
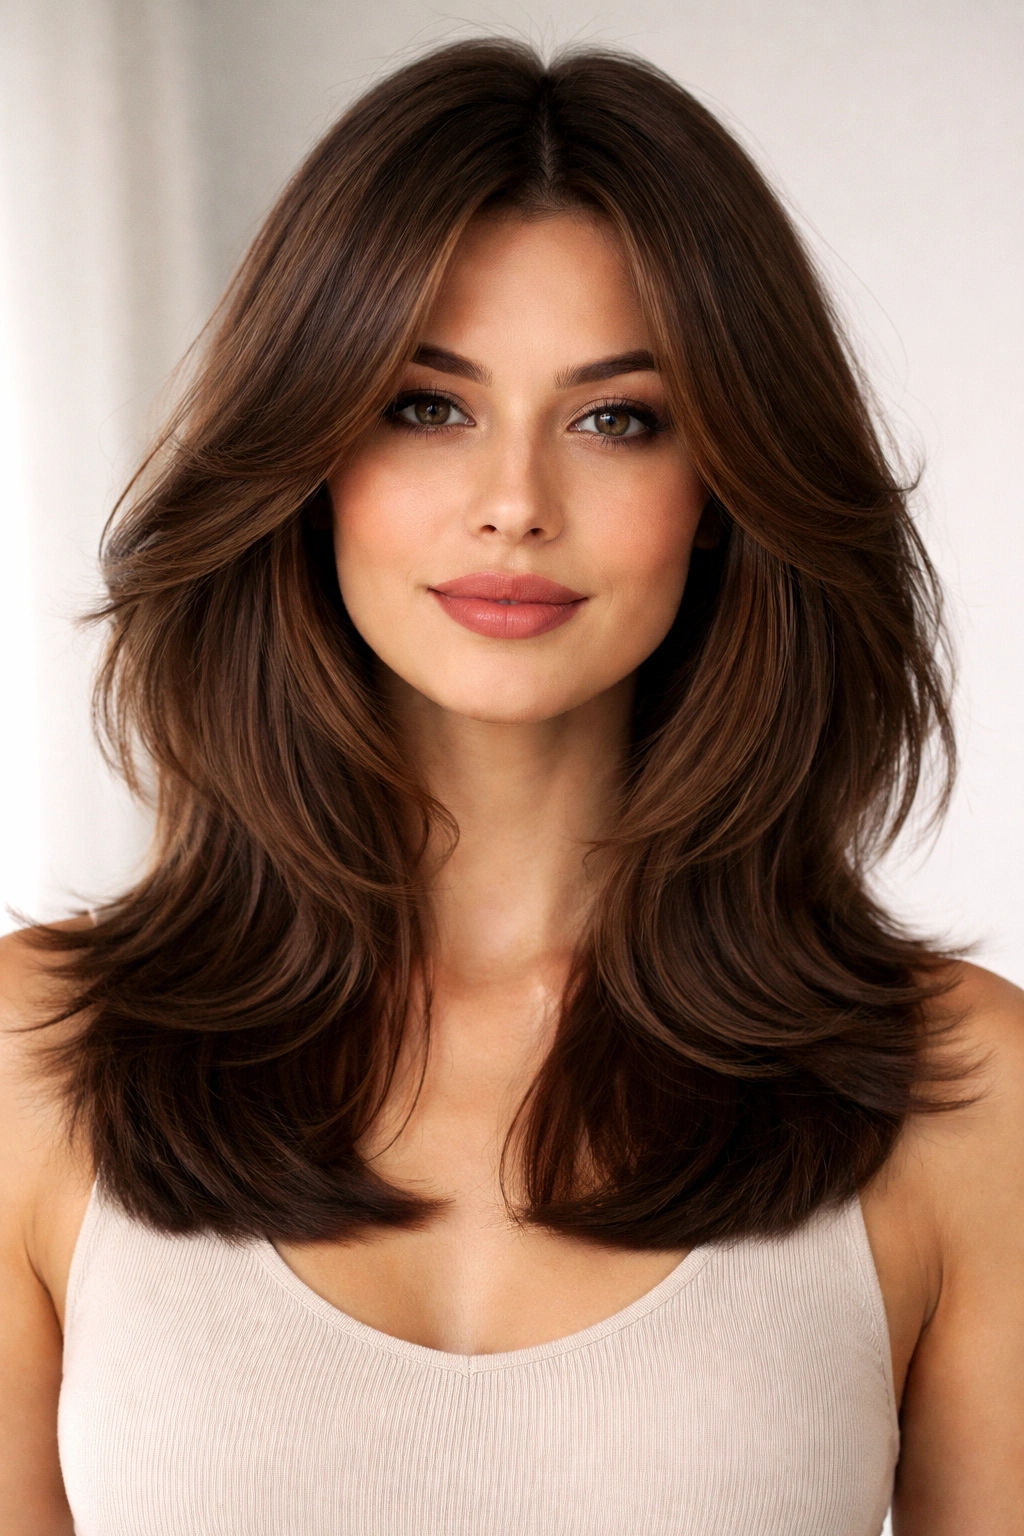
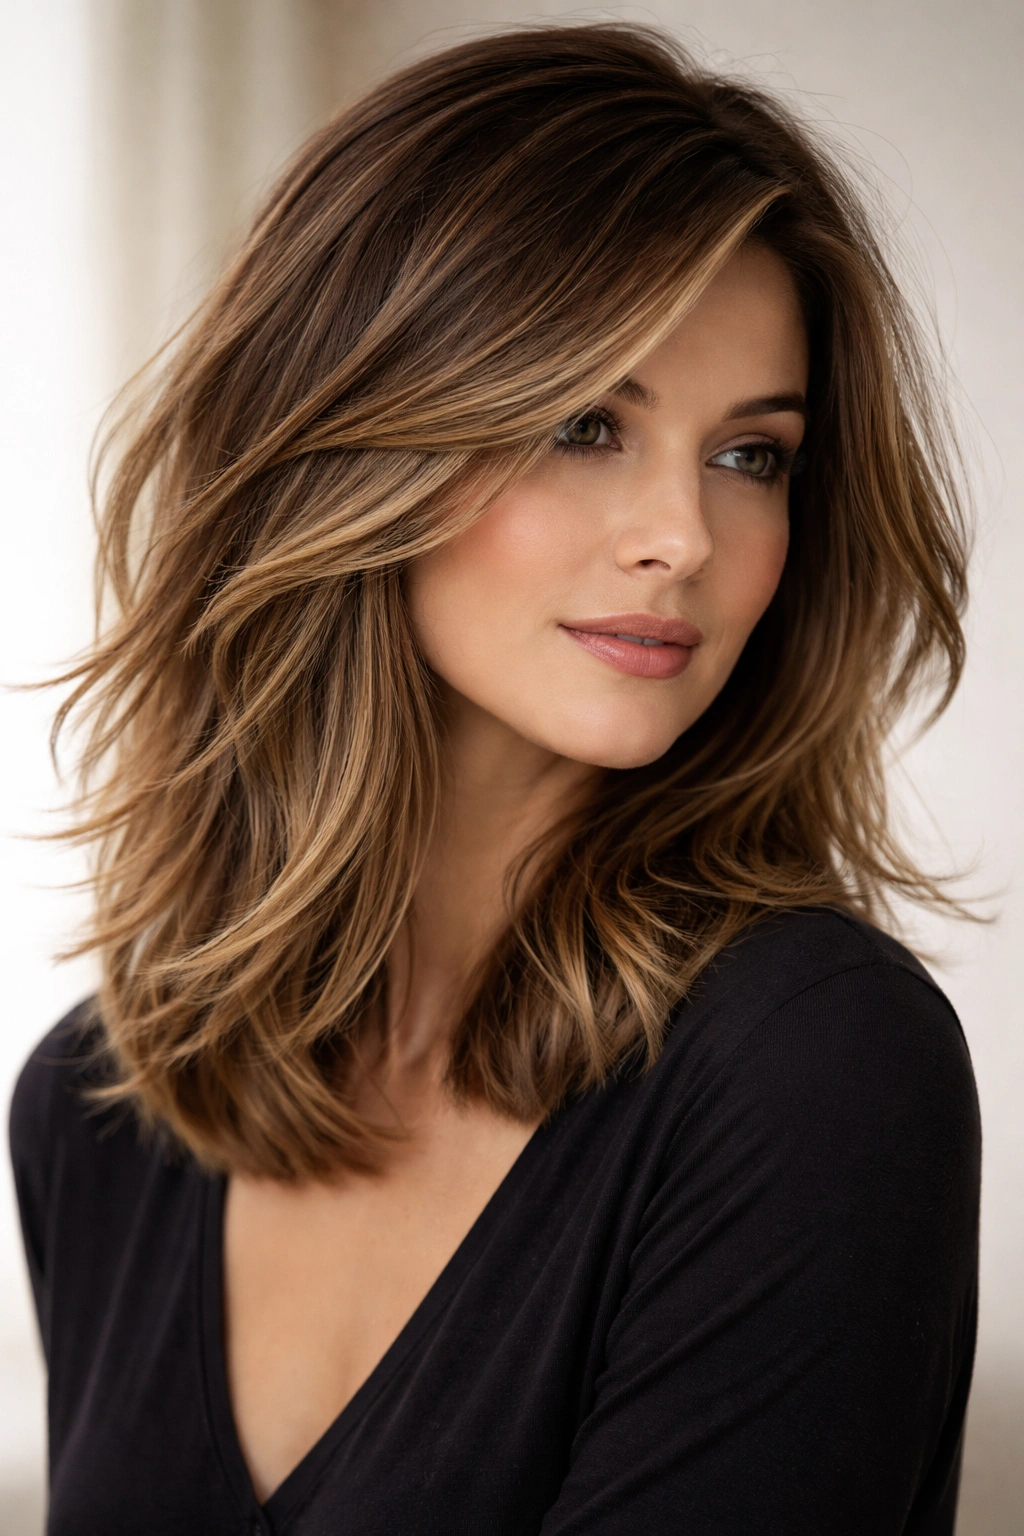
2. The Shag Cut with Modern Proportions
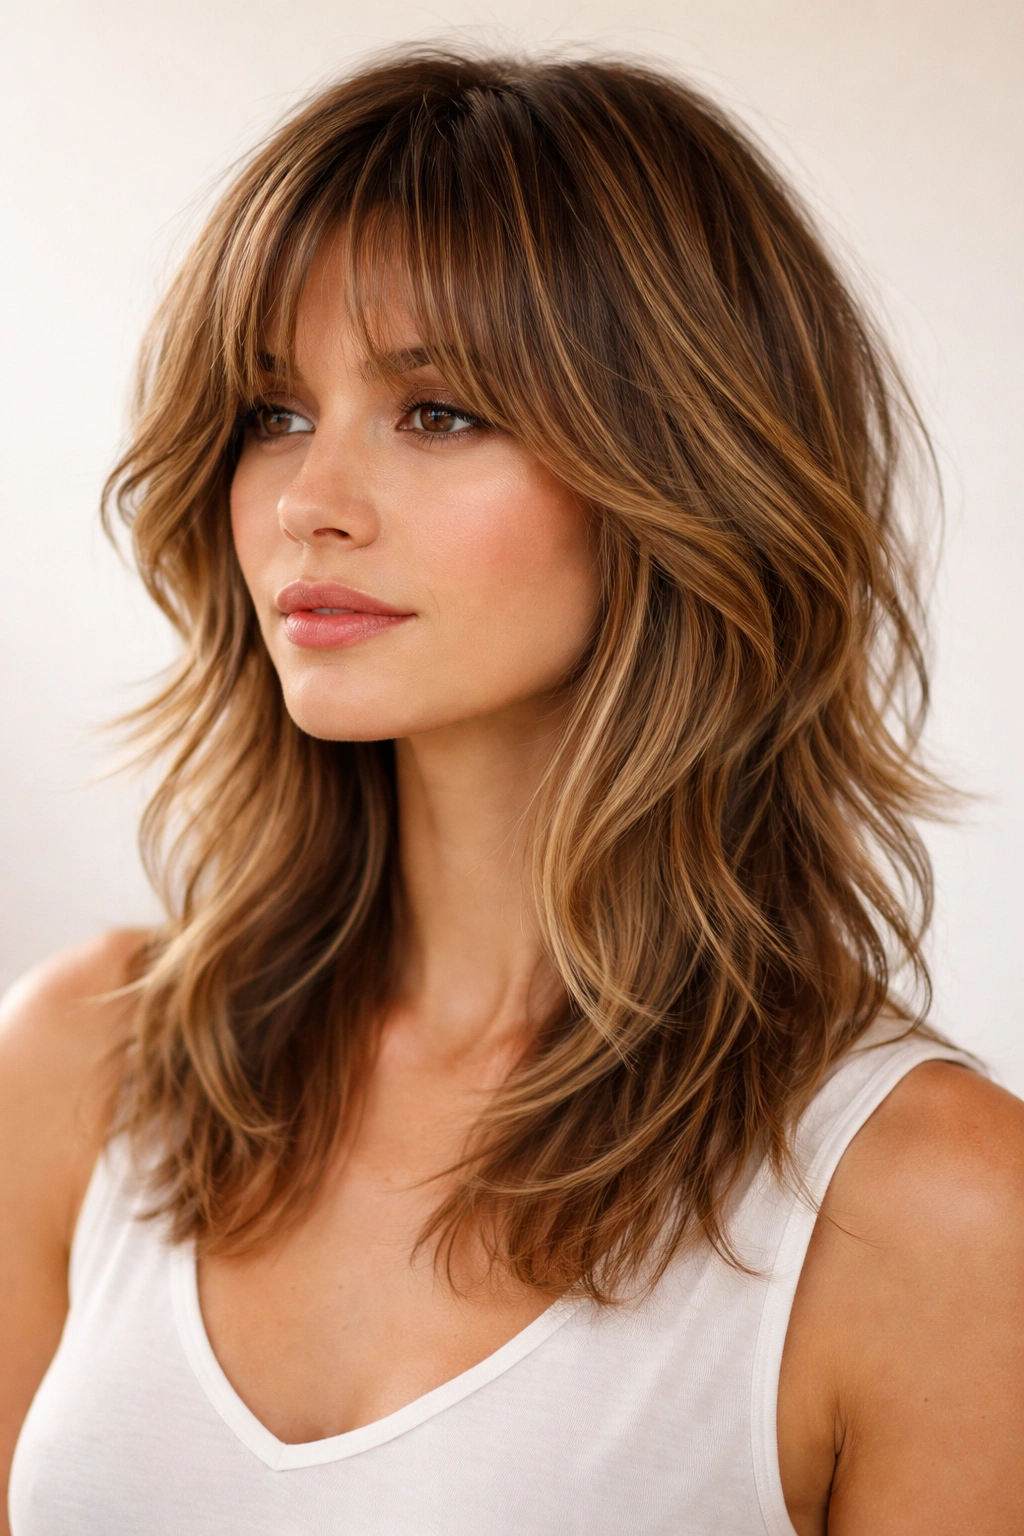
The shag is back—but this isn’t the thin, stringy version from past decades. Today’s modern shag has thicker, more strategic layering that actually works with fine or thin hair, and it absolutely thrives at in-between lengths. The cut typically sits somewhere between shoulder and mid-shoulder, with lots of choppy, blended layers throughout that create movement without looking sparse or unkempt.
What Makes This Work for In-Between Lengths
A properly executed shag is designed for the in-between phase. The layers are dense enough that the cut looks intentional and cool rather than awkward or unfinished. The multiple layers also mean that even if the overall length is in that tricky zone, you have shorter pieces framing your face and longer pieces underneath, so it adapts to different styling methods and looks polished from every angle.
Getting the Most From Your Shag
- Schedule trims every 6-8 weeks to keep the layers defined and prevent the shag from looking grown out and messy
- Use a volumizing mousse on damp roots before blow-drying to build a strong foundation, then dry with a round brush to create texture
- Apply a light texturizing spray or dry shampoo mist to already-styled hair for enhanced dimension
- A light pomade or wax through the ends creates intentional texture without weighing down the layers
- Blow-dry your shag while tousling with your fingers for maximum texture; this is not a “straight and sleek” cut
3. The Chin-Length Bob with Face-Framing Pieces
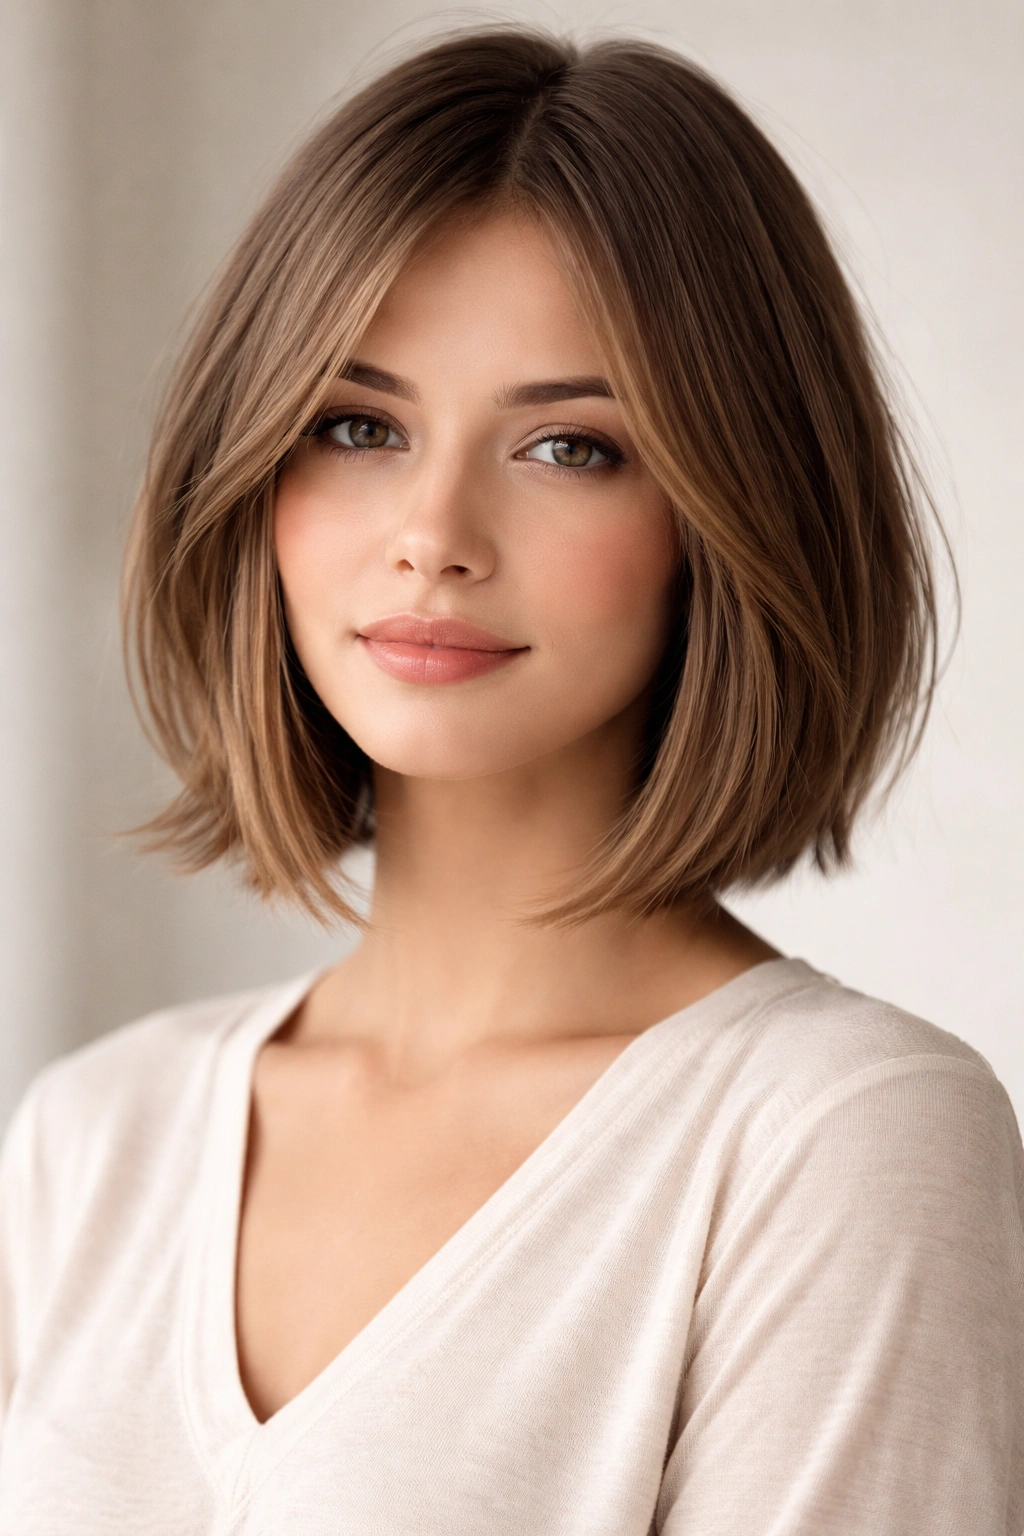
A classic chin-length bob is already a bit in-between—not quite short, not quite long—but when you add longer, wispy face-framing pieces that extend below the main length, you get a style that works beautifully during the awkward phase. These pieces give you something to tuck behind your ears or style around your face depending on your mood or the occasion, adding flexibility to an otherwise structured cut.
The Strategic Genius Behind Face-Framing Layers
Face-framing pieces break up the potential heaviness of a blunt bob, especially if you have a rounder or wider face shape. They create the illusion of more length and softness, making the cut feel less severe and more current. The longer pieces also give you styling options—you can curl them, straighten them, tuck them behind your ears, or weave them around the back of your head, so one cut works multiple ways.
Styling Techniques That Elevate the Look
- Blow-dry the face-framing pieces away from your face and then gently curl them back toward your face using a 1.25-inch curling iron for a soft, romantic texture
- Apply a smoothing serum or anti-frizz cream to the face-framing pieces to keep them sleek and polished throughout the day
- Pin the longer pieces back with a clip or hidden bobby pin for a different look on days you want a cleaner, more minimal aesthetic
- A light hairspray on the face-framing pieces helps them hold their shape and prevents them from constantly falling in your face
- Style the main body of the bob with some texture or wave rather than keeping it pin-straight, which can make the cut feel dated
4. The Mullet (Modern Interpretation)
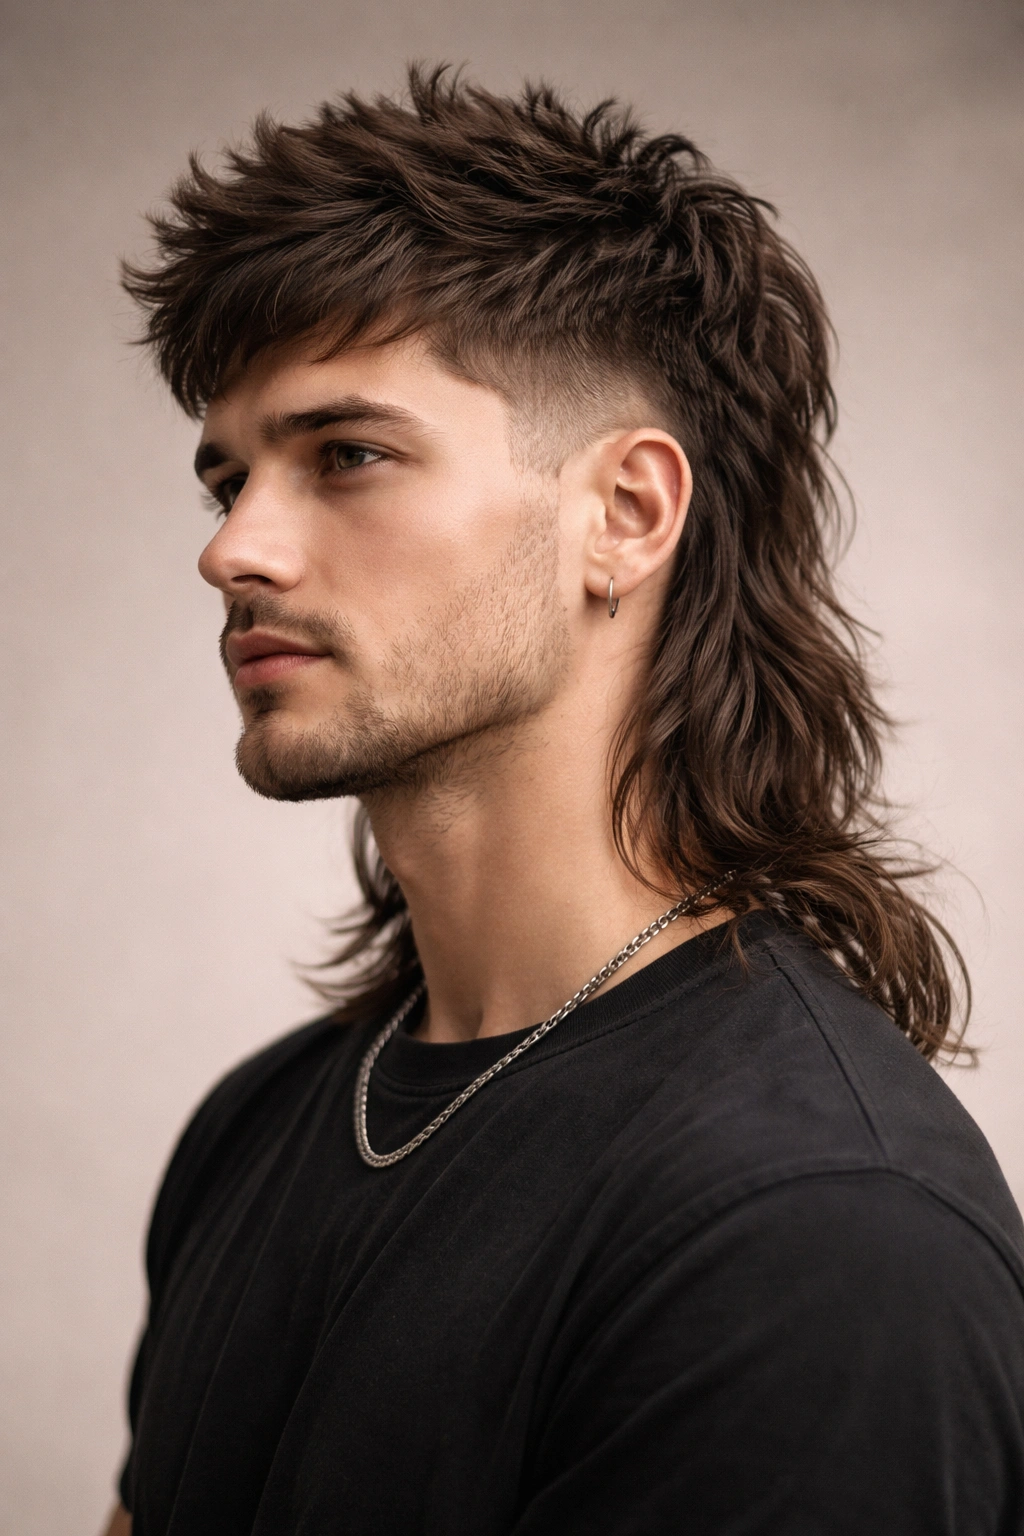
Before you scroll past—hear this out. Today’s modern mullet is nothing like the 80s version. It’s a subtle, sophisticated cut with shorter textured layers on top and longer, blended length underneath. It’s specifically designed for people dealing with in-between hair because it makes a statement about choosing that length rather than looking like you’re stuck in transition.
Why The Modern Mullet Works at Awkward Lengths
This cut is intentionally built around length variation, so being in between is actually the point. The contrast between the textured, choppy top and the longer, straighter bottom creates visual interest and makes the style look completely deliberate. It’s a bold move, yes, but it’s also a way to make peace with your in-between length and own it as a styling choice rather than a phase.
Making This Cut Work for You
- Style the top with maximum texture using a texturizing spray and a blow dryer, creating a piece-y, voluminous crown
- Keep the bottom length sleek and straight or add subtle waves depending on your usual styling preference
- The contrast between top and bottom is what makes this work, so don’t try to blend it too much
- Trim the top every 4-6 weeks to maintain that textured, choppy shape while letting the back grow gradually
- This is a statement cut that requires confidence and commitment to own it properly
5. The Curtain Bangs with Shoulder-Length Hair
Curtain bangs have become a go-to way to refresh in-between length hair because they draw focus to your eyes and face while the longer underneath length is growing out. The bangs fall from a higher point at the crown and sweep away from the face on either side, creating movement and softness that instantly updates a stagnant length.
The Psychological Shift Curtain Bangs Create
Adding bangs—especially sweeping, face-framing curtain bangs—makes you feel like you did something to your hair even though the overall length hasn’t changed. This psychological refresh is powerful when you’re stuck in that in-between phase and feeling frustrated. The bangs also help disguise how long you haven’t had a substantial cut, because the eye lands on the fresh new frame around your face first.
Bangs Require Specific Styling and Maintenance
- Blow-dry your bangs in the direction they naturally fall (usually away from your face and to either side) before they dry
- Use a velcro round brush and a blow dryer to create a subtle flip at the ends of your bangs
- Apply a lightweight styling cream or wax to your bangs before blow-drying to help them hold their shape and prevent frizz
- Trim your bangs every 3-4 weeks because they grow fast and will start covering your eyes if you let them get too long
- Curtain bangs require more styling attention than you might initially think, but they’re worth the effort during the awkward phase
6. The Blunt Lob With Subtle Undercut
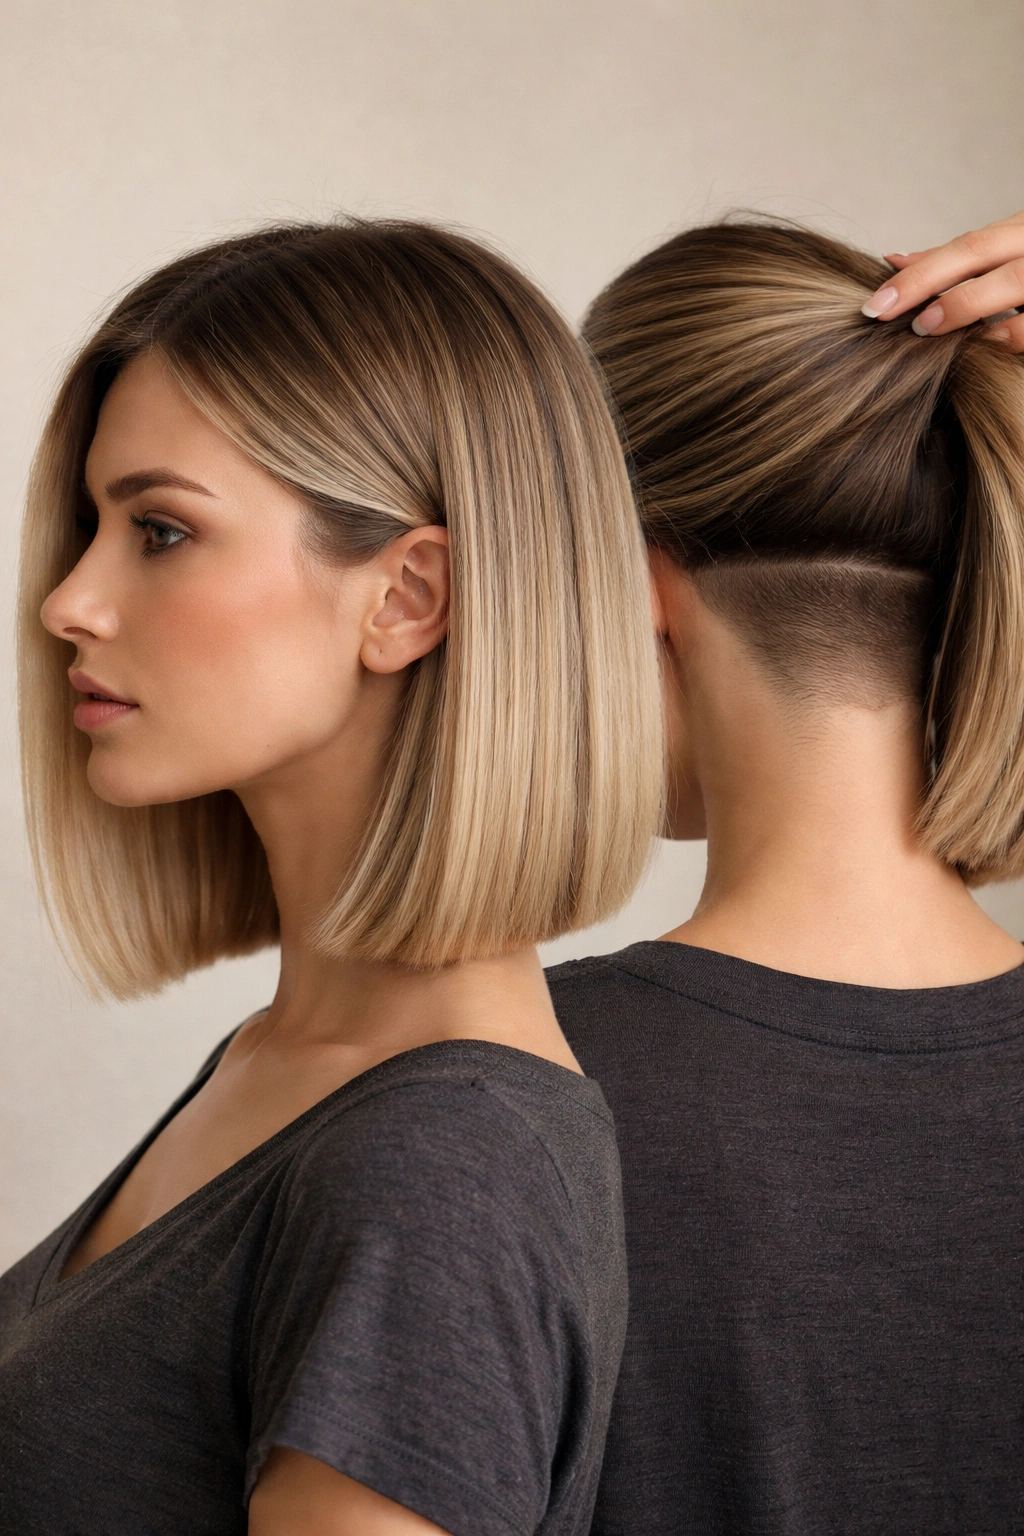
A blunt, straight-across lob (roughly collarbone length) paired with a very subtle undercut underneath is secretly genius for the in-between phase. The clean, defined line of the blunt cut makes the length feel intentional and polished, while the undercut hidden underneath creates lightness and prevents the cut from feeling heavy or stuck.
The Visual Trick Behind This Combination
A completely blunt cut can sometimes look harsh or unforgiving if you’re in an awkward length phase, but when you add a discreet undercut that’s only visible when you move or tie your hair up, you solve that problem without sacrificing the clean aesthetic. The blunt line looks intentional and modern on the surface, while the undercut prevents the weight from feeling oppressive.
Styling to Maximize This Cut
- Use a flat iron to keep the blunt line sharp and clean, emphasizing the intentional cut
- A lightweight styling mousse applied to damp roots creates subtle texture and body without disrupting the blunt line
- The undercut adds natural texture, so you don’t need to do much to create dimension—let it exist subtly underneath
- Trim every 6-8 weeks to maintain that sharp blunt line, which is what makes this cut work
- Your hair doesn’t need to be blown out perfectly for this to look good; the blunt line does most of the work
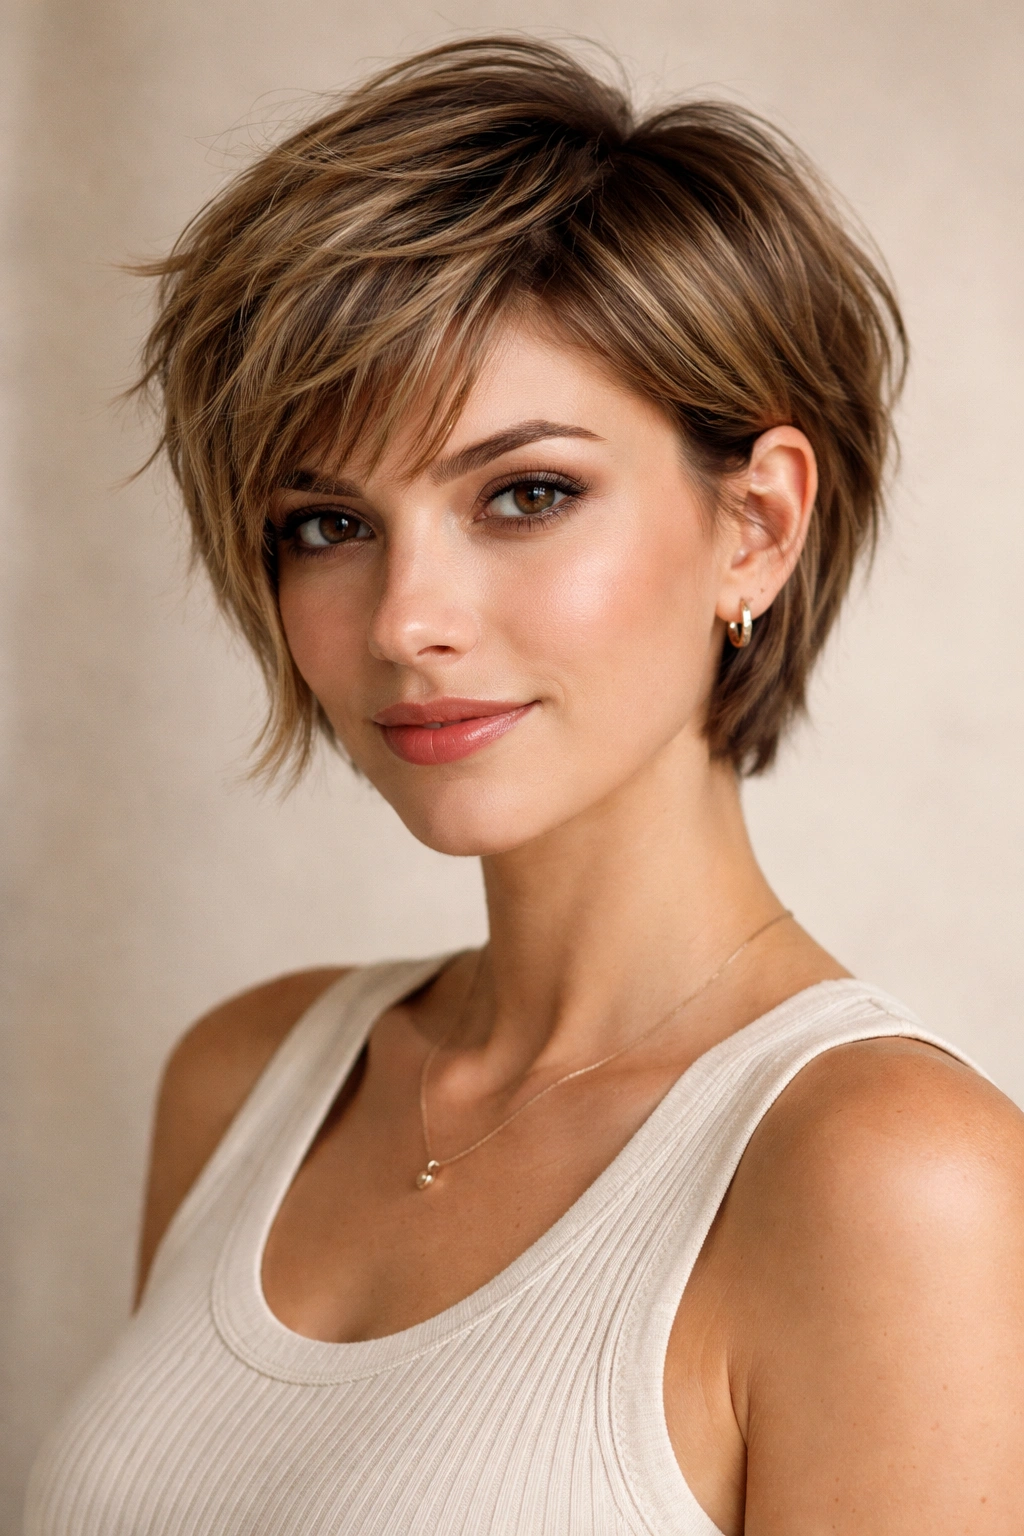
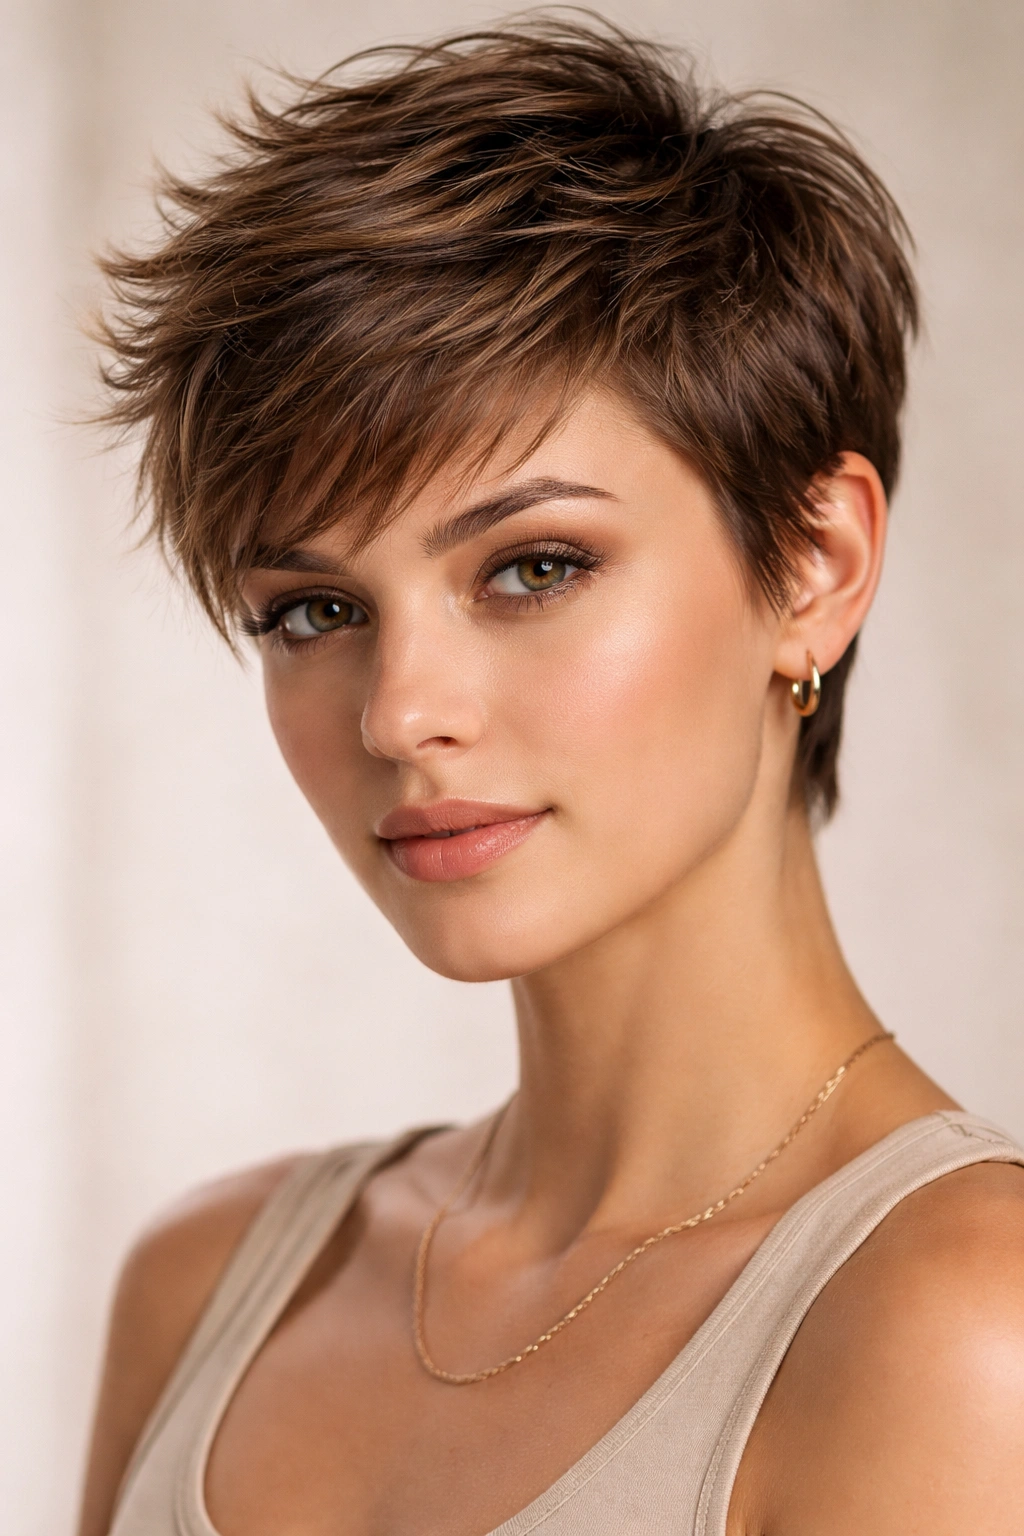
7. The Pixie-Bob Hybrid
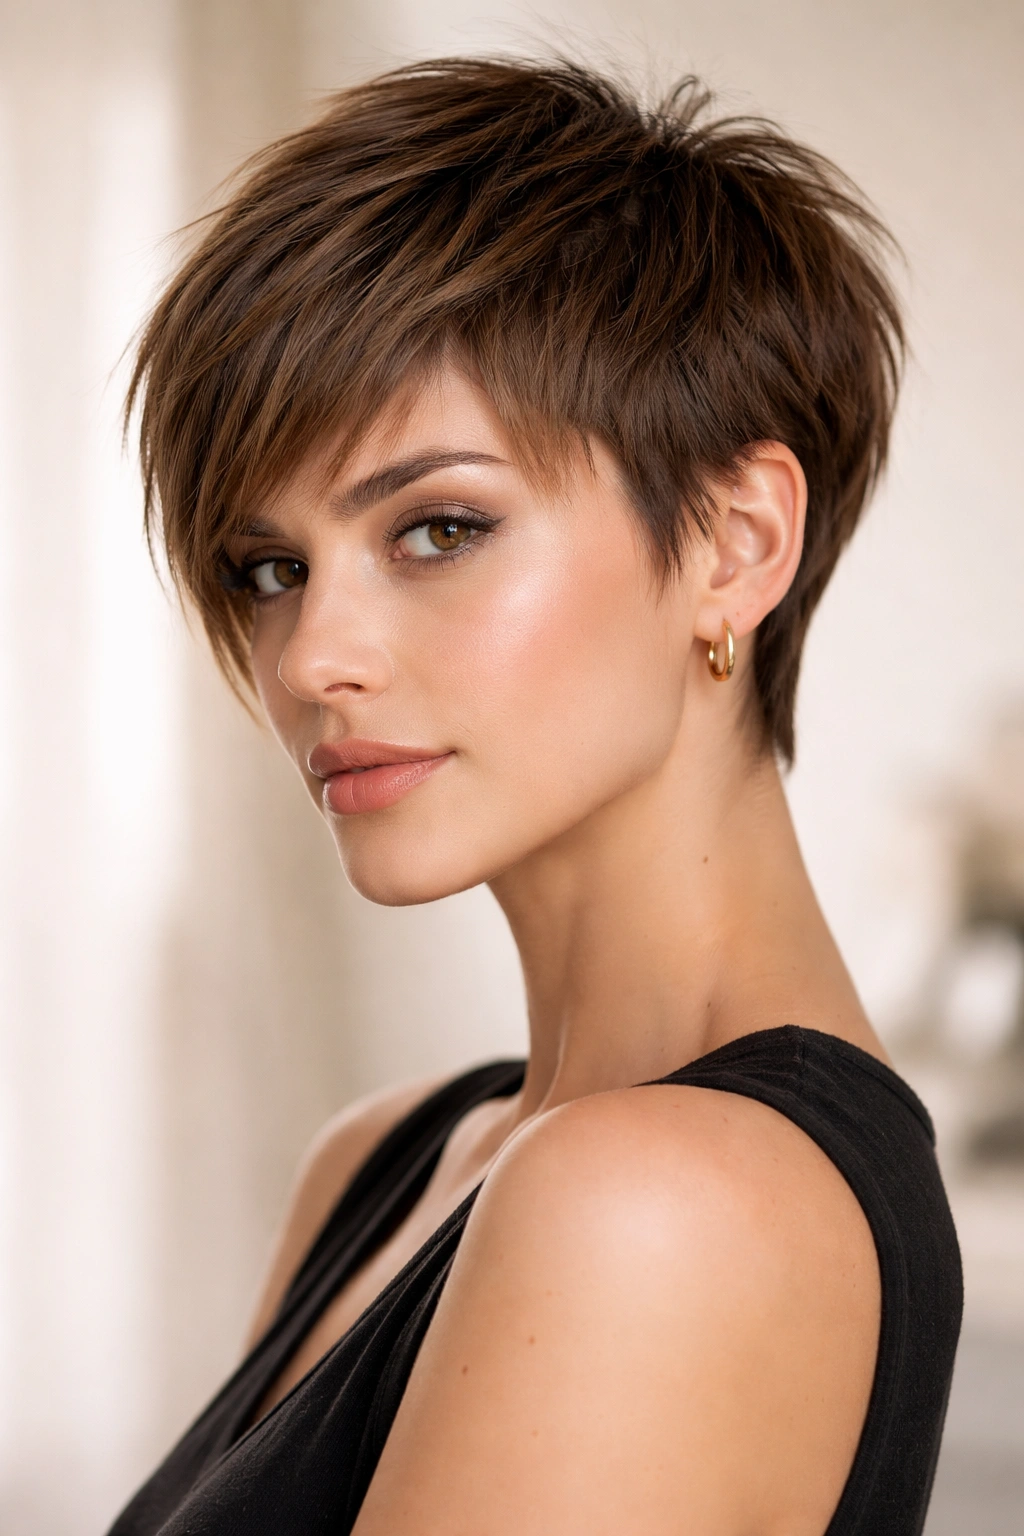
When your hair is past a true pixie cut but still pretty short—maybe hitting your ears and upper neck—a pixie-bob hybrid bridges that awkward short-to-medium phase beautifully. This cut has the texture and choppiness of a pixie but with slightly longer pieces that can be tucked behind your ears or styled around your face like a baby bob.
Why This Cut Feels Deliberate Instead of Awkward
A pixie-bob is specifically engineered to work at that in-between short length where you’re not quite ready for a full pixie but a standard bob is too long. The shorter crown and sides give you the edgy, modern vibe of a pixie, while the slightly longer front pieces and overall length offer more styling versatility. It feels cool and intentional rather than unfinished.
Styling and Product Recommendations
- Use a volumizing mousse on damp roots before blow-drying to create a strong foundation of volume and texture
- Apply a texturizing cream or paste to your palms and work through damp hair before blow-drying for maximum dimension
- A texture spray or dry shampoo mist applied to finished hair adds grip and prevents the shorter styles from lying flat
- Trim every 4-6 weeks to maintain the shape and prevent the cut from growing into an awkward, in-between mess
- This cut actually looks better with some texture and movement rather than blown out and sleek
8. The Long Bob With Asymmetrical Layers
An asymmetrical lob—where one side is slightly longer than the other—is a sneaky way to make an in-between length look intentional and editorial. The length imbalance draws the eye and creates visual interest, making you look like you made a deliberate styling choice rather than just being stuck growing your hair out.
The Magic of Asymmetry
Asymmetrical cuts are powerful because they immediately read as intentional and fashion-forward. When you’re in that awkward in-between phase, an asymmetrical length prevents the style from looking boring or stagnant. The slight difference between sides also makes the cut feel more dynamic and less severe, which works particularly well if you have a rounder face shape or want to create the illusion of more movement.
Making Asymmetry Work for Your Face
- Blow-dry your hair slightly away from your face to emphasize the asymmetrical length and create movement
- Use a round brush or curling iron to add subtle waves or curls that enhance the dynamic quality of the asymmetrical cut
- Style the shorter side tucked behind your ear and the longer side flowing forward for maximum impact
- Trim every 6-8 weeks to maintain the intentional length difference; let it grow out asymmetrically too
- An asymmetrical cut needs some styling attention to look intentional rather than like you just cut one side shorter by accident
9. The Bixie Cut (Bob-Pixie Hybrid)
Similar to the pixie-bob, a bixie is the ultimate in-between cut because it takes the best parts of both styles. You get the sharpness and texture of a pixie on top with slightly longer, softer pieces through the sides and back. It’s polished enough for work or an event but cool and modern enough to feel like an intentional style choice.
Why Bixies Thrive at Awkward Lengths
A bixie is literally designed to live in that in-between zone. The cut has clear intention built into it—the texture on top, the graduated length through the sides, the overall shape—so even if the length is technically awkward, the cut itself communicates that you know what you’re doing. This is a style where being in between is actually a feature, not a bug.
Maintaining Your Bixie
- Trim every 4-6 weeks to keep the textured crown sharp and prevent the style from growing into a shapeless mess
- Use a volumizing products on damp roots, then blow-dry while tousling with your fingers for maximum texture at the crown
- Apply a texturizing paste or pomade through the crown and sides to enhance the piecy, dimensional quality
- The slightly longer pieces at the sides can be styled smooth or textured depending on your mood
- This cut requires some styling effort to look its best, but it’s manageable for most people
10. The Butterfly Layers With a Blunt Hem
Butterfly layers are choppy, face-framing pieces that create a wider, softer silhouette, and when you pair them with a relatively blunt hemline underneath, you get a cut that looks polished and intentional even at an in-between length. The soft layers on top prevent the cut from feeling heavy while the blunt bottom keeps it looking clean and sharp.
The Flattering Geometry of Butterfly Layers
This cut is flattering on almost every face shape because the wider, softer silhouette around the face balances proportions without looking severe. The contrast between the soft, choppy layers and the blunt hem creates visual interest and prevents the style from looking boring or stagnant. It’s a cut that actually benefits from being at an in-between length because the balance between soft and structured elements feels more intentional.
How to Style Butterfly Layers
- Blow-dry with a round brush to create movement and prevent the layers from lying flat against your head
- Use a texturizing spray or sea salt spray before blow-drying to enhance the choppy texture and create that soft, piece-y effect
- A lightweight styling cream applied to damp hair helps define the layers without weighing them down
- Trim every 6-8 weeks to maintain the shape and prevent the layers from becoming too wispy or stringy
- This cut looks better with some texture and movement rather than blown out completely straight
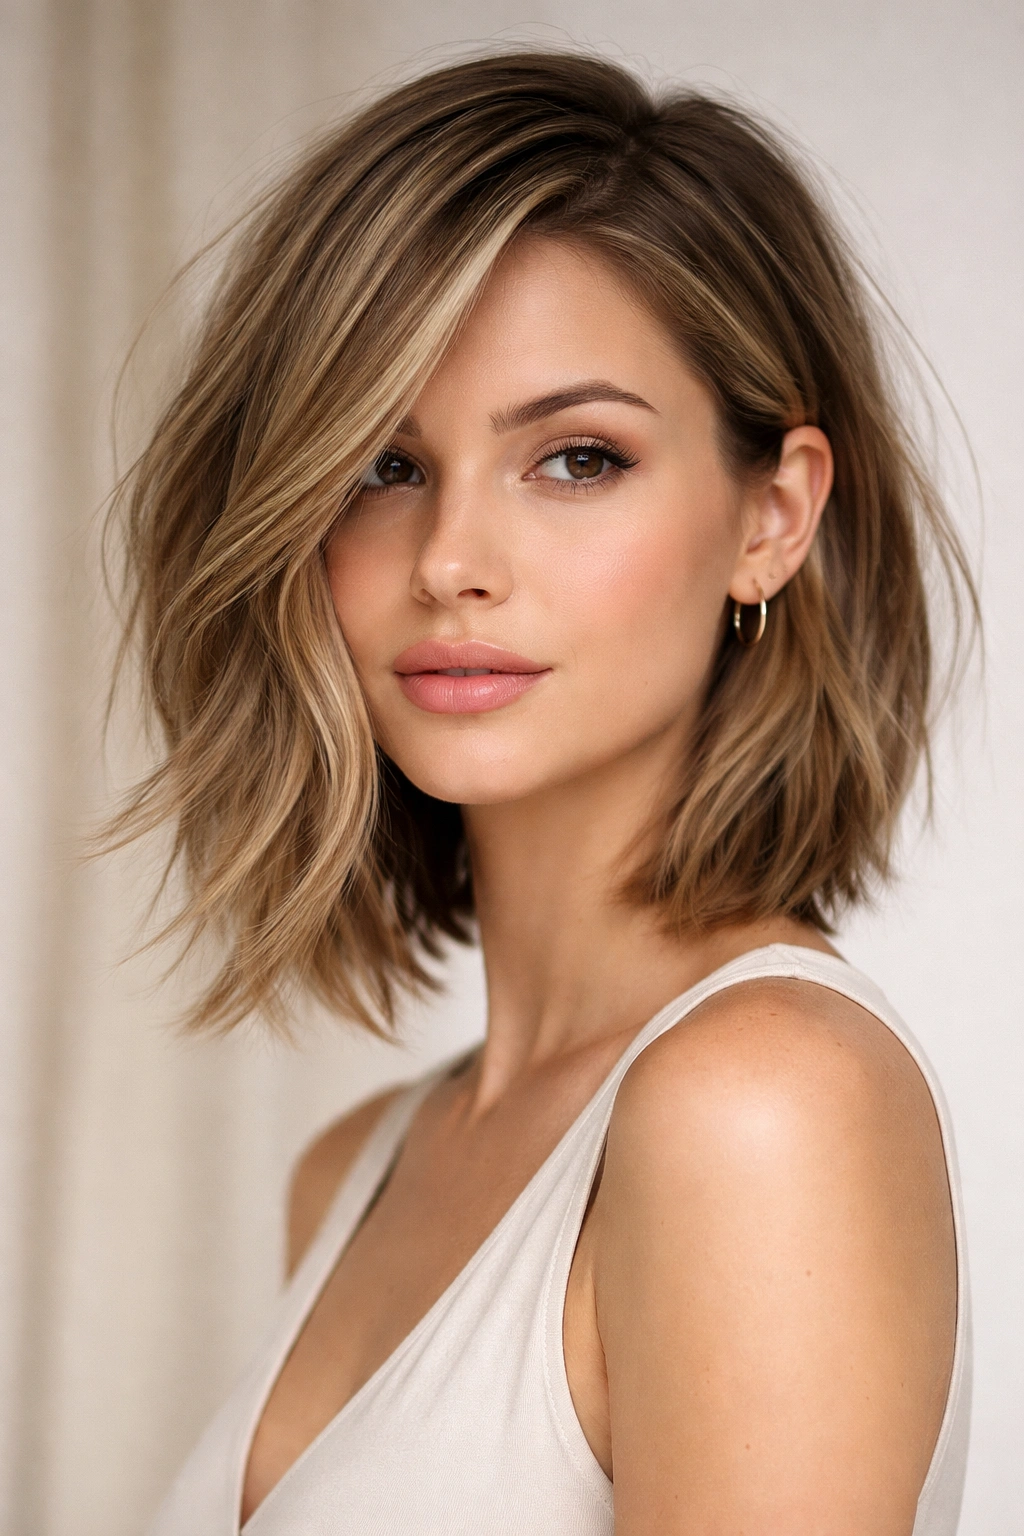
11. The Wolf Cut (Shag-Bob Mashup)
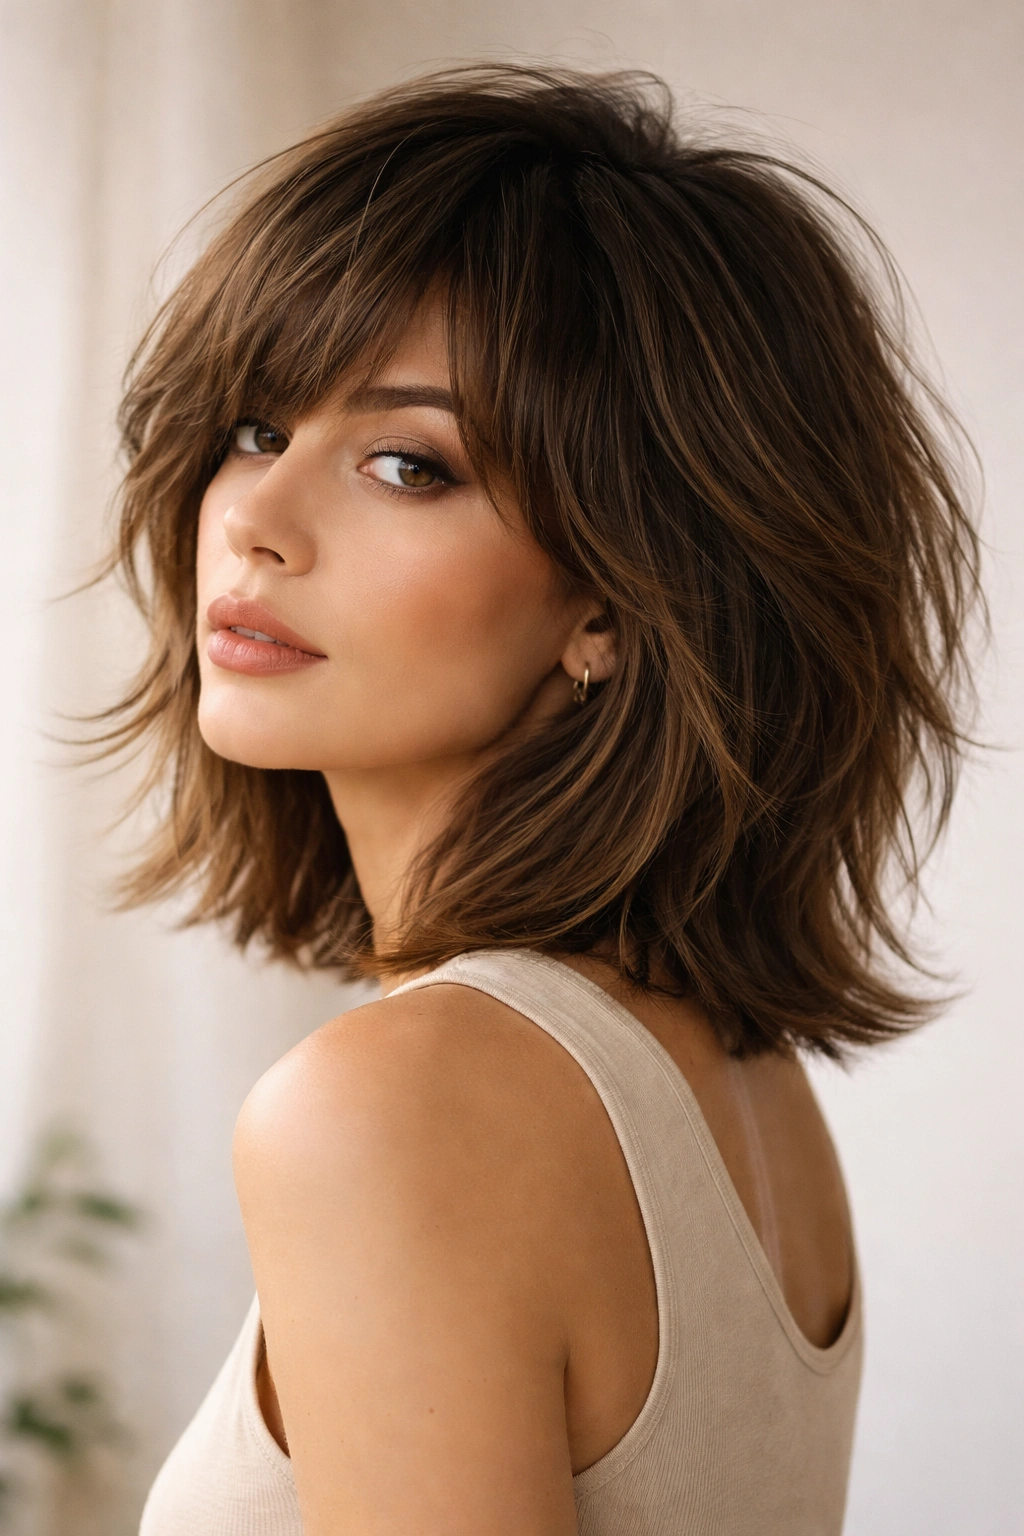
A wolf cut is exactly what it sounds like—a mashup of a shag’s texture and a bob’s structure, creating a style that’s both edgy and wearable. It sits at that perfect in-between length (typically around shoulder) where you have enough length to create the tousled, textured vibe of a shag but the overall structure and neatness of a bob.
Why Wolf Cuts Own the In-Between Aesthetic
Wolf cuts are specifically designed to capture that cool, undone, tousled energy that works so well at in-between lengths. The blend of choppy layers (shag) with a more structured shape (bob) creates a style that feels current, editorial, and intentional. This is a cut that makes you look like you’re making a fashion statement rather than waiting for your hair to grow out.
Styling Your Wolf Cut for Maximum Impact
- Use a texturizing spray on damp hair before blow-drying to enhance the piece-y, tousled texture
- Blow-dry with a round brush or diffuser attachment to create volume and texture throughout
- Apply a light pomade or texturizing paste to finished hair to define individual pieces and prevent the cut from looking messy
- Trim every 6-8 weeks to maintain the textured layers and keep the cut looking intentional rather than grown-out
- This cut absolutely benefits from some styling effort; it will look best when you lean into the textured, tousled aesthetic
12. The Sleek Midi Length With a Geometric Bang
A midi-length cut (typically hitting mid-thigh on the body, or mid-collarbone when we’re talking hair) paired with blunt, geometric bangs is an unexpected way to make an in-between length feel modern and intentional. The clean lines of geometric bangs draw attention to your face while the longer underneath length creates a different silhouette than a typical in-between style.
The Statement-Making Power of Geometric Bangs
Geometric bangs are bold and unapologetic, and when paired with a longer length, they create a striking visual contrast that immediately reads as intentional. While you’re in that awkward phase, geometric bangs shift focus to your face and make the overall style feel like a cohesive, planned look rather than just hair growing out. It’s a high-fashion approach to the in-between length problem.
Maintaining Geometric Precision
- Blow-dry your bangs down and then use a flat iron to create that clean, geometric line
- Trim your bangs every 2-3 weeks to maintain that sharp line; geometric bangs require precision maintenance
- Use a smoothing serum or light styling product on your bangs to keep them sleek and defined
- The rest of your hair can be relatively simple—sleek and straight, soft waves, or textured, depending on your preference
- Geometric bangs require commitment and regular trims, but they transform an in-between length into something striking
13. The Grown-Out Pixie With Pomade and Texture
Instead of fighting the grown-out phase of a pixie cut, lean into it. A grown-out pixie that sits somewhere between a true pixie and a pixie-bob, styled with pomade and maximized texture, is intentionally cool and fashion-forward. The key is owning the awkward length and making it look deliberate through styling.
Owning the Awkward Growth Phase
This approach turns the in-between length into a feature by emphasizing texture, dimension, and styling choices. A pomaded, textured grown-out pixie feels intentional and editorial in a way that a simple, unstyled short-medium length doesn’t. You’re not waiting for your hair to grow out—you’re actively styling a choice, which is a mental shift that actually makes you feel better about the process.
Styling a Grown-Out Pixie
- Apply a texturizing spray or dry shampoo mist to damp roots to create grip and body throughout
- Use a blow dryer with a diffuser attachment or just scrunch while air-drying to emphasize natural texture
- Apply a textured pomade or paste once your hair is mostly dry, working it through with your fingers for maximum dimension
- Trim your crown every 4-6 weeks while letting the sides grow slightly; this maintains the intentional shape while allowing growth
- The styling is what makes this look cool rather than awkward, so invest in the right product and take time to style it daily
14. The Layered Shoulder-Length Cut With a Deep Side Part
A layered shoulder-length cut with a deep side part is a classic, flattering option that becomes even more powerful when you’re navigating the awkward in-between phase. The layers create movement and prevent the length from feeling heavy, while the deep side part adds dimension and makes the style feel intentional and polished.
Why Classic Never Goes Out of Style
When you’re in an awkward phase, sometimes the best option is to go with a classic that’s proven to work. A layered shoulder-length cut with a deep side part is flattering on most face shapes, universally wearable, and intentional enough that it doesn’t read as “still growing out.” The deep part adds sophistication and works especially well if you have a rounder face shape or want to create the illusion of more length.
Styling This Timeless Cut
- Blow-dry in the direction of your deep side part, using a round brush to create soft waves and movement
- Use a volumizing mousse on damp roots before blow-drying to create body and prevent the cut from lying flat
- A lightweight texturizing spray applied to finished hair adds dimension and prevents flyaways
- Trim every 6-8 weeks to maintain the layers and keep the cut looking intentional and shaped
- This cut looks good blown out with waves, styled sleek, or with subtle texture—it’s versatile and forgiving
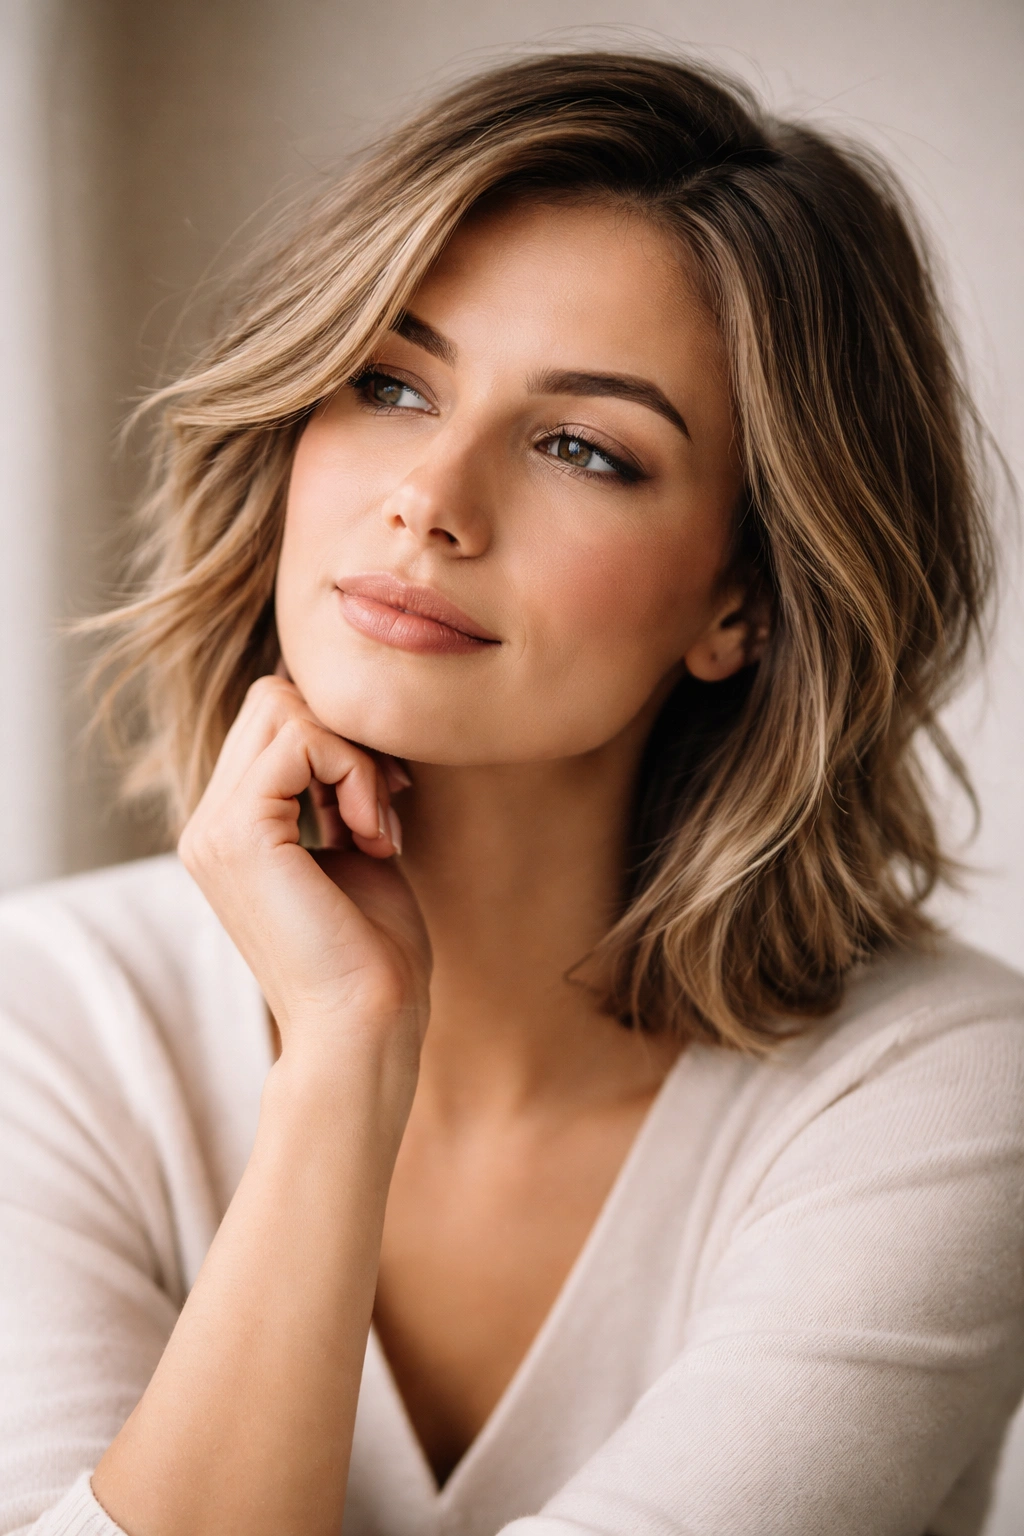
15. The Reverse Layers (Longer Underneath, Shorter on Top)

Reverse layers flip the traditional layering structure—instead of shorter layers on top and longer underneath, you get longer pieces underneath with choppy, textured layers on top. This creates a surprising silhouette that feels modern and editorial, and it’s secretly brilliant for making in-between lengths feel intentional.
The Unexpected Beauty of Reverse Layers
Reverse layers create a silhouette that’s rounder and softer on the surface but with hidden length underneath, which makes them feel cool and intentional. The reverse structure also allows you to style the cut different ways—you can emphasize the choppy texture on top and let the longer underneath pieces hide under your main styling, or you can emphasize the longer pieces underneath for a different vibe entirely.
Maximizing Your Reverse-Layered Cut
- Blow-dry with a round brush while tousling the top pieces to emphasize the choppy, textured crown
- Apply a texturizing spray or dry shampoo mist to maximize the piece-y quality of the shorter top layers
- You can style the longer underneath pieces sleek or textured depending on your mood and the occasion
- Trim every 6-8 weeks to maintain the distinction between the choppy top and longer bottom; this contrast is what makes the cut work
- This is a style that rewards styling effort and looks best when the texture on top is maximized and defined
Final Thoughts
The in-between phase doesn’t have to feel like a styling standstill. Each of these cuts is specifically designed to work with that awkward length rather than against it, transforming a phase many people dread into an opportunity to experiment with a style you might not have considered otherwise. The real secret is choosing a cut with intention—one that has clear lines, purposeful layers, or a distinct shape—so that your in-between length reads as a deliberate choice rather than just hair waiting to grow out.
The styling and maintenance matter too. None of these cuts will look their best if you’re not willing to use the right products and give them a few minutes of attention during your styling routine. But here’s the thing: once you commit to the styling, you’ll probably realize that your in-between length is actually more versatile and interesting than you expected. You’ll have more options for different occasions, more flexibility to experiment, and honestly, a better understanding of what works for your hair texture and face shape.
Most importantly, owning your in-between length—by choosing a cut that celebrates it rather than trying to hide it—is a confidence game. When you style a choppy shag or a wolf cut with intention, when you commit to the modern mullet or the reverse layers, you’re sending a signal that you know what you’re doing. That confidence translates into how you wear the style, and suddenly that awkward length doesn’t feel awkward anymore.