Long hair is a blank canvas for creativity, yet managing it can feel overwhelming when you’re short on time. Whether you’re dealing with thick, thin, wavy, or straight strands, the challenge isn’t finding a hairstyle—it’s finding one that looks intentional, feels comfortable, and doesn’t demand a full hour at the styling station. The good news is that some of the most gorgeous, polished styles for long hair take just a few minutes to master, and many of them work whether your hair is freshly washed or a day or two old.
The styles that work best for long hair play to its natural strengths: they use length and weight to create volume, they allow multiple styling options, and they adapt beautifully to different hair textures and face shapes. More importantly, easy doesn’t mean boring. A loose braid, a thoughtful half-up arrangement, or a strategically placed twist can transform your look from casual to sophisticated without requiring professional-level skills or time you don’t have.
What follows is a curated collection of 25 hairstyles that balance simplicity with impact. Some are perfect for work or formal settings, others are ideal for weekend relaxation, and many transition seamlessly from day to night. Most of these styles can be completed in under 10 minutes, require minimal heat styling, and use tools or techniques you likely already know. Think of this as your go-to reference guide for the days when you want your hair to look effortlessly put-together—because with long hair, the best styles are often the ones that feel natural and require the least fuss.
1. The Classic Straight and Sleek

Straight, glossy hair is timeless for a reason—it’s undeniably elegant and works with nearly every face shape and outfit. This style shines when your hair is healthy-looking and smooth, relying on the natural texture and shine of your strands rather than complex techniques. The goal is to enhance what you already have rather than dramatically transform it.
Why It Works for Long Hair
Long hair’s weight actually helps this style come together more easily than it does for shorter lengths. The weight naturally pulls hair downward and smooth, reducing volume at the roots and creating that coveted sleek appearance. Unlike shorter hair that can require constant touch-ups and aggressive styling, long hair maintains this look throughout the day with minimal intervention. The shine becomes even more visible over long lengths, creating a flowing, healthy-looking finish.
How to Achieve It
- Use a smoothing shampoo and conditioner designed to tame frizz and enhance shine
- Apply a heat protectant spray before blow-drying or flat-ironing
- Blow-dry with a paddle brush, working in sections from roots to ends
- Finish with a flat iron on a lower heat setting if needed for extra polish
- Add a light finishing spray or serum for extra shine and movement
Pro tip: Skip the flat iron entirely on days when you’re willing to let your hair air-dry after blow-drying with a paddle brush—you’ll get a smoother finish with less heat damage over time.
2. The Loose Waves

Soft, flowing waves create movement without the polished feel of curls, making this style endlessly wearable and forgiving. Waves complement long hair beautifully because the length allows the wave pattern to develop fully and be visible from scalp to ends. This style works equally well for casual outings and more formal occasions depending on how you style the rest of your look.
Why Waves Flatter Long Hair
Waves break up the visual weight of very long hair without removing length, creating a balanced, feminine silhouette. They add dimension and texture without requiring tight curls or aggressive styling, which makes them easier to maintain and less damaging to your hair. The movement in waves also makes your hair look fuller and more voluminous, even if your natural texture is fine or thin.
Methods for Creating Effortless Waves
- Curling iron method: Wrap sections of hair around a 1.5-inch barrel, holding for 8-10 seconds, then release—alternate the direction you wrap for a more natural wave pattern
- Braiding overnight: Braid damp hair before bed and release in the morning for soft, undone waves that require zero heat
- Salt spray: Apply sea salt spray to damp hair and scrunch gently, then air-dry or blow-dry for textured waves
- Curling wand: Use a tapered wand to create looser waves by wrapping hair around the barrel without clipping
Worth knowing: Waves last longer and look more voluminous if you don’t brush through them immediately after styling—use your fingers to gently separate them instead.
3. The Sleek Low Bun

A low bun at the nape of the neck is the ultimate polish-meets-practicality hairstyle. It keeps hair completely off your face and neck while maintaining an elegant, put-together appearance that works in virtually any setting. Unlike high buns, which can feel sporty or casual, a low bun reads as intentional and sophisticated.
Why This Bun Works
The low placement makes it flattering for virtually all face shapes and hair textures. Because you’re gathering hair from a lower point on the head, it’s easier to achieve without creating tension at the roots, which means less breakage and more comfort if you’re wearing it for extended periods. Long hair has plenty of volume to work with, so you can create a full, visually interesting bun rather than a thin, tight one.
Styling Steps
- Gather hair into a low ponytail at the nape of your neck and secure with an elastic
- Twist the ponytail loosely and wrap it around the base, pinning with bobby pins as you go
- Smooth flyaways with a light hairspray or edge control product
- Leave a few face-framing pieces loose if you want a softer, less severe look
Pro tip: For a fuller-looking bun, gently pull and tease the twisted sections before wrapping them around the base—this creates texture and makes the bun appear more voluminous.
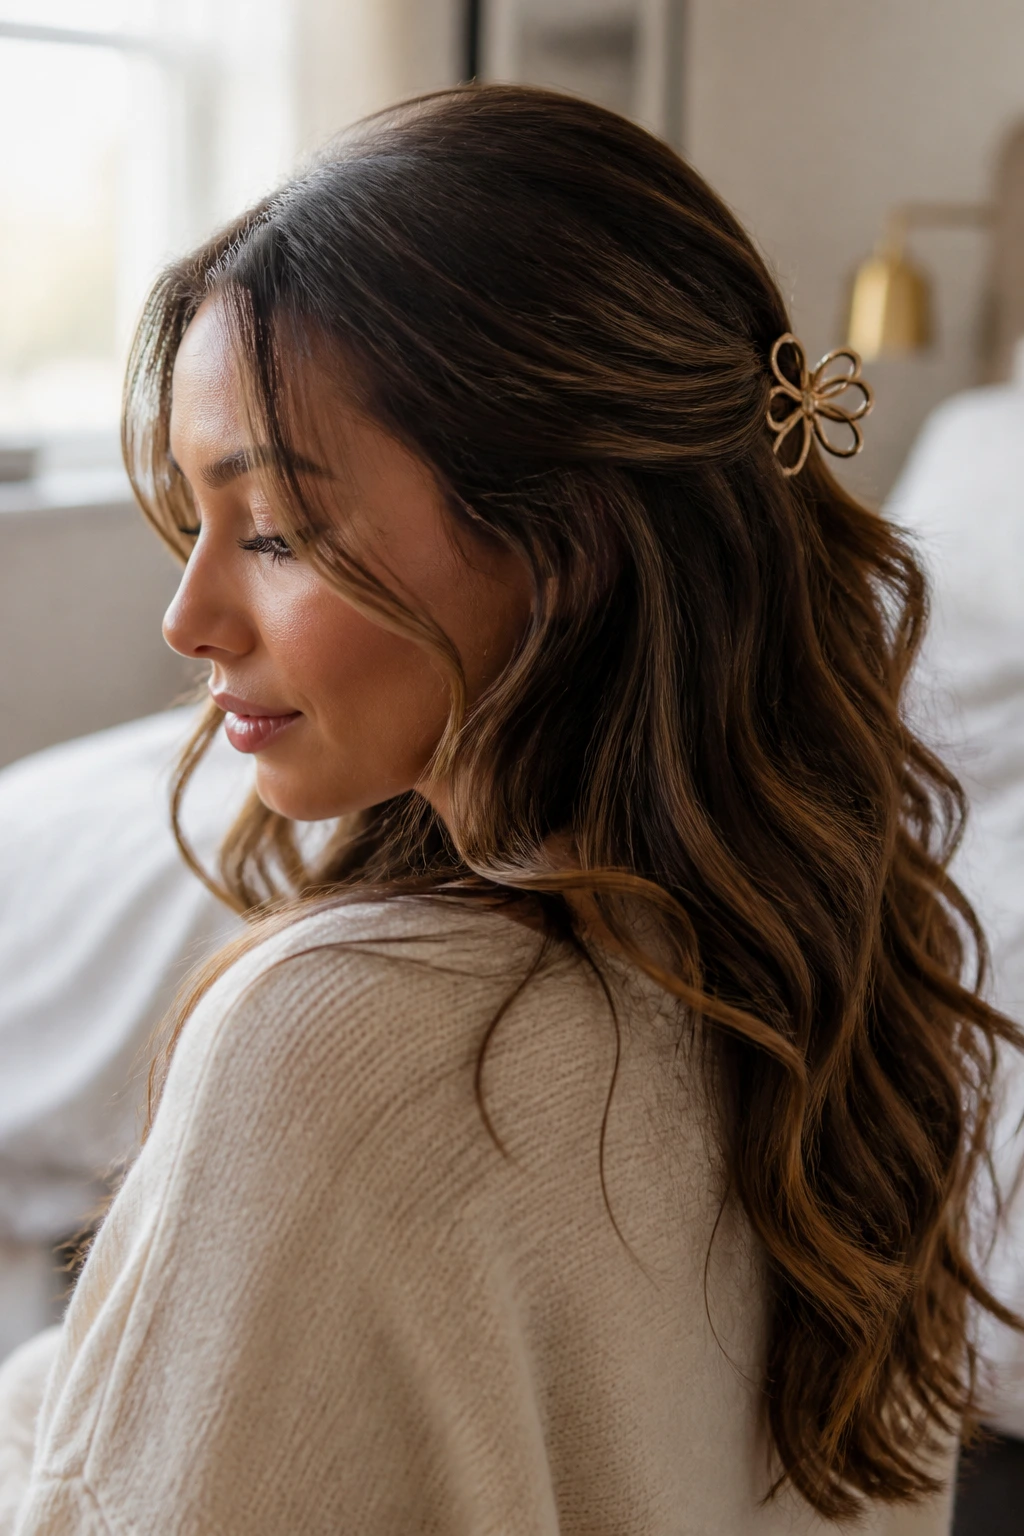
4. The Half-Up Half-Down

This style gives you the best of both worlds: keeping hair partially off your face while maintaining the flowing length and movement of wearing your hair down. It’s endlessly versatile, working beautifully with both straight and wavy hair, and it reads as effortless even though it’s actually quite polished.
Why It’s Perfect for Long Hair
Half-up styles take advantage of long hair’s length while addressing one of the biggest complaints people have about very long hair—it getting in the way of your face. The top section is gathered away, creating a neat, intentional frame for your face, while the bottom half remains free to move and create dimension. This style also works on multiple days of hair since the gathered section can hide slightly greasy roots while the loose section below hides texture.
How to Create It
- Brush your hair smoothly away from your face
- Take a section from each side at ear level and pull it toward the back of your head
- Secure with a clear elastic or small clip where the two sections meet
- For a softer look, gently pull and tease the top section to create texture and volume
- Leave face-framing pieces loose if desired
Variation: Create a twisted half-up by twisting each side section before bringing them together and securing them—this adds visual interest and feels more intentional than a simple pull-back.
5. The Textured Braid

A braid feels special without being complicated, and with long hair, braids have the space to show off texture and detail. A loose, undone-looking braid is far more modern and approachable than a tight, neat one, and it photographs beautifully while being surprisingly easy to achieve.
Why Braids Showcase Long Hair
Braids work best with long hair because the length gives the braid pattern room to breathe and be visible throughout its entire length. A braid that’s six inches long feels tight and constrained, but a braid that travels 20+ inches down your back is naturally more visually interesting and forgiving. The texture a braid creates stays in your hair for extended periods, making it a practical style for days when you want waves without heat styling.
Braid Techniques for Maximum Impact
- Three-strand braid: Divide hair into three sections and cross right over center, then left over center, alternating
- Loose texture: Once the braid is complete, gently pull on the sides of each braid section to loosen it and create a fuller, more textured appearance
- Fishtail braid: Divide hair into two sections and pull small pieces from the outside of each section to the opposite side—this creates a delicate, complex-looking braid that’s actually easier than it sounds
- French braid: Start at your crown and braid while continuously adding new sections of hair as you work downward
Pro tip: Braid your hair when it’s slightly damp—the moisture helps it hold the texture longer and makes the braid easier to control.
6. The Side-Swept Look

Sweeping your hair to one side creates an asymmetrical, flattering frame that elongates your face. This style is infinitely adjustable—you can sweep hair dramatically to create a dramatic side part, or just slightly off-center for a subtler effect.
Why Side-Swept Styles Work
Side-swept hair has an inherently flattering quality because it creates an angle rather than centering everything on your face. This slight asymmetry is more visually interesting than center-parted hair and can actually balance certain face shapes better. With long hair, a side-sweep creates beautiful, cascading lines that are both elegant and romantic.
Creating the Look
- Create your side part closer to one side than the center—the more dramatic the part, the more dramatic the sweep
- Blow-dry or wave your hair to create movement that encourages it to fall to one side
- Use a light hairspray to keep the sweep in place without looking heavy
- For extra polish, pin the hair on the opposite side discretely behind your ear with a bobby pin
Styling note: This style works beautifully with a small clip, comb, or barrette on the pinned side, which adds visual interest and helps keep the sweep in place throughout the day.
7. The Slicked-Back Ponytail

A sleek, tightly pulled ponytail is sporty and modern—the opposite of fussy. It’s the ultimate practicality hairstyle when you need hair completely out of your way, yet it reads as intentional rather than purely functional.
The Appeal of the Slicked-Back Style
This style is particularly flattering if you have nice bone structure or a clear complexion, as it exposes your entire face without softening. Long hair makes this style more dramatic and striking than shorter lengths, and the weight of your hair naturally pulls everything smoothly back without requiring as much product or effort as shorter hair would need.
Steps for a Polished Result
- Brush hair straight back from your hairline, smoothing as you go
- Gather hair into a ponytail at the desired height—higher for a sporty look, lower for something more relaxed
- Secure with a strong elastic that won’t slip
- Use edge control or gel on flyaways around your hairline for a truly polished finish
- Optional: Wrap a small section of hair around the elastic to hide it
Pro tip: This style looks best when your hair is either freshly washed or one day old—slicked styles can look greasy on older hair, so plan accordingly.
8. The Messy Bun

A messy bun is the ultimate “I’m not trying but I look cute anyway” style. It’s intentionally undone, which paradoxically makes it look more modern and effortless than a perfect bun. With long hair, you have plenty of volume to make a genuinely messy, interesting-looking bun.
Why Messy Buns Suit Long Hair
The term “messy” is actually a design choice rather than a laissez-faire approach—a well-executed messy bun is carefully styled to look casual. Long hair has the weight and volume to create a bun that actually looks full and intentional rather than thin and scraggly. You can pull out pieces strategically, tease the base, and create a bun that reads as artfully undone.
How to Create It
- Gather hair into a high or mid-height ponytail—not too low, or the bun will look limp
- Twist the ponytail loosely or wrap it around the base without being neat
- Secure loosely with bobby pins, leaving some texture and pieces loose
- Gently pull sections of the bun outward to increase volume and create that undone texture
- Leave some face-framing pieces down if you prefer a softer look
Styling insight: The messier you try to make it, the better it looks—overthinking creates a bun that looks tight and constrained rather than effortlessly undone.
9. The Sleek Middle Part

A middle part creates a balanced, centered look that feels modern and unfussy. It’s completely different in vibe from a side part, creating symmetry and a clean, contemporary aesthetic that pairs well with minimalist outfits and makeup.
What Makes the Middle Part Work
The middle part flatters most face shapes, particularly if your face is relatively balanced. With long hair, a middle part creates a beautiful frame that elongates your face while the length adds softness and movement. This part works best with either very straight hair or consistent waves throughout, as uneven texture can look intentional with side parts but can look unbalanced with middle parts.
Achieving a Perfect Middle Part
- Use a teasing brush or pointed comb to create a clean, straight line from your forehead to the crown
- Blow-dry your hair smooth, aiming a dryer down the part line to help set it
- Use edge control on the first inch of hair on each side of the part for a polished hairline
- For extra hold, use a light hairspray after styling
Pro tip: A middle part looks best when your hair is completely smooth or has very uniform waves—any texture inconsistency will be visible along that center line.
10. The Bubble Ponytail

A bubble ponytail breaks up a simple ponytail with multiple elastics positioned down the length, creating a segmented, playful look that’s both fun and practical. Each “bubble” section adds volume and visual interest, and the style works beautifully with straight, wavy, or even slightly curly hair.
Why Bubble Ponytails Are Underrated
Bubble ponytails feel trendy and fashion-forward without being difficult to execute. They take a basic ponytail and add dimension and movement by creating distinct sections. With very long hair, bubble ponytails have the length to show off multiple bubbles, which makes the style feel more impactful and polished.
Creating Multiple Bubbles
- Gather hair into a high or mid-height ponytail and secure with an elastic
- Place a second elastic about 2-3 inches below the first, creating the first bubble
- Gently pull and tease the hair in that section to increase volume
- Continue placing elastics down the length of your hair, creating bubbles as you go
- Pull each bubble section gently outward to create maximum volume and texture
Variation: Alternate the direction you pull each bubble (some out to the sides, some more rounded) for a more organic, less uniform appearance.
11. The Soft Heatless Curls

Heatless curls create beautiful, bouncy waves without any heat damage, and long hair holds this style exceptionally well because of its weight and length. These curls are perfect for sleeping in or creating while you’re doing other things, then releasing for that just-styled-but-not-trying vibe.
Why Long Hair Holds Heatless Curls Better
The longer your hair, the more time heatless curls have to develop and set before you release them. Short hair often doesn’t have enough length to hold a curl for more than a few hours, but long hair can maintain heatless curls throughout an entire day, especially if you sleep in them. This makes heatless curls a practical, low-effort option for long-haired people.
Methods for Heatless Curls
- Braiding method: Braid damp hair loosely and sleep in the braids, releasing in the morning
- Roller method: Wrap damp hair around large barrel rollers and either sleep in them or use a dryer on cool setting
- Twist method: Twist sections of damp hair and pin them up, then release once dry for soft waves
- Ribbon method: Wrap damp hair around a silk ribbon, secure at the top, and leave until dry
Pro tip: This style works best if you apply a light curl-enhancing product to damp hair before setting the curls—it helps them hold longer and look more defined.
12. The Sleek Ponytail with a Wrap

A ponytail with a wrapped base elevates the entire look, turning a simple ponytail into something that feels intentional and polished. The wrapped section hides the elastic and adds a custom, professional-looking touch that takes just a few extra seconds to complete.
Why the Wrap Makes All the Difference
A small section of hair wrapped around the base of a ponytail creates a finished, salon-quality appearance that completely changes how polished the style looks. This detail is what separates a casual, thrown-together ponytail from one that looks intentional. With long hair, you have plenty of hair to spare for this wrapped section without compromising the fullness of the ponytail itself.
Steps for a Wrapped Ponytail
- Gather hair into a sleek ponytail at your desired height
- Take a small, thin section from the underside of the ponytail (about the thickness of a pencil)
- Wrap this section tightly around the elastic, covering it completely
- Secure the wrapped section with a bobby pin tucked underneath where it won’t be visible
- Optional: tease the ponytail slightly before wrapping for added volume
Styling note: This technique works best with a clear elastic under the ponytail and a small bobby pin that matches your hair color to secure the wrap.
13. The Deep Side Part with Waves

Combining a deep side part with soft waves creates a romantic, feminine look that’s more interesting than waves alone. The dramatic side part adds structure while the waves provide movement and softness, balancing each other beautifully.
Why This Combo Works
The side part creates an angular frame for your face while waves add softness and romance—together they create a look with personality and dimension. This style is flattering for most face shapes and works with various hair textures. Long hair allows the waves to develop fully while the side part creates visual interest at the hairline.
How to Execute It
- Create your side part closer to one side than center—the more dramatic the better
- Blow-dry or curl your hair to create soft waves throughout
- Use the side part as your styling anchor, making sure waves fall naturally over it
- Pin the back side of the part discretely if needed to keep it in place
- Finish with a flexible-hold hairspray that doesn’t feel stiff or crunchy
Pro tip: This style works especially well the day after you wash your hair, when your waves have more texture and hold naturally.
14. The Dutch Braid

A Dutch braid is essentially a reverse three-strand braid, where you cross strands under rather than over, creating a raised, eye-catching braid that looks more complex than it actually is. Dutch braids photograph beautifully and feel special enough for events while being easy enough for everyday wear.
What Makes Dutch Braids Stand Out
Dutch braids create a dimensional, textured look that stands out from your head rather than lying flat. With long hair, a Dutch braid can be quite substantial and impressive-looking, making it perfect for days when you want your hairstyle to be a feature rather than just functional. The raised design is particularly striking and catches the light beautifully.
Executing a Clean Dutch Braid
- Section your hair into three strands at the crown
- Cross the right strand under the center strand (this is the reverse of a regular braid)
- Cross the left strand under the new center strand
- Continue this pattern, always crossing under rather than over
- As you work down, gently pull on the sides of each section to create a fuller, more textured braid
- Secure at the end and tease gently for maximum volume
Worth knowing: Dutch braids look best when they’re slightly loose and textured—a too-tight Dutch braid can actually look unflattering because the raised sections become too pronounced.
15. The Soft Updo

A soft updo is the sweet spot between casual and formal—it’s clearly styled and intentional without being as structured as a formal evening updo. Pieces fall softly around your face and neck, creating a romantic, approachable look that works for everything from dinner dates to casual work events.
Why Soft Updos Flatter
Unlike severe, pulled-back styles, soft updos create a gentle frame around your face with strategically placed, softening pieces. This style is flattering because it shows off your face and bone structure while still feeling romantic and feminine. With long hair, you have plenty of volume to create a soft updo that looks full and intentional rather than thin and sparse.
Creating a Soft Updo
- Blow-dry or create waves in your hair beforehand for added texture
- Gather the top section of hair into a half-up position and secure loosely
- Create a low bun or twist with the gathered section, securing with bobby pins
- Leave face-framing pieces down on both sides—tease them slightly for softness
- Leave a few pieces loose around your neck for a romantic, undone feel
Styling tip: Pull small pieces out of the updo gently after you’ve secured it to add texture and increase the visual softness of the style.
16. The Sleek High Ponytail

A high ponytail positioned near the crown is sporty, energetic, and youthful. Unlike low ponytails which can feel severe, high ponytails have an inherent playfulness while still being practical and polished.
The Appeal of High Positioning
A high ponytail opens up your entire face while lifting your features, which is naturally flattering. The position creates lift and volume that makes your hair look fuller and thicker. Long hair in a high ponytail creates beautiful lines and movement, and the length is clearly visible and impressive.
Achieving a Sleek High Ponytail
- Flip your head upside down and brush your hair straight up—this creates immediate lift at the roots
- Stand up and gather hair at the crown, smoothing any bumps
- Secure with a strong elastic, pulling tightly enough that it won’t slip throughout the day
- Apply edge control to your hairline for a polished finish
- Wrap a small section of hair around the elastic to hide it
Pro tip: Tease gently at the crown before creating the ponytail—this gives you extra lift and makes the ponytail sit higher and look fuller.
17. The Scarf or Ribbon Wrapped Bun

Adding a scarf, ribbon, or silk tie to your bun transforms it into something special and personalized. This style takes minimal additional effort but creates a completely different aesthetic that feels more intentional and curated.
Why Accessory Wraps Elevate a Bun
A wrapped accessory adds color, texture, and visual interest to a basic bun. You can choose colors and patterns that complement your outfit or mood, making the same bun feel completely different on different days. This personalization makes the style feel more intentional and fashion-forward without requiring any additional styling skills.
How to Add a Wrap
- Create your bun as usual—either sleek or messy depending on your preference
- Take a silk scarf, ribbon, or decorative tie
- Wrap it around the base of the bun, covering the elastic
- Tie it off on the side or back, leaving the ends long if desired
- You can even create a loose bow or knot with the ends for extra visual interest
Variation idea: Use a metal hair cuff or wrap instead of fabric for a more modern, metallic look that works especially well with sleek buns.
18. The Textured Crown Braid

A crown braid that wraps around your head creates a romantic, bohemian look that’s actually quite practical—it keeps your hair off your face and neck while looking intentionally styled. This braid works best with textured or wavy hair, as the texture makes the braid more visible and interesting-looking.
Why Crown Braids Work for Long Hair
Crown braids take advantage of your hair’s length by using it to create a substantial, visible braid that wraps around your entire head. With shorter hair, crown braids can look thin and sparse, but long hair creates a braid that’s genuinely impressive and visually striking. The length also means the braid can be relaxed and textured without looking underdone.
Creating a Crown Braid
- Create a deep side part to one side
- Start braiding at that side, near your ear, using a three-strand or Dutch braid
- Braid across the back of your head, continuing around to the opposite ear
- Secure the end with a bobby pin tucked underneath the braid
- Gently pull on the braid sections to loosen and create texture throughout
- Leave some face-framing pieces down if desired
Pro tip: This style works best if you braid slightly damp hair—the moisture helps the braid hold better and makes it easier to control.
19. The Half-Up Twist

A half-up twist is simpler than a braid but equally elegant, creating a polished look that’s more interesting than a basic half-up and less complicated than a braided version. The twisted section catches light beautifully and adds dimension to your overall look.
Why Twists Feel More Sophisticated
Twists have an inherent elegance that feels more refined than a simple gathered section. They’re not as casual as a standard half-up, but they’re easier to execute than a braid, making them the perfect middle ground. With long hair, a twist has plenty of length to spiral and create visual interest.
Creating a Half-Up Twist
- Take a section from each side of your head at ear level
- Twist each section tightly or loosely depending on the aesthetic you want
- Bring the twisted sections to the back of your head and secure together with a bobby pin or small clip
- Gently pull on the twist sections to loosen them and create texture
- Leave face-framing pieces down for softness
Styling option: Create two twists instead of one on each side and secure them together at the back for a more substantial, visually interesting version.
20. The Beachy Texture

Beachy texture is all about creating undone, salty, tousled waves that look like you’ve just come from the ocean. This style doesn’t require perfect waves—in fact, the more imperfect and varied the wave pattern, the more authentic the beachy look becomes. It’s perfect for relaxed, casual occasions.
Why Beachy Texture Suits Long Hair
Beachy texture looks best on longer hair because the length allows varied wave patterns to be fully visible and create real movement. Shorter hair can look flat with this style, but long hair naturally creates the kind of movement and dimension that reads as genuinely beachy. This style is also forgiving—you don’t need perfect waves, just varied texture.
Creating Beachy Texture
- Apply a sea salt spray to damp or dry hair
- Scrunch your hair gently with your hands, encouraging waves and texture
- For more defined waves, braid damp hair loosely, then release and scrunch
- Blow-dry while scrunching to set the texture
- Optional: Use a curling iron on low heat to add more defined waves to specific sections
Pro tip: Layer your sea salt spray application—spray, scrunch, let it dry slightly, then apply again for more texture and staying power.
21. The Low Twisted Ponytail

A low ponytail created from twisted sections has more visual interest and texture than a simple gathered ponytail. The twisting adds dimension and the low placement feels sophisticated and polished without being too formal.
What Makes Twisted Sections Special
Twisting your hair before gathering it into a ponytail automatically creates texture and visual interest. The twisted strands catch light differently than straight sections, making your ponytail look fuller and more intentional. This technique is simple enough for everyday wear but polished enough for more formal occasions.
Steps for a Twisted Ponytail
- Take a section from each side of your head and twist each section separately
- Bring the twisted sections to the low nape of your neck and secure together with an elastic
- Gather any remaining loose hair and add it to the ponytail, securing with the same elastic or a separate one just below
- Gently pull on the twisted sections to create texture and increase volume
- Wrap a small section of hair around the elastic to hide it
Variation: Create more than two twisted sections for a more substantial, visually interesting ponytail base.
22. The Sleek Low Side Ponytail

A low ponytail positioned to one side is elegant and effortlessly stylish. It combines the practicality of a ponytail with the romance of a side-swept style, creating something that works for both casual and dressy occasions.
The Elegance of the Side Position
Positioning a ponytail to one side instead of center-back creates an asymmetrical, more interesting look than a centered ponytail. The low placement feels mature and sophisticated while the side positioning adds a touch of romance. With long hair, a side ponytail creates beautiful cascading lines that are visually striking.
Creating a Low Side Ponytail
- Brush your hair smoothly and decide which side you want your ponytail on
- Gather hair toward that side, creating a low ponytail near the nape of your neck
- Secure with an elastic that matches your hair color
- Smooth any flyaways with edge control or light hairspray
- Wrap a small section of hair around the elastic for a finished look
- You can leave the ponytail smooth or tease it gently for added texture
Styling tip: This style works beautifully with a small clip or decorative barrette added to the side of your hair where the ponytail gathers.
23. The Romantic Waves with Volume

Creating voluminous, romantic waves requires a bit more intention than casual beachy texture, but the payoff is a genuinely stunning style that works for special occasions or whenever you want to feel extra polished. These waves are full-bodied and clearly styled while still maintaining a soft, feminine feel.
How Volume Changes Wave Impact
Voluminous waves look completely different from flat, limp waves. When you add body and lift at the roots, waves become dramatically more impactful and flattering. With long hair, voluminous waves create movement throughout your entire length and catch light beautifully, making your hair look thicker and fuller.
Creating Voluminous Waves
- Blow-dry your roots with the dryer pointed upward to create lift
- Apply a volumizing mousse or spray to damp roots before blow-drying
- Curl sections of hair with a curling iron, using 1.5-inch barrels for defined but soft waves
- Flip your head upside down and shake gently to distribute volume
- Tease gently at the crown and smooth the top layer for a polished finish
- Use a flexible-hold hairspray that won’t weigh the waves down
Pro tip: Create waves in the opposite direction of where your part naturally falls—this creates more lift and prevents the waves from falling flat in one direction.
24. The Edge-Controlled Style

Controlling your edges with edge control cream or gel creates a clean, polished foundation for any hairstyle, whether you’re wearing it down or up. Clean edges dramatically increase how intentional and polished any style appears, making this detail worth the small effort.
Why Edges Matter
Edges frame your face and are one of the first things people notice about a hairstyle. Flyaways and undefined edges make even a well-executed style look unfinished, while controlled edges make the same style look intentional and professional. This is true regardless of whether you have naturally sleek edges or textured edges—the key is intentionality.
Perfecting Your Edges
- Apply a small amount of edge control to your hairline using a toothbrush or edge brush
- Smooth your edges back following the natural lines of your hairline
- For styles with parts, edge-control the part itself for a sharp, defined line
- Keep a travel-sized edge control in your bag for quick touch-ups throughout the day
- Choose edge control formulas that work with your hair texture—thick products can look heavy on fine hair
Worth knowing: You can create edge control using small amounts of styling gel, pomade, or even a light hairspray applied with a brush—you don’t need a product specifically labeled “edge control.”
25. The Casual Waves with a Clip
The simplest way to elevate casual waves is to add a decorative clip or claw at the back of your head. This small addition transforms waves from “just wore it down” to “intentionally styled,” taking about five seconds of effort.
Why One Accessory Changes Everything
A single strategic clip adds intentionality to an otherwise casual look. It creates a focal point and suggests that your waves are styled rather than accidental. The clip also gently gathers some of your hair, adding subtle dimension to the back of your style without requiring any actual styling.
Styling With a Clip
- Style your hair into soft waves using your preferred method
- Once fully dry, take a clip or claw of your choice
- Clip the back section of your hair, positioning it wherever feels balanced on your head
- Leave face-framing pieces down and loose
- Choose clips that complement your outfit or hair color for maximum visual impact
Variation idea: Use multiple small clips on each side for a more intentional, less casual look, or opt for a vintage-inspired hair comb for an elegant touch.
Final Thoughts
The best part about having long hair is the sheer versatility it offers—from intricate braids to romantic waves to sleek, minimal styles, your length gives you endless options without requiring extensive time or styling skills. Most of these 25 styles can genuinely be executed in under 10 minutes once you’ve practiced them a few times, and many require nothing more than the tools you already have at home.
The styles that look the most effortless are often the ones that balance intention with imperfection. Whether you’re going for a completely sleek, polished look or embracing intentional undone texture, the difference between “I just threw my hair up” and “I styled my hair” usually comes down to small details—a wrapped elastic, controlled edges, or strategic teasing for volume. These small touches transform any style from casual to clearly intentional.
As you experiment with these styles, remember that your hair texture, face shape, and personal style all influence which ones will feel most natural for you. A style that’s perfect for one person might feel awkward for another, so give yourself permission to adapt these ideas, combine them, and make them work for your specific hair and aesthetic. The most wearable hairstyles are always the ones that feel comfortable and authentic to you, so start with the ones that appeal most and build your repertoire from there.