Anyone who regularly wears a helmet knows the struggle—you finish your ride, remove your helmet, and discover your hair has been completely flattened or twisted into shapes that defy fixing with a brush. Helmet hair isn’t just a minor inconvenience; it can affect how confident you feel for the rest of your day, whether you’re a cyclist commuting to work, a motorcyclist heading into important meetings, or an equestrian preparing for an event.
The good news? Your choice of hairstyle makes an enormous difference in whether a helmet leaves you with respectable hair or a complete disaster. The right styles work with the structure of a helmet rather than fighting against it. They distribute pressure more evenly across your head, they hold their shape even when compressed, and most importantly, they look intentional and polished when you take the helmet off—or they’re styles that actually improve when slightly tousled.
This isn’t about settling for unflattering hair just because you wear a helmet. Instead, it’s about understanding which hairstyles are naturally helmet-resistant and knowing exactly how to prepare and maintain them. The styles that work best tend to share certain characteristics: they either avoid putting pressure on a single spot, they incorporate texture that bounces back after being compressed, or they’re styles where a slightly messed-up look is actually part of the design.
Over the following sections, you’ll discover ten genuinely flattering hairstyles that thrive despite regular helmet-wearing, along with specific styling techniques and products that make each one work harder for you.
1. The Sleek Low Bun
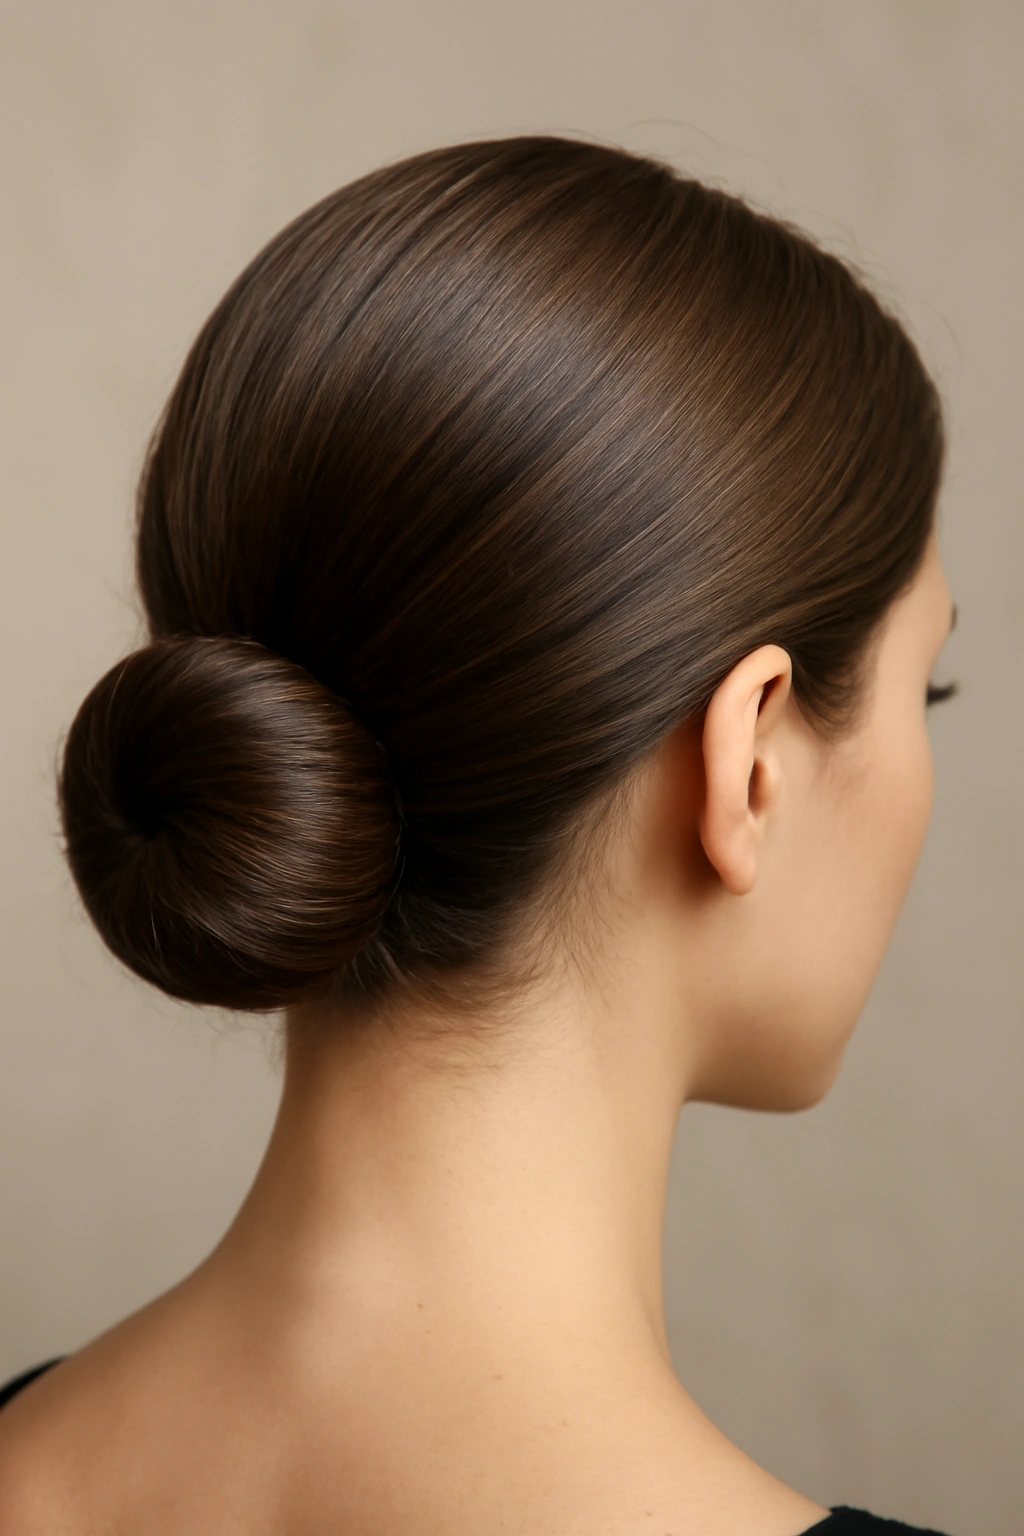
A low bun is the workhorse of helmet hairstyles—it’s practical, polished, and remarkably forgiving of the pressure a helmet creates. The key to making this style survive a helmet isn’t just throwing your hair into a bun; it’s about how you position it and what products you use to keep it smooth and secure.
Why This Works for Helmet-Wearing
A low bun sits at the nape of your neck, well below the helmet’s pressure points. Your helmet primarily compresses the crown and sides of your head, leaving the nape relatively untouched. This positioning means your bun escapes the worst of the helmet’s flattening effect. Additionally, the bundled structure of the bun is inherently more resilient than loose or partially pinned hair—the sections are already gathered, so they don’t have room to twist or compress unevenly into the awkward shapes that create bedhead.
The smooth lines of a sleek bun also mean that when you do have slight compression from the helmet, it’s less noticeable because the style was already intentionally structured. A tiny amount of flattening at the sides reads as neat rather than as damage.
How to Create a Helmet-Ready Low Bun
Start with dry or lightly damp hair, depending on your hair type—fine hair often looks better when you bun it with a little moisture, while coarser textures can be bunned successfully either way. Apply a lightweight smoothing cream or serum to your hair, then brush it back into a low ponytail at the base of your skull. The tighter you create this base ponytail, the better your bun will hold up under helmet pressure.
Twist the ponytail around itself to form a coil, then pin it securely with at least three bobby pins positioned at different angles (not just vertical). Smooth any flyaways with a fine-tooth comb and lock everything in place with a flexible-hold hairspray that won’t crack when your helmet compresses it slightly.
Pro Tips and Maintenance
Use a silk or satin hair tie instead of elastic. Elastic tends to create a visible crease or dent in the bun’s shape after your helmet comes off. A silk hair tie distributes pressure more evenly and creates less of a mark.
Bring bobby pins and a small bottle of smoothing spray with you. Even the best bun might develop a stray section or two after helmet removal. A quick smoothing spray and a minute of pinning fixes almost any small imperfection in seconds.
- A low bun takes about 2 minutes to create once you’re practiced, making it perfect for rushed mornings
- This style keeps hair completely off your face and neck, which is especially valuable if you’ll be active or in warm weather
- You can wear a low bun for 2-3 consecutive days before washing if you use dry shampoo and a light misting of hairspray to refresh it
A sleek low bun works best for hair that’s at least chin-length and holds a ponytail securely. It’s particularly effective for people with straight to wavy hair, though curly hair can absolutely work if you apply smoothing products.
2. Two-Strand Dutch Braids
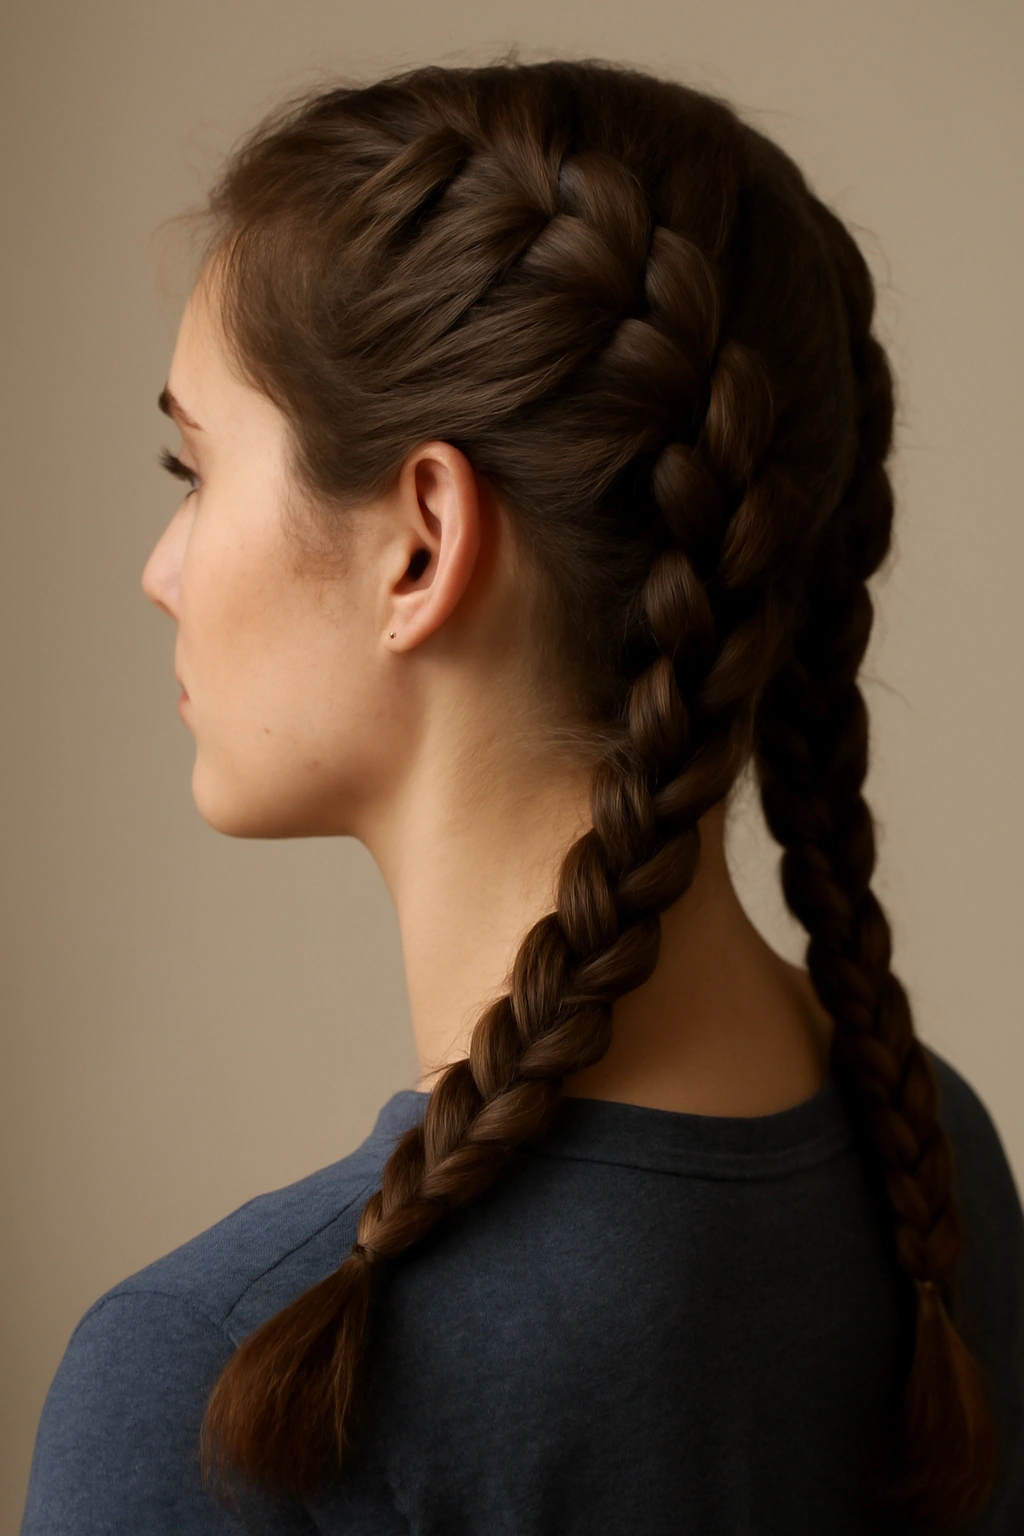
Dutch braids—where you braid by crossing sections underneath rather than over—create a raised, textured look that’s naturally immune to compression damage. Because the texture is already built into the style, a helmet flattens some of the dimension without ruining the overall look. In fact, your braids often look intentionally tousled when you remove your helmet.
Why Braids Resist Helmet Compression
Braids work brilliantly under helmets for a simple reason: the interlocking structure of braided hair already distributes pressure across the entire braid rather than concentrating it in one spot. When a flat ponytail gets compressed, it creates a visible crease and kink that takes hours to bounce back. A braid, by contrast, compresses slightly but maintains its integrity because the sections are already interlocked.
Two braids instead of one distributed the pressure even further across your scalp. Rather than one thick braid bearing all the compression, two thinner braids share the load. This means less overall deformation and a much faster recovery time once you remove your helmet.
How to Create and Secure Two Dutch Braids
Divide your hair into two equal sections down the middle of your scalp, from your forehead to the nape of your neck. Start the first braid at your temple, braiding by crossing sections under the central section rather than over (this creates the raised, 3D effect that’s more forgiving of flattening).
Braid each side down to the ends of your hair, securing each with a small elastic. The key to maximum resilience: make your braids snug but not so tight that they create tension headaches or cause your hair to pull. Tight braids look tighter and create more obvious creases when compressed; moderately snug braids have a little flexibility.
Products and Techniques for Maximum Hold
Start with textured hair rather than perfectly smooth hair. If your hair is freshly washed and silky smooth, braids can slip slightly and look messier after helmet wear. Braid your hair the night before wearing a helmet, so it has time to set. Alternatively, use a texturizing spray on clean hair before braiding to create grip.
Use fabric-covered elastics, not metal ones. Metal clips and tight elastics create sharp creases at the ponytail ends that are visible and take time to relax.
- Dutch braids can be worn for 2-4 days before washing when maintained with a light refreshing spray
- You can tuck the ends of your braids under and pin them to create a braided halo effect that’s even more helmet-compatible
- Braids create the appearance of fuller hair, making them especially flattering if you have fine or thin hair
Two Dutch braids suit most hair types, but they work most effortlessly with hair that’s shoulder-length or longer. Even shorter hair can be braided, though very short hair may not hold a braid securely under helmet compression. This style is perfect for people who want a genuinely pretty look that doesn’t require recreating or refreshing after helmet removal.
3. A Slicked-Back High Pony
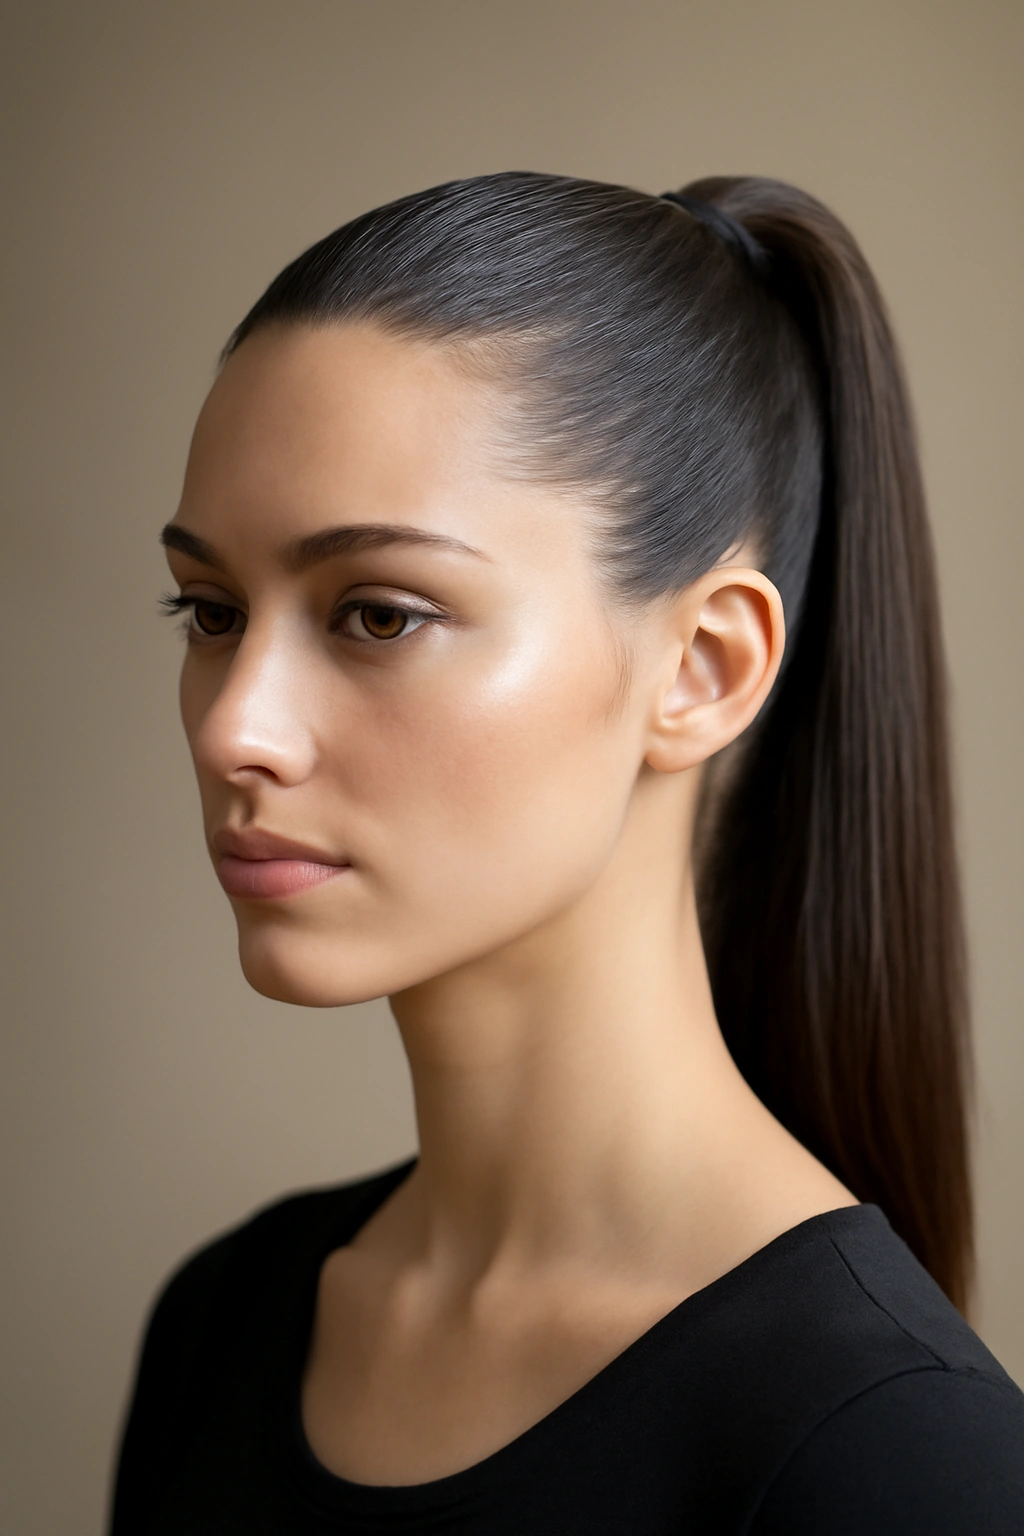
A high ponytail positioned at the crown of your head might seem like the worst possible choice for helmet-wearing, but here’s the secret: when executed correctly, a sleek high pony actually works beautifully under a helmet because the slicked-back style means no hair is loose to compress unevenly.
Why Slicked Hair Survives Compression
The reason this works comes down to hair positioning and product. When hair is slicked straight back against your head with a strong-hold styling product, it has nowhere to twist, tangle, or compress into awkward shapes. Your helmet compresses it flat against your scalp, but because it’s already smooth and flat, the compression doesn’t create the kinked, kinky texture that loose hair develops.
The moment you remove your helmet and run your fingers through your hair, the natural texture and slight wave of your hair reactivates. Because your hair has been held smoothly in place, it actually springs back to life better than hair that’s been rumpled under the helmet.
How to Achieve the Perfect Slicked-Back High Pony
This style absolutely depends on using the right products. A light pomade, gel, or slicked-back cream is essential—hairspray alone won’t cut it. Apply the product to damp hair, working it through from roots to ends, focusing on smoothing the hair straight back from your face and sides.
Brush your hair back firmly with a fine-tooth comb, gathering it at the crown into a high ponytail. The tighter and more secured this ponytail, the better. Use a sturdy elastic and reinforce it with bobby pins. Finish with a strong-hold hairspray that won’t crack or flake when your helmet compresses it.
Tips for Long-Lasting Results
Choose your product strategically. A water-based pomade typically gives a sleeker finish than an oil-based one and tends to hold longer under the pressure of a helmet. Some people prefer a lightweight gel, which often looks shinier and more polished but might need a small touchup after helmet removal.
Secure your ponytail at the exact highest point of your crown. This positioning distributes the ponytail’s weight optimally and is less likely to shift under helmet pressure.
- The slicked-back look is unquestionably modern and polished—this is not an emergency solution but a genuinely stylish choice
- This style works particularly well if you’ll be seen immediately after removing your helmet, since your hair emerges looking intentional rather than messed up
- Fine or straight hair types excel with this style, though any texture can work with the right products
This style works best for people with medium to long hair and requires styling products on hand. It’s especially flattering for those with strong facial features or if you’re confident with bold, clean hairstyles.
4. Textured Waves with a Braided Crown
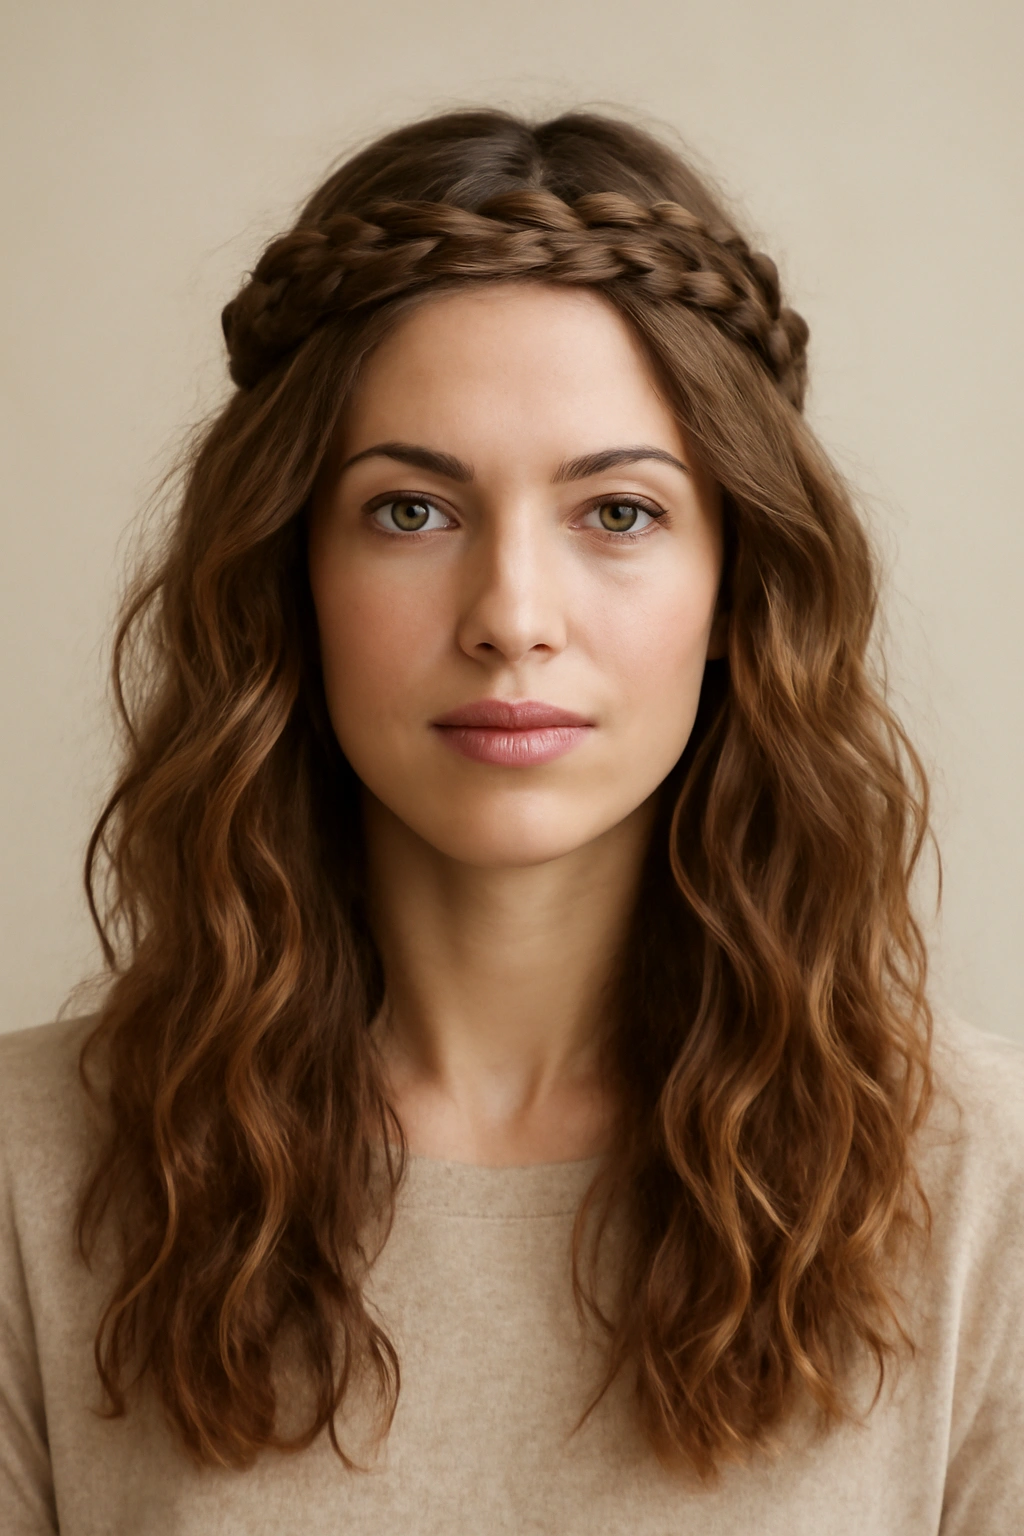
This style combines the best of both worlds: softness and texture that looks pretty without being overly formal, paired with a structural braid that distributes helmet pressure. The braided crown element creates an anchor point that prevents the rest of your waves from compressing unevenly.
Why Waves and a Crown Braid Work Together
Loose waves tend to compress into flat, kinked sections under a helmet. However, when you add a braided crown detail, you’ve essentially pinned your hair in place along a substantial portion of your head. The sections of hair that run through the braid are held secure and protected from compression.
The hair that falls loosely below the crown braid does compress slightly, but because it’s still part of the overall textured look, the compression is less obvious. Textured hair naturally bounces back more than smooth hair, so even with compression, it recovers its shape quickly.
How to Create Waves and Crown Braids
Start with damp hair and apply a sea salt spray or texturizing product throughout. Use a curling iron or wand to create soft, loose waves, curling sections away from your face. Once your waves are set, gently run your fingers through them to break up the curls slightly—you want textured waves, not ringlets.
Now create the braid crown: start a three-strand or Dutch braid at one temple, braiding along the crown of your head to the opposite temple. Secure the end of the braid with a small elastic that matches your hair color, then gently tug on the braid sections to loosen and soften them. This creates an undone, romantic look rather than a tight, precise braid.
Styling Products That Matter Most
Use a texturizing or sea salt spray as your base. This creates grip in your hair so waves hold their shape longer under helmet pressure. It also makes the entire style look more intentional and textured.
Choose a flexible-hold hairspray rather than a strong-hold formula. You want your waves to survive compression without becoming stiff or crackly when the helmet presses against them.
- This style works beautifully for 1-2 days before washing, especially if you refresh it with a light texturizing spray
- The braided crown element hides any root regrowth, making this style ideal if you’re a few days past your last wash
- This style flatters nearly all face shapes and works with most hair types, from straight to curly
The style requires shoulder-length or longer hair to work effectively. It’s perfect for people who want something dressy enough for evening plans but casual enough to wear to work or on a riding trail.
5. Micro Braids or Box Braids
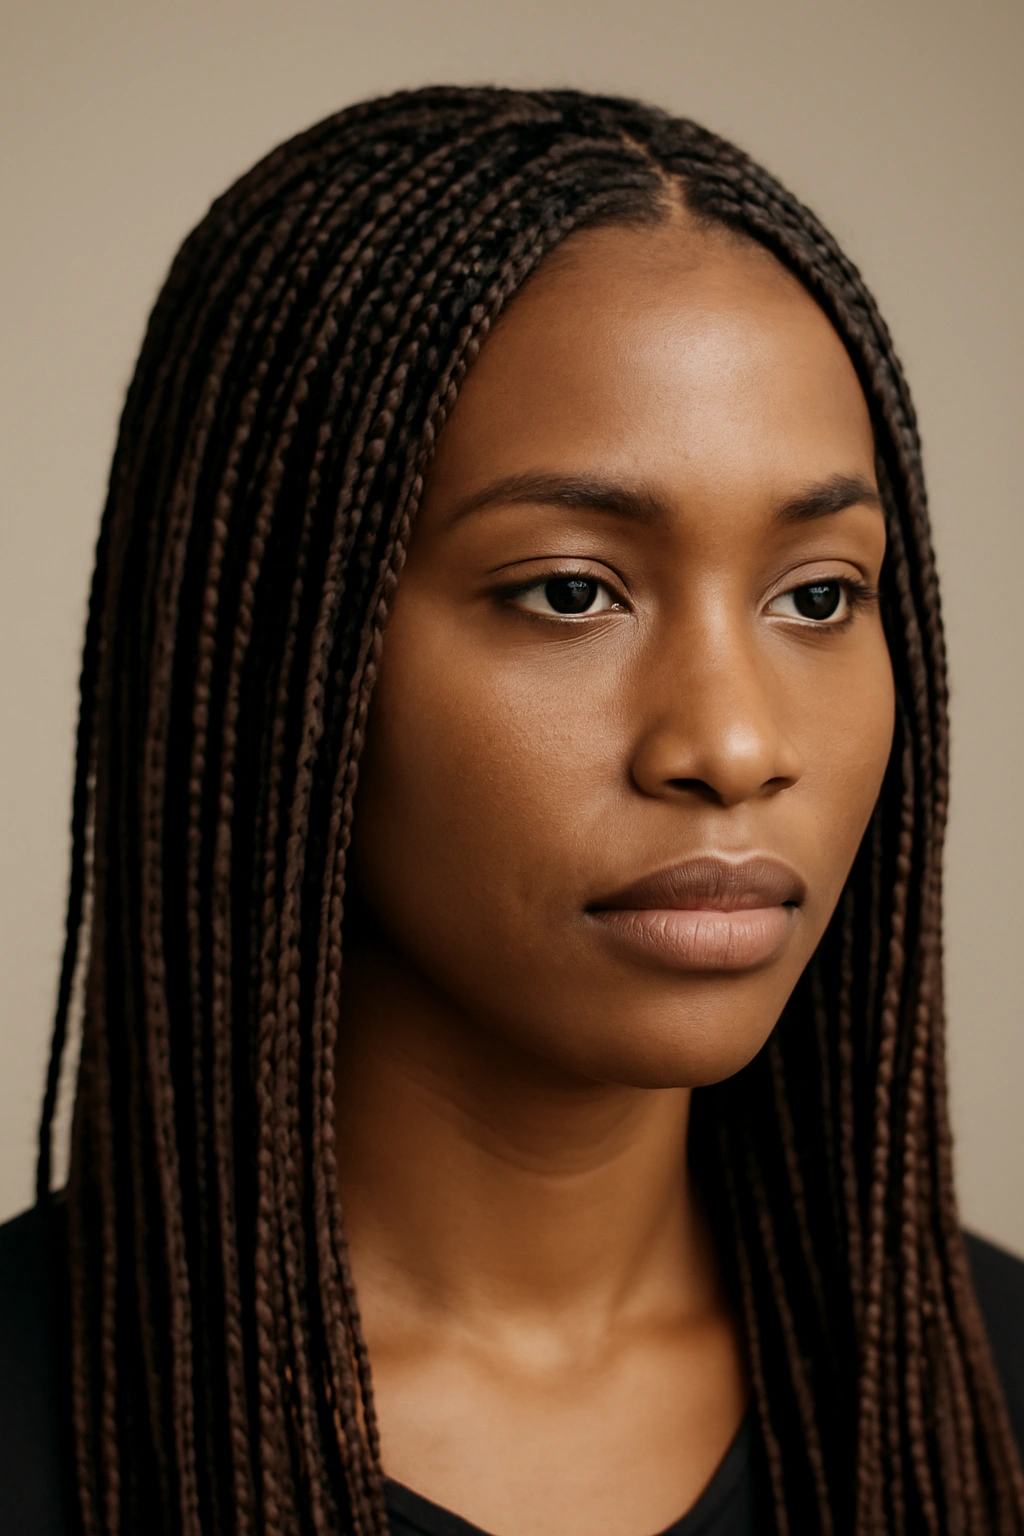
For ultimate helmet hair immunity, protective braids like micro braids or box braids are nearly unbeatable. These styles involve many small sections of hair braided individually, which distributes pressure across dozens of points rather than concentrating it in one or two areas.
Why Small Braids Outperform Larger Styles
Micro braids and box braids work so effectively under helmets because the pressure is distributed across the entire scalp rather than being concentrated on a single braid or ponytail. Additionally, these styles are designed to withstand manipulation and movement—they’re naturally resistant to compression and distortion.
Because there are many individual braids, even if a few experience some flattening under the helmet, the overall style remains attractive and intentional-looking. You’re not trying to recover from a bad hair day; you’re just showing off protective braids that are part of your styling choice.
How to Create and Maintain Braids
If you’re braiding your own hair: This is genuinely time-intensive. Most people take 3-5 hours to complete micro braids or box braids on their own hair. Start with clean, dry hair and section it carefully. Use extensions if you want longer, fuller braids. Braid each section tightly and secure with a small elastic.
If you’re getting them done professionally: Visit a skilled braider who has experience creating helmet-friendly braids. Tell them upfront that you’ll be wearing a helmet—a good braider can position the braids and create them with just enough tightness that they’ll withstand helmet compression without becoming uncomfortable or causing pain.
Care and Longevity
These braids typically last 2-8 weeks depending on how well you maintain them. This is a long-term style, not a daily recreate situation.
Refresh your braids every few days with a light braid spray or edge control. This keeps flyaways minimal and the braids looking neat.
- Micro and box braids protect your natural hair underneath, which is an added benefit beyond helmet-friendliness
- These styles come in countless variations: you can add colored extensions, create different braid patterns, or size the braids differently
- Sleep on a silk pillowcase or wear a silk bonnet to prevent friction and extend the life of your braids
This style works for all hair types and textures, though it requires either significant time investment or a financial investment in professional braiding. It’s ideal for people who want a set-it-and-forget-it style that doesn’t require daily styling.
6. The Half-Up Half-Down Twisted Style
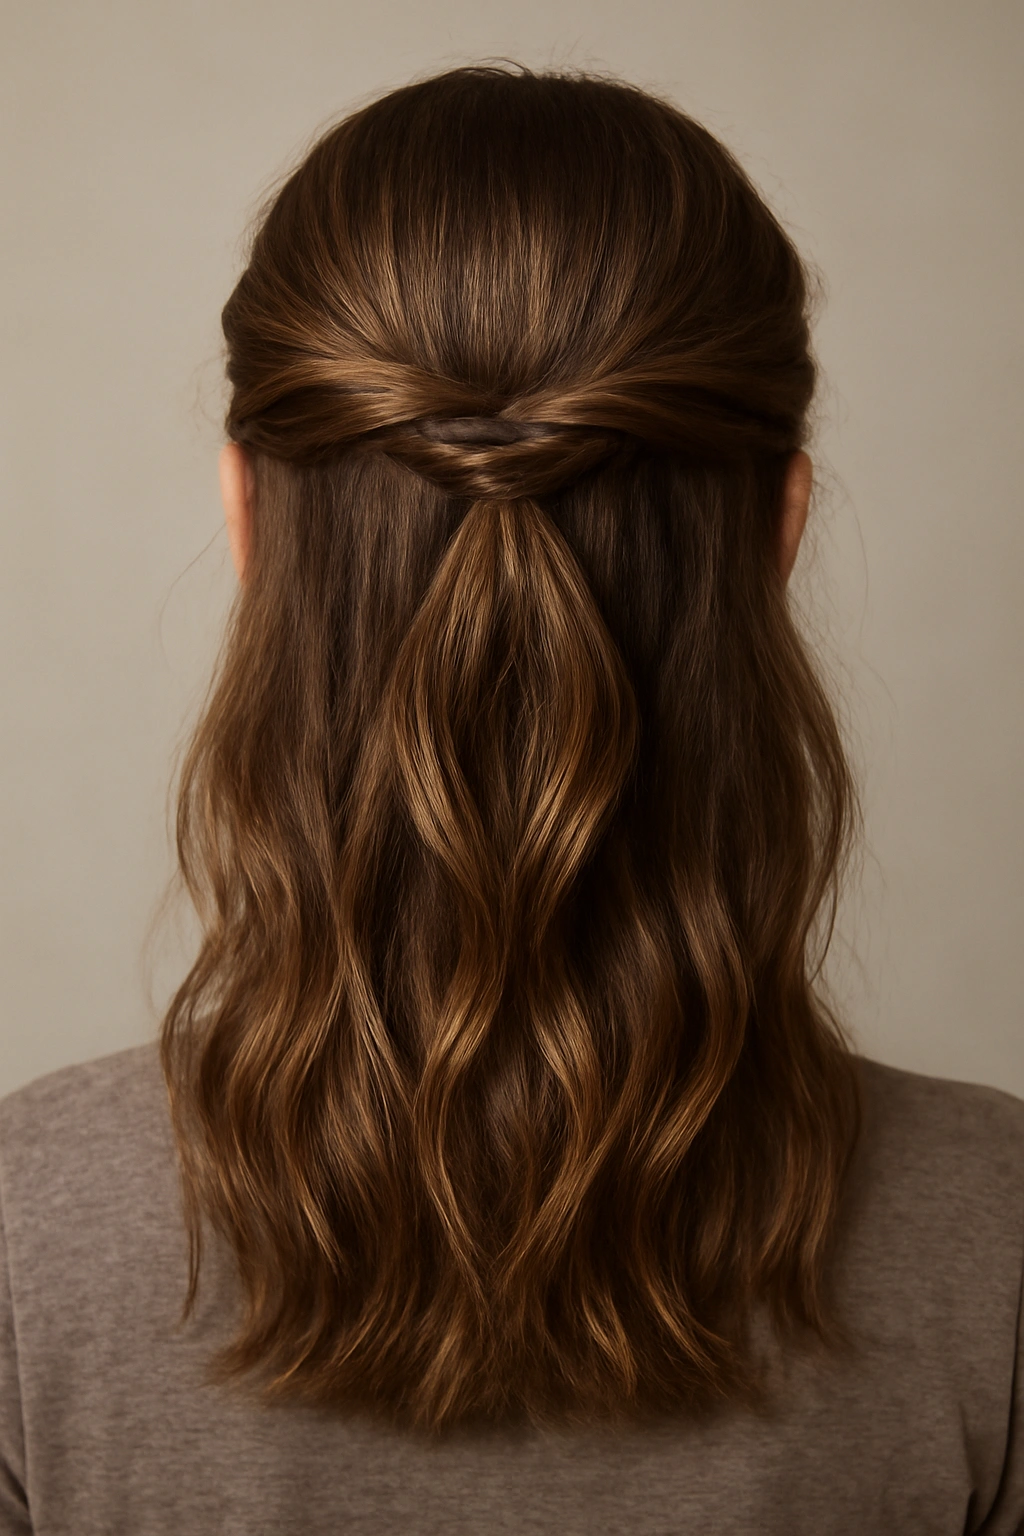
This style gives you the best of both worlds: half your hair is secured in a way that protects it from compression, while the other half remains loose for softness and movement. A twisted (rather than braided) half-up creates a more relaxed, modern look than a traditional half-up style.
Why This Hybrid Approach Works
By securing the top half of your hair, you prevent it from compressing unevenly under your helmet. The bottom half does compress slightly, but because it’s being held by the secured top section, the compression is less dramatic than it would be for completely loose hair.
The twisted element means the style looks intentionally textured and piece-y rather than like you’re dealing with helmet hair damage. When you remove your helmet, the bottom section often looks charmingly tousled rather than obviously flattened.
How to Create a Half-Up Twisted Style
Divide your hair roughly in half horizontally—imagine a line from one ear to the other across the back of your head. Take a section of hair from one side of the top half and twist it loosely as you work toward the back of your head. Add hair from the opposite side and twist that section too, creating two twists that wrap around the back.
Gather the ends of these twists together at the center back of your head and secure with an elastic. The bottom half of your hair remains completely loose and unstyled, creating a soft frame for your face.
Product Application for Maximum Hold
Apply a light texturizing spray to the entire head before starting. This gives your hair grip so the twists won’t slide out under helmet pressure.
Use a flexible-hold hairspray on the twisted sections. You want them secure but not stiff.
- This style takes about 3-5 minutes to create once you understand the technique
- It works beautifully with both straight and textured hair, though textured hair naturally holds this style with better shape recovery
- The twisted sections hide any flyaways or pieces that escaped the elastic, creating an intentionally undone aesthetic
This style suits most hair lengths from shoulder-length onward. It’s perfect for people who want something softer and more romantic than a full bun or braid, while still protecting a significant portion of their hair from compression.
7. A Tousled Ponytail with Texturizing Spray
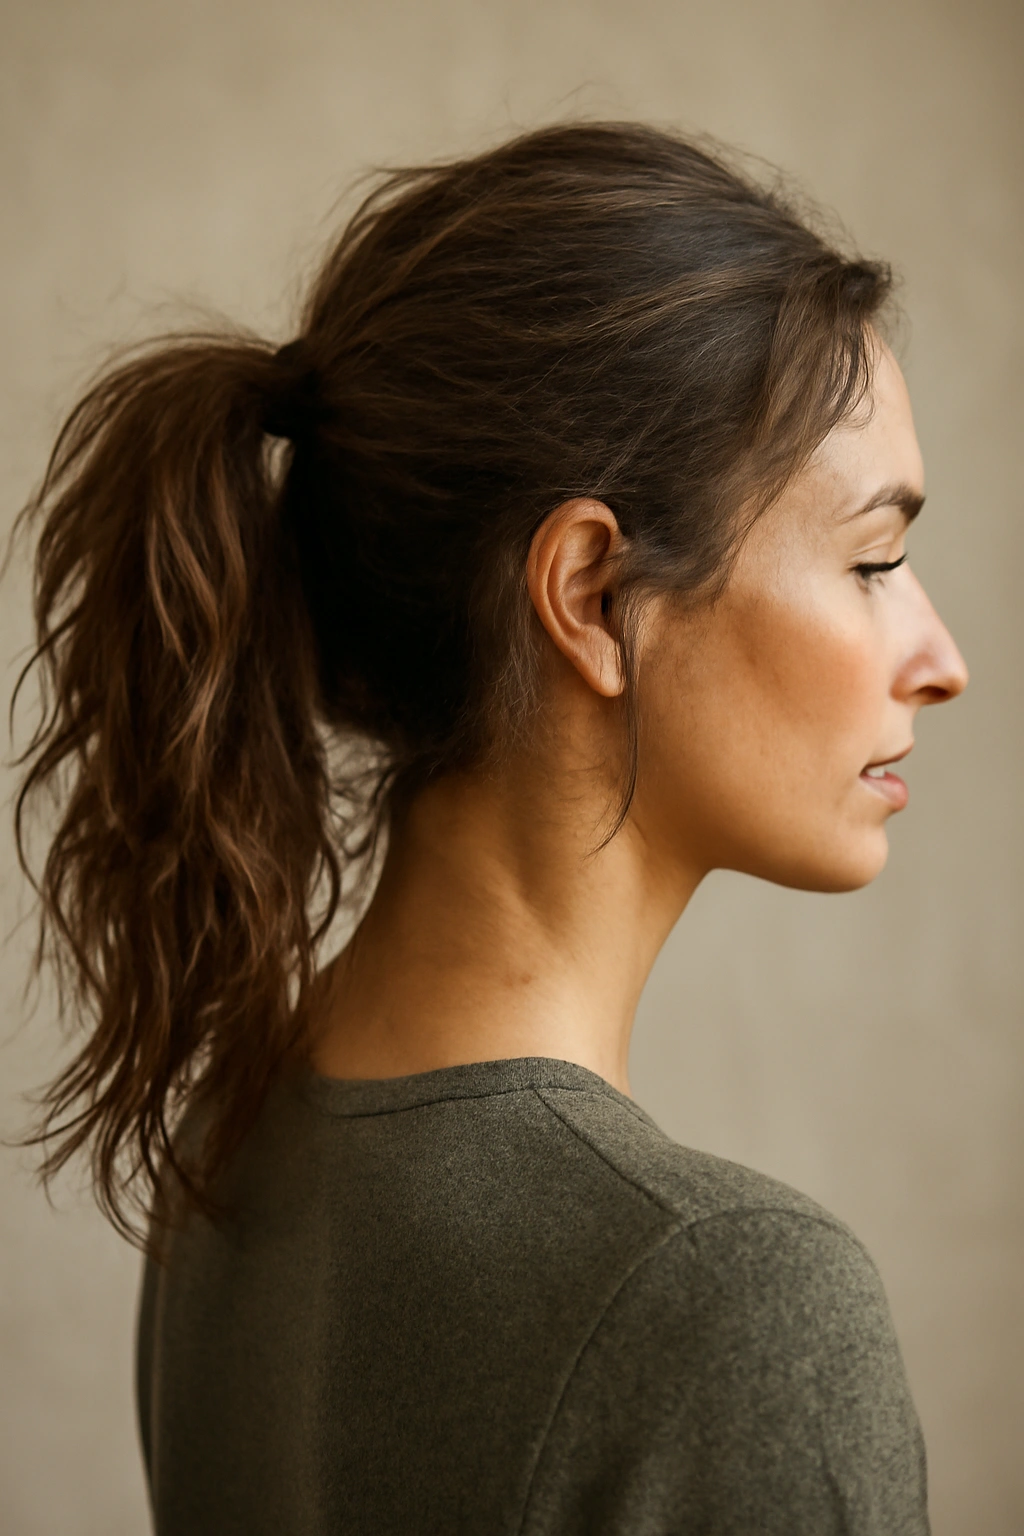
Sometimes the best solution to helmet hair isn’t fighting compression—it’s leaning into it. A tousled ponytail styled with texturizing products looks intentionally undone and piece-y, so the compression your helmet creates actually looks like part of the style rather than damage.
Why Tousled Texture Hides Compression Damage
Helmet compression becomes obvious and unflattering when your hair is smooth and sleek—the flattening is easy to see. However, when your hair already has texture and intentional piece-y strands, the additional compression is essentially invisible. It just adds to the already-textured look.
This style is clever because it’s not pretending your hair won’t be compressed; it’s embracing the reality of helmet wear and creating a style that looks good because of that compression, not in spite of it.
How to Create a Tousled Ponytail
Start with clean or second-day hair and apply a volumizing or texturizing spray throughout. The texture in your hair is essential to this style’s success. Create a ponytail at whatever height feels right to you—high, mid, or low all work—but don’t make it perfectly smooth or tight.
Use a texturizing spray or dry shampoo to create volume and piece-y texture throughout the ponytail and around your face. Gently tease sections with a fine-tooth comb to add additional dimension. Secure the ponytail with a fabric-covered elastic, and let a few shorter pieces frame your face intentionally. The finished look should feel relaxed and like you just threw your hair together, even though you’ve actually styled it deliberately.
Product Selection Is Key
Volumizing dry shampoo creates texture while also absorbing oil, keeping your hair looking fresh. Use it liberally for maximum texture.
A sea salt spray mimics the texture of ocean-washed hair and pairs beautifully with the tousled ponytail aesthetic. Apply it and run your fingers through your hair to activate the texture.
- This style actually improves slightly after helmet wear, looking more intentionally undone and textured
- It works for 2-3 days before requiring a full wash, especially if you use dry shampoo to refresh between wears
- The ponytail can be worn high, middle, or low depending on your preference and what works with your face shape
This style works best for people with some natural texture or wave in their hair—truly straight hair can look a bit flat even with texturizing products. It’s ideal for people who embrace a more casual, undone aesthetic rather than polished looks.
8. Cornrows for Durability and Protection
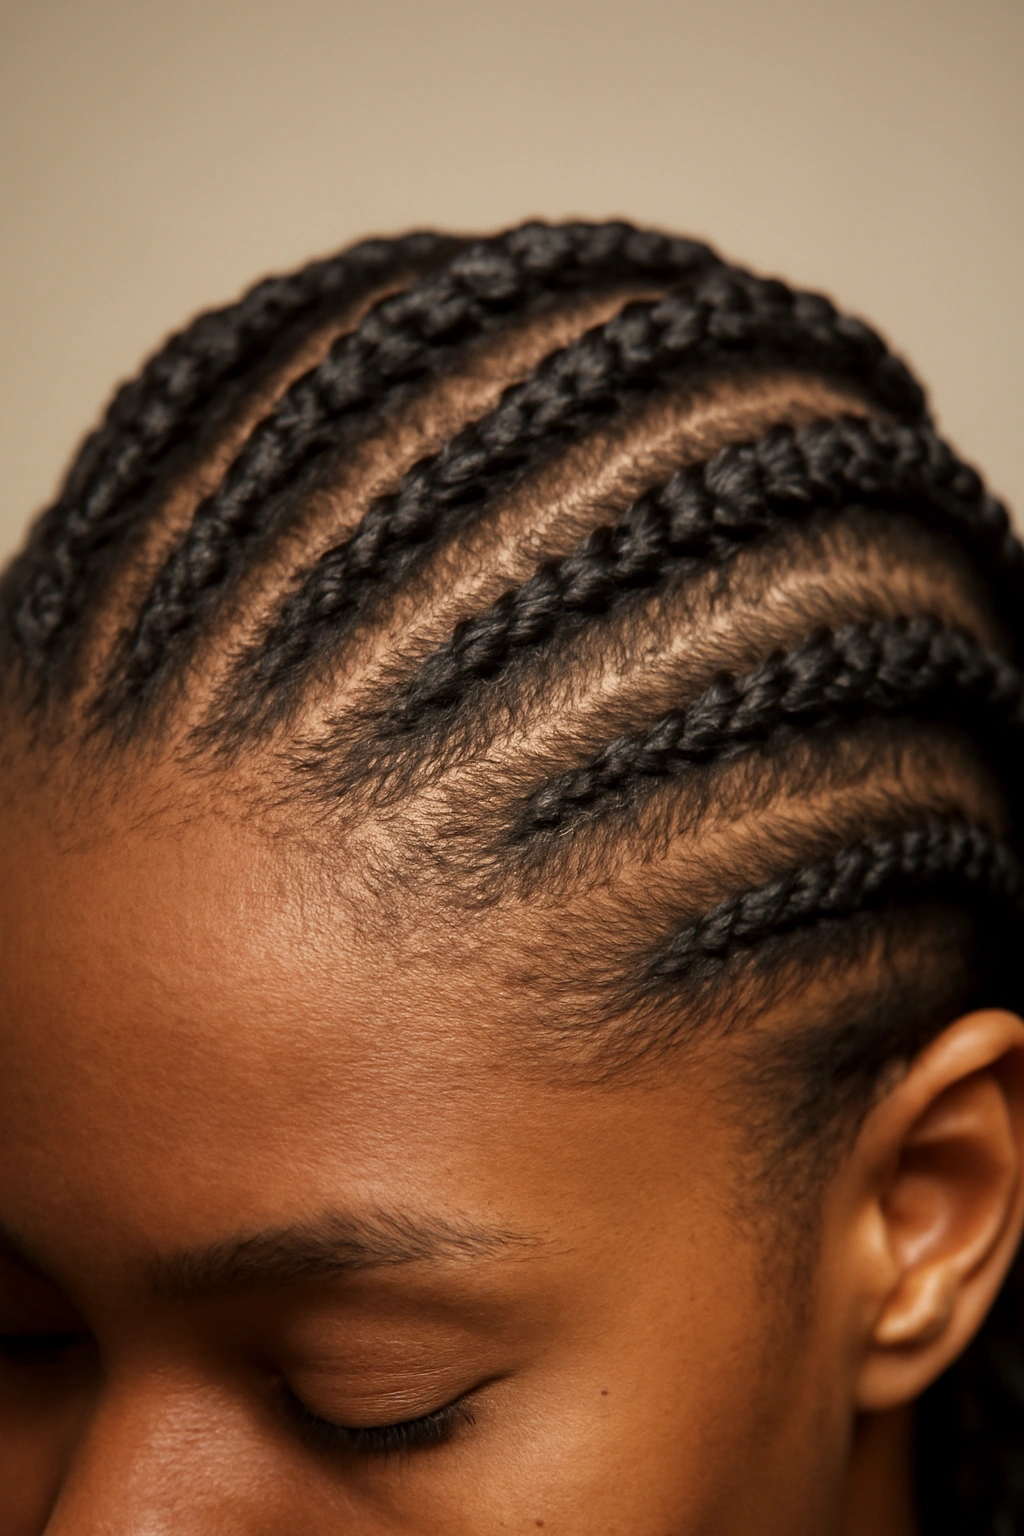
Cornrows—braids that follow the contours of your scalp with hair woven directly into the braid—are an incredibly durable, helmet-resistant style that can last for weeks. Like micro braids, they distribute pressure across many points, but they’re even more secure because they’re woven directly from the scalp.
Why Cornrows Excel Under Helmet Pressure
Cornrows are essentially rows of braids that follow your scalp’s natural curves, which means they’re maximally secure and won’t slip or shift under helmet compression. The pressure of the helmet essentially locks them in place rather than loosening them.
Additionally, cornrows are designed to be active-lifestyle compatible—they’re popular among athletes and people in physically demanding environments specifically because they hold their shape regardless of movement, pressure, or sweat.
How to Create Cornrows
If you’re doing this yourself: Divide your hair into sections following the pattern you want. Start with a three-strand braid at your scalp, picking up new hair from the scalp as you braid down, incorporating it into each successive pass of the braid. This creates a braid that’s woven directly into your scalp rather than just plaited hair.
If you’re getting them professionally: A skilled cornrower can create any pattern you want—straight lines, curved patterns, geometric designs, or intricate layouts. Tell your braider upfront that you’ll be wearing a helmet so they can create the cornrows with optimal security.
Styling Variations and Maintenance
Cornrows can be short and practical, or long with extended hair woven in. You can add colored extensions, create multiple thin cornrows or fewer thick ones, and style the ends (loose, braided, bundled into a bun).
Maintain your cornrows by washing gently with a cleansing spray designed for braids, refreshing the edges with edge control, and protecting them at night with a silk bonnet.
- Cornrows typically last 3-8 weeks depending on your hair growth and how well you maintain them
- They protect your natural hair underneath from daily manipulation and breakage
- These braids work for all hair types and can be styled in countless creative ways
This is an excellent long-term style option that requires either significant time or a professional investment. It’s perfect for people who want maximum helmet-friendliness with virtually zero daily styling required.
9. Loose Waves Anchored with a Headband
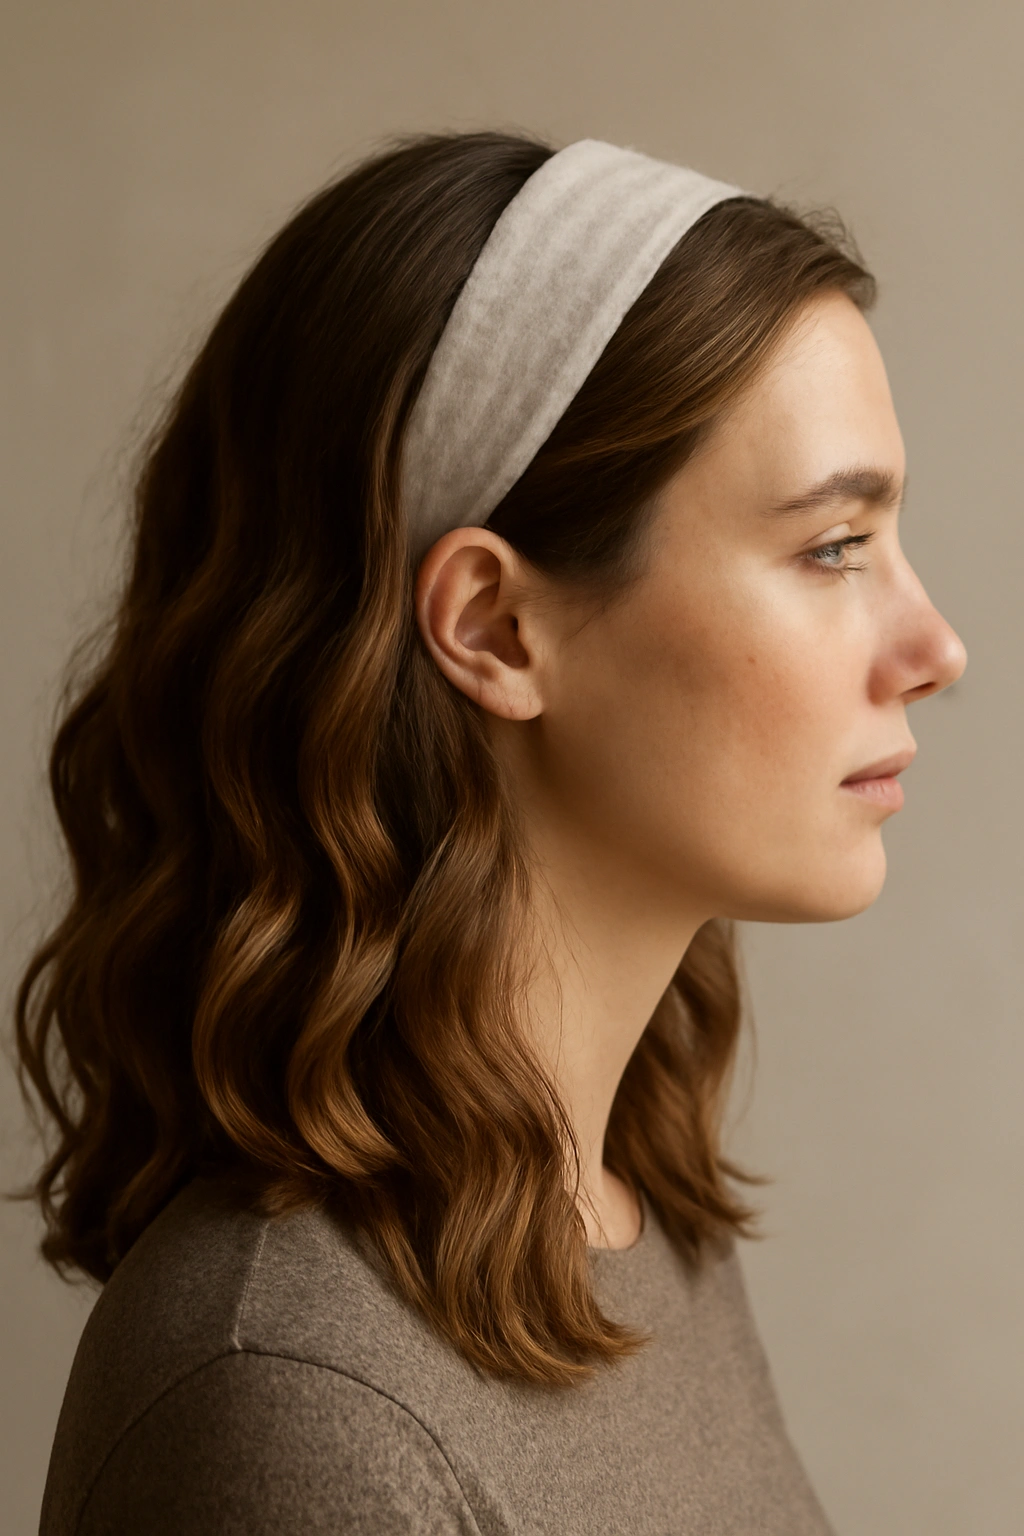
A soft headband can serve a surprisingly practical function for helmet-wearers: it creates an anchor point that prevents loose hair from compressing into a single kinked mass under your helmet. The headband holds the crown area of your hair in place, while loose waves fall freely below.
Why a Headband Changes Everything
A helmet compresses loose hair in one consistent pattern, which creates a visible line of flattening that takes hours to recover from. However, when a headband is in place, it distributes the helmet’s pressure differently. The headband prevents the hair directly under it from compressing as severely, and the overall distribution means less dramatic flattening.
Additionally, a headband is a legitimate styling element, so if your hair does look slightly compressed when you remove your helmet, the headband is doing important visual work by framing your face and making the whole look intentional.
How to Style Waves with a Headband
Start by creating soft waves in your hair using a curling iron, wand, or braiding method. Once your waves are set, gently break them up with your fingers to create a softer, more natural texture.
Position a fabric headband (or a metallic one, depending on your style preference) across the crown of your head, right at or slightly above your hairline. The headband should hold your hair back slightly from your face while allowing the waves to flow loosely down your back and around your shoulders. Secure the headband so it won’t slip during helmet wear.
Headband Selection Matters
A padded fabric headband is more comfortable under a helmet than a rigid one. The padding prevents pressure points and is gentler on your scalp.
Choose a headband color that either matches your hair or complements your skin tone. This prevents it from looking like an accessory and more like an intentional part of your hairstyle.
- Waves can last 2-3 days when you set them with product and maintain them with a light hairspray
- This style works beautifully for both casual and dressier occasions depending on your headband choice
- It works for all hair types and lengths from shoulder-length onward
This style is perfect for people who want soft, feminine waves without the hassle of daily recreating them, and who appreciate the practical benefit of a headband preventing compression damage.
10. The Short, Textured Pixie Cut
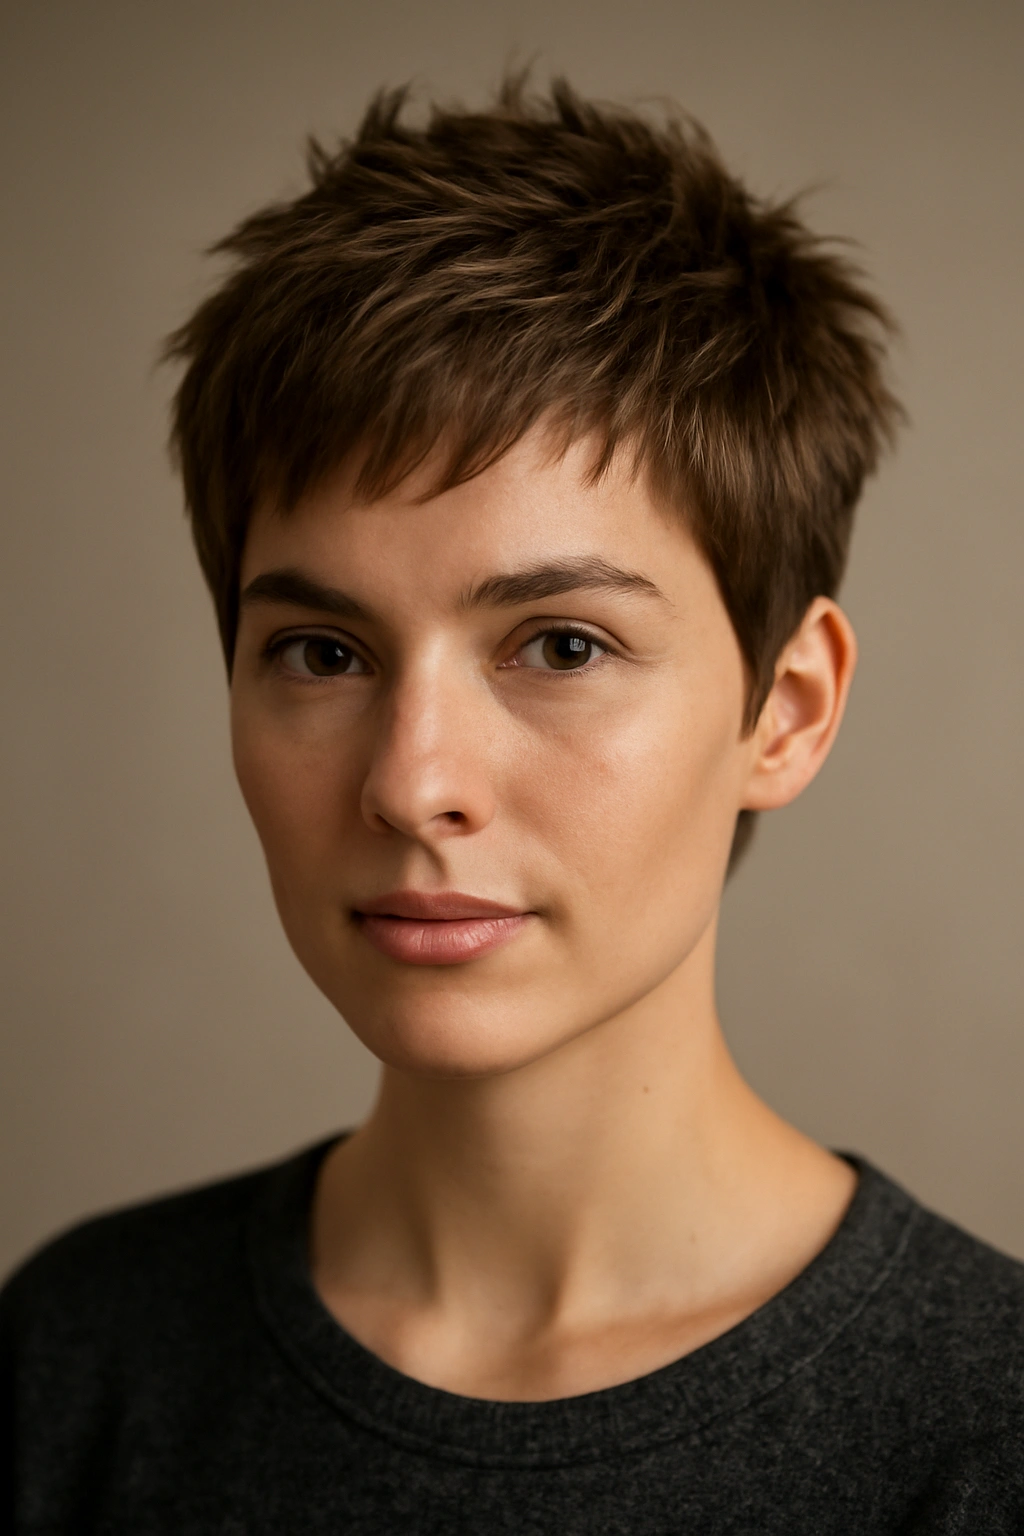
For ultimate helmet hair immunity, nothing beats a very short cut. A textured pixie cut has no length to compress into awkward shapes. Your helmet might flatten it slightly, but because the hair is already short and textured, it springs back quickly and looks intentionally styled rather than messed up.
Why Short Hair Sidesteps Helmet Hair Problems
The core problem with helmet hair is that long hair gets compressed into shapes it wouldn’t naturally fall into, creating kinks and flattening that take hours to recover from. Very short hair simply doesn’t have the length to compress dramatically. A helmet might mess up your texture slightly, but it can’t create the kind of flattening that plagued longer styles.
Additionally, short textured hair looks better when it’s slightly tousled or compressed. The pieces separate and create movement, making the cut look more dynamic rather than messy.
Styling a Pixie for Maximum Texture
A good pixie cut for helmet-wearing should have some length on top (at least 2-3 inches) so you can style it with texture and movement. Avoid a completely shaved or buzzed cut if helmet compatibility matters to you, since those don’t allow for styling options.
Style your pixie by applying a lightweight texturizing product to damp hair, then using your fingers to create movement and separate the pieces. You can create a sleek, polished pixie with a light pomade, or a more textured, piece-y pixie with a volumizing spray. Both work beautifully under helmets.
Maintenance and Styling Options
A pixie requires a trim every 3-4 weeks to maintain its shape. This is more frequent than longer styles, but the styling is simpler.
You can style a pixie in multiple ways: sleek and smooth, textured and tousled, side-swept, or piecey and undone. The versatility is higher than people expect from such short hair.
- Pixies suit most face shapes, though they’re especially flattering for those with strong jawlines or delicate features
- This style requires minimal daily styling—usually just 2-3 minutes with texturizing product and your fingers
- A pixie works for all hair types and textures
This is the ultimate low-maintenance, helmet-compatible option. It’s perfect for people who are genuinely busy, who prefer short hair aesthetically, or who want zero stress about how their hair looks after helmet removal.
Final Thoughts

The right hairstyle transforms helmet-wearing from something that damages your hair and self-confidence into something that’s genuinely easy to manage. Each of these ten styles works because they either distribute pressure across your entire head rather than concentrating it in one spot, they incorporate enough texture that compression is invisible, or they’re designed to look intentionally undone in a way that makes helmet hair indistinguishable from styling.
The style that works best for you depends on your hair type, how much time you’re willing to spend styling, and what aesthetic you prefer. A sleek low bun is completely different from a textured pixie cut, but both will look polished and put-together the moment you remove your helmet. Spend some time experimenting with one or two of these styles to find what actually works with your hair and your lifestyle—then lean into it.
You don’t have to choose between wearing a helmet and having great hair. You just have to choose the right style for your specific situation.