Short hair doesn’t mean you’re limited when it comes to being a bridesmaid. In fact, shorter lengths offer incredible versatility for wedding day styling—they’re easier to manage, often more comfortable to wear for hours, and can look absolutely stunning with the right approach. The key is finding a hairstyle that complements your face shape, works with your hair texture, and actually feels like you, not like you’re wearing someone else’s idea of what you should look like.
The challenge many short-haired bridesmaids face is finding styles that feel formal enough for a wedding while still being practical and wearable. You need something that photographs beautifully, holds up through ceremony and reception, and doesn’t require constant adjustments while you’re trying to enjoy the day. The good news? There are way more options than you might think, and most of them take less time to create than long hair styles do.
What makes a bridesmaid hairstyle work, regardless of hair length, is intention. Every element—whether it’s texture, volume, direction, or embellishment—should serve a purpose. For short hair especially, this means being strategic about where you add fullness, how you incorporate romantic touches, and which styling techniques will make your hair look polished without feeling overdone. The styles below run the gamut from sleek and sophisticated to textured and playful, which means there’s genuinely something here for every bride’s vision and every bridesmaid’s comfort level.
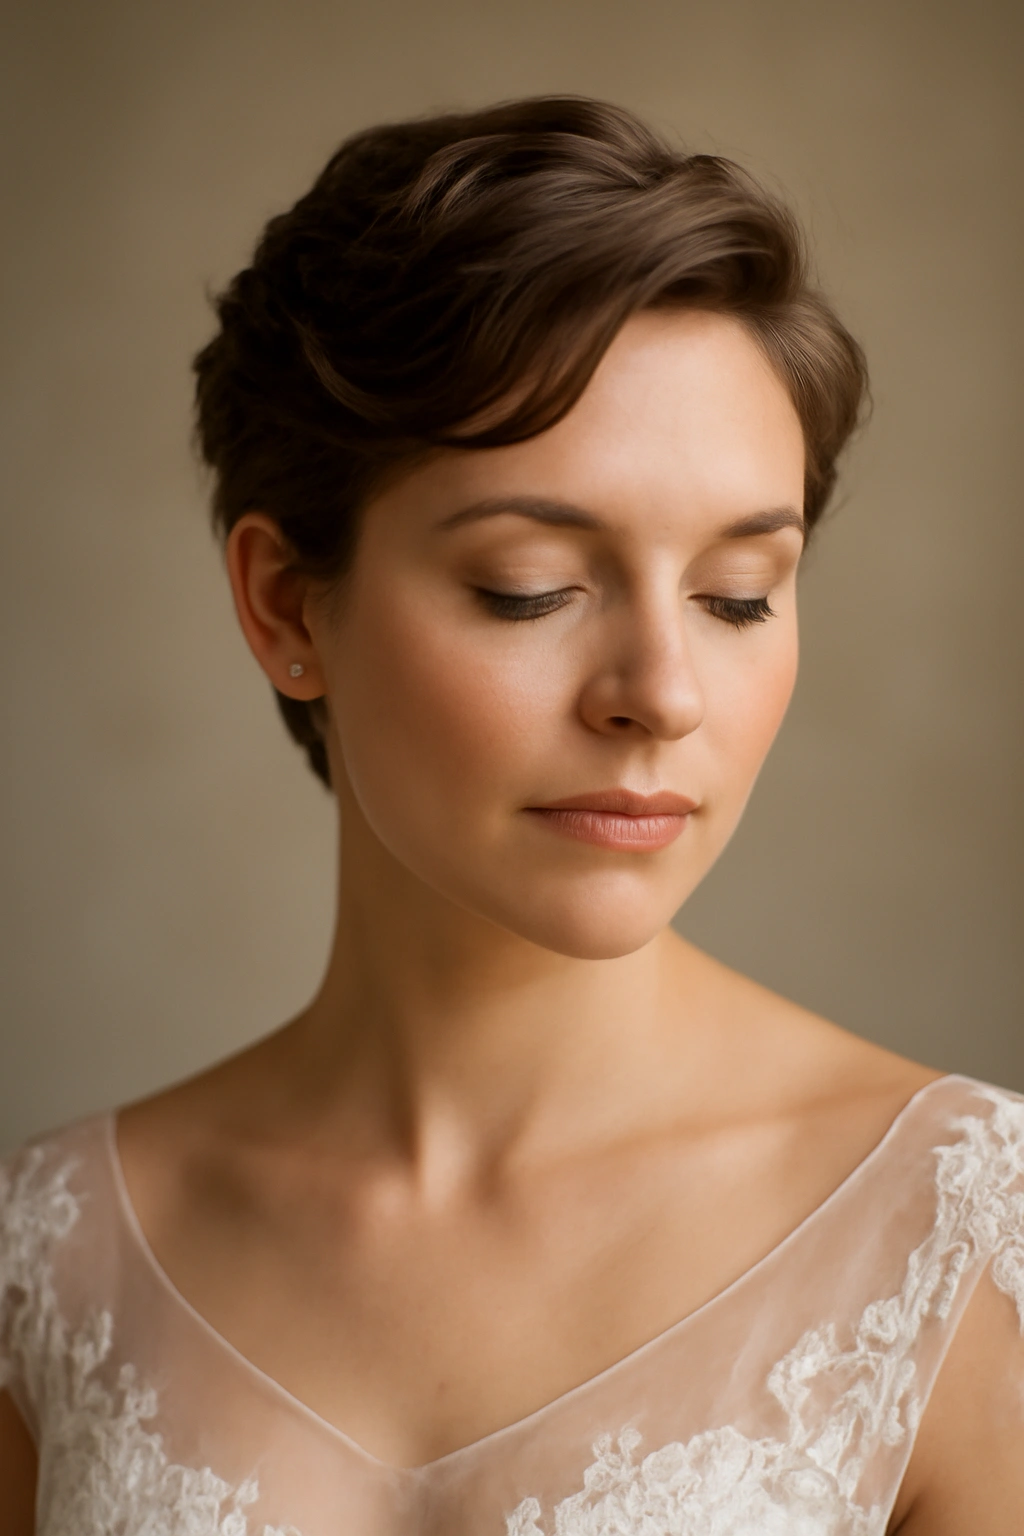
1. The Textured Pixie Wave
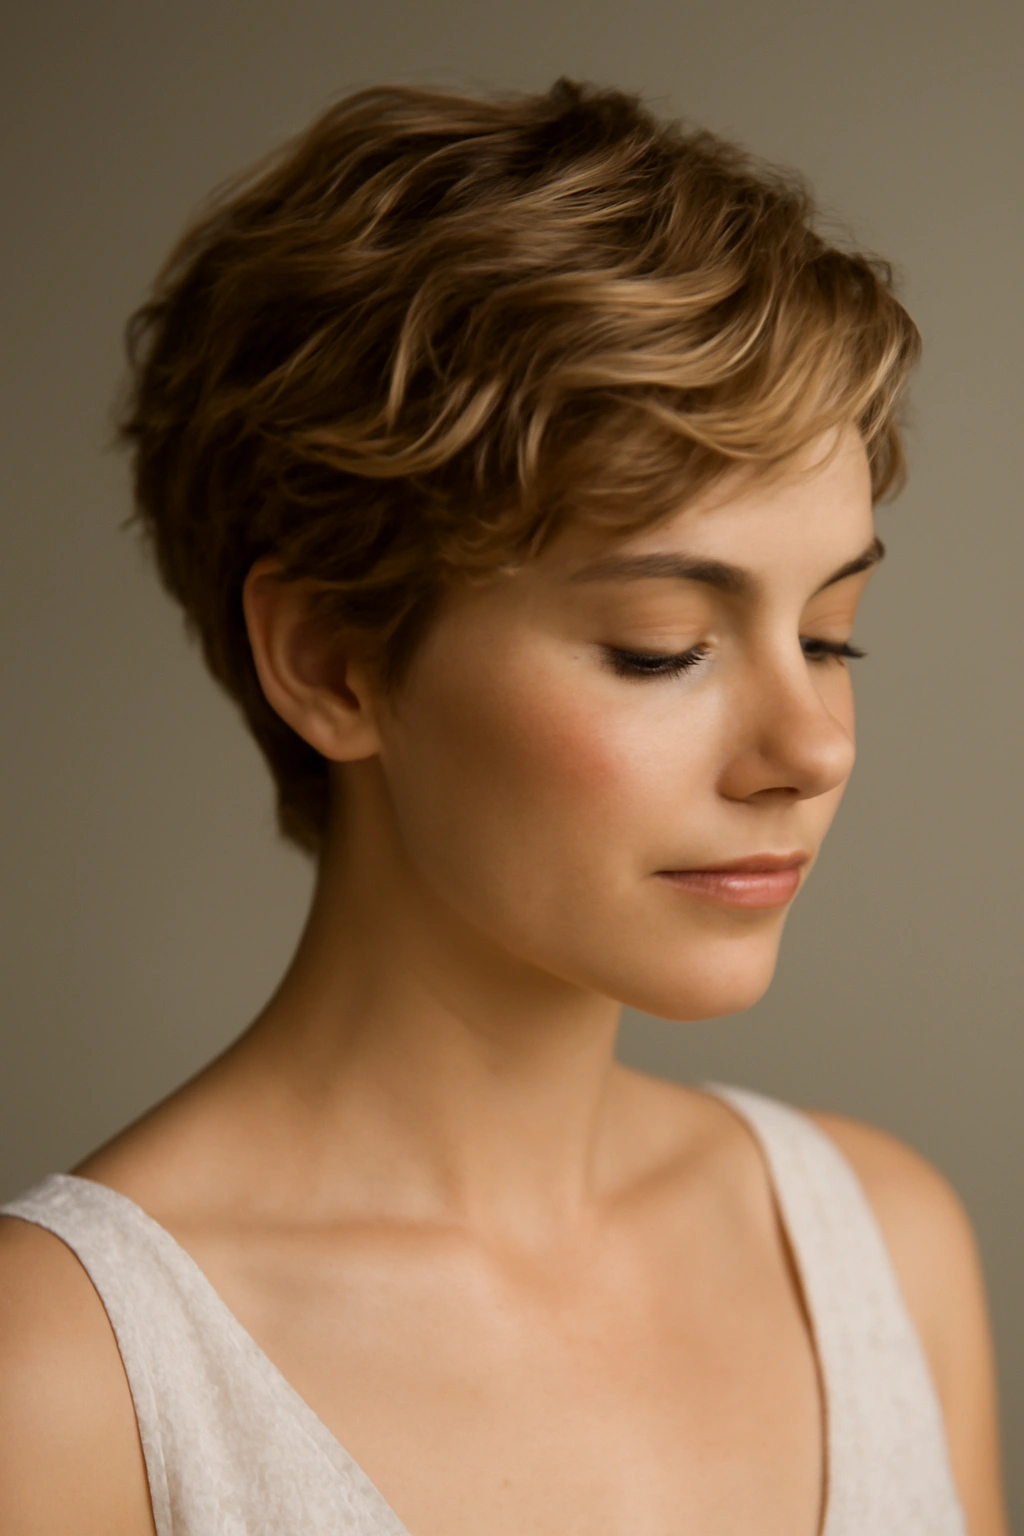
A textured pixie wave transforms a short cut into something undeniably bridal. This style works by creating intentional waves and texture throughout the entire pixie or short crop, then directing those waves back and to the side. The result is romantic and modern at the same time—you still have your signature short silhouette, but it reads as special and wedding-appropriate because of the deliberate styling and direction.
Why This Look Works for Bridesmaid Duties
Textured pixie waves sit beautifully in photos because they catch light, create dimension, and give you visible styling without looking stiff or overly done. The waves don’t need to be perfectly uniform; in fact, the more organic they look, the better. This style holds through standing, sitting, and dancing, and it works with updos or accessories if the bride wants to coordinate the look across the whole party.
How to Create Textured Pixie Waves
Start with damp hair and apply a texturizing spray or sea salt spray throughout, scrunching as you go. Use a 1-inch curling iron or wand to create loose waves in sections, working from the back and sides toward the front. Don’t aim for perfect curls—messy waves are the goal here. Once you’ve waved the entire head, run your fingers through to break up the waves and create that soft, textured finish. Lock everything with a medium-hold hairspray that won’t make your hair feel crunchy.
Key Styling Elements
- Use a texturizing product before heat styling for better wave hold
- Curl away from the face on the front sections for a flattering frame
- Leave some shorter pieces loose around the face for softness
- Consider adding a delicate bobby pin or small clip to anchor one side back if desired
- Finish with a flexible hairspray that moves with you
Pro tip: If your pixie has grown out slightly, you’ll actually have an easier time creating waves. The slightly longer length gives you more to work with and automatically reads as more romantic.
2. The Sleek Side-Swept Bob

A side-swept bob is the bridesmaid hairstyle that feels effortlessly chic. You’re starting with a cut that already has a directional bias, then amplifying that by sweeping the longer side dramatically across and pinning it subtly at the back. This style works on almost every face shape because the swept direction can be customized to your features—you can bring it lower or higher depending on what’s most flattering.
Why This Look Works for Bridesmaid Duties
Side-swept bobs are inherently sophisticated and photo-friendly. The asymmetry is interesting without being distracting, and the swept direction creates a slimming effect on the face while the pinned-back section opens up your features. This is the kind of style that looks polished in candid shots and absolutely stunning in posed photos. It’s also extremely stable—once you’ve pinned that swept section, it stays put all day.
How to Create a Sleek Side-Swept Bob
If your bob is naturally blunt, start by blow-drying with a round brush on the longer side to create a subtle bend. Using a flat iron on the longer section (or your entire head if you prefer an ultra-sleek look), run the iron through the hair and direct it back and across as you go. This creates smooth, shiny, directed hair rather than waves. Take the swept section and twist it slightly at the back of your head, then secure it with bobby pins that match your hair color. Use a finishing spray to polish everything without adding frizz or stiffness.
Key Styling Elements
- Keep the shorter front section soft and face-framing
- Make sure the swept section has enough length to actually reach and pin
- Use bobby pins in matching shades to hide the anchor point
- Consider a thin hairline or baby hairs if you have them—they add softness
- Keep the back and underside sleek for contrast with the top layer
Worth knowing: If you have a naturally wavy bob, you can absolutely create this style without straightening. The swept direction will be more textured and romantic, which is equally stunning and sometimes even more interesting than the ultra-sleek version.
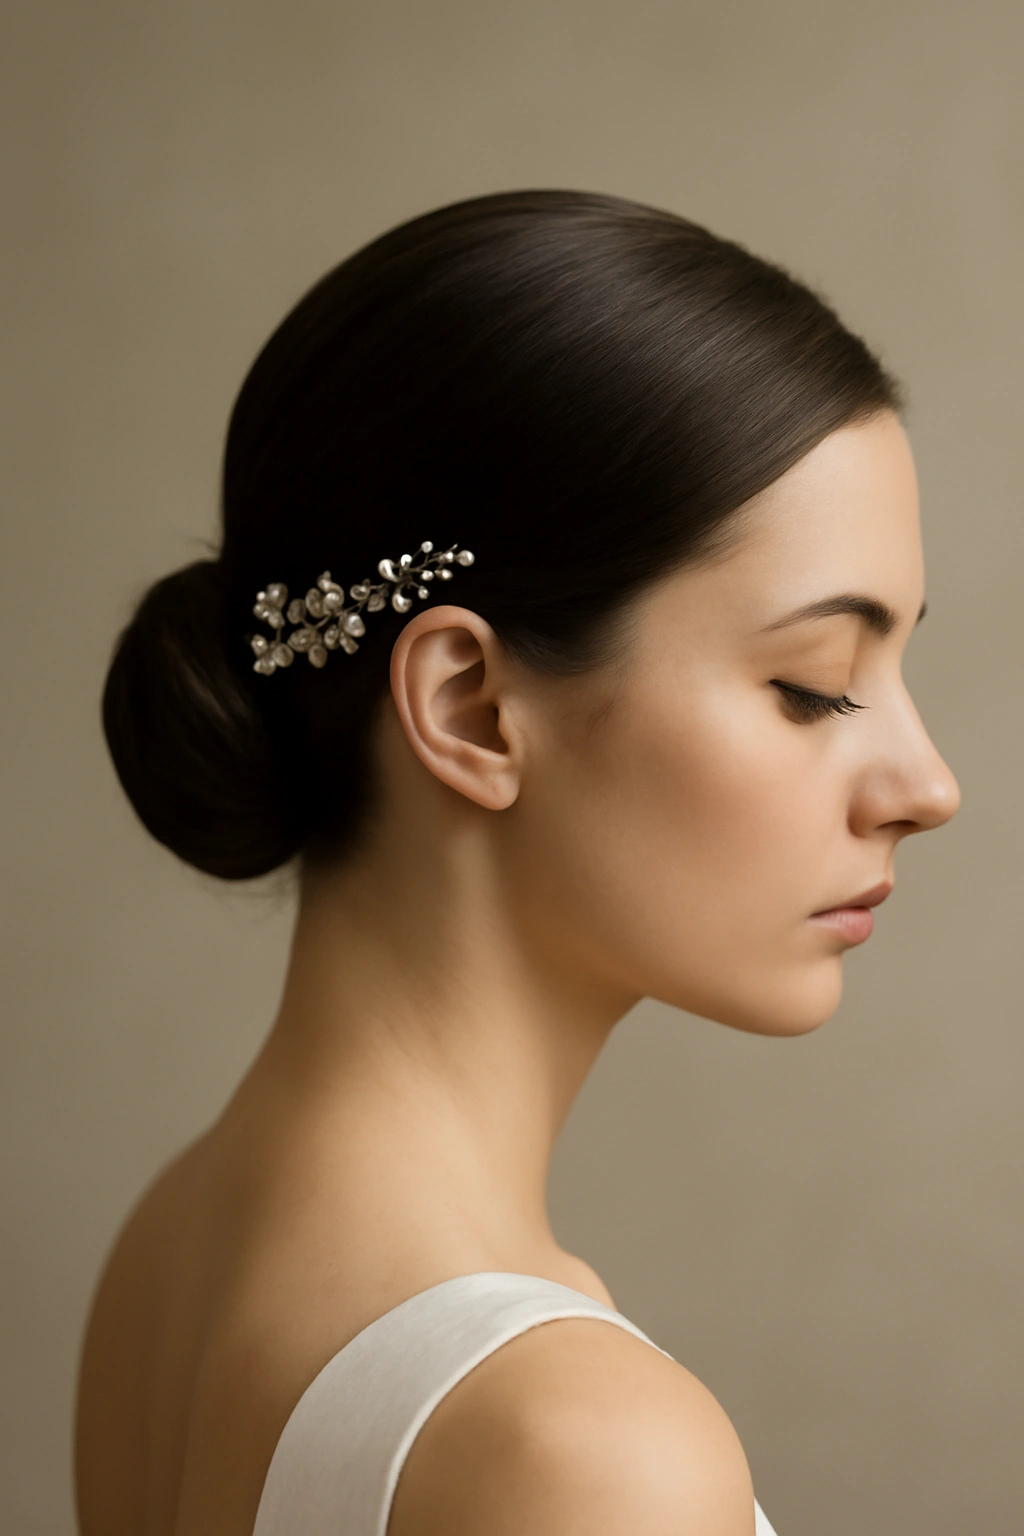
3. The Twisted Crown Updo
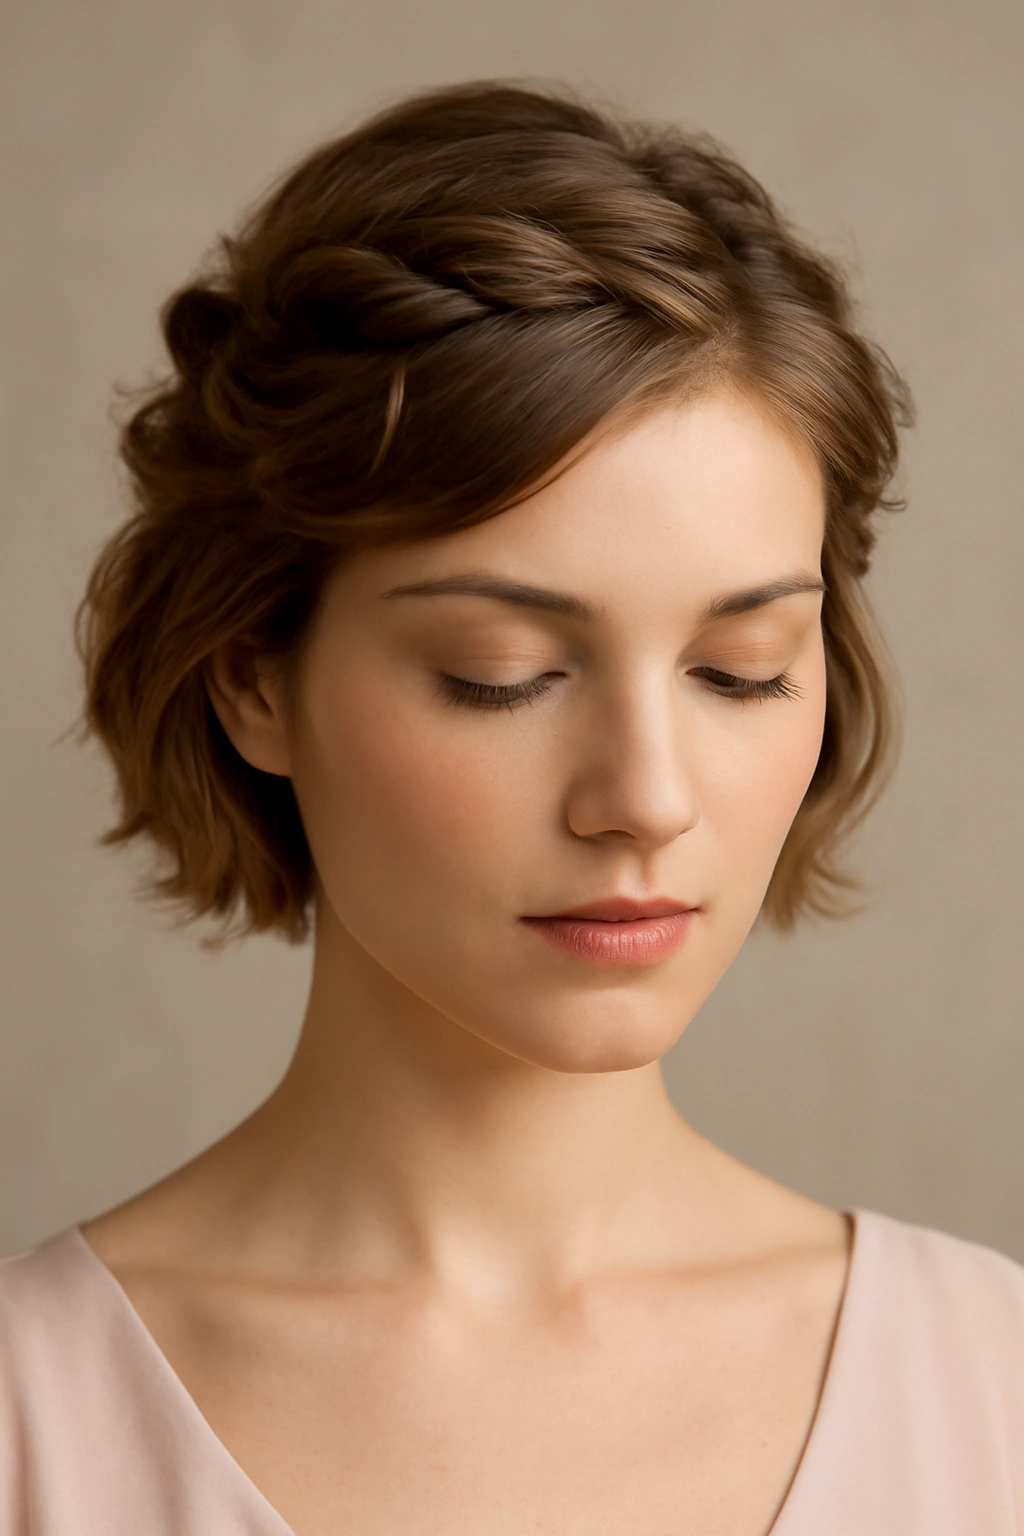
A twisted crown updo is about as formal and bridal as short hair can look. You’re essentially creating a partial updo by twisting sections of hair around the crown of your head, pinning as you go, and letting the rest fall or stay short. The beauty of this style is that it creates the visual and actual lift of an updo while preserving the elegance of a shorter cut.
Why This Look Works for Bridesmaid Duties
This style reads as distinctly bridal and special occasion. It shows you’ve put thought and effort into your appearance without looking over-the-top. The crown of twists creates a focal point at the top of your head, which actually makes your face and features appear more balanced. This style also photographs beautifully from all angles—the back of your head looks intentional and polished, and the front reads as soft and romantic.
How to Create a Twisted Crown Updo
Start with hair that has some texture or grip to it—blow-dry with a texturizing product or work with slightly damp hair. Take a section from one side of your head, twist it loosely, and pin it across the back of your crown, securing with bobby pins as you go. Repeat with a section from the other side, layering the twists over each other or creating a crossover effect. If your hair is long enough (or if you’re combining the twisted sections with the rest of your hair), you can create a fuller crown by twisting multiple sections. Finish with flexible hairspray and add a delicate hairpiece or flower if the bride wants coordinated accessories.
Key Styling Elements
- Use bobby pins strategically to hide the twist anchors
- Leave softer pieces around the face and nape for femininity
- Consider the balance of twisted crown height with your face shape
- Test the updo the day before to make sure you have enough length to work with
- Add a subtle hairpiece only if it coordinates with the bride’s vision
Insider note: This style works especially well if you’re a bridesmaid with a pixie or very short crop because the twisted crown instantly reads as “wedding formal” while celebrating your short hair rather than fighting it.
4. The Voluminous Half-Up Style
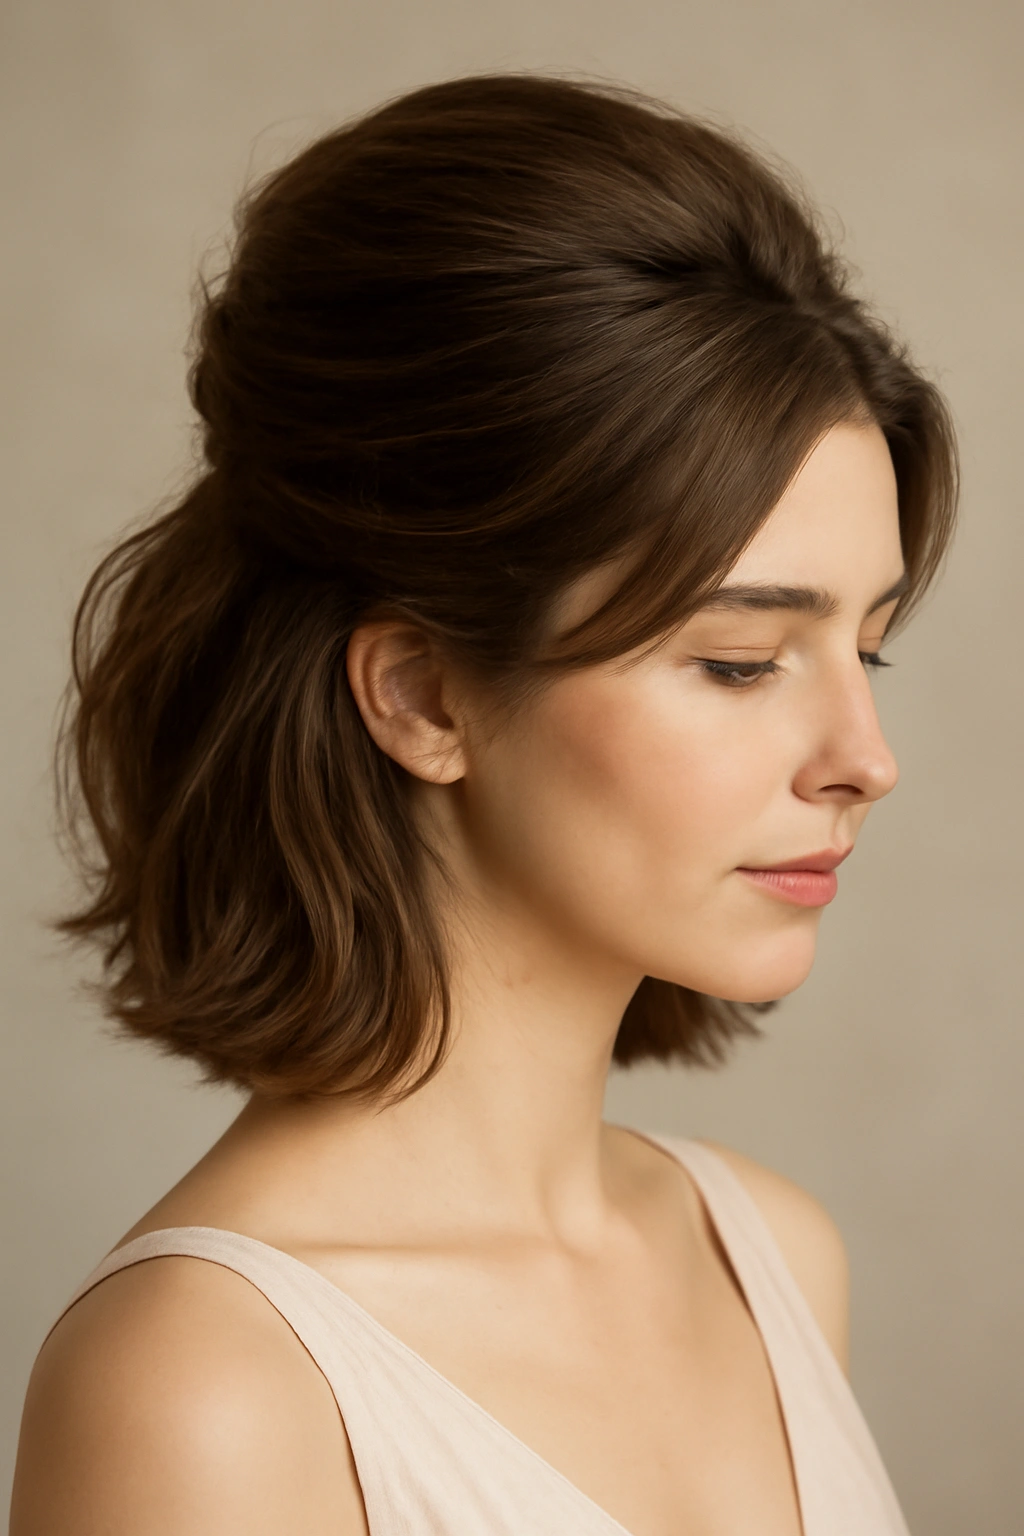
A half-up, half-down style is the bridesmaid sweet spot—it’s formal enough to feel special occasion but still relaxed and wearable. For short hair, the key is creating volume at the crown and roots, then securing the top section back without it looking like you’re just pulling your hair into a ponytail. This style bridges the gap between fully down and fully up, giving you the best of both worlds.
Why This Look Works for Bridesmaid Duties
Half-up styles feel friendly and approachable while still being wedding-appropriate. They show off your short cut while creating dimension and height, and they actually make short hair look fuller because the upswept section creates a visual lift. This style is incredibly stable—your hair stays secured where you want it—but it still feels soft and romantic rather than formal or severe.
How to Create Volume in a Half-Up Style
Begin by blow-drying your roots with a round brush or blow-dryer, flipping your head upside down to encourage natural volume. Use a volumizing spray or mousse at the roots to add grip and hold. Once you’ve got height at the crown, take a section from the top front of your head (roughly from ear to ear or slightly wider) and tease it gently at the roots for additional volume. Smooth the outer layer without flattening the teased section underneath. Pull this section back toward the crown and secure it with bobby pins, making sure the pins are hidden under the smoothed-over layer. Leave the rest of your hair to fall naturally or style it with waves for added texture.
Key Styling Elements
- Create height at the roots before pulling anything back
- Tease the crown section gently to avoid damaging hair
- Hide bobby pins completely under the smoothed layer
- Consider a delicate clip or hairpiece to secure and embellish the upswept section
- Keep the down section soft with subtle waves or texture
Pro tip: The exact placement of your half-up section can change the entire vibe of this style. Higher and tighter reads more formal; lower and looser reads more relaxed and playful. Choose your placement based on the wedding’s formality and your own comfort.
5. The Tousled Waves with Face-Framing Pieces
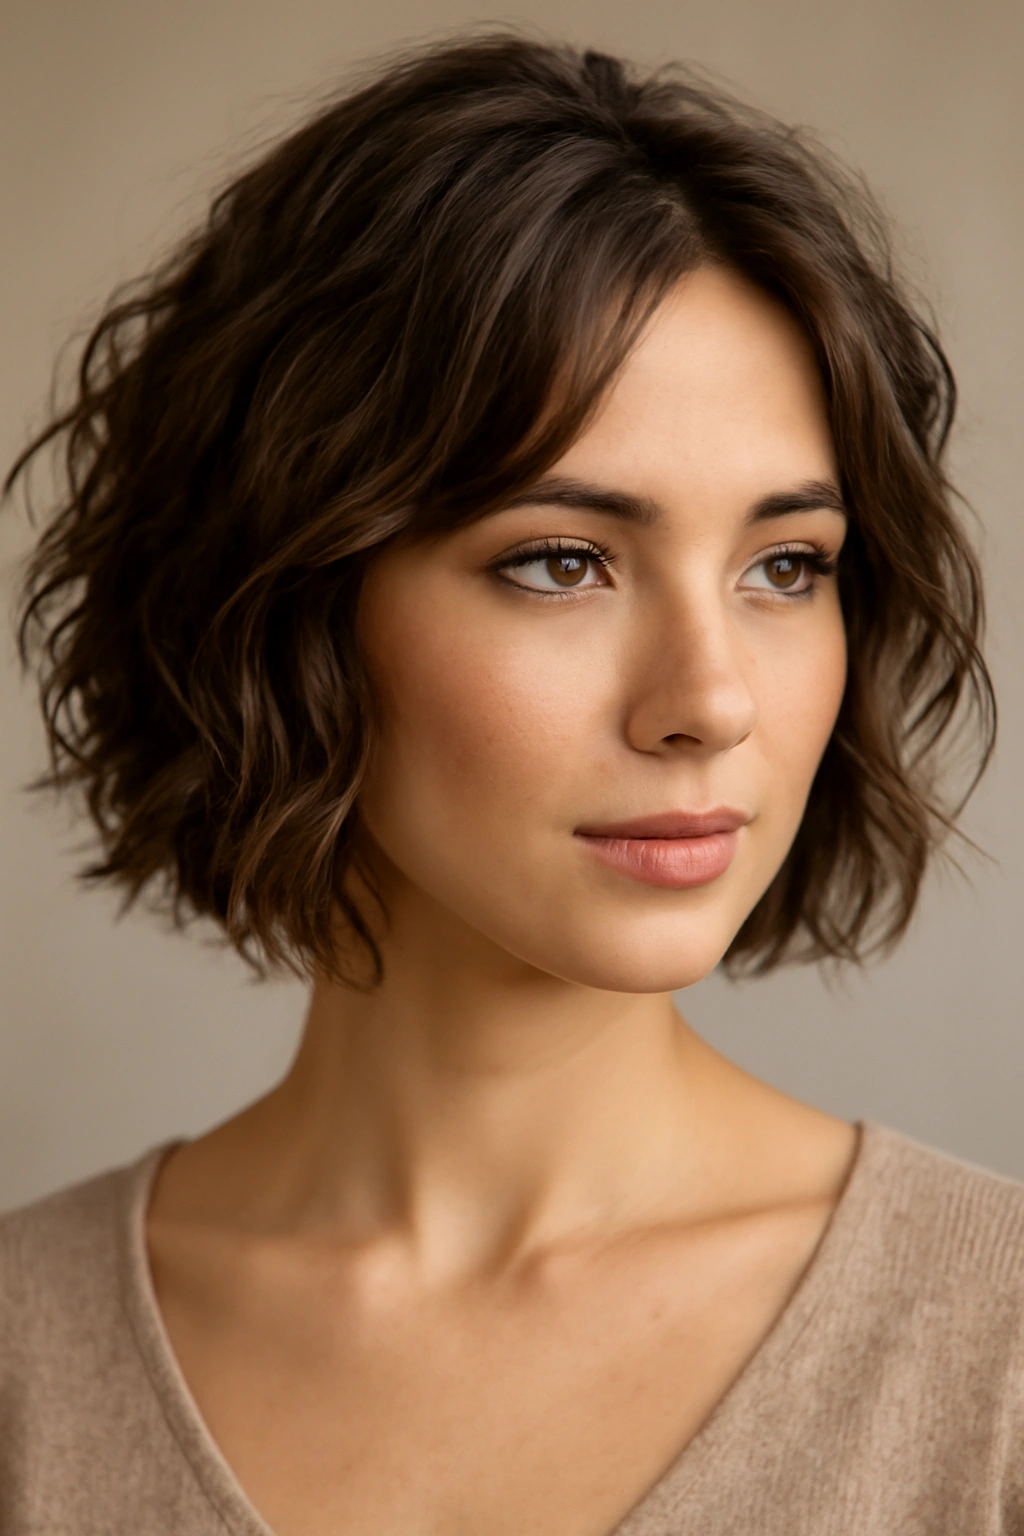
Tousled waves are the ultimate “I woke up like this” but actually put together look. This style celebrates texture and movement rather than fighting them. For short hair, it means creating loose, romantic waves throughout, then deliberately leaving some pieces loose around the face to create a soft frame. This is the style that says you’re comfortable, confident, and effortlessly beautiful.
Why This Look Works for Bridesmaid Duties
Tousled waves work with almost any hair type—fine hair, thick hair, curly, straight, everything. They’re inherently romantic and soft, they photograph beautifully because they catch light in interesting ways, and they actually get better as the day goes on. This style doesn’t require precision or perfection, which means if a wave falls or something shifts, it actually adds to the charm rather than ruining the look.
How to Create Tousled Waves
For short hair, the fastest way to get tousled waves is with a 1.25-inch curling iron or wand. Apply a lightweight texturizing spray to damp hair, then curl sections away from the face, aiming for loose waves rather than tight curls. Work in small sections and wrap the hair around the barrel of the iron for 1-2 seconds, then release. Once you’ve curled the entire head, run your fingers through your hair to break up and separate the waves, scrunching gently as you go. The goal is textured, lived-in waves, not a head of uniform ringlets. Finish with a flexible hairspray that won’t make your hair feel crunchy or heavy.
Key Styling Elements
- Use a texturizing product before heat styling for better wave hold
- Curl away from the face for a flattering frame
- Leave at least some pieces looser or unstyled for that effortless vibe
- Break up waves with your fingers to create separation and texture
- Consider leaving a few face-framing pieces completely unstyled for softness
Worth knowing: If you have naturally wavy or curly hair, you can skip the curling iron and just amplify your natural texture with a texturizing spray and some finger-scrunching. Your natural curl pattern is already doing most of the work; you’re just defining and enhancing it.
6. The Sleek Pulled-Back Style with Accessories
A sleek pulled-back style is incredibly versatile and works with everything from boho to modern weddings. The idea is to create a polished, smooth appearance by sweeping your hair back and securing it, then letting a delicate accessory do the decorative work. This style celebrates the shape of your head and face while keeping hair off your neck and shoulders.
Why This Look Works for Bridesmaid Duties
This style is chic, sophisticated, and surprisingly flattering. Pulling your hair back opens up your face and neck, which is incredibly photogenic and makes you look more defined. The sleek quality reads as modern and intentional, while the accessory adds the romantic or decorative touch that makes it feel wedding-appropriate. This style is also extremely practical—nothing falls in your face, and your hair stays exactly where you put it.
How to Create a Sleek Pulled-Back Style
Start with your hair either damp or blow-dried, depending on your hair type and texture. Using a flat iron on low-to-medium heat, smooth your entire head, working section by section to create a sleek, polished surface. Once smoothed, use a comb to sweep the hair back toward the crown. Depending on how much hair you have and how short your cut is, you can either: secure it with bobby pins that match your hair color, use a sleek clip or barrette, or simply let the direction and smoothness hold the hair in place naturally. Add a delicate hair accessory—a comb, pins, or a thin headband—to define the pulled-back area and add a decorative element.
Key Styling Elements
- Smooth hair completely with a flat iron for maximum polish
- Sweep hair back in a direction that’s flattering to your face shape
- Use accessories to add interest and coordinate with the bride’s vision
- Keep the pulled-back section neat and intentional
- Consider whether you want pieces loose or everything completely secured
Pro tip: If you have baby hairs or a shorter, wispy hairline, leaving a few pieces loose around your face actually softens this look and makes it feel less severe. The contrast between the sleek back and the soft front pieces is really beautiful.
7. The Braided Detail Accent
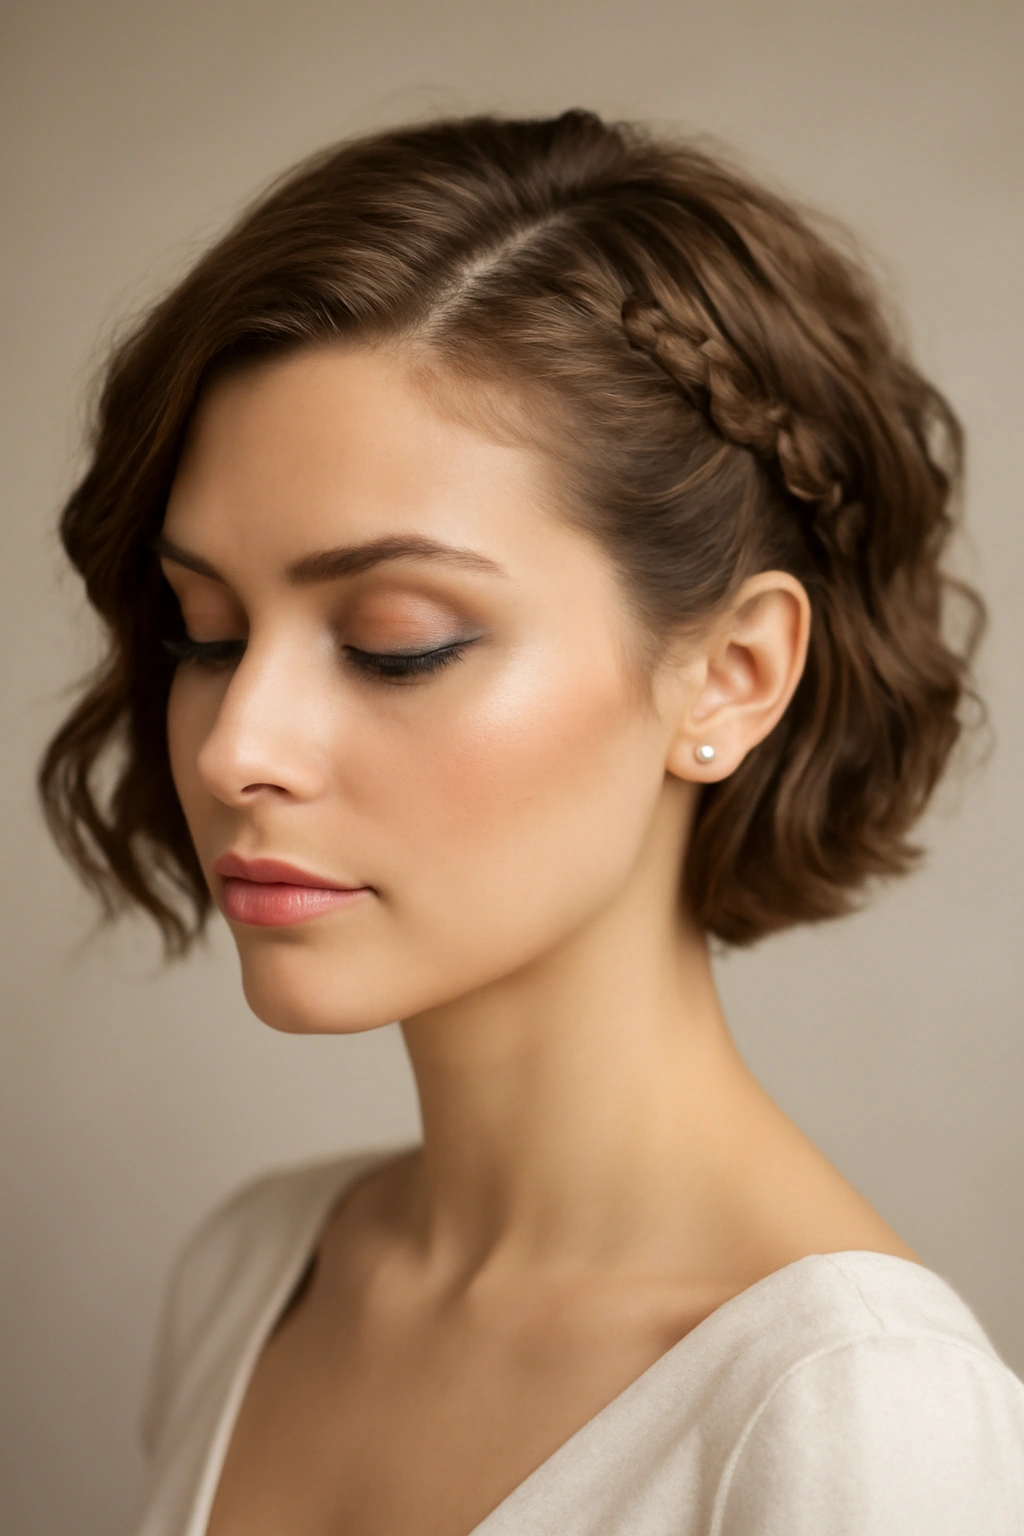
A braid woven through short hair creates instant visual interest and instantly reads as special occasion. Even a thin braid can transform a simple style into something elegant and intentional. For short hair, the braid doesn’t need to be elaborate—sometimes the most stunning bridal styles are the simplest ones with one thoughtful detail.
Why This Look Works for Bridesmaid Duties
Braids are inherently bridal and romantic, and they add texture and movement to a style that might otherwise feel too simple. A braid also serves as an anchor point for your hair—it keeps things polished and intentional without looking fussy. Even people who say they don’t know how to braid can master a simple three-strand braid, which is honestly all you need for a stunning effect.
How to Create a Braided Detail
Start with slightly textured or wavy hair to give the braid more grip and visual interest. You can create a braid in several ways: start at one side near the temple, braid toward the back of your head, and secure with bobby pins; or braid a thin section from the front near your hairline back toward the crown; or create a side-swept braid that anchors longer pieces on one side. The braid doesn’t need to be tight—a looser, slightly messier braid actually looks more romantic and wedding-appropriate than a perfectly tight one. Once you’ve secured the braid, you can add the rest of your style around it: waves, texture, or keep it simple with a sleek finish.
Key Styling Elements
- Use slightly textured hair to give the braid grip and visual interest
- Choose a braid placement that flatters your face shape
- Keep the braid slightly loose for a romantic, not severe, appearance
- Secure the braid end with bobby pins that match your hair color
- Coordinate braid placement with any flowers or accessories the bride wants
Insider note: A Dutch braid (braided underneath instead of over) can look more elegant and refined than a traditional three-strand braid, especially if you have fine or shorter hair. The underside of the braid shows dimension and texture in a really beautiful way.
8. The Textured Crown with Soft Face Frame
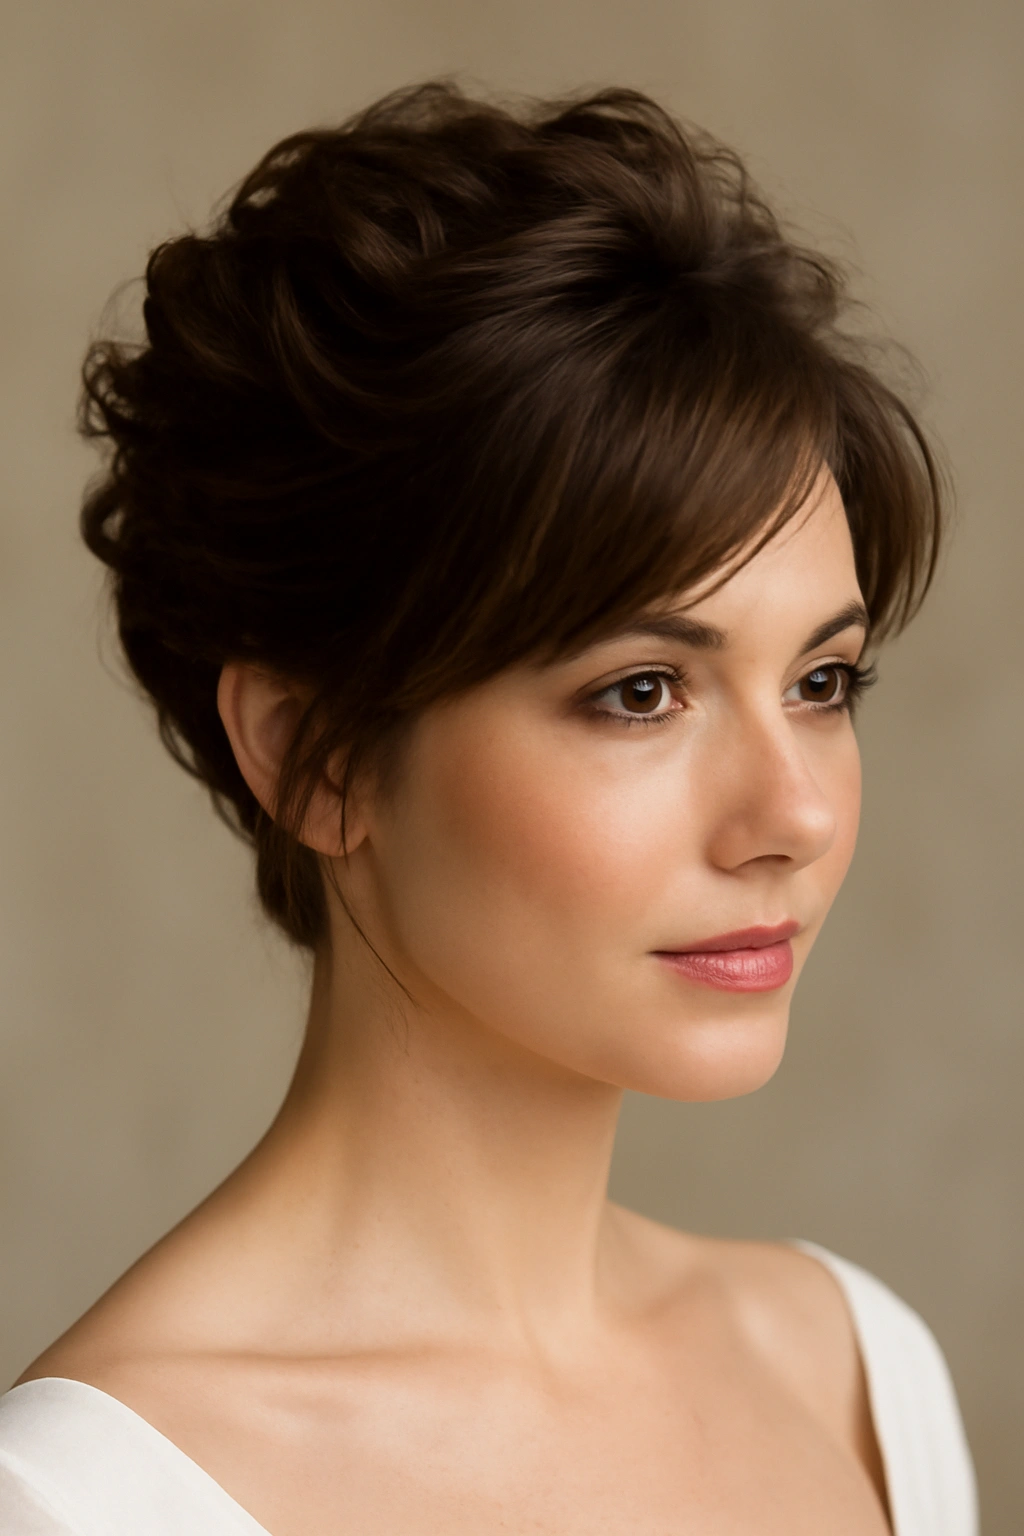
This style is specifically designed to create softness and femininity around the face while adding height and structure at the crown. You’re essentially teasing the crown area to create volume, then styling the shorter pieces around your face to fall softly. This combination creates a balanced, flattering look that works beautifully in photos and feels comfortable all day.
Why This Look Works for Bridesmaid Duties
Crown texture reads as intentional and bridal without looking overdone. The volume at the top of your head balances your face, makes your features appear more defined, and creates a visual lift that’s incredibly flattering. The soft face-framing pieces add romance and approachability. This style works especially well if you have a shorter crop or pixie because it creates an illusion of more length and fullness.
How to Create Textured Crown Volume
Begin by blow-drying your hair with a volumizing product at the roots. Use a round brush to lift hair at the crown while blow-drying. Once your roots have natural volume, use a teasing brush or fine-tooth comb to gently tease the hair at your crown, working in small sections. Start at the roots and work toward the ends, creating a cushion of texture that will hold volume. Smooth the outer layer of your crown section gently without flattening the teased underbody. For the face-framing pieces, either leave them unstyled or style them with a soft wave that curves away from your face. Finish everything with a flexible hairspray.
Key Styling Elements
- Tease gently to avoid damaging hair and creating visible lines
- Smooth the outer layer over the teased section for a polished appearance
- Let face-framing pieces be noticeably softer than the crown texture
- Consider curling face-framing pieces slightly toward the face for a flattering effect
- Use bobby pins at the crown to secure teased sections if needed
Worth knowing: This style works beautifully if you’re self-conscious about a larger forehead—the crown texture draws the eye upward, while the soft face-framing pieces create a flattering frame that balances your proportions.
9. The Sleek Topknot with Delicate Wisps

A sleek topknot might sound like a casual style, but when executed with intention and polish, it’s absolutely bridal. The key is making the knot intentional and decorative rather than just functional. You’re creating something that reads as styled and special occasion, with delicate wisps around the face adding softness and femininity.
Why This Look Works for Bridesmaid Duties
A topknot is instantly recognizable as intentional styling—it’s not just “your hair up,” it’s a defined, crafted shape. When paired with delicate wisps and subtle accessories, it reads as modern, elegant, and wedding-appropriate. This style is incredibly stable (nothing will fall down), and it actually shows off your face and features beautifully. It works especially well if you want an updo style but don’t have the length for traditional updo options.
How to Create a Sleek Topknot with Wisps
Start by blow-drying your hair smooth with a round brush. Using a comb, sweep your hair directly upward toward the crown of your head and secure it in a high ponytail with an elastic that matches your hair color. The ponytail should sit at the very crown of your head, not toward the back. Twist the ponytail section loosely and wrap it around the base of the ponytail to create a bun shape. Secure with bobby pins pushed directly into the center of the bun, keeping them hidden. Leave at least a few wisps loose around your face—pull out one or two smaller pieces from the sides and allow them to fall softly. These wisps soften the structure of the knot and add romance. Smooth any flyaways with a lightweight hairspray.
Key Styling Elements
- Position the topknot at the crown rather than the back for a modern look
- Leave intentional wisps around the face for softness
- Keep the knot itself neat and polished
- Use bobby pins that match your hair color
- Consider adding a delicate hairpiece or pins to embellish the knot
Pro tip: The size of your topknot should balance your face and head. If you have a smaller frame or delicate features, a tighter, smaller knot is more flattering. If you have a larger frame, a slightly looser, fuller knot balances better.
10. The Textured Sweep-Back with Volume
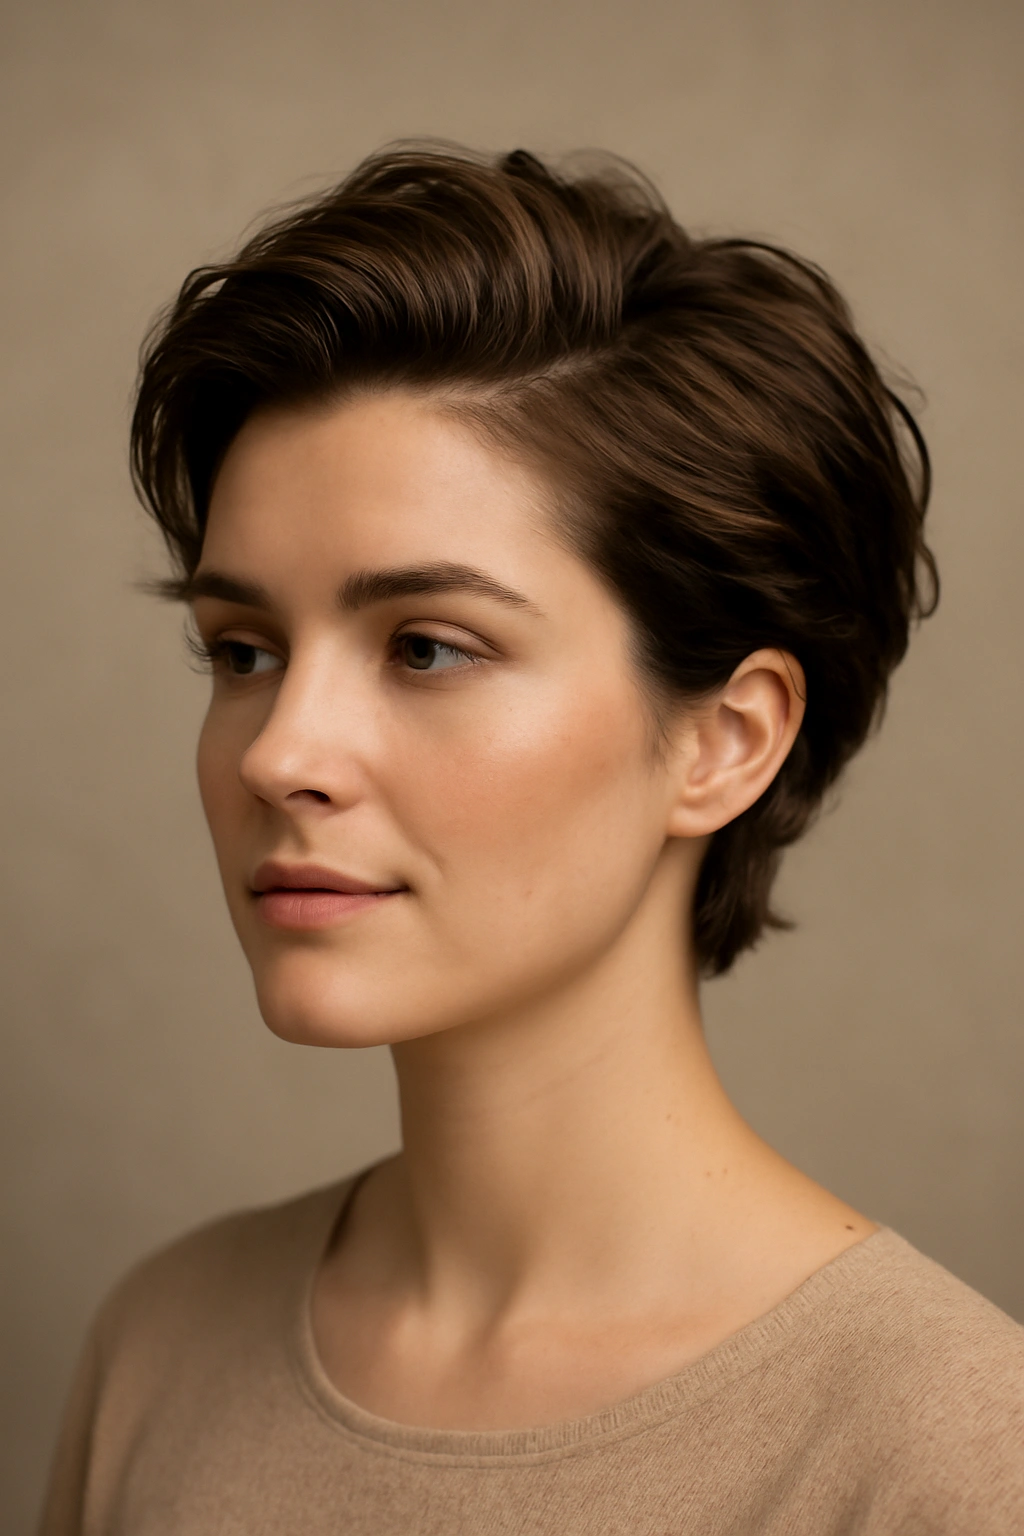
This final style combines the best elements of several techniques: textured waves throughout, volume at the crown, and a subtle sweep-back element that keeps everything polished and intentional. It’s the kind of style that works for nearly any wedding aesthetic and flatters most face shapes and hair types.
Why This Look Works for Bridesmaid Duties
This style is the epitome of “beautifully bridal without being too much.” The texture adds romance and visual interest, the volume at the crown is flattering, and the sweep-back element adds sophistication. This style photographs incredibly well, holds up through a full day of wedding events, and makes short hair look fuller and more luxurious. It’s also customizable—you can adjust the wave intensity, the volume level, or the sweep direction based on your preferences and hair type.
How to Create Textured Sweeps with Volume
Start by blow-drying with a volumizing product at the roots, using a round brush to create lift at the crown. Once you have volume, apply a texturizing spray to your entire head. Using a 1.25-inch curling iron, create loose waves throughout by curling sections away from your face and working all over your head. Once all sections are waved, run your fingers through to separate and texturize the waves further. Take a subtle section from one or both sides and gently sweep it back toward the crown, securing with bobby pins that match your hair. The sweep-back should feel soft and intentional, not severe or overly tidy. Finish with a flexible hairspray that holds without stiffening your hair.
Key Styling Elements
- Create volume at roots before wave-setting for maximum lift
- Use texturizing spray before and possibly after styling for hold
- Curl away from the face for a flattering frame
- Keep the sweep-back subtle and soft, not pulled tight
- Let waves separate and breathe rather than staying in uniform ringlets
Worth knowing: This style is forgiving—if a wave falls or your sweep-back shifts throughout the day, you can gently re-sweep and re-pin as needed. The textured, romantic nature of the style means small adjustments won’t disrupt the overall effect.
Final Thoughts
Short hair as a bridesmaid means you have the freedom to choose a style based on what actually makes you feel beautiful and confident, not based on length limitations. Each of the styles above works because it respects your short cut while adding the intentional styling, polish, and touches of romance that make a hairstyle feel wedding-appropriate. The key is selecting a style that aligns with the bride’s vision, complements your face shape, and honestly feels like you wearing your hair in a special way—not you wearing someone else’s idea of what a bridesmaid should look like.
The best bridesmaid hairstyles are the ones that make you forget about your hair and let you focus on celebrating. Whether you’re choosing sleek sophistication, textured romance, or anything in between, the most important element is that you feel like yourself, just a more polished, more bridal version. Your short hair is genuinely an advantage in the bridesmaid party—these styles are faster to create, more comfortable to wear, and they often photograph more clearly than longer styles because they don’t get lost or blended into fabric or backgrounds. Own your short hair, commit to your style choice, and show up to that wedding looking and feeling absolutely beautiful.