Wedding season brings the perfect opportunity to showcase hair that’s not just beautiful, but authentically tailored to celebrate Black beauty and texture. Attending a wedding as a guest means you want to feel confident, elegant, and genuinely like yourself—not squeezed into a one-size-fits-all mold. The styles that work best for Black hair at weddings are the ones that honor your natural texture, allow for movement and comfort throughout a full day of celebration, and photograph beautifully in any lighting. Whether you prefer protective styles that keep hair secure while you dance until midnight, or flowing looks that frame your face with elegance, there’s a perfect wedding guest hairstyle waiting for you.
The key to finding your ideal wedding hair is understanding what actually works with your hair’s natural texture and density, rather than chasing trends that don’t serve you. A well-executed style holds up through hugs, humidity, and hours of movement—it’s not something you’ll be adjusting every five minutes. The styles ahead range from intricate braided designs to smooth, sculpted looks and voluminous curls, each offering different levels of time commitment and styling expertise. Many of these can be created at home if you’re confident in your styling skills, while others benefit from professional hands, especially if you’re unfamiliar with the technique.
What makes these hairstyles truly stunning for Black women is that they work with your hair’s natural characteristics instead of fighting against them. Texture adds volume, movement, and visual interest in ways that create depth and sophistication. These aren’t styles that require your hair to be chemically altered or blown out into something unrecognizable—they’re styles that let your hair be exactly what it is while looking absolutely breathtaking.
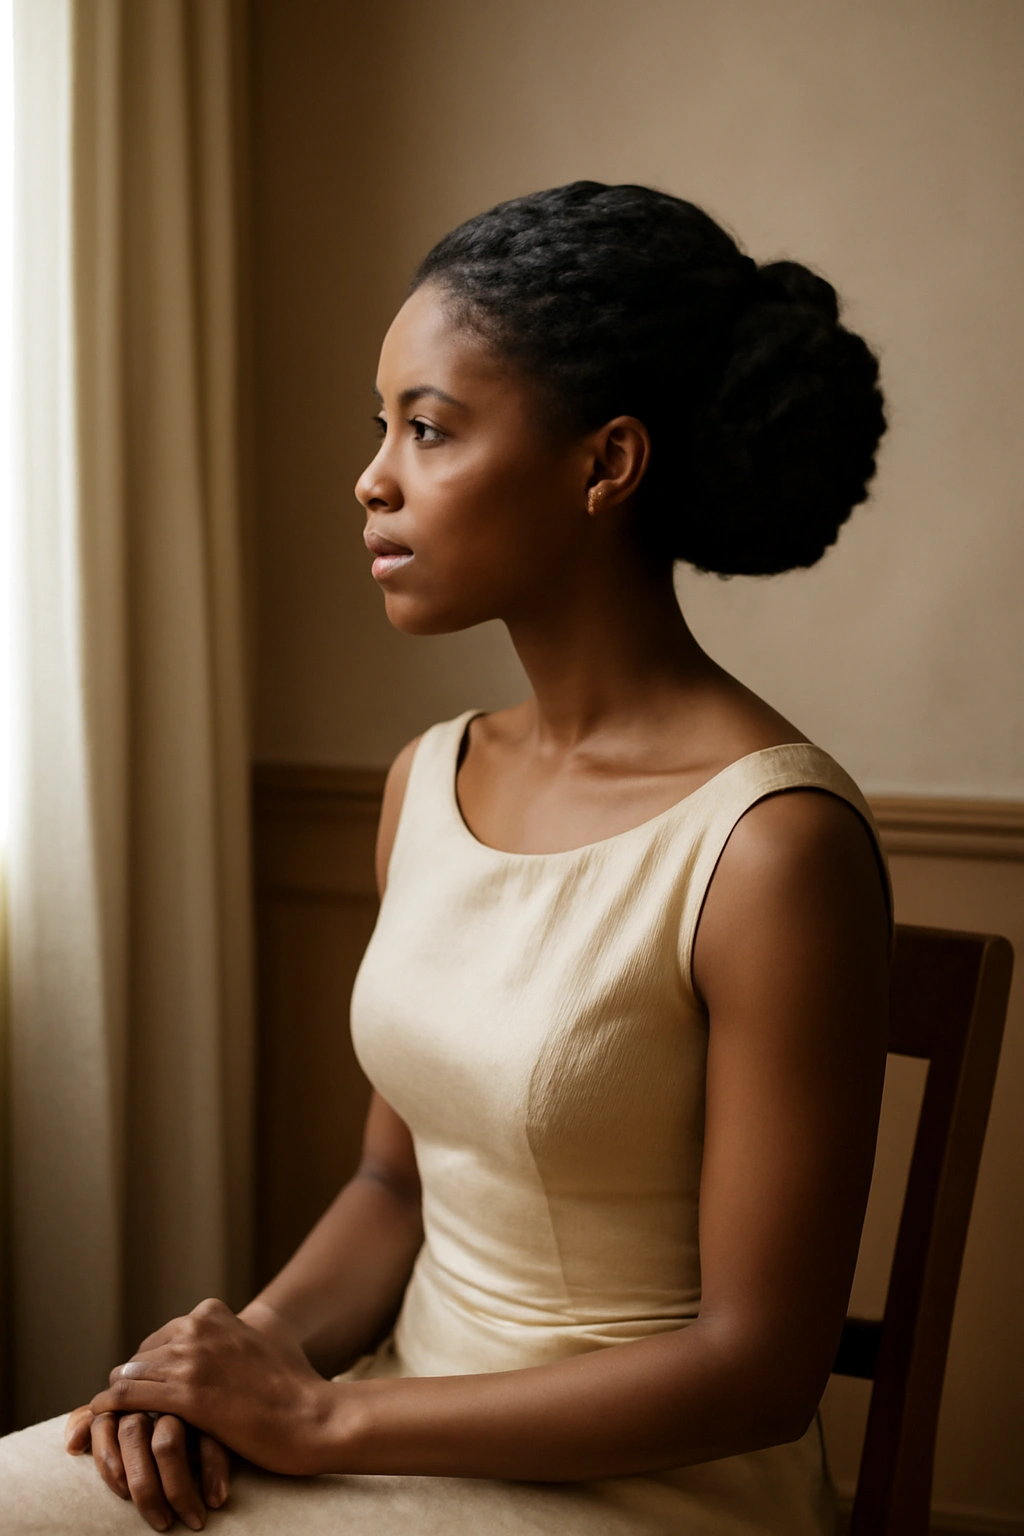
1. Classic Twisted Bun
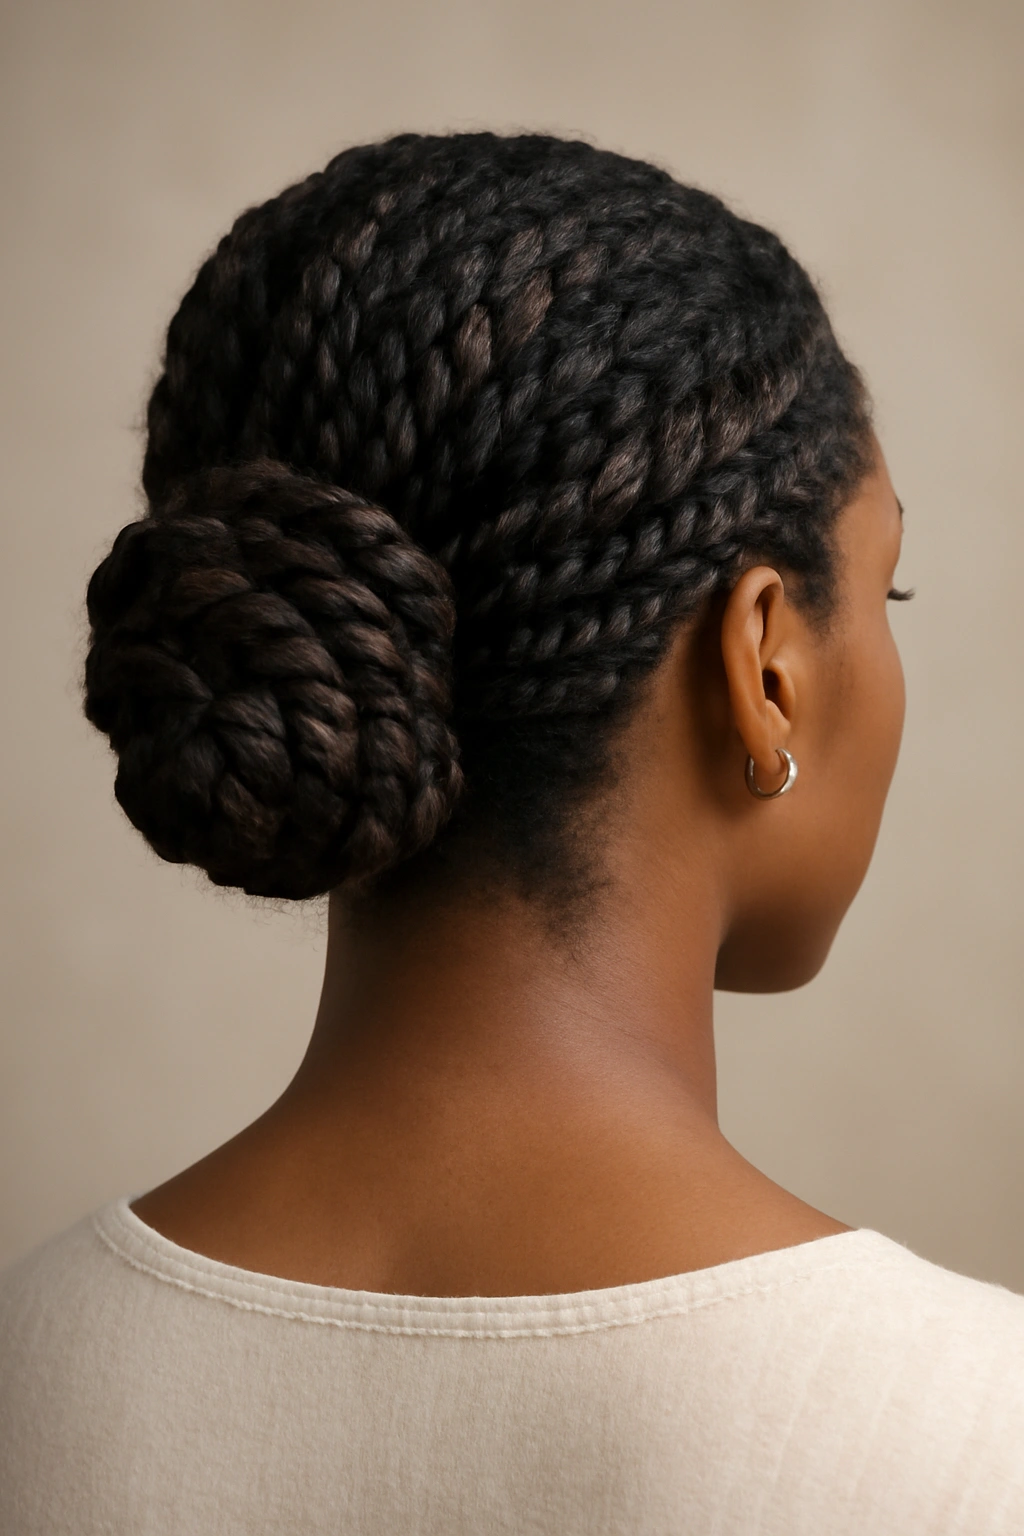
The twisted bun is the sophisticated older sibling of the casual topknot, and it’s absolutely wedding-ready when done with intention. Two-strand twists wrapped around a center point create an intricate-looking updo that reads as both polished and effortlessly chic. The beauty of this style is that it works with virtually any hair length past shoulder-length, and the defined texture of twists photographs beautifully from every angle—you’ll look stunning in every single guest photo.
Why This Style Works for Weddings
Twisted buns offer professional elegance with built-in texture interest. The twists create visual complexity and movement, even though the bun itself sits secure and still. Your face remains fully visible and framed, which is ideal for a celebratory day when you want people to see your full expression. The style works equally well with your natural curl pattern or with hair that’s been blow-dried for a smoother base—versatility is the strength here.
How to Create It at Home
Start with hair that’s been lightly moisturized and detangled. Create two thick sections at the crown, twist each one individually while moving backward, and wrap both twists around each other as they reach the back of your head. Secure the end with bobby pins hidden beneath the twists, then gently loosen the twist spirals slightly with your fingers to add dimension. A light holding spray keeps everything intact without creating stiffness or crunchiness. The whole process takes 15-20 minutes once you’ve practiced it once or twice.
Pro Tips for Longevity
Sleeping in a pineapple (gathering hair loosely on top of your head) the night before preserves the twists without creating new tangles. If your hair tends toward dryness, applying a leave-in conditioner before twisting prevents that tight, parched appearance and makes the twists glide more smoothly. Adding small accessories like delicate gold bobby pins or a decorative hair comb elevates the look from everyday to wedding-appropriate without overdoing it.
2. Sleek Ponytail with Embellishments
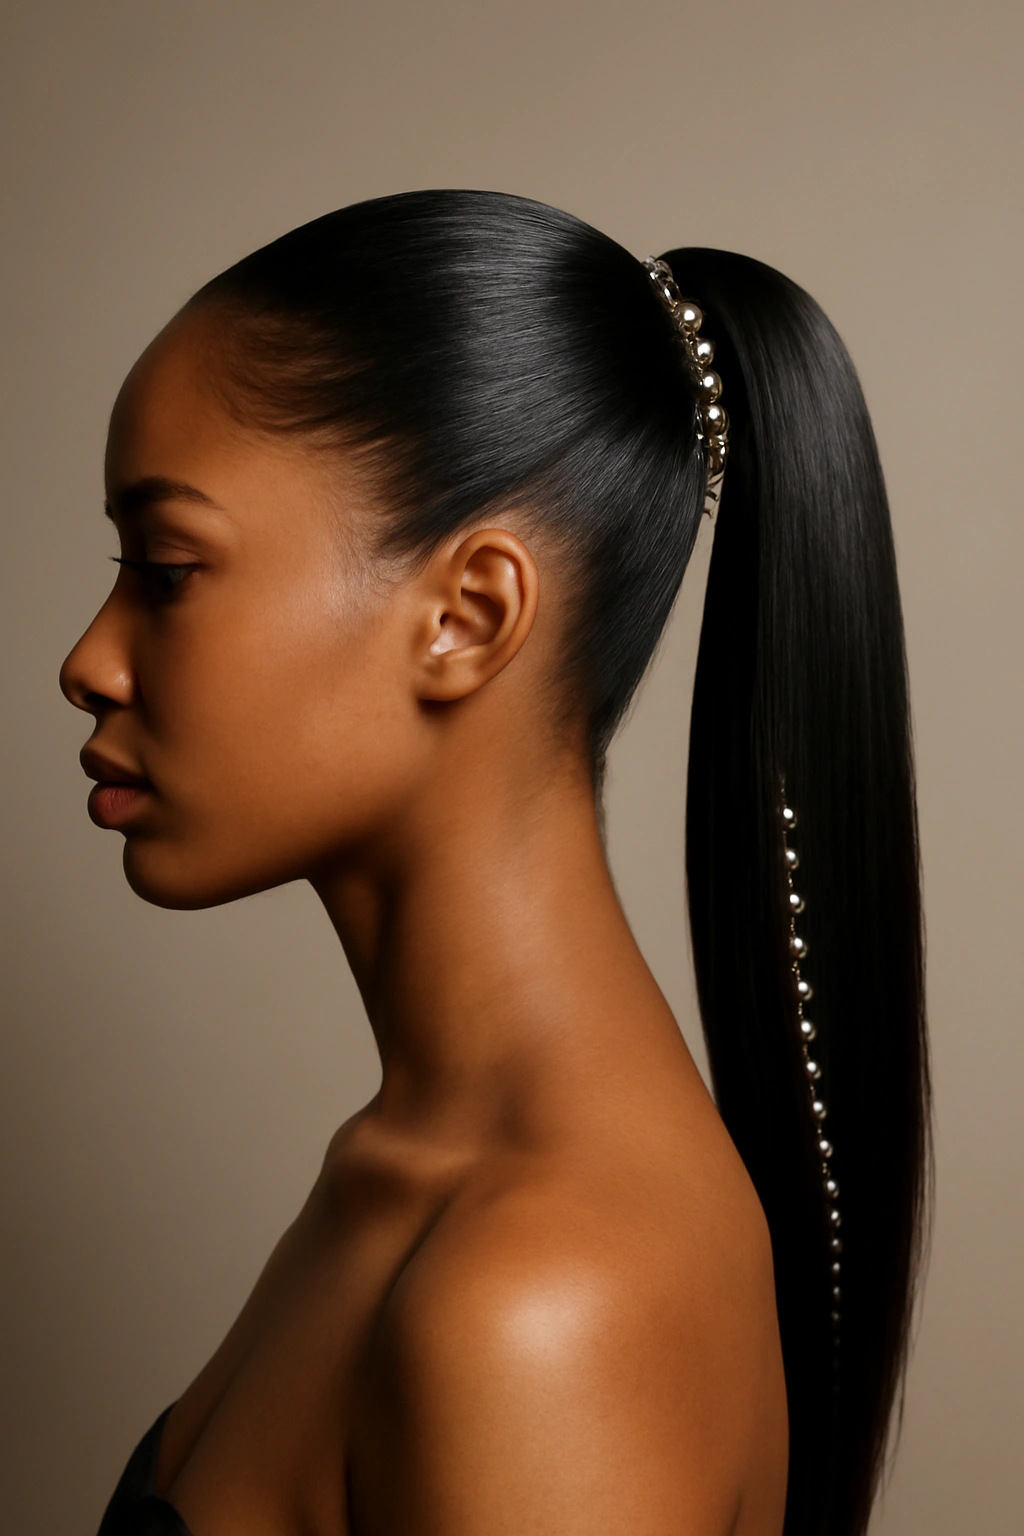
Don’t underestimate the power of a perfectly executed ponytail—when it’s smooth, centered, and paired with intentional embellishments, it becomes a statement piece rather than a casual style. This works brilliantly for Black hair because a slicked-down ponytail actually showcases your scalp and hairline with pride rather than hiding them. The contrast between the sleek base and voluminous ends creates visual interest and movement that reads as intentional and polished.
Why It’s Perfect for Wedding Guests
A sleek ponytail keeps hair completely off your face and neck, which is ideal if you’re dealing with heat, humidity, or a busy day of movement. It shows confidence in your appearance without any self-consciousness, and it photographs beautifully from behind—important when you’re in group shots at the ceremony. The style also pairs seamlessly with statement earrings or an ornate neckline, since nothing competes for attention.
Creating the Perfect Sleek Base
The difference between a casual ponytail and a wedding-worthy one is in the preparation and precision. Brush hair smooth with a fine-tooth comb or detangling brush, applying a smoothing cream or gel as you go. The goal isn’t rigid stiffness—it’s a smooth finish without flyaways. Gather hair at your desired height (high, mid, or low depending on face shape and personal preference) and secure with a sturdy elastic. The real magic happens when you take a small section of hair from the ponytail, wrap it around the elastic base to conceal it, and pin it underneath. This detail transforms the whole look from casual to intentional.
Embellishment Ideas That Elevate
A decorative hair cuff placed partway down the ponytail adds instant sophistication. Gold or silver mesh bands, pearl-studded clips, or delicate chainwork catches light and creates visual interest. You could also weave a thin metallic cord through the lower half of the ponytail, or add fresh flowers (baby’s breath, roses, or eucalyptus) tucked into the base for a romantic touch. The key is restraint—one or two well-chosen embellishments read as elegant, while too many feel costume-like.
3. Half-Up Crown Braid
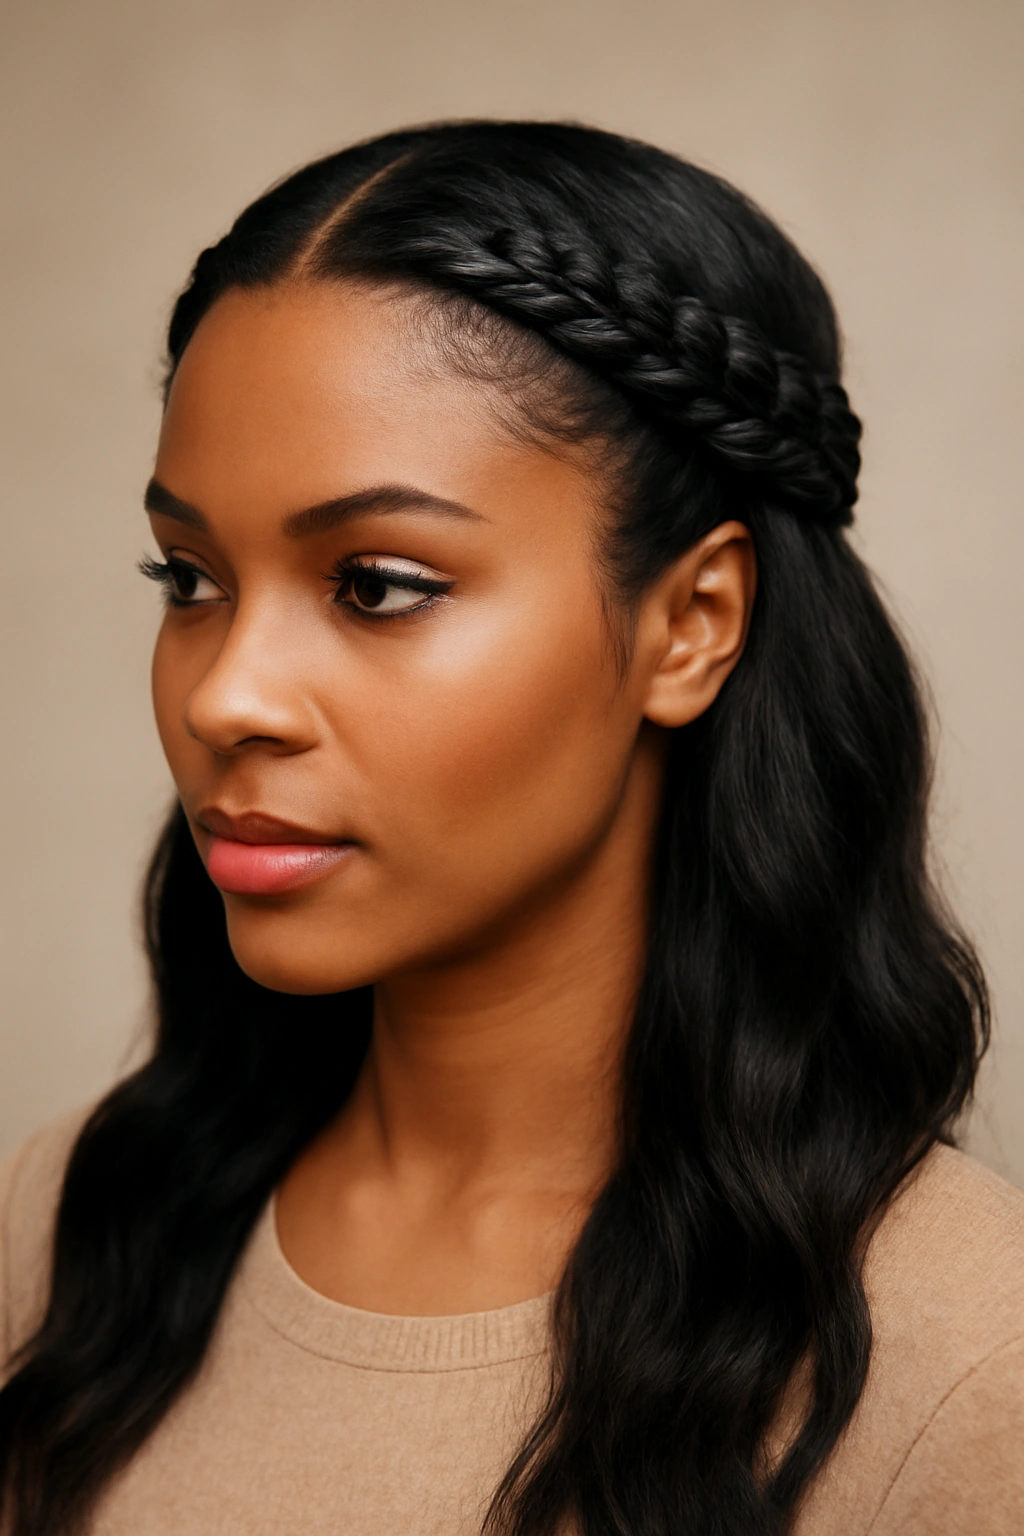
This style splits the difference between up and down, offering the elegance of an updo while keeping length visible and flowing. A braid that travels from one side of your head to the other, sitting just above where your crown naturally peaks, creates a frame for your face while keeping hair off your shoulders and neck. It’s romantic, polished, and works beautifully with both natural texture and smoother finishes.
The Visual Impact of Half-Up Styles
Half-up braids work because they create natural dimension—your face gets framed by the braid and by the flowing hair below, and that layering reads as intentional and sophisticated. The braid itself becomes a design element rather than just a way to manage hair. For weddings, where you’re photographed from multiple angles, this style keeps you looking put-together without appearing severe or overly formal.
Step-by-Step Braid Placement
Begin on one side of your head (right or left, depending on which way you naturally part), taking a small three-strand braid and incorporating hair as you travel across the crown toward the opposite side. The braid should sit high enough to feel clearly defined, but not so high that it’s hard to execute. Once you reach the back of your head, you have choices: pin the braid end under the remaining hair for a seamless look, or leave it visible and bind it with a thin elastic. The braid works best when it’s not pulled so tightly that it creates tension on your hairline—aim for gentle, relaxed tension that feels secure without straining.
Styling Notes for Different Hair Types
If you have tighter curls, braiding works beautifully because the texture adds visual interest and holds the braid structure naturally. For more loosely textured hair, you might want to lightly smooth each section with a smoothing cream before braiding to make the braid pattern clearer. In either case, gently loosening the braid after you’ve pinned it adds softness and dimension—tighter braids can read as juvenile, while gently loosened braids feel elegant and intentional.
4. Soft Waves with Defined Curls
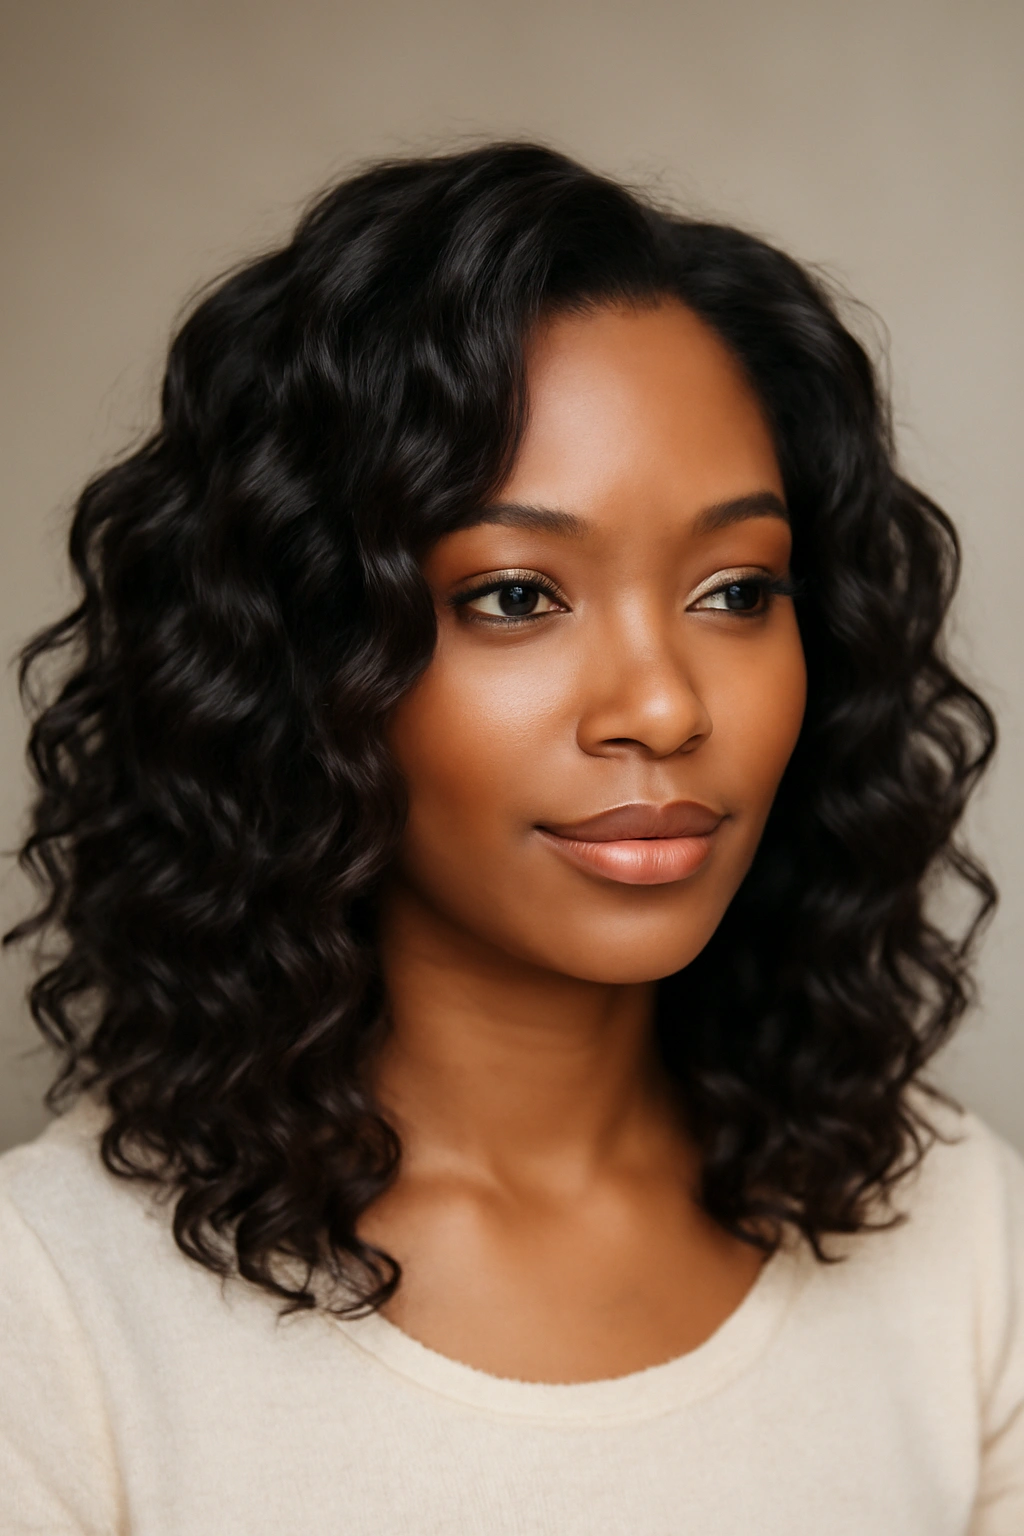
Sometimes the most stunning wedding hairstyle is simply your hair at its absolute best—hydrated, defined, and arranged to showcase your natural texture. Soft waves created with a curling iron or by finger-coiling damp hair offer movement and volume without requiring an updo. This works especially well for shoulder-length or longer hair, and it’s a celebration of your texture rather than an attempt to fight it.
Why Texture Is Your Secret Weapon
Black hair’s natural curl pattern has inherent beauty that shines when it’s properly moisturized and defined. Waves and curls catch light differently than straight hair, creating dimension and visual interest that photographs gorgeously. A hairstyle built on your natural texture actually requires less maintenance throughout the day because it’s built on what your hair naturally wants to do, rather than fighting against your hair’s structure.
Achieving Definition Without Crunch
The enemy of beautiful curls is product buildup that makes hair look stiff or heavy. Start with a hydrating leave-in conditioner applied to damp hair, then use a curl-defining cream or gel—just enough to encourage definition without creating a shell around each curl. Scrunch upward from the ends toward the roots, encouraging curl formation as you go. If you’re using heat tools, a curling iron creates more uniform waves, while finger-coiling creates more organic, varied curl patterns. The time investment is real (30-45 minutes typically), but the result is hair that feels soft and moves naturally.
Keeping Waves Intact Throughout the Day
Sleeping in braids or twists the night before a wedding preserves wave pattern without requiring you to recreate it on the morning of. A light refresher spray (not heavy hairspray) through the curls helps them hold without stiffening. If humidity is a factor in your climate, applying a small amount of curl-smoothing serum before leaving the house helps prevent frizz without flattening curl definition. Strategic pinning—securing waves at the crown with barely visible bobby pins—keeps everything in place during hours of activity.
5. Wrap-Around Faux Locs
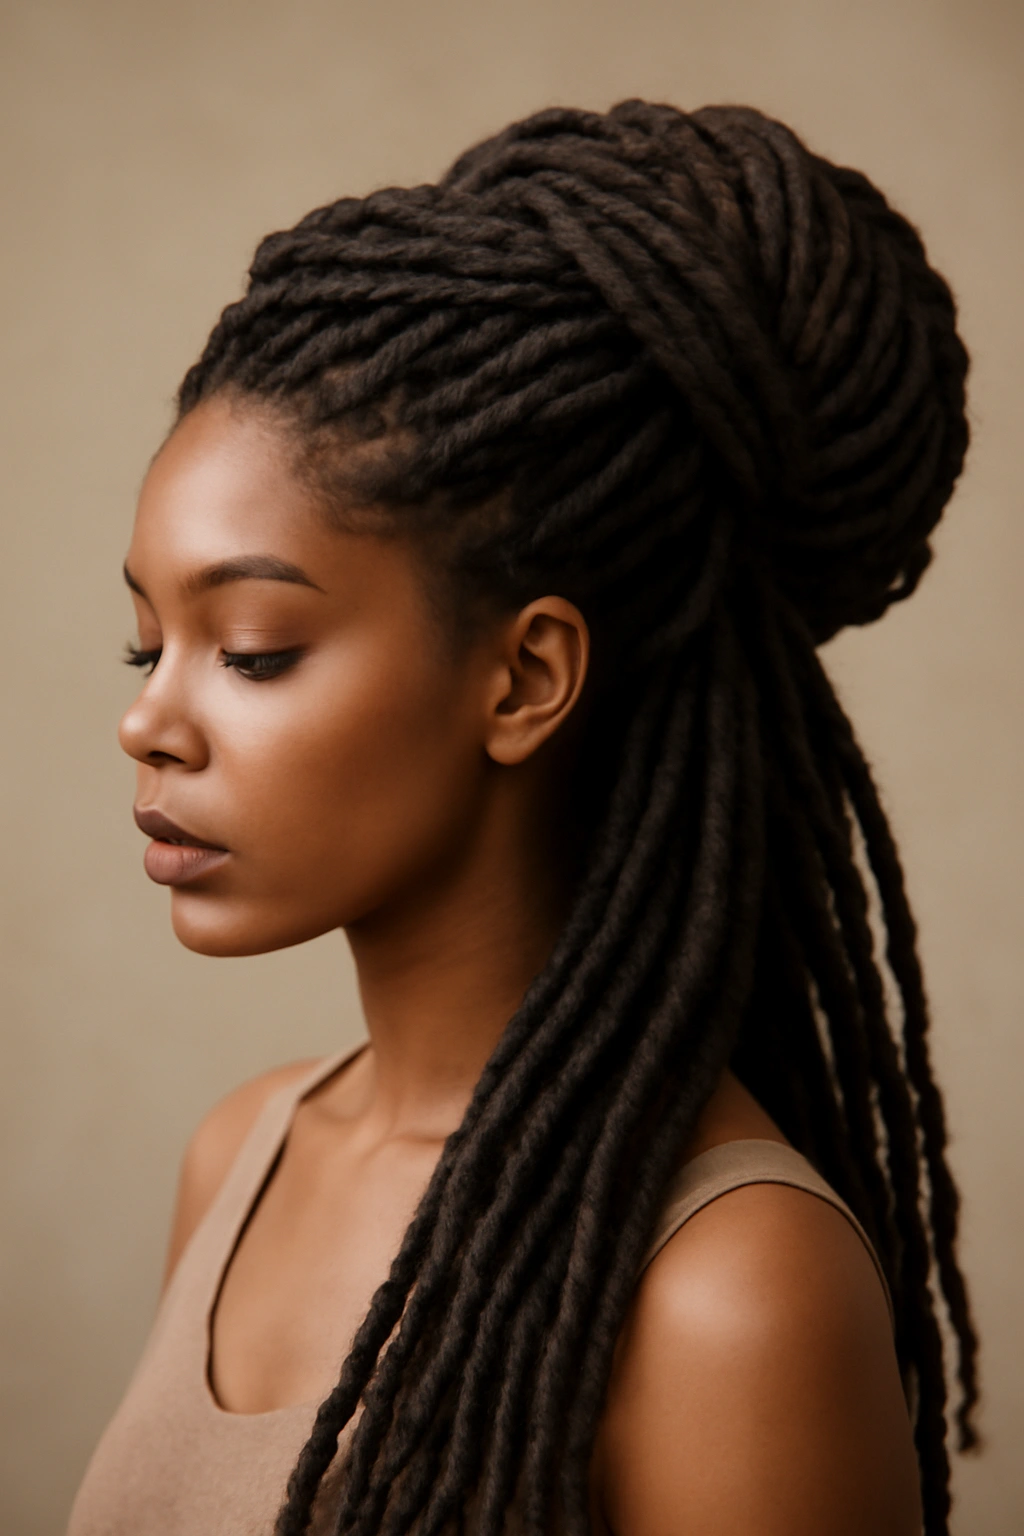
Faux locs offer the visual drama and protective benefits of actual locs without the long-term commitment, making them an excellent choice for a special event. Hair is wrapped with thread or yarn to create the appearance of individual locs, and the style photographs beautifully with incredible dimension and movement. This is a style that absolutely requires professional hands—it’s intricate work that benefits tremendously from someone experienced in the technique.
Why Faux Locs Make a Statement
Locs as a protective style keep hair secure and low-maintenance, which means you can actually enjoy the wedding rather than worrying about your hair. The visual impact is significant—the volume and movement of wrapped locs create an undeniably stunning look that photographs beautifully. For Black women, wearing locs (real or faux) is a statement of cultural pride and beauty that doesn’t need justification, but does deserve celebration.
Styling Options with Faux Locs
Faux locs can be styled up in an elaborate updo, left down for maximum movement, or worn half-up for a balanced look. Wrapping some locs around others to create a bun, securing some at the crown while leaving others flowing, or creating a side ponytail all work beautifully. Some loc styles include decorative elements like gold rings, beads, or small charms wrapped into individual locs, which adds personalized flair. The flexibility of styling options means faux locs work for conservative weddings or more celebratory, bold gatherings.
Appointment Timing and Maintenance
Creating faux locs typically takes 3-5 hours with a professional, so you’ll want to schedule this a few days before the wedding, not the morning of. Ask your loctician whether the wrapping uses synthetic hair, human hair, or yarn, since different materials have different looks and feels. Once created, faux locs require minimal maintenance—just gentle handling and possibly some light refreshing if any wrapping loosens. They typically last 4-8 weeks, making them an investment that works for multiple events if needed.
6. Glamorous Updo with Accessories
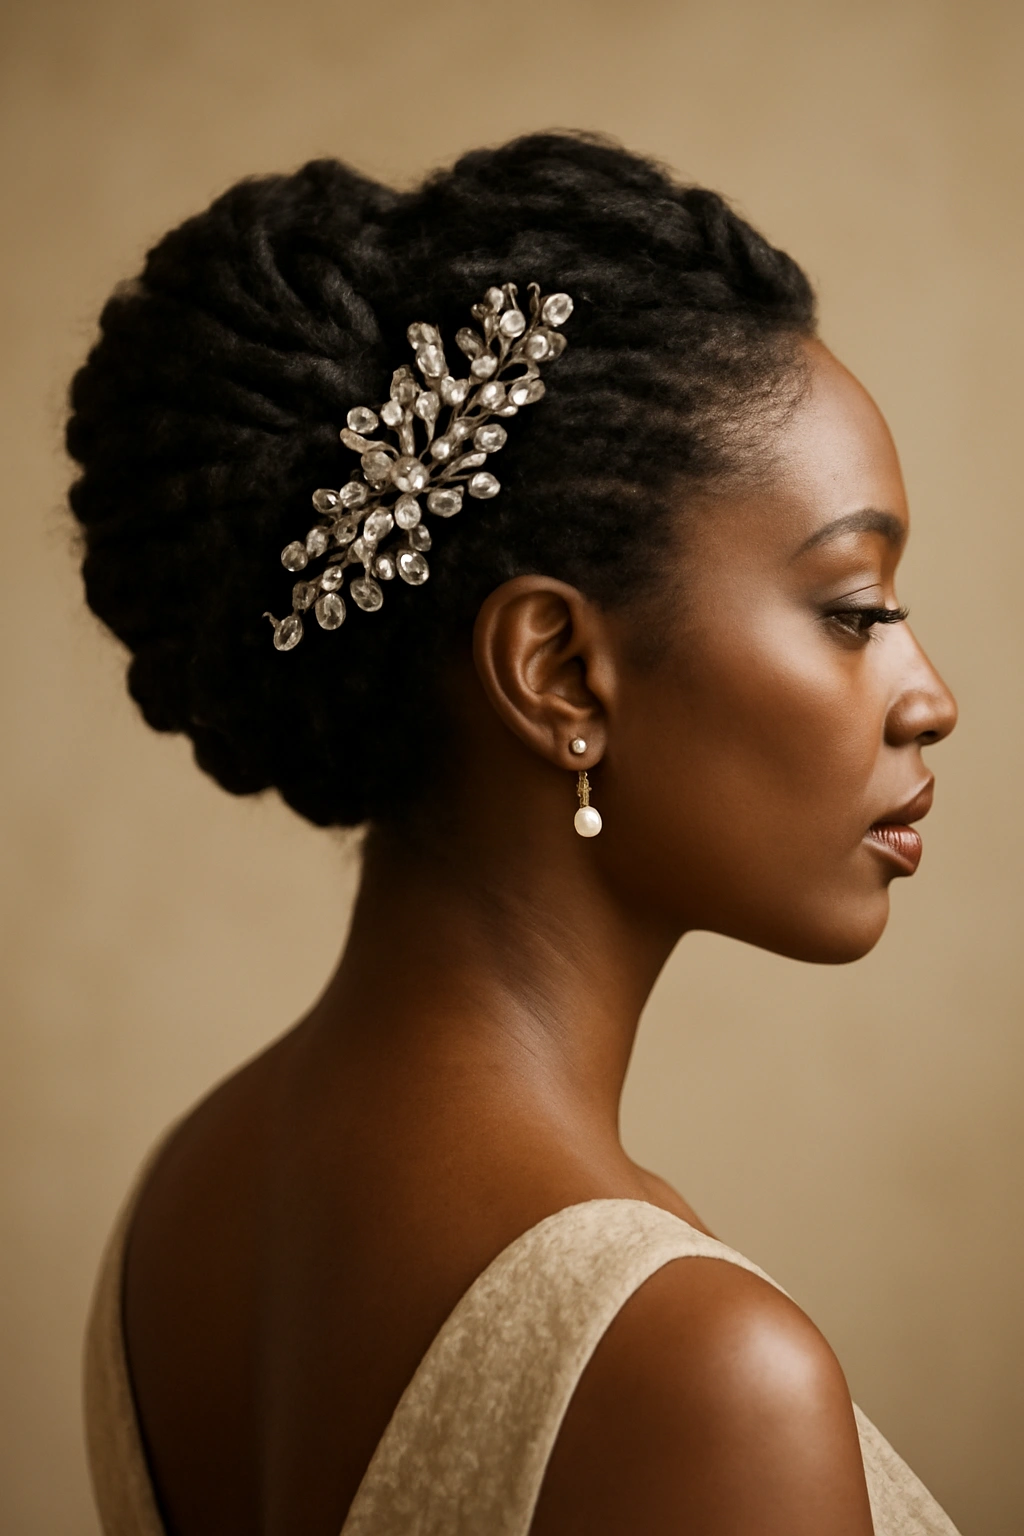
An updo says formality and celebration, and when you add intentional accessories, it becomes the kind of hairstyle that gets compliments all night. This isn’t a single specific style—it’s a category of updos (twists, braids, rolls, or gathered curls) elevated with decorative elements that catch light and draw attention. The key is balancing the complexity of the updo with the placement of accessories so the overall look reads as cohesive, not cluttered.
Building an Updo Foundation
A glamorous updo starts with secure pinning and strategic placement. Whether you’re creating multiple twists, braids, or curled sections, each element should be pinned independently so nothing shifts when you move. The goal is an updo that’s secure enough to survive hours of activity—hugs, dancing, sitting in various positions—without requiring constant adjustment. Test the security by gently tugging on different sections; if anything shifts, it needs more pinning.
Strategic Accessory Placement
Rather than scattering decorative pieces randomly, consider creating a focal point. Perhaps a cluster of small gold hair pins on one side of the updo, or a delicate chain woven through one section of twists. Pearls, rhinestones, or metallic elements should be clustered in groups rather than spread throughout—grouping creates visual impact, while scattering reads as fussy. The color and material of your accessories should complement your skin tone and the wedding’s color scheme. Gold typically reads as warm and elegant, while silver offers a cooler, more modern feel.
Securing Without Damage
Using bobby pins correctly is essential for both security and the health of your hairline. Insert bobby pins horizontally into the base of twists or curls rather than straight down—this creates more grip. Use enough pins that the weight of your hair is distributed rather than concentrated in one area. If you’re adding clip-in pieces or hairpieces, make sure they’re clipped securely into sections that can bear the weight without pulling on your hairline. Your updo should feel secure but never painful or tight.
7. Side-Swept Braided Style
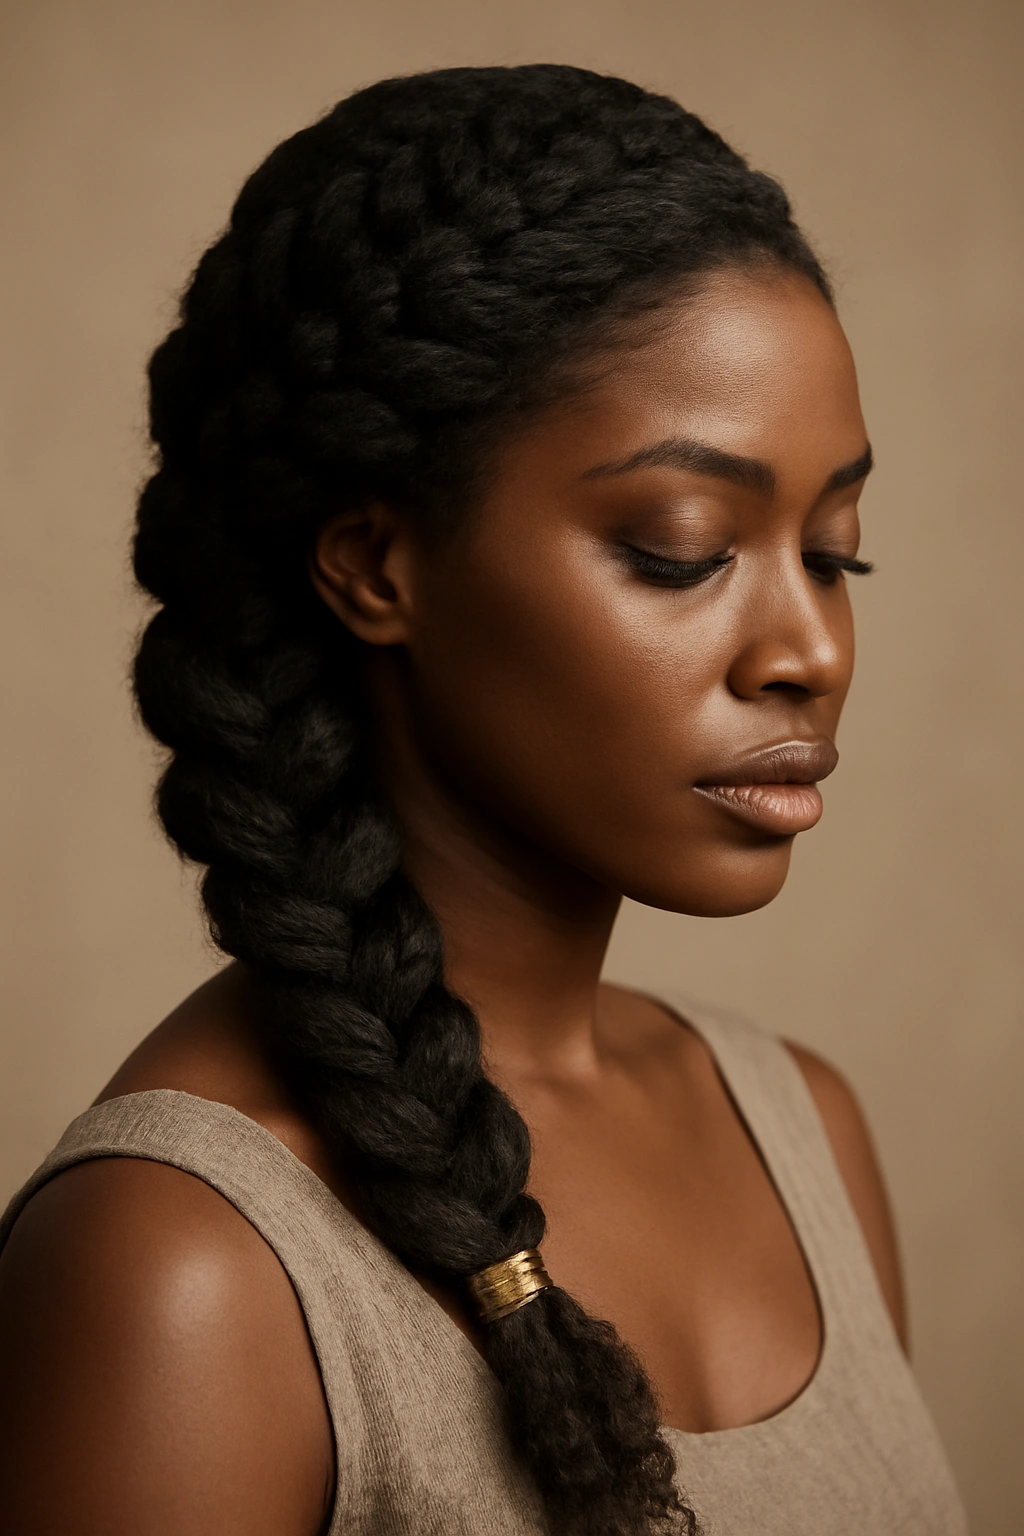
A braid that sweeps dramatically across the back of your head, gathered to one side, offers glamour and sophistication with effortless-looking ease. The side placement creates asymmetry that’s visually interesting, while the braid itself can range from a simple three-strand to an intricate cornrow or Dutch braid. This style works beautifully for Black hair because it showcases both texture and the sculpted beauty of your braiding.
The Geometry of Side-Swept Placement
The placement of a side-swept braid matters enormously for the overall look. A braid that begins at the crown and sweeps toward one side of the back of your head follows the natural contours of your head in a flattering way. The braid should be thick enough to feel like a statement piece—thin, wispy braids can read as underdone. Gathering the braid end to the side (securing with decorative pins or a cuff) creates a focal point that draws the eye. The side placement also means one side of your face remains fully visible and unframed, which is flattering for photos.
Braid Styles That Work
A classic three-strand braid offers timeless elegance. A Dutch braid (braiding under rather than over) creates more dimension and visual interest. A fishtail braid looks intricate and detailed. A cornrow braid (with added hair incorporated along the line) offers incredible security and a more modern, intentional look. Choose based on the formality of the wedding and your comfort level with braiding techniques. Even if you’re not confident in your own braiding skills, a professional stylist can execute any of these options.
Adding Visual Interest to the End
Rather than simply securing the braid with an elastic, consider weaving a thin metallic cord or delicate chain through the bottom section of the braid. This catches light and creates a finished, intentional look. You could also wrap a small silk scarf around the braid end, or secure the braid with a decorative cuff or hair clip. These finishing touches transform the style from practical to polished without requiring much additional effort.
8. Bubble Ponytail

The bubble ponytail is the playful, statement-making option that still reads as intentional and wedding-appropriate. A regular ponytail is divided into sections with elastics spaced down the length, then each section is gently poofed outward to create bubble-like volume throughout. It’s modern, fun, and offers incredible visual impact—especially for mid-length hair where the bubbles create movement and shape.
Why Bubbles Work for Special Occasions
A bubble ponytail combines elements of fun and sophistication. It’s clearly intentional and styled, rather than casual, but it’s not the severe, buttoned-up elegance of a sleek ponytail. For younger wedding guests or more modern celebrations, it’s perfect. The bubbles create volume and interest that photographs beautifully, and the style actually feels secure and stable despite its playful appearance.
Creating Bubbles That Look Intentional
Start with a sleek, smooth ponytail secured at your desired height. Divide the ponytail into 3-5 sections depending on hair length, securing each section with a small elastic spaced about 1.5 inches apart. The spacing should feel balanced and intentional—not too tight, not randomly scattered. Once all elastics are in place, gently pull outward on each section between the elastics, creating a bubble shape. The bubbles should look full and rounded, not deflated. This step requires some finesse; you’re aiming for each bubble to look gently voluminous rather than aggressively puffed.
Customization and Style Variations
You can create bubbles throughout the entire ponytail length, or only through the lower half while keeping the top sleek. You could wrap a small section of hair from the base around each elastic to conceal it (more formal appearance) or leave the elastics visible for a more modern look. Adding small decorative clips at each elastic point, or weaving delicate chain or ribbon through the bubbles adds personalized flair without overwhelming the style.
9. Goddess Braids
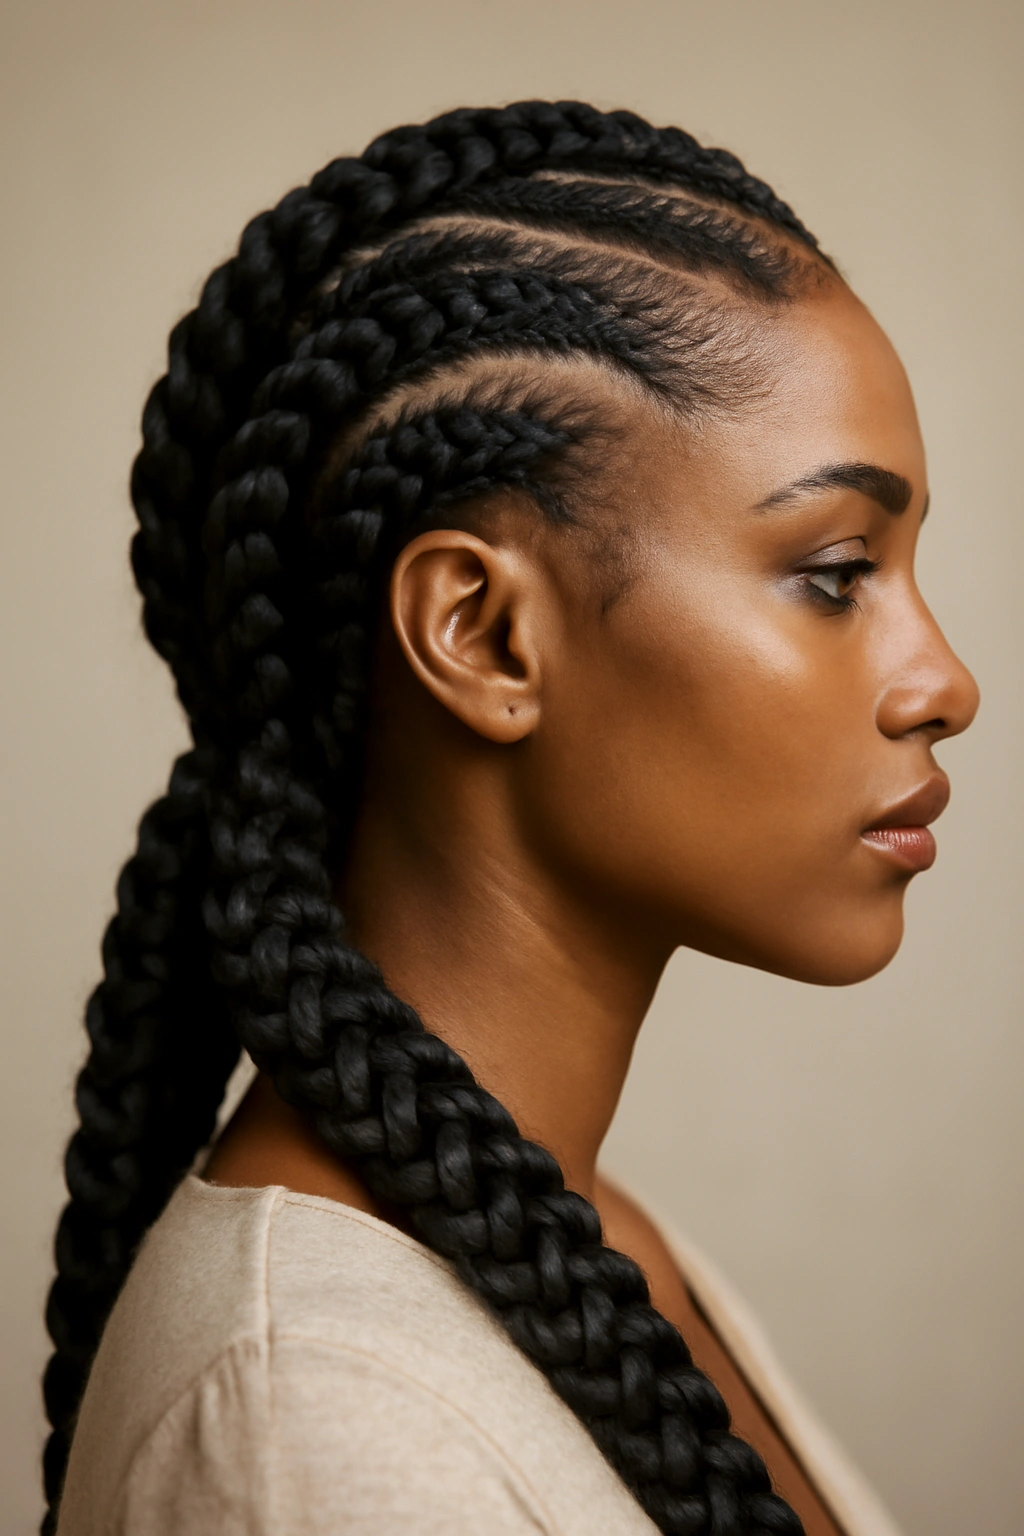
Goddess braids are thick, sculpted braids that travel along the sides and back of your head in a deliberately artistic pattern. Unlike smaller cornrows, goddess braids are bold and substantial, creating architectural beauty that reads as intentional art rather than casual braiding. This style absolutely requires professional hands, but the result is undeniably stunning and deeply rooted in protective styling tradition.
The Cultural Significance and Visual Power
Goddess braids celebrate Black beauty and braiding traditions while offering incredible protection for your hair. The thick, clearly defined braids are visually striking and photograph beautifully from every angle. The style reads as confident and intentional—there’s no mistaking it for casual, low-effort hair. For someone wanting to make a statement while keeping hair secure and beautiful, goddess braids are an excellent choice.
Design Possibilities
Goddess braids can be arranged in countless patterns: multiple thick braids running straight back, braids that curve and swoop across the head, braids twisted into an updo at the back, or braids left to flow down. Some styles incorporate added hair for extra thickness and length, while others work with just your natural hair. The braids can be uniform in size or vary intentionally. Some include decorative elements like gold cuffs, beads, or wrapped thread at the base of each braid.
Appointment and Aftercare
Creating goddess braids takes 2-4 hours depending on the design complexity, so schedule well in advance. During the appointment, discuss the specific design you want—show pictures if possible. Once created, goddess braids require minimal daily maintenance and typically last 6-8 weeks. The protective nature of the style means your actual hair underneath stays moisturized and safe from daily manipulation, which is beneficial. Sleep on a silk or satin pillowcase to reduce friction and keep braids looking fresh longer.
10. Voluminous Curled Bob
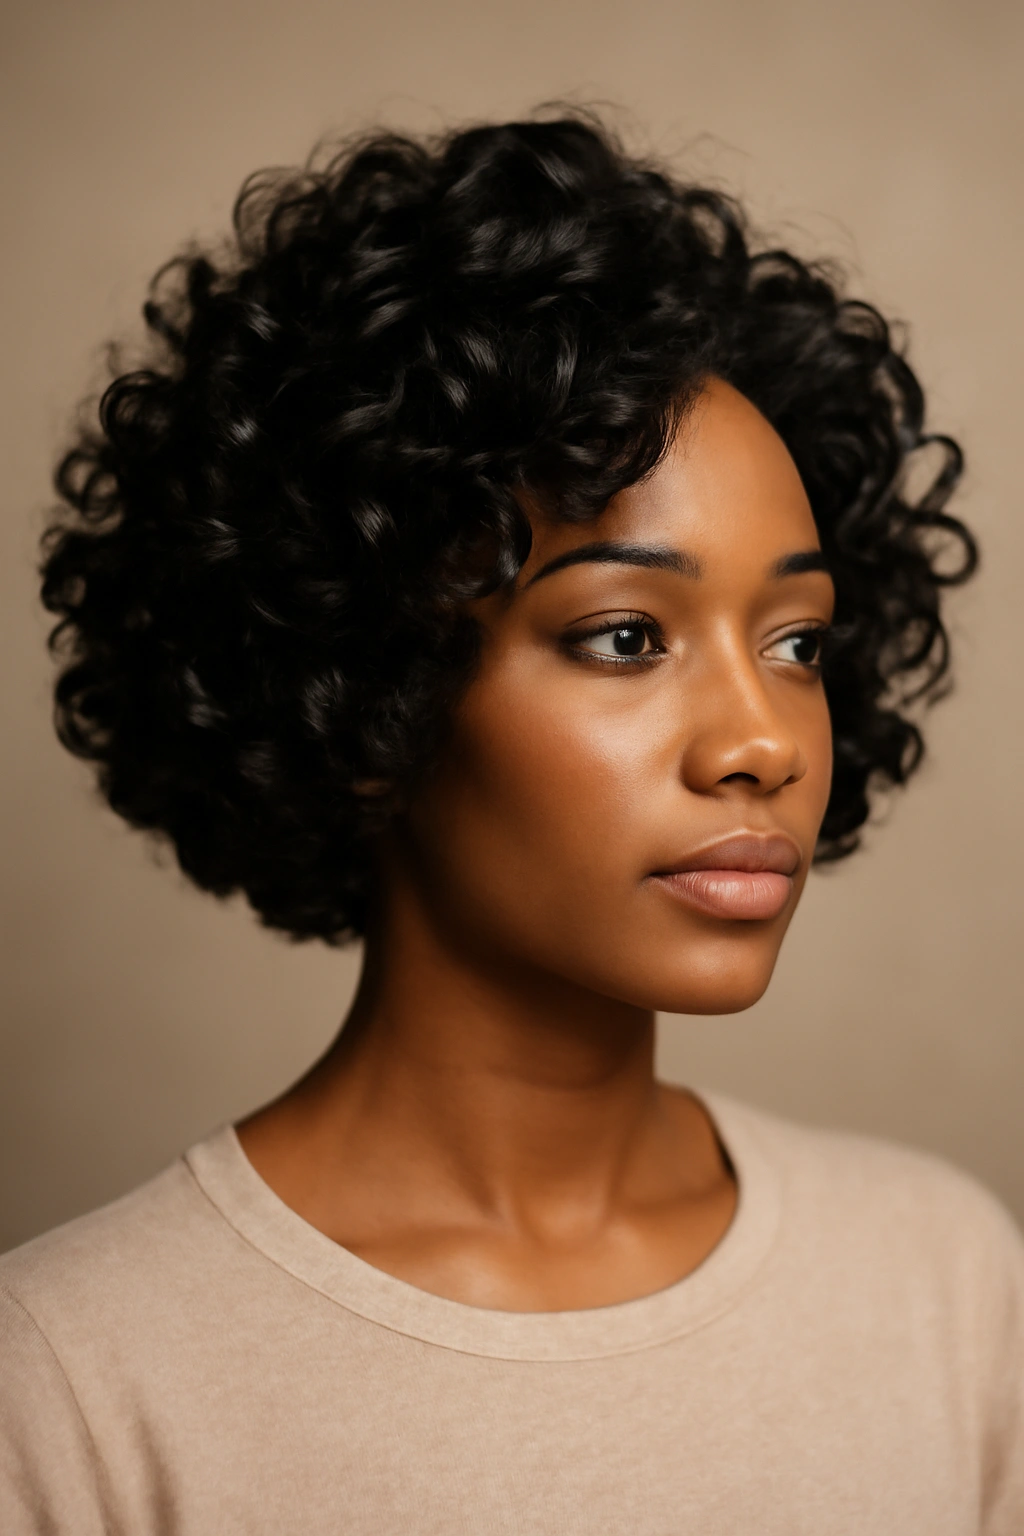
For shorter hair or those preferring a bob length, a beautifully curled or waved bob offers elegance and movement without requiring an updo. The bob showcases your face completely, which means this is a style choice that says you’re confident in your appearance. When the curls are well-defined and voluminous, a bob reads as intentional and styled, absolutely appropriate for a wedding rather than casual.
Why a Curled Bob Is Surprisingly Formal
There’s an assumption that wedding hairstyles must be up, but that’s not actually true. A voluminous, well-styled bob is equally formal and sophisticated because it’s clearly intentional and maintained. The volume and curl definition require effort and skill to achieve, and that effort shows. For face-framing appeal, a curled bob is unbeatable—it draws attention to your face in the most flattering way possible.
Creating Volume in a Bob
Volume in a shorter style depends on multiple factors: how the hair is cut (layers create movement), the texture of your hair, and how it’s styled. For curled bobs, blow-drying upside down, root-lifting sprays, and a round brush or curling iron all contribute. Section by section, curl the hair away from your face on the sides and around the back, using a curling iron or blow dryer and round brush. The curls should fall in the direction away from your face, creating an open, welcoming frame.
Styling Products and Longevity
A lightweight mousse applied to damp roots before blow-drying adds lasting volume without weighing hair down. Once curls are set, a light-hold styling spray keeps everything in place without stiffness. Avoid heavy serums or oils that can make a bob look limp—instead, use lightweight, volumizing products. Sleep in braids or pineapple the night before the wedding to preserve the curls, and plan a 20-30 minute refresh in the morning with the curling iron and a touch of styling spray.
Final Thoughts
Choosing a wedding guest hairstyle means selecting something that makes you feel genuinely beautiful and confident—not something you’re forcing yourself into because it’s expected. Black hair has incredible versatility, and the styles available to you range from intricate protective styles to flowing, romantic waves. The best choice is always the one that feels like an authentic expression of yourself while fitting the formality level of the wedding you’re attending.
Most importantly, plan ahead for whichever style you choose. Whether it’s scheduling a professional appointment, practicing a style you’re creating yourself, or gathering supplies and watching tutorials, last-minute panic never results in your best hair. Consider your daily routine too—will you have time to refresh the style in the morning? How many days will you need to look polished? What’s the weather situation? These practical questions actually matter as much as the aesthetic ones.
Your hair is part of your presence at a celebration, and you deserve to feel like your absolute best self. Whether you go bold with goddess braids, romantic with waves, or sleek with a ponytail, make sure it’s a choice that brings you genuine joy. The weddings you’ll remember most are the ones where you felt completely comfortable and confident—and that feeling starts with hair that’s absolutely right for you.