Your hair is one of the first things people notice when you walk into a room, and at a wedding or formal event, it’s often the final touch that transforms your entire look. An elegant updo isn’t just a hairstyle—it’s a statement of grace, sophistication, and intentional beauty. Whether you’re the bride, a wedding guest, or attending a black-tie affair, the right updo can elevate your appearance while keeping your hair secure and polished throughout the celebration.
The beauty of updos lies in their versatility. You can choose something timeless and classic that photographs beautifully, or opt for a modern interpretation with unexpected twists. The right style depends on your face shape, hair texture, the neckline of your dress, and how formal the event truly is. What works for a garden wedding won’t necessarily work for a gala, and that’s the real art of this choice.
An updo also solves practical problems. It keeps your hair off your shoulders, ensuring your dress’s neckline shines. It stays in place through hours of celebration, dancing, and mingling. It photographs beautifully from every angle and won’t fall into your face during emotional moments. For anyone with longer hair, an updo is the difference between confidence and constantly adjusting strands throughout the evening.
What makes an updo truly elegant isn’t the complexity—it’s the intentionality. The best formal updos feel effortless while actually requiring skill and precision. They incorporate texture, proper proportions, and usually some kind of interesting detail that catches the light or adds dimension. Let me walk you through ten elegant updos that work beautifully for weddings and formal events, each with specific guidance on how to achieve them.
1. The Classic French Twist
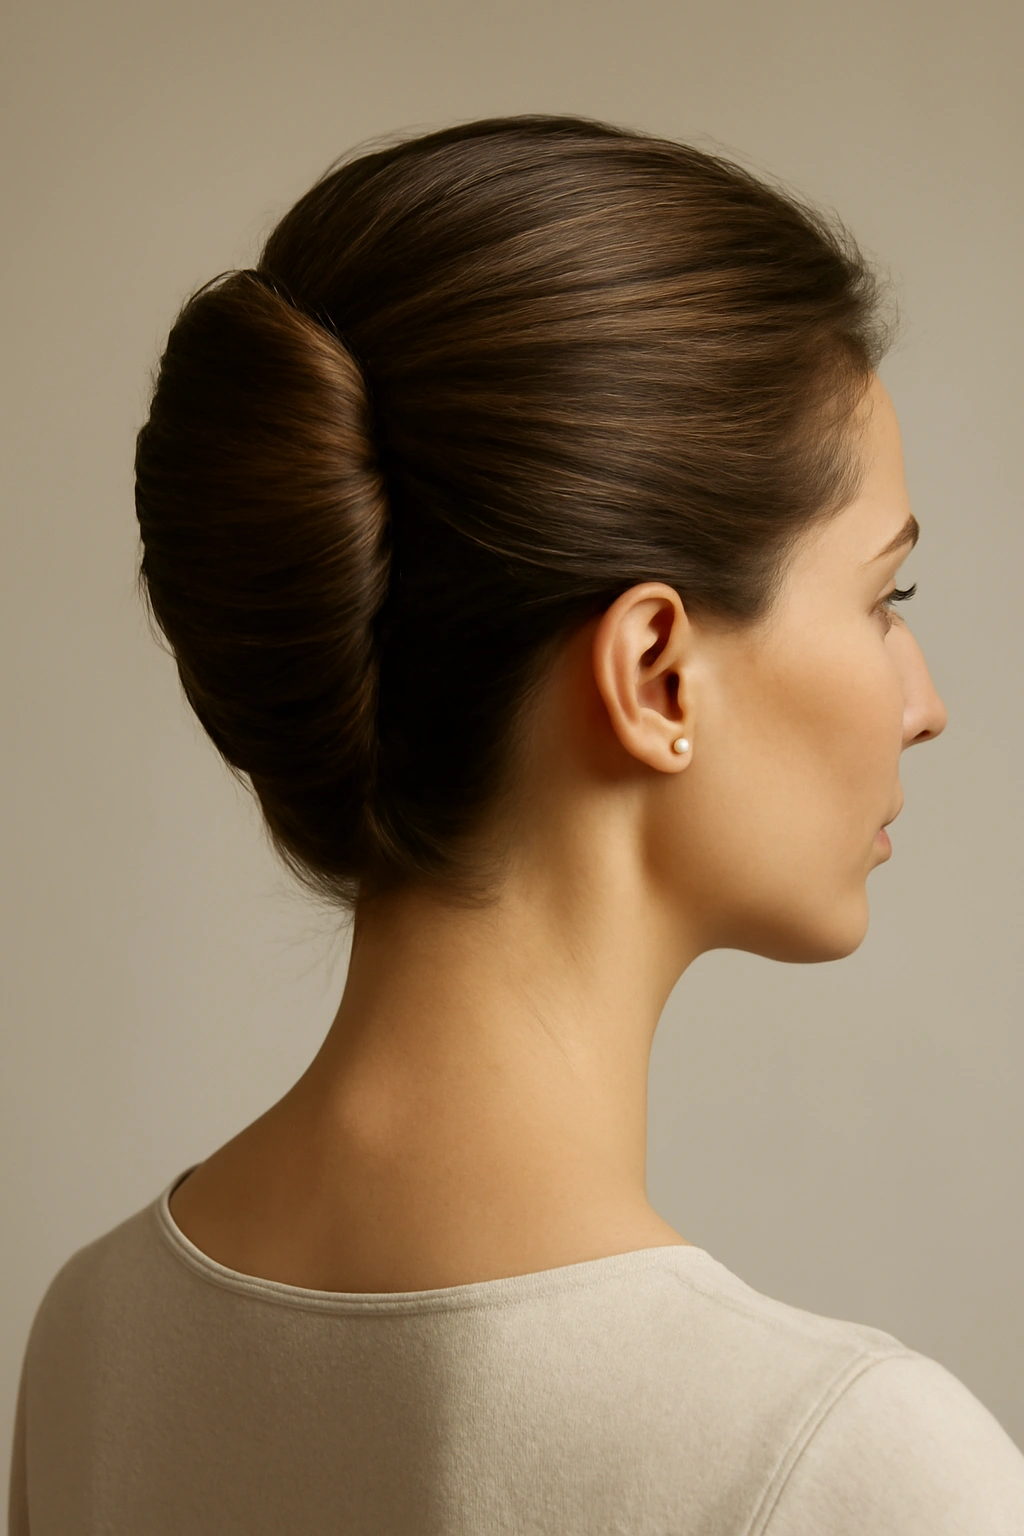
The French twist is the updos what a white button-down shirt is to a wardrobe—essential, timeless, and always correct. This sleek, vertical style sweeps all your hair to one side and folds it into an elegant tube shape, typically secured along the back of the head. It’s particularly flattering for longer face shapes and works with nearly every dress neckline imaginable.
Why It’s Perfect for Formal Events
The French twist speaks a language of understated elegance that works equally well at a black-tie wedding, a corporate gala, or a formal dinner. It’s sophisticated without looking overdone, and it keeps hair completely off the face and shoulders. The smooth, clean lines photograph beautifully and suit both traditional and contemporary styling. It’s also genuinely timeless—a French twist from decades ago looks just as appropriate today.
How to Achieve This Look
Start with hair that has some grip and texture. Blow-dry your hair with a slight wave or texture if you have naturally silky-straight hair; the texture helps the twist hold securely. Section off hair on one side (typically, the opposite side from which you want the twist to fall). Smooth the unsectioned hair and roll it toward the center back of your head, folding it upward into a cylinder shape as you go. Secure with bobby pins inserted horizontally into the roll, then tuck any loose ends inside the roll itself. Finish with a light hold hairspray to keep everything in place.
Pro tip: Pin small pearl or crystal hair accessories into the twist itself for a touch of sparkle without overwhelming the clean lines.
2. The Low Romantic Bun with Soft Tendrils
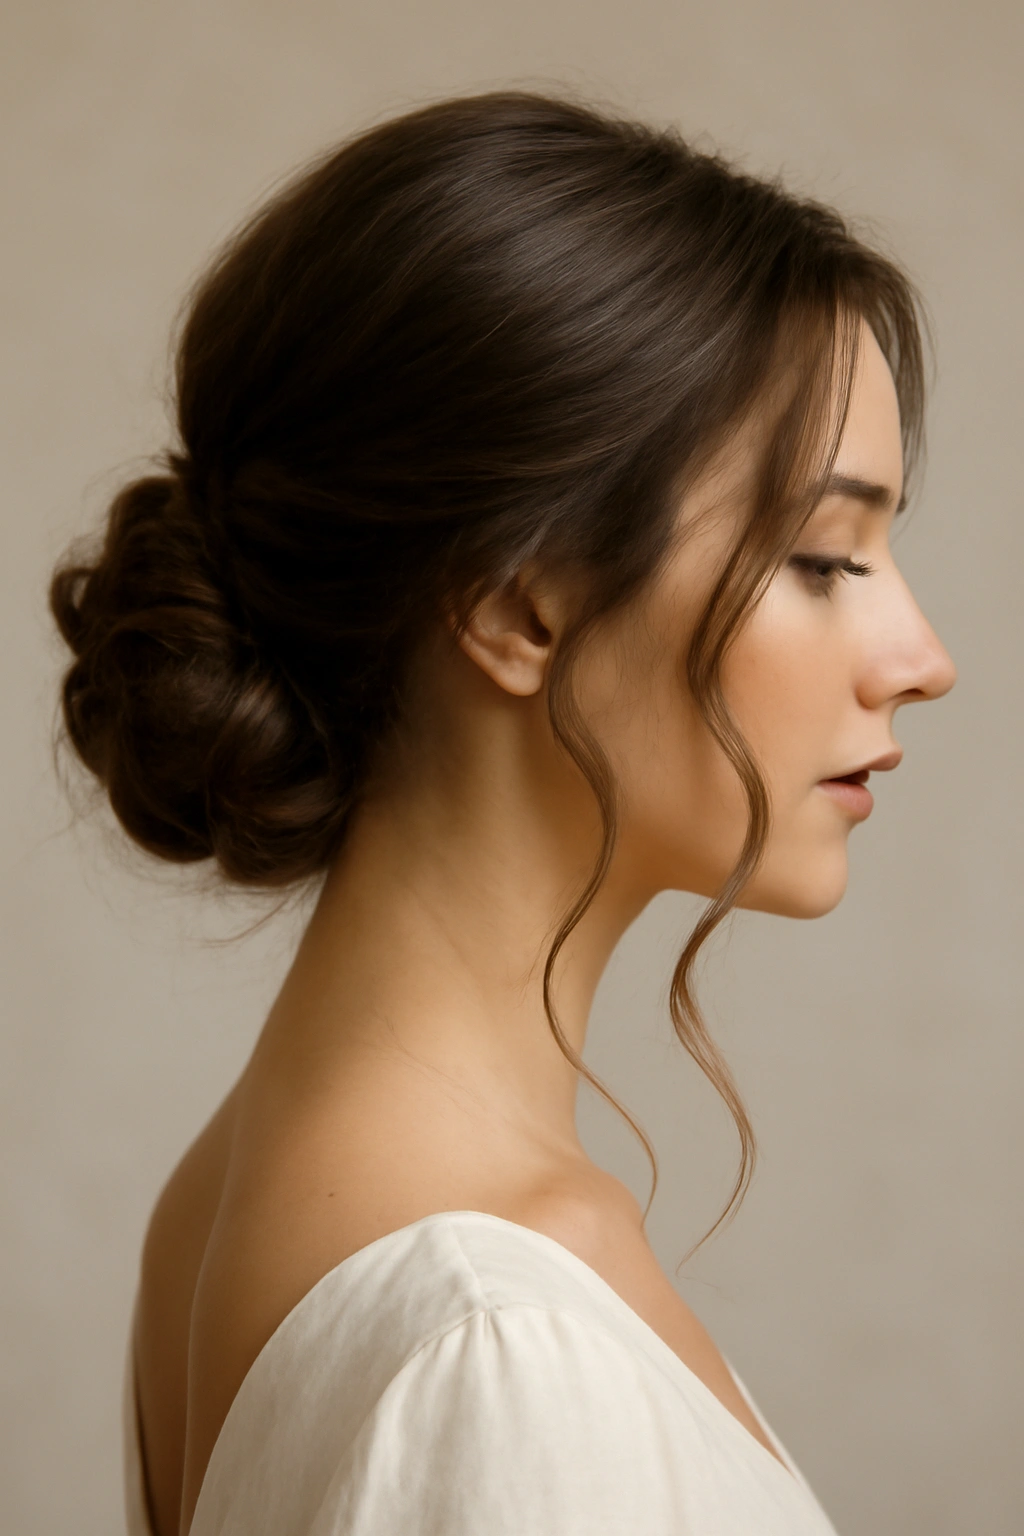
If elegance means soft rather than strict, this bun is your answer. Positioned low on the back of the head, this style features a full, slightly undone bun paired with carefully styled face-framing tendrils that fall loosely on either side. It’s romantic without being theatrical, and it suits bridesmaids, guests, and even brides who want accessibility and comfort.
Why This Works for Weddings
A low bun feels inherently bridal and romantic. The soft tendrils add movement and dimension, breaking up the formality just enough to feel approachable. This style also looks beautiful from behind (crucial for ceremony photos) while keeping the face and shoulders clear. It works with nearly every dress style and can be styled to match either traditional or modern event aesthetics. The loose tendrils also create a flattering frame for most face shapes.
Creating the Perfect Low Bun
Blow-dry your hair with texture or use a curling iron to create loose waves before styling. Gather your hair into a low ponytail at the base of your neck, positioned slightly off-center if desired. Before securing the ponytail, separate out two thin sections from the front edges—these become your face-framing tendrils. Twist or curl these tendrils gently with your fingers or a small iron and secure them with bobby pins at the side of your face. Take the ponytail and twist it loosely, then wrap it around itself to form a bun shape. Secure with bobby pins and finish with hairspray. Gently pull a few pieces from the bun itself to create a soft, textured appearance rather than a tight, polished sphere.
Worth knowing: Use a texturizing spray or dry shampoo before styling to give your hair more grip, especially if you have fine or slippery hair.
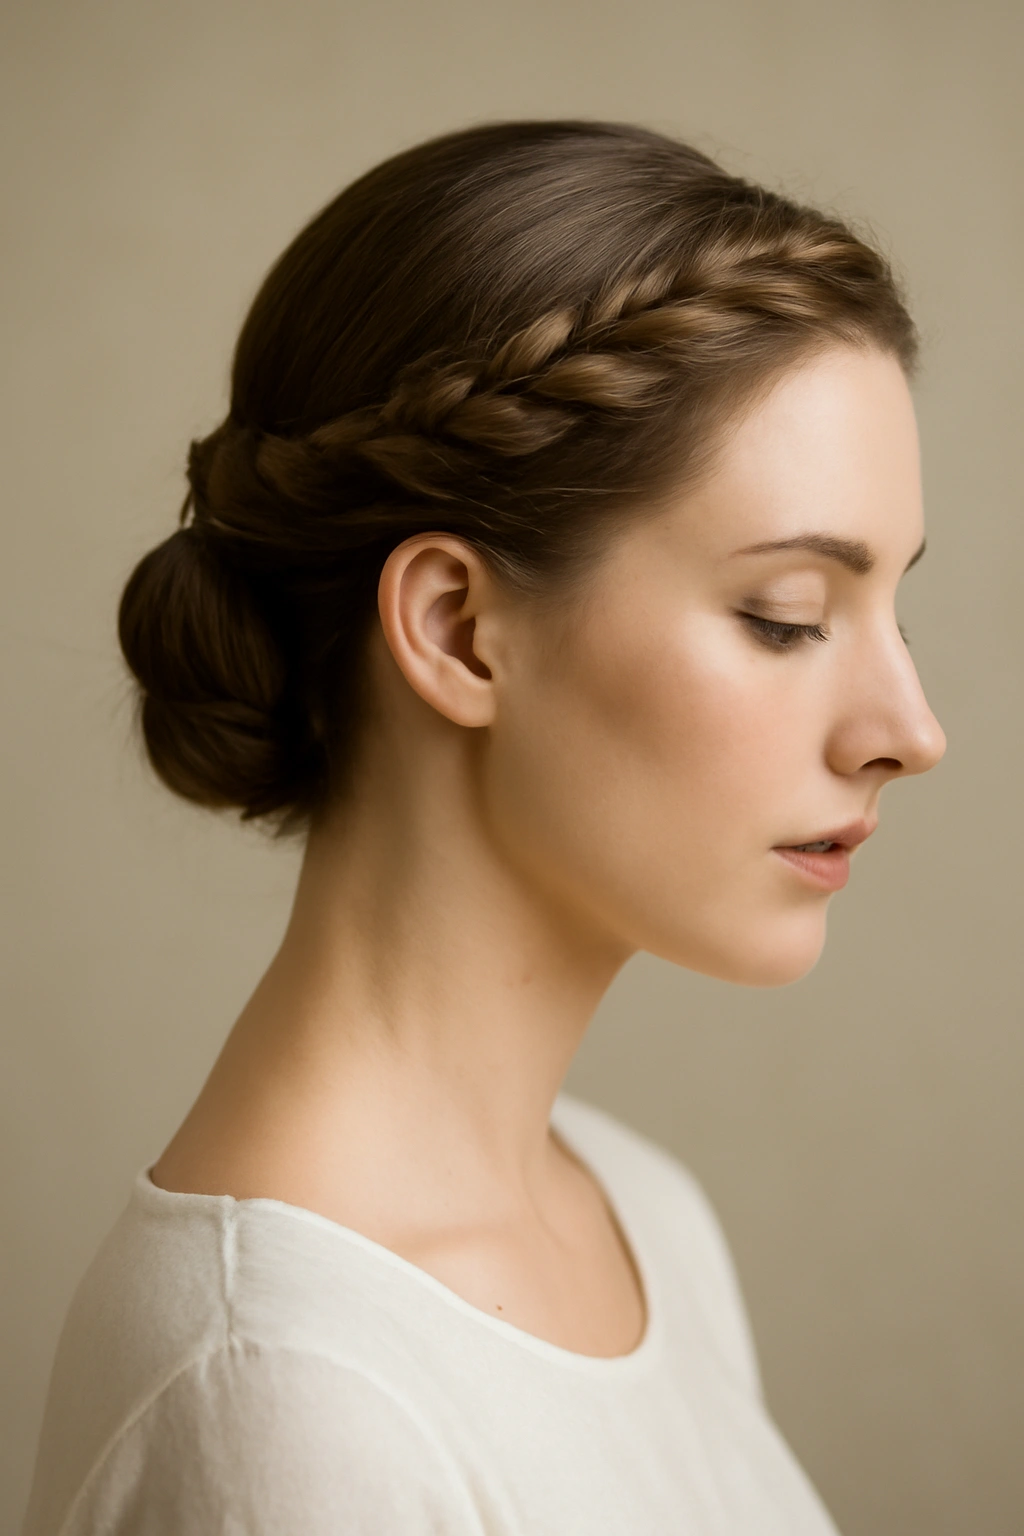
3. The High Crown Braid Updo
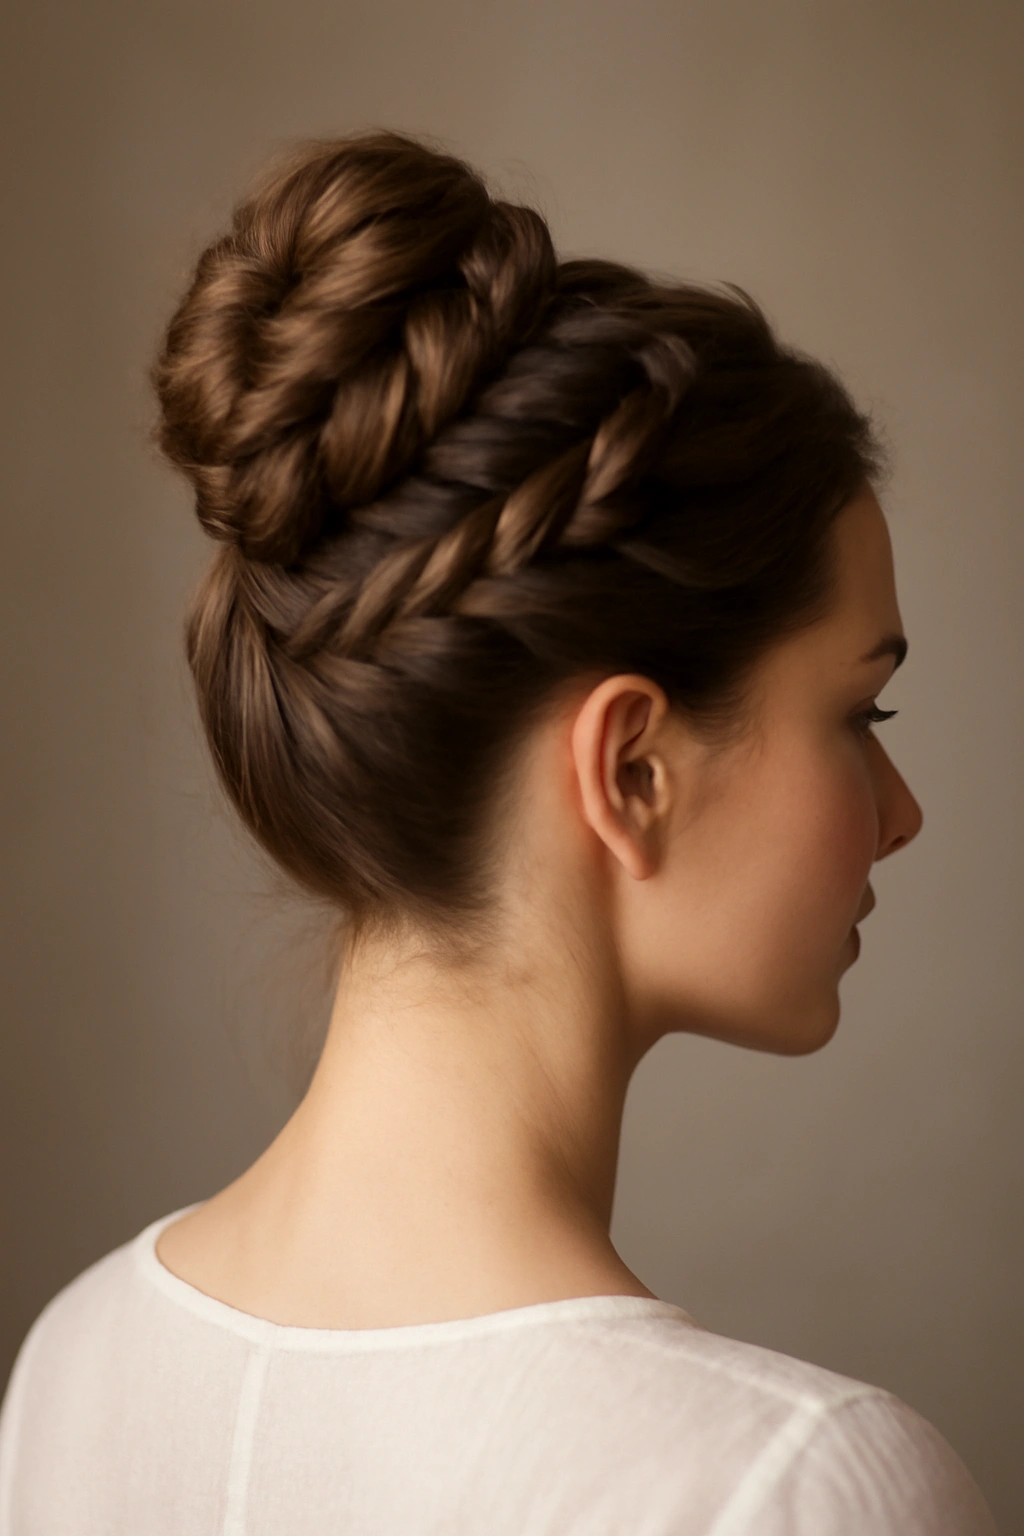
This style positions the height and interest at the crown of your head, with either a single braid or a series of smaller braids woven through the crown area before gathering into a secured knot or bun. It’s eye-catching without being costume-like, and it suits nearly every hair type and face shape.
The Appeal for Formal Events
A braided crown draws the eye upward and adds visual interest that elevates your overall styling. This look works beautifully for anyone seeking something more modern or unconventional than a simple twist or bun. The braids add a handcrafted, intentional quality that speaks to fashion awareness. It photographs exceptionally well and suits outdoor weddings, daytime events, and contemporary celebrations.
Technique and Execution
Begin with textured, wavy hair for the braids to grip. Starting at one ear, braid a three-strand braid diagonally up and across the crown of your head toward the opposite ear. You can make this braid tight and intricate, or loose and romantic—both look beautiful. Once you reach the opposite ear, gather all your hair (including the braid) into a ponytail or bun at the back of your head. Alternatively, you can create multiple smaller braids starting from different points and weave them together as they meet. Secure with bobby pins and finish with a flexible-hold hairspray that allows a bit of movement.
Insider note: If braiding doesn’t come naturally, practice several times before your event or consider booking a trial appointment with your stylist weeks in advance.
4. The Half-Up Half-Down with Woven Details
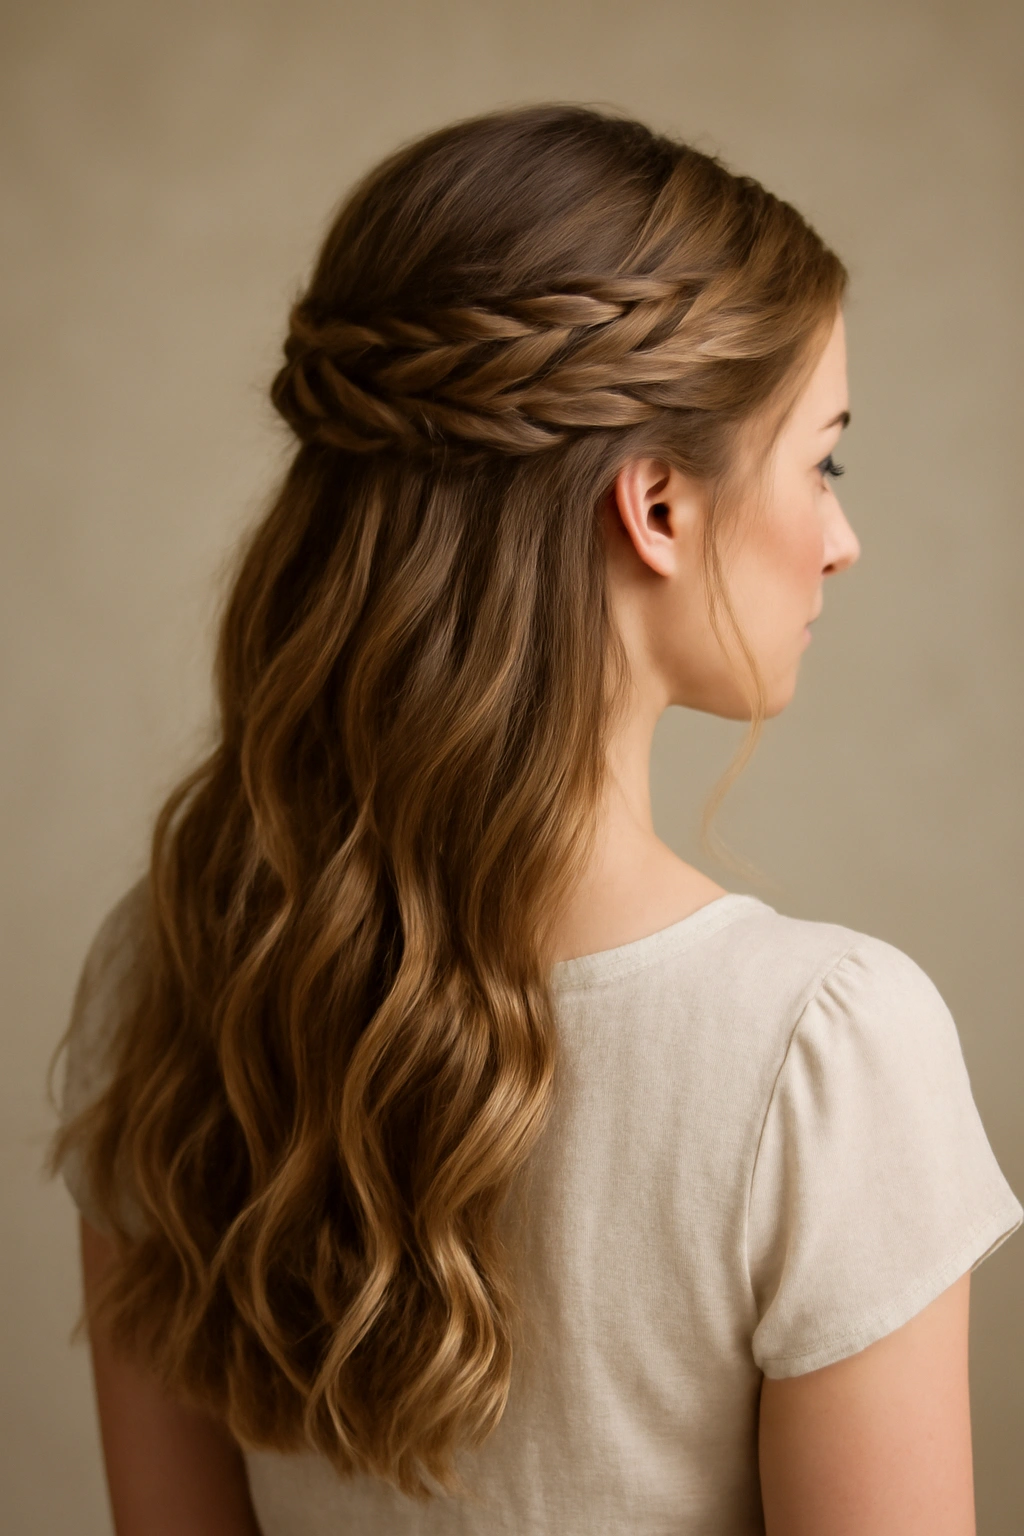
This style splits the difference between an updo and wearing your hair down—it’s perfect for anyone uncertain whether they want an updo but craving something more polished than completely loose hair. The upper portion is swept up and secured, while the lower half flows down the back and over the shoulders, often featuring woven details like twisted sections or small braids integrated throughout.
Why This Is Perfect for Formal Events
The half-up style looks romantic and intentional while maintaining the softness of down hair. It’s particularly flattering for people with long, thick hair who want to show off the length. It photographs beautifully in both close-ups and full-body shots, and it works for virtually any dress neckline. This style also tends to be more comfortable for longer events since it’s less structured than a full updo.
How to Create This Look
Blow-dry your hair with waves or curls for the best texture. Take a section of hair from the top of your head on one side, and either twist, braid, or smooth it across toward the opposite side. Secure this section with bobby pins at the back, creating a half-crown effect. You can incorporate more sections as desired—perhaps a second twisted section underneath the first. The lower half of your hair remains down, flowing freely or with intentional waves. Finish with hairspray and ensure any securing pins are hidden beneath the upper section.
Key consideration: This style works best with hair that’s at least shoulder-length and has natural body or intentional texture. Fine, straight hair may need blow-dried waves added first.
5. The Sleek Chignon with Pearl Pins
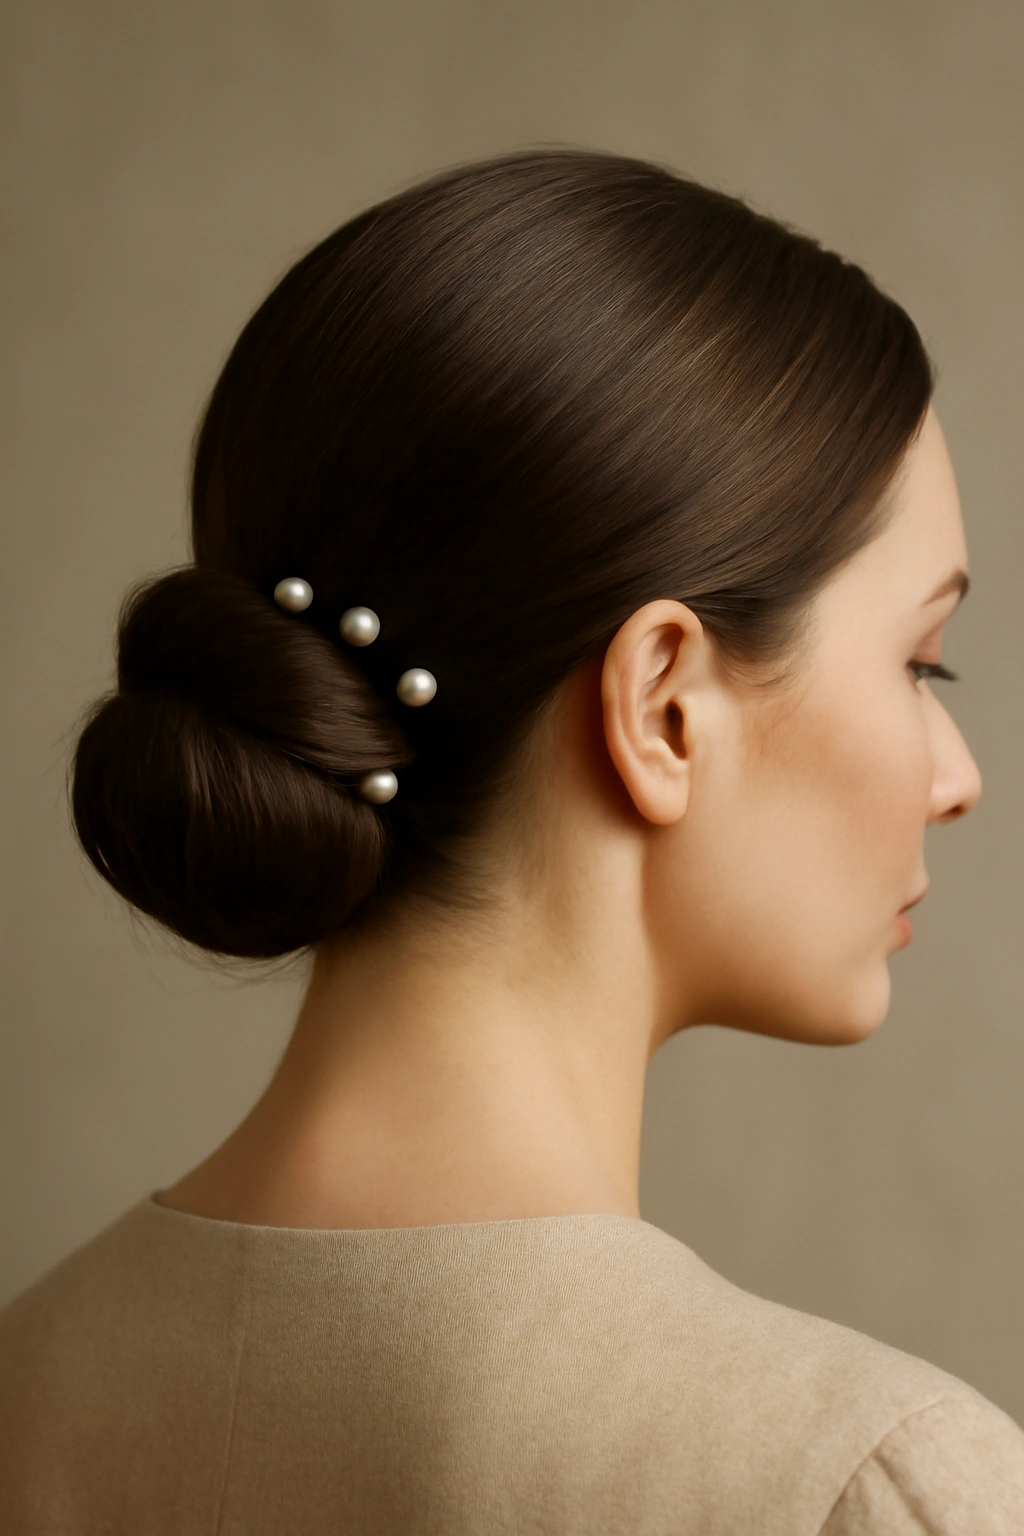
A chignon is essentially a low bun positioned at the nape of your neck, but the “sleek” version takes it further by making the entire updo smooth, polished, and refined. This is paired with decorative pearl or crystal pins inserted visibly into the bun itself, adding elegance without excessive ornamentation.
The Appeal and Best Occasions
The sleek chignon is perhaps the most universally flattering updo. It works beautifully for formal dinners, weddings of any style, and black-tie events. The smooth lines are incredibly photogenic, and the style suits every face shape. The visible pins add a refined detail that elevates the look from simply neat to intentionally elegant. This is the go-to for anyone seeking absolute polish and sophistication.
Styling the Perfect Sleek Chignon
Use a smoothing serum or polish on damp hair before blow-drying to create the sleekest possible finish. Blow-dry your hair completely straight and smooth, using a paddle brush and a smoothing tool if needed. Gather your hair into a low ponytail at the nape of your neck. Twist the ponytail once or twice, then wrap it around itself to form a compact bun. Secure tightly with bobby pins, tucking all ends inside the bun. Use a smoothing serum or hairspray to tame any flyaways and create a polished appearance. Insert 3-5 decorative pins through the bun, spacing them evenly so they’re visible and intentional-looking rather than functional.
Pro tip: Practice the technique multiple times on a day you don’t have plans, as this style requires genuine smoothness and precision for maximum impact.
6. The Textured Top Knot with Flowing Layers

This modern updo positions the bulk of your hair in a high knot on the crown, but incorporates intentional texture and loose, flowing layers that fall from underneath, creating movement and dimension. It’s less severe than other high styles and reads as contemporary while remaining formal.
When This Look Works Best
The textured top knot suits anyone with thicker hair and anyone seeking a more fashion-forward, unconventional updo. It works beautifully for modern weddings, destination celebrations, and events where you want to stand out. The style is particularly flattering on people with longer faces, as the high placement balances proportions. It photographs well and maintains visual interest from every angle.
Creating the Look
Start with textured, wavy hair—use a curling iron or texture spray to create loose waves throughout. Create a high ponytail on the crown of your head and secure it loosely. Before creating the bun, separate out several thin sections from the underside of the ponytail and pin them loosely around your face to frame your features. Take the remaining hair and twist it loosely, then wrap it around itself to form a textured bun. Secure with bobby pins, leaving intentional pieces loose and undone. Gently tease and separate the bun with your fingers so it has dimension rather than appearing like a tight sphere. Finish with a flexible-hold hairspray.
What to watch for: Ensure the loose layers aren’t so loose they look messy. Aim for intentional texture, not accidental disarray—there’s a real difference.
7. The Side-Swept Vintage Waves Updo
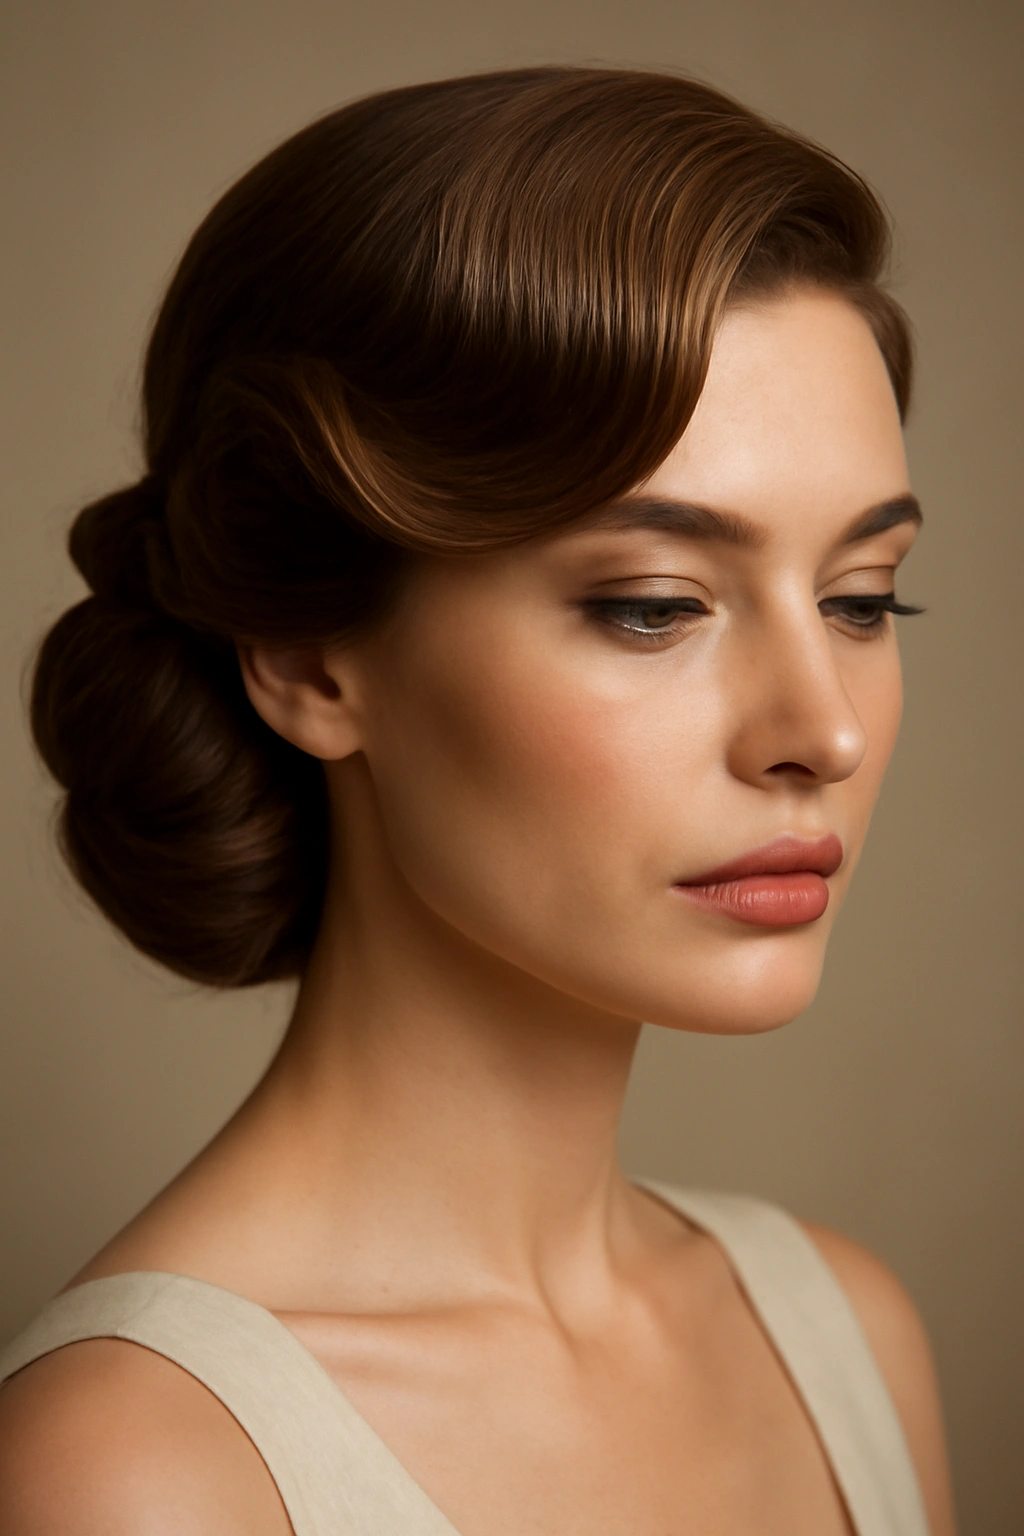
This style channels old Hollywood glamour, with hair swept dramatically to one side and pinned into an updo featuring soft, voluminous waves. It’s one of the most romantic and universally flattering updo options, and it works beautifully for both traditional and modern events.
Why It’s Perfect for Weddings
The side-swept vintage waves updo is inherently bridal and romantic. It’s extremely flattering on nearly every face shape because the side sweep and height at the crown are universally complimentary. The waves add dimension and movement, and the side positioning creates asymmetrical interest. This style photographs beautifully and feels special without looking costume-like. It suits any dress neckline and any wedding aesthetic.
How to Achieve the Look
Blow-dry your hair with waves, using a large-barrel curling iron to create soft, loose waves throughout. Create a deep side part on one side of your head. Use a smoothing serum on the deeper side to create a smooth, swept appearance while leaving waves on the top side. Sweep all your hair toward one side, gathering it loosely. As you gather it, fold the hair up and back slightly, securing it with bobby pins at the back of your head (roughly where the opposite ear sits). The goal is to create the appearance of waves cascading down one shoulder while the other side is pinned and secured. Finish with hairspray.
Insider tip: This look requires genuinely soft waves, not tight curls. Use a large-barrel iron and don’t re-curl sections—instead, finger-comb waves through your hair for a softer effect.
8. The Braided Halo Crown
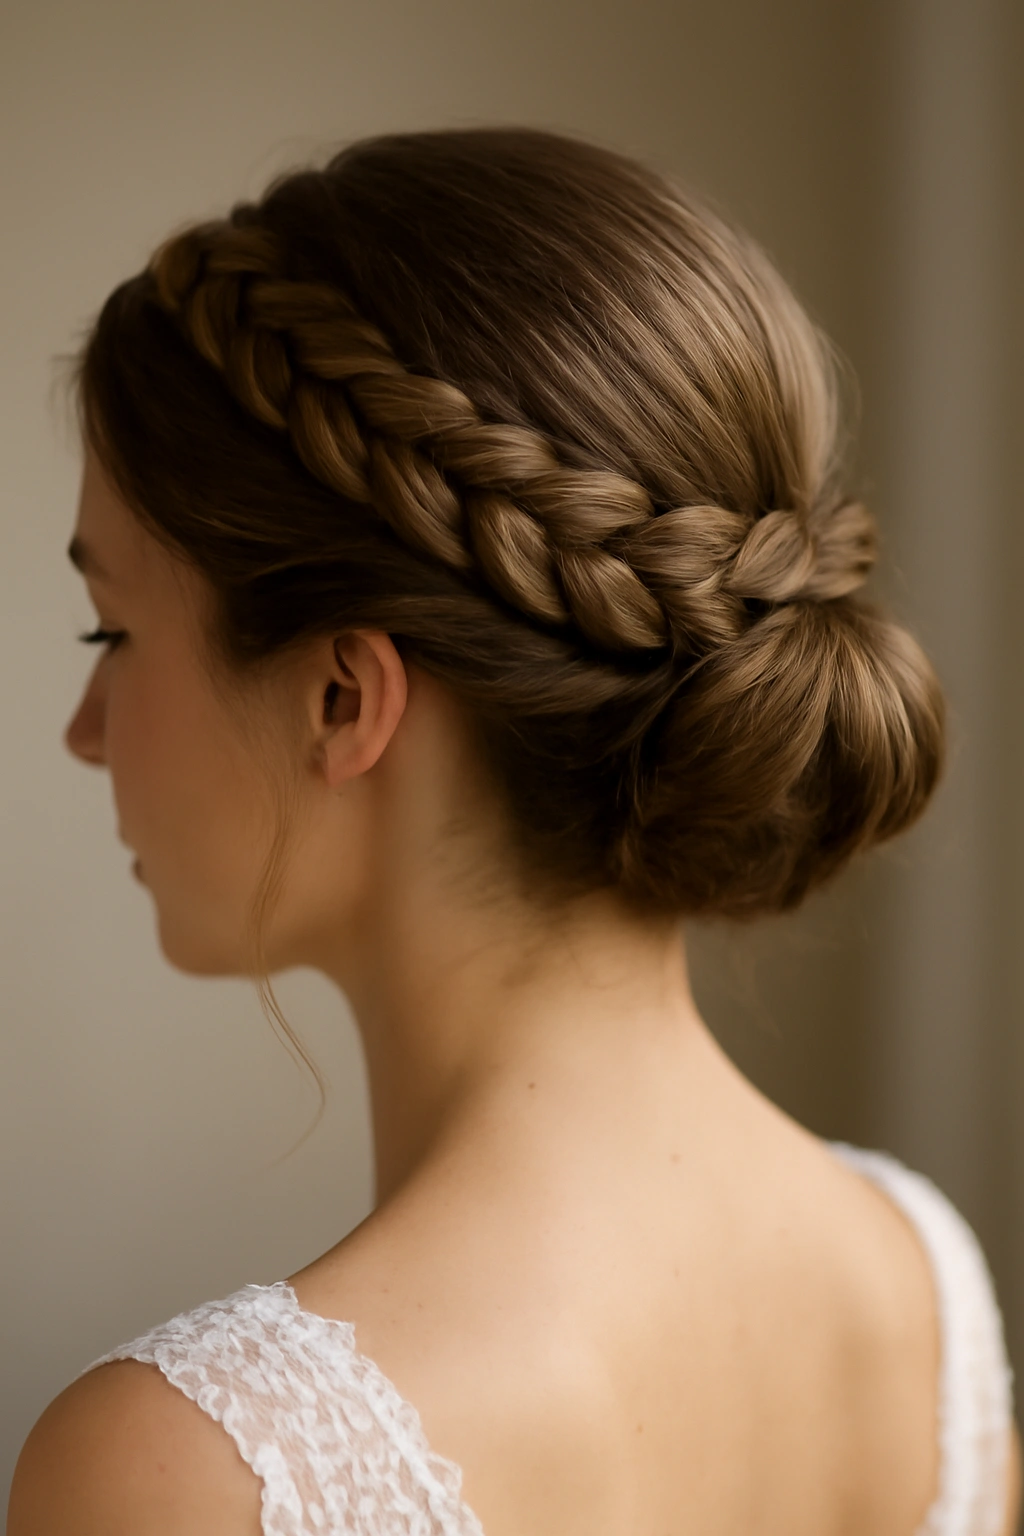
This style features one or more braids that circle around the crown of your head like a halo, with the remaining hair either pinned into a low bun or left to flow down the back. It’s romantic, whimsical, and universally flattering, making it particularly popular for bridesmaids and garden weddings.
The Appeal for Formal Celebrations
The braided halo crown looks inherently special and intentional. It’s flattering on all face shapes and works beautifully with flowers, pearl pins, or other accessories woven through the braid. The style is romantic without being overly elaborate, and it suits both traditional and contemporary aesthetics. It photographs beautifully and maintains visual interest from every angle.
Creating a Braided Halo
Start with textured hair. Section off a one-inch piece of hair above one ear. Create a three-strand braid, adding hair as you braid around the crown of your head toward the opposite ear (this is called an “around-the-head” or “crown” braid). The technique is the same as a regular three-strand braid, but you’re adding hair from the side sections as you go. Once you’ve braided all the way around to the opposite ear, secure the braid end with a small elastic. You can tuck the end into the braid itself if you prefer it hidden, or leave it visible and incorporate it into a bun. If keeping the halo and flowing hair, the remaining hair can be left loose or gathered into a low bun at the nape.
Worth knowing: You can create a single halo braid or a double halo for extra romance—create two smaller braids that circle around the crown separately.
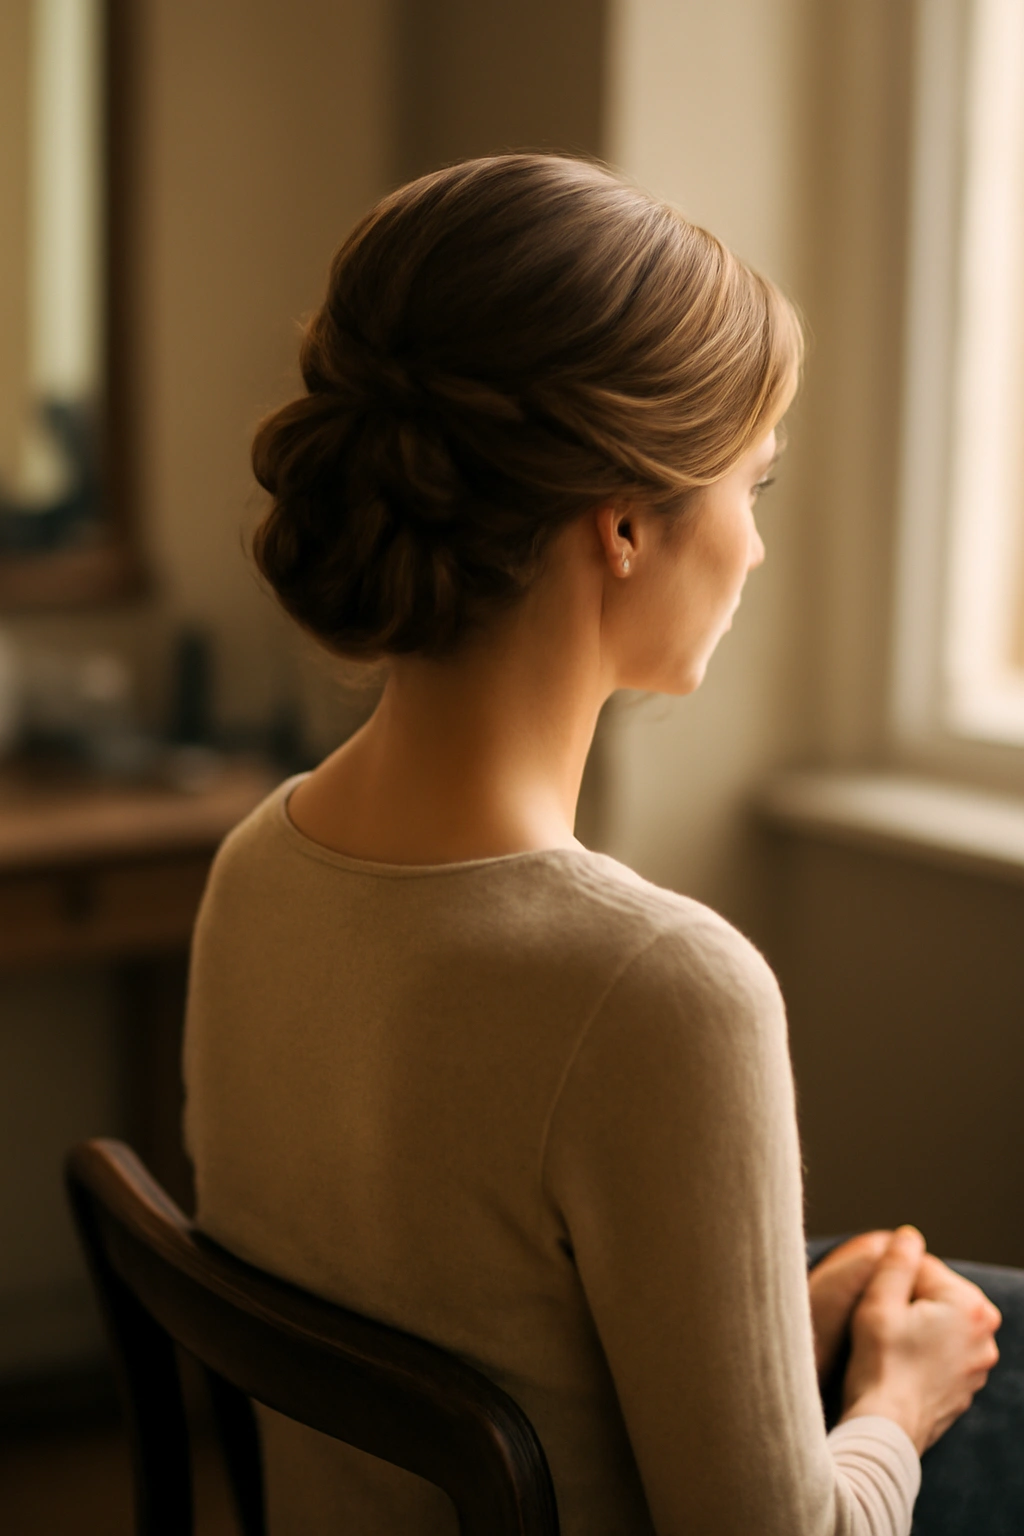
9. The Low Side Bun with Volume
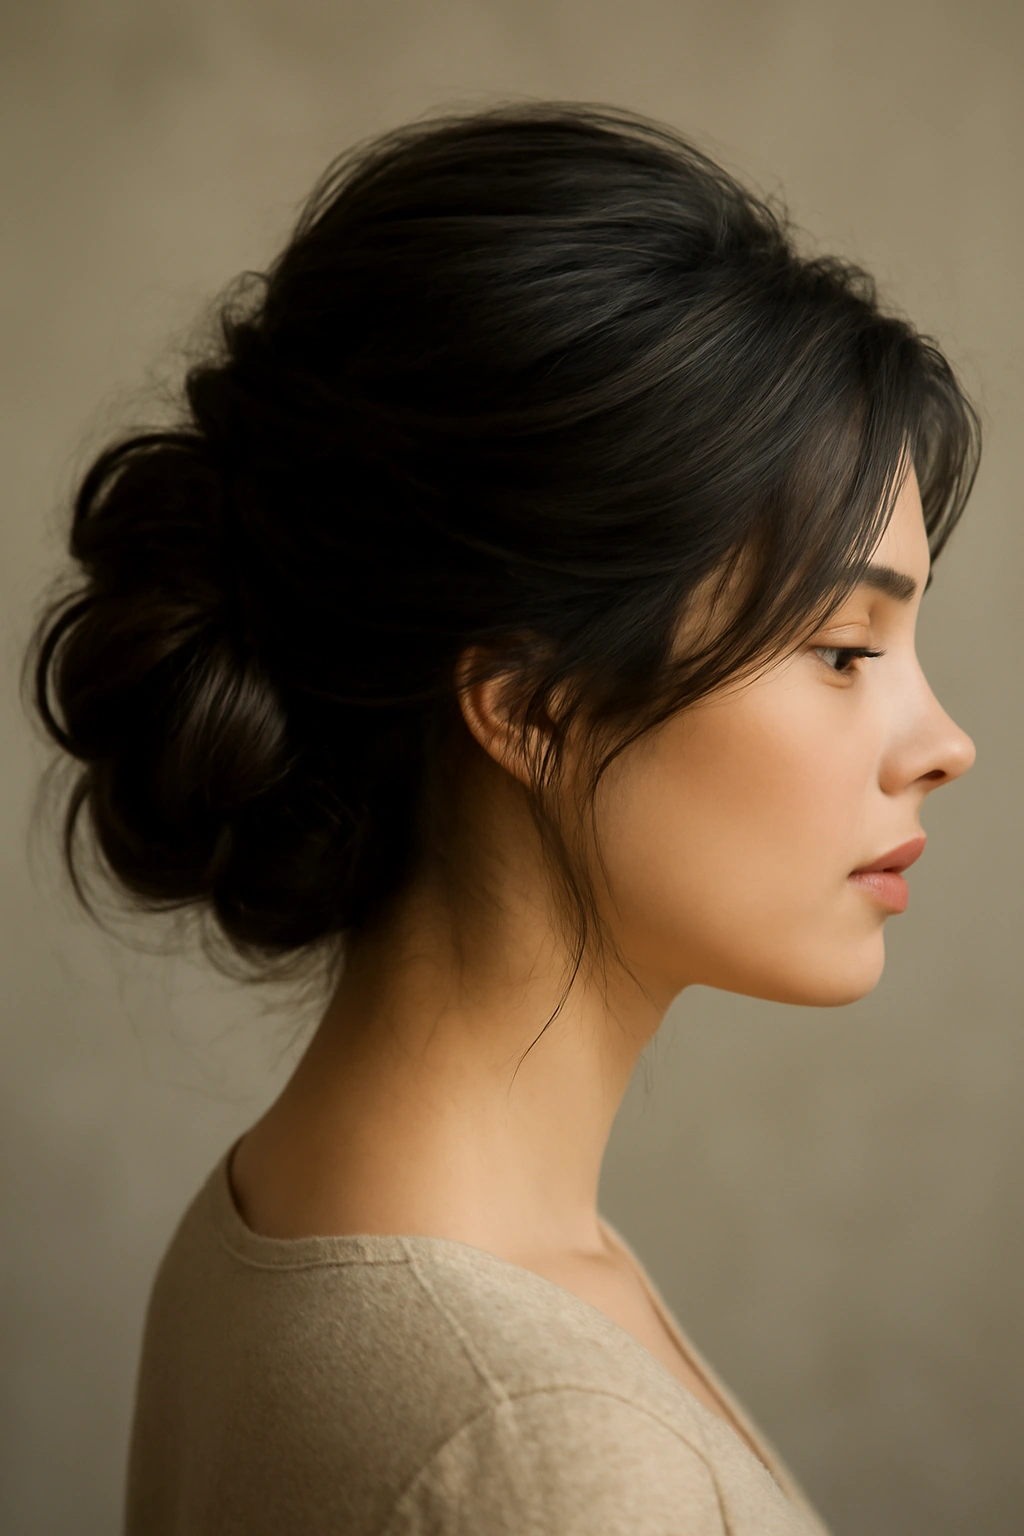
This updo positions a full, voluminous bun off-center and low on the back of your head, creating an asymmetrical silhouette that’s both elegant and dynamic. The volume is key—this isn’t a sleek, tight bun but rather a soft, textured one with intentional fullness.
Why This Works for Formal Events
The low side bun is endlessly flattering and works beautifully for anyone with thicker hair wanting to showcase that thickness. It suits asymmetrical dress necklines and modern, fashion-forward aesthetics. The volume and positioning create a youthful, romantic feel while remaining appropriately formal. This style is particularly popular for events where you want something more interesting than a centered bun without looking unconventional.
Achieving Perfect Volume
Blow-dry your hair with texture and some volume at the crown—flip your head upside down while blow-drying if you have fine hair and need extra height. Create a low ponytail positioned slightly to one side rather than center-back. Before gathering the ponytail, tease the hair at the crown and back section to create volume and grip. Secure the ponytail loosely. Twist the ponytail, then wrap it around itself to form a bun, leaving some sections slightly loose and undone for texture. Secure with bobby pins and gently pull the bun apart with your fingers to increase its apparent size and soften its edges. Finish with hairspray.
Pro tip: Use a velvet scrunchie or fabric elastic rather than a standard hair elastic, as it grips better and won’t create visible marks or indentations in the bun.
10. The Twisted Crown with Face-Framing Pieces
This elegant style features two or more twisted sections that begin at the temples and wrap around the back of the head like a crown, with the remaining hair either gathered into a low bun or left to flow down. Face-framing pieces are intentionally left out to soften the overall effect and create a romantic, accessible feel.
The Appeal and Best Uses
The twisted crown is modern yet timeless, working beautifully for contemporary weddings and formal events. It’s particularly flattering for people with longer faces and smaller face shapes, as the twisted sections around the crown add width and dimension. The style reads as intentional and sophisticated while remaining comfortable and wearable. It photographs beautifully and works with nearly any dress neckline.
How to Create This Look
Blow-dry your hair with some texture. On one side, separate a one-inch section of hair at the temple. Twist this section loosely and pin it toward the back of your head, securing it at roughly the level of the opposite ear. Repeat on the other side, creating a matching twisted section. If desired, create one or two additional twisted sections lower down, bringing them toward the center back and securing them together. Leave thin sections of hair framing your face on both sides, curling them slightly with a curling iron or your fingers. Gather the remaining hair into a low bun if you prefer a complete updo, or leave it to flow down if you prefer a half-up style.
Key consideration: The twist should be loose enough to feel romantic rather than severe. Practice this several times to get the right balance between secure and soft.
Final Thoughts
Choosing the right updo for a wedding or formal event comes down to understanding your hair’s natural texture, considering your face shape and dress style, and deciding whether you want maximum elegance through simplicity or through interesting detail and dimension. None of these styles requires a particular hair type or length, though they may require slightly different execution depending on whether you have fine, thick, straight, or curly hair.
The most important thing is practice. Try the updo you’re considering at home a few times before the actual event. You’ll discover how your hair responds, whether you need texture spray or smoothing serum, and where bobby pins need to go for maximum security. If you’re genuinely uncertain, booking a trial appointment with a skilled stylist weeks before your event is money well spent—a professional can assess your hair in person and troubleshoot any challenges specific to your texture and style preferences.
Remember that the best updo is the one you feel confident wearing. If you’re self-conscious about your new hairstyle, that hesitation will show in your posture and expressions, and it will show in photographs. Choose a style that feels like a refined version of yourself, secure in its construction, and beautiful from every angle.