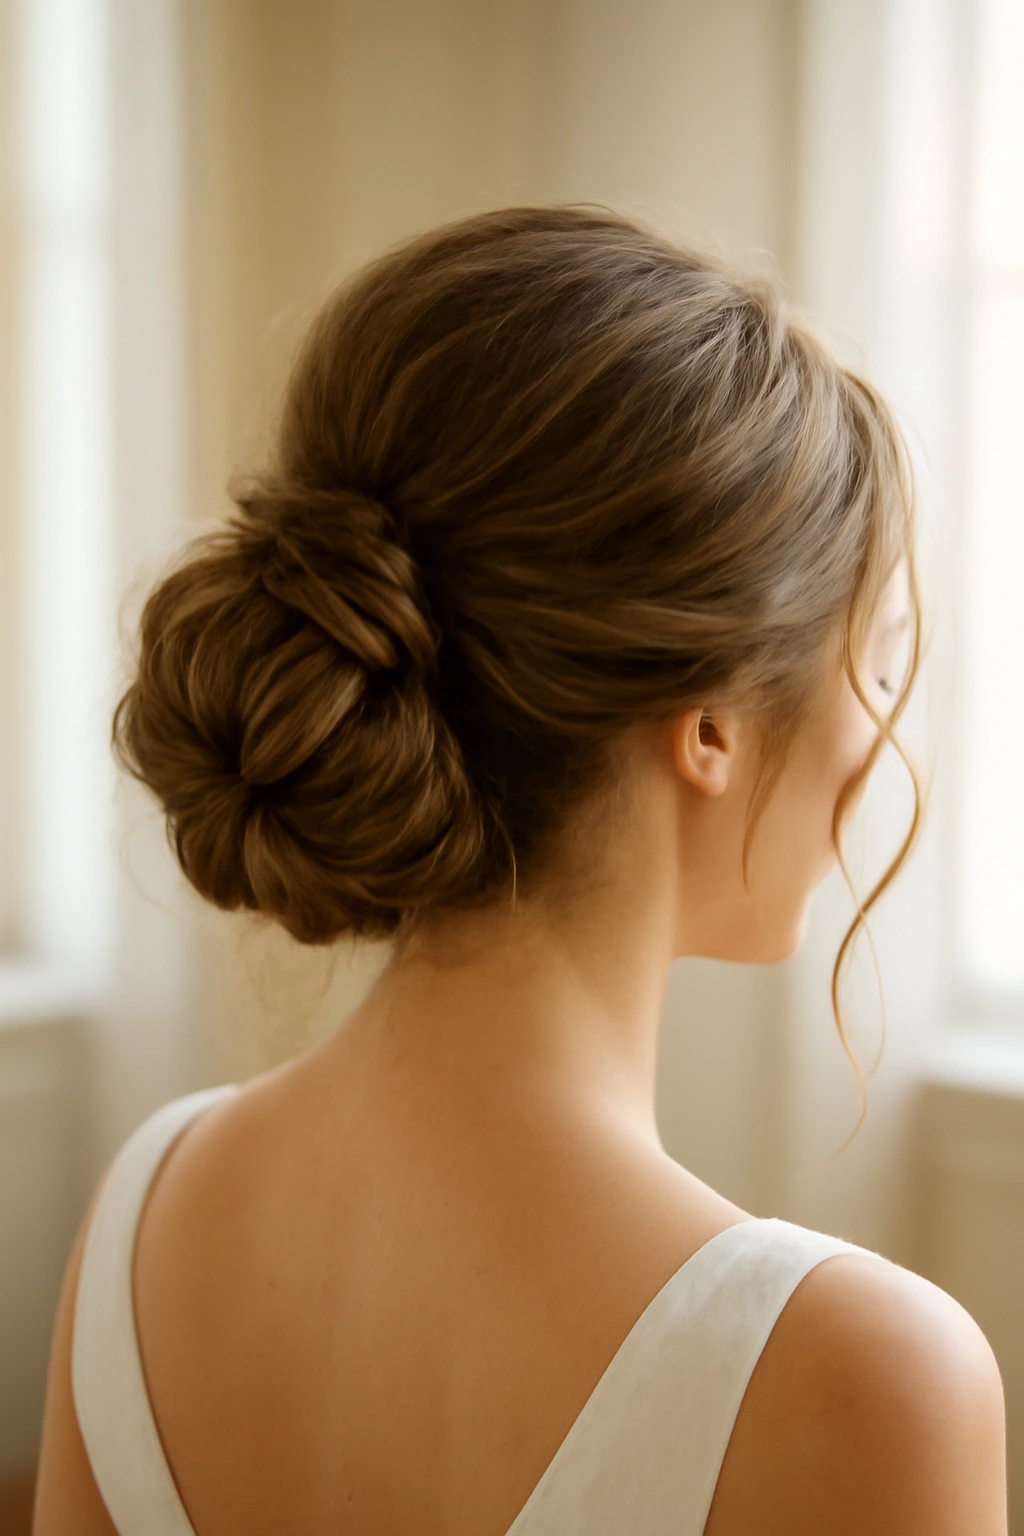
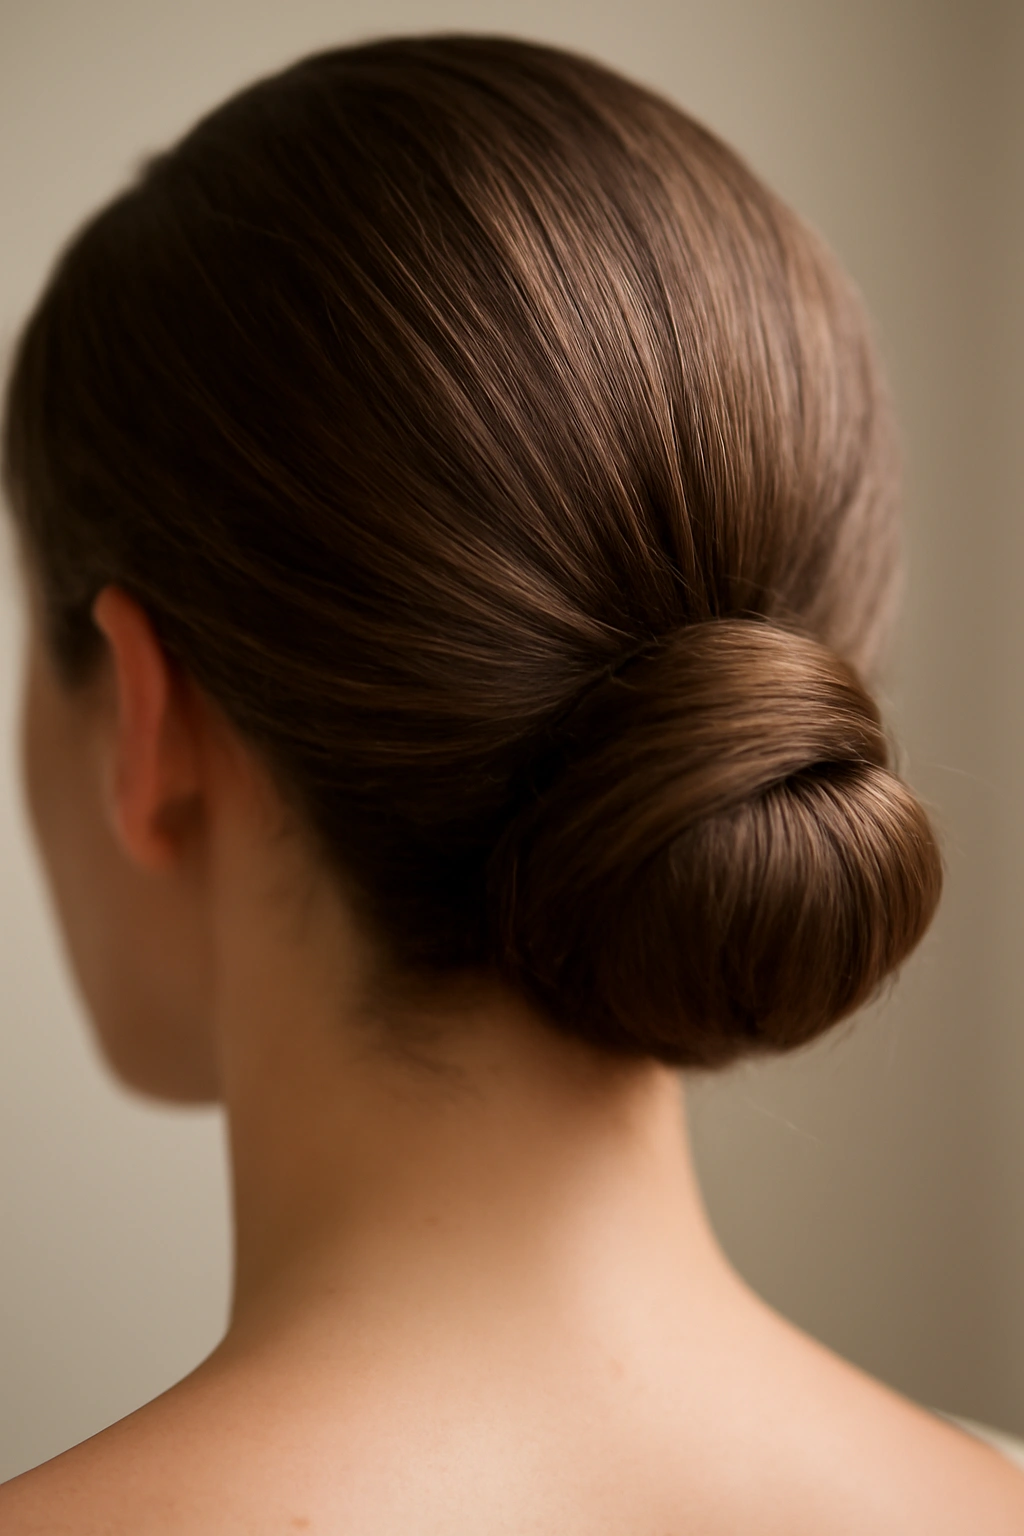
A low bun represents the intersection of elegance and practicality—the hairstyle that says “I’m polished and intentional” without screaming “I tried too hard.” On your wedding day, when you’re managing a dress, vows, and about seventeen different photo angles, your hair needs to look effortlessly beautiful while actually staying put through a ceremony, dinner, and dancing. A well-executed low bun accomplishes exactly that, cradling your face with softness while keeping everything secure for hours.
The challenge isn’t creating a low bun. It’s creating your low bun—one that flatters your face shape, complements your dress neckline, and feels like an authentic extension of your style rather than a costume you’re wearing. A bun that’s too tight reads severe and uncomfortable. Too loose and it collapses by the cocktail hour. Too elaborate and it overshadows your face and dress. Perfect hits that sweet middle ground where it looks intentional, stays put, and makes you feel absolutely beautiful.
This guide walks through everything you need to know to create a wedding-day low bun that’s both gorgeous and genuinely wearable—from the hair prep that happens days before to the last-minute anchoring tricks that keep it secure through every moment.
Why a Low Bun Is the Perfect Wedding Hairstyle
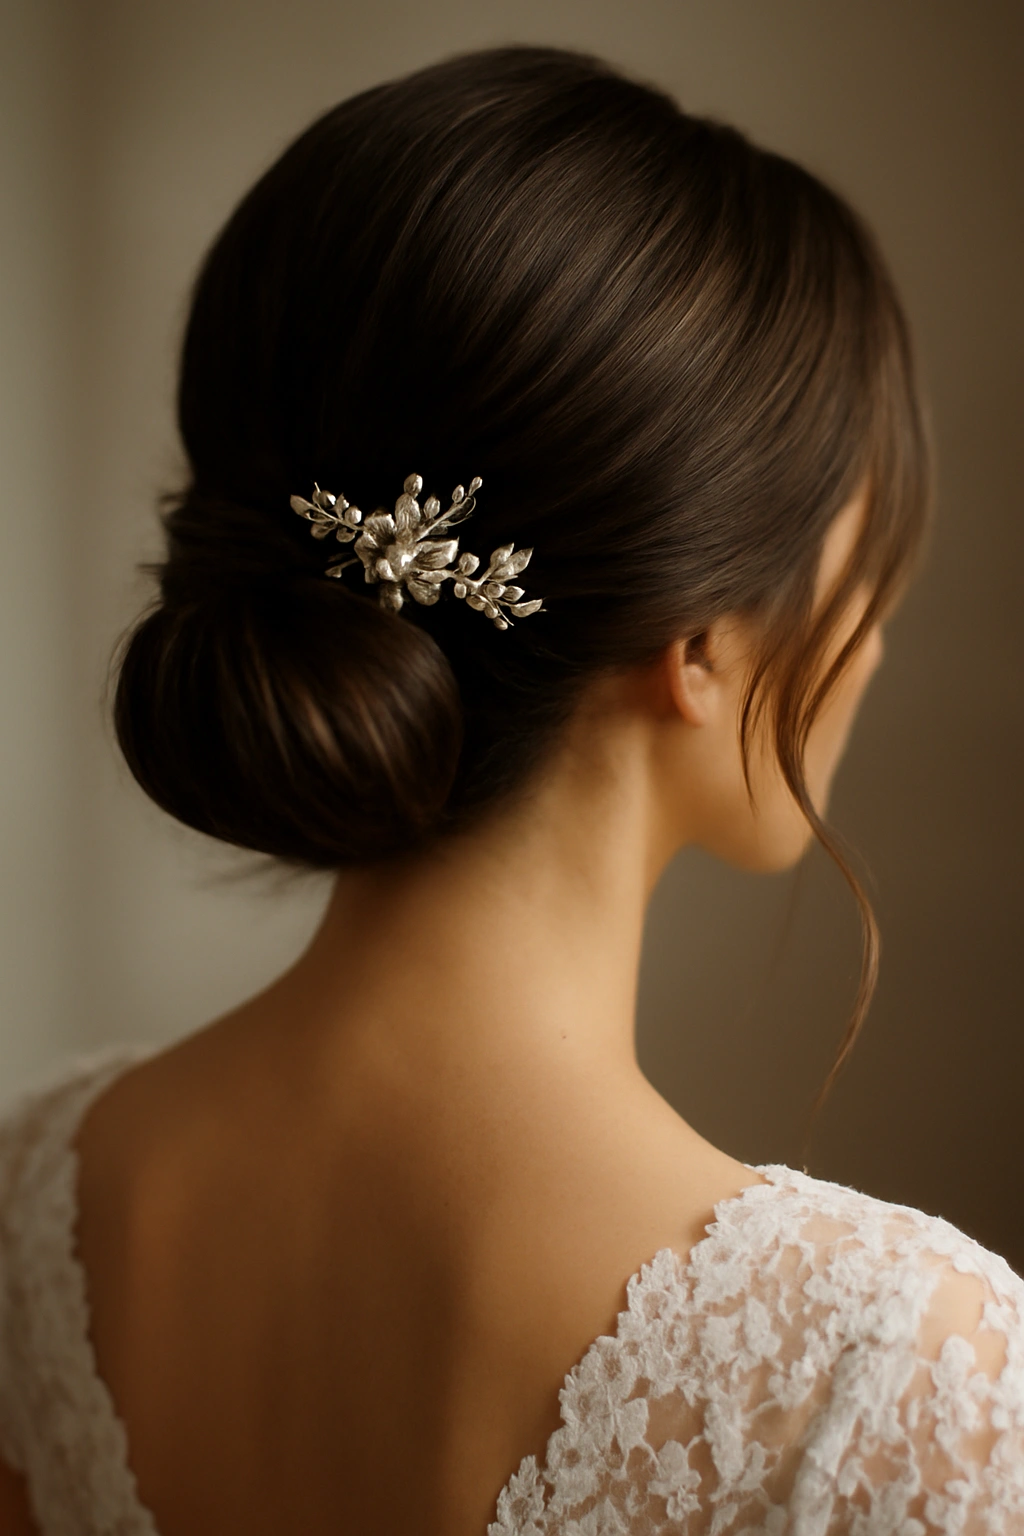
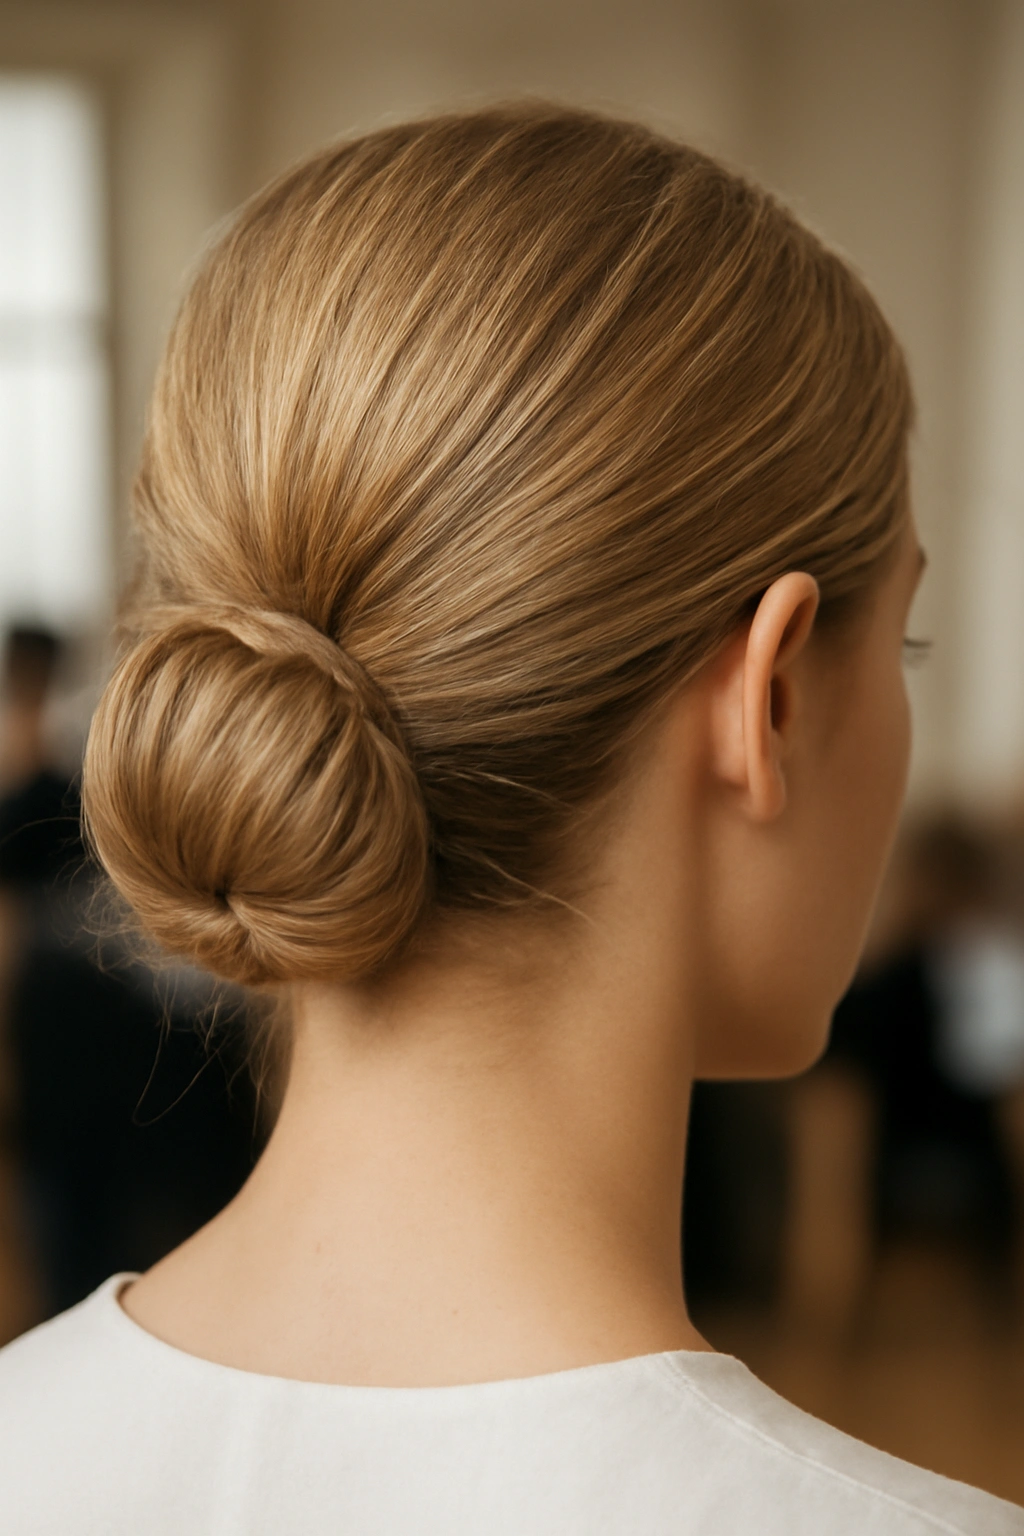
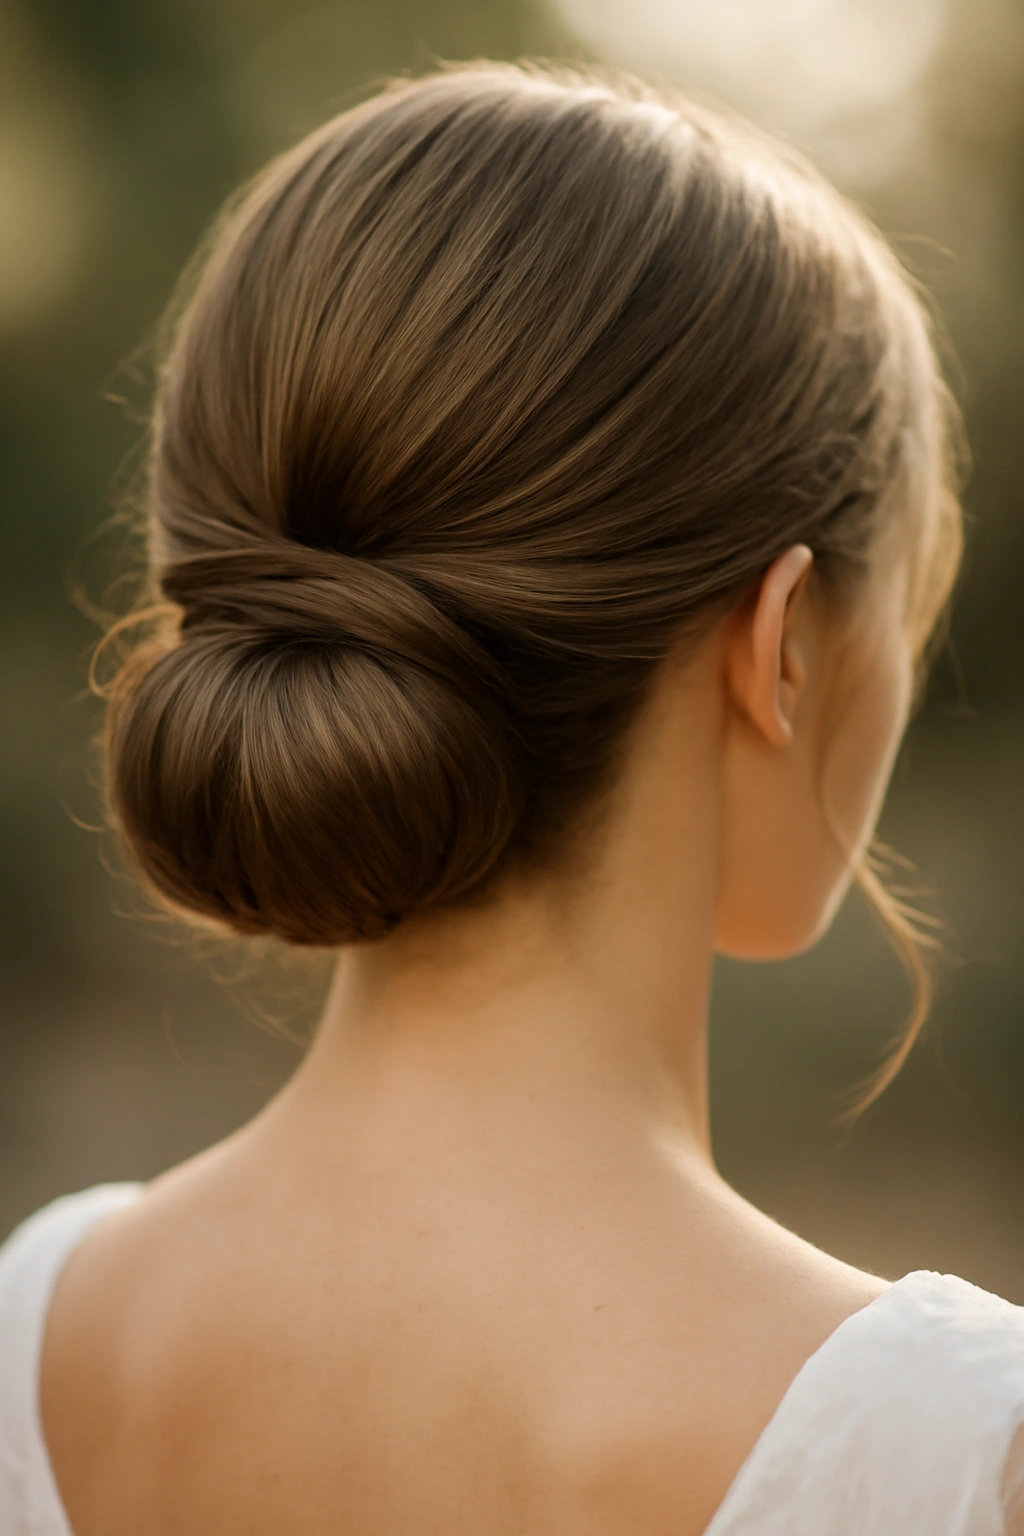
A low bun works for practically every wedding aesthetic imaginable. Pair it with delicate vintage accessories and a lace dress for romantic elegance. Keep it sleek and modern with clean lines and minimal embellishment for a contemporary vibe. Add dramatic flowers and greenery for bohemian charm. Texture it up with waves and a few strategic pieces left loose around the face for something softer and more approachable.
Beyond versatility, a low bun solves real practical problems on a wedding day. It keeps hair off your face and neck, which means you can actually feel the breeze and won’t be constantly pushing strands away in photos. It sits at a height that works beautifully with most wedding dress necklines—it doesn’t compete with a high halter neck or clash with delicate spaghetti straps. It frames your face in a way that flatters most face shapes when styled with a few soft pieces around the face.
The low bun also photographs exceptionally well. It shows off your face, your dress neckline, and any jewelry or accessories you’re wearing without stealing focus. In profile shots, it creates an elegant line from your jawline down through your neck and shoulders. In overhead shots, it adds visual interest and dimension to the back of your head rather than disappearing entirely.
Practically speaking, a low bun is comfortable for eight or ten hours of wear. It doesn’t create the tension-headache feeling that some updos cause by pulling hair too tightly at the crown. You can still hug people and have them hug you without worrying about crushing an elaborate construction. You can rest your head against your partner during the ceremony or reception without feeling like you’re going to knock them over with a complicated topknot.
Essential Tools and Products You’ll Need
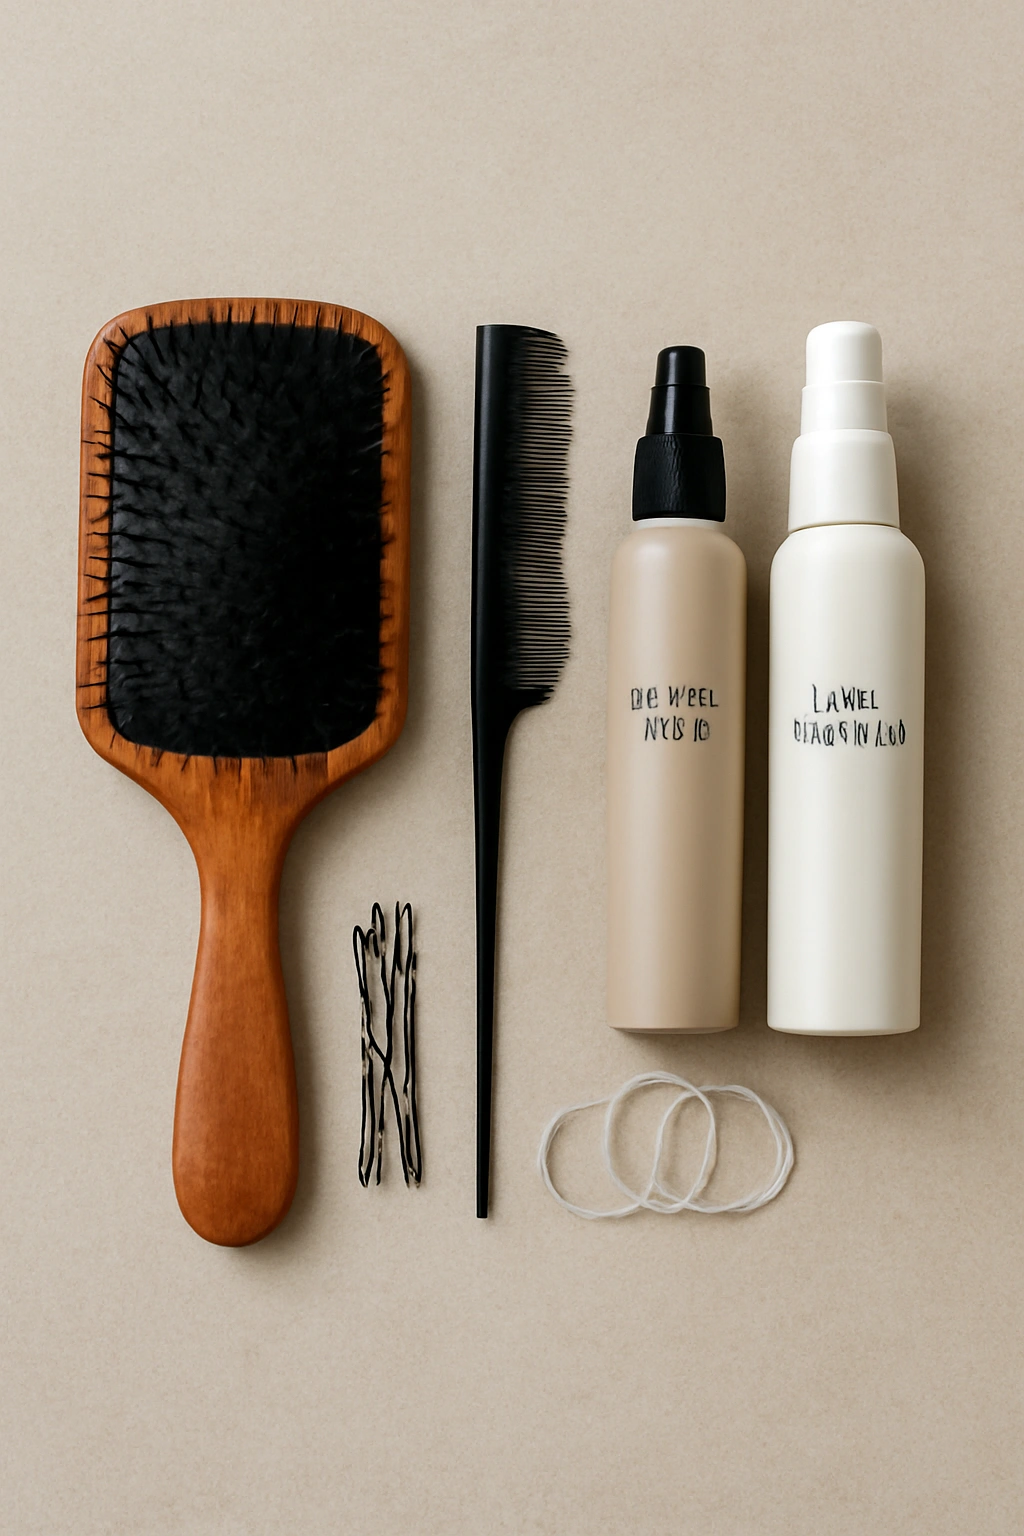
Before you even touch your hair, gather the right tools and products. The difference between a bun that looks polished and one that looks scraggly often comes down to having quality equipment on hand.
For brushes and combs, a paddle brush works beautifully for smoothing and detangling. A fine-tooth comb helps with precision when you’re gathering sections and creating sleek lines. A teasing brush (also called a backcombing brush) adds grip and texture when you need it. Having all three means you can handle any hair situation that arises.
For securing and shaping, you’ll want multiple options. Bobby pins in your exact hair color (not silver or gold unless your hair is blonde) are essential—they disappear instead of creating visible lines. Expect to use 12 to 20 bobby pins depending on your hair thickness and length. A hair elastic or small elastic band creates the initial gathered base. Many stylists prefer seamless elastics or spiral hair ties over traditional rubber bands, which can create indentation and breakage.
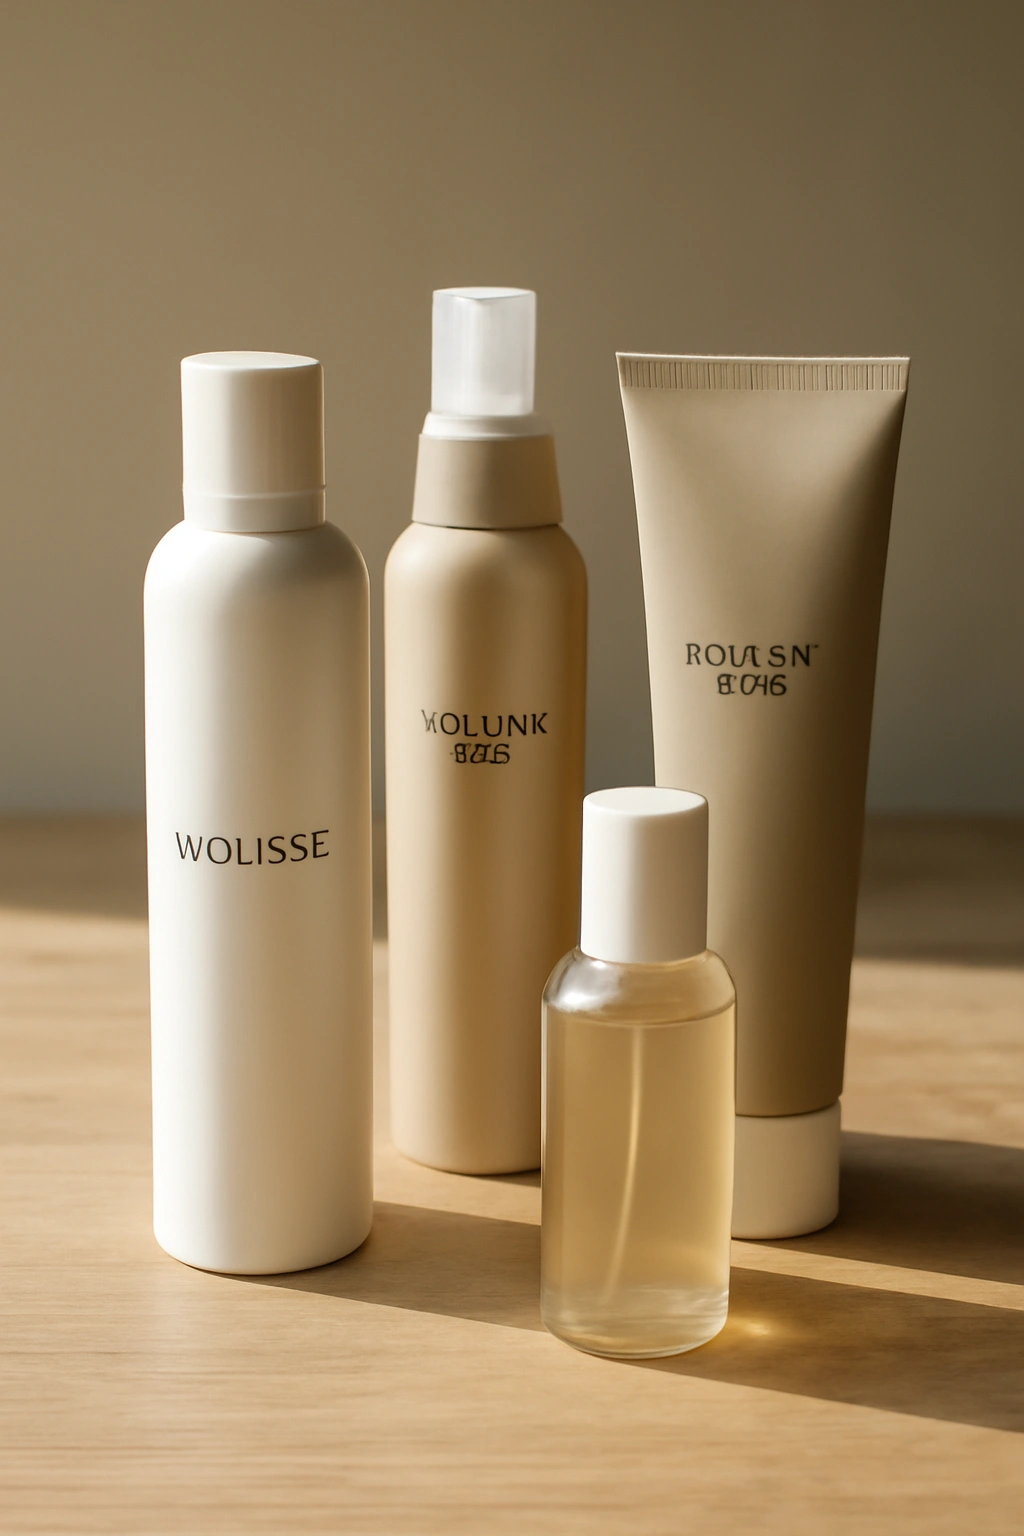
Texture and grip are crucial. A texture spray or volumizing spray applied to dry hair creates friction that helps your bun hold its shape. Dry shampoo works similarly if you don’t have texture spray—it adds grip and absorbs oils that might make a bun slippery. A light hairspray that provides hold without stiffness finishes the look. Avoid super-heavy hairspray, which can make hair look plastic and clumpy.
For styling products, a smoothing serum or shine spray adds polish. A light styling cream or mousse (applied to damp hair before blow-drying) helps build texture and hold. Heat protectant spray is non-negotiable if you’re blow-drying and curling—it prevents damage and actually helps products adhere better.
Consider hair extensions or a hair donut if your own hair is very fine or you want extra volume. A hair donut (a small, donut-shaped piece of synthetic hair) sits inside your bun and adds fullness without adding weight. Clip-in extensions placed strategically can add density to a thin section of hair.
Gather everything before you start. Having to hunt for bobby pins while you’re in the middle of styling is incredibly frustrating and breaks your momentum.
Preparing Your Hair the Day Before
The best wedding-day hairstyles start with preparation the day before. Your hair should be clean but not freshly washed—hair that’s two to three days clean actually holds styles better than squeaky-clean hair. Fresh shampoo makes hair slippery and harder to grip.
If your hair is naturally oily or you last shampooed three or four days ago, use dry shampoo the night before. Spray it at the roots, let it sit for five to ten minutes, then brush it through. This removes excess oil and adds texture that helps your bun grip better. Don’t overdo it—you want texture, not visible white powder.
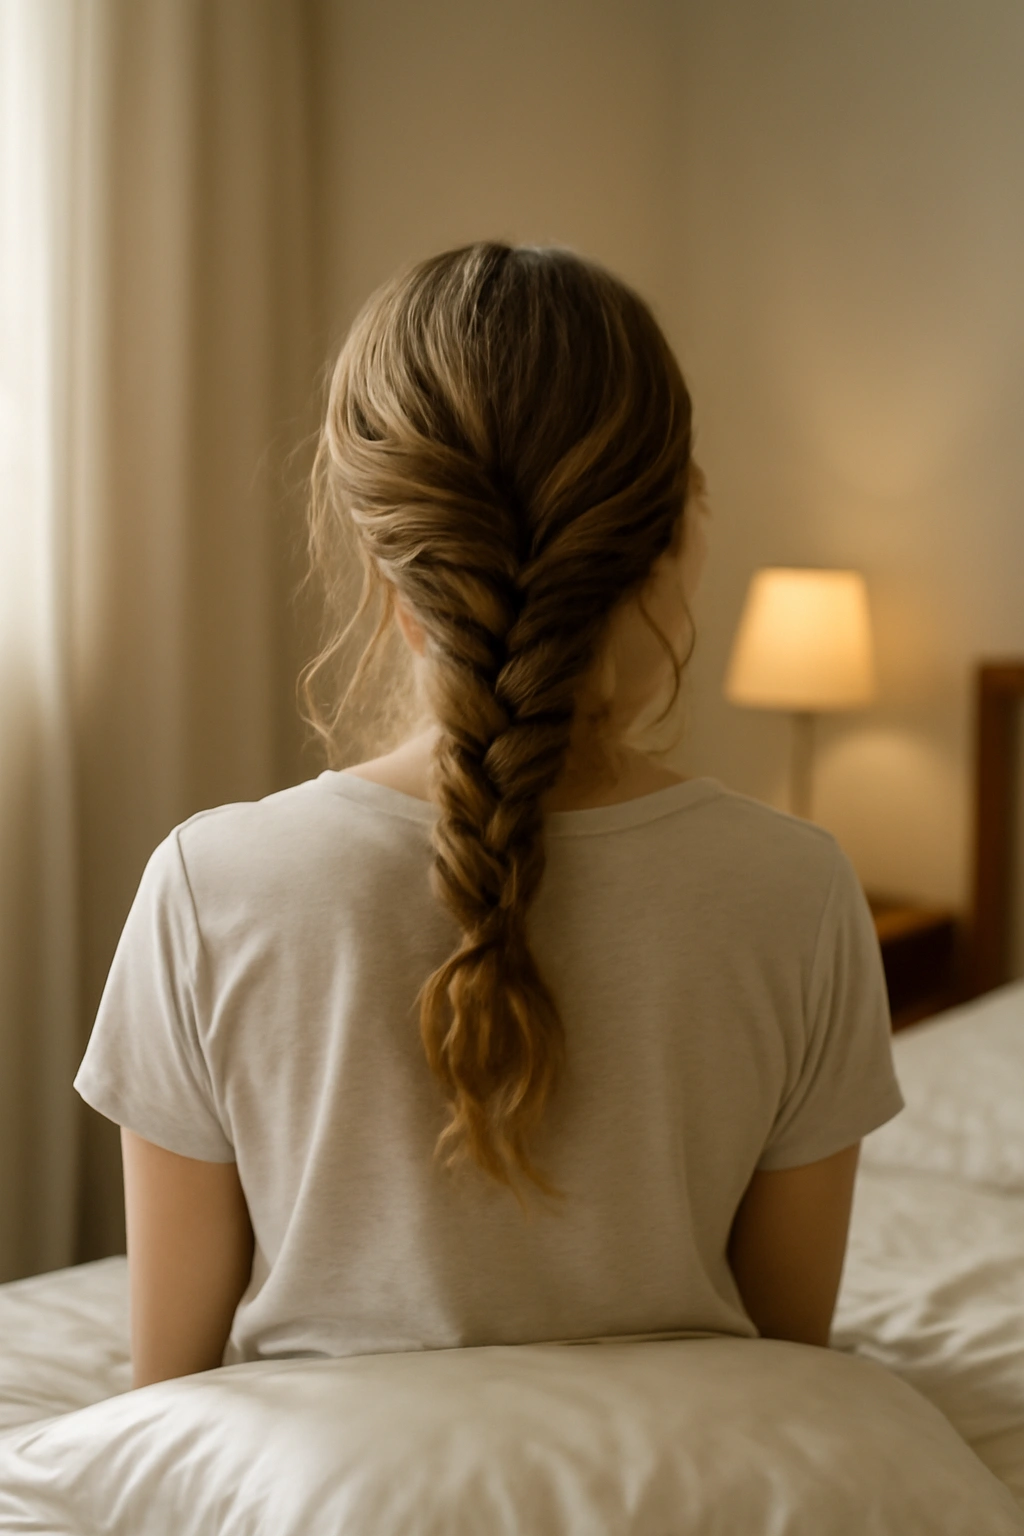
Sleep on your hair in a way that creates gentle waves or texture. A loose braid before bed works beautifully. A pineapple—gathering hair loosely on top of your head with a soft scrunchie—creates gentle waves without creating a crease. Even just sleeping on a pillowcase made of silk or satin (rather than cotton) reduces friction and helps preserve any waves or texture you’ve created.
The night before, do a test styling if you’re planning something elaborate or if you’ve never created this exact style before. This isn’t the time for full styling—just loosely practice gathering your hair in the position where your bun will sit, securing it temporarily, and seeing how it looks. Walk around, sit down, move your head side to side. If something feels awkward or uncomfortable, you’ve got time to problem-solve before the actual wedding day.
Check your dress neckline and any accessories you’re planning to wear. Simulate how your bun position will interact with your dress. If you’re wearing an elaborate updo comb or hair vine, practice how it sits in the bun so there are no surprises. A fifteen-minute rehearsal prevents a thirty-minute scramble on the actual day.
Creating the Perfect Foundation with Styling Products
On wedding day morning, start with dry hair. If you’ve slept on your hair properly, you already have some texture. If your hair is completely flat, dampen it slightly with a spray bottle—not soaking wet, just lightly misted. Completely wet hair takes forever to dry and is harder to work with when you’re trying to create a polished, precise style.
Apply a lightweight volumizing mousse or styling cream to your roots and mid-lengths. Mousse works better than cream for fine or thin hair; cream works better for thick or coarse hair. Work it through with your fingers, focusing on creating lift at the crown and texture throughout. This product creates a grip that makes hair hold its shape better.
If your hair tends to be slippery or fine, apply texture spray to the entire head, focusing on your roots. Spray it directly onto dry hair, then brush through. This creates friction between your hair strands so they grip each other and stay in place rather than sliding around. Texture spray is often the difference between a bun that holds for eight hours and one that starts looking sad by hour three.
Let any products you’ve applied set for a minute before moving to the next step. You’re not blow-drying yet—you’re just letting the products do their job and your hair to absorb them slightly.
Blow-Drying Your Hair for Maximum Volume and Control
Blow-dry your hair in sections for maximum volume and control. Section hair by creating a line from your forehead straight back to your crown, then another line from ear to ear. This divides your hair into four sections: two sides and a front-to-back center section, plus the back.
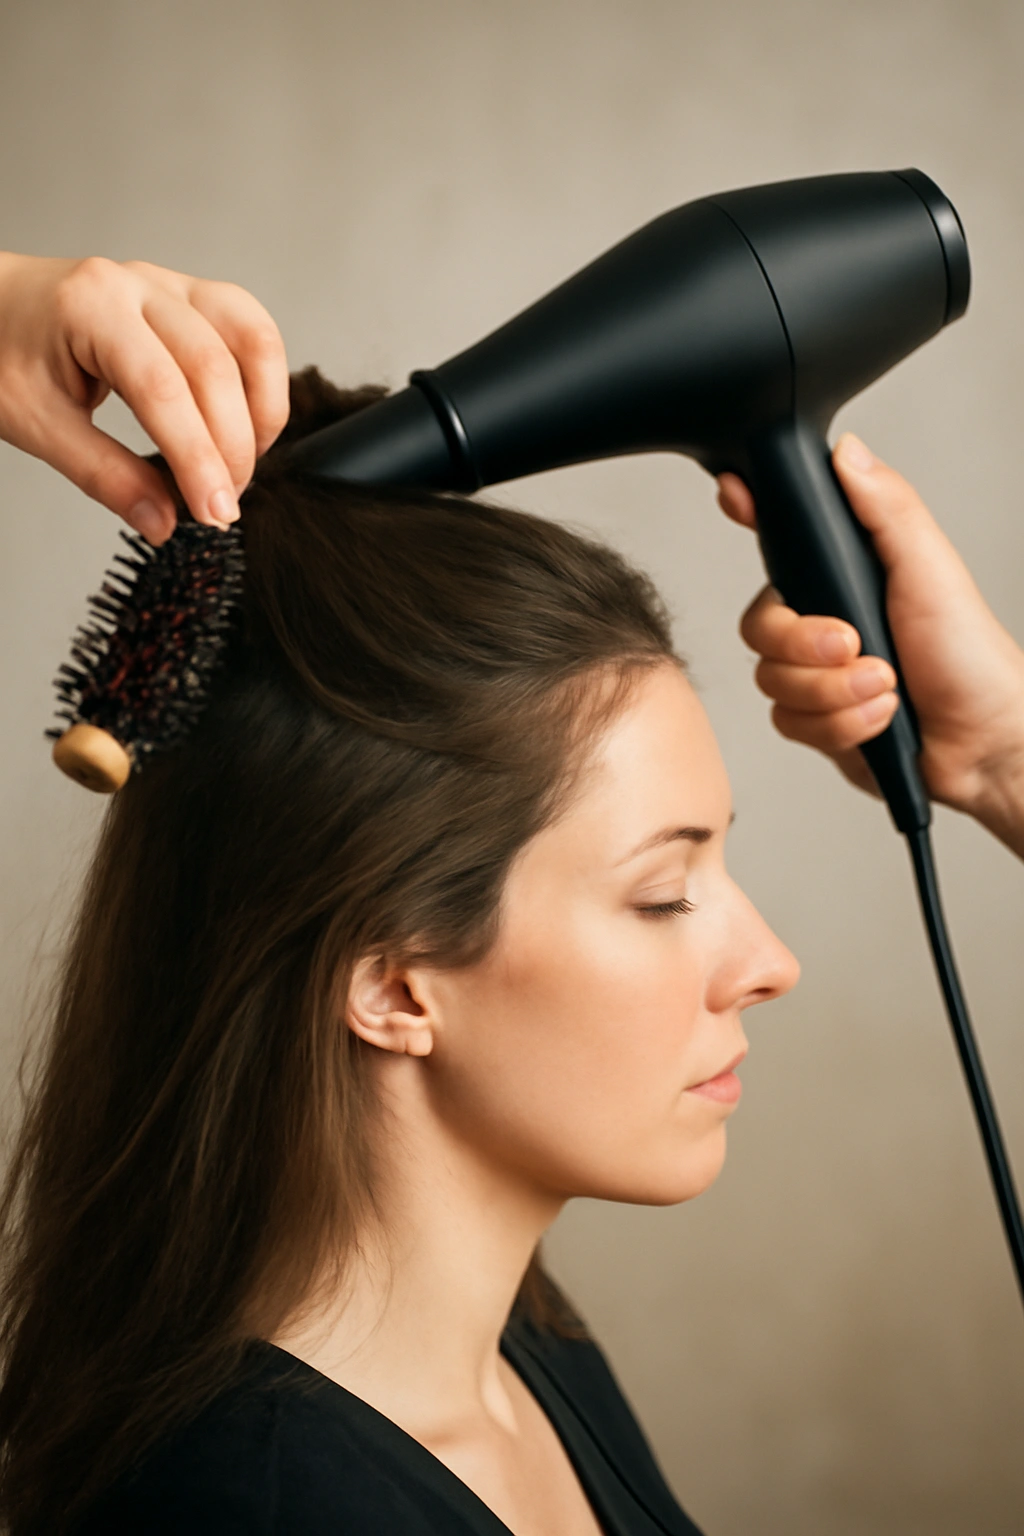
Start with the back section, which will eventually become part of your bun. Flip your head forward and blow-dry the back of your hair upside down, directing the blow-dryer nozzle downward toward your scalp. Blow-drying against your hair’s natural growth pattern creates lift. Use your fingers or a paddle brush to separate your hair as you dry, preventing it from clumping together. The goal is volume at the roots—this is where the fullness in your bun begins.
Dry the sides and crown while your head is upright, pulling hair away from your face and creating lift at the roots. Use a round brush if you want to add body; a paddle brush works well if you want to smooth. Direct the blow-dryer nozzle downward to seal the hair cuticle and create shine.
Don’t completely dry your hair yet—you want it about eighty percent dry at this point. The remaining moisture helps products adhere and prevents your hair from becoming so dry it becomes frizzy or flyaway.
Curling or Waving Your Hair for Texture
Texture transforms a bun from potentially limp to dimensional and interesting. Even slight waves create visual interest and help your bun hold its shape because wavy hair grips better than completely straight hair.
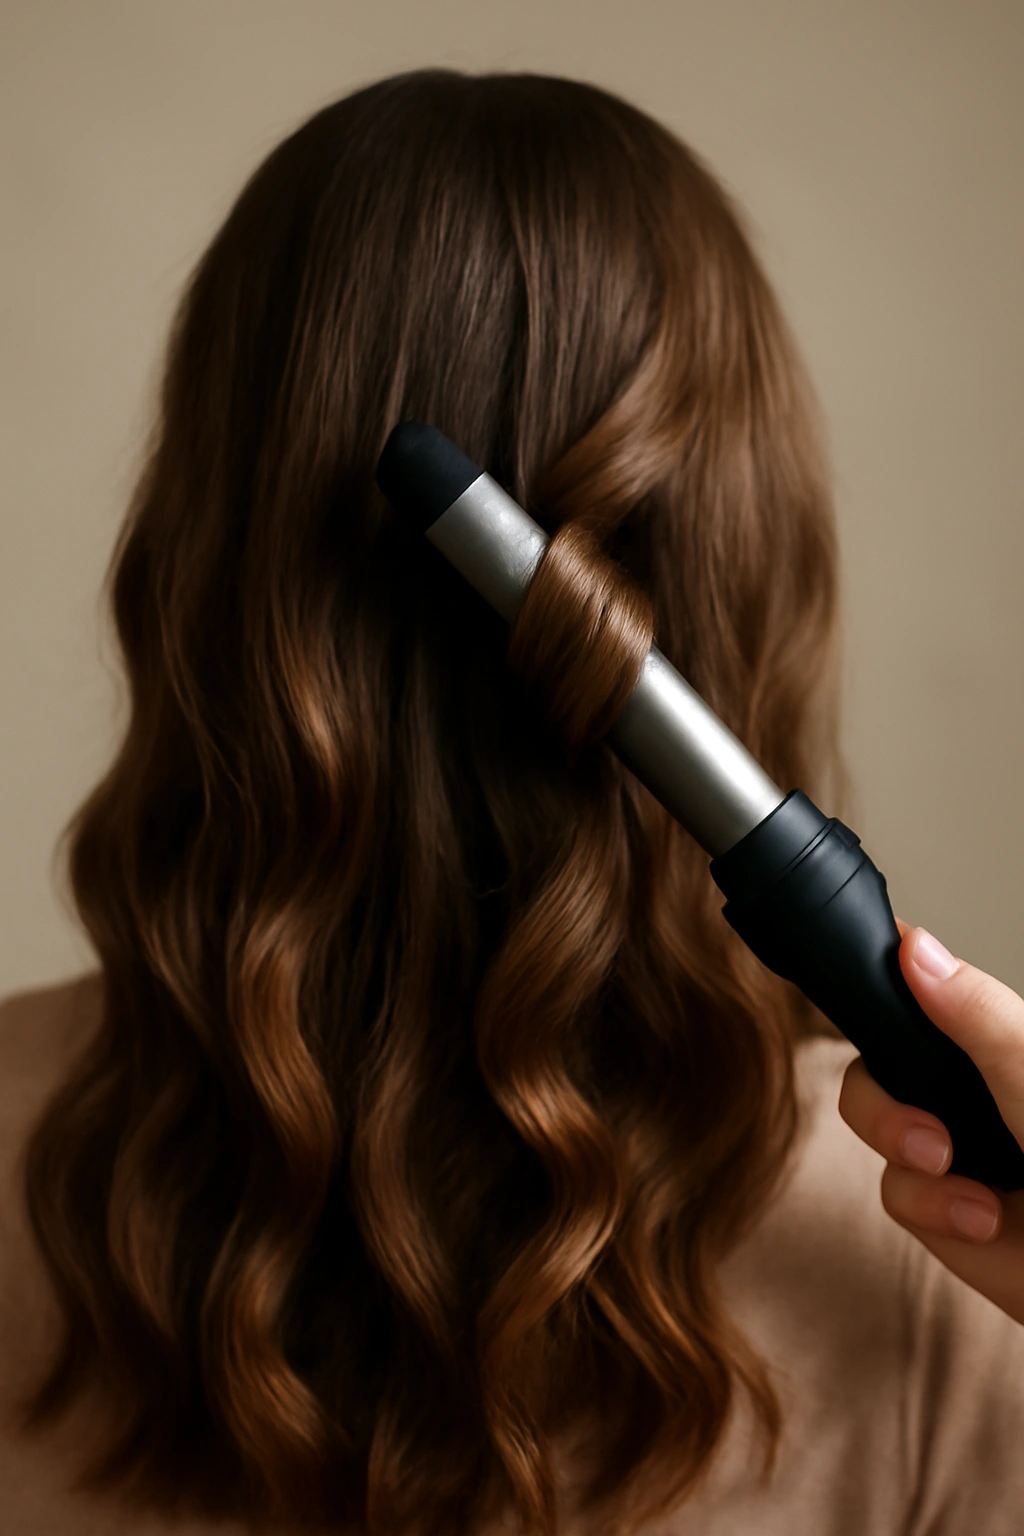
Use a one-and-a-half to two-inch curling iron for the most flattering wave. Thinner irons create tighter waves that can look dated; larger barrels create loose, modern waves that feel elegant. If you have very long or very thick hair, use a two-and-a-half or three-inch barrel.
Divide the back section of your hair (which will become your bun) into one-to-two-inch vertical sections. Take one section, place your curling iron horizontally at the mid-point of the section, and wrap the hair around the barrel away from your face (if you’re working on the back middle section, wrap the hair either direction—consistency doesn’t matter as much as fullness). Hold for two to three seconds, then slowly release. The wave should be loose and flowing, not a tight ringlet.
Work through all the back section, then move to the sides and crown. Curl everything the same direction for a polished look, or alternate directions for something softer and more relaxed. Let the curls cool completely before touching them—they’ll set and hold much better.
Once all the curls are cool, gently run your fingers through them to soften them into waves. Don’t brush them out—you want the texture, not completely smooth curls. The goal is soft waves that add dimension and help your hair grip together when you form the bun.
Gathering and Positioning Your Hair
Positioning is crucial. Too high and it reads as a top knot or updo rather than a low bun. Too low and it sits awkwardly at the base of your neck. The sweet spot is two to three inches above the nape of your neck—low enough to feel elegant and off your neck, high enough to look intentional and positioned.
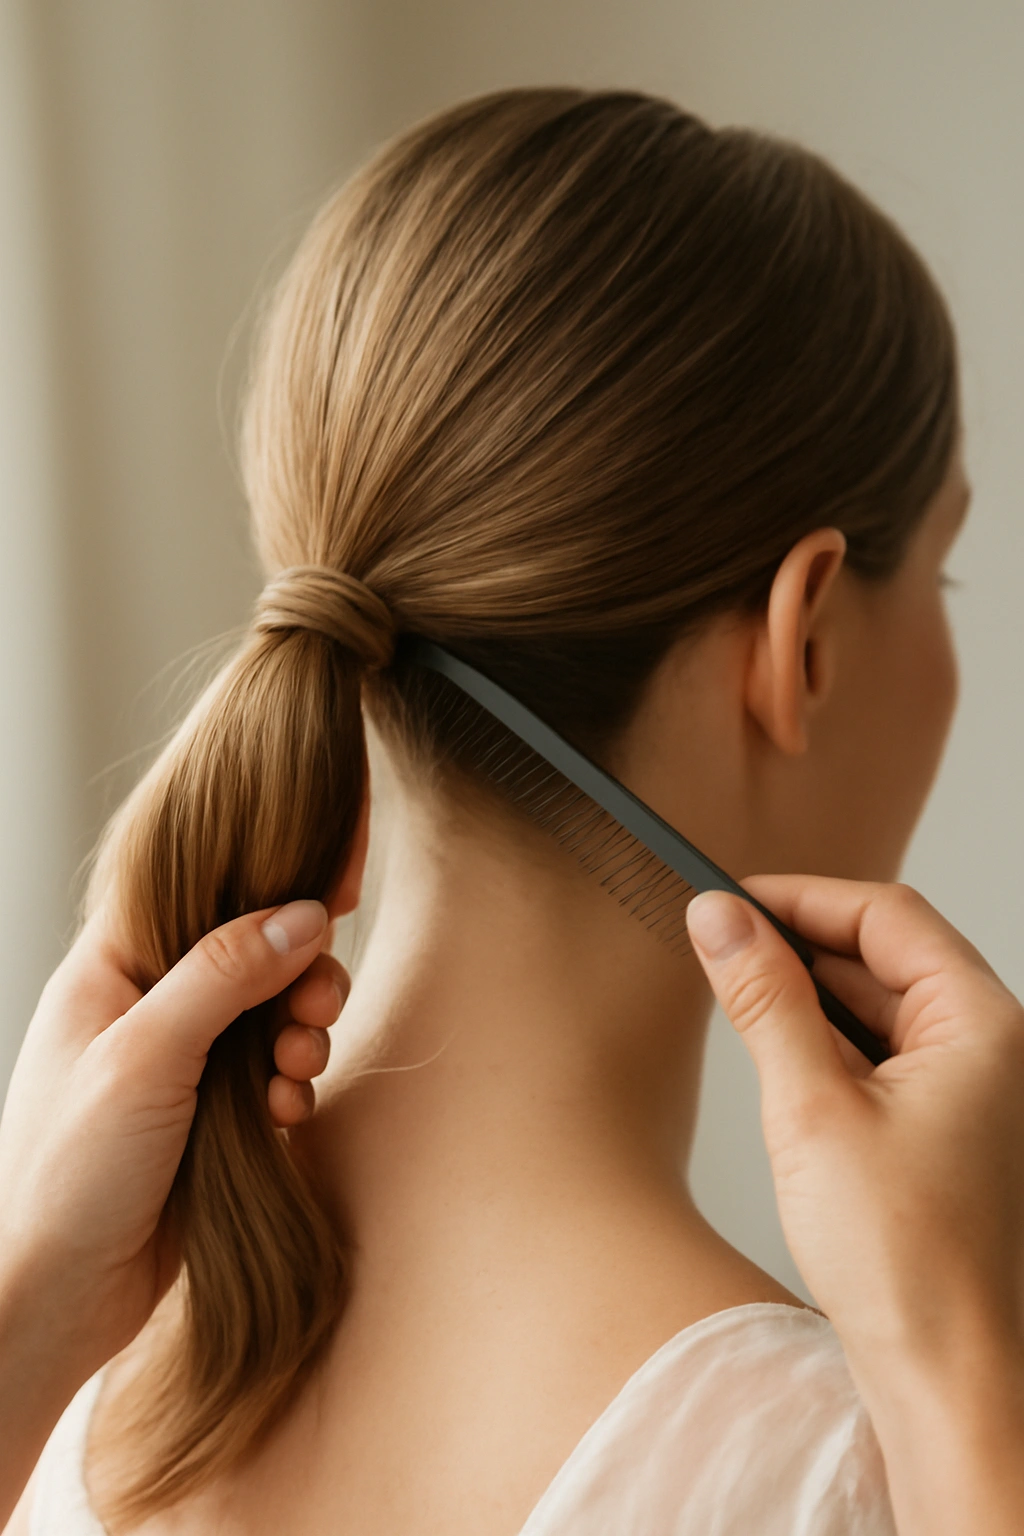
Use your comb to locate this spot. Hold the comb horizontally against your head where you want the bun to sit. This marks your positioning. This is where you’ll create the gathered base that becomes your bun.
Tip your head forward slightly and gather all your hair into a low ponytail at this position. Use your paddle brush to smooth the front and sides as you gather, creating clean lines from your face to the base. If you want a few soft pieces around your face, leave them out now—typically a small section at each temple and possibly a small section at the back of the neck if you’re going for a softer look.
Secure the ponytail with an elastic. Don’t pull it too tight—tight elastics create tension, can damage hair, and create a visible indent in your bun. The elastic should be snug enough that the ponytail won’t slip, but not so tight that it’s uncomfortable or leaves a crease.
Securing and Shaping the Bun
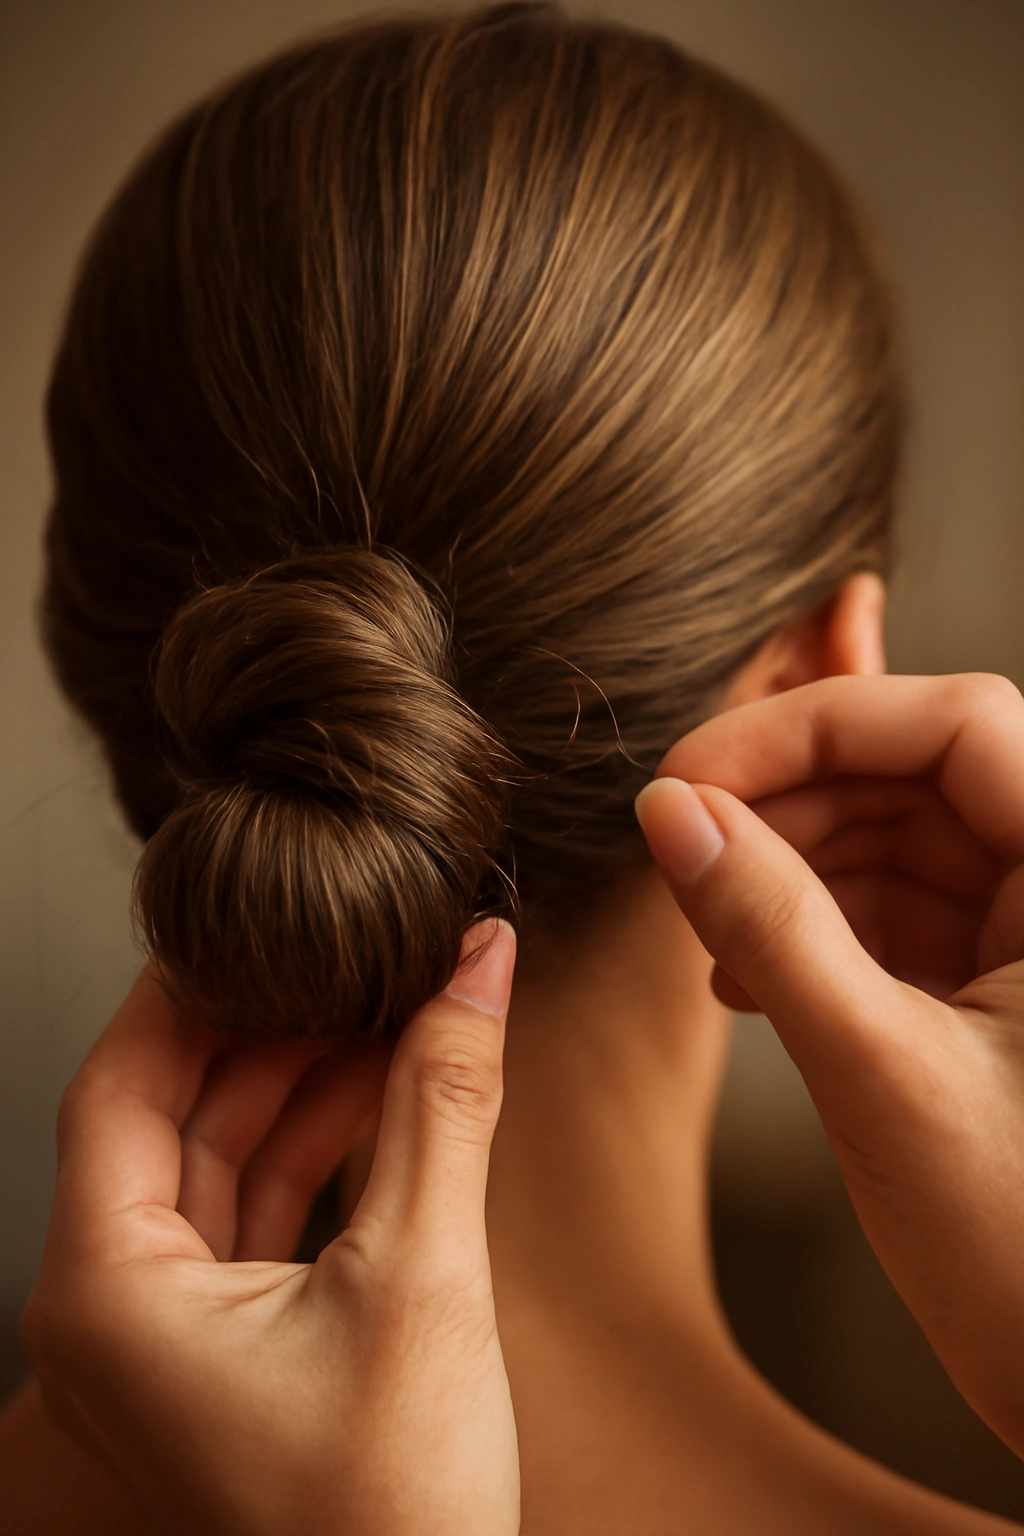
Now transform your ponytail into a bun. There are two methods: the twist method and the coil method.
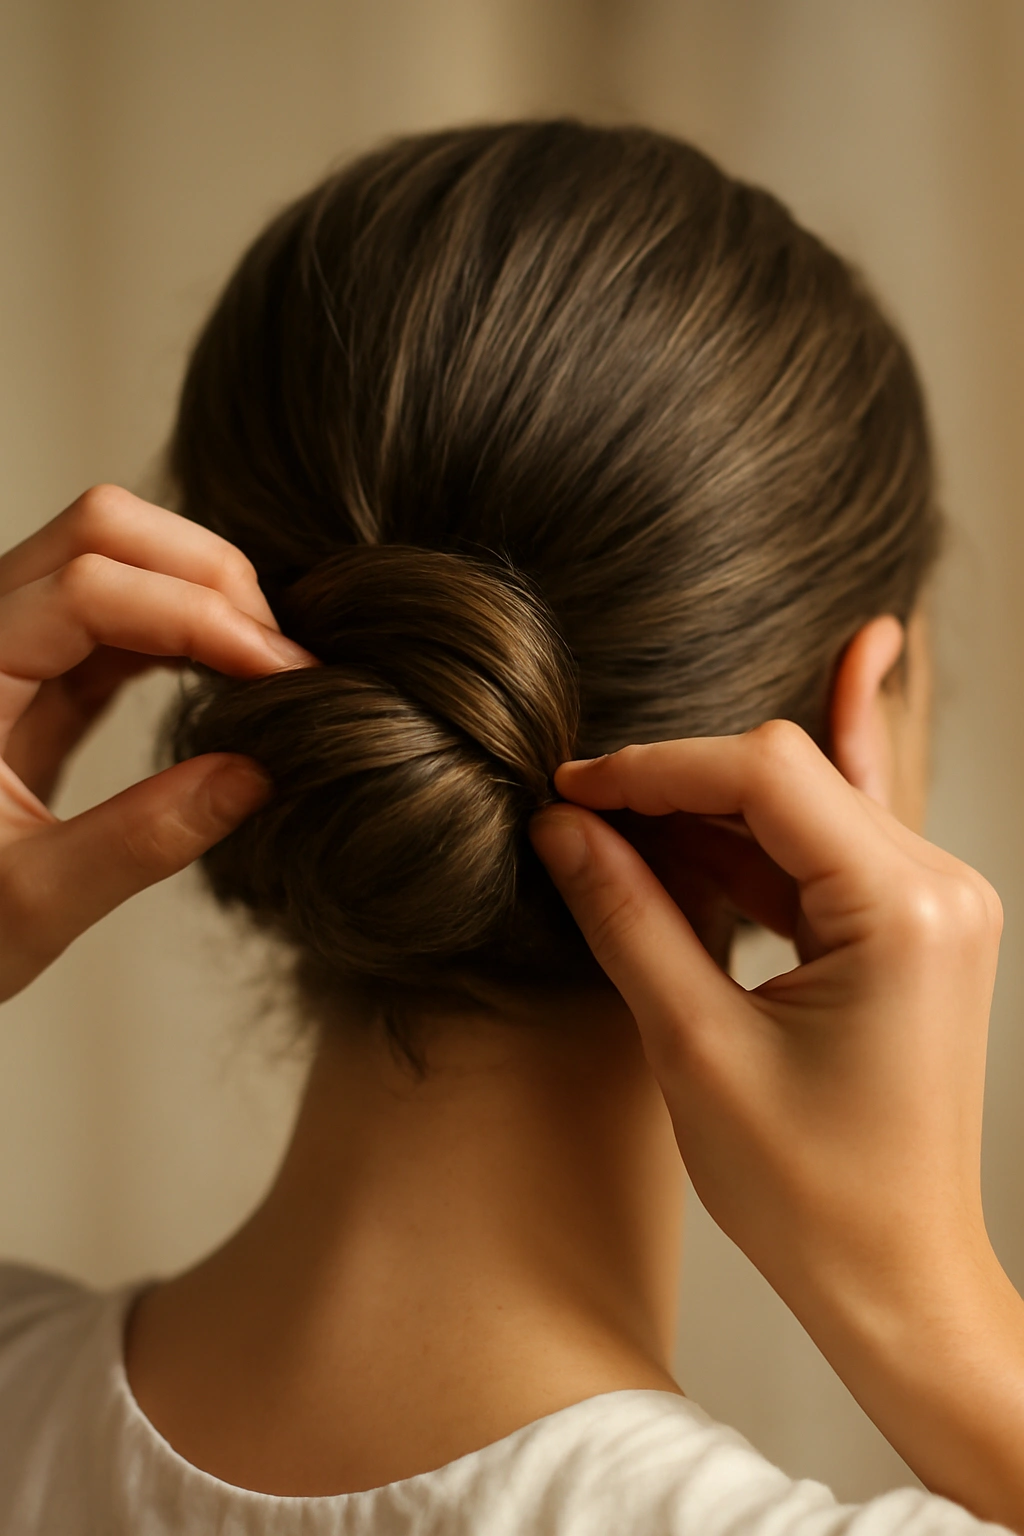
The twist method works beautifully for thick hair and creates a more structured, polished-looking bun. Divide the ponytail in half. Twist one half around itself, creating a rope of hair. Wrap this twisted rope around the elastic, forming a circle. Secure with bobby pins, inserting them horizontally into the base of the bun, not sticking straight into the top. Repeat with the second half of the ponytail, wrapping it around the elastic alongside the first twisted section.
The coil method works well for all hair types and creates a bun that looks fuller and slightly more relaxed. Rather than twisting, you’re coiling the ponytail around the base in a spiral. Roll the ponytail upward and around the elastic, securing as you go with bobby pins. This method tends to create a bun with more visible texture and dimension.
Neither method is objectively better—choose whichever feels more natural to you and looks better with your face shape and dress style. Twisted buns read more formal and structured. Coiled buns feel slightly softer and more organic.
As you secure your bun, make sure all the hair from your ponytail is incorporated—no chunks should be sticking out or dangling. Once you’ve wrapped the entire ponytail around the base, you should have a neat, rounded shape.
Adding Volume and Dimension to Your Bun
A wedding-day bun should look full and dimensional, not tight and slicked. Once you’ve secured the basic shape, work on making it look more voluminous.
Gently tease or backcomb the outside of the bun slightly. Using a teasing brush in gentle, short downward strokes, create a bit of texture on the outer surface. This gives the bun more visual interest and prevents it from looking like you’ve plastered all your hair down. Smooth the teased areas gently with your brush so it looks like soft volume, not messy backcombing.
If your bun looks too small or your hair is thin, gently pull and loosen some of the wrapped sections. Don’t fully unwrap—just gently tug on the spiral to make it look fuller and slightly messier in an intentional way. This creates more surface area and makes a thin bun look more generous.
Fluff the bun with your fingers, gently pulling at different sections to create an organic, three-dimensional shape. The bun shouldn’t be perfectly smooth and sculptural—it should look like beautiful hair that’s been carefully arranged, not a geometric shape.
Working with Hair Extensions or Adding Fullness

If your own hair is very fine, thin, or shorter than you’d like, extensions or a hair donut add fullness without creating bulk or weight.
A hair donut is a small, donut-shaped piece of synthetic hair that you weave your own hair through. Thread your ponytail through the donut, position the donut at the base of the ponytail, then wrap and coil your hair around it using the same method you’d use for a regular bun. The donut adds significant fullness, making your bun look much fuller than your hair alone could achieve. Hair donuts come in multiple sizes and colors—choose a size that fits your ponytail diameter and a color that matches your hair.
Clip-in extensions offer more flexibility. Clip them into your ponytail before you wrap it into a bun, positioning them so they blend seamlessly with your own hair. This works especially well if you have thinning at one particular spot or want to add dimension without adding weight everywhere.
A faux bun (a pre-made bun of synthetic hair) is another option if you’re short on time or want to guarantee a certain size and shape. You still style your own hair, but rather than wrapping your own hair into a bun, you secure a pre-made bun over your gathered ponytail. This sounds like cheating, but it’s actually a legitimate and increasingly popular choice among brides—it guarantees a beautiful, full bun without stress.
If you choose any of these options, practice with them before the wedding. Understanding how they attach, how they look with your actual hair, and how to adjust them if necessary prevents wedding-day panic.
Anchoring Your Bun Securely for All-Day Wear
You’ve got a bun now, but keeping it securely in place through eight hours of ceremony, photos, hugging, and dancing requires strategic pinning.
Insert bobby pins horizontally into the base of the bun where it meets your head. Horizontal pins grip better than vertical ones. Space them around the perimeter of the bun—aim for pins every quarter-inch to half-inch around the base. This distributes the weight and ensures the entire bun is secure, not just one side.
For a very thick bun or longer hair, add a second layer of pins inserted at a slightly different angle through the middle sections of the bun. These interior pins prevent the bun from shifting or rotating as you move throughout the day.
Smooth your hair as much as possible as you pin. Any bumps or ridges you create with pins will be visible and uncomfortable. Pin into areas where your hair naturally overlaps or gathers, not through sparse areas.
Once you’ve pinned the bun base thoroughly, check your head movement. Gently shake your head side to side, tip it forward and back, and do a few gentle shoulder rolls. The bun shouldn’t shift at all. If any part moves, add more pins to that area.
Adding Decorative Elements and Accessories
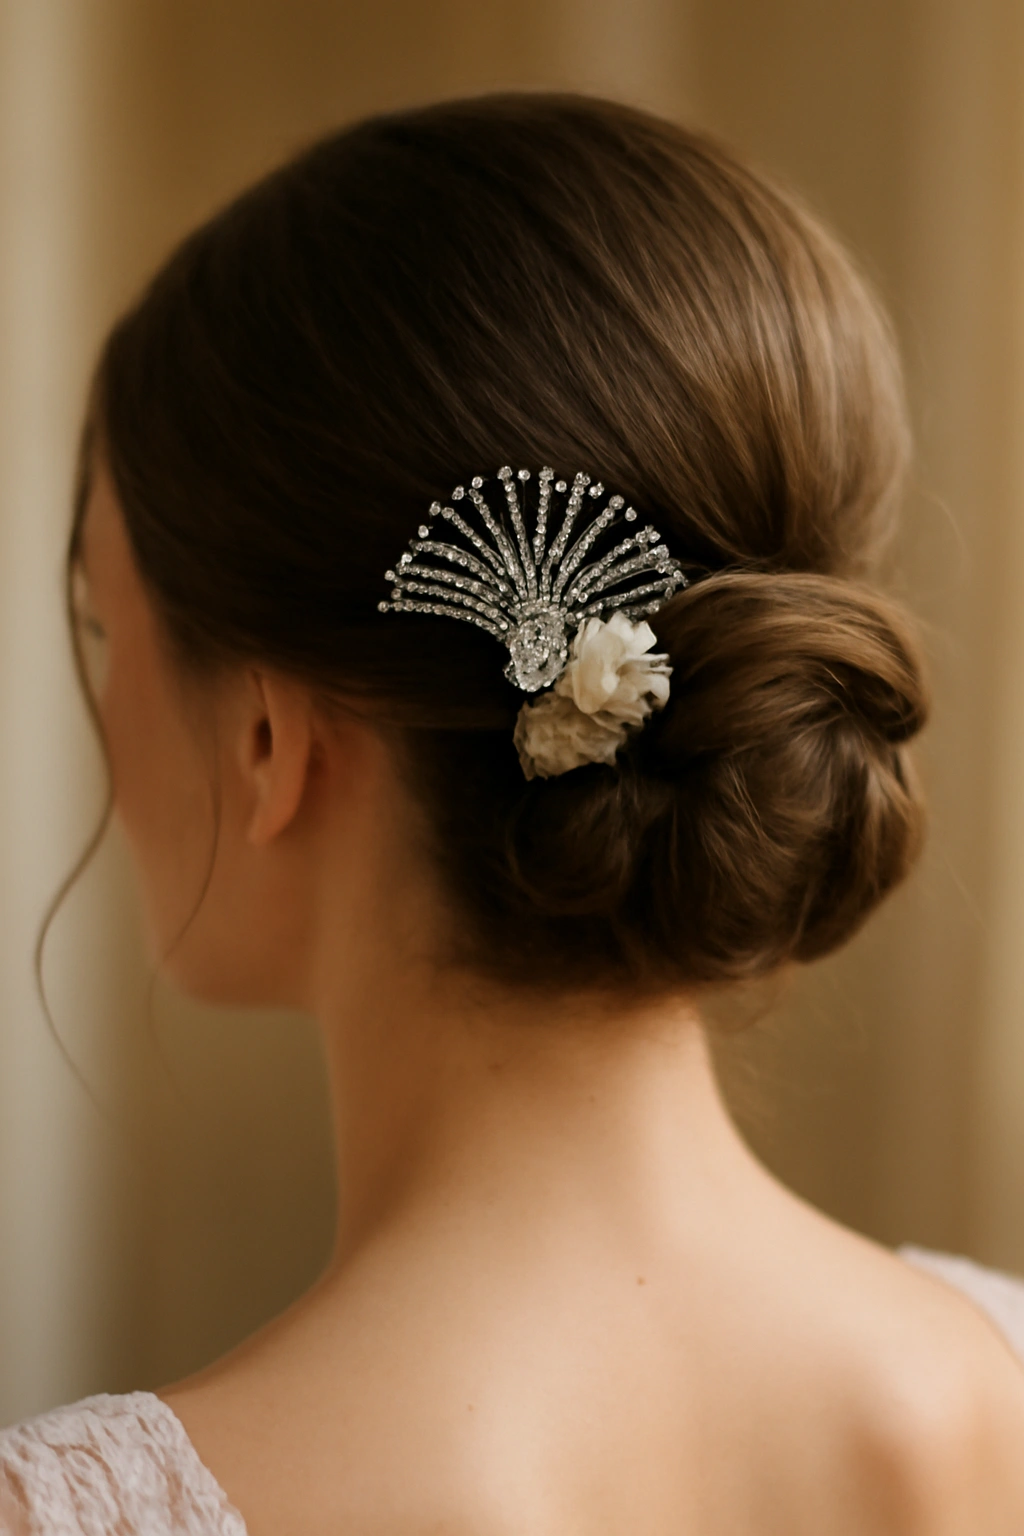
After your bun is completely secure, you can add decorative elements. This is the last step because pinning through decorations is frustrating and can damage delicate pieces.
Hair combs and vines sit securely in the bun itself. Create a small opening or gap in the bun where you want the comb to sit, insert it, and let your bun hair close around it. Comb teeth grip hair beautifully and sit very securely without needing to be pinned.
Flowers (fresh or faux) can be tucked into the bun by inserting their stems or picks into the bun structure and securing with bobby pins if necessary. If you’re using fresh flowers, have a light spray of water nearby to keep them fresh. Faux flowers offer the advantage of not wilting throughout the day.
Ribbons or silk cords can be wrapped around the base of the bun or woven through the bun. Pin the end or tie it off so it doesn’t slip.
Hair jewelry or decorative clips attach directly to the bun with built-in clips or small bobby pins.
Add decorations thoughtfully—a single focal piece like a statement hair comb is often more elegant than multiple small elements scattered throughout. Consider what shows up in photos and what complements (rather than competes with) your dress and overall look.
Fixing Common Low Bun Problems
Even with perfect technique, things sometimes go wrong. Here’s how to fix the most common low bun issues.
Your bun is falling down mid-way through the day. Stop, gently tease the base of the bun where it meets your head using your teasing brush, and repin. The teasing creates grip. If your bun keeps slipping, your elastic might be too loose or you might not have enough bobby pins at the base. Add more pins around the perimeter of where the bun meets your head.
Flyaways are creating a halo around your bun. Use a tiny amount of edge control or smoothing gel on a small brush to tame individual flyaways. Don’t use so much product that your hair looks wet or shiny—you want to just barely tame the wayward strands. Alternatively, use clear mascara on a clean mascara wand to smooth flyaways—the wand separates them and the mascara holds them in place without creating visible product.
Your bun looks too loose and feels unstable. Gently secure the outer layers of your bun with more bobby pins, inserting them horizontally into the spiral of wrapped hair. Also check that your elastic at the base is tight enough—sometimes a slightly tighter elastic (without being painfully tight) solves the problem.
There’s a visible dent or crease from your elastic. This typically can’t be fixed once it’s formed. For the future, use a seamless elastic or spiral hair tie rather than a traditional elastic band. If you’re dealing with this on your wedding day and can’t change it, style the area around the dent to make it less visible—add flowers, a hair vine, or extra volume in that spot.
Your bun is too slick and lacks dimension. Use texture spray directly on the bun, wait a few seconds, then gently tease the outside with a small teasing brush. You can also try gently pulling at different sections of the bun spiral to loosen them slightly and create more surface texture.
Your soft pieces around your face are falling out. These tiny pieces need their own mini bun or twist at the base to stay in place. Rather than just leaving them loose, twist them slightly, secure with a tiny bobby pin, and then curl them with your curling iron so they frame your face as a styled element rather than loose, flyaway pieces.
Keeping Your Bun Perfect Throughout the Wedding Day
Your bun needs to survive hours of ceremony, photography, hugging, eating, and dancing. A few strategies help it look fresh all day.
Bring bobby pins with you. Tuck a small packet in your wedding bag or give some to your maid of honor. If a section loosens during the day, you can quickly secure it without that loose piece becoming increasingly annoying.
Carry a small brush. A fine-tooth comb or small paddle brush lets you smooth any ruffled sections without a mirror. In bathrooms throughout the venue, you can quickly check and adjust if needed.
Use hairspray strategically. Rather than applying heavy hairspray to your entire bun (which can make it look stiff and product-laden), use light hairspray on specific sections that tend to loosen or flyaway. A light mist, not a heavy application, maintains hold without changing the look.
Avoid sitting directly against your bun. When you’re sitting during the ceremony or at tables during the reception, position yourself so your bun isn’t pushed against the chair back. If you need to rest your head, lean it forward or to the side rather than back. This prevents the bun from being compressed into an odd shape.
Be strategic about how people hug you. When people congratulate you with hugs, gently guide them to hug from the side or front. Most people are thoughtful enough to avoid crushing your hair, but a gentle hand on the side of their waist cues them not to squeeze around your head area.
Touch it sparingly throughout the day. The more you fidget with your bun, the more you loosen it. Trust that you’ve pinned it securely and resist the urge to constantly adjust. If you feel it loosening, find a moment to address it properly rather than repeatedly futzing with it.
Final Thoughts
A low bun that’s truly perfect doesn’t feel perfect in the moment—it just feels like you, beautiful and secure and exactly right. You’re not thinking about your hair; you’re thinking about your partner, your vows, dancing, and celebrating. Your hair is simply there, looking gorgeous and staying put while you experience one of the most important days of your life.
The techniques in this guide give you the tools to create that bun—the tools, the product knowledge, the positioning strategy, and the problem-solving skills to handle unexpected situations. But the real magic happens when you practice enough that creating your bun feels natural and intuitive rather than stressful and complicated.
Do a full practice run-through at least once before your wedding. Style your hair exactly as you plan to style it on the day, wear your dress or something with the same neckline, and keep it styled for several hours. Take photos in different lighting. See how it looks at various angles and movements. This practice isn’t wasted effort—it’s insurance against wedding-day stress and the thing that makes all the difference between a hairstyle you’re anxious about and one you’re genuinely confident in.
On your wedding day, start early enough that you don’t feel rushed. A bun created when you’re calm and have time looks visibly better than one created in a panic. Trust your preparation, trust your technique, and enjoy knowing that you’ve given yourself the gift of showing up as the most confident, beautiful version of yourself—with hair that actually stays in place.