There’s a persistent myth that prom requires long, flowing hair. The reality? Some of the most striking, memorable prom looks happen on short hair — especially when you’re styling it yourself at home. Short hair actually offers unexpected advantages: it photographs beautifully under formal lighting, it stays put all night without constant adjusting, and it gives you freedom to get creative with texture, angles, and accessories in ways that longer hair sometimes limits.
The challenge isn’t finding a great prom hairstyle for short hair. The challenge is finding one that feels special, feels you, and doesn’t require a salon visit or professional-level skills. That’s exactly where this guide comes in. Whether you’re working with a pixie cut, a textured crop, a short bob, or something in between, these ten styles are designed to be achievable with basic styling tools, products you probably already own, and techniques that don’t require years of salon experience. Each one trades complexity for impact — meaning you’ll spend less time fussing and more time feeling confident on prom night.
The styles that follow aren’t generic. They include specific techniques for creating volume on short hair, methods for adding glamorous texture without heat damage, ways to incorporate accessories that actually stay put, and styling tricks to elongate your face and frame your features beautifully. You’ll find detailed step-by-step instructions for each look, product recommendations that genuinely make a difference, and troubleshooting tips based on common mistakes people make when styling short hair for formal events.
Let’s dig into each style with the specificity you need to pull off something extraordinary.
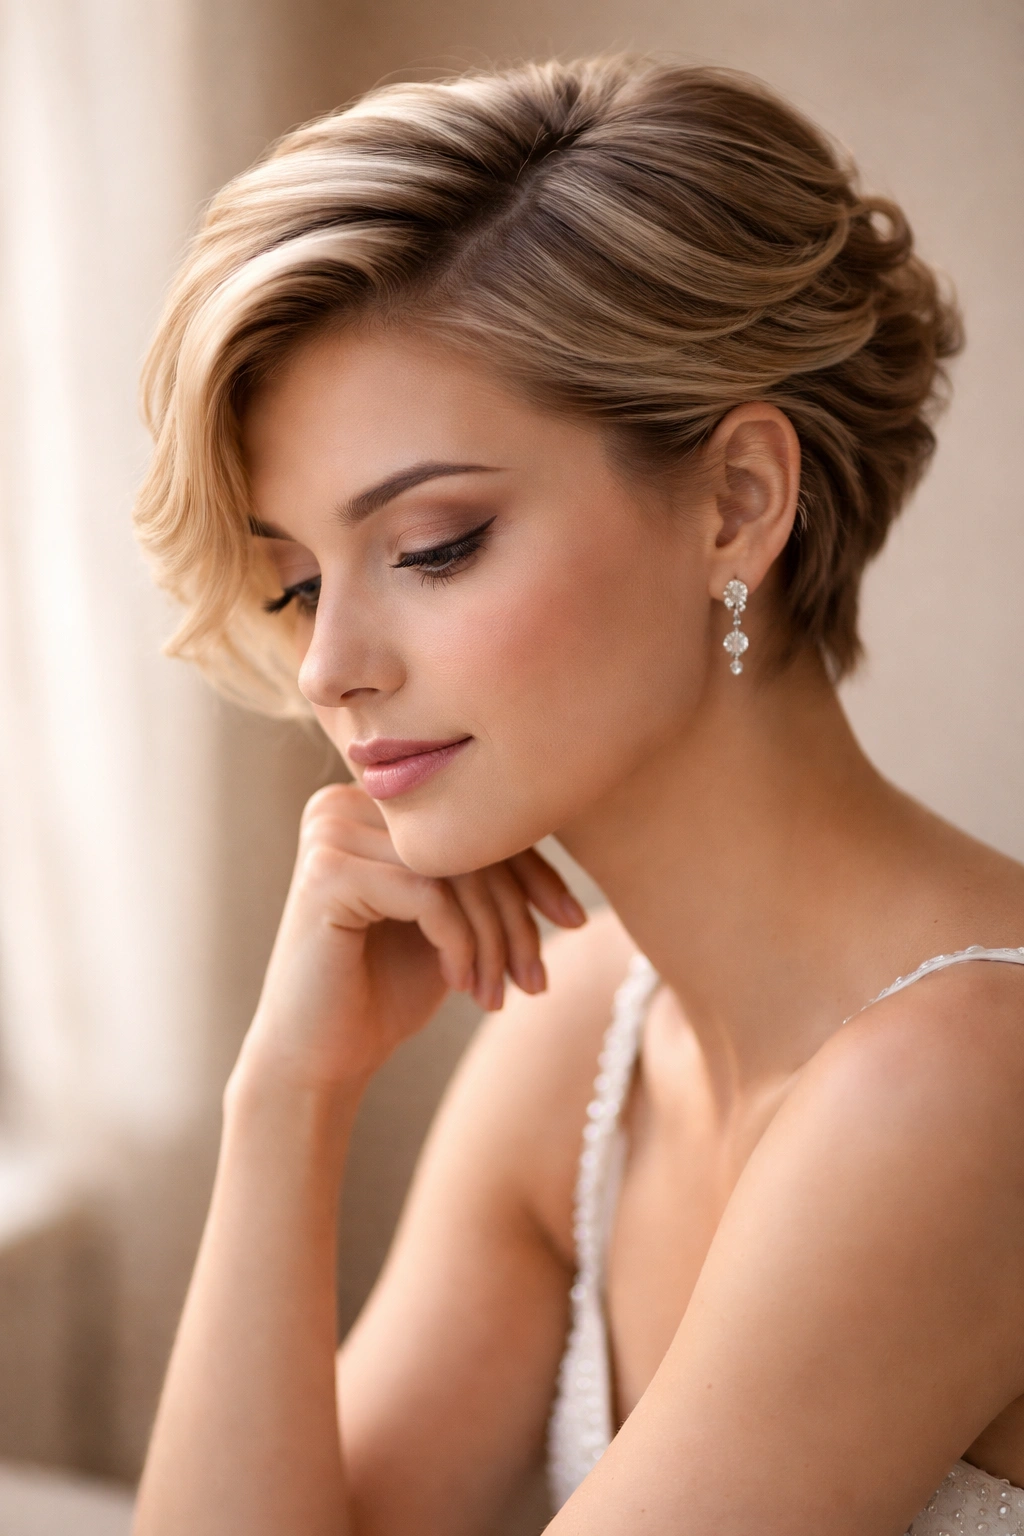
1. Textured Pixie with Face-Framing Waves
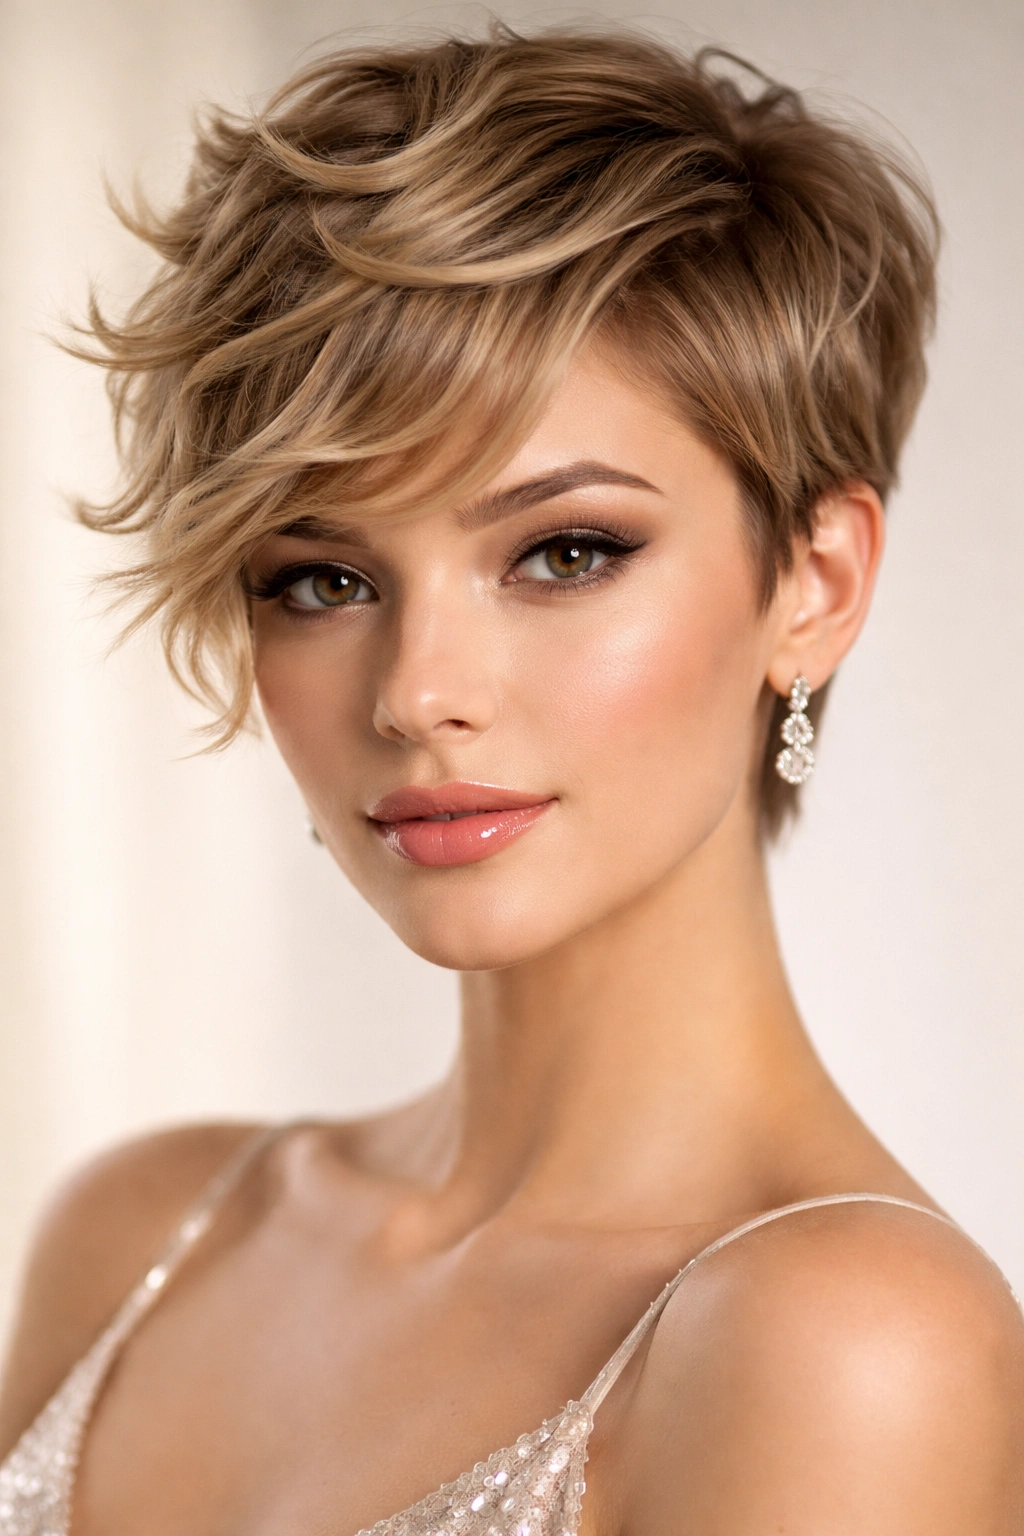
A pixie cut has serious prom potential when you transform it into something with movement and dimension. The goal here is creating the illusion of length through strategically placed texture and soft waves that frame your face and catch light beautifully. This style works whether you have a grown-out pixie, a cropped pixie-bob hybrid, or layers throughout.
How to Create This Look
Start with clean, dry hair — texture works best on hair with some grit rather than freshly washed silkiness. Apply a texturizing spray or sea salt spray to your roots and through the mid-lengths, using your fingers to work it through while you spray. This creates grip and helps waves hold.
Using a 1-inch curling iron or a smaller barrel wand, take sections from your crown and curl them away from your face, holding each curl for 3-4 seconds. Focus on the pieces that frame your cheekbones — these are the ones people see first. Work down and back, creating curves rather than tight ringlets. The key is loose waves that look intentional but relaxed.
Once all sections are curled, run your fingers through the curls gently to break them apart and create softer, messier waves. Avoid a brush here — it smooths out the texture you just created. A lightweight dry texture spray or volumizing spray locks everything in place without weighing it down.
Products and Tools You’ll Need
- Sea salt or texturizing spray (applied to damp or dry hair before styling)
- 1-inch curling iron or small barrel wand (ceramic or tourmaline barrel creates smoother waves than metal)
- Lightweight hair spray or texture-holding spray
- Optional: pomade or wax on your fingertips to define individual pieces
Pro Styling Tips
Curl away from your face around the entire perimeter — this draws attention upward and creates a flattering frame. If your hair is very short, the waves won’t last as long, so add the spray-and-curl step right before you leave for prom rather than hours earlier. Sleeping on textured waves crushes them flat; style on prom day only.
2. Sleek High Bun with Decorative Accessories
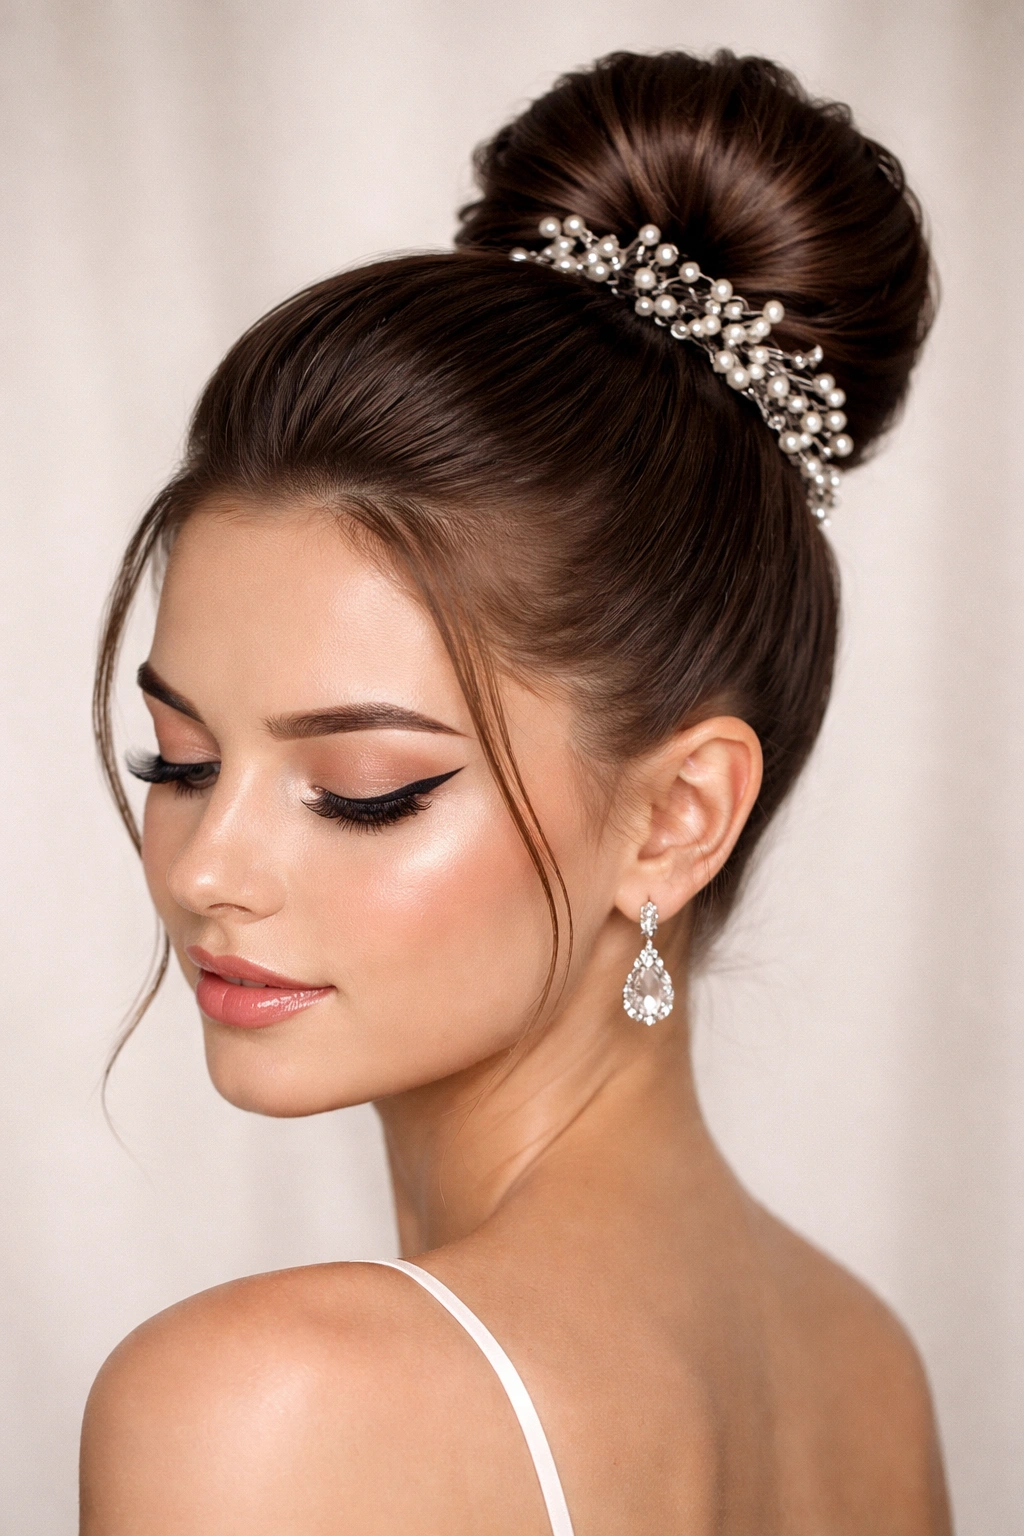
A high bun elevates short hair instantly and makes a statement without looking overly trendy. The trick is getting enough hair together to create actual volume at the crown rather than a sad, tiny knot. You’ll likely need 2-3 inches of hair minimum for this to look intentional, though shorter lengths can still work with strategic bobby pins and clever layering.
The Foundation Technique
Blow dry your hair smooth and straight first — this creates a clean base and makes the bun look polished rather than wispy. Apply a smoothing serum to damp hair before blow drying, working it through from roots to ends. This reduces frizz and gives you that salon-quality shine.
Gather all your hair at the crown, pulling it up and back at about a 45-degree angle from the crown of your head (not straight up, which can look severe on short hair). Secure with a small elastic, creating a small ponytail. Take that ponytail and twist it around the base elastic in a spiral, tucking the ends underneath and securing everything with bobby pins that match your hair color.
The magic happens next: tease the base of the bun gently with a fine-tooth comb to add volume and make it look fuller, then smooth the outer layer with a comb and hairspray. This creates a bun that looks substantial even if your actual hair volume is modest.
Accessory Placement That Actually Works
Hair clips, decorative combs, or jeweled bobby pins transform a simple bun into formal-ready. Insert them at angles into the bun structure so they sit securely and catch light. A single statement piece (like a pearl comb or crystal clip) looks more sophisticated than several small pieces competing for attention.
Consider a delicate hair wrap — thin metallic thread or ribbon wound around the bun base — for an elegant detail that’s nearly impossible to find on retail shelves but easy to DIY using supplies from a craft store.
Pro Tips for Short-Hair Buns
If you don’t have enough length for a substantial bun, create a “fake bun” effect: pull your hair into a small ponytail, wrap it around the elastic, then fold under a decorative comb or clip that creates the visual of a larger bun beneath. People see the accessories and the shape, not necessarily all your actual hair. Hairspray is your friend — apply it before, during, and after construction to hold everything in place. High buns sit better and last longer when you use bobby pins in an X pattern (criss-cross) rather than parallel lines.
3. Side-Swept Undercut Design
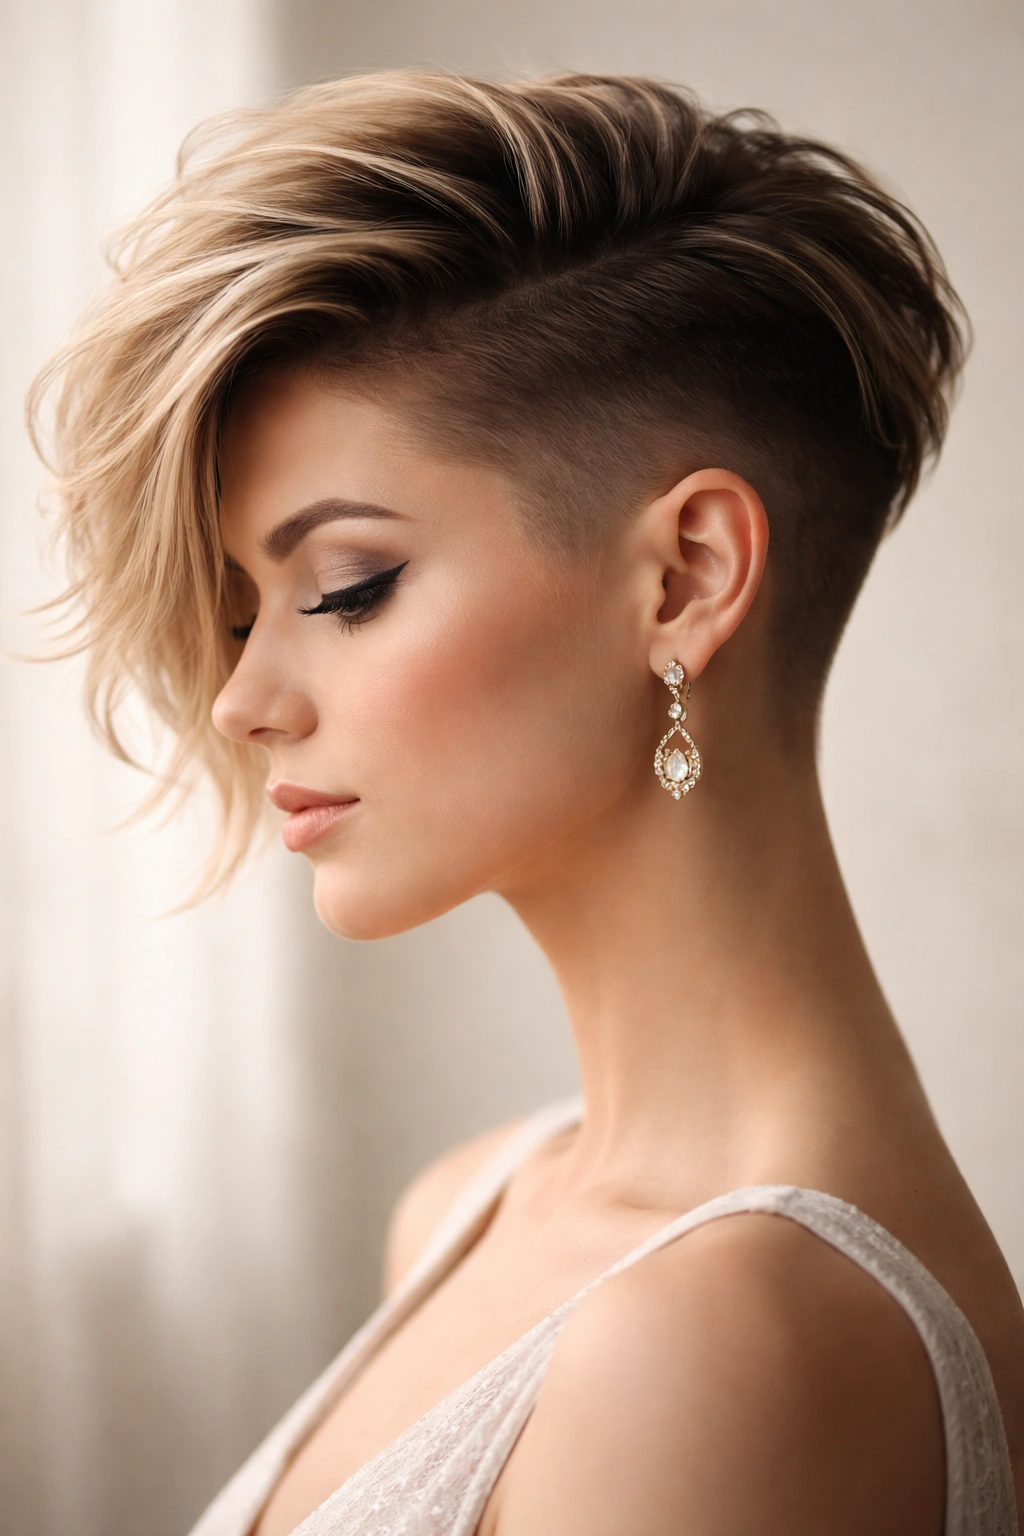
If you have an undercut (shorter sides with longer length on top), prom is the perfect time to make it architectural. The contrast between longer and short creates visual interest and photographs beautifully. A side-swept top with defined texture plays up the cut’s natural drama.
Creating Definition and Shape
Start by blow drying your longer top section away from your face with volume. You want height at the crown and texture throughout. Use a volumizing mousse or thickening spray applied to damp roots before blow drying — this creates hold and prevents the style from falling flat by evening.
Once dry, use a texturizing wand or 1-inch curling iron to create loose waves through the longer section. Don’t focus on the undercut area itself; keep those shorter sides smooth or use a light pomade to create subtle sheen and definition. The visual interest comes from the contrast between textured length on top and sleek definition below.
Sweep the longer section dramatically to one side, securing it with bobby pins hidden underneath. The goal is a strong side part with volume that moves. Pin strategically so the pins aren’t visible, using 3-4 bobby pins in a small triangular cluster rather than one pin that might slip.
Making the Undercut Part of the Design
This is where short-haired prom styles shine. Instead of hiding the undercut, emphasize it. Keep it clean and sharp-edged — ask someone to trim it fresh the day before prom if you can. Use edge control or pomade to define the line between the longer and shorter sections.
Consider temporary hair color or shimmer dust on the undercut if you’re feeling adventurous and your prom allows it — a soft metallic sheen on the sides creates modern elegance without looking costume-y.
Pro Tips for Side-Swept Longevity
This style holds best when you don’t sleep on it, so style on prom evening only. Hairspray applied in layers (spray, wait 10 seconds, spray again) holds longer than one heavy application. If bobby pins slip, try velcro rollers on the top section while you do your makeup — this sets the shape and adds hold without heat-tool damage.
4. Braided Crown with Curls
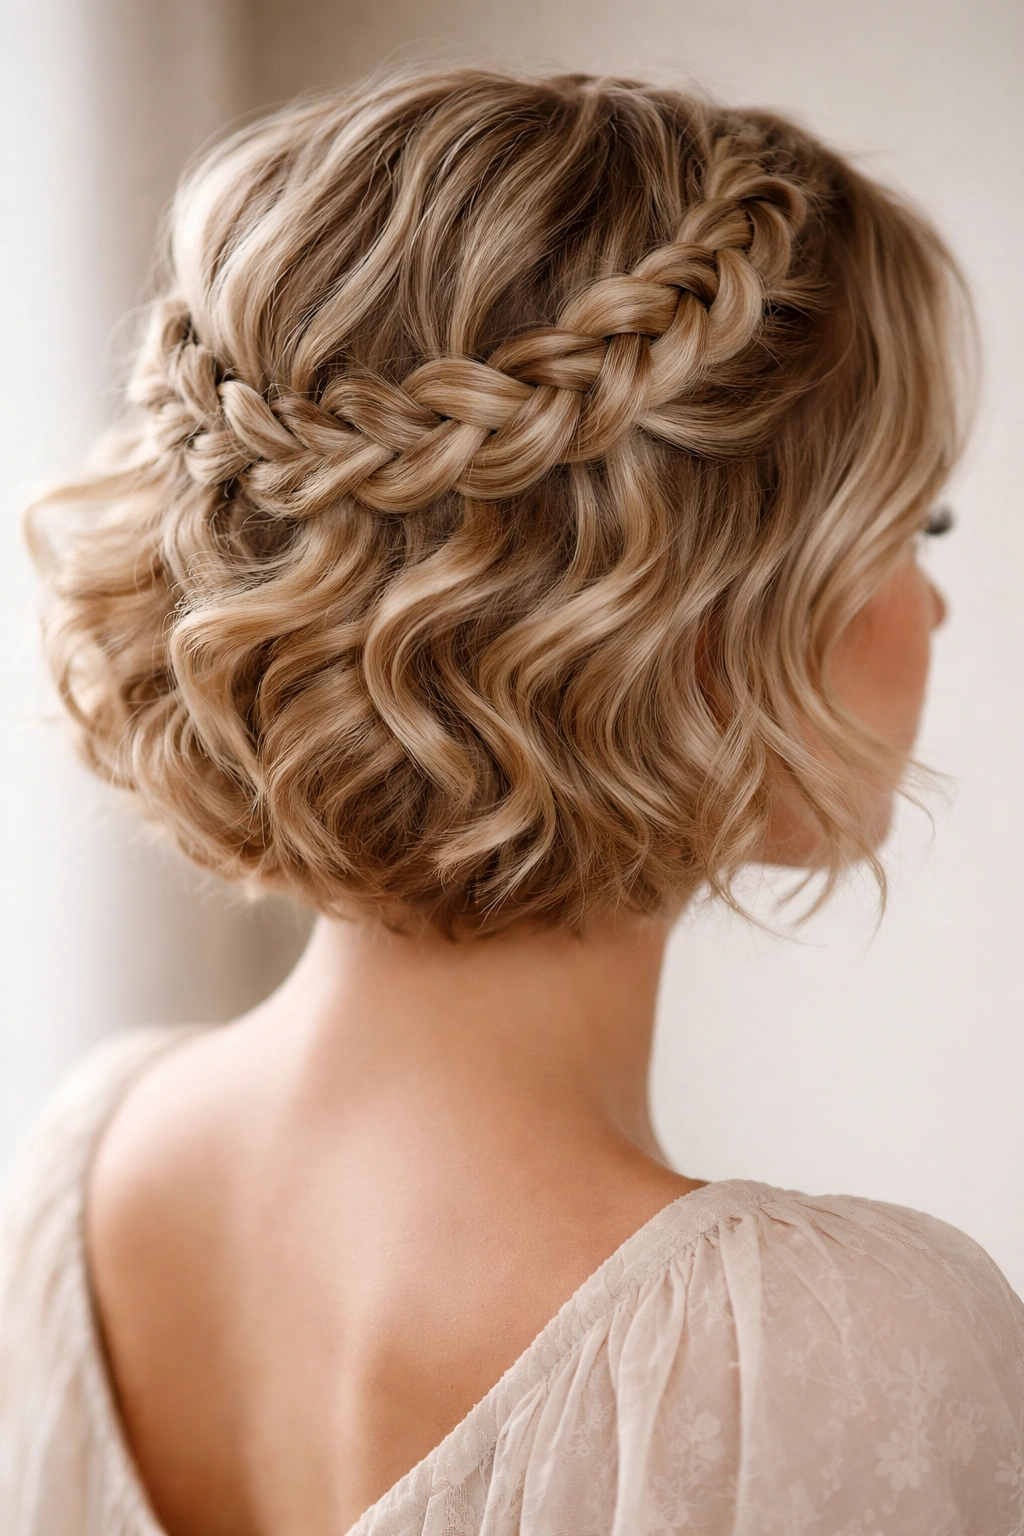
A braided crown makes short hair look romantic and intentional without requiring length. The braid sits at the nape or curves around the back of the head, and loose curls fill in the crown area. This works especially well if your hair has texture or layers.
Building the Braid Structure
On short hair, French braids and Dutch braids work better than thin, delicate three-strand braids — they look more intentional and hold better. Start at one temple, taking a small section of hair and beginning a French braid (adding hair as you go). Braid toward the back of your head, curving slightly as you go so the braid follows your head’s contours.
The braid doesn’t need to be tight — looser braids actually look more elegant and romantic. Gently pull at the outer edges of the braid after you’ve completed it, stretching the braid wider. This adds volume and softness that reads as formal rather than sporty.
Secure the braid at the nape with a small elastic, tucking the end under if you have enough length, or simply securing it flat against your head. Tuck that elastic under a decorative element — a small comb, a jeweled clip, or a pearl-centered bobby pin.
Adding the Crown of Curls
While the braid sits at the back, the crown of your head should have soft, voluminous curls. Blow dry your hair at the crown with an upward motion to build height. Once you have a dry base, use a 1-inch curling iron to create loose waves through the crown area, curling sections upward and back.
Brush these curls out gently so they’re soft and moveable rather than tight spirals. You’re creating texture and volume, not uniform ringlets. Add texture spray if you need extra hold.
Making the Style Stay Put
Braids are naturally secure, but curls fade. Hairspray applied before you even curl (to your dry, blow-dried hair) sets the base. Spray again after curling but before brushing out — this locks the wave pattern before you soften it. Reapply once more after you’ve completed the full style.
If curls start dropping by the end of prom, it’s not a failure — soft, slightly-fallen waves often look more beautiful than perfectly-formed ringlets anyway. The overall effect still reads as intentional and formal.
Pro Tip
Practice this braid once or twice on a regular day before prom — the more familiar your hands are with the technique, the faster and better it will look on the actual day. You’ll also discover if your hair type holds this style, or if you need extra-hold products.
5. Half-Up Half-Down with Strategic Volume
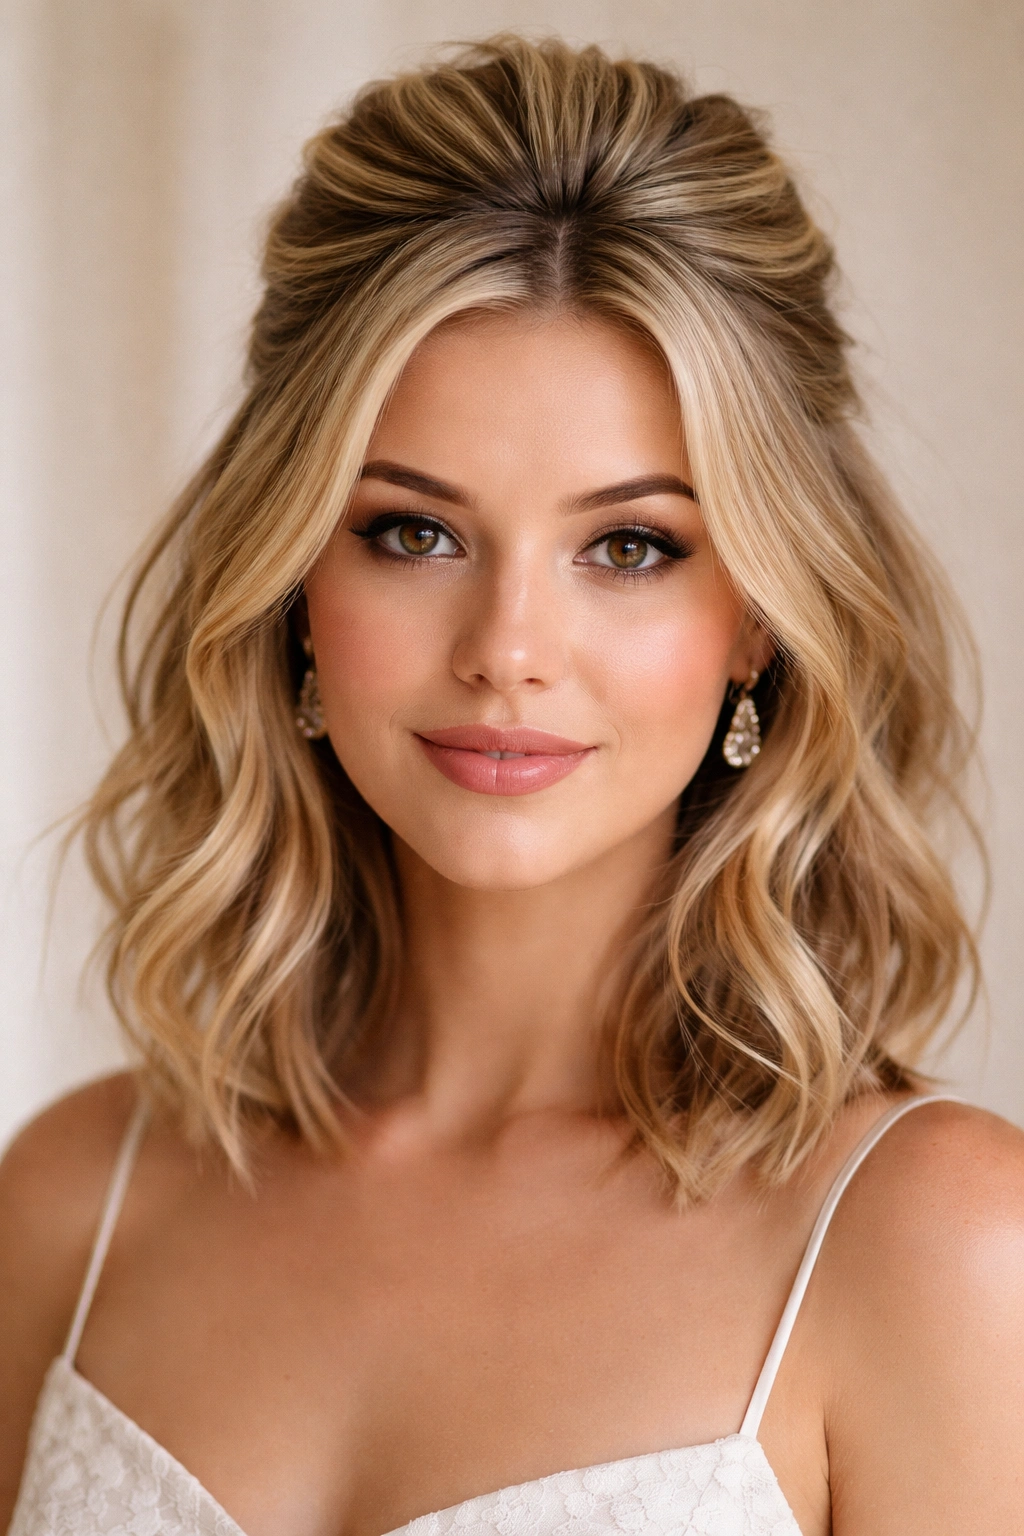
The half-up style bridges the gap between fully up and fully down, and it’s surprisingly forgiving on short hair. The key is creating enough volume at the crown that the style reads as intentional and formal rather than rushed.
Creating the Volume Foundation
Start with a volumizing mousse applied to damp roots. Blow dry your entire head with an upward direction, focusing on your crown and the roots of the section you’ll be pulling up. You need real height at the crown, not just movement.
Once dry, use a texturizing spray throughout the hair, working it through with your fingers. This creates grip and makes the hair easier to work with when you gather the half-up section.
Gathering and Securing the Half-Up
Take a section from just above your ears, working across the crown from ear to ear. This section should include about one-third of your total hair. Gather it loosely and secure with an elastic that matches your hair color. Don’t pull too tightly — the goal is a relaxed, slightly undone quality.
Tease the gathered section gently at the base to add volume, then smooth the outer layer. This creates a fuller-looking half-up without needing actual additional hair. Cover the elastic with a small decorative element — a comb, clip, or ribbon.
Styling the Remaining Loose Hair
The bottom half of your hair should have texture, not hang flat. Create waves or curls through the lower section using a 1-inch wand, working in sections. These waves should complement the volume at the crown, not compete with it.
If your hair is very short, the “half-down” might just be short pieces framing your face with gentle texture. That’s perfectly formal and reads as intentional.
Pro Styling Tips
This style looks best when the half-up section has dimension — tease it, add waves to it before pulling it up, or create subtle texture with a wand. A flat half-up on short hair can look thin and sad. The texture transforms it into something beautiful.
The elastic should sit about 2 inches from your crown, not right at the very top. This placement is more flattering and photographs better. Use bobby pins under the elastic to create a small pad — this prevents the elastic from slipping and looks more polished.
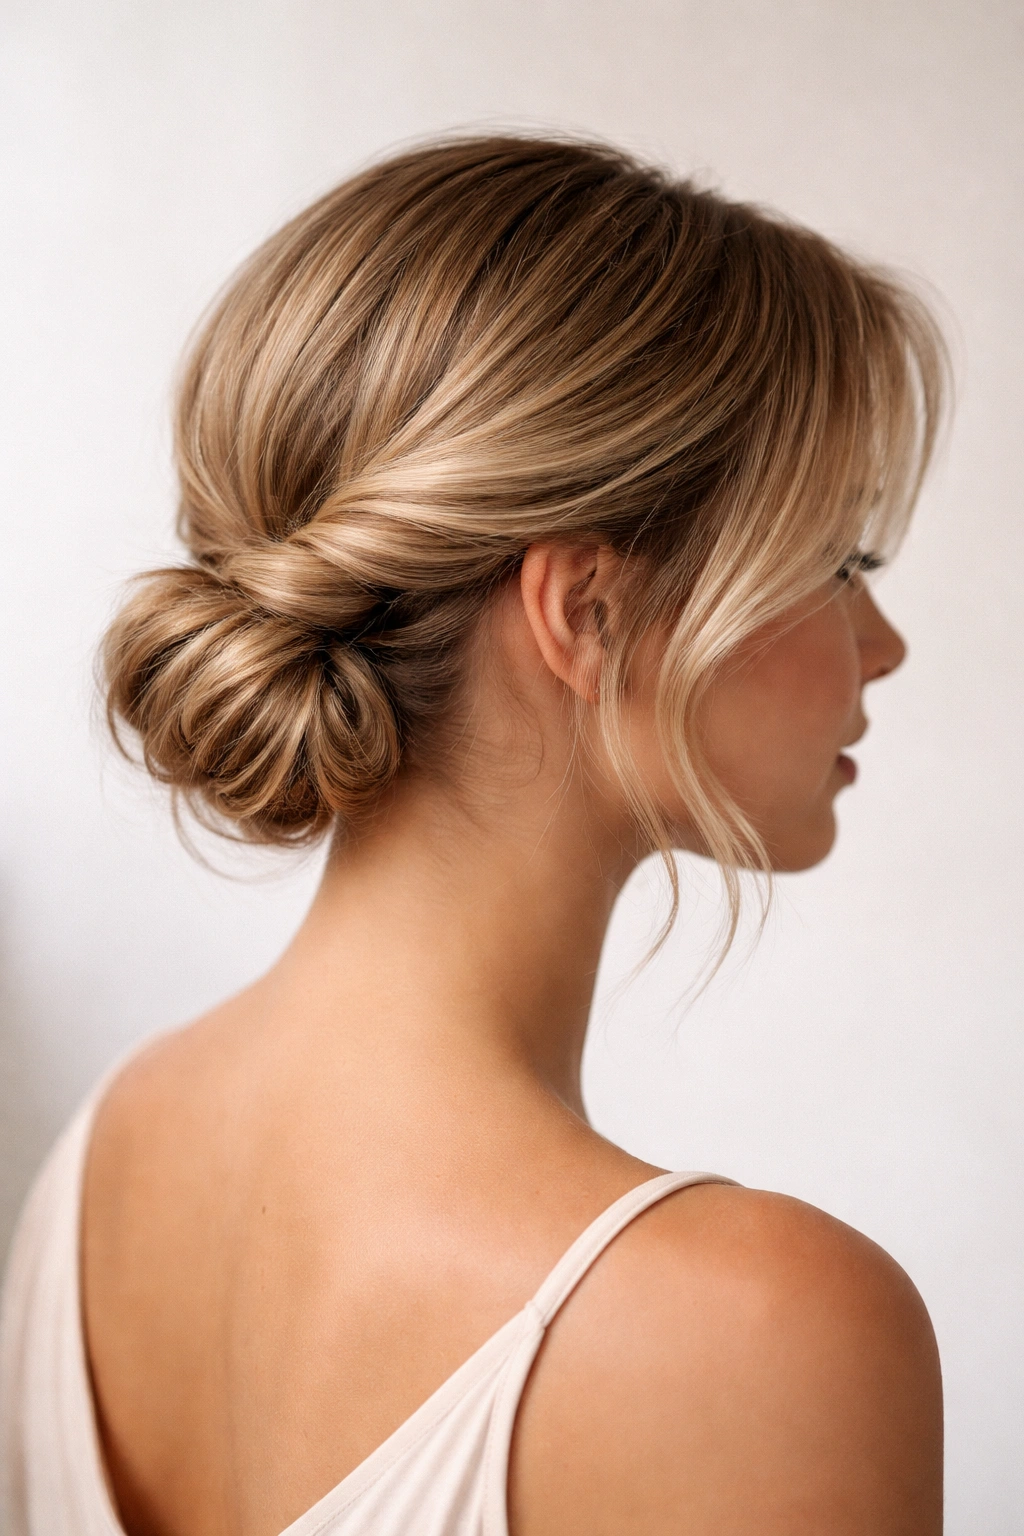
6. Slicked-Back Low Bun with Shine
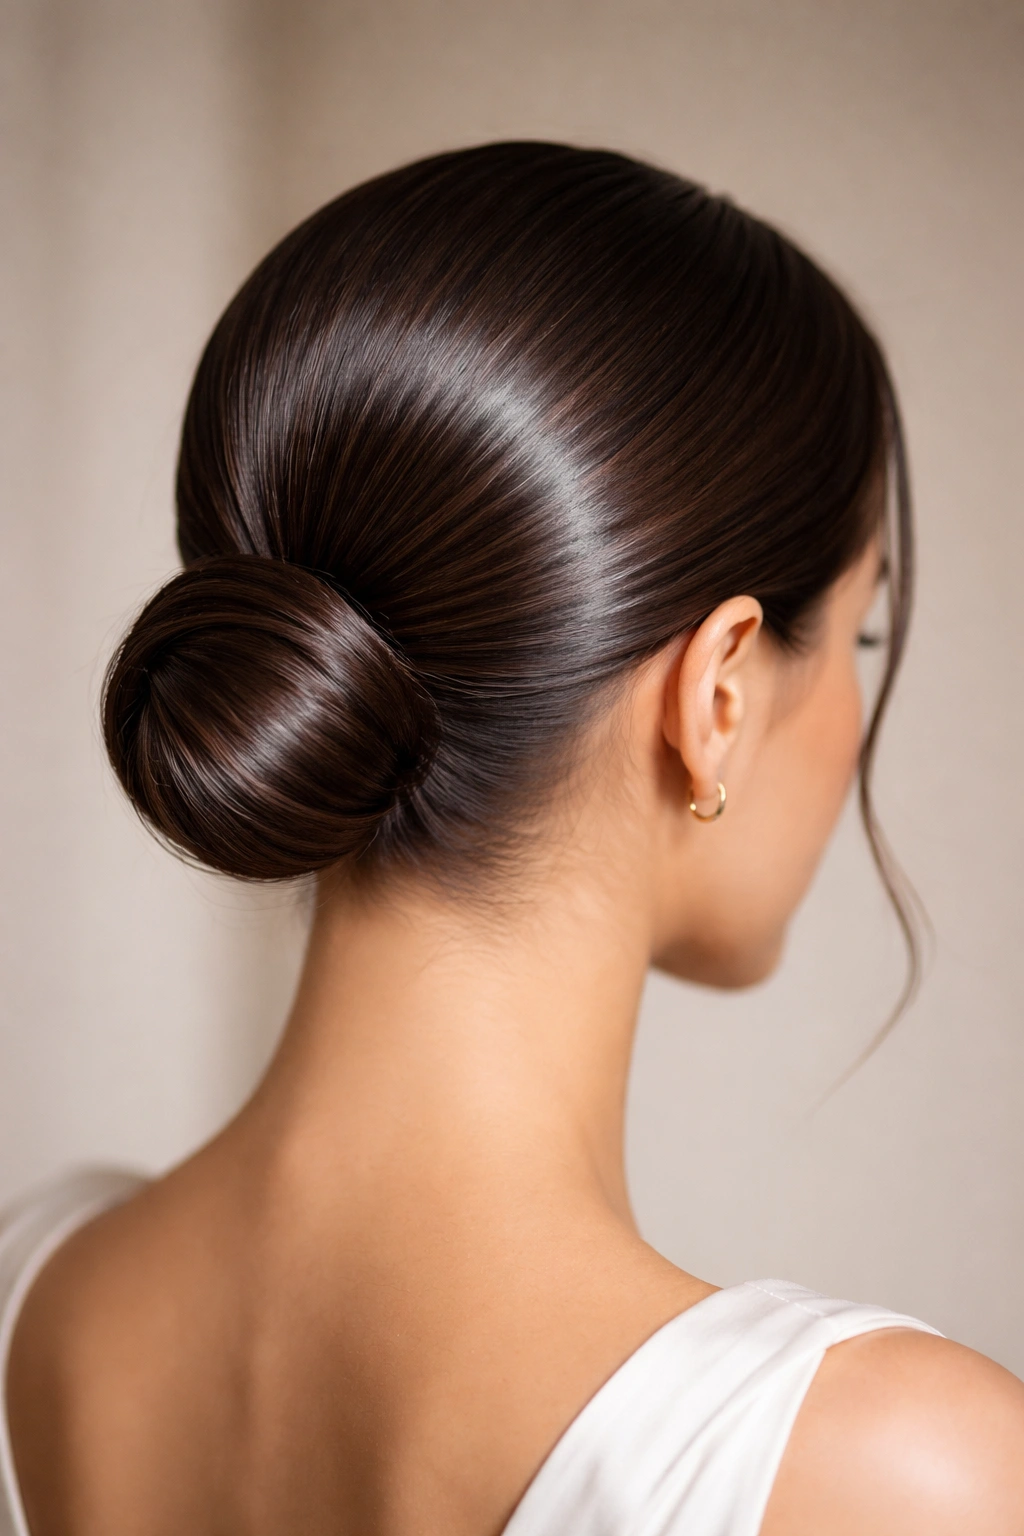
This is the most sophisticated option for short hair — sleek, clean, and elegant. It works at any hair length and emphasizes facial features beautifully. The “shine” component is critical; without it, a slicked-back bun can look severe or unfinished.
Creating the Sleek Foundation
Apply a lightweight smoothing serum to damp hair before blow drying. Blow dry straight, using a paddle brush or blow-dry brush to smooth the cuticle and eliminate frizz. You want shine and polish, not texture, so this step is crucial.
Once completely dry, apply a light gel or pomade to create hold and additional shine. Gel works better than pomade for this look because it’s lighter and won’t weigh down short hair. Work the gel through your hair evenly, coating every section.
Gathering the Low Bun
Gather your hair at the nape of your neck, much lower than a high bun. Create a small ponytail secured with a thin elastic. Twist this ponytail and wrap it around the base, tucking the ends under and securing with bobby pins.
Use a fine-tooth comb to smooth any flyaways, working the comb through the gel for additional polish. The goal is a seamless, mirror-like finish with zero pieces out of place.
The Shine Factor
This is what elevates the look from “plain bun” to “formal elegance.” Use a light hairspray with shine (some brands specifically make shine-enhancing formulas), or apply a tiny amount of argan oil to a comb and gently run it over the finished bun to add lustre without creating greasiness.
Under formal lighting and in photographs, this shine makes the bun look three-dimensional and intentional. It’s the difference between a hairstyle and a polished, finished look.
Pro Tips for Flawless Execution
Flyaways are the enemy here — use a small spray bottle of water with a few drops of conditioner to tame them before smoothing with the comb. Practice this style the day before to see if your hair naturally cooperates or if you need stronger-hold products. A smaller bun actually looks more elegant than a large one on short hair, so embrace the compact size rather than fighting it.
7. Textured Crop with Metallic Accents
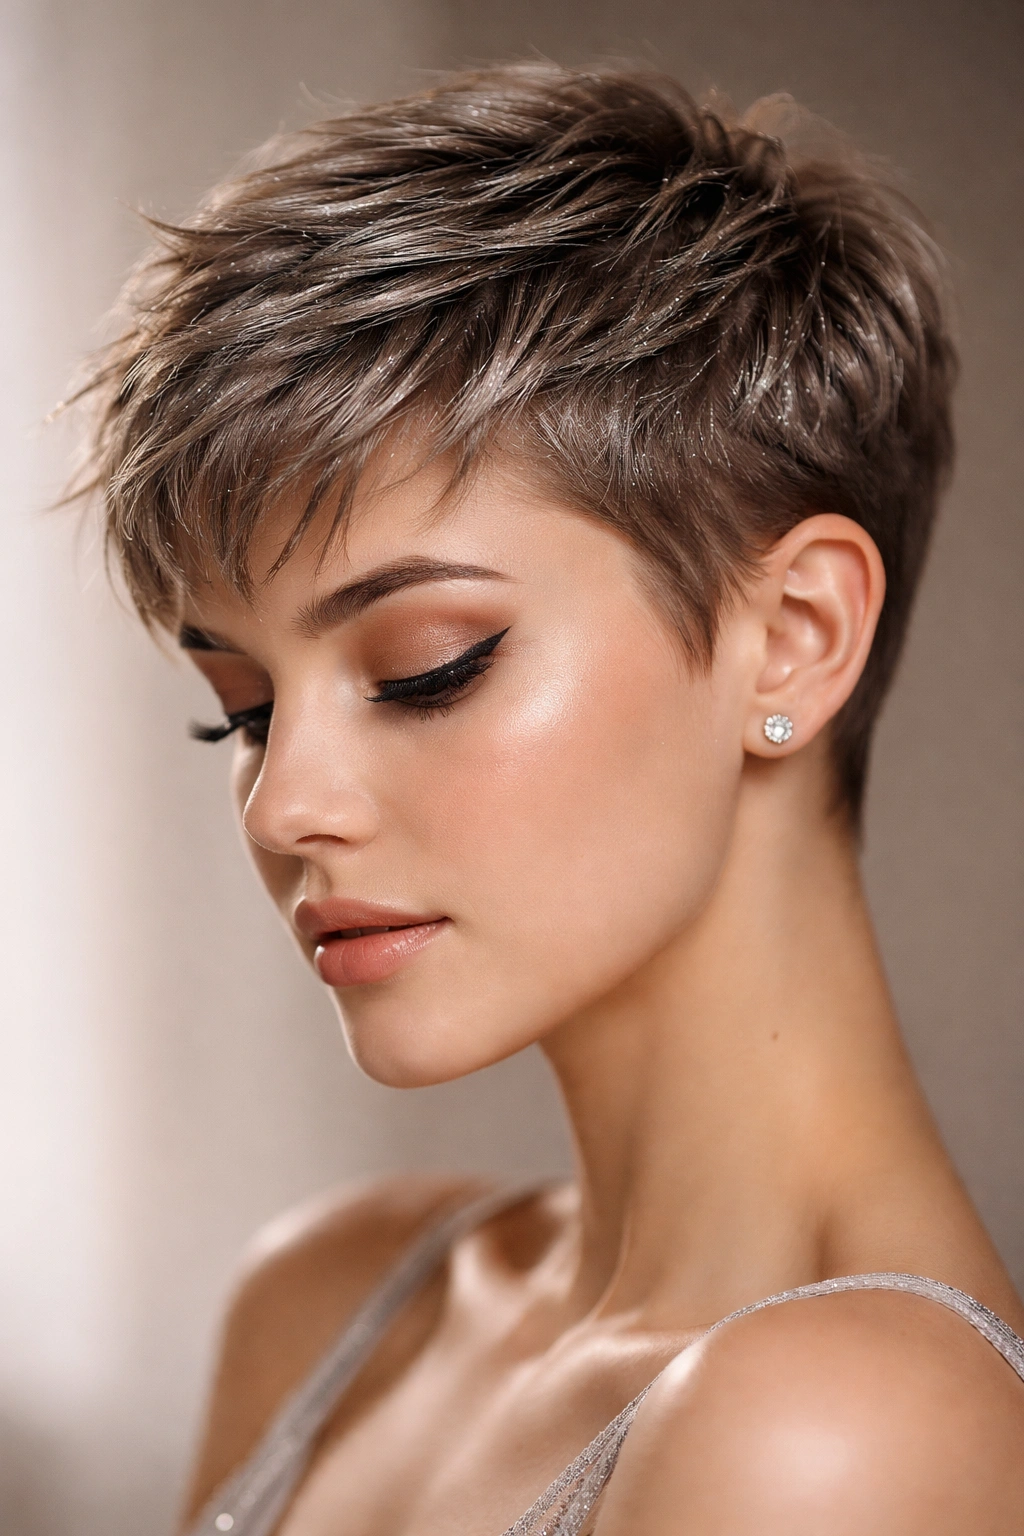
If you’re rocking a very short crop, textured pixie, or similar cut, lean into the length rather than trying to create something longer. A deliberately textured, piecy crop with strategic metallic touches reads as fashion-forward and intentional.
Building Intentional Texture
Apply a dry texture spray to the base of your hair and throughout, creating grip and visual definition. Using your fingers, work the spray through and create separation between pieces — the goal is an air-dried, piecey look rather than a smooth surface.
With a small wand or even a straightening iron used at an angle (not for straightening, but for creating texture), gently wave or curl small sections. You don’t need waves throughout — even 5-6 strategic curled pieces create interest and dimension on a very short cut.
Run your fingers through everything to break up the curl and create texture rather than ringlets. Apply a lightweight dry texture spray or finishing spray to hold the pieces in place.
Adding Metallic Shimmer
Temporary metallic spray (sold specifically for hair) can be applied to random pieces for a subtle shimmer that catches light beautifully. Apply it to the tips of pieces or along one side of your head, depending on your vibe.
Alternatively, use a metallic dry shampoo applied lightly to the roots for an ombre-shimmer effect, or apply a tiny amount of shimmering highlighter powder to the tip of a small spoolie and brush it through a few sections.
Accessorizing the Short Crop
Tiny clips, bobby pins in metallic finishes, or even a delicate chain worn as a hair accessory (pinned into place) work beautifully on short hair. The small scale matches your short length rather than overwhelming it.
Why This Works for Short Hair
You’re not fighting your hair’s natural tendency toward texture on a short cut — you’re emphasizing it. This is the one prom hairstyle where “done-in-10-minutes” actually looks intentional and fashionable rather than rushed.
8. Soft Waves with Hair Tape Extensions
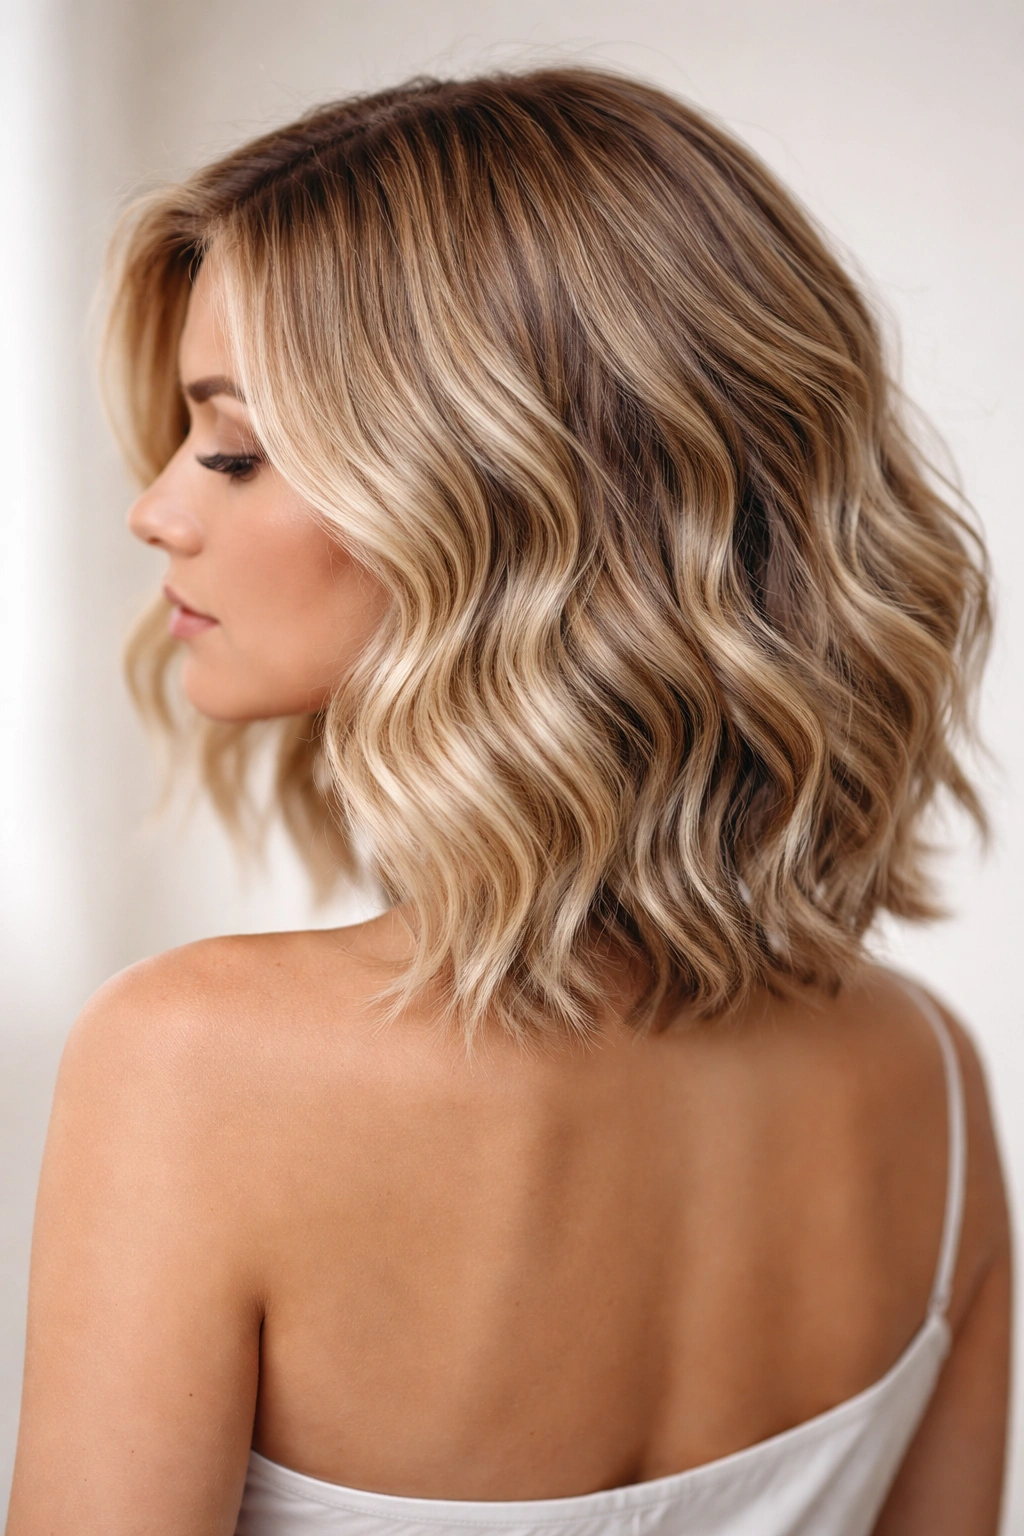
If your short hair is limiting you and you want more volume or length for one night, hair tape extensions are a game-changer. They apply quickly, stay secure, and wash out easily. They’re not permanent, so they’re perfect for a single event.
Understanding Hair Tape Extensions for Short Hair
Tape-in extensions are thin strips of hair attached with adhesive strips. They blend seamlessly with short hair and add volume and length without the commitment of permanent extensions. One package of extensions (usually 40-50 pieces) costs $30-80 and creates noticeable fullness and length.
Application Basics
You can apply tape extensions yourself, though it takes practice. Watch a tutorial video specific to your hair type and length before attempting. The basic process: section your hair, apply an extension with the adhesive strip to the roots, flip your head, and ensure the extension sits smoothly against your scalp.
Apply extensions throughout your head for overall fullness, or focus on the crown and sides for volume where you need it most. On short hair, you’ll apply fewer extensions than someone with long hair, so the cost is lower and the application faster.
Styling Extended Short Hair
Once extensions are in, style them like your own hair. Create soft waves with a 1-inch curling iron, blow dry with volume, or pin them half-up. The extensions add body and fullness that makes every style look better.
Gentle waves and soft texture work best with extensions because the extension hair is pre-curled; too much additional heat can damage it. Spray in texture, curl randomly, and brush out softly rather than creating tight, defined waves.
Important Notes
Remove extensions the night of prom or the following day — leaving them in for days causes matting and potential damage to your natural hair. Extensions add height and fullness, which some venues appreciate and others don’t, so check your prom’s expectations about artificial styling aids.
9. Twisted Side Knot
A twisted side knot combines elegant movement with secure, practical styling. It’s romantic without being overly feminine, and it works at almost any short length. The knot sits low on one side, with a gentle twist creating dimension.
Creating the Twist
Take a small section of hair from one side of your crown and create a loose two-strand twist, wrapping one section of hair around the other as you move toward the back of your head. Don’t pull the twist tight — gentle, relaxed twists look more elegant.
As you twist, you can add additional pieces of hair by incorporating them into the twist (similar to a French braid technique). This creates a thicker, more substantial twist than simply twisting one section.
Stop when you reach the nape or the opposite side of your head, depending on how long your twist is. Secure the end with a bobby pin hidden underneath.
Creating the Knot
Take the end of the twist and form a small knot by wrapping the twisted section back on itself. Secure this knot at the base with bobby pins, tuck the very end under if you have enough length, and cover the bobby pins with a small decorative element.
The knot should sit off to one side, not centered. This asymmetrical placement is more flattering and interesting than a centered knot.
Softening the Overall Look
Add soft waves throughout your remaining loose hair using a curling iron. These waves complement the structured twist and create balance. The contrast between the defined, twisted knot and soft, wavy loose hair is what makes this style special.
If your hair is very short, you might have limited loose hair to wave — that’s fine. Even a small amount of soft texture around your face, combined with the twisted knot, creates an intentional, finished look.
Pro Tips
Practice this twist several times before prom — the looser and softer you can make it, the more elegant it looks. Tight, perfectly twisted knots can read as stiff. Loose, slightly undone knots read as sophisticated. Use a light hairspray; heavy spray makes the twist look stiff and crusty.
10. Faux Hawk with Decorative Details
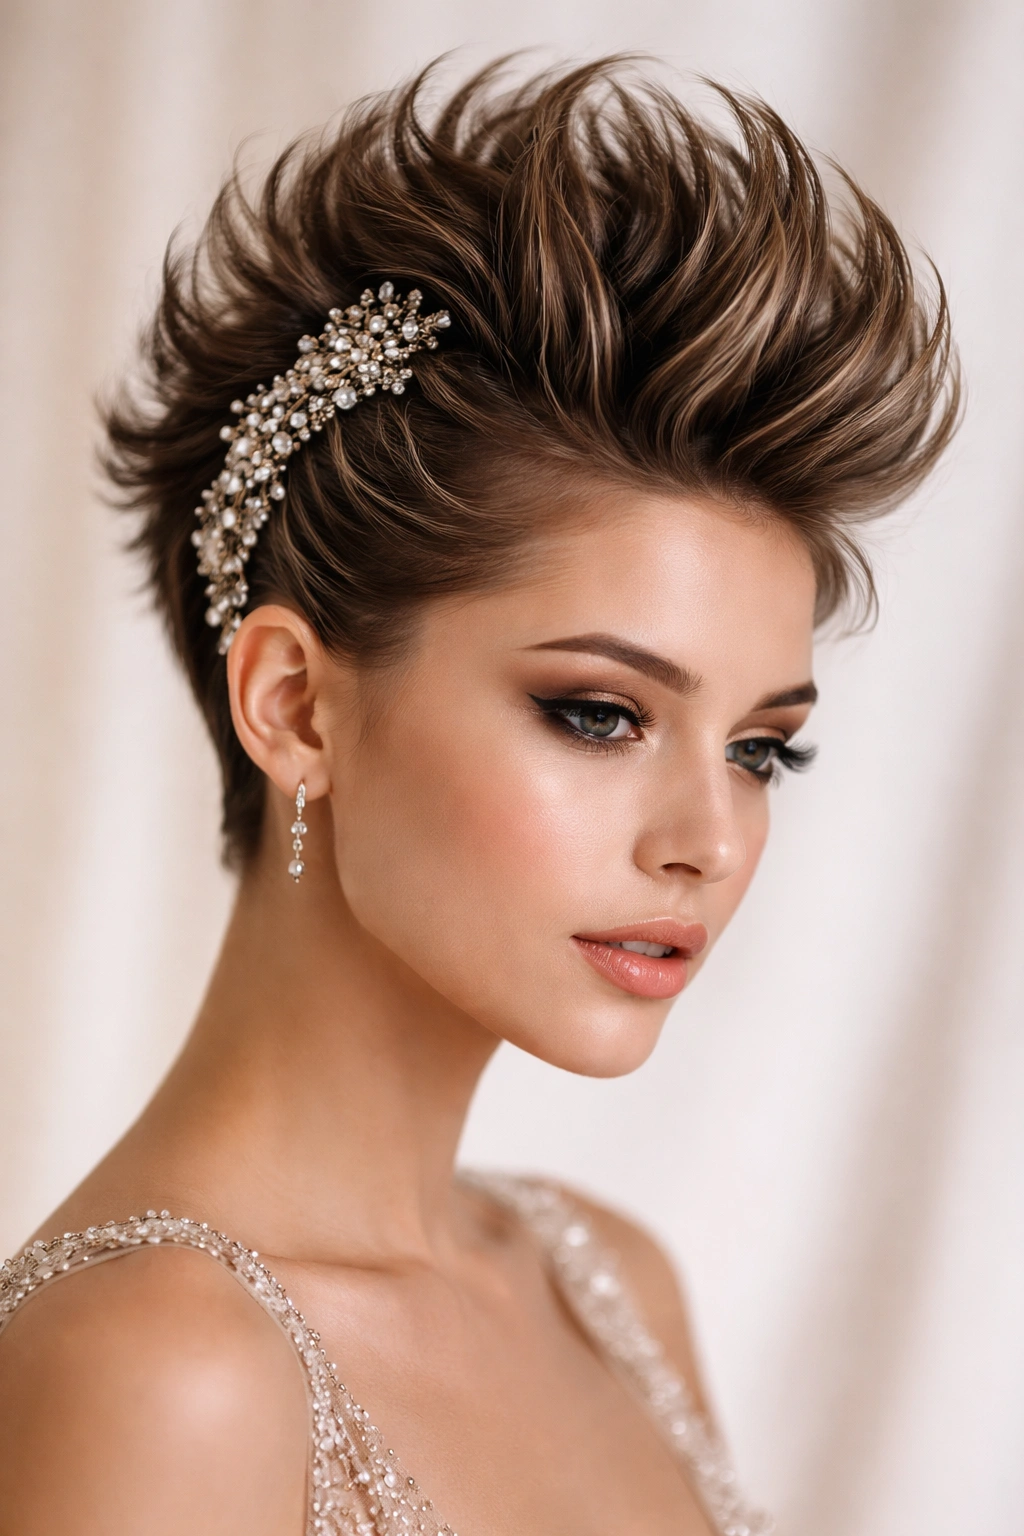
A faux hawk gives you edge, style, and dramatic impact on short hair. Unlike a traditional mohawk (which is permanent), a faux hawk is temporary styling that creates the visual of a hawk without actually cutting or shaving anything.
Building the Faux Hawk Structure
Apply volumizing mousse or texturizing spray to your entire head, focusing on the center crown. Blow dry with an upward motion along the center of your head, creating height from your forehead back through the crown to the nape.
The sides should be smoother or more slicked down than the center, creating contrast. You can use a light pomade on the sides and gel or texture spray on the center to accentuate the difference.
Adding the Visual Drama
Use a small wand or curling iron to create texture along the center strip — slight waves or curls that add dimension and catch light. You’re not creating tight ringlets; you want soft, moveable texture that has shape without looking costume-y.
Tease along the center line for volume, then smooth the outer layer slightly. This creates a dramatic silhouette without looking wild.
Decorative Details That Elevate It
Metallic clips, delicate chains, or even a few small jeweled bobby pins strategically placed along the center create sophistication. Hair jewelry (thin metal chains designed specifically for hair) can be pinned into place for an edgy-elegant vibe.
Keep decorations sparse — a faux hawk is already a statement, so additional accessories should be minimal and intentional.
Pro Styling Notes
This look photographs dramatically and stands out in formal settings. It reads as confident and fashion-forward. However, it’s not subtle, so make sure your prom setting and personal vibe align with a bolder style.
The style holds best when you apply products in layers: mousse on damp hair before blow drying, texture spray while dry, then hairspray after styling. One product alone won’t provide enough hold for a dramatic style that needs to last all evening.
Final Thoughts
The most beautiful short-hair prom style is one that makes you feel confident and comfortable. Each of these ten styles emphasizes different aspects of short hair — texture, structure, shine, or boldness — but they all share a common thread: they’re designed to be achievable at home, with tools and products you likely already own, and with techniques that don’t require professional training.
Start practicing your chosen style at least a week before prom. Do a full run-through with the exact products and tools you’ll use on prom night, including your makeup and dress if possible. You’ll discover what works, what doesn’t, what needs more hold, and how long the style actually lasts. That practice round removes the pressure of prom night itself, letting you execute confidently when it matters.
Short hair at prom isn’t a limitation — it’s an advantage that gives you the chance to create something unique. You won’t see ten other people with your exact hairstyle, and you’ll spend far less time getting ready than friends with longer hair. That’s freedom, and it’s beautiful.