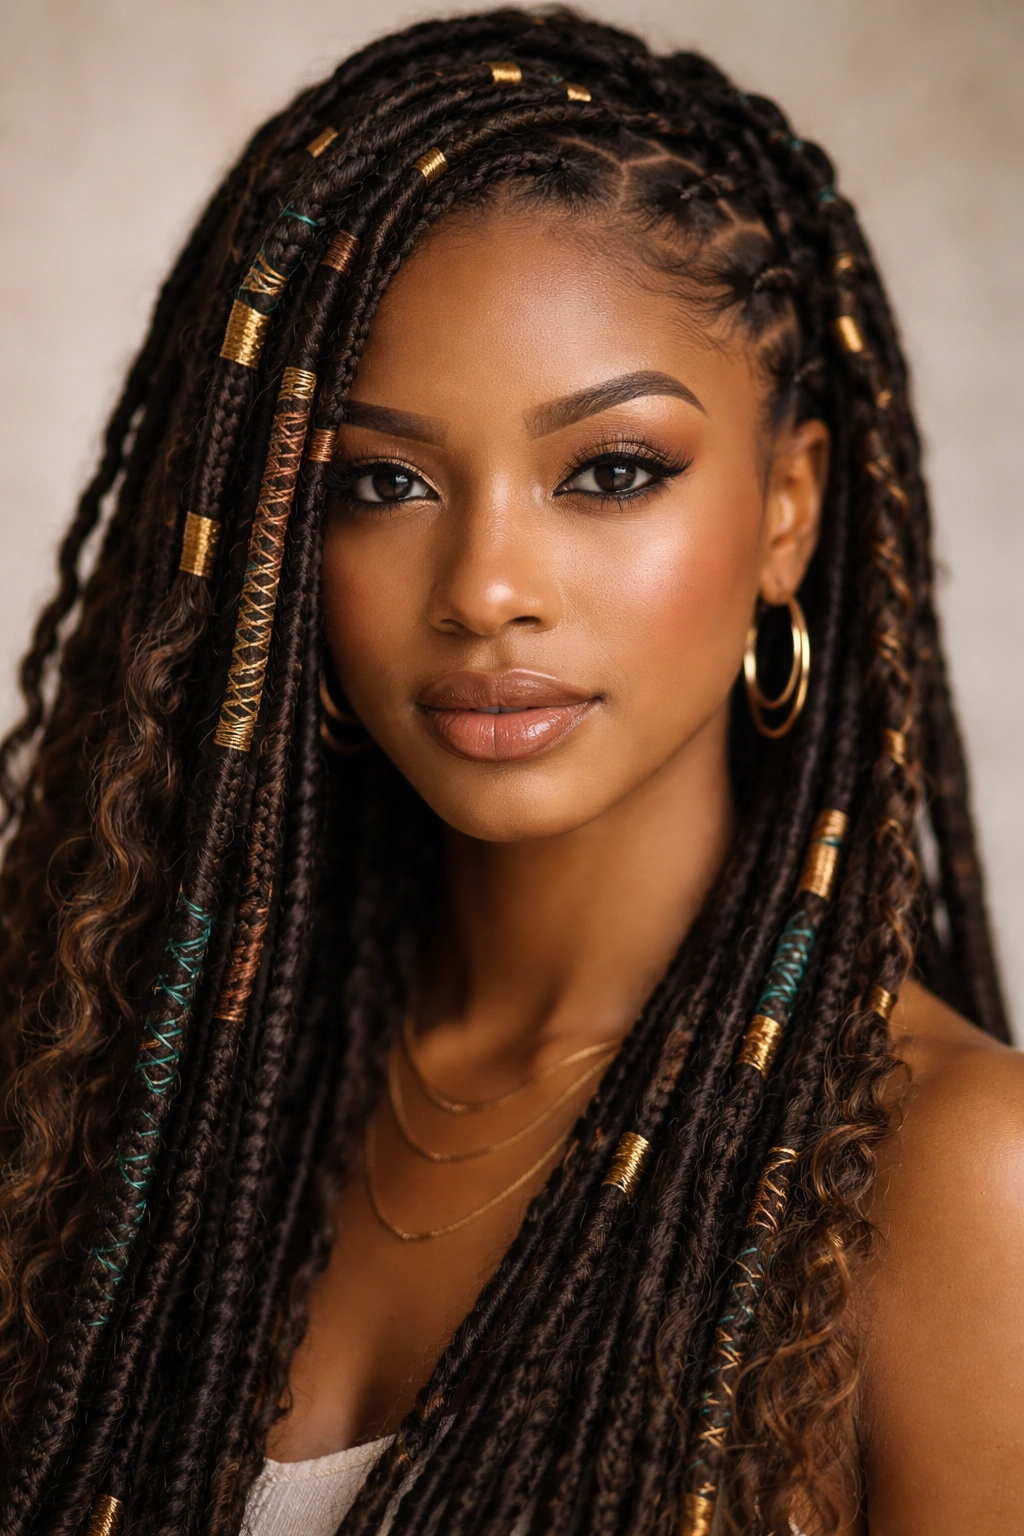
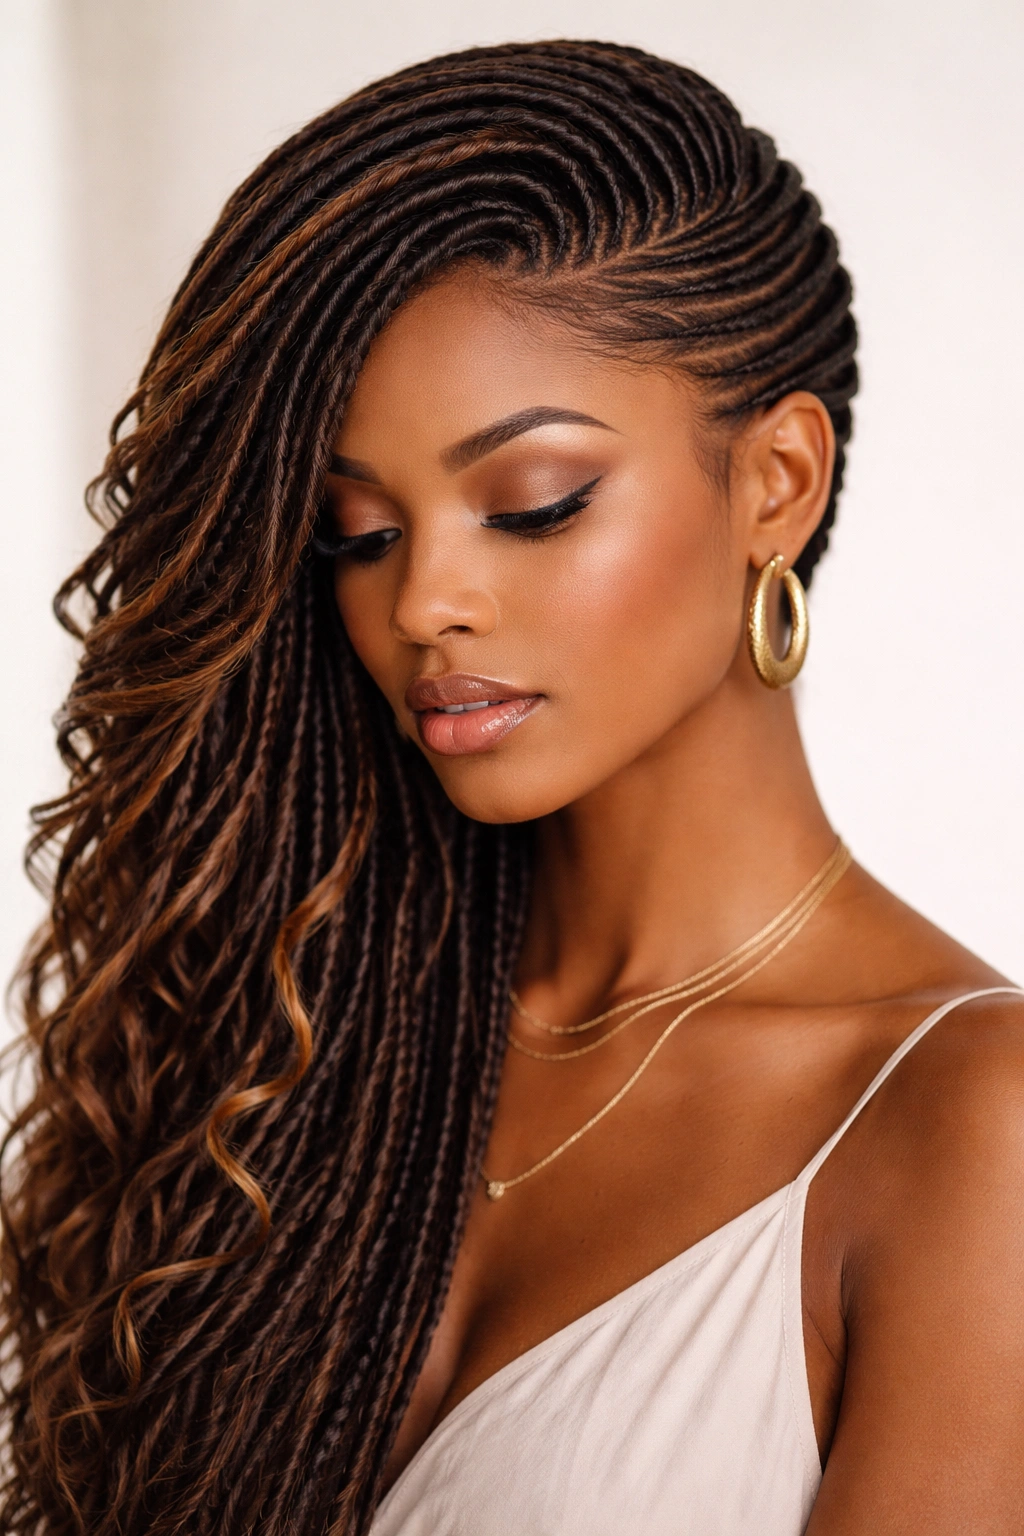
The beauty of goddess locs lies in their versatility—they’re not just a protective style, they’re a canvas for creative expression. Whether you’ve been wearing locs for years or you’re newly locked, styling them with intention transforms them from everyday wear into genuine art. Medium and long locs especially offer remarkable styling possibilities because you have enough length to work with multiple techniques at once, creating dimension and movement that catch light and attention.
Goddess locs specifically blend the protective benefits of traditional locs with the refined elegance of intentional styling. The term “goddess” typically refers to styled locs that incorporate wrapping elements, strategic placements, and braiding techniques that elevate the look beyond the locs themselves. What makes these styles so special is that they work for any hair texture within the locs—straight locs, textured locs, curly locs—they all respond beautifully to thoughtful styling.
The best part? Most goddess loc styles can be created and maintained at home once you develop the technique. You don’t need expensive salon visits every week, though having a skilled loctician for initial styling or refreshes is always worthwhile if you have access. Let’s explore eight distinct goddess loc styles that work beautifully on medium to long hair, each offering a different vibe depending on your mood, occasion, or personal aesthetic.
What Makes a Style “Goddess” and Why Medium-to-Long Locs Shine
A true goddess loc style goes beyond simply wearing your locs down. These styles incorporate intentional wrapping using colorful thread or yarn, strategic braiding that creates visual interest, careful sectioning that produces defined lines, and sometimes additional hair or synthetic extensions woven through the locs for volume and dramatic effect. The key to pulling off a goddess style is making every element look intentional—every wrap, every braid, every coil should feel purposeful rather than accidental.
Medium to long locs give you the length necessary to create depth in your styling. Shorter locs can absolutely be gorgeous, but once you hit shoulder-length and beyond, your design options expand significantly. You can create patterns that weave through multiple sections. You can wrap locs without them falling out immediately. You can pin, coil, and layer in ways that shorter hair simply doesn’t support as easily. If your locs fall between shoulder and mid-back length, you’re in the sweet spot for nearly all of these styles.
The time investment varies with each style—some take 30 minutes if you’ve practiced, while others require an hour or more if you’re new to the technique. Starting with simpler styles and building toward more complex ones makes sense. That said, none of these styles require professional skills; they require practice, patience, and willingness to watch yourself in a mirror (or use your phone’s mirror feature) until you nail the technique. You’ll be faster and more confident after the second or third attempt.
1. Long and Luxurious Crown Wrap
This style creates an immediate wow factor by wrapping your longest locs around your head like a crown, with remaining locs flowing down your back or pinned into a low bun. The wrapped locs catch light beautifully and create visual height, making it perfect for occasions when you want impact without necessarily putting your locs fully up.
How to Create the Crown Wrap Effect
Start by sectioning out which locs will become your crown—typically the locs that start at your temple on one side and travel across the back to your temple on the other side. For medium locs (shoulder-length), you might use 6-10 locs depending on their thickness and how wide you want the crown to be. For long locs, you can be more selective and create a thinner, more delicate crown line.
Choose your wrapping material: colorful thread, yarn in coordinating or contrasting colors, or even thin fabric strips work beautifully. Start wrapping at the base of one of your crown locs, wrapping tightly and consistently down the length. The wrap should feel snug but not so tight it creates tension or pain. Wrap completely to the end of the loc, then tie off your wrapping material securely.
Repeat with each loc in your crown section. Once all the locs in your crown are wrapped, carefully position them across the top and back of your head, using bobby pins to secure them into place. The locs should lay in a smooth line across your crown—think of it like placing a decorated tiara. Leave the remaining locs to flow free down your back or pin them into a loose bun at the nape of your neck.
Real-World Styling Notes
This style works particularly well for events—weddings, date nights, professional settings where you want your locs to feel intentional and elevated. The crown wrap also helps keep your wrapped locs protected and clean, as they’re not touching your shoulders and face throughout the day. If your locs are thinner, use more of them in your crown to create fullness. If your locs are thicker and fewer in number, your crown will look more dramatic and striking.
Wearing this style for 2-3 days is comfortable and safe for your locs if you’ve pinned them securely. The wrapped locs won’t loosen from normal movement if they’re pinned well. When you release the style, you’ll have beautiful crimped texture from the wrapping that lasts for days—reposition those wraps every few days for freshness.
Pro tip: Use metallic thread or yarn in gold, silver, or bronze for a style that photographs beautifully and works for nearly any skin tone. Matte metallics photograph better than shiny ones, which can sometimes look plastic under certain lighting.
2. Twisted Half-Up Goddess Style
This style takes half your locs up and twisted, while the other half flows freely down your back. The twisted section creates texture and visual movement, and because half your locs remain down, it’s softer and less formal than a full updo while still feeling intentional and styled.
How to Build the Twisted Half-Up Section
Divide your locs down the middle from forehead to the back of your head, creating a clear vertical line. The locs on one side will remain down; the locs on the other side will be swept up and twisted. Start gathering your half-up locs at roughly ear level, using your hands to sweep them back smoothly.
Once you’ve gathered your half-up locs, begin twisting them. Unlike braiding, twisting is simple—you’re simply rotating the gathered group of locs around itself, creating a spiral or twisted column. Keep the twisting tight enough that the style feels secure but not so tight you’re creating tension at your roots. Twist all the way down to the ends of your locs.
At the bottom of your twisted section, secure everything with a hair elastic or tie your wrapping thread around the twisted column multiple times to hold it in place. You can wrap the base of your twisted section with colorful thread before securing it, creating an intentional transition point between your free-flowing locs below and the twisted section above.
Variations on the Half-Up Twist
Some people prefer a double-twist half-up style: divide your half-up locs into two sections and twist each one separately, then bring both twisted columns together at the back. This creates a more intricate, textured look while maintaining the same ease of execution. Others prefer a spiral rather than a straight twist—create large spiral coils with your half-up locs, pinning them into place as you go.
The side where your locs remain down can be smoothed back on one side and left textured on the other, creating asymmetry that’s very modern and intentional. You can also wrap the free-flowing locs on the down side with thread to create additional visual definition.
This style holds beautifully for 3-4 days without loosening, making it a practical choice for someone who wants their locs protected but still visible. The twisted section won’t unravel if it’s secured properly at the base.
3. Side-Swept Sculpted Locs
Instead of centering your locs, push them all dramatically to one side and secure them with wrapping and pinning to create a sculpted, off-to-the-side look. One side of your head is nearly completely exposed, while the other side is densely covered with locs—it’s a bold, confident style that works especially well on people with defined facial features or high cheekbones.
Technique for the Side-Sweep
Section your locs intentionally before you begin—you want to know which locs will be swept over and which (if any) will remain on the non-swept side. Start from the center-back of your head, gathering locs as you move toward the side you’re sweeping to. Use bobby pins to secure locs flat against your head as you sweep them, creating a smooth contour rather than a bumpy one.
Once all your locs are swept to one side, you can leave them loose and flowing at the side, or gather them into a low side ponytail. If you’re leaving them loose on the swept side, use pins every few inches down the length to keep them positioned and sculpted. The pins should be nearly invisible—use ones that match your loc color if possible.
For the exposed side of your head (where your hair is slicked back), use a styling gel or loc butter to smooth everything flat and shiny. This creates contrast: the smooth, sleek exposed side of your head against the textured, full locs on the swept side.
Creating Visual Interest in the Sculpted Area
You can wrap locs on your swept side with colorful thread while they’re still loose, or you can braid some of the side-swept locs together before pinning, creating dimension and texture in that clustered area. The key is making the side-sweep look intentional and controlled, not like you’re just pushing your hair out of the way.
This style photographs beautifully from the profile view (the exposed side) and works well for anyone who wants to draw attention to facial features or create a more fashion-forward, editorial appearance. It’s also excellent for keeping locs off your face and neck during workouts or hot weather while still looking styled.
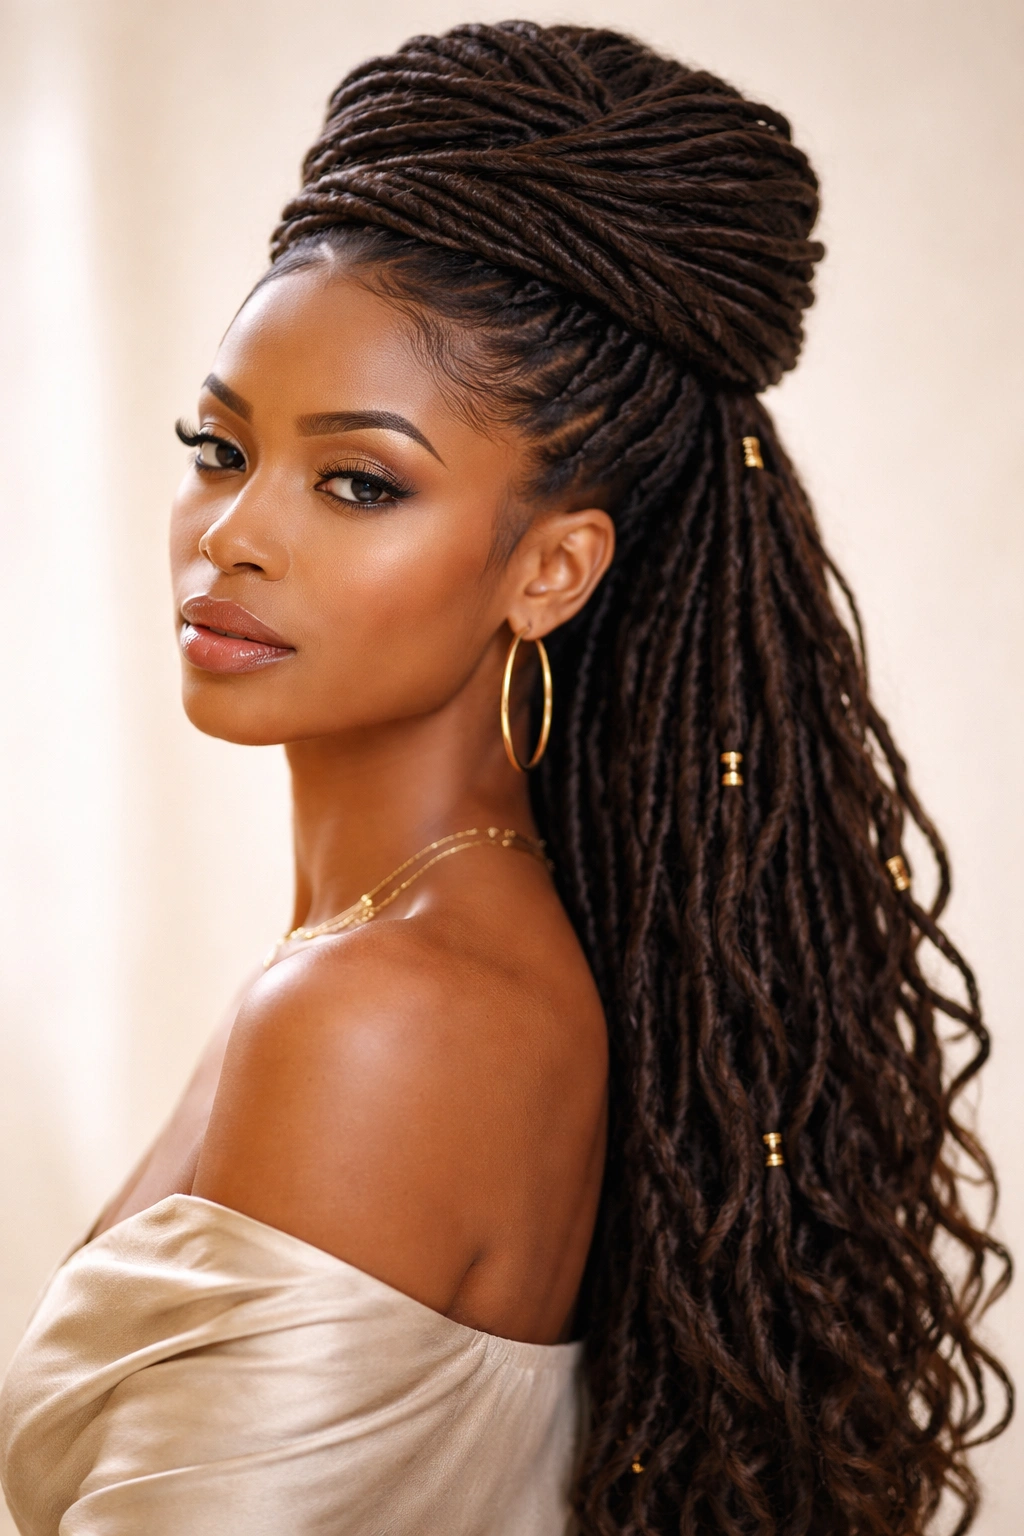
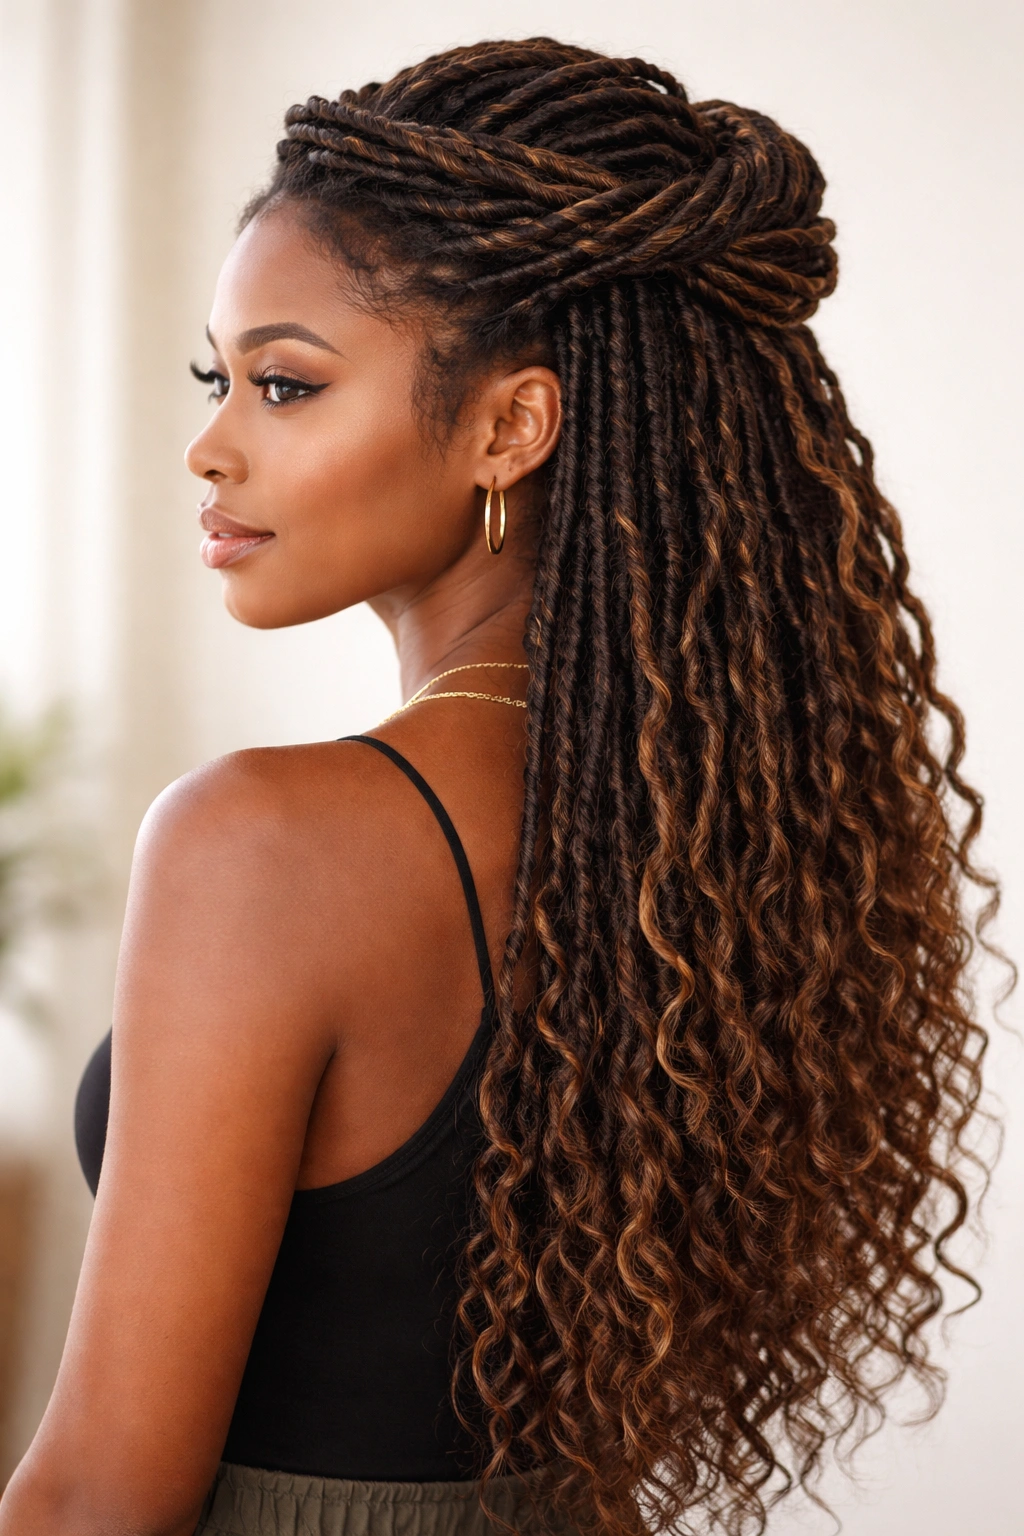
4. High Bun with Layered Intricate Braids
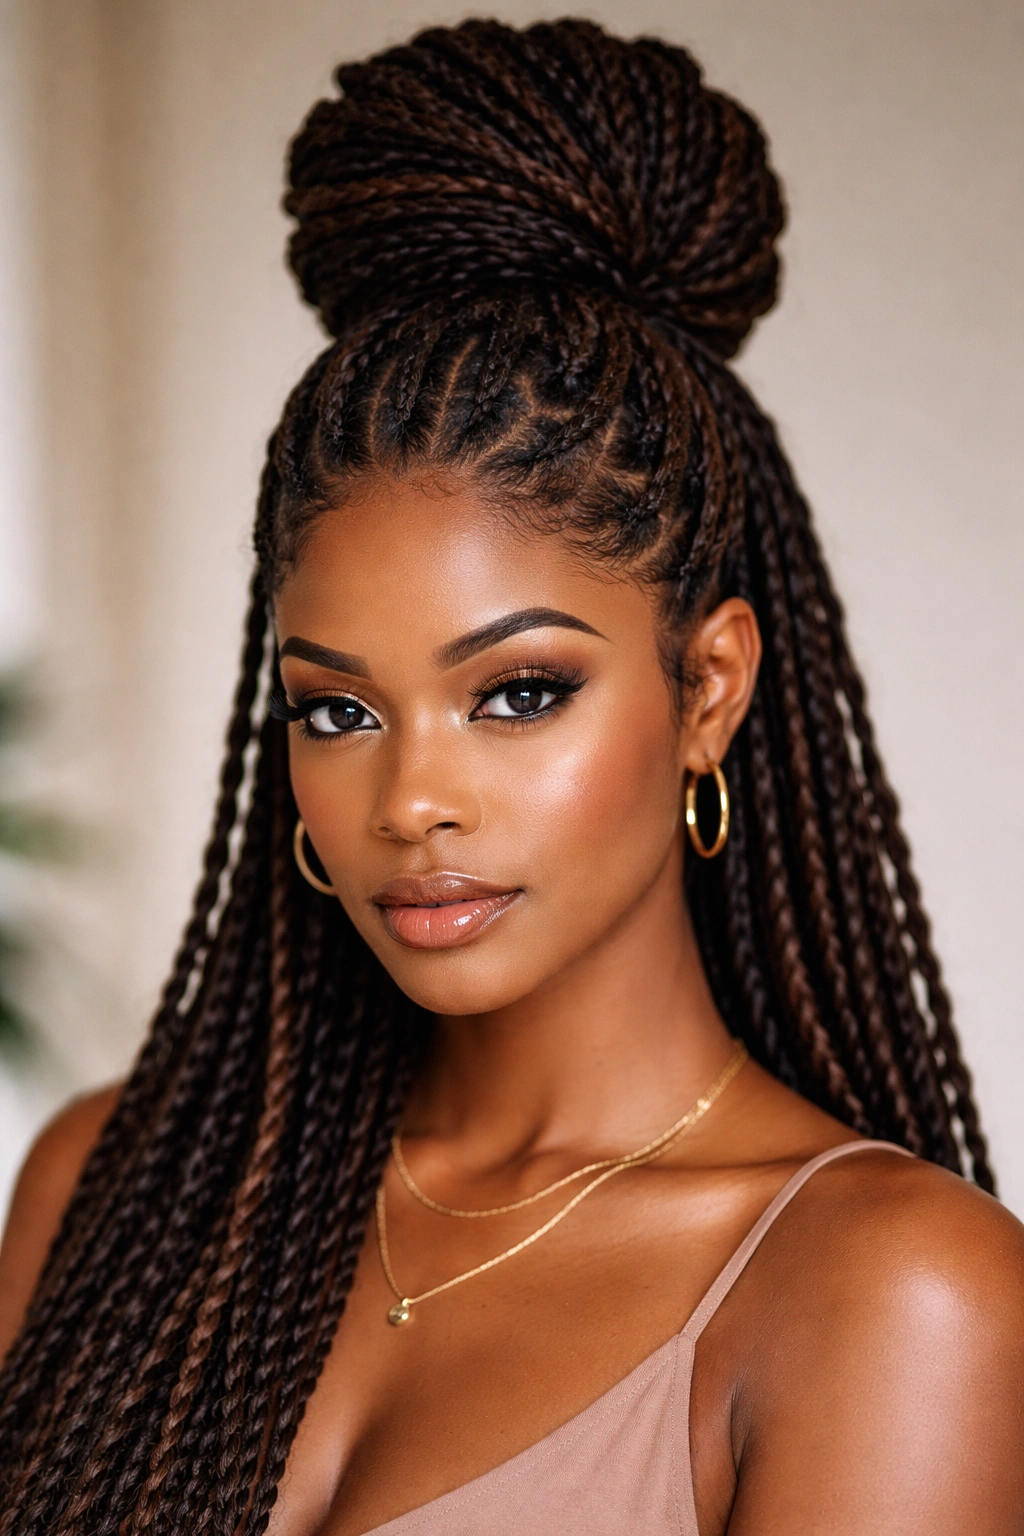
Gather your locs into a high bun at the crown of your head, but before securing the bun, create 2-4 small braids from locs at the front and sides of your head, weaving them toward your center bun. The braids create intricate detail and visual depth that make the simple bun feel sophisticated and intentional.
Step-by-Step Bun Construction with Braids
Begin by sectioning out which locs will become your braids—typically locs at your temples, sides of your face, or from your part line. Each braid should use 3-6 locs depending on their thickness. Create small three-strand braids (or flat twists if you prefer their aesthetic) using your selected locs, braiding from the front toward the back of your head where your bun will live.
As you finish each braid, pin it into place temporarily so it stays exactly where you want it. You’re creating a roadmap of where the braids will converge at your bun. Once all your braids are created and pinned, gather your remaining free locs (the ones not involved in braids) into a high, centered bun at the crown.
Pull your braids into the bun as well, weaving each one into the bun’s interior so they’re integrated rather than just resting on top. Secure everything with bobby pins and a hair elastic. The finished look should show the braids emerging from the center and extending toward the front of your head, creating a layered, detailed appearance.
Wrapping and Finishing the Bun
Wrap your completed bun tightly with colorful thread or yarn, covering the entire bun structure. This accomplishes two things: it secures everything in place and it creates additional visual interest. You can use a single color for a clean, modern look or alternate colors every few wraps for a more playful aesthetic.
Some people prefer leaving the braids unwrapped to show their intricate structure, while wrapping only the central bun. Others wrap everything for a unified, cohesive look. Both approaches work beautifully—it depends on whether you want the braids to be the focal point or whether you want visual unity across the entire style.
This style is excellent for work, special events, or any situation where you want your locs fully secured but still visually interesting. The height of the bun combined with the detailed braids creates an elegant, polished appearance that reads as intentional and professional.
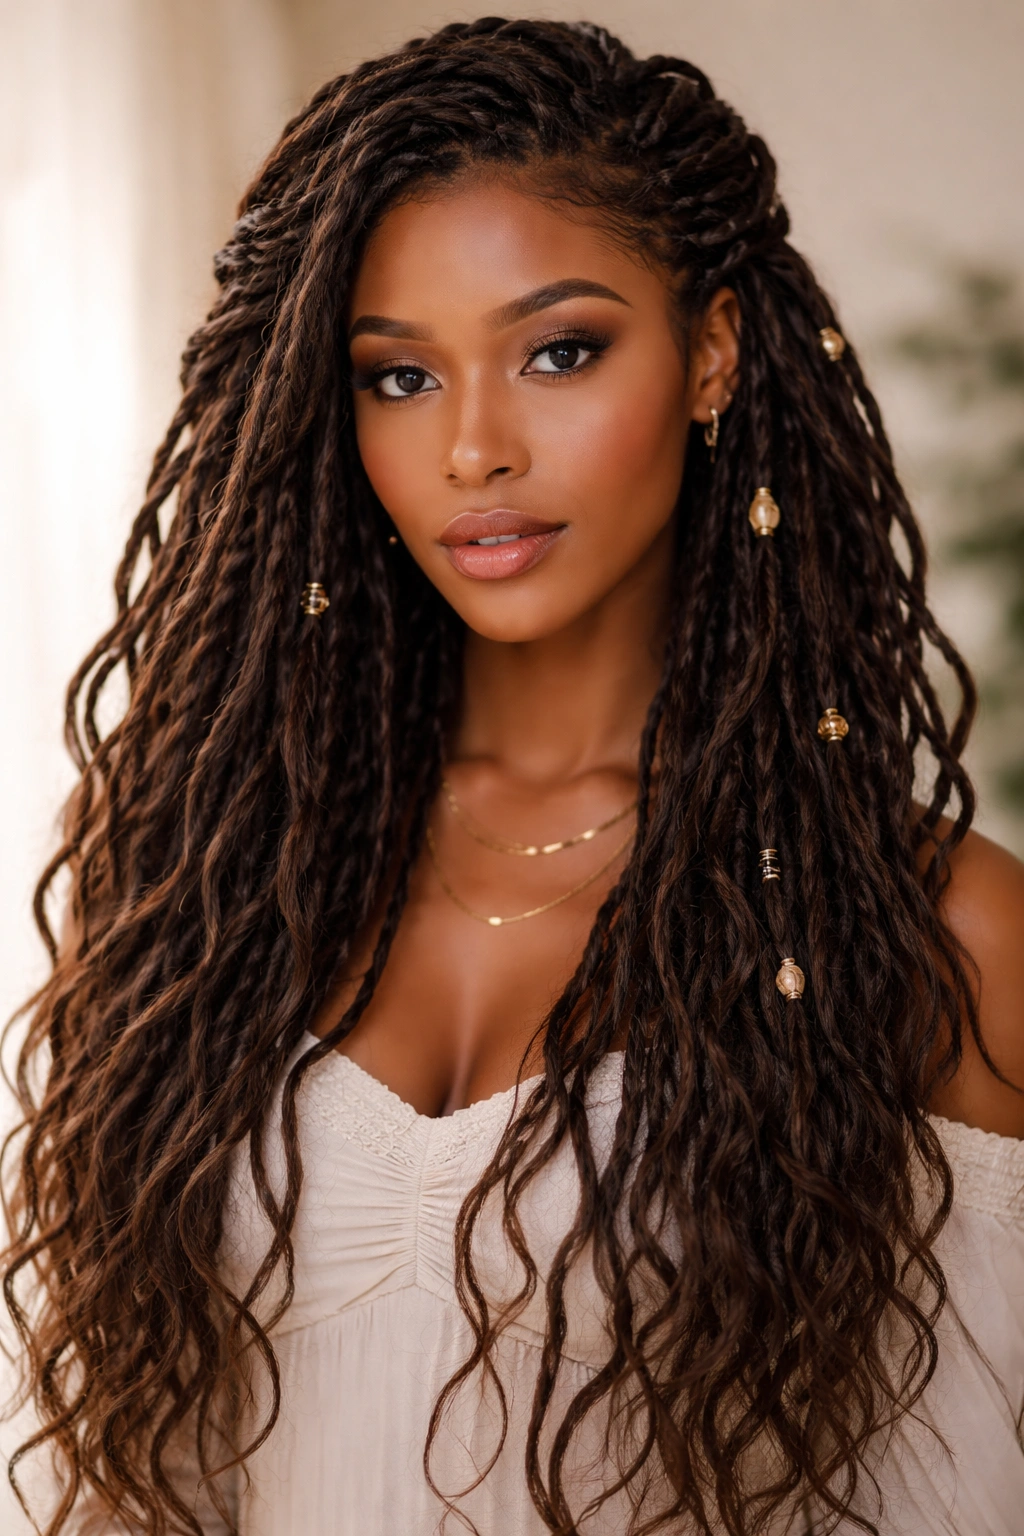
5. Romantic Waterfall Locs
This style creates a cascading effect by incorporating some locs into intricate wrapping and braiding while allowing others to flow free, creating the visual effect of a waterfall. It’s the most romantic of the goddess loc styles and works beautifully for weddings, anniversary celebrations, or any time you want your locs to feel soft and flowing rather than structured.
Building the Waterfall Effect
Divide your locs into sections—you’ll use some for wrapping and structure, and leave others completely free and loose. Start by creating a diagonal line across your head from one temple area toward the back. Locs above this line will be wrapped, braided, or pinned; locs below this line will flow freely as the “waterfall.”
For the upper section, use your wrapping material to create patterns. Some people prefer wrapping every other loc, creating alternating wrapped and unwrapped columns. Others prefer wrapping in geometric patterns—diagonal lines, V-shapes, or random designs. The wrapped locs create visual texture and guide the eye downward toward the free-flowing waterfall below.
You can also create braids in your upper section instead of (or in addition to) wrapping. Flat braids using 3-4 locs create elegant lines that direct attention down toward your waterfall. The combination of wrapped and braided elements in your upper section, contrasted against the loose, textured locs flowing freely below, creates romantic movement.
Styling the Free-Flowing Section
The waterfall section—your loose locs—can be left completely natural and textured, or you can add subtle definition by using a light styling product (like loc gel or light mousse) to enhance whatever natural curl or texture your locs possess. Some people prefer a very textured, wild appearance for maximum romanticism, while others prefer a slightly more controlled, intentional texture.
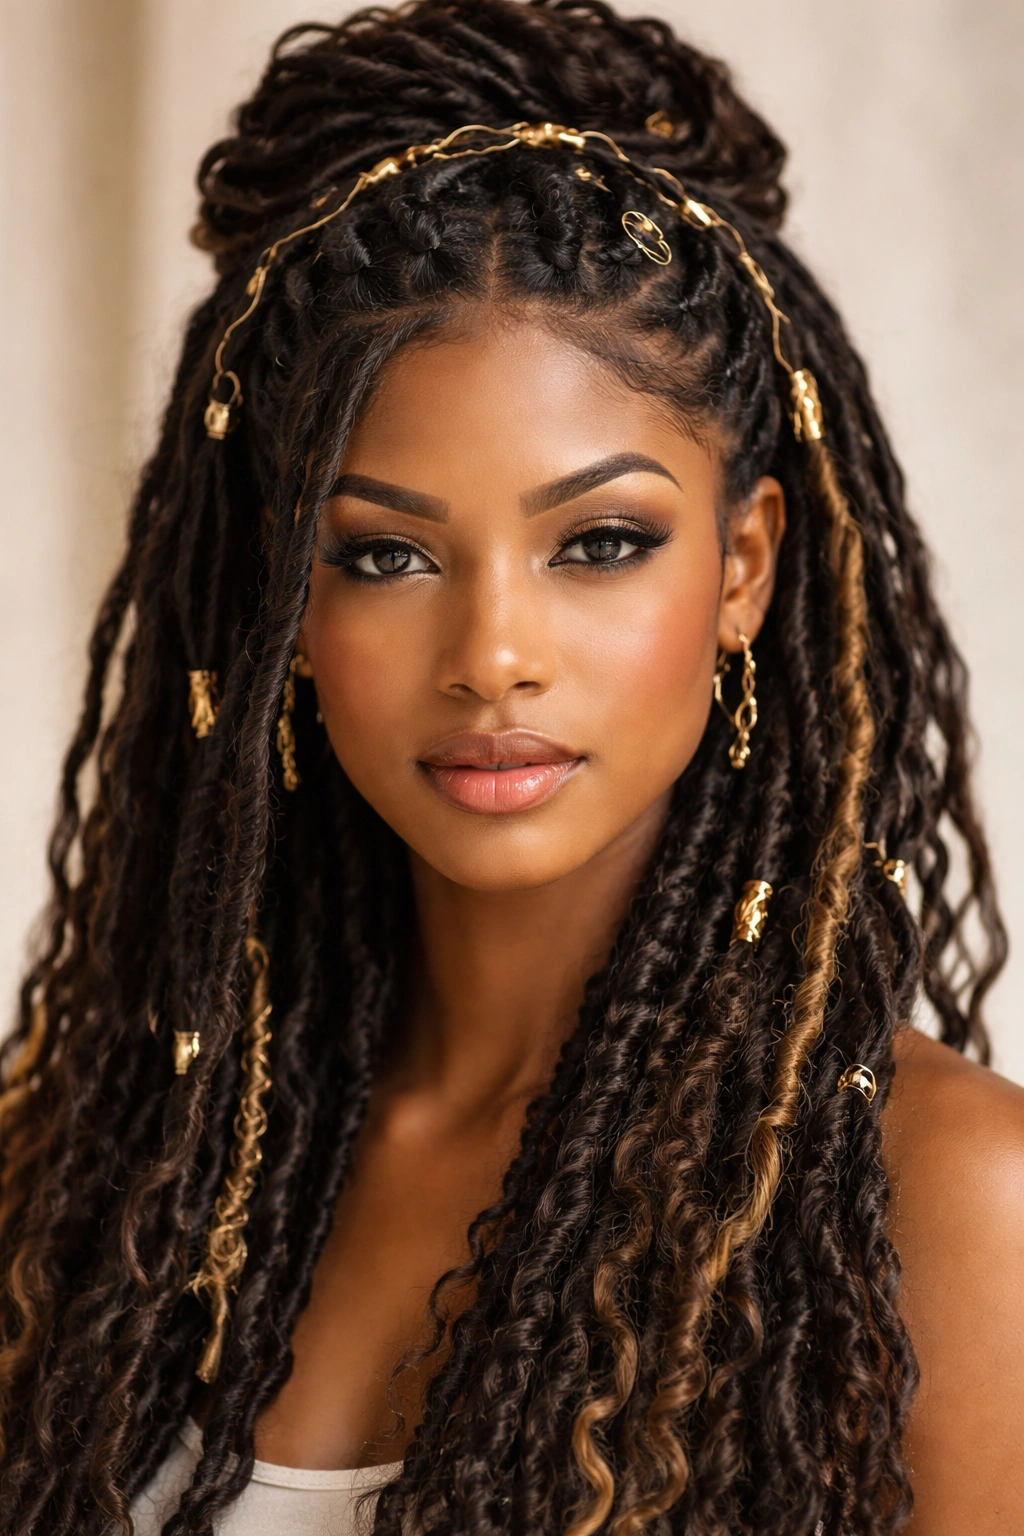
You can add decorative elements like hair jewelry, cuffs, or beads to some of your waterfall locs for additional shimmer and movement. Gold or silver cuffs work beautifully, as do gemstone-style beads. The key is not overdoing it—the waterfall should feel organic and romantic, not costume-like.
This style works especially well if your locs are naturally curly or textured, as the wrapped/braided upper section creates elegant structure while the free lower section shows off your locs’ texture and movement.
6. Double-Sided Dutch Braid with Locs
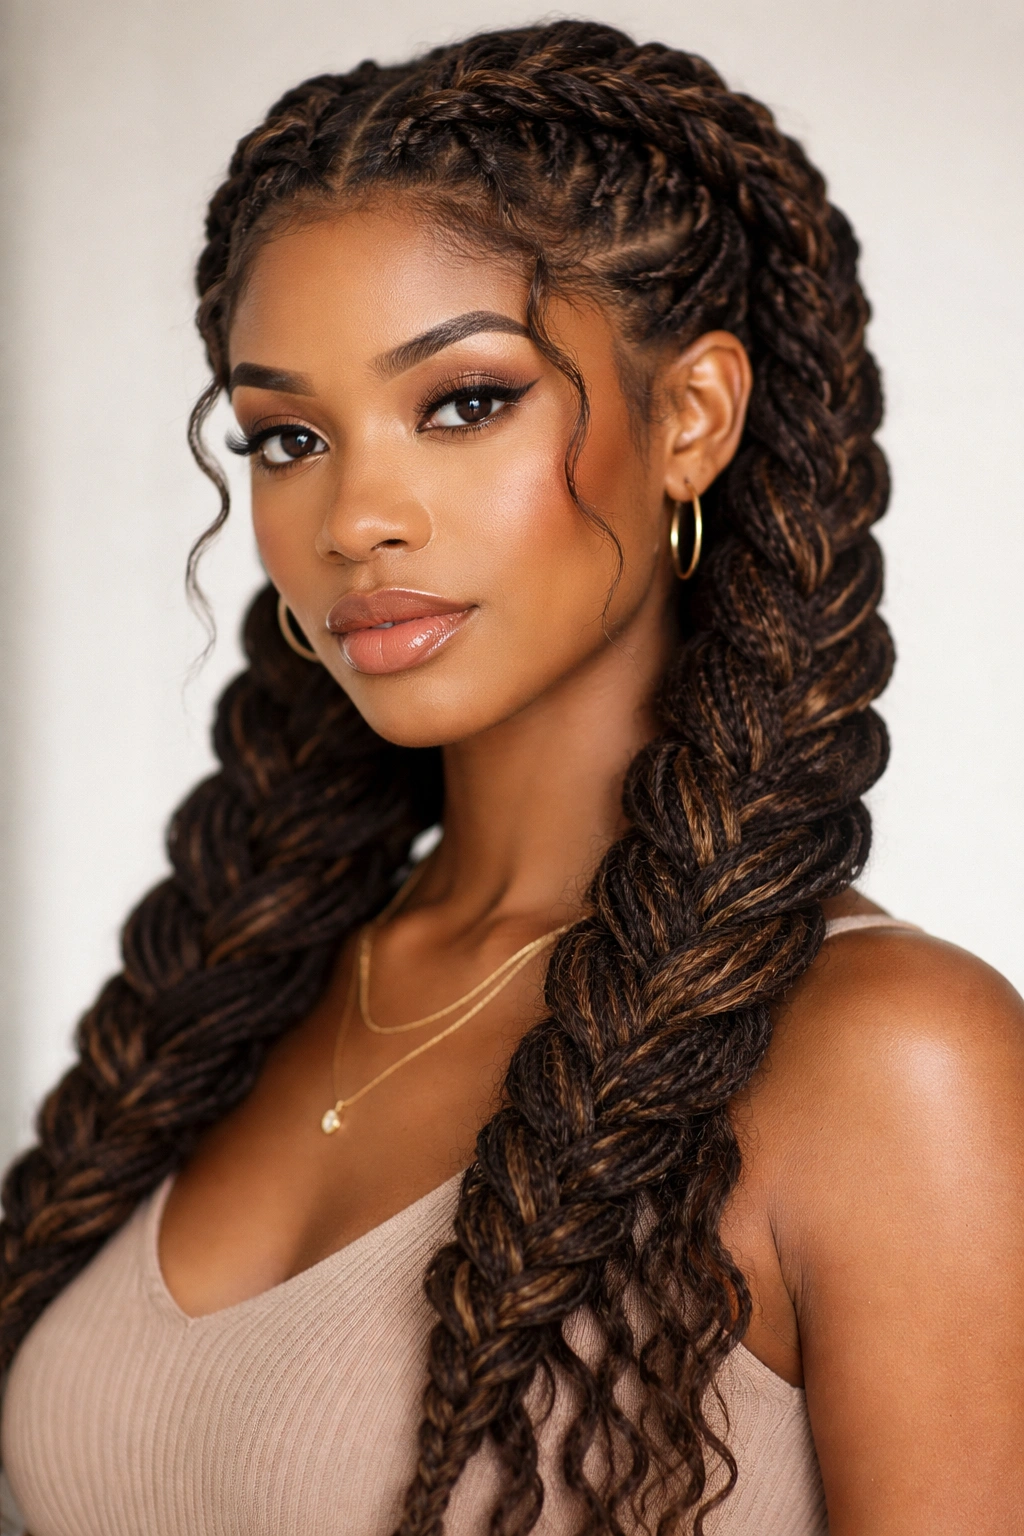
Instead of traditional braiding, this style uses your actual locs as the braiding material, creating thick, dimensional Dutch braids on both sides of your head that meet at the back. It’s bold, visual, and shows off your locs’ thickness and texture beautifully.
Creating Symmetrical Dutch Braids
Start by creating a clear center part from your forehead to the nape of your neck. This ensures your locs naturally divide into two sections, one for each braid. Take locs from your temple area on the left side of your part and begin creating a Dutch braid—this means braiding down rather than up, so the braid sits on the surface of your head and stands out visually.
Select 3-4 thicker locs for each section of your braid (or 6-8 thinner locs), depending on the braid’s thickness you want to achieve. A thicker braid creates bold visual impact; a thinner, more delicate braid feels refined and elegant. Dutch braid by crossing your sections under each other rather than over, which creates that distinct, protruding braid appearance.
Braid from your temple toward the back of your head, gradually incorporating additional locs as you move backward (like a traditional Dutch braid). Once you reach the back of your head, begin your second braid on the right side, mirroring the first braid’s path.
At the back of your head, both braids will meet. You can either leave them meeting naturally and secure them together, or you can weave them together into one larger braid or bun, depending on your preference and your loc length.
Customizing the Braid Appearance
Wrap each Dutch braid with coordinating or contrasting thread to add color and definition. You can wrap solid colors, create striped patterns, or alternate colors for visual movement. The wrapping also keeps the braids secure and looking fresh longer than unwrapped braids.
If you have long locs, you can braid past your shoulders and down your back, creating braids that extend several inches beyond your natural hairline. This dramatic length makes the style feel intentional and bold. If your locs are medium length, your braids might only extend to your shoulders or slightly beyond, which is still stunning and feels very controlled and polished.
This style is excellent for people who want their locs to feel sporty, intentional, and visually striking. It’s a style that announces “I’m wearing my locs intentionally and confidently,” which is powerful and beautiful.
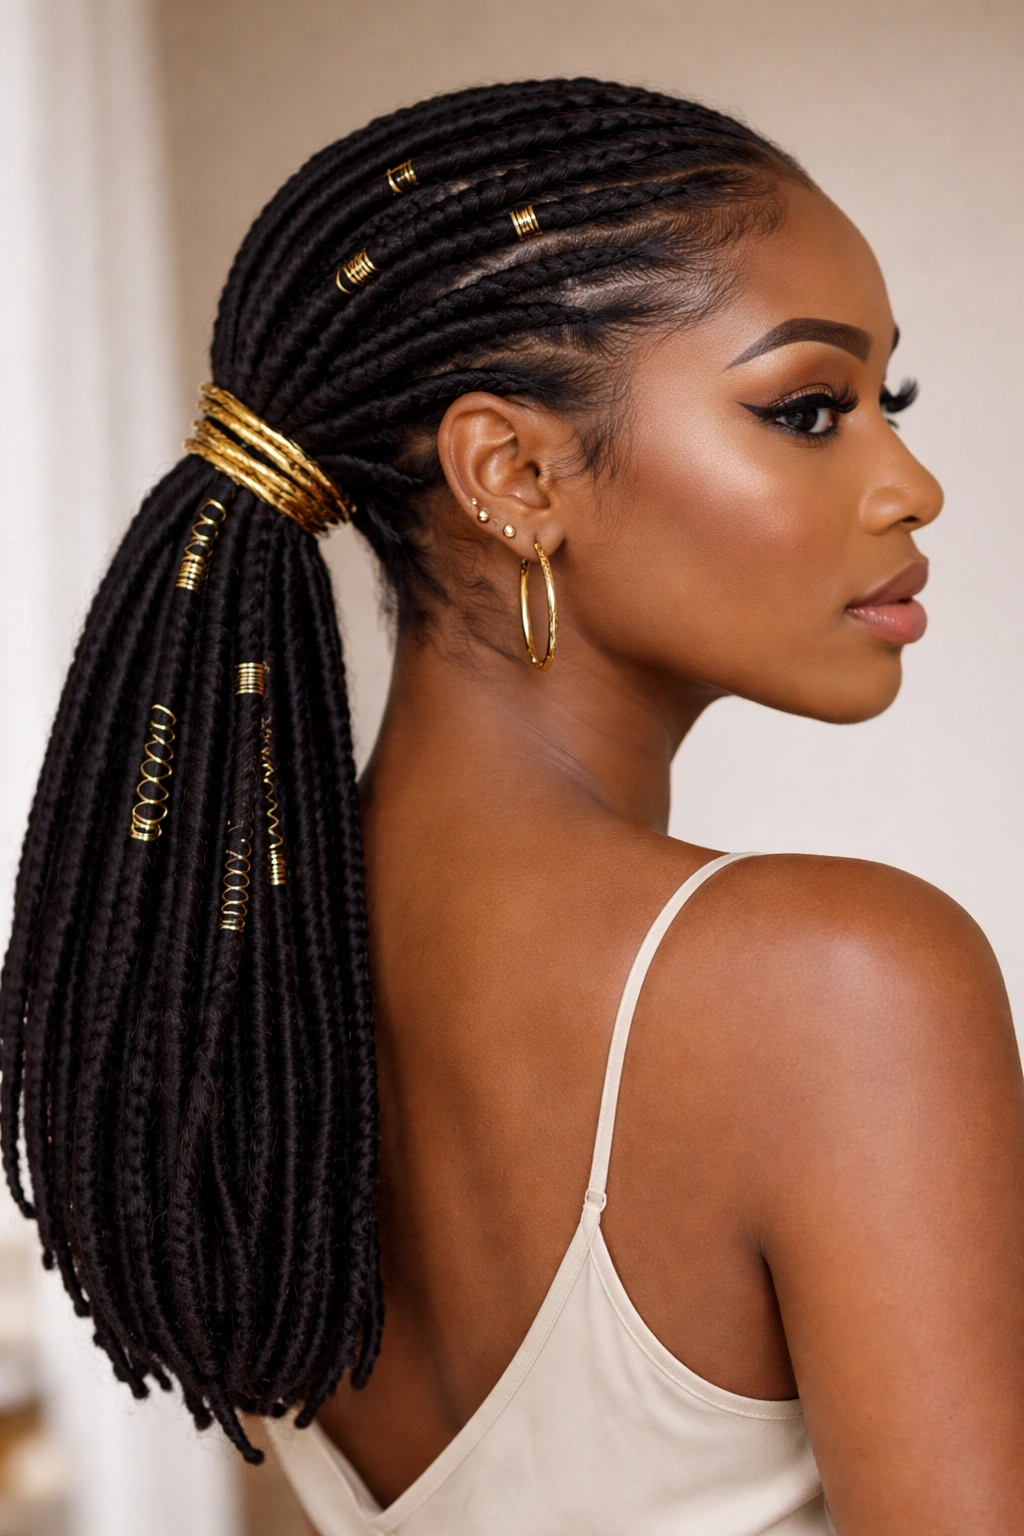
7. Sleek Low Ponytail with Goddess Accents
Gather your locs into a low ponytail at the nape of your neck, keeping it smooth and sleek, then add goddess touches like wrapping, decorative cuffs, or small braids woven through the ponytail. The result is polished and professional while still feeling special and intentional.
Creating a Smooth, Sleek Ponytail Base
Start by applying a smoothing product (like a lightweight loc gel or edge control) to your roots and throughout your locs if needed. You want the ponytail base to look smooth and controlled, not fuzzy or undefined. Gather your locs at the nape of your neck—not too high (which can look unflattering and feel tight), not too low (which can feel loose and unsecured).
Secure your ponytail with a clear elastic or a colored elastic that matches your locs. The elastic should be tight enough to hold firmly all day but not so tight it’s causing tension at your roots. If you’re concerned about tension, wrap a loc around your elastic to hide it and distribute the hold more evenly across multiple locs.
Adding Goddess Details
Now that your base ponytail is secure, add intentional details. Wrap your ponytail base with colorful thread, creating a band of color that frames the transition between your loose head locs and your gathered ponytail locs. You can create a simple wrapped band, or you can wrap in patterns—diagonal stripes, checkered patterns, or color-blocking all work beautifully.
Alternatively, create 2-3 small braids from locs on each side of your head and weave them into your ponytail base, creating an integrated, detailed look. These braids add visual interest and texture that transforms a simple ponytail into a styled goddess look.
Add decorative elements to your ponytail itself: gold or silver cuffs at intervals down the length, beads, hair jewelry, or even thin chains woven through the gathered locs. The key is intentionality—every addition should feel like a choice, not an accident.
Occasion-Appropriate Variations
For professional settings, keep your goddess details subtle: perhaps just a wrapped base with matching accessories. For social events, you can be bolder with multiple colors, more cuffs, and more visible braids. The versatility of this style makes it workable across different contexts while still maintaining its goddess aesthetic.
This style is comfortable for all-day wear and keeps your locs protected and off your face, making it practical for work, travel, or active days while still looking intentional and elevated.
8. Spiral Wrapped Crown Locs

This final style creates large spiral coils across your crown, wrapping them with colorful thread and pinning them into place to create an intricate, dimensional crown. It’s the most visually dramatic of these eight styles and works beautifully for anyone who wants their locs to feel like art.
Creating the Spiral Coil Structure
Select locs from the top and back of your head—roughly 6-10 locs depending on their thickness and how densely you want your crown to feel. Starting with one loc, wrap it tightly with colorful thread from the base toward the end, creating a fully wrapped column. Once the loc is completely wrapped, create large coils or spirals with that wrapped loc, pinning each coil into place as you shape it.
A coil might be 2-3 inches in diameter, with the spiral creating height and dimension. Once the first spiral is pinned securely, move to your next loc, wrap it, and create another spiral adjacent to your first one. Continue until you’ve created spirals across your crown area.
The finished effect is a crown of dimensional spirals that catch light and create shadow—visually stunning and completely unique to how goddess locs express artistry and creativity.
Color Strategy for Maximum Impact
Use coordinating or contrasting colors in your wrapping thread to create visual themes. You might use all golds for a sunny, warm crown, or alternate between two colors to create a pattern. Some people prefer a rainbow effect, using different colors for each spiral. Others prefer monochromatic elegance, wrapping in shades of the same color family.
Metallic threads in gold, silver, or copper create luxurious shine, while matte threads in jewel tones or pastels create different vibes entirely. Consider your skin tone and what colors make you feel most confident.
Securing Your Spiral Crown for Longevity
Use bobby pins extensively to secure each spiral into place—don’t rely on the wrapped thread alone. Use pins that match your thread color for invisible support, or use contrasting pins as an intentional design element. The spirals should feel very secure and not move or unwind when you move throughout your day.
This style can last 3-5 days if pinned securely and maintained gently. Avoid sleeping on your spiral crown directly; instead, sleep on your other side or use a sleep bonnet to protect the style. The spirals won’t loosen from normal movement, but sleeping directly on them can flatten and distort them.
Maintaining Goddess Locs Between Styling
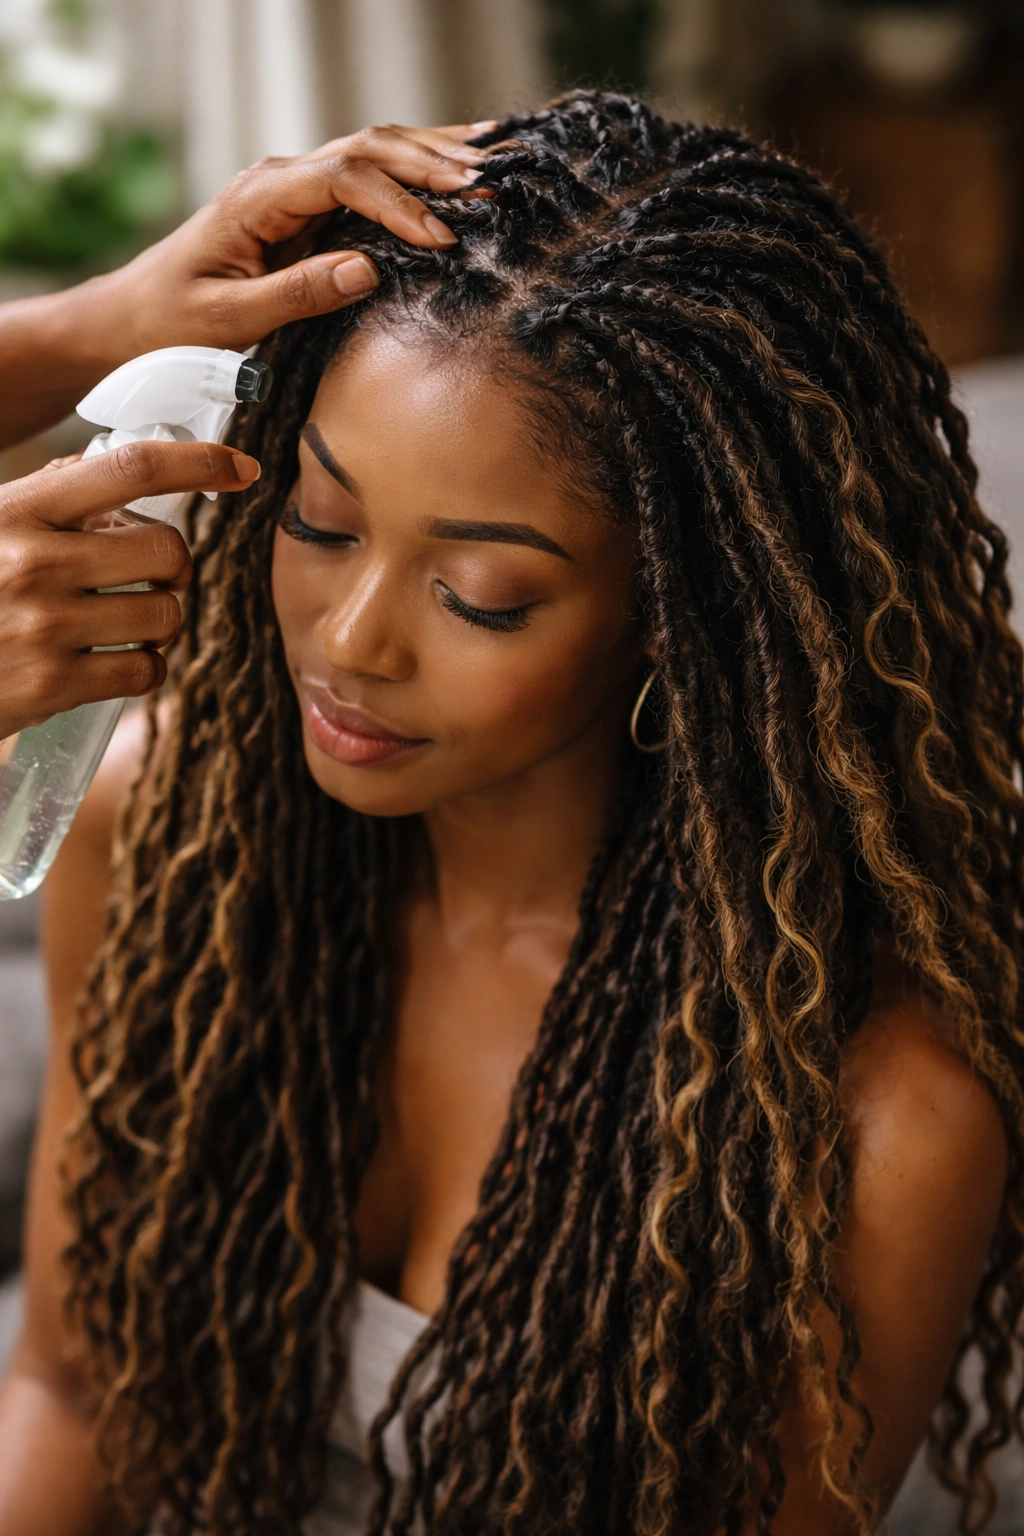
Your locs need consistent care to stay healthy and vibrant, regardless of which goddess style you’re wearing. Start with a loctician or experienced stylist every 4-8 weeks for maintenance—they’ll retwist your roots, remove any build-up, and ensure your locs are strong and healthy at the base. Between professional visits, you can maintain your locs at home with simple practices.
Wash your locs every 1-2 weeks with a lightweight shampoo designed for locs. Use warm water and massage the shampoo gently into each loc from root to tip. Rinse thoroughly until all soap is gone, as residue can create build-up that makes your locs look dull and feel stiff. You can either air dry your locs (which takes several hours) or use a blow dryer on medium heat, holding it a few inches away from your locs and moving it constantly to avoid heat damage.
Between washes, keep your locs moisturized with a lightweight loc oil or water-based moisturizer. Apply this to the length of each loc, not heavily but enough to keep them soft and prevent dryness. Dry locs are more prone to breakage and look dull, so moisture is non-negotiable for beautiful locs.
At night, protect your locs by wrapping your head in a silk or satin bonnet or pineapple-ing your locs (gathering them at the top of your head in a loose, high ponytail). This prevents friction against your pillowcase, which can cause frizz, dullness, and breakage. Cotton pillowcases absorb moisture from your locs; silk and satin prevent this moisture loss.
Styling Tips for Maximum Impact and Longevity
Before you style, assess the current state of your locs. Are they freshly retwisted? Are they fuzzy at the edges? Do they feel dry or oily? Your starting point determines which styles will look best and last longest. Freshly retwisted locs have a clean, tight appearance that makes all styles look sharp. Locs a few weeks into their cycle can still look beautiful but might require more product and secure pinning to maintain defined styles.
Consider the occasion and how long you need the style to last. A style for a single evening event can be more delicate and intricate; you can use fewer pins and lighter securing techniques. A style you’re wearing for several days needs to be more robustly secured with multiple pins, tighter knots, and more secure wrapping so nothing loosens or unwinds.
Product choice matters significantly. Lightweight gels, mousses, and oils work better than heavy pomades or butters, which can make your locs look greasy and can trap dust and dirt. You want products that provide hold and shine without weight. Water-based products tend to work better than oil-based ones for most locs.
When wrapping your locs, practice getting the tension right—tight enough to stay secure but not so tight you’re creating pain or pulling at your roots. Start by wrapping loosely and then tightening as you gain confidence. Many people wrap too tightly their first few attempts, which can damage their roots and cause breakage.
Use a hand-held mirror in addition to your bathroom mirror when styling. The hand mirror lets you see the back of your head and ensure you’re creating symmetry, even lines, and the exact effect you want. Styling locs is always easier and more successful with two mirrors.
Final Thoughts
Goddess loc styles represent the intersection of practical hair care and artistic expression. Your locs aren’t just a protective style—they’re a medium for creativity and intention. Whether you choose the elegance of a crown wrap, the drama of side-swept locs, the romance of a waterfall, or the artistry of spiral crowns, you’re making a statement about how you see yourself and how you want to move through the world.
Start with styles that feel achievable to you. The half-up twist and sleek ponytail are excellent entry points if you’re new to goddess loc styling. Once you’ve practiced and grown confident, move toward more intricate styles like the spiral crown or double-sided braids. Each style you master builds skills that transfer to the next one.
Remember that your locs are constantly evolving—they change texture, thickness, and movement over time. A style that didn’t work perfectly on your three-month-old locs might look stunning on your year-old locs. This means you get to continuously experiment, refine, and discover what works best for your hair’s current state and your current aesthetic preferences.
The goddesses in mythology were rarely passive—they moved through the world with intention, creativity, and confidence. Your locs are no different. Treat them as an extension of your power and creativity, style them with intention, and wear whatever style makes you feel most authentically yourself.