Short hair and braids might sound like an impossible combination, but when you understand the mechanics of what keeps braids anchored and which styles work with shorter lengths, you unlock a whole world of possibilities. The biggest misconception is that short hair can’t hold braids securely—that’s only true if you’re trying to force a long-hair braid style into a short cut. The right braided styles for short hair work with your length, not against it, creating intricate looks that hold strong from morning until bedtime without the need for constant adjustments or repair.
What makes braided short hairstyles different from their longer counterparts is the emphasis on root placement and tension. When you have less hair length to work with, where and how tightly you braid matters exponentially more. The shorter the hair, the tighter the braid can be without causing damage—and ironically, that tightness is what gives these styles their staying power. Most of the styles that fail on short hair fail because they’re braided too loosely or positioned in a way that leaves too much loose hair floating around to destabilize the braid.
The real secret lies in understanding your own hair texture and choosing a style that suits your specific hair density and wave pattern. Fine, straight hair needs a different approach than thick, curly hair, yet both can rock beautiful braided styles with the right technique. This guide walks through 12 genuinely wearable braided short hairstyles, each selected specifically because it actually stays put on real hair throughout a real day—no constant fixing, no excessive product, no frustration.
1. The Bubble Braid on Undercut
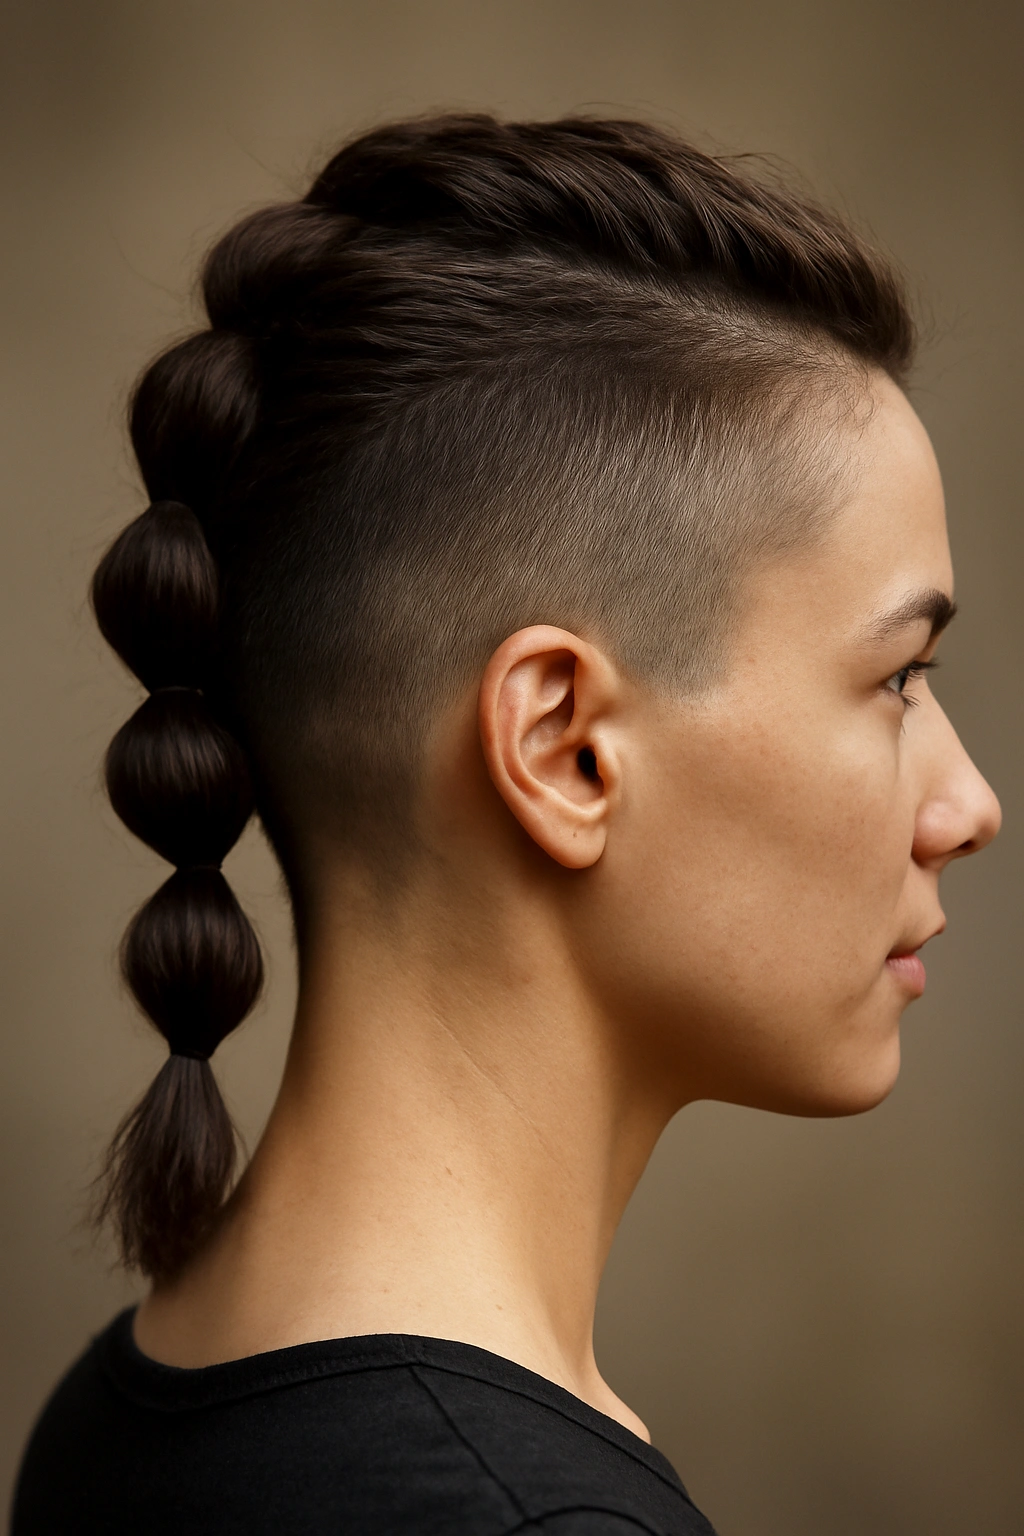
This style works brilliantly on short hair because the undercut (or fade) creates clean lines that let the braid itself be the focus, while the shorter sides mean there’s less weight pulling down on your braid. You start with a basic braid running from the crown down the back, then gently pull apart each section of the braid to create that signature “bubble” effect, which not only looks textured and intentional but also locks the braid structure in place.
Why This Style Holds Its Own
The bubble effect creates friction between the braid strands themselves, making the braid resistant to unraveling even if a few pieces come slightly loose. The pulling motion actually tightens the braid structure rather than loosening it, which is the opposite of what you’d expect. Because you’re working with shorter hair, each bubble section contains all your hair in that area, so it can’t shift or slide down the way it might on longer lengths.
How to Build the Bubble Braid
- Start by creating a standard three-strand braid at the crown, braiding tightly to give yourself a solid foundation
- After completing three to four crosses of the braid, gently pull outward on each section with your fingers, expanding the braid’s width
- Pull evenly on both sides of each bubble section so the braid stays centered and symmetrical
- Secure with a small elastic at the base, then use bobby pins to anchor the braid close to your scalp if you have an undercut (the pins slide into the shaved area, making them completely hidden)
Best Hair Type for Success
This works beautifully on medium-thick hair or textured hair that grips the braid strands. If you have very fine, slippery hair, add a light texturizing spray or dry shampoo to your roots and braid strands before you begin—this gives the hair something to grip.
Pro tip: Create the bubble effect right after you braid while the braid is still fresh and hasn’t had time to settle; the freshly-braided hair is more pliable and pulls apart cleanly without creating frizz.
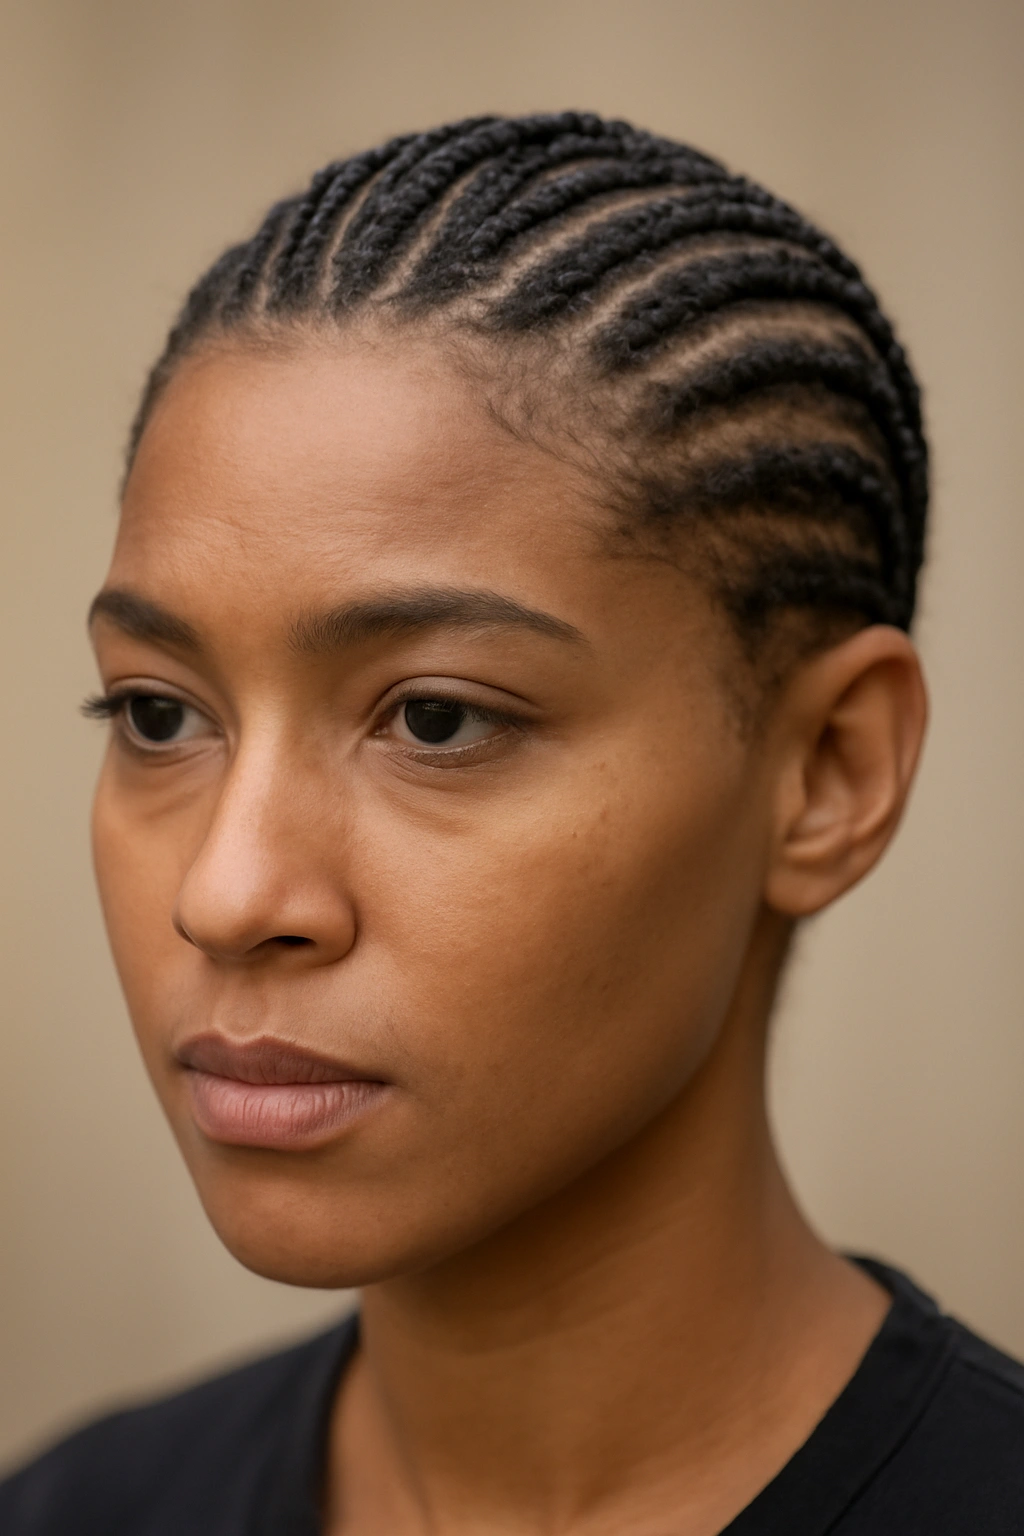
2. French Braid Close to the Crown
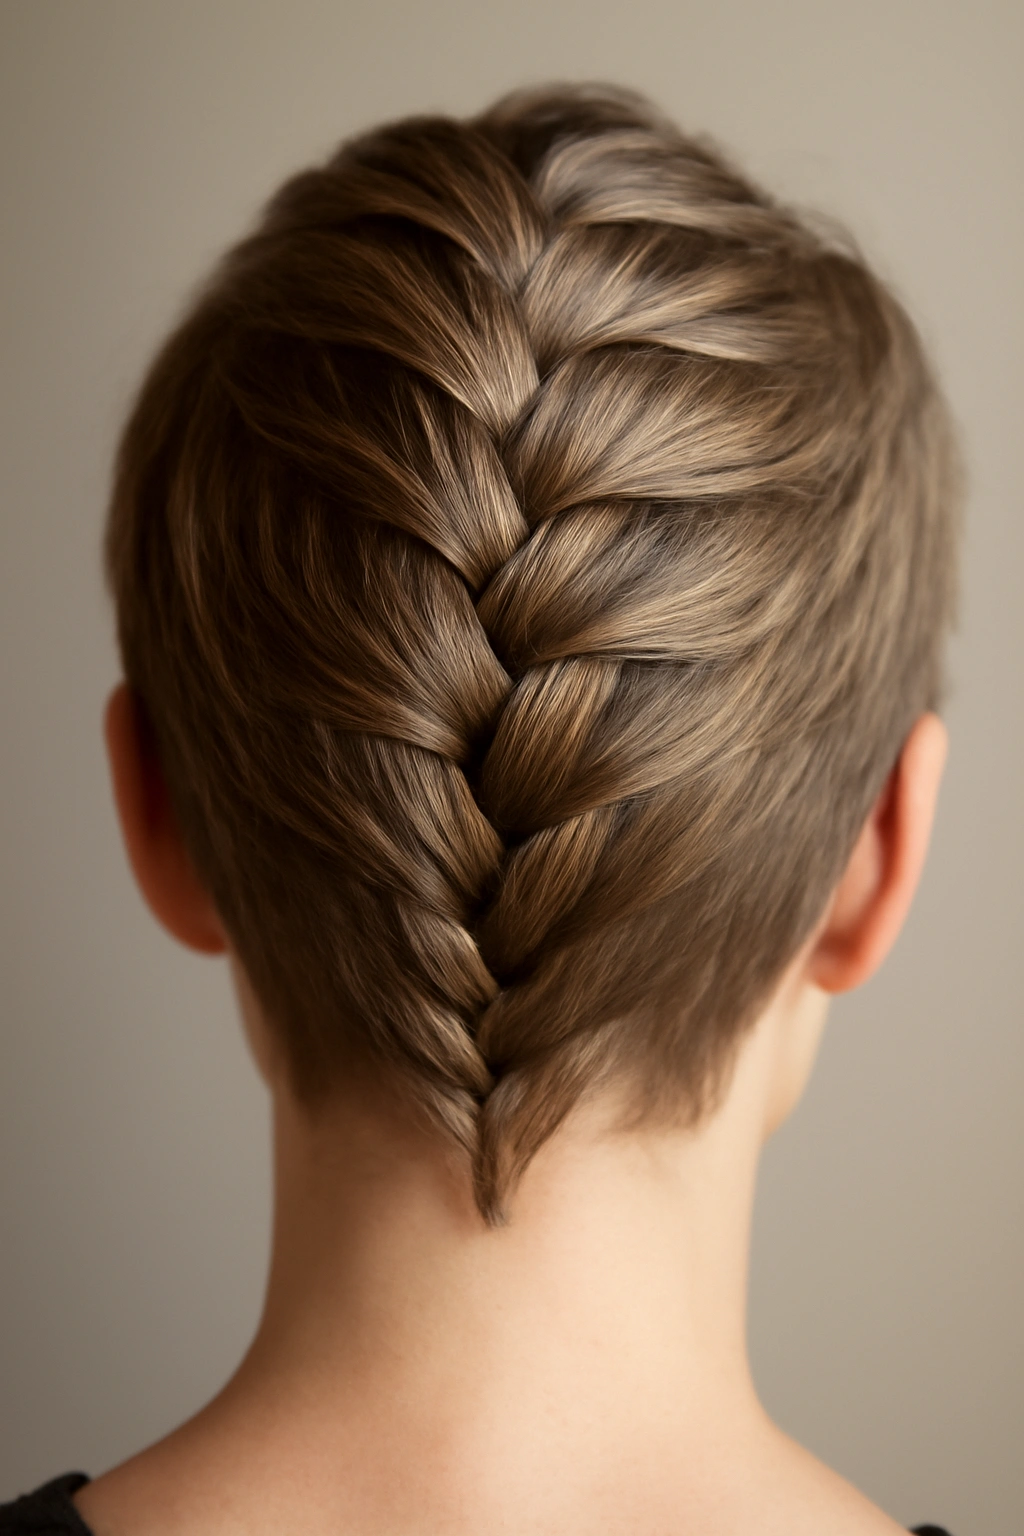
The French braid is the foundation that holds 90 percent of the staying-power secrets for short hair. When you start the braid directly at the crown and braid tightly from the very beginning, you create an anchor point so secure that the rest of the style becomes nearly impossible to dislodge. Short hair actually gives you an advantage here because you can get the starting point higher and tighter than you could with longer lengths.
Why Crown Placement Changes Everything
A French braid only falls out if the base shifts—and a base that starts at your actual crown, right where your hair is thickest and most densely rooted, basically cannot shift. The weight of the braid pulls downward on securely-rooted hair, and gravity becomes your ally rather than your enemy. This is why so many short-hair braids fail: they start too low on the head where hair is thinner, or they’re braided too loosely at the crown.
The Technique for Maximum Hold
- Begin with a small triangular section of hair right at the crown, dividing it into three strands
- Braid tightly from the very first cross—this is not the place to be gentle
- Add new hair from the sides of your head with each new cross, continuing straight down the back
- Braid all the way down until you run out of hair to incorporate, then finish with a standard three-strand braid to the ends
- Secure with an elastic and tuck the elastic under with a bobby pin so it’s not visible
The Texture Advantage
Textured and curly hair holds French braids longer than straight hair because the curl pattern naturally grips the braid strands. If you have straight hair, slightly damp it with a hydrating spray before braiding—the moisture gives it grip without creating frizz.
Worth knowing: A French braid braided at moderate-to-tight tension on short hair can legitimately hold for 24+ hours without needing any touch-ups or repairs.
3. Dutch Braid with Ribbon Weave
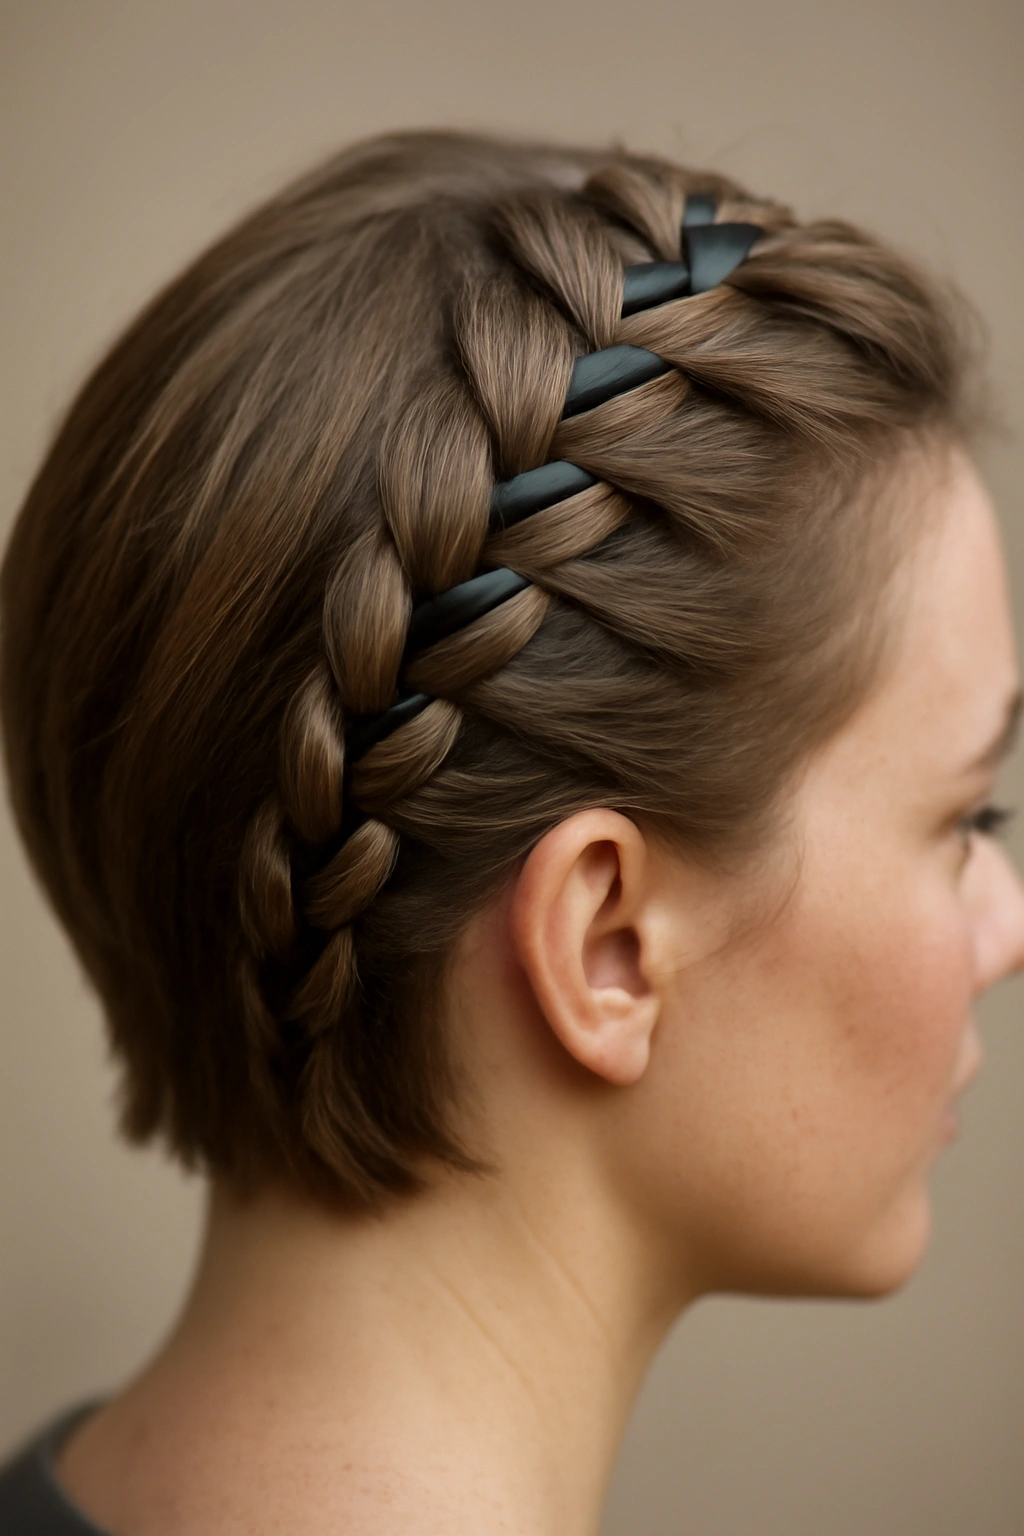
The Dutch braid is French’s bolder cousin—instead of braiding over, you braid under, which creates a braid that sits on top of the hair and looks raised off the scalp. On short hair, this visibility works in your favor: every layer of the braid is visible, so it looks more intricate and complex than it actually is. Adding a ribbon woven through the braid adds visual interest while also providing subtle reinforcement that helps the braid hold its shape.
Ribbon Selection Matters More Than You’d Think
The ribbon should be thin (about ½-inch wide) rather than thick, because thick ribbon weighs down short hair and can actually pull your braid loose. Choose a ribbon with slight texture rather than pure silk or satin—texture grips your hair strands and keeps the ribbon from sliding.
Threading the Ribbon Through
- Complete your Dutch braid first before adding the ribbon—this is easier than trying to weave it in as you go
- Use a small crochet hook or bobby pin to thread the ribbon under and over the braid strands, alternating which strand it goes under
- Secure the ribbon at both the top and bottom with small bobby pins so it can’t slide or shift throughout the day
- Let any excess ribbon hang naturally or tuck it into the braid base if you want a more finished look
Why This Works for Short Hair
The Dutch braid sits raised off your scalp, which means it’s less affected by scalp movement and friction. On short hair, this raised position also means the braid stays cleanly away from your face and neck, reducing the chance of it getting caught on clothing or accidentally pulled.
Quick tip: If your ribbon is slipping, apply a tiny dab of edge control product to the braid where the ribbon will thread—this creates grip without making your hair look greasy or stiff.
4. Side Braid Anchored Behind the Ear
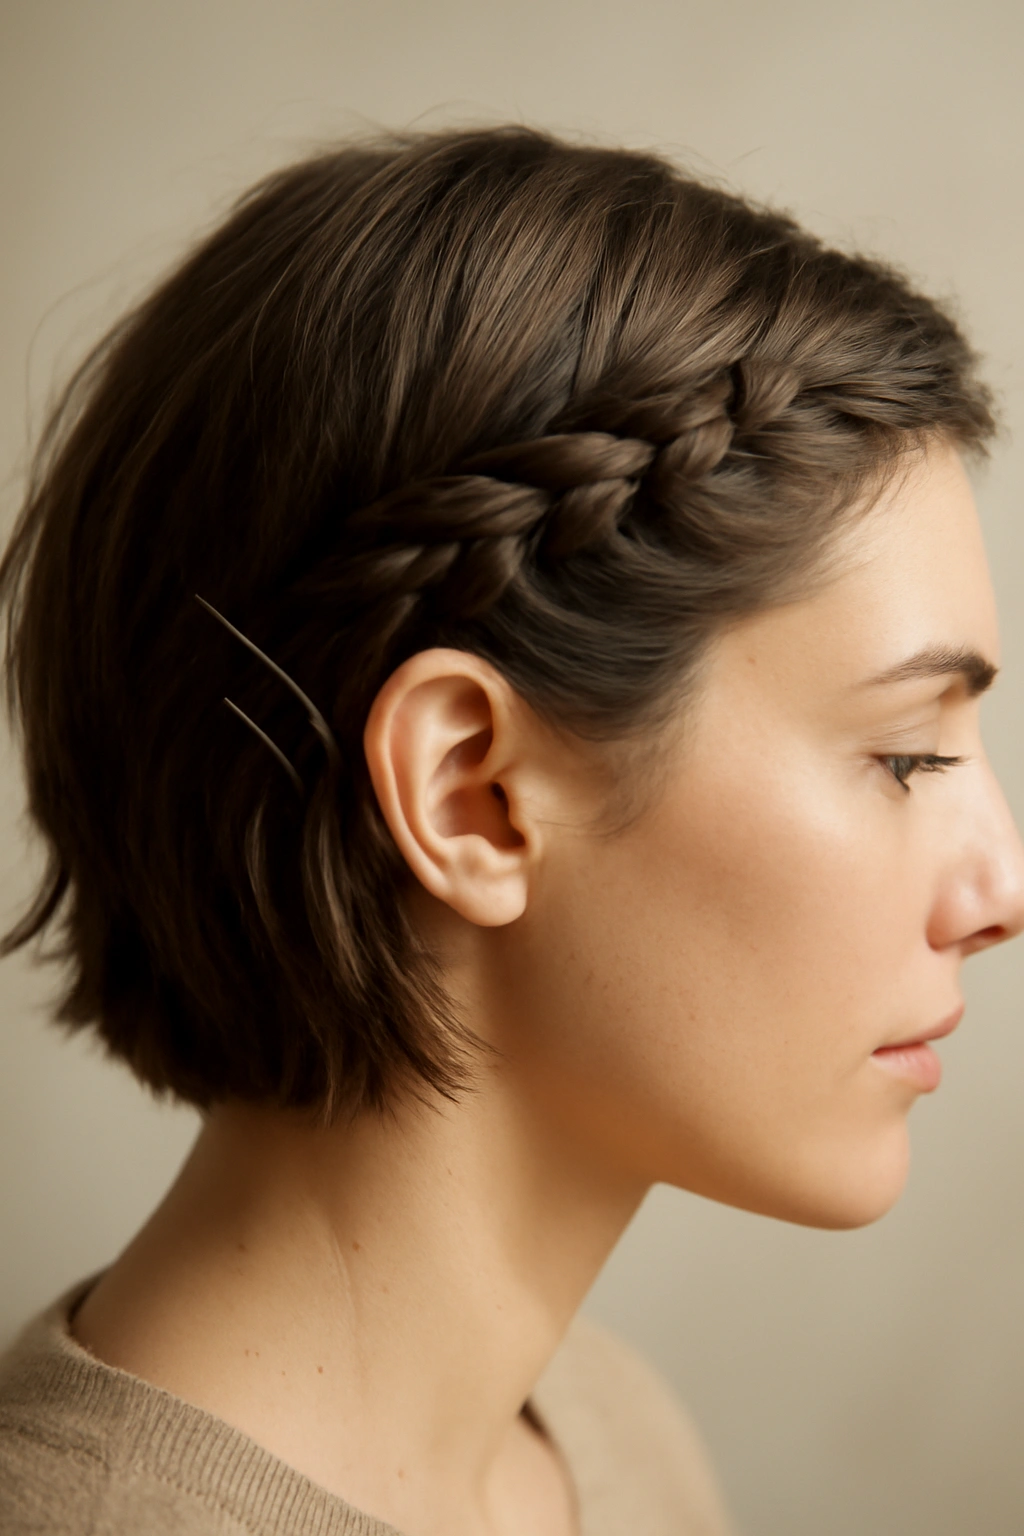
This is the short-hair braid style that looks effortless and beachy while actually being held in place with precision. The braid begins behind one ear, runs diagonally across the back of your head, and ends near the opposite ear, creating an off-center asymmetrical line that flatters most face shapes. The magic ingredient is the anchor bobby pins placed strategically behind both ears.
Positioning for Security
- Start braiding from a small section behind your ear, working at a diagonal angle across the back of your head toward the opposite ear
- Use a tighter tension than you might naturally gravitate toward—short hair can handle it
- After braiding about 2-3 inches, use a bobby pin placed horizontally (not vertically) behind your starting ear to anchor the braid to your scalp
- As you continue braiding toward the end point, place another bobby pin or two to keep the braid from sliding backward
The Asymmetrical Advantage
Short hair has less weight to hold a center-back braid in place, but it has plenty of weight to hold a diagonal braid anchored at both ends. The off-center placement actually works with the physics of short hair rather than against it.
Finishing Without a Visible Elastic
- Braid all the way to the ends and secure with a small elastic
- Tuck the elastic behind your ear on the finishing side so it’s completely hidden
- Place a bobby pin through the elastic and into your hair to anchor the end point
Real-world note: This style holds for a full 8-10 hours of normal activity without any touch-ups, and you can refresh it by gently finger-tousling the braid in the morning.
5. Boxer Braids for Maximum Hold
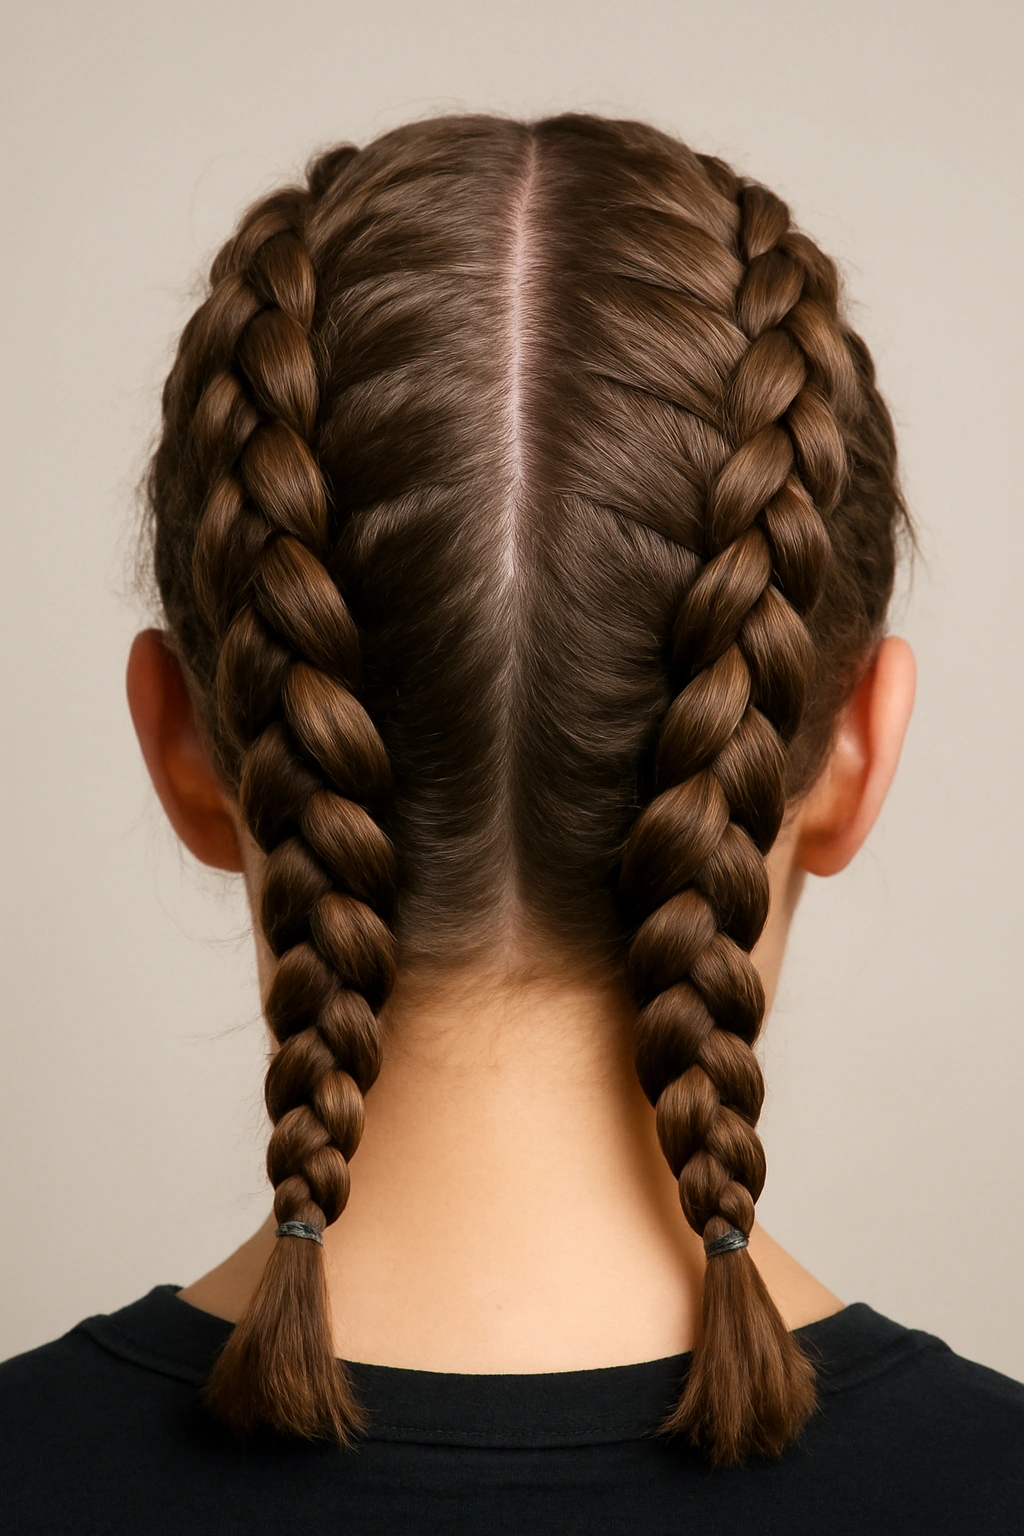
Boxer braids are two Dutch braids running parallel down either side of your head, and they’re essentially the staying-put champion of the braided short-hair world. Having two braids instead of one distributes the weight and tension across your entire scalp, meaning no single braid is bearing all the load. This symmetrical arrangement also looks intentional and polished rather than accidental.
Building Two Strong Braids
- Create a center part from your forehead all the way down the back of your head (use a rattail comb for a clean line)
- Take the hair on one side of the part and divide it into three sections starting at the temple
- Braid using the Dutch technique (braiding under rather than over) so the braid sits on top of your head
- Braid tightly, adding hair from the sides as you go, braiding all the way down to the nape of your neck
- Repeat exactly the same process on the other side, making sure both braids have equal tension and alignment
The Weight Distribution Secret
Two braids equal more contact points with your scalp, which equals more friction, which equals more security. Even if one braid shifts slightly, the other is still anchored, holding the overall style in place.
Securing Both Braids
- Gather both braid ends together and secure with a single elastic
- For a styled finish, you can wrap the ends around themselves into a bun and pin, or leave them down for a more casual look
- Place bobby pins hidden along each braid’s path to keep them from migrating backward or forward
Game-changer note: Boxer braids can handle chlorine, sweat, wind, and physical activity better than almost any other braid style on short hair—this is your go-to for an active day.
6. Reverse Braid Crown
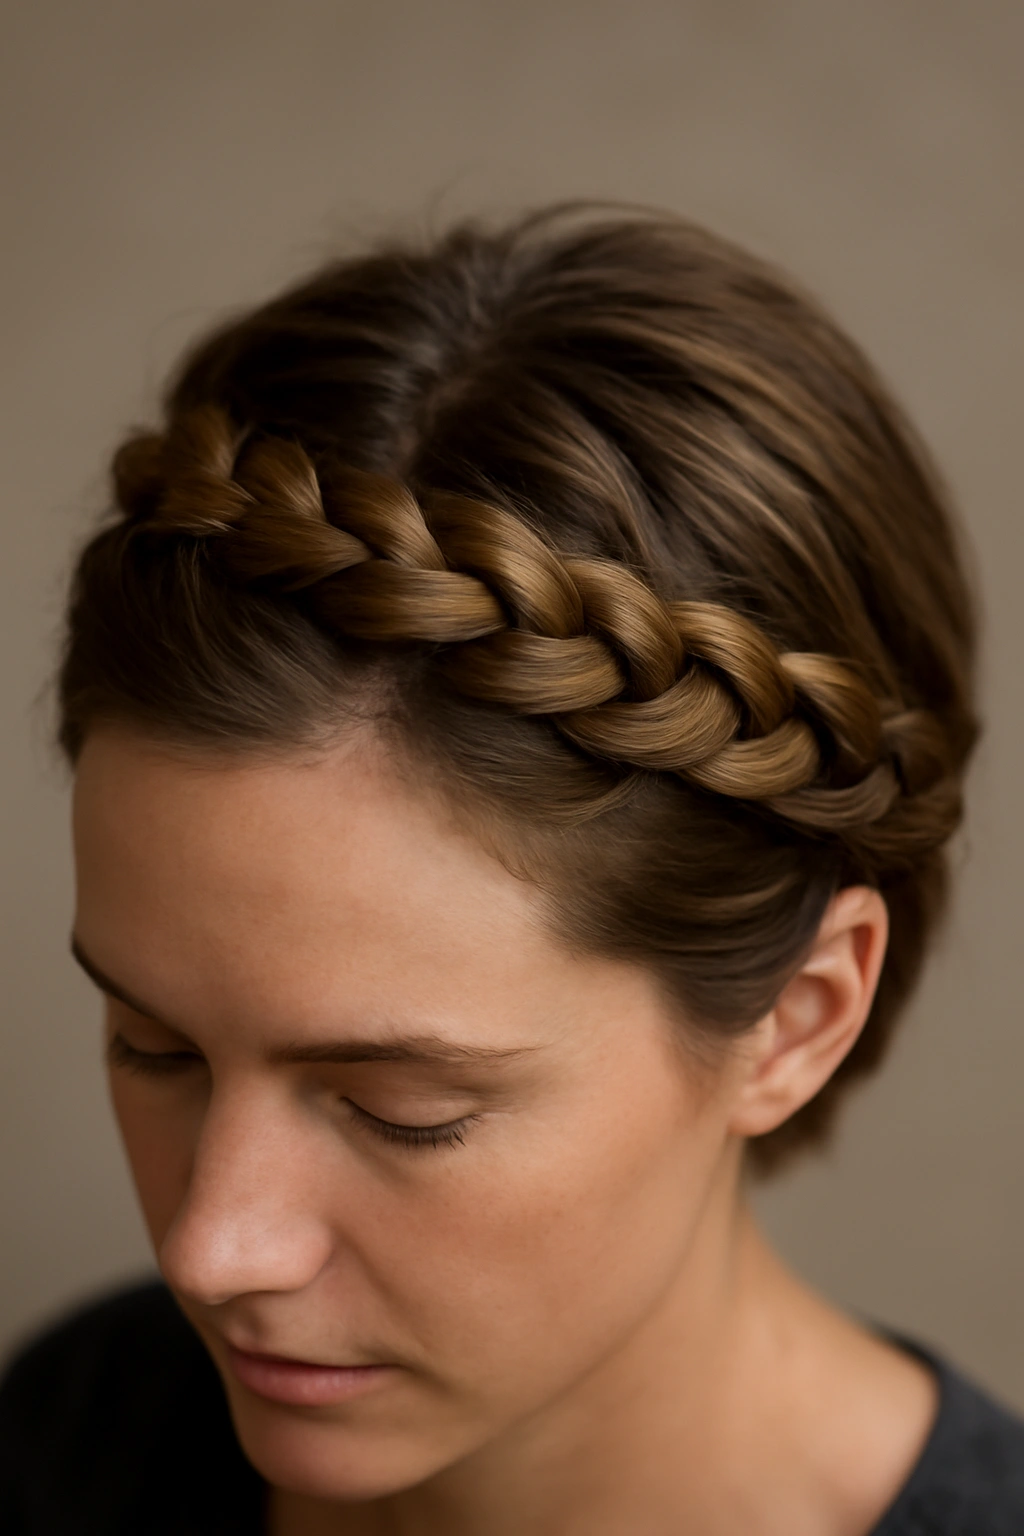
This is a variation where you create a braid that hugs your crown like a halo, starting at one ear, wrapping around the back and top of your head, and ending at the opposite ear. The reverse (Dutch) technique means the braid sits on top of your head visually, making it look like a decorative crown. Short hair is actually ideal for this because the braid is close enough to your scalp that it can’t possibly shift or slide.
Mapping Out Your Crown Path
- Imagine a line running from ear to ear, up and over the crown of your head (this is your braid path)
- Divide a section of hair along this path into three strands
- Begin braiding using the Dutch (reverse) technique so the braid raises up off your scalp
- As you braid, add hair only from the path line—don’t add hair from below the path, which would destabilize the crown effect
Why Short Hair Excels at Crown Braids
Longer hair can shift and slide along the scalp while a crown braid progresses. Short hair, with less length and less weight, stays locked in place. The braid moves down your head as you braid, but it can’t slide side-to-side.
Creating a Seamless Crown
- Braid the entire path around your head in one continuous braid
- End near the opposite ear from where you started
- Secure with a small elastic hidden behind the ear
- Use bobby pins to anchor spots around the crown if needed, placing them vertically into the braid structure
Finishing Options
- Leave the braid crown and let the remaining loose hair flow down and around it
- Pin the braid end into a twisted bun for a full updo
- Create two braids running parallel for a double-crown effect
Insider secret: A crown braid holds throughout an entire day of movement because it’s anchored at two points (both ears) and supported by the curve of your head, making it nearly impossible for gravity to dislodge.
7. Twisted Braid Hybrid
This style combines a braid with a twist, and it works beautifully on short hair because twists are actually more secure than braids on shorter lengths. A twisted braid hybrid uses sections that are braided tightly while other sections are twisted, creating visual complexity and texture variation while maximizing hold. The combination of braided and twisted sections means more points of friction and more ways for the style to anchor itself.
Creating the Hybrid Structure
- Start with a French braid or Dutch braid at the crown (choose whichever direction suits your hair texture)
- Braid down 2-3 inches, then switch to a two-strand twist for 2-3 inches, alternating back and forth
- This alternation creates a visually interesting texture while giving the style multiple anchor points
- The twisted sections are tighter than braided sections and naturally resist unraveling
Why Twists Outperform Braids on Short Hair
A three-strand braid needs three strands to have tension balance; take one strand and you’re done. A two-strand twist only needs two strands, and the tension wraps around itself, making it inherently more secure with less hair. On short hair, this makes twists actually stronger than braids.
Anchoring the Style
- Use bobby pins at the transitions between braided and twisted sections to lock each element in place
- Tuck pins behind existing braid/twist structure so they’re completely hidden
- The pins don’t need to be tight—just tight enough to prevent shifting
Pro tip: If you have fine, slippery hair, the hybrid braid-twist style works better than a pure braid because the twists create more friction than braids alone.
8. Fishtail Braid Pulled Tight
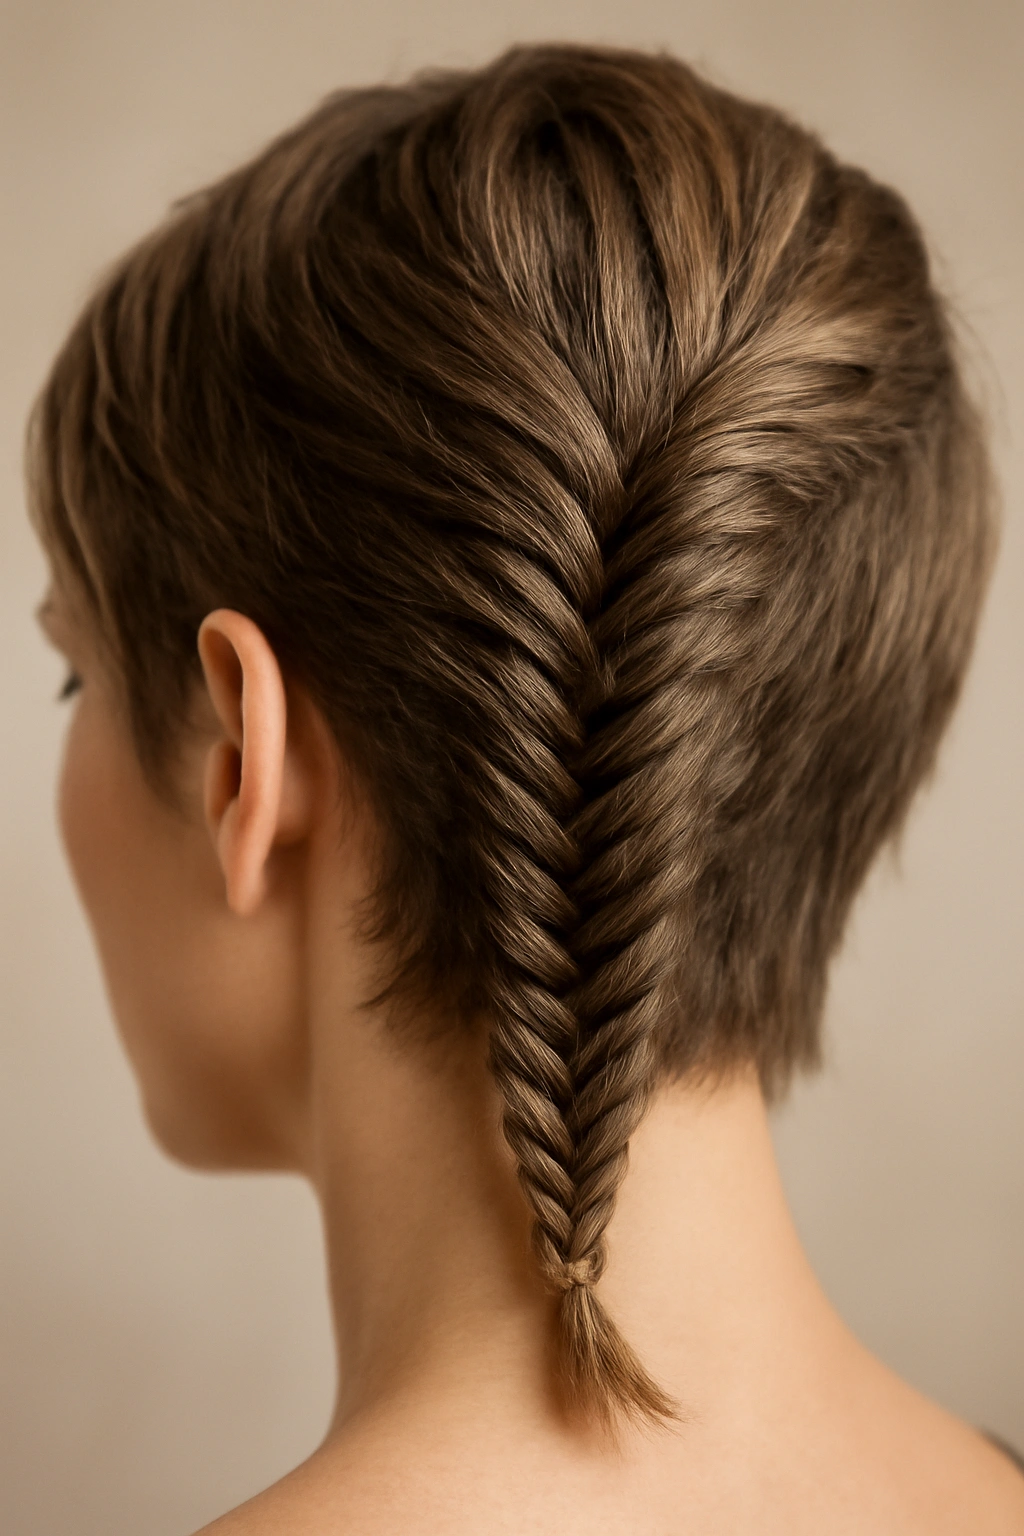
The fishtail braid looks delicate and intricate, which tricks people into thinking it’s fragile—actually, a tight fishtail braid is one of the most secure braid styles available, especially on short hair. A fishtail uses only two sections instead of three, which means fewer moving parts and fewer chances for the braid to unravel. When you pull it tight and anchor it properly, it becomes a solid, secure style that lasts all day.
The Fishtail Technique Simplified
- Divide your hair into two large sections
- Take a small piece of hair from the outside of the right section and cross it over to join the left section
- Take a small piece of hair from the outside of the left section and cross it over to join the right section
- Continue alternating, always taking from the outside of each section
- Pull each new section tight before crossing it over to create a secure weave
Why Tight Fishtail Braids Hold on Short Hair
The fishtail braid’s structure naturally creates a tightly-woven texture because you’re pulling thin sections across at an angle, creating maximum interlocking. Tight tension means the sections lock together, and there’s no loose space for the braid to shift.
Securing a Fishtail Braid on Short Hair
- Braid all the way to the ends and secure with a small elastic
- Create a French or Dutch fishtail (braiding into your scalp as you go) rather than a standalone fishtail for maximum security
- Anchor the braid at regular intervals with bobby pins hidden within the braid structure
The Pulled-Tight Secret
- As you create each cross-over, gently pull the braid tighter than feels necessary—short hair can handle it and benefits from the tension
- After you’ve completed the full braid, go back through and tighten any sections that feel loose
- The resulting braid should feel firm and solid, not squishy or flexible
Real talk: A properly-executed tight fishtail braid on short hair can easily last 12+ hours without shifting, making it better than many other braid styles for longevity.
9. Zig-Zag Braid Down the Back

This style creates a zigzag pattern from your crown down the back of your head by positioning the braid off-center at each step, creating visual movement and geometric interest. The path of the braid—moving side to side rather than straight down—actually increases the number of anchor points because the braid contacts more of your scalp surface area, making it more secure than a traditional center-back braid.
Mapping the Zig-Zag Path
- Start at the crown, slightly to the right of center
- Braid for 2-3 inches straight down, then begin angling the braid toward the left side of your head
- At about the midway point down your head, angle the braid back toward the right
- Continue alternating sides as you braid all the way down, creating a visible zigzag pattern
Why the Diagonal Angle Increases Hold
A straight-down braid only touches the center strip of your scalp. A diagonal braid that moves side to side touches more of your scalp, creating more contact points where the braid can anchor itself to your head. More anchor points equals more resistance to shifting.
Creating Sharp Angles
- Use bobby pins at each angle change to lock the braid in its new direction
- The pins should be placed perpendicular to the direction of the braid so they catch the braid structure at the angle point
- Even with bobby pins, the braid itself should feel secure due to tight tension
The Visual Payoff
The zigzag pattern creates movement and intentionality that makes even a simple three-strand braid look complex and thought-out. On short hair, this geometric pattern is especially visible, making it a great choice for days when you want your style to look polished and intentional.
Worth knowing: This style works on all hair types, but it’s especially striking on textured and curly hair where the zigzag angles are clearly visible even without careful smoothing.
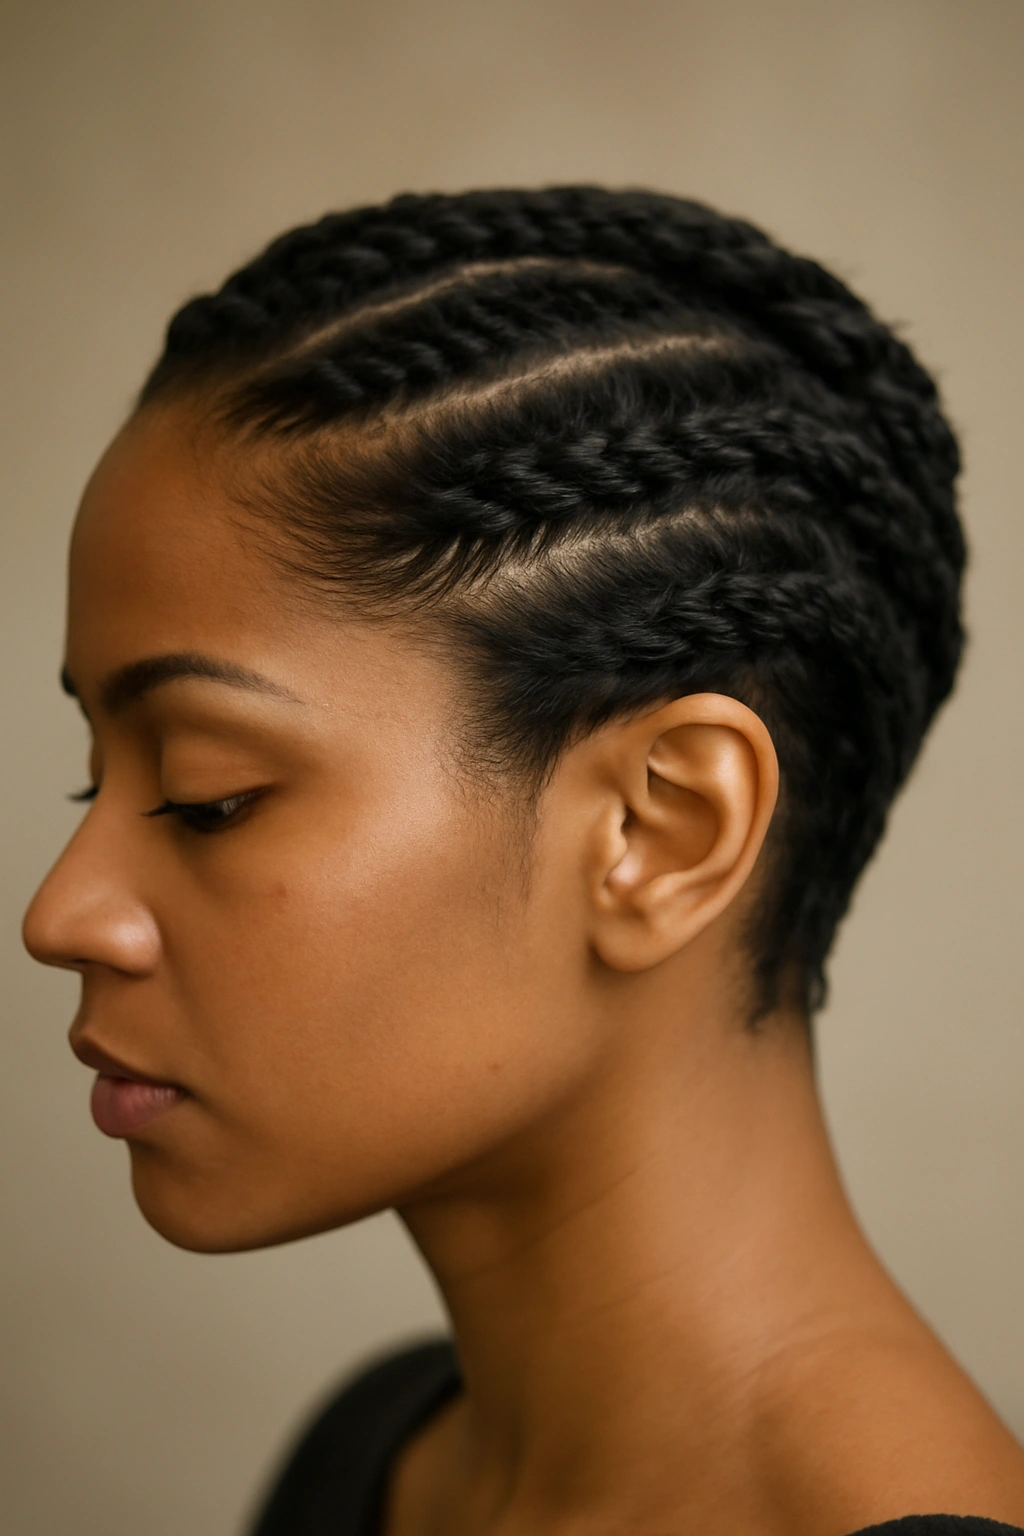
10. Braided Pixie or Undercut Design
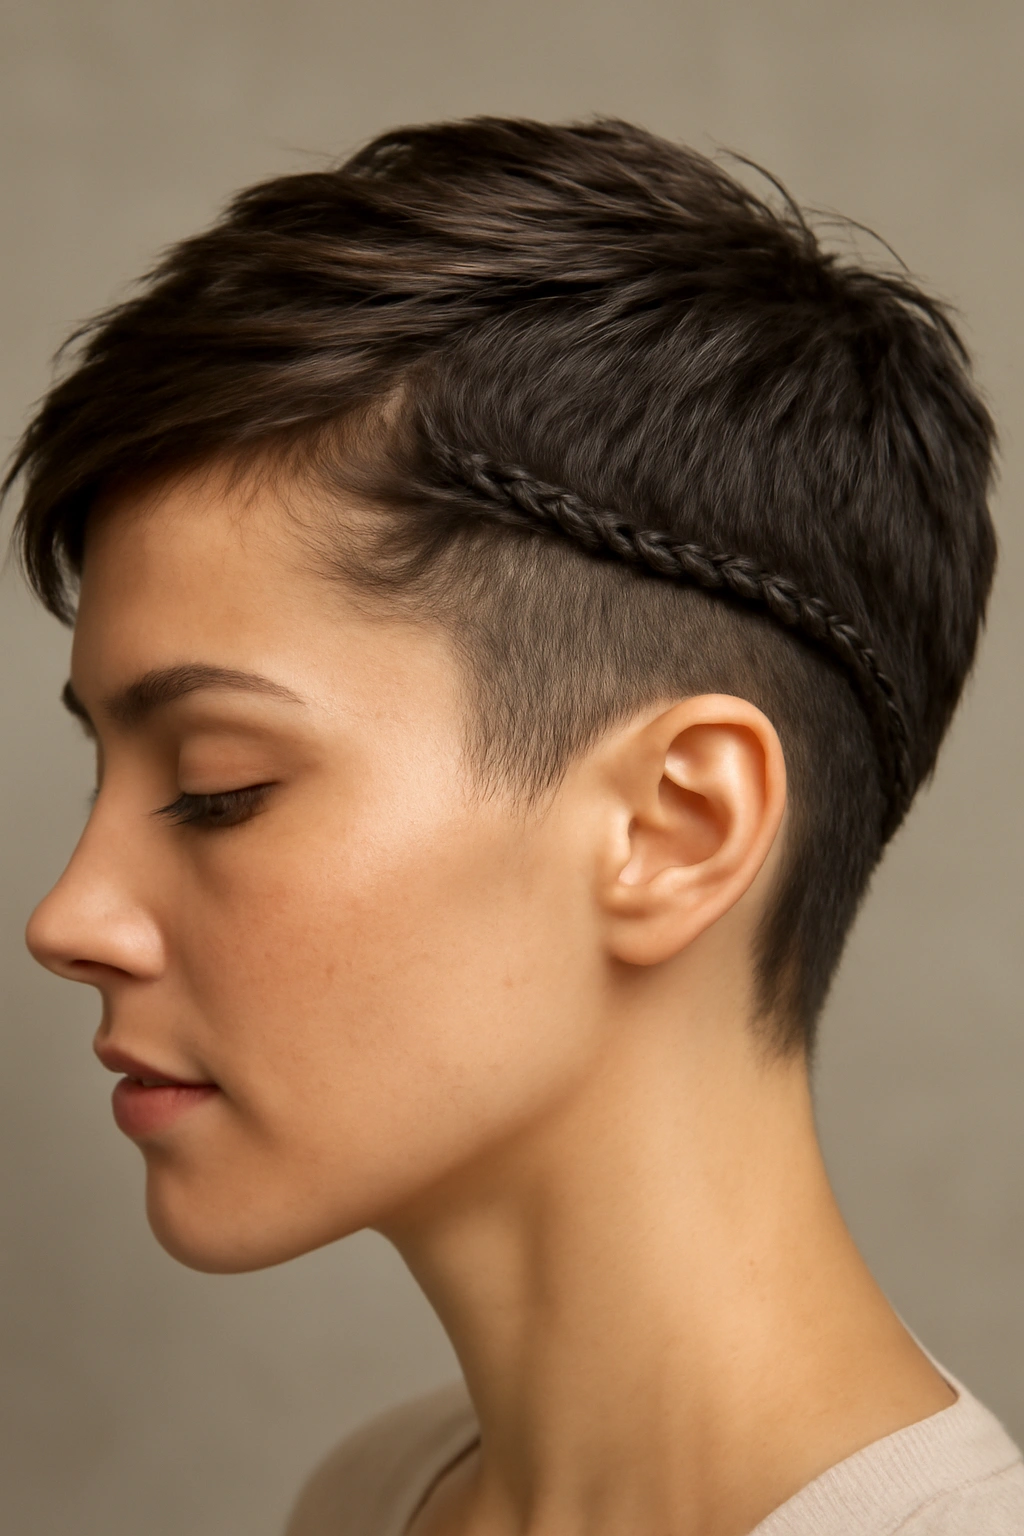
If you have an undercut or fade, you can use the short sides as a canvas for a braided design element that sits right at the boundary where your length transitions. A small braid—sometimes just 1-2 inches long—can be placed along the edge where the long hair meets the short sides, anchored with bobby pins into the shorter hair for incredible staying power. This style works beautifully because the bobby pins grab the super-short hair, which doesn’t slip or shift.
Positioning for Maximum Impact
- Identify where your longest hair transitions into your undercut or fade
- Create a small braid from this transition area, braiding diagonally or horizontally
- The braid should be 1-3 inches long and use only the hair from the transition zone
- Secure the braid with bobby pins that go through the braid and directly into the shorter hair underneath
Why Short Hair Anchors Work Better Than You’d Expect
Bobby pins grip short, stubbly hair better than they grip longer hair. The friction is exponentially higher, making even a thin braid essentially immovable once pinned into an undercut or fade. This is a case where short hair’s perceived limitation becomes its strength.
Design Variations
- Run a single small braid along the edge on one side only for an asymmetrical look
- Create multiple small braids spaced around the perimeter for a pattern effect
- Braid horizontally (parallel to the ground) rather than vertically for a different visual line
- Use multiple bobby pins per braid to create an almost sculptural effect
Real advantage: This style works for active days, humid weather, and long hours because the bobby pins grip the short hair with such force that movement is essentially impossible.
11. The Halo Twist-Braid Combination
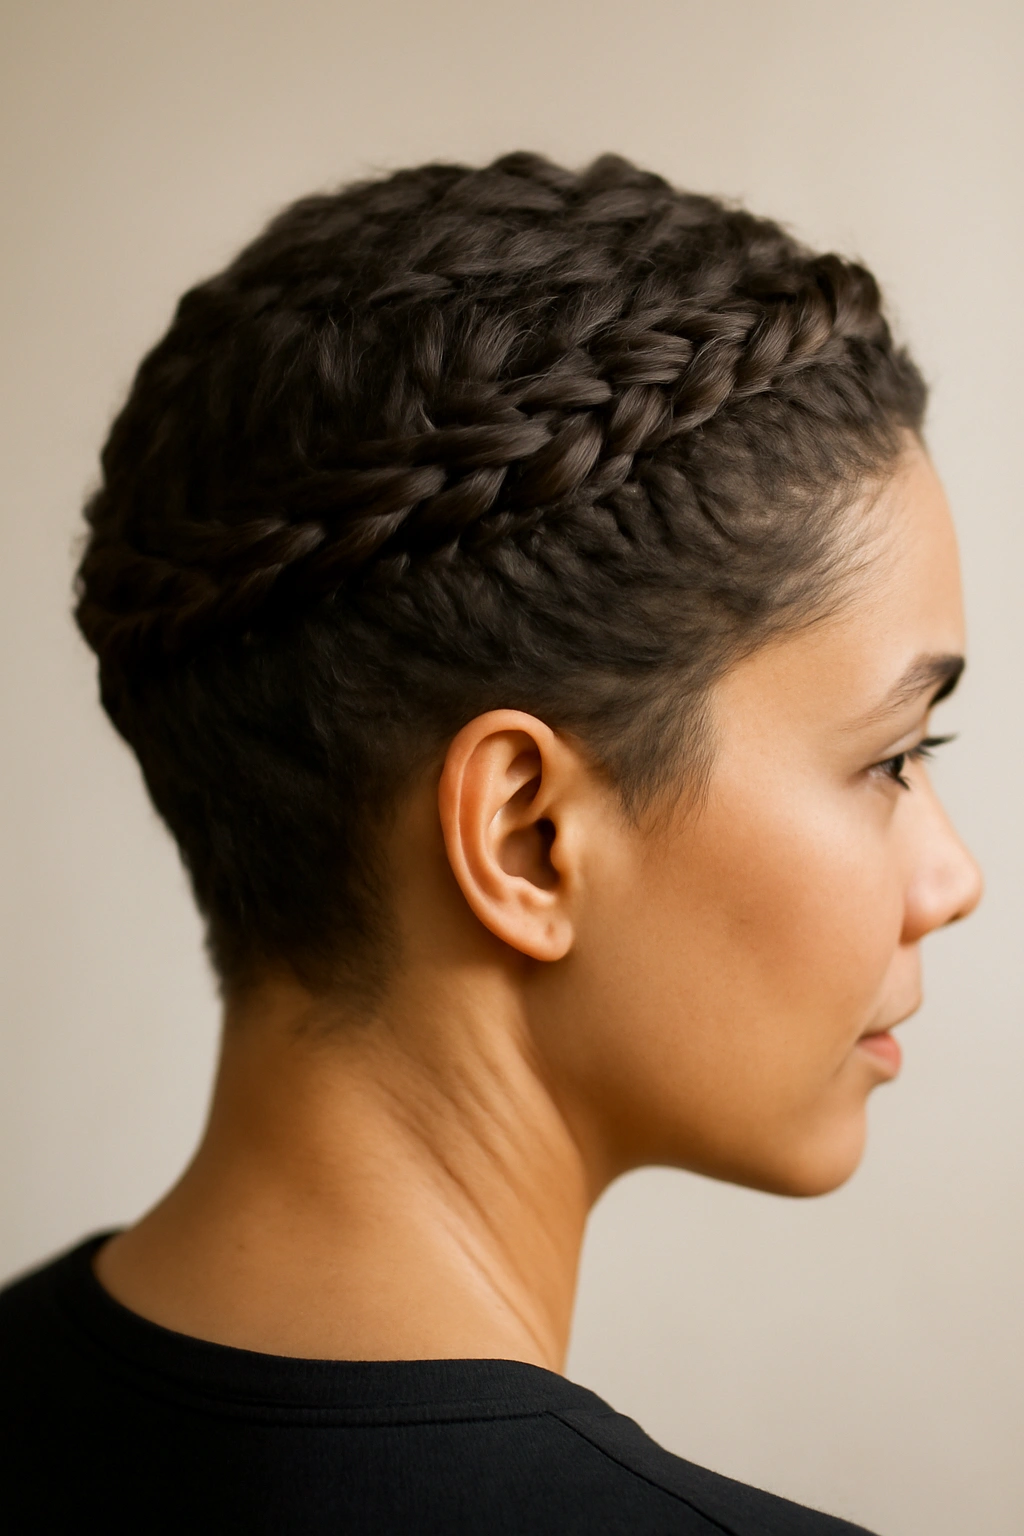
This style is similar to the crown braid but uses a combination of twists and braids wound around your head in a spiral that mimics a halo. The hybrid structure means you get the security of braids with the elegance of twists, and the spiral path around your entire head creates maximum contact with your scalp. On short hair, this is one of the most secure styles possible because the spiral path literally touches nearly every part of your head.
Creating the Spiral Path
- Start at one temple and begin braiding or twisting diagonally across the front of your head toward the opposite temple
- As you reach the side of your head, begin spiraling around the back, maintaining diagonal lines
- Continue spiraling until you’ve worked your way around and back to where you started
- The path should feel like a spiral staircase wrapped around your head
Building the Braid-Twist Combination
- Use a braided section for 2-3 inches, then switch to a twist for 2-3 inches, alternating throughout
- This creates visual interest and gives you multiple types of anchor points (braids hold differently than twists)
- Keep tension consistent so the entire spiral feels equally secure
Securing the Spiral
- Place bobby pins at the point where one section ends and the next begins, using these transition points as anchor locations
- You’ll need more bobby pins for this style than for a single braid—probably 4-6 total, but they’ll be hidden throughout the spiral
- The spiral path itself, combined with the bobby pins at key points, creates a style that’s essentially immovable
The Psychological Advantage
Even beyond the actual security, the spiral path looks so intentional and constructed that it reads as secure to both you and the people looking at you. This creates confidence, which translates to how you move and carry yourself.
Quick note: This style takes longer to create than a single braid (probably 10-15 minutes for first-timers), but it lasts longer than almost any other style and is worth the investment for special occasions.
12. Micro-Braid Grid Pattern
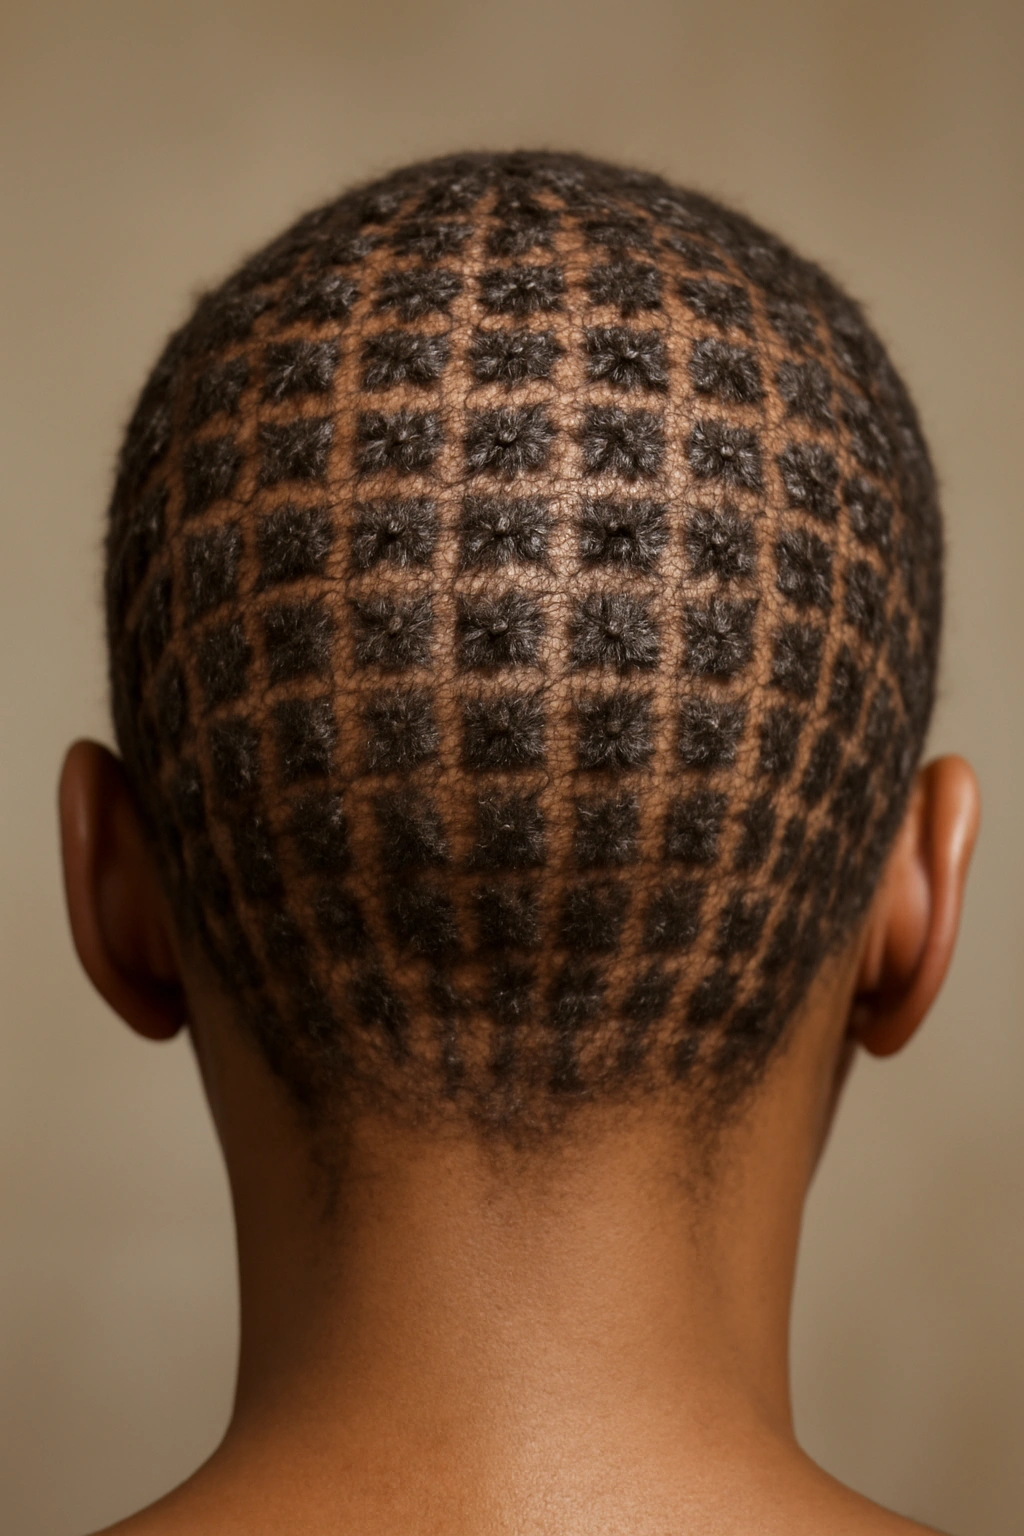
This final style breaks short hair into multiple small sections and creates multiple micro-braids, positioning them in a grid or pattern across the back of your head. Each individual micro-braid is tiny—maybe ½-inch wide—and tight, creating dozens of anchor points rather than just one. This distributes tension across your entire scalp, making it nearly impossible for any single point to shift.
The Grid Layout Strategy
- Mentally divide the back of your head into a grid (perhaps 4 columns by 3 rows, adjusted to fit your head size)
- Each grid square becomes a mini braid
- Create the grid from top to bottom, left to right, braiding a small three-strand or fishtail braid in each square
- Make each braid about 1-2 inches long and braid tightly
Why More Braids Equals More Security
One braid falling out means your entire style is compromised. Twelve micro-braids falling out would require a cascading failure that’s essentially impossible—if one shifts slightly, the others hold it in place. This redundancy creates a nearly fail-proof system.
Securing the Grid
- Use bobby pins at the base of each micro-braid, placing them vertically into the braid structure
- You won’t need many pins—probably just one per braid—because the braids themselves are so short and tight
- The grid structure itself, with all the interconnected braids, creates stability
Time Investment Worth It For These Situations
- Days when you know you’ll be active or sweating (workout, outdoor event, high-humidity weather)
- Situations where your style absolutely cannot fail (presentations, performances, important meetings)
- Days when you plan to be awake longer than normal and want the style to last into evening
Styling Tips for Micro-Braids
- Create the braids when your hair is slightly damp—they’ll be easier to work with and will dry tighter
- After securing all the braids, you can gently tousle them or leave them neat depending on your vibe
- The grid pattern is intentional enough to look styled even if you don’t add any other products
Honest take: This style is more labor-intensive than others, but if you’re someone whose braid styles consistently fail by midday, the micro-braid grid basically solves that problem permanently.
Final Thoughts
The reason so many people say short hair can’t hold braids is because they’re trying to use techniques designed for longer hair. When you understand that short hair requires tighter tension, more strategic anchor points, and positioning that works with your head’s shape rather than against it, suddenly every one of these styles becomes totally achievable. The best style for you depends on your hair texture, how much time you’re willing to spend styling, and how long you need the braid to stay perfect.
Start with whichever style appeals to you most visually, but go in knowing that tension is your friend here—don’t braid loosely and expect security. Short hair benefits from firm, intentional braiding in a way that longer hair doesn’t. If your first attempt doesn’t hold as well as you hoped, the fix is almost always tighter braiding or additional bobby pins, not a different style entirely.
The beautiful thing about braided short hairstyles is that they’re visible from all angles. Unlike long braids that mostly show from the back, short braids display their texture and intricacy from the front, sides, and back. That makes these styles worth the little bit of extra effort they require—you’re not just creating security, you’re creating a style that actually looks intentional and polished from every angle.