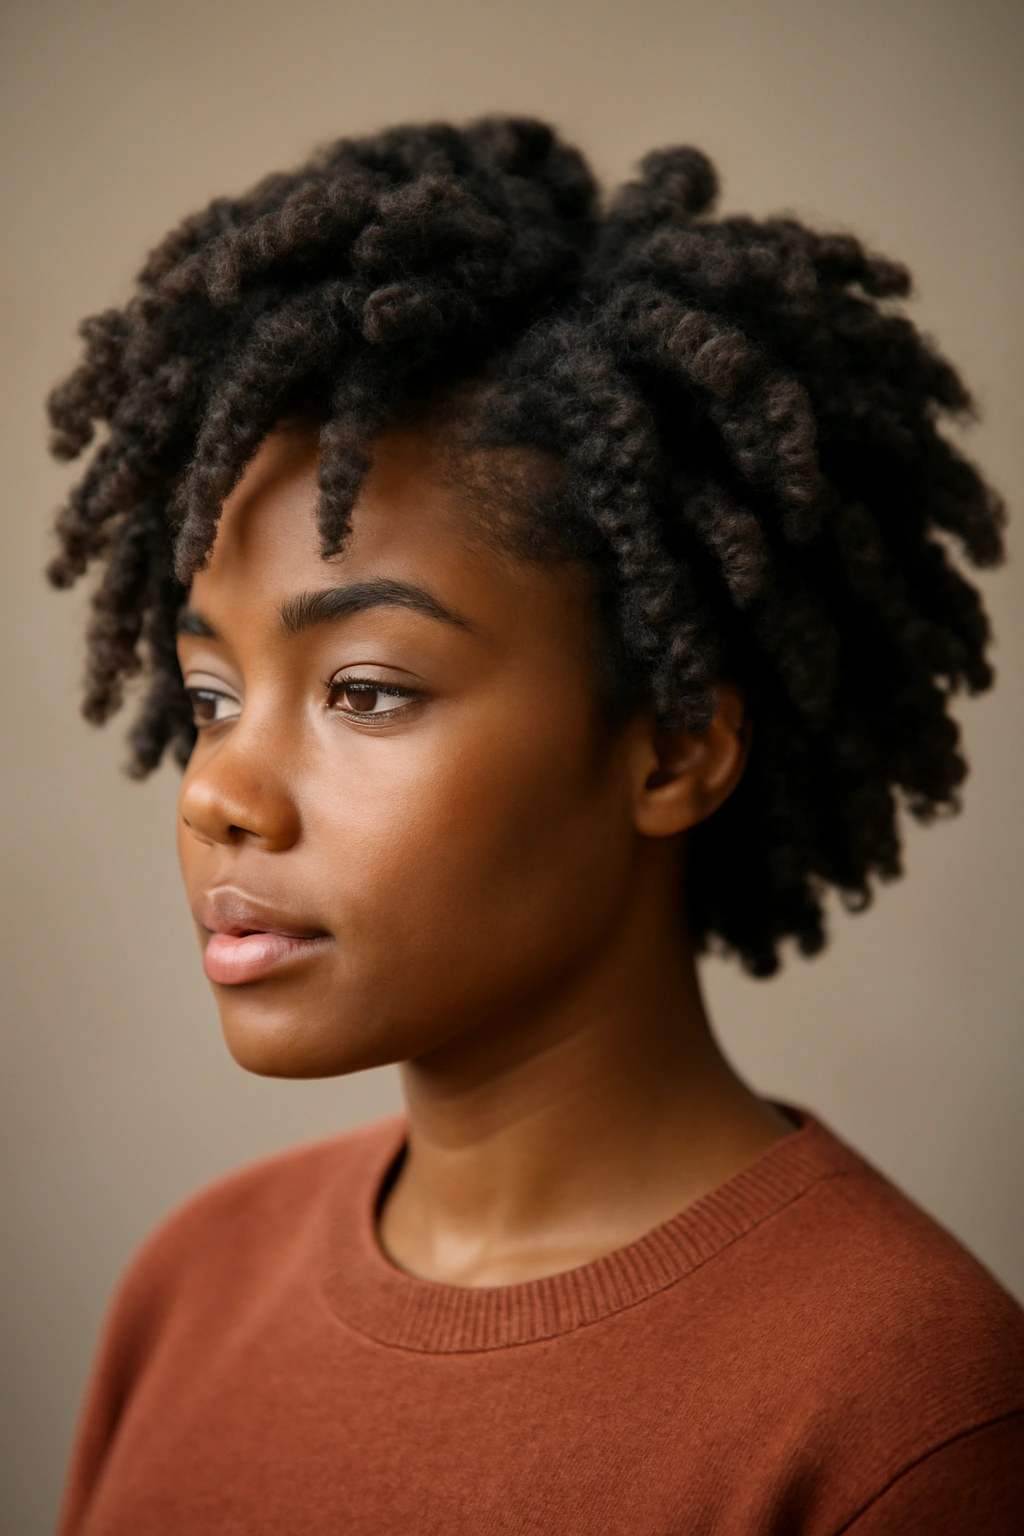
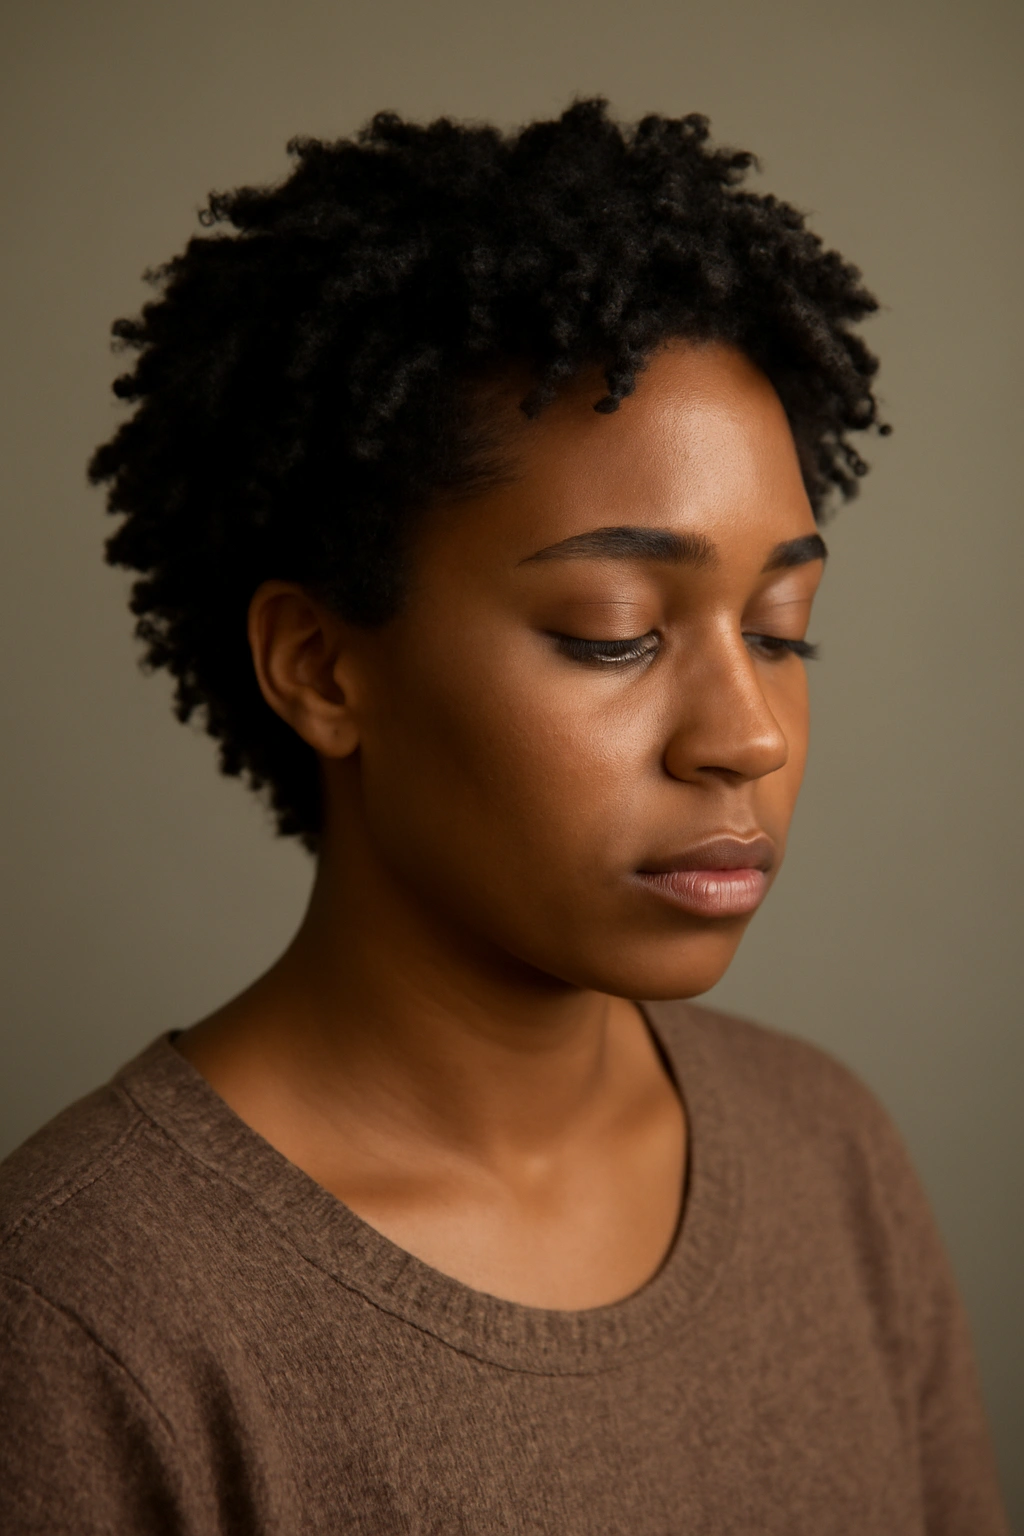
Short natural hair is the perfect canvas for twist outs, and honestly, it’s one of the most versatile styling techniques you can master. Whether you’re working with coils, coils, or waves, twist outs offer defined texture, volume, and movement that transforms your look completely—without the need for heat or lengthy styling sessions. The beauty of twist outs on shorter lengths is that they’re actually easier to execute than on longer hair, and the results pop with incredible dimension and shine.
The thing about twist outs is that the styling doesn’t end when you take down the twists. That’s when the real magic happens. The way you unravel them, the products you use, and how you separate or keep them intact all determine whether you get tight coils, loose waves, bouncy curls, or defined spirals. For short natural hair, understanding these techniques means you can create completely different aesthetics from the same base style—a huge advantage if you like variety without constantly changing your approach.
What makes twist outs particularly stunning on short hair is how they interact with your natural density and curl pattern. Short styles showcase texture details that longer hair sometimes obscures. Your twist outs will have more movement, more shine, and more personality when you’re working with a shorter canvas. The length also means you can refresh your twist out multiple times per week without dealing with the fatigue that comes with maintaining longer twists.
Let’s explore the most impactful twist out styles that actually work beautifully on short natural hair, complete with the specific techniques that make each one distinctive.
1. Defined Spiral Twist Outs
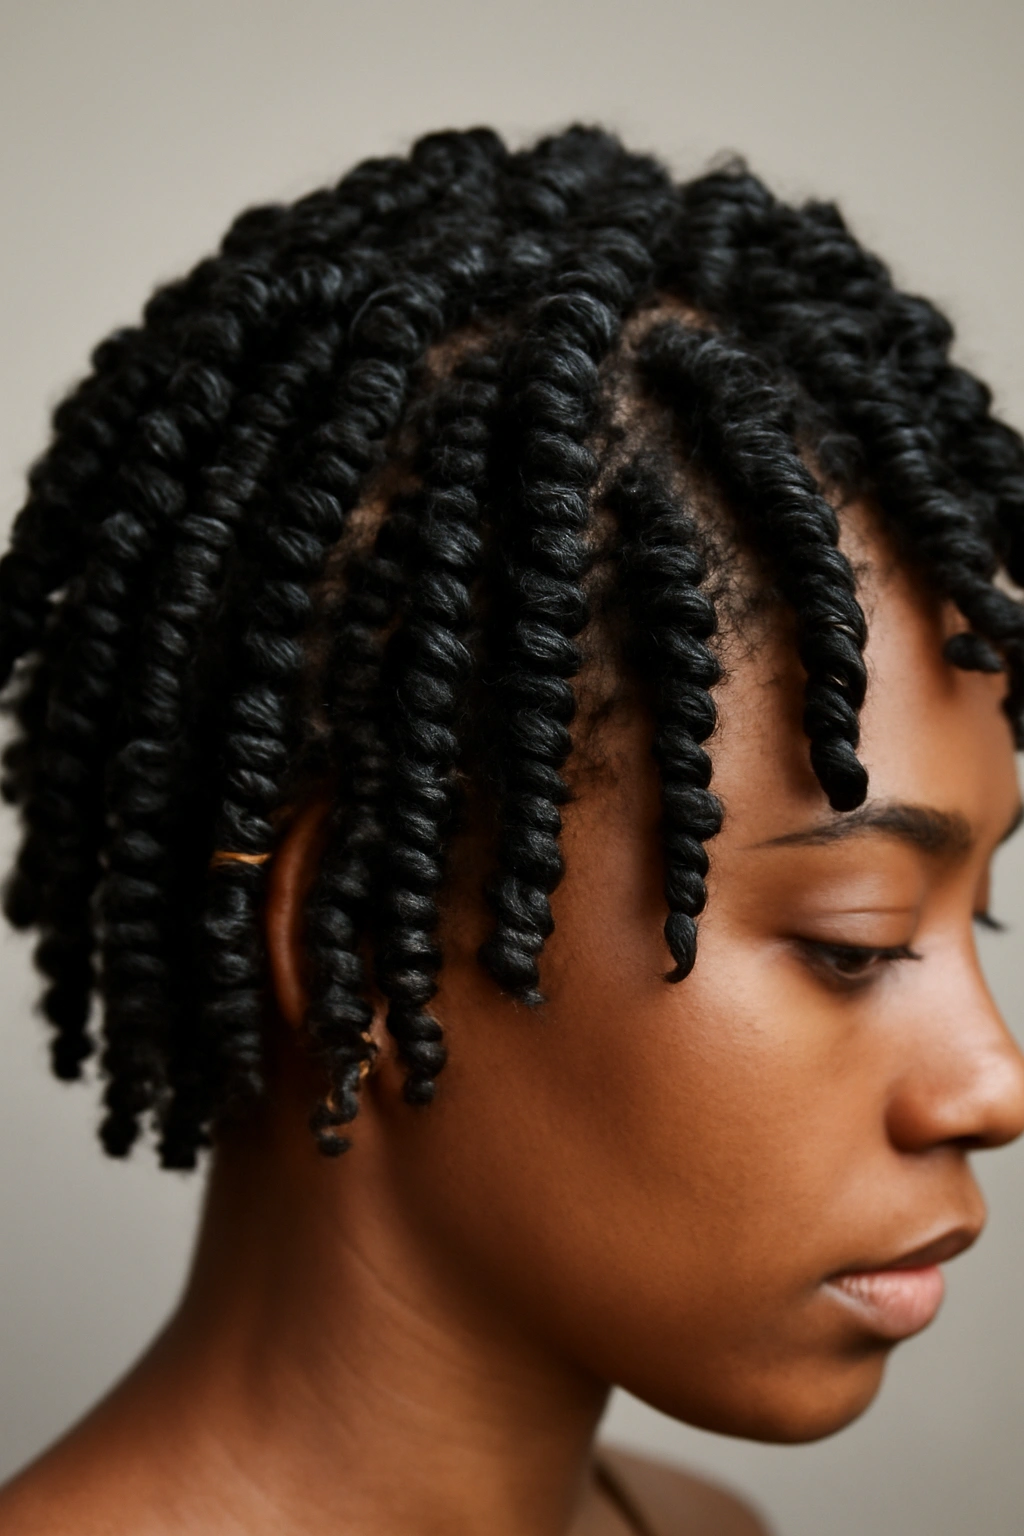
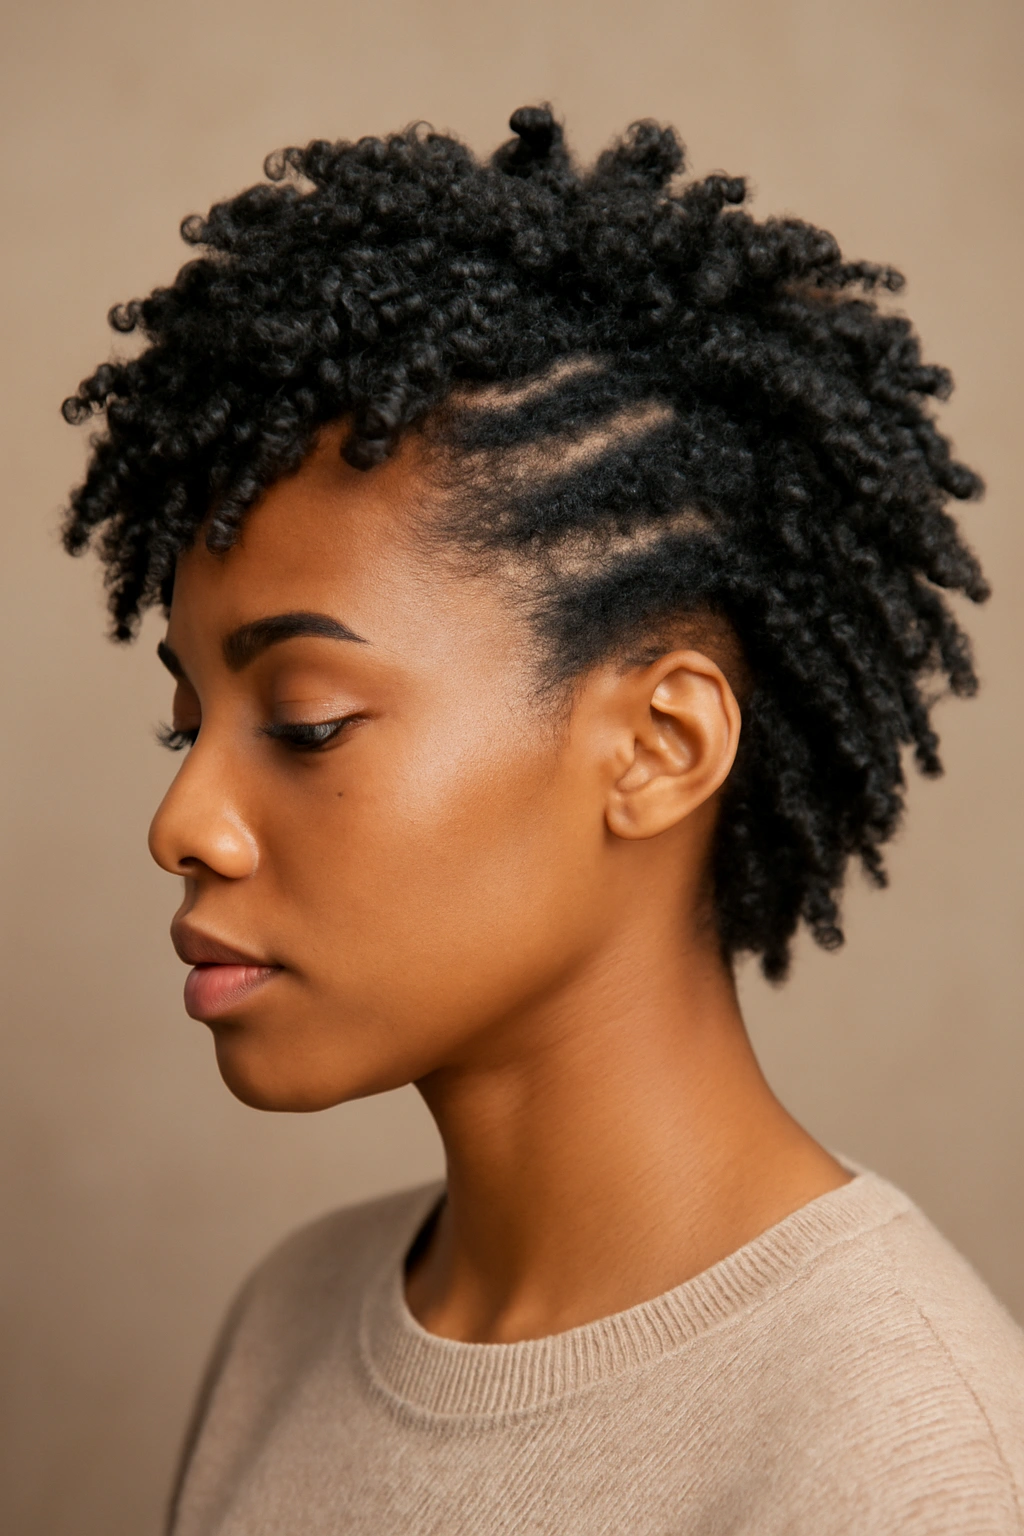
Spiral twist outs are what you get when precision meets technique. Instead of a standard two-strand twist, you’re deliberately twisting in a way that creates visible coils that corkscrew around each other. The finished look has ultra-defined spirals that catch light beautifully and create an almost jewelry-like quality to your texture.
How to Create True Spirals
The secret is in how you tension the twists as you’re creating them. Section damp hair into the size you want (typically medium for short hair), apply twist cream or gel, then twist while rotating your fingers around the center line rather than just wrapping hair around itself. The tighter your rotation and the more consistent your tension, the more pronounced your spirals will be. Think of it like creating a rope versus just wrapping one piece around another—the rotation creates that corkscrew effect.
Characteristics That Define This Look
- Takes 2–4 hours depending on section size and hair density
- Works best on hair with at least medium texture (coils and coils specifically respond beautifully)
- Needs a firmer hold product—creams alone won’t give you the definition you’re aiming for
- Lasts 5–7 days if you sleep on a silk pillowcase or in a bonnet
- Spirals loosen slightly as days pass, so day-one spirals look different than day-five spirals (both gorgeous)
Pro tip: Apply your product in very thin layers and build up rather than using one thick application. Overloading with product weighs spirals down and prevents them from forming cleanly.
Real-World Performance
On short hair specifically, defined spiral twist outs are almost impossible to miss. They create height and dimension that makes your hair look fuller and longer than it actually is. The spirals catch light at different angles, which photographs beautifully in natural light—this is one of the most Instagram-friendly twist out styles available.
2. Chunky Twist Outs with Maximum Volume
Chunky twists create bold, statement-making texture with fewer sections taking up less styling time. These twists are thick and substantial, which means when you unravel them, you get maximum volume and a tousled, almost carefree aesthetic. On short hair, chunky twist outs read as confident and striking.
Building Volume Into Chunky Twists
The volume starts with how you section. Instead of dividing your head into many small sections, create larger foundation sections using the clip method—clip most of your hair up, work on a small section at a time, and really focus on directing each twist away from your scalp as you twist. This creates lift at the roots, which translates to volume at the style stage. Use less product than you would with thin twists; thick sections need lighter product application or they’ll look flat instead of fluffy.
What to Expect Visually
- 8–12 chunky twists depending on head size and hair density
- Styling time: 45 minutes to 90 minutes for the entire head
- Creates a more relaxed, undone aesthetic than smaller twists
- Each twist creates one large, defined wave or coil when unraveled
- Best on 3c–4b curl patterns that naturally have body
Worth knowing: Chunky twist outs look different on day one versus day three. Day one has that fresh-from-unraveling look, while day three develops a softer, broken-in quality that some people actually prefer. You’re getting two different styles from one set of twists.
Styling Timeline
Chunky twists need at least 24 hours to set properly—trying to take them down too early results in frizz and lost definition. But once they’re fully set, they’re incredibly easy to refresh. Just mist with water and a light oil spray, and your texture bounces back.
3. Two-Strand Twist Outs with Extended Length
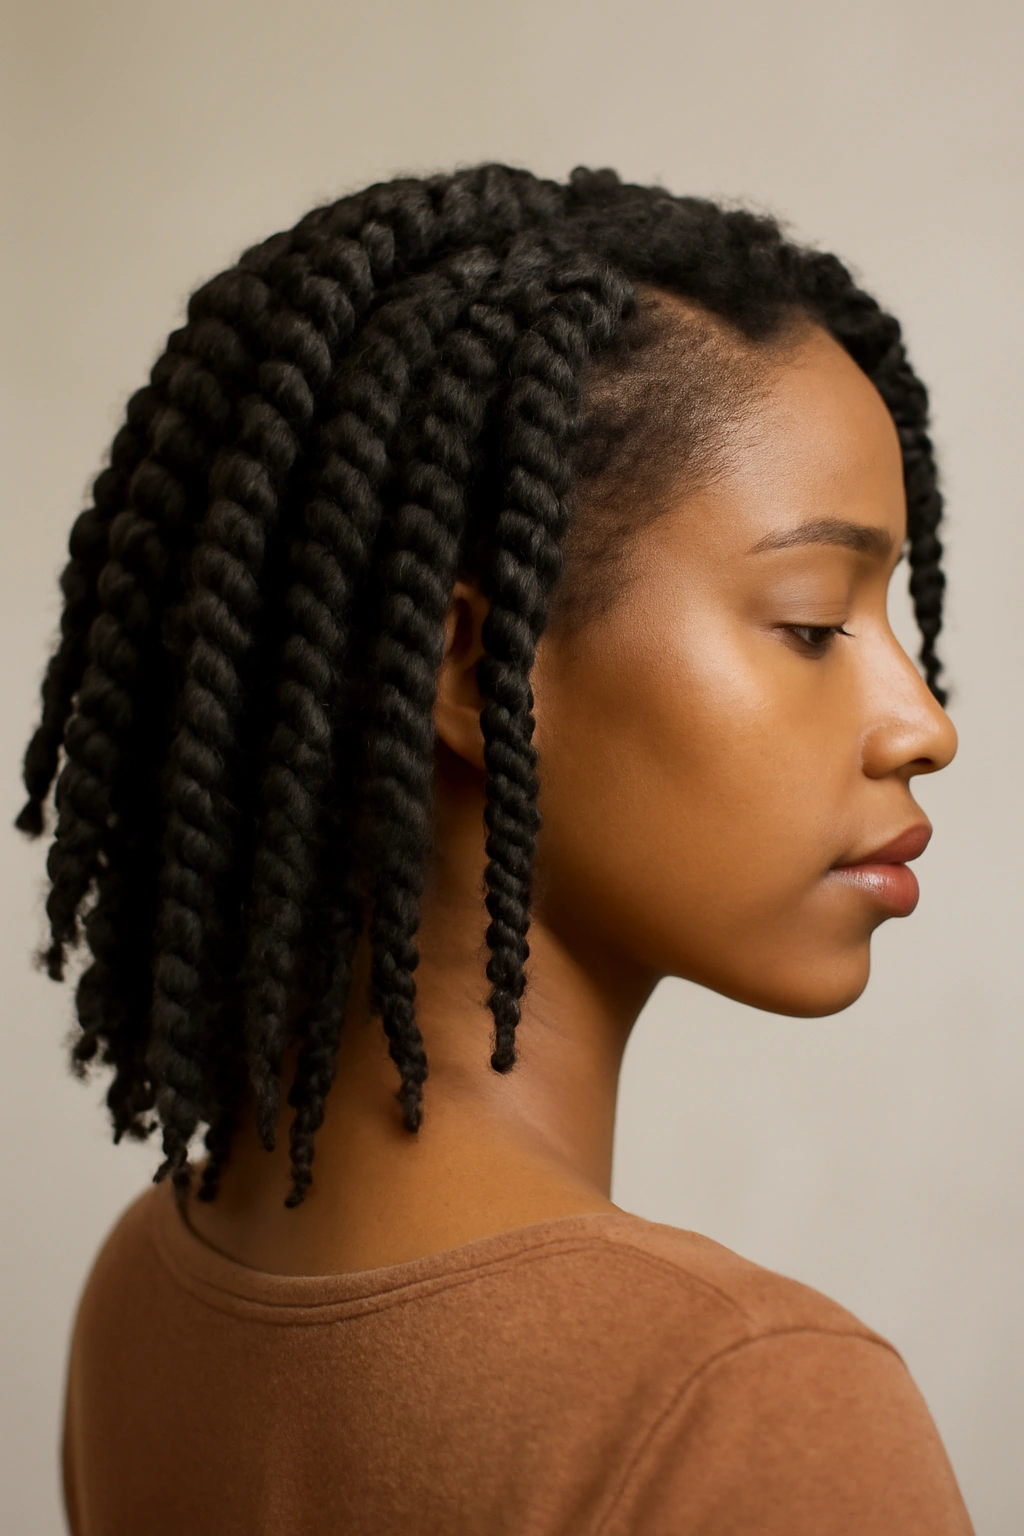
This is the classic technique that works on virtually every natural hair type and texture. Two-strand twists create clean, defined lines, and when you take them down, you get coily texture with intentional movement. On short hair, this approach offers controlled styling that’s still distinctly textured and dimensional.
The Foundation Technique
Two-strand twists are straightforward: divide a section in half, twist each strand around the other, and work down to the ends. The key is consistent tension—too loose and your twists won’t hold definition, too tight and you’ll cause breakage. For short hair, aim for twists that are about the thickness of a pencil or slightly thinner. Work on damp (not soaking) hair, and use a lightweight twist cream or leave-in conditioner combined with a light gel or mousse for hold.
Performance Specifications
- Takes 2–3 hours for a full head on short hair
- Creates defined, bouncy texture when unraveled
- Lasts 6–9 days depending on moisture level and nighttime protection
- Works on all curl patterns and porosity types
- Can be left in as a style or unraveled for a completely different look
Quick facts:
- Leaving twists in for at least 24 hours ensures good definition
- Unraveling with damp fingers instead of dry fingers prevents frizz
- You can re-twist individual sections as needed to extend the style
- Works perfectly as a protective style on its own (twists as the final look)
Versatility Factor
What makes two-strand twist outs so valuable is their flexibility. You can take them down immediately after they dry for loose, cascading curls, or leave them in for days and develop a sleeker aesthetic. On short hair, this means you’re genuinely getting two distinct styles from one styling session.
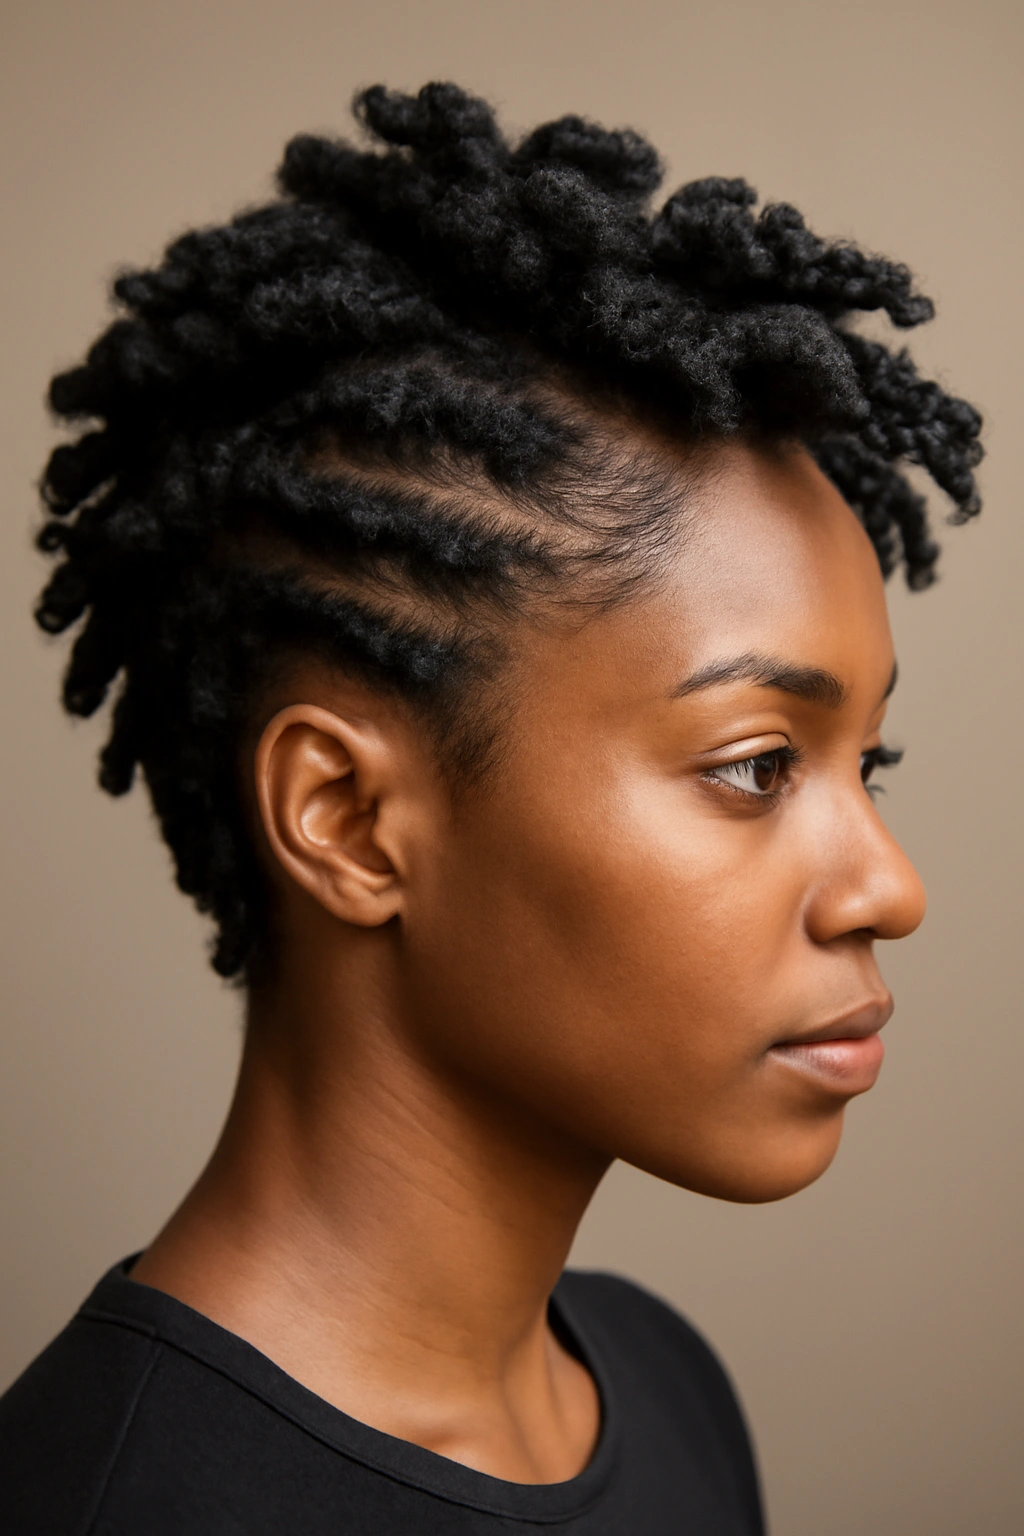
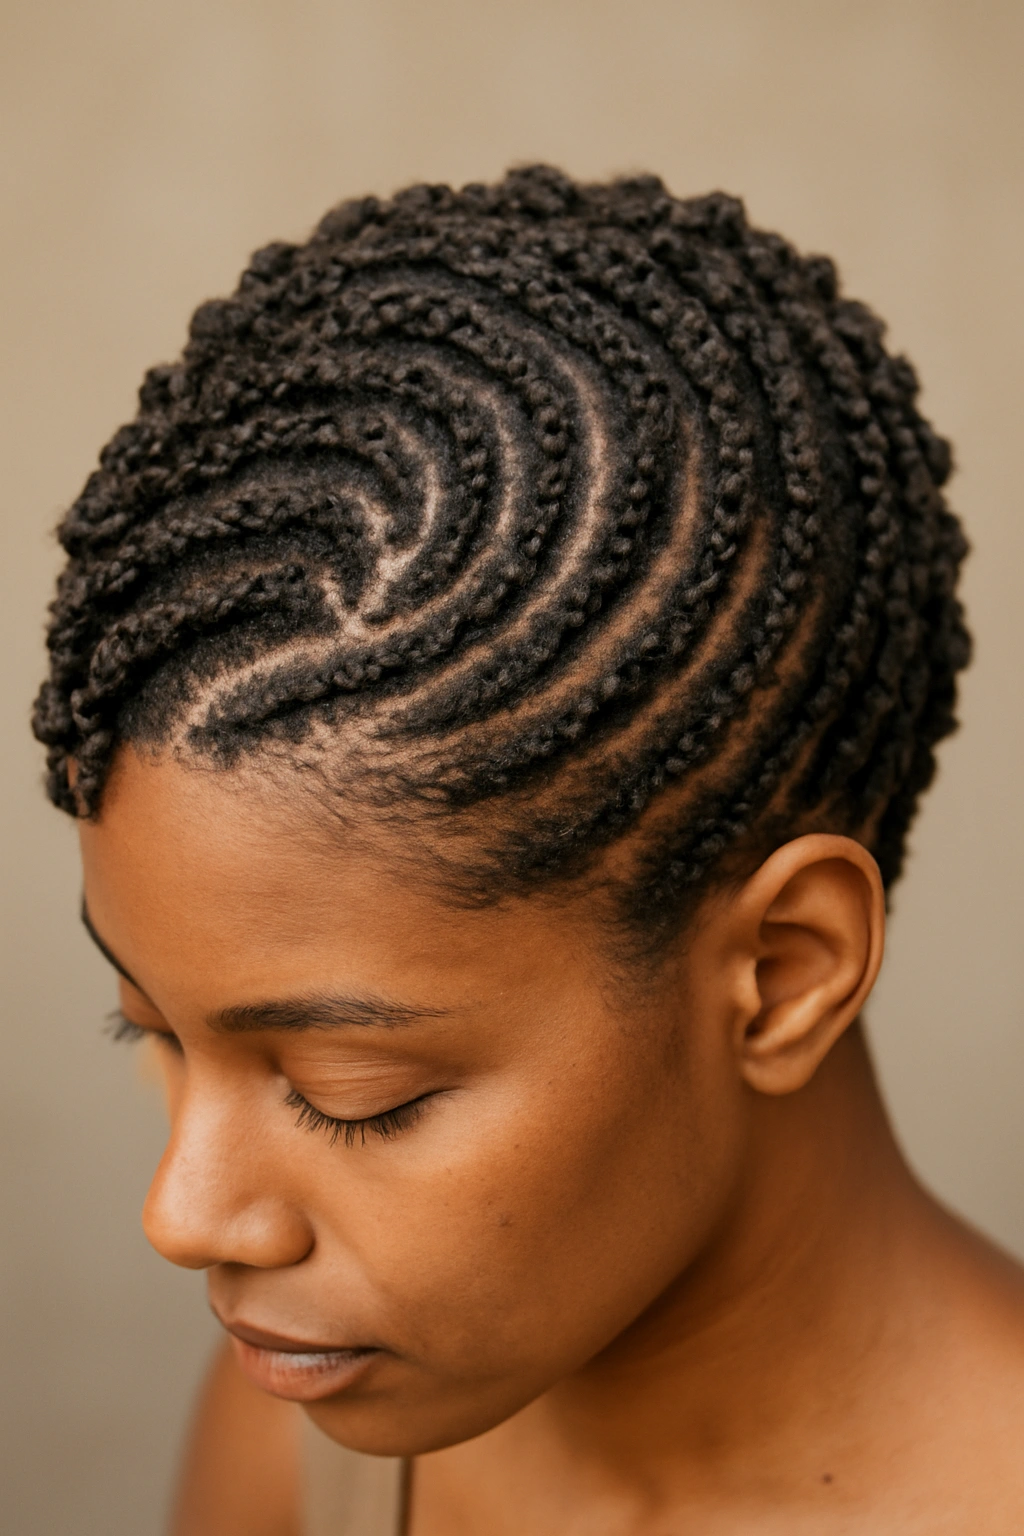
4. Mini Twist Outs for Maximum Definition
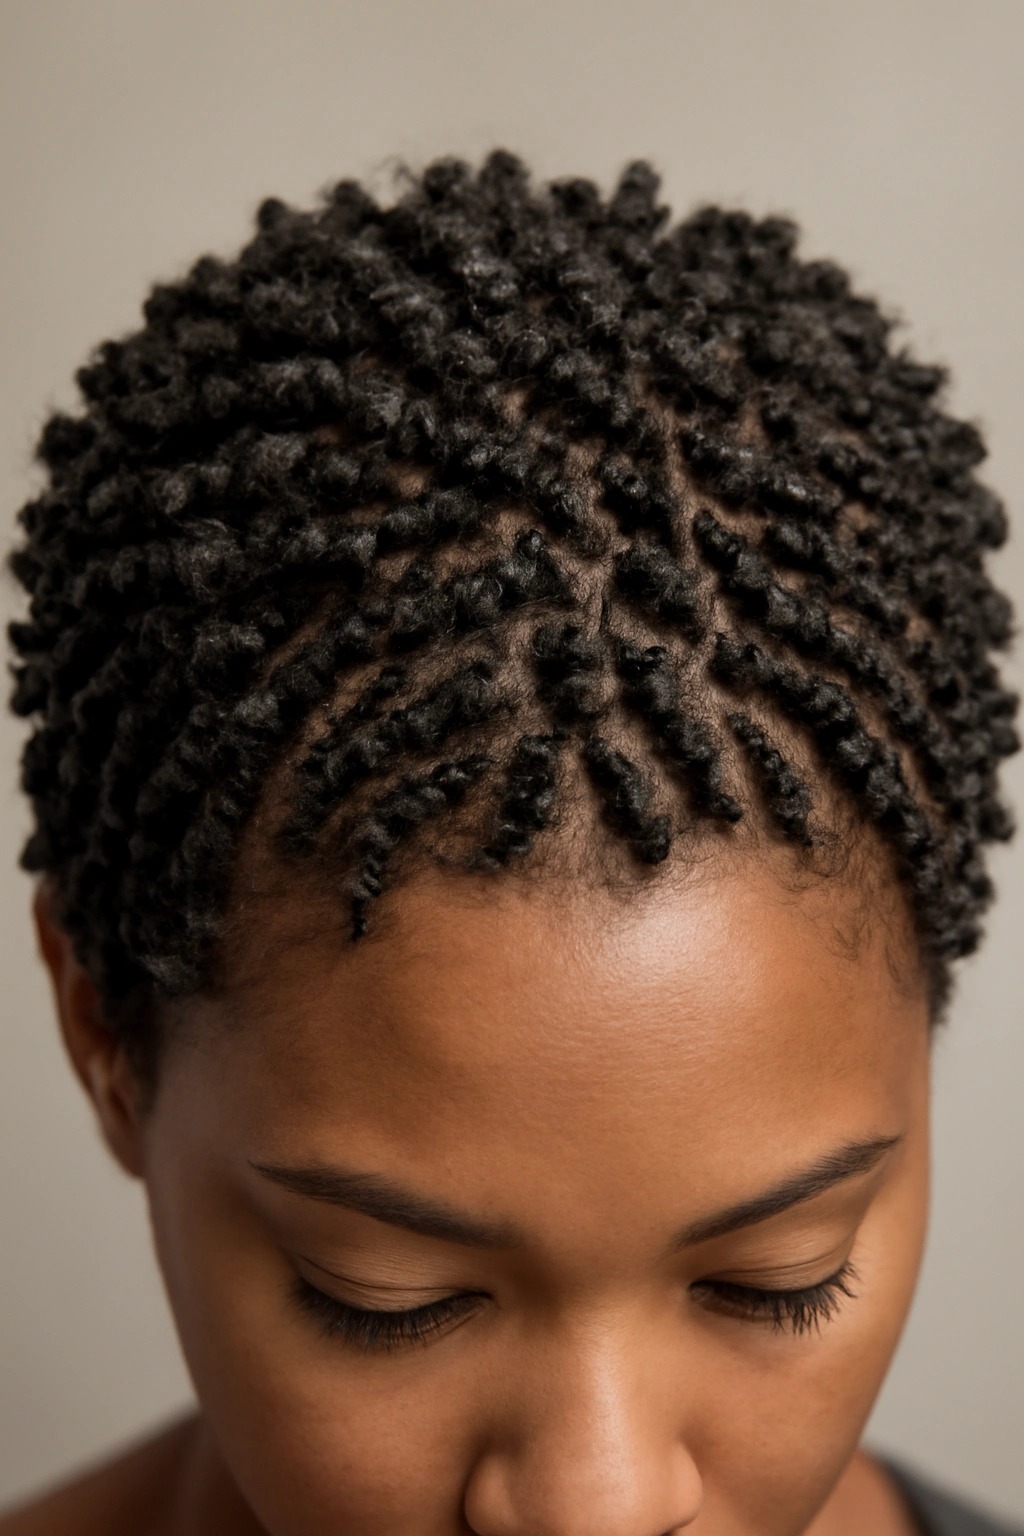
Mini twists are significantly smaller than standard twists—think toothpick-sized or smaller—and they create incredibly intricate texture with exceptional definition. On short hair, mini twist outs look almost like you’ve got a full head of coils or crochet-braided texture. This is the style to choose if you want serious texture impact.
Creating Hundreds of Tiny Twists
Mini twists require patience and a methodical approach. Section your head into a grid pattern using clips, then subdivide each section into teeny pieces before twisting. This takes longer than standard twists—we’re talking 5–8 hours for a full head—but the payoff is undeniable. Use a very lightweight product or a mousse-based formula; heavy products will slick down mini twists and prevent them from drying properly.
Why Short Hair Showcases This Style Best
- Mini twists on short hair create the appearance of extremely dense, full texture
- The entire head reads as intentionally textured rather than frizzy
- Perfect for people wanting a no-manipulation style for 7–10 days
- Creates a uniform, polished look that photographs incredibly well
- Offers maximum styling time between touch-ups
Important note: Mini twist outs require gentle sleep practices. Sleep in a bonnet or on a silk pillowcase, and avoid friction that causes frizz. The trade-off for incredible definition is that you need to be thoughtful about how you move while wearing them.
Longevity and Maintenance
Mini twist outs can easily last two weeks if you’re careful. The definition stays crisp, and they don’t loosen or look tired nearly as quickly as larger twists. If you’re looking for a protective style that’s genuinely low-manipulation, this is it.
5. Colored Twist Outs with Strategic Highlights
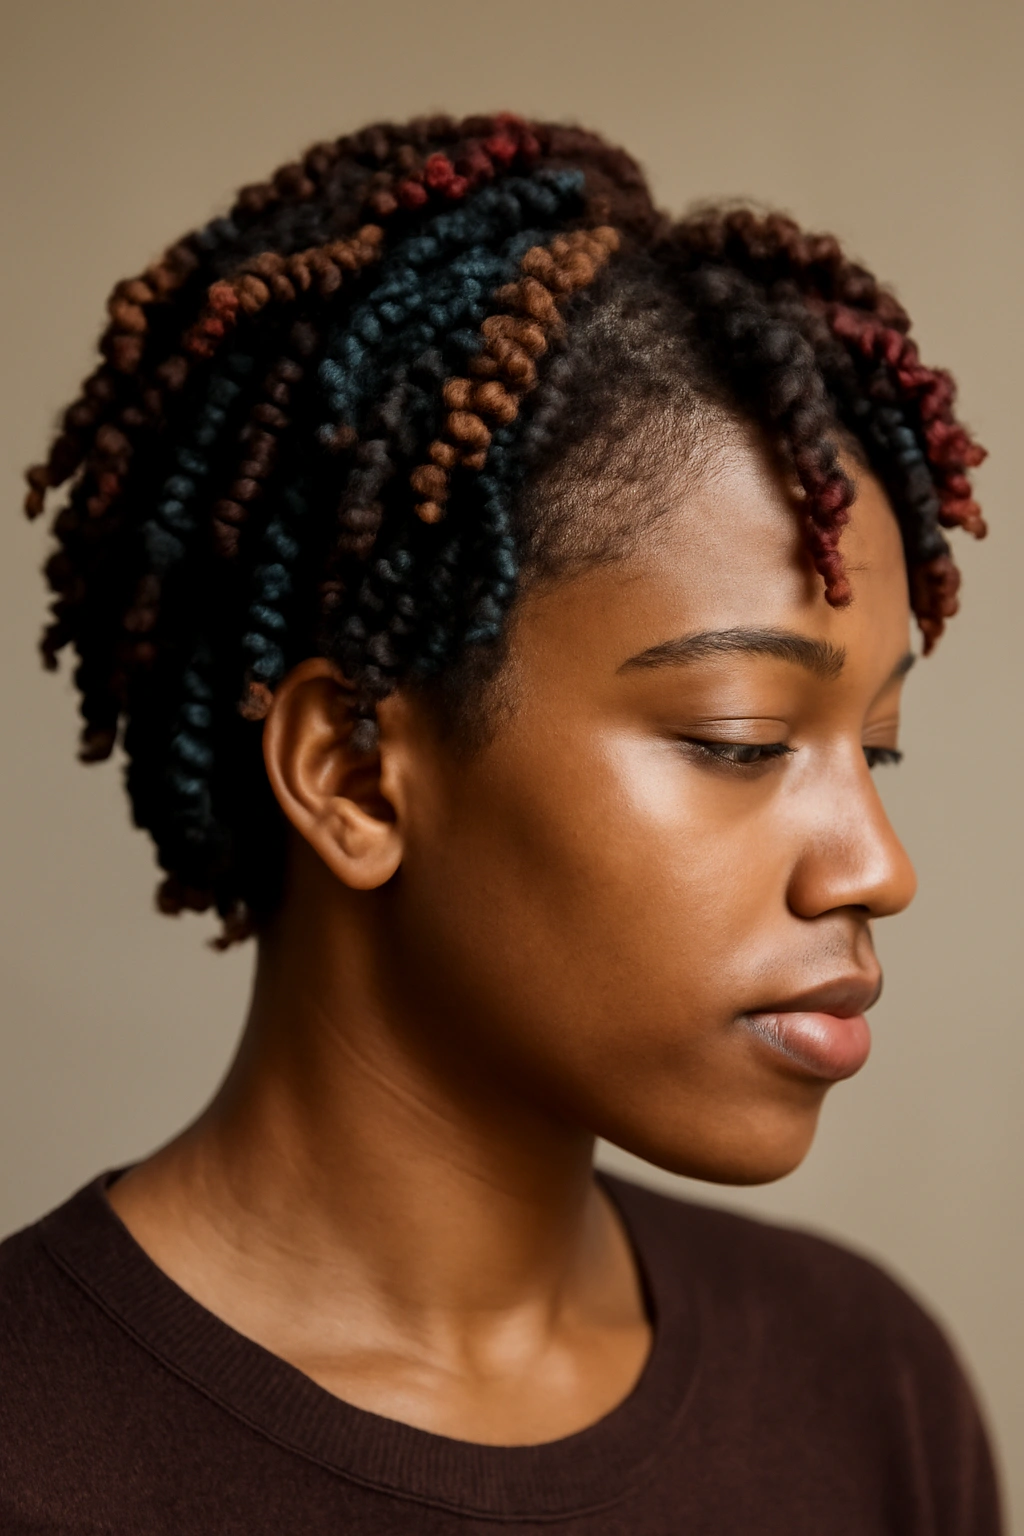
Adding color to twists—whether through temporary dyes, henna, indigo, or even colored extensions twisted into your hair—creates a completely different visual impact. On short hair, colored twist outs become a statement piece. The color plays through your texture in a way that feels intentional and artistic.
Integration Approaches
There are multiple ways to incorporate color: dye your natural hair before twisting (permanent), use temporary color spray applied to sections before twisting, twist in colored extensions from root to tip, or add color through dips (dipping the ends of finished twists in diluted dye or color mousse). For short hair, the most manageable approach is usually temporary methods that don’t require long-term commitment.
Visual Impact Options
- Full head in one alternate color (copper, burgundy, ash tones)
- Money pieces (colored twists framing the face)
- Ombre or balayage effect (darker roots transitioning to lighter ends)
- Random placement for an almost confetti-like effect
- Color concentrated at the crown for maximum visibility
Real consideration: Color shows most beautifully on twists that are well-defined and shiny. Use a moisturizing leave-in conditioner and light oil to seal your twist texture, which also amplifies how color shows up in your hair.
Maintenance Specifics
Colored twist outs need a bit more attention than non-colored versions. Protect color from fading by avoiding excessive sun exposure and chlorine. Refresh moisture every 2–3 days with a light misting and oil combination. Most temporary color methods will gradually fade, which can actually be part of the appeal—you get subtle color shifts over the week you’re wearing the style.
6. Twist Out with Braided Crown Detail
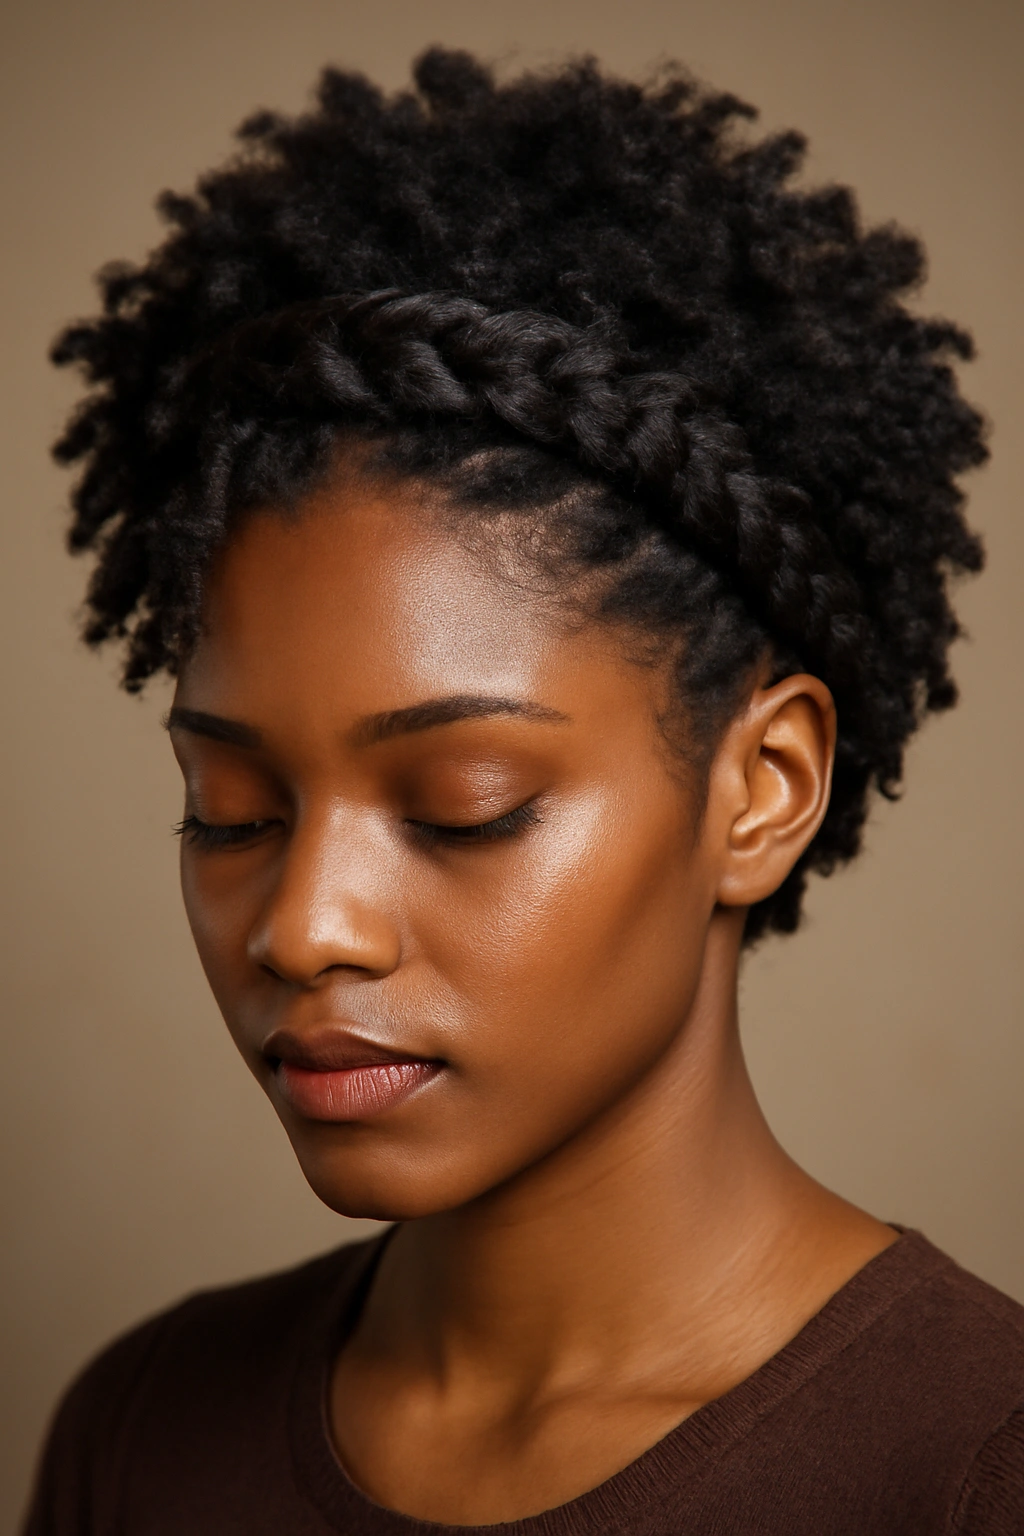
This hybrid style combines twists with a French braid or Dutch braid crown, creating a romantic, intentional aesthetic. The braided detail pulls hair back from the face and adds structure, while the twisted sections flow freely behind. On short hair, this creates a sophisticated look that works for both casual and more polished occasions.
Creating the Braided Framing
Start by planning your braid line—typically from one ear to the other ear, forming a crown or halo shape. Braid this section first (French or Dutch, depending on your preference), securing it with bobby pins as you go. Once the braid is complete, twist the remaining hair in standard two-strand twists, allowing them to flow away from the braid. The contrast between the structured braid and the free-flowing twists is what makes this style visually interesting.
Design Elements to Consider
- Braid can be loose and romantic or tight and graphic, depending on occasion
- Color the braid and twists differently for contrast, or keep everything the same for a subtle effect
- Place the braided section high on the head for an updo feel, or low at the nape for a sleeker approach
- Braid width matters—thinner braids look more delicate, thicker braids make a bolder statement
Styling advantage: The braided section keeps your hair off your face while the twists give you movement and texture. This is genuinely functional, not just beautiful.
Timeline and Execution
Allow extra time for this style since you’re combining two techniques. Budget 3–4 hours total. The payoff is a style that looks way more intricate than the work actually required—this is the type of twist out that makes people ask where you got your hair done.
7. High-Contrast Twist Out with Varied Thicknesses
Instead of uniform twist sizes, strategically vary your twist thickness to create visual interest and texture play. Some sections get thick, chunky twists while others get thin, delicate twists. When you unravel them, you get a landscape of different-sized coils and waves all on the same head. This is genuinely striking on short hair.
Strategic Placement Approach
Typically, people place chunky twists at the crown for maximum volume and impact, then transition to medium or thin twists at the sides and nape. Another approach is to create thick twists throughout but make every other section thinner, creating a striped effect of varying texture. Or go random—thick in front, thin in back, chunky at the crown. The key is intentionality; this works best when it feels like a deliberate choice, not an accident.
Visual Payoff Specifics
- Creates the illusion of more volume and movement than uniform twists
- Different thicknesses catch light differently, adding dimension
- Photographs beautifully because texture isn’t monotonous
- Offers multiple styling options when you unravel (keep chunky ones twisted, take down thin ones)
- Works with any product combination you’d normally use
Pro tip: Use a firmer hold product on the thinner twists specifically—they need extra help maintaining definition, while chunky twists stay put with lighter product.
Customization Potential
This approach is infinitely customizable based on your preferences. If you have good density, you can go extreme with very chunky and very thin. If your hair is finer, work with medium and thin for better control and definition.
8. Twist Out with Incorporated Updo Elements
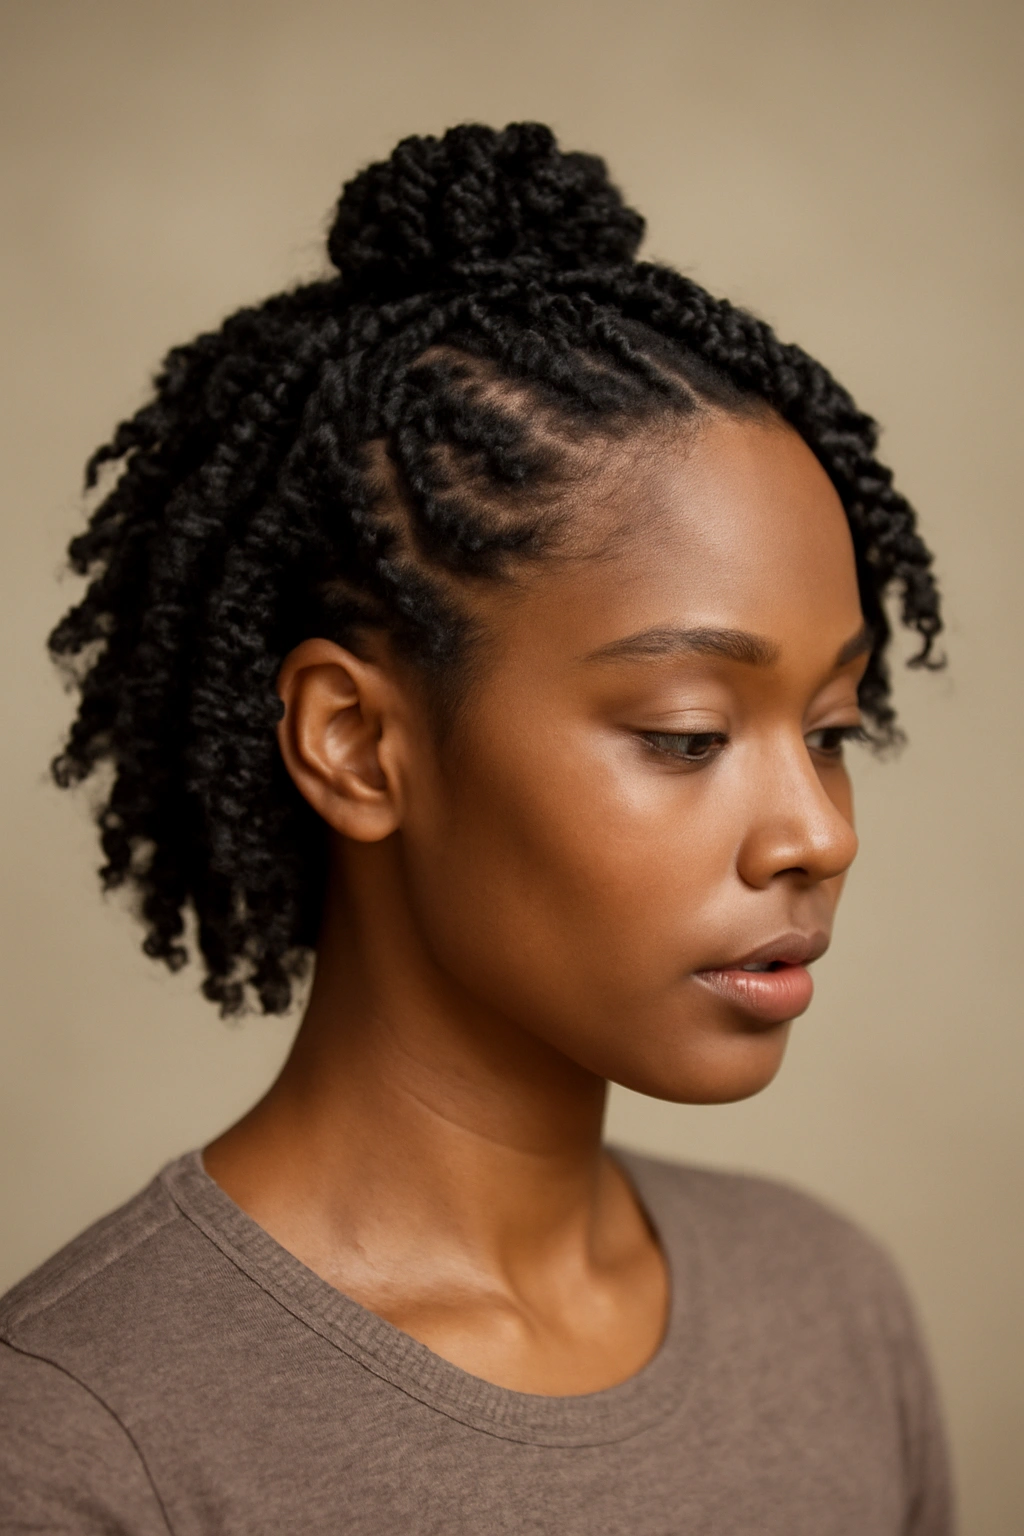
This is the style that doubles as both a casual textured look and an updo-adjacent style. You’re creating twists throughout, but you’re leaving sections loose or styling them into a partial bun, half-up situation, or even a full bun, depending on hair length. On short hair, this might be a crown of twists with a small low bun, or twisted sides with loose texture flowing down the back.
Updo-Twist Combinations
Think about how much of your hair you want to incorporate into the updo versus leaving loose. For very short hair, you might create a tiny twisted bun at the crown or nape, with the remaining hair left as loose texture. For slightly longer short hair, you could do a half-up bun with two twists on each side of your head. The twist texture frames the updo and softens what might otherwise feel too severe.
Occasion Versatility
- Works for casual settings (coffee, errands, everyday)
- Polished enough for professional or business settings
- Appropriate for date nights or social events
- Can be made more formal with sleeker twists and a tighter bun, or more relaxed with looser twists and a messy bun
- Especially effective if you add decorative pins or clips to the bun area
Worth knowing: This style lets you wear your hair up (keeping it off your neck if it’s hot) while still showcasing texture and movement. You’re getting the best of both worlds.
Execution Timeline
This takes 2–3 hours, same as a standard twist out, but you’re spending the last 15–30 minutes creating the updo element. The result is a style that looks way more involved than the time suggests.
9. Tapered Twist Out with Graduated Sizing
Tapered twists vary in thickness from root to tip—they start thick at the base and get progressively thinner toward the end. When unraveled, tapered twist outs create this really interesting effect where coils are larger at the root and transition to finer texture toward the ends. On short hair, this creates a visual flow that’s almost feathered.
Creating the Taper Consciously
Begin your twist with a thicker section of hair at the root. As you twist downward, gradually add less hair with each rotation, or hold the section at a different angle to reduce volume as you go down. This takes practice—you’re basically training your hands to narrow as you move down the twist. Alternatively, section your hair so that root sections are thicker and tip sections are thinner naturally, then twist consistently through each section.
Aesthetic Results
- Creates an almost feathered or layered appearance
- Provides movement and shape that isn’t as rigid as uniform twists
- Generally reads as more intentional and considered than random variation
- Offers a sophisticated alternative to standard two-strand twists
- Particularly effective on shorter hair where the taper is visible
Technical note: Tapered twists take slightly longer to create than standard twists because you need to be mindful of your technique throughout. Budget an extra 30–45 minutes.
Why This Matters on Short Hair
On shorter lengths, subtle techniques like tapering become visible and contribute to the overall aesthetics of the style. You’re not fighting length or density—you’re working with a smaller canvas where intentional details show up.
10. Twist Out Wave Pattern with Structured Movement
This final style focuses on how you arrange twists to create intentional wave patterns across your head. Instead of twists going straight down, you’re directing them in curved or zigzag patterns. When unraveled, this creates waves or movement that follows the direction you set with the twists themselves. On short hair, this creates the impression of waves or waves almost sculpted into your texture.
Directional Twist Planning
Map out your pattern before you start twisting. You might create twists that curve from one side to the other, creating horizontal waves across your head. Or twist in diagonal lines for a different effect. Some people create a spiral pattern, with twists moving clockwise around the head. The twist direction + pressure from the twists creates a “memory” in your hair that translates to wave pattern when you unravel.
Visual and Tactile Effects
- Creates intentional wave or directional pattern that looks styled, not random
- The pattern becomes a design element—it’s part of what makes the look distinctive
- Works on all curl patterns and textures
- Maintains pattern and wave for 5–7 days with proper care
- Creates movement that flatters different face shapes depending on pattern direction
Styling consideration: This works best if you use enough hold product to support the wave pattern. A lighter approach might result in the waves relaxing before you’re ready for them to.
Pattern Ideas
Experiment with different patterns: horizontal waves across the head, diagonal lines from one side to the other, concentric circles spiraling outward from the crown, or a figure-8 pattern. Each creates a distinctly different final look, even though you’re using the same basic twist technique.
Final Thoughts
Twist outs on short natural hair are genuinely one of the most versatile and achievable styling techniques available. Each of these styles offers something different—from ultra-defined spirals to structured wave patterns—but they all start with the same basic technique and adapt through intentional variation. The advantage of short hair is that you can experiment freely, try new approaches, and refresh your style quickly without significant commitment.
The real power of mastering twist outs is that you’re not limited to one look. You can wake up with defined spirals on Monday, unravel them for bouncy coils on Tuesday, add a braided crown on Wednesday, and create waves on Thursday. That kind of versatility from a single styling foundation is genuinely valuable, especially when you’re managing natural hair.
What matters most is understanding the foundation technique, then learning how small choices—section size, product type, twist direction, unraveling method, and timing—completely change your final result. Once you internalize that relationship between technique and outcome, you’ve got the skills to create literally any twist out variation you can imagine. Your short natural hair isn’t a limitation; it’s actually the ideal platform for showcasing texture, movement, and intentional styling.