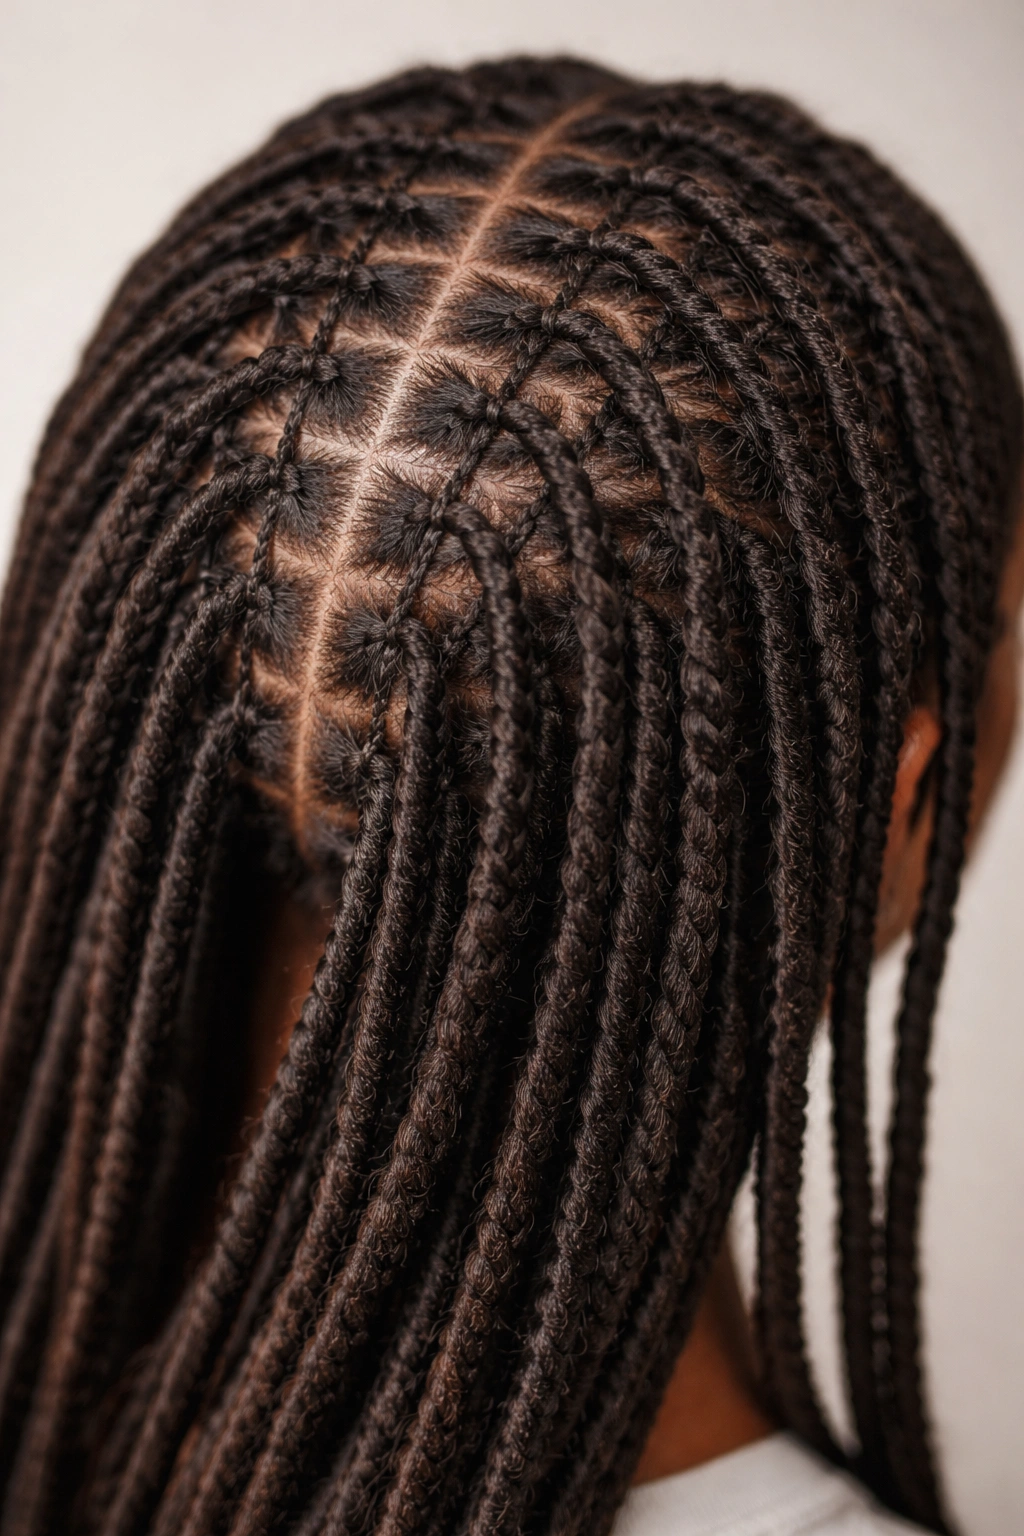
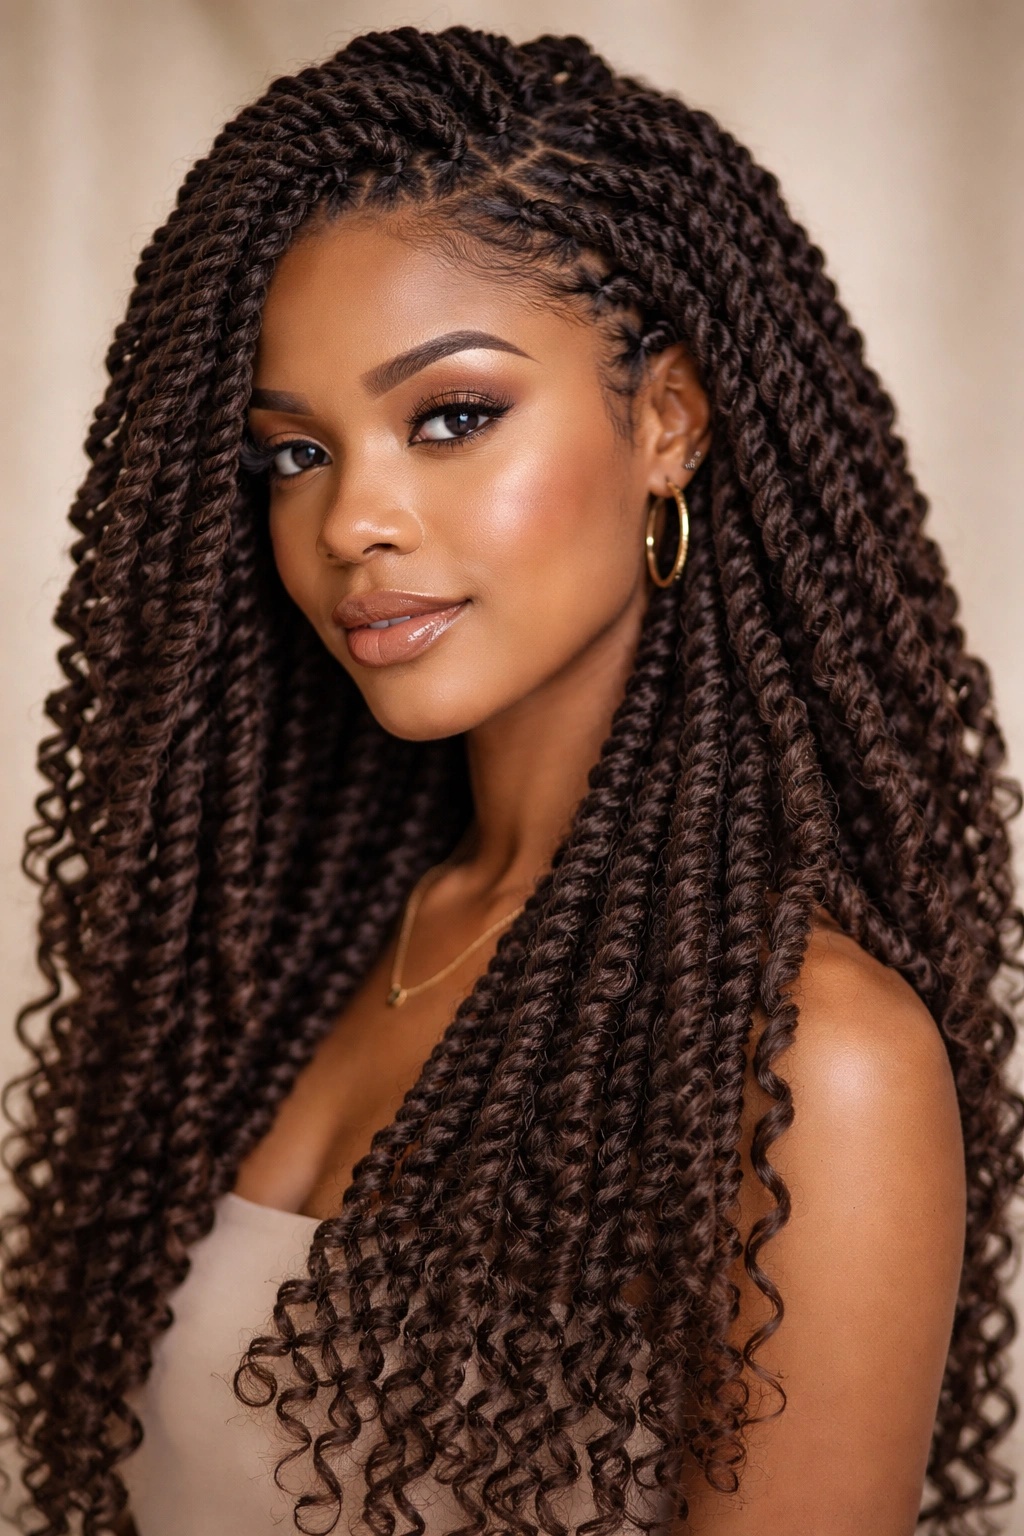
Locs are one of the most versatile protective styles you can wear, offering endless styling possibilities regardless of where you are in your locking journey. Whether you’re just starting with baby locs, maintaining established mid-length locks, or rocking waist-length locs, the way you style them dramatically transforms your overall look. The beauty of locs isn’t just in wearing them down — it’s in the creative, intentional ways you can dress them up for work, special occasions, everyday confidence, or simply because you want a change without commitment.
What makes loc styling so special is that each style tells a story about your personality while simultaneously caring for your locs. When you style your locs thoughtfully, you’re not just changing your appearance — you’re protecting the ends of your hair, distributing tension evenly along each loc, and preventing breakage. The versatility becomes even more apparent once you understand that length isn’t a limitation; it’s actually an advantage. Short locs allow for tight, sculptural styles, while waist-length locs give you dramatic, flowing options that catch attention the moment you walk into a room.
This guide covers 20 distinct loc styles organized from short to long, each with specific techniques, best-suited lengths, maintenance tips, and variations you can try. You’ll discover styles that work for professional environments, celebrations, beach days, lazy weekends, and everything in between. More importantly, you’ll understand why each style works, what tools or products enhance the look, and how to maintain your locs’ health while rocking these styles with confidence.
1. High Loc Buns
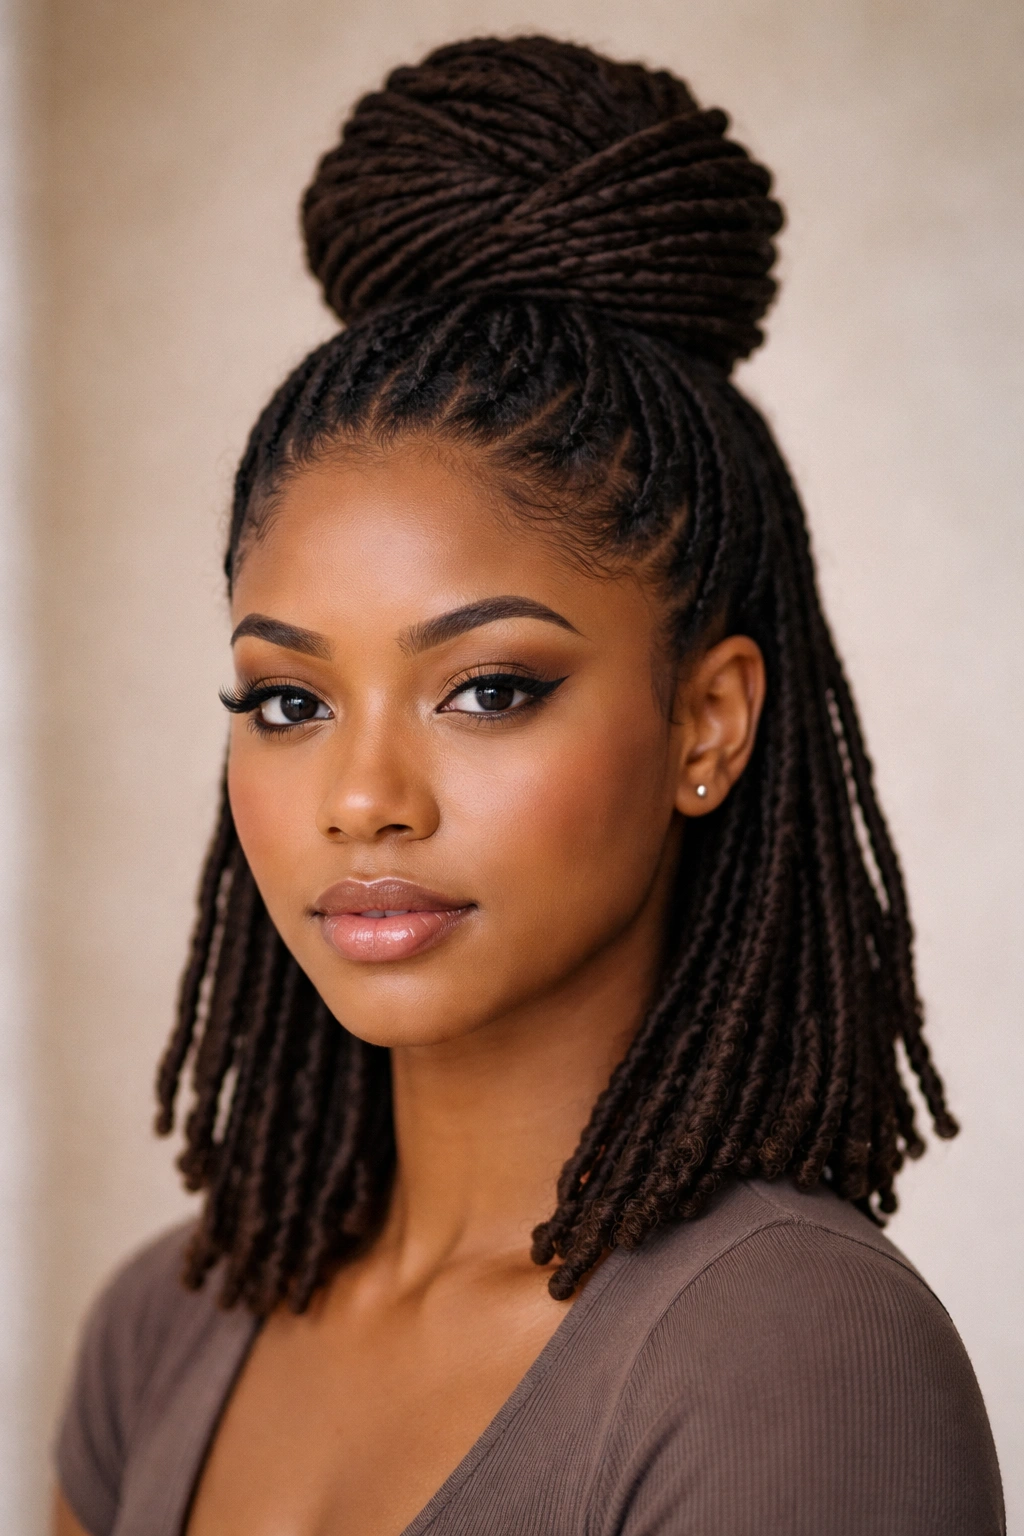
A high bun is the ultimate go-to style for any length of locs, but it shines particularly well when you have short to shoulder-length locks. Gather all your locs toward the crown of your head using a hair tie, elastic band, or decorative bun holder, and secure them into a tight, compact knot at the very top. The style creates instant volume and lifts your face, making it perfect for both everyday wear and polished professional settings.
Why It Works for Locs
High buns showcase the beautiful texture and movement of your locs without requiring heat or manipulation of individual locks. This style distributes tension evenly across your scalp rather than concentrating it in one spot, making it genuinely protective. You can style a bun in minutes, which means less handling of your hair overall — a key principle of healthy loc maintenance.
How to Perfect the High Bun
- Brush locs gently from roots to tips using a soft-bristled brush or wide-tooth comb to detangle any knots
- Apply a light styling gel or edge control to your hairline for a polished, finished appearance
- Gather all locs into a high ponytail first, then twist the tail into a coil and wrap it around the base to form the bun shape
- Secure with a clear elastic that won’t slip, and pin any loose locs with bobby pins that match your hair color
- Finish with a light hairspray to keep flyaways in place without creating stiffness
Pro tip: Vary the tightness of your bun depending on your plans — a sleek, tight bun works for professional environments, while a slightly messier, looser bun feels more casual and effortless for weekend wear.
2. Two-Strand Twists Within Locs
This style interweaves two locs together in a spiral pattern, creating dimension and visual interest while keeping your hair securely styled. Two-strand twists within locs work beautifully at any length but are especially striking when you have medium-length or longer locs that can showcase the twisting pattern clearly.
Why It Creates Visual Texture
Two-strand twists add an extra layer of definition to your locs by creating a rope-like appearance that’s visually distinct from wearing locs down. The twisted pattern catches light differently than straight locs, adding depth and sophistication to your overall look. This style is also protective because the twisting keeps locs separated and prevents them from rubbing against each other.
Technique for Flawless Twists
- Select two locs you want to twist together — ideally ones that are close to each other on your head
- Starting at the roots, twist one loc over the other in a consistent direction, maintaining even tension throughout
- Continue twisting from root to tip, then secure the ends with a small elastic or decorative tie
- Repeat this pattern across sections of your head or your entire head, depending on the look you want
- Allow twists to set for 24 hours before styling to ensure they hold their shape
- Apply a light moisturizer to the twists to keep them hydrated and prevent frizz
Worth knowing: The tighter you twist, the longer the style will last — twists that are too loose may unravel within a few days, while tightly twisted locs can hold the style for 2-3 weeks.
3. Loc Crown or Halo Braid
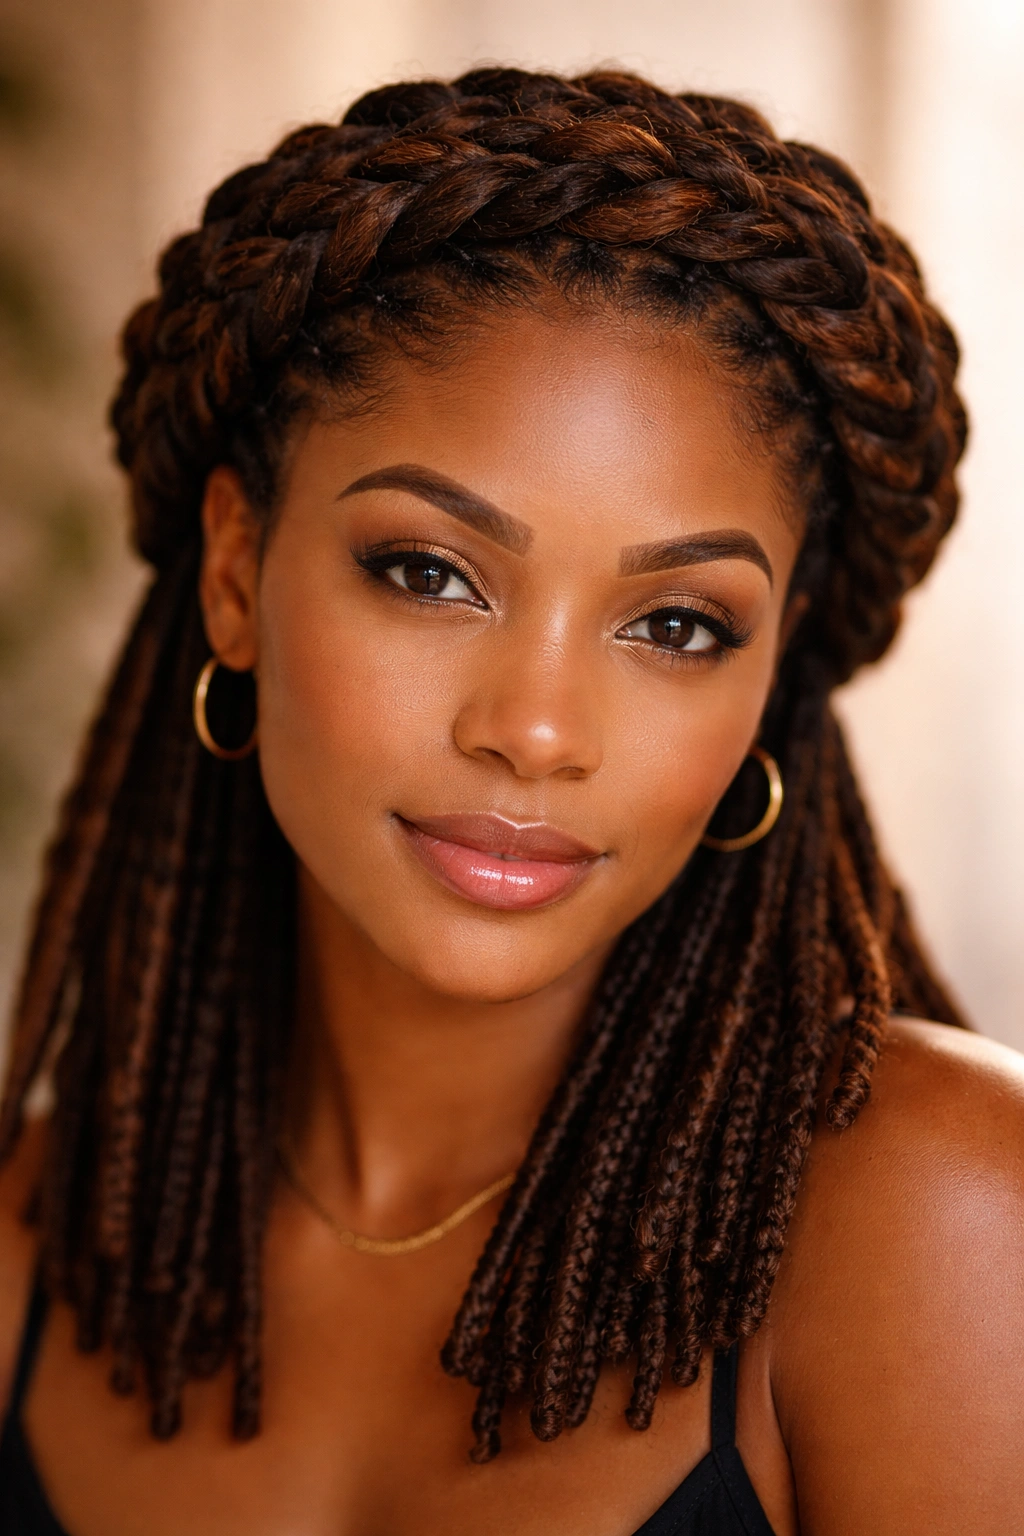
A crown or halo braid wraps around your entire head, using your locs as the “hair” being braided. This regal, romantic style works particularly well for short to medium locs and is perfect for weddings, formal events, or any occasion where you want to feel like royalty. The crown braid frames the face beautifully and keeps hair away from your shoulders while looking effortlessly elegant.
What Makes This Style So Striking
The crown braid creates a polished, intentional look that reads as high-effort while actually being relatively simple to execute. By arranging your locs in a braid pattern around your head, you’re creating a visual frame for your face while keeping all your hair secured. This style distributes tension evenly around your entire scalp, making it one of the most protective options available.
Steps to Creating Your Halo
- Part your hair into two sections: one from ear to ear across the top of your head, and one below that line
- Take a small section of locs from one side of your head and begin a three-strand braid using full locs (not strands within a loc)
- Continue braiding around the perimeter of your head, incorporating new locs as you go, similar to a regular cornrow pattern but using thicker sections
- When you reach the other side, secure the braid with a small elastic and tuck it behind your ear or pin it with bobby pins
- Leave the locs underneath the braid down, or gather them into a low ponytail for a different variation
- Smooth your edges with edge control and finish with hairspray to ensure the braid stays put
Insider note: Adding decorative beads or gold thread to your halo braid elevates the style instantly, making it appropriate for celebrations and special occasions.
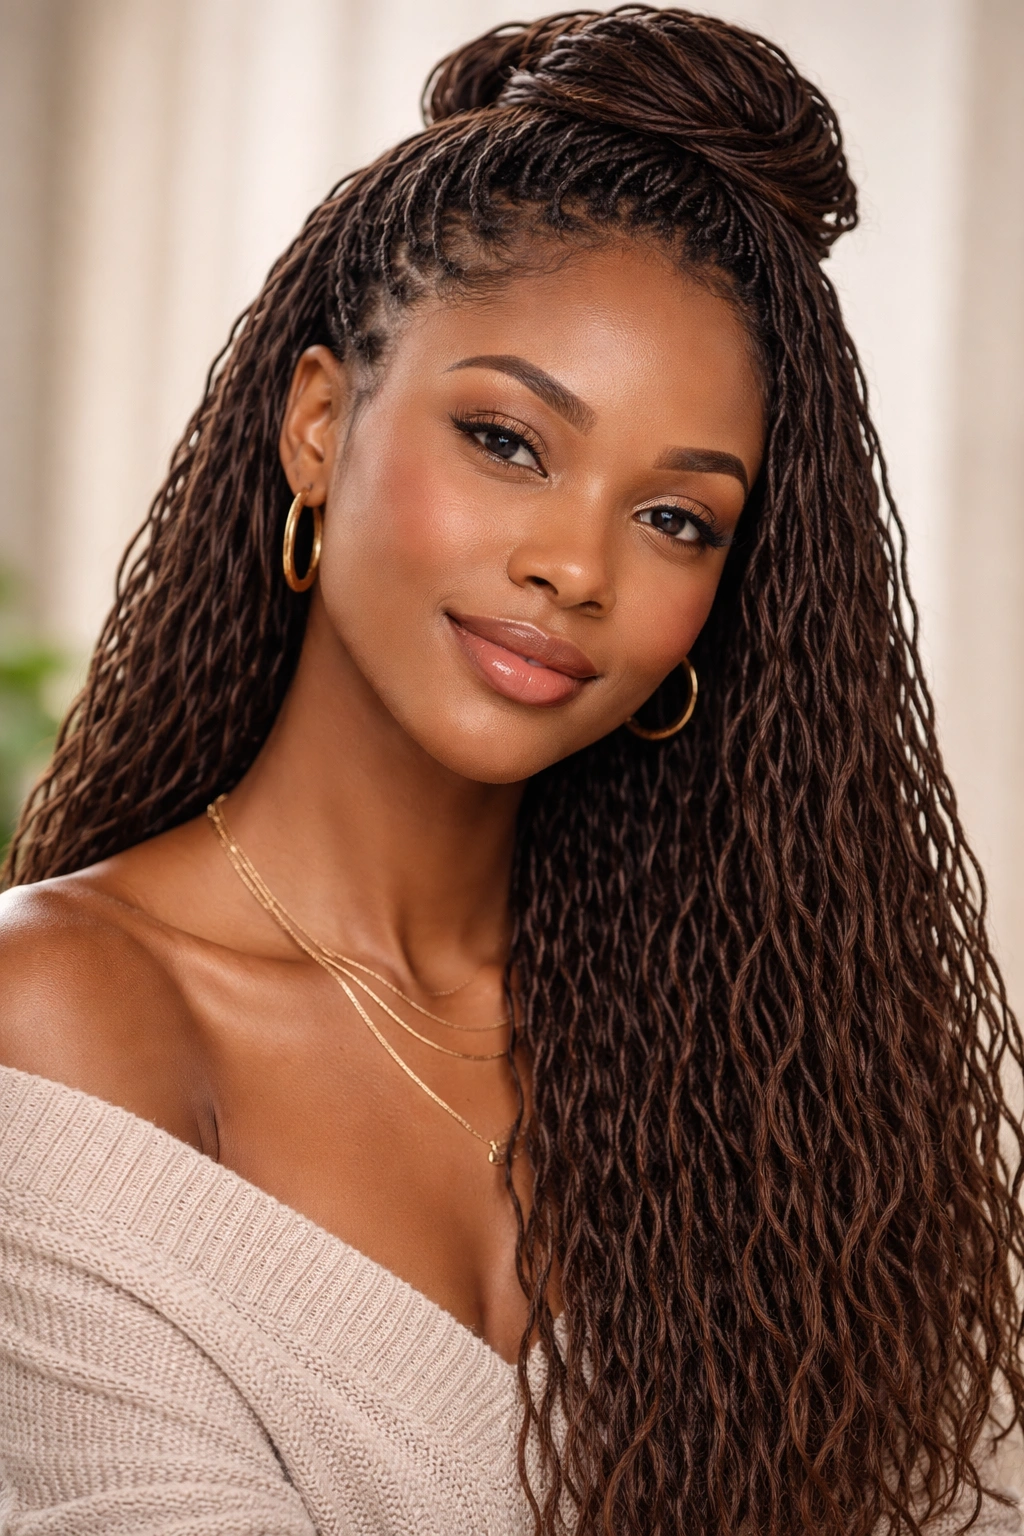
4. High Ponytail With Volume

A high ponytail gathers locs at the crown of your head into a sleek, elongated tail that falls down your back. This style works exceptionally well for medium to waist-length locs and offers instant polish and professionalism. The high placement creates the illusion of more hair volume and lifts the entire face.
Why High Ponytails Flatter Every Face Shape
The elevated placement of a high ponytail naturally draws the eye upward, creating a lengthening effect on the face and neck. This style also removes hair from your face and shoulders, creating clean lines that work beautifully in professional, casual, and formal settings. Because you’re gathering locs rather than creating new hairstyles within them, there’s minimal manipulation and maximum protection.
Creating a Polished High Pony
- Brush your locs thoroughly with a soft brush to remove tangles and ensure a smooth appearance
- Gather all your locs toward the crown of your head using a fine-tooth comb if needed
- Use a thick elastic band or decorative hair tie to secure the ponytail at the highest point that’s comfortable on your head
- Take a small section of locs from the ponytail itself and wrap it around the base of the elastic to cover it
- Pin the wrapped section with bobby pins to keep it in place
- Spray the ponytail lightly to smooth flyaways and add shine
Pro tip: For extra volume at the crown, gently backcomb the roots of your locs before gathering into the ponytail — this creates a fuller, more textured appearance.
5. Loc Braids
Loc braids intertwine multiple locs together in a braiding pattern, creating thick, rope-like sections that stand out visually. This style is ideal for medium-length locs and can be worn loose or incorporated into an updo. Braided locs add movement and dimension while keeping hair well-protected and beautifully structured.
How Braiding Locs Differs From Regular Braiding
When you braid with locs, you’re working with thicker, already-textured sections of hair compared to regular stranding. This means your braids will have inherent texture and won’t look flat or boring — even a simple three-strand braid has built-in visual interest. Loc braids can be worn for extended periods without causing damage because you’re not manipulating individual strands excessively.
Braiding Method for Maximum Definition
- Select three locs you want to braid together — they can be adjacent or spaced across your head
- Starting at the roots, cross one loc over another, then under the third, maintaining consistent tension
- Continue this over-under pattern all the way down to the ends of the locs
- Secure the ends with a small elastic, decorative tie, or wire wrapped tightly around the base
- Repeat across other sections of your head or create just a few accent braids for a subtler look
- Sleep with the braids loosely tied to prevent them from loosening overnight
Worth knowing: Braids look best when you braid locs that are at least mid-length or longer — short locs don’t have enough length to create defined braids that hold their shape.
6. Wrapped and Adorned Locs
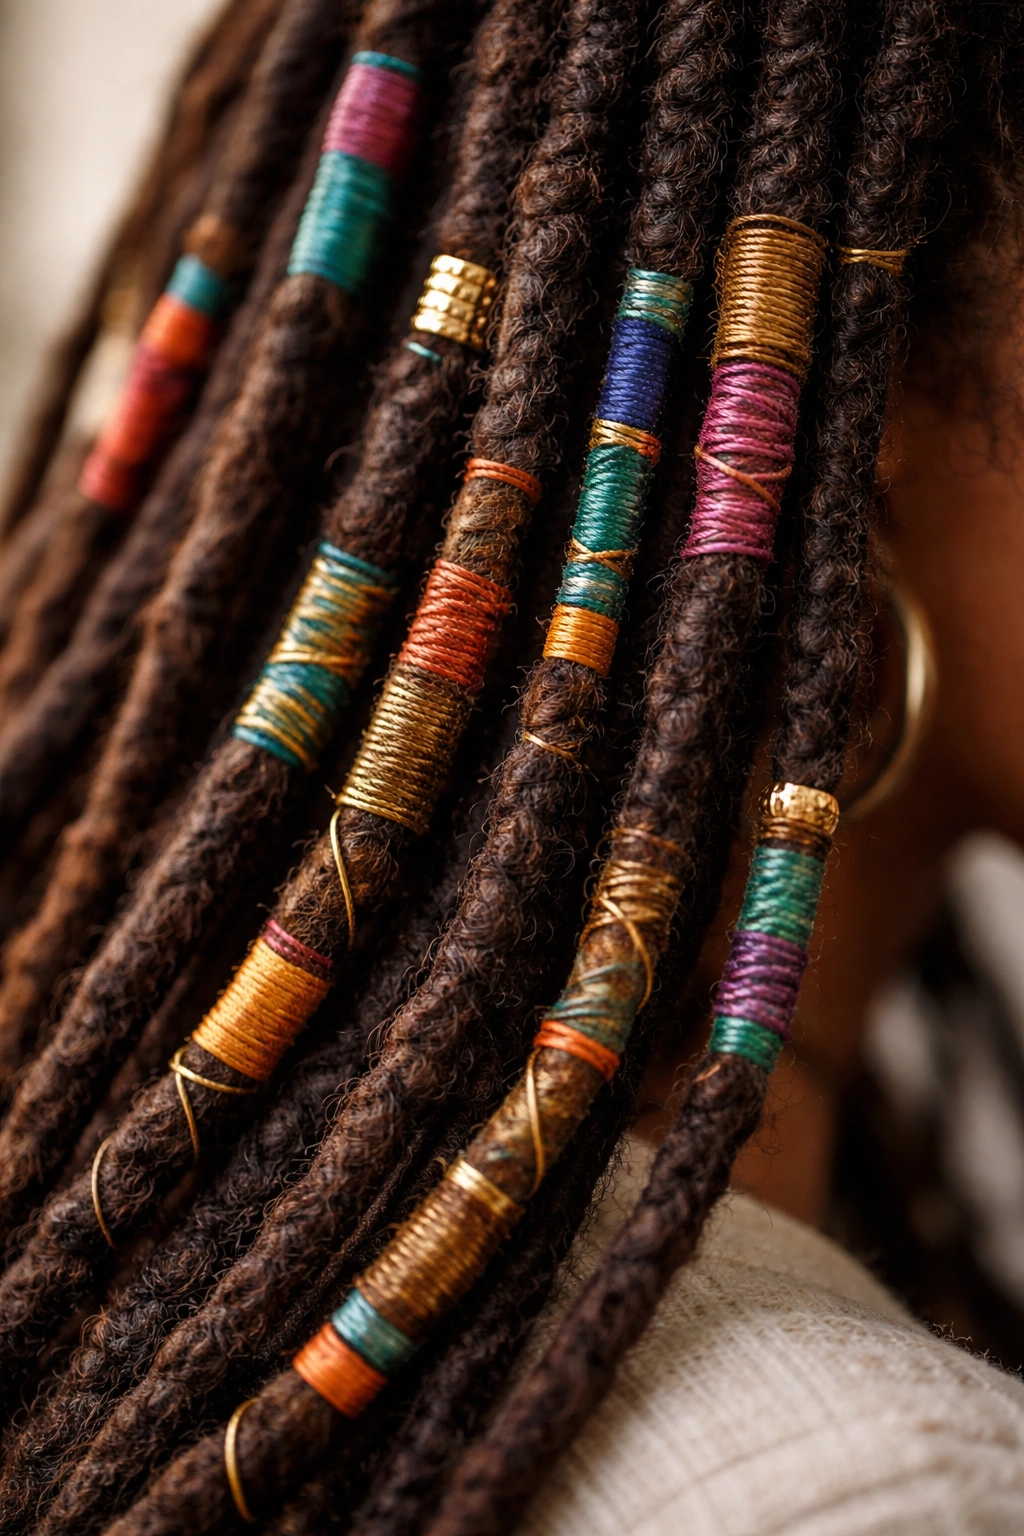
Wrapping individual locs or sections of locs with thread, wire, yarn, or decorative string is one of the easiest ways to elevate your style instantly. Wrapped locs work beautifully at any length and offer endless color and texture possibilities. This style keeps locs defined while adding a creative, artistic dimension to your look.
The Appeal of Wrapped Locs
Wrapping locs with decorative materials allows you to customize your style without making permanent changes. You can change the look weekly by using different colors, materials, or wrapping patterns. Wrapping also serves a practical function — it keeps loc ends tight and protected while adding visual weight and movement to your style.
How to Wrap Locs Properly
- Choose your wrapping material: colored thread, yarn, wire, or decorative string all work beautifully
- Decide on a pattern: you can wrap every loc, every other loc, just the ends, or accent locs throughout
- Starting at the root of a loc, begin wrapping the material tightly around the loc in a spiral pattern
- Continue wrapping down the entire length of the loc or just partway, depending on your desired look
- Tie off the wrapping material securely at the end, or tuck it under existing wraps to hide it
- For a graduated look, use different wrap widths or wrap different sections to varying densities
- Layer multiple wrapping materials on the same loc for a dimensional, textured appearance
Pro tip: Wrap locs while they’re still slightly damp to ensure the wrapping material adheres smoothly and evenly without slipping or bunching.
7. Swept Side Loc Styles

A swept side style gathers locs to one side of your head, creating an asymmetrical, elegant look that’s perfect for professional settings and special events. This style works beautifully at any length and is particularly striking on longer locs. The side sweep draws attention to your face and neck while keeping hair completely off one shoulder.
Why Swept Sides Work for Every Occasion
Swept side styles instantly read as intentional and polished, making them appropriate for job interviews, presentations, dates, or everyday confidence. By moving all your hair to one side, you’re creating visual asymmetry that’s inherently more interesting than a centered style. This style also keeps locs off your face and neck without the formality of a bun, striking the perfect balance between relaxed and refined.
Creating the Perfect Swept Side
- Comb your locs gently to remove tangles and ensure smooth, even texture
- Decide which side you want your locs to sweep toward, considering your face shape and personal preference
- Using a fine-tooth comb, gather all your locs toward that side, starting from the back of your head
- Secure the gathered locs with a hair tie or decorative clip at the side of your head behind your ear, or just below the ear
- Leave a few face-framing locs loose if you want a softer, more romantic appearance
- Apply edge control to your edges and hairline for a polished finish
- Smooth the swept locs with a light hairspray to maintain the style throughout the day
Insider note: The more dramatically you sweep your locs to the side, the more dramatic and formal the style appears — subtle side sweeps feel more casual and everyday.
8. Loc Updos Beyond the Bun
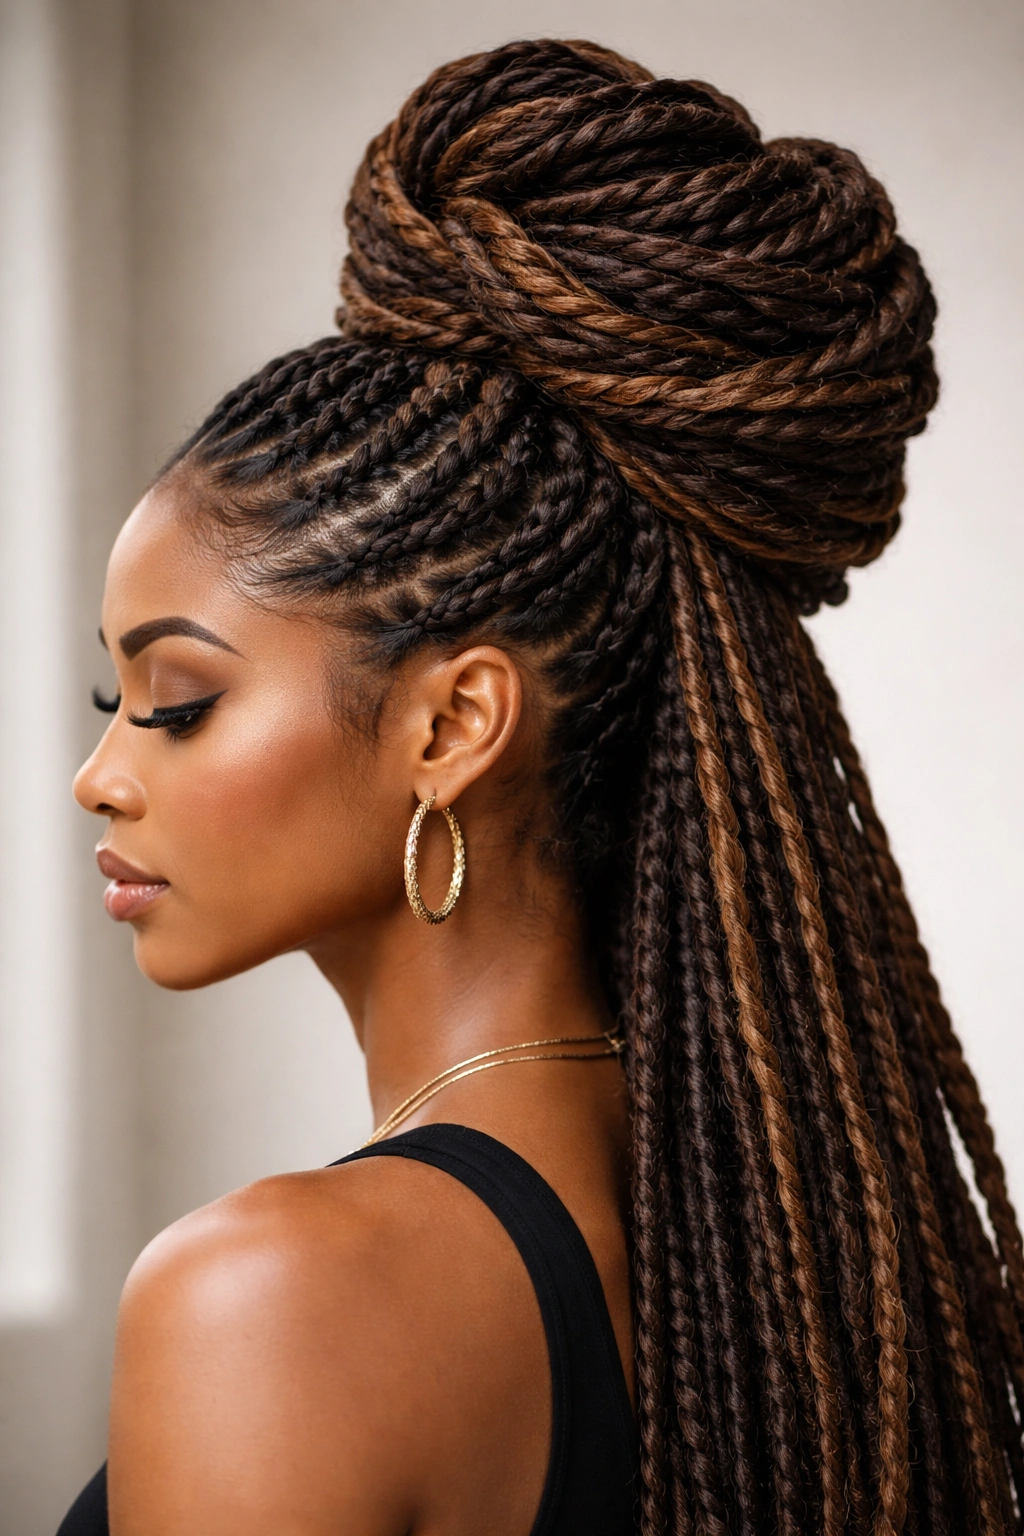
While buns are classic, updos with locs can take many creative forms beyond the simple knot. Try twisted updos where you wrap locs around each other, rolled updos where you create swirls at the crown, or braided updos that combine multiple styling techniques. Updos work beautifully for medium to waist-length locs and are perfect for events, professional settings, or anytime you want an elevated look.
Variations That Feel Completely Different
A twisted updo has an organic, textured feel that’s more relaxed than a sleek bun. A rolled updo creates geometric patterns that feel artistic and intentional. A braided updo combines multiple techniques for a complex, multidimensional appearance. Each variation allows you to control exactly how your locs are arranged while keeping them completely off your face, neck, and shoulders.
Creating a Twisted Updo
- Gather your locs into a high or mid-level ponytail at the crown or back of your head
- Divide the ponytail into two thick sections
- Twist one section around the other in a clockwise direction, maintaining even tension
- As you twist, wrap the twisted section into a coil at the base of your ponytail
- Continue until all your locs are incorporated into the coiled updo
- Secure with bobby pins and finish with hairspray
- Leave a few face-framing pieces loose for a softer, more romantic version
Pro tip: Experiment with the placement of your updo — positioning it at different heights and angles completely changes the overall aesthetic and how formal or casual the style appears.
9. Half-Up, Half-Down Loc Styles
Half-up, half-down is the perfect middle ground when you want some hair off your face but still want to showcase your full length. This style works beautifully at any length of locs and is ideal for occasions where you want a romantic yet polished appearance. The combination of gathered and loose locs creates visual balance and movement.
The Versatility of Half-Up Styles
Half-up styles allow you to enjoy the aesthetic of longer locs while keeping hair away from your face and out of your way. You can dress this style up or down depending on how you secure it and whether you add accessories. For professional settings, a sleek half-up secured tightly at the crown feels polished. For casual occasions, a looser, messier version feels effortless and relaxed.
Styling a Half-Up Half-Down Look
- Comb through your locs thoroughly to remove tangles and prepare them for styling
- Take a section of locs from one side of your head, roughly from temple to temple across the crown
- Gather this section toward the back of your head, creating a horseshoe shape with the remaining locs flowing freely
- Secure the gathered section with an elastic band or decorative clip
- For extra height and volume, gently backcomb the gathered section before securing
- Add accessories if desired: beads woven into the gathered section, a decorative hair cuff, or a statement clip
- Smooth the front hairline with edge control for a finished appearance
Worth knowing: The size of your half-up section determines how much hair is gathered — a larger section means less length flowing free, while a smaller section maximizes the length you can display.
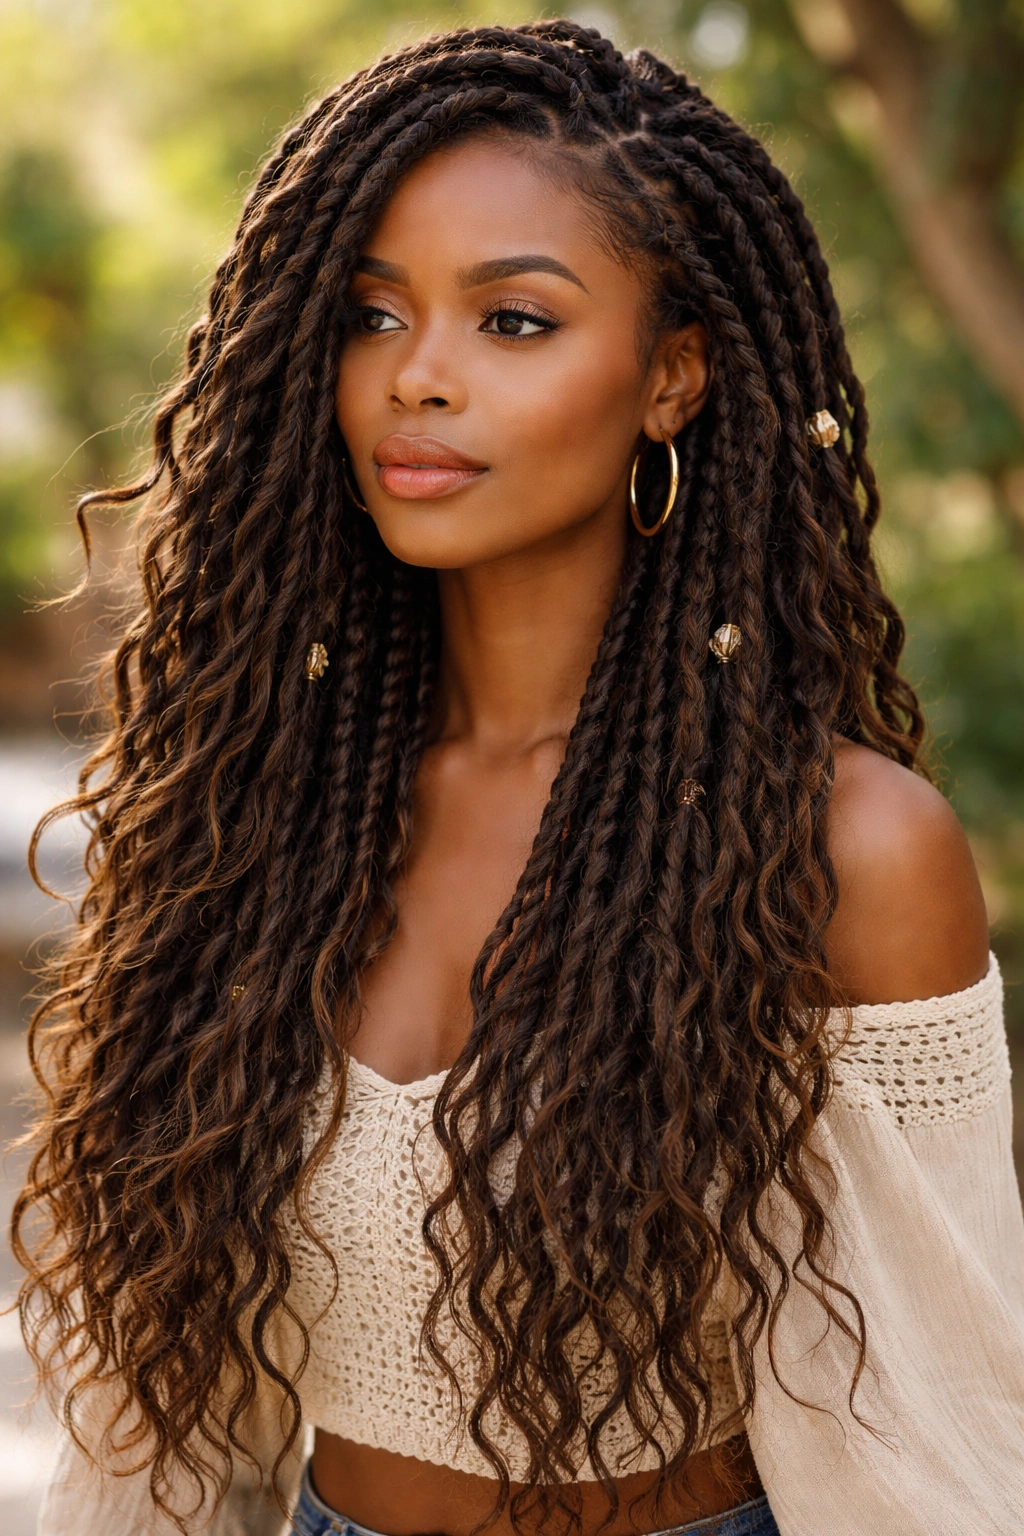
10. Decorated Locs With Cuffs and Rings
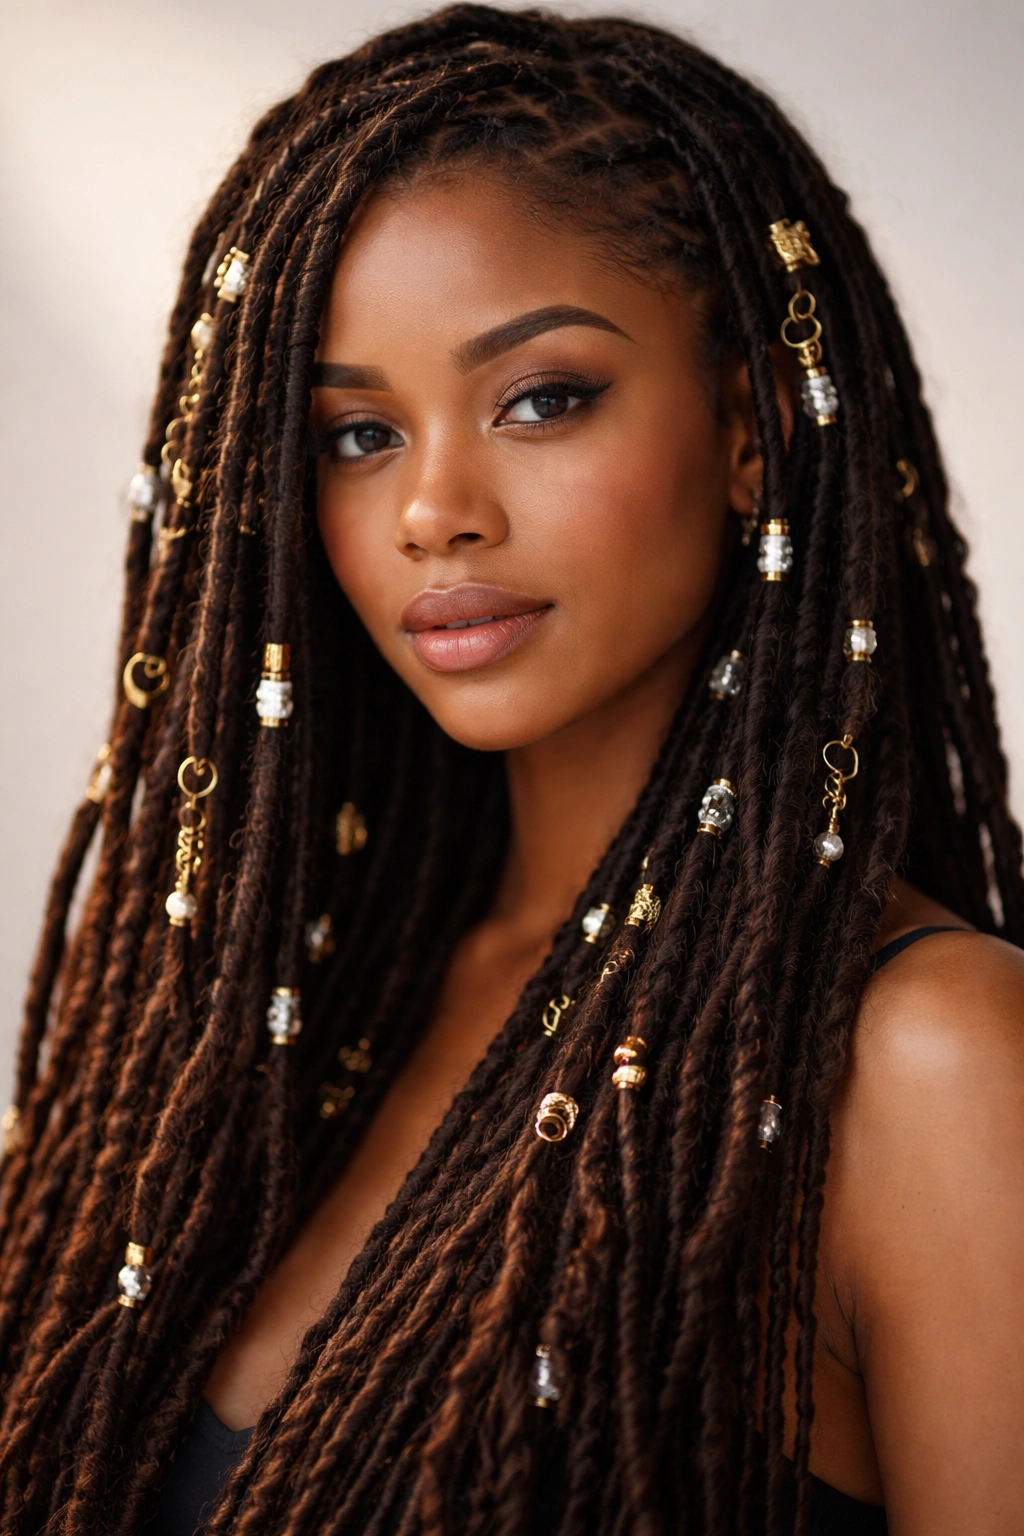
Loc cuffs, rings, and decorative beads instantly elevate your style by adding visual interest, color, and metallic shine. These accessories work beautifully on locs of any length and can be mixed and matched for completely different aesthetics. Metal cuffs feel edgy and modern, while beaded cuffs feel bohemian and artistic.
How Accessories Transform Your Look
The beauty of loc jewelry is that it’s completely non-permanent and can be changed whenever you want. You can wear metal cuffs for work and switch to colorful beads for weekend activities. Cuffs also serve a practical function — they keep loc ends tight and protected while adding visual weight and dimension to individual locs.
Methods for Adding Cuffs and Rings
- For metal cuffs: Slide the cuff up the loc from the tip toward the root, positioning it where you want it to sit
- For loc rings: Wrap the ring around a single loc or multiple stacked locs, sliding it up to your desired position
- For beaded locs: Thread beads onto locs by parting the beads’ center hole and sliding locs through it, or use a threading needle to attach beads securely
- Mix metals and colors for a eclectic, artistic look, or choose one color family for a cohesive appearance
- Layer multiple cuffs on the same loc for a more dimensional, decorated appearance
- Focus decoration on the front face-framing locs for a subtle look, or decorate throughout for a bolder statement
Pro tip: Heavier cuffs and rings look best on longer, thicker locs that can support the weight — on shorter or thinner locs, lighter, smaller accessories create a more balanced appearance.
11. Interlocked Locs
Interlocking is a maintenance technique that can also be used creatively as a styling method to create patterns and texture across your scalp. This style involves using a tool to loop locs through the roots, creating a tightened, interlocked appearance. Interlocked locs create gorgeous geometric patterns and are particularly striking when you have medium-length or longer locs.
The Aesthetic of Interlocked Patterns
When done strategically across your scalp, interlocking creates visual patterns and texture that shift the entire appearance of your locs. You can interlock every other loc to create a striped pattern, interlock in geometric shapes, or interlock the roots while leaving the rest of the locs loose. Each approach creates a completely different visual effect.
Interlocking for Styling Impact
- Using an interlocking tool (available at most beauty supply stores) or a crochet hook, insert the tool through the roots of a loc
- Loop the tip of the loc through the tool, pulling it back down through the root to create the interlocked appearance
- Repeat this process on select locs to create your desired pattern
- Interlocking for styling is less aggressive than maintenance interlocking, so use a gentle hand
- Combine interlocking with other styling methods — buns, updos, or wrapped sections — for layered visual interest
- Reinterlocked locs can be undone by gently loosening them with the tool or a fine-tooth comb
Worth knowing: Interlocking works best on locs that have been growing for at least 6-12 months and have well-established roots — newer locs may be too fragile for this technique.
12. Half Locs or Partial Loc Styles
If you’re not ready to commit to full locs or want a hybrid style, half locs (where only part of your hair is locked while the rest remains loose) offer a unique aesthetic. This style is perfect for those exploring locs or wanting a transition look. Half locs create interesting visual contrast and can be styled numerous ways.
The Appeal of Hybrid Loc Styles
Half locs let you enjoy the protective benefits and aesthetic of locs while maintaining flexibility and ease of styling. The unlocked portion can be braided, twisted, or worn loose, creating endless styling possibilities. This style is also ideal if you have mixed hair textures or want to grow out non-locked hair while locking other sections.
Creating and Styling Half Locs
- Decide which sections of your head you want to loc — typically the back or side sections work well
- Begin the locking process on your chosen sections while leaving other areas unlocked
- As your locs mature, you can style the locked sections in buns, braids, or twists
- Style the unlocked portions separately with braids, twists, or loose waves
- Combine techniques: a locked bun with loose, wavy unlocked hair creates stunning visual contrast
- Over time, decide whether to extend locking to the unlocked sections or maintain the partial style indefinitely
Pro tip: Half locs work especially well if you have fine or textured hair that needs different care approaches — the locked sections provide protection while looser sections maintain more freedom and flexibility.
13. Loc Braid-Outs
A braid-out is created by braiding damp locs and then unraveling the braids once they’re fully dry, leaving textured waves throughout your hair. Braid-outs work beautifully on medium to waist-length locs and create a voluminous, textured aesthetic that’s perfect for casual, effortless-looking days.
Why Braid-Outs Create Gorgeous Texture
When you braid damp locs and allow them to dry in that braided formation, the moisture sets the wave pattern permanently until you wash again. When you unravel the braids, you’re left with defined, textured waves that create movement and visual interest. Braid-outs also allow you to style your locs without creating new patterns or configurations — you’re simply manipulating the surface texture.
Creating a Textured Braid-Out
- Dampen your locs by misting them with water or rinsing them in the shower
- Braid your damp locs into two, three, or multiple braids, depending on how many waves you want
- Allow the braids to air-dry completely — this can take 12-24 hours depending on humidity and how thick your locs are
- For faster drying, you can use a hair dryer on low heat, but air-drying creates the best texture
- Once completely dry, gently unravel each braid by separating the locs that were braided together
- Use your fingers to fluff and separate the waves for maximum volume and texture
- Spray lightly with a light hairspray to set the waves in place
Worth knowing: The tighter you braid, the tighter the waves will be — looser braids create softer, more relaxed waves.
14. Faux Locs
Faux locs are temporary locs created using yarn, hair extensions, or crocheted hair looped through your actual hair. Faux locs offer the aesthetic of locs without the long-term commitment and work beautifully as a protective style. They come in countless colors and can be customized for different lengths and thicknesses.
Advantages of Faux Locs as a Protective Style
Faux locs protect your actual hair by keeping it enclosed within the faux loc, minimizing manipulation and exposure to the elements. They allow you to experiment with colors and lengths you might not commit to permanently. Faux locs also give your actual locs a break if you’ve been wearing them constantly, allowing them to rest and rejuvenate.
Installing Faux Locs
- Section your hair into square or rectangular boxes, depending on the thickness of faux locs you want
- Use yarn or pre-made faux loc hair looped through your hair using a crochet hook
- Insert the crochet hook through each section, grab the faux loc material, and pull it through
- Wrap the faux loc material around your actual hair, securing it at the root
- Continue wrapping down the length of your actual hair
- Burn the ends of yarn faux locs lightly with a lighter to seal the ends (be careful not to singe your hair)
- Pre-made faux locs can simply be wrapped around your hair without this step
Pro tip: Faux locs typically last 6-8 weeks before they become loose or matted — plan installation accordingly, especially before special events.
15. Spiral Locs
Spiral locs are locs that have been twisted into a tight spiral pattern from root to tip, creating a coiled, rope-like appearance. Spiral locs work beautifully at any length and create stunning visual interest. They can be achieved during the locking process or added as a styling technique to established locs.
The Visual Drama of Spiral Locs
Spiral locs create a dimensional, artistic appearance that’s more eye-catching than straight locs. The spiral pattern catches light differently, creating movement and energy even when worn down. Spirals also tend to make locs appear fuller and denser because of the coiled pattern.
Creating Spirals in Your Locs
- Start with damp or slightly damp locs that are brushed and tangle-free
- Using a spiral tool (available at beauty supply stores) or by hand, twist a loc into a tight spiral from root to tip
- Continue spiraling the entire length of the loc, maintaining consistent tension
- Secure the spiraled loc at the end with a small elastic band or wrapped thread
- Repeat on all locs or select accent locs for a partial spiral effect
- Spray lightly with a light hairspray to set the spirals
- Sleep with spiraled locs in a pineapple style (gathered at the top of your head) to prevent them from loosening overnight
Worth knowing: Spirals look best when maintained regularly — every 2-3 weeks, you may need to re-spiral locs that have begun to loosen as your hair grows and moves.
16. Sisterlocks
Sisterlocks are a specialized form of dreadlocks that are much thinner and smaller than traditional locs, created using a specific interlocking method. While not technically a “style” of locs, sisterlocks offer unique styling possibilities because of their small size and delicate appearance. Sisterlocks can be worn loose, braided, twisted, or styled in countless creative ways.
Advantages of Smaller Sisterlocks
Because sisterlocks are so much thinner than traditional locs, they offer incredible styling versatility. You can braid them into intricate patterns, wrap them individually without creating too much weight, style them in detailed updos, or wear them in flowing waves. Sisterlocks also look different on the scalp — they create a smoother, more refined aesthetic while still offering loc benefits.
Styling Sisterlocks Uniquely
- Sisterlock braids can be created by braiding 3-5 sisterlocks together for a delicate, detailed braided appearance
- Twisted sisterlocks create rope-like sections by spiraling the locks around each other
- Wrapped sisterlocks look particularly detailed because the thin locks take on the pattern of the wrap more distinctly
- Updos with sisterlocks are highly detailed and can showcase intricate patterns and designs
- Half-up styles with sisterlocks appear more delicate and intricate than with standard locs
- Braiding sisterlocks is easier and faster than braiding thicker locks
Pro tip: Installing or maintaining sisterlocks requires professional expertise — these specialized locs should be created by a trained sisterlock consultant rather than attempted at home.
17. Goddess Locs
Goddess locs are thicker, more loosely textured locs that often incorporate crocheted hair or extensions, creating a bohemian, flowing aesthetic. They’re larger than traditional locs and often have a more relaxed, slightly curled appearance. Goddess locs work beautifully as a protective style and offer a different visual vibe than tighter, more structured locs.
The Aesthetic Appeal of Goddess Locs
Goddess locs have a softer, more romantic appearance than traditional locs because of their looser texture and larger size. They move and flow beautifully when worn down, creating an effortless, bohemian aesthetic. The size of goddess locs also means styling them requires less manipulation — they’re easier to gather into buns or ponytails because fewer locs need to be handled.
Creating and Styling Goddess Locs
- Goddess locs can be installed by a professional using your hair mixed with extensions or crocheted hair
- If DIY installing, use a crochet hook to loop pre-made braids or extensions through your hair, similar to faux locs
- Wrap the crocheted material loosely around your hair to create the looser texture
- Style goddess locs in high or low buns, ponytails, side sweeps, or half-up styles for maximum impact
- The looser texture means braids and twists work particularly well, creating flowing, romantic details
- Goddess locs typically last 6-8 weeks before loosening and requiring reinstallation
Worth knowing: Goddess locs are heavier than traditional locs because of the added hair and material — they work best on healthy, strong hair that can support the weight.
18. Ombre and Colored Locs
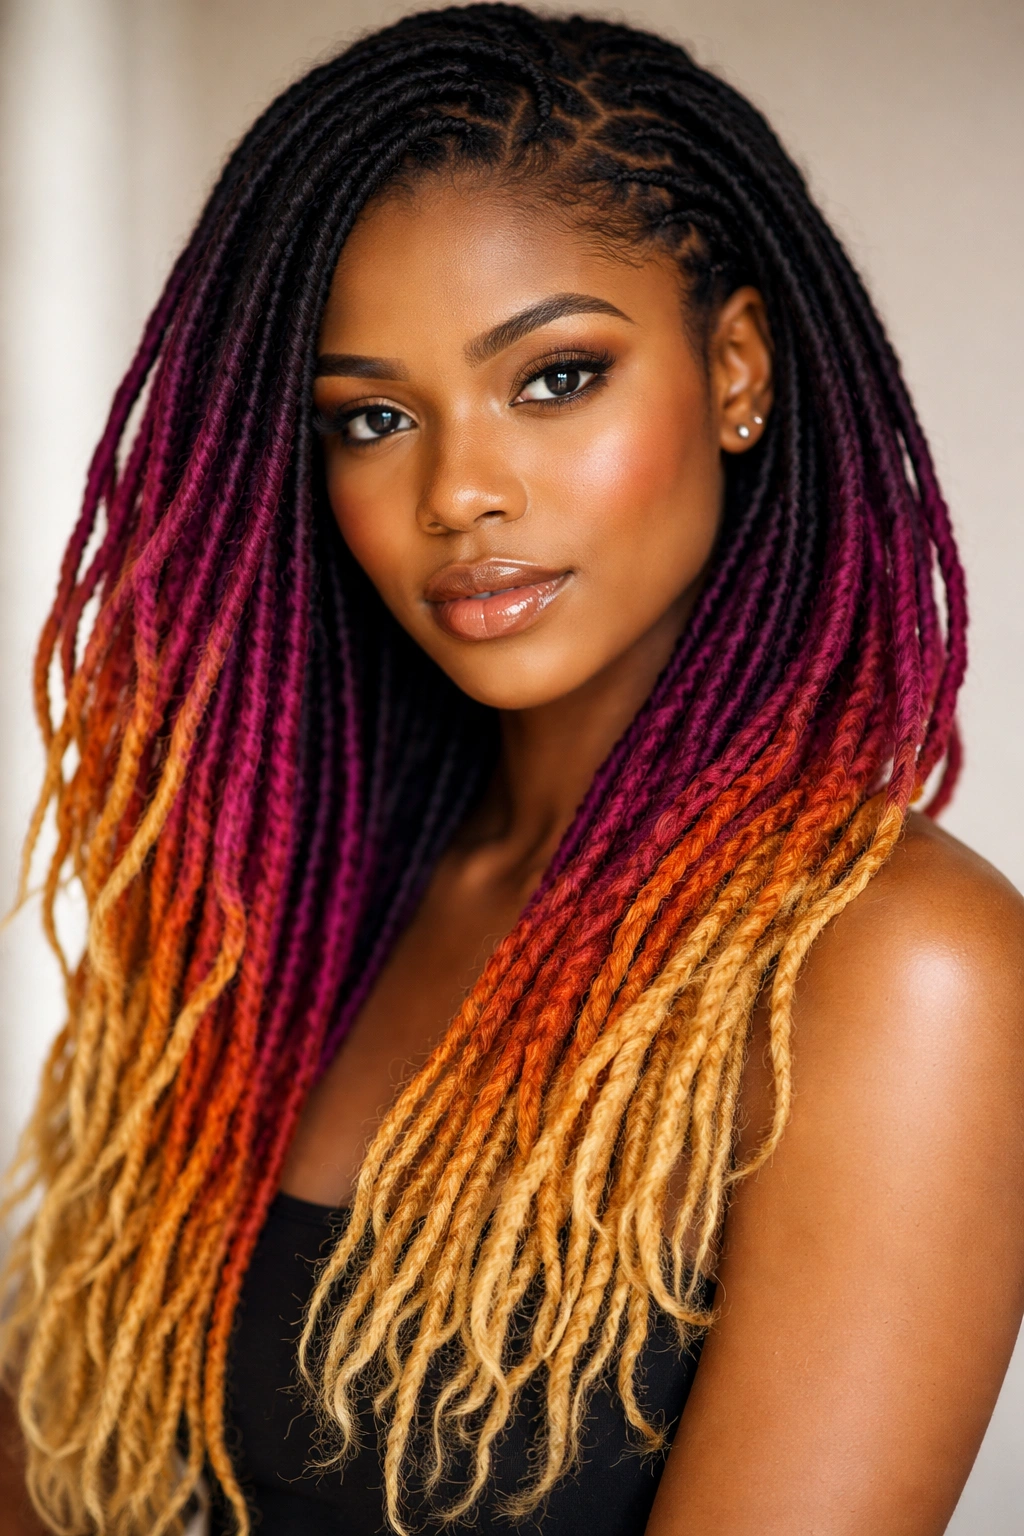
Coloring your locs with permanent dyes, temporary dyes, yarn wrapping, or pre-dyed extensions allows you to add creative color without changing your natural hair permanently. Ombre locs (darker at roots, lighter at tips) are particularly striking and work beautifully at any length. Colored locs offer endless creative possibilities.
Creative Color Approaches
You can dye all your locs one color for a bold statement, create an ombre effect, use multiple colors for a rainbow effect, or add color only to accent locs for a subtle pop. Colors can be applied to new locs during the growing process, added to established locs through direct dyeing or yarn wrapping, or incorporated through pre-dyed extension hair in goddess locs or faux locs.
Methods for Adding Color to Locs
- For permanent color: Mix dye according to package directions and apply to dampened locs with a brush, ensuring even saturation
- For temporary color: Apply semi-permanent dyes, which rinse out gradually, allowing for color changes without permanent commitment
- For yarn wrapping: Use colored yarn to wrap around specific locs or sections, creating color without dyeing your actual hair
- For extension-based locs: Choose pre-dyed extensions in your desired colors during installation
- For ombre effect: Apply darker color to roots and gradually lighten toward tips by using less product or lighter shades
- Protect your scalp with petroleum jelly along your hairline before applying dye to locs
Pro tip: Lighter-colored locs show texture and dimension more clearly, while darker colors can sometimes make locs appear flatter — consider this when choosing colors.
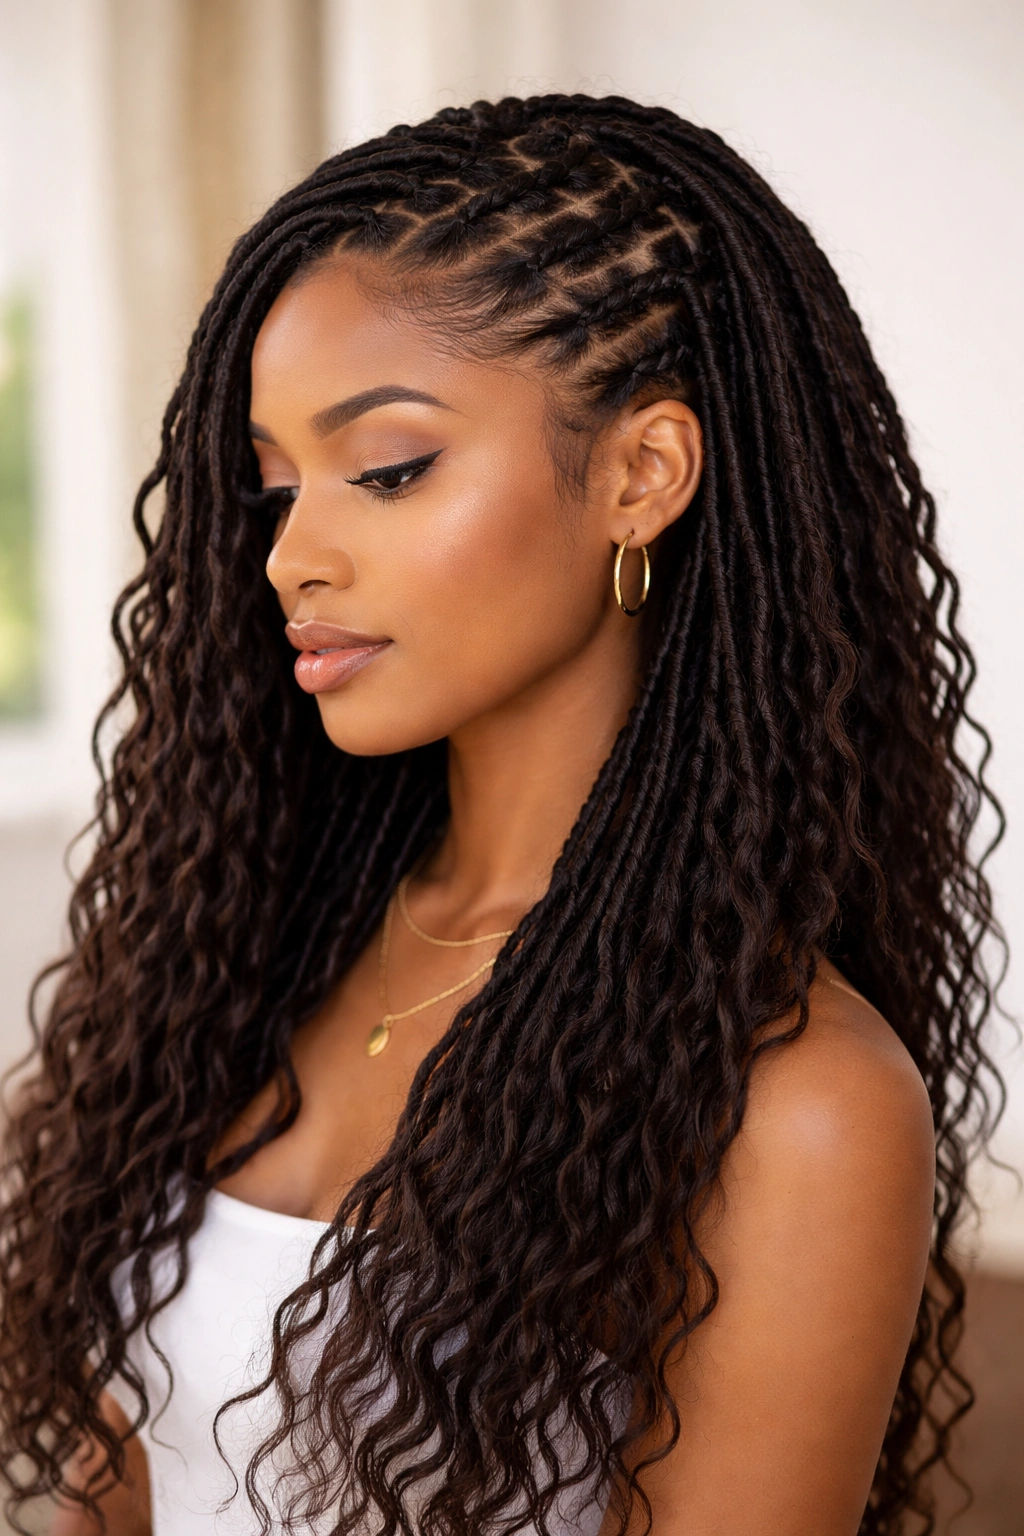
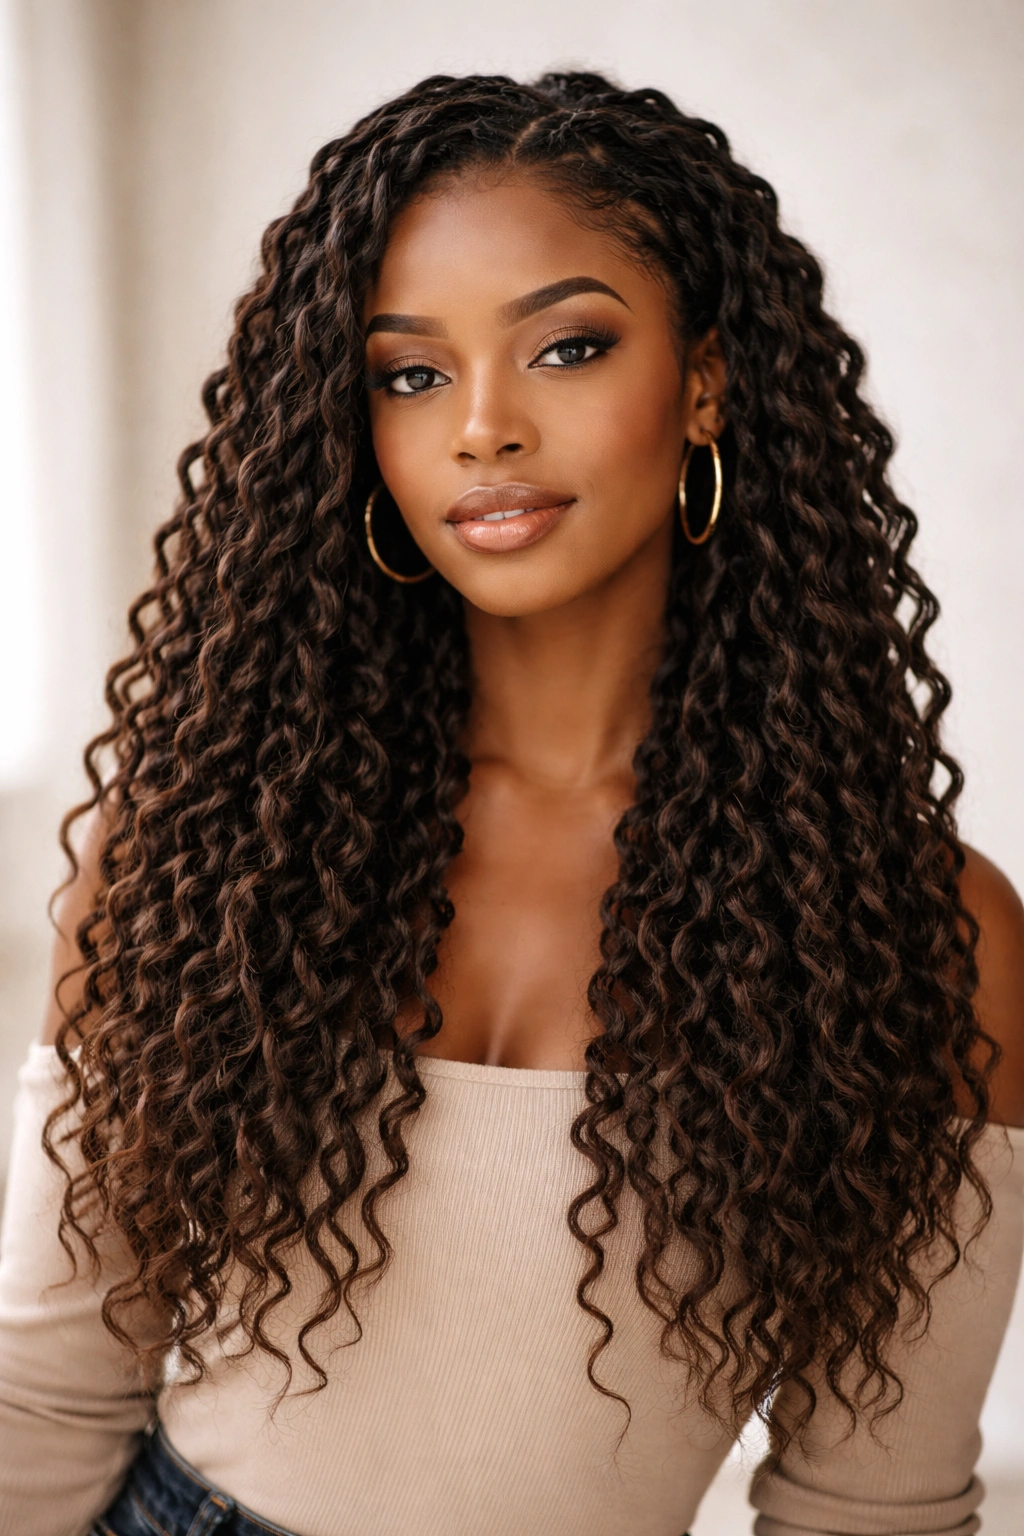
19. Wavy and Textured Locs
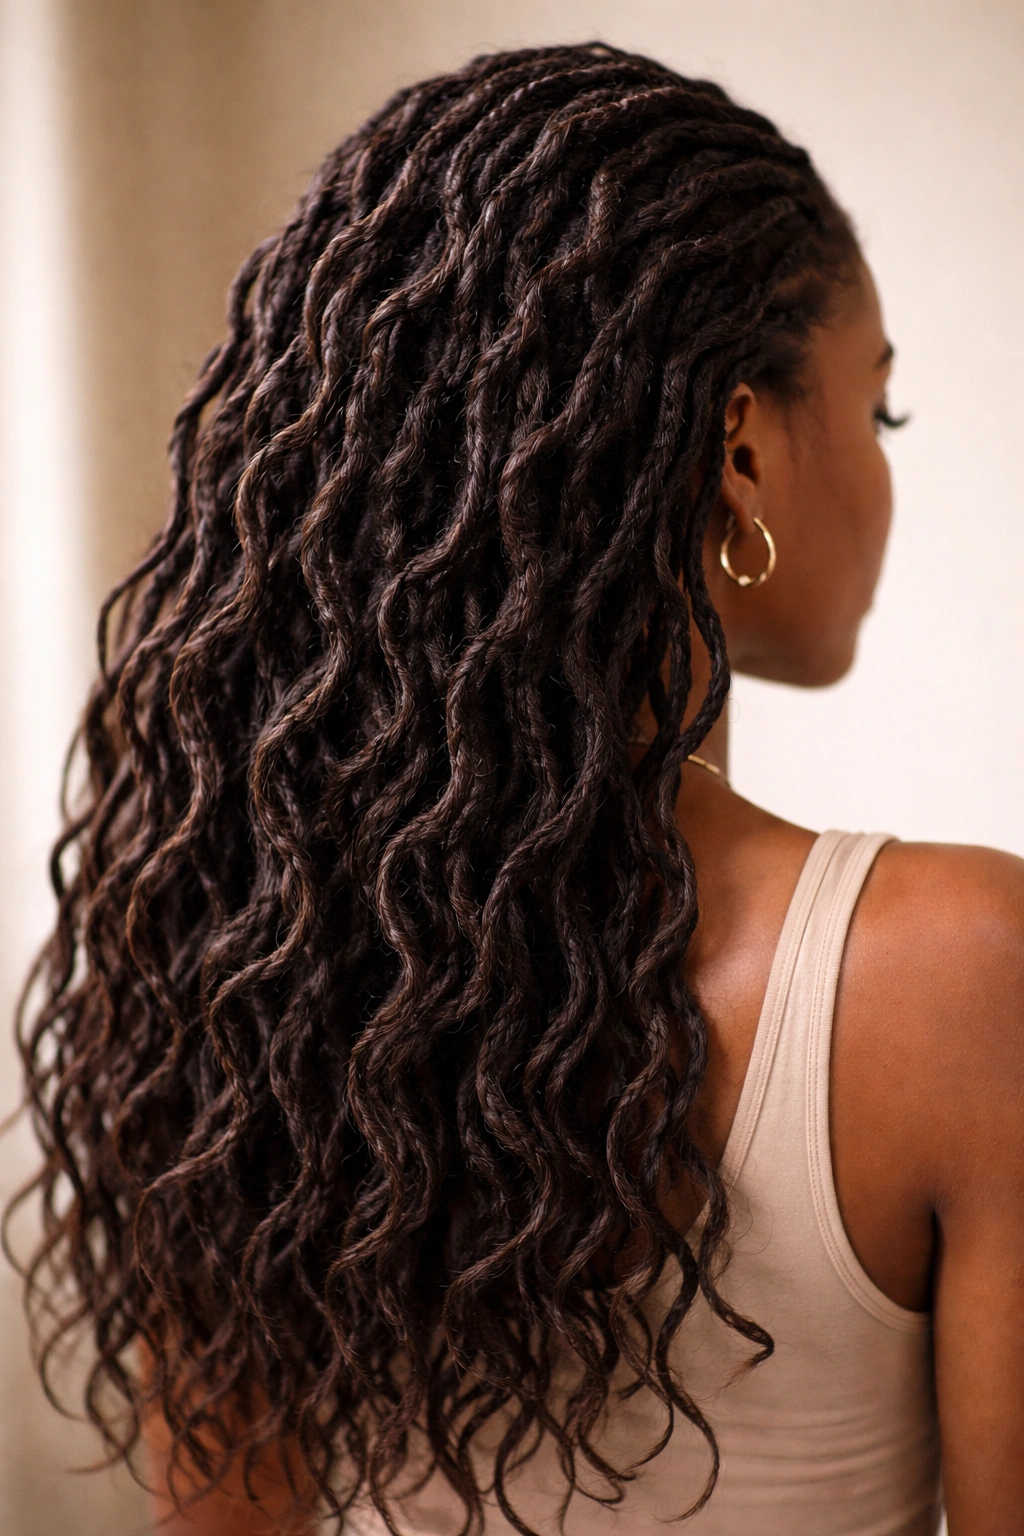
Creating waves or adding extra texture to your locs through braiding, twisting, or using texture tools creates a completely different aesthetic from straight locs. Wavy locs work beautifully at any length and offer movement and visual interest. This style is ideal when you want your locs to feel softer and more flowing.
Different Ways to Create Waves in Locs
Two-strand twist-outs create defined waves, braid-outs create loose waves, or you can use a waver tool to create uniform, structured waves. Some people create waves on the entire head for maximum movement, while others prefer accent waves that highlight specific sections. Waves can be temporary (created through dampening and braiding, lasting until the next wash) or semi-permanent (created through heat styling).
Achieving Wavy Locs
- Dampen your locs thoroughly using water, a spray bottle, or by rinsing them in the shower
- Braid or twist your locs while damp, then allow them to air-dry completely (12-24 hours)
- Unravel the braids or twists gently to reveal waves throughout your locs
- For defined waves that last longer, you can use a curling wand or waver tool on low heat (be cautious with heat on locs)
- Sleep with your locs loose or in a loose pineapple to maintain wave patterns overnight
- Refresh waves by spritzing with water and allowing them to air-dry daily
Worth knowing: Wavy locs feel softer and flow more dramatically than straight locs, making them ideal when you want a more feminine or romantic aesthetic.
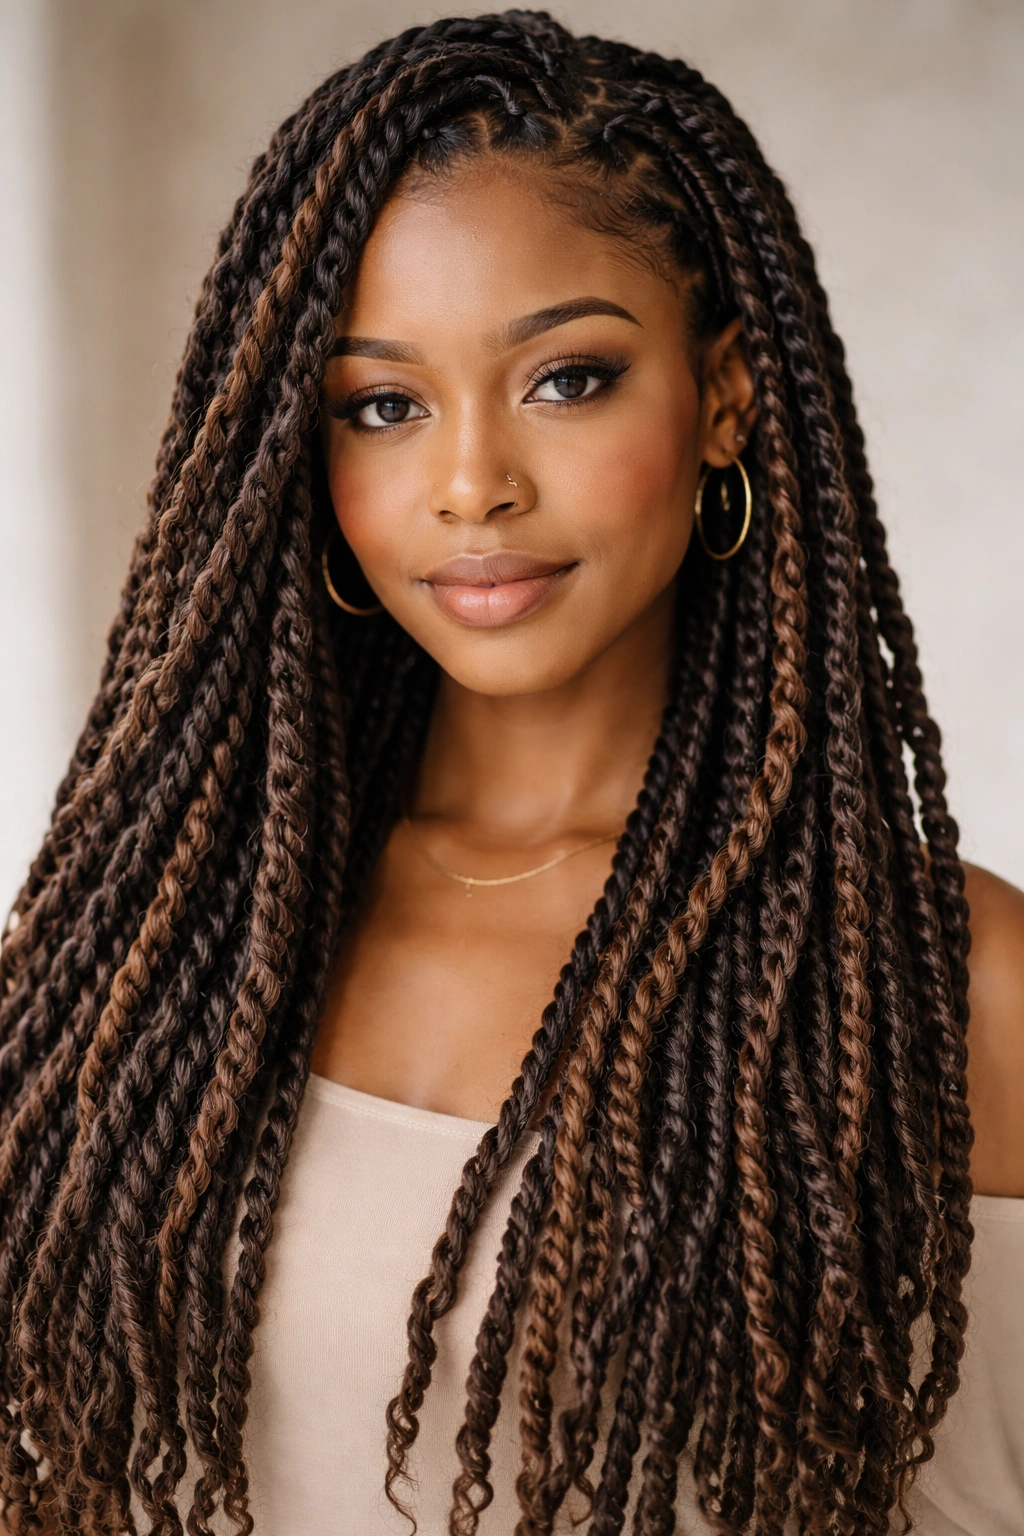
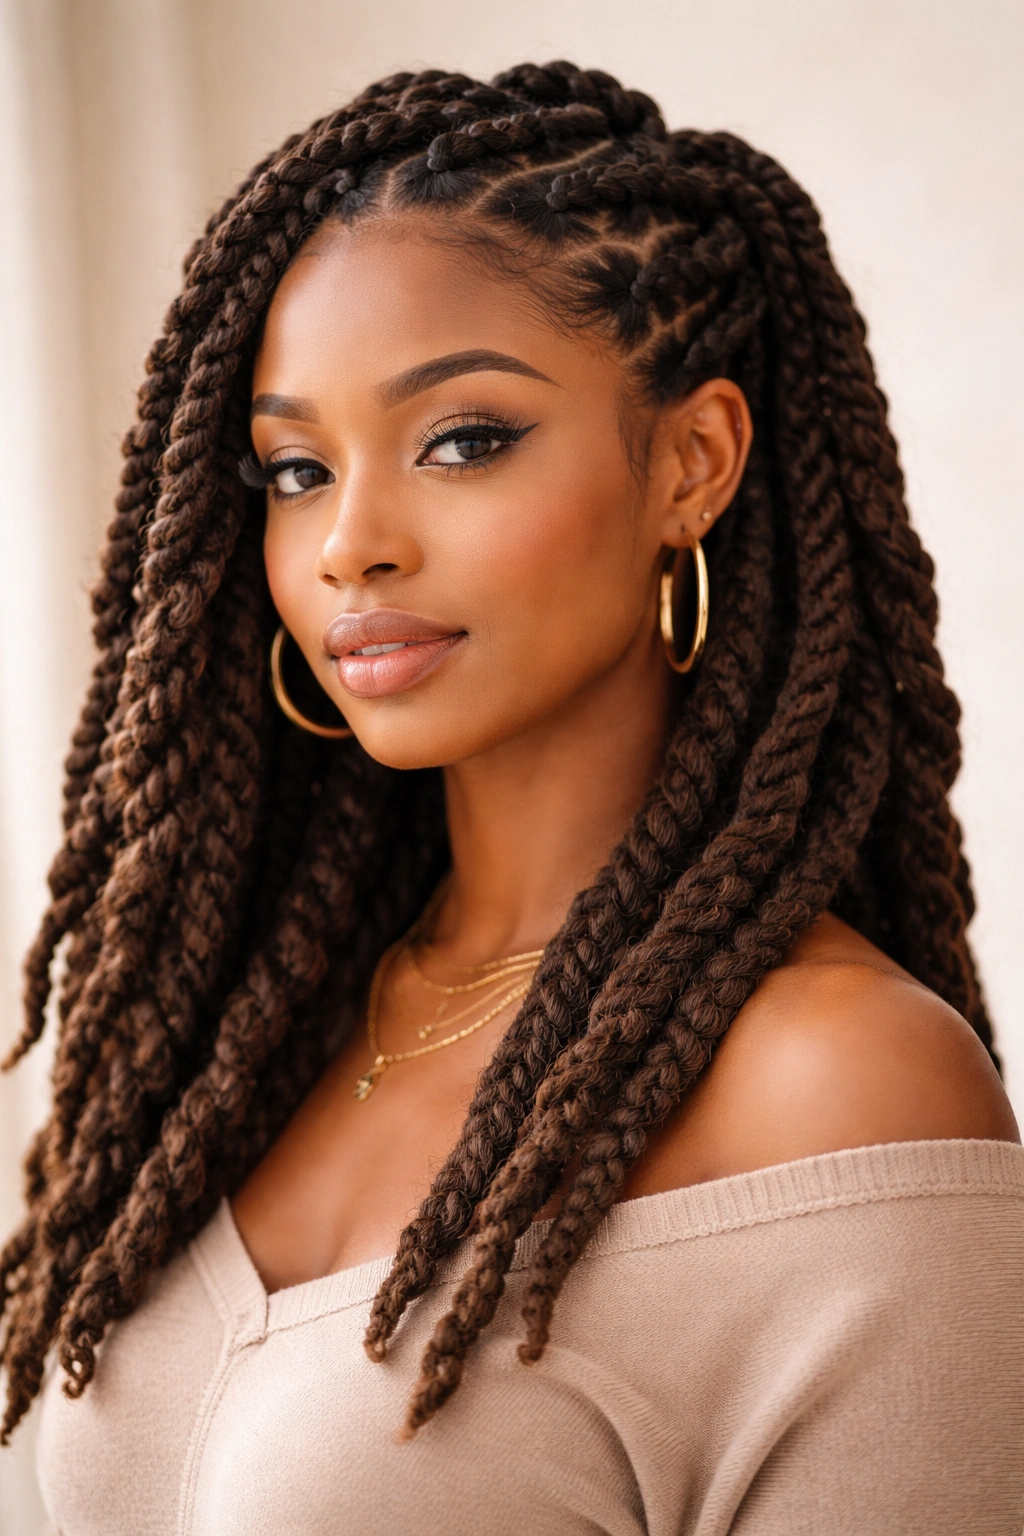
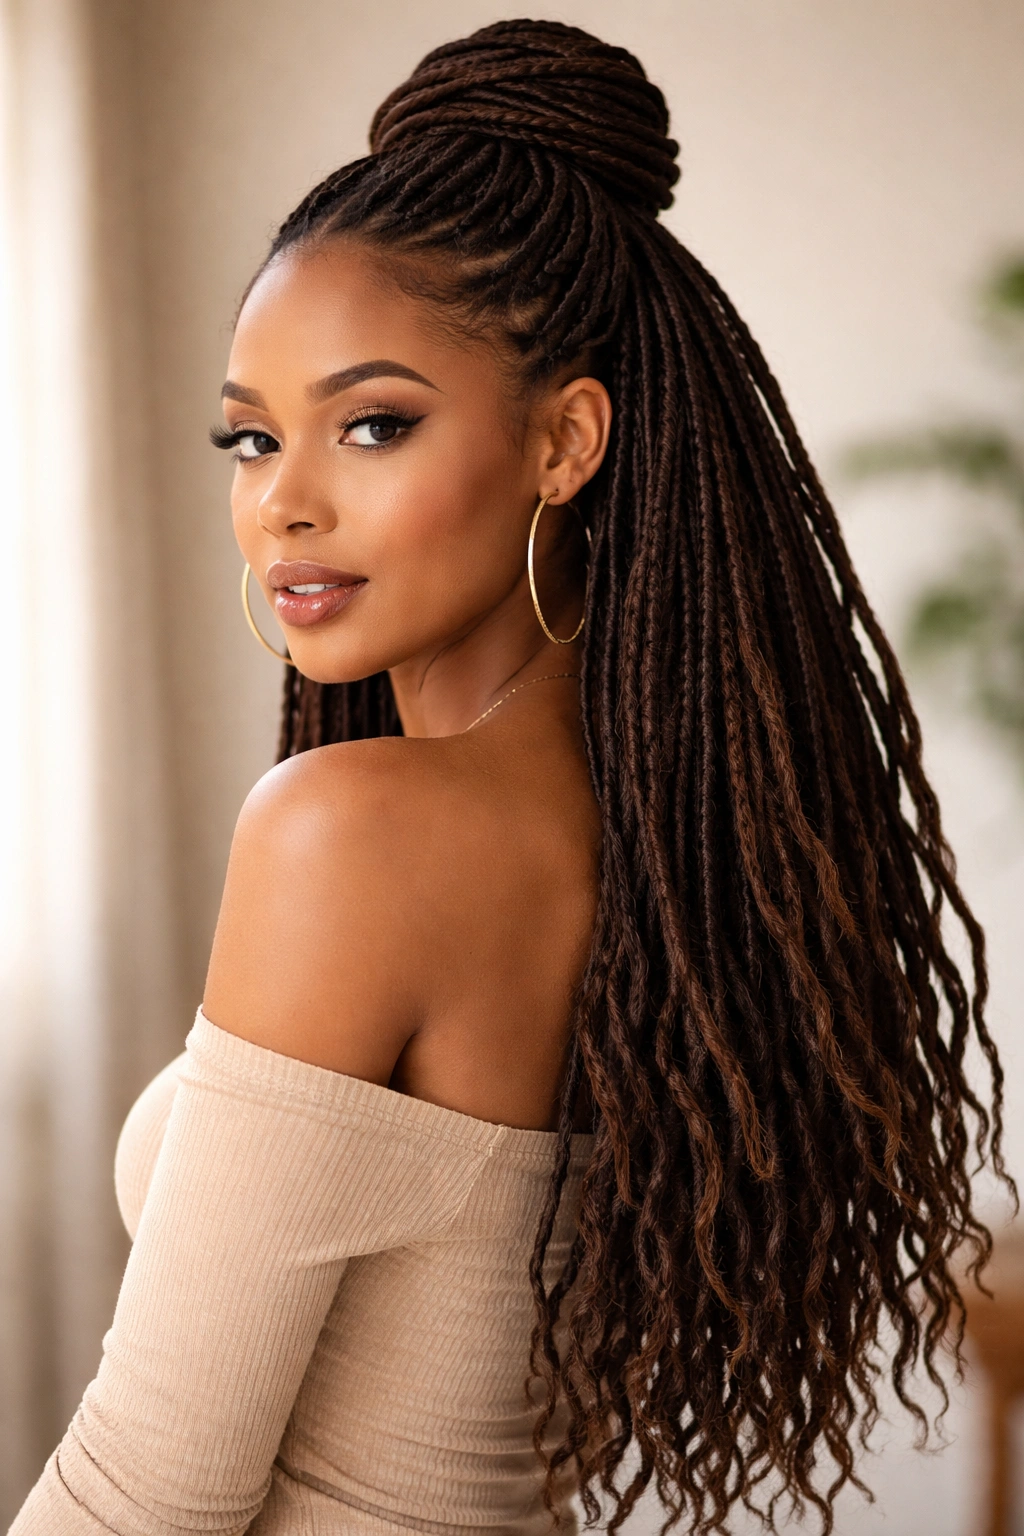
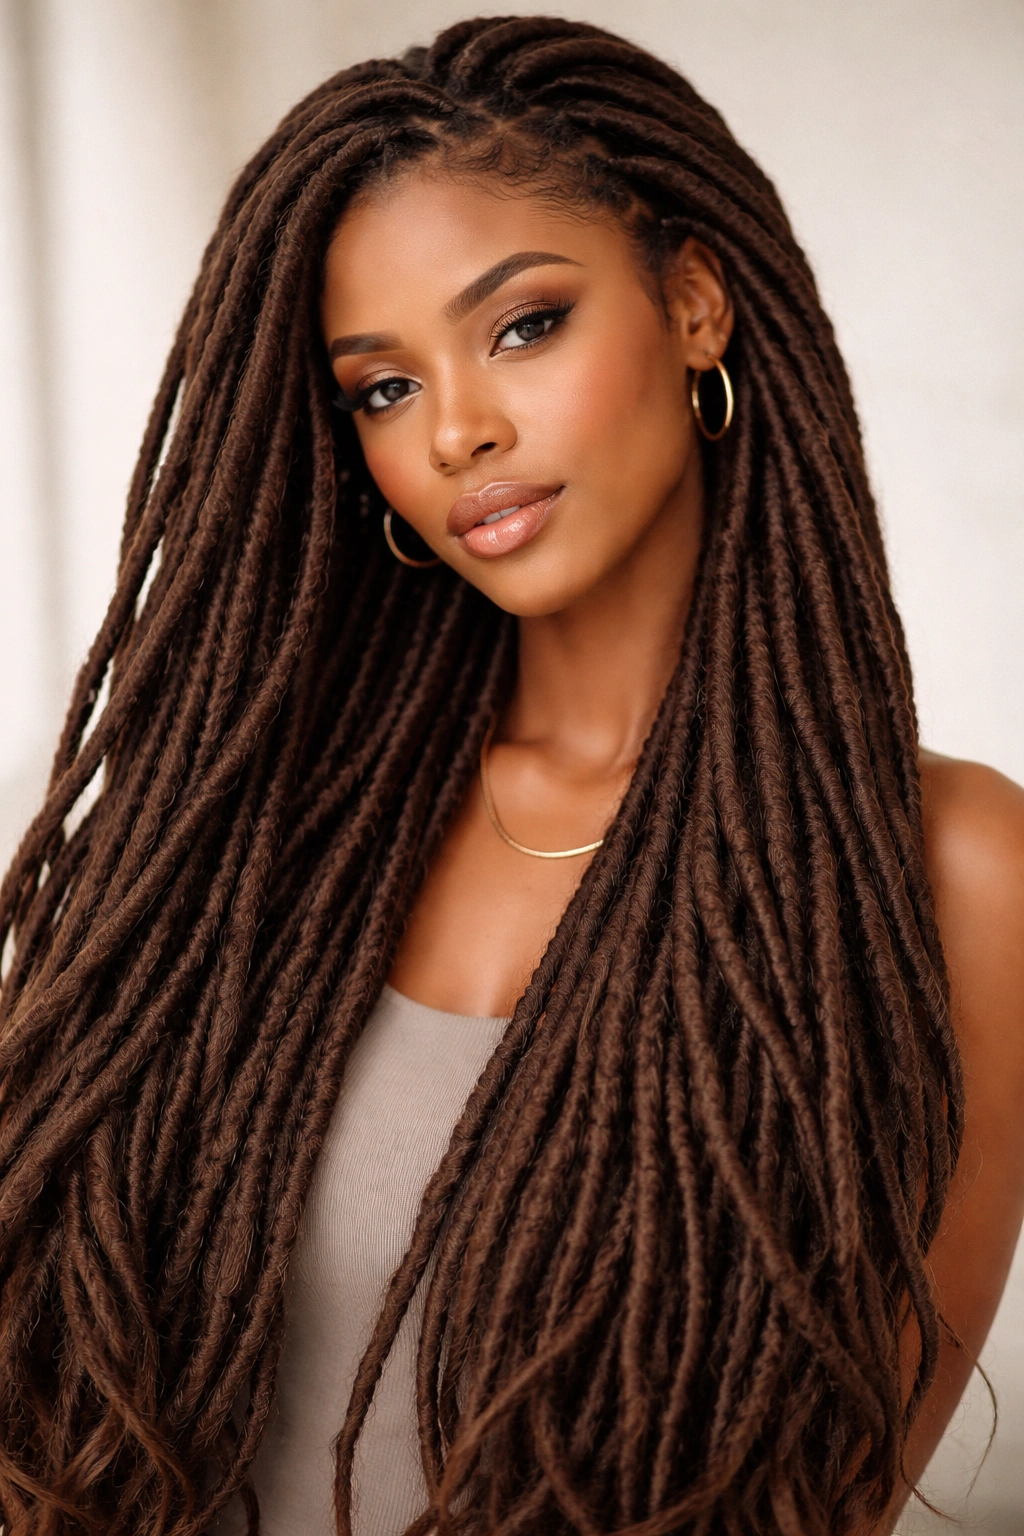
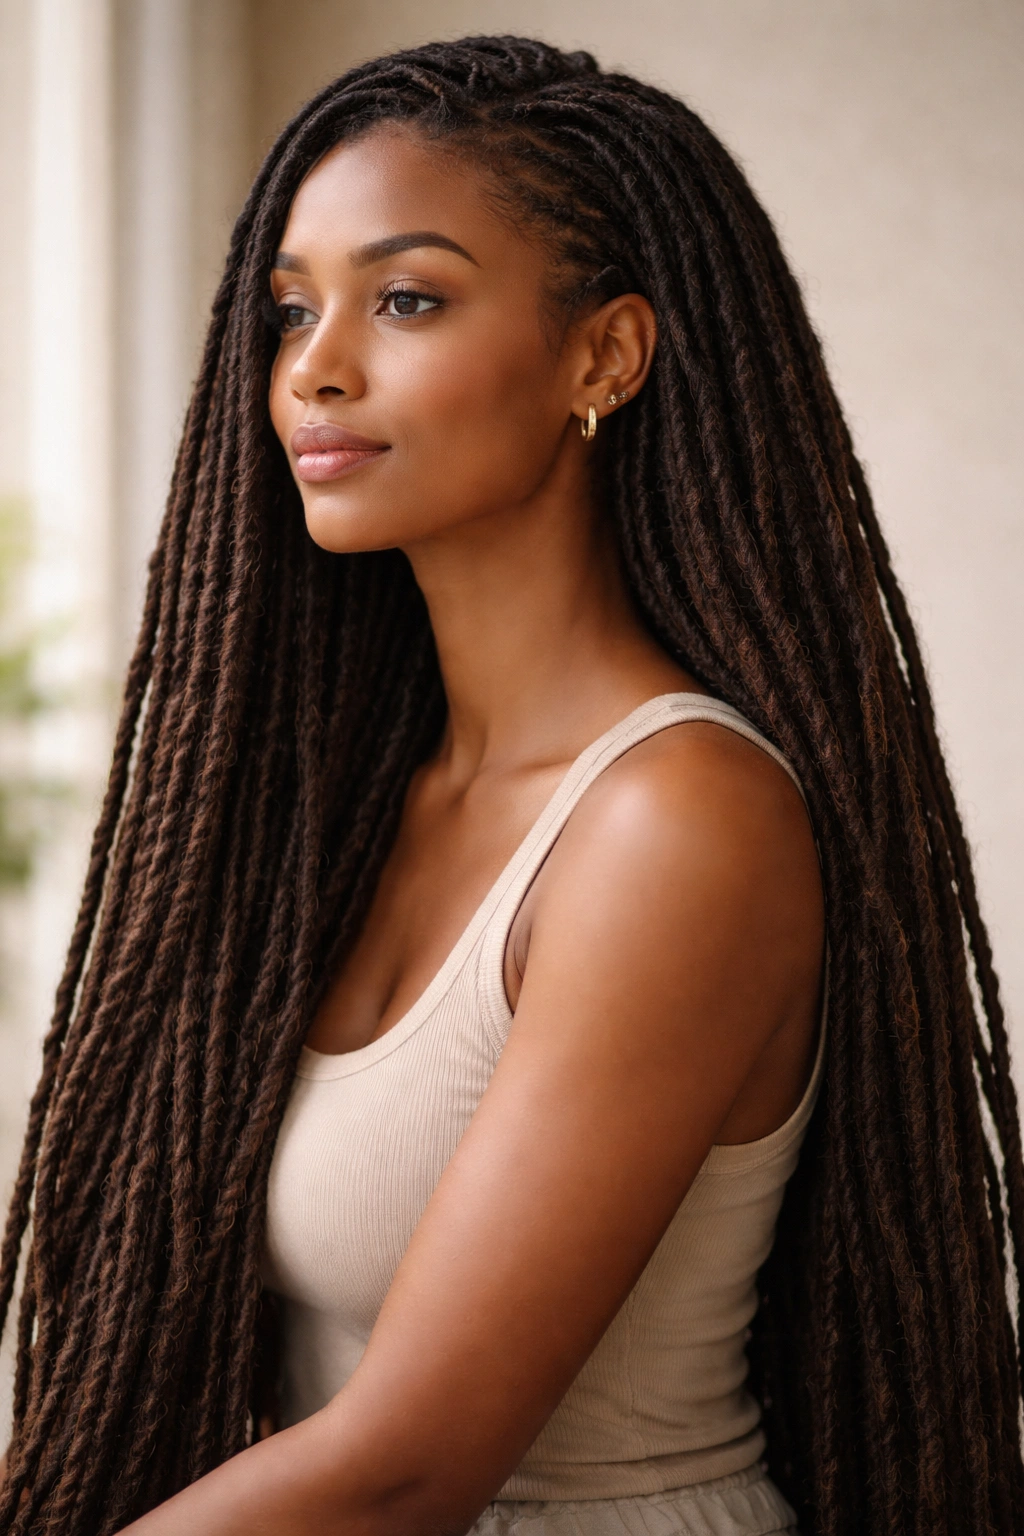
20. Waist-Length Statement Locs
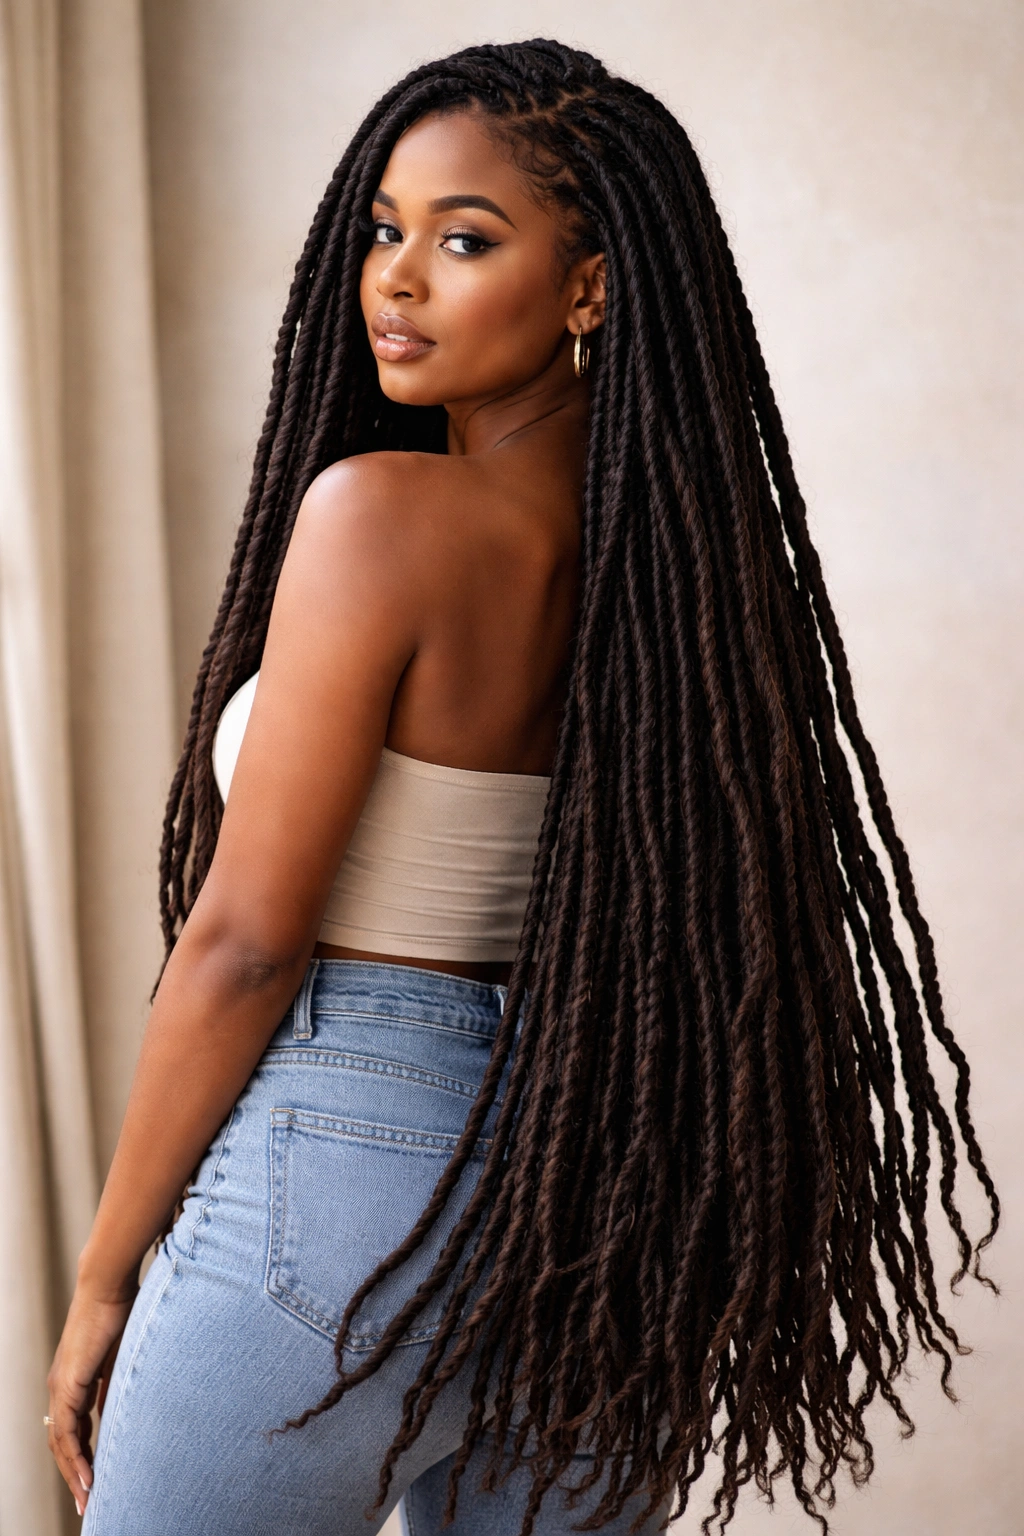
Growing your locs to waist-length is a journey that requires patience and consistency, but the result is a stunning, statement-making style. Waist-length locs can be worn in countless ways — down and flowing for maximum drama, in elaborate updos, in thick braids, or styled with every creative technique available. This length offers the ultimate versatility and visual impact.
The Transformation of Growing to Waist Length
Growing locs to waist length is a commitment that can take 3-5+ years depending on starting length and your individual growth rate. The journey is part of the beauty — you’re building a connection to your hair and a practice of consistent care and maintenance. Once at waist length, your locs become a serious style statement that turns heads whenever you walk into a room.
Styling and Caring for Waist-Length Locs
- Wear waist-length locs down whenever possible to showcase the full length and impact
- Create braids with multiple thick locs intertwined — these are truly statement pieces
- Style elaborate updos incorporating braids, twists, and coils at the crown or back of your head
- Use decorative cuffs, beads, and wrappings throughout to add color and visual interest
- Protect the ends of your long locs by keeping them wrapped or covered when sleeping or exercising
- Maintain consistent moisture to keep long locs healthy — they dry out more quickly because moisture has to travel the entire length
- Deep condition regularly (weekly or bi-weekly) to keep all strands hydrated and strong
- Trim or loc seal the very ends every 3-4 months to prevent split ends and keep tips tight
Pro tip: Waist-length locs require serious commitment to maintenance and protection — invest in a silk or satin pillowcase, protective sleep wrapping, and consistent conditioning to keep them healthy and beautiful.
Final Thoughts
The journey through these 20 loc styles reveals the incredible versatility available at every length. Whether you’re sporting short, finger-sized locs that can be twisted and gathered, shoulder-length locs that showcase braids and updos beautifully, or waist-length statement locs that move and flow dramatically, your styling options are genuinely limitless. The style you choose should reflect not only your aesthetic preferences but also your lifestyle and your locs’ current health and maturity.
What makes loc styling so empowering is that you’re not limited by length — you’re actually enabled by it. Short locs create clean, sculptural styles that are effortless to maintain. Medium locs offer the sweet spot where braiding, twisting, and elaborate updos become possible without the weight and maintenance demands of very long locs. Long locs give you the dramatic visual impact and flowing movement that makes heads turn.
Remember that healthy locs are the foundation of every style. No matter which of these 20 styles you choose, prioritize consistent moisture, protective styling that doesn’t create tension at the roots, regular maintenance if you’re interlocking or retwisting, and gentle handling throughout your styling process. Your locs are an investment — treat them accordingly, and they’ll support every creative style you dream up for months and years to come.