Side parted braids have become a signature style for Black women, offering endless possibilities for creativity, sophistication, and self-expression. The beauty of this look lies in how it transforms a simple two-braid style into something uniquely yours—whether you’re going for bold and dramatic, soft and romantic, or sleek and polished. The side part itself creates an asymmetrical balance that flatters virtually every face shape, while the braids add texture, movement, and a timeless elegance that works for casual hangouts, professional settings, or special occasions.
What makes the side part two-braid combination so powerful is the versatility. You can wear these braids hanging loose down your back, pinned up into an elaborate updo, wrapped around your head like a crown, or styled with extensions that add volume and dramatic length. The braids frame your face beautifully when worn to the side, and they protect your hair while looking absolutely stunning at the same time. Whether you’re working with your natural texture, adding extensions, or incorporating beads, metallic thread, or other embellishments, this style adapts to your vision.
The side part also has an undeniable sophistication that center parts sometimes miss. It creates visual interest and draws attention to one side of your face, making it an excellent choice if you want to highlight your cheekbones, showcase your ears, or simply change up your everyday look. Black women have elevated this style in countless ways over the years, creating looks that range from minimalist and understated to ornate and jaw-dropping.
If you’re looking for inspiration—whether you’re planning your next protective style, searching for a look that feels both fresh and timeless, or wanting to try something you haven’t done before—these ten side part two-braid styles showcase why this combination has become such a beloved staple in Black beauty culture.
1. Classic Sleek Side Part Dutch Braids
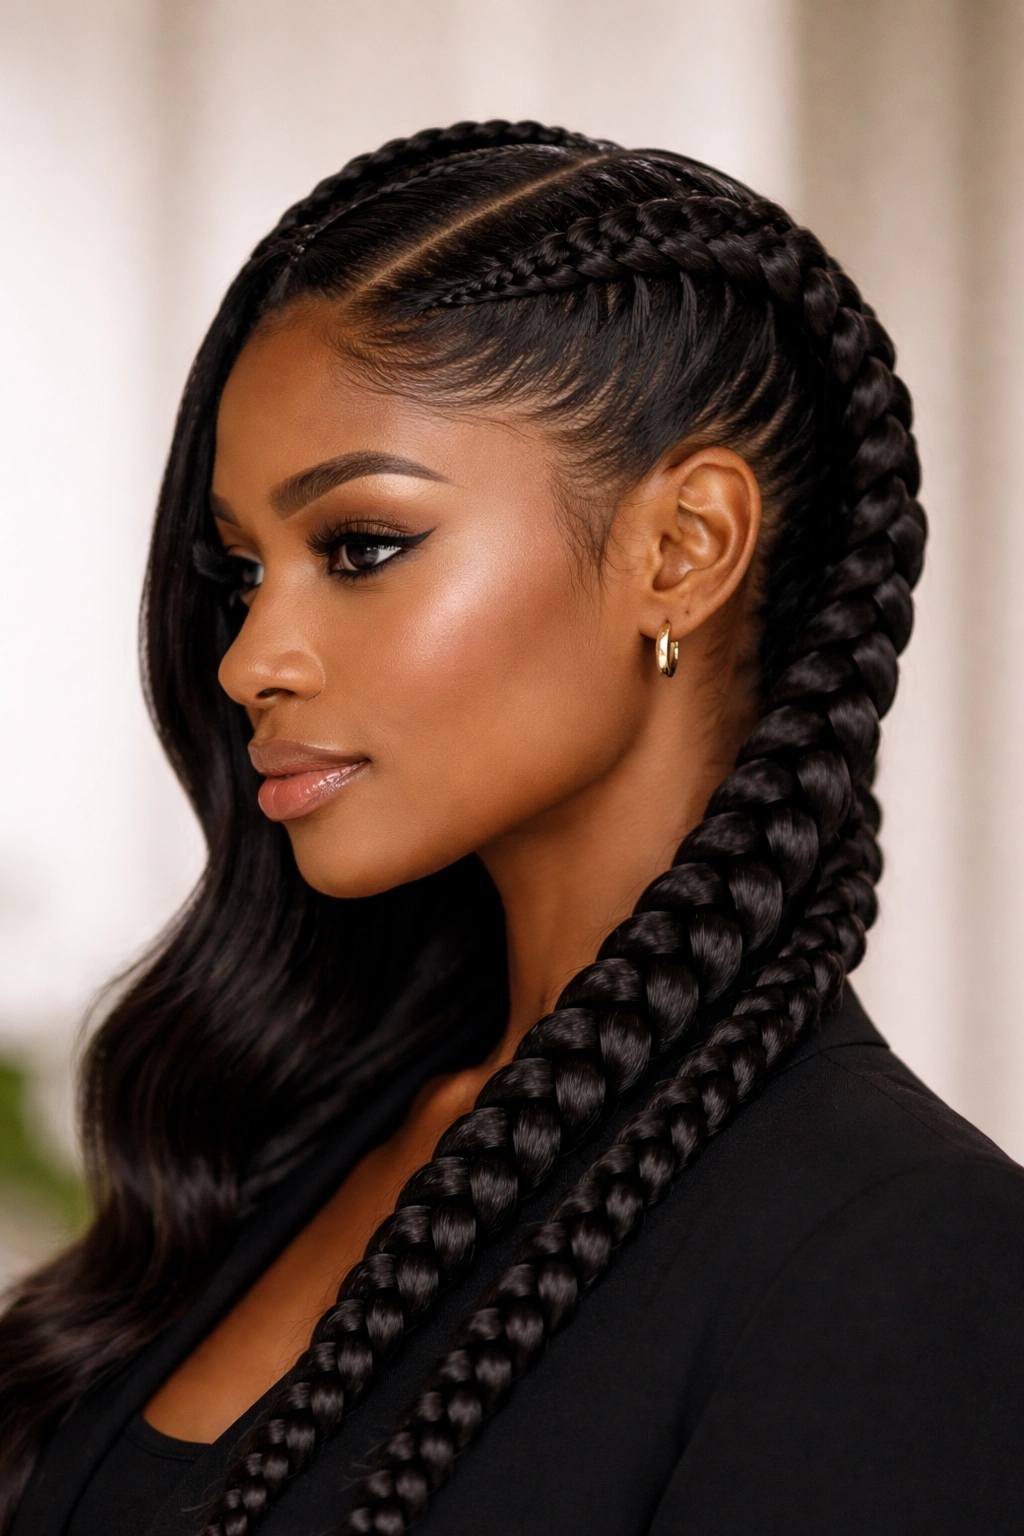
This is the refined, polished cousin of the casual side braid. Dutch braids (also called inside-out braids) sit raised on the scalp and create beautiful geometric dimension that’s perfect when you want a look that’s professional and put-together. Starting from a dramatic side part, each braid runs parallel down the back, creating symmetry that draws the eye down your spine and emphasizes hair health and shine.
Why This Style Commands Attention
Dutch braids created from a side part have a sculpted quality that makes them look intentional and high-effort—even though the actual styling might take less time than you’d think. The raised texture catches light beautifully, and because the braids sit lifted away from your scalp, they feel lighter and more comfortable than rope braids or box braids. This style also keeps hair off your neck and face while looking thoroughly polished, making it perfect for work environments, formal events, or situations where you want to feel completely put-together.
The side part Dutch braid look works particularly well on medium to longer hair lengths and scales beautifully whether your braids are thick statement pieces or delicate and intricate. When you choose very sleek, tightly woven Dutch braids from a deep side part, you’re creating a look with serious architectural precision.
Making It Your Own
- Start with a deep, clean side part using a fine-tooth comb to create a sharp line from your temples to the nape of your neck
- Section your hair carefully into two equal sections, using clips to keep one side controlled while you work on the other
- Add a light-hold styling cream or gel before braiding to tame flyaways and make the braids glide smoothly; sleek styles depend on clean edge work
- Keep tension consistent throughout the braiding process so both braids match in tightness and visual weight
- Finish with a lightweight, shiny edge control around the hairline to frame the side part with polish and definition
Pro tip: For maximum shine and sleekness on Dutch braids, apply a tiny amount of oil or gel to your fingertips between braiding sessions to smooth any bumps or frizz as you work.
2. Playful Feed-In Side Braids with Loose Curls
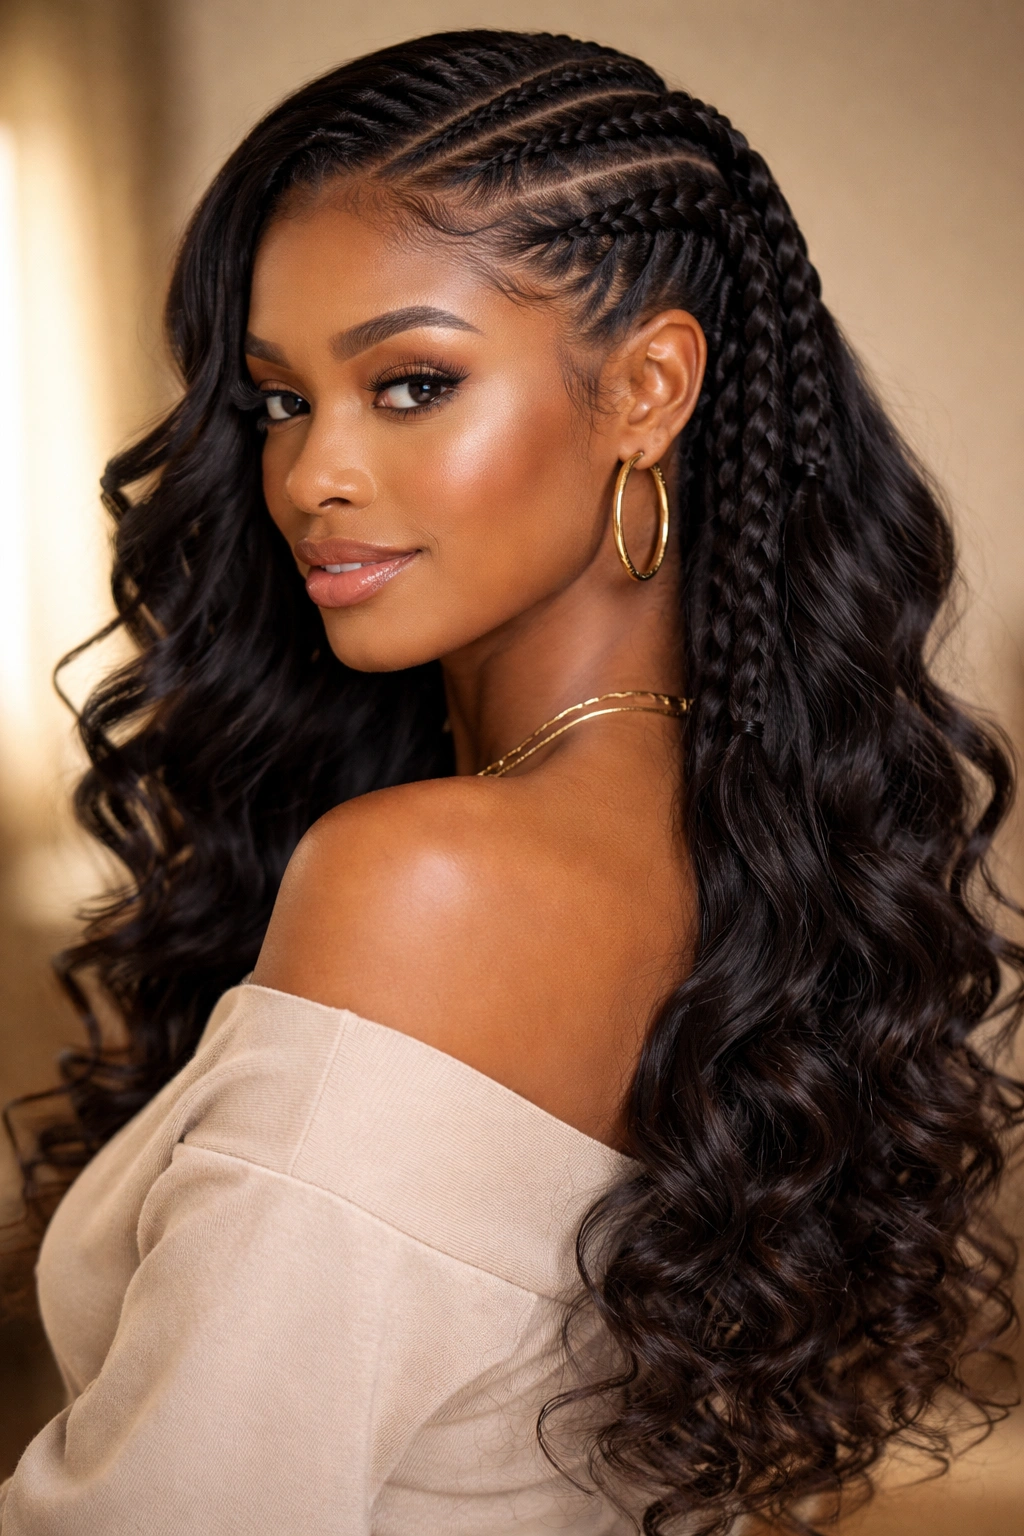
Feed-in braids are the more modern, textured cousin of traditional braids—they start small at the roots and gradually grow thicker as you feed hair into the braid as you go. When you create two feed-in braids from a side part and let them flow down your back, then release the ends into loose, bouncy curls, you get a style that’s romantic, playful, and absolutely gorgeous. This look balances structure with softness, offering something that feels both intentional and effortless.
The Appeal of Fed-In Detail
Feed-in braids are technically a bit more time-intensive than standard braids because you’re adding hair section by section, but the result is a thinner braid at the roots that gradually thickens toward the ends. This creates beautiful visual flow and makes the style feel lighter and more blended into your natural hair. When you release the bottom third or half of the braid into curls, you create movement and dimension that catches the eye. The side part emphasizes the contrast between the structured braid and the soft, curly ends beautifully.
This style flatters textured hair especially well because it celebrates your natural curl pattern while giving you the protective benefits and sleek appearance of braids. The feed-in technique also feels less heavy on the scalp than traditional braids with extensions running the full length.
Getting the Look Right
- Create very thin feed-in sections at your roots to make the style feel delicate and blended
- Feed in small sections of hair as you braid downward, spacing them evenly so the braid thickens gradually
- Wrap the last few inches of each braid with a small elastic or thread before releasing into curls
- Unravel the braids below the elastic using your fingers for a loose, textured curl rather than pulling the hair straight
- Mist with a curl-defining spray to set the curls and add shine; humidity-controlling products help the look last longer
Worth knowing: Feed-in braids can feel tender or even slightly tight for the first day or two, but this is completely normal—your scalp adjusts, and the style loosens up slightly once your hair settles.
3. Side Part Braids with Beaded Extensions
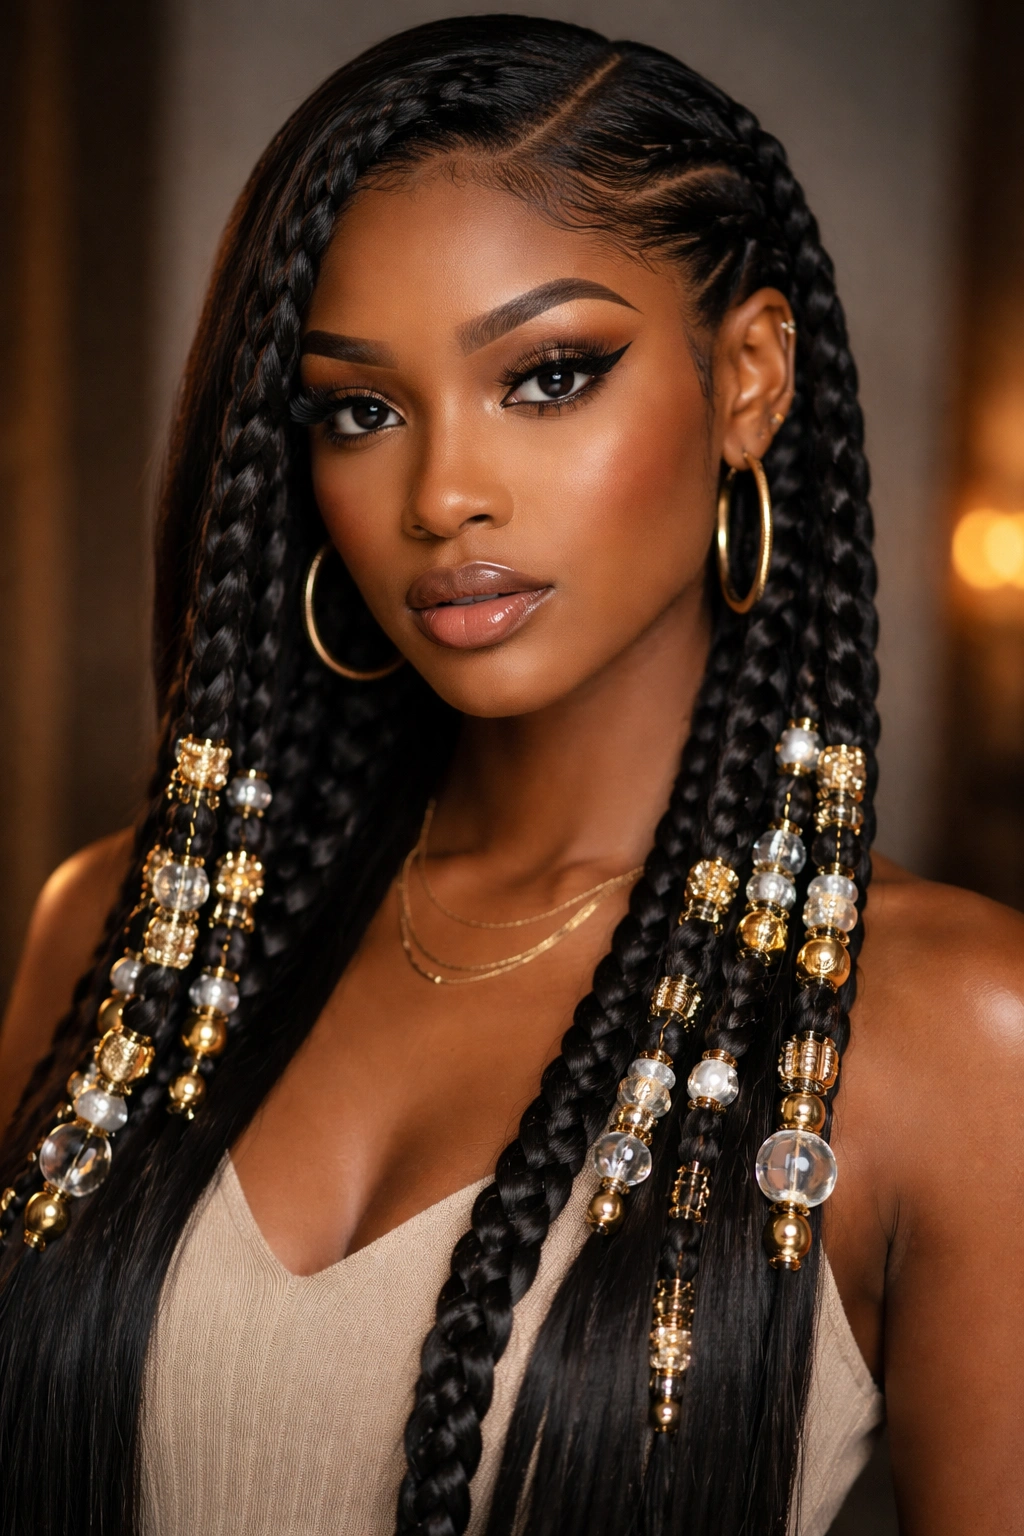
Beads aren’t just for box braids—they look absolutely stunning on two-braid styles, especially when you position them strategically to catch light and add visual interest. Whether you’re using colorful acrylic beads, wooden beads, metallic gold cuffs, or decorative hair cuffs, adding beads to side-parted braids transforms the style from everyday to show-stopping. The beads can run the full length of each braid, cluster in the middle section, or accent just the very ends.
Making Beads Work with Two Braids
The key to making beaded braids look intentional rather than random is placement and consistency. Many women choose to bead both braids identically for symmetry, while others bead one braid heavily and leave the other bare, leveraging the asymmetry of the side part for an edgy, artistic vibe. The beads add weight to the braids, which can actually help them hold their shape longer and sit more gracefully. Gold, silver, or copper metallic beads add luxury and sophistication, while colorful acrylic beads create a fun, youthful energy.
Beaded braids also make beautiful sound—a soft, subtle clicking as you move—that many women love. The tactile experience of running your fingers over beaded braids is genuinely satisfying, and the style photographs beautifully.
Styling Tips for Beaded Braids
- Choose bead sizes that complement your braid thickness—too-small beads disappear on thick braids, while oversized beads look out of proportion on delicate braids
- Thread beads onto the braid as you go, or add them afterward by threading them carefully over the braid with a needle and thread
- Space beads intentionally rather than randomly scattering them; every few inches, a cluster in the middle, or strategically spaced pairs of beads all look deliberate
- Consider weight distribution if adding many heavy beads—they pull on the hair, so balance is important for comfort and hair health
- Mix bead materials and colors within each braid for visual interest, or keep them monochromatic for sophistication
Insider note: If you’re adding beads after braiding, use a thin needle threaded with strong thread or fishing line to thread beads securely onto the braid. This takes patience but gives you full control over placement.
4. Textured Crown Braids with Side Sweep
This is a style that transforms the two-braid look into something more sculptural and artistic. Instead of letting both braids flow down your back, you sweep one or both braids across the crown of your head in a partial updo or crown effect. The side part becomes even more dramatic when one side of your hair is braided and wrapped around while the other hangs loose or is tucked behind your ear. This style creates height at the crown and shows off the back of your neck, making it perfect for warm weather or whenever you want something that feels both casual and put-together.
The Geometry of Crown Braids
Crown braids work by routing one or both braids from your side part, braiding downward initially, then pinning the braid up and across your head in a curve. This requires a bit more styling skill than letting braids hang loose, but the result is absolutely striking. The side part anchors the look asymmetrically, so one side of your face gets framed by loose hair while the other gets framed by the braided crown. This creates a beautiful visual balance and emphasizes your facial features differently than a center part would.
The textured quality of the braids—whether they’re loose, slightly crimped for extra volume, or done with extension hair for more substance—becomes the star of the show when you’re showcasing them as a crown. You can see the detail and artistry much more clearly than with braids hanging straight down.
How to Create the Crown Effect
- Braid from your side part as you normally would, but don’t secure the ends yet
- Pin the braids up and around your crown using bobby pins that match your hair color; secure at the top of your head where the braids meet
- Tuck loose ends underneath the braid or wrap them into a bun for a completely polished look
- Use bobby pins strategically to anchor the braid in place so it doesn’t slide or shift throughout the day
- Add texture to your braids before styling them as a crown—gently pull at the sides of each braid to make them look fuller and looser
- Smooth your hairline with edge control to frame the style cleanly
Quick tip: For crown braids that last, use strong bobby pins or keka clips rather than thin bobby pins, which can slip out of textured braids.
5. Thin Braids with Wrap Detail on One Side
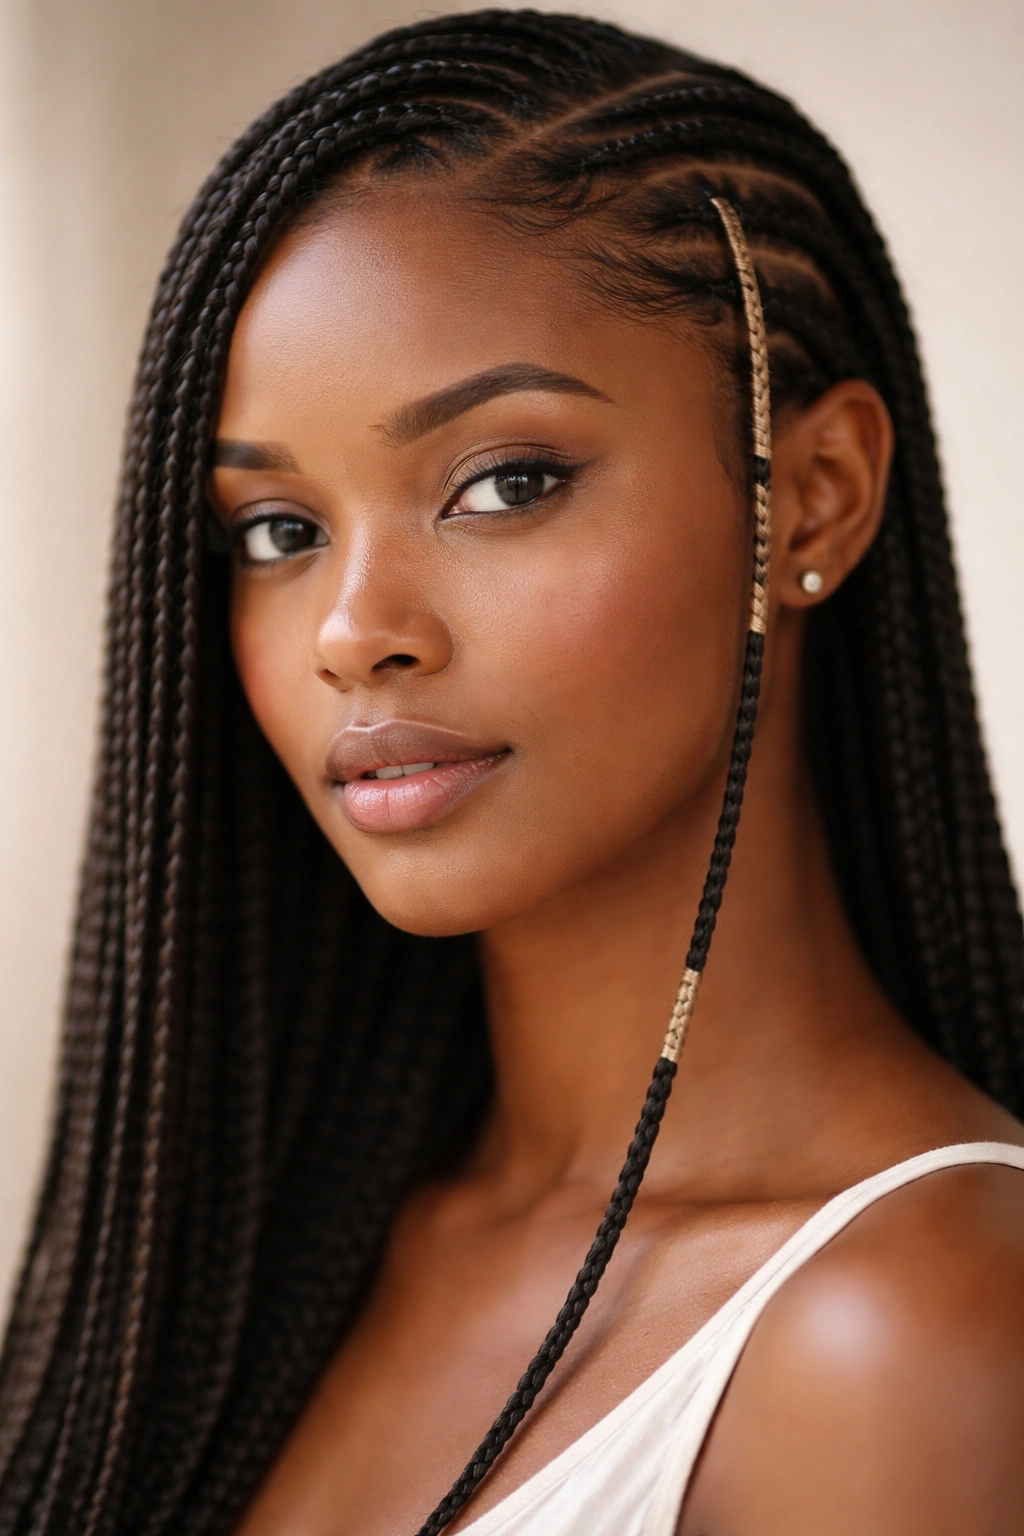
This style takes minimalism and turns it into an art form. By creating two very thin, delicate braids from your side part and then wrapping one braid with thread, yarn, leather, or fabric, you create a look that’s sophisticated and unexpectedly creative. The wrapped braid becomes a subtle accent that completely changes the vibe of the style, while the thin braids themselves feel light and effortless. This is a great option if you love the protective benefits of braids but want something that doesn’t feel heavy or overly elaborate.
The Power of Wrapping
Wrapping one braid completely transforms it visually and adds a handmade, artisanal quality to your style. You can wrap with colorful embroidery thread for a pop of color, metallic thread for shine, thin leather or suede cord for an edgy vibe, or even delicate fabric like silk for a soft, luxurious look. The wrapped braid becomes a visual focal point that draws the eye, and because you’re only wrapping one braid, the asymmetry from your side part is emphasized beautifully.
Wrapping also serves a practical function—it helps secure the braid and prevents it from unraveling, which is especially helpful if your braids are very fine or you’re keeping the style for several days.
Executing the Wrap
- Choose your wrapping material based on the vibe you want—metallic thread for glamour, colorful embroidery floss for fun, leather for edge, or silk for romance
- Create thin, delicate braids that feel light and easy; wrapping material adds visual weight, so thin braids prevent the overall look from feeling heavy
- Start wrapping at the top of one braid, just below where it begins, and wrap tightly but not so tight that you’re pulling on your hair
- Spiral the wrapping material around the braid at a consistent angle and spacing for a neat, intentional look
- Knot off the wrapping material at the end of the braid and tuck the ends underneath so they’re not visible
- Leave one braid completely unwrapped to emphasize the contrast and play up the asymmetry
Worth trying: Wrap only the bottom third of one braid for a more subtle accent, or wrap both braids if you want a bolder, more coordinated look.
6. Side Part Braids with Metallic Threading
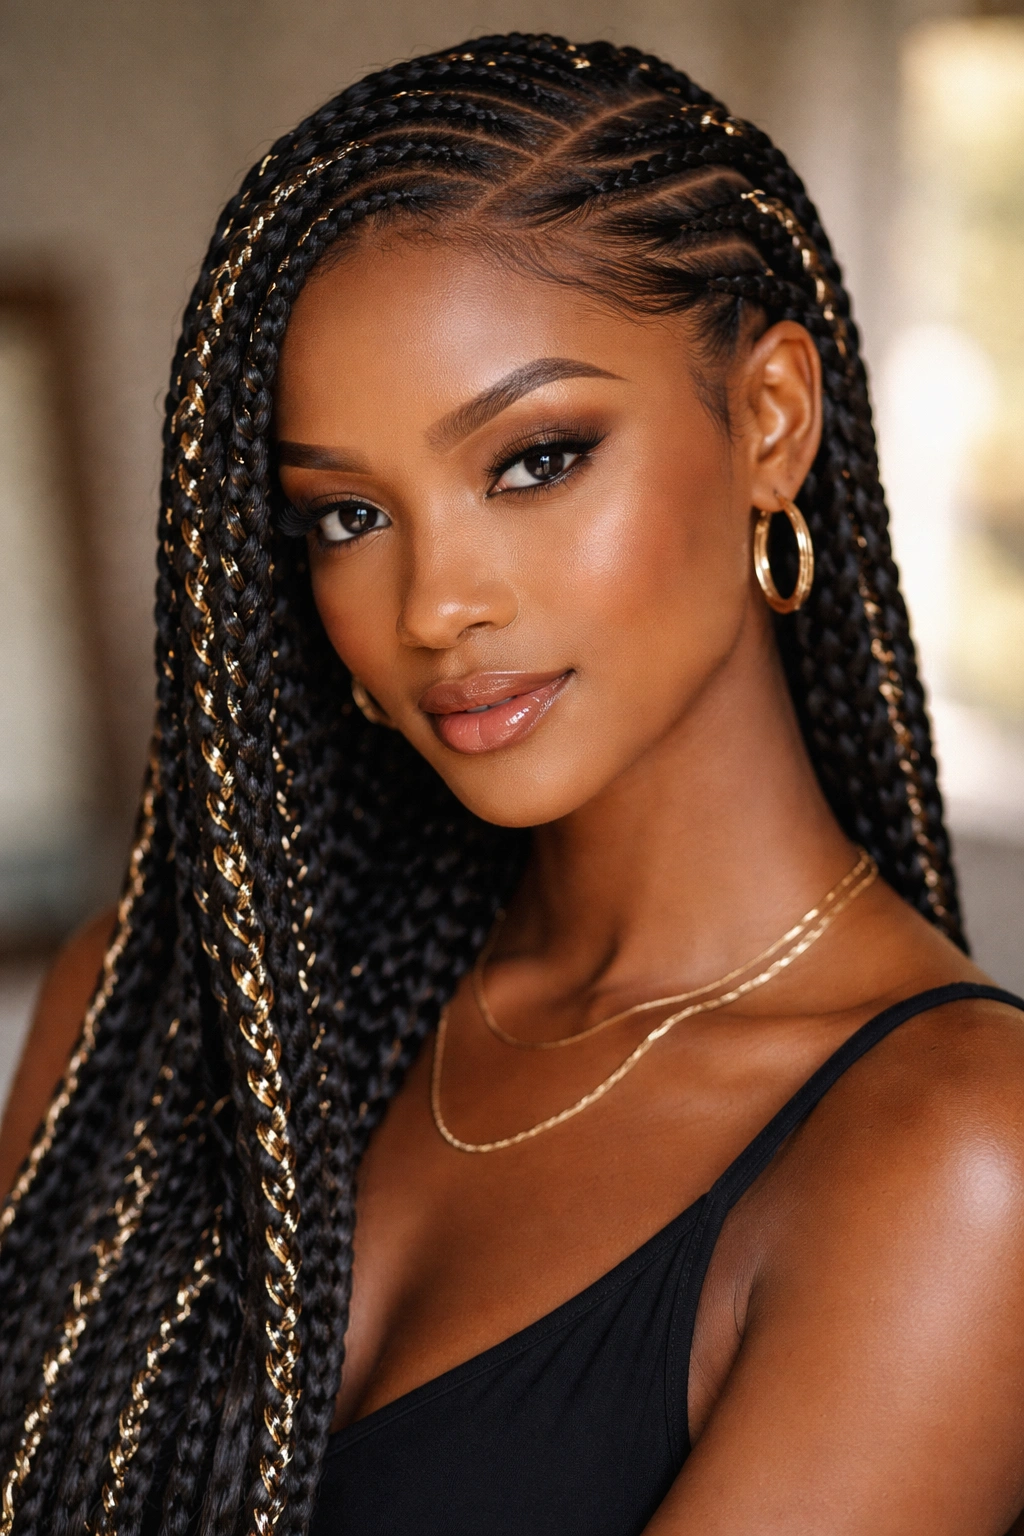
Metallic threading takes the glamour factor of braids up several notches. Instead of wrapping a braid, you weave metallic thread directly into the braiding process, creating braids that literally shine and catch light with every movement. Gold threading is luxurious and warm, silver is cool and modern, and copper adds an earthy richness. This style works beautifully for special occasions, date nights, celebrations, or whenever you want to feel absolutely radiant.
Threading for Maximum Impact
The key to metallic threading is weaving it into the braid structure so it’s secure and distributed throughout the braid rather than just on the surface. This involves folding your metallic thread in half and incorporating it as if it’s a fourth strand in your three-strand braid structure. The metallic catches light beautifully as you move and sit, creating an almost hypnotic shimmer. The side part creates asymmetry that makes the metallic threading feel intentional and artistic rather than costume-like.
Metallic thread comes in varying thicknesses, so choosing the right weight for your hair and your braid size is important. Thinner thread works well for delicate braids, while thicker metallic cord works better with substantial, thick braids.
Working with Metallic Thread
- Purchase metallic thread made specifically for hair (not regular embroidery thread, which can be scratchy)
- Fold the thread in half to create two working strands, then incorporate it into your three-strand braid as you would a fourth strand
- Keep tension consistent on the metallic thread so it doesn’t slip or bunch up within the braid
- Thread only one braid or both, depending on whether you want a subtle accent or a full statement
- Secure the threaded ends firmly so the metallic thread doesn’t unravel when you release the braid ends
- Finish your style with a light hairspray to keep everything in place and reduce frizz around the shiny thread
Pro tip: For the most dramatic effect, use thicker metallic cord (about the thickness of regular yarn) and thread it into thick, chunky braids where the shine will be impossible to miss.
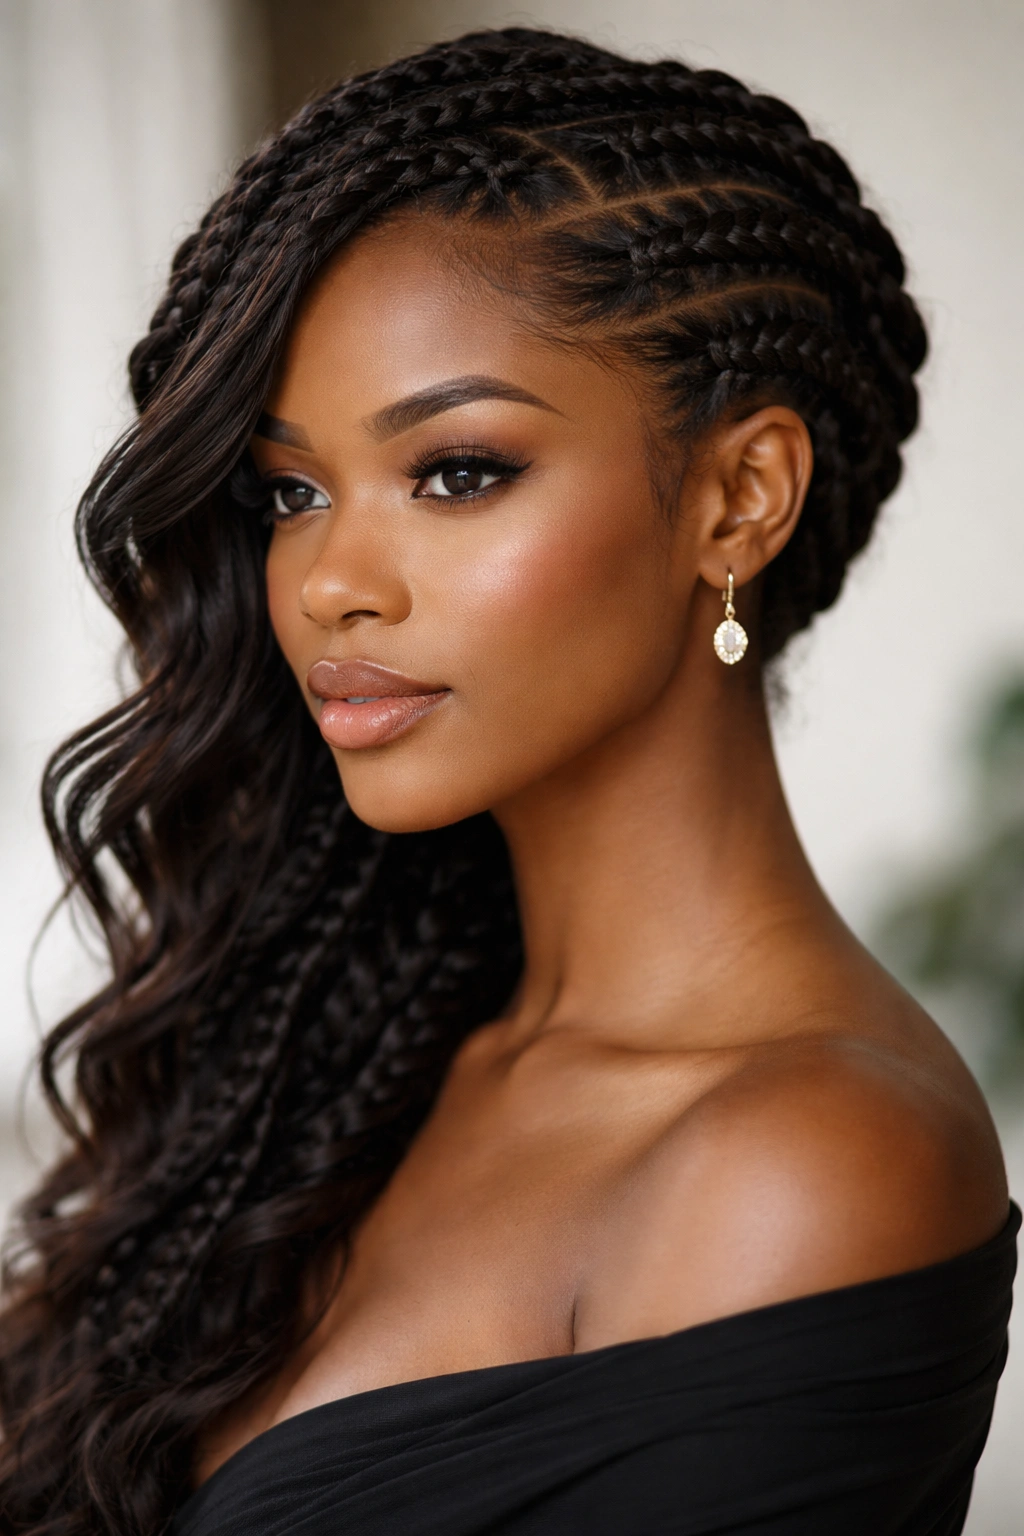
7. Intricate Cornrow Side Braids
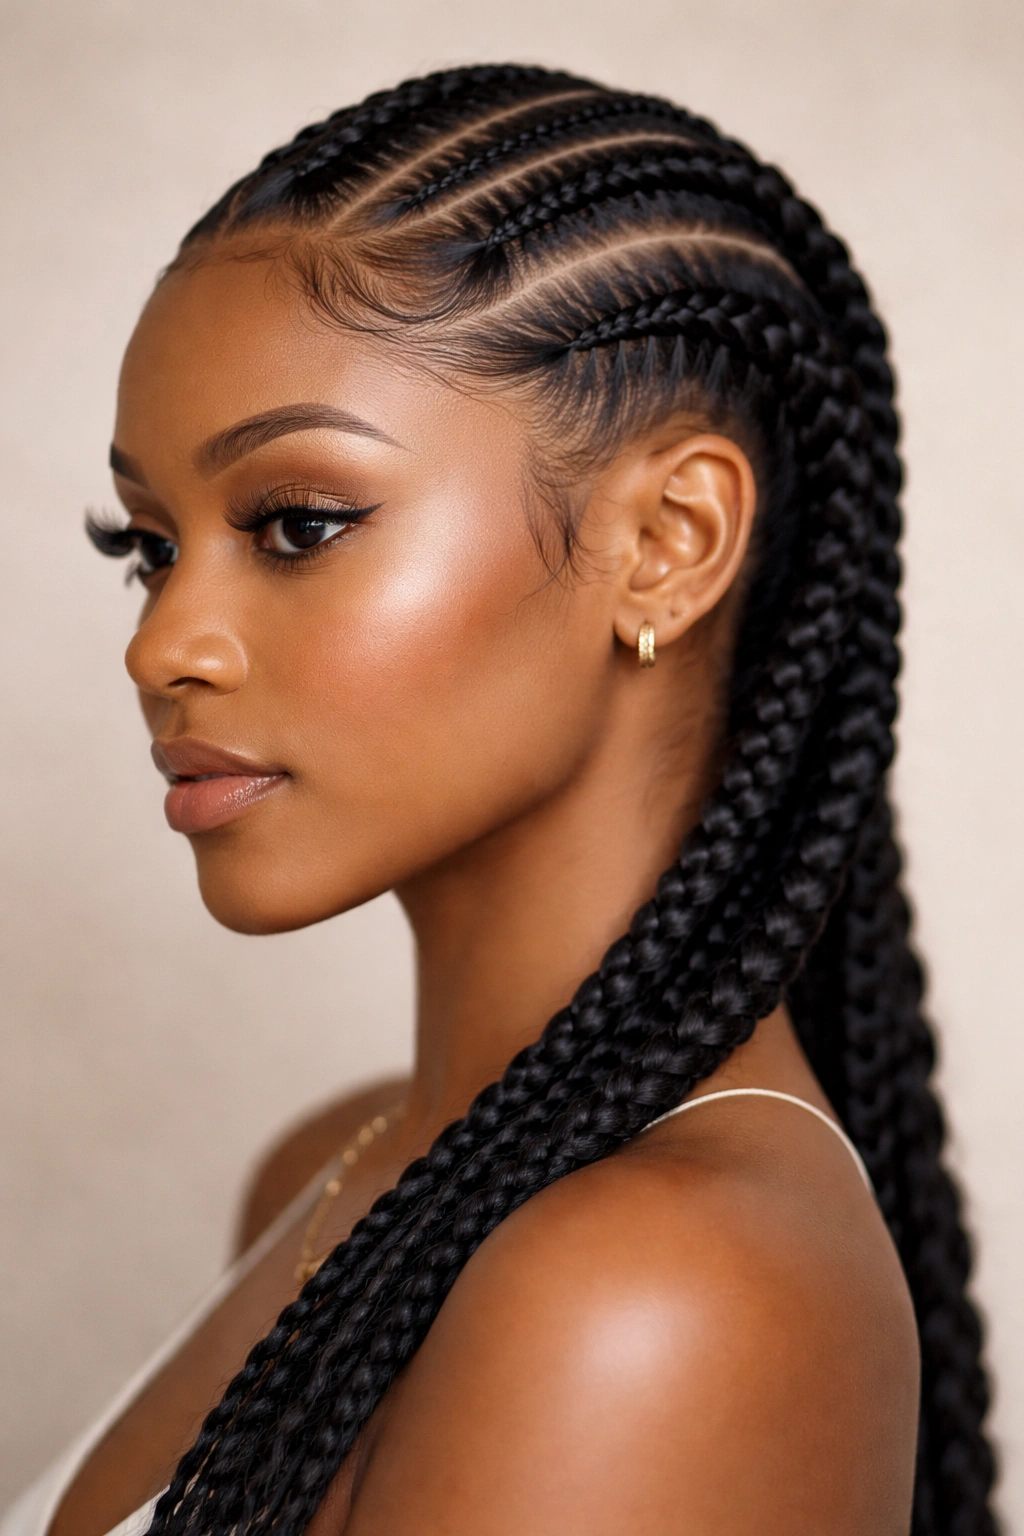
Cornrows are a completely different braiding technique from traditional three-strand braids, and they create an entirely different aesthetic. Cornrows sit closer to the scalp, creating clean, raised lines that are incredibly detailed and precise. When you create two cornrows from a side part, you get a look that’s athletic, artistic, and distinctly sculptural. This style shows off the intricacy of the braiding work and looks freshest when the cornrows are very neat and tightly woven.
The Artistry of Cornrows
Cornrows require more skill and precision than regular braids, and they look their best when done by someone with serious technique. The braids follow the natural contours of your scalp, flowing from your side part downward and meeting at the nape of your neck. Because cornrows sit so close to the scalp, they feel lighter and more secure than regular braids, making them excellent for active lifestyles, workouts, or keeping your hair completely off your neck.
The geometric precision of cornrows is genuinely artistic—when done well, they’re practically wearable sculpture. The side part makes them feel modern and contemporary rather than traditional.
Achieving Perfect Cornrows
- Start with very clean, moisturized hair; cornrows pull more tightly on the scalp, so your hair needs to be in good condition to handle the tension
- Work with a professional braider if this is your first time getting cornrows—the technique requires skill and practice
- Keep the side part razor-sharp; a clean part line is essential for cornrows to look polished
- Choose braid thickness based on your hair density and how long you want to keep the style—thicker cornrows are less time-intensive but more dramatic, while thinner cornrows are more intricate
- Apply a light gel or edge control before braiding to tame flyaways and keep the cornrow lines clean
- Consider adding small beads at the end of cornrows for extra visual interest and to help secure the ends
Real talk: Cornrows require practice to master, and most people benefit from seeing a professional braider who specializes in cornrow work.
8. Braids with Twists on the Side Part
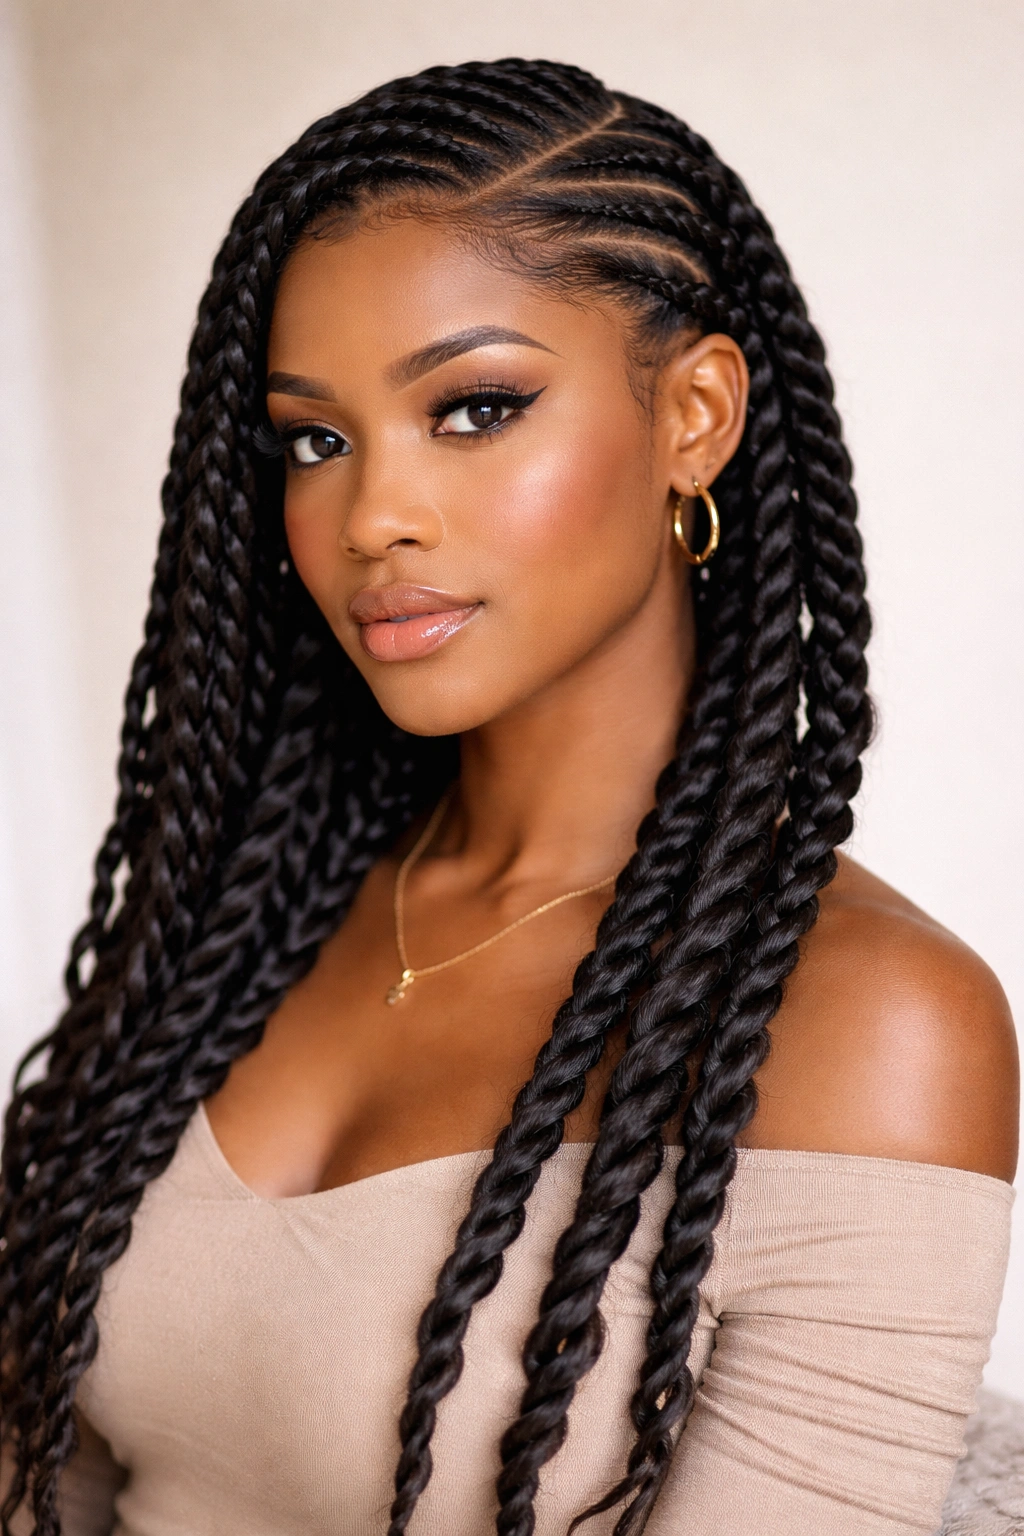
This style blends two different braiding techniques for visual interest and complexity. You create two regular braids from your side part, but partway down, you transition into twisted sections or incorporate twist detail throughout. Twists are created by taking two sections of hair and wrapping them around each other, which creates a rounder, rope-like texture that’s distinctly different from the flat, three-strand braid structure. The combination of braids and twists feels modern and slightly unexpected.
Why Mixing Braids and Twists Works
The braid-to-twist transition creates visual rhythm and texture variation that keeps the eye interested as you move down the length of the style. Twists feel slightly looser and more relaxed than braids, so incorporating them creates a style that balances structure with softness. The side part provides asymmetry that makes the mixed-technique detail feel intentional and artistic rather than accidental or sloppy.
This style is perfect if you want protective styling but find regular braids feel too rigid or too uniform. The texture variation also makes the style interesting when you wear your hair down versus up.
Creating the Braid-Twist Blend
- Braid for the first 3-4 inches from your side part using your standard three-strand technique
- Transition into a two-strand twist by dividing one braid into two sections and wrapping them around each other
- Alternate between braid and twist sections, or transition fully into twists for the bottom half of your hair
- Keep tension consistent across the transition so it doesn’t feel loose or sloppy
- Add extension hair if you want extra length or fullness in the twisted sections
- Gently pull at the twisted sections once complete to make them look fuller and slightly more textured
Worth knowing: Twists are technically faster to create than braids, so a style that combines them can sometimes be quicker overall, even though it looks more intricate.
9. Thick Statement Side Braids with Shaved Detail
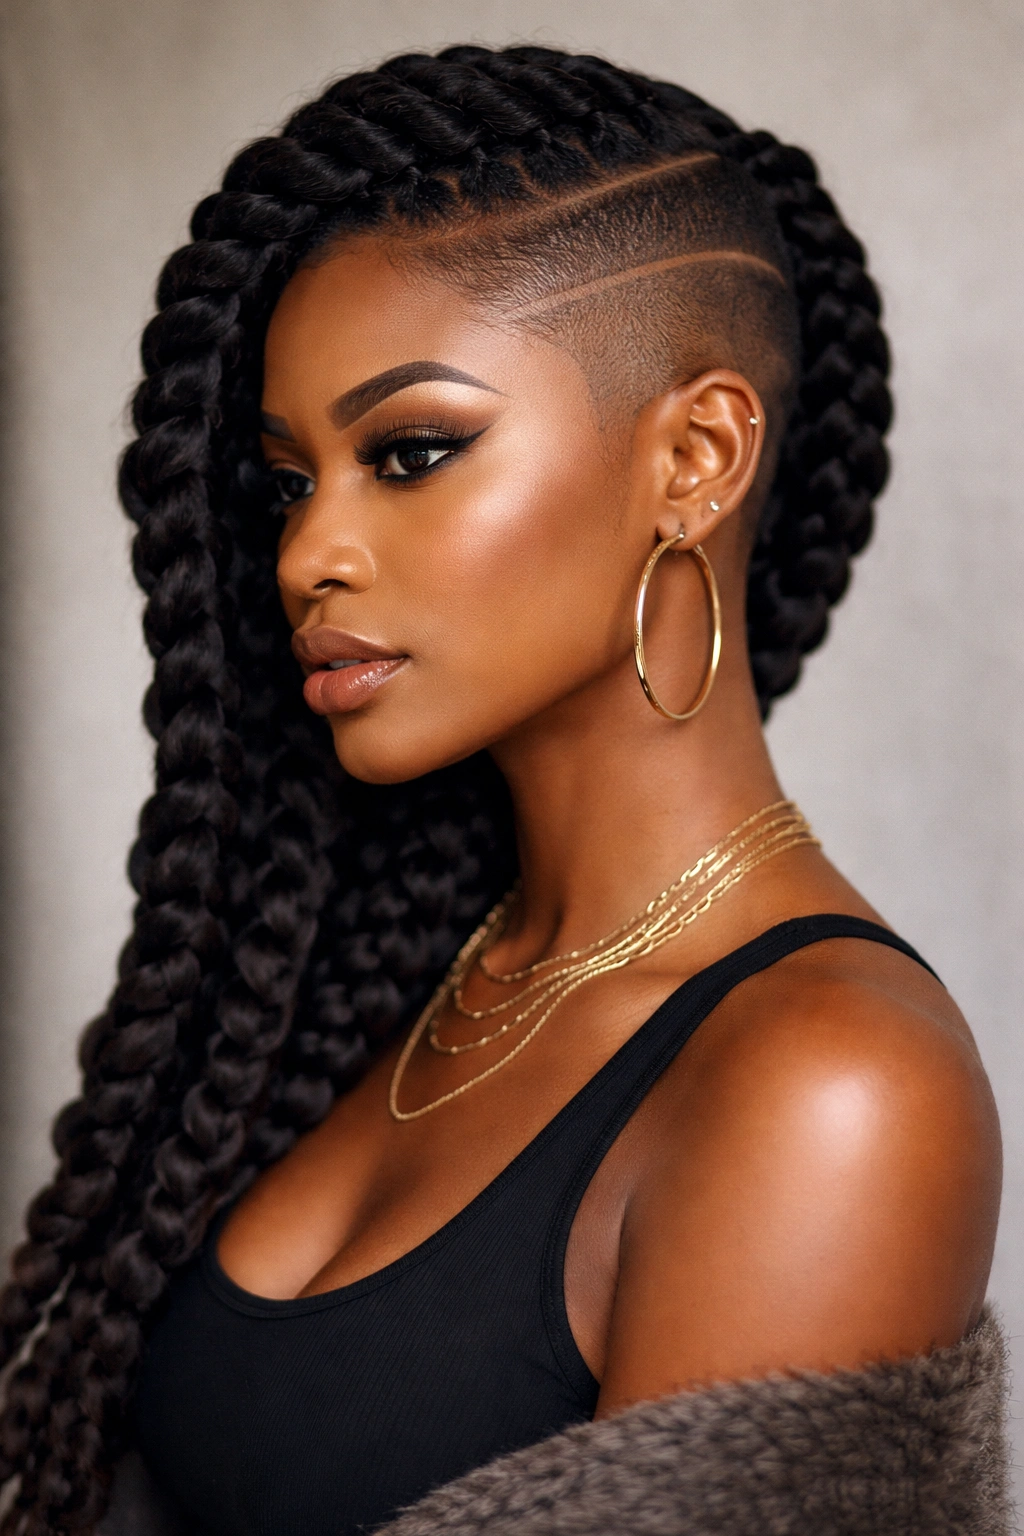
If you want to make a bold statement, thick, chunky braids from a side part paired with shaved detail elsewhere on your head creates a look that’s undeniably striking. The thick braids become architectural elements that command attention, while the shaved or closely faded portions of your head create contrast and emphasize the boldness of the braided style. This look requires confidence and a willingness to take risks, but the result is absolutely powerful.
The Statement Quality
Thick braids have completely different visual weight and presence than delicate, fine braids. They read as bold, intentional, and unapologetically creative. When you pair thick braids with a clean shave on the sides or back, you’re creating a look with serious visual impact. The side part adds to the asymmetry and ensures the look feels modern and fashion-forward rather than purely protective or practical.
This is a style that works brilliantly if you have natural hair or locs and want to celebrate your hair’s texture and volume. The shaved detail doesn’t have to be extreme—a simple fade or clean shave on one side is enough to create contrast.
Going Bold with Thick Braids
- Use thicker sections of hair when creating your side parting, so your braids are chunky and statement-making from the start
- Add extension hair if you want your thick braids to feel even more voluminous or reach longer lengths
- Keep the braids slightly loose rather than pulling very tight, so they look soft and full rather than rigid
- Work with a barber or hair professional on the shaved detail to ensure it’s crisp and clean
- Maintain the shaved portions every 2-3 weeks if you want to keep the sharp line
- Style your thick braids with movement and attitude—these aren’t timid braids
Real talk: Shaved details require commitment and regular maintenance, and they’re not appropriate for all professional environments. Make sure you’re styling for spaces where this look will be celebrated rather than policed.
10. Ombré Braids with a Dramatic Side Part
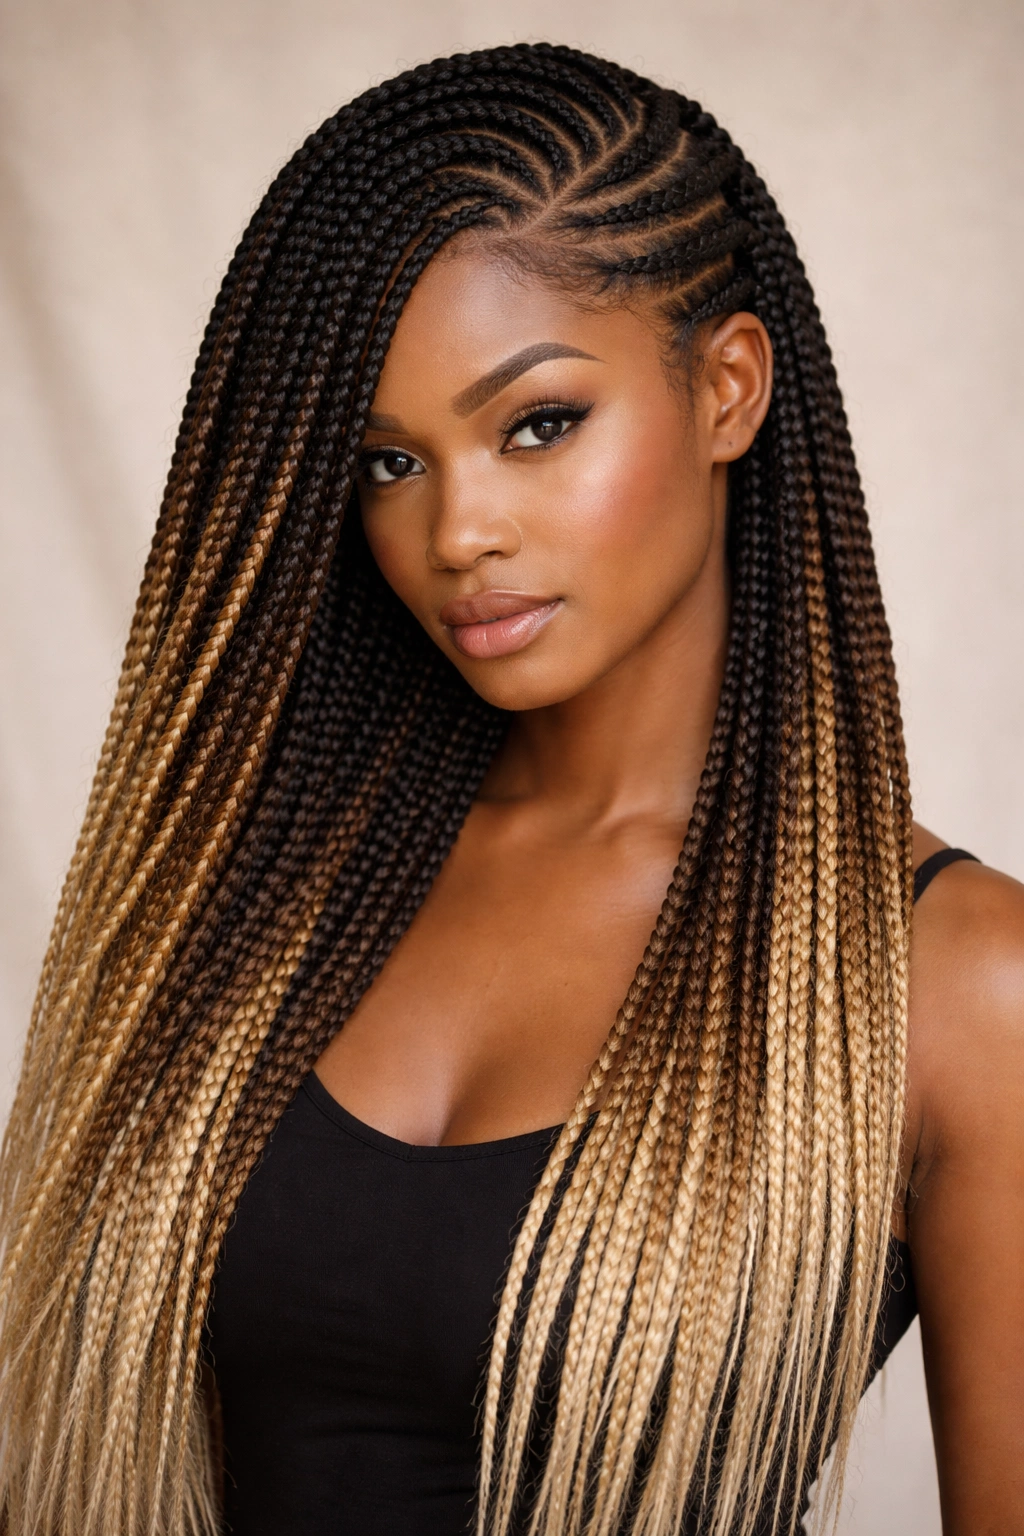
Color creates dimension and visual interest, and ombré braids—where the color gradually transitions from your natural color at the roots to a lighter or contrasting color at the ends—look absolutely stunning when created from a side part. The ombré effect draws the eye down the length of the braids, and the side part ensures the color transition is visible and impactful. You can create ombré with box braid extensions, with dyed hair, with hair chalk, or even with colored thread woven into your braids.
The Visual Drama of Ombré
Ombré creates movement and depth that a single solid color can’t achieve. Whether you’re doing a subtle ombré from deep brown to caramel, a bold transition from black to burgundy, or even a full rainbow ombré, the color gradient makes the style feel artistic and intentional. The dramatic side part emphasizes one side of the color transition, creating asymmetrical visual interest that’s incredibly striking.
Ombré braids photograph beautifully and look fresh and contemporary. They’re perfect for anyone who wants color in their style but isn’t ready for commitment—you can remove extension braids after a few weeks, or you can use temporary color that fades out naturally.
Creating Stunning Ombré Braids
- Choose your color transition carefully—research color combinations beforehand or consult with a professional colorist
- Work with pre-colored extension hair if you’re using box braids or Senegalese twists; many hair suppliers offer ombré options
- Use hair chalk or temporary color if you want to experiment without permanent commitment; these wash out after a few shampoos
- Braid your extension hair and natural hair together to blend the colors seamlessly at the roots
- Maintain your natural hair at the roots to keep the ombré transition clean and intentional
- Use a deep side part to really showcase the color transition and create maximum visual impact
Worth trying: Subtle ombré (natural to a slightly lighter shade) looks sophisticated and wearable, while bold ombré (natural to a bright contrasting color) makes a statement. Choose based on your comfort level and lifestyle.
Final Thoughts
The beauty of side-parted two-braid styles lies in their incredible flexibility. You can wear these looks for a few weeks as protective styling, for a special occasion when you want to look absolutely polished, or as your everyday style because they make you feel confident and beautiful. The side part itself is a small detail that creates outsized impact—it changes the entire vibe of your hairstyle and flatters virtually every face shape.
Whether you’re drawn to the sleek minimalism of classic Dutch braids, the romantic softness of feed-in braids with loose curls, the artistry of intricate cornrows, or the boldness of thick statement braids with shaved detail, there’s a side-parted two-braid style that matches your personality and fits your lifestyle. The real magic happens when you choose a style that makes you feel like the most authentic, confident version of yourself—because that confidence shows in how you wear the style.
Take inspiration from these looks, but don’t feel limited by them. Mix and match elements from different styles to create something entirely your own. Add beads if you want sparkle, incorporate color if you want drama, go for the crown effect if you want something unexpected, or keep it simple and sleek if that’s where your heart is. Your hair is a canvas, and these styles are just the beginning of what you can create.