Micro braids are having a major moment, and for good reason. These tiny, intricate plaits work beautifully on virtually every hair type and length — they’re protective, versatile, trendy, and genuinely fun to wear. Whether you’ve got a pixie cut or waist-length locks, there’s a micro braid style waiting to transform your look. The real magic is how they adapt: you can wear them sleek and polished for professional settings, playful and textured for creative days, or intertwined with beads and accessories for statement-making moments. What sets micro braids apart from other braiding styles is their precision and the incredible range of artistic possibilities they unlock. You can create patterns, build height, frame your face strategically, or simply add texture and movement to otherwise flat hair.
The barrier to entry is lower than you might think. You don’t need incredibly thick hair or any special texture — though curly and coily hair absolutely excels with micro braids, straight and wavy hair takes them beautifully too. The key is understanding which styles suit your hair length, thickness, and your personal lifestyle. Some styles work best for active days when you need everything secured, while others are designed purely for glamour and impact. Below are fifteen distinct micro braid styles, each tailored to different hair lengths and occasions, so you can find the exact look that resonates with your aesthetic.
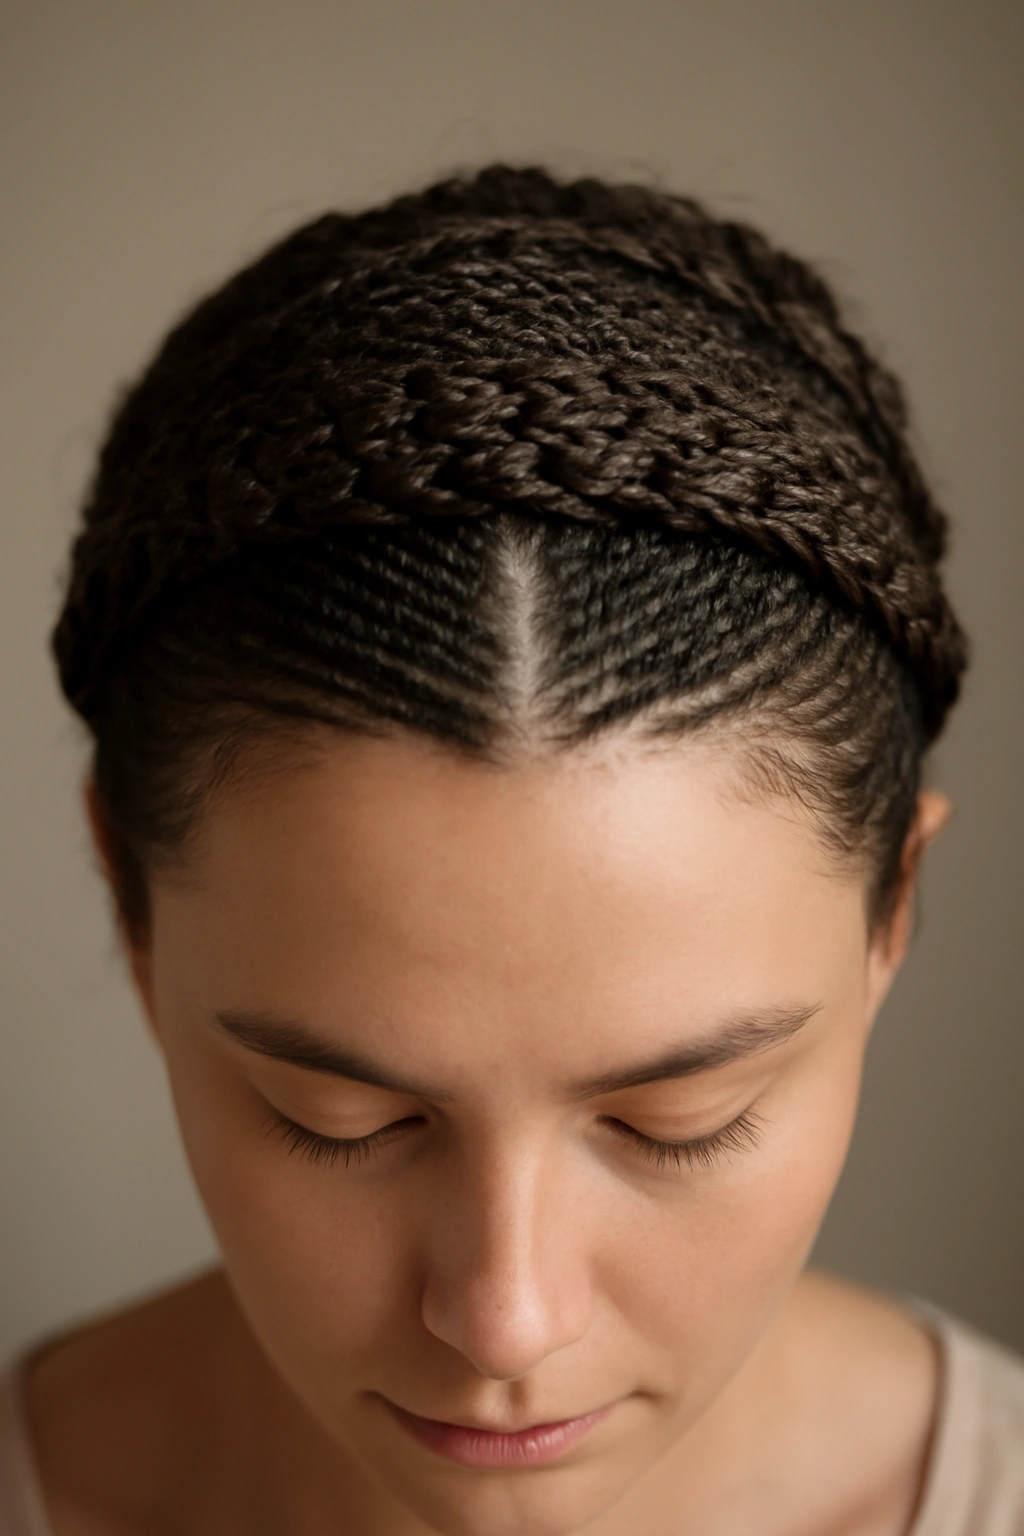
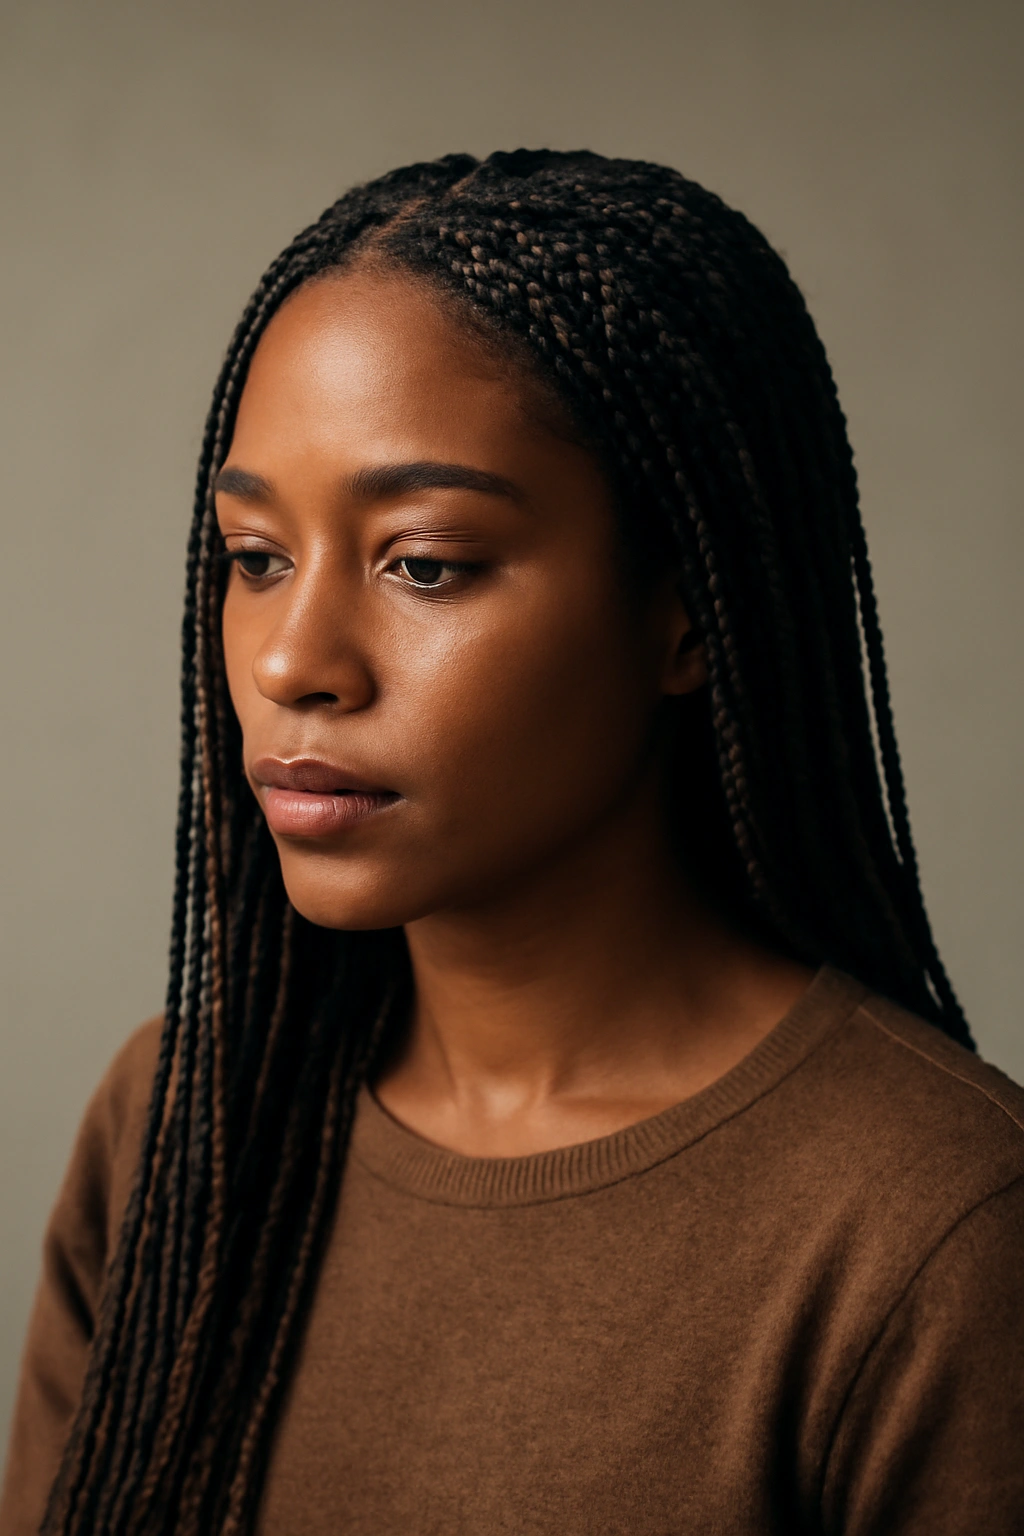
1. Sleek Center-Parted Feed-In Micros
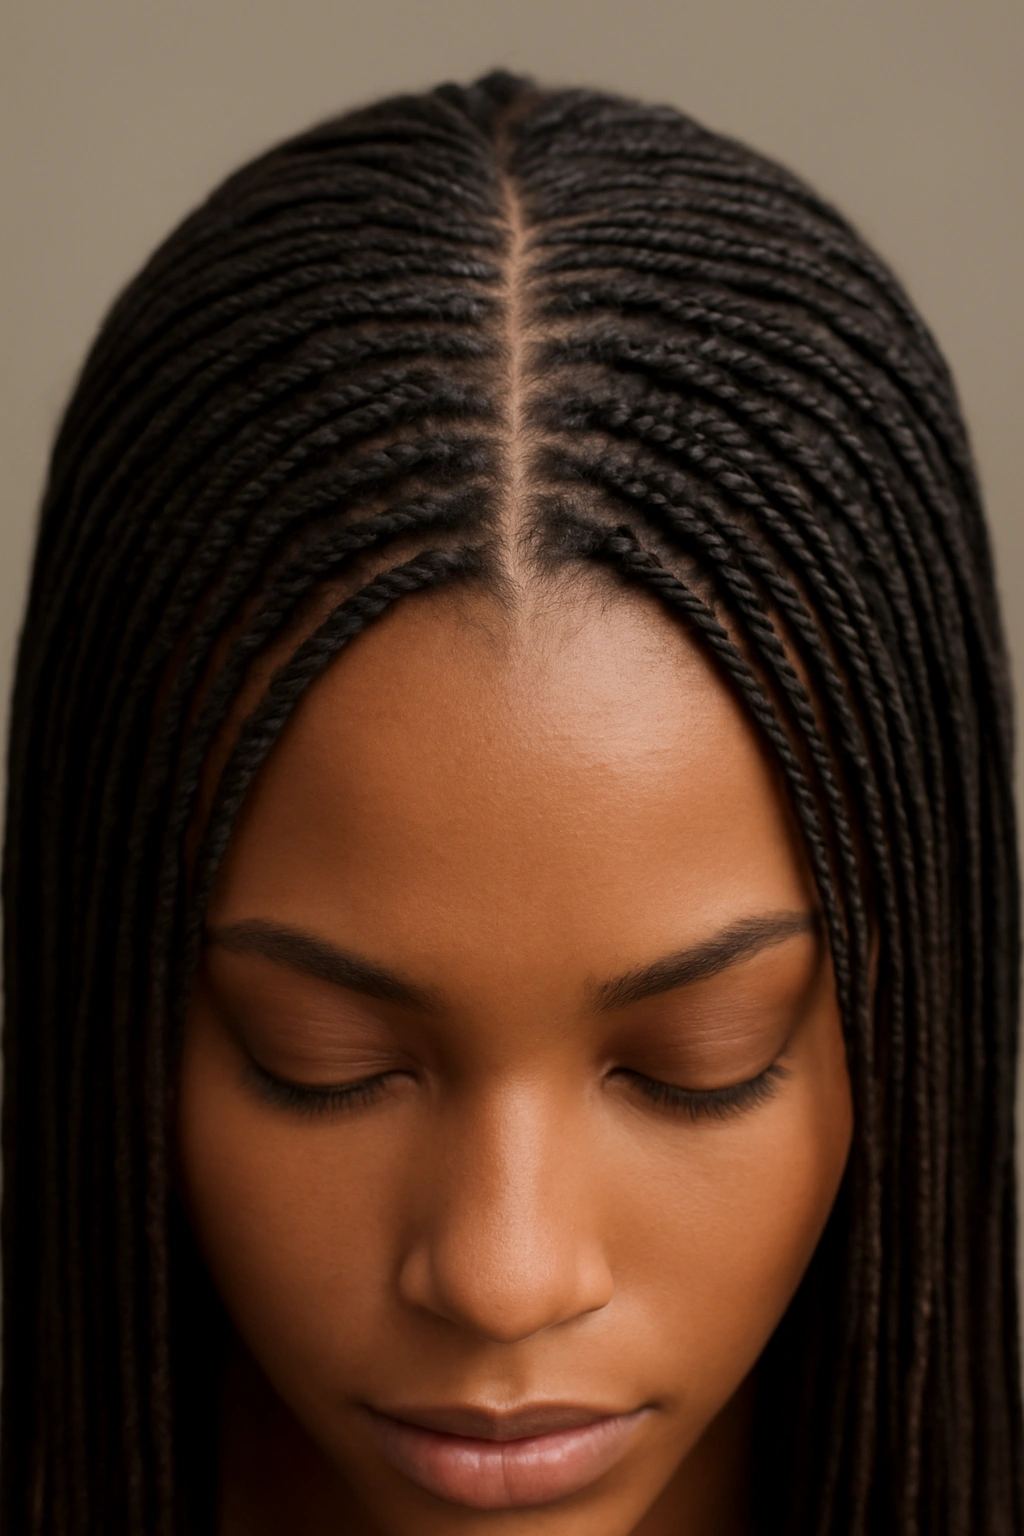
Feed-in micros start small at the root and gradually grow thicker as the braid extends down the length of your hair, creating an illusion of seamless growth from your scalp. When parted straight down the center and fed in on both sides, this creates a balanced, almost sculptural effect that flatters most face shapes and works across all hair lengths. This is the style you see on runways and in high-fashion editorial spreads because it’s absolutely polished.
Why This Style Wins for Professional Looks
Feed-in braids distribute tension evenly and protect your edges beautifully because the base of each braid is thinner and more delicate than traditional box braids. This technique is specifically designed to be scalp-friendly, making it one of the best protective styles if you’re concerned about breakage at the hairline. The center part creates a framing effect that lengthens the face and draws attention upward.
What Makes Them Special
- Takes 4-6 hours to install, but they’ll last 6-8 weeks with proper care
- Best done by a professional braider who understands feed-in tension and technique
- Works beautifully with extensions or with your natural hair length
- The braids taper naturally, which means you can unravel them gently without damaging the hair
- Creates a high-fashion, editorial-ready aesthetic that photographs exceptionally well
Pro tip: Sleep on a silk or satin pillowcase to preserve the sleekness and reduce frizz between wash days.
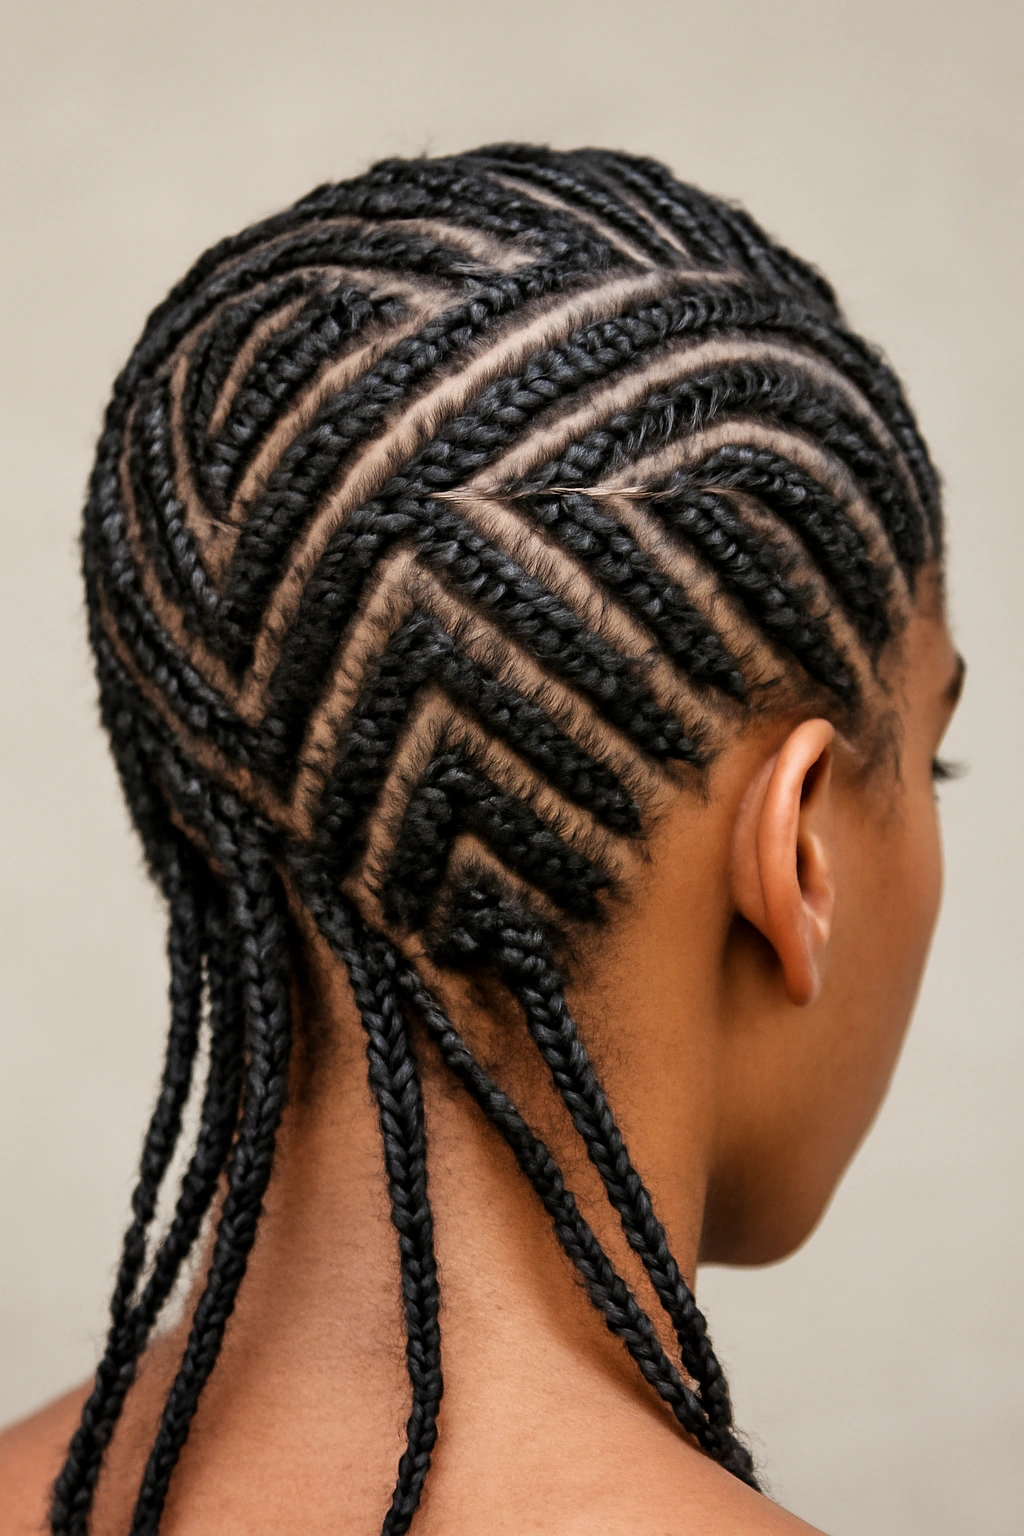
2. Geometric Feed-In Pattern with Beads
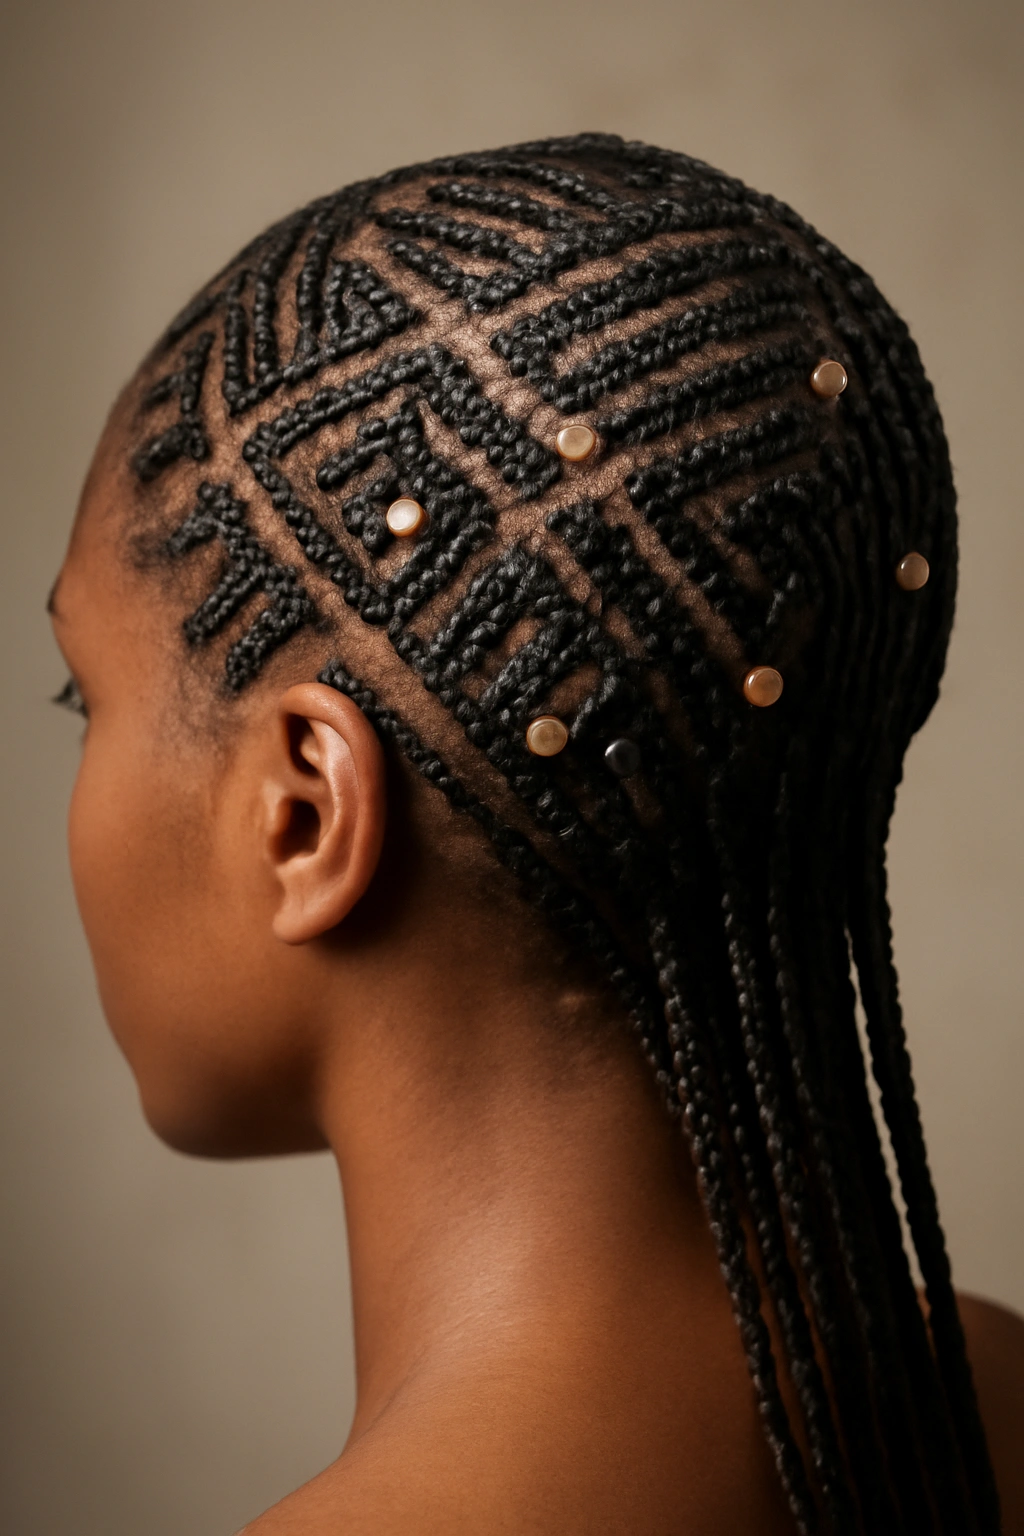
Instead of uniform parallel braids, this style creates a geometric grid or diagonal pattern by varying where each braid begins and how they’re directed across the scalp. Add metallic or colorful beads spaced throughout, and you’ve got a style that reads as intentional art rather than just braided hair. This is the move for anyone who wants their protective style to make a visual statement.
The Creative Potential Here
Geometric patterns tap into your natural head shape and bone structure — a good braider will work with your unique scalp geography to create lines that enhance rather than fight your proportions. The beads add dimension, movement, and visual interest without requiring different colored hair extensions. This style is especially striking in natural light and photographs like you’re wearing a crown.
Key Considerations
- Requires an experienced braider who can plan and execute geometric patterns with precision
- Takes 6-8 hours due to the complexity of placement
- The bead placement matters hugely — spacing them irregularly looks intentional, while too-regular spacing can feel costume-like
- Gold, silver, and rose gold beads tend to work with any skin tone; choose based on your personal metal preference
- This style demands confidence and an eye for bold self-expression
Worth knowing: Request a consultation or reference images before booking so your braider understands the exact pattern and bead style you envision.
3. Two-Strand Twist Micros for Softer Texture
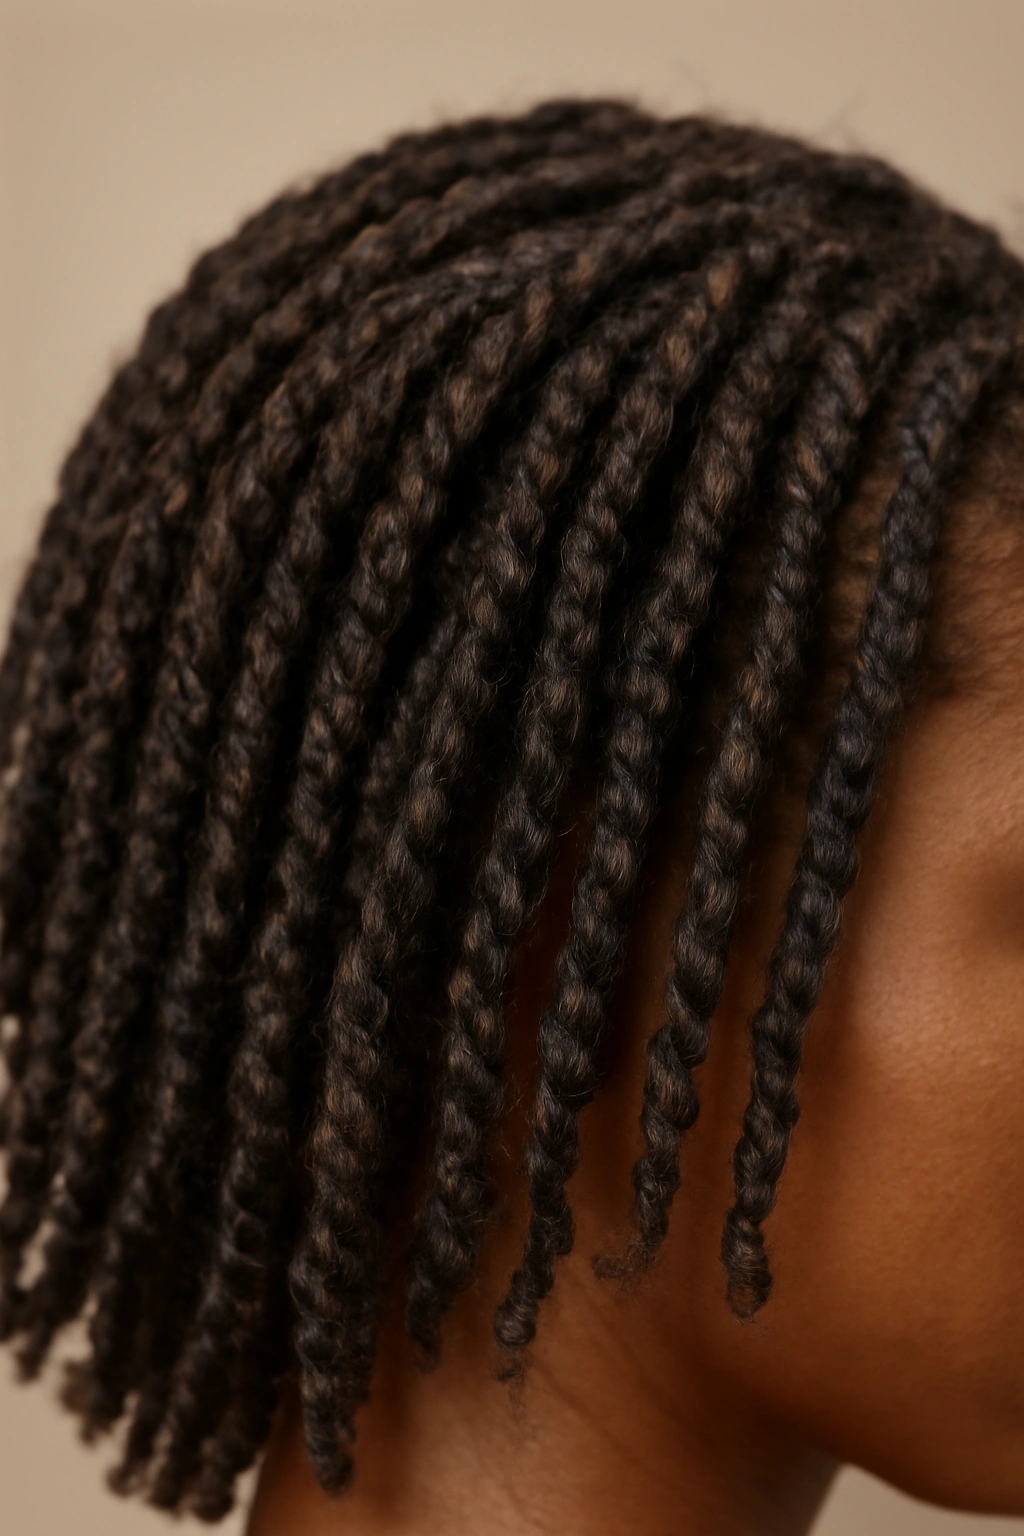
Two-strand twists are technically a sibling to braids rather than true micro braids, but they fall into the same protective style category and offer distinct advantages. Each twist uses just two sections of hair instead of three, which means they’re slightly less intricate to install but create a softer, more textured aesthetic than traditional braids. If you love the protective benefits of micros but want something with more movement and a less “done” vibe, this is your answer.
Why Twists Hit Differently Than Braids
Twists naturally have more bounce and fluidity because of their two-strand construction. They’re also easier to install, which means lower cost and shorter appointment times. If you’ve got type 3 or 4 natural hair, twists work phenomenally because the texture holds the twist shape even without being super tight. They photograph beautifully because they create a different kind of visual rhythm than braids.
Styling With Twists
- Wear them down loose for a relaxed texture that’s still fully protective
- Twist them up into a bun or crown arrangement for a different silhouette
- Unravel one or two for a half-up, half-down moment
- They work equally well with natural length or extensions
- Typically last 6-8 weeks and are slightly easier to remove than braids
Insider note: Two-strand twists are genuinely easier to maintain at home — you can re-twist the roots yourself every 2-3 weeks to refresh the style for weeks longer.
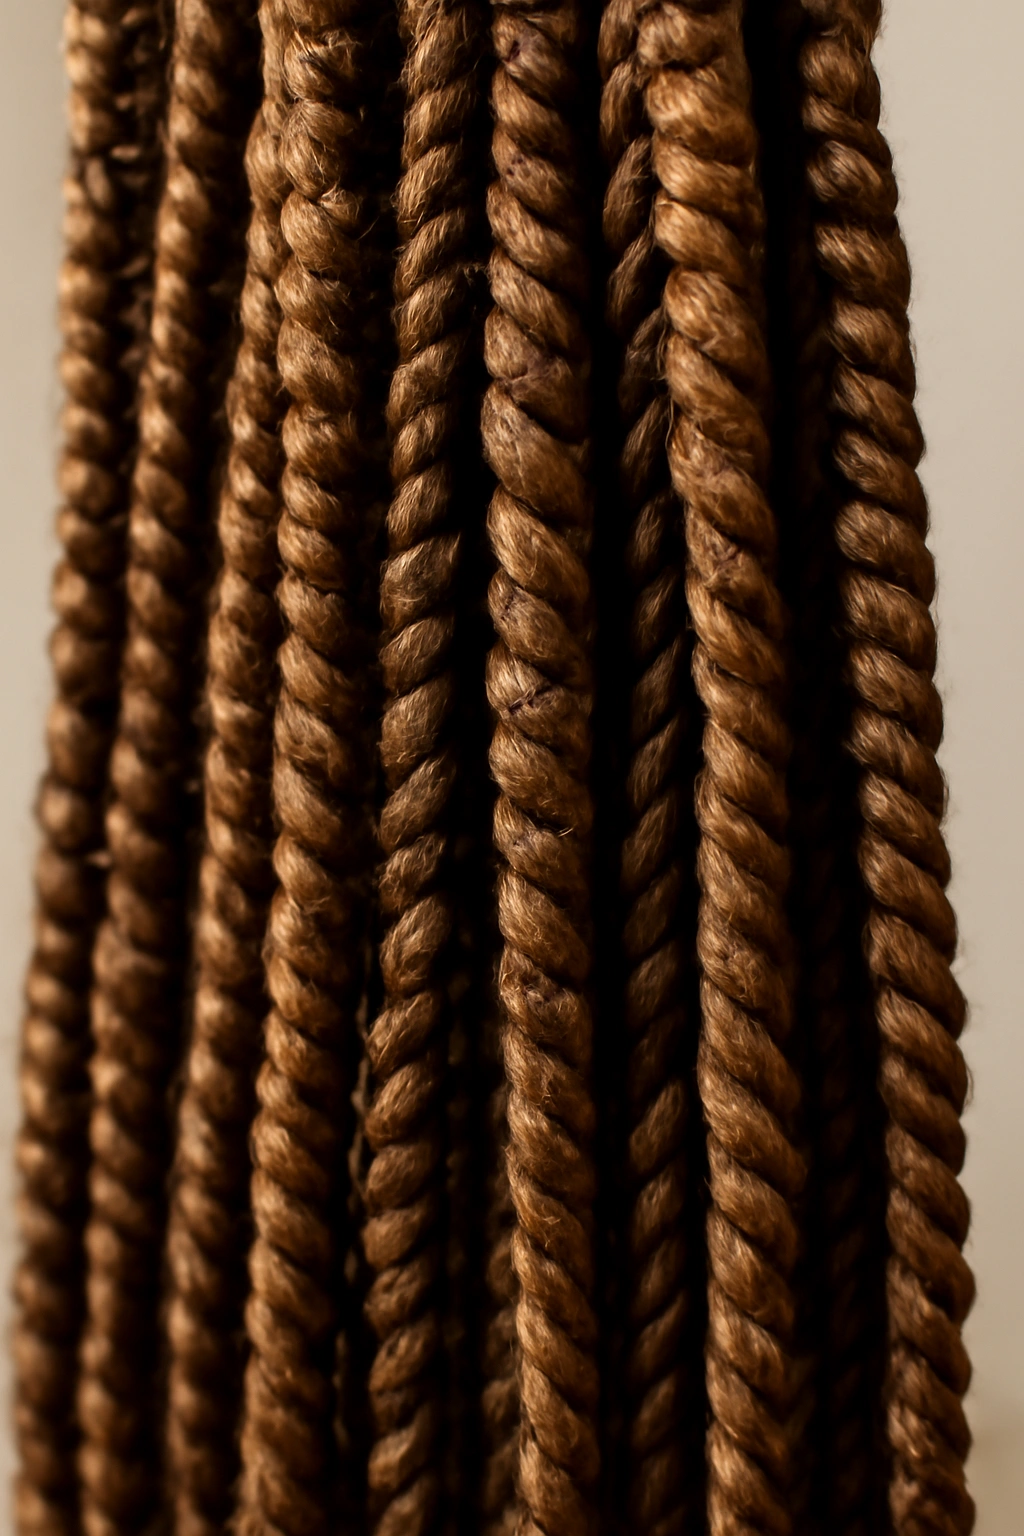
4. Faux Locs with Micro Braid Texture
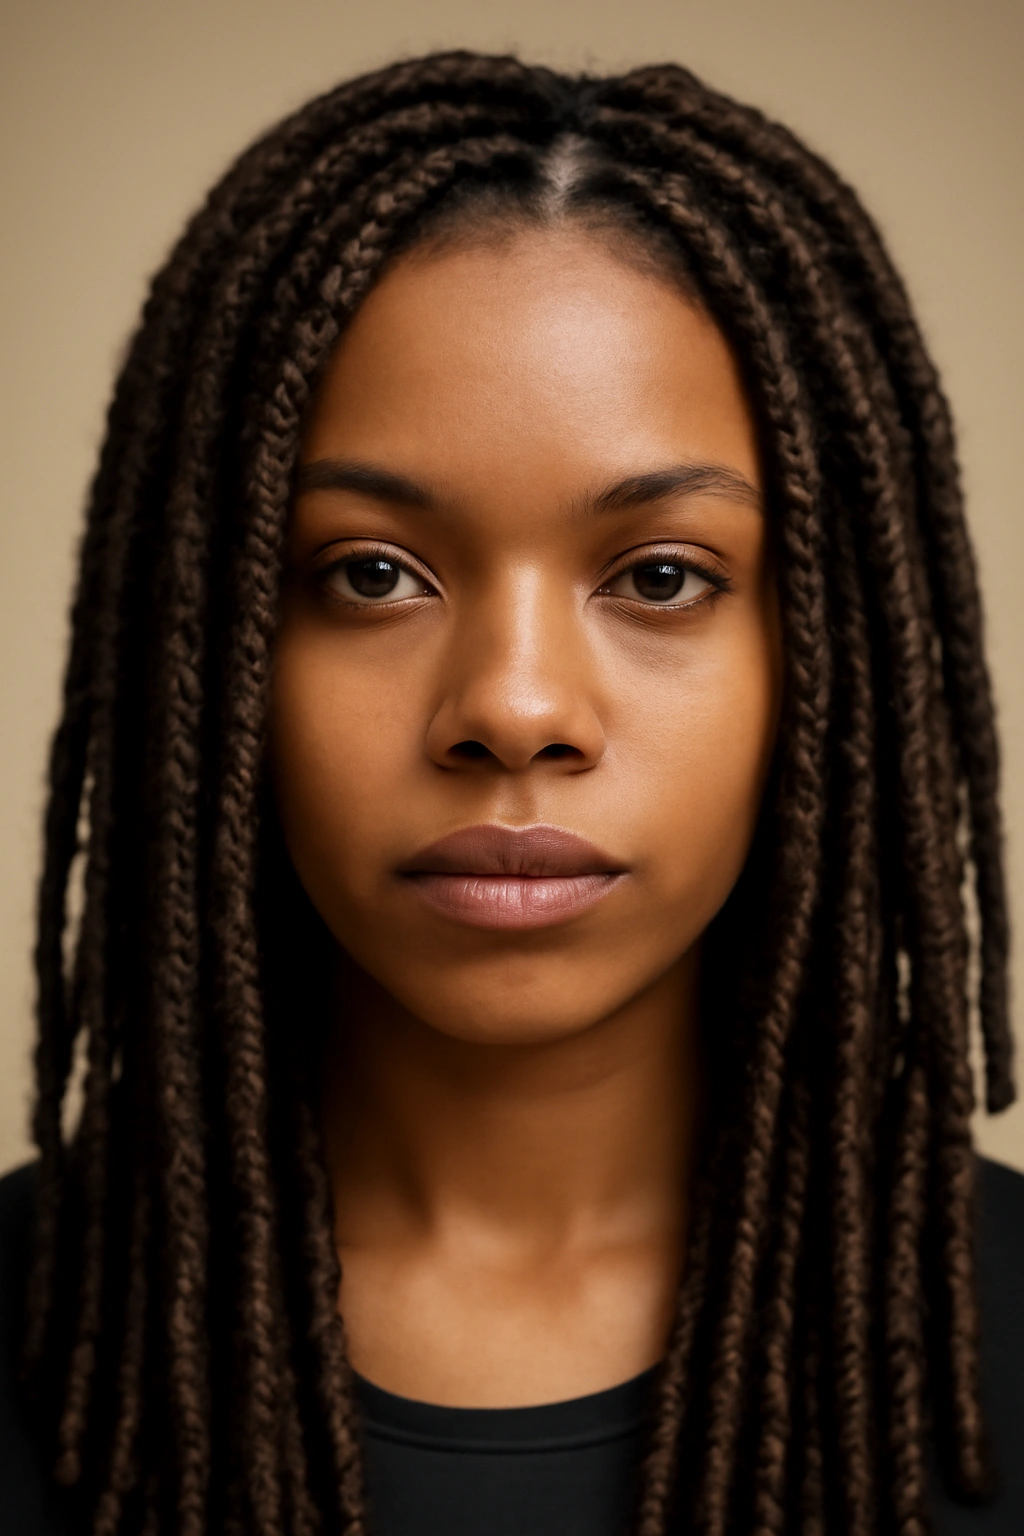
Faux locs created using the micro braid base are a protective style that mimics the look and feel of permanent locs but without the long-term commitment. The base is a traditional braid that’s then wrapped tightly and sealed with hair extensions, creating that chunky, textured loc appearance. This style gives you the aesthetic of locs with the flexibility to take them down whenever you’re ready.
The Appeal of Faux Locs
Faux locs work across all hair types and lengths because the texture is entirely created through the braiding and wrapping process. They’re bolder and chunkier than traditional micro braids, so they read as more of a statement and offer a different protective element — the wrapping distributes weight differently. Faux locs tend to last longer than traditional braids (8-10 weeks) because the sealed structure is more durable.
Installation and Maintenance Details
- Expect 8-12 hours for a full head, depending on thickness and length
- Can be done in different thicknesses — chunky for drama, medium for versatility, thin for delicacy
- Require consistent maintenance to prevent buildup at the base and keep the sealed sections smooth
- Humidity affects them less than traditional braids because the wrapped construction is more secure
- Can be worn half-up, in a top knot, or fully down with equal impact
Real talk: Faux locs are heavier than traditional braids, so they’re best if you have medium-to-thick hair density and a strong hairline.
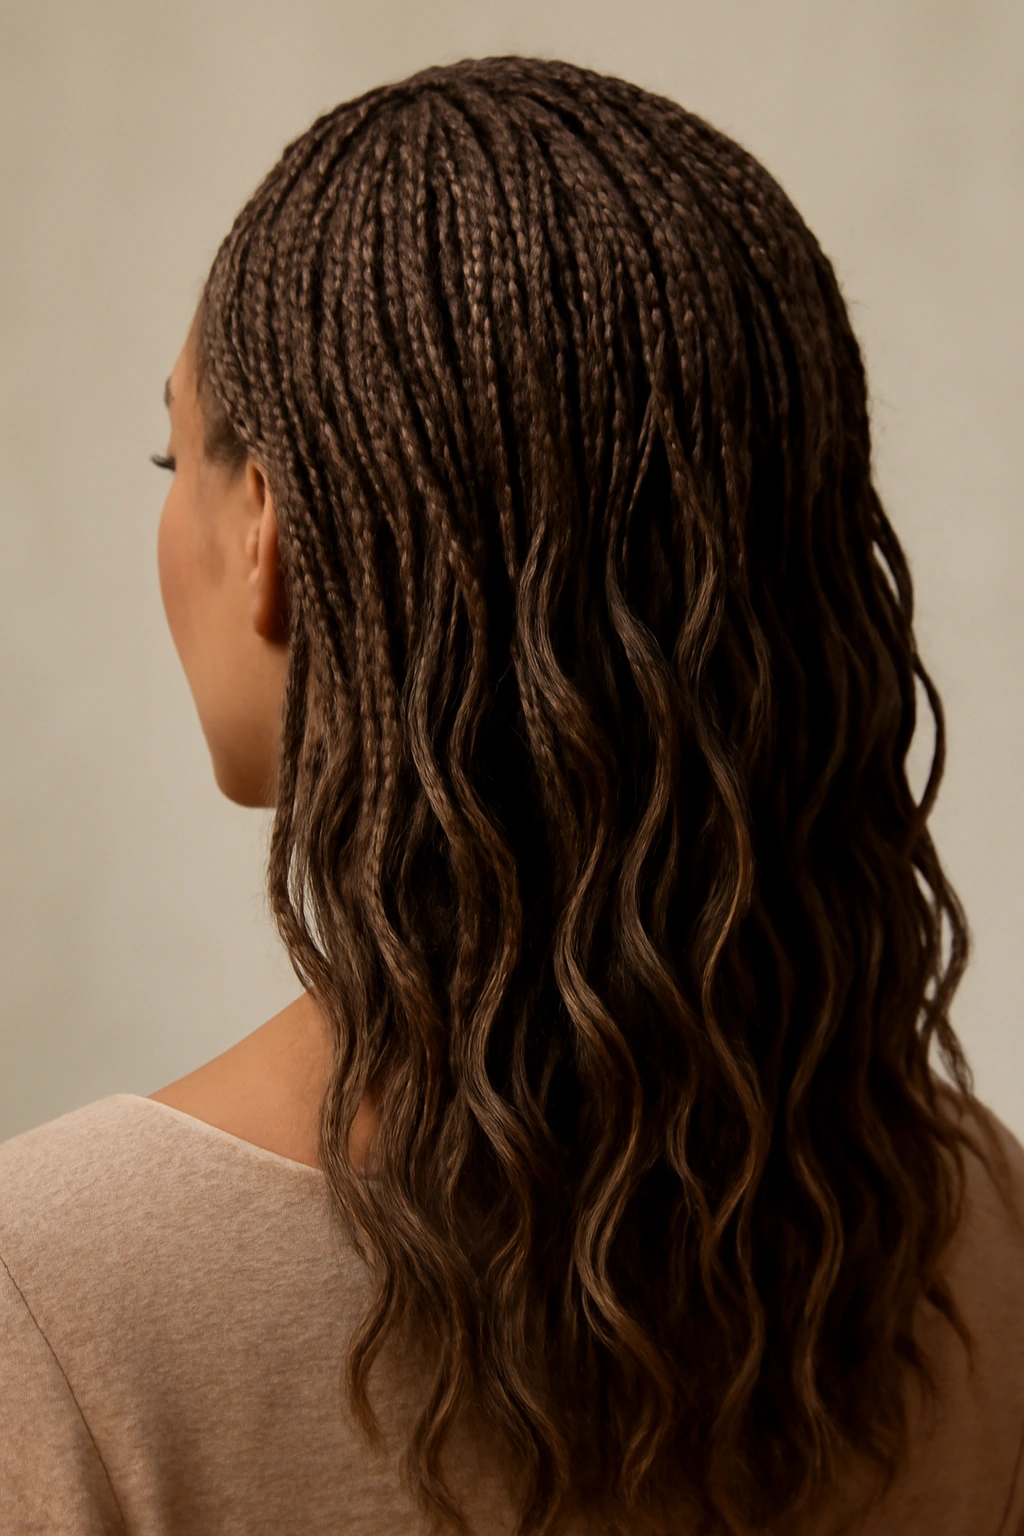
5. Boho Micro Braids with Wispy Texture
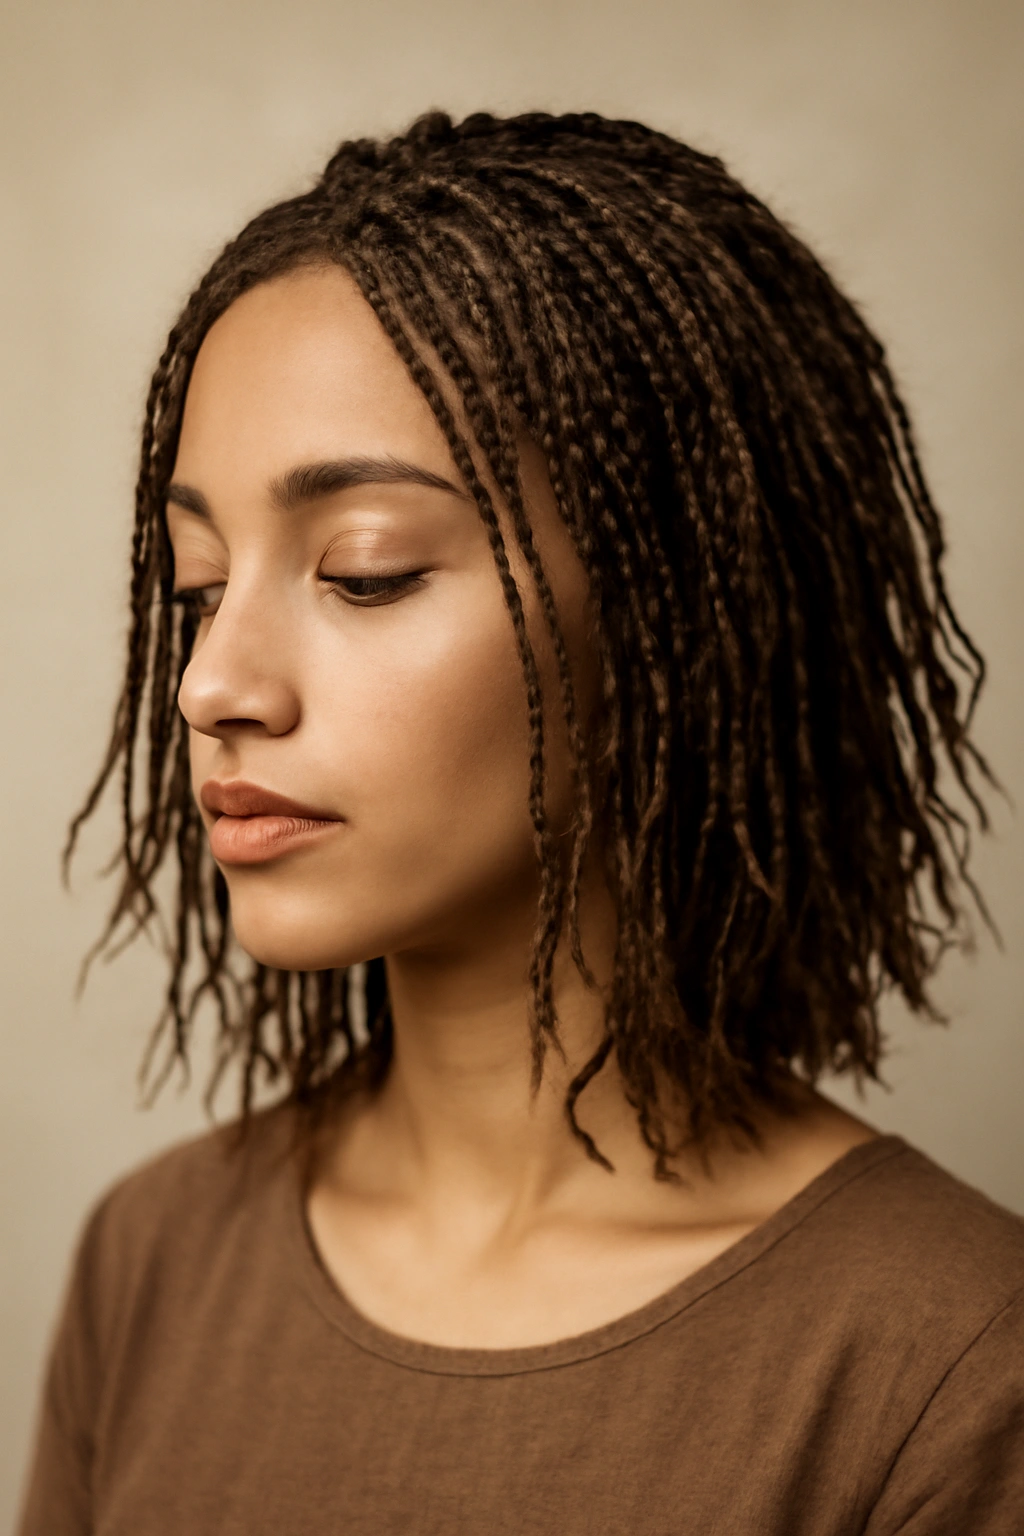
Boho braids intentionally leave some hair unbraided at the ends and throughout, creating a deliberately undone, romantic aesthetic that feels effortless even though it’s carefully constructed. When done with micro-sized braids, the effect is more delicate and wearable than thick boho braids — you get texture and movement without the bohemian-festival vibe if that’s not your style. These work beautifully on medium and long hair where you have enough length to showcase the loose-ends concept.
The Styling Philosophy
Boho micros embrace imperfection and softness. The unbraided sections are often curled, waved, or fluffed out, and the braids themselves might be slightly loose or textured rather than perfectly sleek. This style is perfect if you want to be protective without looking “styled” — it reads as naturally beautiful rather than intentionally done. The movement catches light differently, creating dimension and softness.
How to Achieve This Look
- Start with braids that are slightly looser than traditional micros
- Leave the bottom 2-4 inches unbraided and wave or curl those sections
- Scatter some braids throughout that are thinner and more delicate than others
- Consider adding tiny hair clips, beads, or metallic accents to some braids only
- Sleep on braids loosely braided or twisted to maintain the textured feel
- Frizz is intentional and adds to the aesthetic — embrace it rather than fight it
Pro tip: This style works beautifully with rooted extensions or with your natural hair — it doesn’t require perfectly matched lengths because the boho vibe embraces variation.
6. High Ponytail with Nested Micro Braids
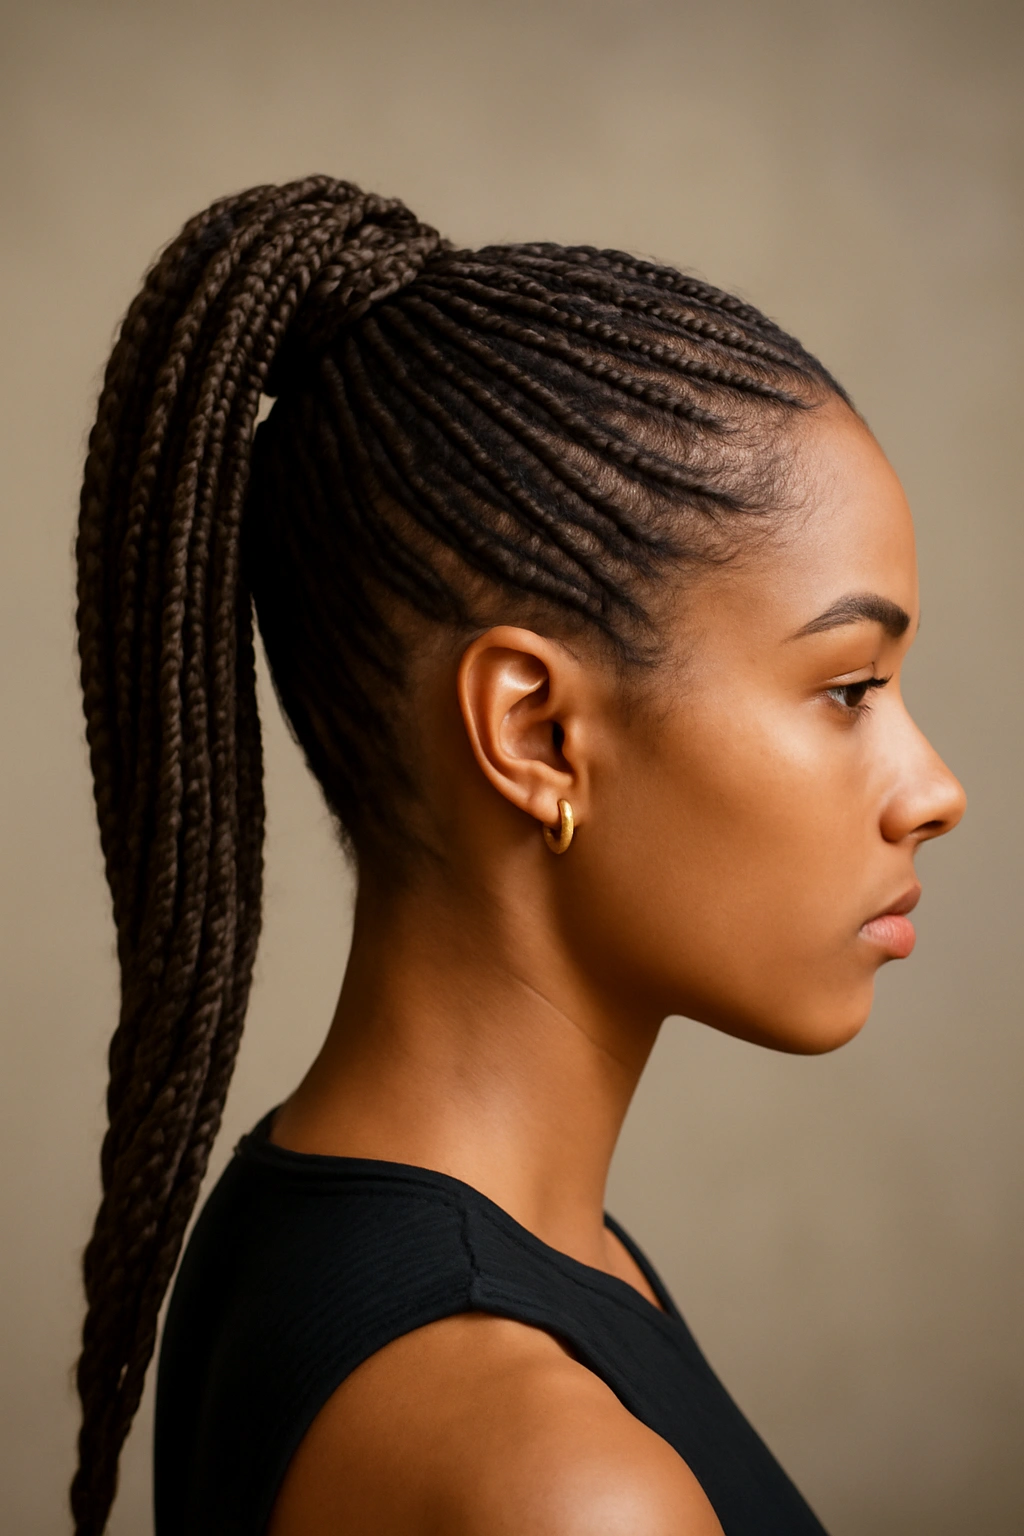
Pull your micro braids into a high, tight ponytail at the crown, then braid or twist the ponytail section itself for a nested-braid effect that’s equal parts sporty and polished. This style works across all hair lengths — if you have shorter hair, the braids might be concentrated lower; with longer hair, you get a longer ponytail section to play with. It’s a perfect style for active days because everything is secured, but it reads as intentional and put-together.
Perfect for Active Lifestyles
When everything is secured in a high ponytail, individual braids won’t swing around and create tension on your edges throughout the day. The nested-braid effect in the ponytail itself adds visual interest and complexity without requiring intricate installation at the scalp. This is the style you see on athletes and people with demanding days who still want to look polished.
Building This Style Successfully
- Your initial micro braids don’t need to be perfect since most will be hidden in the ponytail
- The ponytail base benefits from a sleek gel or styling cream for a clean hairline
- Braid or twist the ponytail section with extensions to add length and thickness
- Secure with a sturdy elastic or cloth wrap to minimize breakage
- Can transition from activity (wearing it super tight) to evening (loosening it slightly and adding beads)
- The contrast between structured edges and flowing ponytail creates a flattering silhouette
Worth knowing: This style is surprisingly low-maintenance because once it’s installed, you literally just secure it and go — no styling required daily.
7. Parted Side Micros with Undercut Design
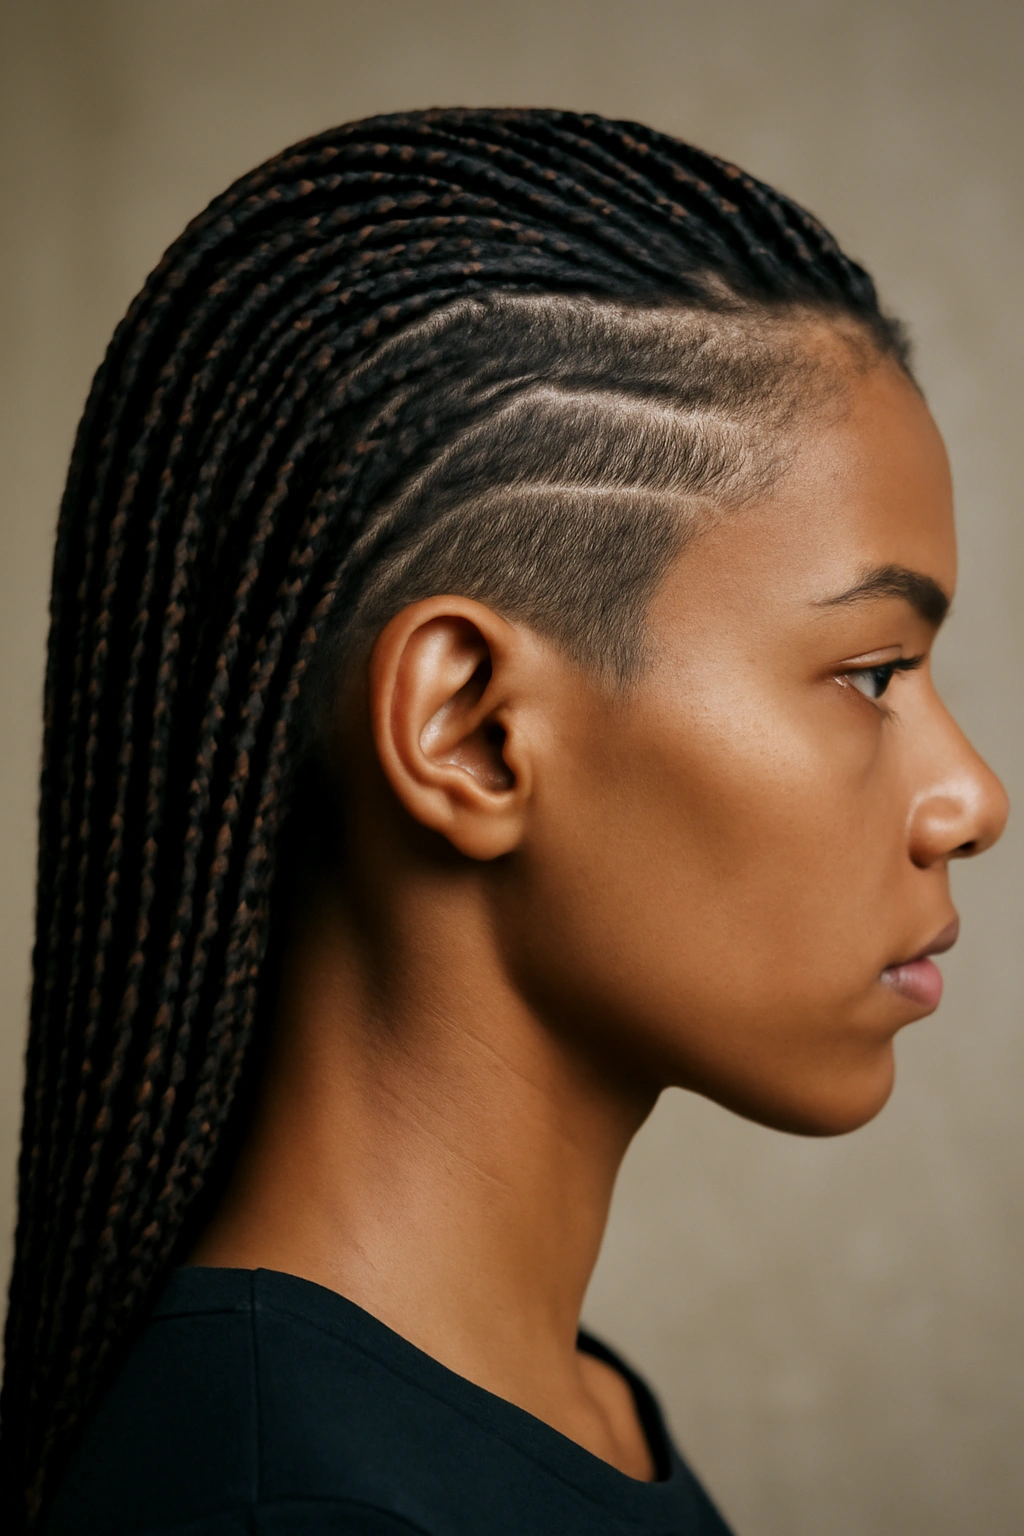
Create an asymmetrical, edge-forward look by parting your hair deeply to one side and installing braids on the fuller side while leaving the undercut section completely clear. This works beautifully if you have an undercut or shaved design underneath — the braids frame that artistic element. On straight hair (no undercut), you still get an incredibly modern, slightly edgy aesthetic that’s less matchy-matchy than a center part.
Why This Style Reads as Contemporary
Side parts with asymmetry feel more architectural and intentional than centered designs. When you pair it with visible undercuts or design work, it becomes a genuine style statement rather than just a protective look. This is the vibe if you want your hair to communicate something bold about your personal style.
Styling Considerations
- The deeper the side part, the more dramatic the asymmetry
- Works beautifully with design elements like lines, patterns, or color in the undercut
- The braids on the fuller side should be slightly chunky for balance against the emptiness of the parted side
- You can wear this sleek and architectural or slightly textured and boho
- Incredibly photogenic from multiple angles because of the asymmetry
- Works best on medium-to-long hair where you have enough length to create clear sections
Insider note: If you don’t have an undercut yet but love this look, ask your braider to create an undercut design with the micro braids themselves — place thinner braids in patterns or leave grid sections completely empty.
8. Spiral Wrap Micros for Maximum Texture
Spiral wraps twist around each micro braid in a tight spiral pattern, creating extra texture and thickness without requiring thicker braids at the root. This technique uses additional hair (usually extensions) wrapped tightly around each finished braid, adding dimension and making the overall style read as chunkier and more textured. If you love the look of thicker braids but prefer thinner, lighter braids at your scalp for comfort, this is the technique that gives you both.
The Texture-Building Magic
Spiral wraps create visual interest through texture rather than thickness, which is easier on your scalp and hairline. The wrapping creates a ridged, dimensional surface that catches light beautifully and photograph incredibly well. This technique is especially striking with color contrasts — black hair wrapped with metallic or blonde extensions creates serious visual pop.
Technical Details
- Each braid gets a coordinating wrap applied tightly after the base braid is complete
- Can use the same color for a tonal, subtle effect or contrast colors for drama
- The wraps add weight and thickness, so this is best for medium-to-thick hair density
- Installation takes longer (6-8 hours) because of the wrapping component
- Lasts 6-8 weeks with proper care and minimal re-wrapping needed
- The wrapped texture is durable and resists frizzing better than loose braids
Pro tip: Ask your braider to wrap in a specific pattern or direction — clockwise spirals read differently than counterclockwise, and that detail adds personality.
9. Crown Braid with Micro Detail
Build a traditional crown braid across the top of your head, but construct that crown using micro-braided sections instead of a thick three-strand braid. This gives you the elegant, romantic silhouette of a crown braid with the protective benefits and longevity of micros. The crown detail works beautifully across all hair lengths — you can leave the back loose or braid the entire back section, creating a fully protective style.
The Elegant Factor
Crown braids are inherently romantic and beautiful, and scaling down to micro braids maintains that elegance while adding practical protection. The crown style is less edgy than other micro braid styles, so it’s perfect if you want something that feels polished and feminine without screaming “protective style.” It photographs like you’re wearing a crown made entirely of your own hair.
Building Your Crown Successfully
- Plan the direction the braids will flow across your head before installation
- The braids don’t need to be super tight across the crown — slight looseness adds romance
- Consider leaving some wispy pieces around your face if you want softness
- The back can be styled multiple ways: loose waves, a second set of braids, or a sleek bun
- Add flowers, pearls, or delicate clips along the crown for special occasions
- This style lasts 5-6 weeks because the crown area will get slightly fuzzy first
Real talk: Crown braids require some styling skill if you’re doing touch-ups at home — work with a professional for the initial installation.
10. Tribal Braids with Bold Placement
Tribal braids are thicker micro braids installed in intentional patterns across the scalp, often following cultural design aesthetics and creating bold geometric or flowing patterns. The braids themselves are thicker than ultra-fine micros, and the installation focuses on the pattern and placement rather than on covering the entire head. This style is visual art — it’s meant to make a statement about your style and cultural appreciation.
Understanding Placement and Meaning
Tribal braids are best worn when you have genuine cultural connection or appreciation (not appropriation). If this is your heritage or cultural expression, the patterns often hold meaning and tradition. The placement matters hugely — designs can follow bone structure, create geometric patterns, or flow in waves. This is absolutely a conversation-starter style that communicates intentionality and boldness.
Installation and Design Elements
- Patterns are planned and discussed with your braider before installation
- The braids are usually thicker (3-5mm) than ultra-fine micros to showcase the pattern
- Can be installed with natural hair or extensions
- Often incorporate color contrasts that emphasize the geometric patterns
- Typically last 6-8 weeks depending on the thickness
- Require a braider who understands pattern design and your cultural context
Worth knowing: Research the cultural meaning behind specific patterns and honor the traditions connected to them — wear with respect and understanding, not as a trend.
11. Soft Wave Micros for Texture Without Braid Commitment
Install loose, soft-tension micro braids that are meant to be unraveled after 2-3 weeks, creating lasting waves in your hair without permanently braiding it. This isn’t technically wearing braids long-term — it’s using braids as a texturizing tool. The braids are installed looser and sometimes fewer in number, and you actually intend to take them down and rock the resulting wavy texture. Perfect if you want protective styling but also want to change your look frequently.
The Texture-Tool Approach
Using micro braids as a temporary texturizing method gives you gorgeous waves with less commitment than traditional protective styling. Your hair gets some break time from heat styling, you get texture and movement, and you can unravel and switch to a different style whenever you want. The waves last 1-2 weeks after unraveling, so you get multiple looks from one installation.
Making This Work
- Install braids with looser tension and slightly larger sections
- Spray braids with water or light leave-in conditioner the night before unraveling for better texture
- Unravel gently, starting from the bottom and working up, to preserve the wave shape
- Use a curl-defining cream or mousse on damp hair right after unraveling to set the waves
- Sleep on the waves loosely to maintain texture through the night
- This works best on medium-to-long hair where you have length to create visible waves
Pro tip: Install these braids, live in them for 2-3 weeks, then unravel for beautiful waves — perfect for that in-between moment when you want change without commitment.
12. Bubble Braids Within Micro Sections
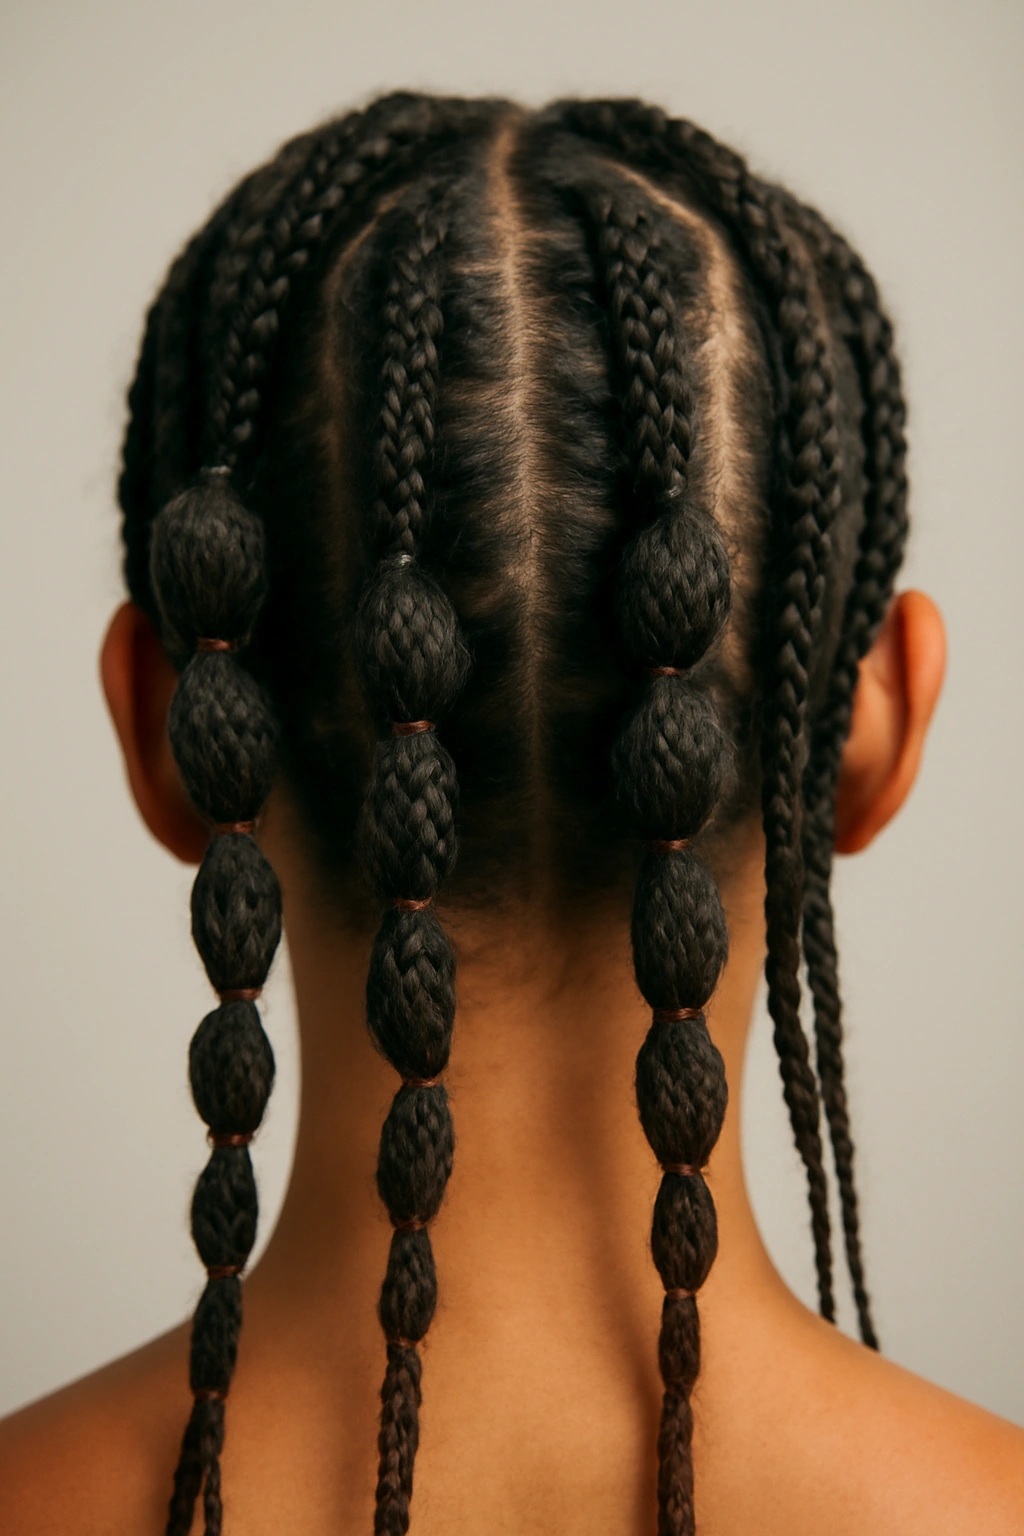
Create bubble braids (braids sectioned and gathered with tiny elastic bands, puffing out slightly between each section) but construct each bubble using micro-braided hair. This technique combines two styles for maximum visual interest and playfulness. The bubbles create dimension and texture, while the micro construction keeps everything secure and wearable for any occasion.
Why Bubble Micros Work
Bubble braids appeal to people who want playfulness and movement but also want protection and durability. The sectioning with elastics creates visual breaks and rhythm along the length of the braid, and the micro thickness means the style reads as intentional rather than whimsical. You get the fun factor without sacrificing polish.
Installation and Styling
- Micros can be created and then sectioned with clear or colored elastics for the bubble effect
- Alternatively, bubble sections can be built directly into the initial braid installation
- Each bubble can be fluffed differently — some sleek, some textured, some with wispy pieces
- Works beautifully with color contrasts if the elastics are a contrasting shade
- Lasts 5-7 weeks because the bubble sections will eventually loosen
- Can be worn down fully or styled into half-ups and top knots
Insider note: Smaller, more frequent bubbles read as cuter and more playful; larger, less frequent bubbles read as more sophisticated and architectural.
13. Shaved Design Undercut Braids with Clean Lines
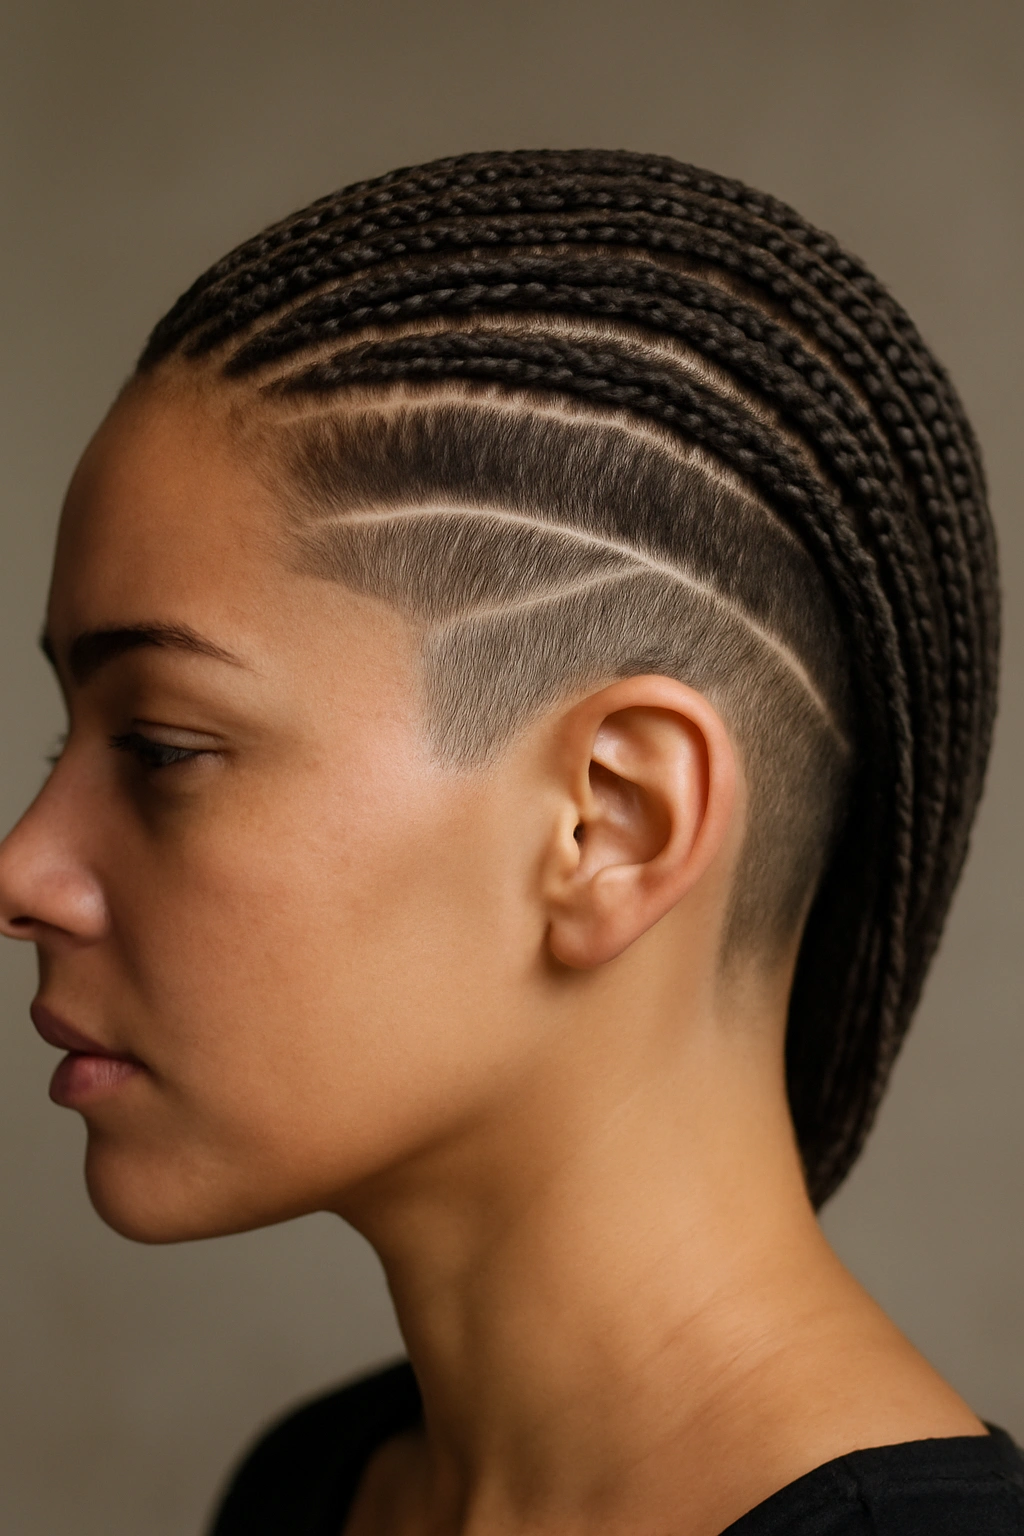
Install micro braids across the full head, but incorporate a shaved or very short undercut section with geometric lines, patterns, or designs cut into it. The undercut becomes a canvas for artistic expression while the braids on top create protective style and cover the design when styled differently. This is absolutely for people who want to make a bold style statement and have fun with the contrast between structured braids and architectural undercut designs.
The Art and Impact Factor
Combining braids with shaved design work creates genuine artistry. The undercut can feature lines, lightning bolts, geometric patterns, initials, or complex designs depending on your vision. The braids protect the undercut as it grows out and create a polished topline when you’re wearing braids pulled back. This is the style that makes people turn around and ask “who does your hair?”
Planning and Maintenance
- Work with a barber or hair artist who specializes in design cuts
- The undercut will grow out, so plan touch-ups every 3-4 weeks
- The braids will eventually cover less of the undercut as it grows, so be okay with the design becoming visible
- Can wear braids fully down or swept up to showcase the undercut
- Requires confidence — this isn’t a subtle style
- Works on all hair textures and pairs well with any braiding style
Real talk: This combination is stunning but demands maintenance. If you’re not ready to commit to regular undercut touch-ups, stick with braids alone.
14. Long Micro Braids with Bead-to-Tip Design
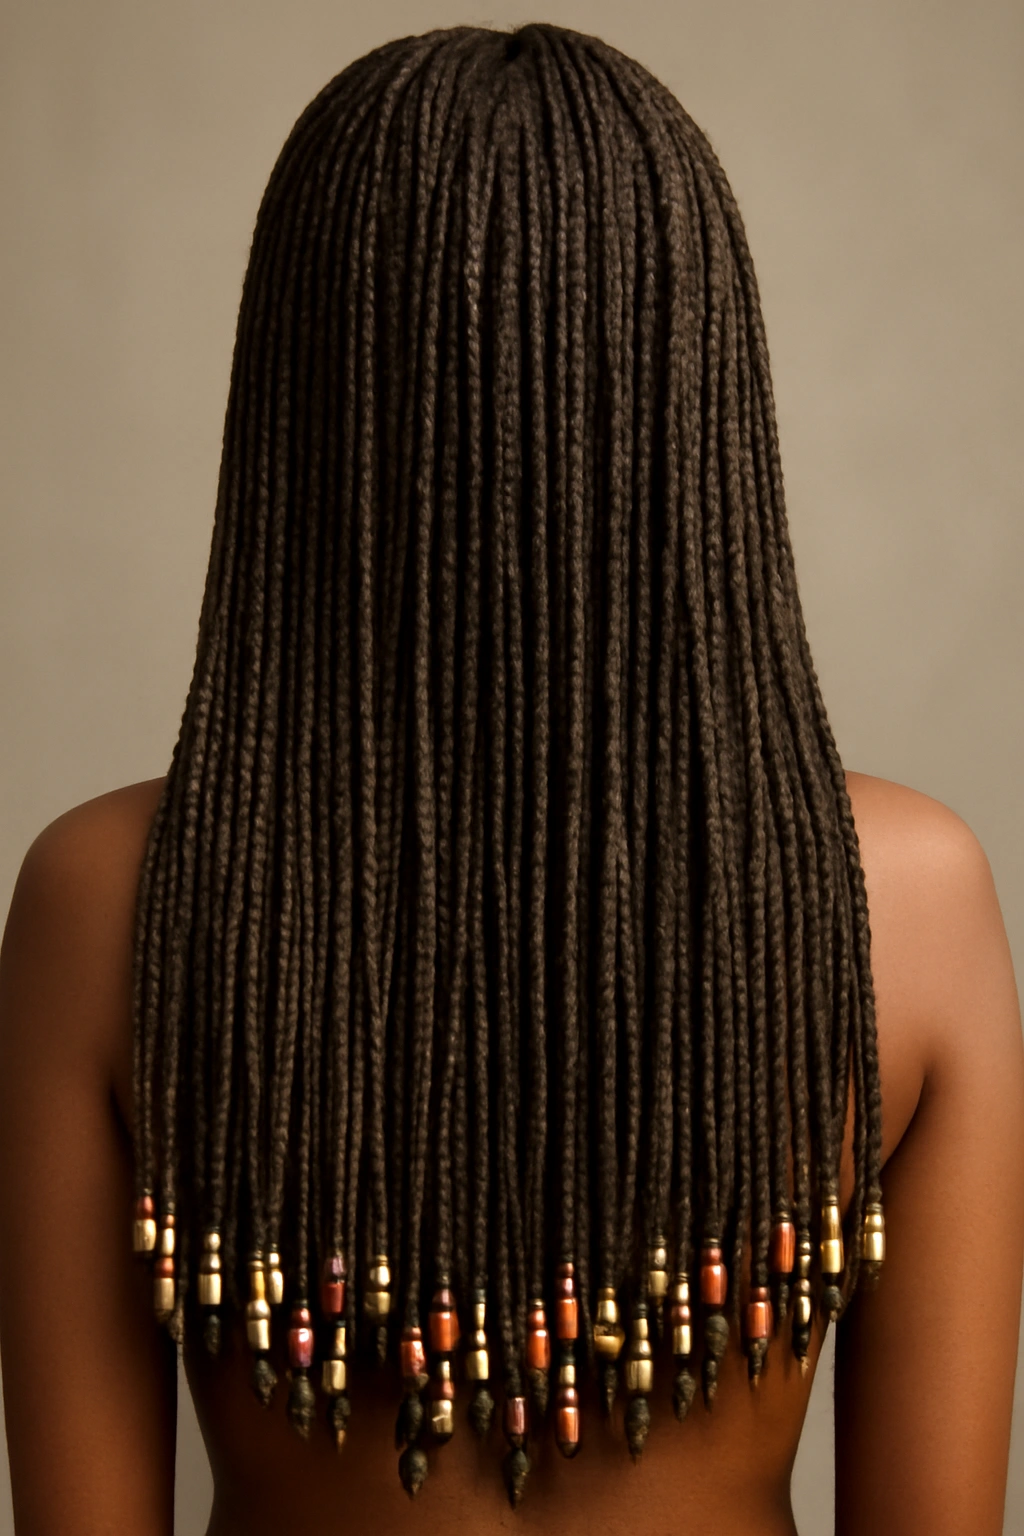
Install micro braids down the full length of your hair, ending each braid with a bead at the very tip. The beads serve both protective and aesthetic purposes — they protect the braid end from unraveling and create visual pops of color or shine throughout your hair. This is the classic “beaded braids” look that’s both protective and undeniably beautiful, and it works across all hair lengths.
The Longevity Factor
Beaded braids actually last longer than unbeaded braids because the bead weight helps keep the braid structure intact and prevents premature frizzing or unraveling. The beads add weight, which some people love (the slight tension feels anchoring) and others find heavy — this depends entirely on your preference and scalp sensitivity. The visual impact is undeniable — beaded braids photograph beautifully and catch light in specific ways.
Bead Selection and Placement
- Metal beads (gold, silver, rose gold) work with any aesthetic
- Colorful beads can match your skin tone, eye color, or personal style
- Larger beads at the tips are visible; smaller barrel beads are more subtle
- Can use matching beads on every braid or create patterns with different bead styles
- Beads should be tight enough not to slide but not so tight they crush the braid
- Expect braids to last 7-8 weeks with bead weight helping maintain structure
Pro tip: Invest in quality beads — cheap beads can tarnish, lose color, or even break, which is disappointing after weeks of beautiful braids.
15. Colored Ombre Micros for Visual Drama
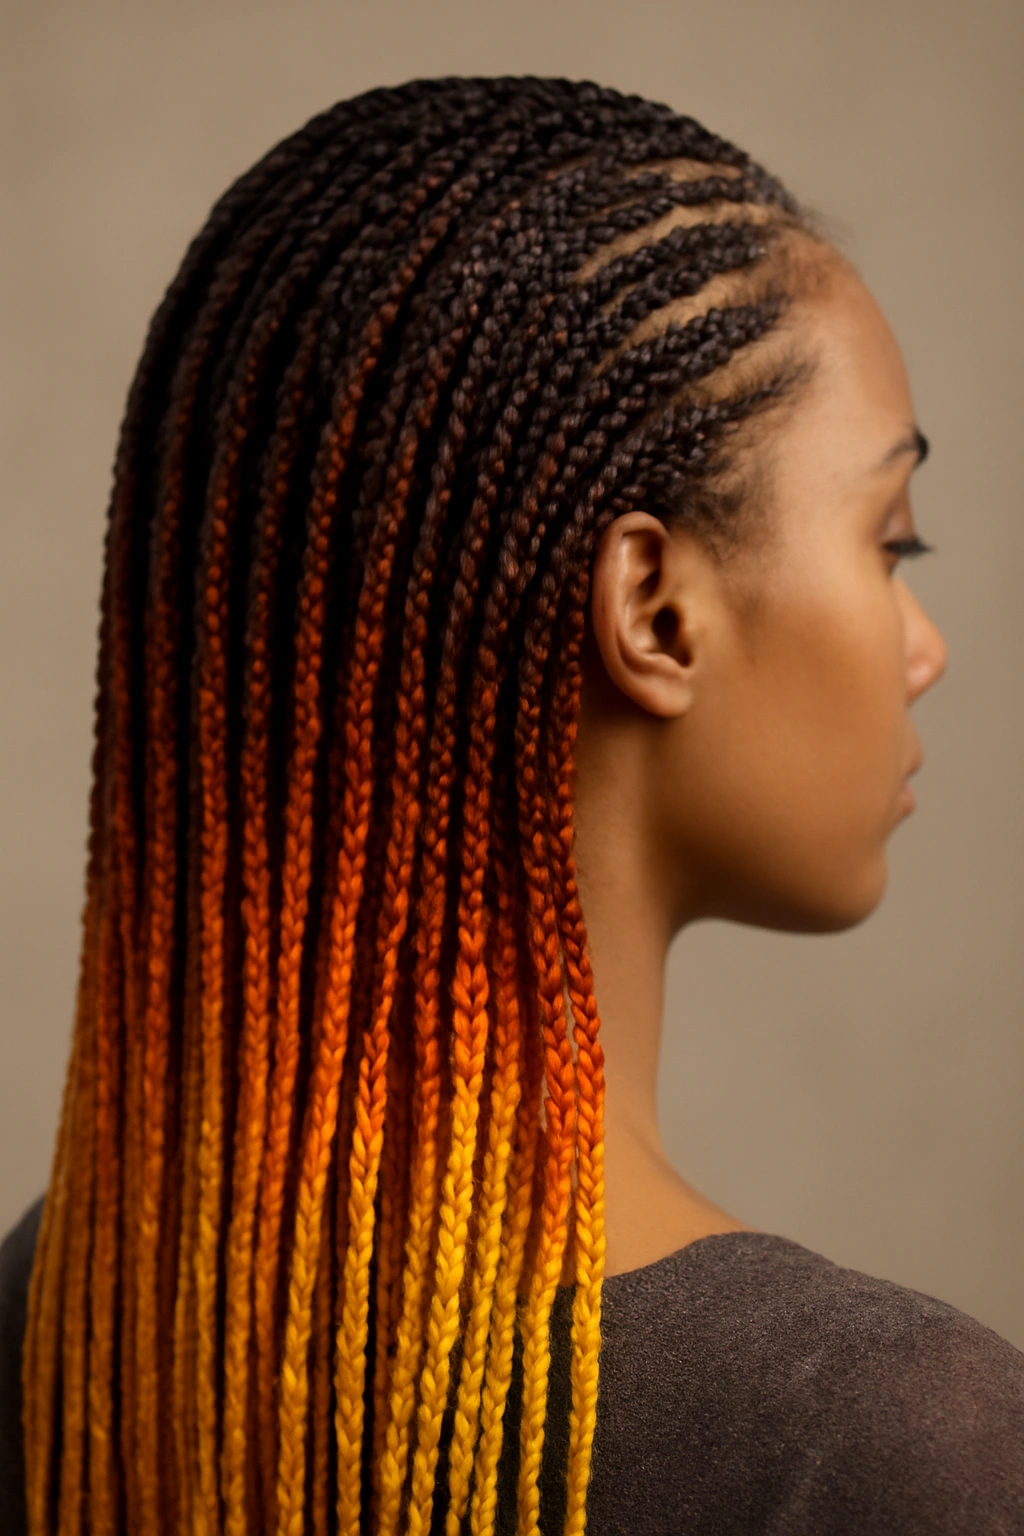
Install micro braids using a gradient of two or three colors, creating an ombre effect that transitions from dark at the roots to light at the tips. The color can be achieved through extensions in different shades or by braiding sections of different colors together. This technique creates stunning visual dimension and is especially striking with high-contrast color combinations like black-to-blonde or burgundy-to-gold.
The Art of Color Gradient
Ombre micros are about creating intentional color progression that photographs beautifully and creates depth in your hair. The gradient draws the eye and creates movement, making the style read as more dynamic than single-colored braids. Ombre works with any color combination — naturals tones for subtlety, contrasts for drama, pastels for softness.
Color and Installation Considerations
- The color gradient should be planned before installation so each braid flows from dark to light
- Blonde extensions against darker roots create the most dramatic effect
- Can achieve ombre through blending multiple extension colors or using pre-colored braiding hair
- Works with any braid thickness and installation style
- Color-treated extensions may fade slightly with time, but the ombre effect remains visible
- Lasts 6-8 weeks; color fade is minimal if you’re using quality extensions
- Incredibly photogenic from all angles, especially in natural light
Worth knowing: Pre-order your color-matched extension packs — this is the one style where color precision really matters for the final effect.
Final Thoughts
Micro braids offer something genuinely special: they’re protective, versatile, beautiful, and infinitely adaptable to your personal style and preferences. Whether you’re drawn to sleek, architectural designs or soft, textured boho vibes, whether you want to express bold artistry through geometric patterns or simply give your hair a break while looking amazing, there’s a micro braid style that fits your vision.
The key is knowing your hair type, understanding your lifestyle, and being honest about maintenance commitment. Some styles require regular touch-ups and careful care; others are more low-maintenance. Some need experienced professional hands; others you could potentially refresh at home. And some styles are pure statement-making art that demands confidence and intentionality.
Whatever style calls to you, arrive at your appointment with reference photos, have a real conversation with your braider about what’s realistic for your hair and lifestyle, and be patient with the installation process. The result will be weeks of beautiful, protective styling that lets your hair rest while you shine. That’s the real power of micro braids.