Loose braids are the secret weapon that separates polished hair from “I tried too hard.” They work because they hit that perfect balance—they look intentionally styled without the rigidity of a tight, formal braid. You can wear them to a casual brunch with coffee stains on your shirt, and you can also wear them to a wedding where you’re standing in front of 150 people. They soften your face, add texture and volume, and work with almost every hair type and length.
The beauty of loose braiding is that it’s fundamentally forgiving. If a strand falls out or your braid isn’t perfectly even, it actually looks better. The whole point is the undone, romantic quality—the impression that you braided your hair while thinking about something else, not that you spent twenty minutes getting the tension exactly right. Whether your hair is straight, wavy, curly, or coily, there’s a loose braid style that’ll work for you. And the amazing part? Most of these styles take less than five minutes once you get the basic technique down.
The way to wear loose braids confidently is understanding which style matches the vibe you’re going for. Some styles scream casual weekend energy. Others have that effortless elegance that actually works for formal events. And then there are the styles that are pure fun—the ones you wear when you want your hair to be interesting and a little unexpected. Here’s how to master the loose braid landscape.
1. Messy Dutch Braid
The Dutch braid is the reverse of a French braid—instead of pulling your hair over the center section, you pull it under. This automatically creates more texture and volume than a traditional French braid, which is exactly why it works so beautifully when you loosen it up. A messy Dutch braid takes that textured base and pushes it even further by pulling out individual sections as you go, creating an intentional undone effect that somehow looks more sophisticated than you’d expect.
How to Master the Undone Texture
Start with hair that has a bit of grip—if your hair is freshly washed and silky smooth, it’ll slip out of the braid too easily. Dry shampoo or a texturizing spray applied to your roots the night before makes the whole thing easier. Divide your hair into three sections at the crown, and start the Dutch braid by taking one section, crossing it under (not over) the middle section, then the next section under the middle. Keep the braid intentionally loose from the start—don’t pull it tight.
As you continue braiding down, gently pull out little wispy pieces from the edges of the braid. Do this as you go, not after you’ve finished, because it’s easier to adjust the looseness in real time. The goal is to see the individual strands loosening up rather than a neat, compact braid. Pull from alternate sides so the effect looks balanced.
Quick Facts About Dutch Braids
- Works beautifully on wavy hair because the texture amplifies the braided effect
- Takes about 4-5 minutes once you understand the under-pulling motion
- Holds all day without needing many bobby pins—the undone texture actually makes it look intentional if a few pieces fall out
- Flatters most face shapes because the side detail draws the eye outward
- Perfect for both casual and formal occasions depending on how much you loosen it
Pro tip: Finish by lightly misting the entire braid with flexible hold hairspray—this doesn’t make it stiff, but it keeps all those pulled-out pieces exactly where you want them without the tight, structured feeling of heavy product.
2. Side Swept French Braid
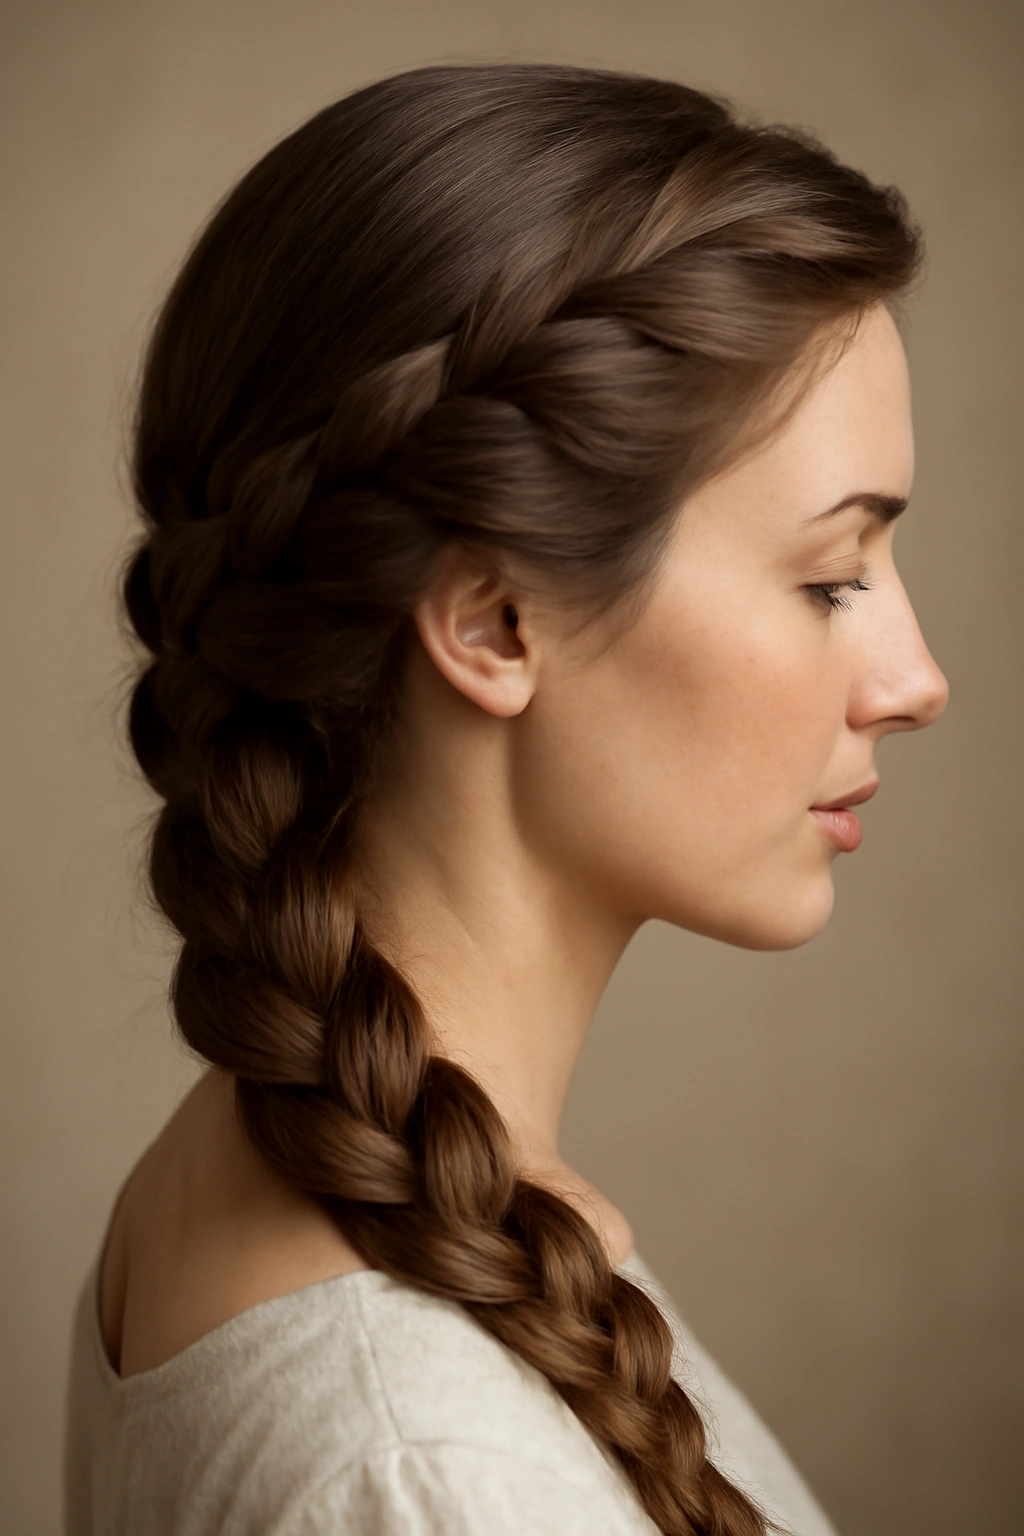
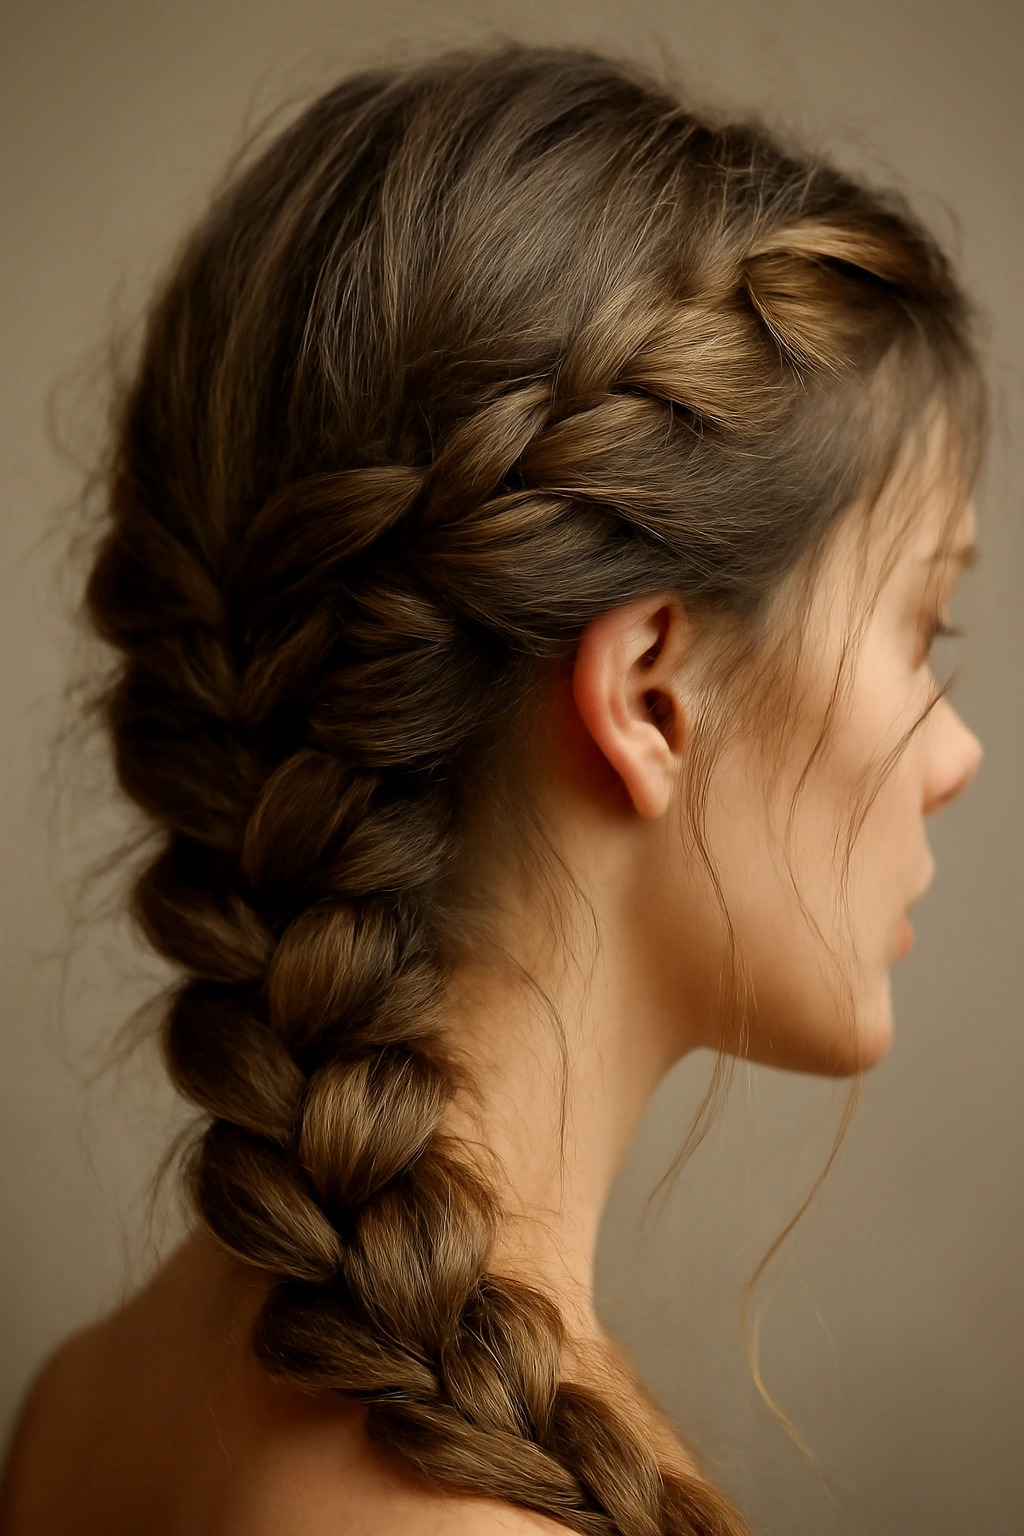
There’s something about a braid swept to one side that instantly feels more polished and intentional than a braid down the middle. A side-swept French braid takes the most classic braid style and positions it at an angle, which changes the whole visual impact. You’re working with gravity differently, which actually makes the braid easier to control, and the asymmetry is instantly flattering because it adds dimension to your face shape.
Why Asymmetry Changes Everything
When you braid to one side instead of down the center, you’re creating a focal point that’s off-center. This is why fashion and styling intuitively gravitate toward asymmetry—it’s more interesting to look at than perfect symmetry. A side-swept braid also exposes more of your neck and jawline, which adds elegance without requiring any formal styling effort. It works whether you’re wearing casual jeans or a cocktail dress.
Start by creating a deep side part on whichever side feels natural for you. Begin the French braid at the temple of your fuller side—so if you’re parting on the left, start the braid on the right. This is counterintuitive at first, but it allows the braid to travel diagonally across your head and end up at the back, which is far more flattering than a braid that sits straight down one side.
Styling Details That Make the Difference
- Loose, wispy baby hairs around your face pair perfectly with this style
- The braid should start above your ear and angle down toward the nape of your neck
- Finish the braid while standing in front of a mirror so you can see whether it feels balanced and intentional
- Secure with a small, delicate bobby pin or elastic that matches your hair color
- Pull out face-framing pieces before you finish the braid, not after—this keeps them looking natural
Worth knowing: This style photographs beautifully and works especially well if you’re going to be taking photos at an event. The asymmetry and the angle create visual interest even in still images, which is why it’s a favorite for weddings and formal occasions.
3. Halo Braid (Crown Braid)
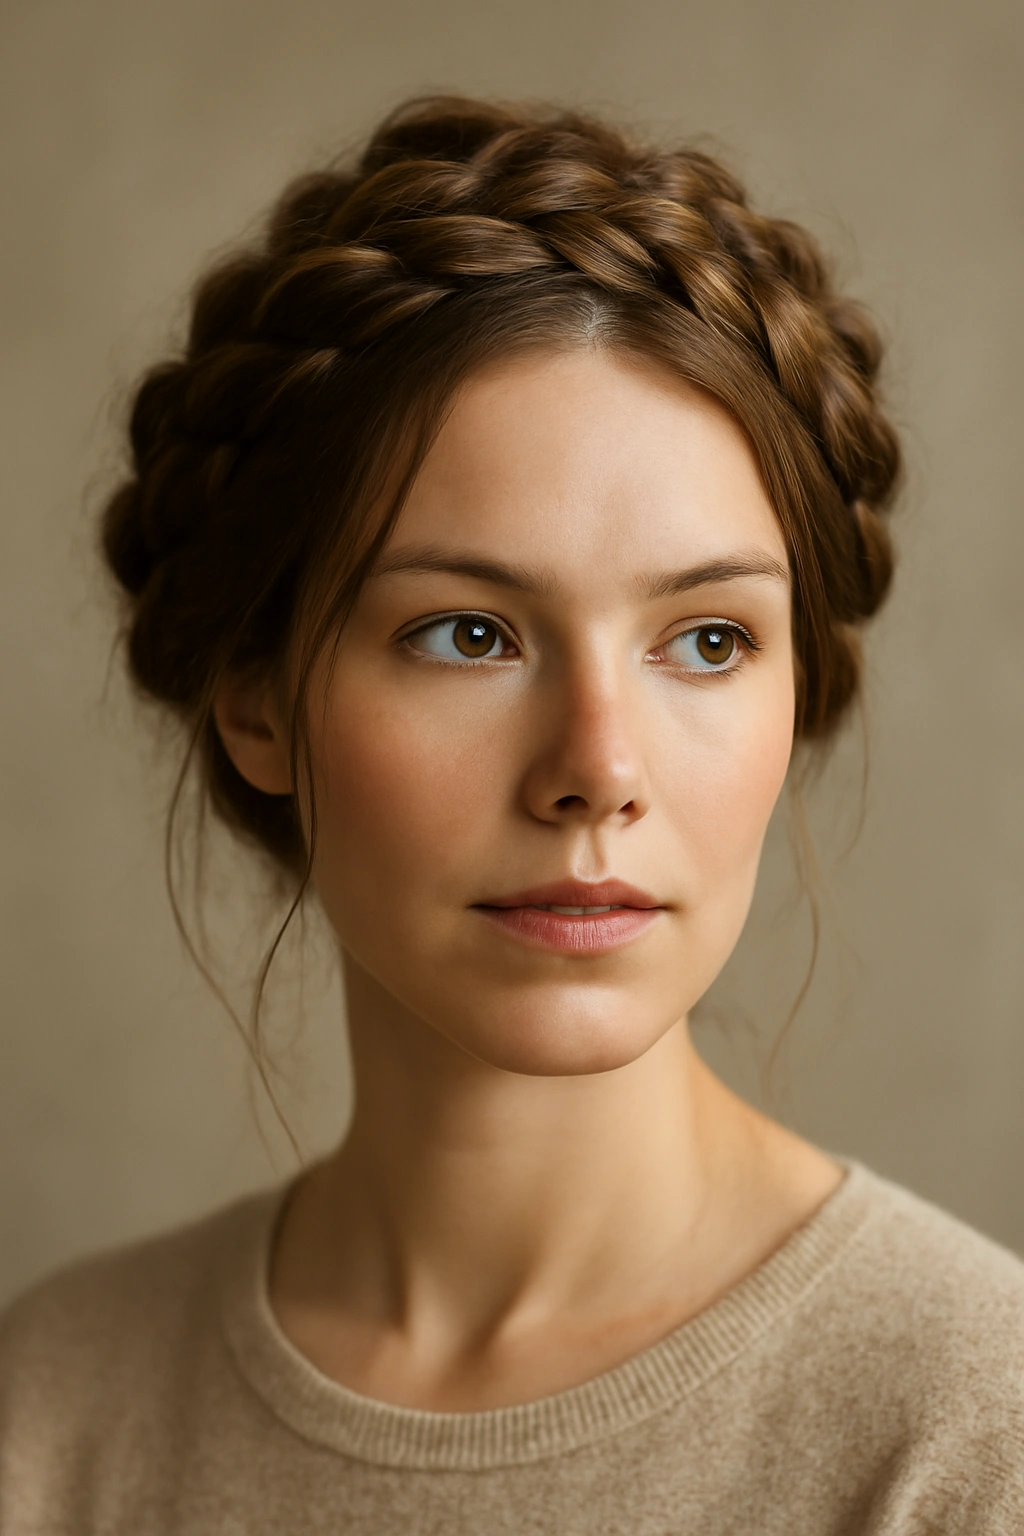
A halo braid is a French braid that travels around the entire perimeter of your head, meeting in the back and pinned to create a crown-like effect. It’s the most romantic and deliberate loose braid style, and it works on almost every occasion because it instantly makes you look like you put real effort into your appearance. Despite looking completely intricate, it’s surprisingly simple once you understand the basic motion.
Creating the Illusion of a Crown
The magic of a halo braid is that it frames your entire face while also showcasing the length and texture of your hair beneath it. Start on one side of your head at about ear level—not at the crown. Create a regular French braid by taking three sections and crossing them over the middle strand as you go. Instead of braiding straight down, angle the braid up and back, following the curve of your head. Your goal is to travel from one ear, up and over the top of your head, and down to the other ear.
This takes longer than other braids because you’re literally going around your whole head, but that’s also why it looks so impressive. The braid ends at the opposite ear from where you started. At that point, you’ll secure the end with a small elastic, then pin the entire braid around your head in a horseshoe shape, tucking the end under as if you’re creating a seamless crown. Pull gently on the braided sections to loosen and widen the braid as you go—this prevents it from looking too tight and structured.
Making It Work for Your Hair Type
- Works on medium to long hair (shoulder length or longer)
- Wavy or curly hair actually holds a halo braid better because the texture gives it grip
- Fine, silky hair benefits from texturizing spray applied beforehand
- Thick hair might need two braids instead of one if you find a single braid too thin-looking
- Any face shape looks good with a halo braid, but it’s especially flattering if you have a longer face
This style takes 8-12 minutes depending on your hair type and whether you’ve braided before, but it’s absolutely worth the time. You can wear it to a casual beach day and look effortlessly romantic, or wear it to a formal event and look like you got your hair done professionally.
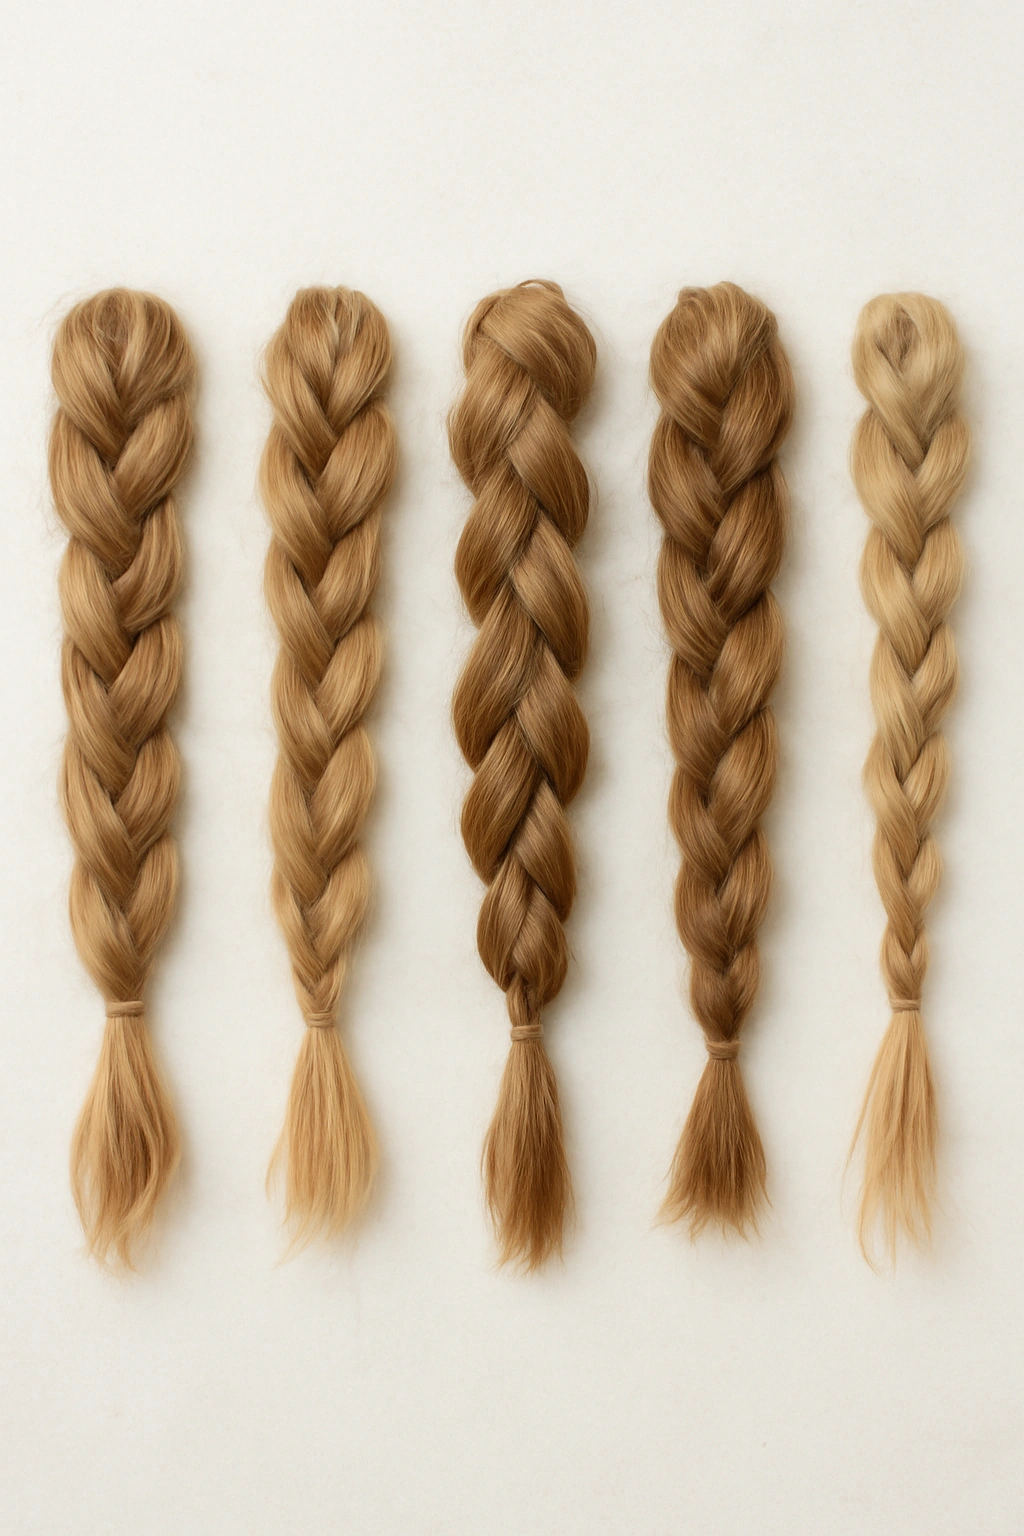
4. Fishtail Braid
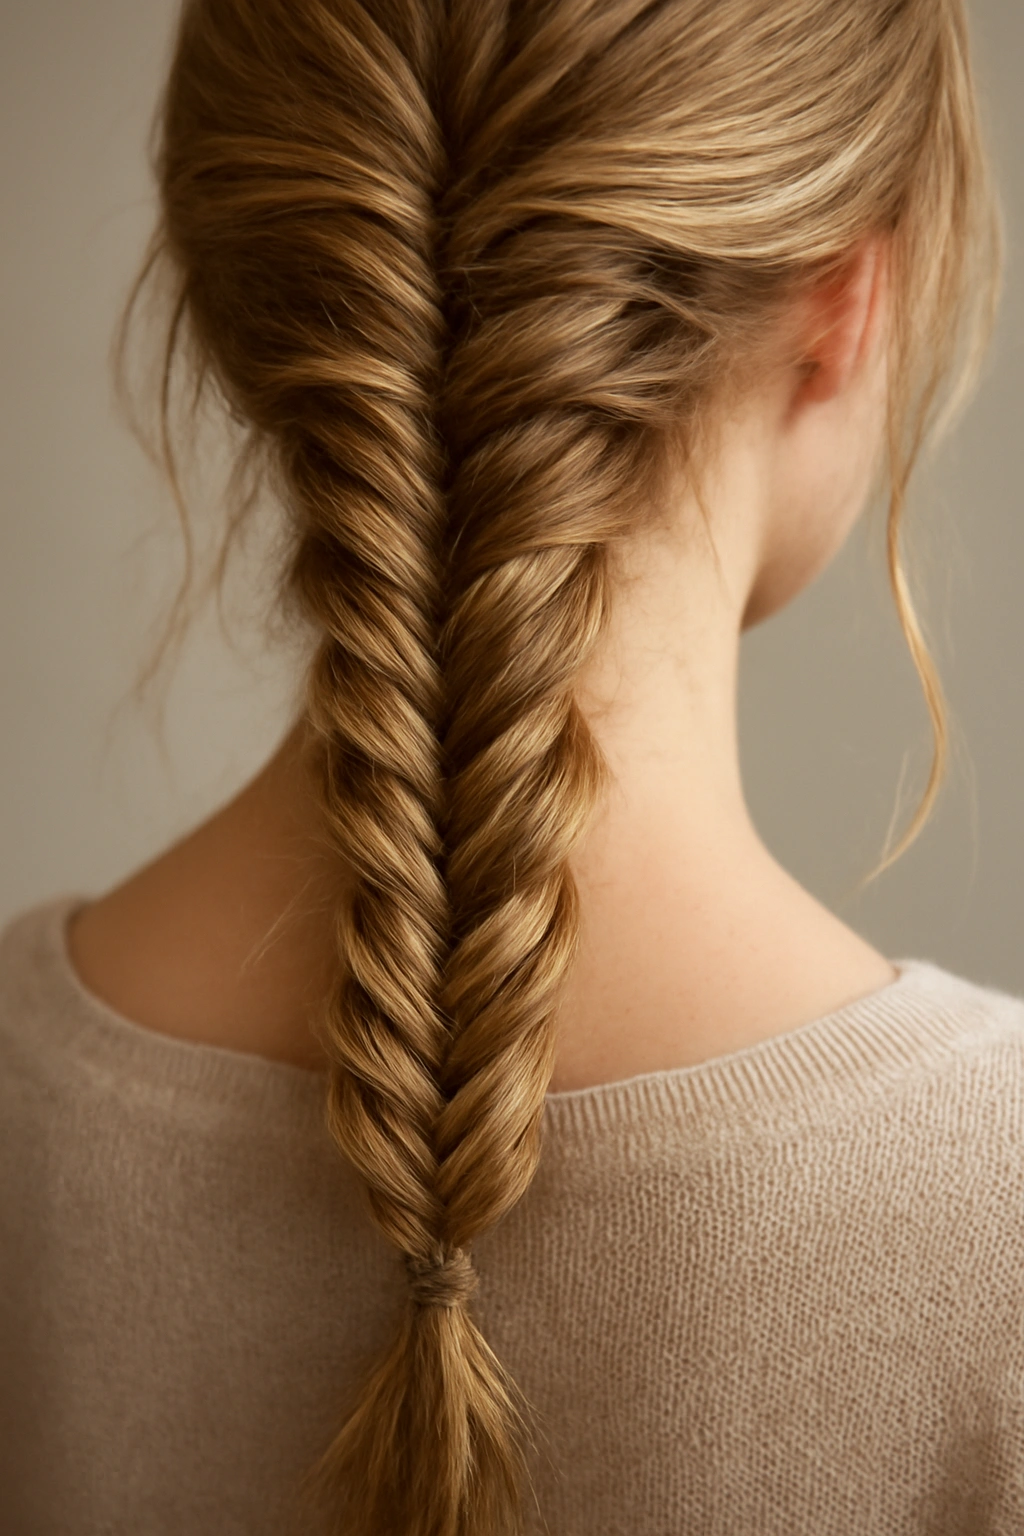
A fishtail braid is the texture superstar of the braiding world. Instead of the three-section pattern of a French or Dutch braid, you’re working with two sections and taking tiny pieces from one side and crossing them over to the other. The result is a braid that looks far more intricate than it actually is, with a delicate, feathered appearance that’s absolutely mesmerizing.
The Two-Section Magic
The fishtail is easier than most people expect once you understand the motion. Split your hair into two equal sections—you’re not doing a French braid where you’re gradually adding hair from both sides; instead, you’re creating that layered, feathered look by taking hair from one side, crossing it over, and incorporating it into the other side. Start at the base of your head or wherever you want the braid to sit, and take a thin piece (about the width of a pencil) from the underside of the left section. Cross it over and add it to the right section. Repeat on the opposite side.
The key to making this look intentionally undone is keeping your sections loose and pulling out pieces generously as you go. This style actually demands looseness—a tight fishtail braid looks awkward. Pull out small sections from both sides of the braid, creating a wider, fluffier texture. The more you pull, the more impressive and romantic it looks.
Why Fishtail Beats Other Braids
- Creates dramatic texture even on straight hair
- Works beautifully in thin hair because the feathered effect creates the illusion of thickness
- Takes about 3-4 minutes once you get the two-section motion down
- Holds surprisingly well despite looking delicate and undone
- Works for both casual ponytails and elegant formal occasions
- Photographs incredibly well because of the detailed texture
Pro tip: Do a fishtail braid on damp hair for the best hold. Wet hair grips better than dry hair, which makes the whole process easier. By the time your hair dries, the braid is set and stays in place all day.
5. Twisted Braid
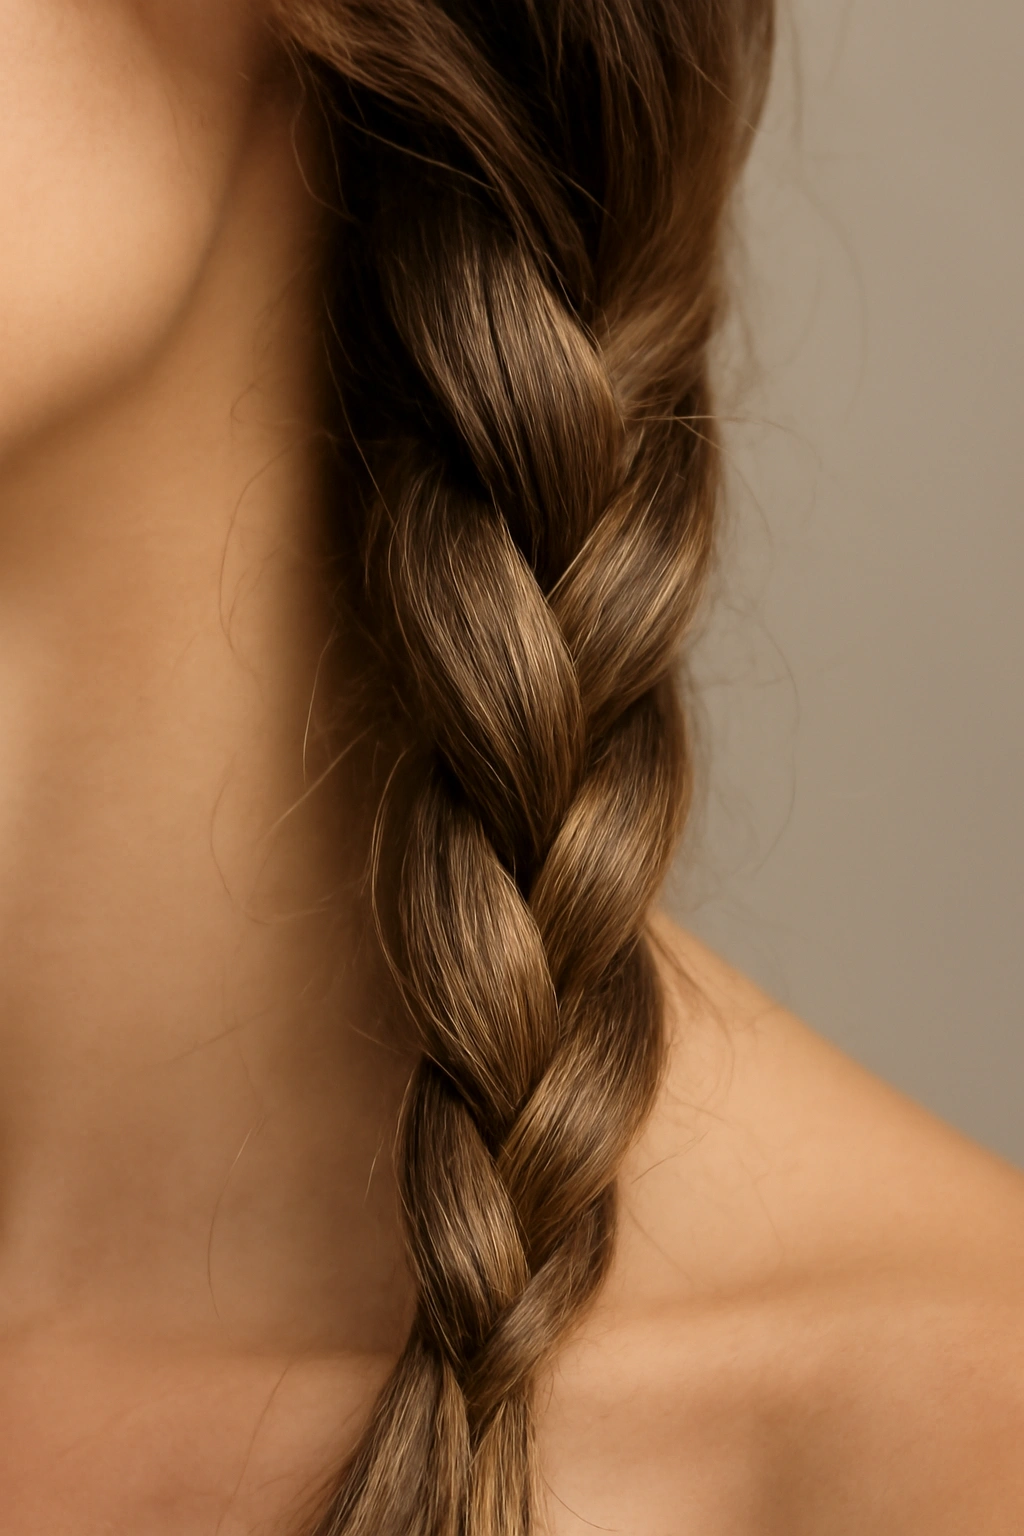
Sometimes the simplest variations create the most impact. A twisted braid swaps the traditional interlocking pattern for something far easier and more elegant—you’re literally just twisting two sections of hair around each other. This is barely a braid in the traditional sense, but it has all the texture and movement you want with none of the complexity. It’s the fastest style on this list and honestly, it looks just as good as braids that take five times longer.
Two Strands Make an Elegant Statement
Start with two sections of hair at the crown or wherever you want the twist to sit. Twist one section clockwise and the other counterclockwise, letting them wrap around each other. The magic is that as they twist, they naturally form a rope-like braid pattern. Keep the tension relaxed so the twist looks organic and undone. You’re aiming for a lived-in texture, not something that looks like you’ve been standing in front of the mirror perfecting it.
Once you’ve twisted your way down to the ends, secure with a small elastic. Pull out wispy pieces from both sides of the twist—this is essential because tight twists look manicured. Loosen the overall structure by gently tugging on the sides and back. A twisted braid should look like something you created in the time it took your coffee to cool down, even if you were working on it intentionally.
When to Wear a Twisted Braid
- Perfect for a casual day when you want your hair contained but interesting
- Works beautifully as a half-up style that’s sophisticated enough for work
- Can be incorporated into a ponytail for extra texture and detail
- Takes literally two minutes, making it ideal for mornings when you’re running late
- Works on all hair types and textures
- Completely transforms hair that feels flat or limp—the twisting motion instantly adds dimension
A twisted braid is often overlooked because it’s so simple, but that’s exactly why it deserves a spot in your rotation. It requires almost no skill, works on everyone, and always looks intentional.
6. Half-Up Loose Braid
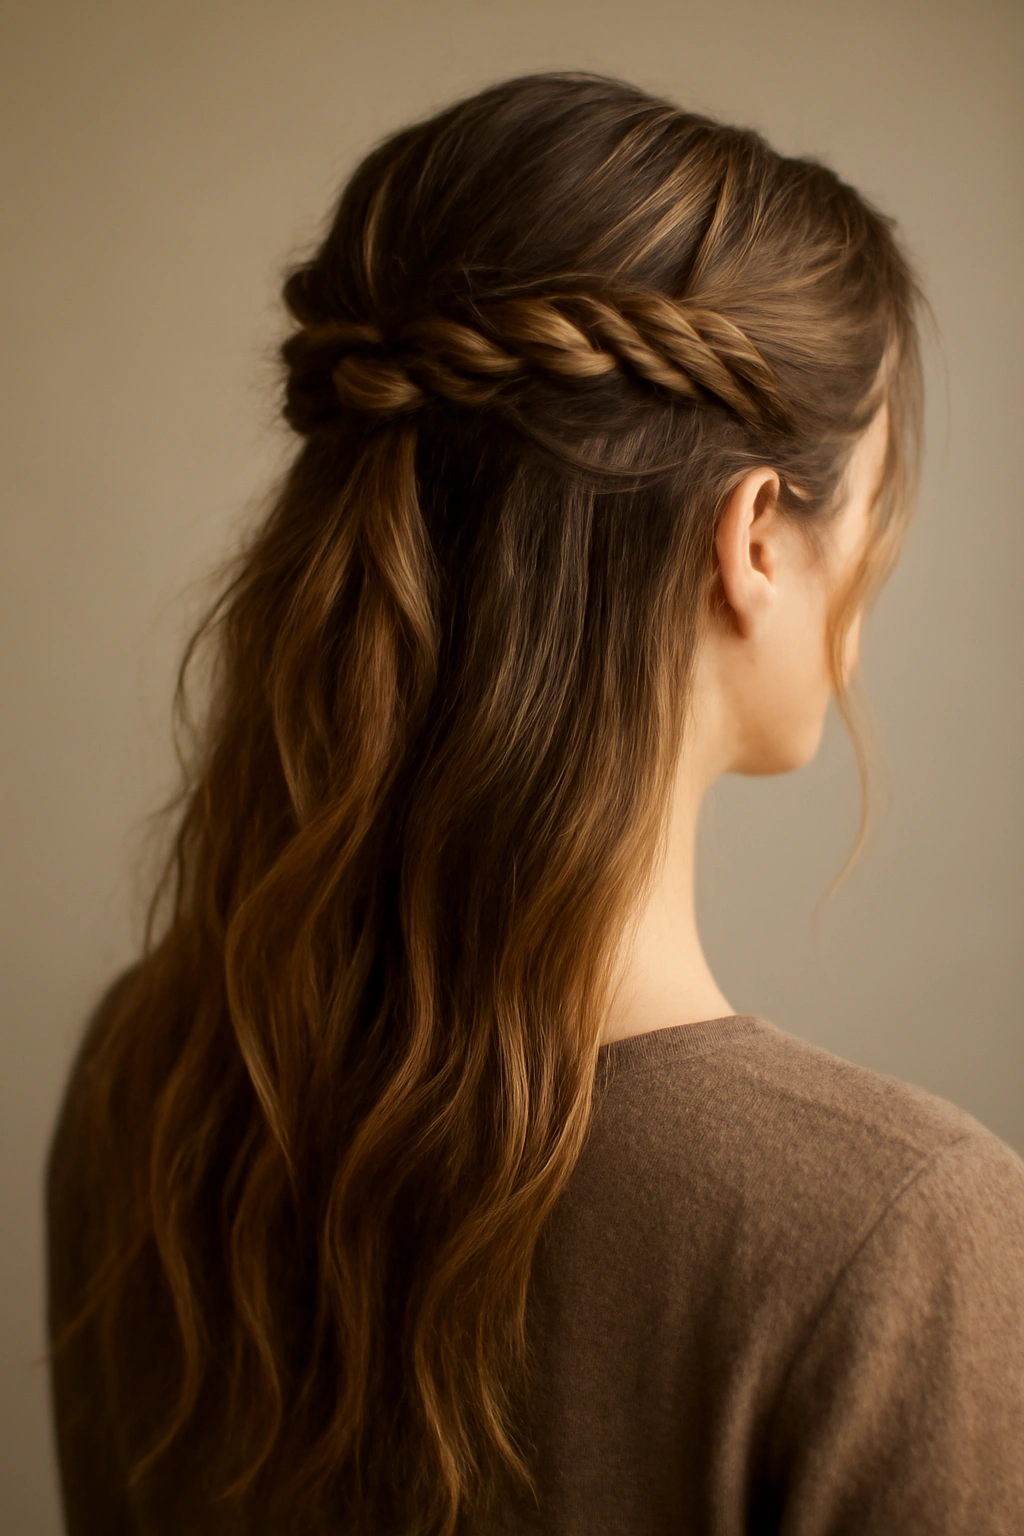
The half-up braid is the perfect hybrid between fully styling your hair and leaving it down. You’re pulling the top section back into a braid while keeping your bottom layers loose and flowing, which gives you the elegance of a braided style without the contained feeling of a full updo. This works for essentially every occasion—casual enough for a regular Monday, but polished enough for dates, dinners, or professional settings.
Balanced Volume and Movement
Start by taking a horizontal section from one ear to the other ear, sweeping across the top of your head. This top section is what you’ll braid. Create a loose French or Dutch braid, or even a simple three-strand braid if that feels easier. The braid starts at one side of your head, travels back, and ends at the opposite side. Secure the end with a small elastic, then gather both the braid and some of your loose bottom hair at the back of your head and secure everything together with a larger elastic.
The beautiful part is that the braid sits on top of your loose hair, creating a layered, textured look. Pull out pieces from the braid and from around your face. This style is endlessly customizable depending on how much of your hair you include in the braid and how much looseness you create.
Styling Variations
- Works as a practical style that keeps hair off your face while maintaining length
- Can be dressed up by adding a delicate clip or hair stick through the braid
- Works for hair that’s been in waves or curls from the day before
- Extremely forgiving if you’re not a braiding expert yet—loose, casual mistakes look intentional
- Solves the problem of hair in your face without requiring a full ponytail
- Flatters almost every face shape because you’re framing your face with the braid while showing your features clearly
Quick fact: This style actually improves as the day goes on. As your hair settles and relaxes, the braid gets looser and more undone-looking, which is the whole goal.
7. Double Dutch Braids
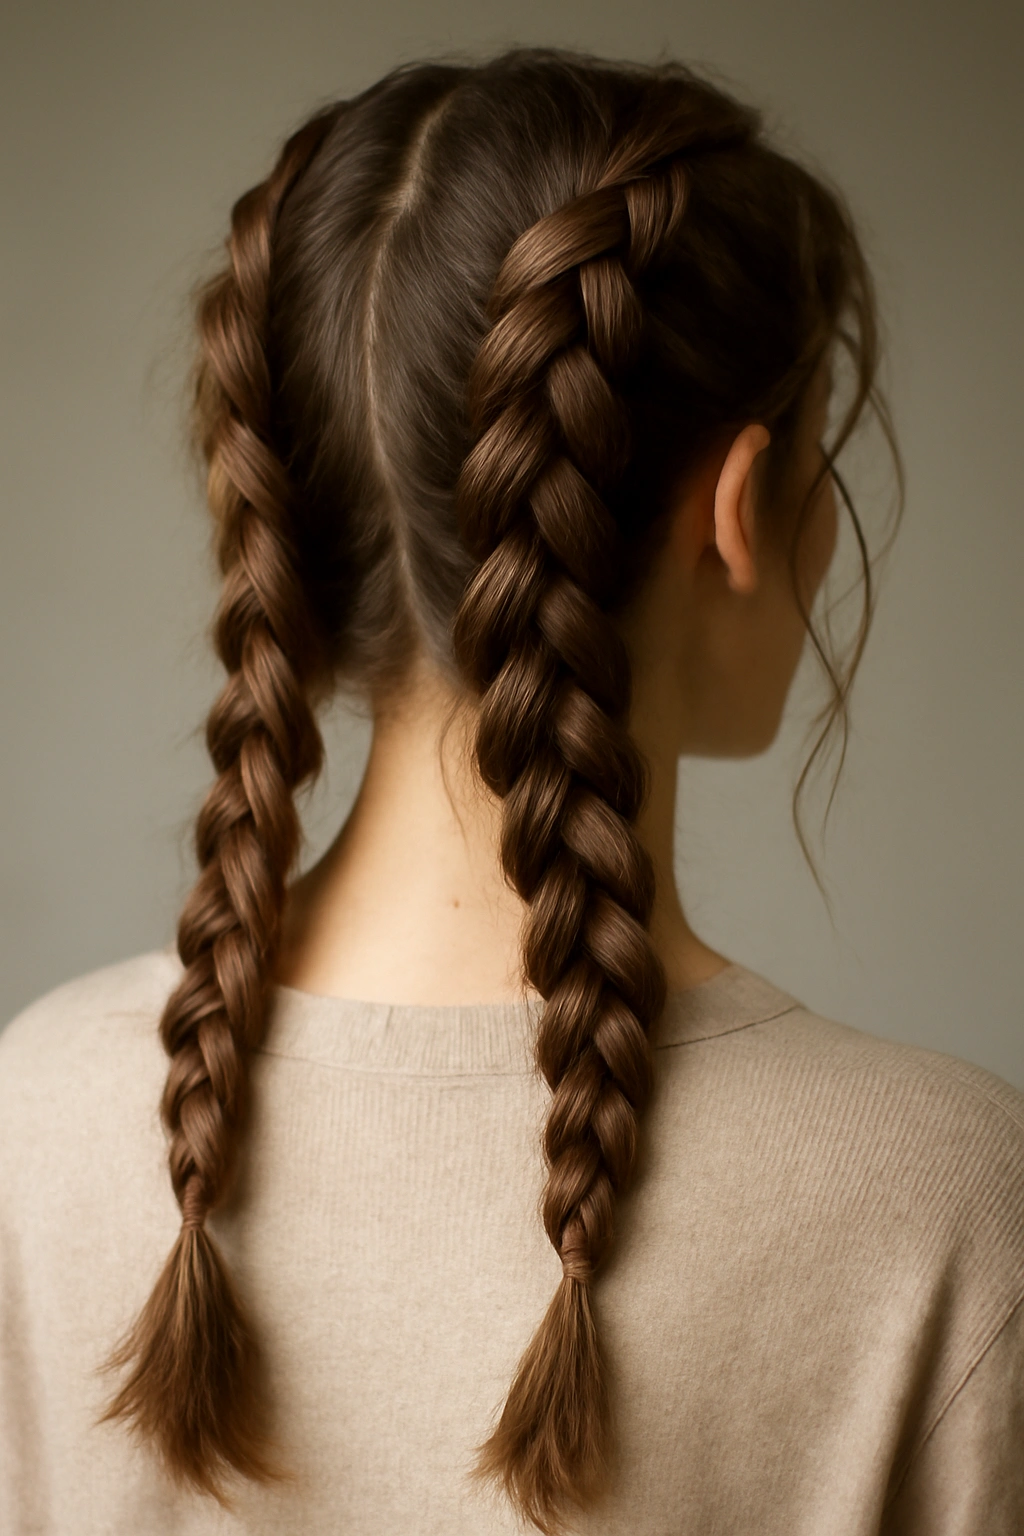
Double Dutch braids are two Dutch braids running parallel down the back of your head. This style bridges the gap between casual and editorial—it’s fun and slightly playful, but it’s also structured and polished enough for more formal occasions. Double braids automatically create more visual interest than a single braid, and they’re especially flattering because they frame your face from both sides.
Creating Symmetrical Texture
Part your hair down the middle from your forehead to the nape of your neck. On each side, create a loose Dutch braid starting at your temple. Remember that Dutch braids go under instead of over, which creates that raised, textured effect. Keep both braids intentionally loose from the start, and as you braid down, pull out wispy pieces from each side. The goal is for both braids to look identical in looseness and texture—stand in front of a mirror periodically to check that you’re not making one braid tighter than the other.
Finish both braids at the nape of your neck and secure each with a small elastic. You can leave the braids separate, or you can gather the ends together into a low ponytail for a slightly different look. Pull out face-framing pieces before you call it done—these wispy pieces are what make the style look intentional rather than overly structured.
Why Double Dutch Works
- Creates a statement look without requiring complicated techniques
- Works on any hair length from shoulder-length on down
- The double-braid effect instantly adds perceived thickness and texture
- Takes about 6-8 minutes, which is longer than a single braid but still manageable
- Works for casual outings, professional settings, and creative formal events
- Photographs beautifully because of the symmetry and detail
This style is a favorite for anyone who wants something that looks more put-together than a simple braid but doesn’t require intricate skills.
8. Waterfall Braid
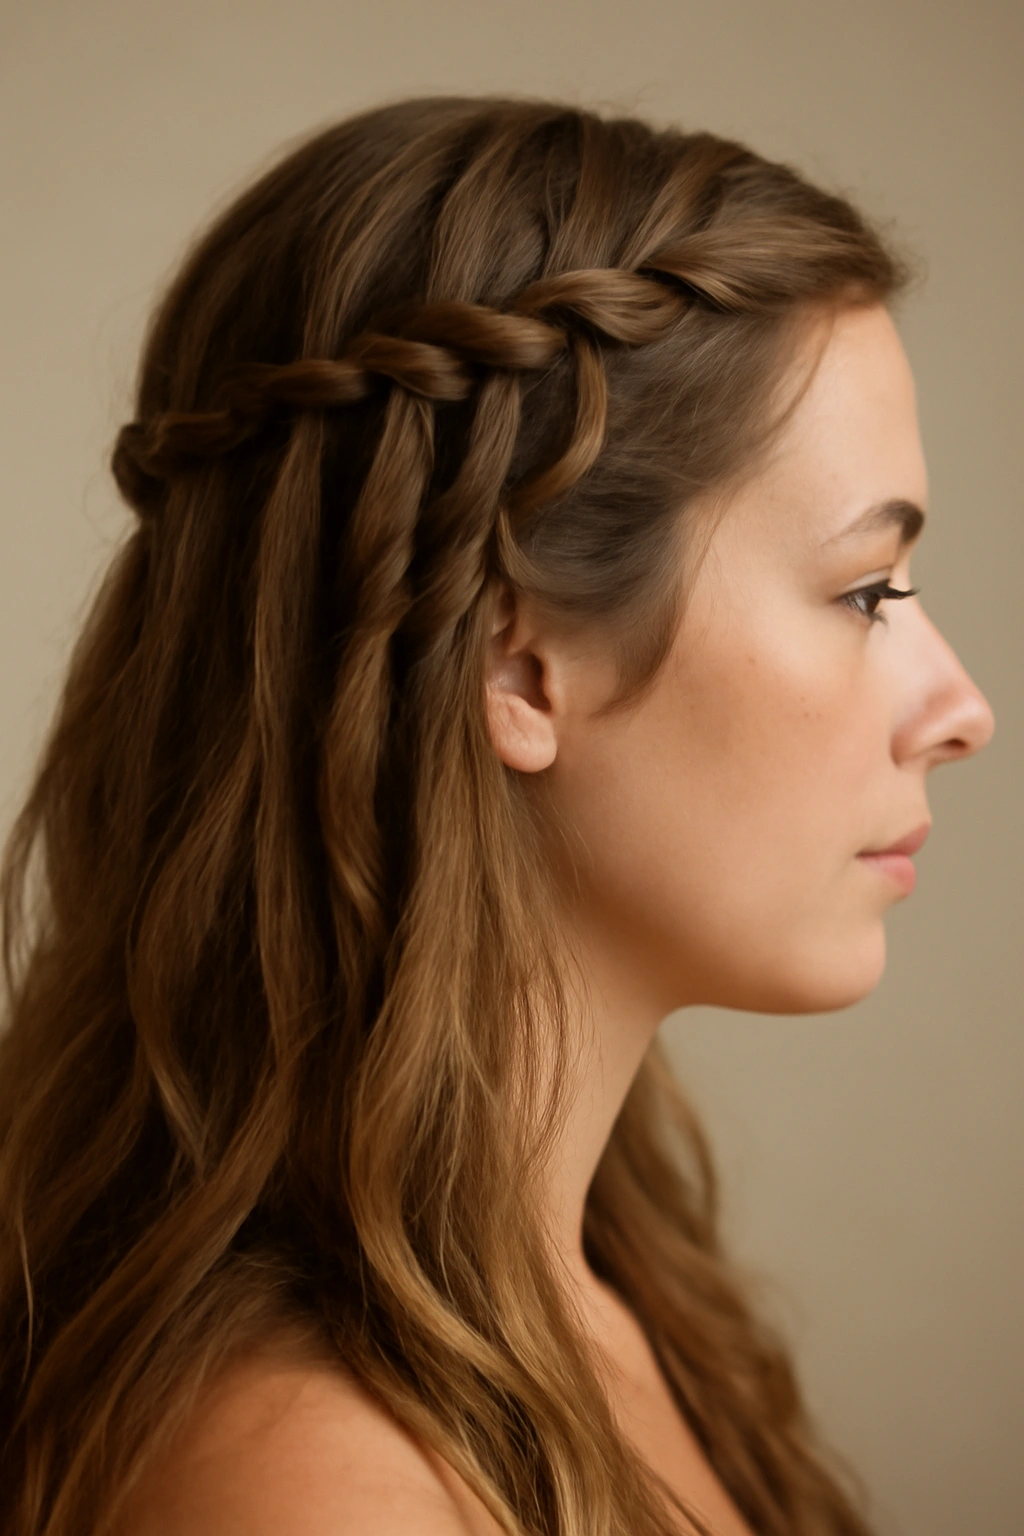
A waterfall braid is a French braid with an intentional twist—sections of hair are released as you braid, creating a cascading effect that looks like a waterfall flowing down the side of your head. It’s more intricate than many other braids, but the payoff is a style that looks genuinely artistic and unique. This is the braid to choose when you want something that looks a little unexpected and creative.
The Release-and-Cascade Technique
Start with a French braid at the crown on one side of your head. As you take a section of hair and cross it over the middle, instead of incorporating it fully, you’re going to drop that strand and let it fall freely. It’s important that this dropped section stays placed behind the braid you’re actively creating—you’re not letting it fall down in front. Add a new section of hair from the side of your head to replace the section you dropped, and continue the braid.
The result is a braid that travels diagonally across your head while loose strands fall from it like a waterfall. Pull out pieces from the braid itself to add looseness and texture. This style requires a bit more concentration than other braids because you’re managing three things at once: the active braid, the dropped sections, and the overall looseness. But once you get it, it’s absolutely stunning.
Making Waterfall Braids Work
- Best on medium to long hair where the cascading sections are visible
- Works especially well on straight hair where the waterfall effect is most noticeable
- Takes 5-7 minutes once you’ve practiced the release motion
- Can be worn as a single diagonal braid or doubled on both sides
- Incredibly flattering for formal events, dates, or photo opportunities
- Actually holds better than you’d expect because the pinned portions keep everything secure
Worth knowing: Waterfall braids show off healthy hair texture beautifully, so this is an excellent choice if you’re feeling good about your hair’s condition and appearance.
9. Bohemian Braided Bun
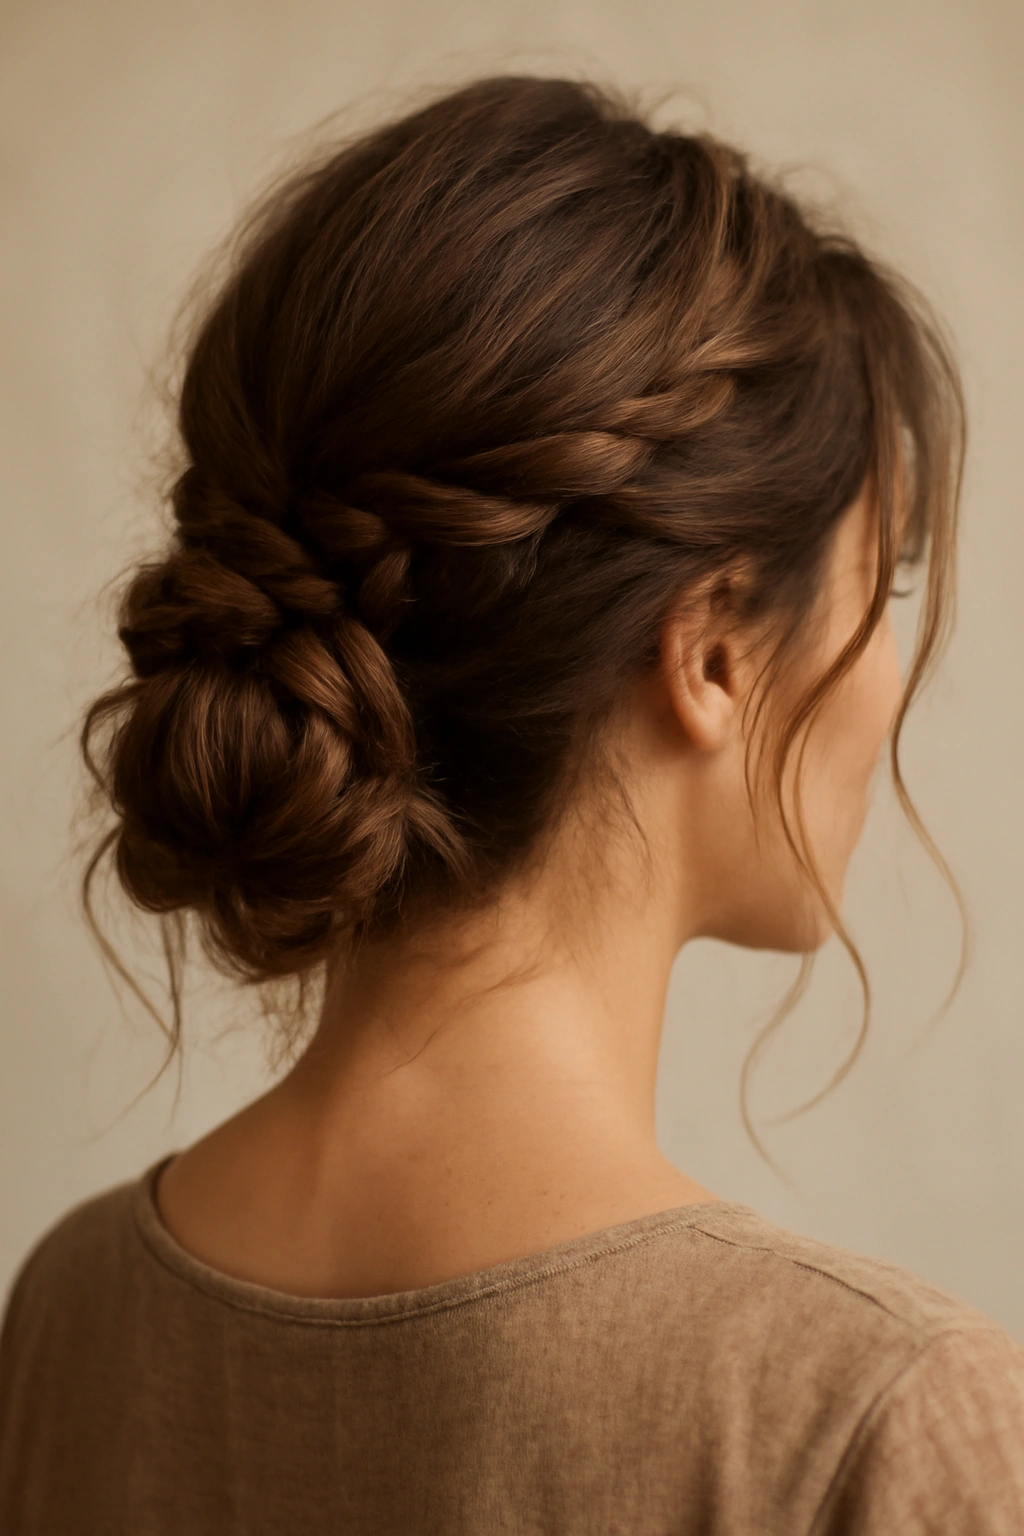
A bohemian braided bun is the ultimate “I woke up like this” updo—it’s intentionally undone, slightly asymmetrical, and so charming that it works for everything from a beach day to a garden wedding. You’re creating a loose braid and then twisting it into a bun, adding plenty of flyaways and loose pieces that make the whole thing look effortless.
The Perfectly Imperfect Updo
Start by creating a loose French or fishtail braid, but don’t braid all the way to the end—stop when you’ve braided about two-thirds of your hair down. Pull the braid apart gently to make it wider and looser. Then take the remaining unbraided hair along with the braided section and gather it all into a low ponytail at the nape of your neck.
Twist the ponytail and wrap it around itself to form a bun, securing it with bobby pins. Leave pieces of hair out intentionally—pull strands from around your face and from the back of your head, creating a romantic, undone frame. The bun should look slightly lopsided and definitely not perfectly round. The looser and more casual it looks, the better it works. This style absolutely depends on embracing imperfection.
Occasions for Bohemian Braided Buns
- Perfect for casual weekend outings, picnics, or beach days
- Works surprisingly well for semi-formal events like rehearsal dinners
- Creates an artistic, romantic vibe that suggests you put thought into your appearance without looking overly styled
- Takes about 5-6 minutes including the bun formation
- Works on most hair types and lengths (medium to long works best)
- Holds surprisingly well despite looking completely undone
Pro tip: Use a texture spray or dry shampoo before creating this style. The grip makes the bun hold better and automatically gives you that undone texture you’re aiming for.
10. Side Braided Ponytail
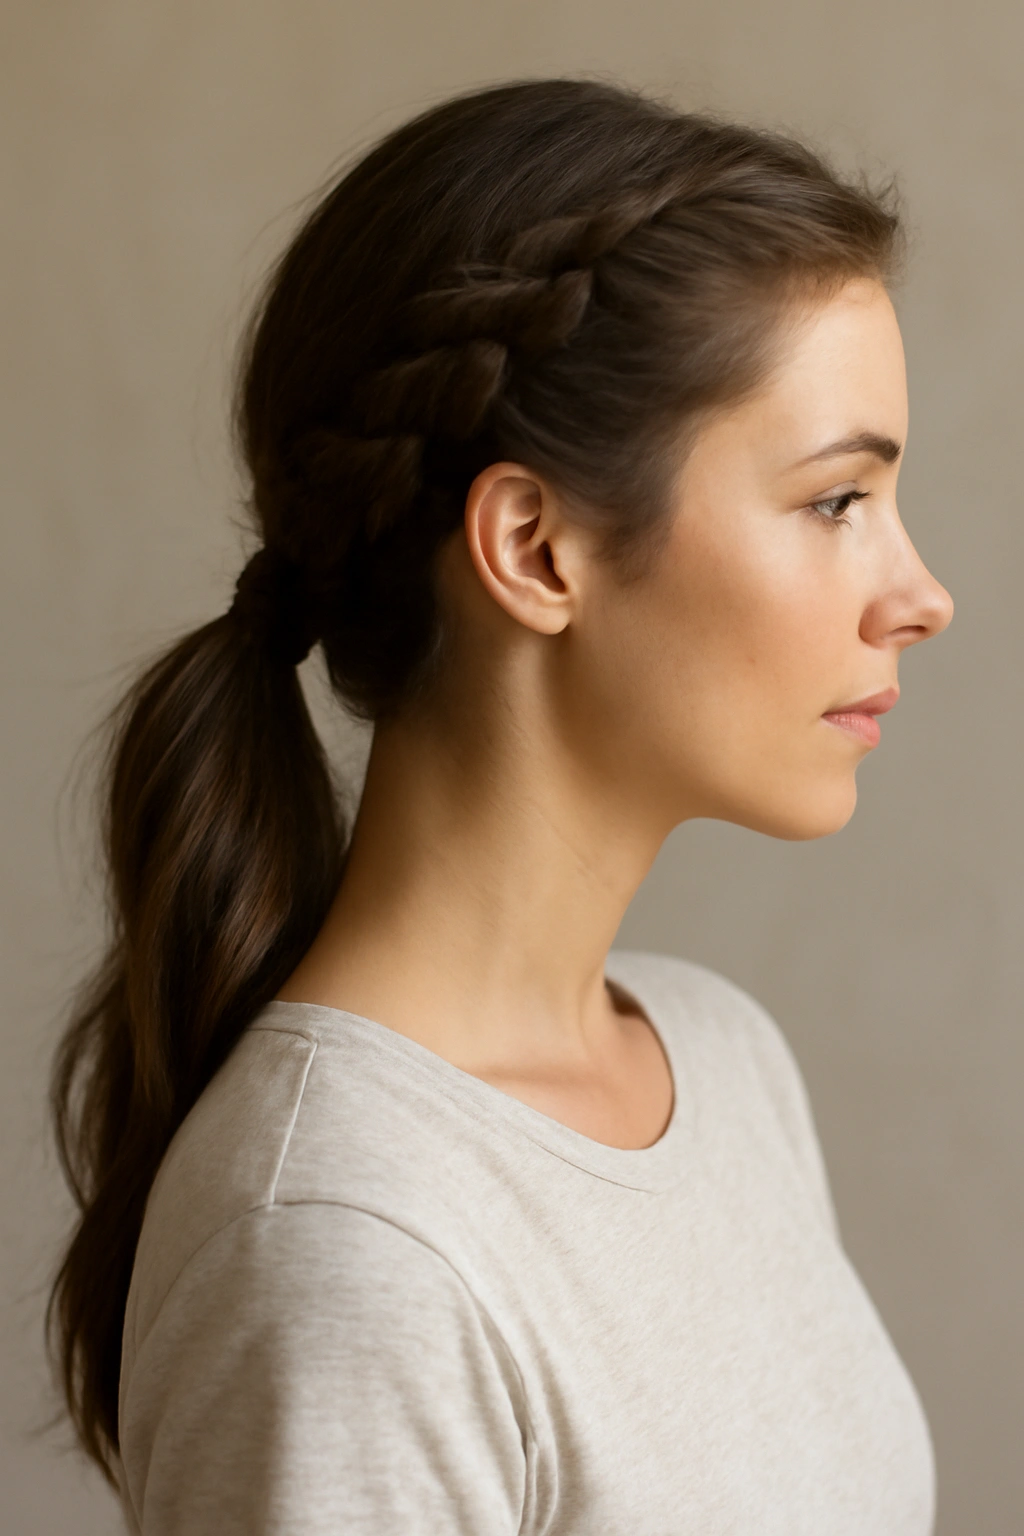
A side braided ponytail takes a basic ponytail and adds a textured, detailed element that makes it look far more intentional and polished. Instead of braiding your entire hair, you’re creating a braid on one side of your head that feeds into a ponytail, creating a hybrid style that’s both practical and beautiful. This is perfect for days when you want your hair pulled back but you don’t want it to look severe or boring.
Adding Detail to a Practical Style
Start by gathering your hair into a low ponytail at the nape of your neck—not too tight, with a relaxed feel. Take a thin section of hair from the front of the side where you want your braid (usually the fuller side if you have a naturally favoring side). Create a loose French braid starting at your temple and traveling back toward the ponytail. The braid should end at the ponytail elastic.
Once the braid reaches the ponytail, you can either stop and let the braided section sit on top of the ponytail, or you can incorporate the braid into the ponytail by wrapping it around the elastic a few times before securing. Pull out pieces from the braid and from around your face to add that essential looseness. The contrast between the structured side braid and the looser ponytail creates visual interest without looking fussy.
When and Where to Wear This Style
- Perfect for work, school, or any professional setting where you want polished but not overdone
- Works beautifully for casual dates because it shows you’ve put thought into your appearance
- Extremely practical for keeping hair controlled while still looking intentional
- Takes about 4-5 minutes including the ponytail setup
- Works for all hair types and any length that’s long enough for a basic ponytail
- Flatters most face shapes because the side element adds asymmetrical dimension
This is the style that bridges casual and polished better than almost any other braid option. You can wear it to work and then to brunch without needing to change a thing.
Final Takeaways
Loose braids are your secret weapon for looking effortlessly put-together. The whole point is that looseness—the undone quality that somehow looks more sophisticated than something you could’ve spent hours perfecting. Once you understand that tightness is the enemy and pulled-out pieces are your friend, every single one of these styles becomes accessible.
The beautiful thing about having ten different loose braid styles in your rotation is that you can adapt based on your mood, your plans, and how much time you have. Some days you’ll grab a quick twisted braid because you’re running late but you want something interesting. Other times you’ll spend the extra ten minutes on a waterfall braid or halo braid because you want to feel genuinely special.
Hair doesn’t have to be styled to perfection to look good. In fact, the most interesting, the most memorable, and the most flattering hair looks intentional but slightly undone. These ten styles all hit that sweet spot—they’re detailed enough that they look like you cared, but loose enough that they feel natural and easy. That’s the real magic of mastering loose braids.