A mohawk braid is the perfect way to rock an edgy, bold hairstyle without committing to an actual undercut or spending hours at the salon. Unlike traditional mohawks that require shaving or significant hair removal, braided versions let you reclaim that rebellious vibe—whether you’re heading to a music festival, a night out with friends, or just want to switch up your everyday look. The beauty of mohawk braids is their flexibility: they work on short hair, medium-length locks, thick textures, fine strands, and pretty much every hair type in between.
What makes mohawk braids so appealing is that they solve a real problem. If you love the aesthetic of a shaved mohawk but aren’t ready to cut your hair, or if your workplace won’t allow it, braided versions give you the best of both worlds. They create that striking illusion of height and edge while keeping all your hair intact. You can wear one for a single day and completely change your look—then take it down and nobody would ever know.
The variety available is genuinely surprising. You can go for a sleek, polished center braid that looks almost elegant, or pile on texture and dimension with a fishtail or Dutch braid version. Add in the option of different placement—center, off to the side, curved, or even double—and suddenly there are dozens of ways to interpret the mohawk braid trend. Whether your hair is short and choppy or mid-length and flowing, there’s a mohawk braid style that’ll look stunning on you.
Let me walk you through ten distinct mohawk braid styles, each with specific techniques, styling tips, and exactly how to execute them on shorter to medium-length hair.
1. Classic Center Mohawk Braid
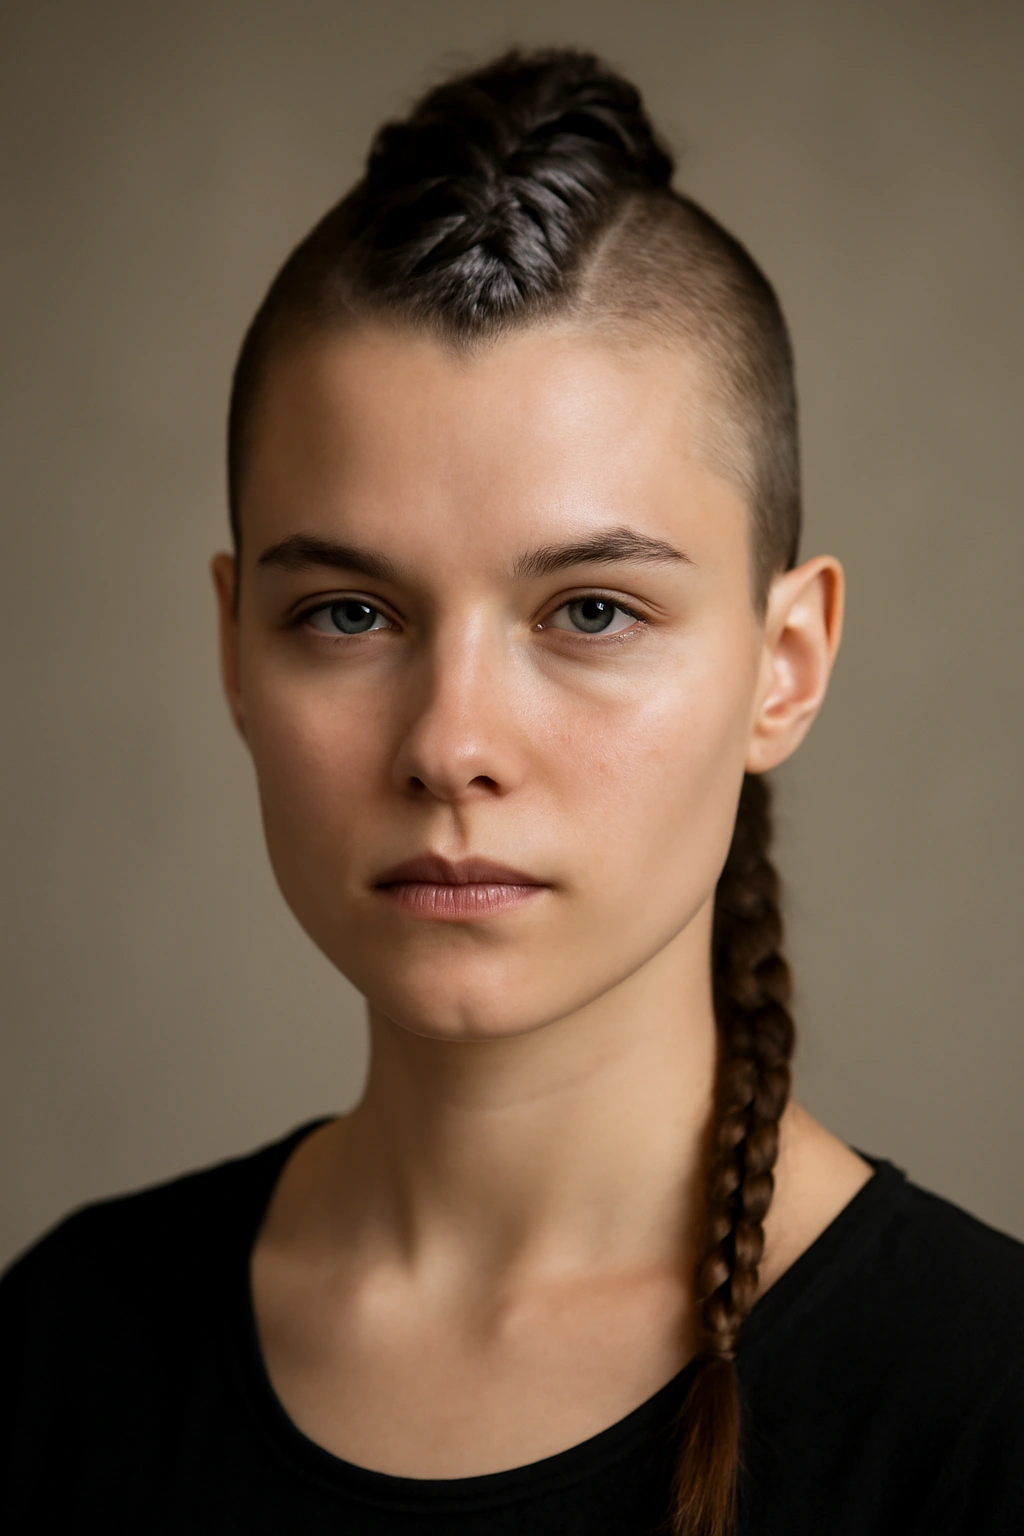
The classic center mohawk braid is where most people start, and for good reason—it’s the most striking version and creates the iconic “shaved mohawk” illusion that the style is known for. This braid runs straight down the center of your head from your forehead all the way down your back, and the braided texture creates volume that makes it look like you have an actual mohawk cut.
The magic happens because the braid naturally pulls your hair away from the sides of your head while keeping all the height and drama on top. Even on shorter hair (around shoulder-length or shorter), a center mohawk braid creates a massive visual impact. The braid itself becomes a sculptural element—the thicker and more textured your braid, the more dramatic the effect.
How to Create the Classic Center Mohawk Braid
Creating a center mohawk braid requires precision, but once you understand the technique, it becomes much easier. Start by parting your hair straight down the middle from your forehead to the nape of your neck—use a fine-tooth comb for a sharp, clean part. Section your hair into three parts: the center section (everything between your parts) and the two side sections that’ll stay loose and frame your face.
Begin your braid at your hairline, using only the center section of hair. Take that center section and divide it into three smaller strands, then begin a traditional three-strand braid. The key difference from a regular braid is that as you braid, you’re intentionally leaving out the hair from the sides—you want a single, prominent braid running down the middle.
As you work your way down, your braid will gradually become narrower because you’re only using the hair from the center section. This is exactly what you want. Continue braiding all the way down to the nape of your neck. Once you’ve finished the braid, you can either secure it with a small elastic band (keep it tucked and hidden if you want a seamless look) or leave it loose and slightly undone for a more bohemian feel. Style the loose hair on the sides in whatever way suits you—leave it straight, curl it, tease it, or pull it back into a partial ponytail.
Pro Tips for Maximum Impact
The thickness of your center braid determines how dramatic the effect looks. If you want maximum drama on shorter hair, consider doing a double braid (two parallel braids running down the center instead of one) or using extensions woven into your braid to add volume. This works beautifully on short hair where natural volume might be limited.
For longevity throughout the day or night, apply a light texturizing spray before you start braiding—this gives your braid more grip and keeps it from loosening or slipping. If you’re worried about the braid holding on shorter hair, use a lightweight hairspray as you braid to set each section as you go. This isn’t necessary for longer hair, but it makes all the difference on shorter lengths.
2. Side Sweep Mohawk Braid
The side sweep mohawk braid offers all the edge and personality of a center braid but with a softer, slightly less aggressive vibe. Instead of running straight down the middle, this braid starts at one side of your head (usually above your ear) and sweeps diagonally across the top of your head to the opposite side. This asymmetrical placement is genuinely flattering on most face shapes because it adds visual interest without feeling overwhelming.
This style works particularly well on short to medium hair because it draws the eye across your head rather than straight down, which creates the illusion of width and makes shorter hair look fuller and more sculpted. The diagonal placement also means you can incorporate loose waves or curls on the other side of your head, creating a high-contrast look—structured braid on one side, flowing texture on the other.
How to Create the Side Sweep Mohawk Braid
Start by creating a deep side part on whichever side you prefer your braid to start from. If you want the braid to sweep from left to right, part your hair on the left side of your head, creating a generous section of hair on the left that you’ll braid.
Begin your braid at the hairline above your temple on the side where you parted. Start with three thick strands and create either a traditional three-strand braid or a Dutch braid (which sits slightly raised on the scalp and looks more graphic). As you braid, angle your braid diagonally across the top of your head rather than straight back.
The tricky part is knowing when to stop braiding. Most often, you’ll want to braid approximately halfway across the top of your head—roughly from one temple toward the opposite back section. Secure your braid with a small clear elastic, then use a bobby pin or two to anchor it against your scalp so it doesn’t loosen throughout the day.
The hair on the opposite side of your head (the unstyled side) can stay completely loose, or you can create waves in it, curl it, tease it for volume, or even pin some sections back to create layers of visual interest. This contrast between the structured braid and the free-flowing other side is what makes this style so visually compelling.
Styling Tricks for the Side Sweep
Texture is your best friend with this style. Before you braid, add a light texturizing spray to your hair—this makes the braid hold better and creates a more interesting visual texture. You can also gently pull and loosen the braid after it’s complete, which softens the look and adds bohemian dimension.
For shorter hair, this style is incredibly flattering because the sweep of the braid creates visual movement and height. If your hair is quite short, make sure your braid starts thick enough to be visible and dramatic—use extensions or double-up your sections if needed.
3. Double Mohawk Braids
Double mohawk braids give you twice the impact with twice the visual interest. Instead of one central braid, you create two parallel braids running down the center of your head, side by side. This variation is particularly stunning on shorter hair because the two braids together create substantial height and volume without requiring a single thick braid.
The double version also offers more flexibility in terms of braid style—you can do two tight Dutch braids for a clean, graphic look, or two loose fishtail braids for a softer aesthetic. You can even do one of each if you’re feeling adventurous. The symmetry of two parallel braids feels inherently balanced and polished, even when you keep them slightly loose and textured.
How to Create Double Mohawk Braids
Start by creating two vertical parts down the center of your head, splitting your hair into left and right halves. Then, divide each of those halves in half again—this gives you two distinct sections in the center that you’ll turn into your two parallel braids.
Begin your first braid on the left side of your center-top section. Part out a small rectangular section of hair from your hairline down toward the nape, and start your braid there. A Dutch braid (braiding under instead of over, so the braid sits on top of your scalp) creates a more three-dimensional, graphic look. Work this braid down the left-center of your head.
Repeat the exact same process on the right side of your center section, creating a mirror-image braid. Both braids should be relatively close together—nearly touching, ideally. Secure both braids at the nape with small elastics, and you’ve got a double mohawk.
For additional drama, tease the sections between your two braids (the small pieces of hair that sit between them) to create height and texture. You can also gently pull and loosen both braids slightly after completion to add dimension and a softer appearance.
Making Double Braids Work on Shorter Hair
On short hair, the key to successful double braids is starting them as thick as possible. Don’t make them super thin and delicate—thicker, chunkier braids read as more intentional and bold. If your hair is very short (above shoulder-length), consider using clip-in extensions woven into each braid to add volume and make the braids more visible.
Texturizing spray is non-negotiable for this style on shorter lengths. It helps the braids grip your hair and prevents them from slipping or loosening throughout the day. Apply it before you start braiding, focusing on the sections you’ll be braiding.
4. Fishtail Mohawk Braid
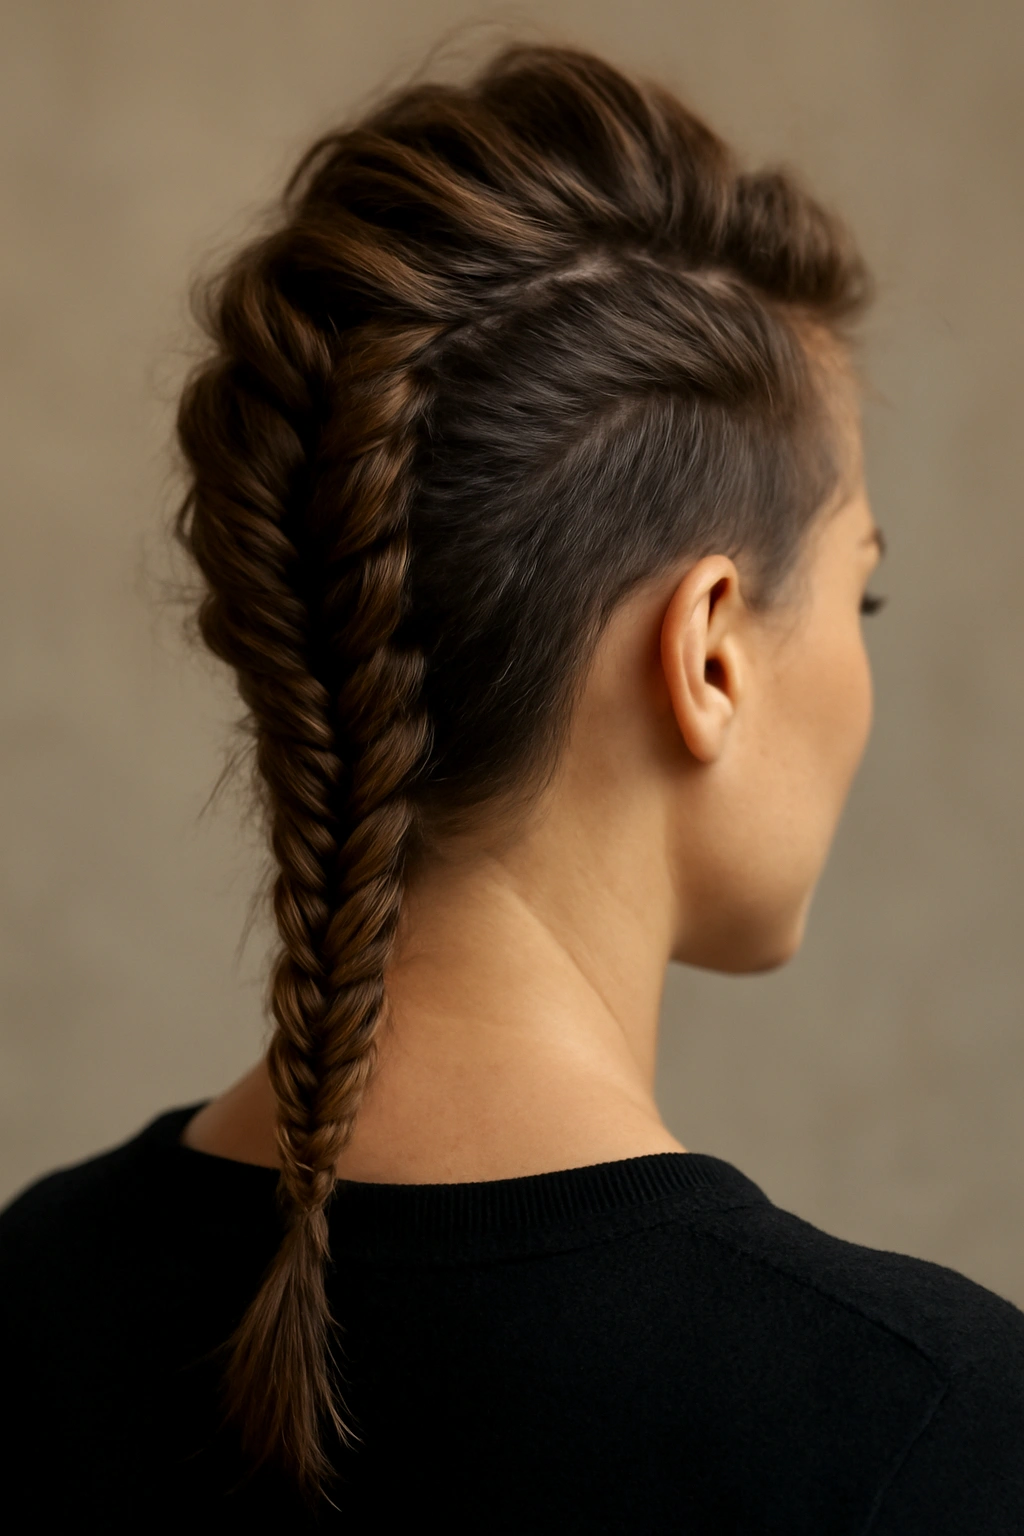
The fishtail mohawk braid brings a delicate, intricate quality to an otherwise edgy style. A fishtail braid uses a different braiding technique than a traditional three-strand braid—instead of three sections, you work with two thicker sections and create the braid by repeatedly taking small pieces from the outer edges of each section and crossing them over the middle.
This technique creates a naturally textured, slightly wispy appearance that looks effortlessly cool. When you use a fishtail technique for a mohawk braid, you get all the drama of the style but with a softer, more artistic edge. It’s perfect if you want to rock a mohawk braid to a casual daytime hangout, a creative workplace, or any situation where you want to look bold but not overly aggressive.
How to Create a Fishtail Mohawk Braid
Start by creating a clean center part from your forehead to the nape of your neck, just like you would for a classic center mohawk. Section out your center hair and begin your braid at your hairline.
For a fishtail braid, start with two thick sections instead of three. Divide your center section into a left half and a right half. Take a small piece of hair from the outer edge of your left section and cross it over to join your right section. Then take a small piece from the outer edge of your right section and cross it over to join your left section. Continue alternating this pattern all the way down.
The secret to a beautiful fishtail braid is to take consistently small pieces—small enough that they create texture and visual interest, but not so small that your braid falls apart or becomes impossibly thin. As you braid, gently pull and loosen sections to create dimension and softness.
Once you’ve finished your fishtail braid, use texturizing spray to set it, then gently tease and pull the braid to make it look fuller and more interesting. A fishtail braid naturally has a delicate, intricate appearance, but making it slightly undone actually enhances this effect rather than detracting from it.
Styling Tips for Fishtail Mohawk Braids
Fishtail braids show texture beautifully, so if you have naturally wavy or curly hair, let that texture shine. If your hair is straight, create some loose waves before braiding—these waves will be visible within your fishtail braid and add visual depth.
The loose sections of hair on either side of your fishtail mohawk braid can be left completely straight and sleek for maximum contrast with the textured braid, or you can add waves, curls, or tousled texture to the sides. This is entirely up to your aesthetic preference and the occasion you’re dressing for.
5. Dutch Braid Mohawk
A Dutch braid is the opposite of a French braid—instead of braiding over, you braid under, which creates a raised, three-dimensional effect that sits on top of your scalp. When you use a Dutch braid technique for a mohawk braid, you get incredible visual impact and a braid that stands out dramatically from your head.
The Dutch braid version is ideal if you want maximum graphic impact and a style that photographs beautifully. It’s the most sculptural option and creates an almost architectural quality to your hair. On shorter hair, a Dutch braid mohawk creates the illusion of substantial height and volume, making even short hair look fuller and more dramatic.
How to Create a Dutch Braid Mohawk
Start with your standard center part, dividing your hair into three sections as you would for a traditional center mohawk braid. Begin at your hairline with three substantial strands of hair from your center section.
Instead of crossing strands over the middle (the traditional over-braid method), you’re going to cross your strands under the middle section. Take your left strand and cross it under your center strand—the left strand becomes your new center. Take your right strand and cross it under your new center strand—the right strand becomes your new center. Continue this under-braiding pattern all the way down your head.
Because you’re braiding under rather than over, the braid naturally sits raised and prominent on your scalp. This creates that striking, almost three-dimensional appearance. Dutch braids do require slightly more tension than traditional braids—pull snugly as you work so the braid sits securely on your scalp and doesn’t collapse or loosen.
After you’ve finished braiding and secured it with an elastic, gently pull and loosen sections of the braid to add texture and dimension. Even though you braided tightly, loosening it afterward creates a full, dimensional look while maintaining that raised structure.
Dutch Braid Maintenance Throughout the Day
Dutch braids are remarkably stable because of how they’re constructed, but on shorter hair, using a light hairspray as you braid helps tremendously. Spray each completed section before moving to the next one—this sets that section in place and prevents it from loosening.
If you’re wearing this style for an extended period (like all day at work or an evening out), check in on it halfway through and gently tighten any sections that have loosened. A few strategic bobby pins clipped underneath the braid (hidden from view) also help secure a Dutch braid mohawk on shorter hair.
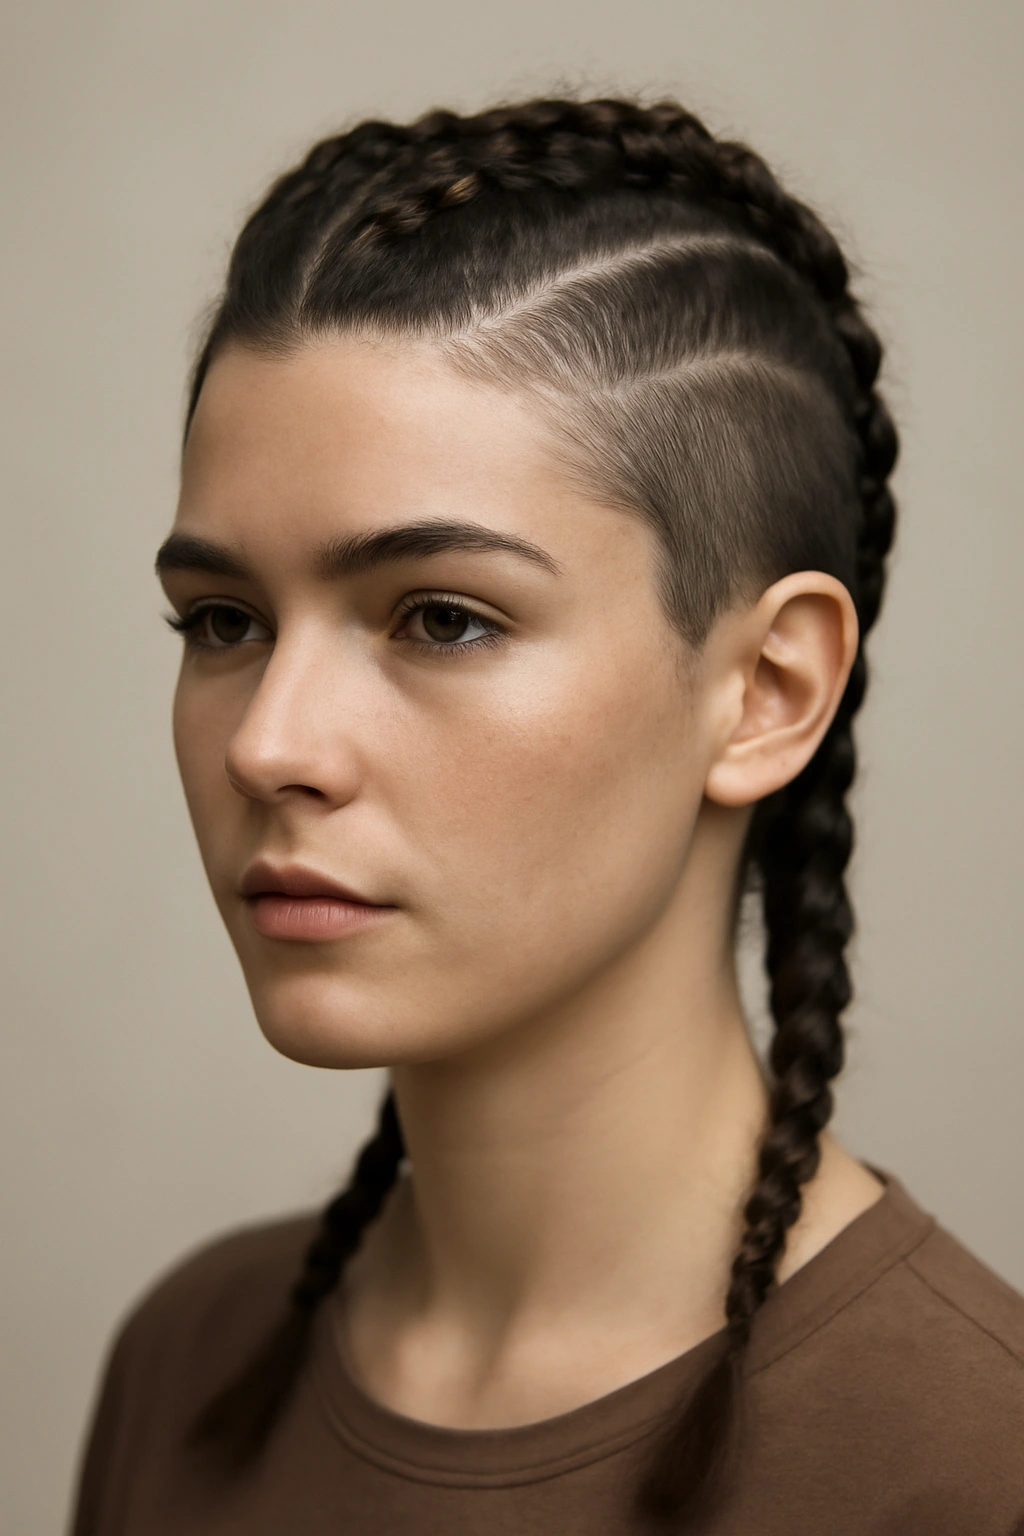
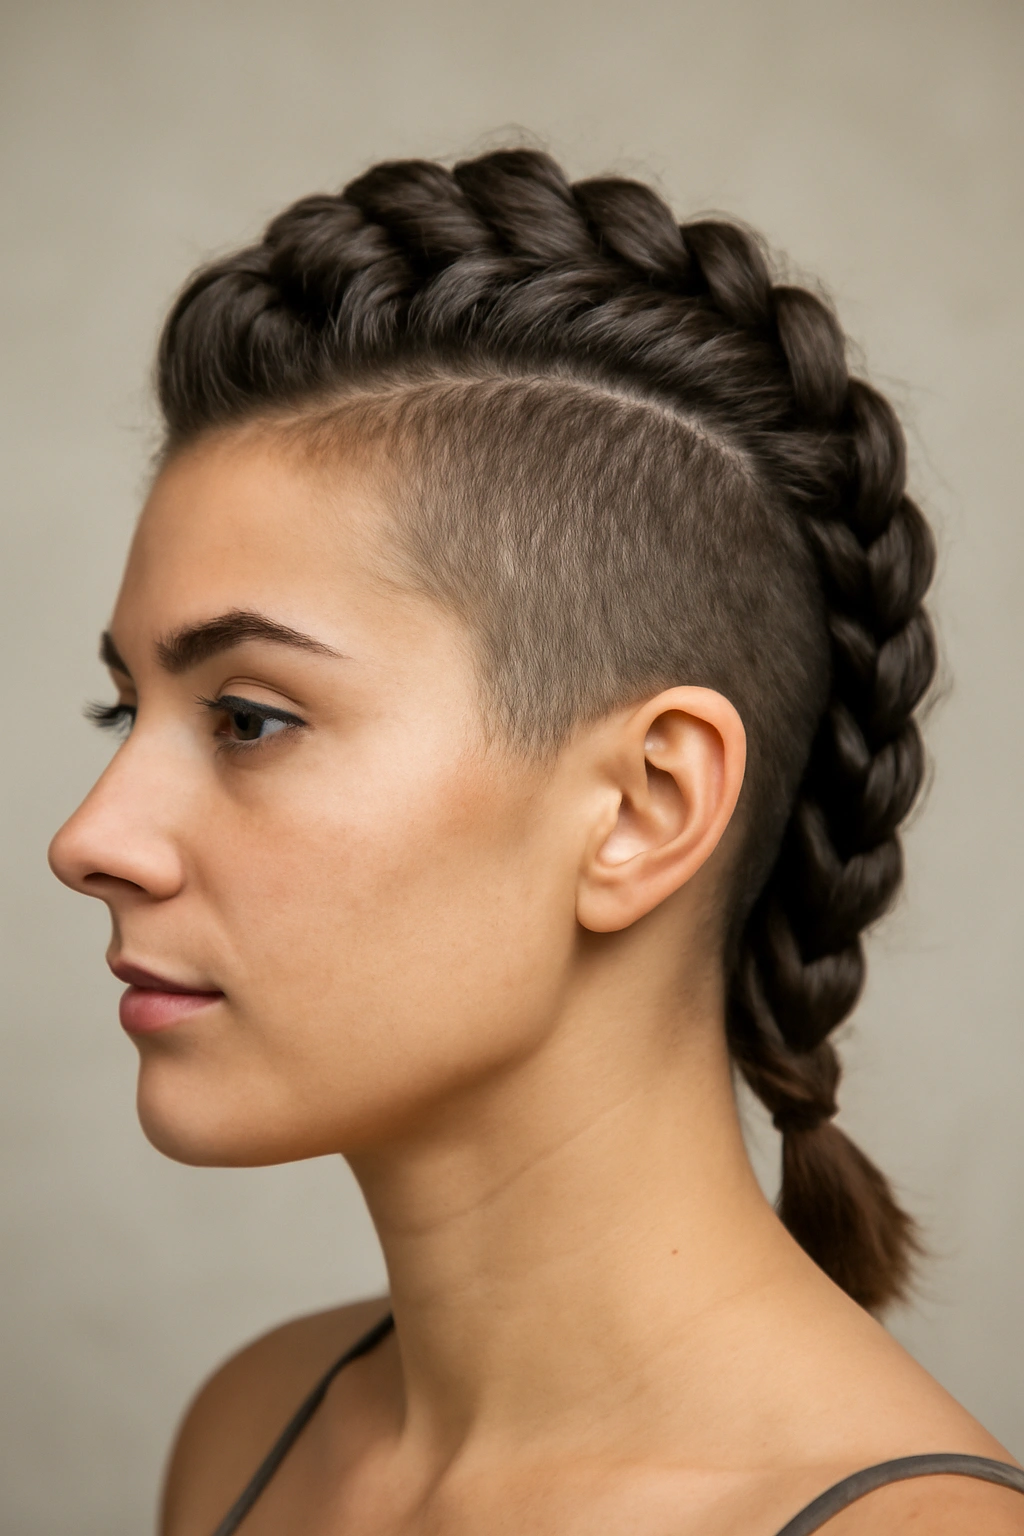
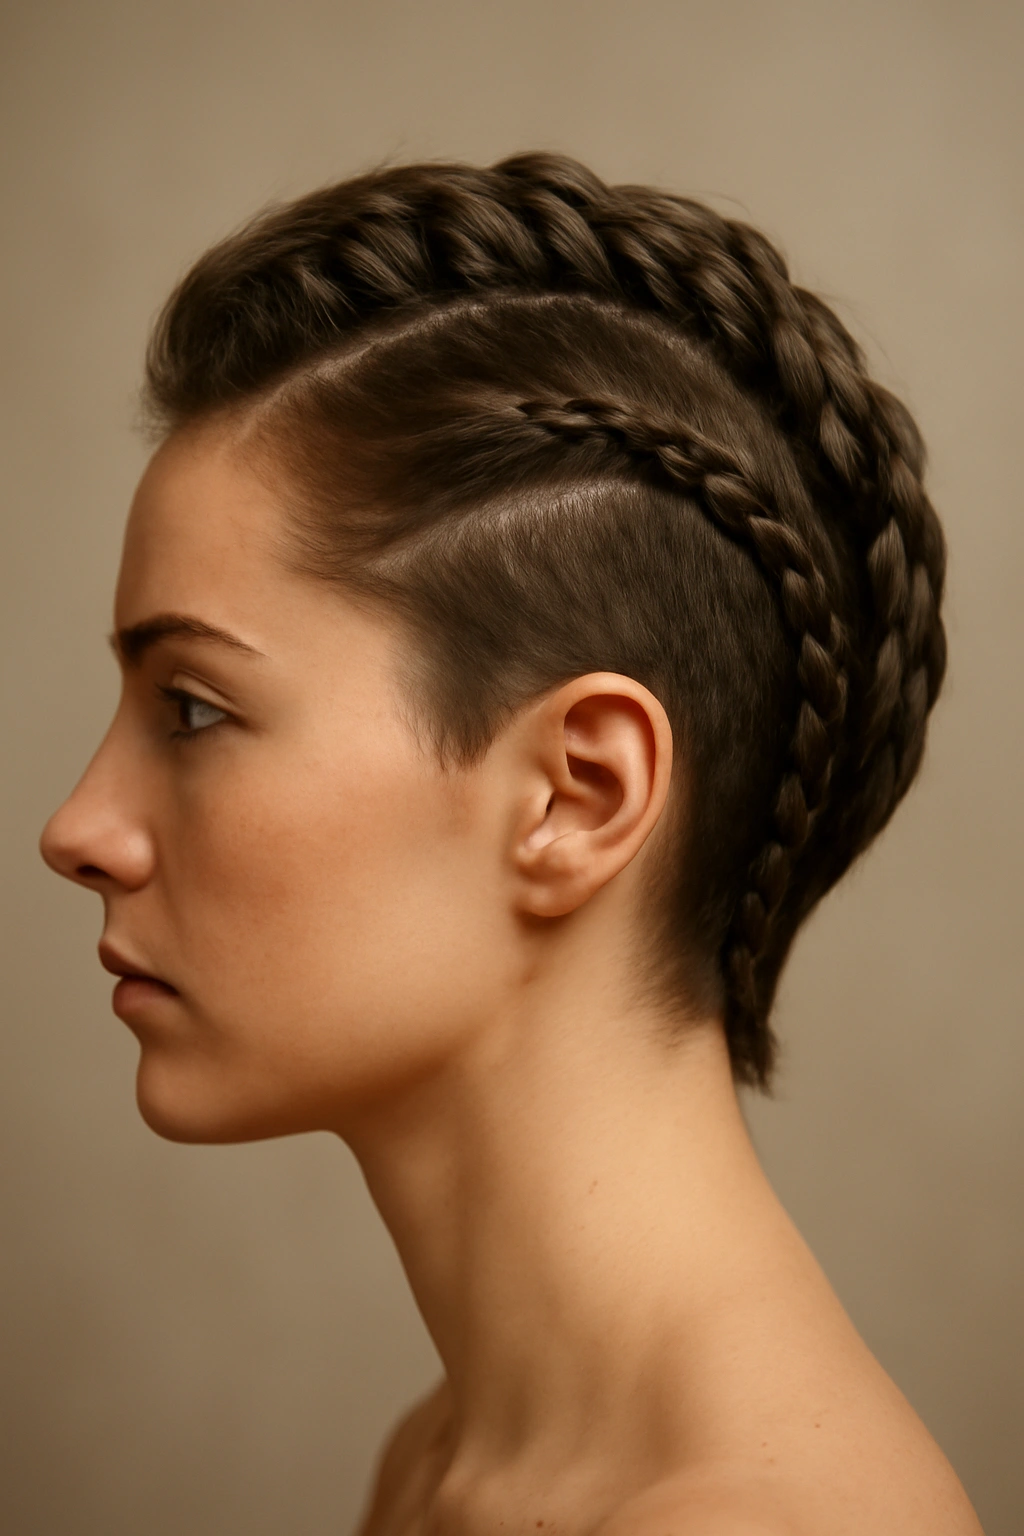
6. Reverse Mohawk with Shaved Sides
If you want the most authentic-looking faux mohawk braid, the reverse mohawk with shaved (or very closely buzzed) sides is the ultimate statement. This isn’t for the faint of heart—it requires either actually shaving the sides of your head or using a clipper for a very close buzz cut. But if you’re willing to commit, the visual impact is genuinely stunning.
The “reverse” part of this name refers to the fact that the shaved sides are real, not an illusion created by braiding and hair placement. Your braid is the only hair visible in the center of your head, making it the absolute focal point. This style works on any length of center hair—whether your top is buzzed short and keeps the braid extremely short, or whether you’ve got longer hair on top that you braid.
How to Create a Reverse Mohawk with Shaved Sides
This style requires either a professional cut or serious DIY confidence. If you’re having it done professionally, consult with a barber or stylist who has experience with undercuts or fade haircuts. You’ll want the sides clipped very short (typically 0.5 to 1.5 inches, depending on your preference) while leaving the center section of your head long enough to braid.
Once you have the shaved sides, styling is straightforward. Create your center part and braid the center section using any braiding technique you prefer—traditional three-strand, Dutch, fishtail, or whatever speaks to you. Because the sides are actually shaved, the visual contrast is immediate and dramatic.
The beauty of this style is that your actual braided mohawk doesn’t need to be thick or voluminous to create impact—the real shaved sides do that work for you. Even a thin, delicate braid creates a striking effect when the sides are completely cleared away.
Commitment Considerations
This style requires maintenance. As your hair grows, the shaved sides will grow in, creating visible stubble or new growth. Most people with this style touch up their sides every two to three weeks to maintain that clean, shaved aesthetic. It’s a genuine commitment, so make sure you’re ready before taking the plunge.
That said, if you commit to it, this is arguably the most authentic and visually powerful version of a mohawk braid you can create. It’s the absolute peak of edgy hair styling.
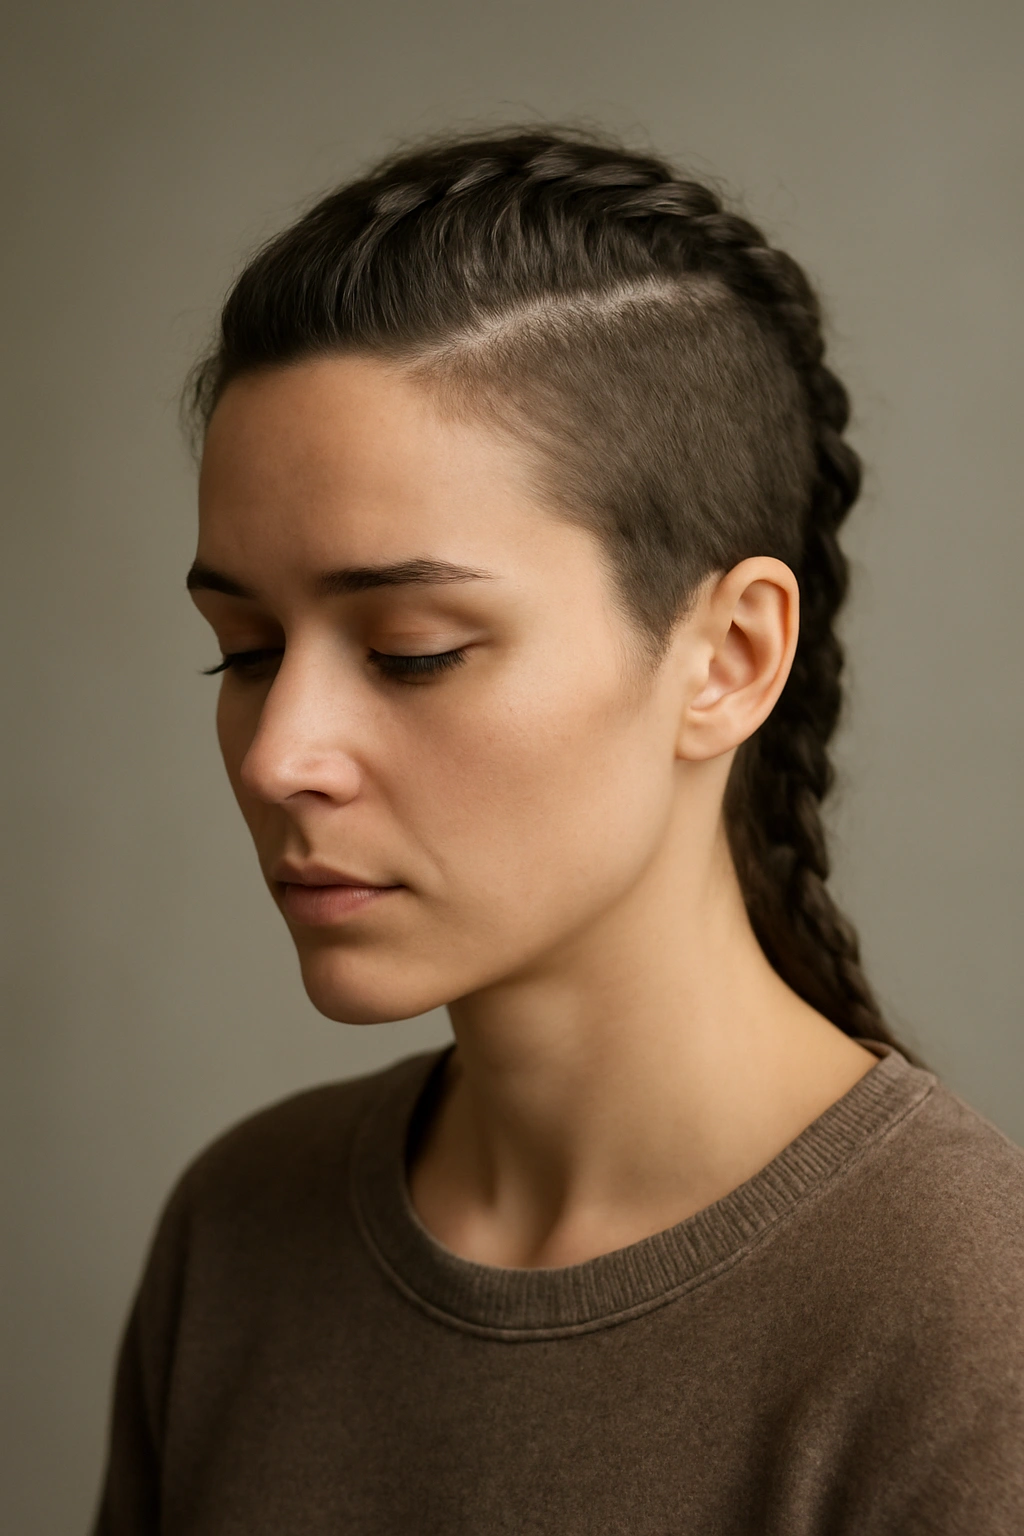
7. Faux Hawk Braid
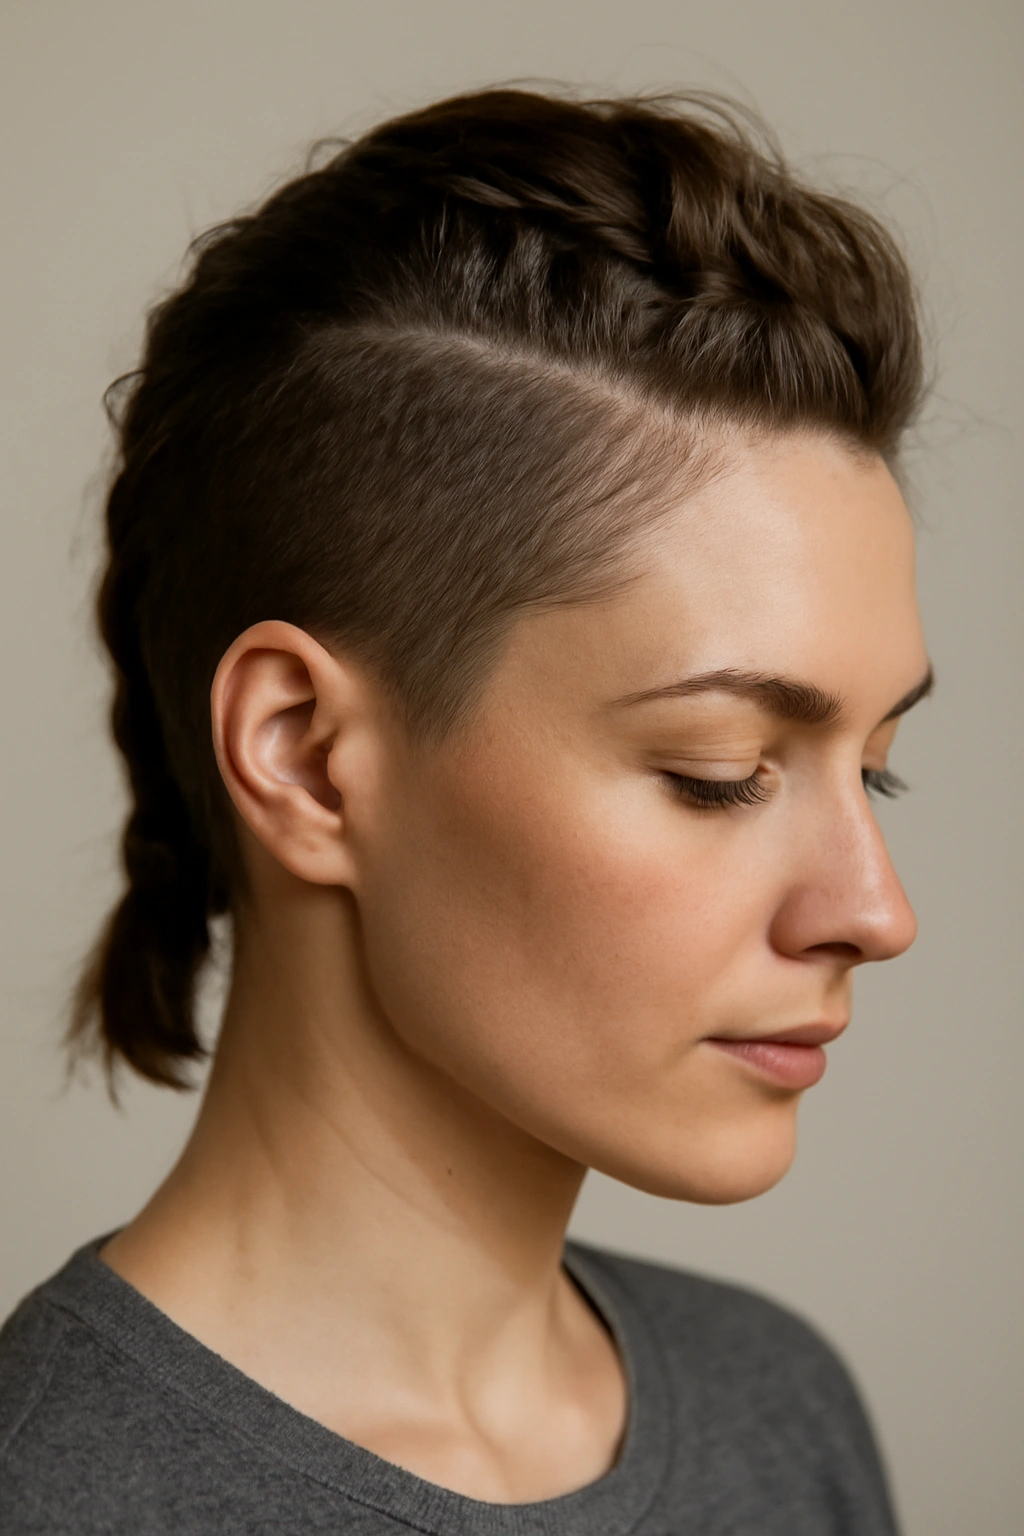
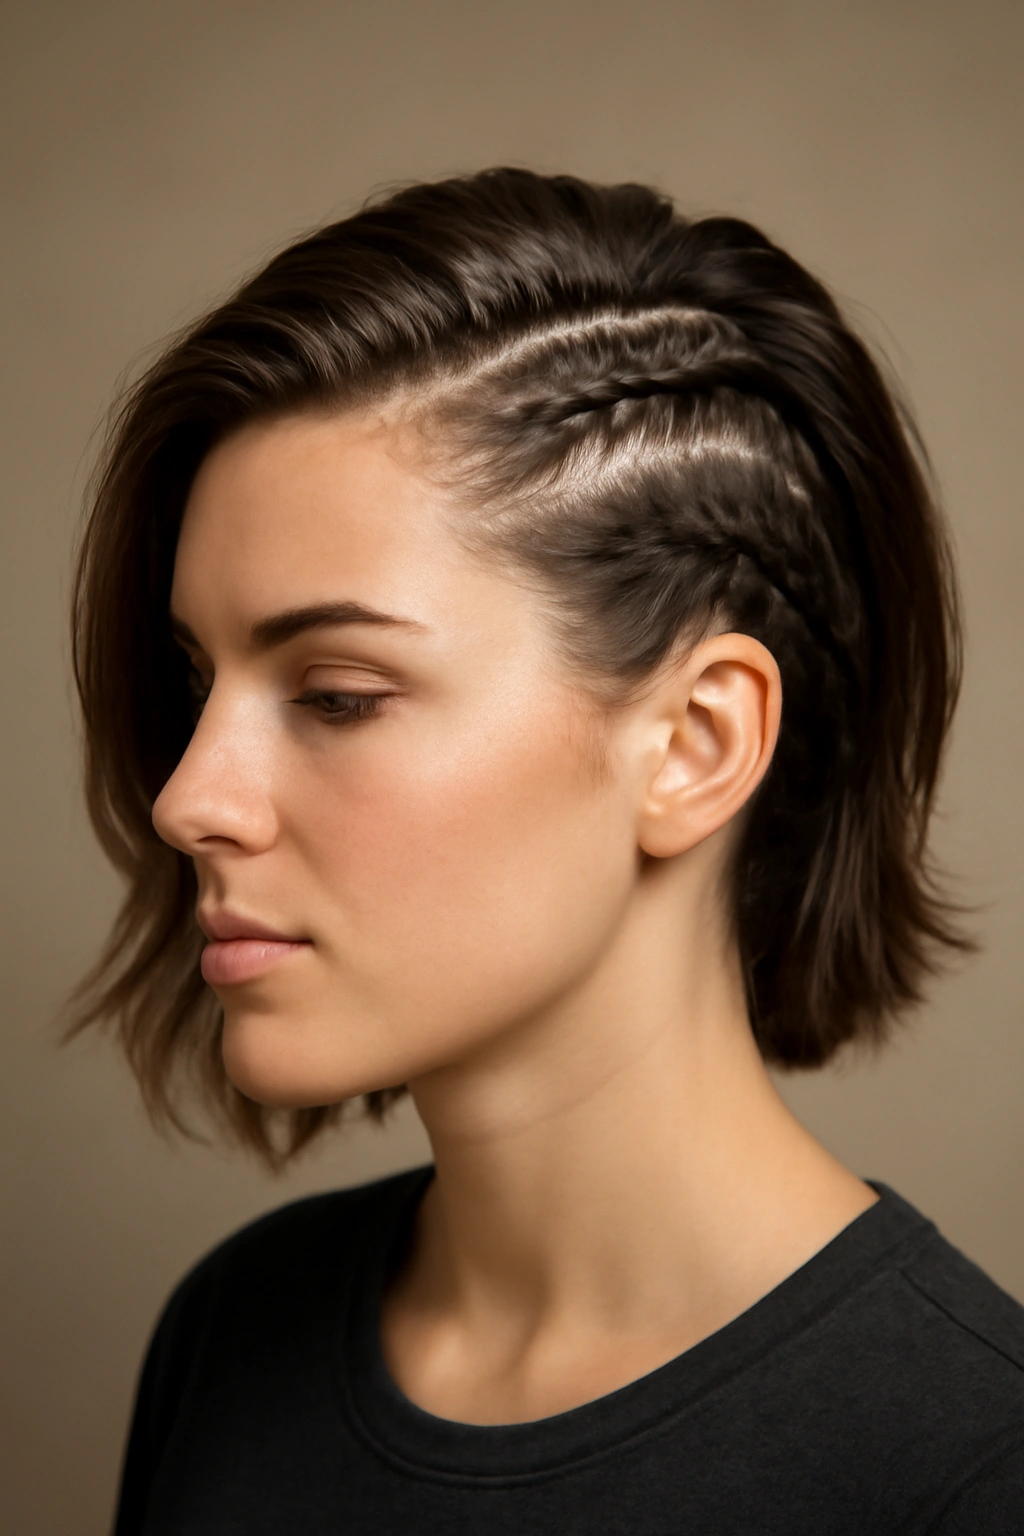
The faux hawk braid (sometimes called a “fohawk”) is the toned-down, work-appropriate cousin of the classic mohawk braid. Instead of braiding straight down the center or creating dramatic visual contrast with shaved sides, the faux hawk braid is more subtle—it creates the suggestion of a mohawk shape without being quite as bold or immediately recognizable as a statement style.
This version works beautifully for people who love the mohawk aesthetic but work in conservative environments, want a style that reads as more professional, or simply prefer a softer approach. The faux hawk braid often sits only along the top third or half of your head, creating a gentle uplift and visual interest without the full-force edge of a complete center braid.
How to Create a Faux Hawk Braid
Instead of parting all the way from your forehead to your nape, create a partial center part that only goes from your forehead to approximately the crown of your head. Begin your braid at your hairline, using only the hair from this partial center section.
Braid straight down the center, working only until you reach approximately the crown area. At that point, secure your braid with a small elastic or bobby pin. The hair below the braid (starting from the crown area down) stays completely loose and unstyled, blending seamlessly into the rest of your hair when you view the back of your head.
What you get is a subtle braid that’s visible when someone looks at the top of your head from the front or sides, but becomes almost invisible when viewed from behind. It’s a gentle way to incorporate the mohawk braid aesthetic without fully committing to it.
Styling the Rest of Your Hair
The genius of the faux hawk is that the rest of your hair can be styled however you prefer. You can leave it completely straight, add waves or curls, tease it for volume, or pin sections back. Because the braid only occupies the top portion of your head, your styling options for the rest of your hair are completely unlimited.
This style is also forgiving on shorter hair because it doesn’t require your braid to go the entire length of your head. Even if you have quite short hair, you can create a visible, interesting faux hawk braid simply by braiding the top third of your hair.
8. Textured Topknot Mohawk Braid
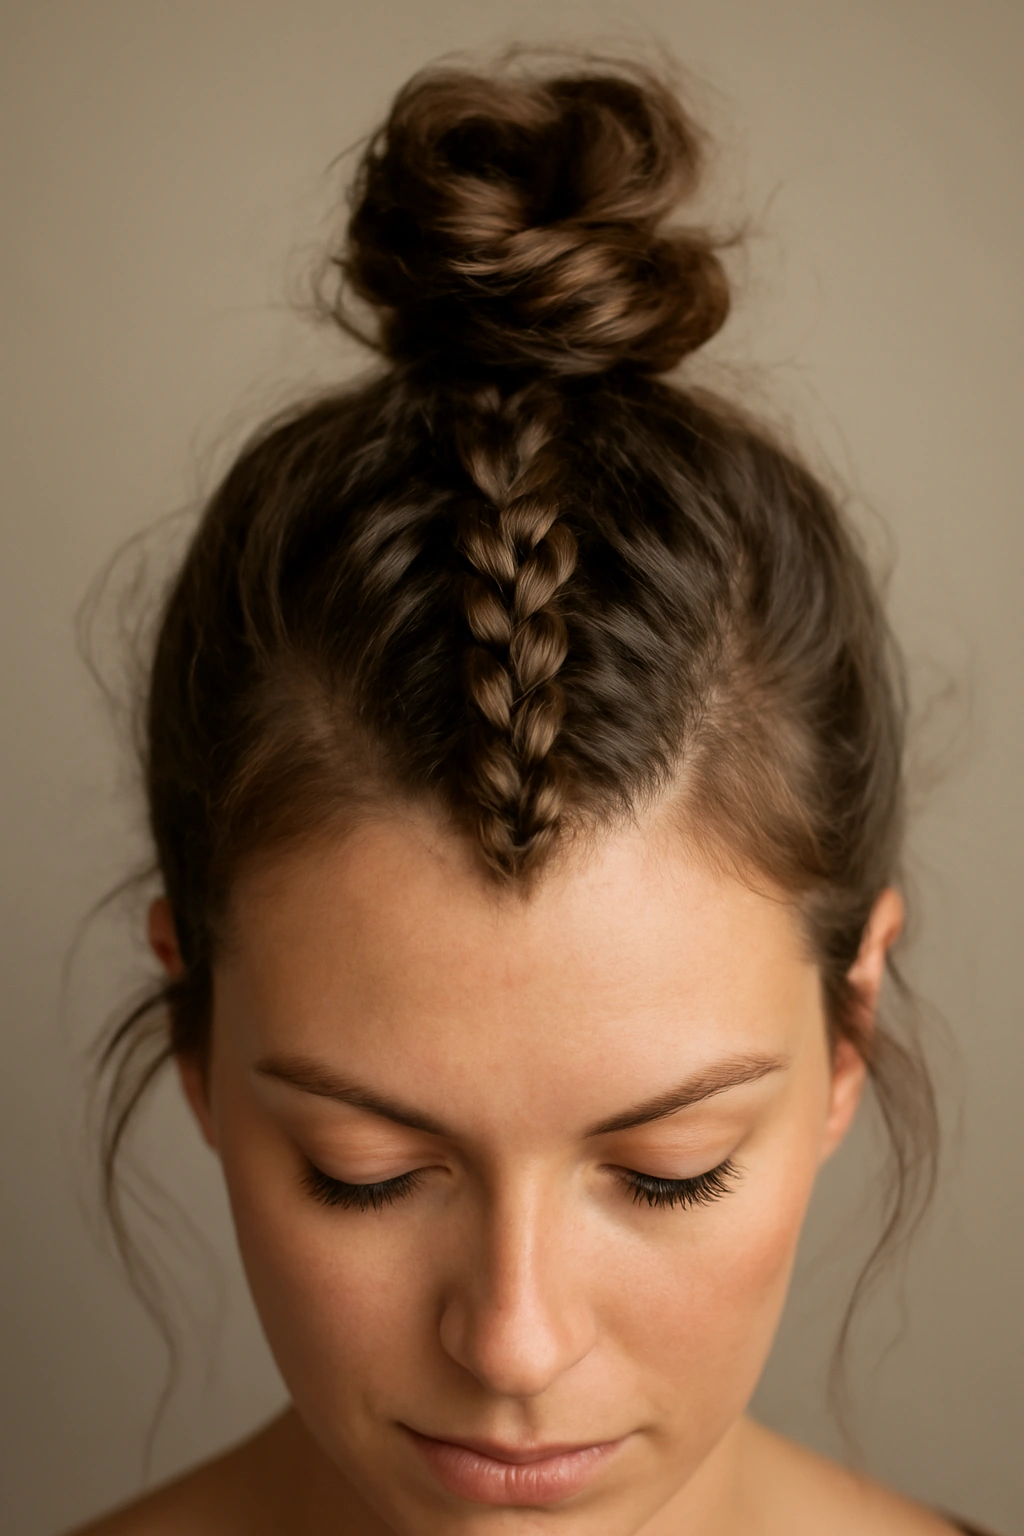
The textured topknot mohawk braid is a playful, almost punk-inspired variation where your mohawk braid doesn’t go straight down your head—instead, it ends in a coiled topknot or twisted bun at your crown. This style combines the edge of a mohawk with the polish of an updo, creating something that works for both casual hangouts and slightly dressier occasions.
This version is particularly flattering on shorter hair because it creates substantial height at your crown without requiring length throughout your hair. The topknot concentrates all the visual drama in one focal point, making even quite short hair look sculptural and intentional.
How to Create a Textured Topknot Mohawk Braid
Start with your standard center part and braid your center section just as you would for a classic center mohawk. Rather than braiding all the way to your nape, stop braiding when you reach your crown—approximately where a topknot would naturally sit.
Once you’ve reached your crown and secured your braid with an elastic, coil the remaining unbrazed hair (or the end section of your braid if you’ve braided all the way down) into a loose topknot or small bun at your crown. Use bobby pins to secure it, aiming for a slightly tousled, undone appearance rather than a polished, sleek bun.
Gently pull and loosen your braid as you work your way up, and loosen sections of your topknot as well. This creates a textured, dimensional appearance that feels both edgy and polished simultaneously.
Making It Work With Short Hair
On shorter hair, this style is genuinely easier to execute than some other mohawk braid variations because you’re not trying to braid all the way down a short length—you’re braiding just the center of your hair and ending in a knot at the crown. This means even very short hair can create a visible, interesting braid.
The key is making sure your topknot is secured well enough to hold throughout the day. Use bobby pins in a crisscross pattern underneath the knot, and consider using a light hairspray to set the texture of your braid and topknot.
9. Curved Mohawk Braid Design
Instead of a straight line down the center of your head, a curved mohawk braid follows the natural contours of your skull in a curved or S-shaped pattern. This style is less common, which makes it genuinely eye-catching, and it’s flattering on most head shapes because the curve can be adjusted to complement your face and cranium shape.
A curved braid requires more spatial thinking than a straight center braid, but once you understand the technique, it’s incredibly striking. The curved path creates visual movement and makes the style feel less rigid or severe—perfect if you want a mohawk braid that’s bold but not aggressive.
How to Create a Curved Mohawk Braid
Rather than creating a perfectly straight center part, create a curved part that roughly follows an S-shape from your forehead to your nape. You might curve slightly to the right at the top, then curve back to center in the middle of your head, then curve slightly left toward the nape—or whatever curve feels natural and flattering to you.
Begin your braid at your hairline, following your curved part line. As you braid, maintain that curved path throughout. This requires slightly more attention than a straight center braid, but the technique is identical—you’re just following a curved line rather than a straight one.
The beauty of a curved braid is that it creates visual movement and looks deliberately artistic rather than utilitarian. It signals that you’ve put thought and creativity into your style.
Adjusting the Curve to Flatter Your Face
The curve you choose can actually work with or against your face shape and head shape. If you have a rounder face, a curve that moves slightly to one side can create visual elongation. If you have a longer face, a more exaggerated S-curve can add width and balance.
Experiment with different curve patterns to see what feels most flattering to you. Take photos from the front and sides to see how the curve works with your overall proportions.
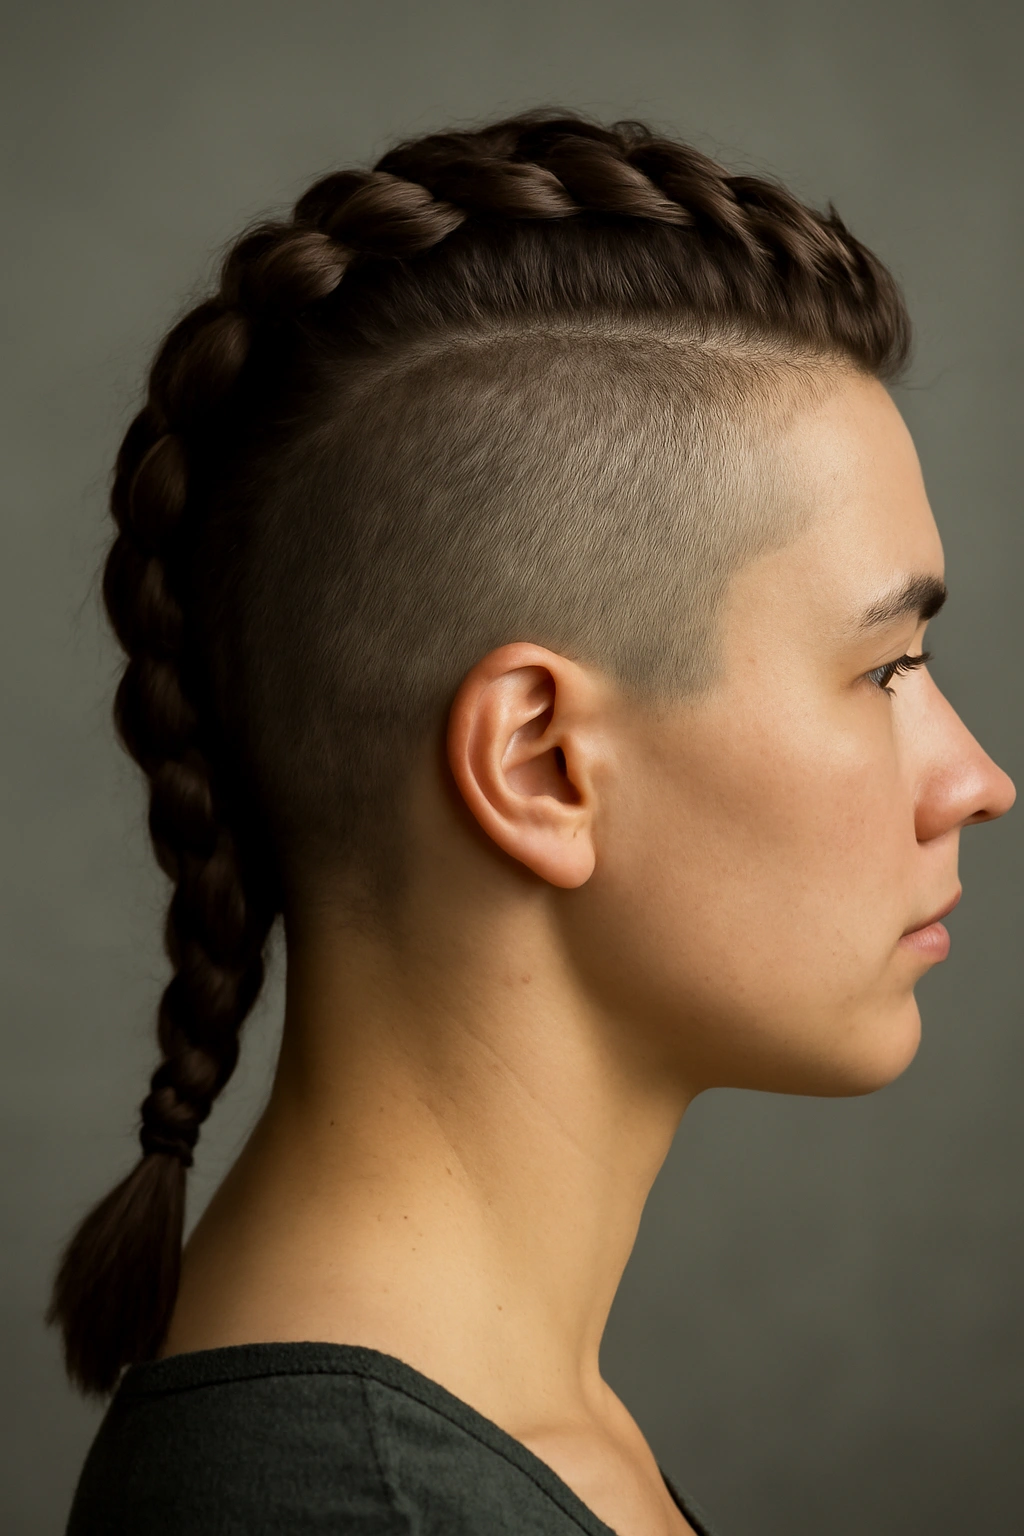
10. Braided Undercut Mohawk
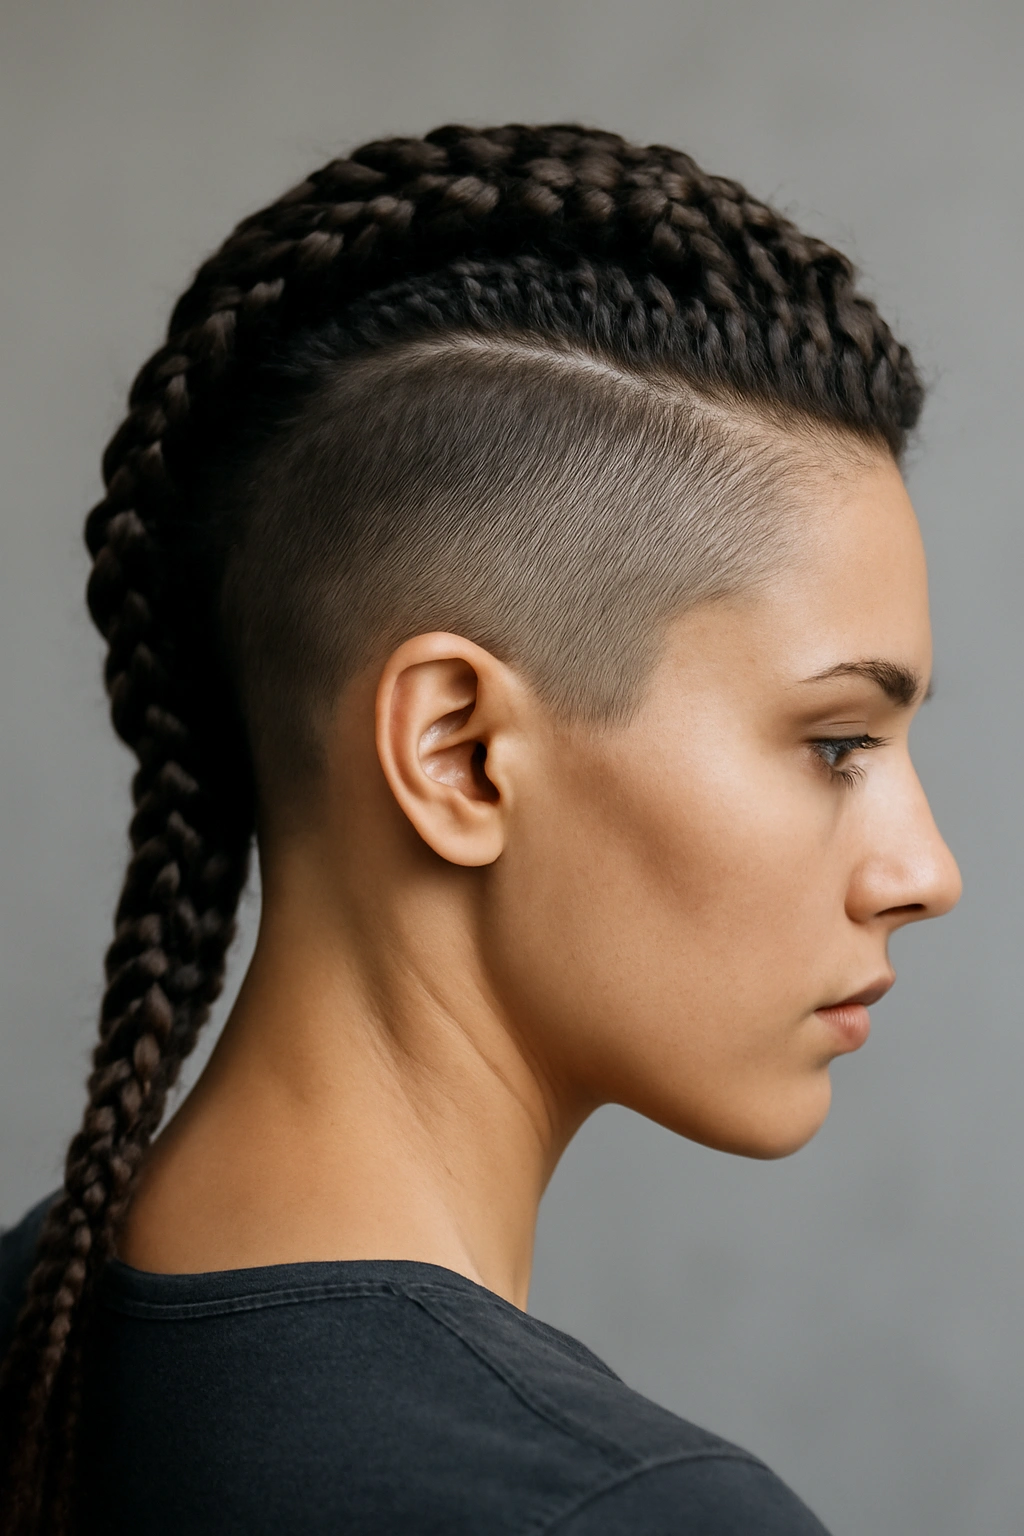
The braided undercut mohawk is the ultimate evolution of the style—it combines a real undercut (where the sides and/or back of your head are shaved or clipped very short) with a braided mohawk on top. Unlike the reverse mohawk where only the sides are shaved, an undercut might include shaved sides, a shaved back, or both, depending on your preference.
This style is for people who want a genuinely transformative hair change. An undercut with a braided mohawk on top is instantly recognizable as a bold, intentional style choice. It reads as artistic, edgy, and confident. On shorter top hair, this style is particularly impactful because the contrast between the braided texture on top and the clean shave underneath is maximized.
How to Create a Braided Undercut Mohawk
Creating an undercut requires a professional cut. Consult with a barber or experienced hair stylist who specializes in undercuts or fade haircuts. Describe exactly which sections you want shaved—sides only, back only, or both—and how short you want the shaved sections (typically 0.5 to 1.5 inches).
Once your undercut is in place, braid the remaining hair on top using whatever braiding technique you prefer. Because the contrast is already so dramatic, even a simple three-strand braid creates significant visual impact. Many people choose slightly more intricate braiding (Dutch, fishtail, or double braids) to add additional visual interest to match the boldness of the undercut.
Maintenance and Styling Commitment
An undercut requires regular touch-ups, typically every two to four weeks, to maintain that clean shaved or closely buzzed appearance. This is a significant time and maintenance commitment, so make sure you’re ready before having it done.
That said, once you have an undercut in place, styling your braided mohawk is straightforward—you braid the top section and everything else is already managed by your cut. There’s something freeing about that simplicity.
Final Thoughts
Whether you’re drawn to the classic elegance of a center braid, the softness of a fishtail version, the boldness of shaved sides, or something entirely unique, a mohawk braid offers a way to express edge, creativity, and confidence without requiring a permanent commitment. The fact that these styles work on short and medium hair makes them accessible to almost anyone—you don’t need waist-length locks to rock a stunning mohawk braid.
The best style for you depends on your lifestyle, workplace, and personal aesthetic. If you work in a creative field or social environment where bold hairstyles are celebrated, go all-in with shaved sides or an undercut. If you need something that reads as slightly more professional, a faux hawk or side sweep braid gives you the aesthetic you love with slightly more subtlety. And if you’re just experimenting with the look before committing to a cut, any of these braided versions let you try out the vibe before taking permanent action.
Start with whichever style speaks to you most, gather your tools (a fine-tooth comb, a few elastic bands, some bobby pins, and texturizing spray), and give it a try. Even if your first attempt isn’t perfect, braiding is a skill that improves with practice. Your second and third attempts will be noticeably better. By the time you’ve braided your hair five or six times, the technique becomes intuitive and muscle memory takes over.
A mohawk braid is more than just a hairstyle—it’s a statement. It tells the world that you’re creative, confident, and willing to take risks. That kind of energy is always worth the five minutes it takes to braid.