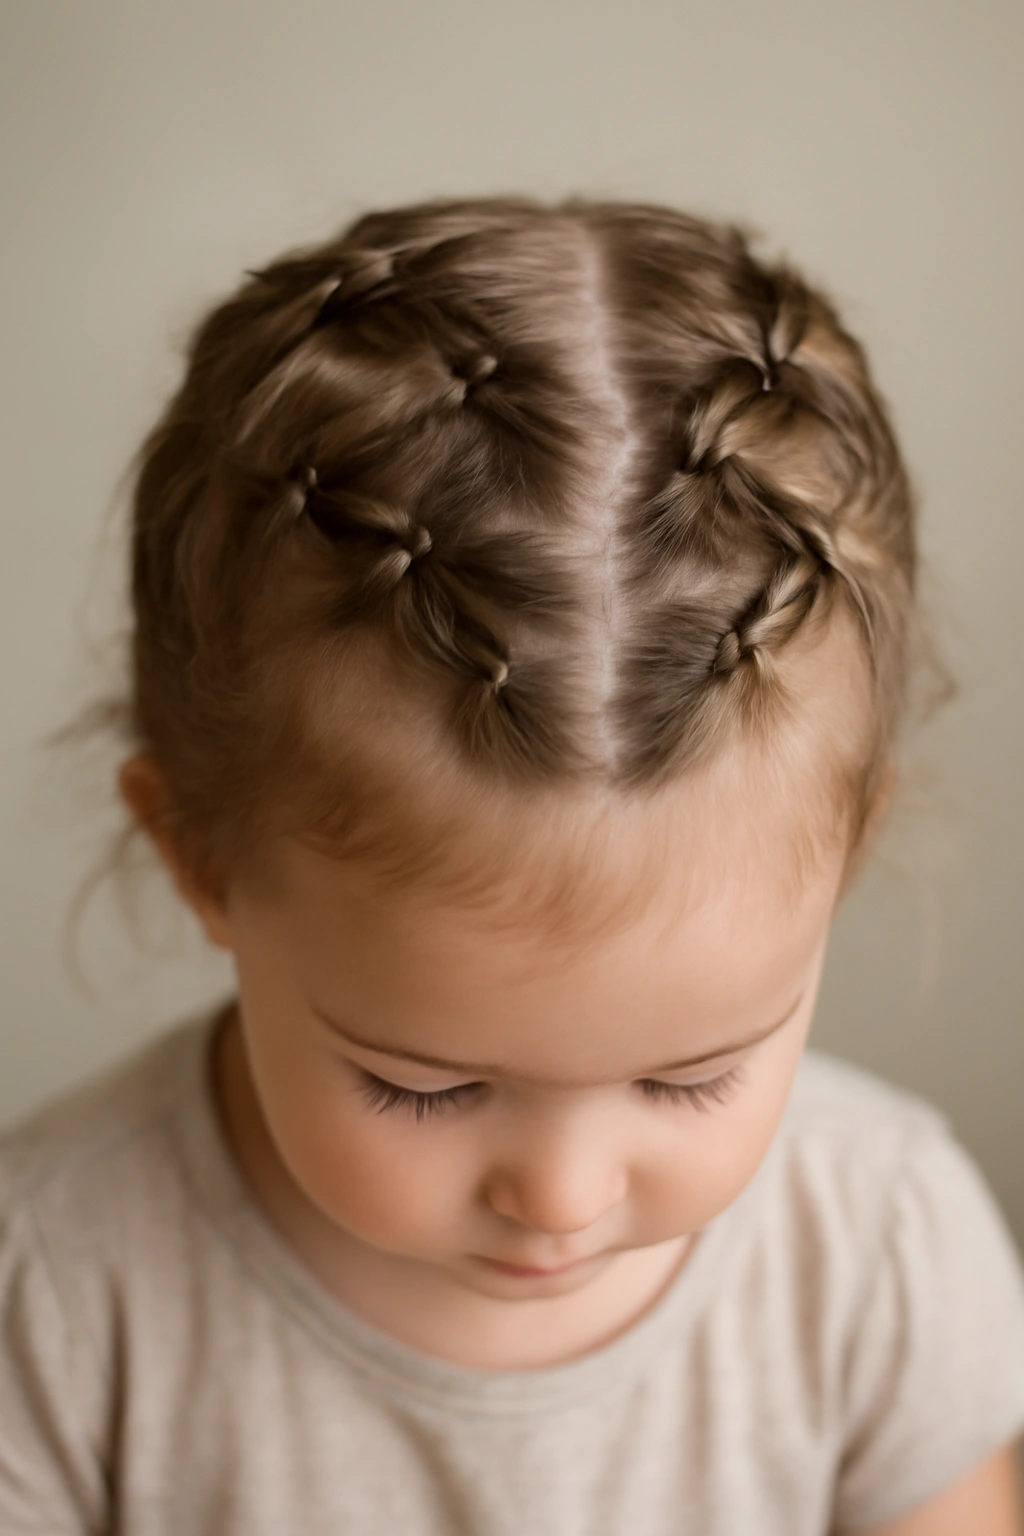
Braiding your toddler’s hair is simultaneously a beautiful bonding moment and a logistical puzzle. You spend twenty minutes carefully weaving those tiny strands into something picture-perfect, only to watch it unravel by snack time. The frustration is real—especially when your little one is squirming, you’ve got limited patience, and you genuinely want a hairstyle that’ll actually last through a full day at daycare or preschool.
The good news? Not all braids are created equal. Some hold up beautifully on active toddlers, while others fall apart the moment they tilt their head or play on the grass. The key difference comes down to technique, braid placement, tension, and—honestly—choosing the right style for your toddler’s hair type and activity level. A French braid will stay put far longer than a loose three-strand braid, and a Dutch braid near the scalp holds better than one that hangs freely.
This guide walks you through eighteen tested braided hairstyles specifically chosen for toddlers because they actually survive the chaos of playtime, nap time, and everything in between. Each style includes practical tips for getting it right the first time, advice on holding power, and real solutions for the common problems parents encounter. Whether your toddler has thick, fine, curly, or straight hair, you’ll find multiple options that genuinely work and don’t require professional skills to execute.
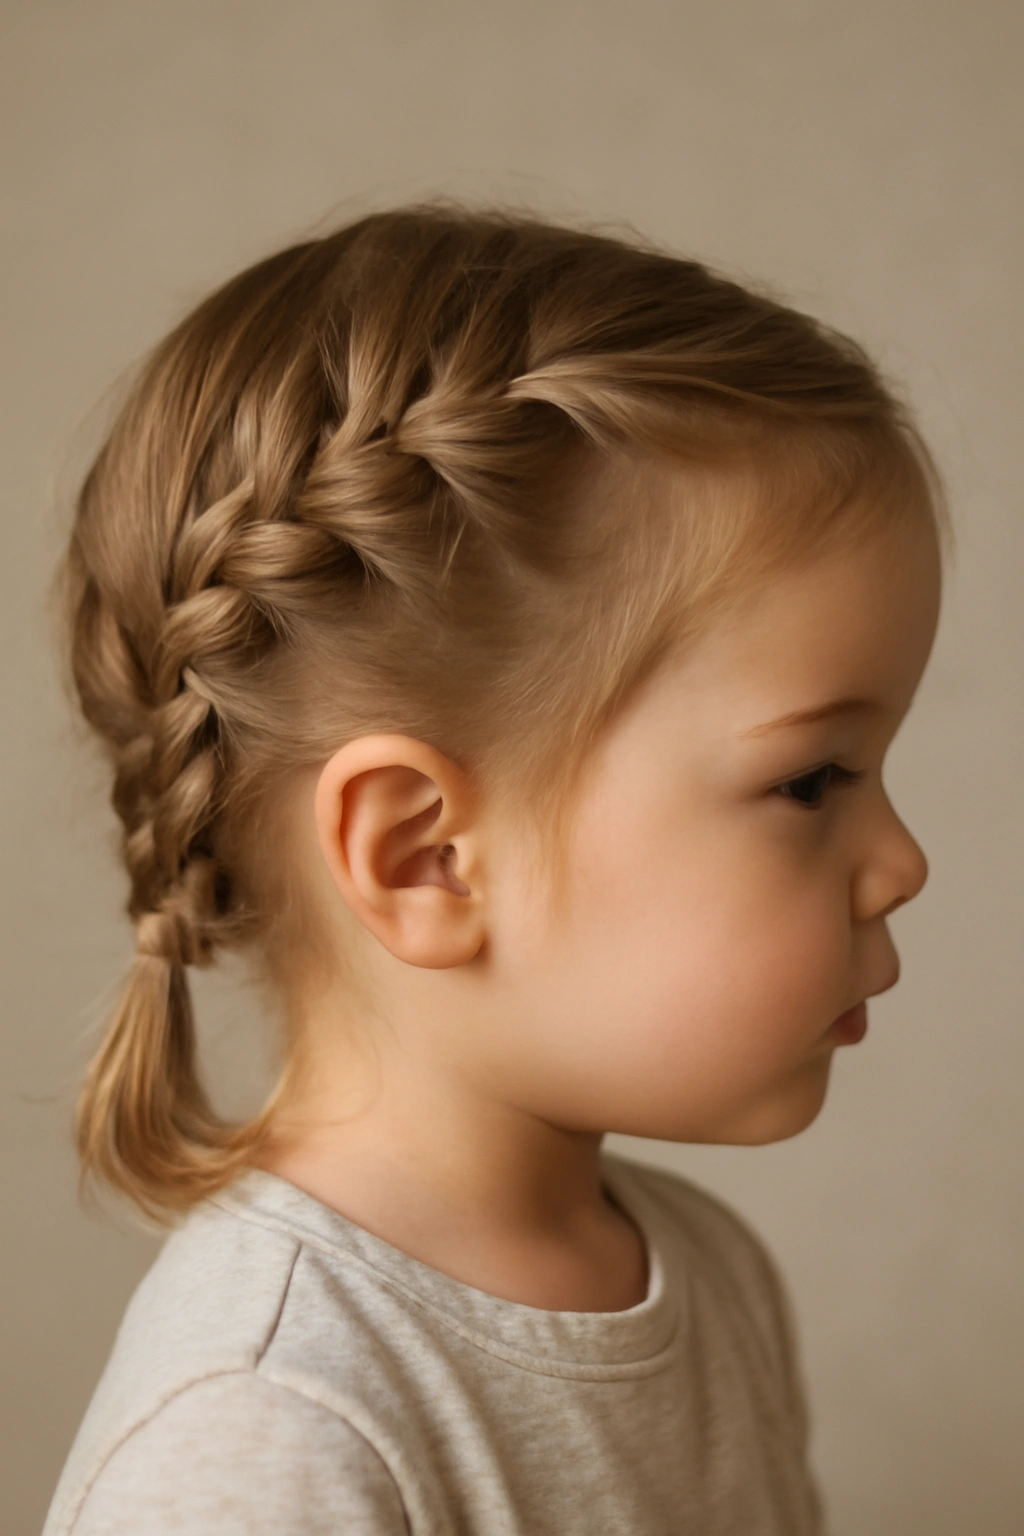
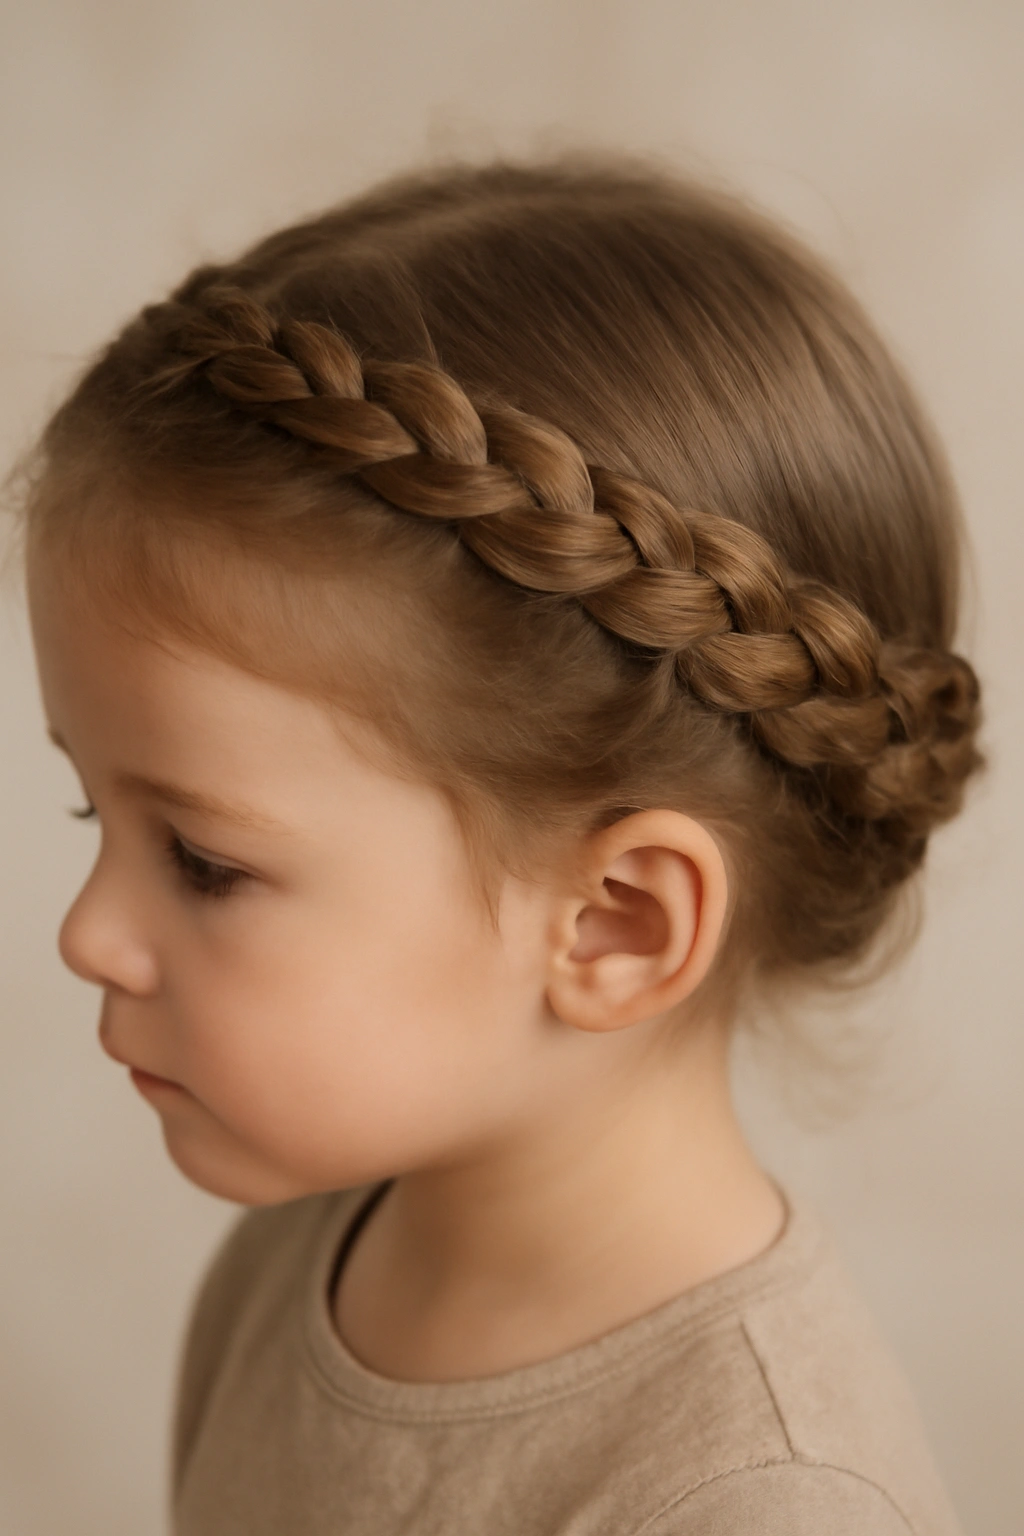
1. Dutch Braid Crown
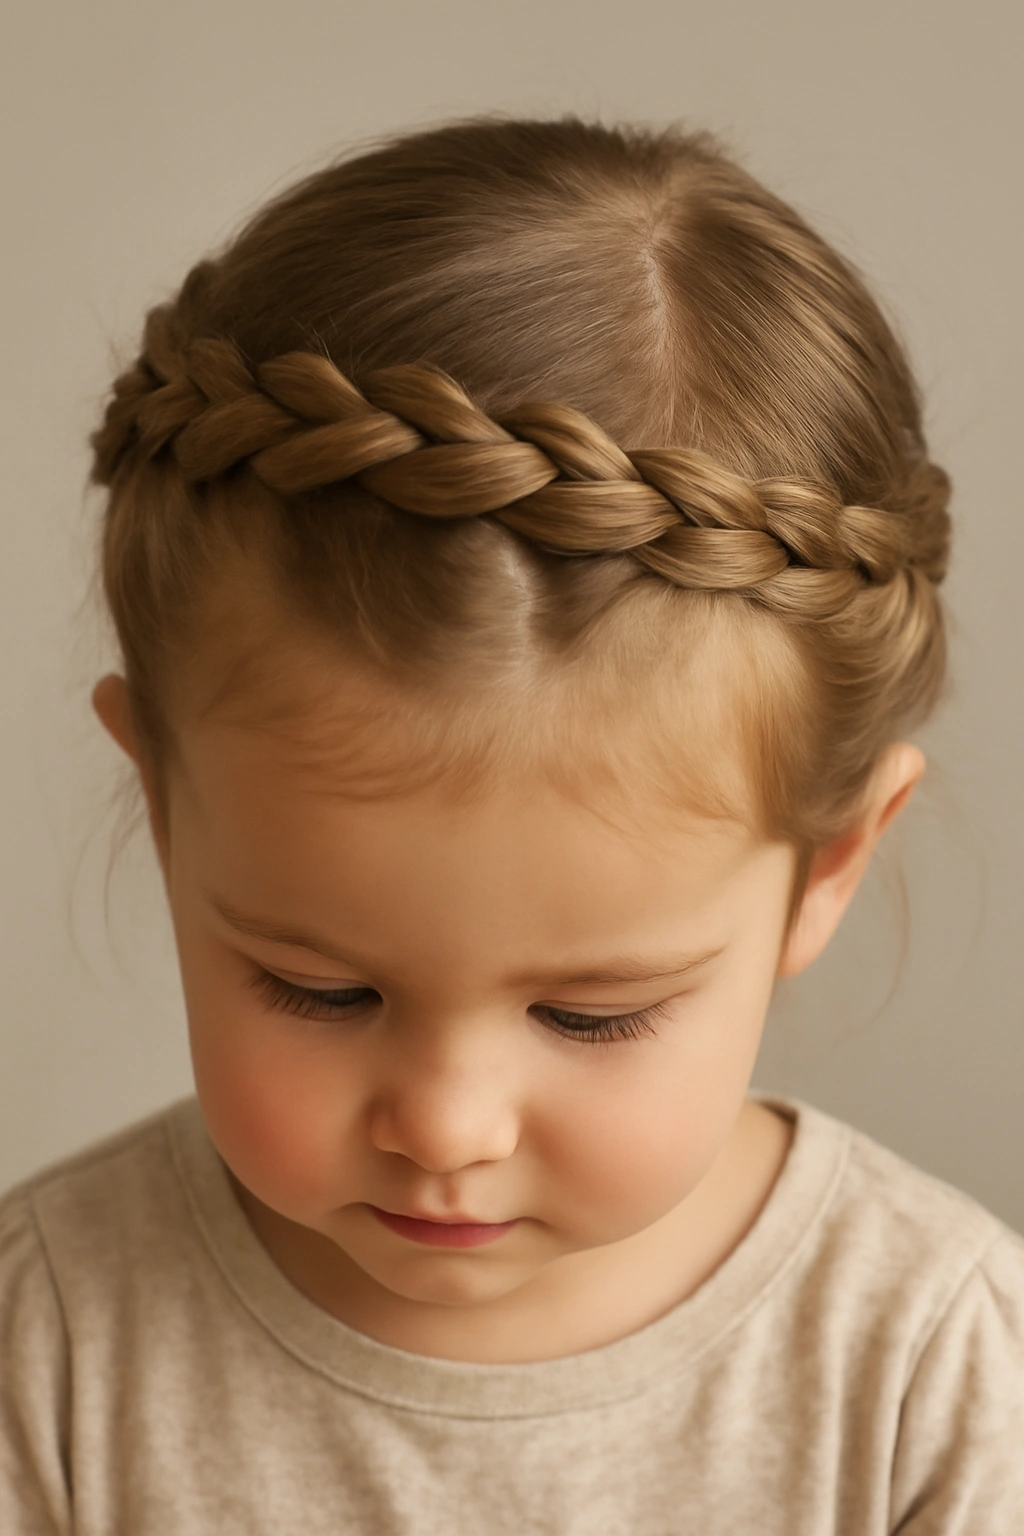
A Dutch braid that wraps around the head like a crown is one of the most durable styles you can create on a toddler. Unlike a loose braid, this one sits directly against the scalp and gains security from the tension against the head itself. You start the braid at one temple, work it back and around the head, and finish it somewhere near the opposite ear or nape of the neck.
Why This Style Stays Secure
The beauty of a Dutch braid is the way the weaving creates a tighter, more compact structure than a regular three-strand braid. Because you’re braiding under instead of over, the strands fold into each other and create more friction. Add the anchor point of being wrapped around the scalp, and you’ve got a hairstyle that can survive active play, rolling around, and even enthusiastic hat removal.
How to Style and Secure It
- Start with damp or slightly damp hair for better grip and easier braiding
- Section a small, triangular piece of hair from one temple
- Dutch braid (braid under, not over) working horizontally around the head
- Use a clear elastic to secure the end, or hide it with bobby pins for a seamless look
- Finish with a light hairspray if your toddler has very fine hair (optional but helpful)
Pro tip: Braid it in the evening and have your toddler sleep on it. You can tighten it gently in the morning and it’ll last twice as long because the braiding has set overnight.
2. Two-Strand Twisted Pigtails
Don’t overlook the humble twisted pigtail—it’s simple, holds beautifully on toddlers, and looks intentionally styled rather than accidental. Instead of traditional three-strand braids, you’re creating two twists by spiraling two sections of hair around each other. These twist naturally tighter as you work and don’t require the coordination that three-strand braiding demands.
What Makes Twists Different From Braids
Twists work through continuous tension and the natural tendency of hair to grip itself as you spiral. On toddlers with finer hair, twists sometimes hold even better than traditional braids because there’s less bulk and fewer strand crossings that can slip. They’re also faster to execute, which matters when you’re working with a wiggly toddler.
Application and Durability
- Part the hair down the middle into two clear sections
- Take a small subsection from the top of one side and twist it with another subsection from below
- Continue adding hair to each twist as you work downward (similar to a French braid technique)
- Secure each with a small elastic at the bottom
- These typically hold for 8-10 hours on active toddlers
Worth knowing: Twisted pigtails look especially polished on toddlers with curly or textured hair because the natural curl helps grip and hold the twist structure.
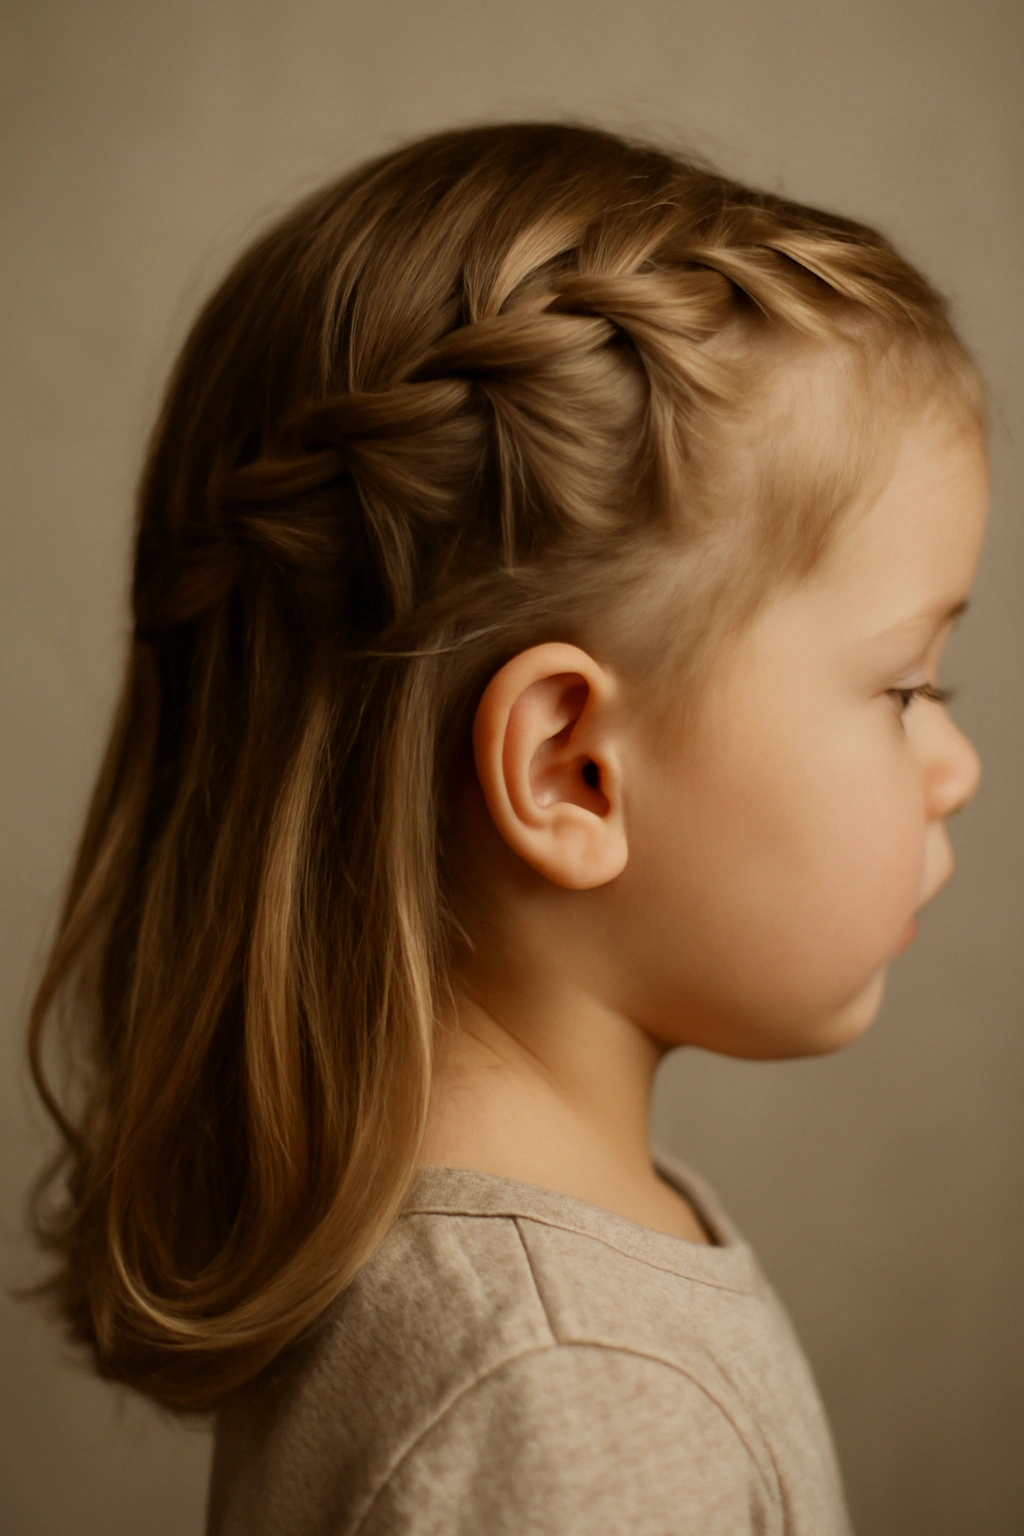
3. French Braid With Elastics at Each Section
This technique breaks the French braid into smaller anchored sections by placing a tiny elastic every two to three inches down the length. It looks decorative but serves a crucial practical purpose—if one section starts to slip, the braid is already secured below it, so the whole thing doesn’t unravel.
Why Sectional Securing Works
By creating multiple anchor points along the braid, you’re essentially creating several smaller braids tethered together. If your toddler pulls on the bottom section or gets hair caught in a car door, the damage is contained. The braid won’t spiral completely loose because of the elastics holding each segment in place.
Step-by-Step Technique
- Create a traditional French braid starting at the crown
- Every 2-3 inches, add a tiny clear elastic to hold that section
- These elastics create the “stacked” look and secure each braid segment independently
- Finish with a final elastic at the very end
- The result looks intricate and intentional while being remarkably durable
Insider note: Use color-coordinating elastics (clear for blonde hair, black for darker hair) to make them nearly invisible, or use fun colored elastics intentionally for a decorative effect.
4. Bubble Braid With Knots
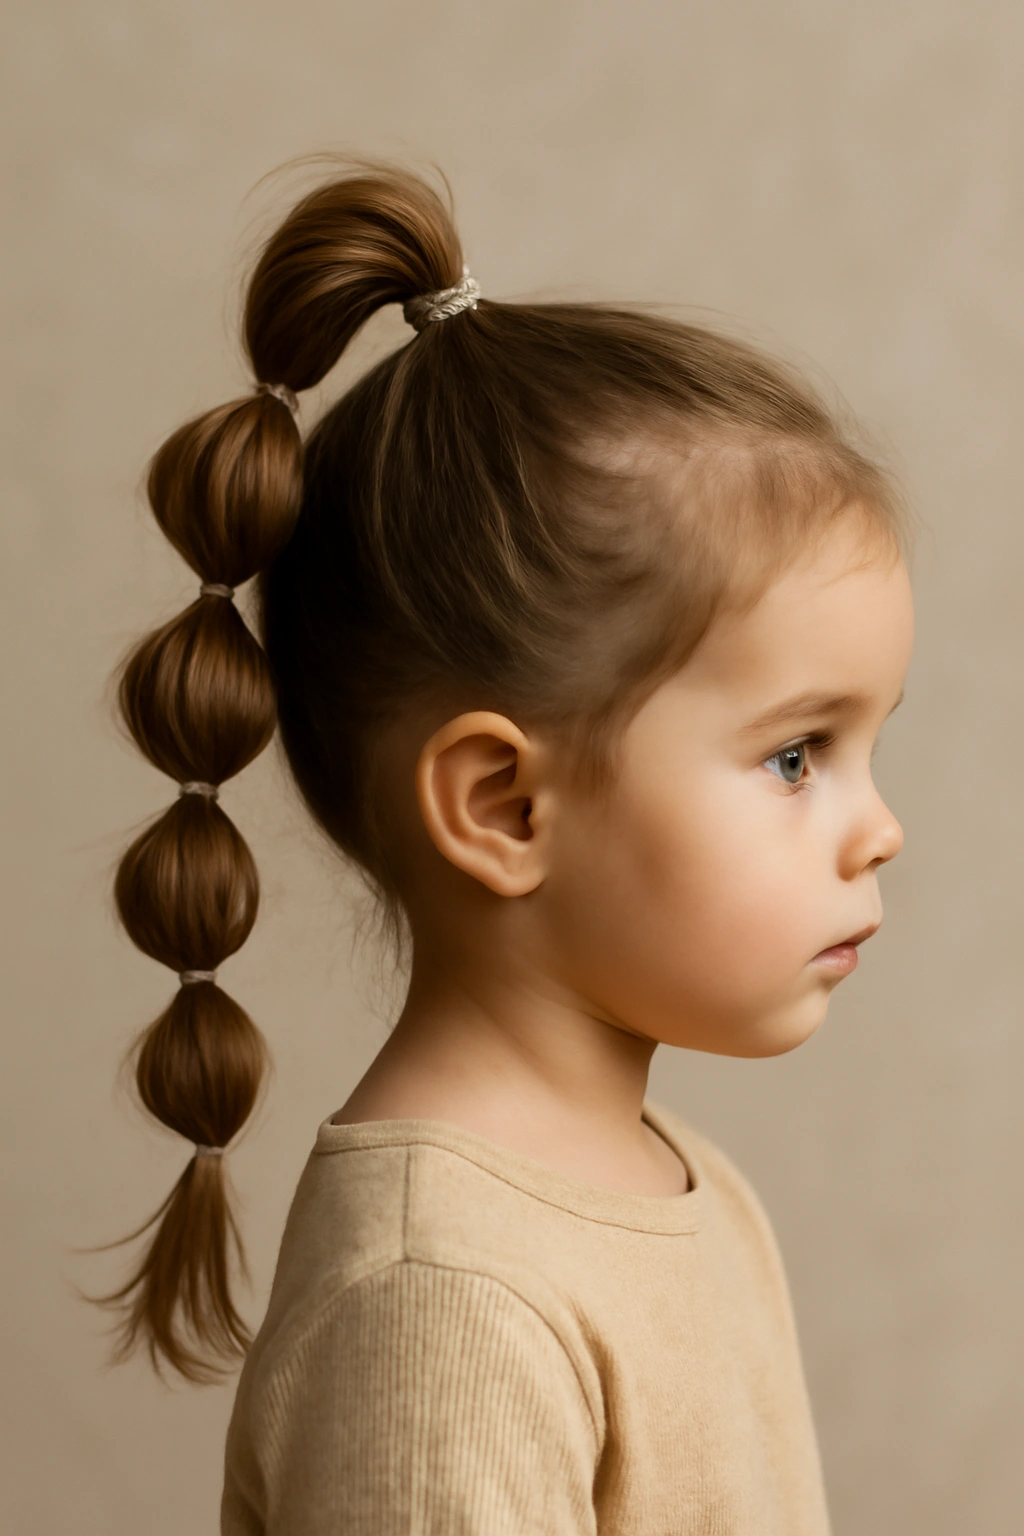
A bubble braid is technically not a braid at all but rather a series of ponytails stacked on top of each other, each one sitting slightly lower than the last. When you tie off each section with a clear elastic, you create the characteristic “bubble” effect. This style is brilliant for toddlers because each bubble is independently secured—when one comes loose, the others stay intact.
The Mechanics of Bubble Security
Each ponytail sits on top of the one below it, so gravity and the weight of the hair actually helps hold it in place rather than fighting against it. The elastic bands create hard stops that prevent the sections from sliding upward or downward. This is genuinely one of the most reliable styles for active toddlers.
How to Build the Bubble Braid
- Create a high ponytail at the crown and secure with an elastic
- Just below that elastic, create another ponytail using hair from below the first ponytail
- The first ponytail fans out above the elastic of the second one, creating the “bubble”
- Repeat down the length of the hair
- Finish with a final ponytail or small braid at the end
- Typically holds 10-12 hours even with vigorous play
Pro tip: Gently fluff each bubble upward after you’ve completed the whole style to make the bubbles more pronounced and voluminous.
5. Side Dutch Braid With Wraparound
Starting a Dutch braid at one side of the head and working it diagonally across toward the other side creates a style that’s both secure and visually interesting. The braid sits at an angle, which makes it less likely to get caught or pulled since it’s not directly in the line of sight or movement.
Why Angle Matters for Durability
A braid that runs horizontally across the back or down the center is more in the direct path of tugging and pulling. An angled braid moves it slightly out of the way, reducing accidental catching and tension. It’s a small biomechanical advantage that actually translates to better hold.
Creating the Angled Braid
- Section hair from the temple on one side of the head
- Dutch braid diagonally back toward the opposite ear or side neck
- This natural angle reduces tension on any one part of the scalp
- Secure with an elastic and bobby pins if needed
- The diagonal creates visual interest and practical durability
Worth knowing: This style works especially well on toddlers with thinner hair because the angle distributes tension more evenly than a straight-back braid.
6. Multiple Thin Braids in a Half-Up Style
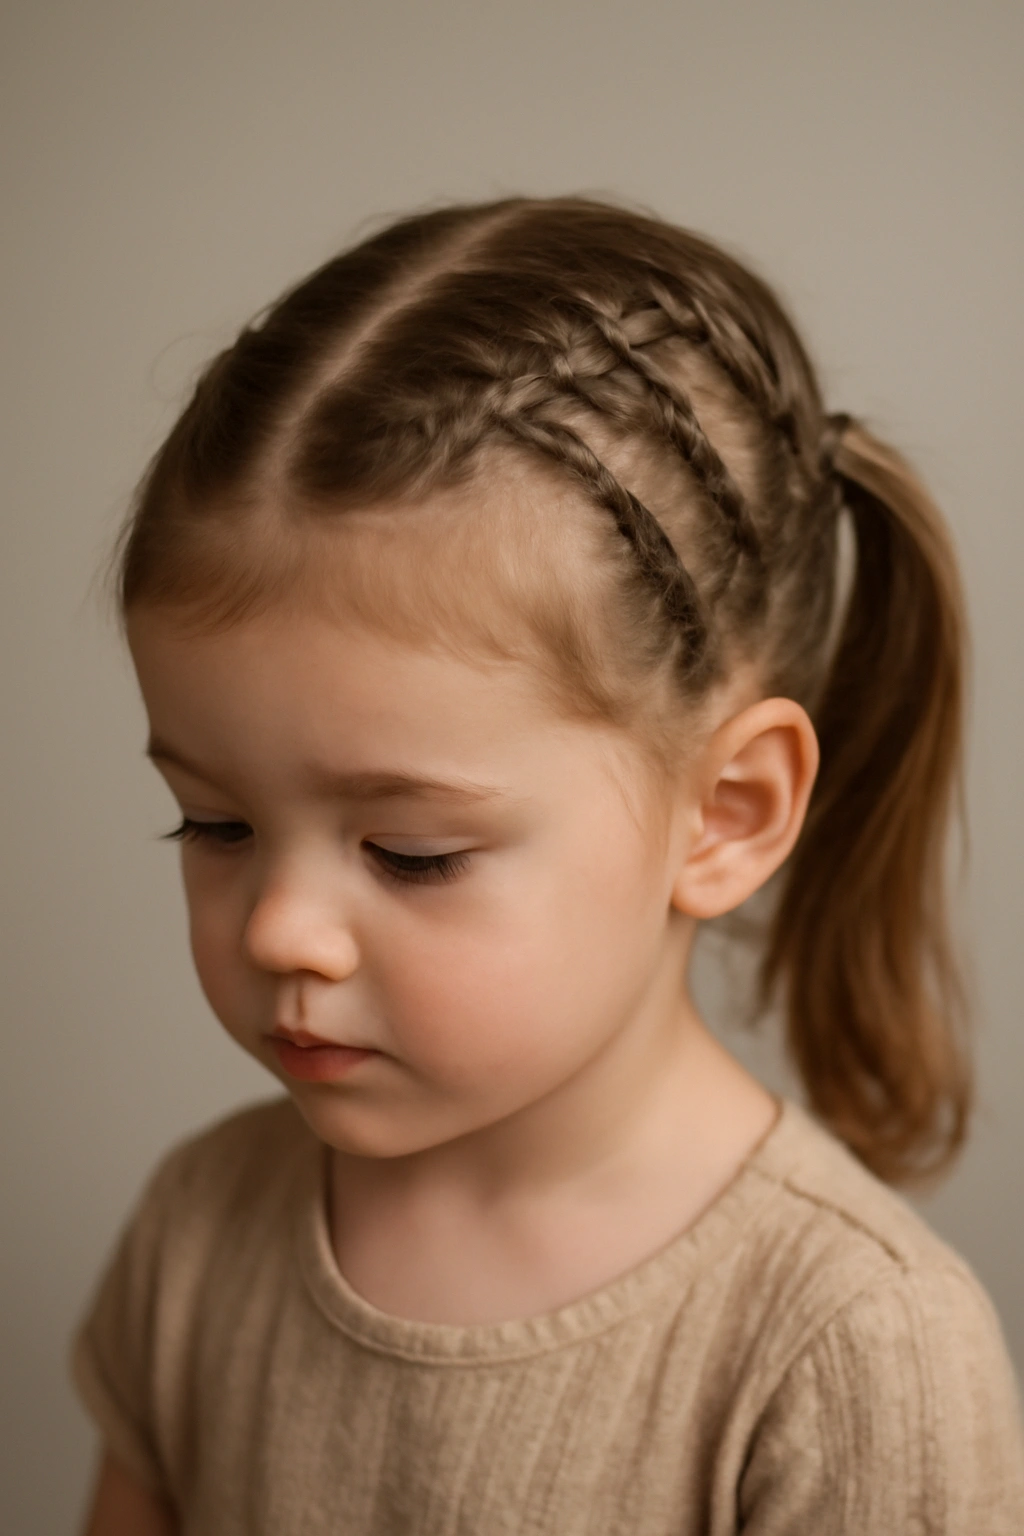
Instead of one thick braid, create four to six thin, delicate braids and gather them together in a half-up ponytail at the back of the head. The multiple braids distribute the weight and tension across several attachment points rather than concentrating it in one place, making the whole style significantly more stable.
Distributed Tension Equals Longer Hold
When you have one thick braid, all the weight and movement stress is concentrated in that single strand. With multiple thin braids, you’re spreading that load across four or six points, each carrying a fraction of the stress. This is the same principle that makes cable stronger than single-strand wire.
Building the Multi-Braid Half-Up
- Create 4-6 thin braids throughout the top half of the hair
- You can braid them close to the scalp (French style) or loose
- Gather all the braid ends at the back of the head into a ponytail
- Secure with an elastic
- This style typically holds through an entire day of active play
Pro tip: Space the braids evenly across the head for a balanced, intentional look rather than random placements.
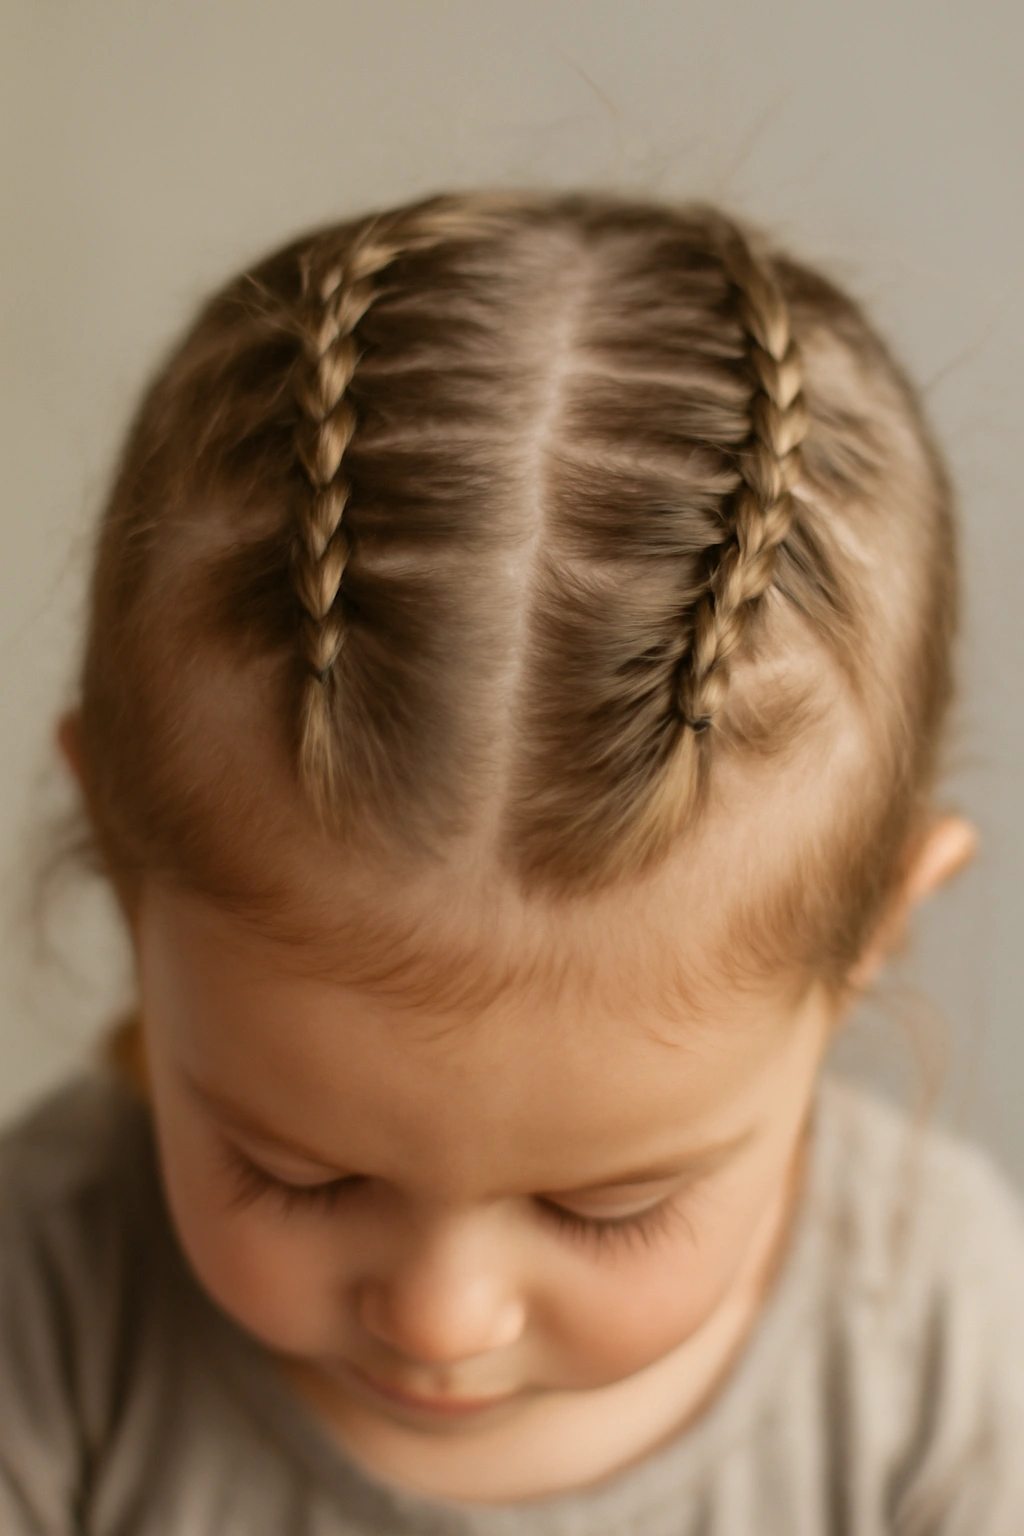
7. Boxer Braids (Two Center Braids)

Boxer braids—two thick French braids running parallel down the center of the scalp—are beloved for good reason. They’re iconic, look athletic and put-together, and because they’re positioned at the center of the head, they’re less likely to get caught or tugged in one direction.
The Security of Symmetry
Having two braids instead of one means you have two anchor points, two pathways for the hair, and two opportunities for securing. If one side starts to slip, it’s not taking the whole style with it. The symmetrical nature also means they’re well-balanced and unlikely to slide to one side.
How to Perfect Boxer Braids
- Part the hair straight down the center from forehead to nape
- French braid one side, starting at the top and working straight back
- Repeat on the other side
- Each braid should be identically tight and positioned for a polished look
- Secure both with elastics at the nape
- These typically last 10-14 hours on active toddlers
Insider note: Boxer braids look intentionally athletic and cool, which means your toddler might actually want to wear them (always a bonus for holding time).
8. Spiral Braid Down the Back
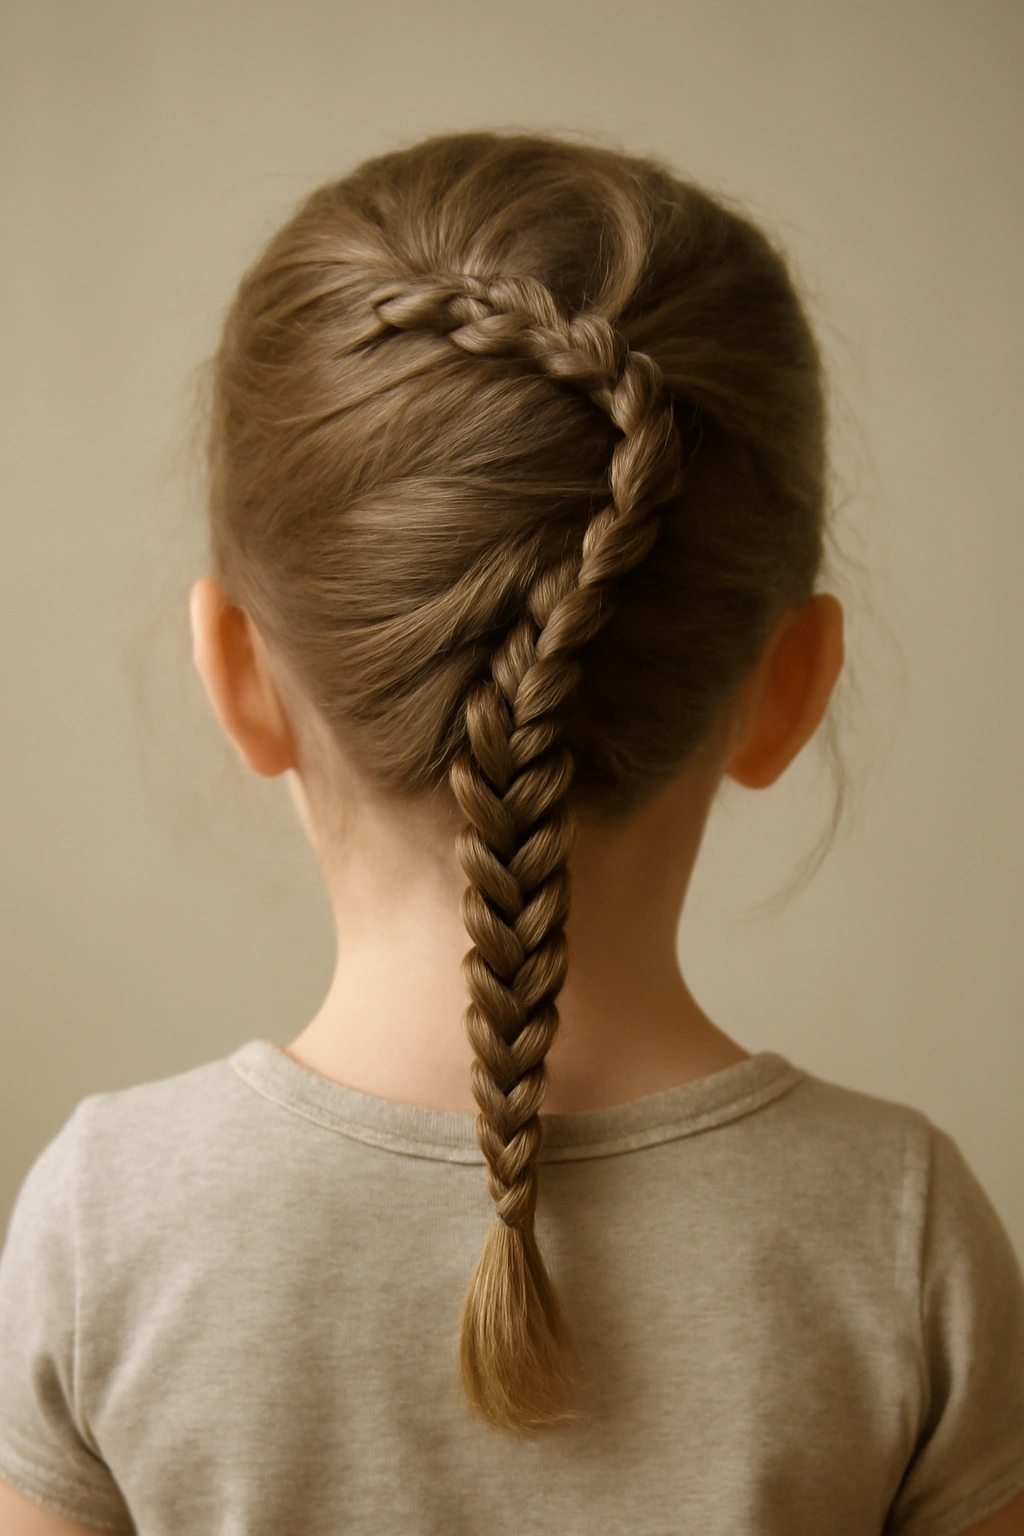
A spiral braid starts at the crown and wraps around the head in a circular spiral pattern before finishing at the nape. It’s intricate-looking but surprisingly durable because the spiral creates a naturally secure pathway that’s difficult to disrupt.
Why Spirals Hold Better Than You’d Expect
The spiral pattern means the braid is working against the natural fall of gravity and hair movement—it’s braced against the head in multiple directions. This three-dimensional bracing makes it remarkably difficult to accidentally pull loose, even with vigorous play and hat removal.
Creating the Spiral
- Start with a small section at the crown
- Dutch braid (or French braid) in a spiral circle around the head
- Work around the circumference of the head, gradually moving downward
- The end result should wrap around the head like a decorative spiral staircase
- Finish and secure at the nape with bobby pins and an elastic
- Holds exceptionally well—often 12+ hours
Worth knowing: This style requires a bit more skill and patience to execute neatly, but it’s absolutely worth mastering because it looks complex but is genuinely reliable.
9. Cornrows With Protective Ends
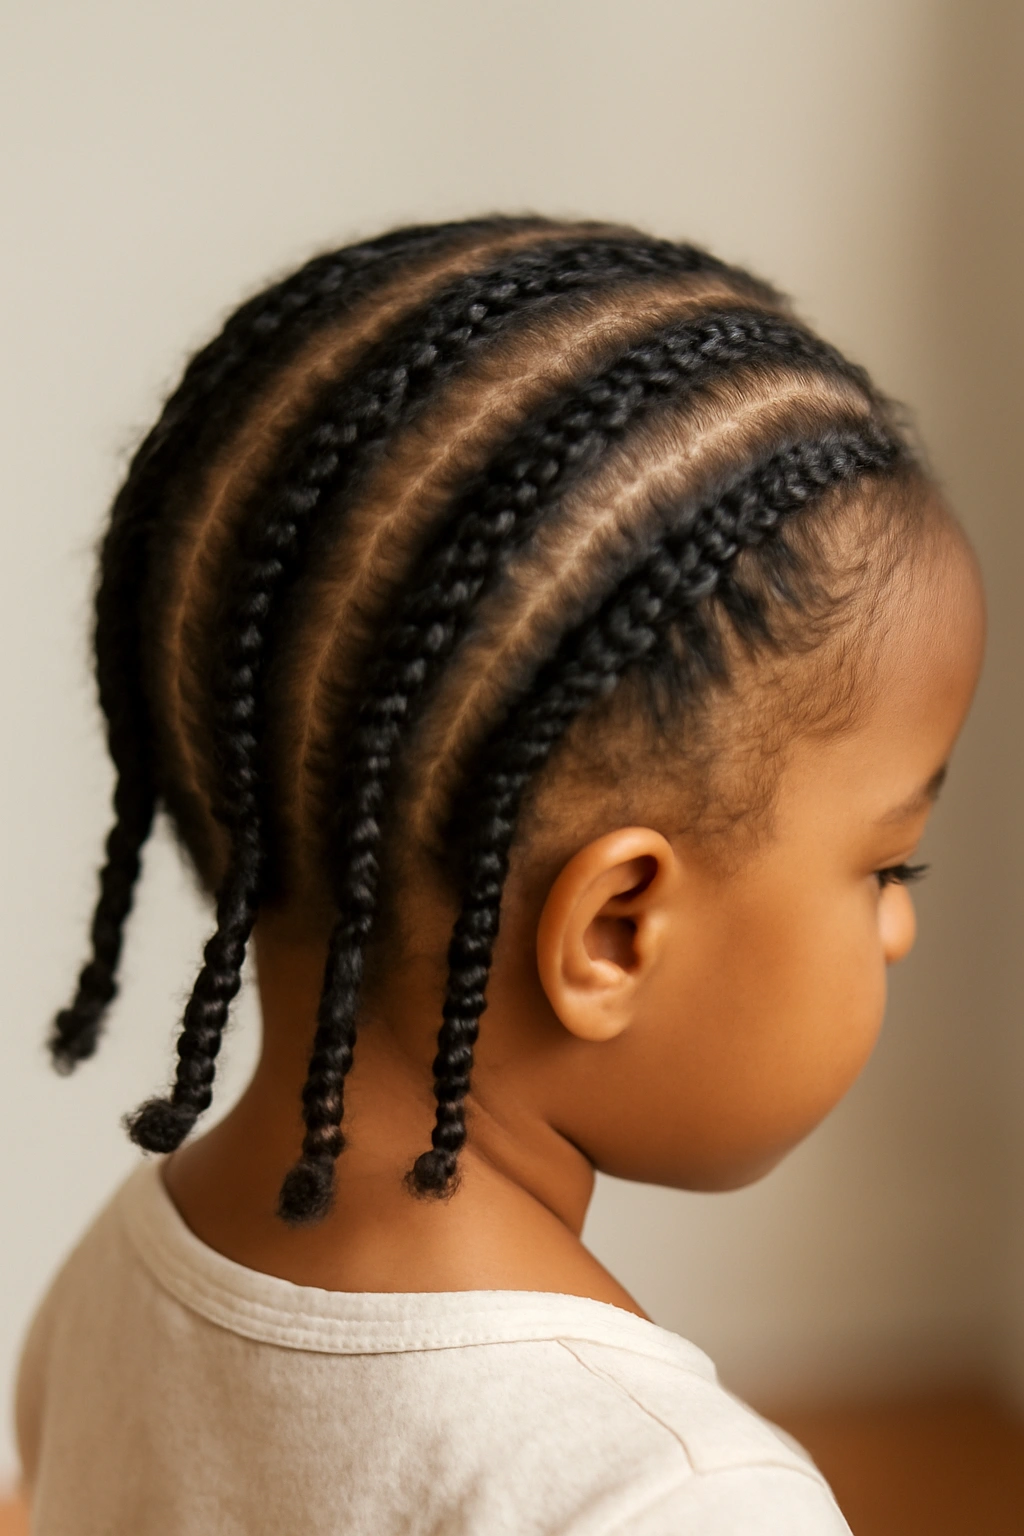
Cornrows are small, tight braids that run close to the scalp, and they’re especially effective for toddlers when you secure the ends individually with small elastics rather than braiding all the way to the end and securing with one band. Each cornrow becomes its own unit—fully secured and independent.
The Advantage of Individual Securing
By tying off each cornrow individually, you create multiple anchor points that work together to hold the style. It’s not a cascade of secure points like bubble braids, but rather a network of independent, secure units. Each row can move slightly without affecting the others.
Cornrow Technique for Toddlers
- Create 4-6 thin cornrows depending on hair volume
- Position them however you prefer (down the back, across the head, etc.)
- Secure the end of each cornrow individually with a tiny elastic
- The tight braiding against the scalp means minimal movement
- Typically holds 12-16 hours
Pro tip: Cornrows work beautifully on toddlers about to start swimming or water play because they’re one of the few braided styles that actually improve with water and chlorine exposure—they get tighter.
10. Halo Braid With Internal Pins
A halo braid is a thick braid that wraps all the way around the head at ear level, creating the appearance of a halo crown. By pinning it internally to the hair underneath (rather than relying solely on the end elastic), you create a style that’s genuinely bulletproof for active toddlers.
Internal Pinning for Maximum Security
Rather than simply ending the braid with an elastic and hoping it stays, you tuck the end back into the braid system and secure it with bobby pins threaded through the braid structure. This creates mechanical anchoring that’s nearly impossible to disrupt through normal play.
Building the Halo Braid
- Start the braid at one ear
- Work it around the head at ear level, using the French braid technique
- When you’ve completed the circle, tuck the end back into the braid structure
- Secure with 3-4 bobby pins threaded through the braid, not just holding the end
- Finish with hairspray for extra hold
- This style can last 14+ hours even with active play
Worth knowing: This style takes practice to perfect, but it’s absolutely worth learning because it’s one of the most secure and beautiful braided options for toddlers.
11. Loose Side Braid With Twists
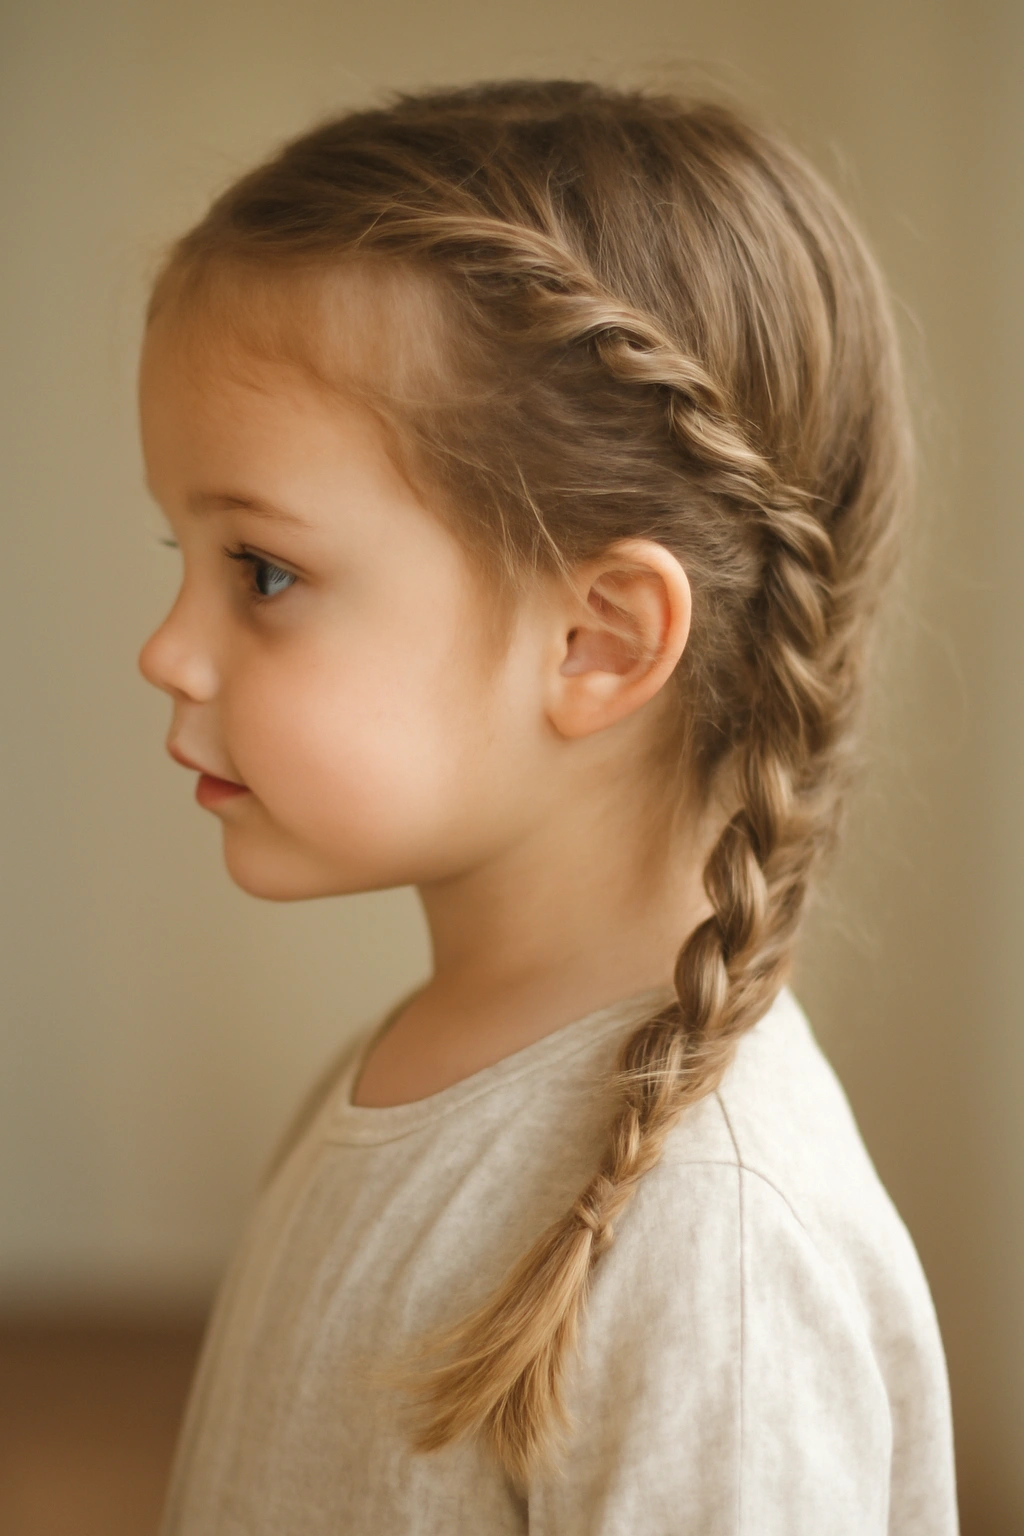
A loose three-strand braid down one side of the head might sound less secure than tighter options, but when you incorporate small twists feeding into the main braid (similar to a French braid technique), it becomes significantly more durable than a simple, loose braid while maintaining that relaxed, effortless aesthetic.
Combining Braid Styles for Better Hold
By using the French or Dutch braiding technique but keeping the strands looser and more romantic-looking than traditional tight braids, you get the best of both worlds: the security of integrated braiding with the soft, flowing appearance of a loose braid.
Executing the Soft-Hold Side Braid
- Start at one temple with a three-strand braid
- As you braid, incorporate small sections from nearby hair (French braid technique)
- Keep the tension moderate—not tight, but not loose either
- Work the braid down toward the shoulder
- Secure with an elastic and let it fall over the shoulder
- Typically holds 8-10 hours while looking effortlessly romantic
Pro tip: Finish this style by gently tugging on each strand section to loosen and textured it up slightly—this actually helps the braid hold better by creating more friction between strands.
12. Waterfall Braid With Secure Anchors
A waterfall braid appears to have strands cascading down like water while the main braid continues behind. It’s visually striking and, when done with secure anchoring points and bobby pins, it’s remarkably durable despite its delicate appearance.
The Illusion of Delicacy Versus Real Security
Waterfall braids can look fragile because of the “falling” strands, but if you secure each waterfall section with a tiny bobby pin and include proper anchoring, it’s actually quite stable. The visual delicacy is pure aesthetics—the mechanics are solid.
Creating a Secure Waterfall Braid
- Start at one temple with a three-strand braid
- As you braid, drop one strand and allow it to fall (the waterfall), then pick up a new strand from above
- Secure each dropped strand section with a tiny bobby pin so it doesn’t fall away
- Continue the main braid behind the “waterfall” sections
- Finish at the nape and secure well
- These hold quite well—10-12 hours typically
Worth knowing: This style is more time-intensive than simpler braids, but it’s stunning for special occasions and genuinely holds as well as more conventional styles.
13. Twisted Halo With Wrapped Ends
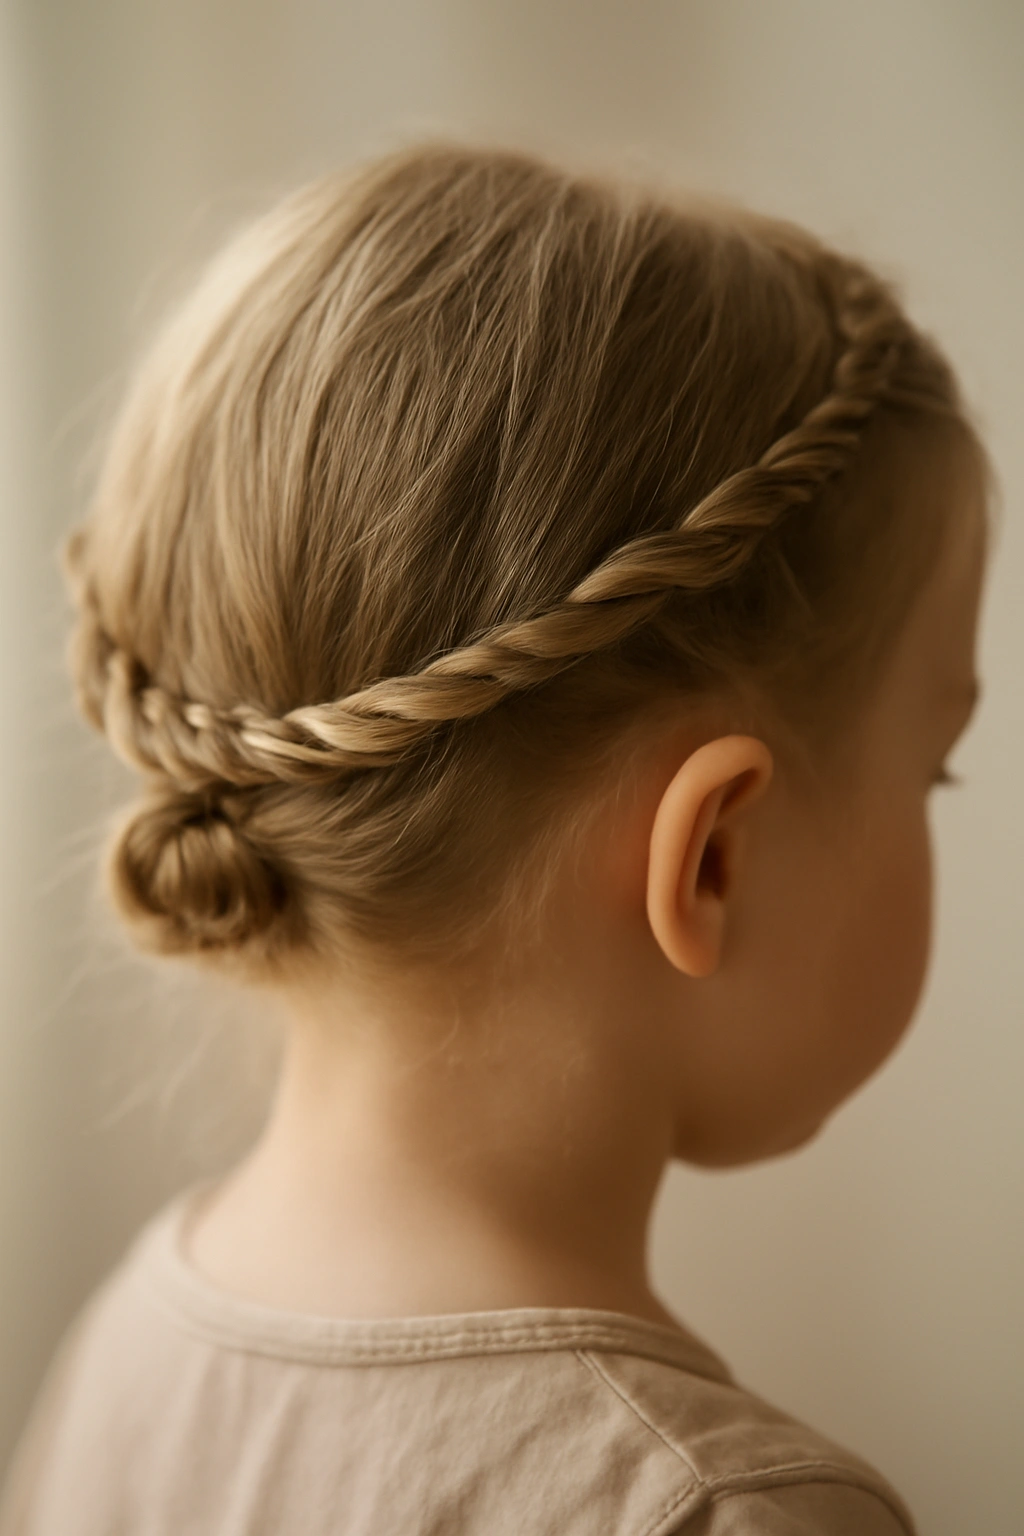
Similar to a halo braid, a twisted halo circles the head but uses twists instead of braids. The ends are then wrapped around the base to create a secure, decorative finish that pins back on itself—completely bulletproof.
Twisted Halos for Fine Hair
On toddlers with finer or more delicate hair, twists sometimes work better than braids because they’re gentler (less strand crossings pulling on individual hairs) and still create excellent hold through the friction of twisted hair.
Building the Twisted Halo
- Start at one ear with two sections of hair
- Twist them together as you work around the head in a circle
- Incorporate hair as you go (similar to a French twist technique)
- When the circle is complete, wrap the twist ends around the base and pin
- 3-4 bobby pins threaded through to secure the wrapped section
- Holds 12-15 hours with minimal maintenance
Pro tip: Add a decorative flower pin or small bow at the place where the wrapped section meets the circle for extra visual interest without compromising security.
14. Three Small Braids Clipped Together
Instead of creating one large braid, weave three small, independent braids and then clip them together at the back of the head with a barrette. This distributes the weight and doesn’t create a single point of vulnerability.
Distributed Security Through Multiple Units
Three separate braids mean three separate systems of security. If one strand pops loose from one braid, that braid can still be functional while the other two remain completely intact. It’s redundant security.
Arranging Three Braids
- Create three thin braids: one down each side and one down the back center, or three down the back
- Secure each braid individually with a small elastic
- Gather all three braids together at the nape
- Clip with a decorative barrette
- Finish with bobby pins securing any loose strands
- Typically holds 10-12 hours
Worth knowing: This style is perfect for toddlers who are starting to move away from typical “baby” hairstyles but still need the security and practicality of braids.
15. Braided Pigtails With Elastic Spirals
Take traditional braided pigtails to the next level by wrapping small elastics down the length of each braid at regular intervals. You’re creating a spiral effect similar to the bubble braid, but with the added texture and security of the braid itself.
Why Elastics on Braids Work Better Than on Loose Hair
When you wrap elastics around loose hair, they can slide. When you wrap them around a braid, they grip the braid structure and stay exactly where you put them. The elastics become micro-anchors along the entire braid.
Creating Spiral Braids
- Create two regular three-strand braids down the back
- Starting near the elastic at the end of each braid, wrap a small elastic up the braid every 1.5 inches
- You’re working upward, so the next elastic sits just above the one below it
- Create 4-5 elastics per braid
- The result is a series of “bubble” sections within the braid itself
- Holds exceptionally well—12+ hours
Pro tip: Use alternating colors of elastics (clear, color, clear, color) to create a playful striped effect while maximizing hold.
16. Cross-Back Dutch Braids
Two Dutch braids that start at opposite temples and cross at the back of the head create a dramatic, secure style that’s difficult to disrupt. The crossing point creates additional anchoring that reinforces the whole style.
The Strength of Intersection
Where the two braids cross at the back of the head, they brace each other. Each braid is working against the tension of the other, creating a locked, stable system. This intersection point is remarkably difficult to accidentally pull loose.
Building the Cross-Back Style
- Start a Dutch braid at the right temple
- Start a second Dutch braid at the left temple
- Work both braids back at an angle so they cross at the midpoint of the back of the head
- Cross them over each other
- Secure the ends together or individually with elastics
- Pin the crossing point with a decorative bobby pin or clip
- Holds exceptionally well—14+ hours
Worth knowing: This style looks complicated but is actually straightforward to execute once you understand the path of each braid.
17. Fishtail Braids Down the Back
A fishtail braid is technically not a traditional three-strand braid but rather a two-section braid where you’re pulling tiny pieces from each outer section and crossing them over to the opposite side. These braids look delicate but are remarkably secure because of how tightly the strands interlock.
The Hidden Security of Fishtail Braids
Because a fishtail involves pulling from outer edges and crossing inward repeatedly, the strand interlocking is more complex than a three-strand braid. This complexity actually creates better grip and hold—the strands have more contact points and more friction.
Creating a Fishtail Braid
- Divide the hair into two equal sections
- Pull a thin piece from the outside edge of the right section and cross it over to the left section
- Pull a thin piece from the outside of the left section and cross it over to the right section
- Continue this alternating pattern
- The braid builds down the back center
- Secure well at the end with an elastic
- Typically holds 10-12 hours
Pro tip: Fishtail braids look especially beautiful when you gently tug on each side section after completing the braid to make them looser and more textured.
18. Zig-Zag Braids Across the Crown
Create a zig-zag pattern by braiding sections across the top of the head from one side to the other, then back again, similar to a zigzag pattern. Each braid section is short and independently secured, creating multiple anchor points across the entire crown.
Anchor Point Strategy for Maximum Security
By creating multiple short braid segments instead of one long braid, you’re creating a network of anchor points that work together. Even if one section is disturbed, the surrounding sections hold the style intact.
Building the Zigzag
- Divide the crown into 4-5 sections depending on the tightness of the zigzag you want
- Create a small braid across the head from left to right
- Secure the end with a tiny elastic
- Create the next braid just below it, going right to left
- Continue this zigzag pattern until you’ve covered the crown area
- Use bobby pins to secure any loose sections
- Holds very well—12-14 hours
Worth knowing: This style works beautifully on toddlers with smaller heads because the zigzag pattern naturally follows the contours of the scalp without needing to be too elaborate.
Key Takeaways
The best braided hairstyle for your toddler depends on her hair type, the activity level planned for that day, and your skill level with braiding. Tighter braids like Dutch braids and cornrows consistently outperform loose styles, and styles with multiple anchor points (bubble braids, sectional elastics, multiple independent braids) are more durable than single-strand styles because they distribute stress across several secure points rather than concentrating it all in one place.
Start with the simpler styles—loose side braids, twisted pigtails, bubble braids—and work your way up to more complex options like spiral braids and waterfall braids as you get comfortable. Practice makes perfect, and the more you braid, the faster and neater your work becomes. Your toddler will likely become more patient with braiding practice too.
Remember that no hairstyle is truly permanent on an active toddler—the goal isn’t perfection throughout the entire day, but rather a style that starts beautiful and doesn’t completely fall apart by afternoon snack time. These eighteen styles are specifically chosen because they actually achieve that balance between beautiful and practical.