Tangled hair, a ticking clock, and a toddler who’d rather do literally anything than sit still—yeah, mornings can feel like a battle. The good news? Simple braids aren’t just beautiful; they’re your secret weapon for keeping little hair manageable all day while actually getting out the door on time. Braids protect delicate toddler hair from breakage, look intentional without requiring a degree in cosmetology, and keep flyaways under control through naptime, playtime, and whatever sticky situations your day brings.
The braids in this guide aren’t complicated. Many take under five minutes once you get the hang of them, and they work whether your toddler has silky-straight hair, waves, or those gorgeous spiraling curls that seem to have a mind of their own. Some are perfect for one-and-done mornings; others work beautifully when combined into a bigger style that looks fancier than it is. Most importantly, they’re forgiving enough that a slightly imperfect braid from a tired parent at 7 a.m. still looks intentional and sweet—not sloppy.
Before we dive into each style, let’s cover the basics that make braiding toddler hair faster and easier.
The Best Tools and Prep Strategy for Fast Toddler Braiding
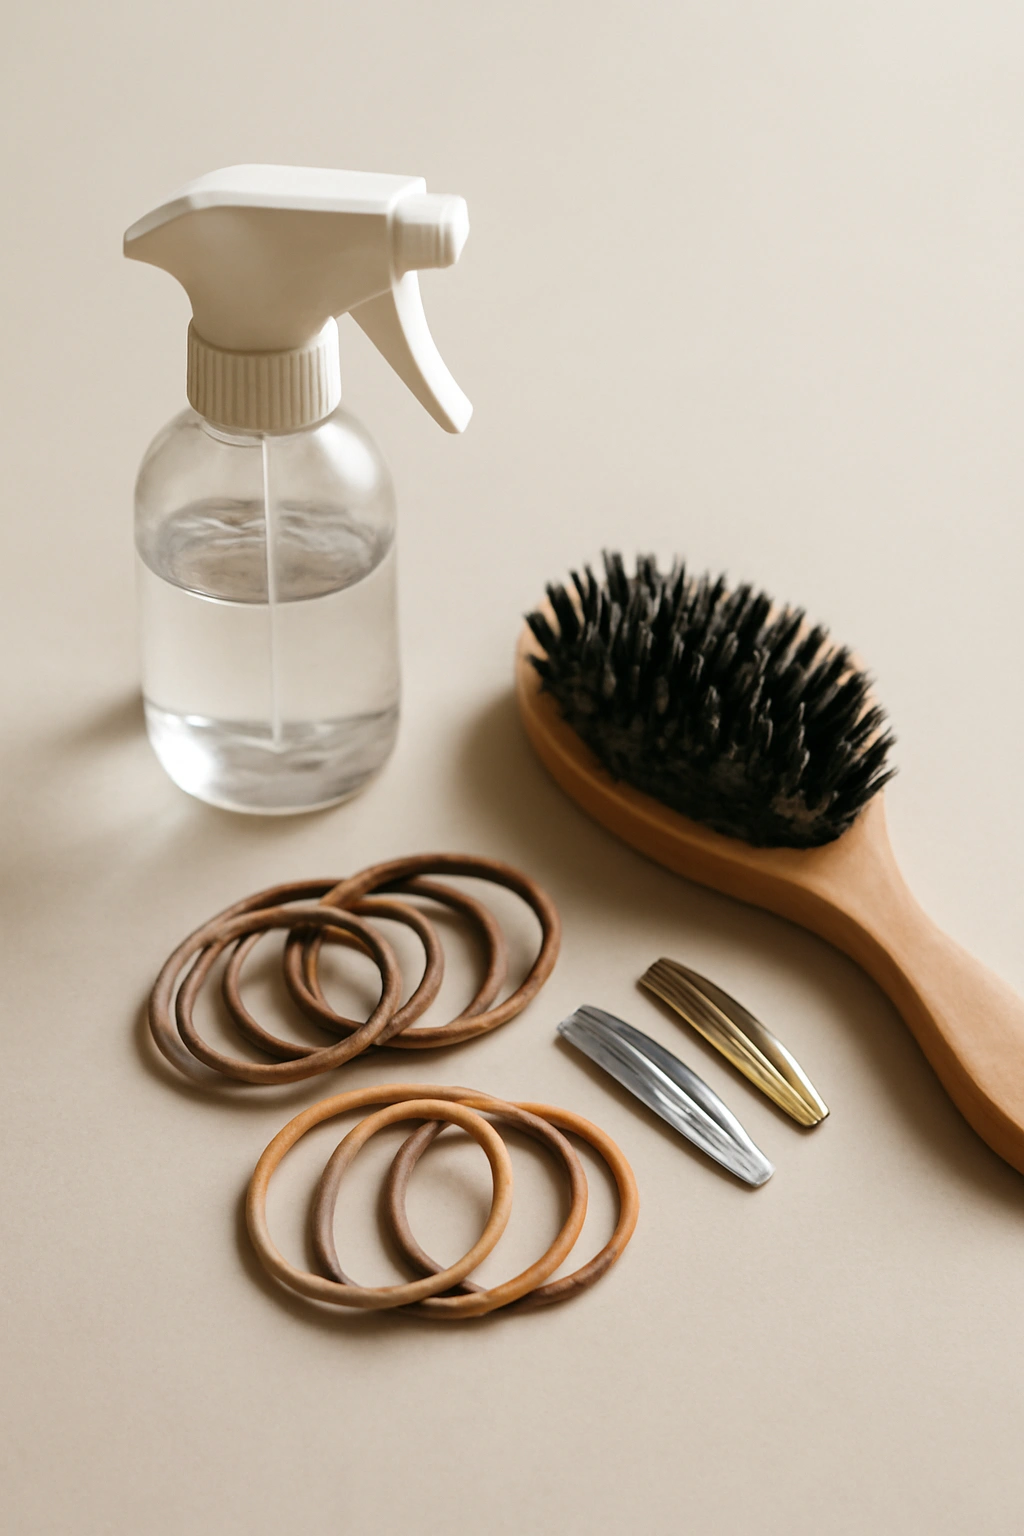
Getting your toddler’s hair ready matters more than you might think. Damp hair braids far more smoothly than dry hair, which tends to frizz and break. A light mist from a spray bottle takes ten seconds and saves you minutes of fighting with tangles. For busy mornings, I keep a small spray bottle right next to my hairbrush so there’s no searching—it’s already there waiting.
The right elastic matters too. Tiny elastic bands with plastic-coated ends don’t snag fine toddler hair the way bare metal ones do. Silicone-coated elastics are genuinely worth having; they slide into hair cleanly and don’t pull when you remove them. Keep at least two different colors handy so you can match whatever your toddler’s wearing or mix colors intentionally for a fun touch.
Essential Tools You Actually Need
- Spray bottle or water mister — a dollar-store spray bottle filled with plain water, or a proper detangling spray designed for kids’ hair
- Soft-bristle brush or comb — plastic combs designed for kids work better than adult brushes; they’re gentler and won’t snag
- Silicone-coated hair elastics — grab a multipack so you always have backups
- Clips or bobby pins — thin flat clips hold small sections while you work; bobby pins secure flyaways at the end
- Leave-in conditioner or detangling spray — optional but genuinely helpful on mornings when hair is especially tangled
Start by misting hair lightly—not soaking wet, just damp enough to make it pliable. This takes five seconds and transforms your toddler’s willingness to cooperate. Work through tangles gently from the ends upward, holding the base of the hair near the scalp so you’re not tugging at their head. This matters more with fine, delicate toddler hair than you’d think.
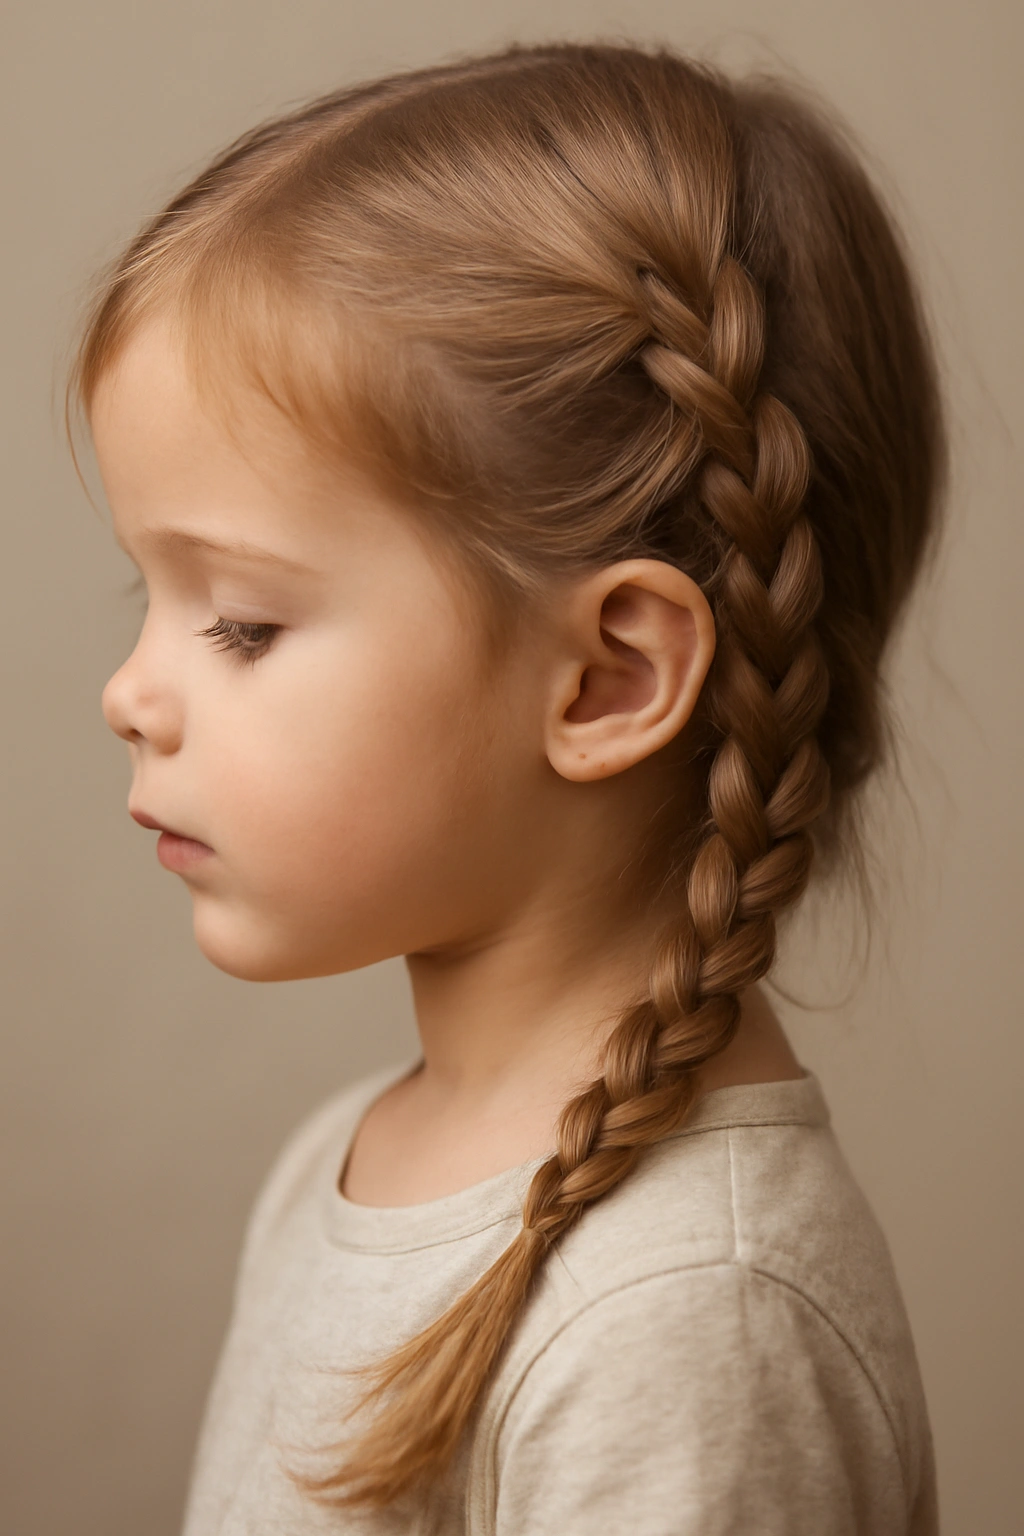
1. Two-Strand Twisted Pigtails
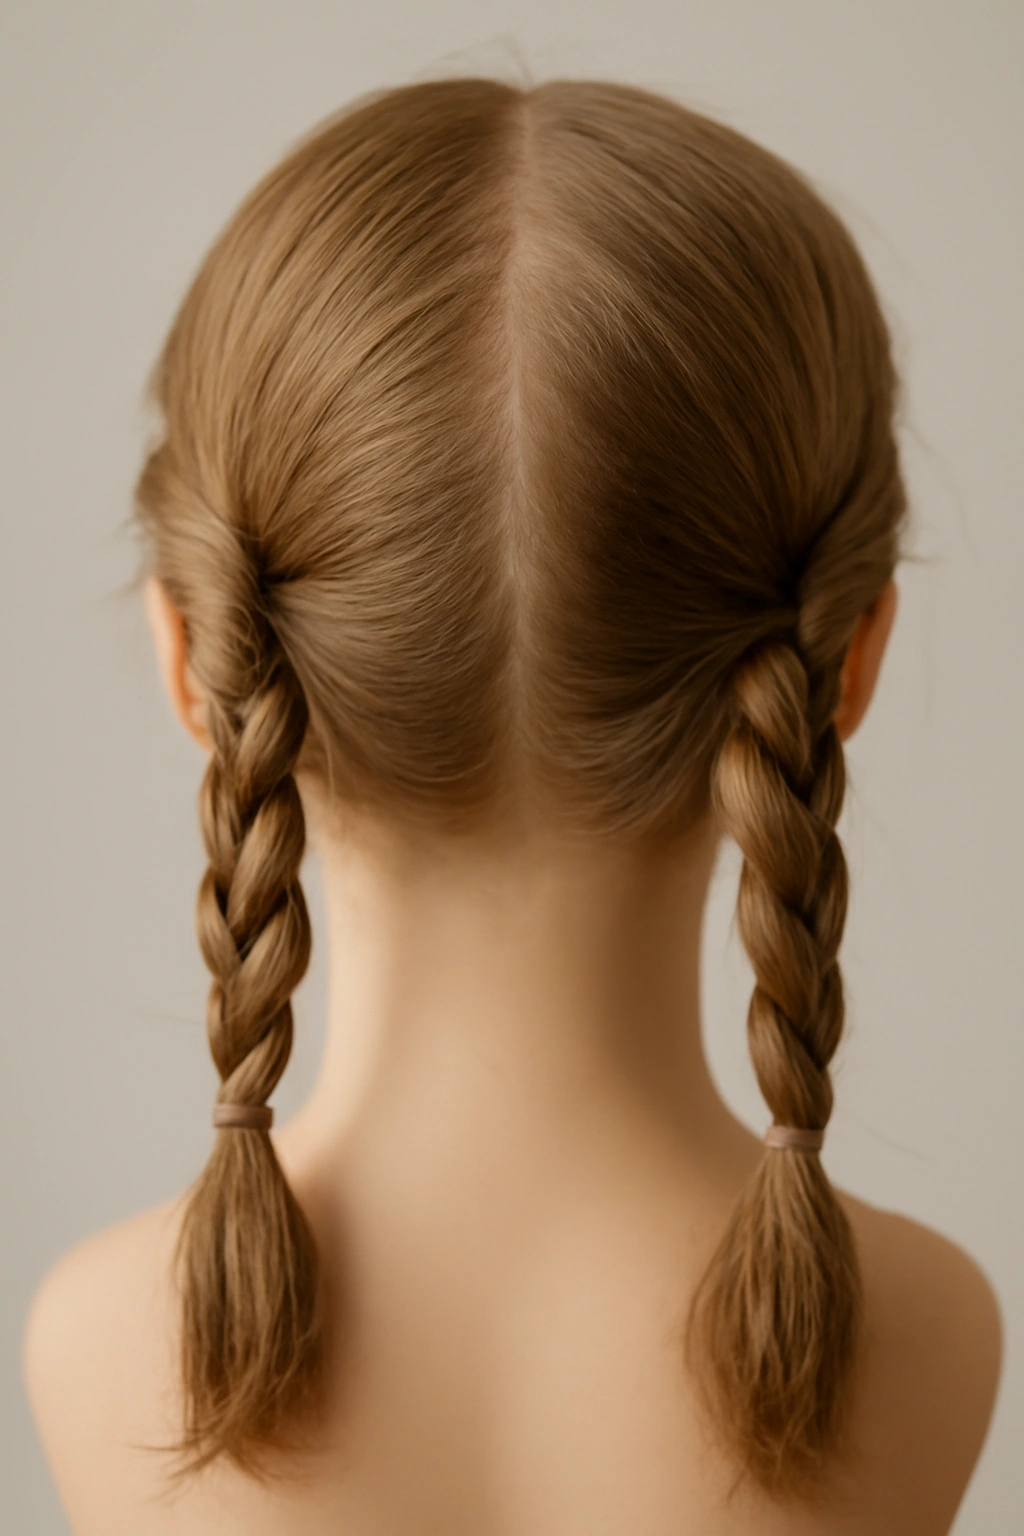
Two-strand twists are the fastest “braid” you can do, and honestly, most people don’t realize they’re twists rather than actual braids—they still look intentionally styled. The beauty of twists is that they require zero three-strand braiding coordination; you’re literally just wrapping two sections around each other in a spiral. Your toddler can sit still for this in under three minutes, and the result lasts all day without loosening.
Part hair down the center from forehead to nape. Clip one side out of the way. On the working side, divide hair into two even sections at the roots. Twist one section clockwise while the other goes counterclockwise, wrapping them around each other as they spiral down. The twist should feel like you’re winding two cords together. Secure at the end with a silicone elastic, then repeat on the other side.
Why Twists Are Your Speed-Running Secret
- Takes 2-4 minutes total for both sides, making it your fastest “braid” option
- Works beautifully on wavy or curly hair; the twist actually enhances the texture
- Loose twists look relaxed and cute; tighter twists look more polished for special occasions
- The spiral motion is intuitive once you practice once—easier than managing three strands
- Stays secure even if your toddler plays rough without additional bobby pins
Pro tip: Twist loosely for a romantic, undone vibe—too-tight twists can pull at the scalp after an hour or two of wear. The loose twist also photographs better because it has dimension.
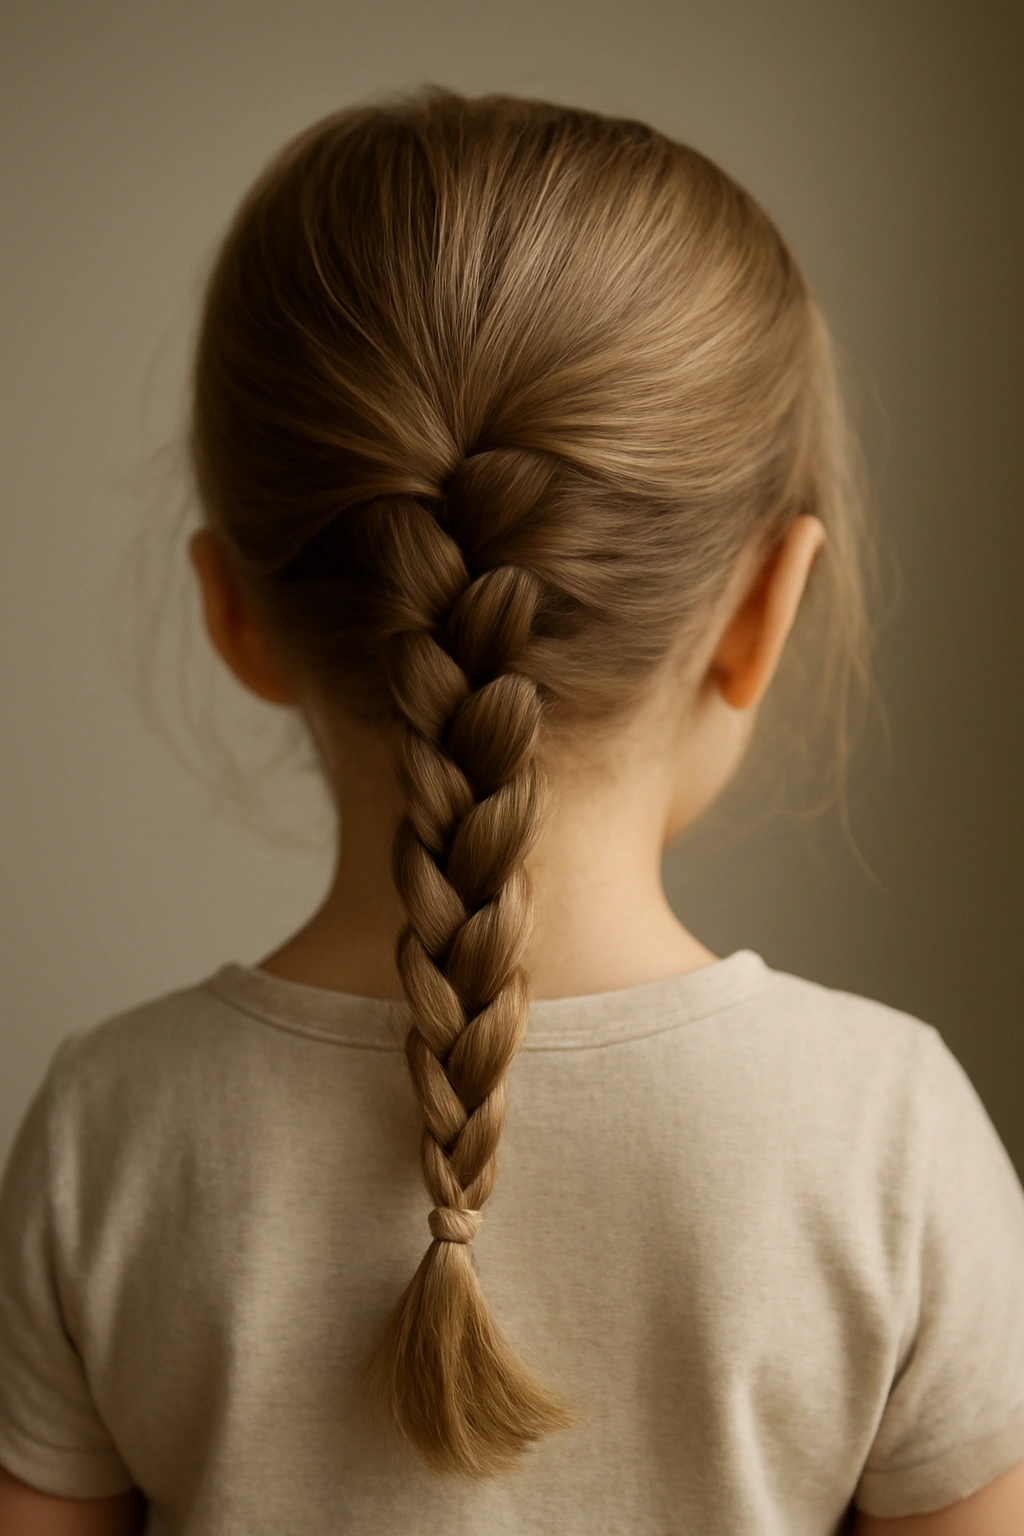
2. Three-Strand Classic Braid
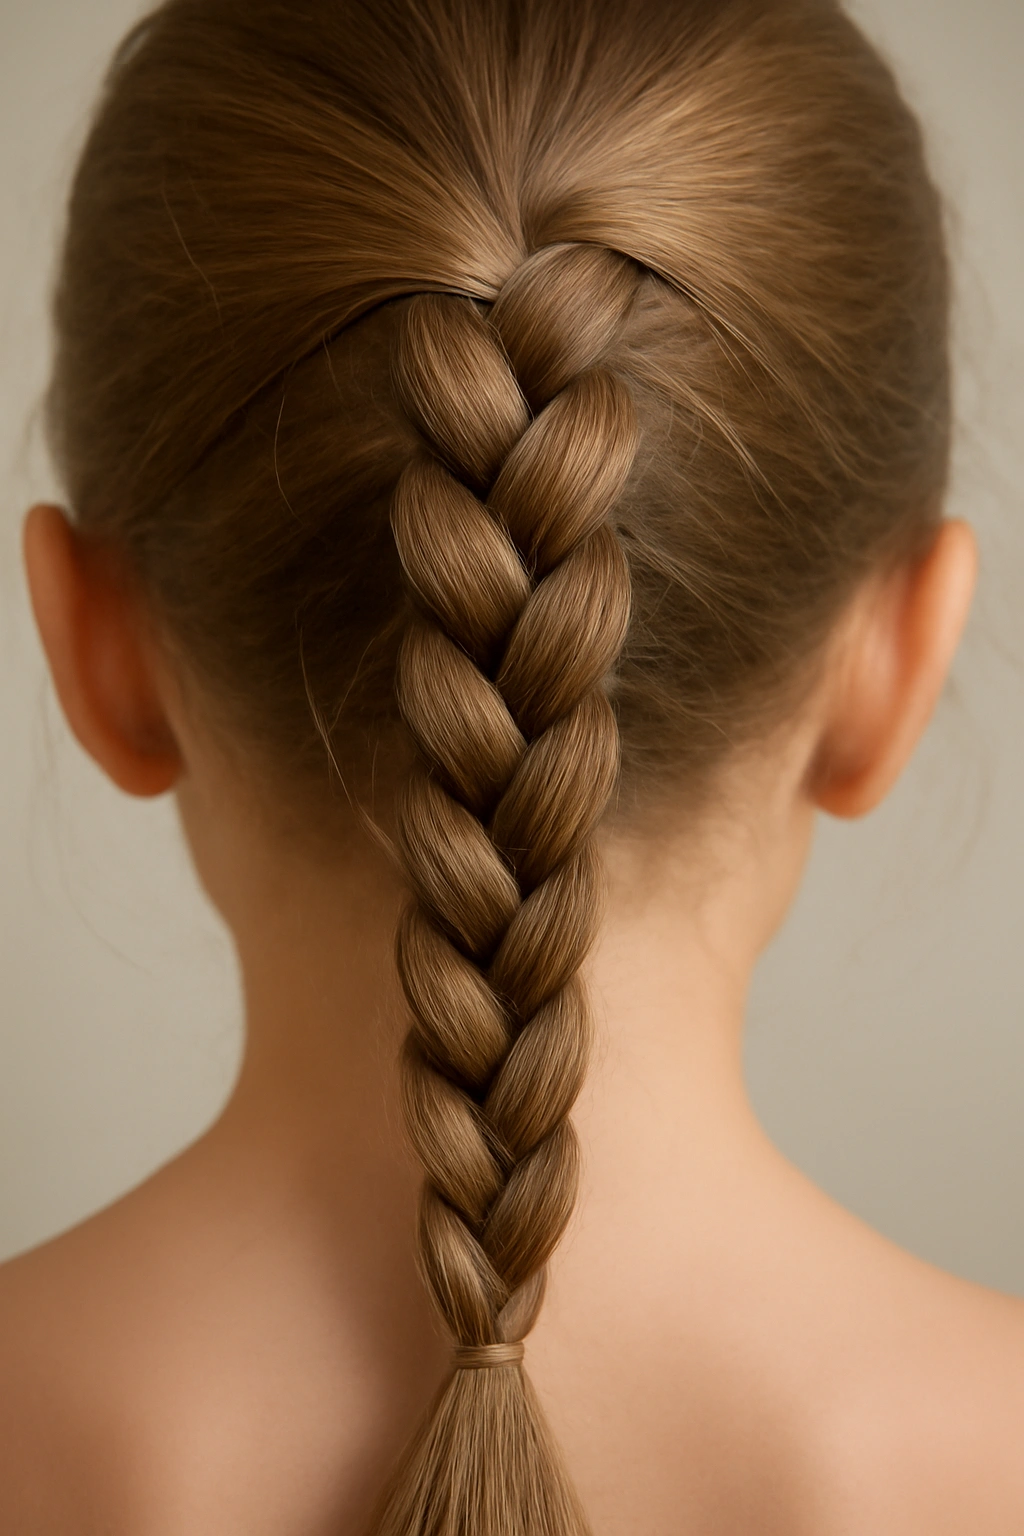
The three-strand braid is the foundational skill that makes everything else possible. It looks timeless, works on any hair type, and once your hands learn the motion, you can do it practically on autopilot even half-asleep. This is the braid to master first because it opens up dozens of variations you can do in the future.
Divide hair into three equal sections. Cross the right section over the center, making it the new center. Cross the left section over the new center, making it the new center. Keep alternating: right over center, left over center, right over center. The motion becomes rhythmic and almost meditative once your hands understand it. Work the braid down to the ends and secure with an elastic.
The Technique That Makes Everything Easier
- Keep tension even and consistent—too loose and the braid falls out; too tight and it pulls hair
- Start the braid at the roots with all three sections held tightly, then ease tension slightly as you work down
- Practice the cross-over motion at waist level while sitting down before doing it on your toddler; it’s easier to learn without standing over someone’s head
- Braiding with damp hair dramatically reduces flyaways and slipping
Quick tip: A slightly messy braid looks intentionally textured and cute—don’t stress about perfect alignment. Toddler braids should look natural and lived-in, not rigid.
3. Dutch Braid
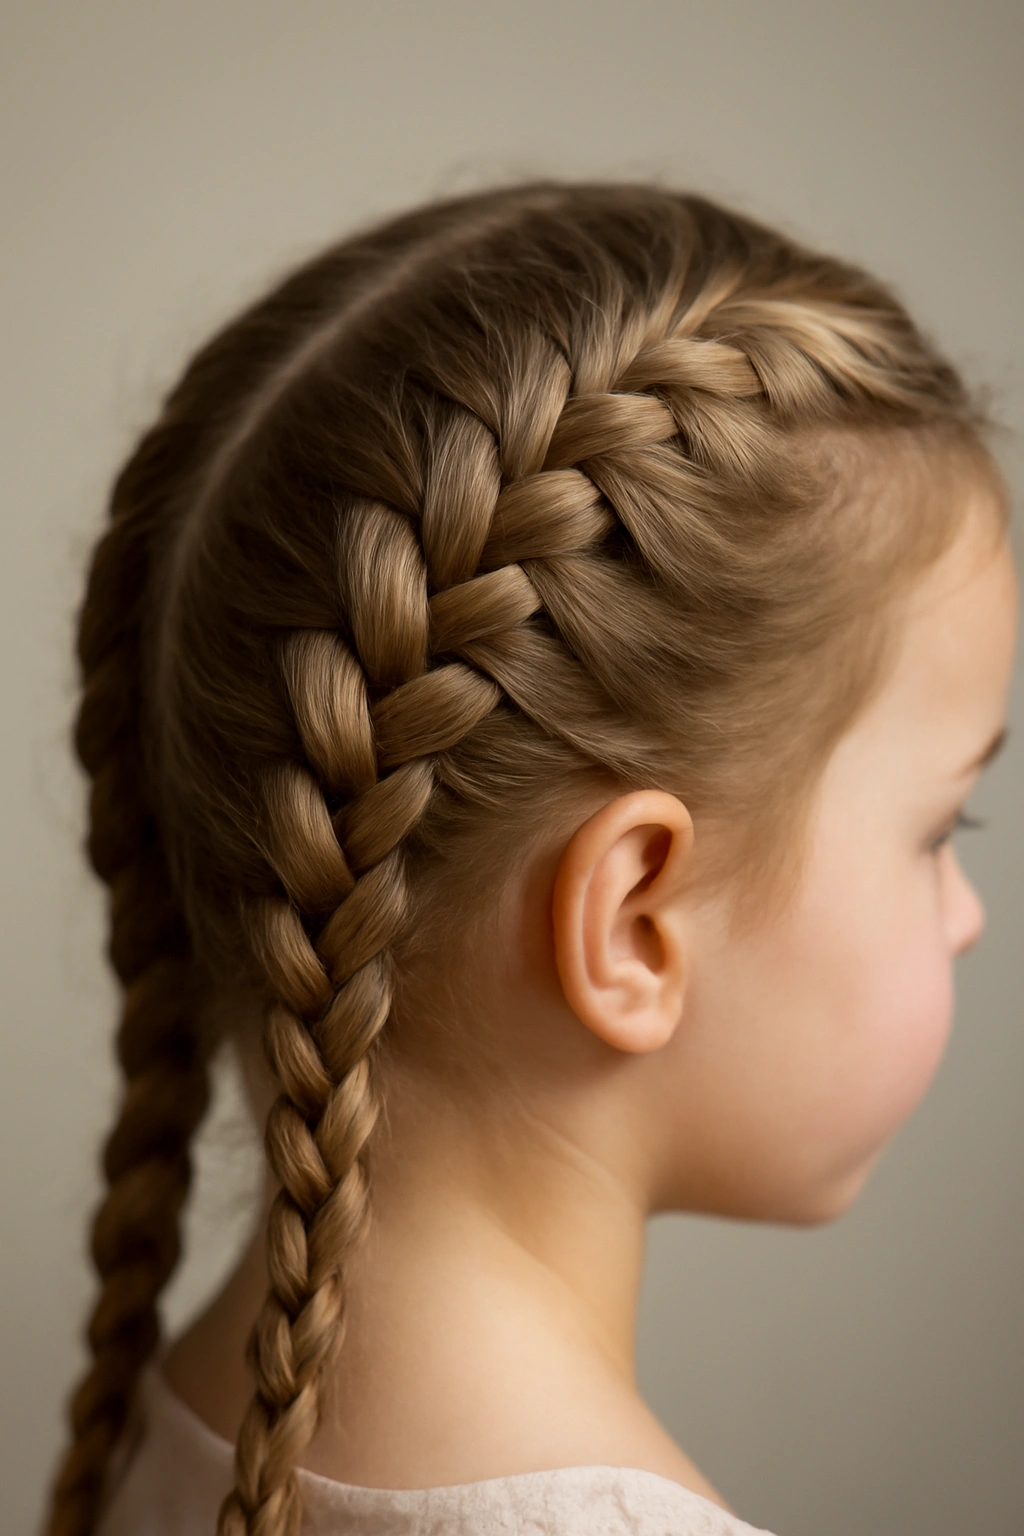
Dutch braids look more intricate than they actually are, which makes them perfect for making a simple morning look feel special. A Dutch braid is basically a three-strand braid done in reverse: instead of crossing sections over the center, you cross them under. This flips the braid so it sits raised on the scalp instead of nested into the hair, creating more visual texture and dimension.
Start at the roots with three even sections. Cross the right section under (not over) the center, making it the new center. Cross the left section under the new center. Continue this under-crossing motion all the way down. The braid should look embossed, almost like it’s resting on top of the hair rather than woven into it.
Why Dutch Braids Photograph Beautifully
- The raised, embossed look creates depth that photographs well and catches light differently
- Slightly easier for beginners because the under-crossing motion feels more natural for some hands than the three-strand over-cross
- Works especially well on thick hair or textured curls, where the raised placement showcases the texture
- Looks intentional without looking like you spent an hour styling—perfect for “I woke up like this” mornings
- Holds better than some braids because the under-crossing creates more grip on the hair
Insider note: Loosen a Dutch braid after you’ve secured it by gently pulling small sections of the braid outward. This creates a softer, fuller, textured look—much cuter than a tight, compact braid.
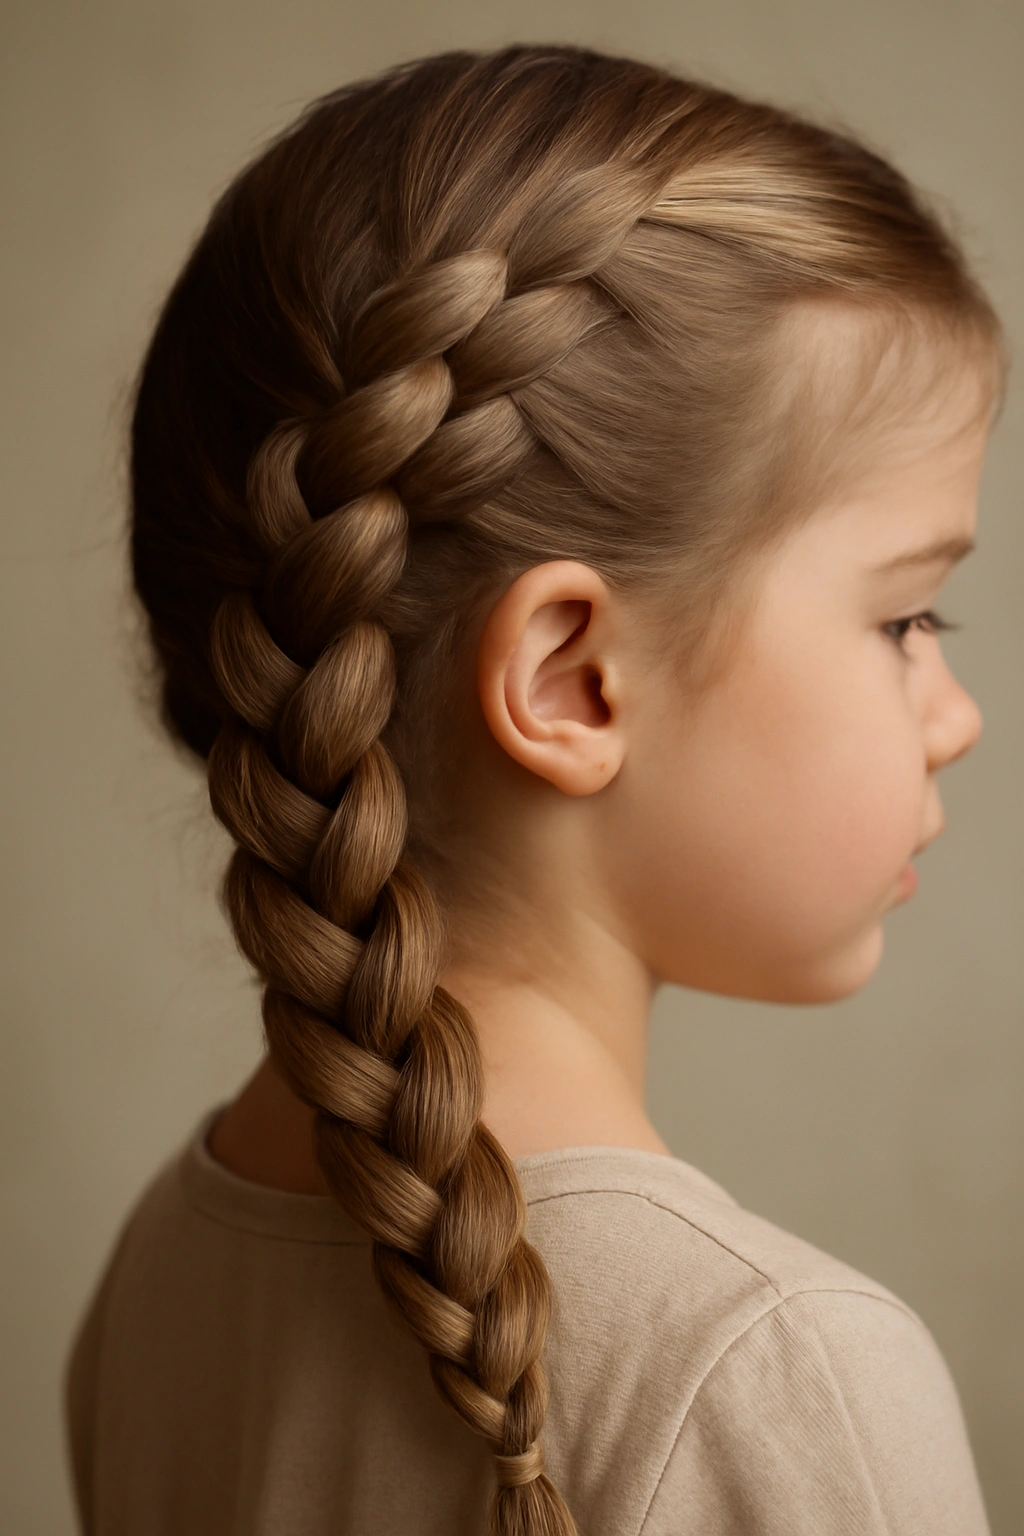
4. French Braid
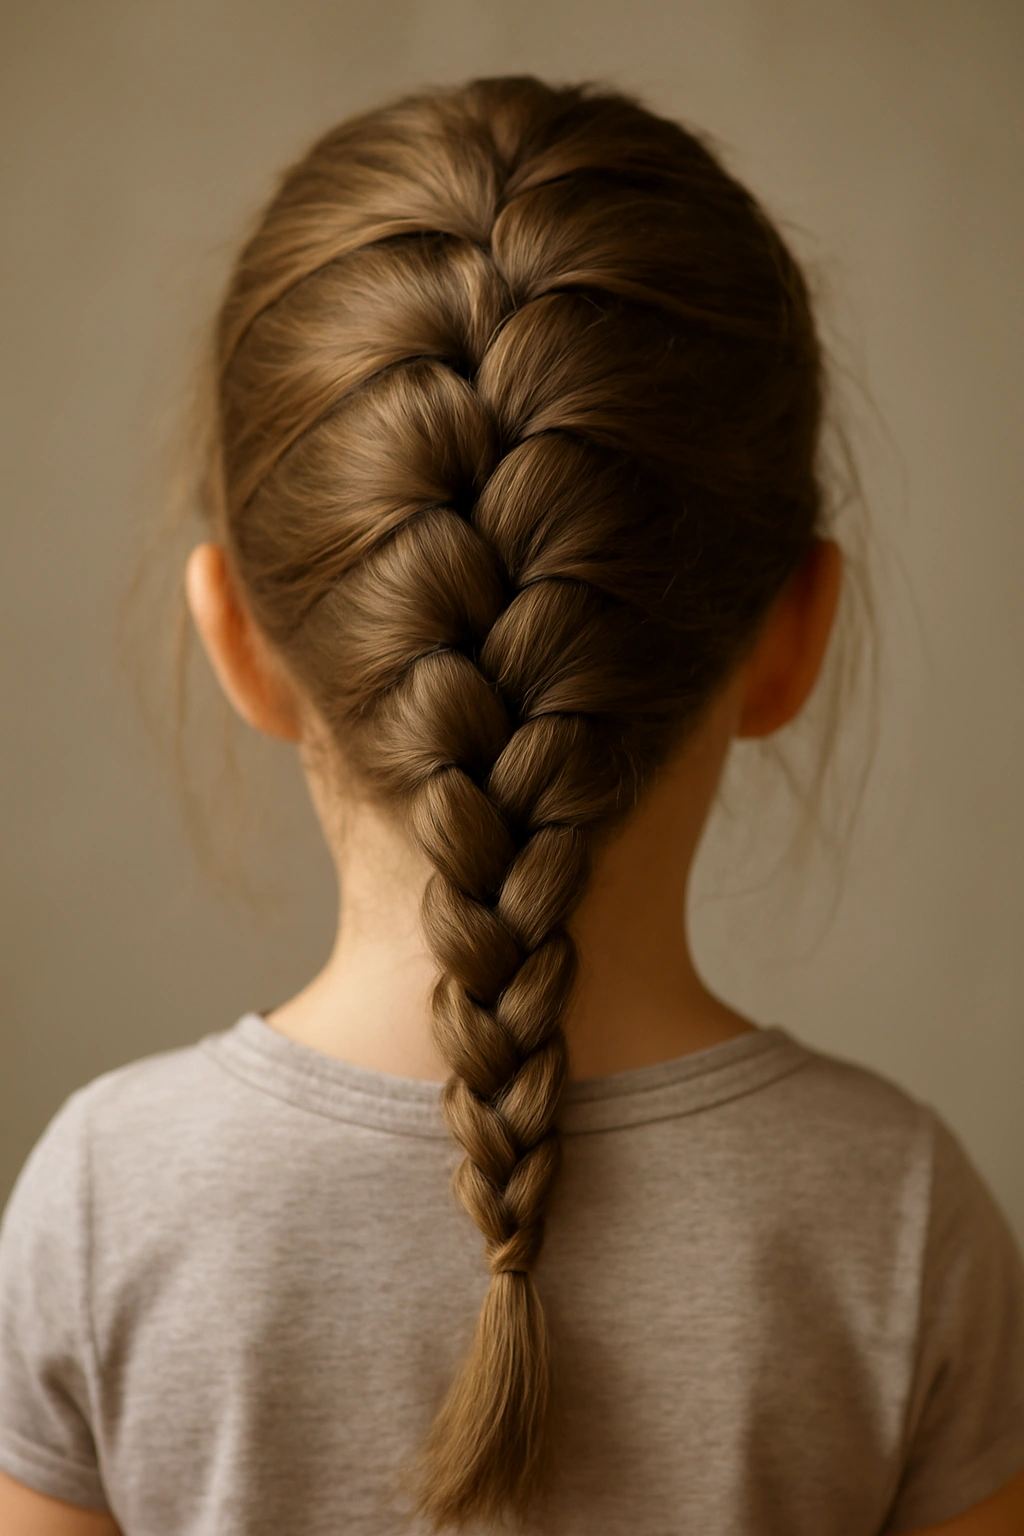
A French braid starts small at the crown and incorporates loose hair as you work downward, ending in a fuller, thicker braid. This is a signature style that looks polished and actually makes manageable hair much longer visually. French braids work wonderfully on toddlers because they contain hair right from the roots, preventing flyaways and keeping everything tidy all day.
Start with a small three-strand section at the top of the head. Begin a normal three-strand braid, but after the first two crosses, add a small section of loose hair to one of your strands before the next cross. Continue rotating which side you add hair to, gathering more hair with each pass. By the time you reach the ends, you’ve incorporated all the loose hair into one large braid. Secure at the nape.
The Technique for Incorporating Hair Smoothly
- Start with less hair in your initial three-strand section than feels comfortable—you’re going to add a lot as you go down
- Add hair in similar-sized sections each time; this creates an even, balanced braid
- Use a comb or the tip of your pinky to separate the section you’re adding, making sure it’s clean and not snarled with nearby hair
- The braid gets progressively thicker and more impressive as you work downward, which looks intentional and beautiful
Worth knowing: French braids are slightly more challenging than basic three-strand braids, but they’re absolutely learnable with three or four practice rounds. Most parents get comfortable with them quickly because the repetitive motion is the same as a three-strand braid—you’re just adding hair each time.
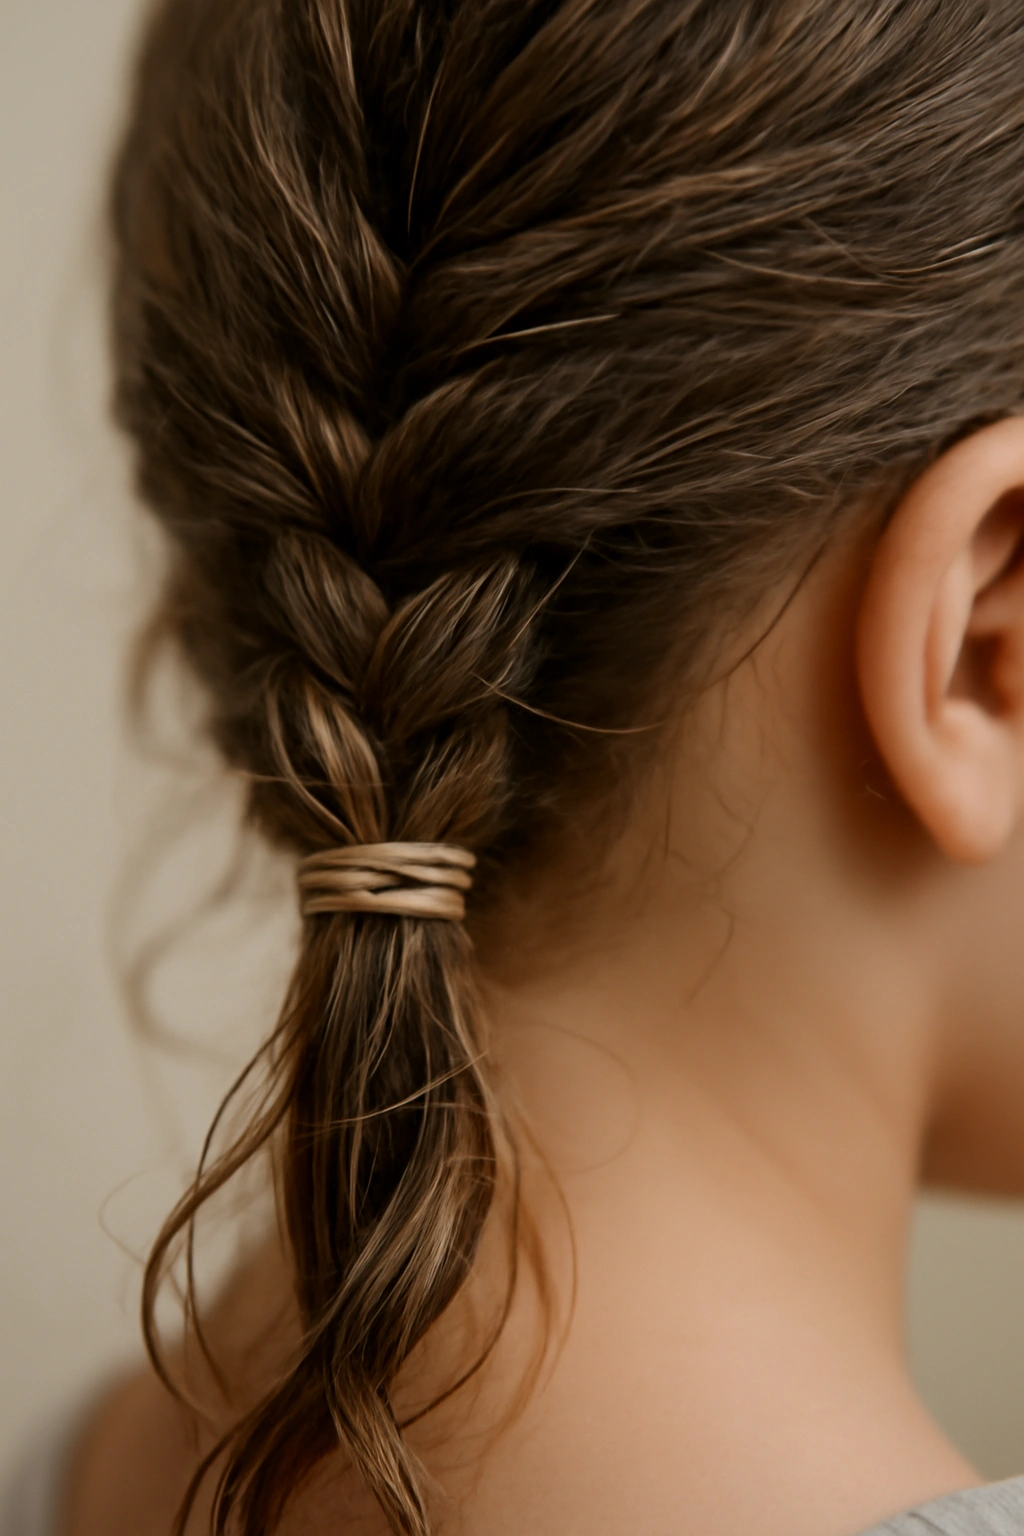
5. Fishtail Braid
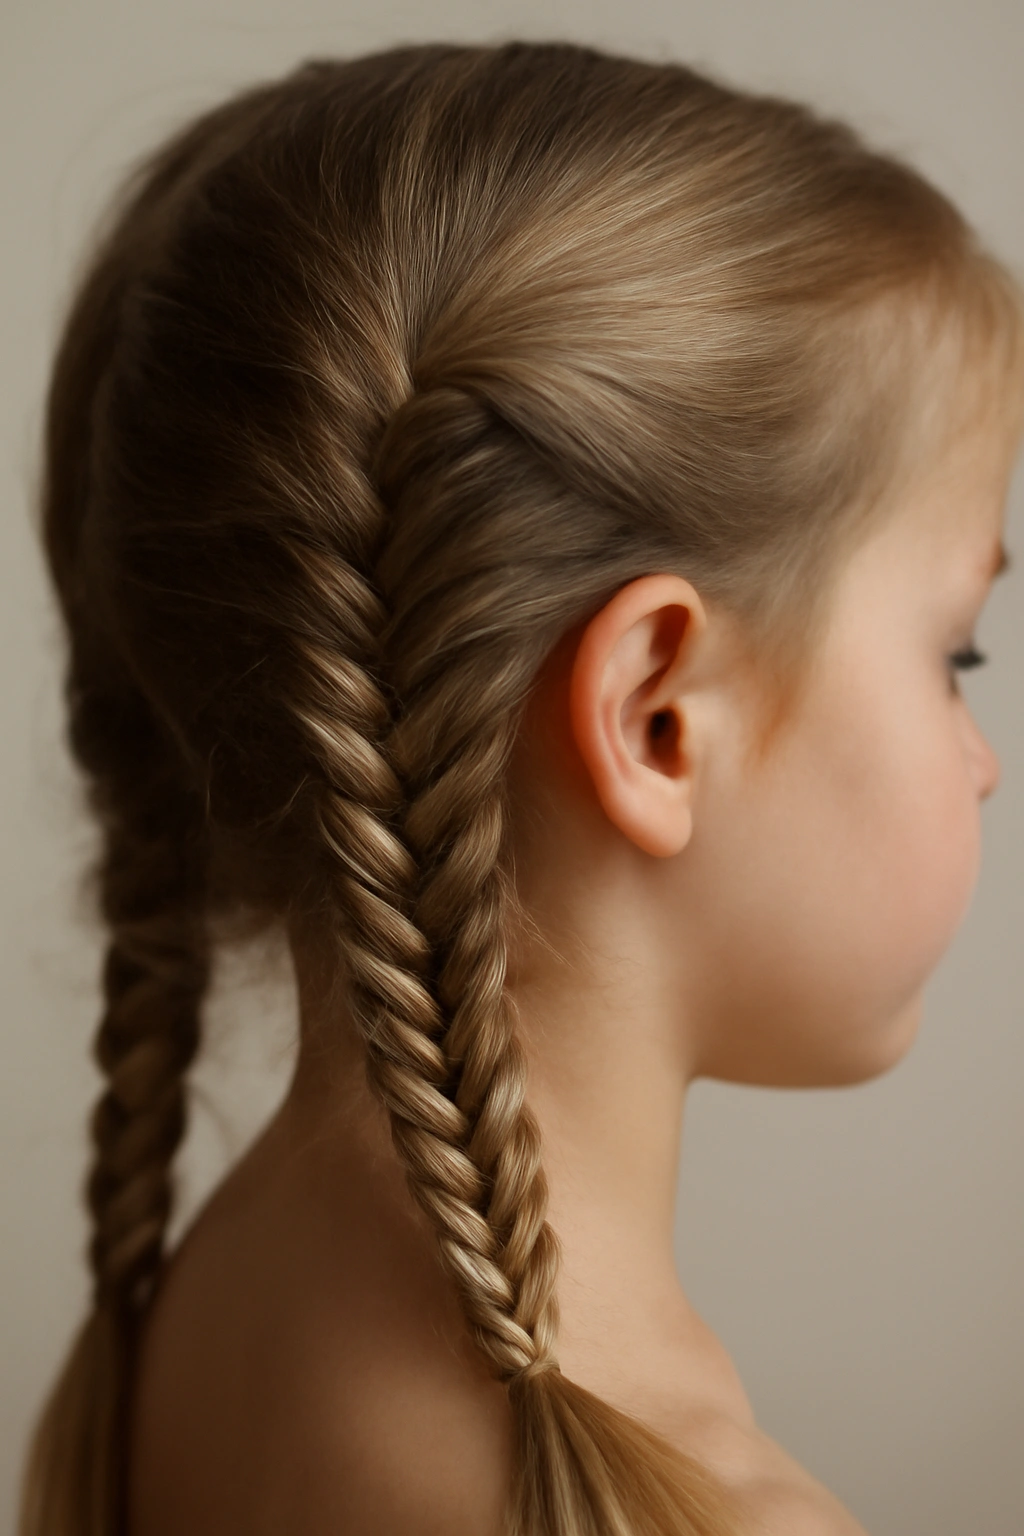
Fishtail braids have a delicate, intricate look that honestly feels fancier than the actual technique requires. Instead of three thick sections, you work with two sections and add tiny pieces to each side repeatedly. The result is a narrow, textured braid with a distinctive woven pattern that catches light beautifully. Fishtail braids work especially well on fine hair because the thin sections show off the intricacy of the pattern.
Divide hair into two even sections at the roots. Pull a thin piece of hair from the outer edge of the right section and cross it over to join the left section. Pull a thin piece from the outer edge of the left section and cross it over to join the right section. Continue alternating, always taking from the outer edge and pulling inward. The braid narrows toward the center while creating a pattern that looks intricate and professional.
Why Fishtails Look More Complicated Than They Are
- The thin two-section technique is actually simpler than managing three strands, once you get the motion down
- Thin sections create a delicate, detailed look that photographs beautifully
- Works on all hair types but especially flatters fine or thin hair because it doesn’t require thickness to look impressive
- The pattern naturally hides slight imperfections—a slightly uneven fishtail still looks intentionally textured
- Loose fishtails look romantic; tight ones look sporty—you can adjust the vibe by changing tension
Pro tip: Practice the motion slowly with damp hair first; once your hands learn it, fishtails become second nature. The repetition is actually meditative.
6. Crown Braid
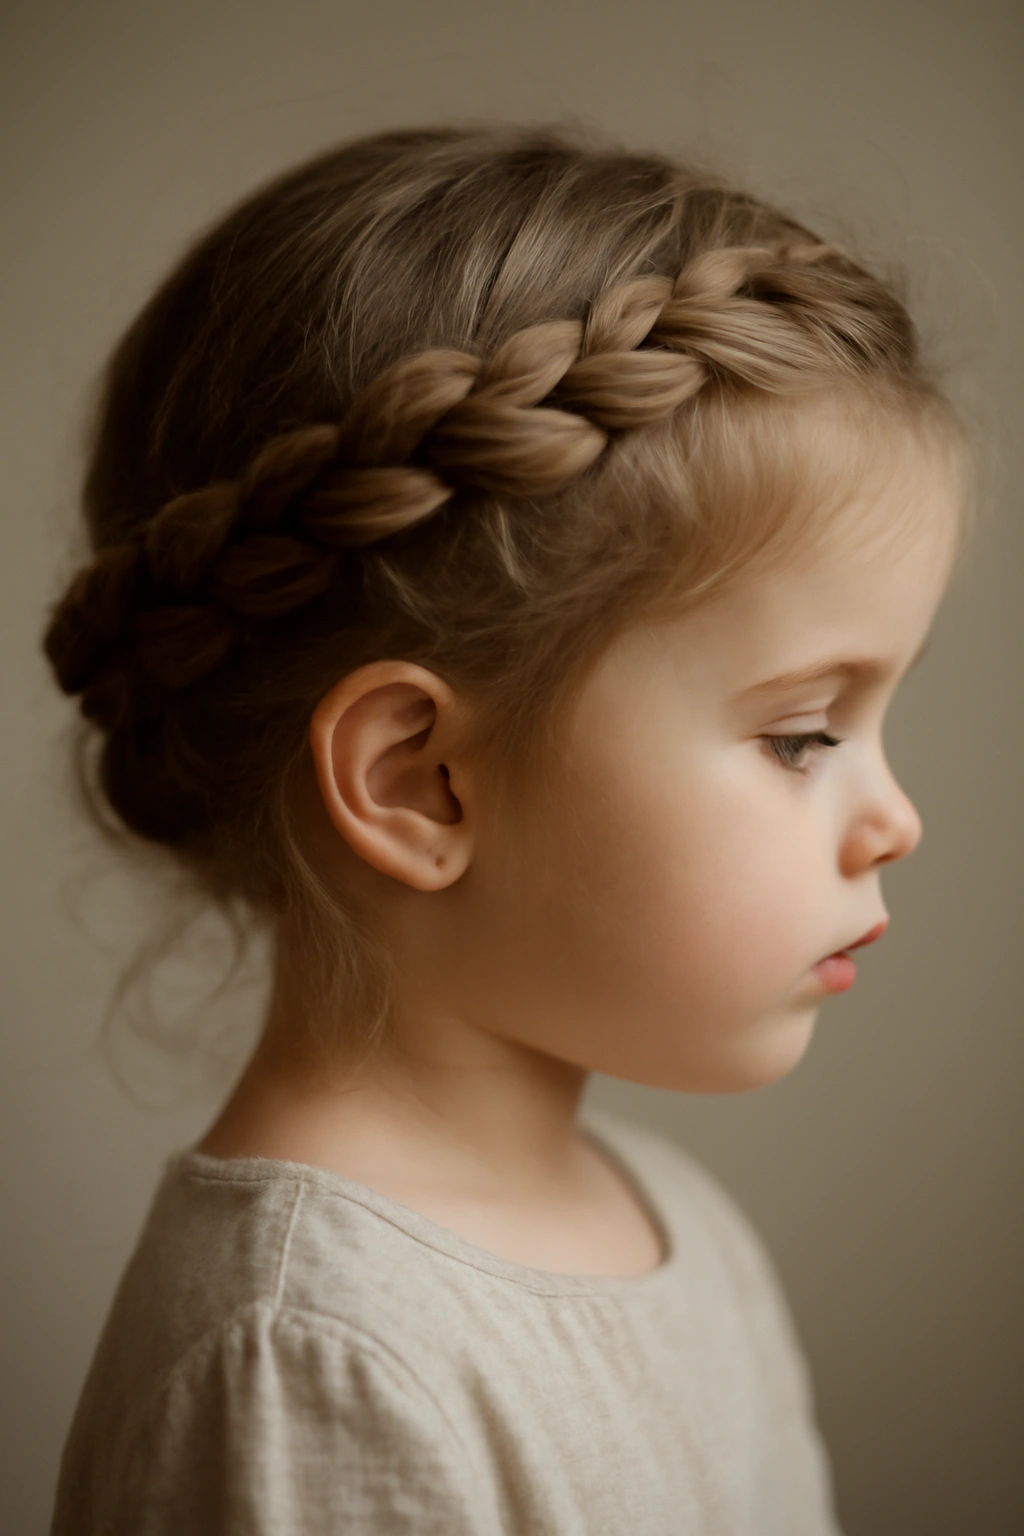
A crown braid wraps around the head from one side to the other, creating the effect of a decorative crown or halo. This style is especially stunning on toddlers because it frames the face beautifully and contains hair completely, making it ideal for active play or special occasions. Despite the fancy appearance, crown braids are typically faster than you’d expect because you’re only braiding a portion of the hair.
Start at one side of the head, just above the ear. Take three small sections and begin a basic three-strand braid, but position it to angle across the back of the head toward the opposite ear. As you braid, add small sections of loose hair from above the braid line, gathering hair as you move toward the other side. Finish the braid just above the opposite ear and secure with an elastic. The loose section below the braid can be left down for an intentional look, or you can gently pull it up and pin it for a more secure, completely contained style.
Creating a Crown That Actually Stays Secure
- Start the braid slightly higher than where you want it to sit—hair stretches slightly as you work, and the braid lowers a bit
- Add hair sections consistently as you work across; this distributes the weight evenly and prevents the braid from sliding
- Secure the end very tightly; crown braids need extra grip because gravity pulls downward
- Pin the elastic end underneath loose hair if you want it to disappear completely
- Tease the roots slightly before starting for extra grip and texture
Insider note: Crown braids look stunning with small ribbons woven through the braid. Thread a ribbon in at the start and weave it alongside the hair sections as you braid—it adds instant elegance and works on even the quickest morning timeline.
7. Halo Braid
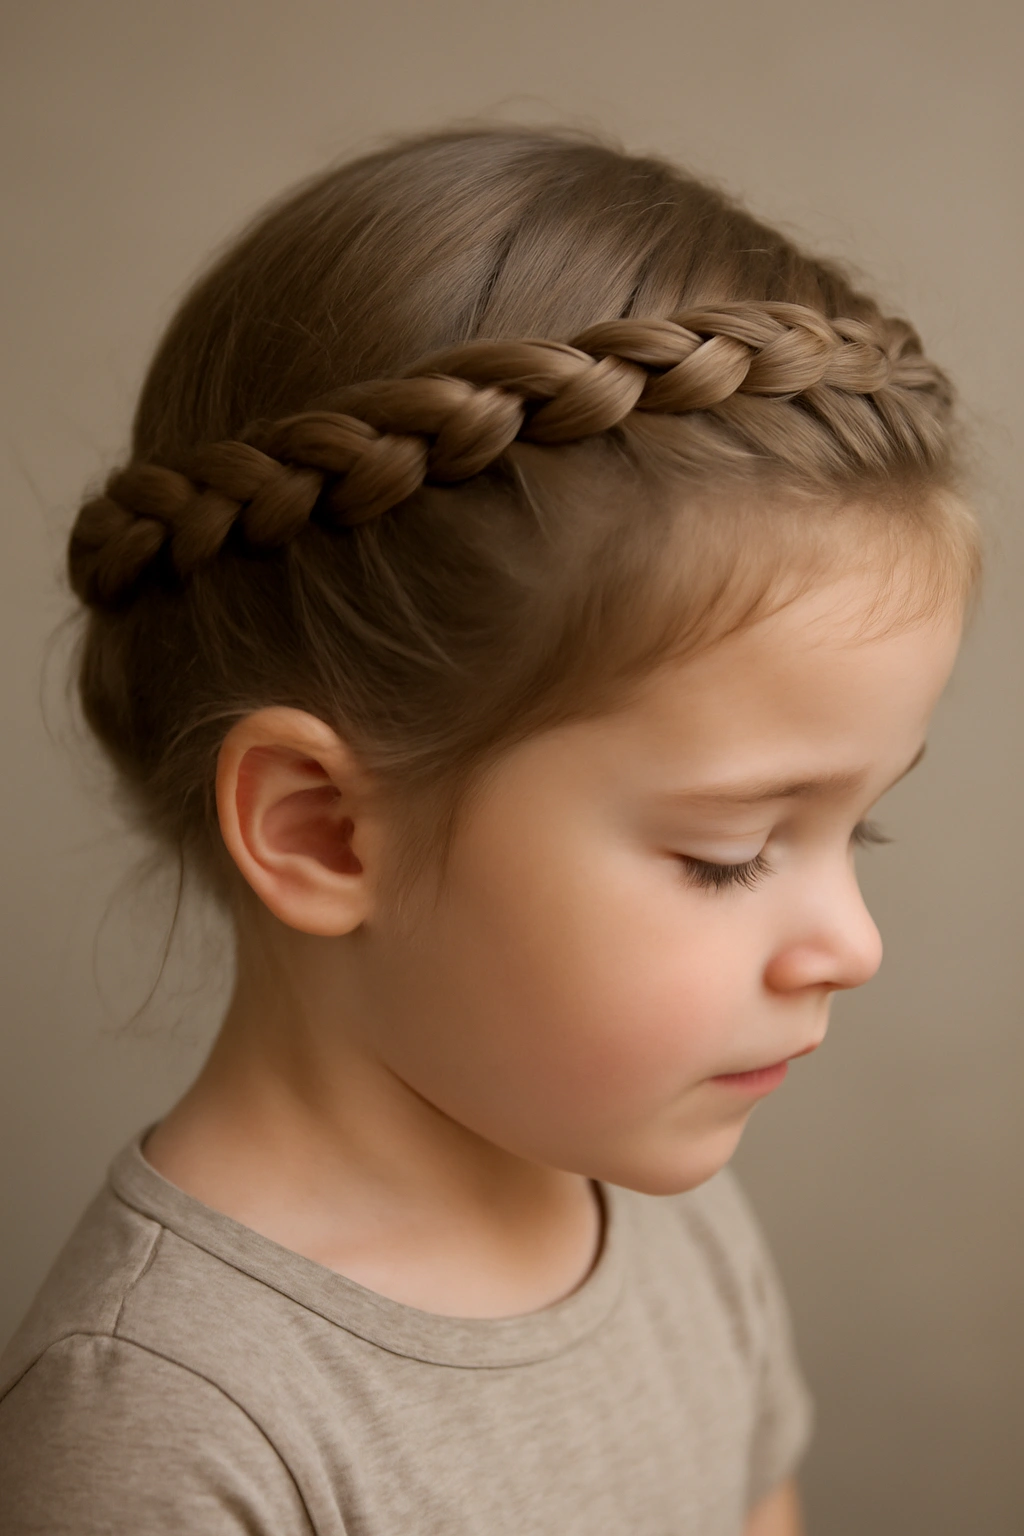
A halo braid is similar to a crown braid but wraps completely around the head, creating an actual enclosed circle. This is a statement style that’s perfect for special occasions but actually simpler than it sounds because you’re creating one braid instead of managing multiple sections. Halo braids contain hair completely, making them ideal for very active toddlers who play rough.
Start at one side of the head, just in front of the ear, with a small three-strand braid. Position the braid so it angles toward the back of the head. Add hair sections as you braid (like a French braid), gathering hair as you move across the back. Continue around the head until you reach the opposite front ear. Finish the braid and secure it at the starting point, tucking the elastic end underneath the hair so it’s invisible.
The Key to a Symmetrical Halo
- Mark your starting point clearly—you’re going to end right back where you started
- Divide your mental path into quarters (sides, back center, other side) and aim for even spacing
- Add hair sections consistently; this creates even thickness all the way around
- Don’t tighten sections too much—a slightly loose halo looks softer and less pulled
- Use bobby pins to secure the end point if it feels insecure; a halo braids works best when it feels solid
Worth knowing: Halo braids take slightly longer than single-side braids, but they’re so stunning that the extra five minutes feels worth it for special occasions. Practice once before attempting on a morning you’re already rushed.
8. Side Braid
A side braid starts at the top of the head and braids down one side to the shoulder, creating an asymmetrical, playful look. This is one of the easiest braids to execute because you’re only working with one section of hair, not wrapping around or managing multiple parts. Side braids are perfect for fine hair because you’re not dividing hair into multiple sections, so all of it contributes to the braid’s thickness.
Comb hair to one side and start a three-strand braid at the temple of your chosen side. Braid straight down the side of the head, ending near the shoulder. Secure with an elastic. The loose hair on the opposite side frames the face beautifully, and the asymmetry makes this style feel intentionally modern and cute. You can wear it with hair completely down on one side, or pin the loose side back with a clip for a more polished look.
Variations That Expand This Simple Style
- Wrapped side braid: Complete the side braid, then wrap it around the back of the head and secure it at the opposite shoulder for a different silhouette
- Side Dutch braid: Create the side braid using the under-crossing Dutch technique instead of the standard three-strand over-cross for a raised, more textured look
- Loose, textured side braid: Loosen the braid after securing by pulling sections outward—this creates a romantic, flowing version of the same basic style
Quick tip: A slightly messy, loose side braid actually looks cuter and more age-appropriate on toddlers than a tight, precise one. Aim for “played in” not “perfect.”
9. Space Buns With Mini Braids
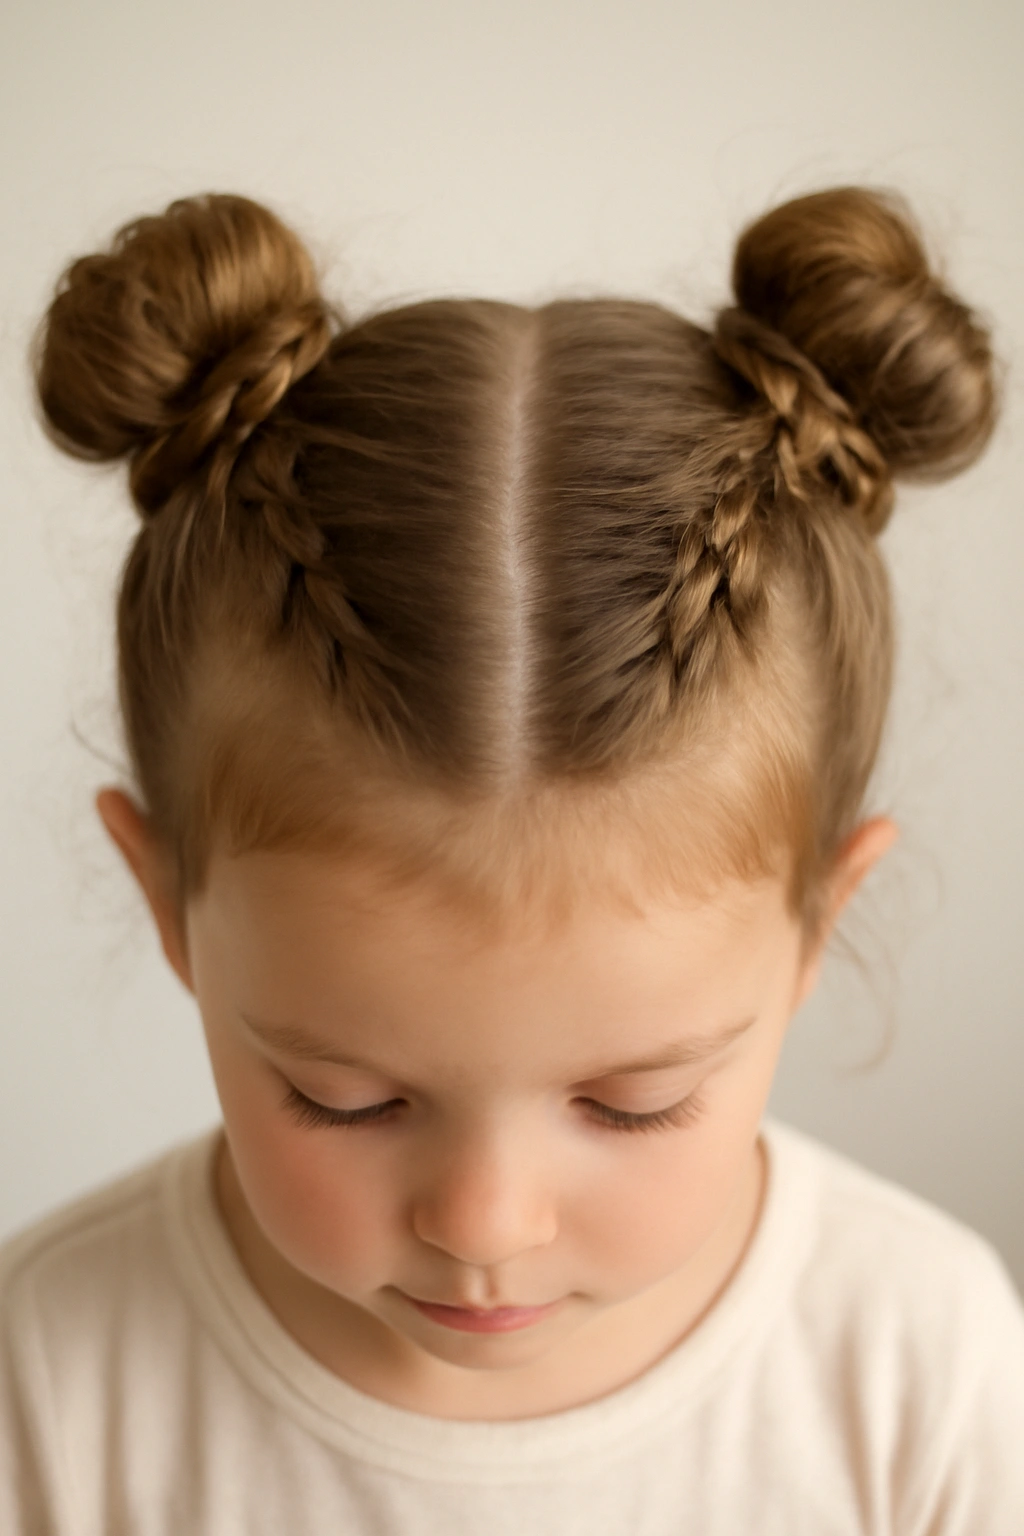
Space buns are cute, fun, and way easier than they look. Instead of just twisting hair into simple buns, weave tiny braids into the buns for extra detail and texture. This style screams “my kid is adorable” and takes about five minutes total. Toddlers usually love the uniqueness of space buns because they feel a little bit fancy while staying completely comfortable.
Part hair down the center from forehead to nape. Create two high pigtails, one on each side of the head. Take one pigtail and create a small three-strand braid or twist, about halfway down the length. Then gather all the hair—both braided and unbraided sections—and twist it into a bun shape. Secure with bobby pins or a hair elastic. Repeat on the opposite side. You can make the buns tight and neat or loose and textured depending on the effect you want.
Making Space Buns Look Intentionally Styled
- Position the buns high and slightly toward the back of the head for a modern look; higher placement looks younger and cuter
- Don’t stress about every hair being perfectly tucked into the bun—flyaways add to the playful vibe
- Leave a few face-framing pieces loose if you want a softer look, or secure everything for a clean aesthetic
- Add small clips, ribbons, or ornaments into the buns for extra personality
- Textured braids mixed into the bun add visual interest without requiring additional time
Pro tip: Space buns with braids are one of the few toddler hairstyles that actually look intentional when slightly messy. A perfectly neat space bun looks almost too styled; a loose, slightly textured one looks genuinely playful.
10. Half-Up Half-Down Braid
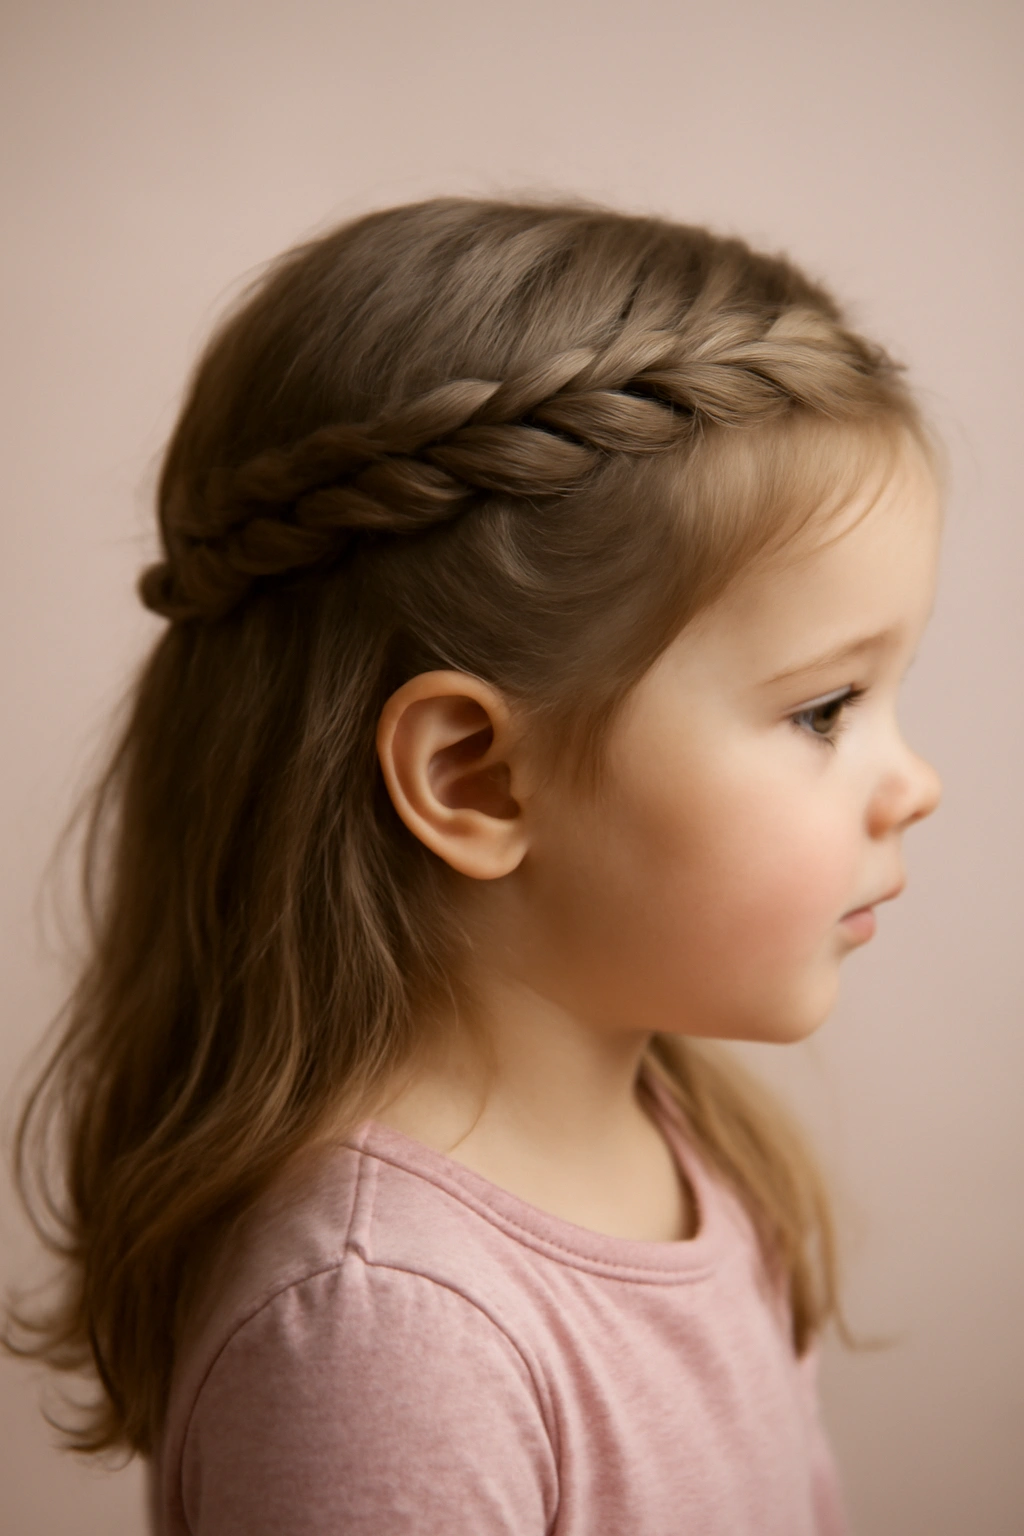
A half-up half-down braid captures the top section of hair in a braid while leaving the bottom section loose. This gives you the manageability of a braid without fully containing hair, which is perfect for toddlers who want their hair down but need something functional. Half-up styles are quick because you’re only braiding about a third of the total hair.
Take a section of hair from one temple, approximately where a normal part would be. Create a three-strand braid working backward toward the other temple, staying at ear level. When you reach the opposite temple, secure the braid with an elastic. The hair below the braid stays completely loose, while the braid sits like a decorative band across the upper half of the head.
Variations That Change the Whole Look
- Double half-up braids: Create a braid on each side instead of one across the top—looks similar from the front but slightly different in structure and can be easier for some hands
- Half-up French braid: Use the French braiding technique to incorporate loose hair as you braid across, making the braid thicker and more impressive
- Half-up twisted pigtails: Instead of a braid, create two-strand twists on each side that meet in the middle—faster and equally cute
- Half-up with pull-through braid: Create a loose three-strand braid and gently pull sections outward for an embellished, fuller-looking braid
Worth knowing: Half-up braids are one of the most versatile morning options because they take five minutes but look put-together. You can dress them up or down depending on the occasion.
11. Four-Strand Braid
A four-strand braid uses four sections of hair instead of three, creating a thicker, more textured result with a slightly different pattern than the standard three-strand. Four-strand braids look more intricate than they are, which makes them perfect for parents who want their toddler to look extra styled without spending extra time. The pattern is striking because you’ve got more visual weight.
Divide hair into four equal sections. Cross the rightmost section over the second-from-right section (so the rightmost is now in position two). Bring the leftmost section under the new second-from-right section and over the now-leftmost section. Continue this pattern: right over, left under and over. It sounds complicated written out, but the motion becomes intuitive with practice. Once you do it twice, your hands remember the sequence.
Why Four-Strand Braids Deserve Their Moment
- Creates more volume and texture than three-strand braids—especially impressive on thin hair where the extra sections make the braid look fuller
- The pattern is visually distinct from standard braids, making toddlers’ hairstyles look especially intentional and styled
- Once you learn the motion, it’s as fast as a three-strand braid—not slower, just different
- Works beautifully as a Dutch four-strand braid (crossing under instead of over) for an embossed look
- Holds tighter than three-strand braids because more sections are woven through each other
Pro tip: Learn a four-strand braid by practicing the hand motions slowly while sitting down, watching your hands. Once the sequence clicks, you can do it almost without thinking. The learning curve is steeper than three-strand braids, but it’s genuinely worth it.
12. Waterfall Braid
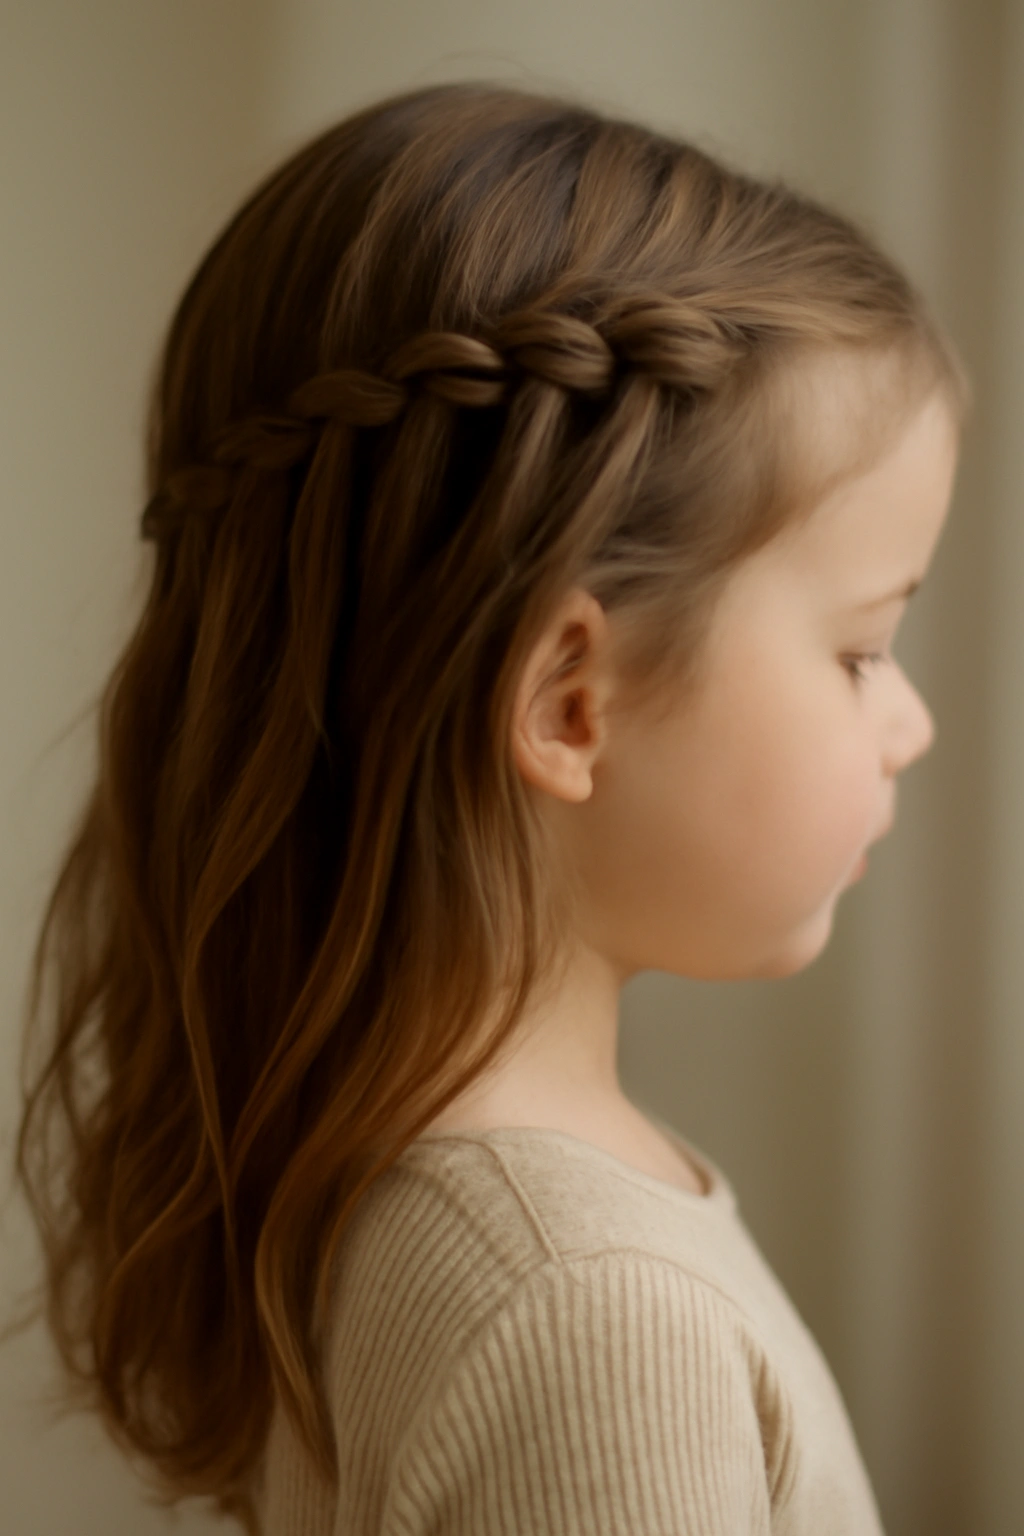
A waterfall braid is visually stunning—it looks like you let sections of hair cascade down like a waterfall while braiding. The effect is delicate and special-occasion-worthy, but the technique is simpler than most people think. Waterfall braids work beautifully on medium to long hair and can be done down the side or wrapped around the head.
Create a basic three-strand braid starting at the temple, angling down the side of the head. As you braid, drop one strand before each new braid cross, letting it fall loose while incorporating a new section of hair from above. This creates a graduated effect where loose strands cascade downward while the braid continues. Secure the braid at the opposite side of the head, and the waterfall sections naturally fall in front of the shoulder.
Why Waterfall Braids Work for Every Occasion
- The cascading strands create movement and flow that looks graceful and elegant
- Despite the fancy appearance, waterfall braids are only slightly more complex than basic three-strand braids
- Works beautifully with any hair type, but especially flatters wavy or curly hair where the natural texture enhances the cascade effect
- Can be done as a simple side version or wrapped all the way around the head for more intensity
- Loose strands can be curled, crimped, or left straight depending on the desired vibe
Insider note: Waterfall braids photograph exceptionally well because the cascading strands create visual interest and movement in photos. Perfect for capturing toddler hair moments for keepsakes.
13. Bubble Braids
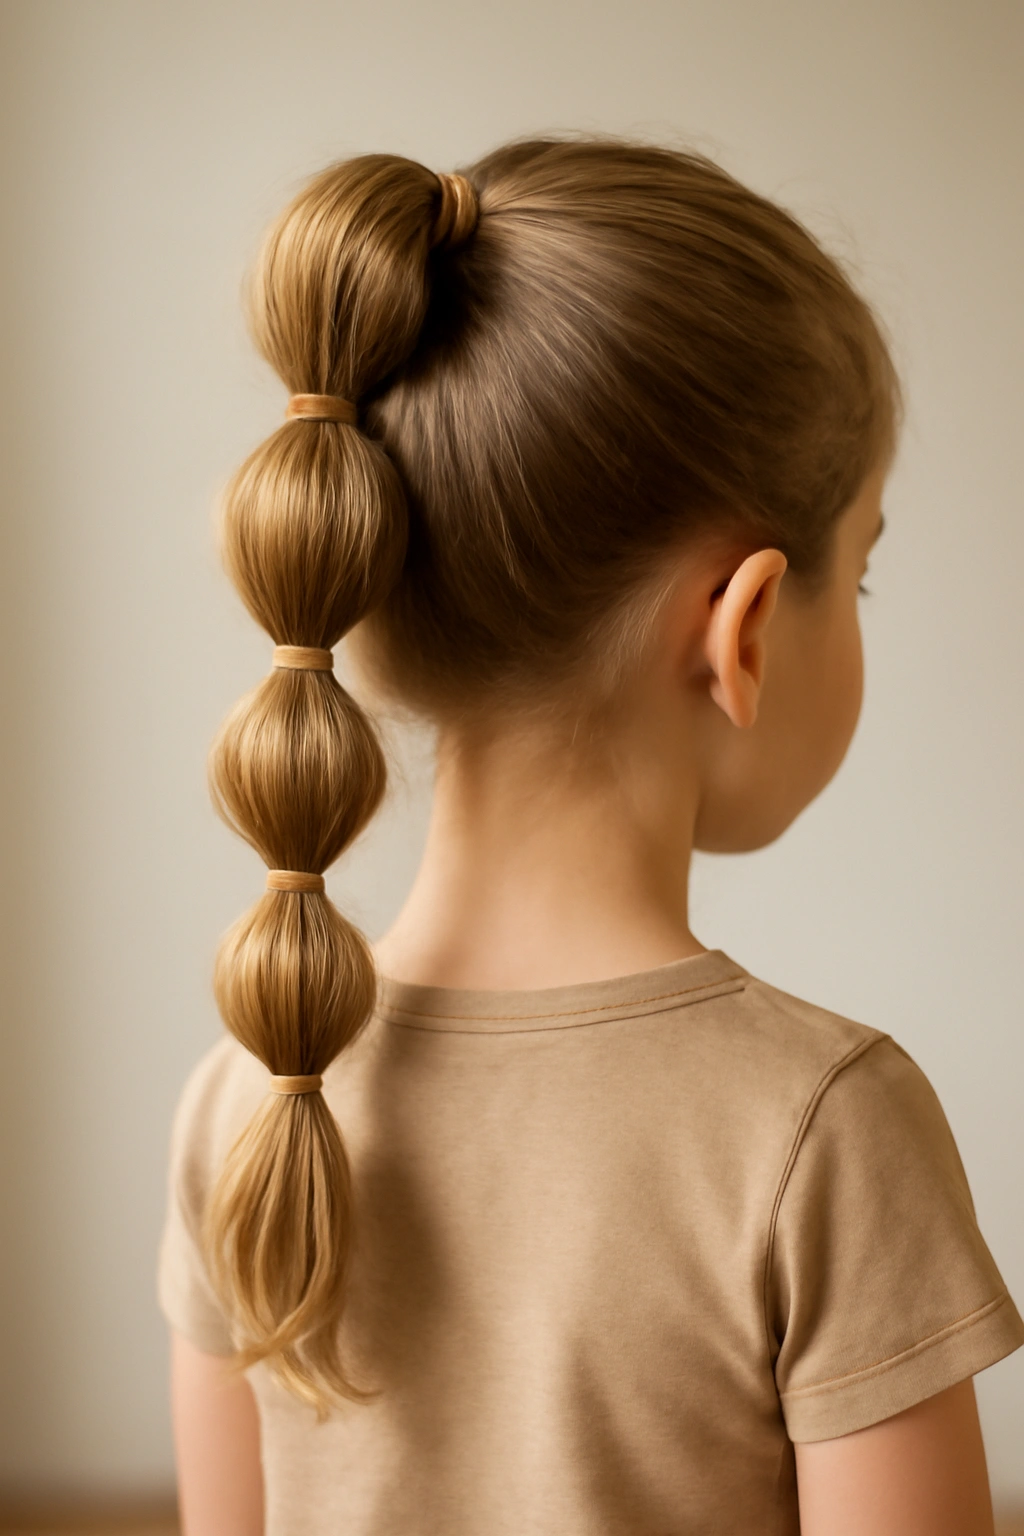
Bubble braids are more sculptural than traditional braids—they use elastic bands spaced down the length of hair to create puffy, bubble-like sections that look modern and playful. Kids absolutely love the dimensional, cloud-like appearance of bubble braids, and they’re genuinely quick to create. The bubbles hold themselves, so there’s minimal slipping or loosening throughout the day.
Create a high ponytail and secure with an elastic. Move down about an inch and secure another elastic, gathering both the ponytail and new loose hair. Move down another inch and repeat, always gathering the elastic-held section below plus new loose hair. Continue this pattern down the length of the hair. Once all elastics are in place, you can gently pull each bubble outward to make it fuller and more pronounced. The result is a sculptural, textured style that looks intentional and fun.
Making Bubble Braids Look Polished Instead of Cartoonish
- Distribute the bubbles evenly—consistent spacing looks intentional; random spacing looks accidental
- Don’t pull bubbles too tightly outward; slightly loose, soft bubbles look more age-appropriate
- Use matching elastics in the hair’s color; contrasting colors can make the style look too costume-y unless that’s intentional
- Start the first ponytail higher up than feels natural—the bubbles extend downward as you pull them, so high starting points end higher on the head
- Combine bubble braids with other techniques (weave a regular braid through the bubbles, add a twist, weave ribbons through) for elevated versions
Pro tip: Bubble braids are one of the few toddler hairstyles that actually stay looking great all day with zero loosening. The elastic tension keeps everything secure, making them perfect for school days or active play.
14. Boxer Braids
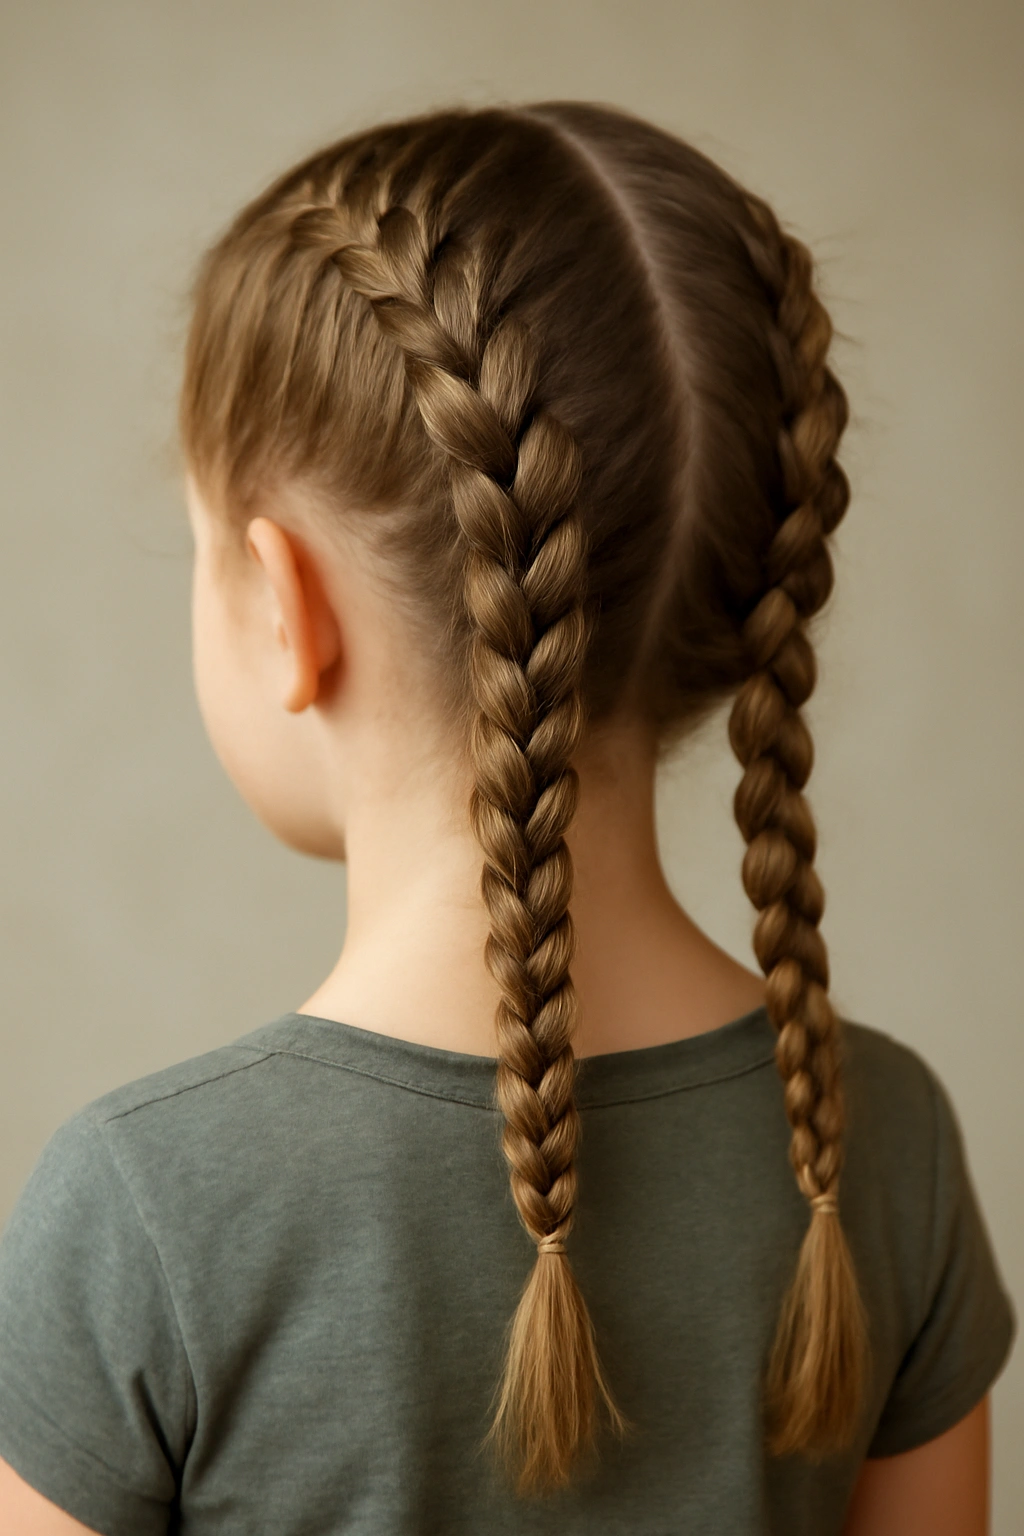
Boxer braids are two Dutch braids running parallel down the back of the head, starting at the roots and working toward the nape. They look sporty, cool, and intentionally styled while actually being faster than a single large braid. Boxer braids contain hair completely, making them ideal for active toddlers, sports days, or whenever you need hair completely out of the way.
Part hair down the center from forehead to nape. Take one side and create a Dutch braid (crossing sections under instead of over) from the temple toward the opposite temple, angling toward the back of the head. Repeat on the other side. Both braids should angle toward each other and meet at the nape, where you can secure them together with one elastic or leave them separate.
Why Boxer Braids Are Perfect for Active Toddlers
- Contain hair completely and securely—nothing is falling loose or getting in the face, even with rough play
- Two braids share the weight distribution, making them more comfortable for all-day wear
- The Dutch under-crossing creates raised braids that look more textured and intentional than regular three-strand braids
- Work beautifully on thick, textured, or curly hair where the raised braids showcase the natural texture
- Hold style all day with zero loosening, even through water play or active sports
Worth knowing: Boxer braids are excellent for combining with other styles. Finish the braids at the nape, then create a bubble braid or bun from the combined braids for extra visual interest.
15. Messy Bun With Braid Detail
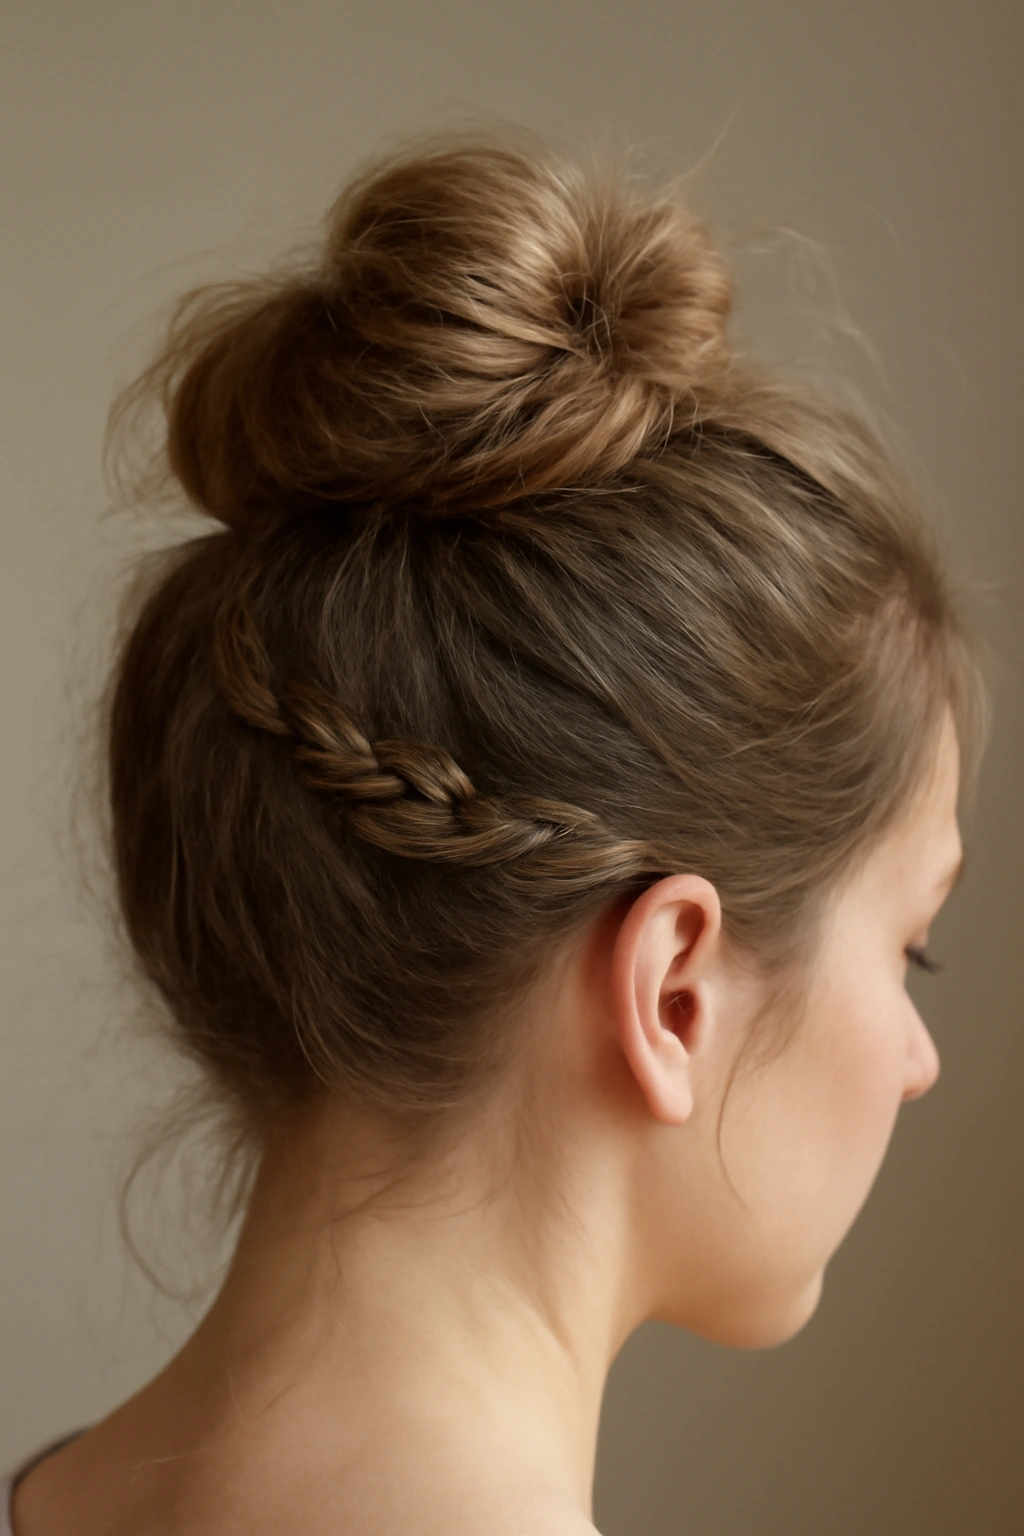
A messy bun with braided detail combines the comfort and ease of a bun with the intentionality of a braid. This is perfect for mornings when you want something quick that still looks styled. The braid wrapped around the bun adds visual interest without requiring complex braiding skills—you’re creating one simple braid that becomes decoration rather than the main styling focus.
Create a high or mid-height ponytail and secure with an elastic. Create a simple three-strand braid from the ponytail, about halfway down the length. Wrap the braided section around the base of the ponytail, tucking the end underneath and securing with bobby pins. The remaining unbraided hair can be twisted around the bun base for extra texture, or left as is. Gently pull sections of both the braid and bun outward to create a soft, lived-in, textured look.
Making Messy Buns Feel Intentional Rather Than Sloppy
- Pull some face-framing pieces loose before creating the bun for a softer, more romantic look
- Tease the roots of the ponytail section before braiding for extra grip and texture
- Wrap the braid around the bun smoothly so it looks like decorative detail rather than an afterthought
- Leave flyaways and loose pieces visible—this is where the “messy” becomes intentional and cute
- Gently pull the braid and bun sections outward after securing for a fuller, more textured final look
- Add small clips or ribbons where the braid wraps around for extra personality
Pro tip: This style is one of the most forgiving because slight imperfections actually enhance the intentional “messy” vibe. A perfectly neat bun with braid detail looks too styled; the goal is soft, textured, touchable.
Tips for Keeping Braids Secure Throughout the Day
Once you’ve created a beautiful braid, you want it staying secure from morning rush through afternoon pickup. A few strategic moves make the difference between a braid that survives the day and one that’s halfway undone by lunchtime. These tricks work for any braid style.
Start with damp hair every single time. Dry hair is slippery and prone to sliding out of braids, while damp hair grips the elastic and holds its shape. By the time hair dries, the braid is set. This single change probably triples how long braids stay secure, with zero extra effort on your part.
Use quality silicone-coated elastics that won’t slip or snag. Thin elastics designed for adult fine hair actually work better than chunky toddler elastics because they distribute tension more evenly. Keep backups in a small bag in your diaper bag; broken elastics happen, and having spares means you can fix a failing braid in thirty seconds rather than restyling entirely.
Bobby pins secure braids that feel loose at the base. A few strategic pins hidden underneath the hair at the elastic secure the style without being visible. This is especially helpful for Dutch braids, which sit raised on the scalp and are slightly more prone to slipping than traditional braids.
Consider lightweight hair clips as both functional security and cute styling detail. A thin clip holding the very end of a braid, hidden under the hair, can prevent loosening. More visibly, small clips at the braid bases add intentional detail while also securing the style. Toddlers often love the sparkle or color of clips, making them feel like part of the intentional look rather than just functional.
Gently misting braids with a light hairspray or texture spray adds grip without the sticky buildup of heavy products. A very light mist on finished braids (not in the face, just on the hair) helps everything stay in place. This works especially well on flyaways and stray pieces that otherwise loosen throughout the day.
Final Thoughts
Braiding toddler hair doesn’t require hours, special training, or Pinterest-level perfection. A few go-to styles that you practice twice become second nature, turning rushed mornings into moments where you’re actually creating something beautiful. The styles that work best are the ones that feel manageable in your hands—some parents find three-strand braids intuitive while others click more naturally with twists or half-up styles. Start with whichever technique feels easiest, build confidence, and expand from there.
The time investment pays dividends beyond just a tidy hairstyle. Braids protect delicate toddler hair from breakage and damage, contain flyaways and tangles, and eliminate the daily battle of tangled hair. Plus, there’s something special about sending your toddler off to school or daycare looking intentionally styled—it’s a small act that somehow feels like saying, “I see you, and I think you’re worth the effort.”
Most importantly, braids stay better on days when you’re not stressed about perfection. Toddler hair does what it wants sometimes, elastics slip occasionally, and a slightly crooked braid is infinitely cuter than a frustrated parent. Give yourself permission to have one go-to simple style that you can execute in under five minutes on mornings when everything’s chaotic. Master that one, add a second, then a third. Within a few weeks, you’ll have enough variety to match mood, occasion, and your toddler’s hair texture, turning mornings from battles into small victories worth celebrating.