Getting a toddler’s hair to look polished and stay that way for longer than five minutes feels like a miracle many parents are still waiting for. The reality is that toddlers are in constant motion — running, jumping, rolling around, pulling at their own hair — which means whatever style you create needs to be practically indestructible. Not every hairstyle holds up to this kind of chaos, and that’s where the problem lies: you can spend twenty minutes creating an intricate braid only to have it completely dismantled by snack time.
The good news is that certain toddler hairstyles are genuinely designed to withstand the chaos of the day. These aren’t complicated styles that require salon-level skills or expensive products. Instead, they use strategic techniques and simple products that lock hair in place while still feeling comfortable and looking intentional. The key is understanding which styles have built-in durability, how to secure them properly, and what products actually work without irritating a toddler’s sensitive scalp.
This guide covers twelve hairstyles that real parents have tested through actual toddler days — the ones that survive playdates, meal times, and vigorous naptime rolling. Each style includes specific techniques to maximize longevity, product recommendations that truly grip (without damaging fine hair), and honest tips about what goes wrong and how to prevent it. Whether your toddler has thick curls, fine straight hair, or anything in between, you’ll find styles that actually work.
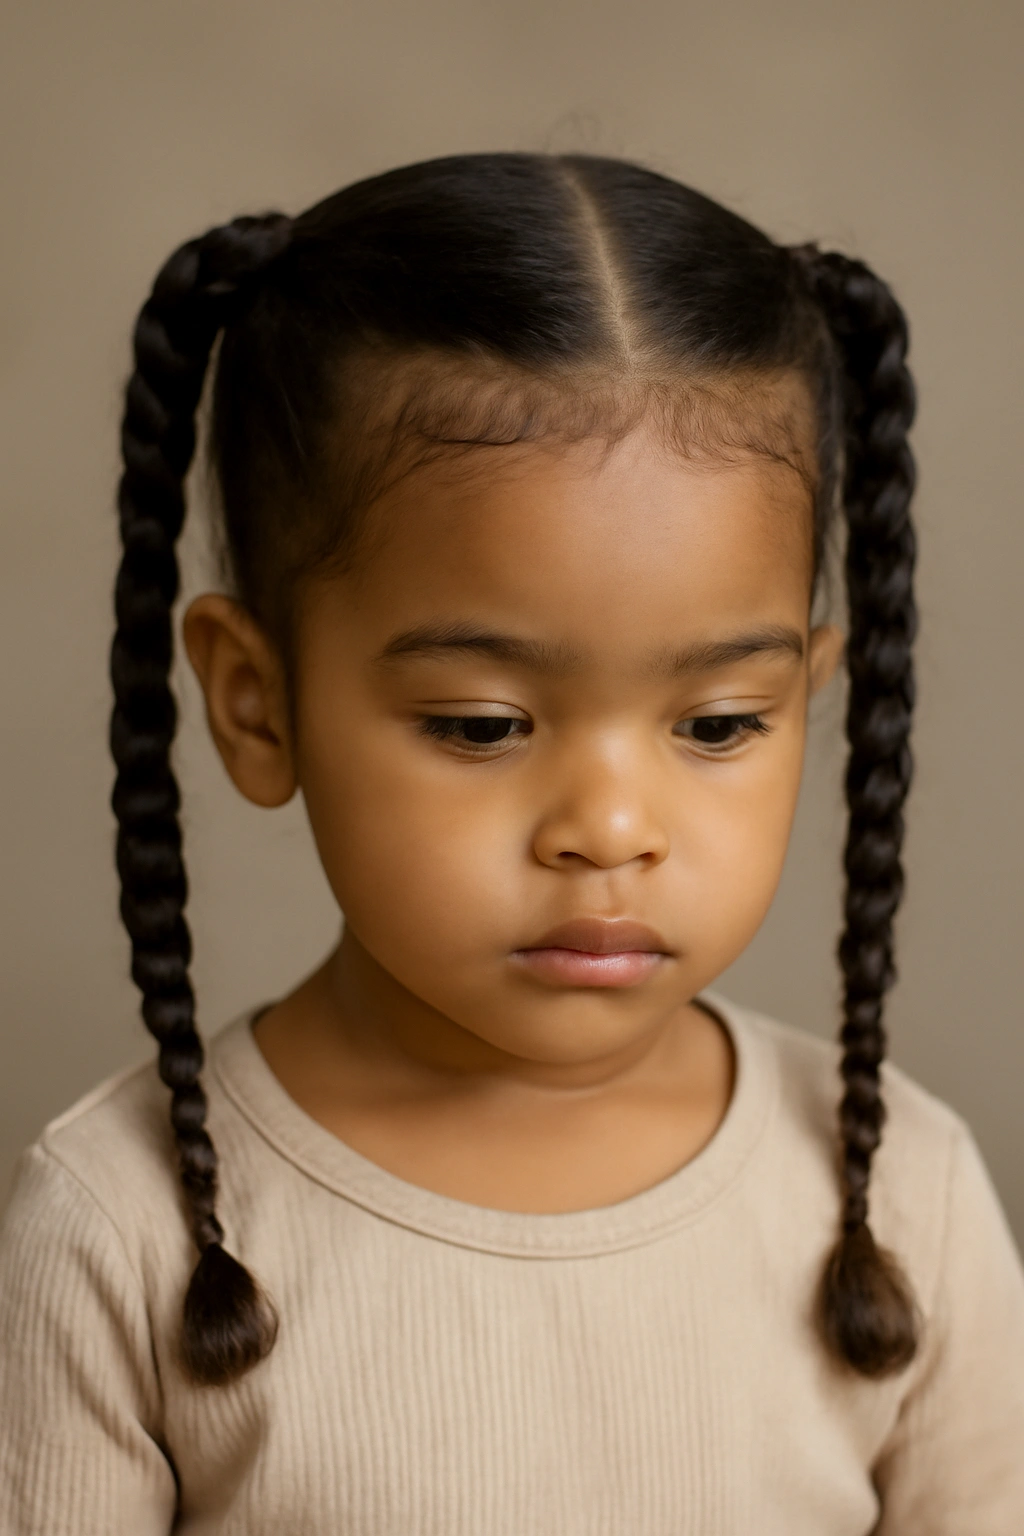
1. Two-Strand Twisted Pigtails
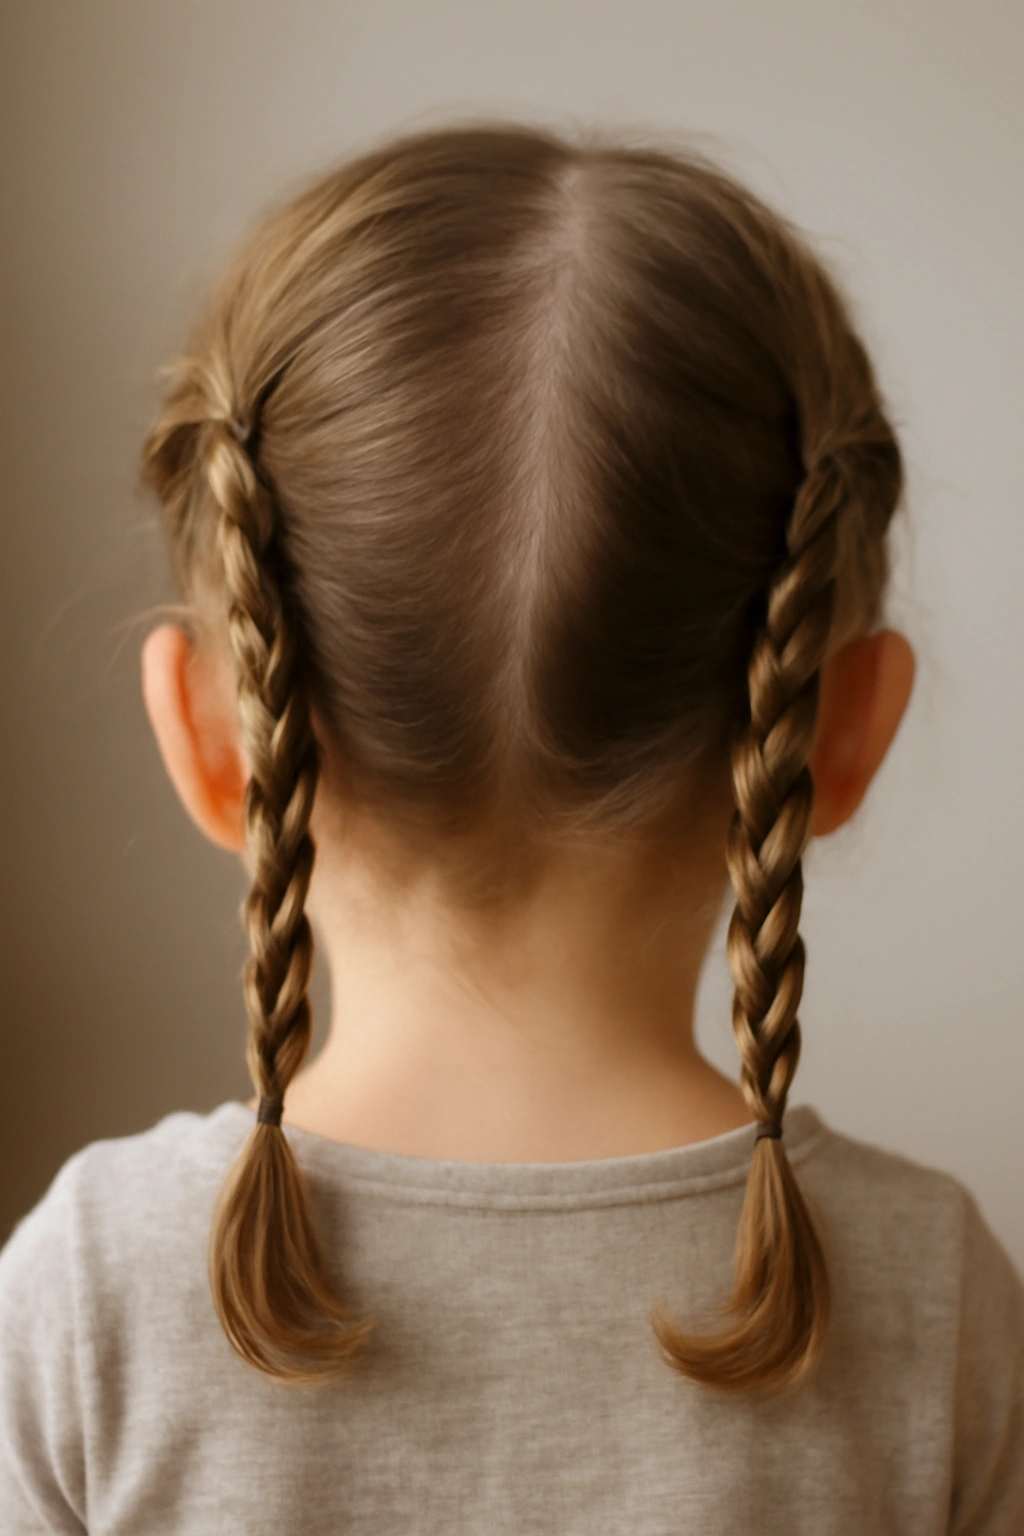
Two-strand twists are one of the most underrated toddler hairstyles for durability. Unlike braids, which can loosen and unravel throughout the day, twists actually tighten slightly as a toddler moves around, especially if you’ve secured them properly at the base. This style works beautifully on toddlers with curly, coily, or wavy hair, though it also holds well on straight hair when done with the right tension.
Why Twists Last So Long
The twisted structure creates natural grip points along the hair shaft. When you twist two sections of hair together and secure them tightly, the friction between the strands actually locks them in place. Even if your toddler shakes their head vigorously or tugs at the pigtails, the twist maintains its shape because each strand is gripping the other one. This is completely different from a simple rubber band holding a ponytail, which can slip and slide.
How to Create Two-Strand Twists That Hold
- Start with damp hair — completely dry hair is actually harder to twist smoothly, and dampness helps the twist “set” as it dries. You don’t need it soaking wet; lightly mist with water and apply a smoothing cream or leave-in conditioner.
- Divide the hair into two sections on each side of the head, making your part lines clear. If you’re creating pigtails, part down the middle first, then part each half where you want your pigtail base to be.
- Take the first section and divide it into two strands. Start twisting these two strands around each other, keeping tension consistent and twisting away from the face for a neat appearance.
- As you twist toward the ends, the hair gets progressively finer and more likely to unravel, so don’t rush this part. Keep tension and twist all the way to the very end.
- Secure each twist with a small elastic band — silicone elastics are gentler on fine hair than traditional rubber bands. You can also use a hair clip that matches the elastic for extra security and a polished look.
- Repeat on the other side.
Pro Tips for Maximum Hold
Use a lightweight gel or edge control on flyaways around the face before you start — this prevents baby hairs from coming loose as the day progresses. Don’t make the twists too thick; thinner twists (about the width of a pencil) actually hold longer than chunky ones because the tension is distributed across more strands. If your toddler’s hair is particularly fine or prone to tangling, apply a small amount of smoothing cream as you twist, working it through the sections as you go.
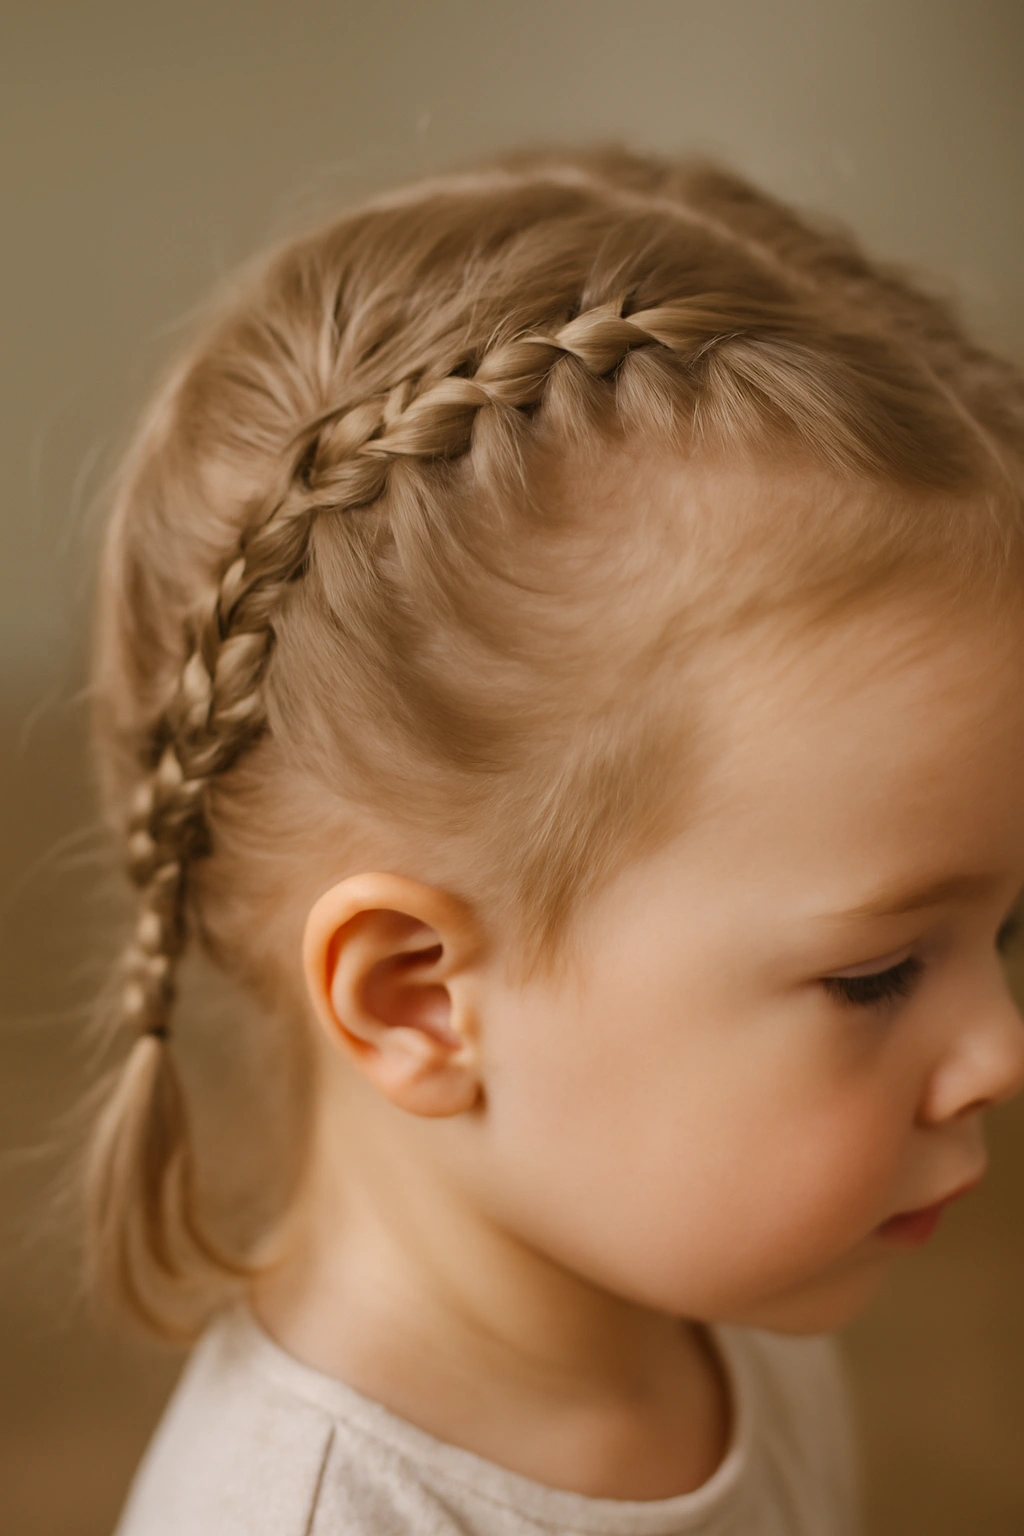
2. Flat Twists with Clips
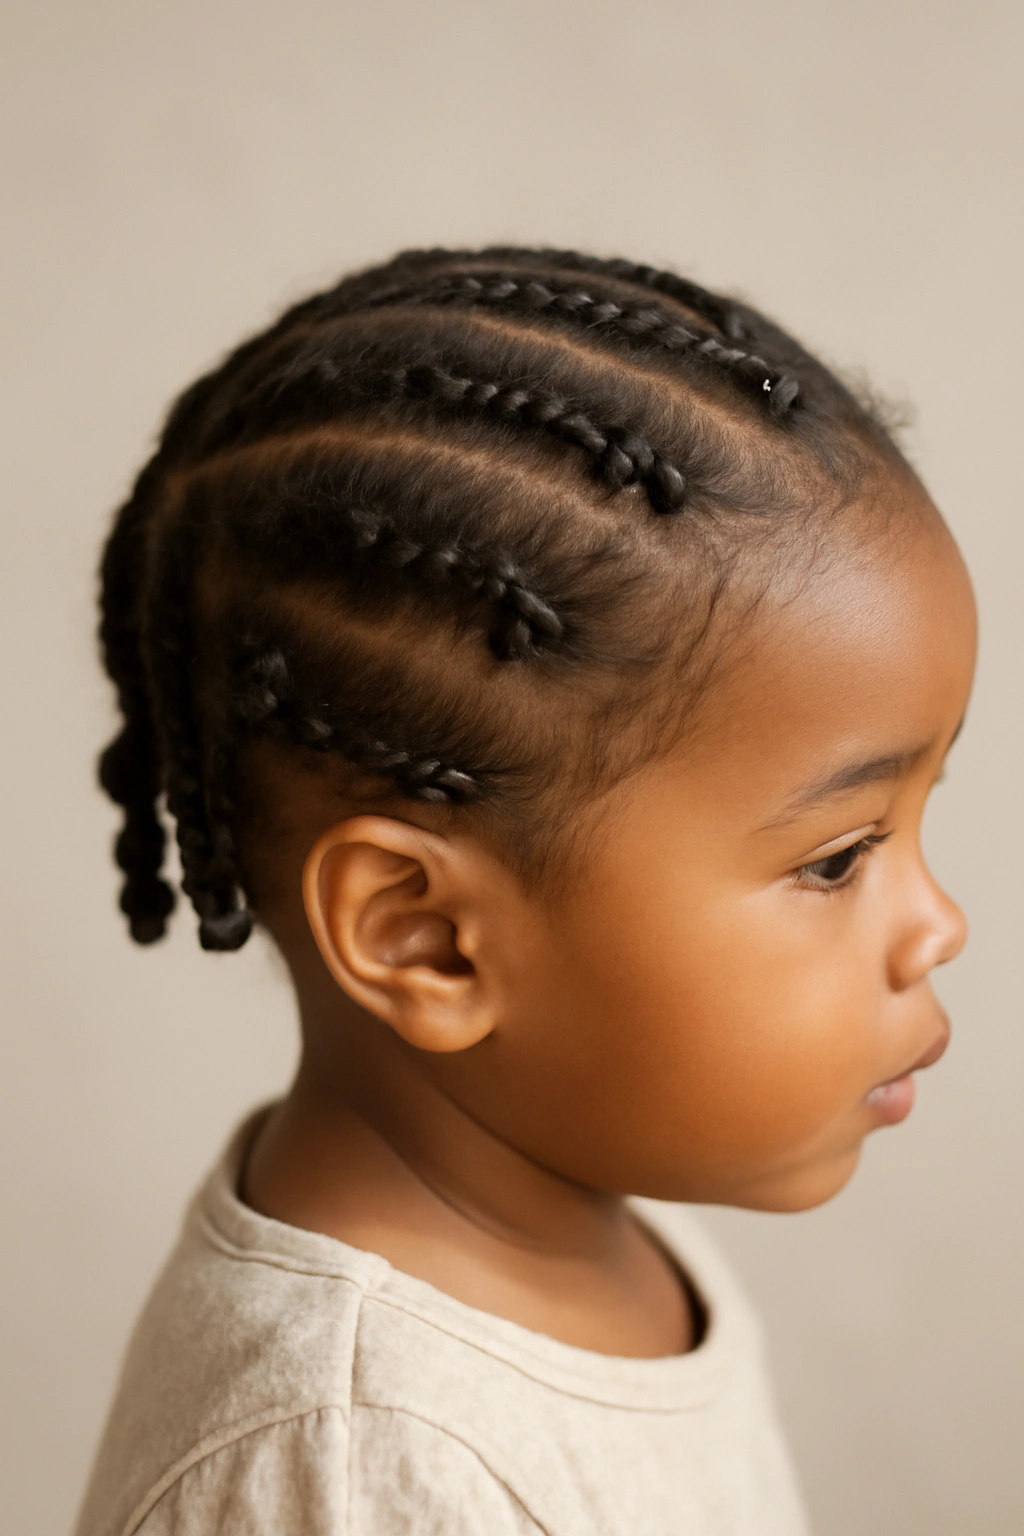
Flat twists are similar to two-strand twists but are created directly against the scalp in a flat line, almost like a cornrow but with a twist motion instead of a braid motion. This style is exceptionally secure because the twist is anchored directly to the head rather than hanging loose. It’s a game-changer for toddlers with longer hair who tend to tug at loose styles.
Creating Flat Twists Along the Head
Part the hair where you want your flat twist to begin. You can do flat twists running across the top of the head, along the sides, or from the front to the back. Start with two thin sections of hair at the root of your parting. Twist these two sections around each other while simultaneously moving your fingers upward along the scalp, always picking up small sections of new hair to add into the twist as you go.
This is the tricky part: you’re constantly adding new hair into the twist while keeping the twist tight against the scalp. It takes practice, but once you get the rhythm, it becomes automatic. Continue until you reach the end of the section you’re twisting, then secure with a small elastic or bobby pin.
Why This Style Stays Put
Because the twist is attached directly to the scalp rather than hanging loose, there’s significantly less movement and stress on the hair. Even when your toddler is bouncing around, the twist stays firmly in place. The constant picking up of new hair as you go also creates multiple anchor points along the scalp, making it nearly impossible for the style to slip.
Styling Options with Flat Twists
You can create two flat twists that frame the face and meet at the back in a low bun. You can do one flat twist that runs from one side of the head to the other. You can even create multiple smaller flat twists across the back of the head for a more intricate look. Secure the ends with small clips if you don’t want additional elastics, or tuck them into a small bun at the nape of the neck.
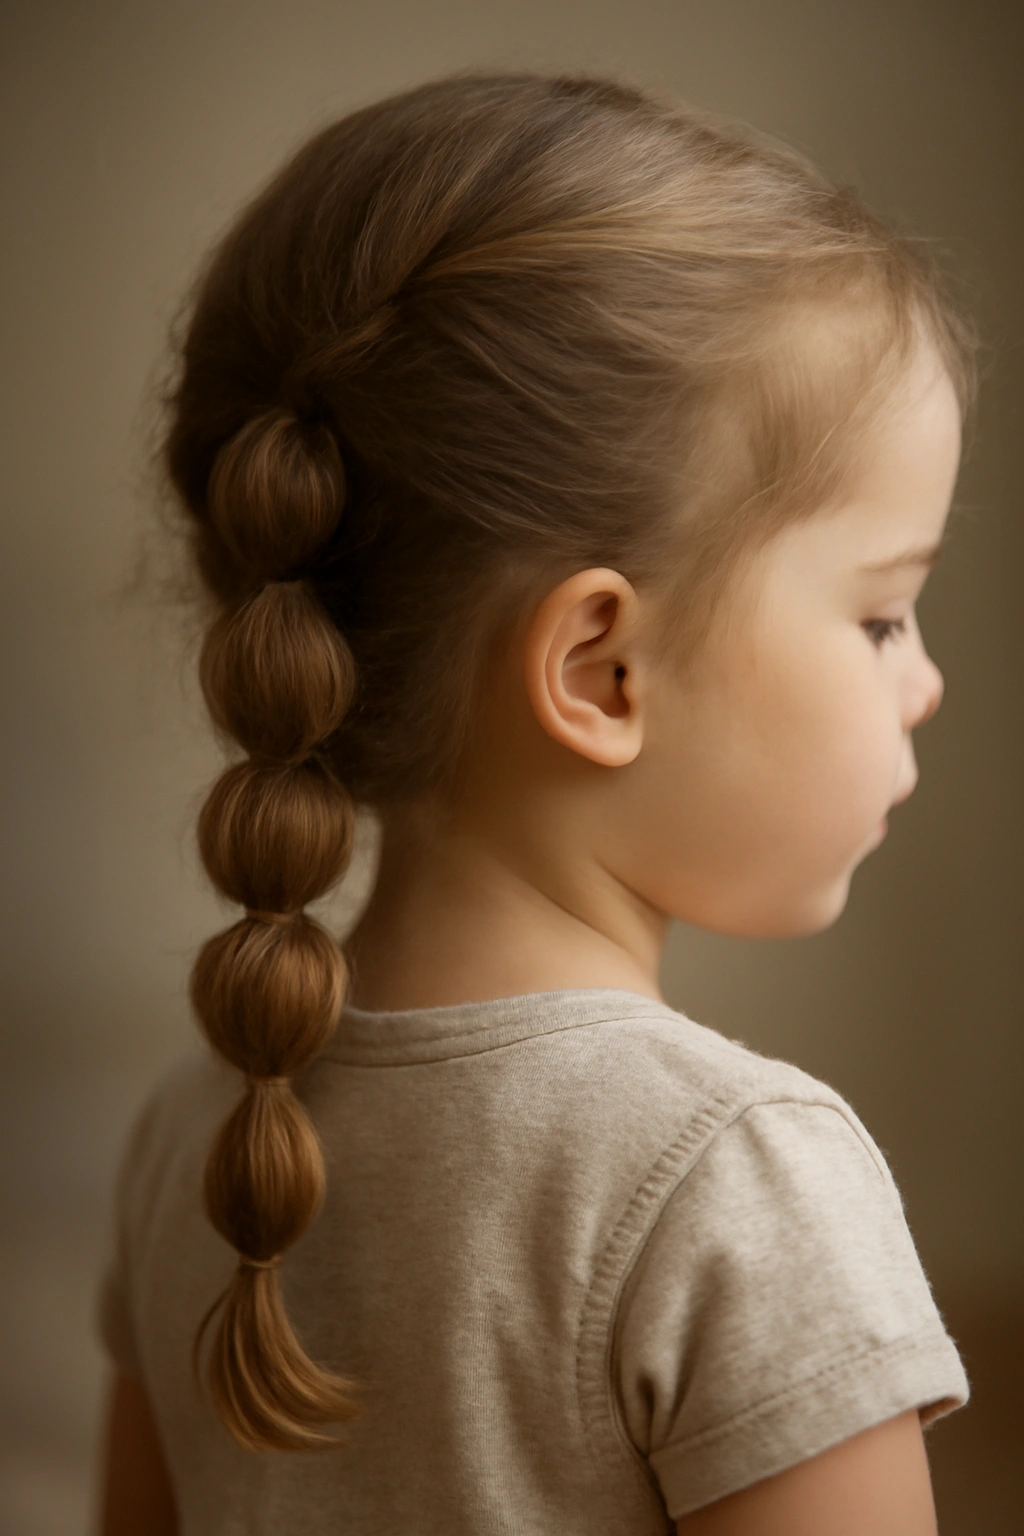
3. Bubble Ponytail
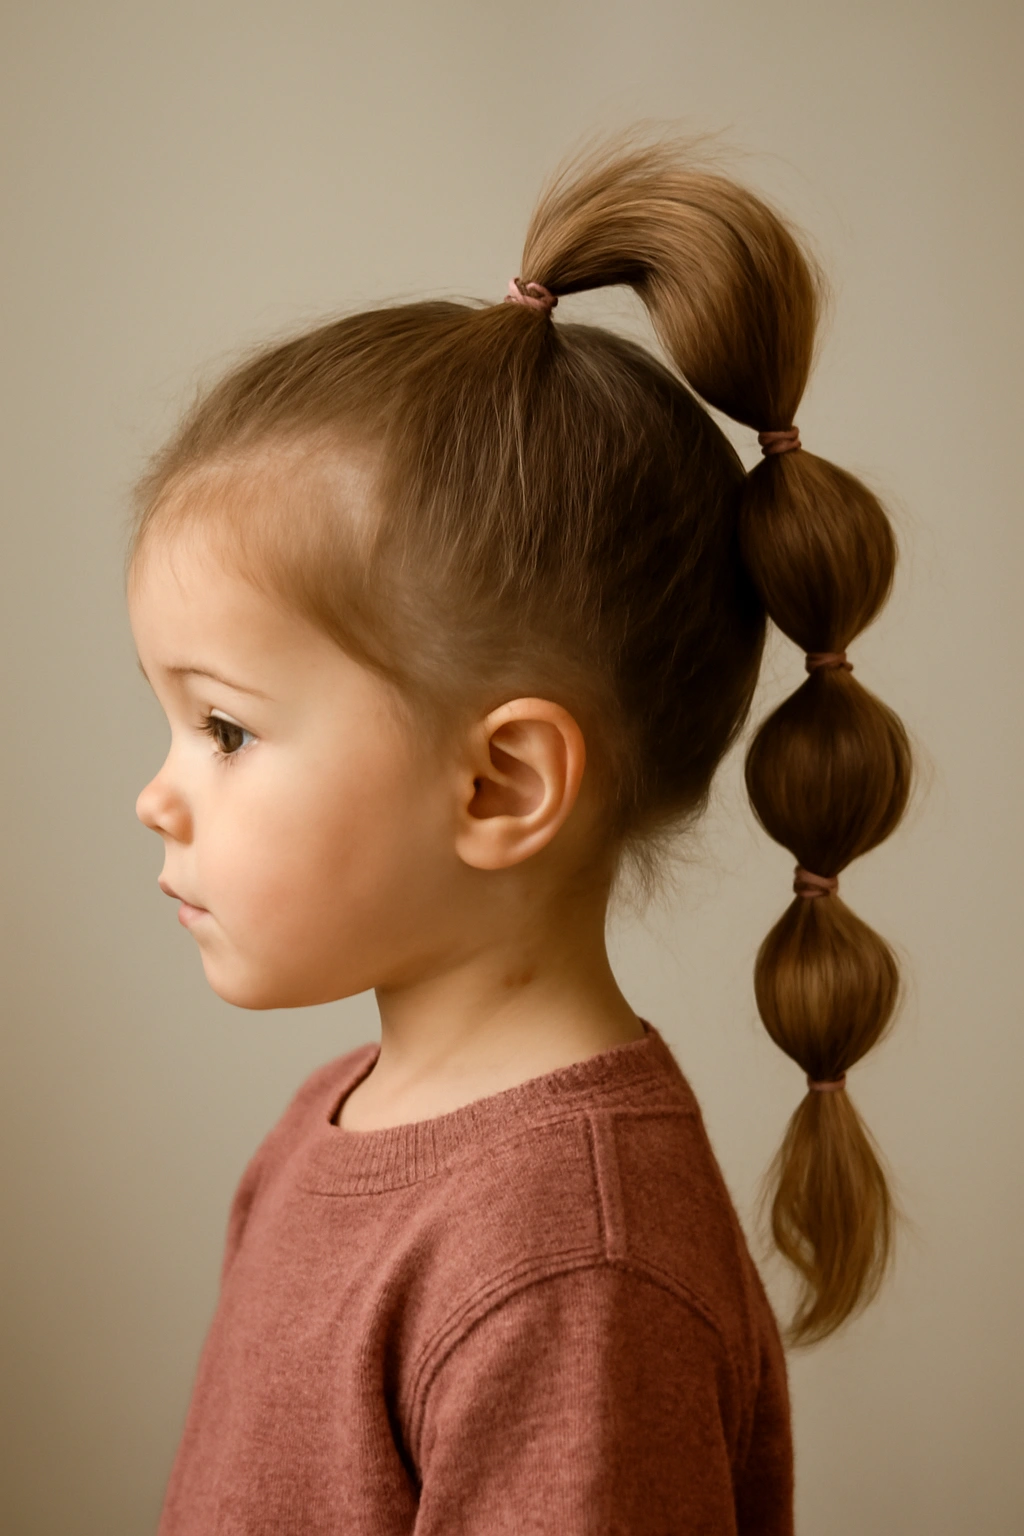
A bubble ponytail is a single ponytail that’s divided into sections and secured at intervals with elastics, creating that bubble or sphere effect along the length. This style is deceptively durable because each bubble section is independently secured, so even if your toddler’s hair somehow starts to loosen in one area, the other bubbles remain completely intact.
Building a Toddler-Proof Bubble Ponytail
Start with a high, centered ponytail at the crown, securing it tightly with a good-grip elastic. Divide the ponytail into sections — typically four to six sections depending on the length and thickness of the hair. The first bubble should be about two inches below the first elastic. Wrap an elastic around this point, creating that characteristic bubble shape above it.
Continue down the length of the ponytail, placing elastics at even intervals and creating bubbles. The key to longevity is making sure each elastic is pulled tight enough to maintain tension but not so tight that it causes breakage or discomfort. For toddlers, you want just enough tension that the bubble maintains its shape even if they tug at it.
Customization for Different Hair Types
On thick, straight hair, make each bubble a bit tighter for definition. On curly or coily hair, let the bubbles be a little bit fuller and rounder — they’ll look intentional and beautiful. You can also use small clips or bows between the elastics for a decorative touch, which also helps distribute the visual weight of the style so it doesn’t feel too heavy.
Longevity Strategy
The magic of the bubble ponytail is that even if one bubble slightly loosens over the course of the day, the other bubbles are unaffected. This means the style looks intentional and put-together even if it’s not perfectly pristine by evening. Because each bubble is independently secured, this style can easily last through a full day, nap included.
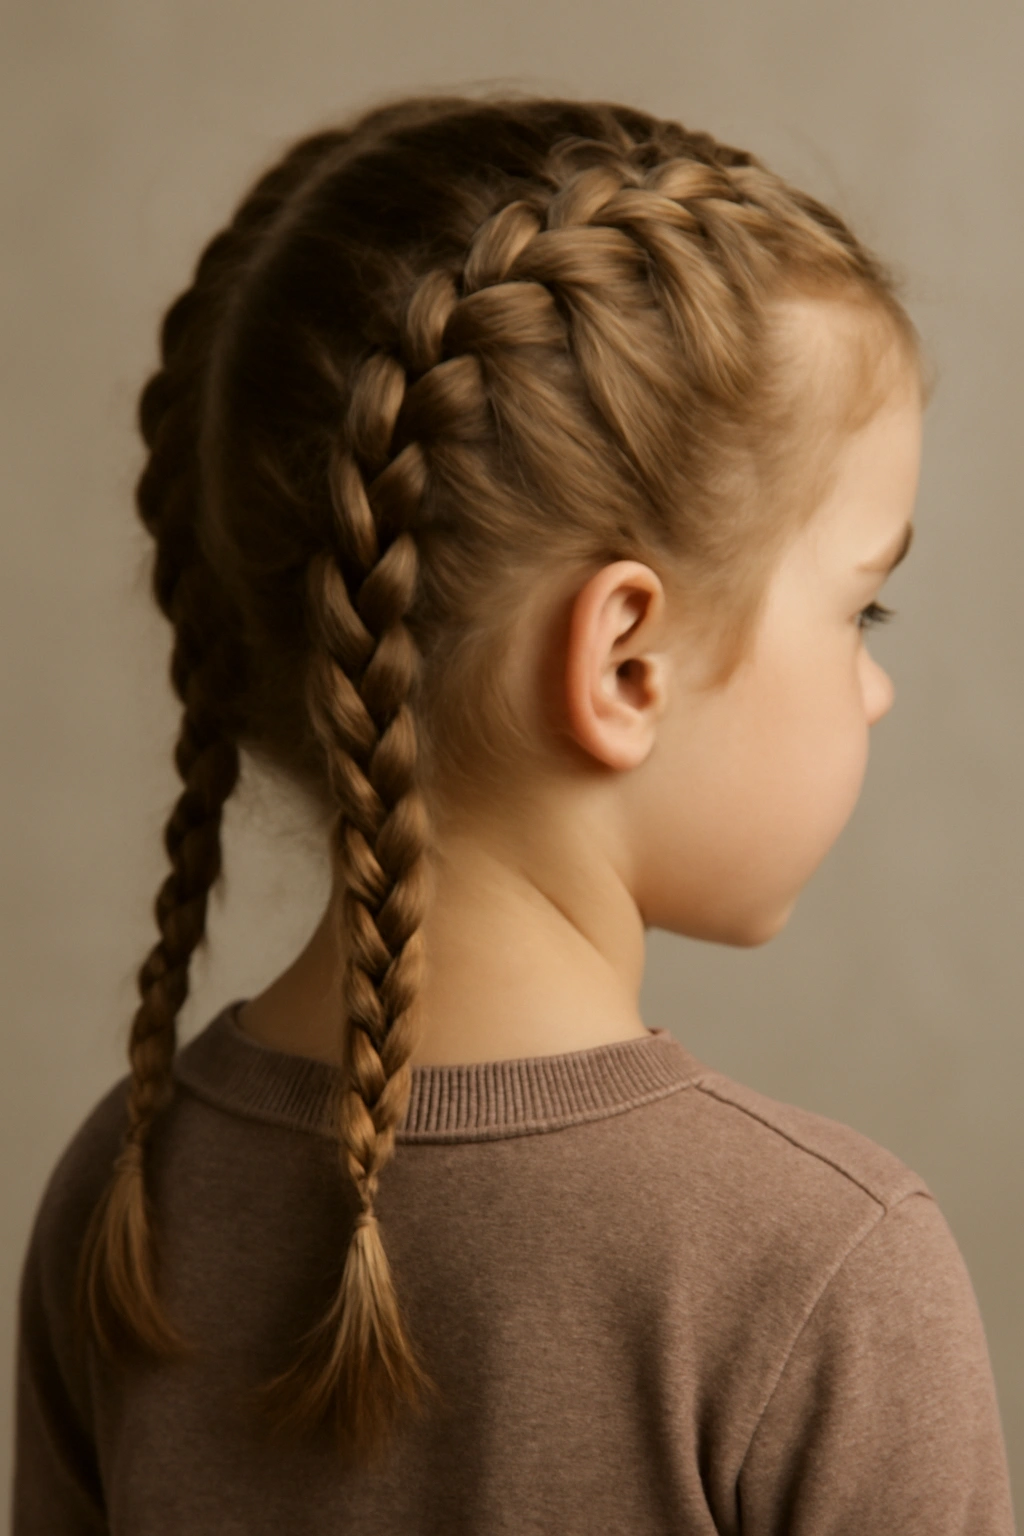
4. Boxer Braids

Boxer braids (also called Dutch braids) are essentially two braids that run from the forehead back toward the nape of the neck, creating a sporty, athletic look. The reason they’re so durable for toddlers is that they’re braided directly against the scalp, so they’re anchored from the very beginning and can’t slip or loosen easily.
Technique for Tight, Long-Lasting Boxer Braids
Part the hair down the middle, creating a clear line from the forehead to the back of the head. Start on one side with a three-strand braid at the hairline, but instead of braiding loosely, braid in a Dutch-braid style by crossing sections under rather than over. This creates a braid that sits slightly raised on the head and grips the scalp tightly.
As you move back along the scalp, continue picking up thin sections of new hair and incorporating them into the braid, always working under rather than over. This technique keeps the braid anchored to the head. When you reach the nape of the neck, secure the end with a small elastic. Repeat on the other side.
Why Toddlers Can’t Undo Boxer Braids
The beauty of braids that are anchored directly to the scalp is that a toddler can’t simply pull on the end and have the whole thing unravel. The anchor points along the scalp prevent the braid from loosening. Even vigorous head shaking won’t significantly disturb a well-executed boxer braid.
Longevity Tips
Make sure your braids are genuinely tight at the scalp, but not so tight that they cause a headache (ask your toddler if it hurts before you move on). Damp hair braids slightly tighter than completely dry hair, so consider lightly misting the hair before braiding. You can also add a tiny dab of gel to the hairline to keep baby hairs smooth throughout the day.
5. Half-Up Bun with Twisted Sides
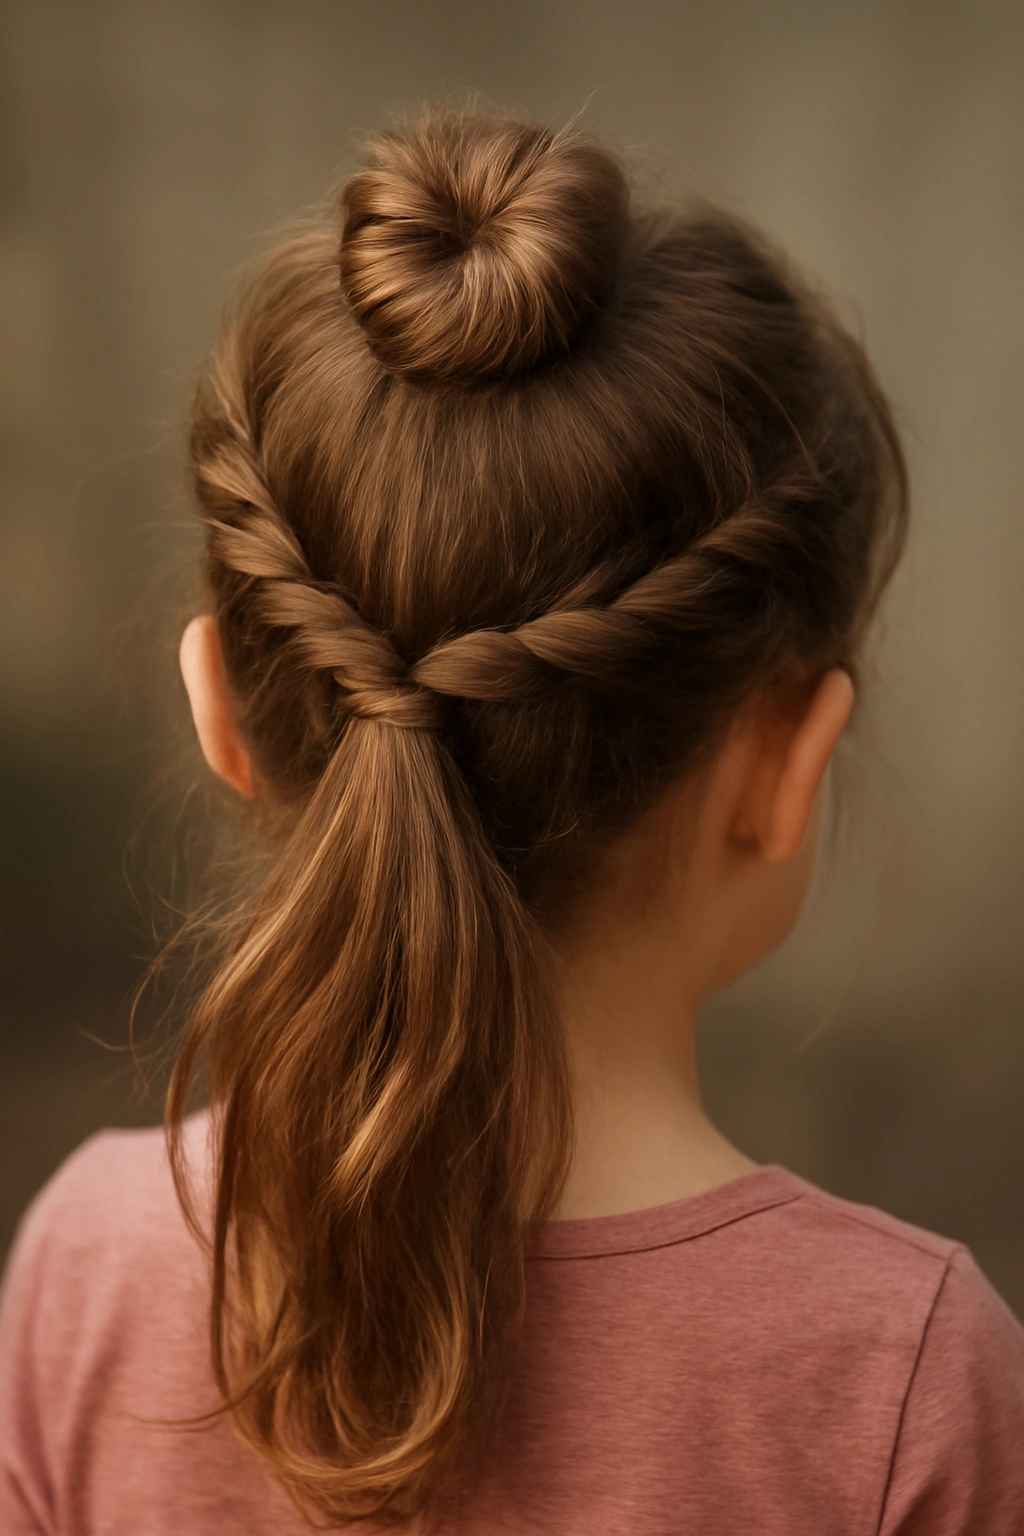
This style combines the security of twists with the polished look of an updo, making it perfect for toddlers who have shoulder-length or longer hair. You’re taking sections from either side of the head, twisting them, and pinning them together in the back to create a half-up style. It’s secure, cute, and surprisingly versatile.
Creating a Half-Up Twisted Bun
Section out a piece of hair on each side of the head, starting at the temple area. Twist each section away from the face, keeping the twists tight. Bring both twisted sections to the back of the head and secure them together with a small clip or elastic band. You can leave the bottom half of the hair completely down, or you can twist the entire length into a full updo.
For a fuller, more intentional look, gather all the hair at the back into a second elastic, creating a high or low ponytail with the twisted front sections anchored into it. The key is making sure the twists at the front are tight and secure so they don’t come loose as the day progresses.
Advantages for Toddlers
This style keeps hair off the face and forehead, which toddlers appreciate (even if they don’t say so explicitly). It also keeps the front layers from tangling or getting in the way during activities. The half-up portion is secured with twists and clips, so it can’t slip down or loosen — your toddler would have to literally pull the clip or elastic out, which takes intentional effort rather than just tousling their head.
Adorning the Style
A small claw clip, a decorative bow, or a pretty hair clip in the back instantly elevates this style and gives you a photo-ready toddler look. The clips serve the dual purpose of securing the style while also adding intentional decoration, so it looks like you spent more time on it than you actually did.
6. Dutch Braids
Dutch braids (or inside-out braids) run along the scalp similar to cornrows and are braided by crossing sections under rather than over. They’re incredibly durable because they’re anchored directly to the scalp along their entire length, making them one of the most secure options for active toddlers.
Step-by-Step Dutch Braid Technique
Start at the crown or at the hairline, depending on where you want the braid to begin. Take three thin sections of hair and begin braiding by crossing the right section under the middle, then the left section under the middle — always working underneath rather than over. This is the opposite motion of a traditional French braid.
As you move down the scalp, pick up thin pieces of new hair on each side and incorporate them into the braid, continuing the underneath motion. The braid should sit slightly raised on the head with a distinct, ridge-like appearance. Continue to the end and secure with an elastic.
Why Dutch Braids Stay Locked in Place
The underneath motion of the braid actually creates more tension and grip than a traditional braid. The hair strands pull slightly tighter against the scalp, creating multiple anchor points. Even if your toddler tugs at the end of the braid or shakes their head, the braid won’t loosen because it’s gripped along the entire scalp.
Single Versus Multiple Dutch Braids
A single Dutch braid running from the crown to the nape is incredibly striking and holds all day. Two Dutch braids on either side of the head in a boxer-braid style offer more coverage and look wonderfully athletic. You can even do multiple smaller Dutch braids across the back of the head, though this takes more time and is better for toddlers with very long hair.
7. Cinnamon Rolls (Hair Coils)
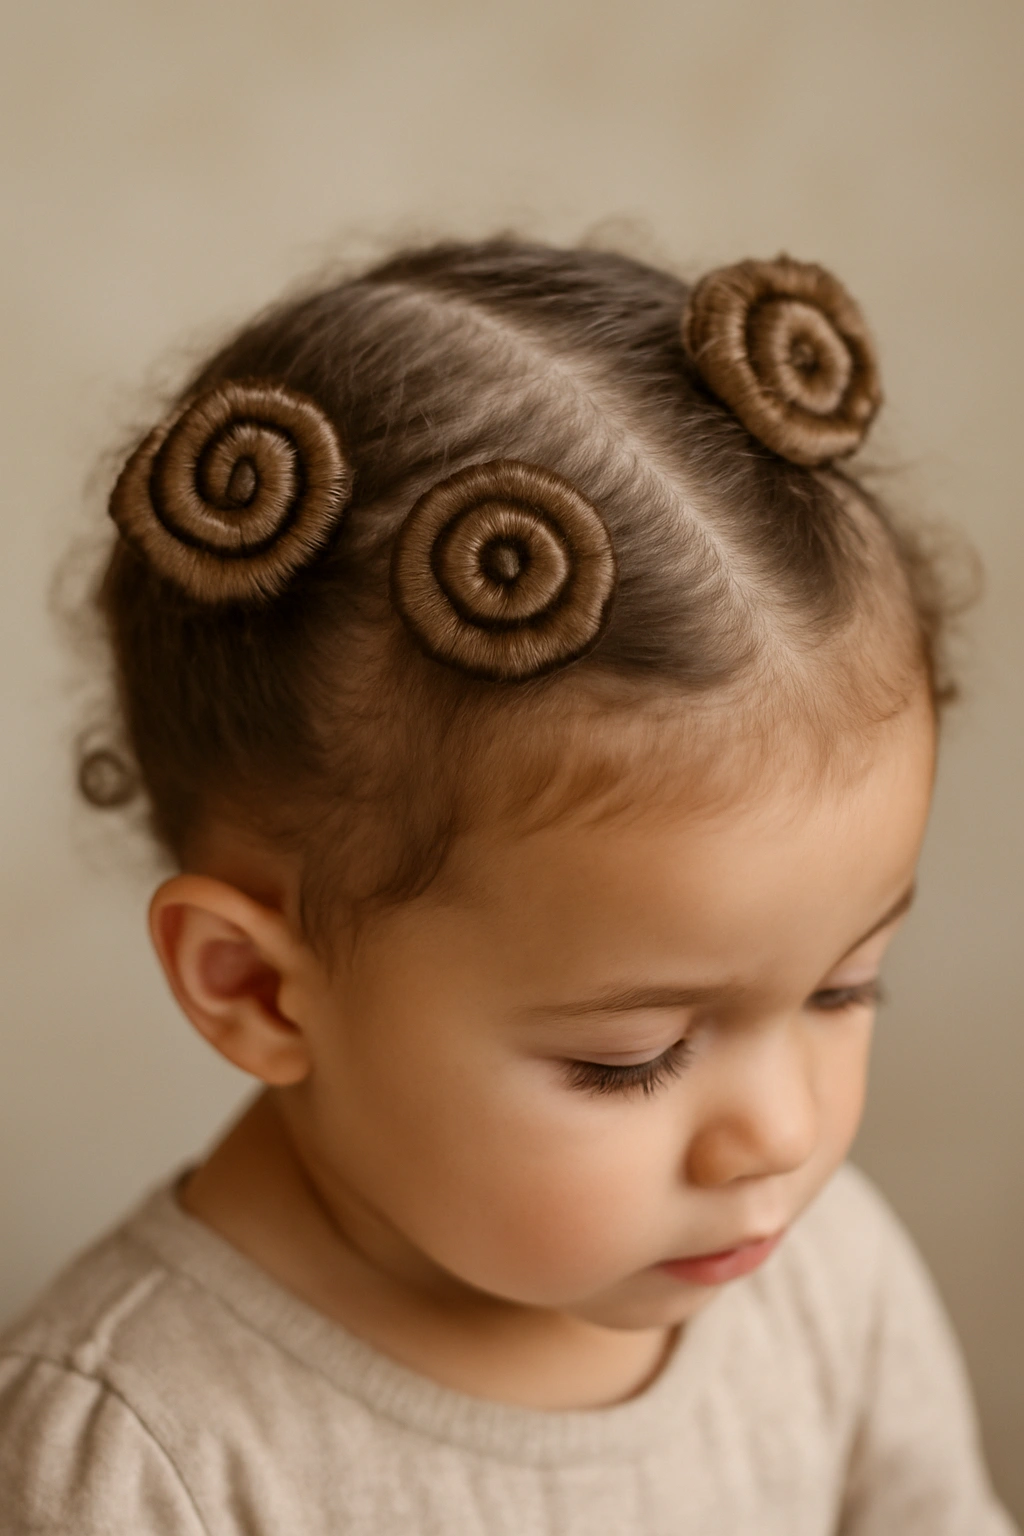
Cinnamon rolls are exactly what they sound like: sections of hair twisted or coiled into spiral shapes and pinned flat against the head. They’re adorable, they hold remarkably well, and they work on nearly every hair type. This style is particularly great for toddlers with curly or textured hair, though it works beautifully on straight hair too.
Technique for Creating Hair Coils
Section out a piece of hair — typically starting from the crown or the side of the head. Twist this section tightly, then coil it into a spiral shape and pin it flat against the head with bobby pins. The coil should stay in place because of the pins, but also because the twisted tension creates natural grip.
You can create a single cinnamon roll at the crown, two rolls on either side of the head (very cute), or multiple rolls across the back. The number of rolls depends on the thickness and length of your toddler’s hair.
Securing Cinnamon Rolls for All-Day Wear
Use at least two bobby pins per roll, angling them in different directions for maximum hold. Consider using bobby pins that match your toddler’s hair color so they blend in. A light spritz of hairspray after pinning helps everything stay in place, though it’s not absolutely necessary if the pins are placed securely.
The Advantage for Toddlers
This style is charming and playful, which toddlers often appreciate. It also keeps hair off the face and neck, making it comfortable for active play. Because each roll is pinned firmly in place, they can’t loosen or unravel — your toddler would have to physically remove the pins, which they’re unlikely to do without help.
8. Bubble Braid
A bubble braid is essentially a braid where the sections are pulled and fluffed out at intervals, creating a fuller, more textured appearance. It’s different from a regular braid because the sections are loosened and shaped, giving it a more intentional, styled look. The reason it holds well is that it’s still a traditional braid structure underneath the fluffed-out sections.
Creating and Shaping a Bubble Braid
Braid a regular three-strand braid, but don’t braid it too tightly. When you’ve finished braiding, go back and gently pull on the outer sections of the braid to loosen and fluff it out. This creates that characteristic pillowy appearance. You can do this along the entire length of the braid or just in certain sections.
Why the Bubble Braid Endures
Even though you’ve loosened and fluffed the braid, the underlying braid structure is still intact and holding firm. The fluffed-out appearance is purely aesthetic; the holding power comes from the braid itself. This means your toddler can play hard all day without the braid falling apart, even though it might look a little bit softer and less structured than a tight braid.
Customization Options
You can create a bubble braid starting at the crown and running down the back for a dramatic, longer-lasting style. You can create two bubble braids in pigtail style. You can even create a bubble braid that wraps around the side of the head, creating a crown-like effect. The fluffed-out nature of the braid makes it look more intentional and styled than a regular braid, so even if it loosens slightly throughout the day, it still looks intentional.
9. Bantu Knots
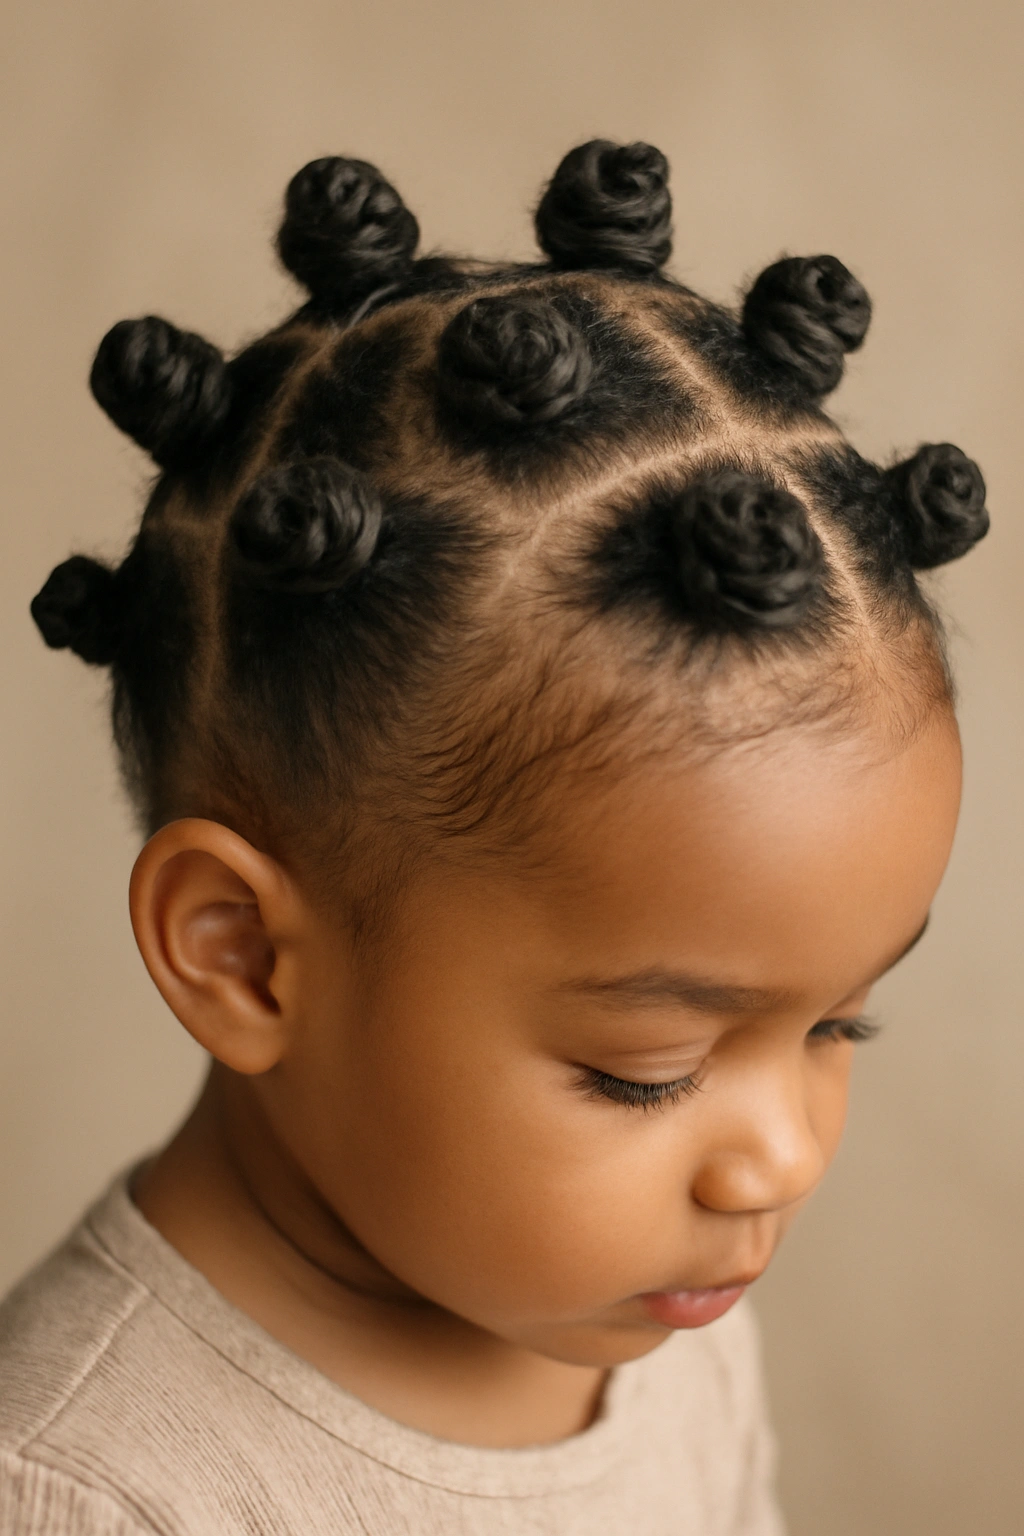
Bantu knots are small sections of hair twisted and coiled into knot shapes, typically pinned close to the scalp. They’re secure, they look intentional and polished, and they work wonderfully on all hair types, particularly curly and textured hair. When you unravel these knots, they create beautiful waves or curls, but they also hold beautifully as-is throughout the day.
Technique for Creating Bantu Knots
Section out a piece of hair — start small if this is your first time. Twist this section tightly, then coil it into a small knot shape and pin it close to the scalp with bobby pins. The key is keeping the knots small enough that they feel secure and intentional. You can create knots across the crown, down the back, or scattered throughout the head.
Why Bantu Knots Are Remarkably Durable
Each knot is anchored with multiple bobby pins, and the twisted tension inside the knot creates additional grip. Even if your toddler is rolling around on the floor or playing vigorously, the knots stay firmly in place. This style is particularly great for nap time because the knots won’t collapse or flatten against a pillow the way loose curls or braids might.
Half-Up Bantu Knot Style
For a less intense look, create Bantu knots only in the top section of the hair, pulling these top knots back into a gathering at the crown, and leaving the bottom half of the hair down. This gives you a polished updo look while keeping the maintenance lower than full-head knots.
10. Top Knot with Reinforced Base
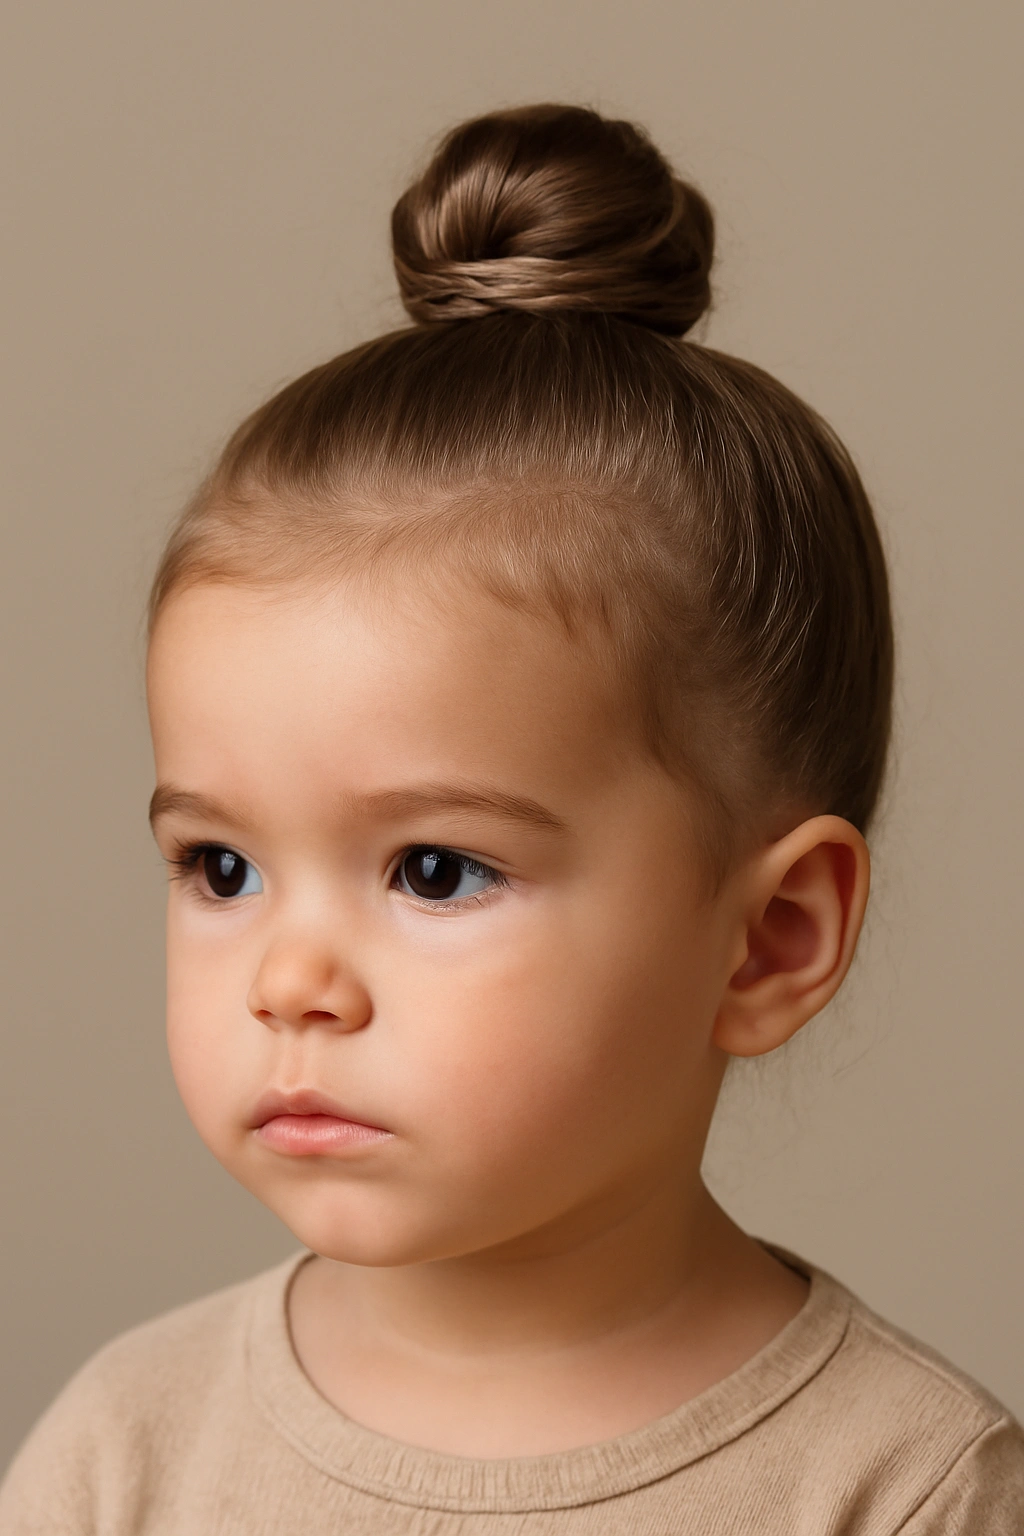
A simple top knot sounds like it wouldn’t hold well for an active toddler, but when you build it with the right technique and products, it can absolutely survive a full day. The key is creating a secure base that won’t slip, then anchoring the knot properly so it doesn’t unravel.
Building a Top Knot That Actually Stays
Gather the hair at the crown into a high ponytail and secure it with a good-grip elastic. Make sure this base ponytail is pulled tight — not so tight it causes discomfort, but tight enough that it won’t slip down throughout the day. Once the base is secure, twist or braid the ponytail, then coil it into a knot shape and pin it firmly with bobby pins.
For extra security, use a bobby pin to anchor the base of the knot directly into the underlying ponytail. This prevents the knot from slipping or rotating. You can also use a second elastic to secure the knot once it’s coiled, which distributes the holding power.
Product Strategy for Longevity
A light-hold gel applied to the ponytail before you twist it helps everything grip together and prevents flyaways. A light hairspray after the knot is pinned in place adds another layer of security without feeling heavy or crunchy. You’re not going for a stiff, helmet-like hold; you just want enough product to prevent slipping.
Adorning the Top Knot
A decorative hair tie, a small scarf wrapped around the base, or a clip positioned strategically all add visual interest while also providing additional security. The more anchor points you have (the elastic, the bobby pins, any clips or ties), the more durable the knot becomes.
11. Side Braid with Hidden Pins
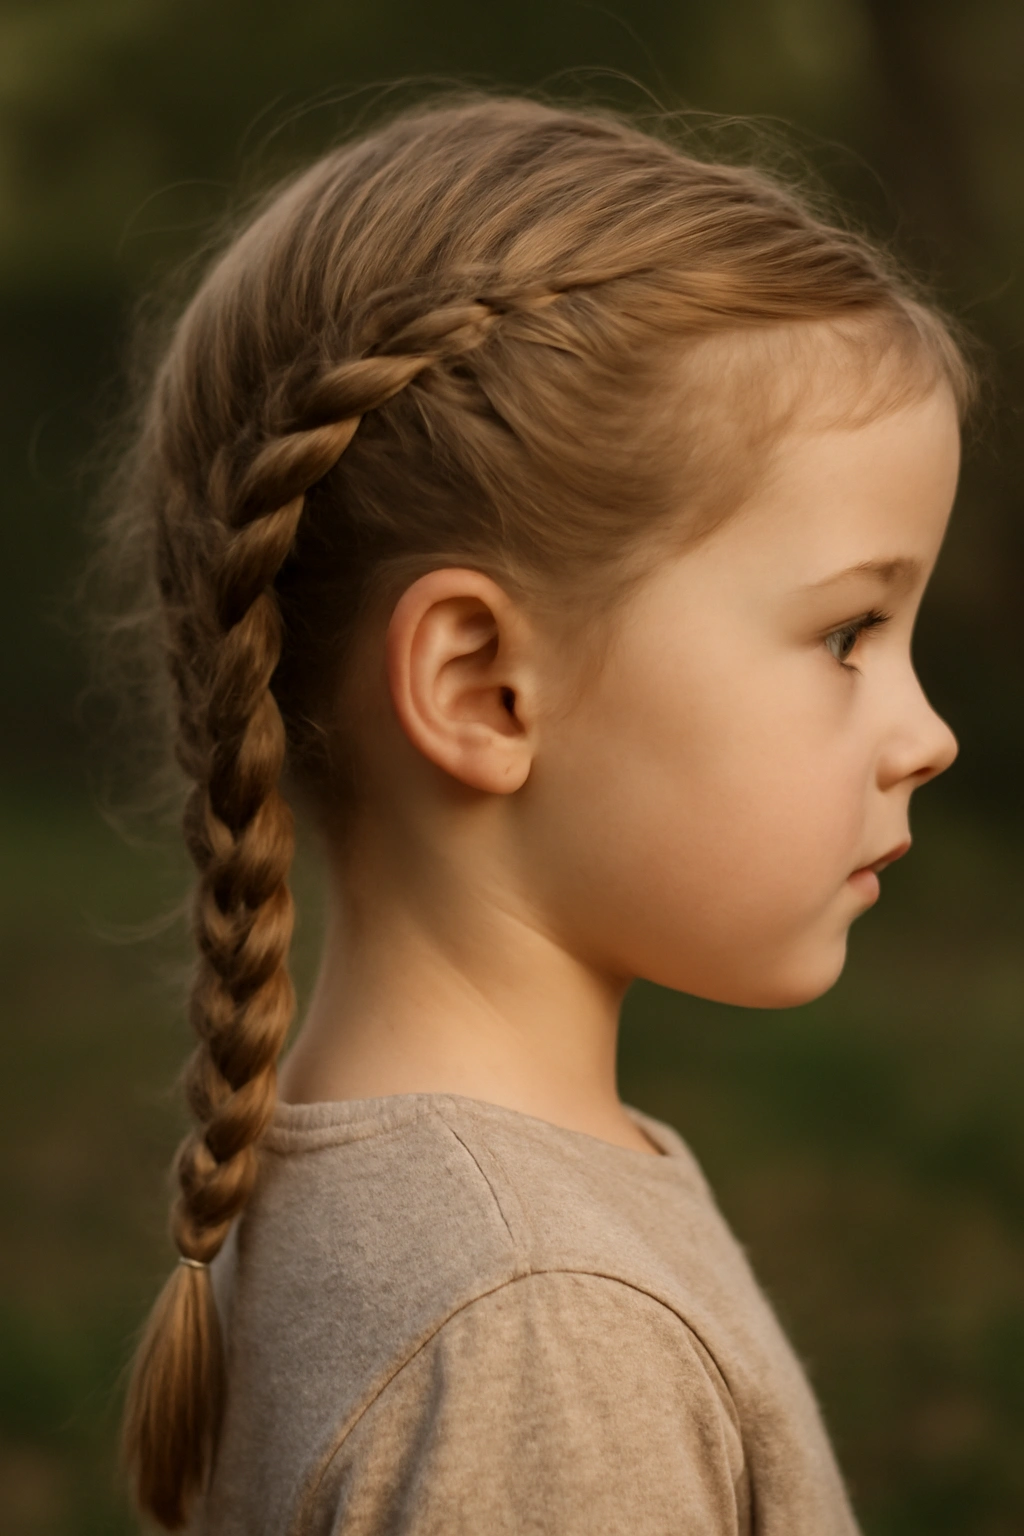
A side braid that runs from one side of the head down the opposite shoulder is both beautiful and practical for toddlers. When you braid it tightly and then strategically hide bobby pins along the length, it becomes incredibly secure and can’t loosen or slip throughout the day.
Technique for a Long-Lasting Side Braid
Section out hair from one side of the head, starting near the ear. Create a tight three-strand braid that angles toward the opposite shoulder. Make sure this braid is genuinely tight — looser braids slip more easily, especially on toddlers who are constantly moving.
Once the braid is complete and secured with an elastic at the end, go back and strategically place bobby pins along the length of the braid, positioning them so they’re mostly hidden by the braid sections themselves. These pins serve as anchor points that prevent the braid from loosening.
Why This Hybrid Approach Works
A tight braid alone is fairly durable, but adding hidden bobby pins takes it to the next level. The pins anchor the braid to the hair underneath, preventing any slipping or loosening. Even if your toddler pulls on the end of the braid, the bobby pins hold the structure firm.
Styling Considerations
This style works best on toddlers with shoulder-length or longer hair. It keeps one side of the face completely clear, which is great for activities like eating or playing without hair getting in the way. You can incorporate a small bow or ribbon into the braid before you start braiding for a decorative touch that also helps secure everything.
12. Twisted Pigtails with Flat Base
Twisted pigtails with a flat-twisted base combines two braiding techniques for maximum durability. You start with flat twists that frame the face, then continue into regular two-strand twists that are secured at the ends. This creates a style that’s anchored at the scalp but also styled throughout the entire hair length.
Creating the Two-Part Twisted Pigtails
Part the hair down the middle. On each side, create a flat twist that starts at the hairline and runs back toward the ear, anchoring the front section of hair along the scalp. When you reach ear level, transition from a flat twist into a regular two-strand twist that continues down the length of the hair. Secure each pigtail at the end with a small elastic.
The flat-twisted base ensures that the front and sides of the hair are secure and won’t slip throughout the day. The two-strand twisted portion below keeps the rest of the hair neatly styled and tangle-free.
Advantages of This Hybrid Style
You get the best of both techniques: the scalp-anchored security of flat twists combined with the elegant appearance of two-strand twisted pigtails. This style keeps hair off the face and neck, prevents tangles, and looks intentional from every angle. Because both the base and the length are secured with twists and elastics, it’s nearly impossible for the style to loosen significantly throughout the day.
Making It Even More Secure
If you’re concerned about the pigtails slipping, add a small clip at the end of each pigtail in addition to the elastic. The clip serves as a backup securing mechanism. You can also add a small amount of lightweight gel to the hairline before creating the flat twists, which helps keep baby hairs smooth and prevents the entire style from shifting.
Final Thoughts
The reality of toddler hairstyles is that the ones that actually last are the ones that use tension, anchoring, and proper securing techniques rather than relying on a single elastic or pin. Every style in this guide shares a common thread: they’re either anchored directly to the scalp (like braids and flat twists), independently secured in multiple places (like bubble ponytails and Bantu knots), or built with underlying tension that resists loosening (like coils and knots).
The product angle matters too, but less than most people think. You don’t need expensive, heavy products that weigh down fine toddler hair. Light-hold gel, leave-in conditioner, and a touch of hairspray are typically enough to support whatever style you’ve created with your hands. The real work is in the technique — taking time to braid tightly, ensuring your elastic bands are pulled snug, and using bobby pins strategically to anchor things that might otherwise slip.
Most importantly, remember that your toddler won’t sit perfectly still while you style their hair, and that’s okay. These styles are designed to withstand movement, imperfection, and the inevitable chaos of a toddler’s day. A style that’s 90% perfect and stays that way all day is infinitely more successful than an intricate style that falls apart by snack time. Pick styles that match your skill level and your toddler’s patience, practice the techniques that feel most natural to you, and trust that the effort you’re putting in genuinely matters — not just for your toddler’s appearance, but for keeping their hair healthy and tangle-free throughout the day.