Beaded hairstyles turn everyday hair into something magical—and your toddler gets to feel like the star they already are. There’s something undeniably special about watching a little one catch their reflection and see themselves adorned with colorful beads, feeling confident and celebrated. These styles aren’t just about aesthetics either. They offer practical benefits too: beads can help keep shorter toddler hair in place during active play, prevent hair from falling into eyes, and make morning routines feel like an adventure rather than a battle. The key to pulling off beaded styles on toddlers is keeping things simple, choosing lightweight beads that won’t stress delicate hair, and picking designs that actually stay put through snacks, naps, and playground shenanigans.
The beauty of beaded hairstyles is their versatility. Whether your toddler has thick, curly hair or fine, straight strands, there’s a beaded style that’ll work beautifully. Some styles take just five minutes to create, while others are perfect for special occasions when you have a bit more time. Best of all, most of these looks can be worn for several days, making them a practical choice for busy parents. In this guide, we’ll walk through twelve adorable beaded hairstyles that toddlers genuinely love—styles that look impressive, feel comfortable to wear, and actually hold up to the demands of toddler life.
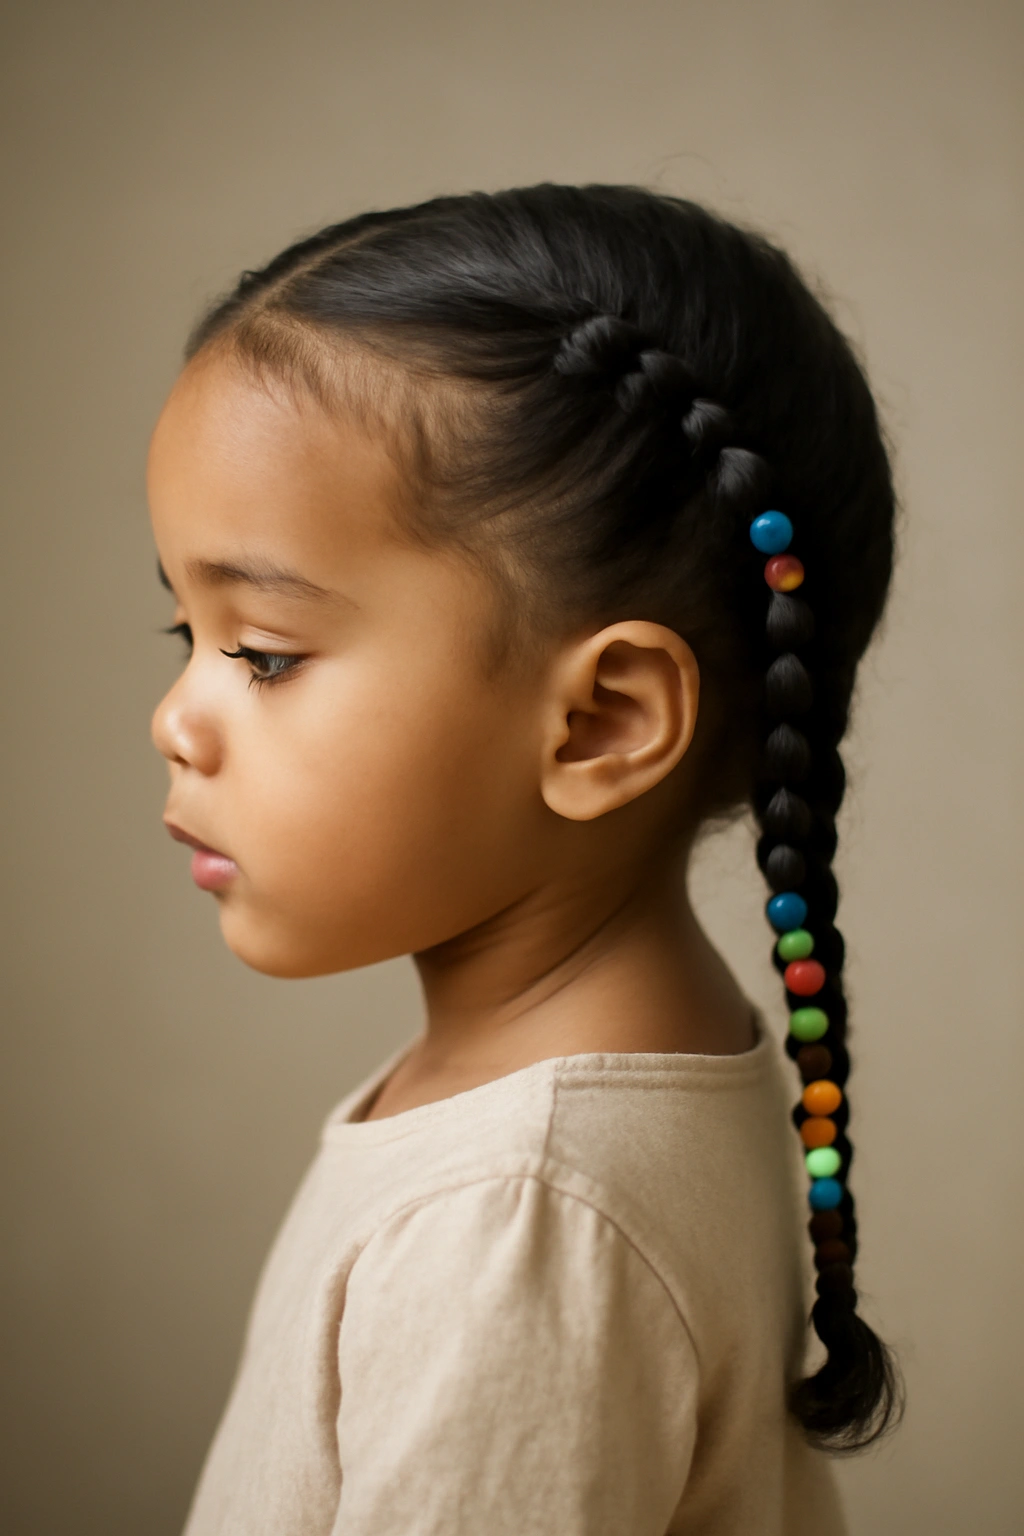
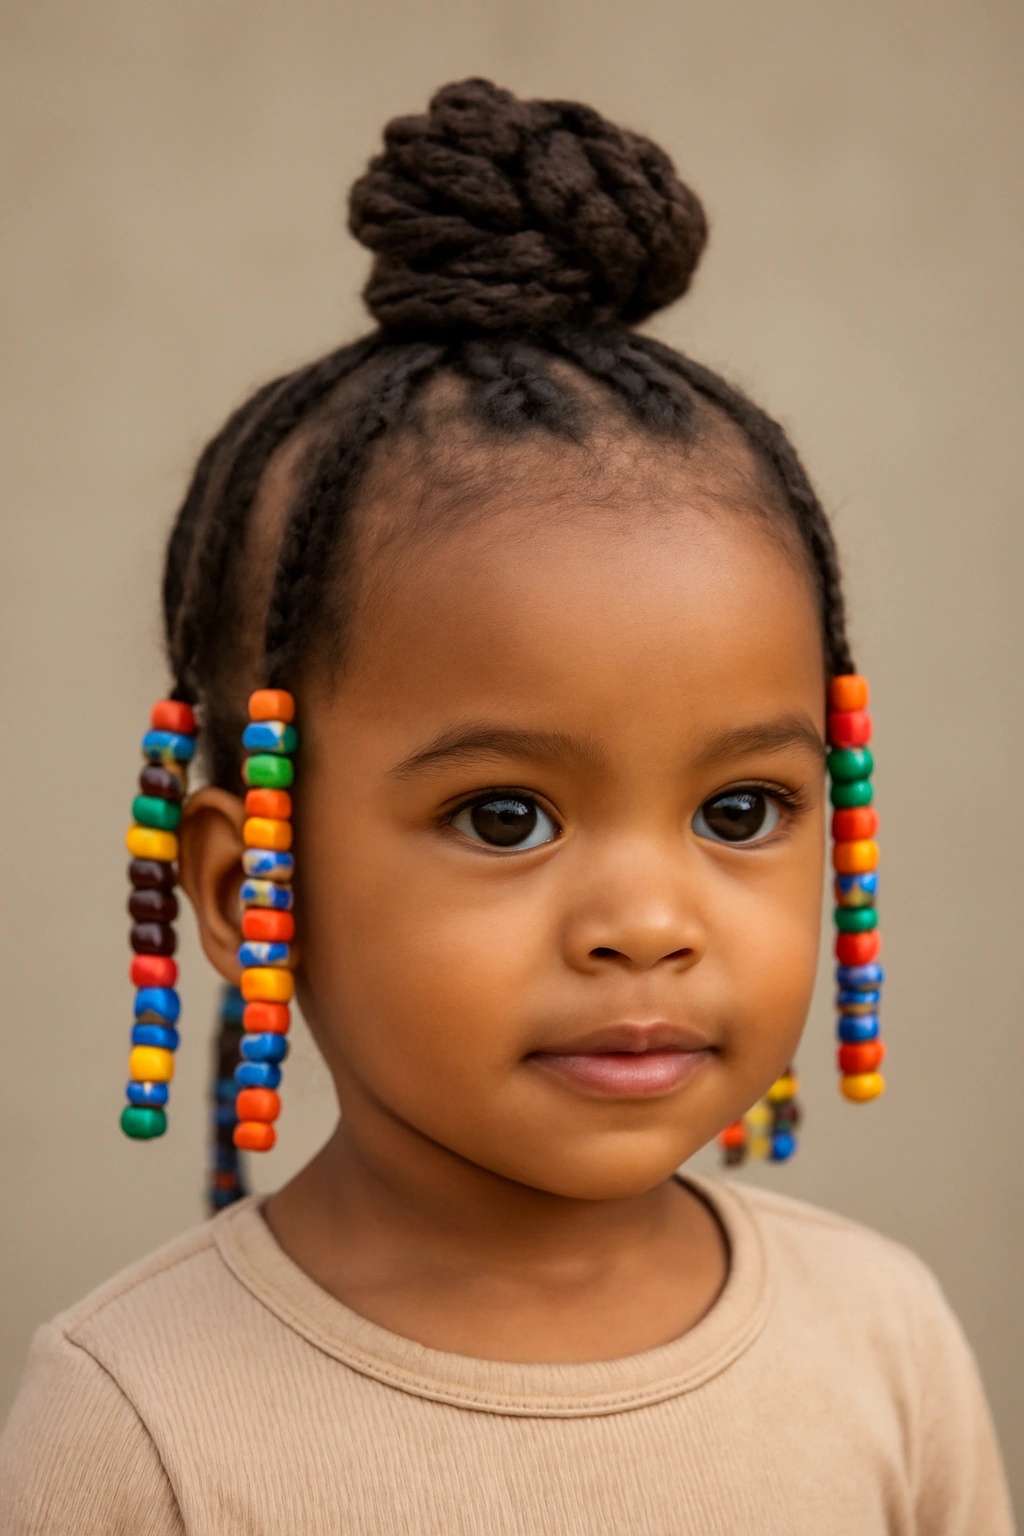
1. Single Beaded Braids
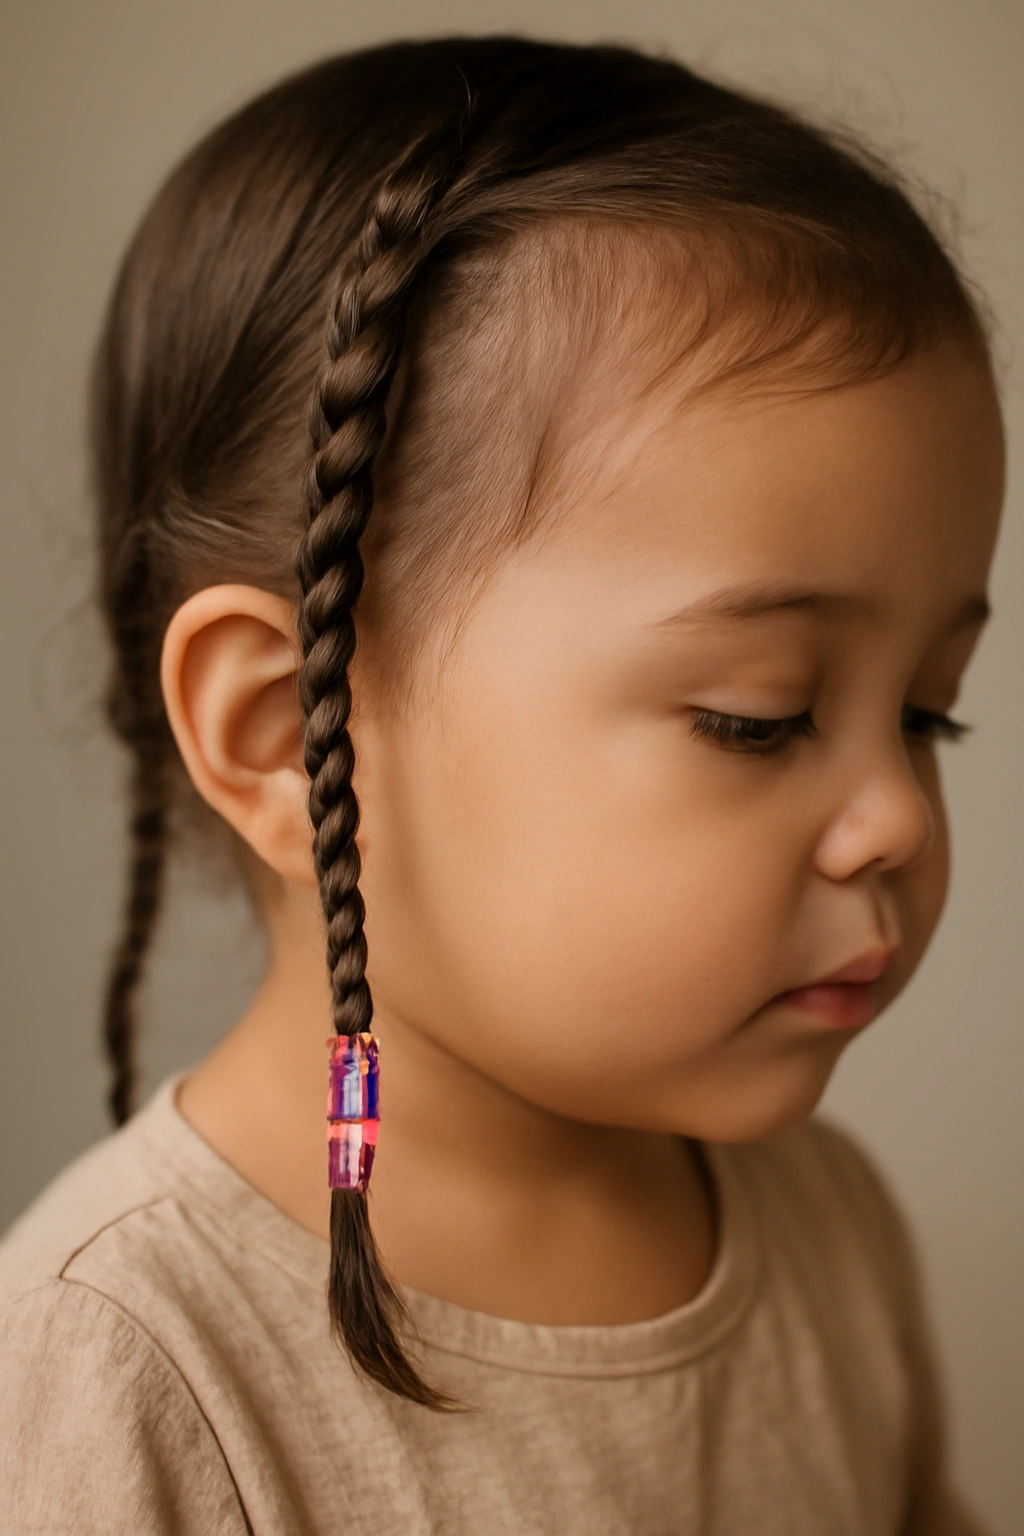
Single beaded braids are the perfect starting point for toddlers new to beaded styles. This look involves creating one or two traditional three-strand braids and securing a few beads near the bottom, where they catch the light whenever your toddler moves. The simplicity is precisely why this style works so well—it’s easy enough for beginners to master, yet distinctive enough to feel special. Single braids work beautifully on all hair types and can be worn loose or pinned to the side for variety.
Why This Style Works for Toddlers
Single braids require minimal hair handling, which means less time sitting still and less risk of discomfort. The beads add visual interest without overwhelming a small face, and they create a satisfying “click-click” sound when they move together, which toddlers find absolutely delightful. This style also grows out gracefully—as hair lengthens naturally, the braid simply elongates without looking unkempt.
How to Create It Successfully
- Section off a portion of hair from the crown or side, then braid down to about an inch from the ends
- Thread small decorative beads (roughly the size of a pea) onto the tail of the braid before securing with a small elastic
- Use beads with larger openings so they slide onto the hair easily without snagging or pulling
- Consider alternating bead colors for a more playful effect, or keep to a single coordinating color for sophistication
- If your toddler’s hair is very fine, double the strand thickness by braiding closer to the scalp where hair is naturally fuller
Pro tip: Let your toddler choose the bead colors—making it their choice dramatically increases the chances they’ll actually want to wear it without complaint.
2. Two-Strand Twist with Beads
Two-strand twists offer a softer, more delicate look than traditional braids, and they’re surprisingly easy to create even on toddler-length hair. This style involves twisting two sections of hair together in a spiral motion and threading beads onto the twisted strand. Two-strand twists are particularly stunning on curly and textured hair, where they add dimension and hold beautifully without tension.
What Makes This Style Special
Twists created with just two strands tend to feel less restrictive than three-strand braids, making them ideal for toddlers with sensitive scalps. The beads glide naturally along the twisted strand and sit exactly where you place them, creating a polished, intentional look. This style also develops personality as the days wear on—the twist naturally loosens slightly, creating a more relaxed, romantic aesthetic by day three or four.
Application Tips for Success
- Start with lightly dampened hair or add a small amount of leave-in conditioner to make the strands easier to work with
- Divide a section of hair into two equal parts, then cross one strand over the other continuously down the length
- Slide beads onto the completed twist while holding it steady, spacing them about an inch apart for movement and visual appeal
- Secure the ends with a small elastic that matches your toddler’s hair color to keep it subtle
- Create multiple twists across the head for a more dramatic effect, or stick with one or two for understated elegance
Worth knowing: Two-strand twists actually hold better on slightly textured hair than on completely straight, slippery strands, so don’t hesitate to add texture with a light mousse if your toddler has very fine, straight hair.
3. Bubble Braids with Beads
Bubble braids are playful, visually interesting, and genuinely easier than they look. This style involves creating a braid from the crown and adding small elastic sections along the length, creating a “bubble” effect where each section puffs out slightly. Adding beads at each bubble junction takes the style from cute to absolutely charming and gives toddlers a tactile element they can feel as they move.
Why Toddlers Adore Bubble Braids
The bubbles create dimension and texture that makes hair look fuller and more voluminous than it actually is—perfect for fine or thin toddler hair. The beads catch light and create visual interest that holds attention. Additionally, this style is genuinely fun to create together; many toddlers enjoy watching the bubbles form as you add each elastic.
Step-by-Step Creation Process
- Braid loosely from the crown downward, using just a light tension so the braid isn’t too tight against the scalp
- Starting at the top and working downward, section the braid into 2-3 inch segments and secure each with a small elastic
- Gently pull each braided section outward to create a puffy “bubble” effect, working from top to bottom
- Add a single bead to each elastic, threading it onto the elastic before cinching it fully, or slide beads onto each bubble after completing the style
- Vary bead sizes or colors at each level for a rainbow effect, or keep beads uniform for a more streamlined appearance
Pro tip: Use elastics in colors that match the beads—this creates a cohesive look rather than visible elastic interrupting the flow of the design.
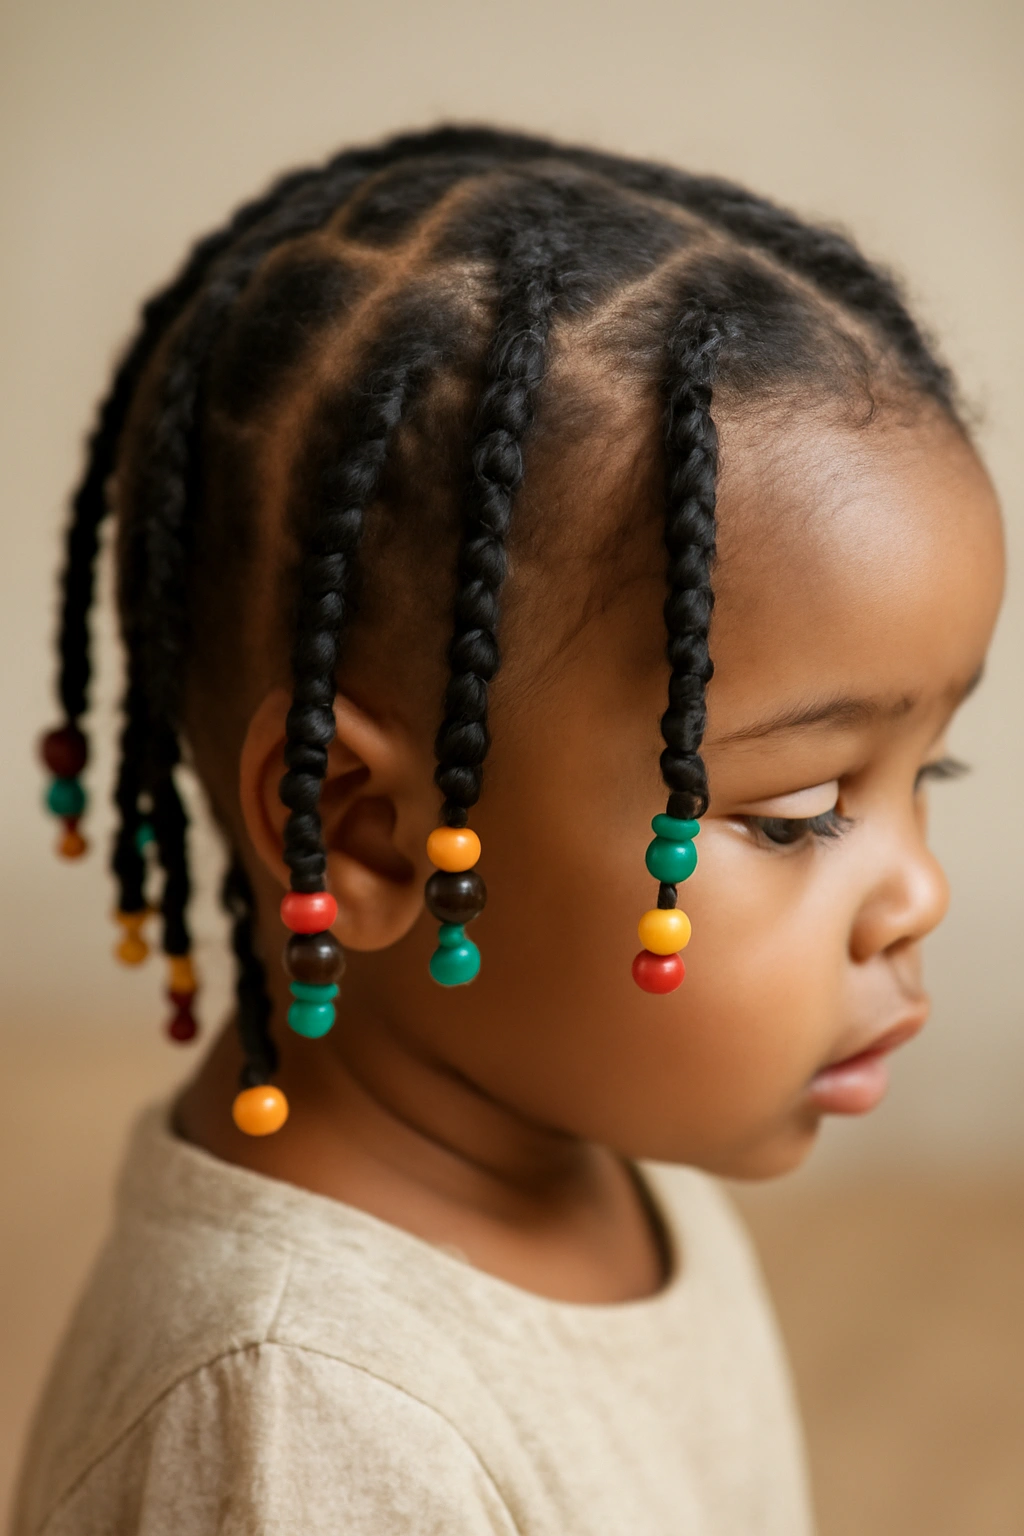
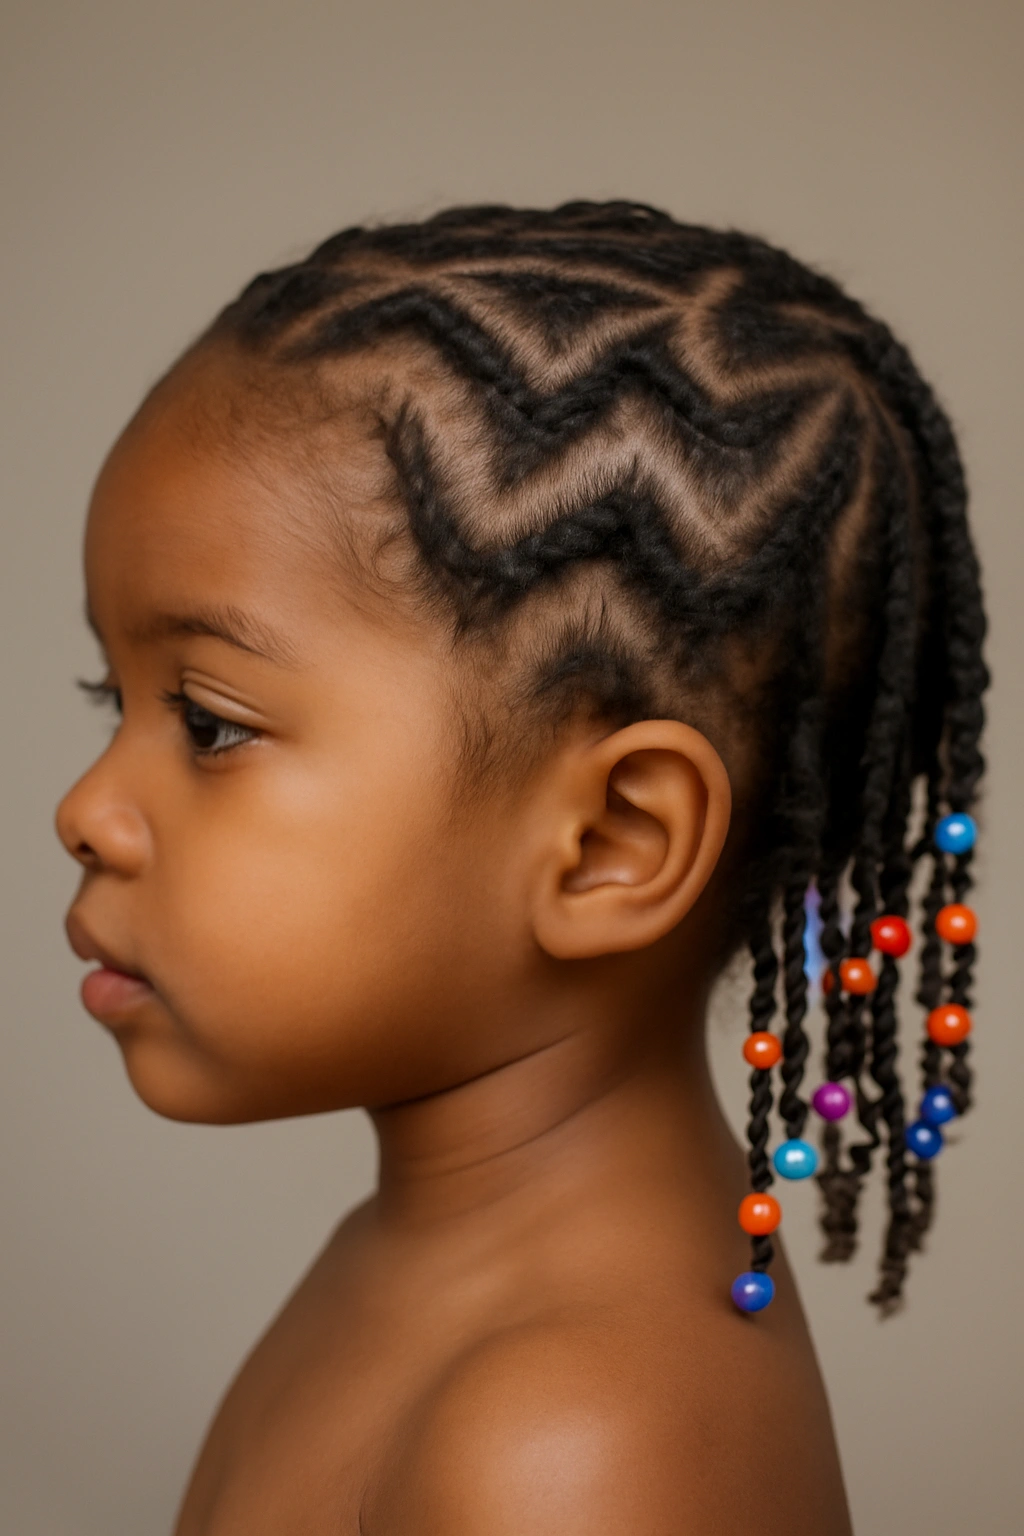
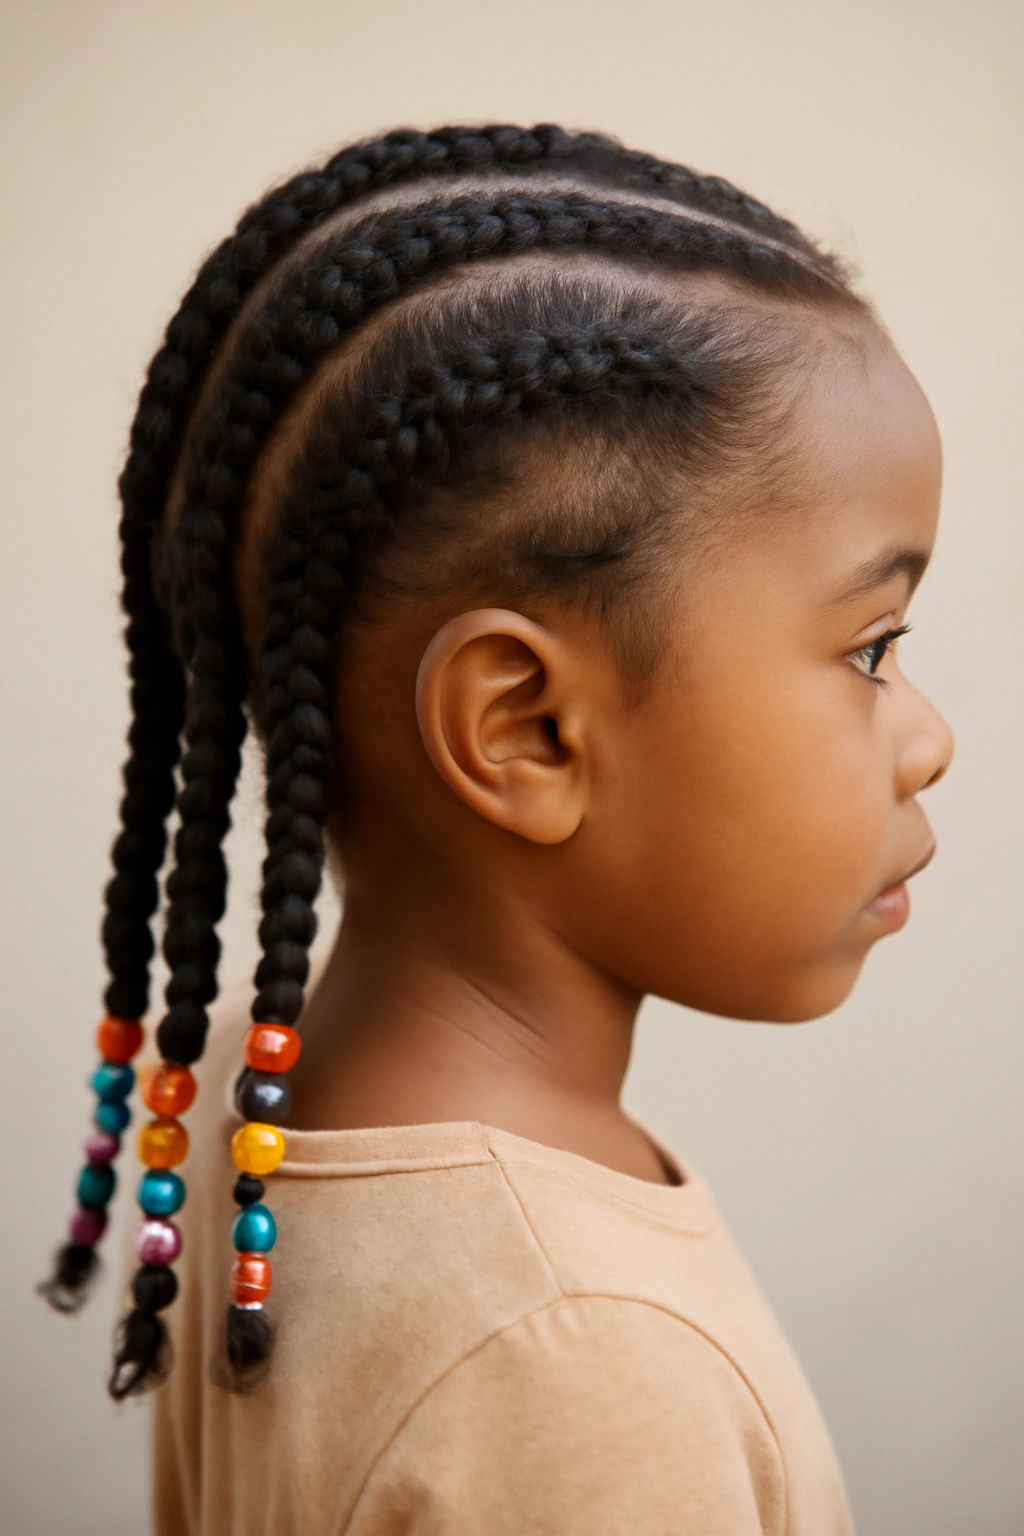
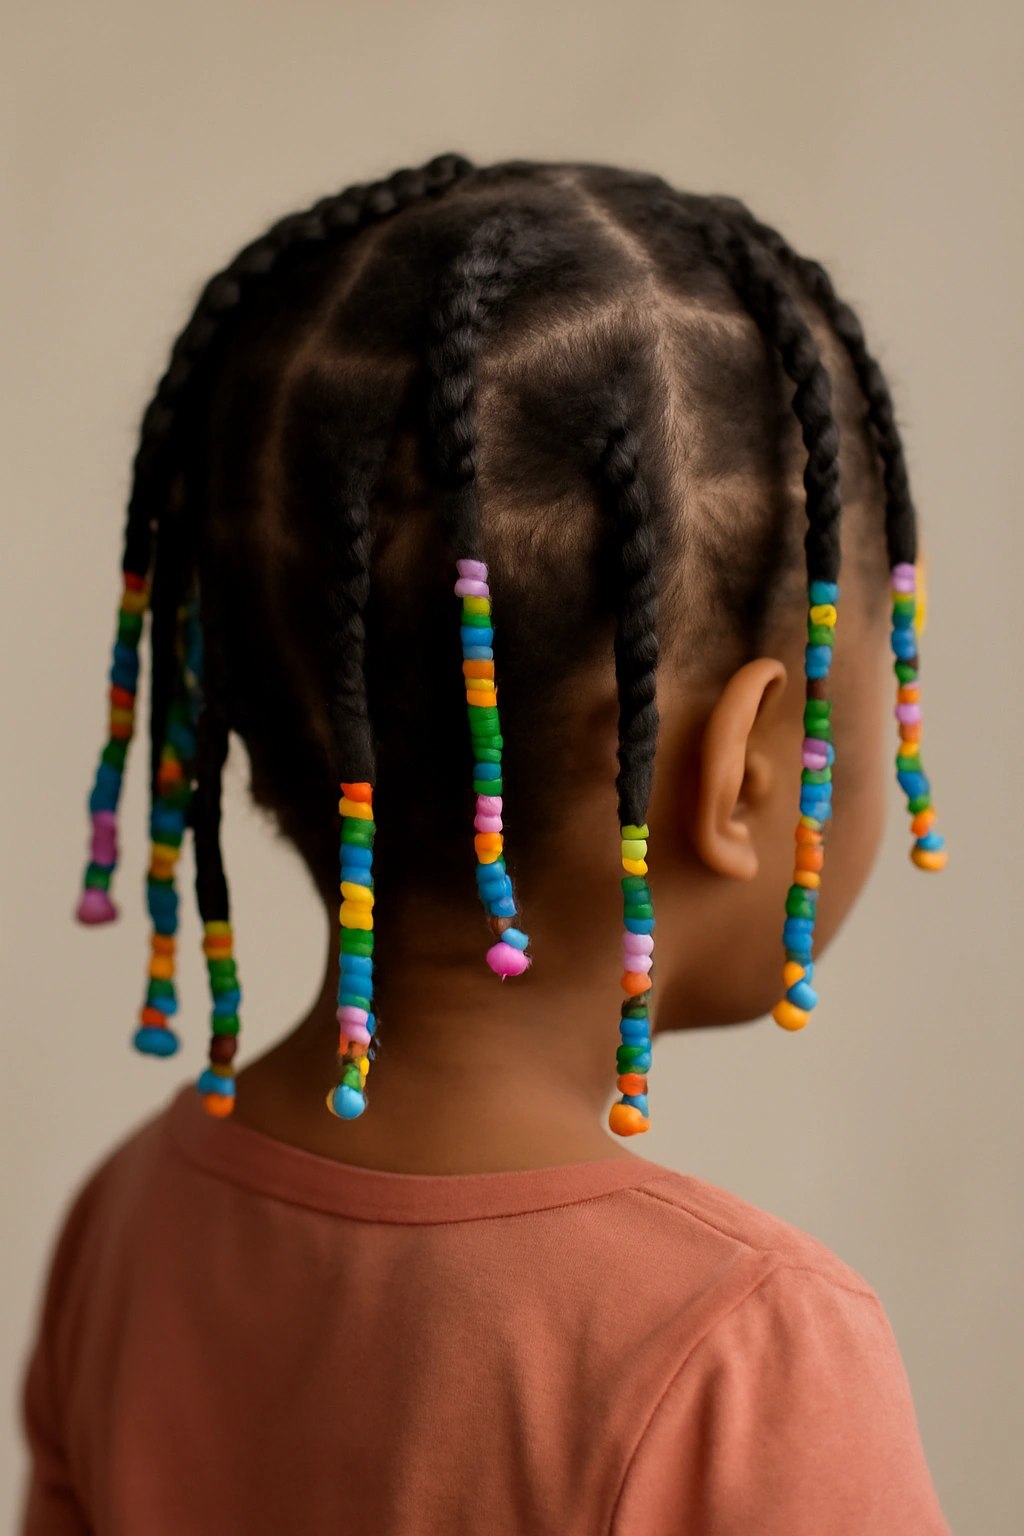
4. Cornrow Braid Grid
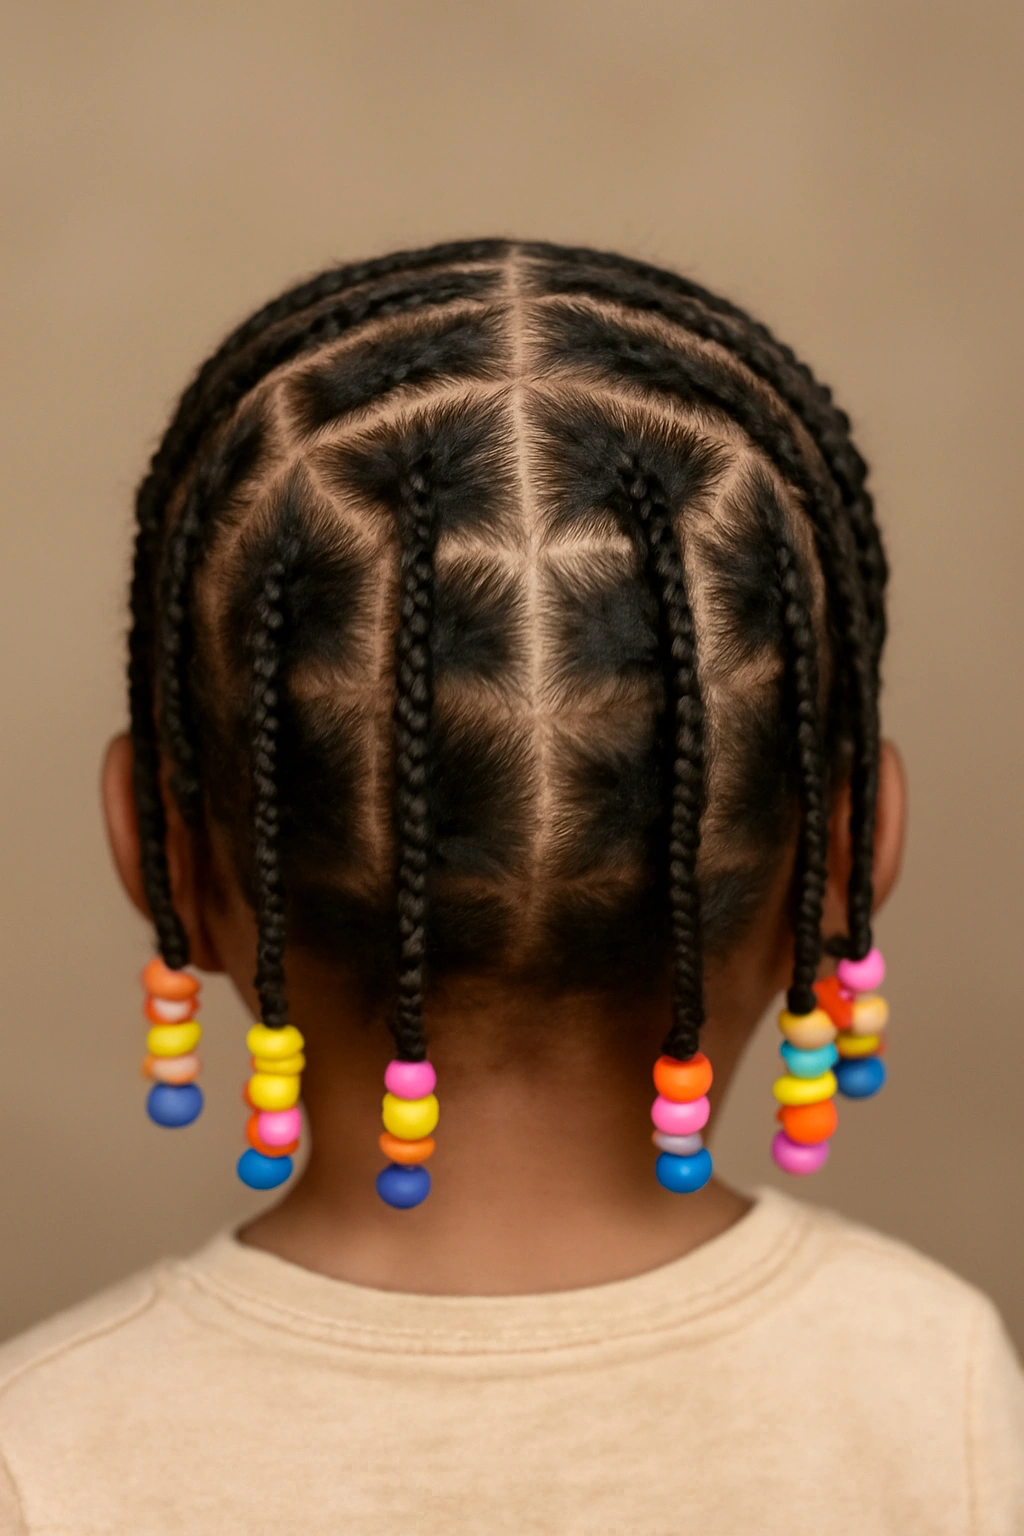
A cornrow grid involves creating multiple parallel cornrows that run either straight back or in a crisscross pattern, with beads threaded into the ends or positioned along the length. This style is a toddler’s dream because it’s versatile, looks impressive, and the grid pattern has an almost meditative appeal to young children. Cornrows hold exceptionally well, making this an ideal style for active toddlers who spend their days playing hard.
The Appeal of Structured Cornrows
Cornrows keep every strand in place through snacks, naps, and backyard adventures, so you get multiple wear days without the style falling apart. The geometric precision of a grid appeals to toddlers who are drawn to patterns and order. Additionally, the repetitive pattern makes the beaded sections feel intentional and cohesive rather than random.
How to Braid a Toddler-Friendly Grid
- Divide hair into equal sections using clips or ties—aim for four to six sections depending on hair density
- Braid each section using the cornrow technique (braiding close to the scalp using the underhand method, incorporating hair as you go down)
- Thread beads onto each completed cornrow before securing the ends, or add beads after braiding by threading them onto the braided strand
- If creating a crisscross grid, position cornrows diagonally across the head rather than straight back for a more dynamic look
- Space beads roughly half an inch apart for visual rhythm, or cluster them at the ends for a different effect
Worth knowing: Cornrows require slightly more tension to hold properly on toddlers with very loose curl patterns, but they’re absolutely achievable—the key is braiding close enough to the scalp that the braid sits flat and doesn’t shift when your toddler moves.
5. Beaded High Ponytail
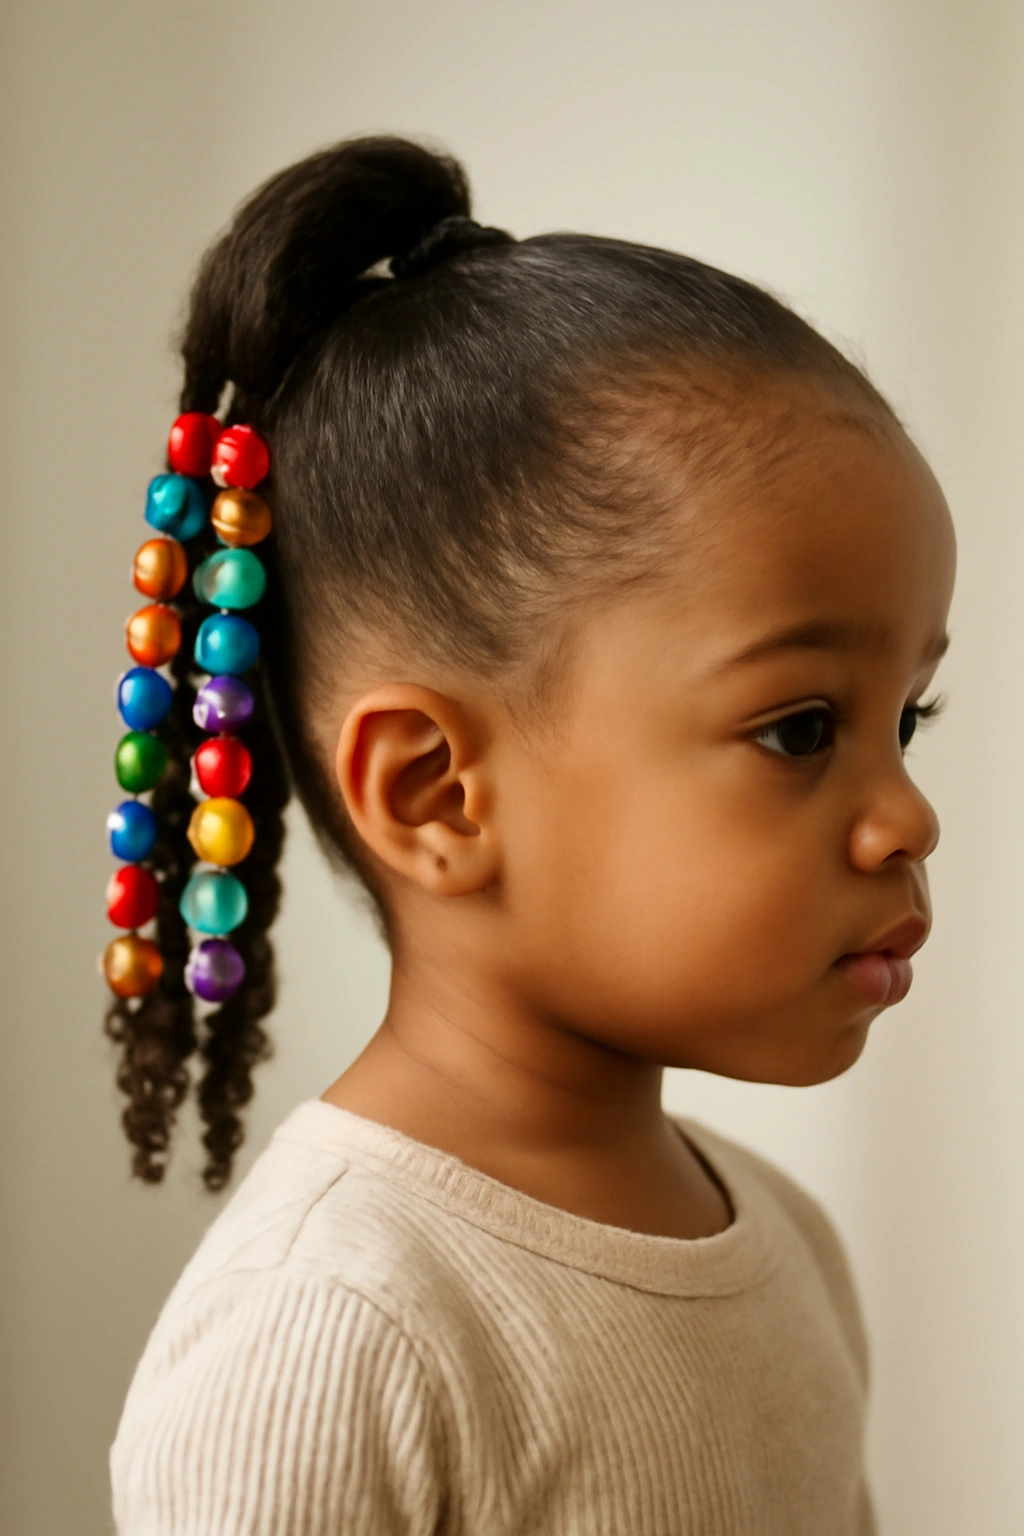
A high ponytail is timeless for a reason, and adding beads transforms it from ordinary to special. This style gathers hair at the crown and secures it with an elastic, then threads beads onto the ponytail tail itself. It’s quick to create, comfortable to wear for extended periods, and gives toddlers an unobstructed view of the world—no hair falling into their faces during playtime or meals.
Why This Simple Style Works So Well
High ponytails keep hair completely off the face and neck, making them ideal for warm weather or active play. The beads add a decorative element without requiring any special braiding skills. This style also feels less precious than some elaborate braids, so toddlers are more likely to leave it alone rather than pull it out. It’s also reversible—you can remove the elastic in seconds if your child decides they want their hair down.
Creating a Secure, Comfortable Ponytail
- Gather hair at the crown using both hands, smoothing any flyaways as you bring sections together
- Use a small elastic to secure the ponytail, wrapping it around multiple times to ensure it won’t slip
- Gently tease or backcomb the ponytail base to add grip and prevent the elastic from sliding down during active play
- Thread decorative beads onto the ponytail tail, spacing them evenly or clustering them near the ends
- Smooth the ponytail with a fine-tooth comb or your fingers to minimize frizz, then secure with a small finishing spray if needed
Pro tip: If your toddler’s ponytail elastic tends to slip, try securing a tiny clip at the base of the ponytail before adding beads—the clip provides additional anchor points.
6. Side-Swept Beaded Braid
A side-swept braid creates asymmetry that’s visually interesting and feels slightly more sophisticated than a centered style. This look involves creating a single braid from one side of the head, sweeping it across toward the opposite side, and securing it with beads and an elastic. It’s romantic without being fussy, and it works beautifully on toddlers with medium to longer hair.
What Makes Side Braids Special for Toddlers
Sweeping the braid to the side creates an asymmetrical silhouette that draws attention to your toddler’s face beautifully. This style keeps all hair off one side of the face while leaving the other side slightly softer and less restrained, creating a balanced look. The beads positioned along the sweep catch light and movement, adding dimension to what would otherwise be a simple braid.
Technique for a Polished Side Braid
- Start by creating a basic three-strand braid near the temple on one side of the head, braiding down toward the nape
- Add beads as you braid (threading them onto one strand before crossing it over the other) or after completing the braid
- Continue braiding down the side and across the back of the head, maintaining even tension throughout
- Secure the end with a small elastic and add final beads if desired
- Smooth flyaways around the face with a tiny bit of edge control product or water on a toothbrush
- Pin the braid behind the opposite ear if desired, or let it rest naturally on the shoulder
Worth knowing: Side braids look best when the strands are slightly loose and relaxed—overly tight braiding can create tension on the hairline and look severe rather than charming.
7. Zigzag Cornrows with Beads
Zigzag cornrows create movement and playfulness that make toddlers smile every time they catch their reflection. This style involves braiding cornrows in a diagonal or wavy pattern rather than straight back, which makes the style feel more dynamic and fun. Adding beads to zigzag cornrows amplifies the playful effect, creating a look that’s both sculptural and joyful.
The Visual Magic of Zigzag Patterns
Zigzag cornrows create an optical illusion of movement even when completely still, which appeals to toddlers’ natural love of visual interest. The pattern can be customized—tight zigzags for a bold statement or gentle waves for a softer look. This style showcases creativity and individuality, making your toddler feel seen and celebrated rather than just groomed.
Creating Zigzag Cornrows Successfully
- Divide the hair into sections as you would for a traditional grid, but instead of braiding straight back, angle each braid diagonally
- Braid alternately from left to right and right to left, creating a zigzag pattern across the head
- Add beads as you braid or thread them on after completing the cornrows, positioning them at the peak of each zigzag for visual interest
- Ensure each braid sits flat against the scalp and maintains consistent tension—loose braiding can cause the zigzag to lose its definition
- Consider using different bead colors to emphasize the zigzag pattern, alternating colors with each change in direction
Pro tip: Mark your zigzag pattern lightly with chalk or a temporary hair marker before braiding to maintain consistent angles and spacing.
8. Beaded Crown Braid
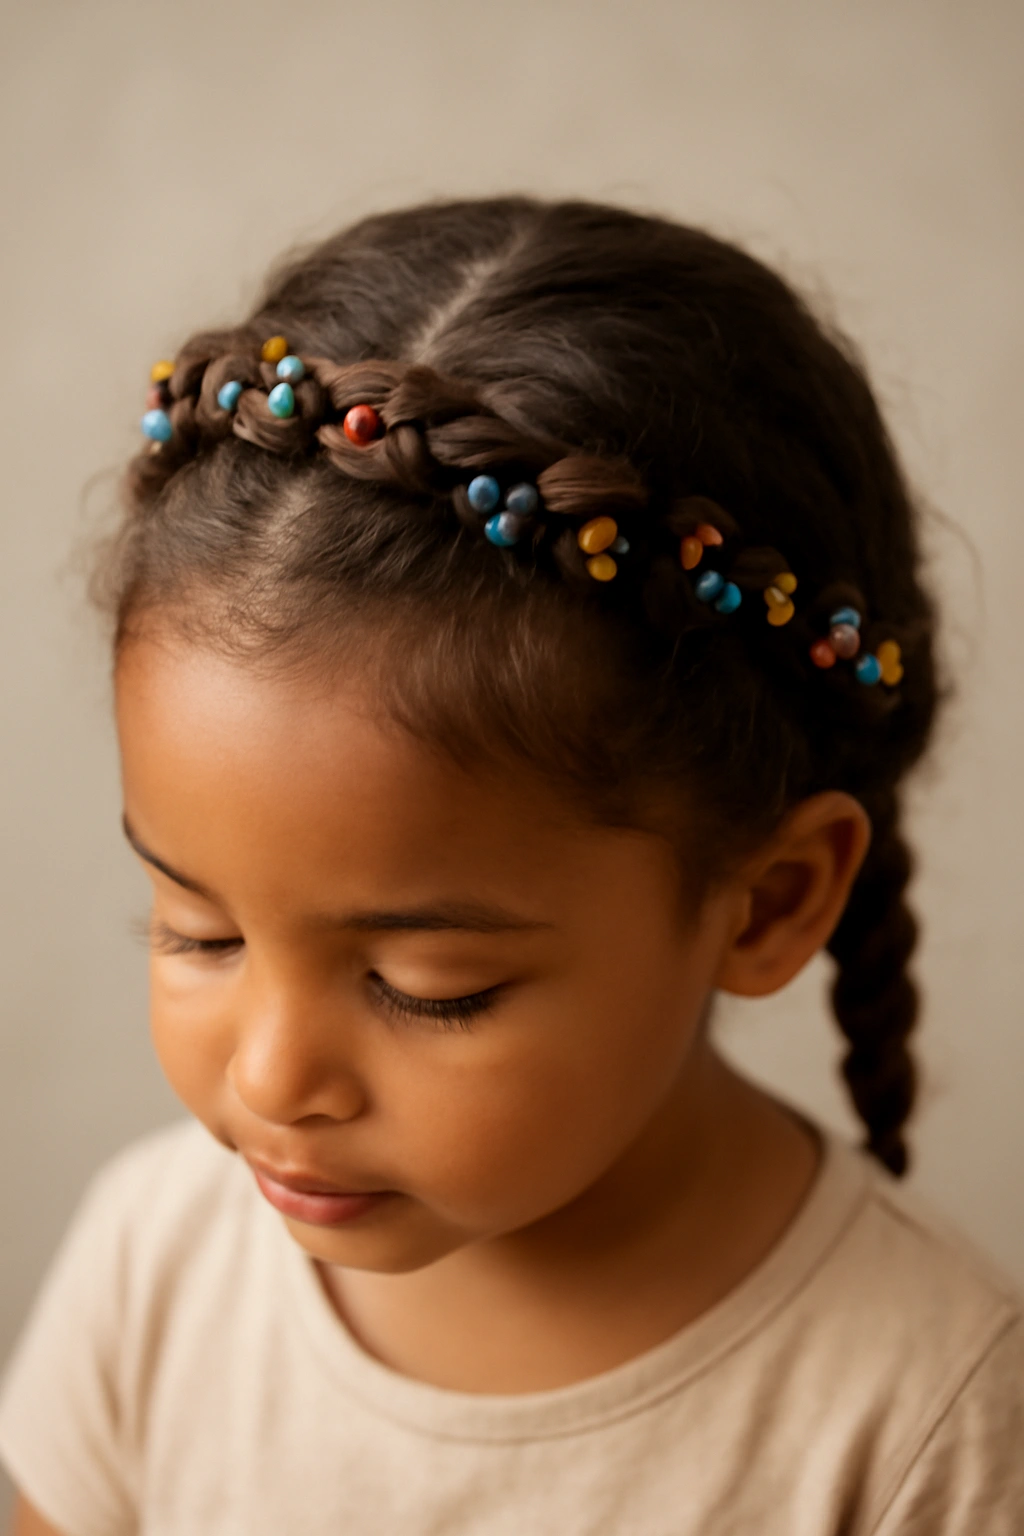
A crown braid creates the illusion of a halo circling the head, which absolutely delights toddlers. This style involves braiding a single braid around the perimeter of the head from temple to temple, creating a crown-like effect. Adding beads transforms this whimsical style into something truly special—perfect for birthday parties, family photos, or any day when your toddler wants to feel royalty.
Why Crown Braids Feel Magical to Toddlers
Braids that wrap around the head create a sense of being adorned and celebrated, which resonates deeply with young children. The beads positioned along the crown catch light and create a sparkly effect that feels genuinely ceremonial. This style also keeps hair completely off the face and neck, making it both beautiful and practical.
Step-by-Step Crown Braid Instructions
- Section off hair from temple to temple along the front and side of the head, leaving the rest down
- Beginning at one temple, create a three-strand braid that follows the natural curve of the head
- Add beads as you braid, threading them onto strands before crossing them over each other
- Continue braiding around the side and back of the head, maintaining even tension and following the contour of the scalp
- End the braid at the opposite temple and secure with a small elastic
- Leave the bottom layers of hair down and wavy, or braid them as well for a completely wrapped effect
- Add a final decorative bead or clip where the braid ends for an intentional finishing touch
Worth knowing: Crown braids look best on hair that’s at least shoulder-length or longer, but you can create a modified version on shorter hair by braiding only partway around the crown.
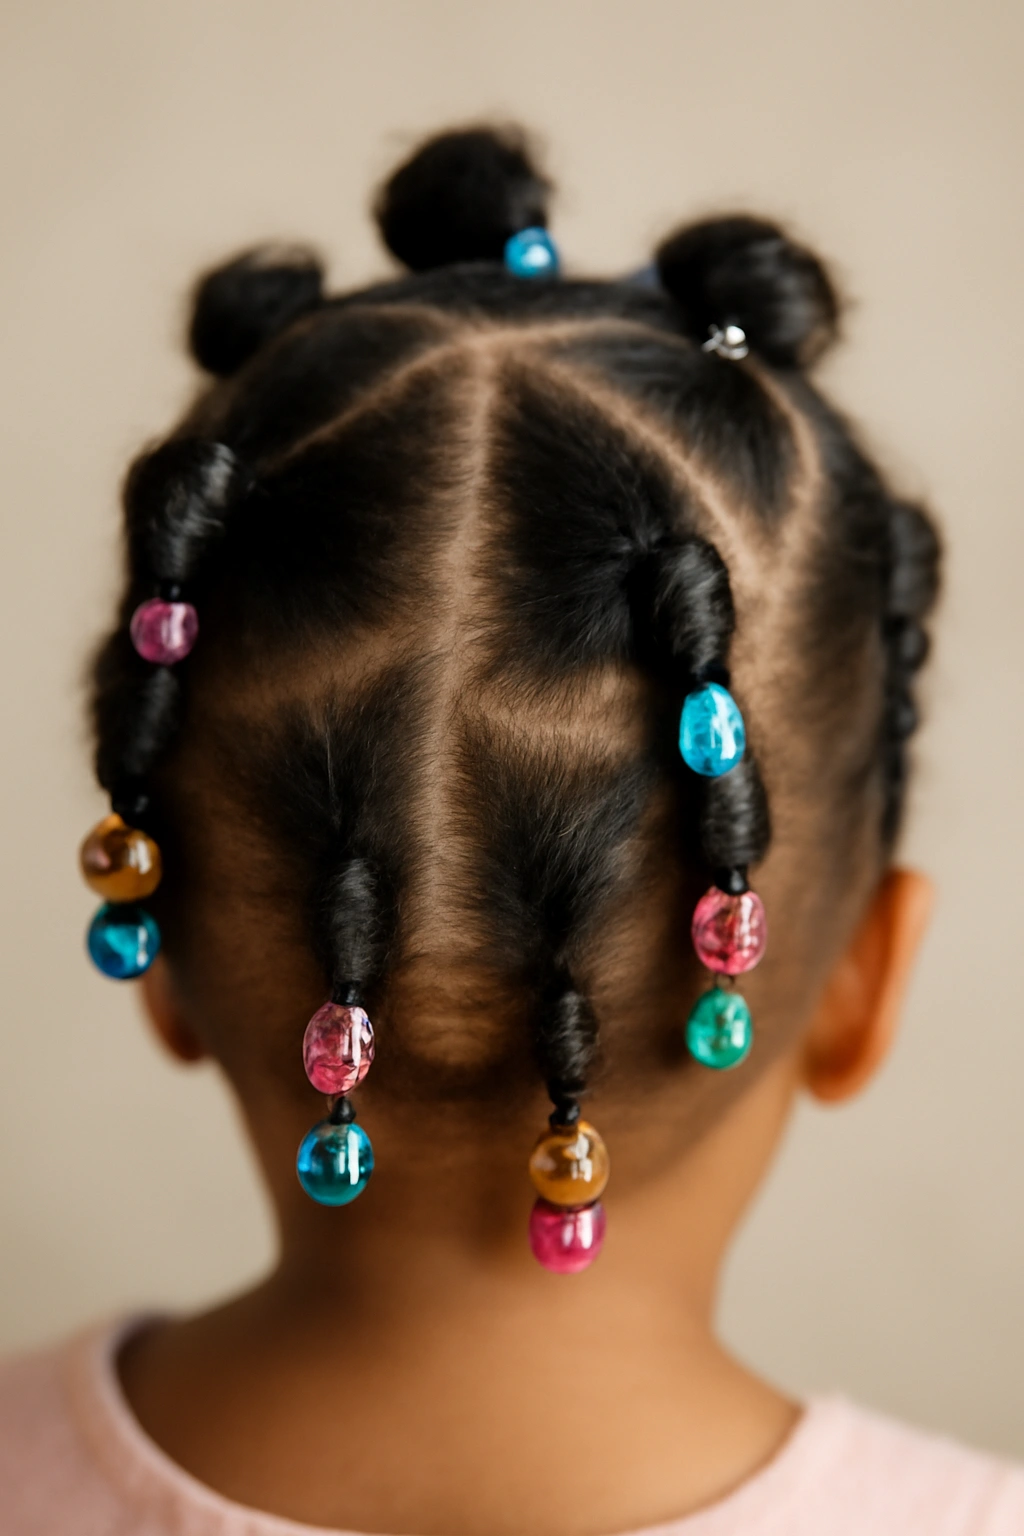
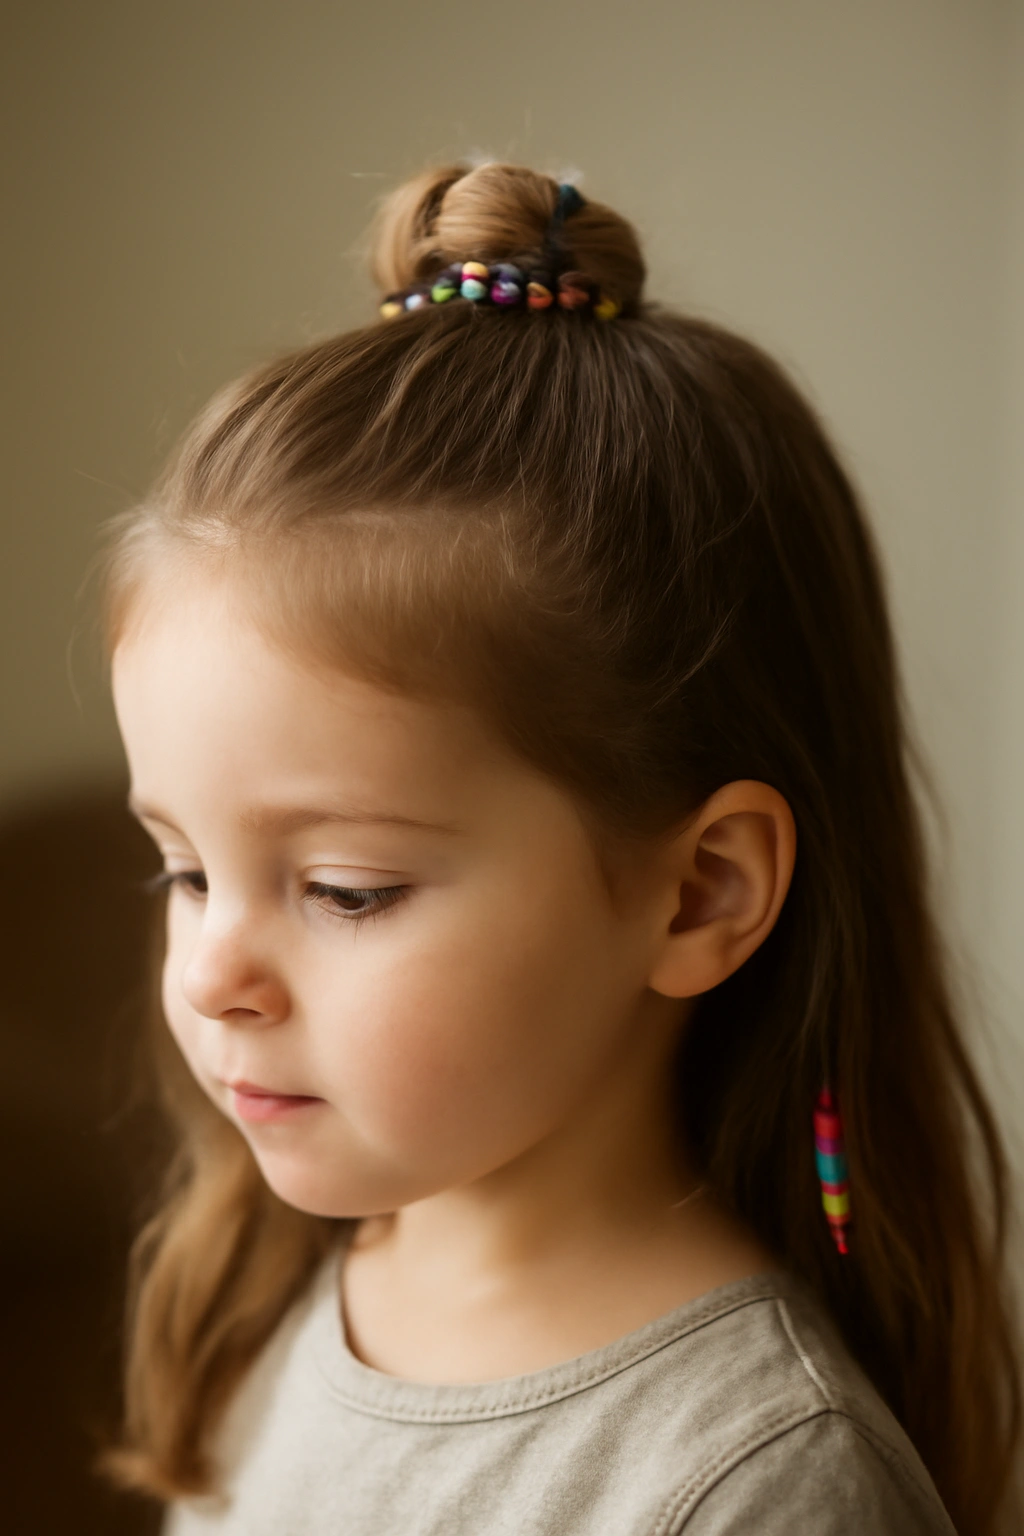
9. Twisted Topknot with Beads
A twisted topknot is basically a bun created from twisted rather than braided strands, and it’s surprisingly simple to create on toddler hair. This style involves twisting sections of hair and coiling them at the crown, securing them with an elastic, then adding beads for decoration. It’s adorable, keeps hair completely off the face, and has enough substance to actually hold throughout a busy toddler day.
Appeal of the Topknot for Toddlers
Topknots feel playful and special without being elaborate or overly precious. They work on all hair types and textures, and they’re quick enough to create during a morning routine without causing stress. The beads add visual interest and make the topknot feel intentional rather than accidentally messy. Plus, toddlers love feeling the weight of their hair piled up on top of their head—it feels grown-up and sophisticated.
Building a Secure Topknot
- Gather hair at the crown into a high ponytail using a small elastic, creating a base that won’t slip
- Divide the ponytail into two to four sections, depending on hair thickness
- Twist each section individually, working from root to tip and maintaining consistent tension
- Coil each twisted section around itself at the crown, creating spirals that stack on top of each other
- Secure the coiled sections with bobby pins inserted at multiple angles to prevent slipping
- Thread decorative beads onto the bobby pins or onto individual twisted strands before coiling
- Set with a light finishing spray to smooth flyaways and maintain hold throughout the day
Pro tip: Use bobby pins in colors that match your toddler’s hair to make them nearly invisible, which creates a more polished final look.
10. Half-Up Beaded Bun
A half-up bun combines the best of both worlds—hair is partially secured and styled while still maintaining the freedom of wearing it down. This style involves pulling the top half of the hair back into a small bun at the crown and securing it with beads and an elastic. It’s the ideal choice for toddlers who want to keep hair off their face but aren’t ready for a full updo.
Why Half-Up Styles Work for Toddler Hair
Half-up buns give toddlers the visual satisfaction of having “done” hair without the commitment or potential discomfort of a full upstyle. The beads add decoration without creating excessive weight or tension on young scalps. This style also allows for styling versatility—you can leave the bottom half of hair straight, curled, braided, or adorned with additional accessories.
Creating a Picture-Perfect Half-Up Bun
- Section off the top half of the hair by drawing an imaginary line from ear to ear across the crown
- Gather this top section into a ponytail at the crown using a small elastic
- Twist or braid the ponytail section (depending on your toddler’s hair texture and the look you want)
- Coil the twisted or braided section into a small bun and secure with bobby pins
- Thread beads onto bobby pins or the base of the bun to add visual interest
- Leave the bottom half of hair down and smooth, or add waves, additional braids, or accessories
- Use a light hairspray to smooth flyaways and maintain the integrity of the bun structure
Worth knowing: Half-up buns look best when the bun sits slightly higher than center—positioning it closer to the crown creates a more flattering, proportionate look on toddler-sized heads.
11. Feed-In Braids with Beads
Feed-in braids are a more advanced technique where strands are added to the braid as you go down, creating a braid that sits flat against the scalp and appears fuller and more substantial than a regular three-strand braid. This style is particularly beautiful on toddlers with finer or thinner hair, as the feed-in technique adds dimension and fullness. Adding beads to feed-in braids creates a sophisticated, polished look that’s impressive without being overdone.
Why Feed-In Braids Create Volume
The feed-in technique naturally creates a fuller-looking braid because you’re incorporating additional hair throughout the braiding process. This makes the style ideal for toddlers whose hair might otherwise look sparse or wispy. The beads positioned along the braid catch light and draw attention to the braid’s texture and dimension, making even fine hair look substantial and styled.
Mastering Feed-In Braids on Toddler Hair
- Start with a small triangular section at the crown and create a basic three-strand braid base
- As you braid, add small sections of loose hair into each strand as you cross them over, gradually incorporating more hair as you work downward
- Continue feeding hair into the braid until you reach the nape, where you can finish with a regular three-strand braid
- Add beads throughout the process by threading them onto strands before crossing them, or add beads after completing the braid
- Create multiple feed-in braids across the head for a more substantial look, or stick with one or two for understated elegance
- Secure the ends with small elastics and thread final decorative beads at the tips
Pro tip: Feed-in braids hold better and create fuller results when done with slightly tighter tension than regular three-strand braids, so don’t be afraid to work with a bit more firmness.
12. Beaded Straw Twists
Beaded straw twists are a modern, playful variation where sections of hair are twisted and then wrapped with colorful straws or tubing before adding beads. This style creates bold, geometric texture that’s absolutely eye-catching. While slightly more involved than some options, straw twists are well worth the effort—they’re genuinely unique and give your toddler an ultra-modern, fashion-forward look that stands out.
The Appeal of Straw Twists for Modern Toddlers
Straw twists create sculpture and dimension that regular twists can’t achieve alone, and the bright colors of the straws add playfulness. This style works beautifully on all hair types and textures, and it’s durable enough for multiple wear days. Toddlers are fascinated by the texture of straw-wrapped twists and enjoy touching and playing with them (carefully), which makes this a style they’ll genuinely want to wear.
Creating Straw Twists Successfully
- Gather decorative straws or plastic tubing in colors your toddler loves (metallic, neon, or pastels all work beautifully)
- Section the hair into portions based on how many straw twists you want to create
- Create a two-strand twist with one section of hair, wrapping the twist with a straw as you go
- Cut straws to length once the twist is complete, or let them extend slightly past the hair ends for a bolder look
- Thread decorative beads onto the straw after the twist is complete, positioning them wherever feels balanced
- Secure the ends with small elastics that match your bead colors
- Create multiple straw twists across the head or concentrate them on one side for asymmetrical flair
Worth knowing: Straws work best on twists rather than braids because the straw can slide directly over the twisted strands without needing to separate three braided sections.
Final Thoughts

Beaded hairstyles transform ordinary days into celebrations of creativity and self-expression for toddlers. The beauty of these styles isn’t just in how they look—it’s in how they make your child feel: seen, celebrated, and confident. Each style in this collection offers different benefits depending on your toddler’s hair type, texture, length, and personality, so don’t hesitate to experiment and find what works best for your unique little one.
Remember that comfort always comes first with toddler hair styling. Beads should never be so heavy that they cause neck strain or headaches, and braids should never be tight enough to create tension on the scalp. If your toddler shows any signs of discomfort—pulling away, touching their head frequently, or complaining of soreness—loosen the style or remove it entirely and try again another day. The goal is for these hairstyles to feel like fun, not like an obligation.
Most importantly, have fun with the process. Let your toddler choose their favorite bead colors, sing songs while you’re styling, and take photos that capture their pride in their new look. These moments of creativity and connection—combined with a hairstyle that makes them feel absolutely fabulous—create memories that’ll last far longer than the style itself.