Braiding natural hair on toddlers requires a different mindset than styling longer, older-kid hair. You’re working with shorter lengths, sensitive scalps that can’t tolerate tight tension, and little ones who have zero patience for a styling session that stretches past 10 minutes. The good news? Some of the most charming, protective, and practical styles for natural toddler hair rely on braiding techniques that are simpler than you might think, kinder to developing hair, and genuinely adorable enough that strangers will stop you on the street asking how you created them.
The styles that work best for toddlers with natural hair aren’t the complex, salon-level braids you see on older kids. Instead, they’re styles that work with your toddler’s hair texture and length, that require minimal tension on the scalp and hair roots, and that can actually stay in place without tight rubber bands cutting into delicate skin. When you choose the right braiding approach, you’re not just creating a cute look—you’re protecting your toddler’s hair while it grows, preventing breakage and damage that accumulates from daily manipulation, and establishing a foundation for healthy hair growth that will serve them for years to come.
Natural toddler hair thrives when it’s moisturized, protected, and handled gently. Braids accomplish all three when they’re done with the right technique and intention. A well-executed braid keeps natural texture intact, reduces daily friction and breakage, locks in moisture longer than loose hair, and looks undeniably sweet while doing it. The styles below range from quick weekday braids that take 5 to 10 minutes to fancier weekend styles worth the extra time investment.
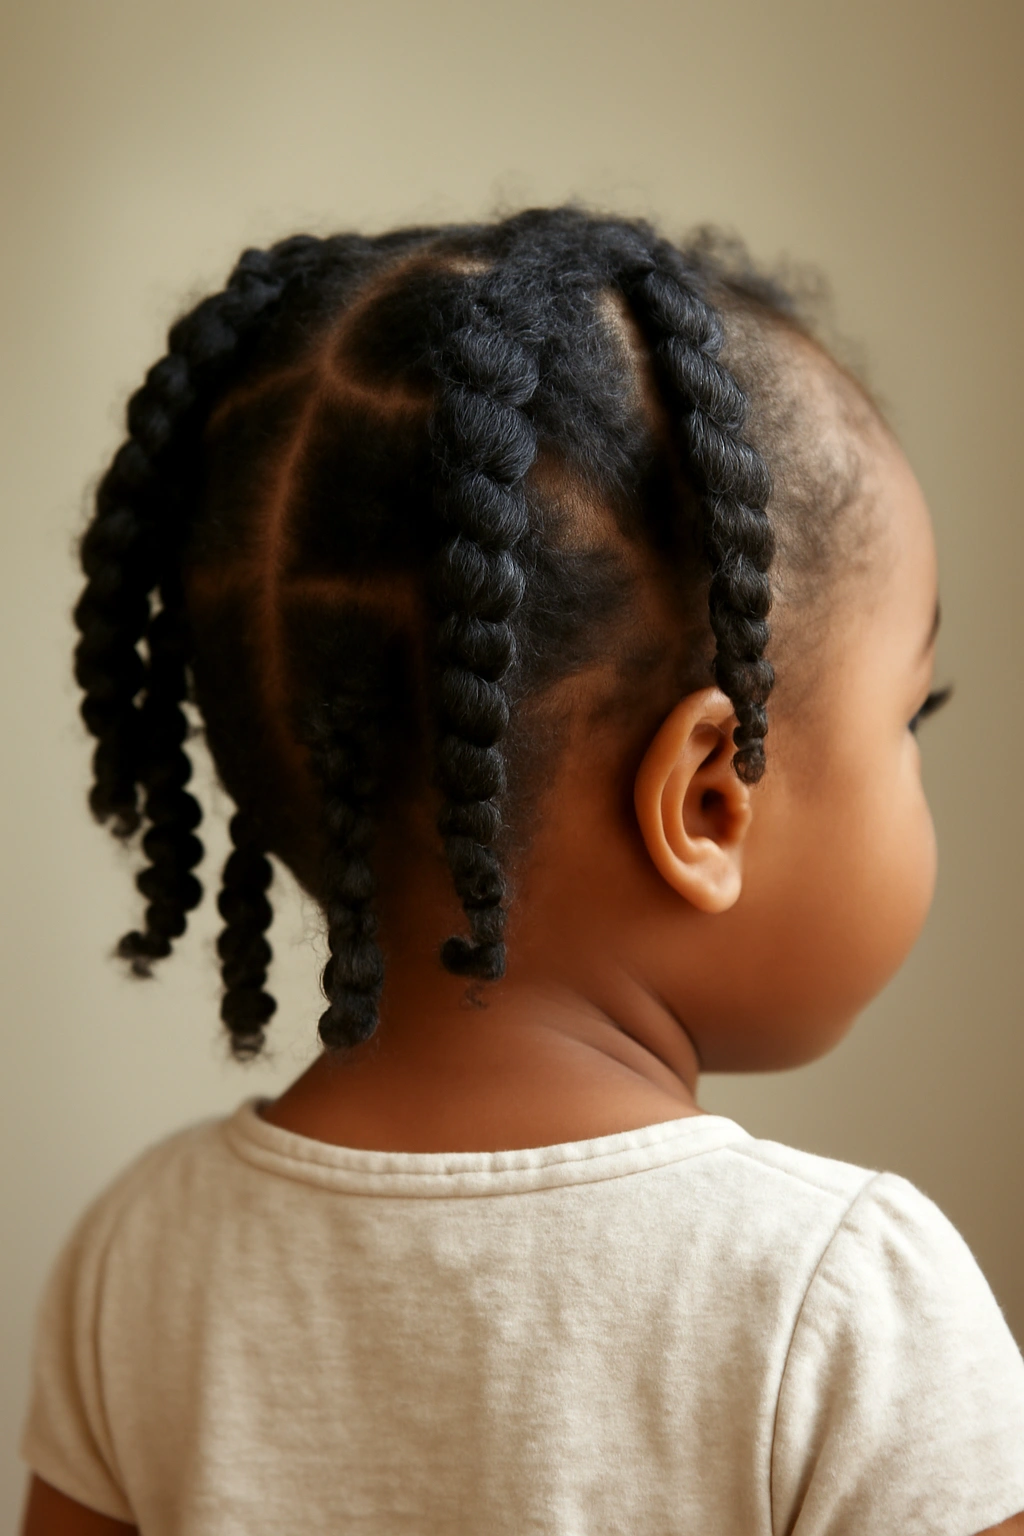
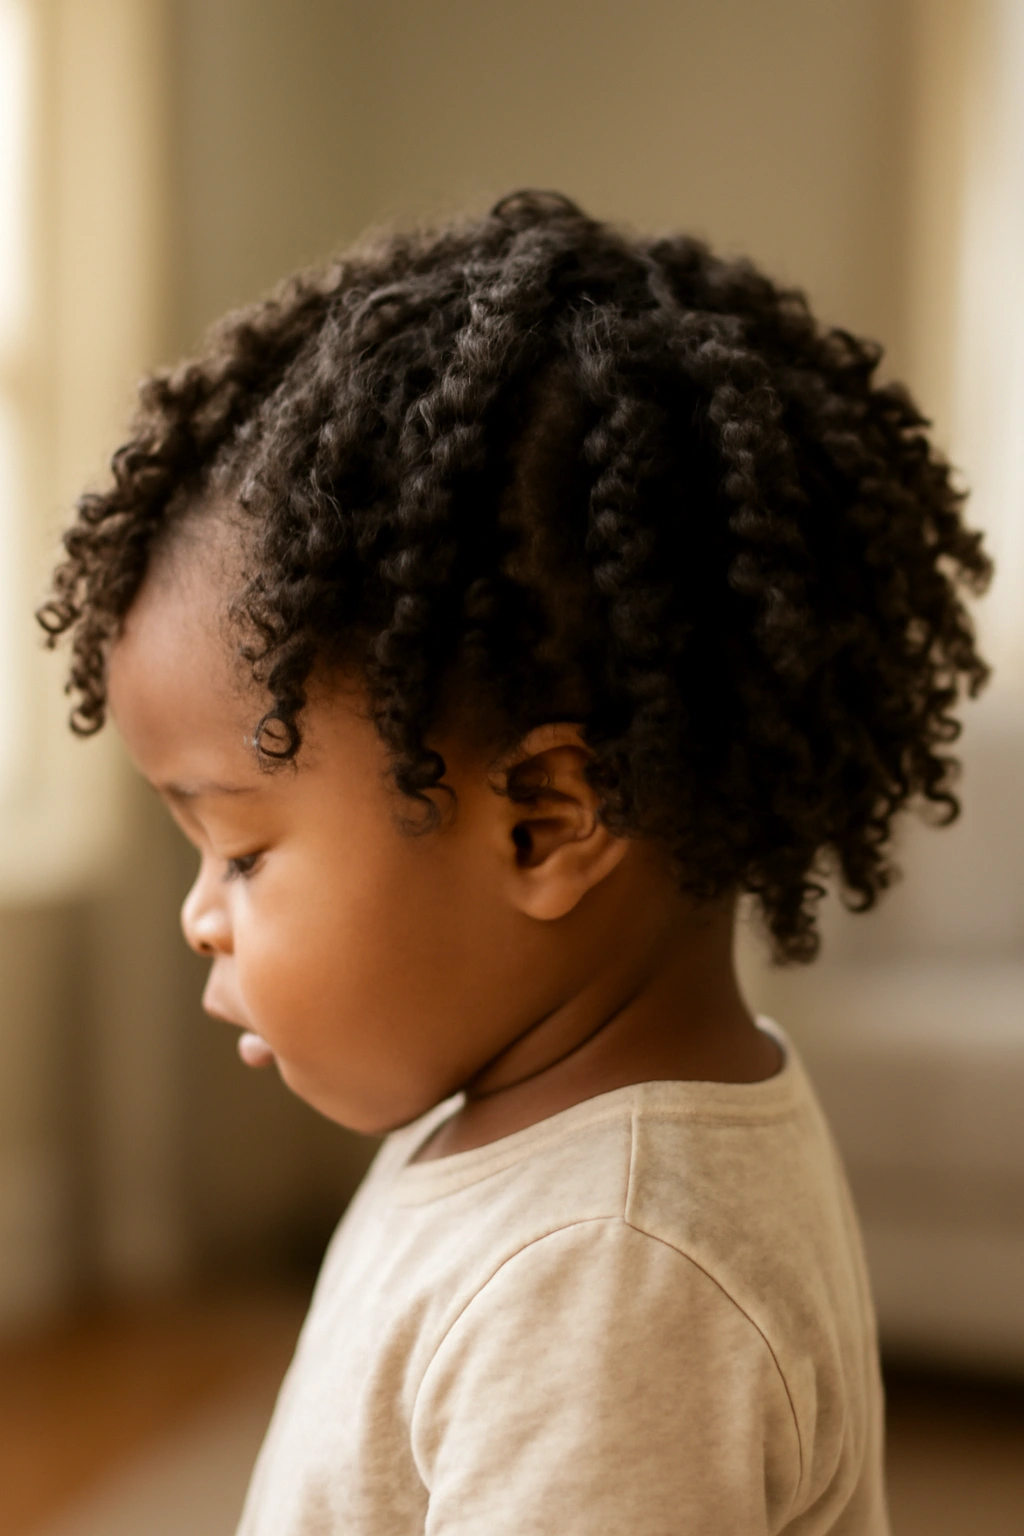
1. Twisted Pigtail Braids
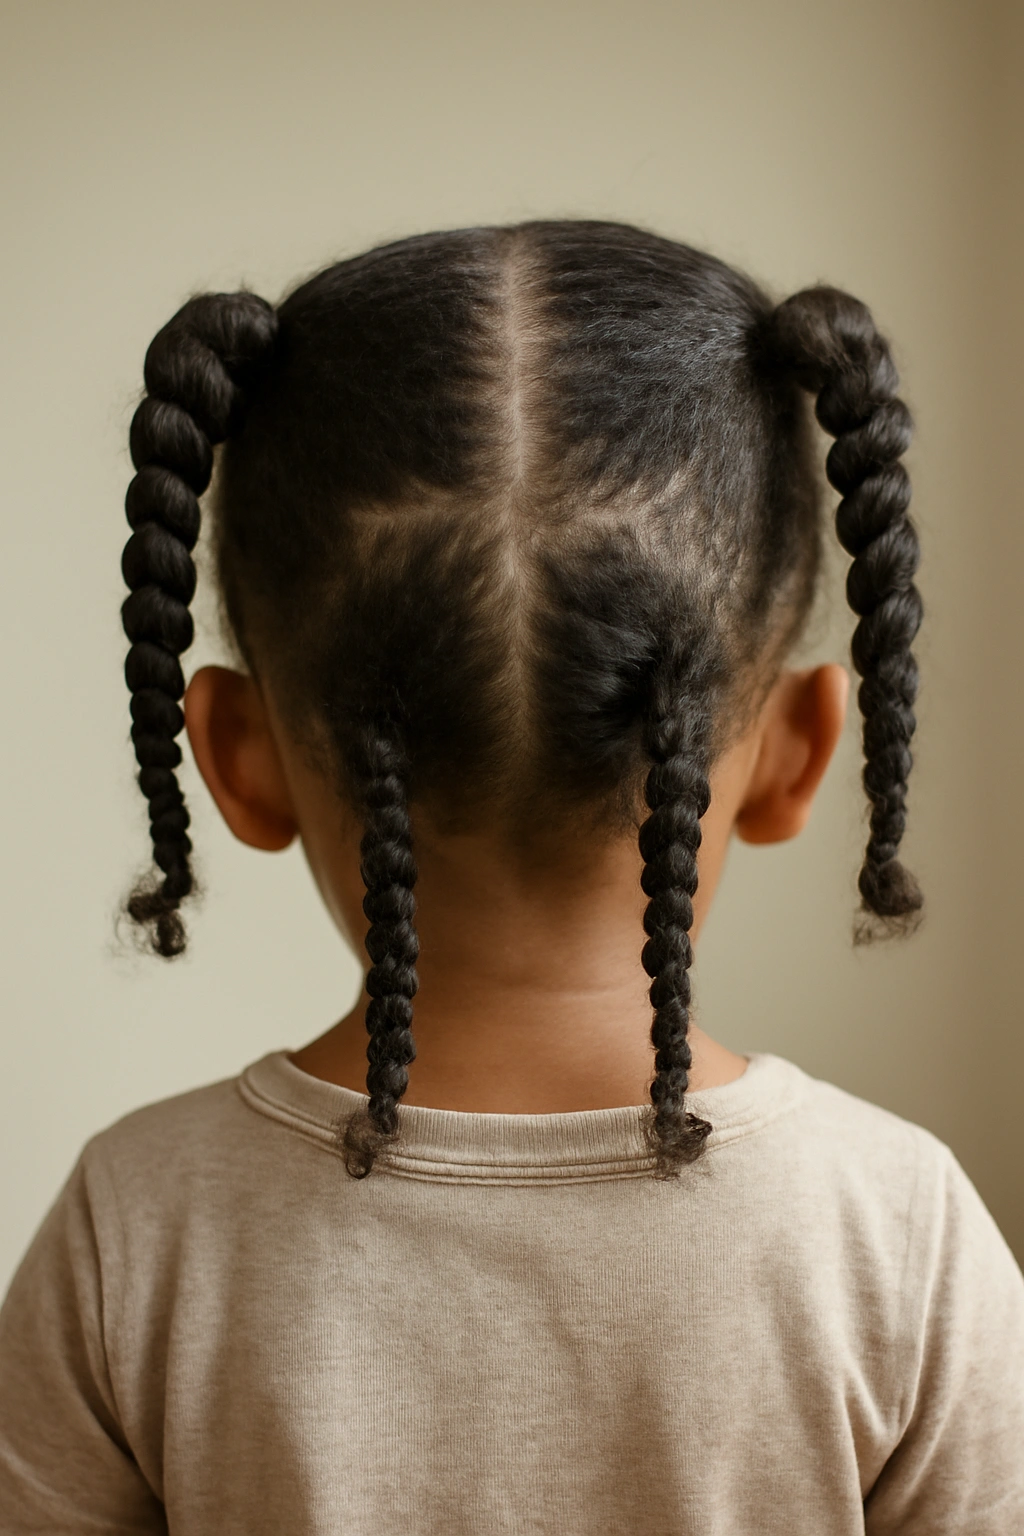
Two-strand twists parted down the middle and secured into pigtails are the workhorse style of natural toddler hair. This style skips traditional braiding entirely—instead, you’re simply twisting two sections of hair around each other, which creates a spiral pattern that’s less tight than a braid and infinitely gentler on a toddler’s scalp.
Why This Works for Toddlers
Twisted pigtails are protective without being restrictive. The two-strand twist technique requires almost no tension—you’re literally just gently turning two sections around each other. This means zero discomfort for your toddler and zero risk of tension alopecia, which is real concern with tighter braiding styles. Pigtails also work on hair as short as 3 inches, so you can create this style even on very young toddlers with fresh-length natural hair.
How to Create Twisted Pigtails
- Separate hair into two sections down the middle of the scalp
- Take the first section and divide it into two strands
- Twist one strand around the other, working your way down without tension—think of it as a gentle spiral, not a tight rope
- Secure the twisted section with a soft hair tie or a small clip
- Repeat on the second section
- The twists will stay in for 4 to 6 days with proper moisture maintenance and a silk or satin bonnet at night
Pro tip: Apply a light leave-in conditioner or hydrating cream to each section before twisting. This reduces friction and makes the twists much easier to manage.
2. Zigzag Dutch Braids

Dutch braids create that adorable three-dimensional texture and can be positioned in zigzag patterns down the scalp. Unlike straight-back Dutch braids, the zigzag approach is playful and gives toddlers a unique look that stands out at the park.
The Visual Appeal and Scalp Health Balance
Zigzag Dutch braids are one of the most recognizable protective styles, and parents choose them specifically for that “isn’t that precious” factor. But here’s what matters underneath the cuteness: a proper Dutch braid that’s loose enough for a toddler’s scalp actually provides excellent protection. The braided sections cocoon the individual hairs, reducing friction and movement that would normally cause breakage.
Creating the Zigzag Pattern
- Start a Dutch braid at the top-front of the scalp, braiding under instead of over to create raised texture
- At the crown, gently redirect the braid toward the left at a 45-degree angle, braiding down to ear level
- Pick up the braid again from the left side and redirect it back toward the right, creating a zigzag effect
- Continue this pattern down the back of the head
- Use small elastic bands or clips at the end to secure—avoid anything too tight
- This style typically lasts 5 to 7 days with proper sleep care
Worth knowing: The key to comfortable zigzag braids is loose, consistent tension throughout. If you find your toddler pulling or scratching at the scalp, the braid is too tight and should be taken down immediately.
3. Bubble Braids
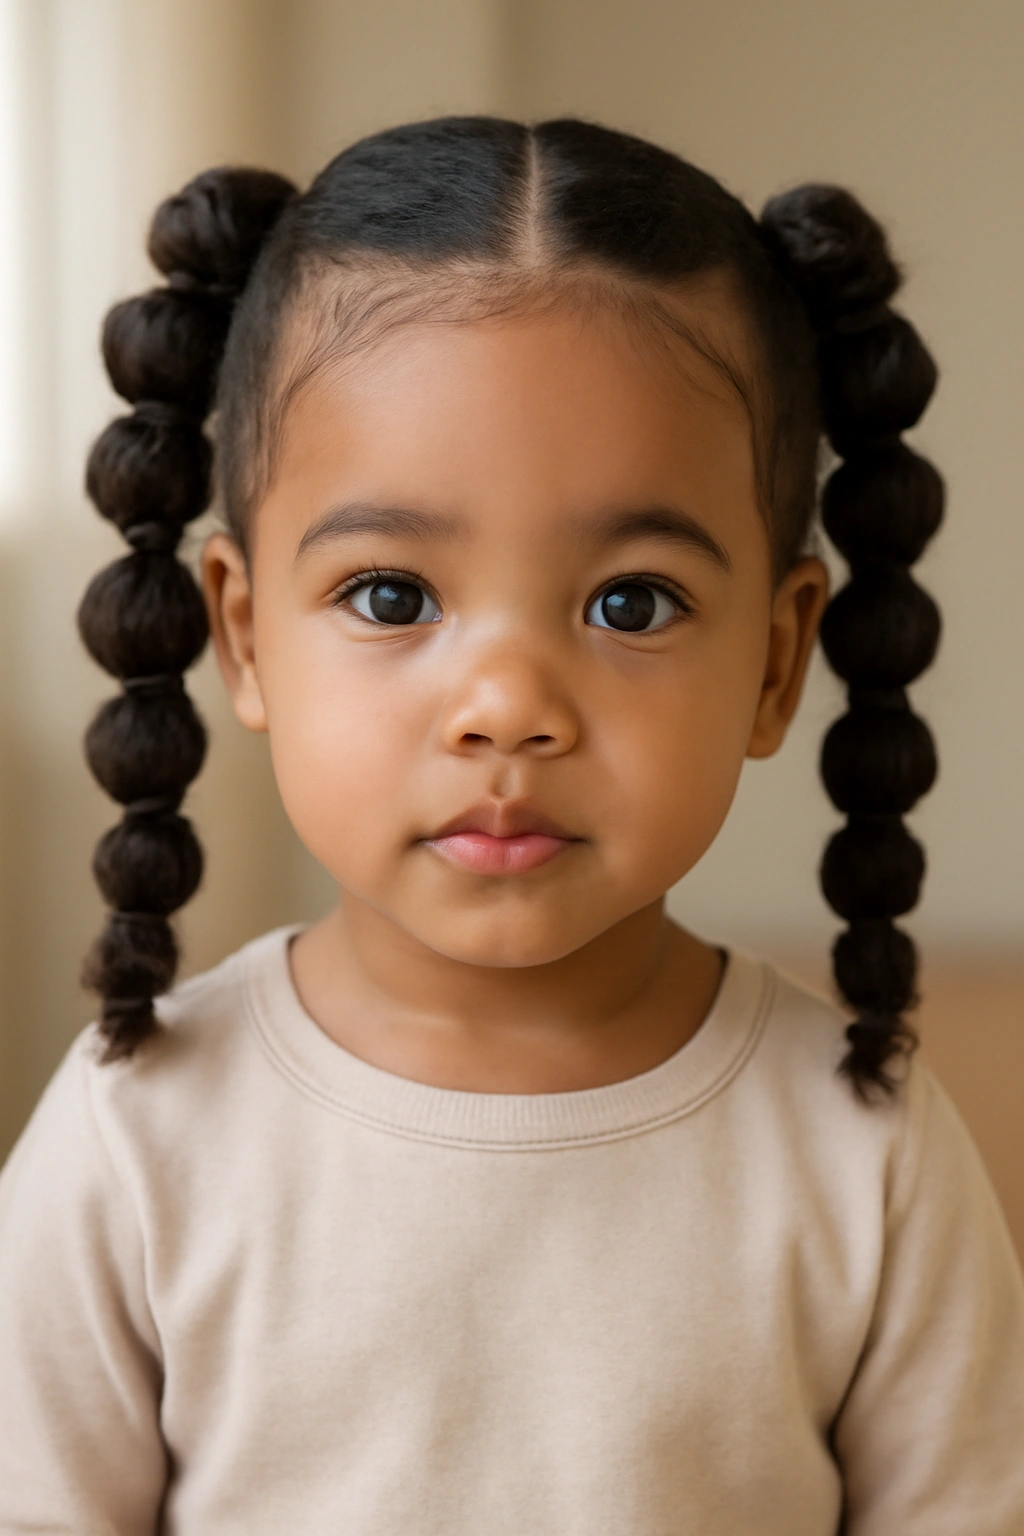
Bubble braids are exactly what they sound like—a simple braid with sections pinched and pushed outward to create puffy “bubbles” along the length. For toddlers, this style is pure visual magic and surprisingly easy to execute.
Why Bubble Braids Charm Toddlers
Bubble braids look intentional and stylish, but they require no special braiding skill. You start with a basic three-strand braid, and then you simply stretch and fluff each braid section outward gently with your fingers. This creates dimension that makes the style look way more complex than it actually is. Toddlers love anything puffy and playful, and this style delivers that vibe completely.
The Simple Execution
- Create a regular three-strand braid starting from the top of the head—keep tension light and even throughout
- Once the braid is complete, gently grasp the middle section of each braid “diamond” and pull outward carefully
- Work from top to bottom, making each bubble roughly the same size
- Use a clear elastic band at the end
- For longer-lasting bubbles, spritz the finished style lightly with water and let it air dry—this sets the shape
- Bubble braids last 3 to 5 days before the bubbles start to relax
Pro tip: Make bubble braids on damp or freshly moisturized hair. The slight moisture helps the hair grip and hold the stretched sections longer without additional products.
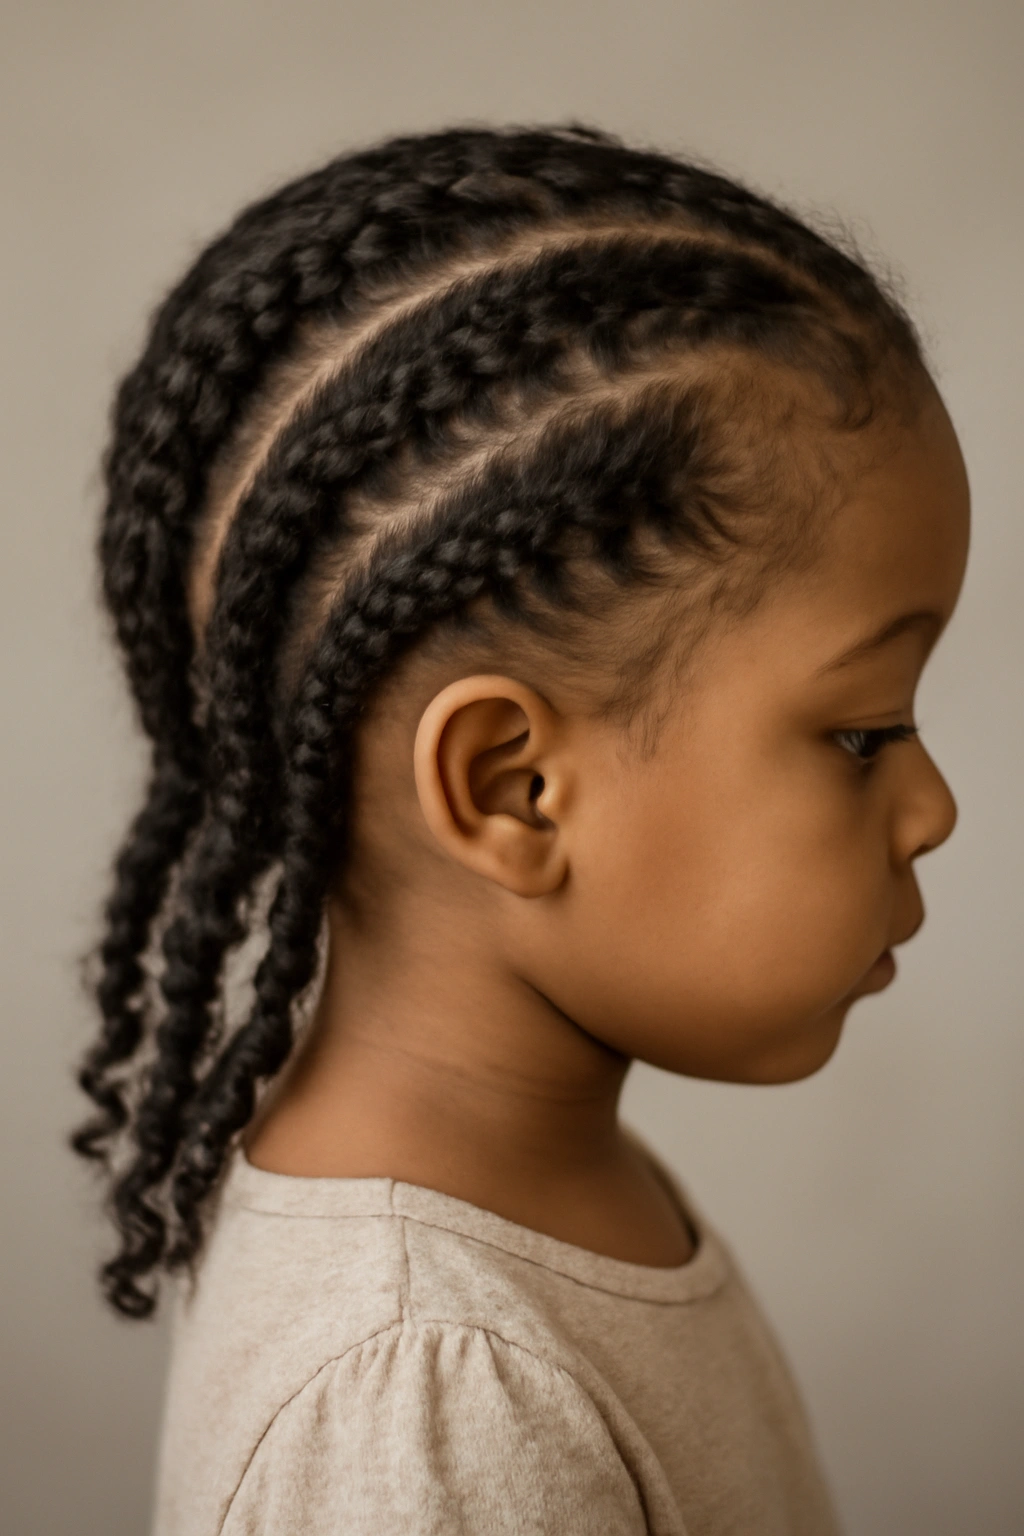
4. Corn Row Braids
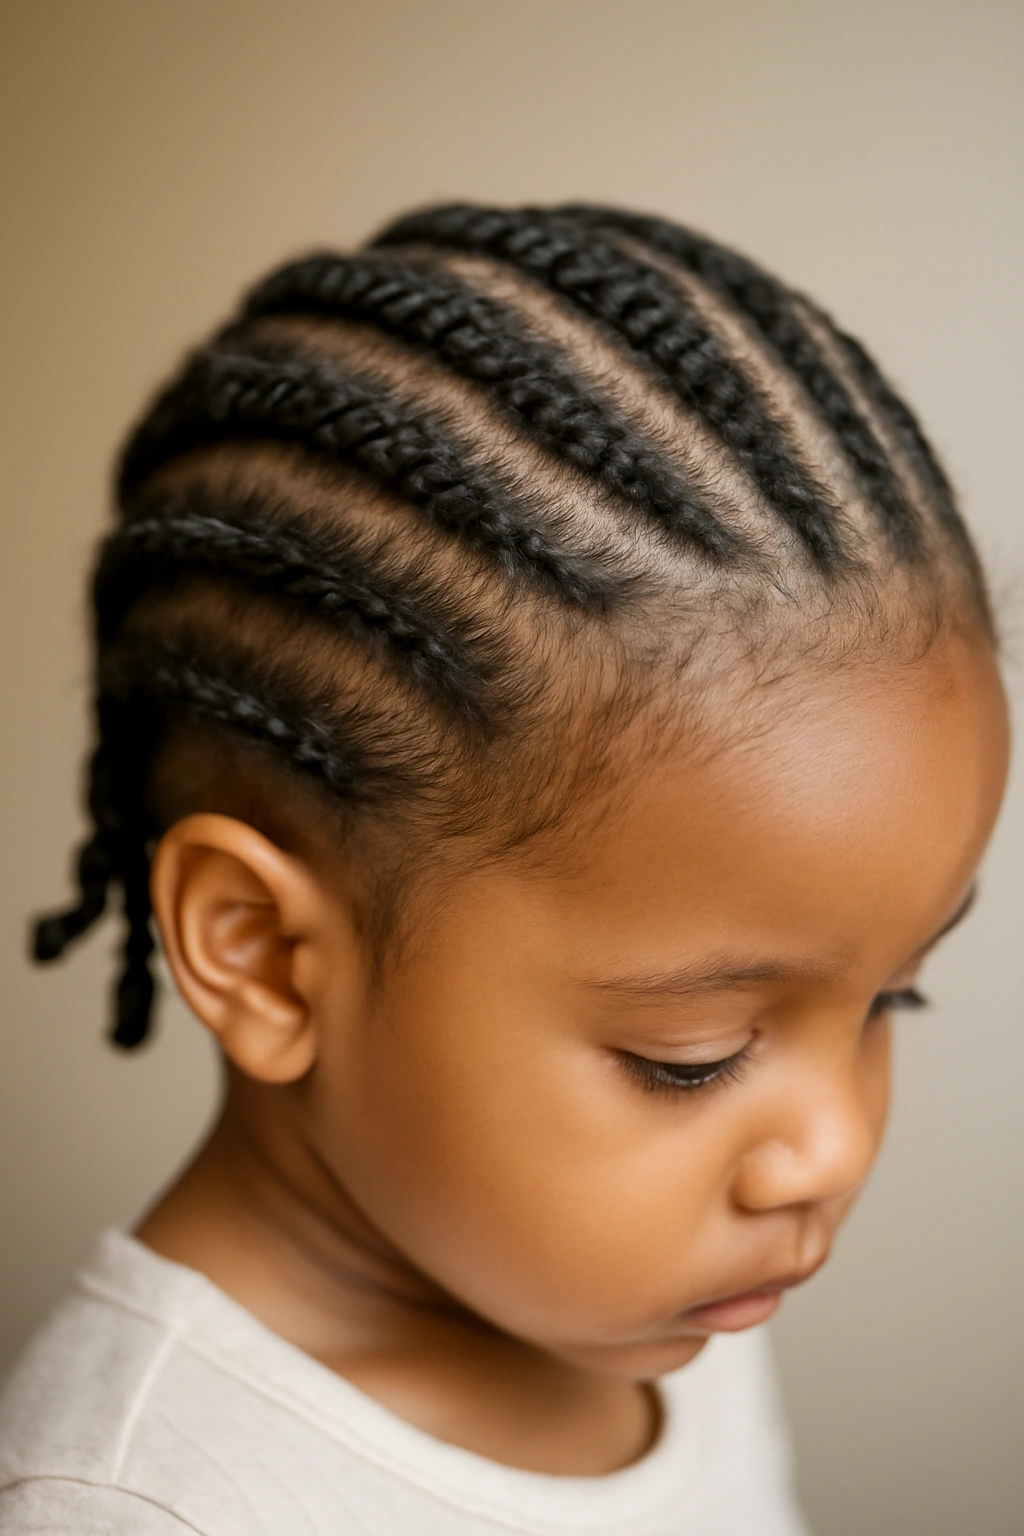
Cornrows are an iconic protective style that’s been used in Black communities for generations to protect natural hair while allowing it to grow. For toddlers, cornrows need to be loose and gentle, but when done right, they’re incredibly protective and last surprisingly long.
The Protective Power for Growing Hair
Cornrows work by sectioning the hair and keeping each section contained and minimally manipulated. This means your toddler’s hair stays in one place, experiences minimal friction during play and sleep, and retains moisture better than loose hair. Cornrows also allow you to space them out so there’s absolutely zero tension on the scalp—something that matters tremendously for protecting a toddler’s developing hair follicles.
Technique for Toddler-Gentle Cornrows
- Section hair into thick rows using a rattail comb—the thicker the sections, the less tension required to braid
- Start each braid at the scalp and feed in small sections of hair as you braid down
- Keep your hands relaxed and your grip light—this is not about a tight, sleek look but a protective, comfortable one
- Cornrows can follow a straight pattern down the back or a curved pattern around the head
- Secure the ends with small, soft clips or tiny elastic bands
- Leave cornrows in for 5 to 10 days depending on moisture and scalp health
Worth knowing: Check your toddler’s scalp every 2 to 3 days for irritation, buildup, or tightness. If you see any redness or your toddler seems uncomfortable, take the cornrows down immediately. Comfort always comes before style.
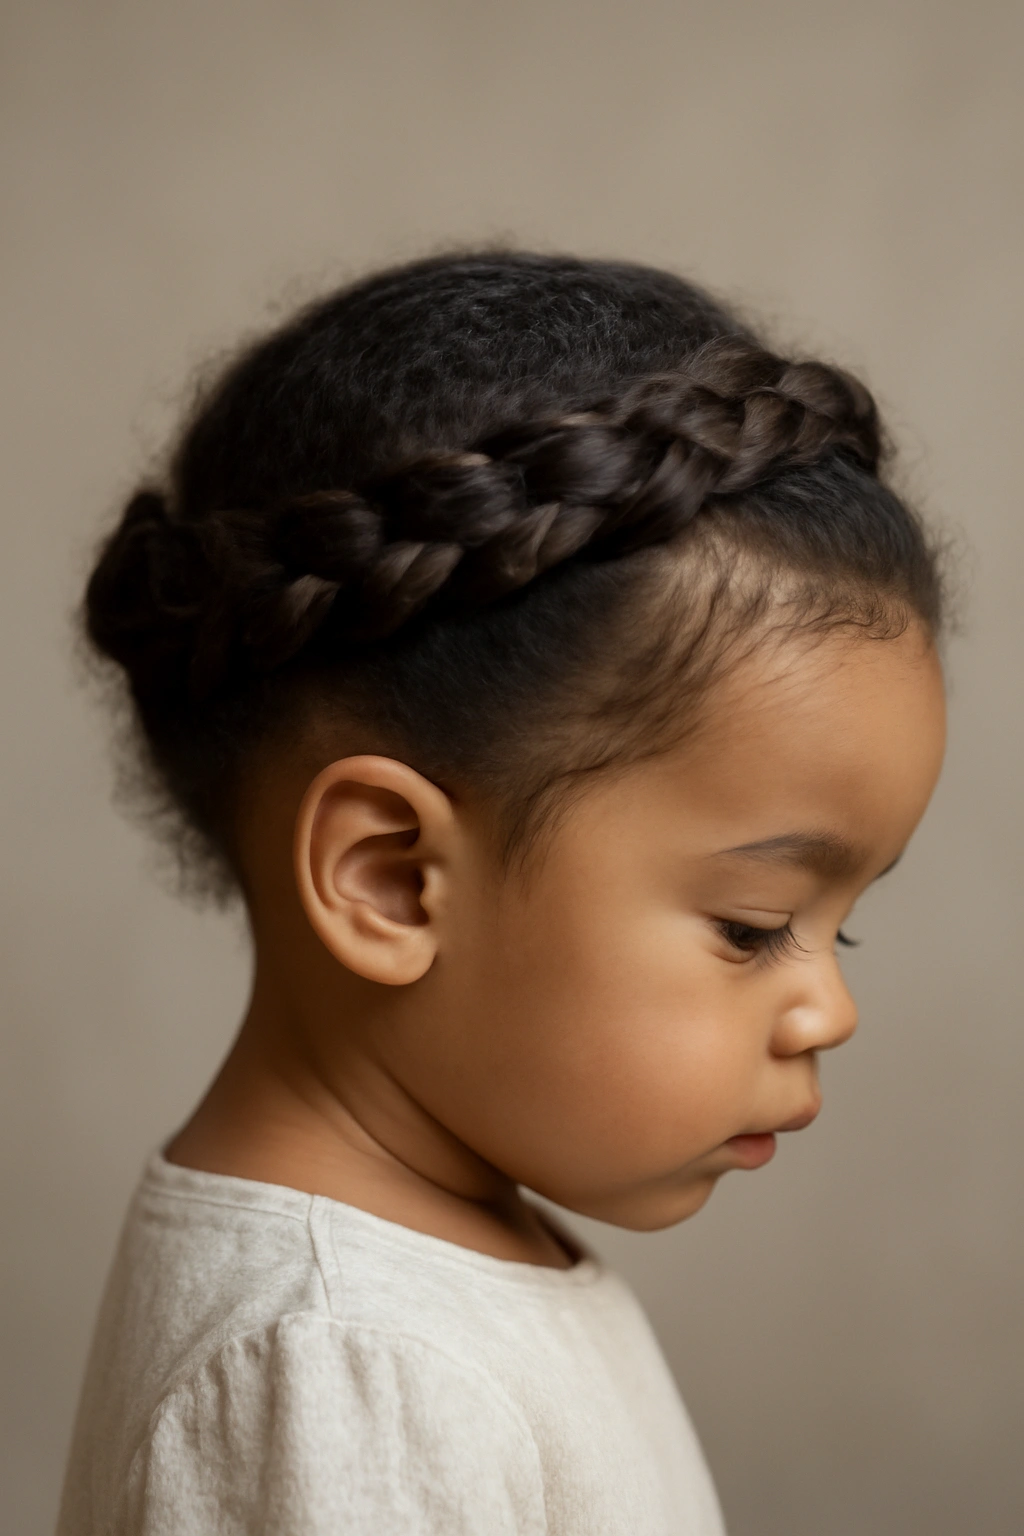
5. Half-Up Twisted Crown Braid
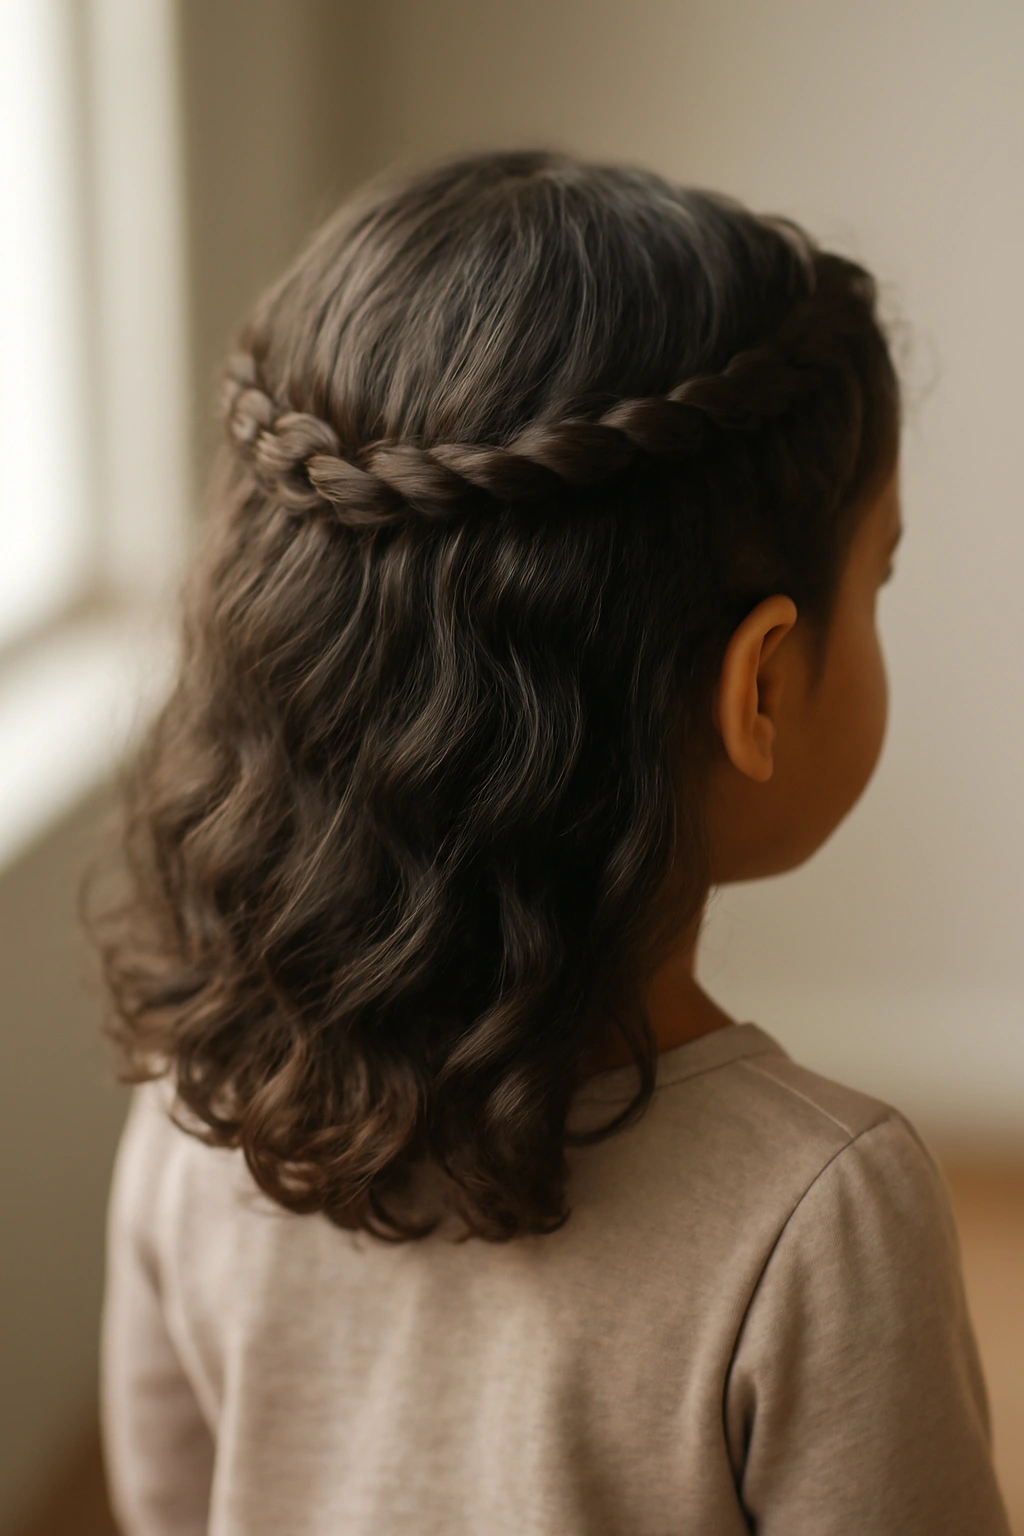
This style combines the sweetness of a crown braid with the practicality of keeping some hair away from the face while leaving the back loose. It’s perfect for toddlers who don’t tolerate full protective styles but still need some hair containment.
Perfect for Toddlers Who Resist Full Styles
Some toddlers get frustrated with their hair being completely covered or styled. This half-up approach gives you the best of both worlds—you’re protecting and styling the top section while allowing the back and sides to remain loose. It’s also a great transition style when you’re moving between loose hair and protective styles.
Creating the Crown Effect
- Take a section of hair from one side of the head at ear level
- Create a loose twisted braid or two-strand twist heading toward the back of the head
- As you twist, gently pick up small pieces of hair along the way, incorporating them into the twist—this is similar to a French braid but with twisting instead of braiding
- Bring the twisted section to the back of the head and secure it with a small clip or soft band
- Repeat from the opposite side, meeting the first section at the back
- The loose hair underneath creates a pretty contrast with the styled section on top
- This style typically lasts 3 to 5 days before you’ll want to take it down and refresh
Pro tip: Use a narrow silk ribbon or thin fabric strip instead of a rubber band at the back. This distributes tension more evenly and is less likely to create tension spots.
6. Chunky Two-Strand Twists
Two-strand twists are the foundation of so many natural hair styles, and the chunky version is perfect for toddler hair because fewer, thicker twists mean less styling time and less manipulation overall. Chunky twists are bold, beautiful, and surprisingly quick to create.
Why Fewer, Thicker Sections Work Better
Toddler hair styling is a patience game—both yours and theirs. The fewer sections you create, the faster you finish, and the sooner you can let your toddler get back to playing. Chunky two-strand twists typically take 15 to 20 minutes total, compared to 45 minutes or more for a full head of smaller twists. Your toddler’s hair also experiences less overall manipulation, which translates to less breakage and healthier hair over time.
The Two-Strand Technique
- Separate the hair into 4 to 8 thick sections depending on hair density—fewer sections for finer hair, more for thicker density
- Within each section, divide the hair into two equal parts
- Twist one part around the other gently, working from root to tip
- The motion is gentle—you’re creating a spiral, not a tight rope
- Secure each twist with a small elastic band or clip
- Two-strand twists last 5 to 7 days with proper nighttime care
- On day 4 or 5, you can lightly fluff the twists or retwist just the roots to refresh the style
Worth knowing: Chunky twists are ideal for toddlers with medium to thick hair density. If your toddler has finer, more delicate hair, medium-sized twists might work better since very chunky sections on fine hair can look sparse.
7. Starburst Braid Pattern
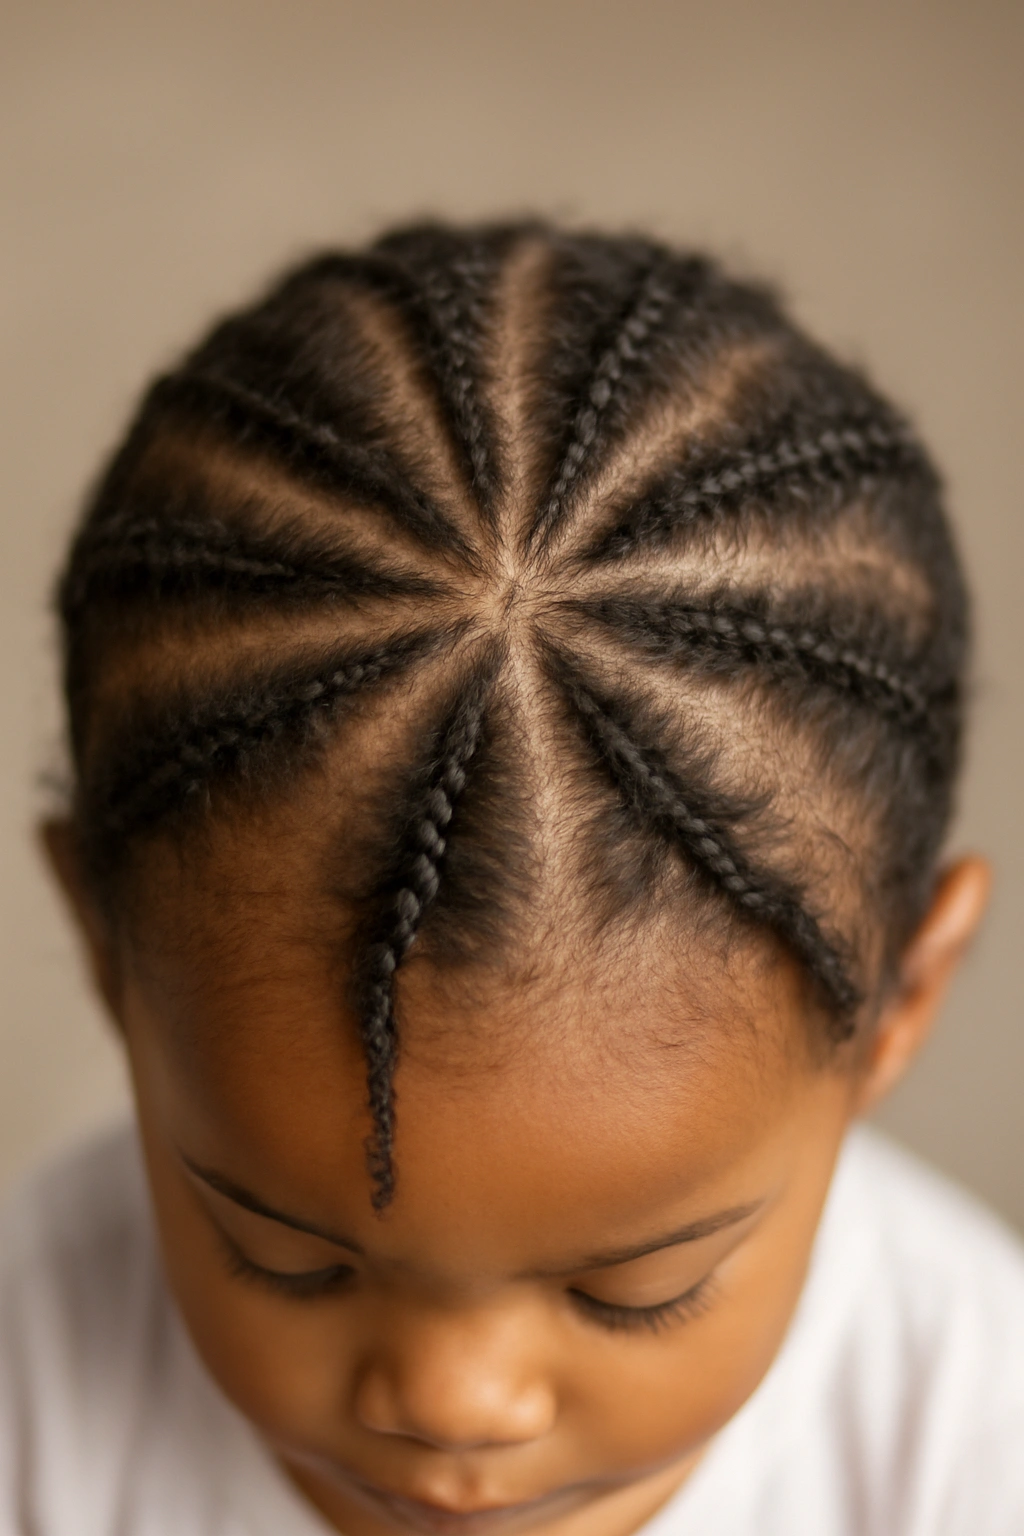
Starburst braids radiate outward from a center point on the crown, creating a pattern that’s visually striking and genuinely practical for keeping hair off the face and neck. This is an advanced-looking style that’s actually much simpler than it appears.
The Impact of the Starburst Shape
Starburst braids instantly draw the eye to your toddler’s face because everything radiates outward from the center. It’s a pattern that flatters different face shapes and hair types, and it keeps hair completely away from the scalp edges where breakage is most common. The starburst pattern also has the added benefit of being visually distinct—it’s a style people recognize and remember.
Creating the Starburst Effect
- Part hair into 5 to 7 sections radiating outward from a center point on the crown, like pizza slices
- Braid each section loosely, starting from the crown and working toward the ends
- Secure each braid with a small elastic or clip
- The natural curve of the head and the way the braids fan outward creates the starburst appearance
- You can arrange the braids flat against the head or flip them outward for more volume
- Starburst braids last 5 to 7 days with proper moisture maintenance
Pro tip: Create the center point by parting a small circle at the crown (about the size of a quarter). This defined center point makes the starburst pattern much cleaner and more intentional-looking.
8. Side-Swept Waterfall Braid
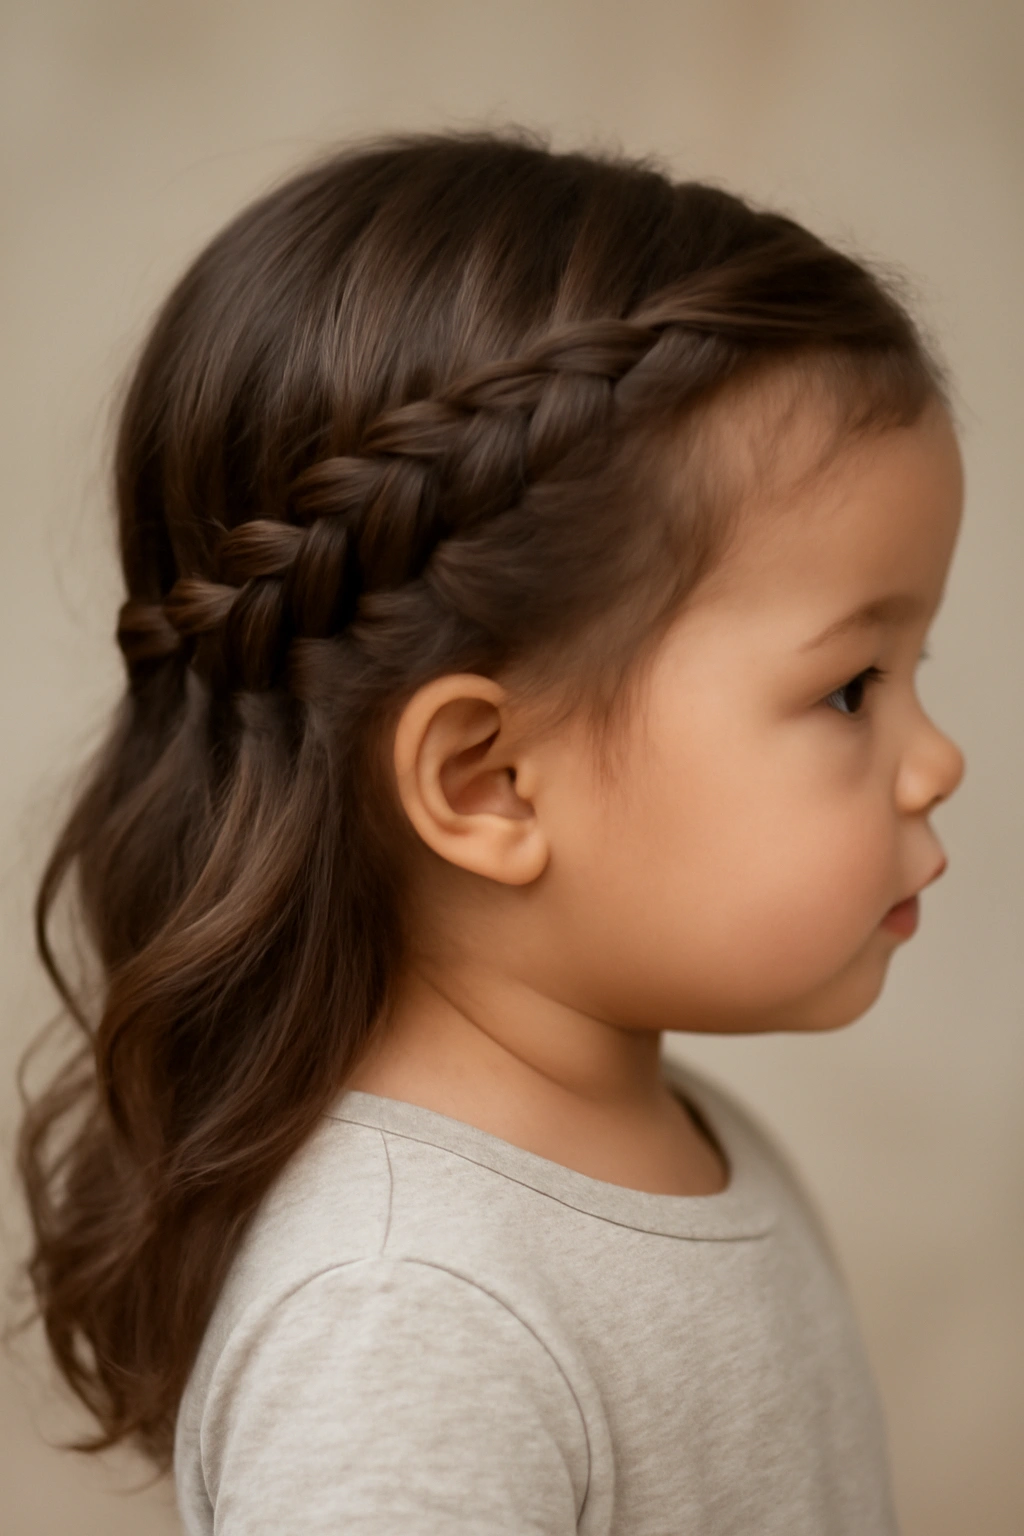
Waterfall braids create a romantic, delicate look that’s perfect for special occasions or when you want to create something a little fancier than everyday styling. The style keeps hair mostly off one side of the face while maintaining a soft, pretty aesthetic.
The Technique That Looks Harder Than It Is
Waterfall braids involve dropping strands of hair as you braid, letting those strands fall freely while you continue braiding with new sections. On toddlers, this creates a cascading effect that’s undeniably charming. The style works on relatively short hair, and it doesn’t require extreme tension, which makes it toddler-appropriate even though it looks more advanced than simpler braids.
How to Execute the Waterfall
- Start a braid at the top-front of the head, near the temple on one side
- As you braid, take a small section from the outside of the braid and let it fall freely
- Replace that dropped section with a new section from underneath
- Continue braiding and dropping sections as you move toward the back of the head
- The braided section will remain visible while the dropped sections create a waterfall effect
- Secure the main braid with a small clip at the back
- Waterfall braids work best as a 1-day or 2-day style since they loosen quickly
Worth knowing: Waterfall braids are best created on hair that’s been lightly styled or braided the day before. Second-day hair has more grip and holds the braid better than freshly washed hair.
9. Rope Braids (Two-Strand)
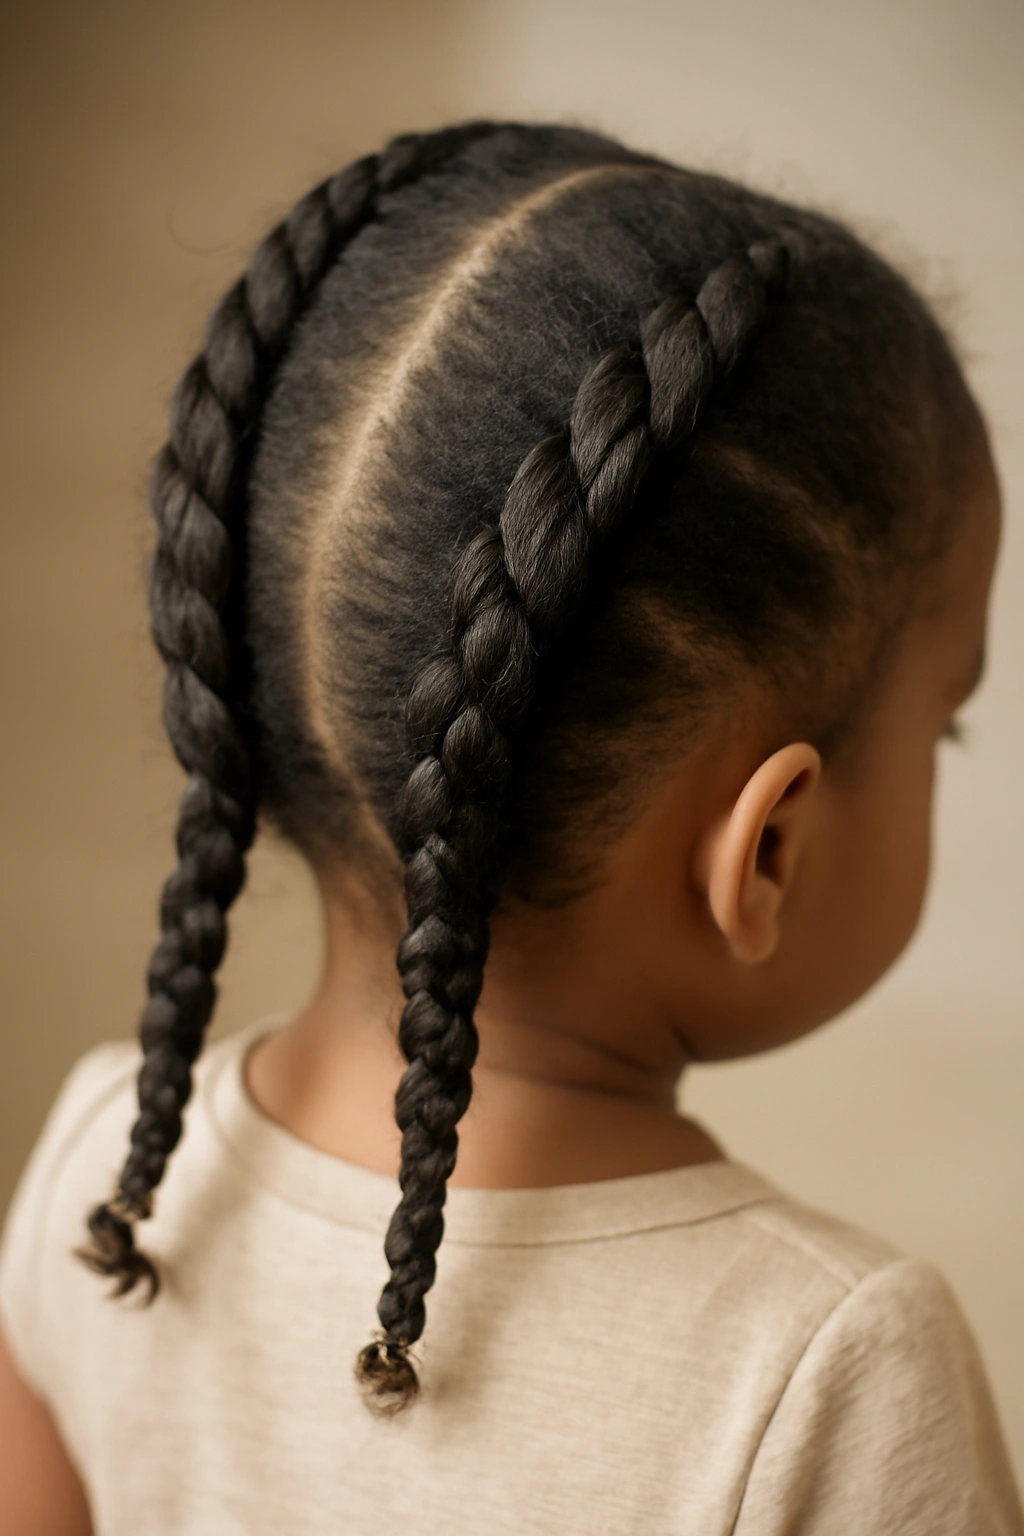
Rope braids are essentially a more controlled version of two-strand twists where the two sections cross over each other in a spiral that resembles a rope. This style is fast, protective, and creates a beautiful texture that’s distinct from traditional three-strand braids.
Why Rope Braids Are Underrated for Toddlers
Rope braids split the difference between loose twists and tight braids. They’re tighter than two-strand twists, so they last longer and provide more defined containment, but they’re not as complex as three-strand braids, so they’re faster and require less precision. They’re also incredibly flattering on naturally textured hair because the spiral pattern showcases the curl pattern beautifully.
Creating the Rope Effect
- Divide hair into two equal sections
- Cross one section over the other in a spiraling motion—this is different from twisting because the sections are crossing over rather than wrapping around
- The motion creates a defined rope-like texture that’s visually distinct
- Continue down the length of the hair, maintaining even tension
- Secure with a small elastic band
- Rope braids last 6 to 8 days with proper care and moisture
- The ends of rope braids can be curled slightly with a light spray bottle of water and allowed to air dry for a finished look
Pro tip: Apply a light gel or smoothing cream to your hands before creating rope braids. This reduces frizz around the perimeter and keeps flyaways controlled.
10. Halo Braids
Halo braids encircle the head like a crown, with the braid traveling from one side to the other and creating a complete frame around the head. For toddlers, this is an elegant style that’s also supremely practical for keeping all hair away from the face and neck.
The Elegance-Meets-Practicality Factor
Halo braids look like something you’d see in a wedding party, but they’re actually incredibly practical for toddlers. Everything is contained and protected, nothing is in the way, and the circular motion of the braid is visually soothing. The style also works on hair of varying lengths since you’re working around the perimeter rather than trying to reach from front to back.
Building the Halo
- Start a braid at one temple, using a loose technique
- Braid around the perimeter of the head, traveling from temple to temple around the back
- As you braid, you can feed in small pieces of hair from the sides and back for added security
- Once you’ve completed the circle and reached the other temple, secure the braid with a small clip
- The loose hair underneath the halo can be left down or styled into twists or curls
- Halo braids last 4 to 7 days depending on how much movement and activity your toddler engages in
Worth knowing: Halo braids work best on toddlers with at least 4 to 5 inches of hair. If your toddler’s hair is shorter, the braid won’t have enough length to create the complete circle.
11. Micro Braids with Beads
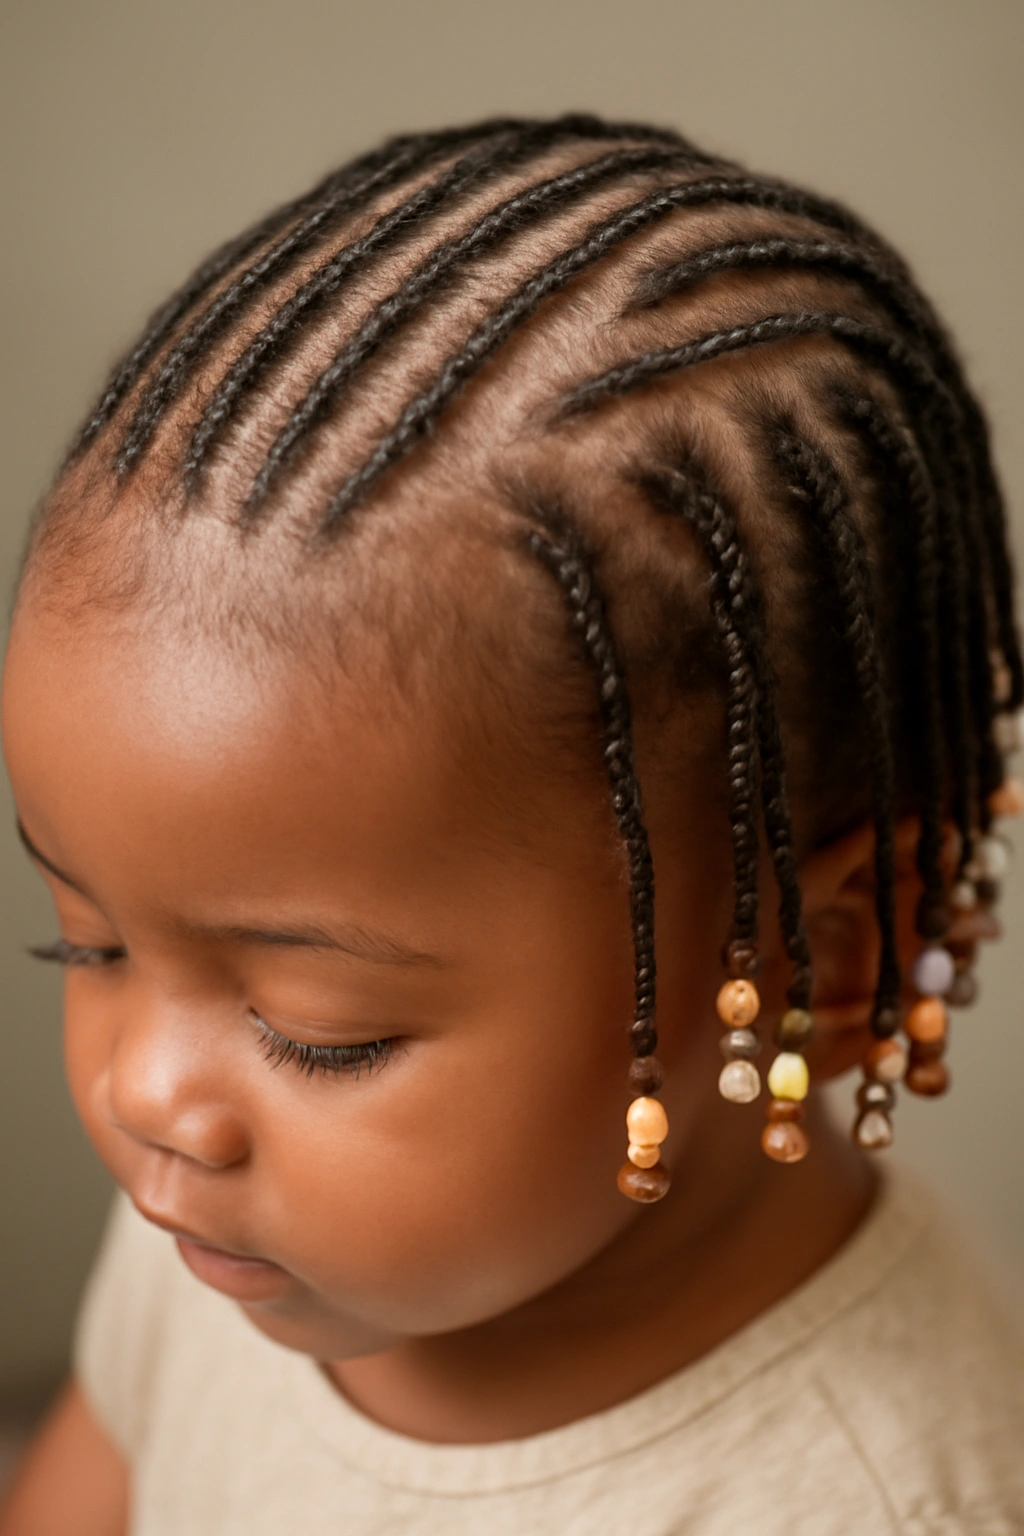
Micro braids are tiny, precise braids that can be adorned with small beads for a fun, festive look. This style requires patience and skill, making it ideal for special occasions rather than everyday wear, but the final result is stunning and very protective.
When Beads Add Joy (Without Adding Risk)
Beads on toddler braids are adorable, but they require serious consideration around safety and comfort. Lightweight beads that are specifically designed for hair (never use jewelry beads or anything with small parts that could detach) work well. The beads add visual interest and can make the style feel special and celebratory, which toddlers genuinely respond to.
Creating Micro Braids Safely
- Create small, thin braids throughout the head—these require precision and even tension
- Lightweight hair beads are slid onto each braid near the end
- Secure the braid with a small elastic band below the bead to prevent it from sliding off
- Micro braids last 7 to 10 days and are excellent protective styles
- However, only use micro braids for special occasions or limited wear—they’re more labor-intensive than other styles and require more maintenance
- Supervise closely to ensure your toddler isn’t pulling at beads or braids
Pro tip: Choose beads in colors that complement your toddler’s skin tone or match a favorite outfit. The beads don’t need to be large or numerous—even 4 to 6 beads strategically placed create a delightful effect.
12. Lace Braids (Inside-Out French Braids)
Lace braids are French braids created by braiding under instead of over, which creates a raised, lacy appearance on the outside. For toddlers, this creates a beautiful texture and looks fancier than a traditional French braid while being virtually the same level of difficulty.
The Three-Dimensional Beauty
Lace braids create incredible dimension because the braiding technique raises the braid strands away from the scalp, giving you visual depth you don’t get from regular French braids. Toddlers look genuinely sophisticated in lace braids, which is funny considering how simple they are to execute once you understand the technique.
The Under-Braiding Technique
- Start with three sections at the crown
- Instead of braiding over (crossing the outer strand over the middle), braid under (crossing the outer strand under the middle)
- This simple direction change creates the lacy, raised effect
- Add hair as you work down, continuing the under-braiding motion
- You can create a single center lace braid or multiple lace braids throughout the head
- Secure with a small elastic band
- Lace braids last 5 to 7 days and look beautiful both as finished braids and worn slightly fluffed for texture
- Spritz lightly with water and gently fluff sections on days 3 and 4 for a softer, more romantic appearance
Worth knowing: Lace braids require slightly more dexterity than regular French braids since you’re working in the opposite direction. Practice on yourself first or on a doll before attempting on your toddler.
13. Feed-In Braids
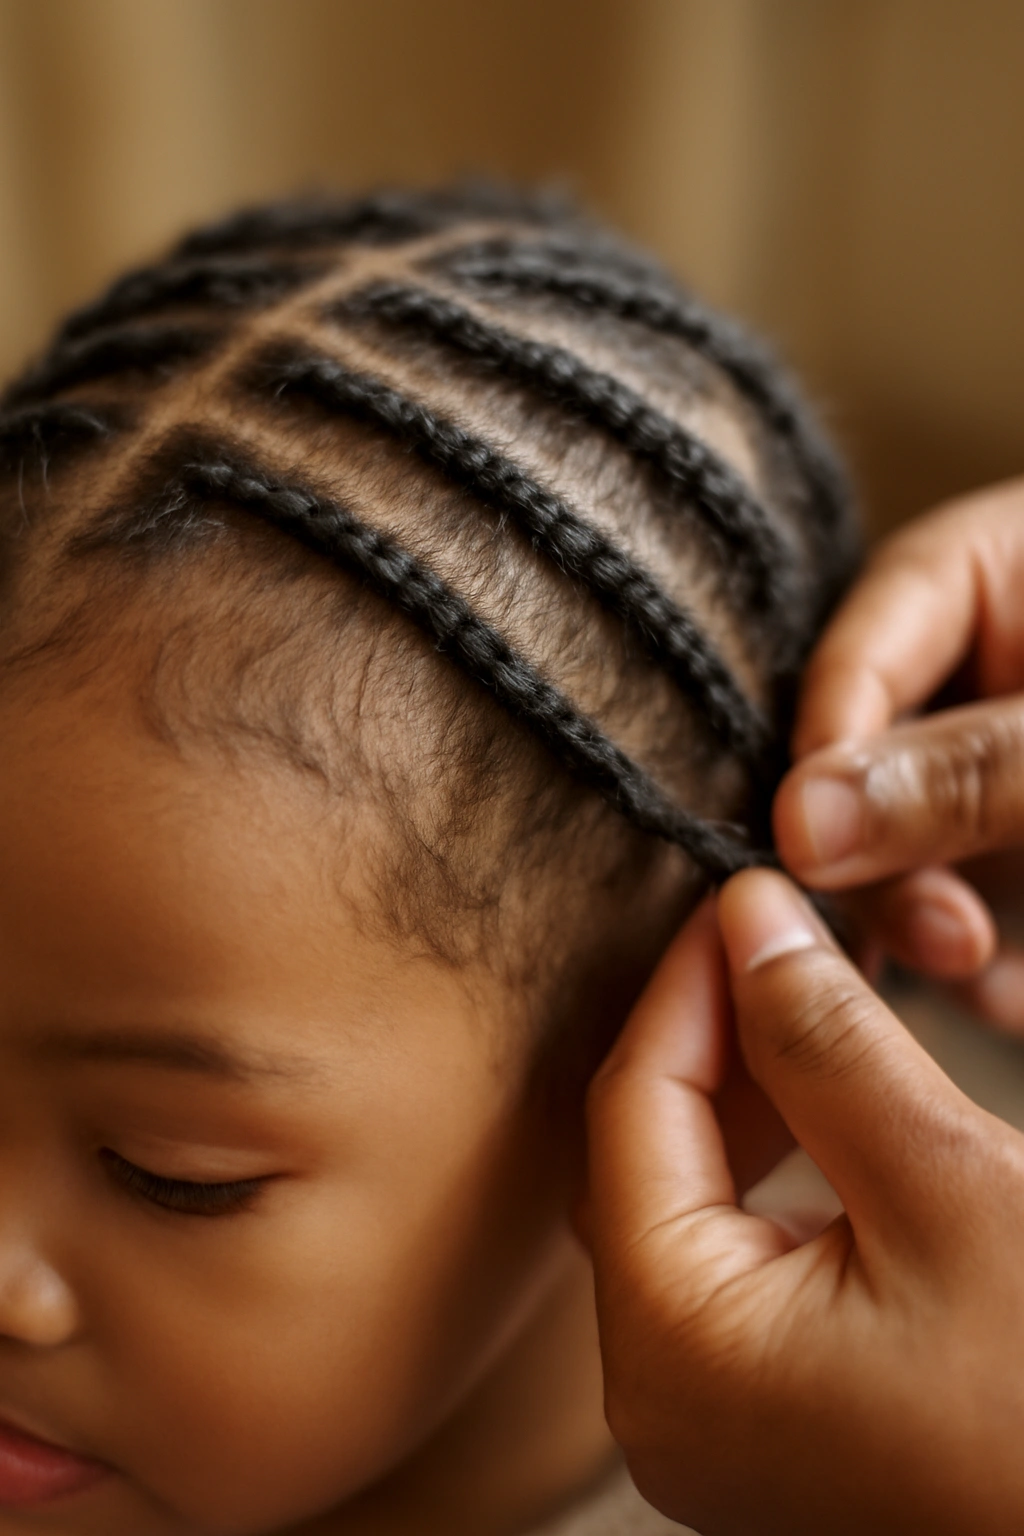
Feed-in braids are a technique where you add hair gradually as you braid, creating a braid that appears to flow naturally from the scalp. This technique reduces tension significantly because you’re not grabbing large sections at once—instead, you’re feeding in hair bit by bit.
The Reduced-Tension Advantage
Feed-in braids are arguably the most scalp-friendly braiding option for toddlers because the tension is distributed evenly and never concentrated at the root. The gradual feeding-in of hair means your toddler’s sensitive scalp is never stressed, and the hair is protected without discomfort. This is the technique to use if your toddler has a sensitive scalp or shows any signs of existing hair loss or thinning.
The Feed-In Process
- Start with three small sections at the crown
- Begin braiding, and with each pass, add a tiny amount of new hair from underneath
- The new hair is incorporated gently, not pulled in
- Continue feeding in hair along the entire length of the braid
- The final braid appears to be growing directly from the scalp in a seamless way
- Secure with a small elastic band
- Feed-in braids last 7 to 10 days with excellent moisture maintenance
- These braids are also ideal for washing while in—you can gently cleanse the scalp without disturbing the braid integrity
Pro tip: Slightly dampen or apply a light cream to the sections you’re feeding in. This reduces friction and makes the hair more cooperative as you incorporate it.
14. Twistout Styled Braids
A twistout involves creating two-strand twists, leaving them in for several days, and then gently unraveling them to create beautiful, bouncy texture. For toddlers, this creates incredible dimension and curl definition while being protective during the installation phase.
Creating Texture That Lasts
Twistouts are one of the most beautiful ways to showcase natural texture, and they last surprisingly long—up to 2 weeks if you maintain them properly. The style starts with loose, protective twists and then transforms into a fluffy, defined texture that’s completely different. Toddlers often love the tactile sensation of unraveling their twists and seeing the new texture appear.
The Twistout Timeline
- Create chunky or medium two-strand twists throughout the head using the gentle technique described in braid #6
- Leave the twists in for 5 to 7 days to set the pattern (this is the protective phase)
- Spritz lightly with water and allow to air dry before unraveling
- Gently unravel each twist, starting from the bottom, to reveal the twisted texture
- The newly unraveled twists will be fluffy and full—avoid re-braiding for at least 24 hours to let them fully set
- Once unraveled, the style lasts another 7 to 10 days before you’ll need to refresh with light retwisting or gentle finger-combing
- This is an excellent style for maintaining curl definition while providing protection
Worth knowing: The longer your toddler leaves the twists in before unraveling, the more defined the twisted texture will be. Patience in the protective phase pays off in the final style.
15. Boxer Braids
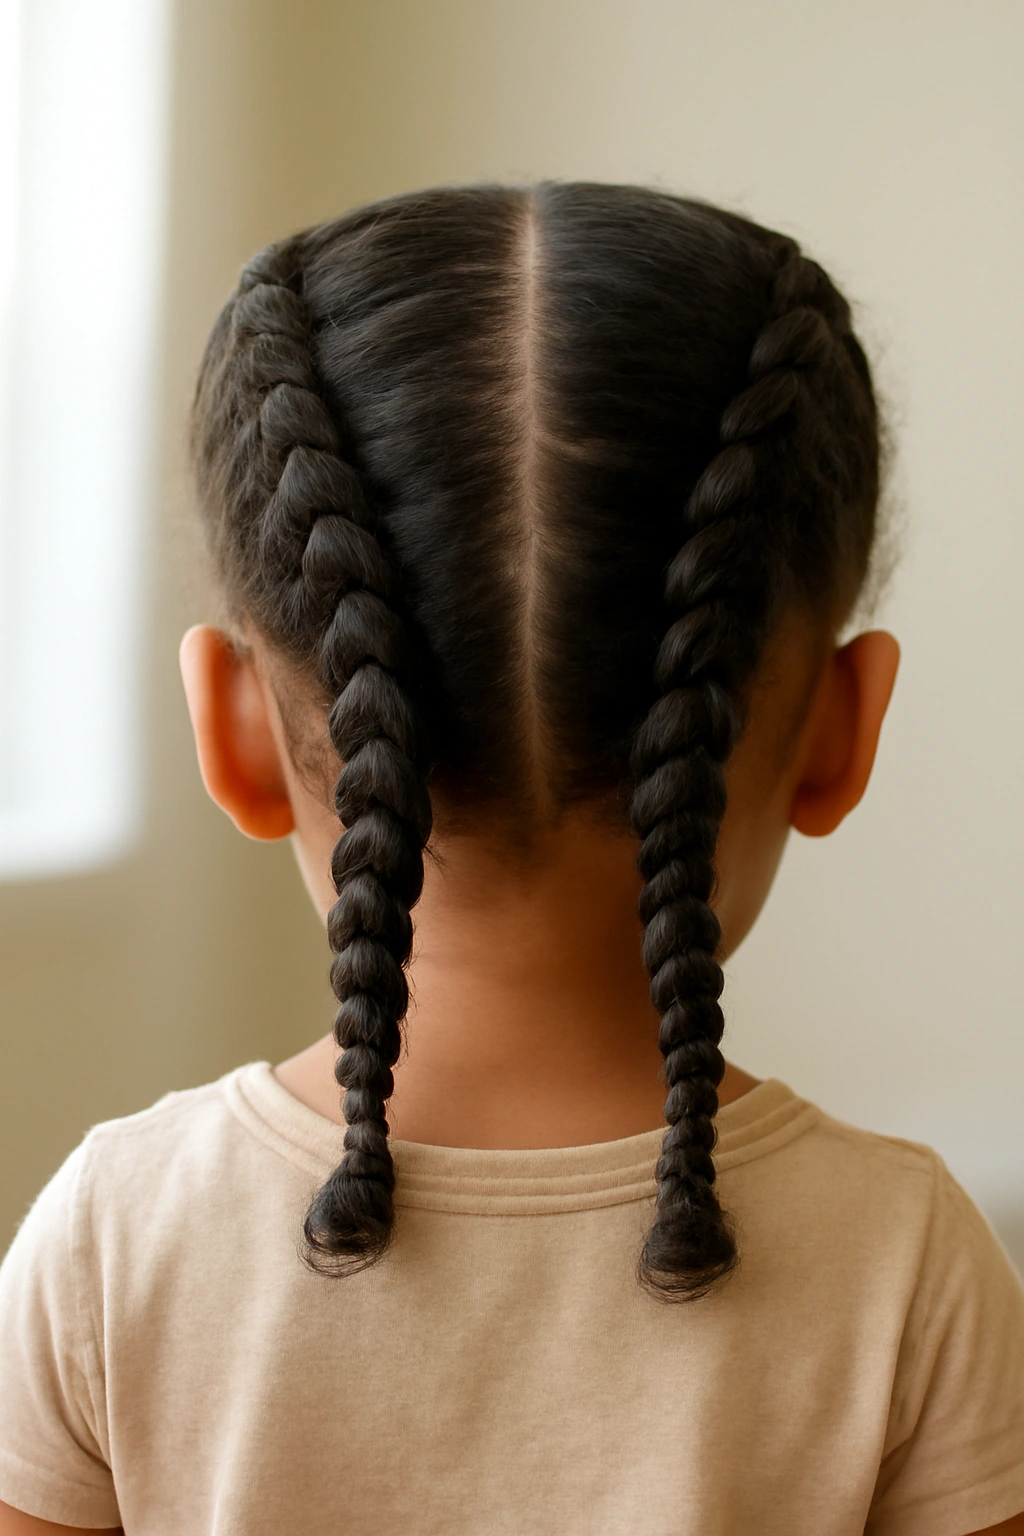
Boxer braids are two thick Dutch braids running parallel down the back of the head. The name comes from boxers who styled their hair this way to keep it contained during matches, but for toddlers, they’re equally functional and adorable.
The Ultimate Practical-Cute Combination
Boxer braids are perhaps the most practical style for active toddlers. They keep all hair completely secured and off the face, they don’t interfere with play or activity, and they look intentionally styled rather than messy. This is the style to choose on days when your toddler is going to be in constant motion—the braids will stay put through tumbling, running, and climbing.
Creating the Two-Braid Structure
- Part hair down the center of the head from forehead to nape
- Create a Dutch braid (braiding under rather than over) along each side of the part
- The braids should be loose but secure, with even tension throughout
- Secure each braid with a small elastic band
- The braids appear to “box” the head, creating a neat, symmetrical look
- Boxer braids last 6 to 10 days depending on activity level and moisture maintenance
- Spritz lightly with water on day 3 or 4 to refresh the braids if they start to look fuzzy
Pro tip: Create boxer braids on slightly damp hair or hair that’s been styled the day before. The hair will have more grip and will hold the braid structure better than freshly washed hair.
Final Thoughts

Your toddler’s natural hair is a crown that deserves protection, moisture, and styling approaches that honor its texture rather than fighting against it. Each of these 15 braiding styles accomplishes that in different ways—some prioritize speed, others prioritize protection, and many manage to accomplish both.
The real secret to successful braiding on natural toddler hair isn’t any single style or technique. It’s consistency, gentleness, moisture, and paying attention to what your specific toddler responds to. One child might thrive with cornrows changed weekly; another might prefer simpler twists that you can take down and redo more frequently. Neither approach is wrong—they’re just different responses to different hair types and different personalities.
As you explore these styles, remember that your toddler’s comfort always comes before aesthetics. A braid that looks perfect but causes scalp pain or creates visible tension isn’t worth it. Your toddler can’t tell you if something hurts until they’re old enough to complain, so you have to be the careful observer, checking the scalp regularly, watching for signs of irritation or tightness, and being willing to take down a style immediately if something seems off. Healthy, growing hair—that’s always the real goal. The adorableness is just the bonus.