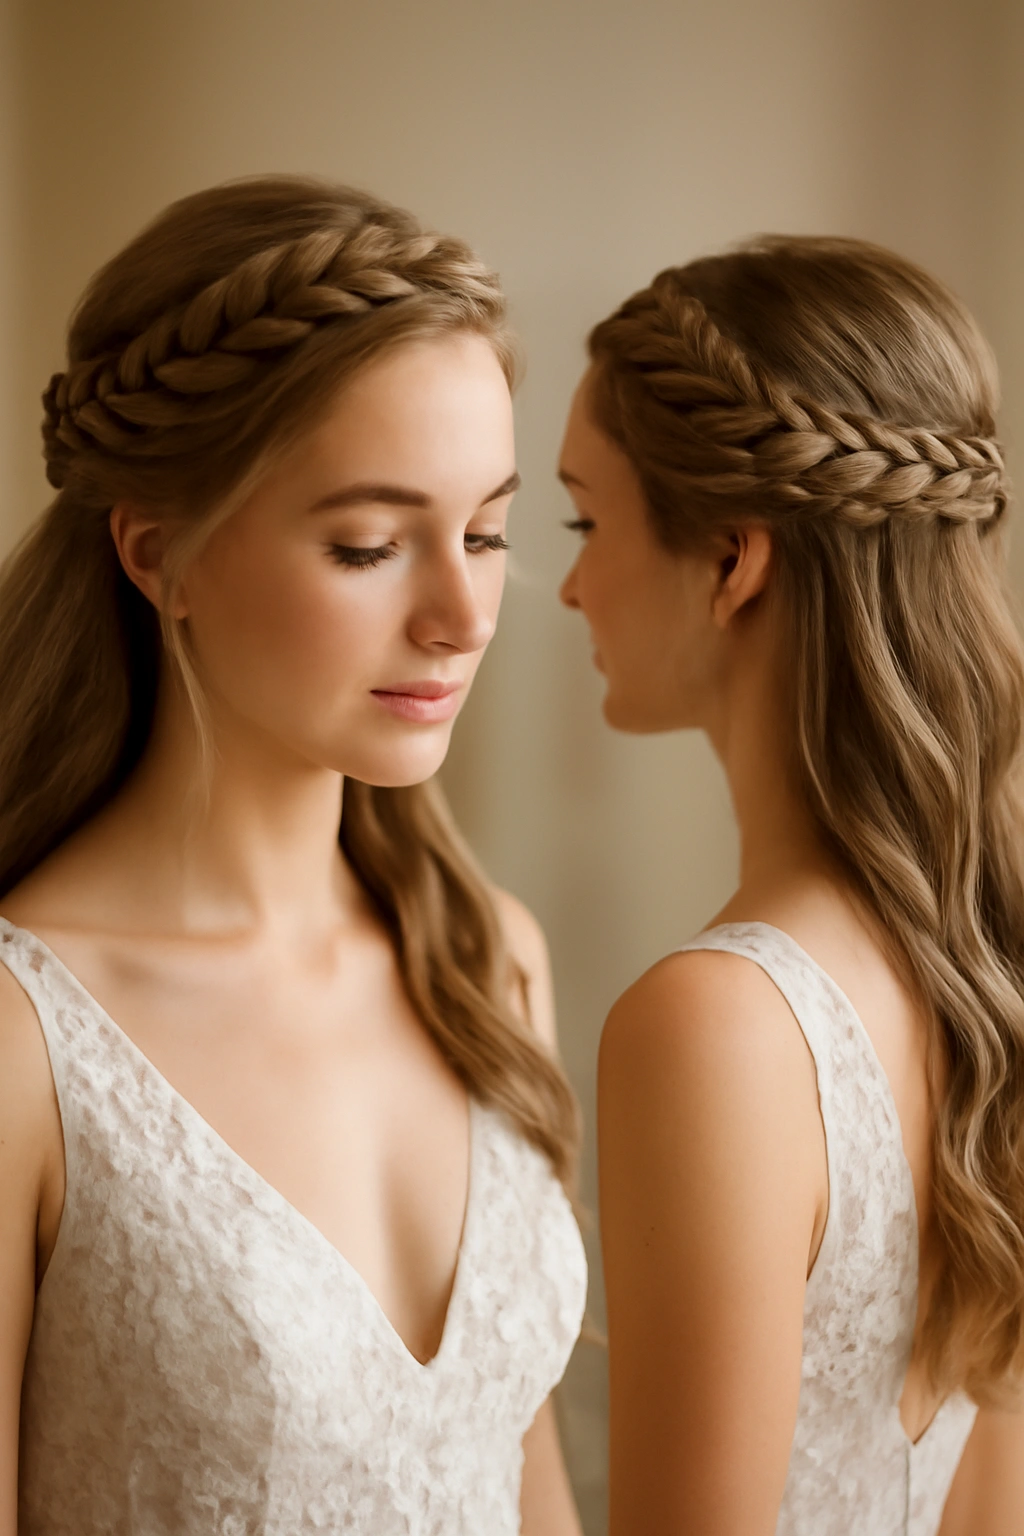
Half-up braided hairstyles are the sweet spot for wedding day hair — they’re elegant enough for ceremony moments but leave your face beautifully framed and your back flowing, which photographs absolutely stunning. Whether you’re the bride, a bridesmaid, or a wedding guest, a half-up braid offers that perfect balance between polished and romantic without requiring an updo that feels too formal or a fully down style that might feel underdressed. The braid component adds intricate detail and texture that catches the light, while the half-up construction keeps hair off your shoulders while showcasing length and movement.
What makes half-up braids particularly magical for weddings is their versatility — they work with straight hair, curls, wavy texture, and everything in between. They photograph beautifully from every angle, they stay secure through hours of ceremony and dancing, and they pair seamlessly with everything from delicate hairpins to statement combs, fresh flowers, or pearl-studded clips. Even better, half-up braids work whether your wedding aesthetic is ultra-formal black-tie or casual garden party. The style signals that you’ve put thought and care into your appearance without looking overdone or costume-like.
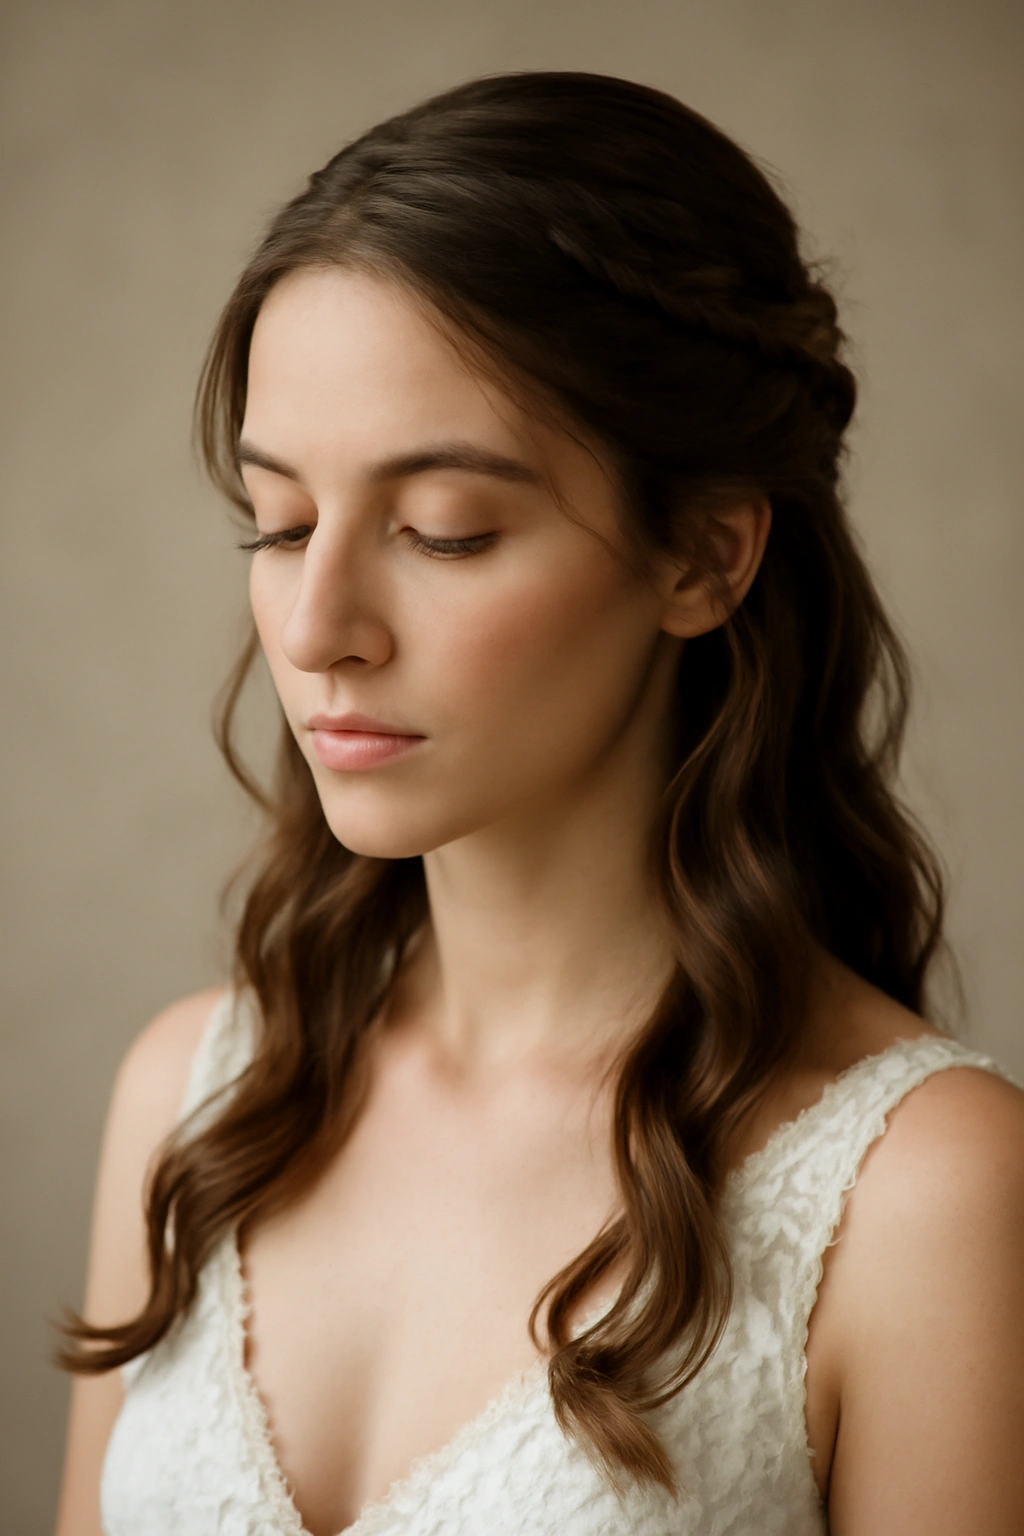
Before diving into specific styles, know that the best half-up braids for weddings typically start somewhere around ear level or slightly above, then incorporate at least part of your crown. This positioning makes the style feel intentional and polished rather than accidental, and it keeps braids visible and front-and-center rather than hidden beneath the top layer of hair. We’ll walk through eight distinct approaches, each with its own personality and technical approach.
1. The Twisted Half-Up Braid
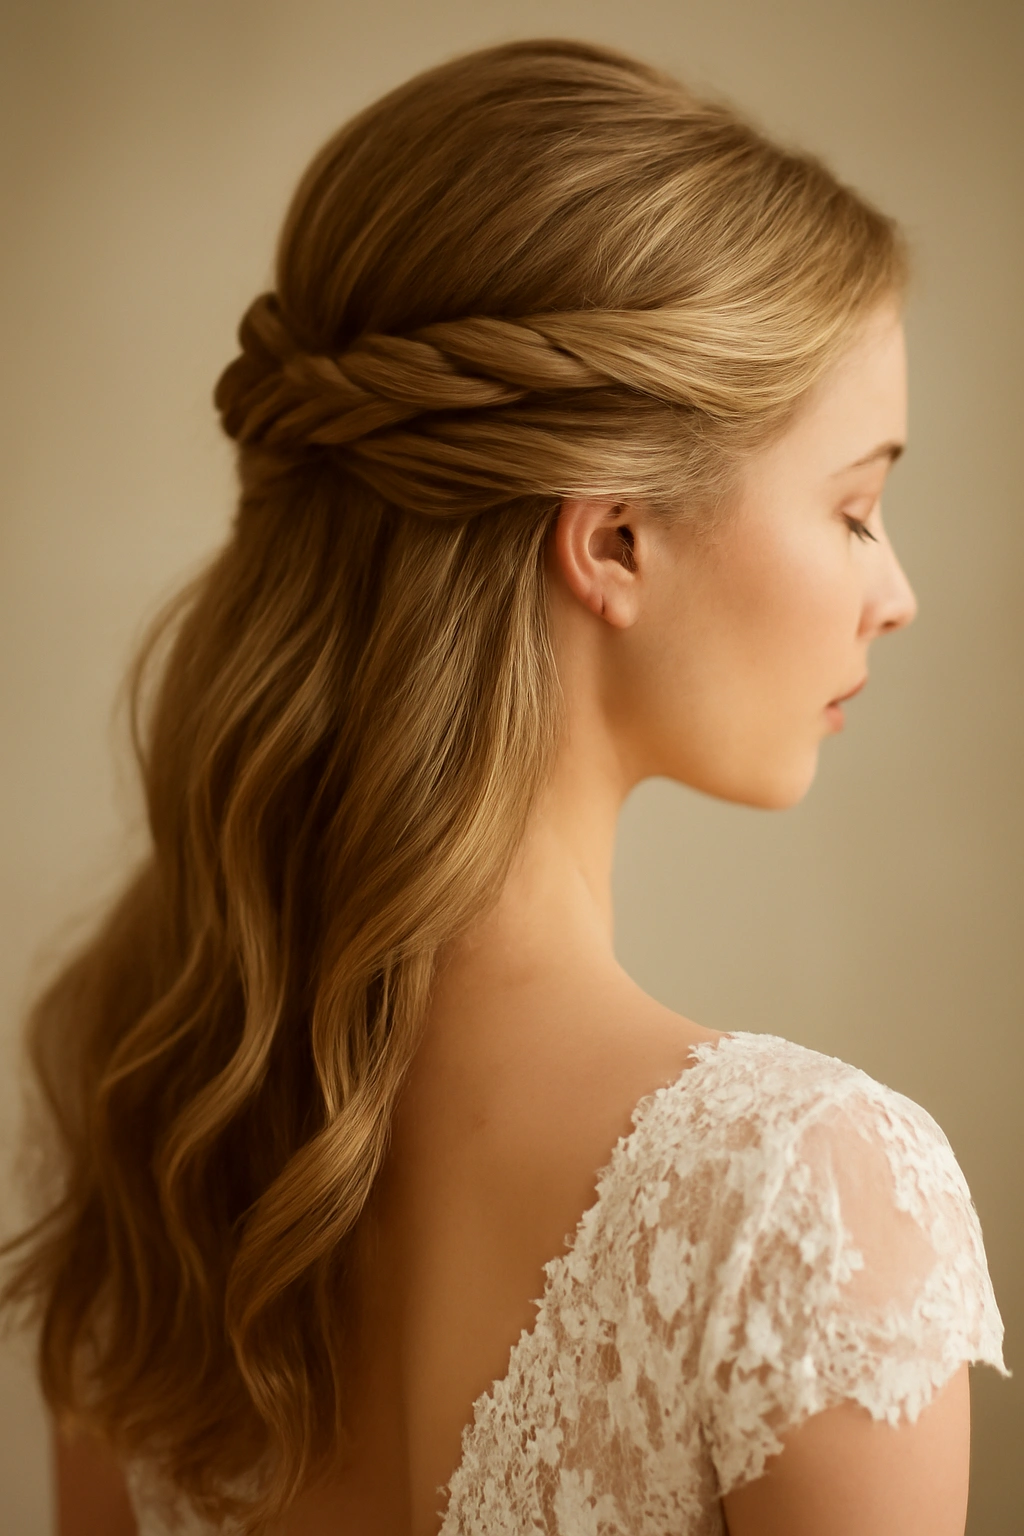
This style swaps out traditional braiding for softer, more romantic twists, making it ideal if you’re looking for elegant without overly intricate. Start by sectioning the top half of your hair from temple to temple — roughly the same amount you’d take for a basic half-up ponytail. Rather than braiding, divide this section into two substantial subsections and twist them tightly around each other as you would two ropes spiraling together, working downward toward the back of your head.
Why Twisted Styles Photograph So Beautifully
Twists catch light differently than traditional braids because the texture is smoother and rounder. This creates a softer, more ethereal appearance in photos while still providing visible structure and intentional design. The gentler aesthetic works particularly well for brides who want refined elegance, and it’s equally stunning on bridesmaids or guests because it feels personal without being costume-like. Twists are also more forgiving of slightly imperfect sections or uneven tension since the movement and light catch their natural dimension.
How to Execute the Twist and Secure It
Start with your hair dried and lightly textured — completely straight hair can slip, and too-slick texture might not hold the twist. Spray a light texture spray through the crown area first. Take your temple-to-temple section and divide it cleanly down the center. Cross the right section over the left, then the left over the right, working downward and slightly back toward the occipital bone (the back center of your skull). As you twist, you can gradually incorporate small pieces of hair from the sides if you want added fullness, or keep it as two clean twisted ropes. Once you reach the back, secure with bobby pins and finish with a flexible-hold hairspray so the twist stays defined all day.
Pro tip: If your twists feel loose or too slippery, lightly backcomb or tease the roots of your top sections before you start twisting — this creates grip and prevents the twist from unraveling during the ceremony.
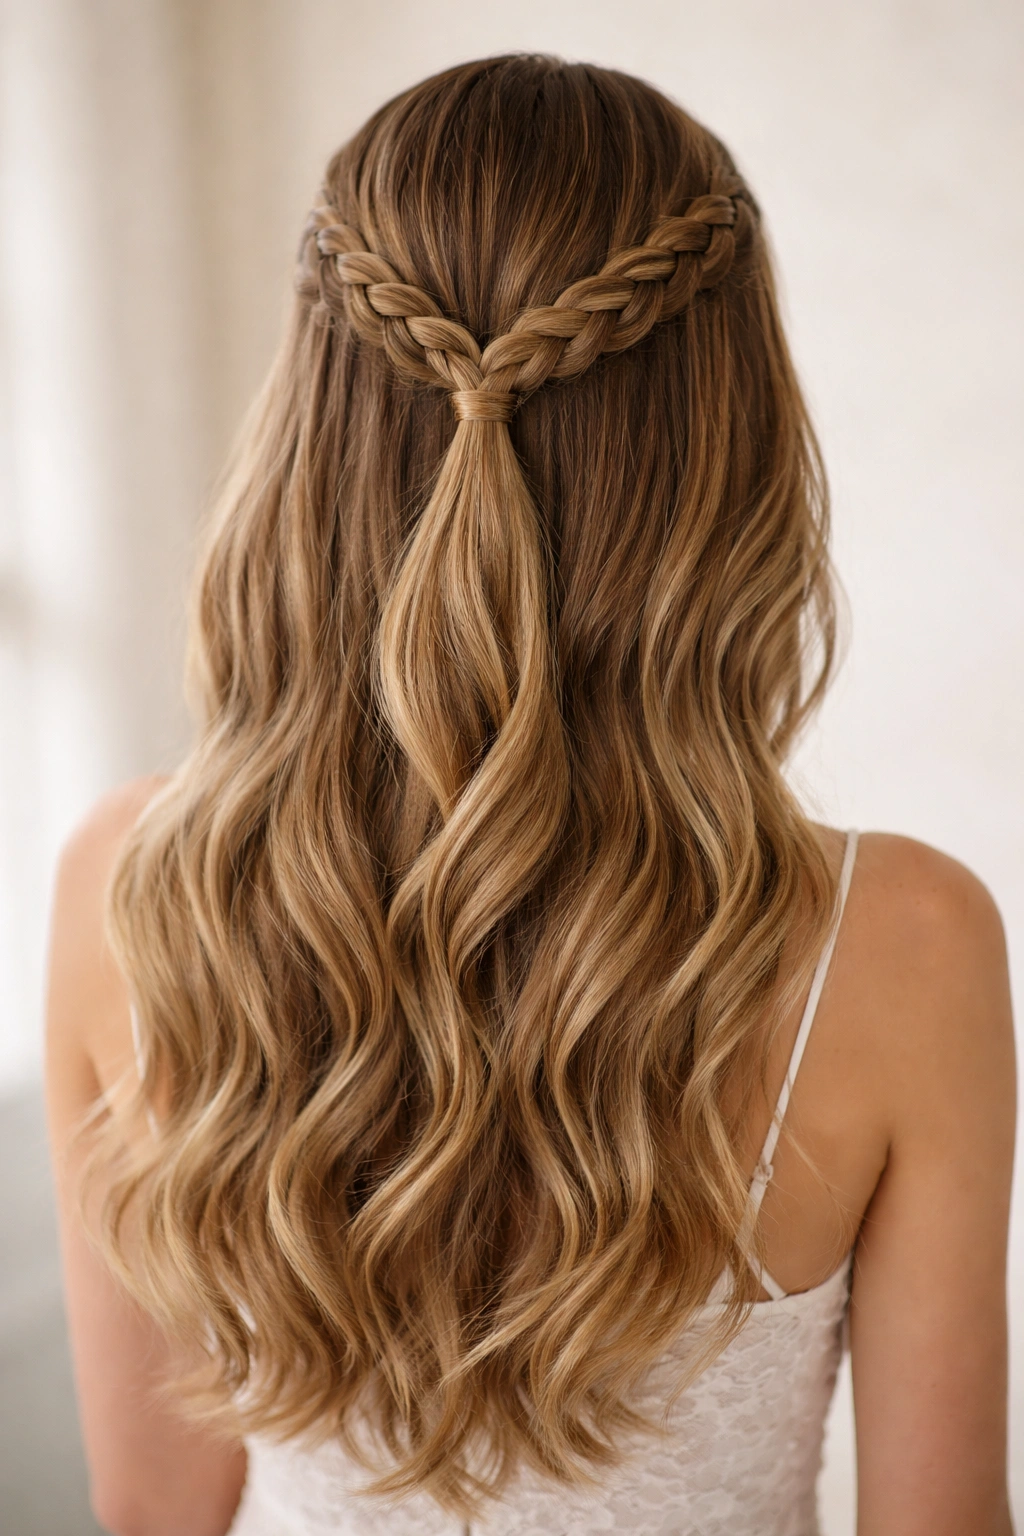
2. The Dutch Braid Half-Up

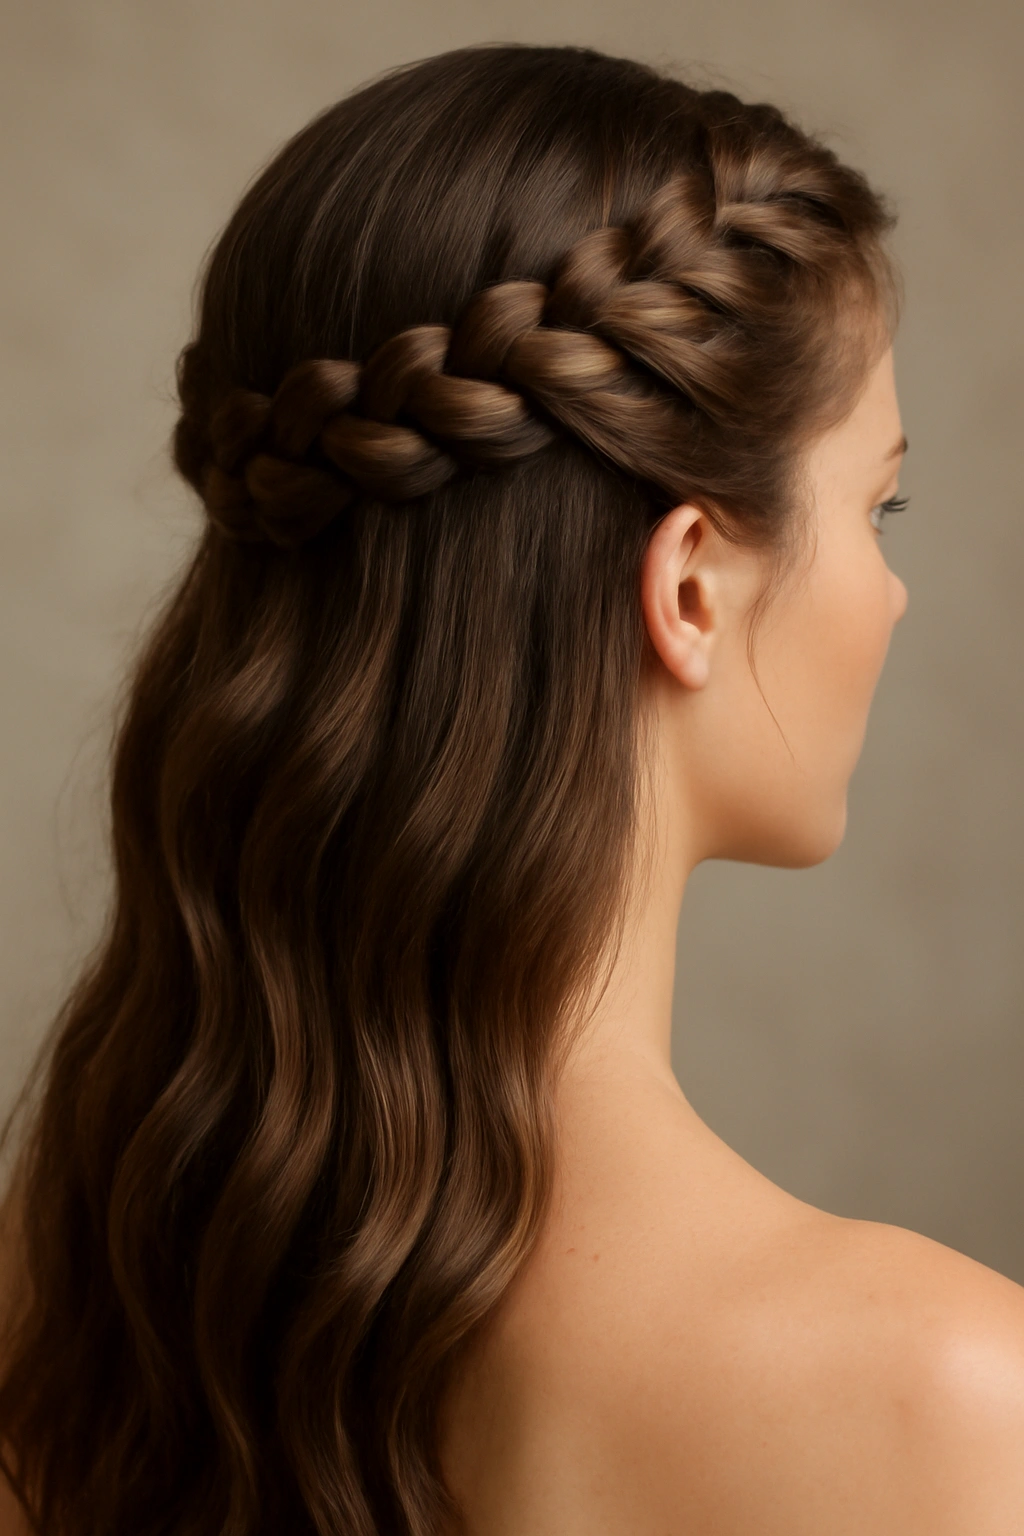
A Dutch braid is essentially a standard three-strand braid but reversed — instead of crossing sections over each other, you cross them under, which creates a raised, more sculptural braid that sits on top of your hair rather than nestling into it. This makes it naturally more visible and formal-looking, which is exactly what you want for a wedding. The Dutch technique works beautifully for a half-up style because the raised pattern reads as intentional and structured, never accidental.
Why Dutch Braids Command Attention
Dutch braids are inherently more dramatic than French or standard braids because they sit on your scalp rather than into it. This raised position makes the braid more visible and creates deeper shadows and dimension in photographs, which is particularly striking in wedding photos where professional lighting and camera angles make texture sing. The braid feels more architectural and refined, reading as a deliberate styling choice rather than a casual protective hairstyle.
Technique and Pro Execution Tips
Begin with a dry or lightly textured scalp section from one temple, and cross sections under each other rather than over as you work your way back. Keep even tension — Dutch braids are more forgiving of wonky tension than French braids, but consistency still matters. You’re aiming to gather roughly the same amount of hair you’d take for a half-up ponytail, creating a Dutch braid that runs from temple back toward the nape, then securing it with bobby pins and a small elastic band hidden beneath the remaining hair. For added impact, you can actually create two Dutch braids framing either side of the face, then combine them at the center back into a single clip or bun.
Worth knowing: Dutch braids can feel a bit thick or heavy on finer hair, so if you have delicate hair, consider loosening the braid slightly after securing it by gently pulling out small sections — this technique, called “pancaking,” makes the braid look fuller and softer without losing that structured Dutch aesthetic.
3. The Waterfall Braid Half-Up
A waterfall braid is one of the most romantic options for wedding day because it incorporates a continuous, elegant strand that literally cascades down your back, interweaving with the braid. The effect is ethereal and whimsical, and it reads beautifully on camera because of all the light-catching dimension. This style works particularly well if you have length and want to showcase it while still pulling some hair away from your face.
The Romantic Movement That Makes This Style Special
What makes the waterfall braid wedding-appropriate is its inherent movement and grace. Unlike tight, contained braids, the waterfall incorporates a running strand that falls freely, creating visual flow and lightness. This is especially striking in ceremony footage or outdoor photos where the cascading strand catches sunlight and wind naturally. The style signals elegance and intentionality without feeling stiff or overwrought.
How to Build a Secure Waterfall Braid
Start at one temple and begin a standard three-strand braid, but instead of incorporating all hair as you go, you’ll periodically drop one strand and replace it with a new piece from above. Specifically: start your first three strands, cross the bottom section over the middle (this strand will be your first “waterfall” strand). Instead of continuing the braid with this strand, let it fall freely and replace it with a new section of hair taken from above the braid line. Continue this pattern — crossing, dropping, replacing — as you work toward the back of your head. Secure the finished braid at the nape with bobby pins and an elastic band. The waterfall strands naturally cascade, creating that signature flowing effect.
Insider note: The thinner your waterfall strands, the more delicate and romantic the effect — but thin strands can also be harder to manage mid-ceremony. For wedding day reliability, make your waterfall sections proportionate enough to hold their shape but thin enough to feel graceful (roughly pencil-width is ideal).
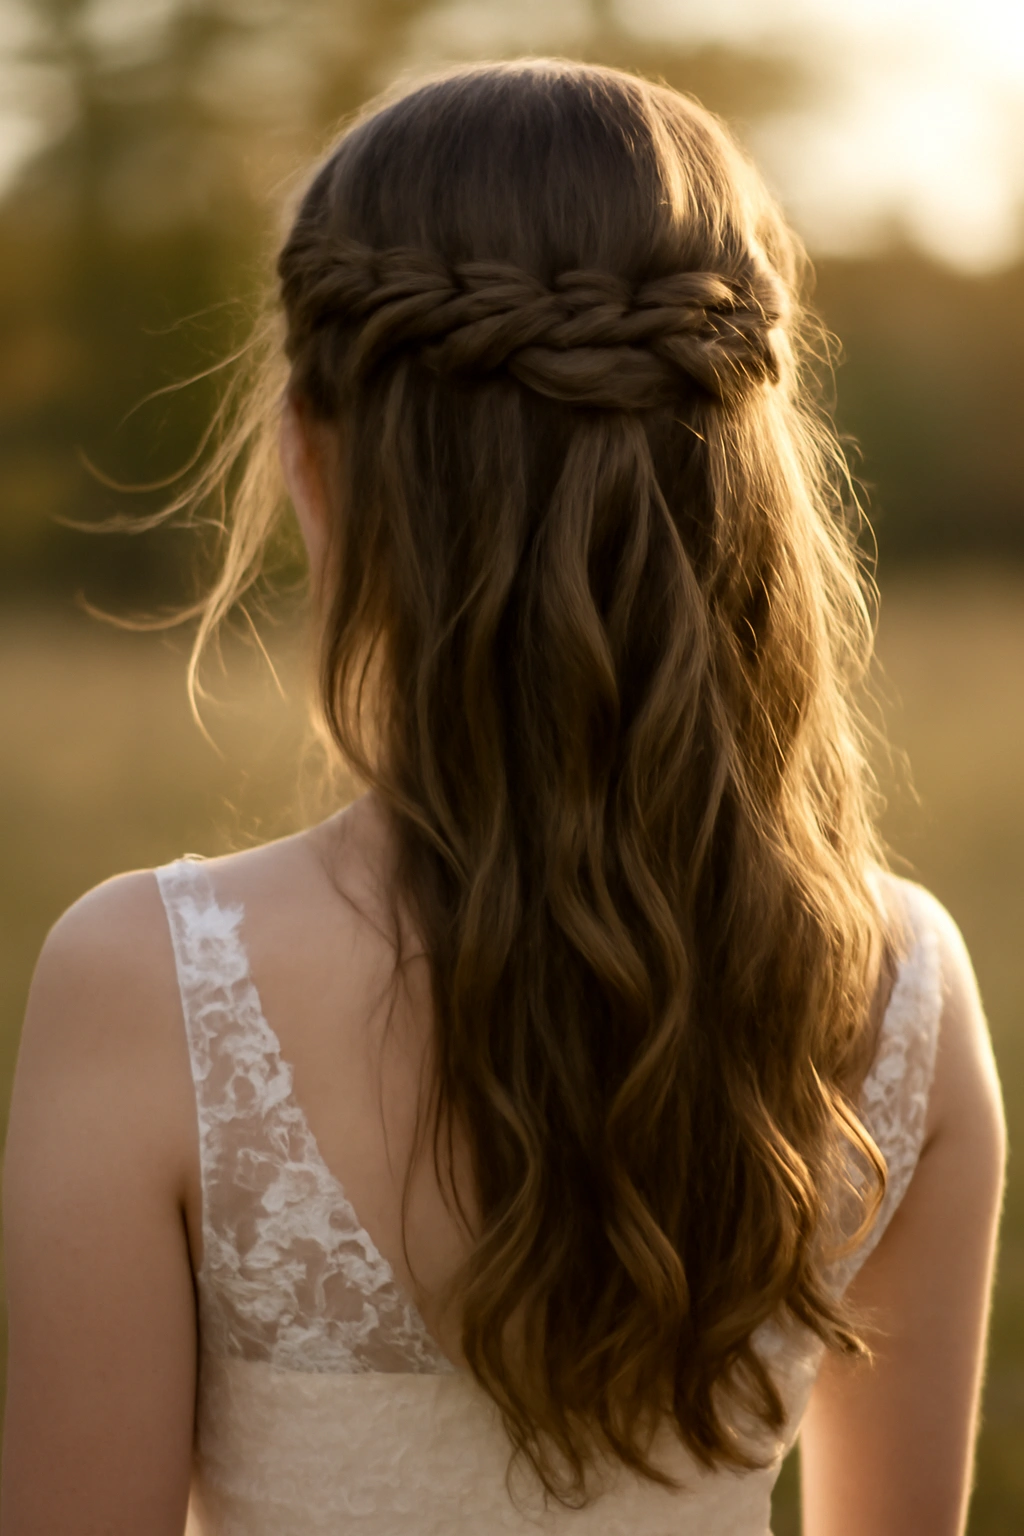
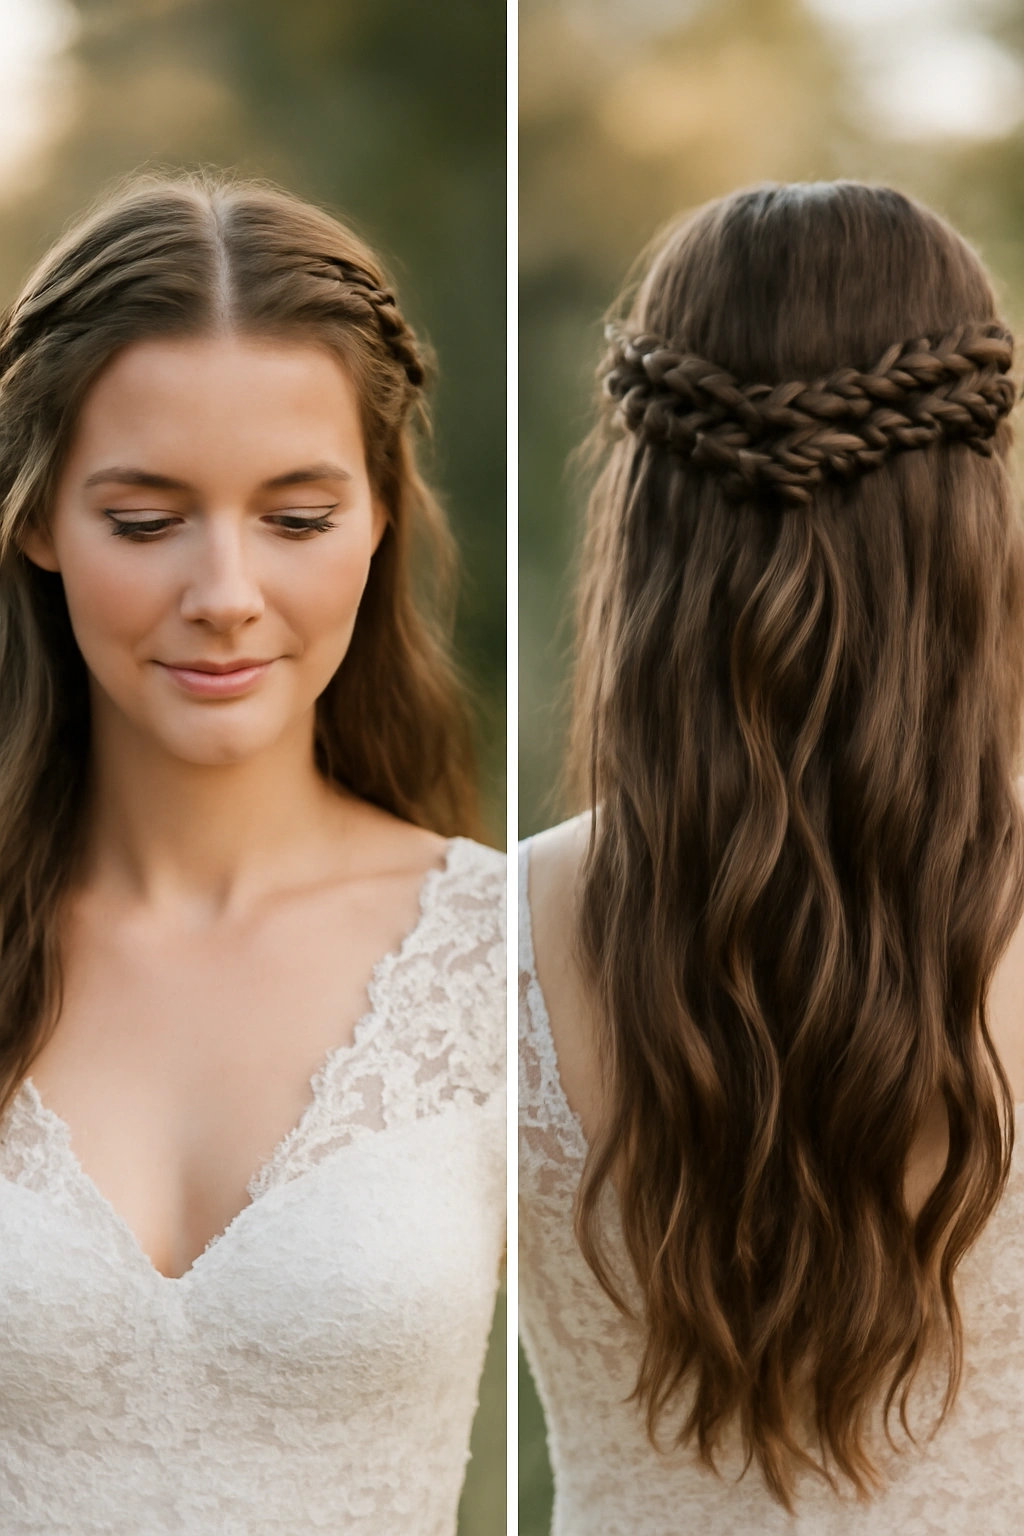
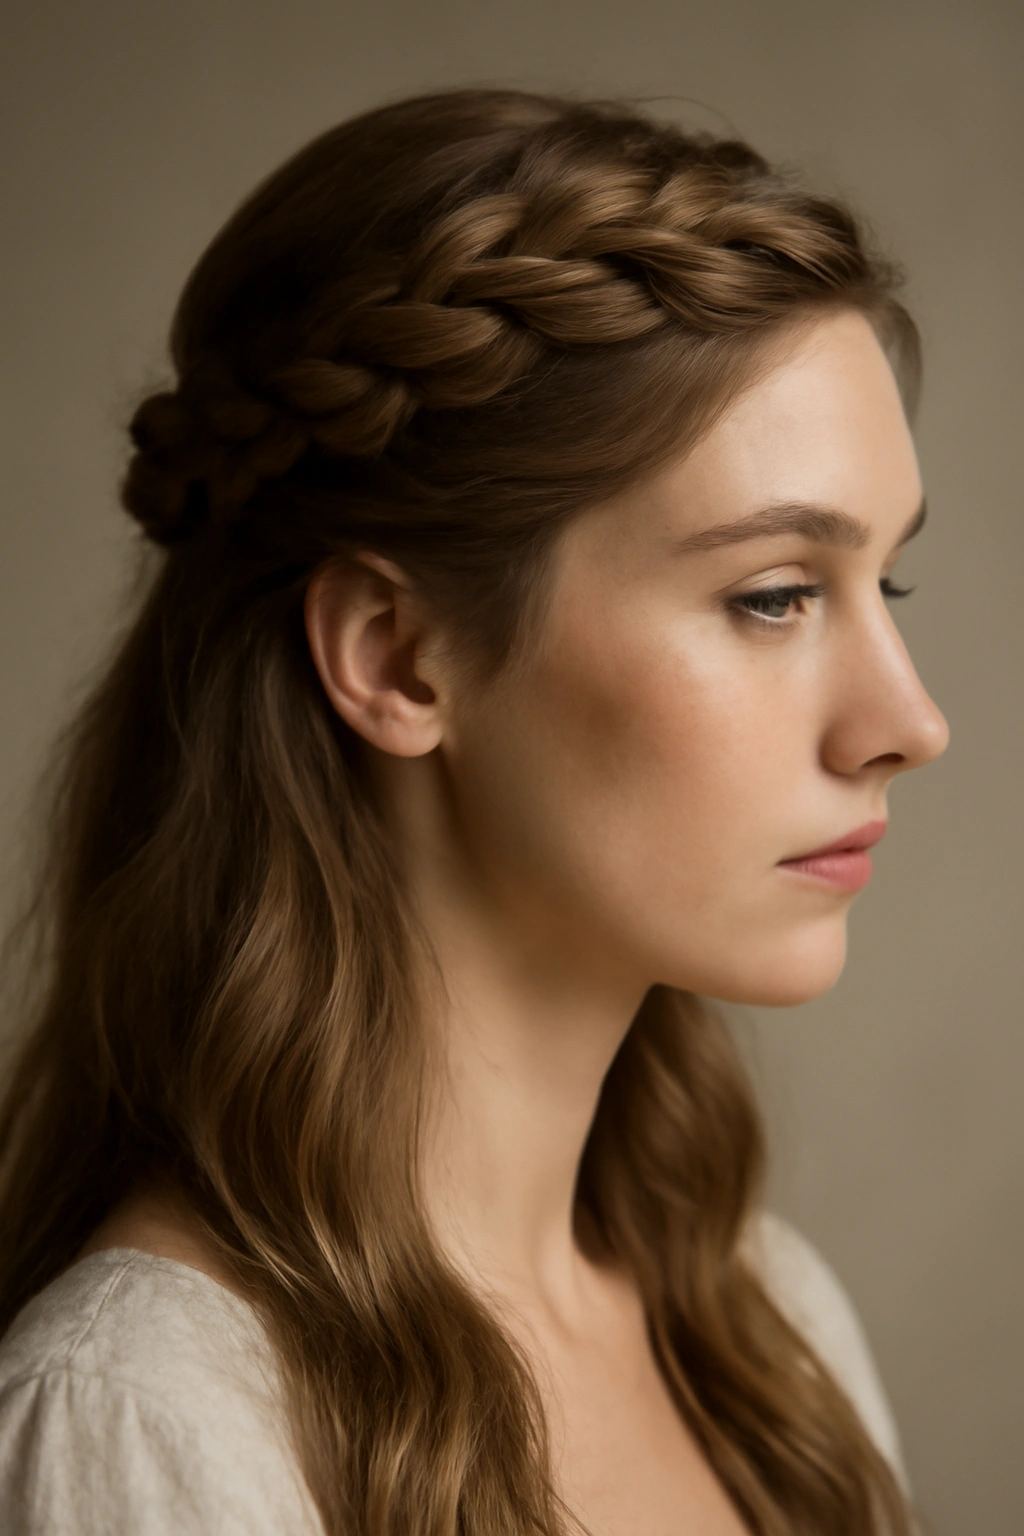
4. The Crown Braid Half-Up
A crown braid incorporates elements of a halo or wreath braid but only covers the crown section, making it perfect for a half-up hybrid. The braid runs along your crown from side to side, and the loose hair below flows freely, creating a style that’s ornate in the upper half and flowing in the lower half. This works beautifully for brides who want obvious bridal hair (the crown braid reads as intentional and formal) but who also want movement and the feel of their hair down.
Why Crown Braids Feel Inherently Bridal
Crown braids naturally frame the face and draw the eye upward toward the overall silhouette and any headpiece, veil, or floral crown you might wear. The positioning along the crown of the head makes it feel regal and special without being so contained that it reads as stiff. The braid sits at the prettiest angle for camera work, meaning it photographs beautifully from both front and side angles.
Execution and Positioning
A crown braid typically begins above one ear, travels across the back of the head, and ends above the opposite ear, with loose hair flowing beneath. Start by taking a generous section from above one ear — roughly one to two inches wide — and begin a standard or Dutch braid working horizontally across the back of your head. Keep the braid at approximately the level of your crown or slightly higher. Work all the way across to the opposite side, then secure with bobby pins tucked away beneath the braid. Leave the bottom half of your hair completely loose and flowing, and consider gently curling or waving it so the contrast between the structured crown braid and the soft, loose hair below feels intentional.
Pro tip: If you’re wearing a veil or headpiece, a crown braid is the ideal foundation — the structured braid keeps a veil from slipping, and a headpiece clips seamlessly over it.
5. The Fishtail Braid Half-Up
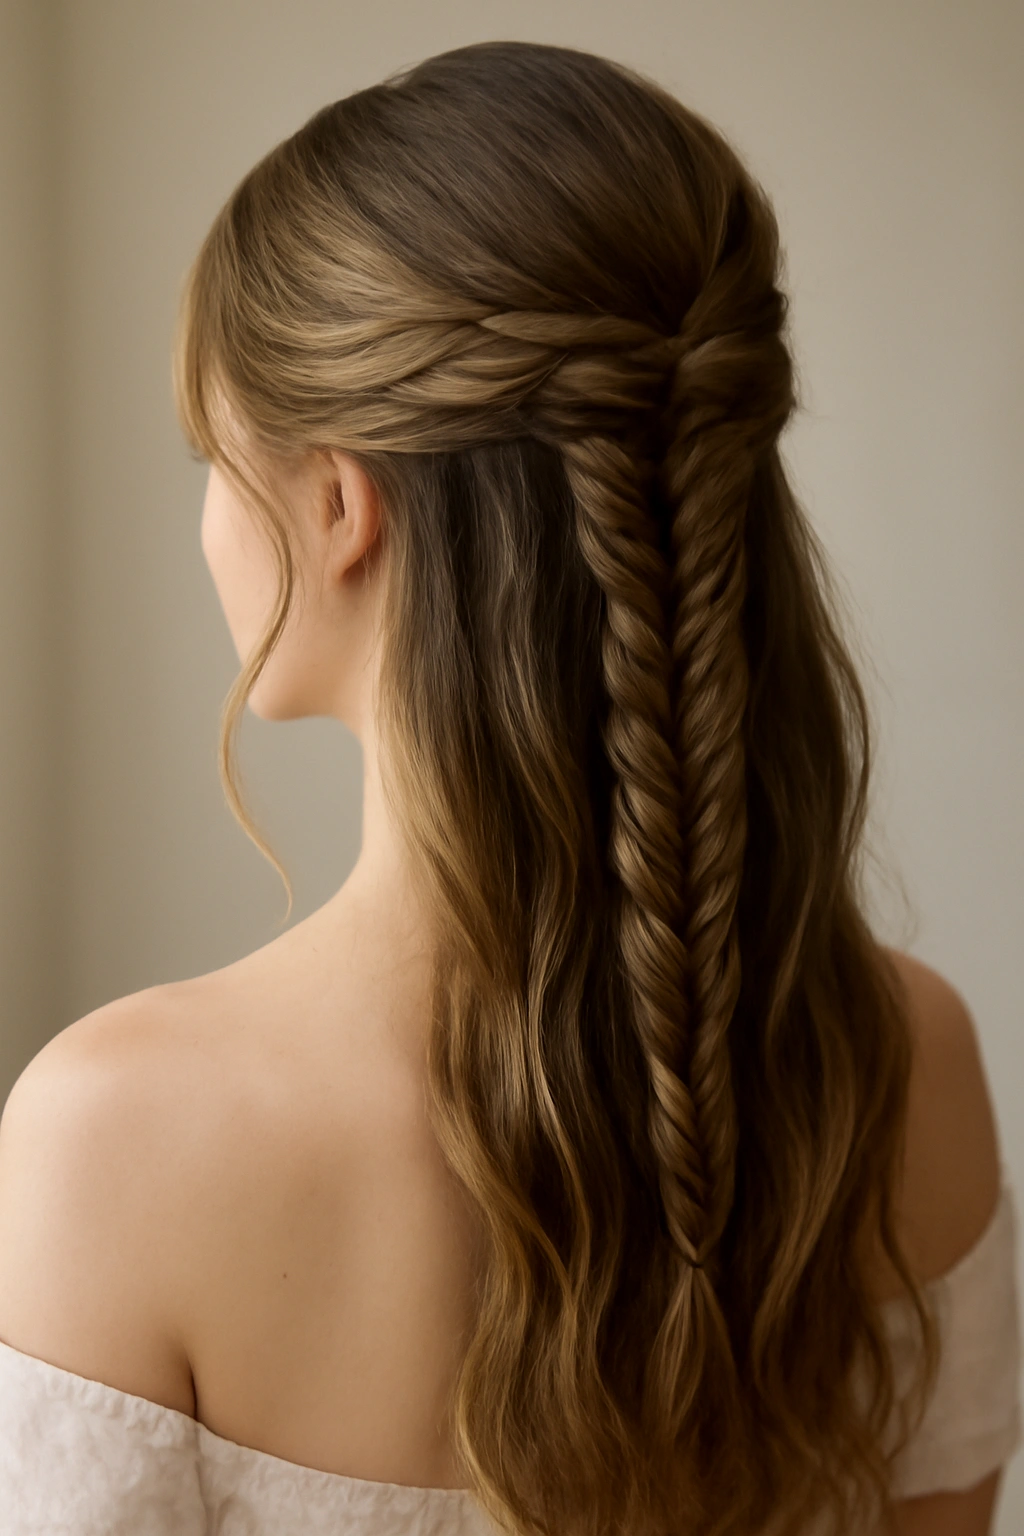
A fishtail braid uses a different technique than standard braiding — instead of three distinct strands, you’re working with two larger sections and alternately crossing tiny pieces from each side to the opposite section. The result is a distinctly tighter, more intricate-looking braid with a beautiful herringbone texture that photographs incredibly well. It’s particularly romantic and modern-feeling, making it ideal for brides who want something slightly unexpected.
The Visual Impact of Fishtail Texture
Fishtail braids create an incredibly detailed, tightly woven appearance that reads as far more intricate than it actually is. The herringbone pattern catches light beautifully and creates depth and dimension in photographs. Because fishtail braids are tighter and more compact than standard braids, they’re also excellent for wedding days — they hold their shape longer and remain crisp and defined even after hours of movement or outdoor elements.
Step-by-Step Fishtail Technique for Half-Up Styling
Divide your half-up section into two equal, large sections rather than three. Take a tiny (roughly dime-sized) piece from the underside of the right section and cross it over to join the left section. Take an equally tiny piece from the underside of the left section and cross it to the right section. Continue this alternating pattern all the way down, maintaining even tension and keeping your sections separated. The braid will feel quite tight and compact as you work, which is exactly right. Once completed, secure the fishtail with an elastic band, then gently backcomb or pancake the finished braid to make it appear fuller and softer if desired. This optional step rounds out the herringbone texture and makes it feel less severe.
Worth knowing: Fishtail braids work beautifully on already-curled or textured hair because the existing texture hides any slightly uneven sections. If you’re starting with straight hair, consider adding texture or curls before you braid to make your fishtail both easier and more visually forgiving.
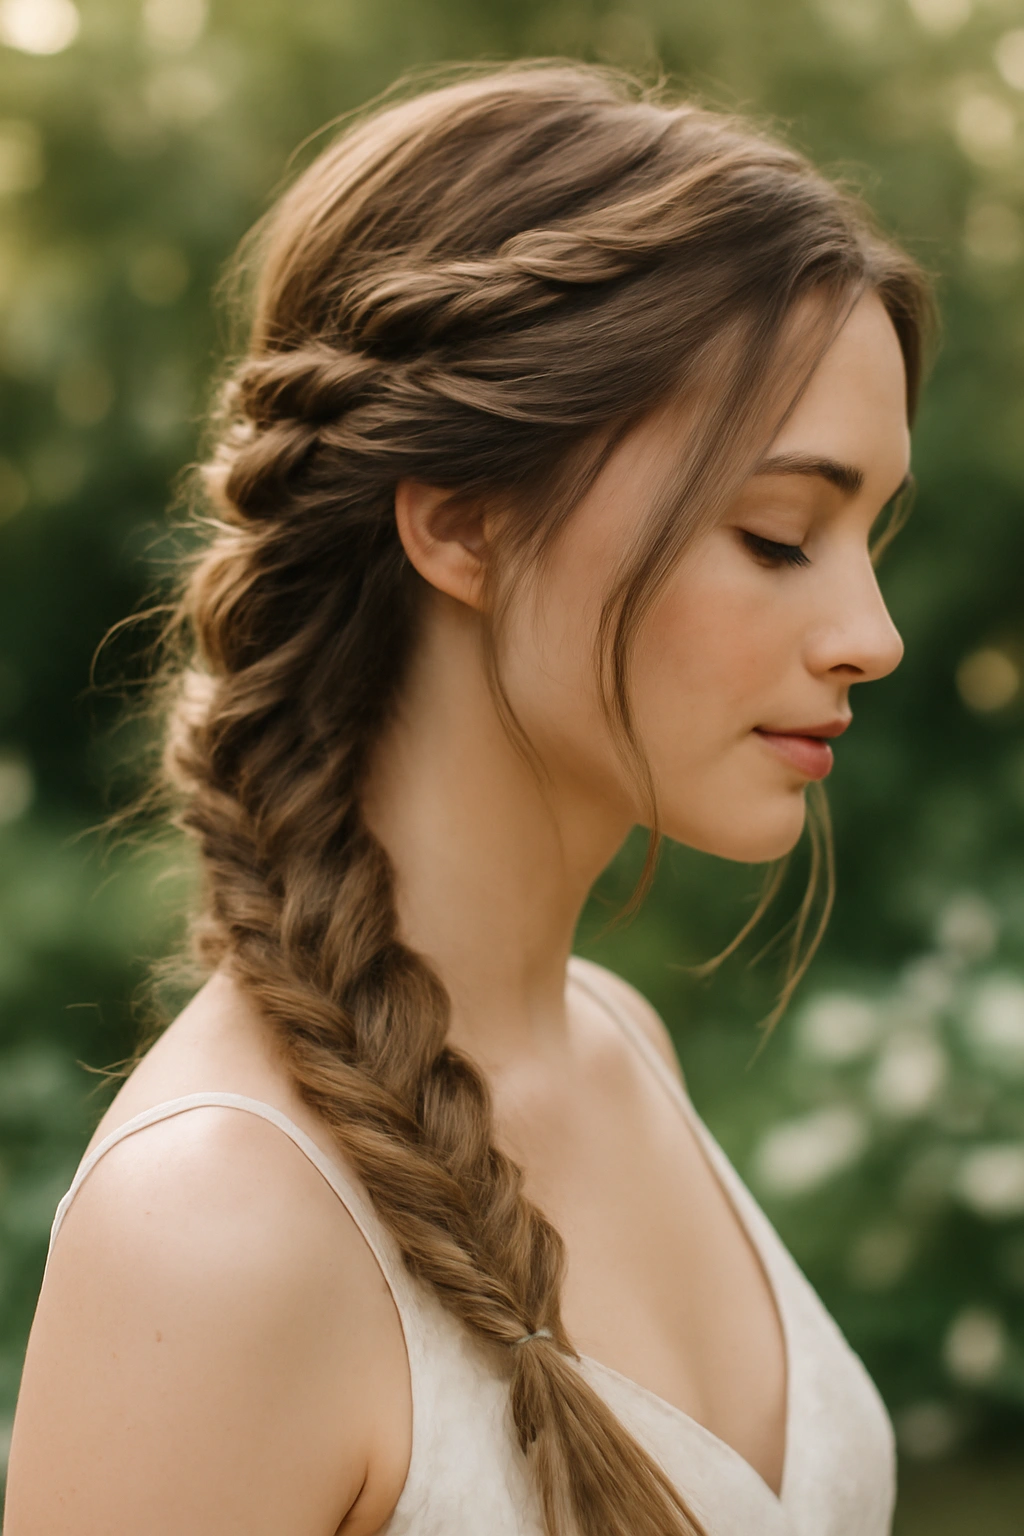
6. The Milkmaid Half-Up Braid
A milkmaid braid is essentially two braids that wrap around the crown of the head, meeting at the back. For a half-up version, you can create two braids starting at ear level, wrapping them up and across the crown, then leaving the remainder of the hair down and loose. This style is playful, romantic, and surprisingly formal when executed in fine, delicate sections. It’s also one of the easier half-up braids to master, making it an excellent choice if you’re doing your own hair.
Why Milkmaid Styles Feel Effortlessly Elegant
Two braids framing the head feel inherently balanced and intentional, but the style maintains a lightness and approachability that reads as less formal than a single dramatic crown braid. The double-braid format creates lovely symmetry in photos and suits nearly every face shape because the braids can be positioned to flatter specific features. The style also feels slightly modern and architectural despite its romantic name, making it work for contemporary wedding aesthetics.
Building Your Two-Braid Milkmaid Style
Begin at one ear and start a standard three-strand braid, working upward and slightly back toward the crown. Use a basic braid (not Dutch, not French) for a softer appearance. As you approach the crown area, continue the braid across toward the opposite side of the head, working horizontally. Once you’ve completed the first braid, start a second braid at the opposite ear, mirroring the path of the first. Both braids should meet at the center back of your head, where you’ll secure both braids together with bobby pins, or wrap the end of one braid into the beginning of the other for an interlocking appearance. Leave your hair loose below the braids, and consider adding soft waves or curls to the loose section for contrast.
Pro tip: For the most romantic effect, make your braids slightly loose and imperfect-looking by gently pancaking them after they’re secured — the more relaxed, less-engineered aesthetic is actually more bridal than too-tight perfection.
7. The Double-Braid Half-Up
Distinctly different from a milkmaid braid, a double-braid half-up incorporates two braids that work together but don’t wrap as dramatically around the crown. Instead, you create two vertical braids on either side of your head, starting from sections around temple level and working downward, then secure both braids together at the center back. This creates a modern, architectural feel that’s particularly striking on straight or wavy hair.
The Modern Geometry of Double Braids
Two parallel braids create clean lines and symmetry that photograph beautifully, especially in professional wedding photography where geometry and composition matter. The style feels contemporary and intentional while remaining completely bridesmaid or wedding-guest appropriate. The key is positioning the braids so they create a pleasing frame for the face and draw the eye toward the center back of the head where they merge.
Execution and Positioning for Maximum Impact
Start at roughly temple level on one side and create a standard braid that travels slightly back and downward toward the nape. Don’t start at the very crown — starting a bit lower creates a more modern, less “costume-y” feel. As you braid, maintain vertical lines so the braid descends in a fairly straight path. Repeat on the opposite side, mirroring the positioning. Once both braids reach the nape area, secure both together with bobby pins, a small comb, or a bejeweled hair clip. The loose hair below the merging point remains down and flowing. Consider adding a subtle braid texture or bend to the bottom section by very gently curling the ends.
Insider note: The beauty of this style is that the braids don’t have to be perfectly tight or identical — slight variations actually make it look more intentional and less like a rigid updo. Embrace a little imperfection in tension and width.
8. The Loose Romantic Half-Up Braid
If the other styles feel too structured or you prefer an undone, effortless appearance, a loose romantic braid is your answer. This style incorporates a single, very relaxed braid that runs from one side of your head back toward the opposite shoulder, staying in that half-up territory. The braid is deliberately loose and textured, emphasizing movement and flow over precision. When done well, it looks like you simply braided a section of your hair without overthinking it — which is actually what makes it beautifully romantic.
The Subtle Elegance of Imperfect Texture
A loose, slightly messy braid reads as romantic and ethereal rather than undone or careless. The key is intentionality in the looseness — you’re creating a specific relaxed effect, not just braiding lazily. This style particularly suits outdoor weddings, garden ceremonies, or any aesthetic that leans boho or romantic. It also photographs beautifully because the loose sections catch light and create dimension that tighter braids sometimes miss.
How to Create Loose Structure With Intention
Take a section from one temple or the side of your head and begin a basic three-strand braid, working loosely and not pulling the sections too tightly. As you braid, don’t worry about perfect alignment or even tension — this style celebrates variation. Once you’ve braided roughly six to eight inches, stop and secure the braid with a small elastic band. Now comes the magic: gently pull out small sections from the sides of the braid to make it wider and less defined. Pull from all the way down the braid, creating an increasingly relaxed appearance as you go. The goal is a braid that’s clearly intentional but looks like it just happened naturally. Leave all remaining hair loose, and curl it gently so the loose hair and the loose braid feel cohesive.
Worth knowing: This style works beautifully with a delicate hair accessory positioned where you secured the braid — a pearl clip, a small comb, or even a velvet ribbon can elevate the intentional looseness and tie it into your overall aesthetic without making it feel like costume.
Getting Your Hair Wedding-Ready Before Braiding
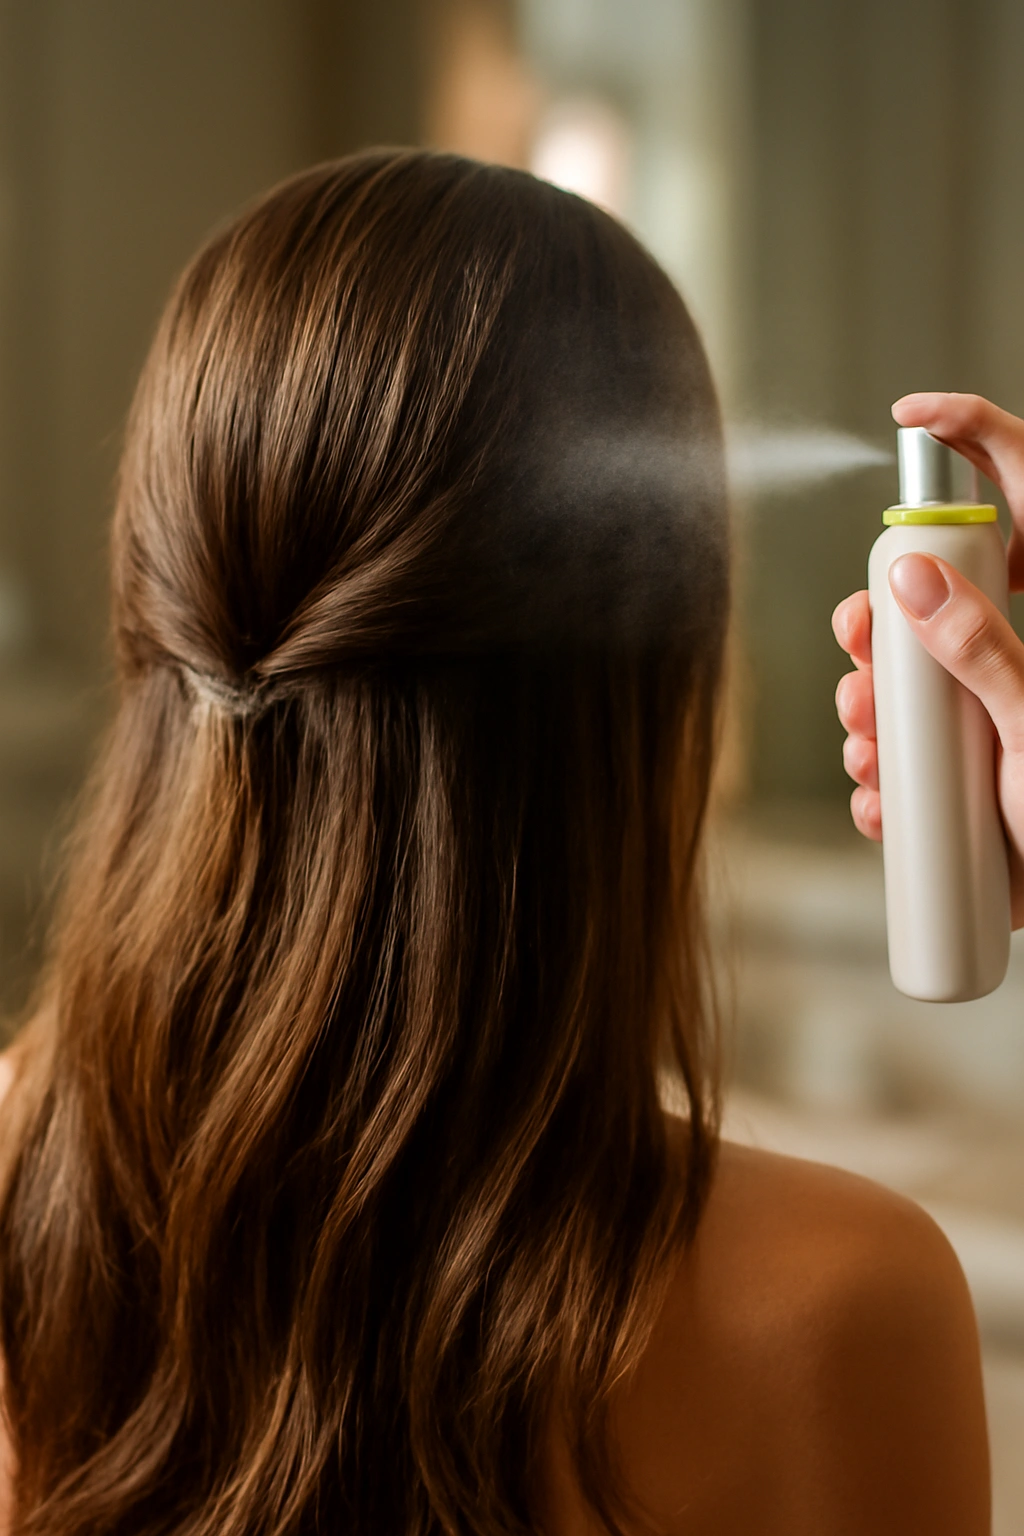
The foundation for any successful braided hairstyle is proper hair preparation. Starting two to three weeks before the wedding, begin a deep conditioning routine to ensure your hair has maximum shine, strength, and texture. Braids grip better and look fuller on textured hair than on completely smooth, slippery strands, so if your hair is naturally straight, consider adding light texture the day before or the morning of your styling. A light texture spray, sea salt spray, or even a careful blow-dry with your round brush held at angles (rather than straight down) creates the grip that makes braids hold beautifully all day.
Avoid washing your hair the morning of braiding if possible — second or third-day hair braids better because natural oils create texture and grip. If you must wash it, do so the night before, then apply a lightweight mousse or texture spray before blow-drying. Blow-dry your hair into the general shape you want it — if you’re planning loose waves below the braid, wave it loosely while blow-drying rather than trying to curl it afterward. This creates a more natural, longer-lasting wave that won’t fall flat under the weight of braids.
Consider getting a professional blow-out the morning of or night before your event, especially if you’re the bride. A stylist can ensure your hair has exactly the right texture and foundation for braiding. Even a half-hour professional blow-dry creates a foundation that braids hold onto far better than DIY drying.
Best Products and Tools for Half-Up Braids
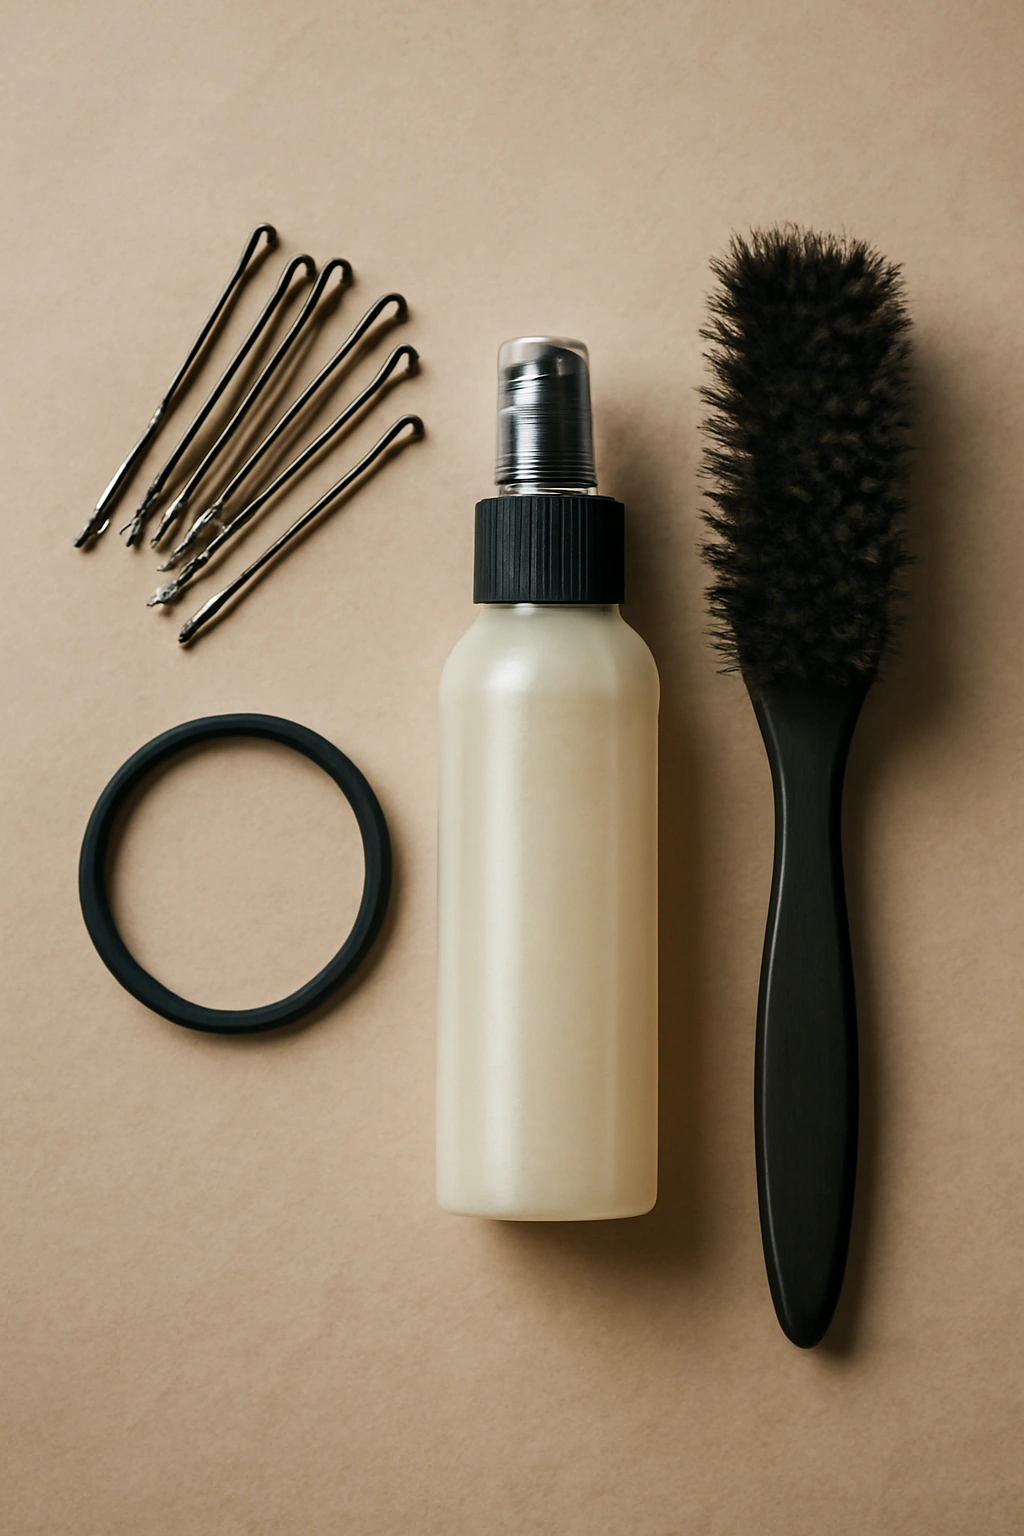
The right tools and products make the difference between a braid that lasts four hours and one that stays camera-ready all day. Invest in quality bobby pins — cheap, thin pins slip and don’t grip well. Look for pins with a slight texture or matte finish rather than shiny, slippery ones. Keep both small and medium sizes on hand. An elastic band designed for braids (typically silicone-coated or fabric-wrapped) is essential — cheap elastics snap hair and create visible breakage in photos.
Texture spray is nearly non-negotiable for successful braiding, particularly if you have fine or slippery hair. A light spritz before you start braiding, and another light mist as you work, creates grip that helps braids hold their shape. Look for flexible-hold formulas that don’t stiffen your hair — you want texture, not crunch. A teasing brush or backcomb is invaluable for adding grip at your braid foundation, especially if you’re pinning braids into place.
For finishing and touch-ups, a flexible-hold hairspray (not ultra-firm) keeps braids from loosening throughout the day without making hair feel crunchy or stiff. Firm, heavy hairsprays photograph with shine that can look artificial, while flexible holds maintain natural movement while keeping braids locked in place. Have this on hand for touch-ups throughout your event.
A fine-tooth comb helps separate braid sections if you’re nervous about uneven spacing, and a hook or threading tool (similar to a crochet hook) can help you position bobby pins precisely without creating creases or bends in hair. Many professional stylists use these tools, and they’re inexpensive to own.
Choosing the Right Style for Your Face Shape
Different braided styles flatter different face shapes, and choosing one that complements your features ensures you’ll feel confident all day. If you have a round or softer face shape, styles that add height and vertical lines — like a crown braid or vertical double braids — create a lengthening effect and balance rounder proportions. Avoid styles that sit too low or create horizontal lines, which can emphasize width.
A square or angular face shape looks beautiful with softer, rounder braids like milkmaid styles or twisted half-ups, which soften angular lines and create gentleness. Avoid very tight, sculpted braids that emphasize the face’s inherent structure.
For a heart-shaped face with a wider forehead and narrower chin, styles that add volume at the sides — like fishtail braids positioned at ear level or waterfall braids that draw the eye downward — balance the proportions beautifully. Crown braids work well too, as they frame the upper face without adding heaviness to the chin area.
An oblong or longer face shape looks beautiful with fuller, more textured braids that add width — milkmaid braids, double braids, or thicker fishtail braids create the visual fullness that balances length. Crown braids can work too, but looser, fuller styles are often more flattering than tight, sleek versions.
If you’re unsure, consult with your stylist before your wedding and bring reference photos of your top three style choices. A professional can advise which works best for your specific face shape, hair type, and the overall aesthetic you’re going for.
How to Add Accessories and Embellishments
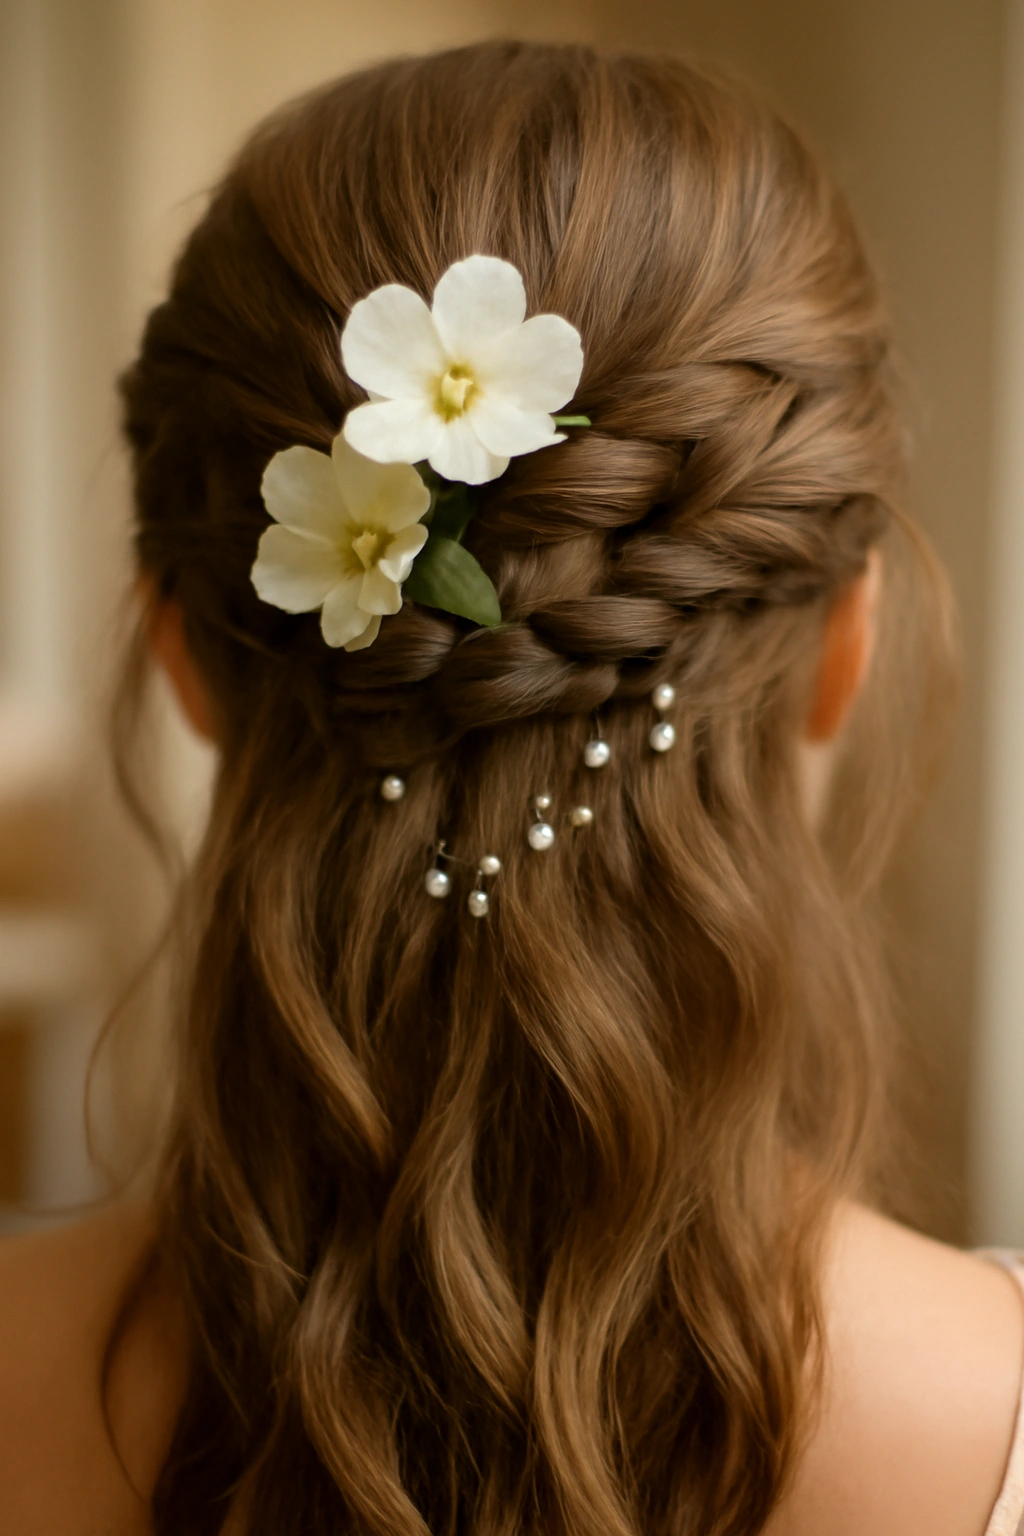
Half-up braids are the perfect canvas for hair accessories, and the right embellishments can elevate your style from pretty to absolutely stunning. Fresh flowers woven into or secured near your braids are classic bridal — think sprigs of baby’s breath, garden roses, or small clusters of your wedding flowers. Wire flowers into your braid or secure them with bobby pins just above where the braid is secured. This works beautifully for outdoor or garden weddings and photographs like a dream.
Pearl or crystal combs can be positioned where your braids meet at the back, adding sparkle and intentionality. If you prefer subtlety, use a single delicate comb. If you want more impact, cluster two or three smaller combs together. Velvet ribbons woven into or tied around your braid add texture and can echo your wedding colors — blush, champagne, or soft sage are all beautifully subtle choices.
Hair pins and bobby pins designed as jewelry are another option — rose gold, gold, or silver pins with pearls or crystals can be scattered throughout your braids or clustered at the base. Use them intentionally rather than hiding them; position them so they’re visible and contribute to your overall aesthetic.
For a more dramatic option, consider decorative hair sticks, elaborate clips, or ornate combs if your aesthetic is bohemian or fashion-forward. These work particularly well with looser, more relaxed braid styles. Position them where your braids are secured at the back, and make sure they’re stable enough to last through ceremony and dancing.
A delicate headpiece or veil sits beautifully on top of a half-up braid (particularly crown braids, which provide an excellent anchor). Make sure your hairstylist and your bridal accessory supplier communicate so your chosen pieces work together seamlessly.
Final Thoughts
Choosing a half-up braided style for a wedding is choosing a look that’s both intentional and romantic, polished and approachable. The key to success is starting with healthy, textured hair, using the right tools and products, and committing to the specific style by practicing it before your big day. If you’re not a professional braider, don’t wait until wedding day to attempt your chosen style for the first time — try it several times in advance so your hands understand the mechanics and you know exactly how long it takes.
Consider booking a trial with your stylist at least a month before the wedding, even if you’re planning to do your own hair on the day. A professional can show you exactly how to achieve your chosen style, which tools and products work best, and offer personalized tips based on your specific hair type and texture. You’ll feel infinitely more confident walking into your event knowing you’ve already successfully executed the style.
Most importantly, choose a style that makes you feel like yourself — just a slightly more polished, intentional version. Your confidence will shine through in photos and throughout the day far more than any technical perfection of the braids themselves. Half-up braided styles are forgiving enough that slight imperfections actually add to the romantic, intentional aesthetic. Embrace the process, trust the style you’ve chosen, and enjoy wearing something beautiful that you helped create.