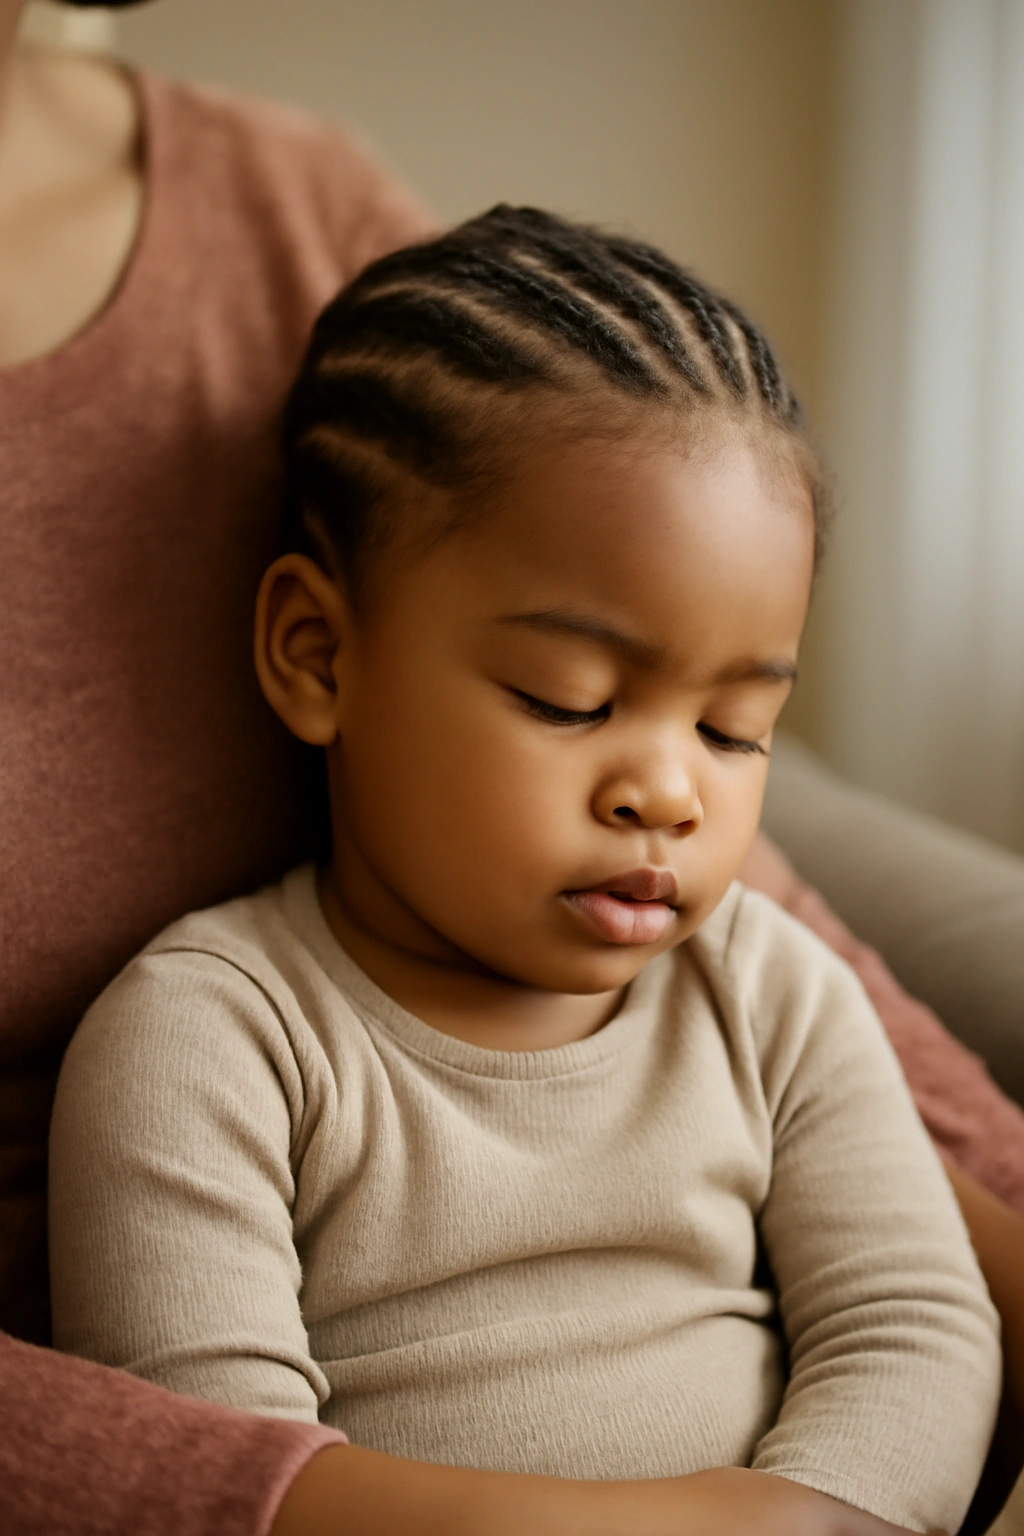
Braided hairstyles are more than just a way to style your toddler’s hair—they’re a celebration of cultural heritage, a practical solution for maintaining healthy curls, and honestly, an art form that can make any little one feel absolutely beautiful. Finding the right braided style for your Black toddler can feel overwhelming at first, especially if you’re navigating the learning curve of working with textured hair or you’re new to braiding altogether. The beautiful truth is that there are endless possibilities when it comes to protective styles, from simple, quick-to-execute designs you can refresh at home to more intricate braided creations that become real head-turners wherever you go.
What makes braided hairstyles so valuable for toddlers with textured hair goes beyond aesthetics. These styles protect delicate curls and coils from daily manipulation, weather, and friction, which means healthier hair growth, less breakage, and less stress during wash days. Plus, a well-done braid keeps hair tidy and neat throughout the day—a genuine win when you’re managing a busy toddler who’s climbing, playing, and getting into everything.
The styles in this guide range from beginner-friendly options you can learn to do at home to more intricate designs that might benefit from a professional braider’s touch. Each one has its own personality, maintenance rhythm, and best-case-scenario wear time. Whether you’re looking for something quick for school pick-ups, an elaborate style for a special occasion, or a protective style that’ll hold strong for several weeks, there’s something here for your child.
1. Classic Box Braids for Toddlers
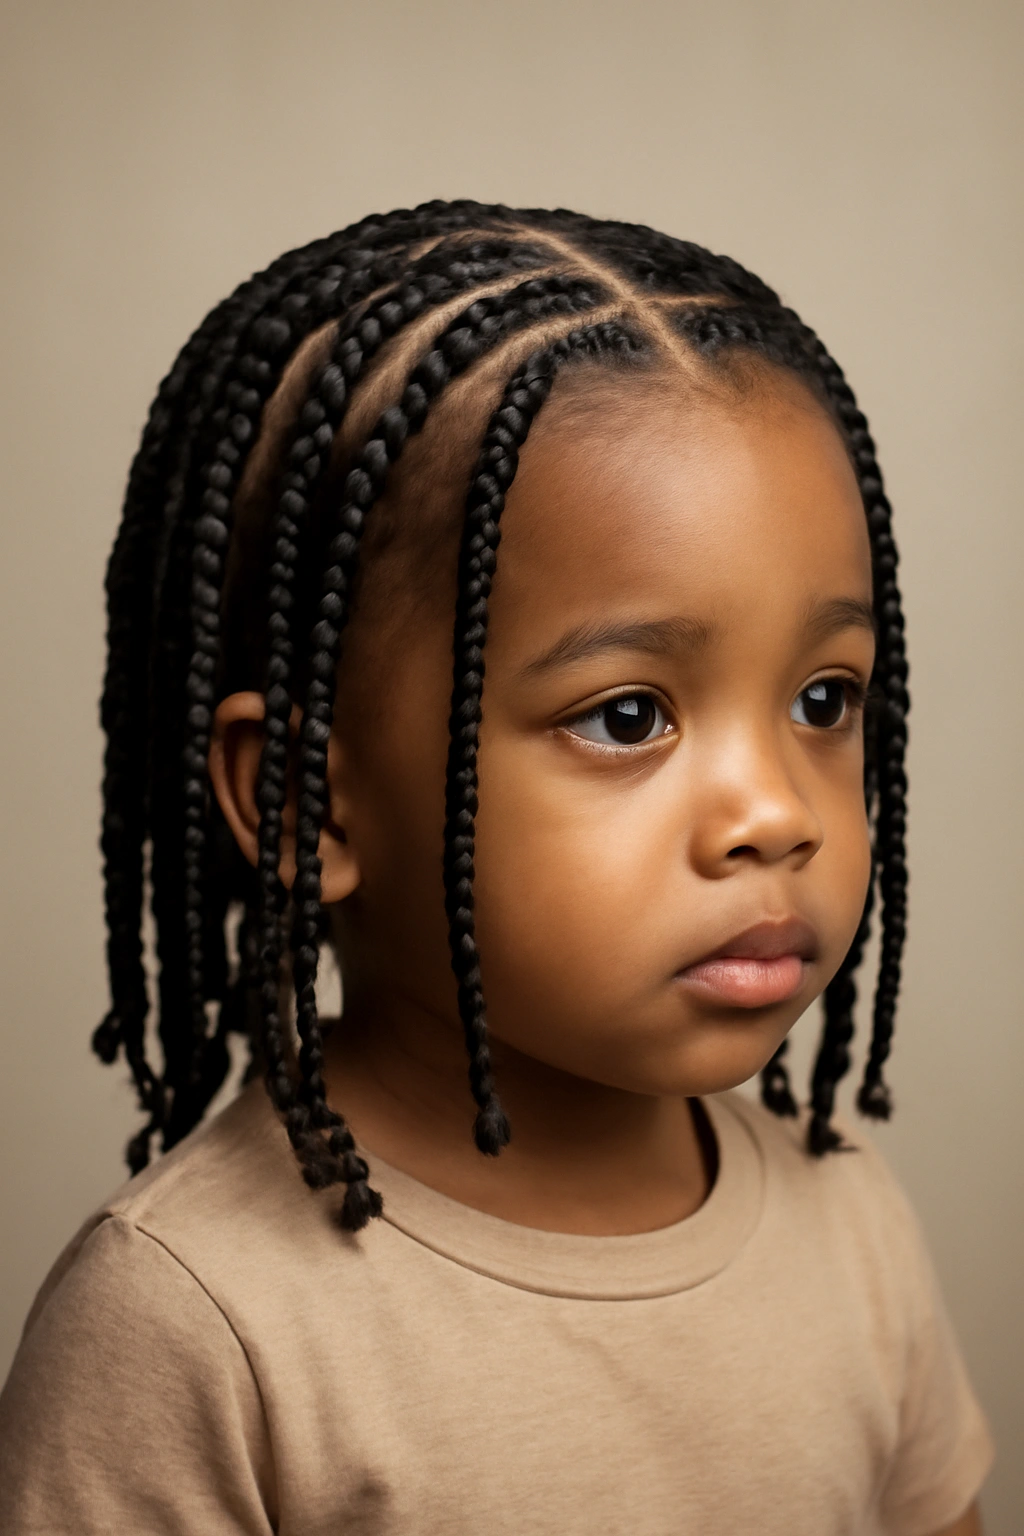
Box braids are the workhorse of protective styling—they’re versatile, they last, and they look stunning when done right. For toddlers, the key is working with smaller sections so the braids aren’t too heavy or tight on the delicate scalp. A good braider will use a grid or section-off method to create uniform, evenly-distributed boxes that don’t create tension or pull.
Why This Style Works for Toddlers
Box braids are brilliant for little ones because they distribute the hair weight evenly across the scalp, preventing stress and breakage on any one area. The braids stay neat for weeks with minimal daily maintenance, which is ideal when you’ve got a toddler who moves constantly. The style is also remarkably versatile—you can style the ends with beads, wrap them, or tie them up with accessories to create different looks from the same protective base.
How Long They Last and Care Tips
Well-executed box braids on a toddler typically hold strong for 4 to 6 weeks, depending on how quickly your child’s hair grows and how well you’re managing them. Spray your child’s scalp with a lightweight braid spray or diluted water-and-conditioner mix every few days to keep the hair moisturized. At night, loosely bundle the braids into a pineapple (a high, loose ponytail) or wrap them in a silk or satin head wrap to minimize friction and frizz.
Pro tip: Don’t add heavy synthetic hair extensions or beads if you’re concerned about neck strain—your toddler’s neck muscles are still developing, and lighter is genuinely better.
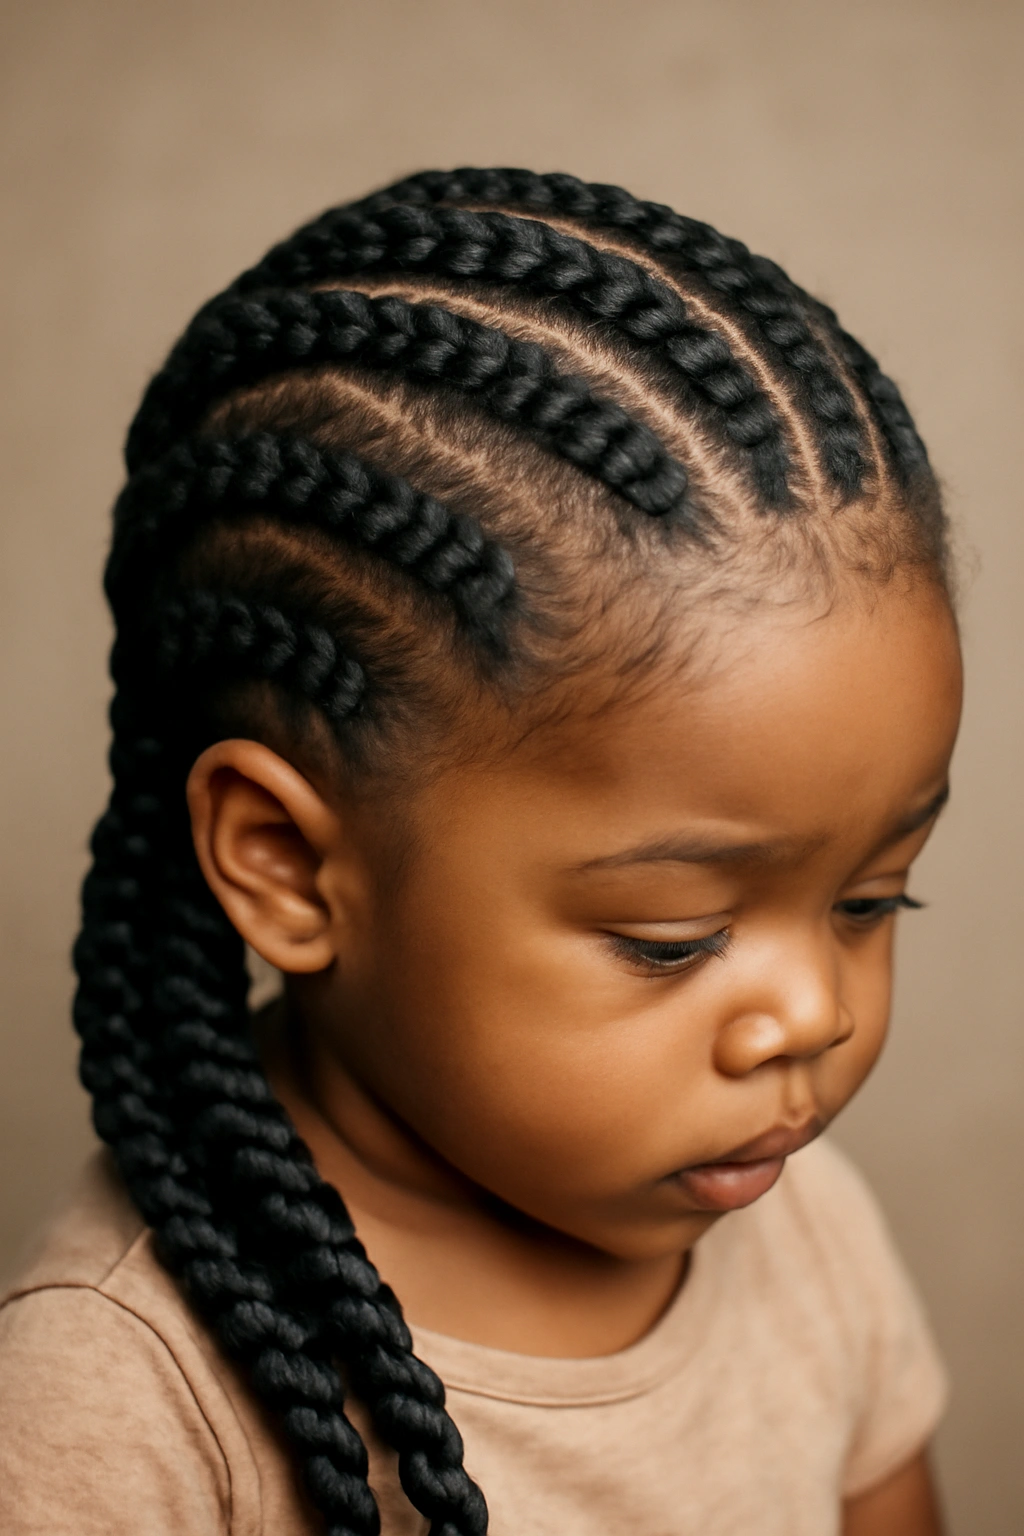
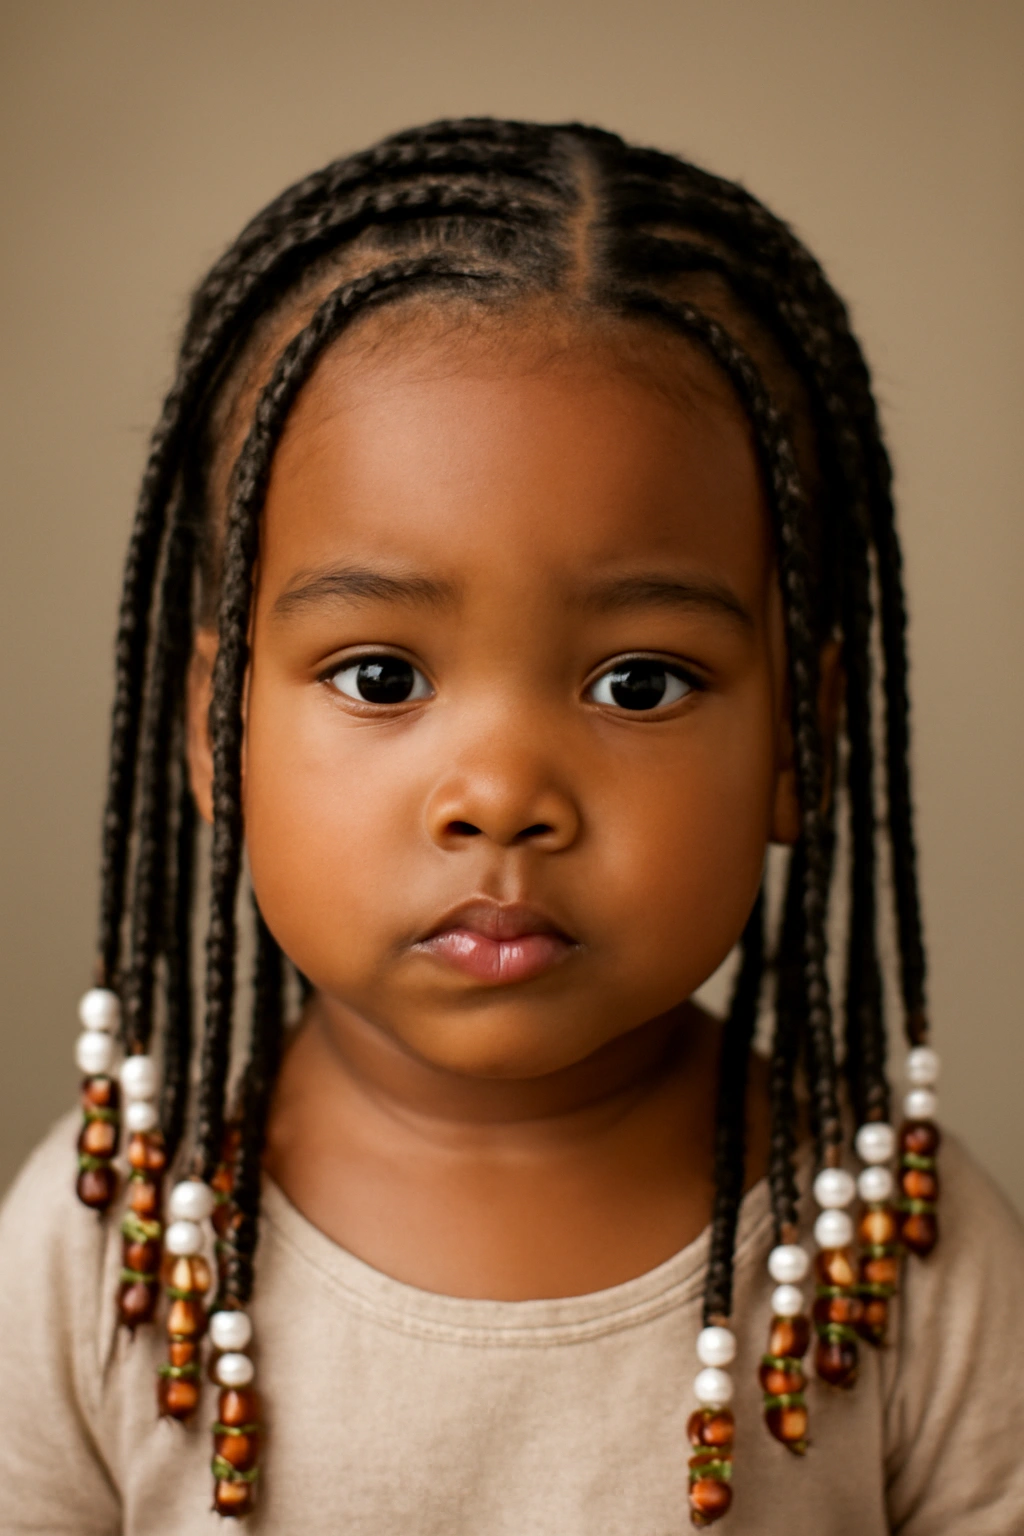
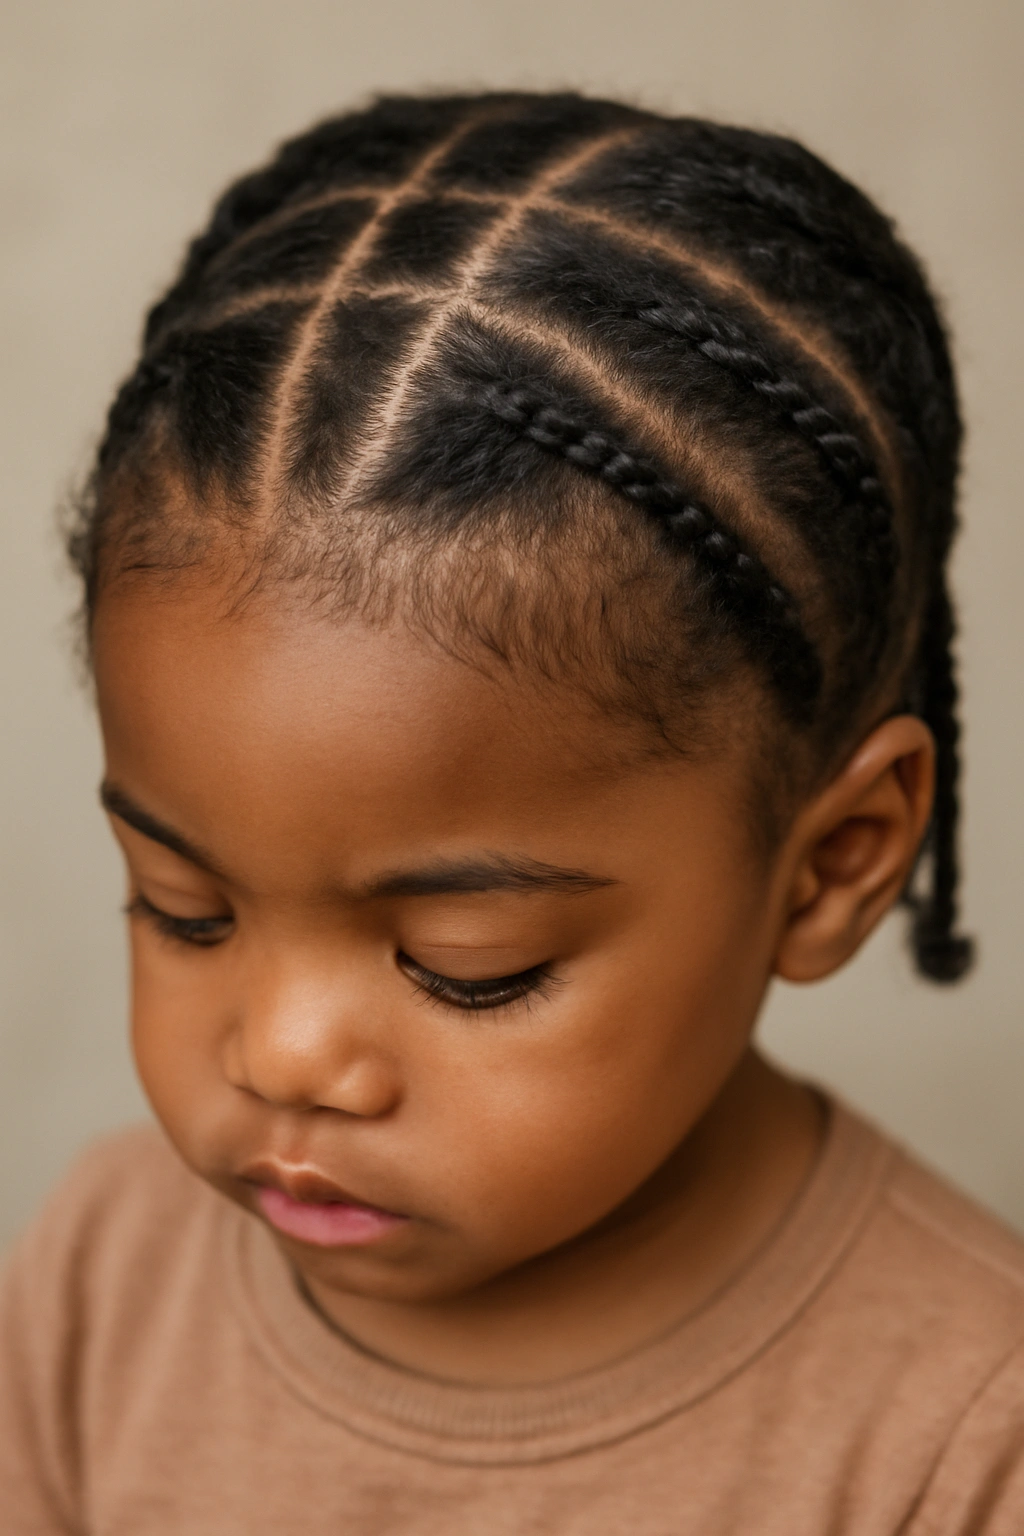
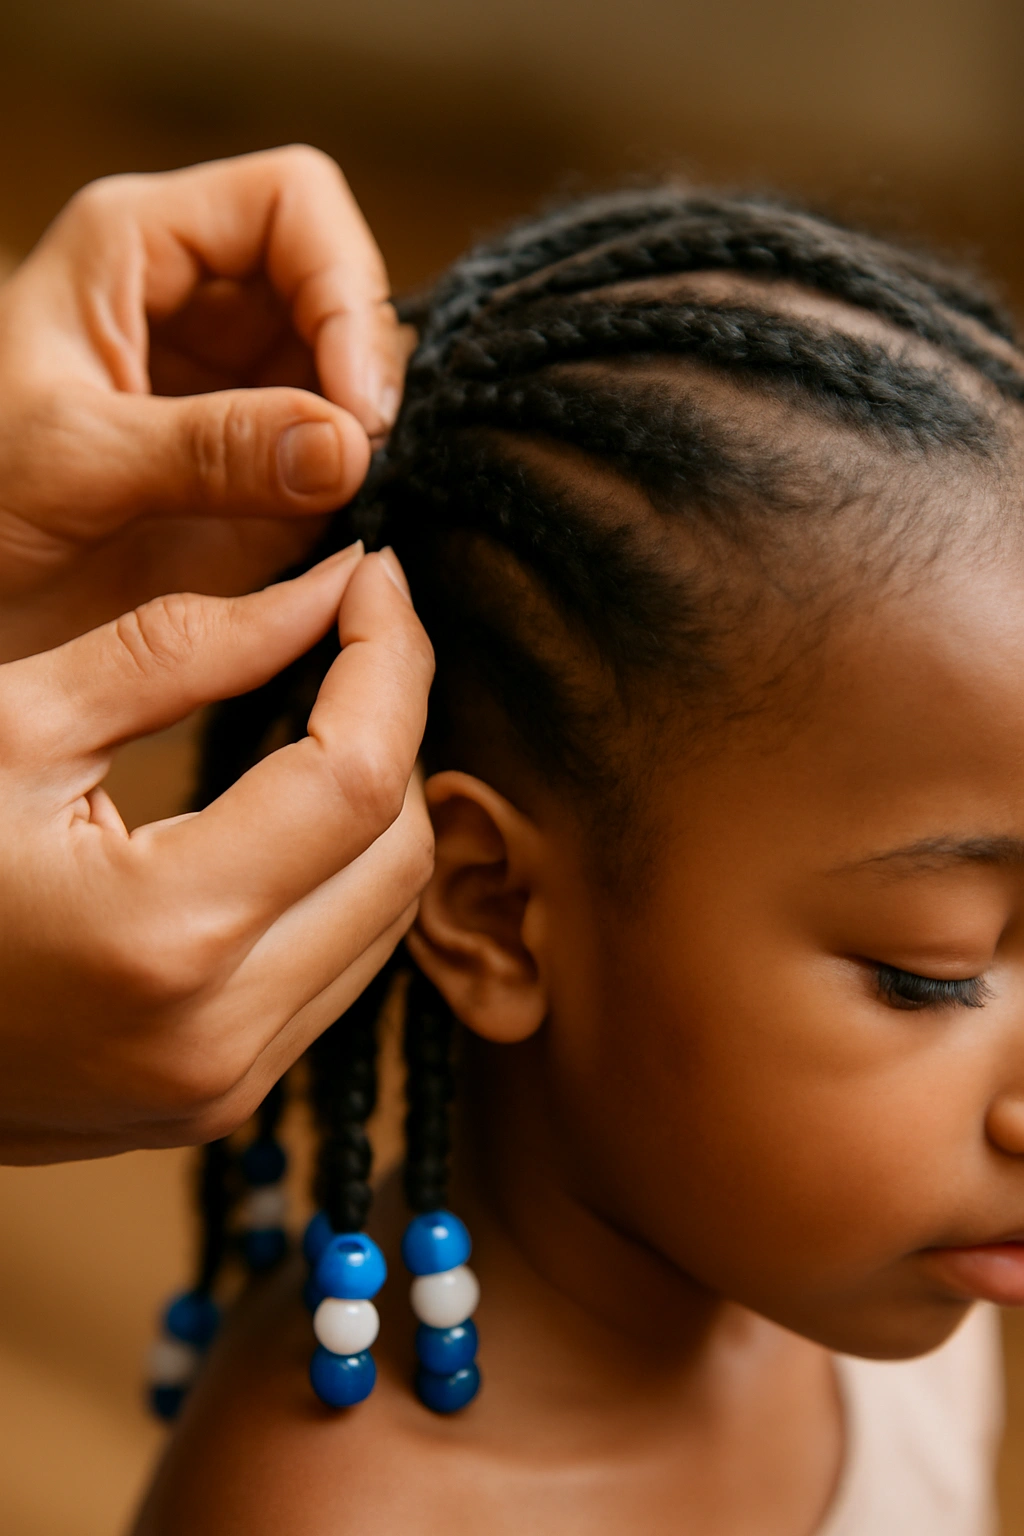
2. Cornrows with Colorful Beads
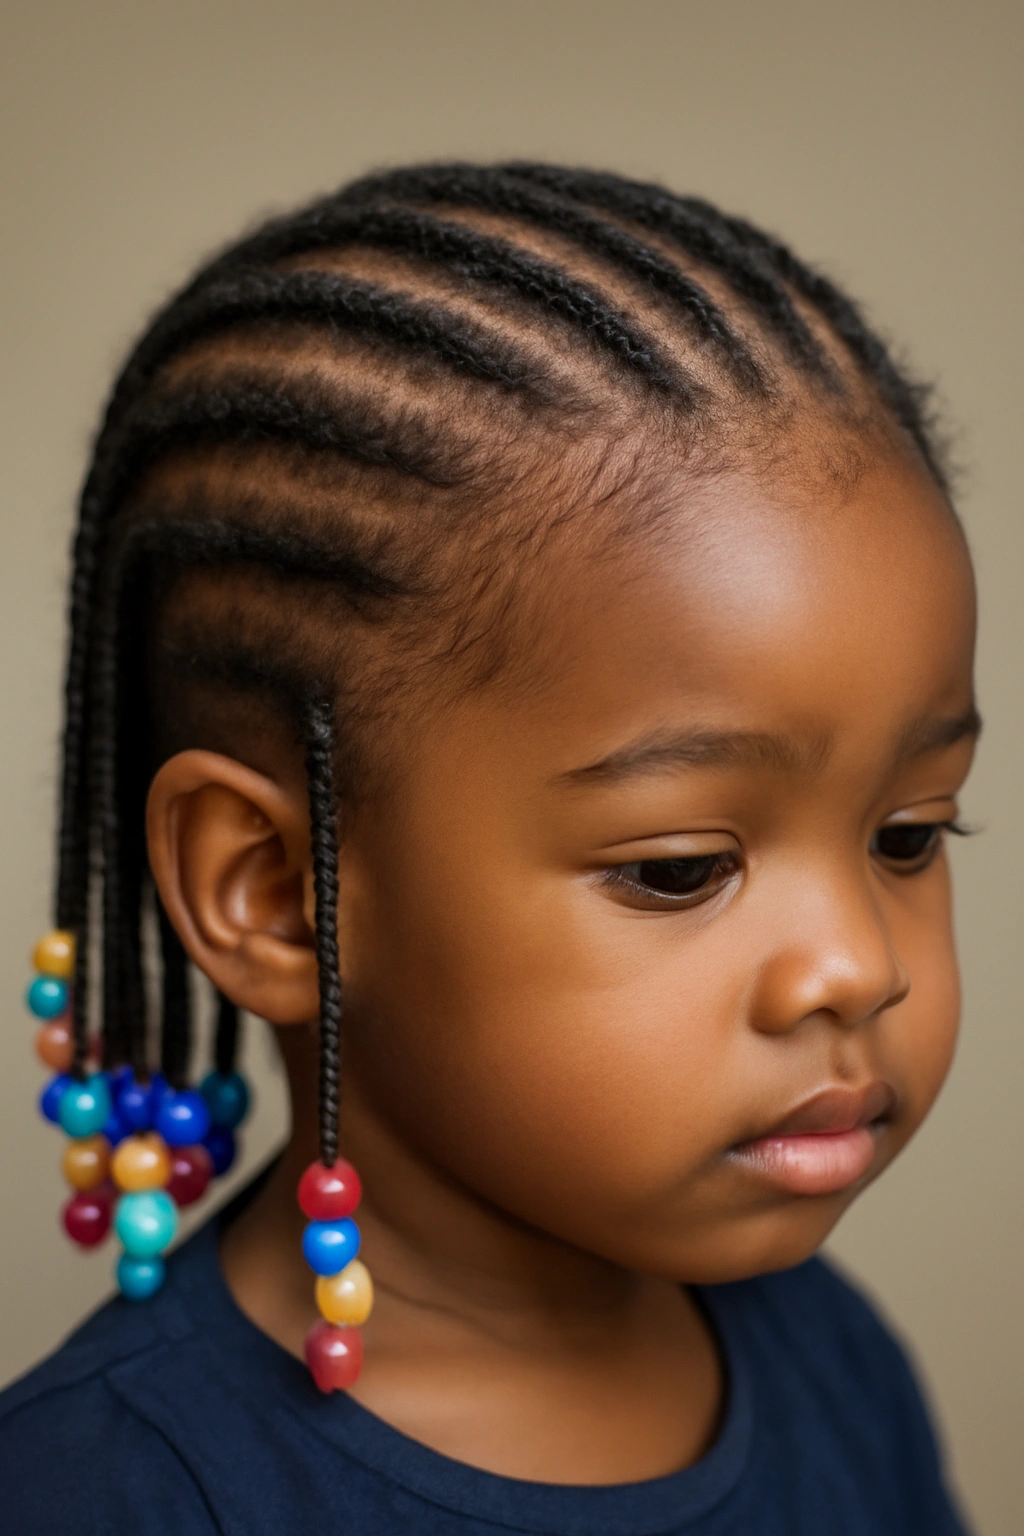
Cornrows are a timeless style that works beautifully on toddlers and comes with built-in opportunities for personality and flair through bead placement. Cornrows run parallel to the scalp in neat, flat rows, and they can be styled straight back, in curves, or in patterns depending on how creative you want to get. Adding wooden beads, gold beads, or colorful acrylic beads at the bottom of each cornrow transforms the look into something playful and expressive.
The Visual Impact and Styling Options
What makes cornrows so appealing is how they frame a toddler’s face and show off their features beautifully. The neat, organized rows create a polished, intentional look that’s appropriate for any occasion. You can create just two or three braids for a minimal look, or go for eight to twelve cornrows across the entire head for fuller coverage. The beads serve a practical purpose too—they help seal and secure the braid ends so they don’t unravel.
How to Add and Remove Beads Safely
Use wooden or smooth metal beads rather than rough plastic ones that can snag or break delicate hair. Slide beads onto each braid gently, and secure them with a small clear rubber band or tie just above the bead so the bead stays in place but doesn’t slip off. When it’s time to take them out, gently slide each bead off rather than cutting it—this preserves your toddler’s braids if they’re going to stay in for a few more days.
Worth knowing: Beads do add a little weight to the braids, so if your child has a sensitive scalp or you’re noticing any discomfort, skip the beads and enjoy the clean cornrow look instead.
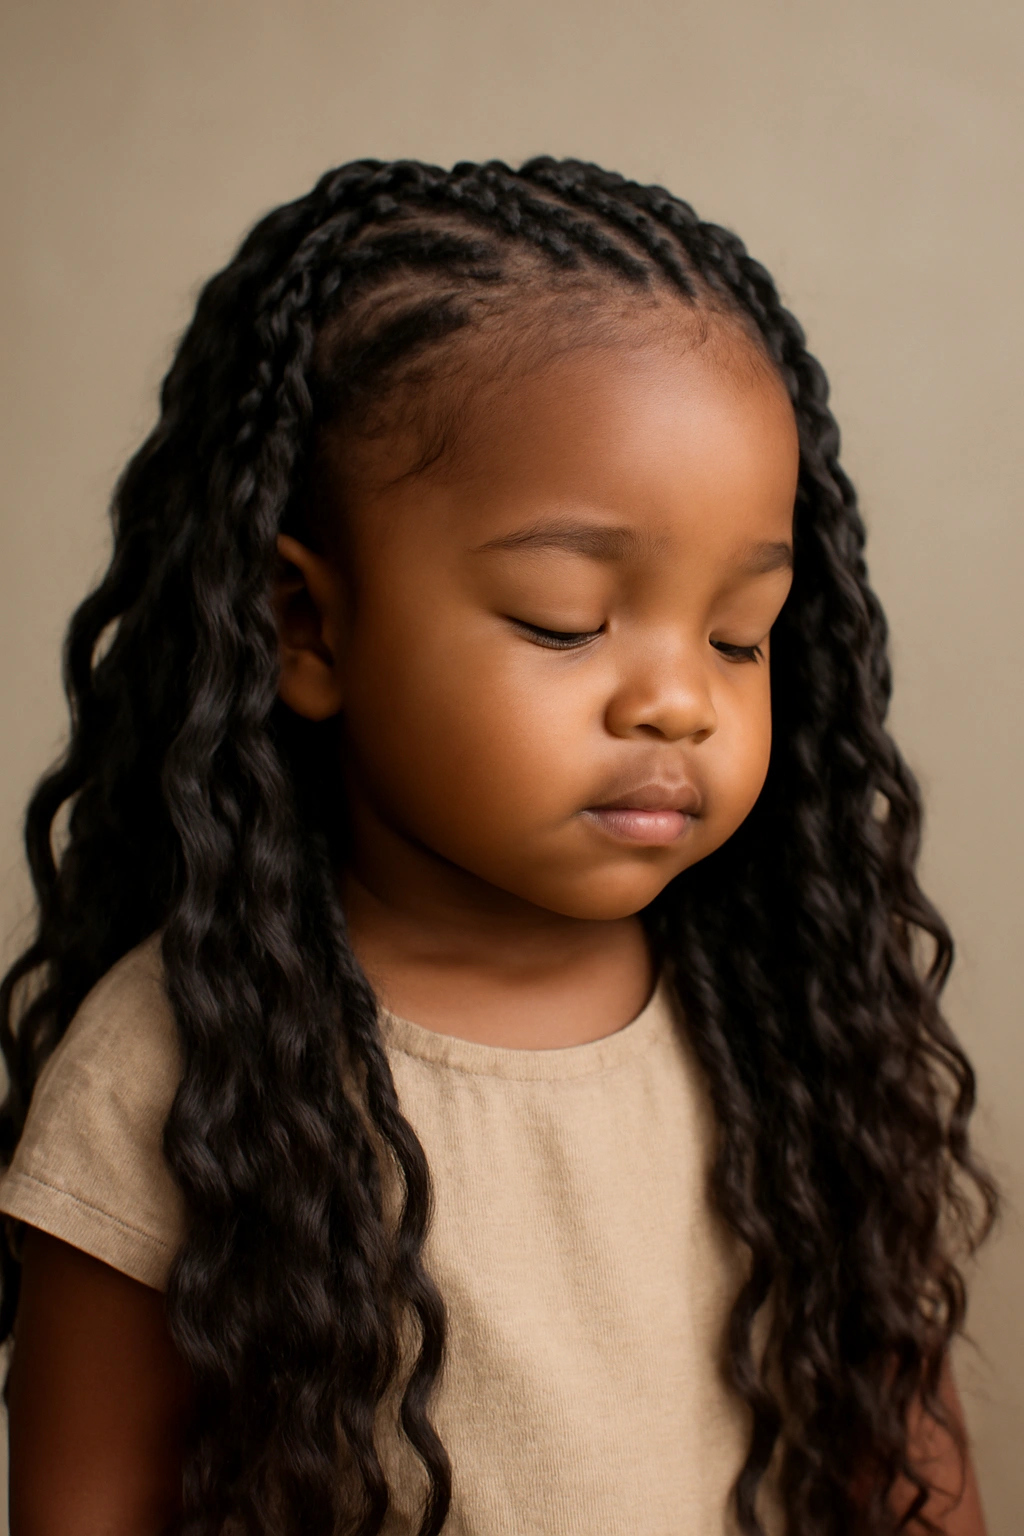
3. Two-Strand Twists

Two-strand twists are one of the easiest protective styles to learn and maintain, making them an excellent choice if you’re new to styling textured hair or you prefer something less time-intensive than traditional braids. The style involves dividing sections of hair into two strands and twisting them around each other from root to tip, creating a rope-like texture that’s visually striking and surprisingly durable.
Why Twists Are Beginner-Friendly
Once you understand the basic twisting motion—divide into two sections, cross one over the other, repeat—you’ve got the technique down. Twists don’t require as much hair-handling as braids, which means less tension and stress on the scalp during installation. They’re also easier to do at home without professional help, which makes them a budget-friendly protective option that still looks intentional and well-maintained.
How to Style Twisted Hair
Two-strand twists look beautiful left down and loose, or they can be pulled up and secured into a high ponytail, bun, or half-up style depending on your child’s mood and what’s practical for their day. You can create thick, chunky twists using larger sections of hair, or thin, delicate twists with smaller sections for a more detailed look. The ends of twists often curl naturally as they set, which adds lovely dimension to the style.
Maintenance and Longevity
Twists typically last 2 to 4 weeks on toddlers, depending on how gently you’re handling them and how well you’re keeping the scalp moisturized. Refresh the scalp every few days with a light braid spray and a bit of leave-in conditioner. Avoid heavy oils or thick creams that can make the twists feel weighed down or greasy—stick with lightweight, water-based products instead.
4. Ghana Braids
Ghana braids are thicker, more sculptural braids that curve and flow across the head in a way that’s both elegant and playful. Unlike box braids, which sit more independently, Ghana braids are often created with curves that follow the natural shape of the scalp, and they’re typically done with added hair (synthetic or human hair extensions) to create dimension and fullness. The result is a style that looks luxe and takes longer to install but wears beautifully for weeks.
The Aesthetic and Cultural Significance
Ghana braids honor West African braiding traditions and represent a beautiful celebration of cultural beauty standards. For a toddler, these braids become a visible connection to heritage while serving the practical purpose of protecting natural hair. The curves and patterns can be customized based on what works for your child’s head shape and personal style—some children look stunning with a central parting and braids flowing to each side, while others rock multiple curves that create an almost crown-like effect.
Installation and Styling Time
Ghana braids require more time to install than simpler styles—plan for 2 to 4 hours depending on the thickness and number of braids. Because of this more involved installation, they’re typically better suited to a professional braider rather than a DIY home project. However, once they’re in, they’re exceptionally low-maintenance and can last 6 to 8 weeks with proper care, which makes the upfront time investment worthwhile.
Potential Concerns for Toddler Comfort
Thicker braids with added hair can be heavier on a toddler’s delicate neck and scalp, so make sure the tension feels gentle and your child seems comfortable. If you notice your toddler tugging at their hair or complaining about discomfort, discuss it with your braider—sometimes adjusting the braid thickness or reducing the amount of added hair makes all the difference in wearability.
5. Fulani Braids
Fulani braids are a stunning style that originated in West Africa and combine cornrows with dangling braids, often with beads, shells, or gold cuffs woven throughout. The style typically features one central braided line (often a cornrow) that runs from the front of the head toward the back, with additional thinner braids or twists extending down in the back. Beaded accents add glamour and cultural authenticity to the look.
Creating the Central Design
What makes Fulani braids distinctive is the deliberate central element—often a thicker, more prominent braided line that draws attention and creates a focal point for the entire style. You can customize this central braid with a pattern, color variation (if using synthetic hair), or special beads that make it feel unique to your child. The braids that flow down from the back are thinner and lighter, creating nice movement and dimension.
Accessorizing and Personalization
Fulani braids are the perfect canvas for meaningful accessories. You can add gold cuffs to represent prosperity, cowrie shells for cultural connection, beads in your family’s favorite colors, or charms that have personal significance. Keep accessories moderate on a toddler—a few meaningful pieces look more intentional than heavy accessorizing that becomes uncomfortable or distracting.
Maintenance and Longevity
Like Ghana braids, Fulani braids are installation-heavy (2 to 4 hours with a professional) but wear for 6 to 8 weeks with minimal daily care. The central braided line may need a little refreshing around the edges after 3 to 4 weeks if hair is growing out noticeably, but overall this style is beautifully low-maintenance once it’s installed.
6. Flat Twists
Flat twists are essentially two-strand twists that are twisted flat against the scalp rather than hanging free, creating a braided appearance without actually using a three-strand braiding technique. They follow the contours of the head and can be laid in straight lines, curves, or patterns. For toddlers, flat twists are an excellent middle ground between simple twists and traditional braids—easier to execute than braids but with more visual interest and longevity than regular twists.
How Flat Twists Sit on the Head
The beauty of flat twists is how close they sit to the scalp, which means less weight pulling on the hair and less chance of tangles or friction. They create a neat, organized appearance similar to cornrows but with a different texture. You can do a few flat twists as part of a mixed style, or cover the entire head in flat twists for a complete protective look.
Creating Patterns and Designs
Flat twists are forgiving enough that you can create patterns—parting the hair into sections and twisting in a grid, creating curved flat twists that follow the head shape, or doing a half-up style with flat twists framing the face. This design flexibility makes flat twists fun to customize based on your toddler’s personality and what works with their hair texture.
Styling and Longevity
Flat twists typically last 3 to 4 weeks and can be styled up into a ponytail, bun, or left down depending on what you prefer. They require less daily maintenance than loose twists since they’re anchored closer to the scalp. A light, water-based leave-in conditioner every few days keeps the scalp happy and the twists fresh-looking.
7. Goddess Braids
Goddess braids are essentially larger, looser versions of cornrows or flat twists that create a romantic, flowing aesthetic. They’re typically done with added synthetic hair or a person’s own hair if there’s enough length and density, and they’re meant to have a relaxed, undone quality despite being precisely executed. The name comes from their ethereal, otherworldly appearance—they genuinely look like something a goddess would wear.
The Romantic Aesthetic
Goddess braids are perfect when you want your toddler to look beautiful and polished but also free-spirited and relaxed. Unlike tight, precise cornrows, goddess braids are intentionally a bit looser and less uniform, which gives them a softer, more romantic feeling. They often look best when they have some texture or wave to them, rather than being perfectly smooth.
Installation and Professional Help
Goddess braids are best done by someone experienced with the looser braiding technique, as the key to the look is getting that perfect balance between neat and relaxed. Plan for 2 to 3 hours with a professional braider. The payoff is a style that looks effortlessly beautiful and wears for 4 to 6 weeks with minimal maintenance.
Styling Options
You can leave goddess braids down and flowing, pull them into a high ponytail or bun, or create a half-up style by pulling back a few braids and securing them. The versatility means one installation gives you multiple looks depending on your child’s mood or what’s practical for their day.
8. Bantu Knots
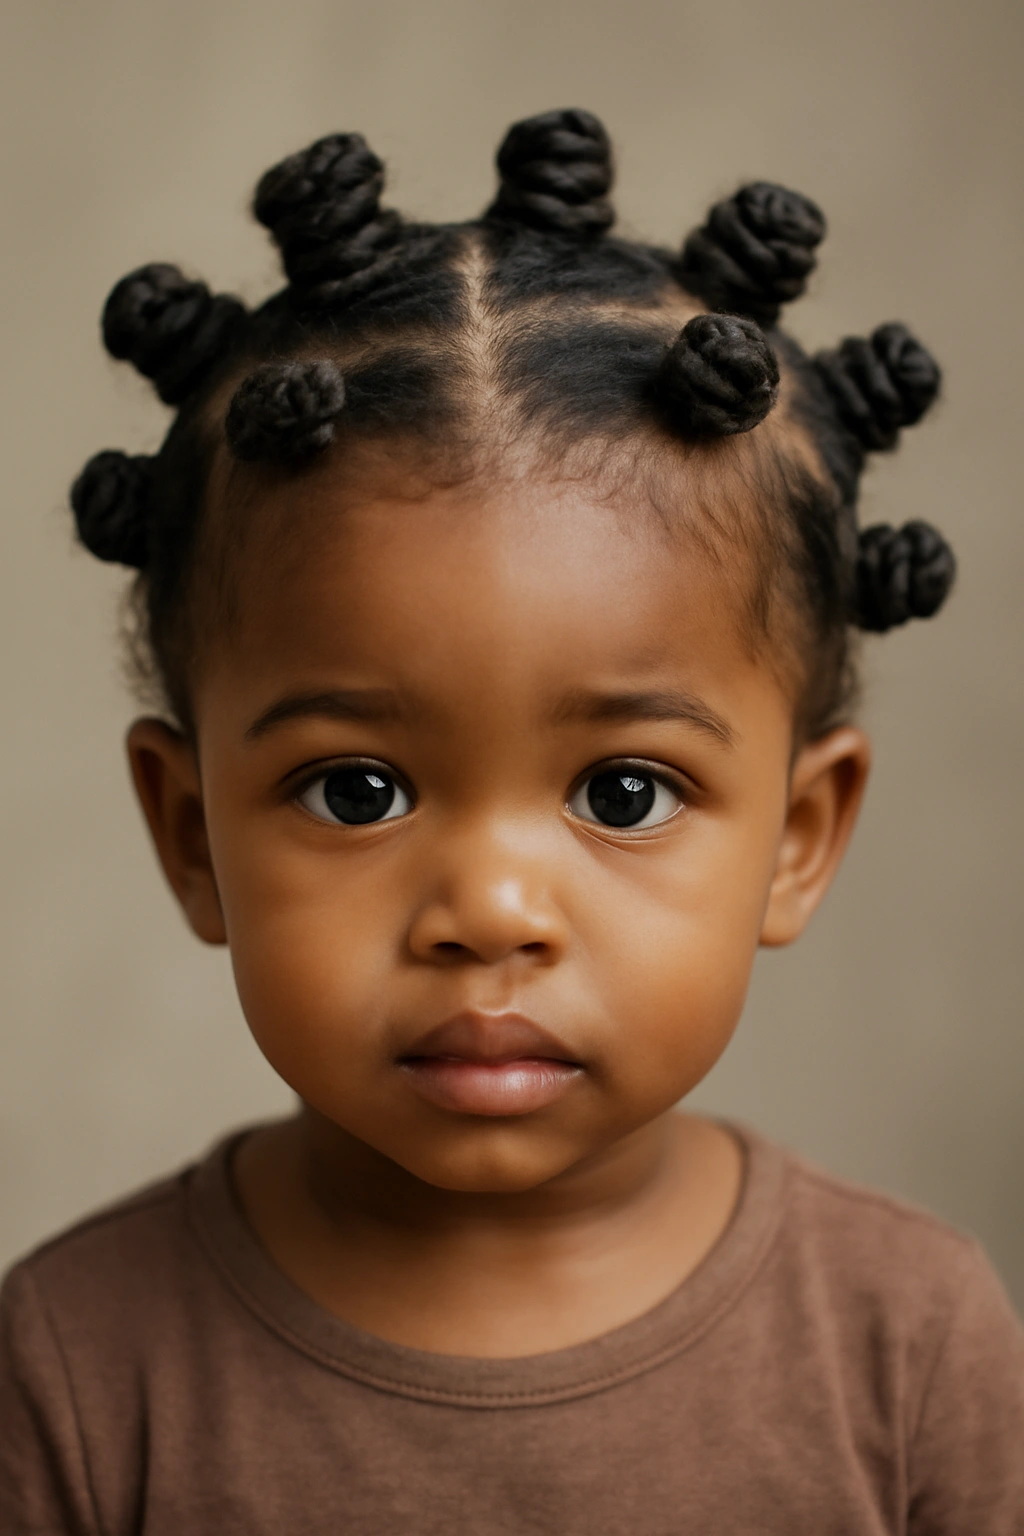
Bantu knots are coiled knots of hair twisted up and secured close to the scalp, creating a sculptural, textured look that’s equal parts protective style and art installation. Each knot is independent and beautiful on its own, but together they create a striking, unified aesthetic. You can leave knots in their coiled form for a full protective style, or you can release them after they’ve set (usually overnight or for a few days) to create a curly, voluminous look.
The Two-in-One Style Approach
What’s brilliant about Bantu knots for toddlers is that they serve double duty—they’re a protective style in their knotted form and can transform into gorgeous curls when released. This means you get protection from the styling and installation, but also styling versatility without having to re-braid or reinstall if you want a different look. Some parents keep them knotted for a week, then release them for curls the following week.
Creating Uniformity and Design
Part of the beauty of Bantu knots is how they look when distributed across the head—typically 6 to 12 knots depending on the hair density and desired fullness. You can arrange them in a grid pattern for order and symmetry, or in more organic placement for a free-spirited vibe. Each knot is typically wrapped at the base with thread or secured with a small elastic to keep it coiled and in place.
Maintenance and Longevity
Bantu knots last 2 to 4 weeks in their knotted form and transform beautifully into curls when released. If you’re releasing them, do it gently after they’ve had at least 24 hours to fully set. Keep the scalp moisturized between installations with a light spray—the knotted areas are prone to dryness since moisture doesn’t move through them as easily as it does through loose hair.
Pro tip: Take photos of your toddler’s Bantu knots before you release them—the coiled style is genuinely photogenic and makes a stunning keepsake.
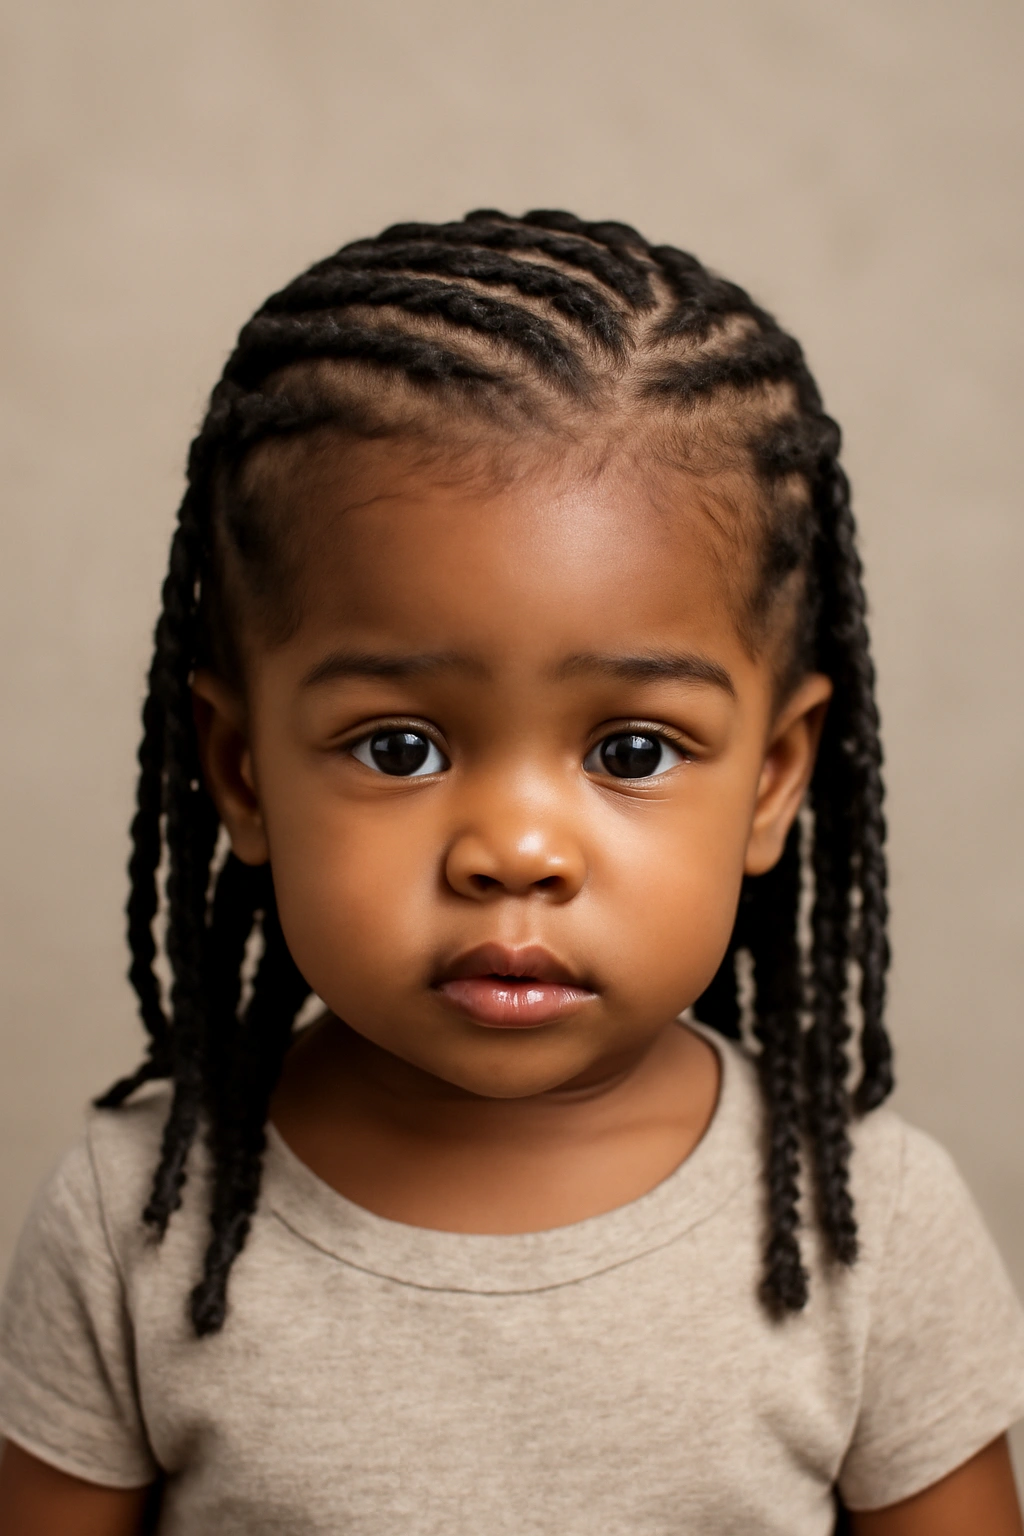
9. Feather Braids
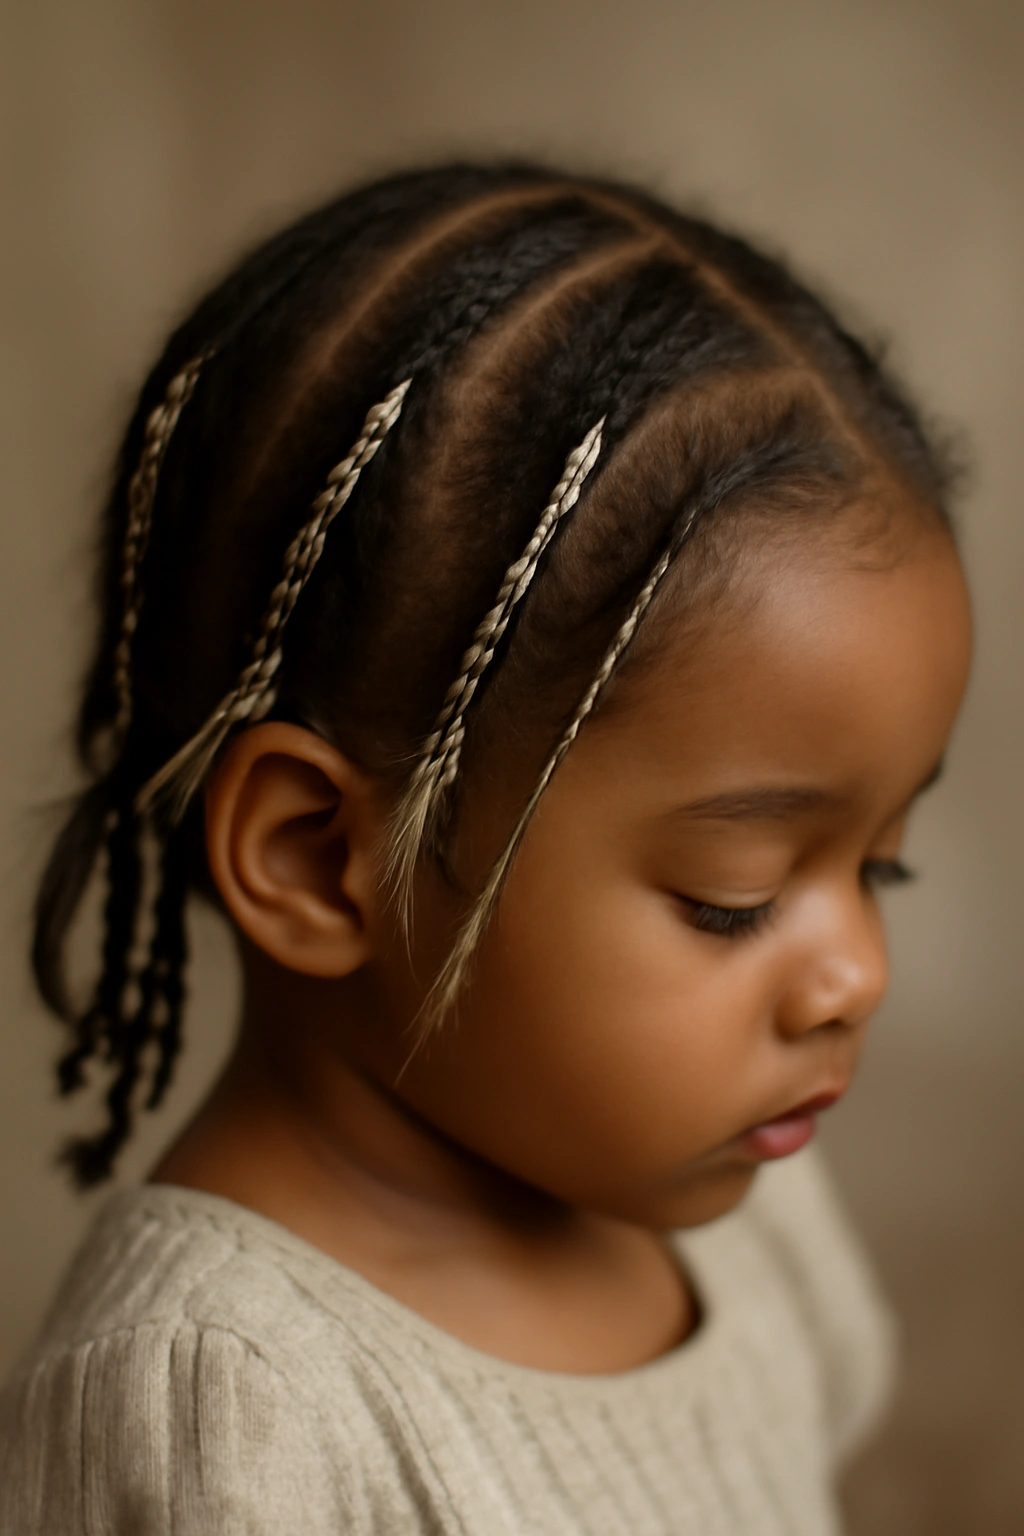
Feather braids are thinner, more delicate braids that often incorporate ribbon, thread, or thin strips of synthetic hair woven throughout for a whimsical, light appearance. The name comes from the feathery, airy quality of the style—these braids are never chunky or heavy, but rather refined and detailed. For toddlers, feather braids are a great option if you want a protective style that still feels light and comfortable.
Working with Lightweight Materials
The key to feather braids is using truly lightweight embellishments—thin, colorful thread or ribbon woven through the braids creates the visual interest without adding significant weight. You can choose colors that match your child’s skin tone for a subtle effect, or go with contrasting colors and patterns for something more playful and expressive. The lightweight nature of the materials means these braids won’t strain a toddler’s neck or scalp.
Creating Visual Interest
Feather braids look beautiful in a variety of arrangements—you can create a few thin feather braids mixed in with regular braids or twists for contrast, or do multiple feather braids across the entire head. The thinner profile means you can do more braids in the same amount of space compared to thicker styles, creating a fuller, more detailed look.
Longevity and Care
Feather braids typically last 2 to 3 weeks and require minimal maintenance—just keep the scalp moisturized and avoid heavy products that might weigh them down or make them look unkempt. Because they’re lighter and less involved than heavier protective styles, they’re a good option if your toddler tends to get uncomfortable with braids or if you want a style that’s quick to install and remove.
10. Zig-Zag Cornrows
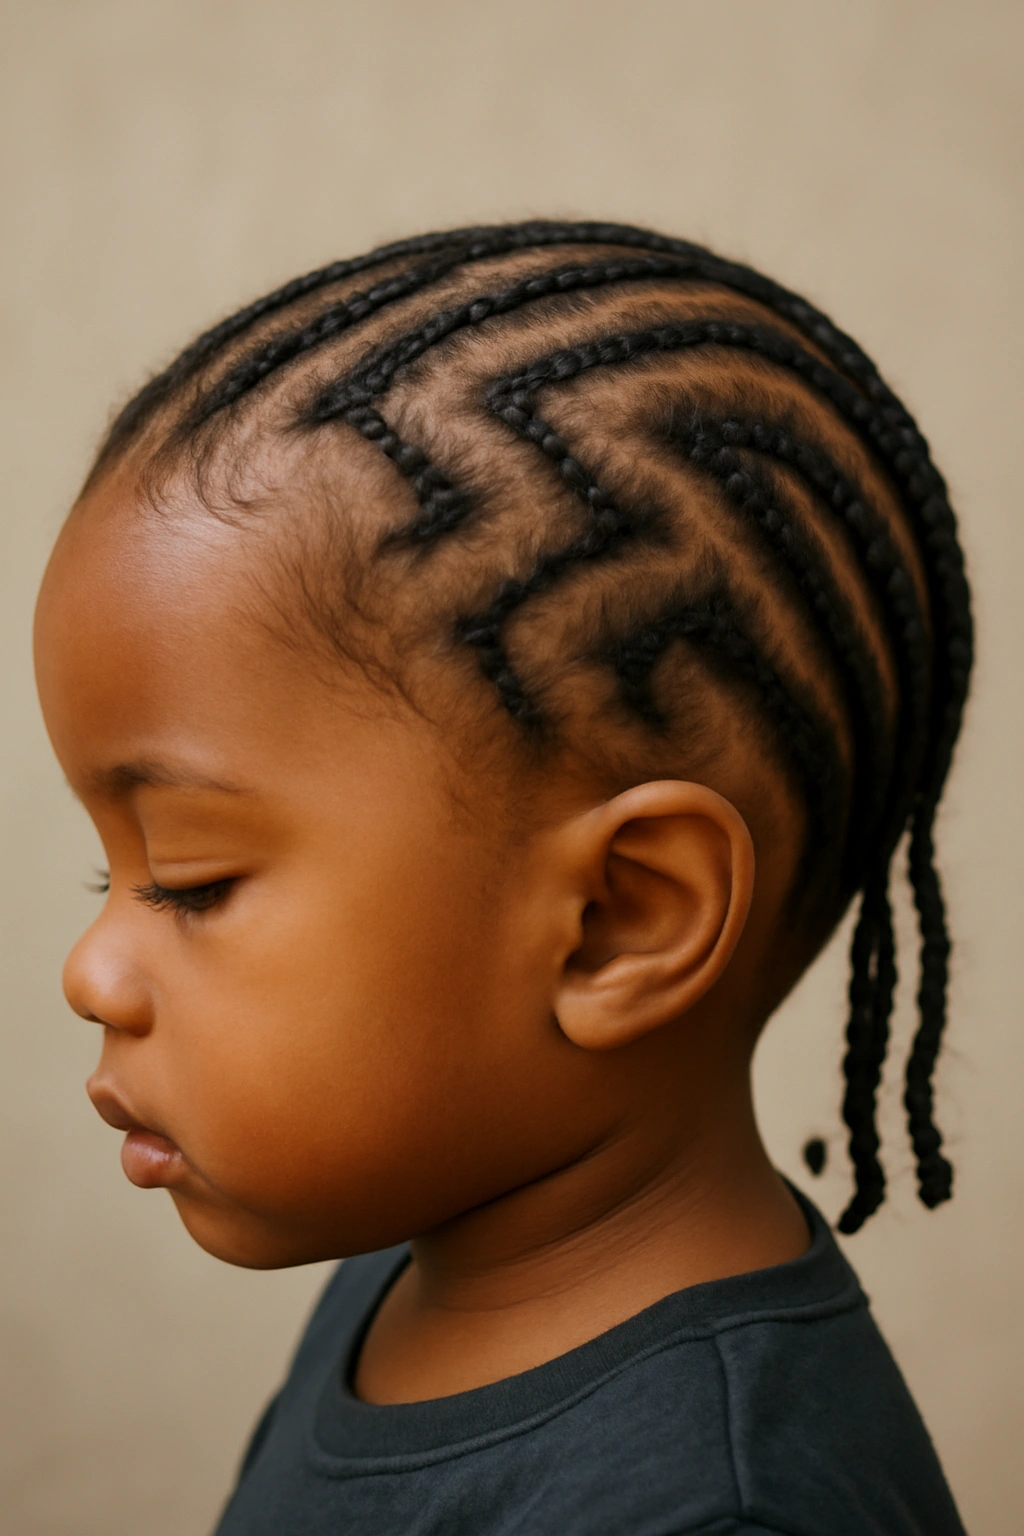
Zig-zag cornrows take the traditional cornrow and make it more playful by creating a pattern that curves back and forth across the head rather than running in straight lines. The result is a style with movement, visual interest, and a fun, youthful energy. Zig-zag patterns can be subtle or dramatic depending on how sharp the angles are, and they’re a great way to make a cornrow style feel more personalized and distinctive.
Planning the Zig-Zag Pattern
The visual impact of zig-zag cornrows depends heavily on how you plan the pattern. You can create sharp, dramatic angles that almost look geometric, or softer curves that are more gentle and flowing. Some braiders love creating patterns that follow the natural shape of the head, while others enjoy the precision of planned geometric designs. Talk with your braider about what pattern appeals to you and what works with your child’s head shape.
Versatility and Styling
Zig-zag cornrows can be styled down and loose, or pulled up into ponytails, buns, or half-up styles depending on your preference. The pattern creates natural visual movement that makes the style interesting from every angle—even pulled-up styles maintain their visual appeal because the zig-zag pattern is visible from behind and the sides.
Longevity and Maintenance
Zig-zag cornrows last 4 to 6 weeks and require the same basic maintenance as any cornrows—light moisturizing spray every few days and a silk or satin head wrap at night. The visual impact remains strong throughout the wear time because the pattern is built into the braids themselves rather than dependent on beads or accessories.
11. Crown Braids
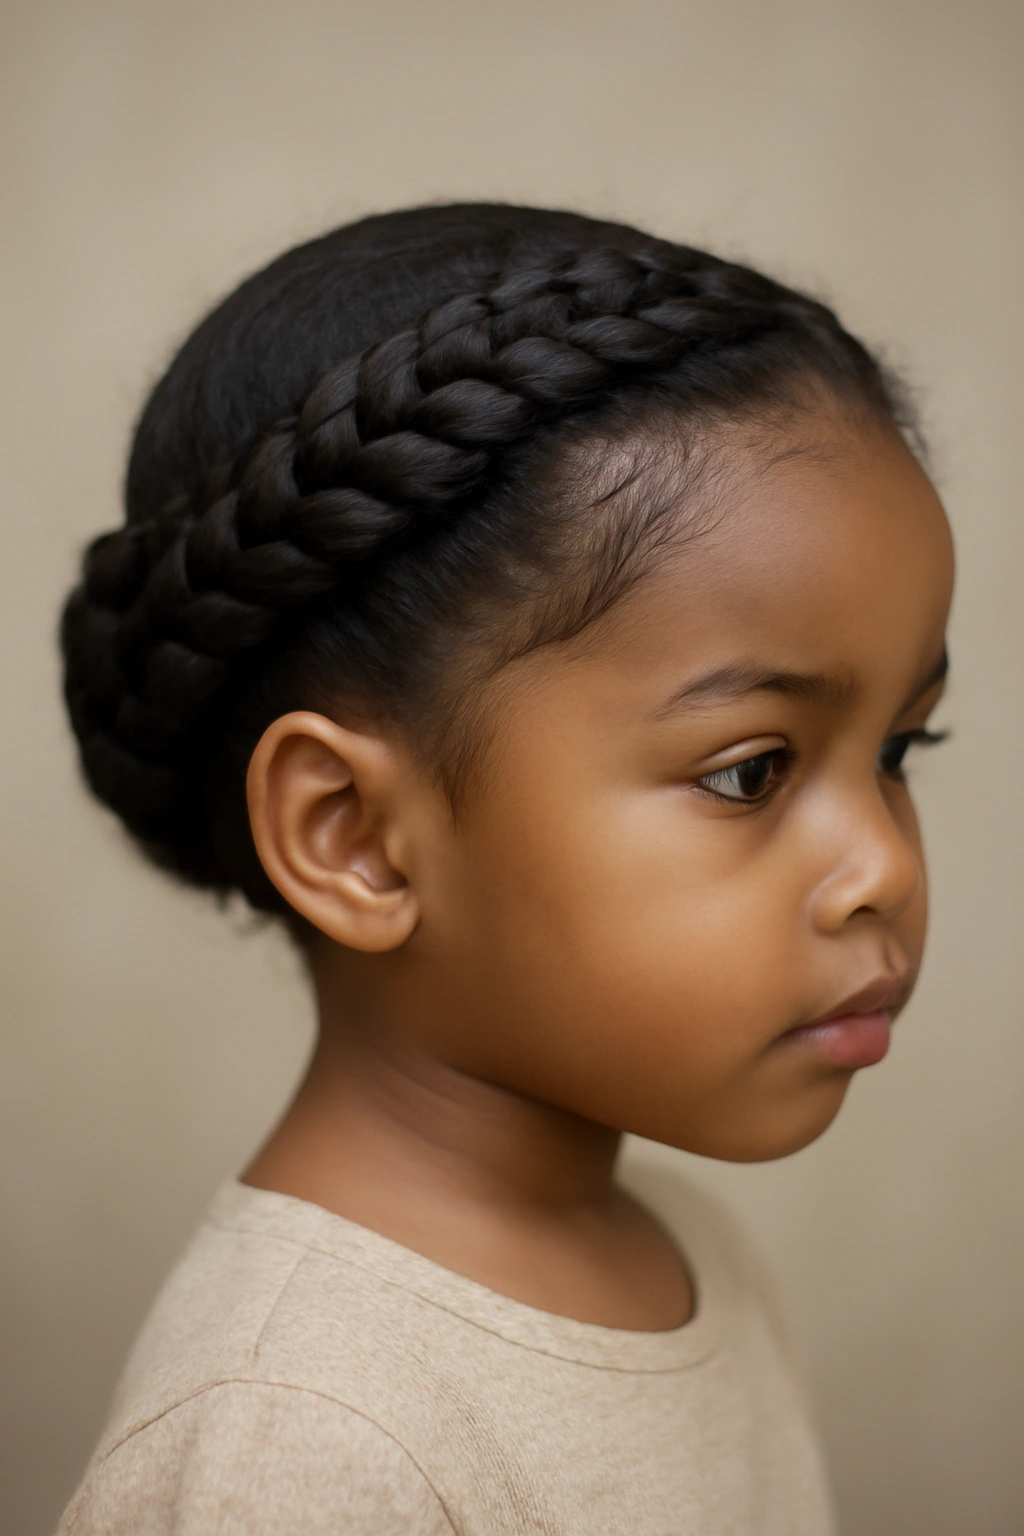
Crown braids frame the hairline and top of the head like an actual crown, with the braids following the edges of the face and potentially connecting across the top of the head. This style is exceptionally elegant and works beautifully for special occasions or just whenever you want your toddler to feel like royalty. Crown braids can be done as a solo protective style or combined with other styles to create a mixed look.
Framing the Face Beautifully
The strength of crown braids is how they frame the face and draw attention to your child’s features. A well-done crown braid follows the hairline gracefully, creating a soft frame that’s both protective and flattering. The braids don’t pull the hair back aggressively, so there’s no harsh look—instead, it’s gentle, elegant, and intentional.
Creating the Complete Crown Effect
Crown braids are often done as a pair—one braid on each side of the head meeting at the back—or as a single braid that starts at one ear, follows the hairline around the crown, and finishes at the opposite ear. You can leave the back hair loose for volume and movement, or incorporate the back hair into additional braids or twists for a completely protected style. Adding beads to the crown braids creates extra visual interest and sparkle.
Longevity and Combination Styling
Crown braids typically last 3 to 4 weeks and work beautifully as part of a larger protective style—for example, crown braids framing the face with box braids or twists covering the rest of the head. This mixed approach gives you both elegance and complete hair protection. Maintain them with the same light moisture sprays and nighttime protection as other braided styles.
12. Feed-in Braids for Toddlers
Feed-in braids are a technique where synthetic hair or the person’s own hair is gradually added or “fed into” the braid as it’s being created, rather than being woven all the way through from the beginning. The result is braids that look thinner and more refined at the roots, gradually thickening as you move down the hair. For toddlers, feed-in braids are a gentler installation because less hair is being grabbed and manipulated at the root.
Why Feed-in Braids Are Gentler on Toddler Scalps
The feed-in technique distributes the tension more gradually along the length of the braid rather than concentrating it at the roots, which makes this braiding method genuinely less stressful on a developing scalp. The thinner appearance at the roots also means less visible tension and pulling, which translates to more comfort for your toddler during installation and beyond. If your child has ever complained about braids being too tight, feed-in braids might be the solution.
The Aesthetic Advantage
Feed-in braids look more refined and intentional than traditional braids because they taper from thin to thick, creating a more polished, professional appearance. The gradual thickening also means the braids catch light differently as they progress down the head, adding subtle dimension and visual interest.
Installation Time and Longevity
Feed-in braids take about the same time as regular braids (2 to 4 hours depending on size and number), but the gentler installation process means you’ll likely have a more comfortable toddler throughout the appointment. Feed-in braids wear for 4 to 6 weeks and require the same basic maintenance as any braids—light moisturizing sprays and nighttime protection to keep them fresh and frizz-free.
Worth knowing: Feed-in braids work especially well if your toddler has fine, delicate hair or a sensitive scalp, as the gentler tension distribution is genuinely noticeable.
Caring for Braided Hair: The Foundation of Healthy Growth
The best braided style in the world won’t protect your toddler’s hair if you’re not caring for it properly during the wear time. The key to keeping hair healthy under braids is maintaining scalp moisture and preventing buildup that can lead to itching, flaking, or breakage. Your goal is keeping the scalp moisturized and clean while the braids themselves stay relatively undisturbed.
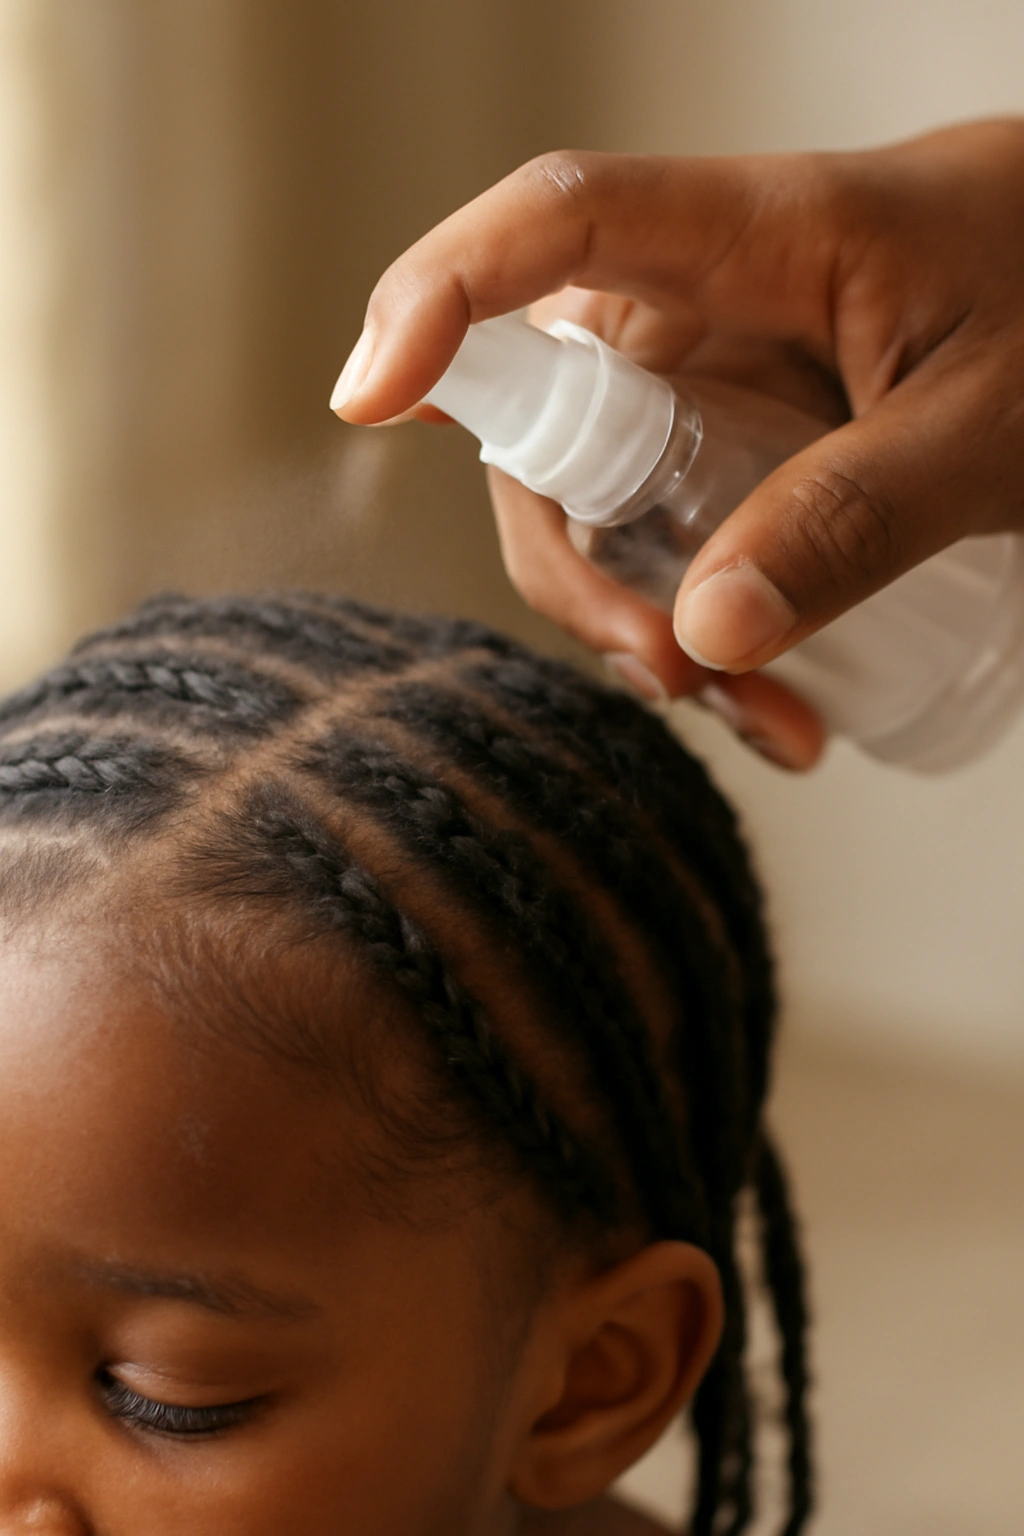
Spray your toddler’s scalp every 3 to 4 days with a lightweight leave-in conditioner mixed with water—the ratio should be about one part conditioner to two parts water so it’s light enough that it won’t make the braids heavy or greasy. You can also add a tiny bit of lightweight oil if your child’s scalp is particularly dry, but resist the urge to slather heavy moisturizers or thick creams throughout the braids themselves. Heavy products accumulate and trap dirt and sweat, which defeats the protective purpose of the style.
Wash your toddler’s scalp gently every 7 to 10 days with a diluted shampoo or a co-wash (conditioner wash), focusing on massaging the scalp where hair is braided and the skin is exposed. Use your fingertips, not your nails, and work gently so you’re not causing unnecessary pulling or tension. Rinse thoroughly so no shampoo residue remains, which can cause buildup and itching.
At night, wrap your toddler’s braids loosely in a silk or satin head wrap, or place them in a pineapple (a high, loose ponytail secured with a soft elastic) so they’re contained and there’s minimal friction against the pillowcase. This nighttime protection dramatically reduces frizz and helps the braids last longer without looking bedraggled. If your child sleeps restlessly or tends to kick off head wraps, a satin or silk pillowcase (instead of a regular cotton one) is a worthwhile investment—it reduces friction throughout the night even if the head wrap comes off.
Tips for Keeping Styles Fresh Throughout the Wear Time
A braided style that looks fresh and intentional for the full wear time requires a little attention and strategy, but nothing complicated or time-consuming. The first week or two is usually the easiest—the braids are newly done, tight, and look crisp. It’s weeks three and beyond where you need to be intentional about maintenance.
If your toddler’s hair is growing visibly and creating frizz at the roots (which is totally normal and not a sign of anything wrong), you can touch up the roots gently by re-braiding just the new growth area close to the scalp. This is a much quicker process than installing the entire style and keeps everything looking neat without requiring you to fully re-braid. Many parents do a root touch-up around week 3 or 4 if the style is going to be worn longer.
For styles with beads or accessories, check them every few days to make sure nothing is loose or at risk of falling out. Beads that have shifted or come partially undone can be gently adjusted back into place, or if a bead has fallen off completely, you can simply slide a new one on and re-secure it.
If your toddler has a particular style they love, take a clear photo of it from the front and back so you can reference it when you’re maintaining it or when you go back to your braider for the next installation. Photos are also wonderful for capturing special hairstyles and becoming beautiful memories—your child may love looking back at photos of themselves wearing different styles over time.
Resist the urge to constantly redo or fuss with the braids. Yes, it’s tempting to adjust beads, refold styles, or tighten loose ends, but every bit of handling creates friction and potential for breakage. If the style is secure and your scalp is clean and moisturized, let the braids do their job and minimize unnecessary handling.
Final Thoughts
Choosing a braided hairstyle for your toddler is about so much more than aesthetics—though beautiful, well-executed braids are absolutely worth celebrating. These styles protect your child’s natural hair during a critical growth phase, they can represent cultural pride and connection, and they’re honestly a practical solution to keeping hair neat and manageable when you’ve got a busy little one.
The right style depends on your toddler’s comfort level, how much time and budget you want to invest in installation, how long you want the style to last, and what aesthetic appeals to you and your child. Some toddlers tolerate elaborate styles brilliantly and sit still throughout long appointments; others do better with quicker, simpler styles that cause less installation stress. Both are completely valid—your job is finding what works for your unique child and your family’s needs.
Invest in finding a skilled, patient braider who understands how to work with toddlers, communicates clearly about what’s possible with your child’s specific hair texture and length, and creates styles that feel comfortable and look beautiful. A great braider is worth their price because they can transform your child’s hair care and give you peace of mind knowing the installation was done with care and skill.
Keep your toddler’s natural hair healthy underneath the braids through consistent, gentle scalp care and moisture maintenance. The braids are protective, but they’re only as good as the foundation they’re protecting. By combining intentional protective styling with attentive scalp care, you’re setting your child up for healthy, strong hair growth that will serve them beautifully as they grow.