Easter is one of those magical times when little girls deserve to feel absolutely special from head to toe—and a gorgeous hairstyle is the perfect way to set the tone for photos, family celebrations, and holiday events. Whether you’re prepping for an Easter egg hunt, a church service, a spring party, or just a fun family gathering, the right hairstyle can make your daughter feel like the star of the day. The beauty of Easter hairstyles for kids is that you don’t need professional-level skills or expensive salon appointments to create something stunning. Most of these styles use basic techniques, everyday hair tools, and accessories you probably already have at home.
The key to finding the right Easter hairstyle is matching the look to your child’s hair type, her comfort level with having her hair styled, and the vibe of the event. Some of these styles work beautifully on straight hair, while others shine on naturally curly or wavy textures. Some are quick five-minute finishes, while others are more elaborate and give you a chance to really play with her hair. The wonderful thing about Easter styling is that you can lean into the season’s pastels, florals, and springtime feel—or keep things classic and timeless.
Here are twelve beautiful Easter hairstyles that will make your little girl feel absolutely gorgeous and photo-ready. Each one comes with exactly what you need to know to recreate it confidently at home, whether you’re an experienced hair styler or a parent tackling this for the first time.
1. Braided Flower Crown
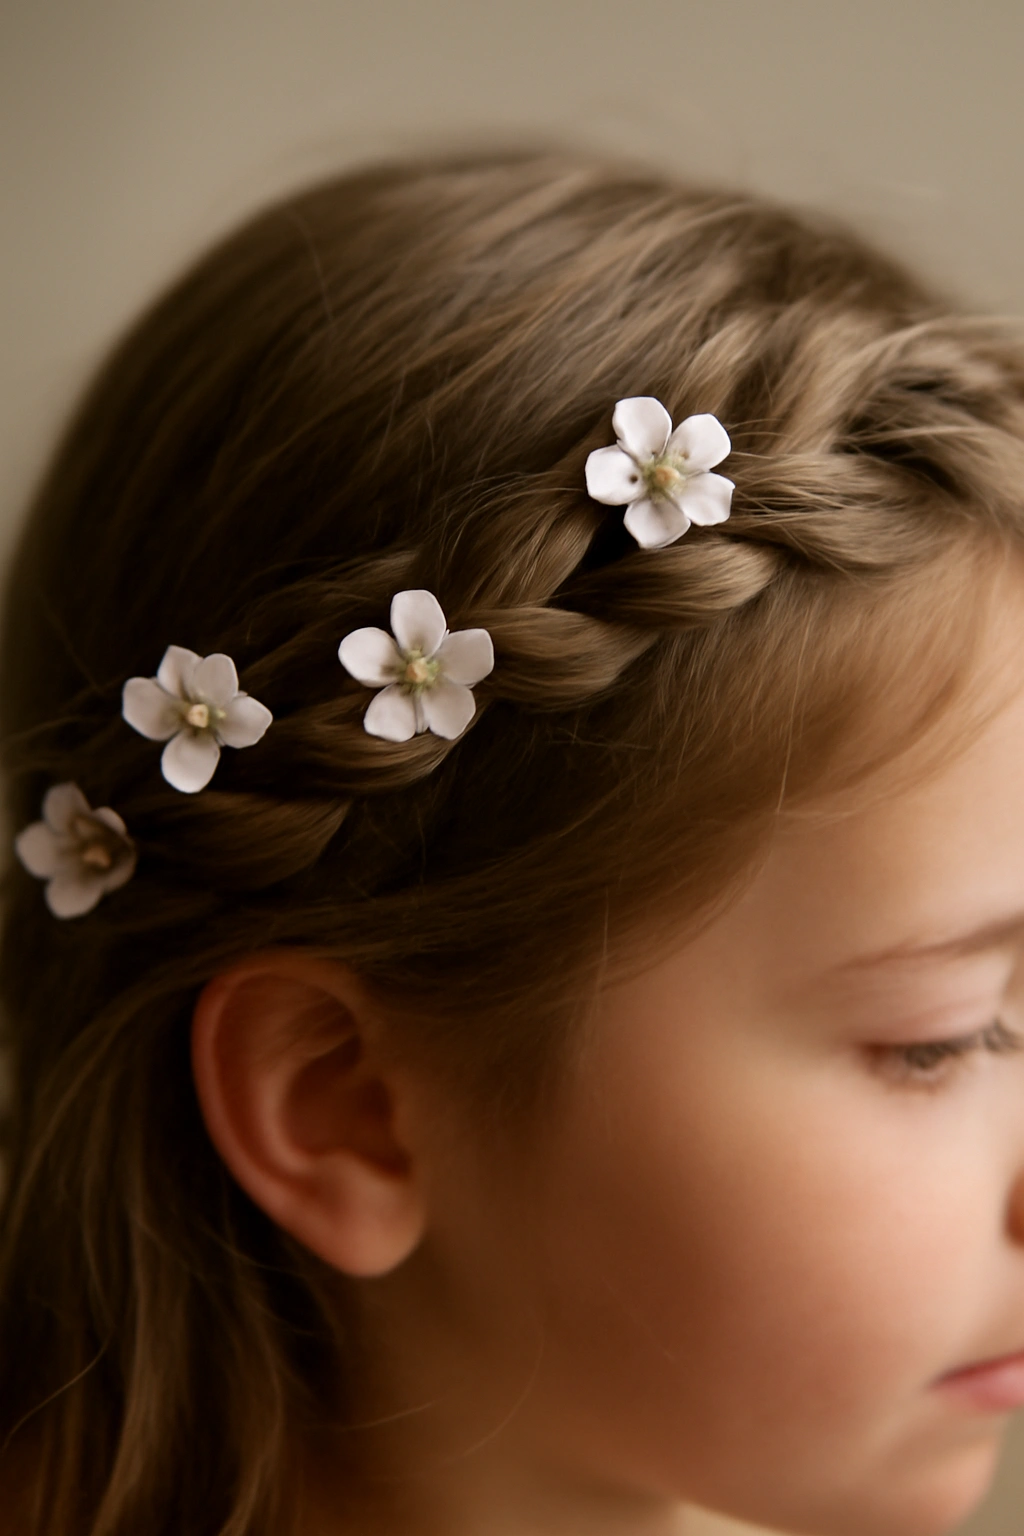
A braided flower crown transforms any little girl into a springtime princess in minutes, and it’s surprisingly easy to execute with just a basic Dutch braid and a handful of artificial flowers. This style works beautifully whether your daughter has thick, voluminous hair or thinner, finer strands—you just adjust the tightness of the braid to match what you’re working with.
Why This Look is Perfect for Easter
The flower crown instantly says “spring” without feeling overdone or costume-like. It sits gracefully on the head and keeps hair off the face, making it ideal for outdoor Easter celebrations where you want clear photos. The combination of a structured braid with soft flowers creates an elegant but playful vibe that feels age-appropriate for kids.
How to Create a Braided Flower Crown
Start with completely brushed, dry hair for the smoothest braid. Section off a piece of hair on one side of her head and begin a Dutch braid (braiding under rather than over, which creates a raised effect). Braid from one side of the head to the other, keeping the braid relatively loose so it doesn’t pull too tight on the scalp. Secure the braid end with a clear elastic. Tuck in small sprigs of artificial flowers (baby’s breath works wonderfully, or small silk roses and peonies) throughout the braid, securing them with bobby pins as needed. You want the flowers to feel distributed and natural-looking, not clumped in one spot.
Pro tip: Do a test run the day before Easter so your daughter knows what to expect and you can troubleshoot any loose pieces or bobby pins that feel uncomfortable against her scalp.
2. Bunny Ear Bows with Top Knot
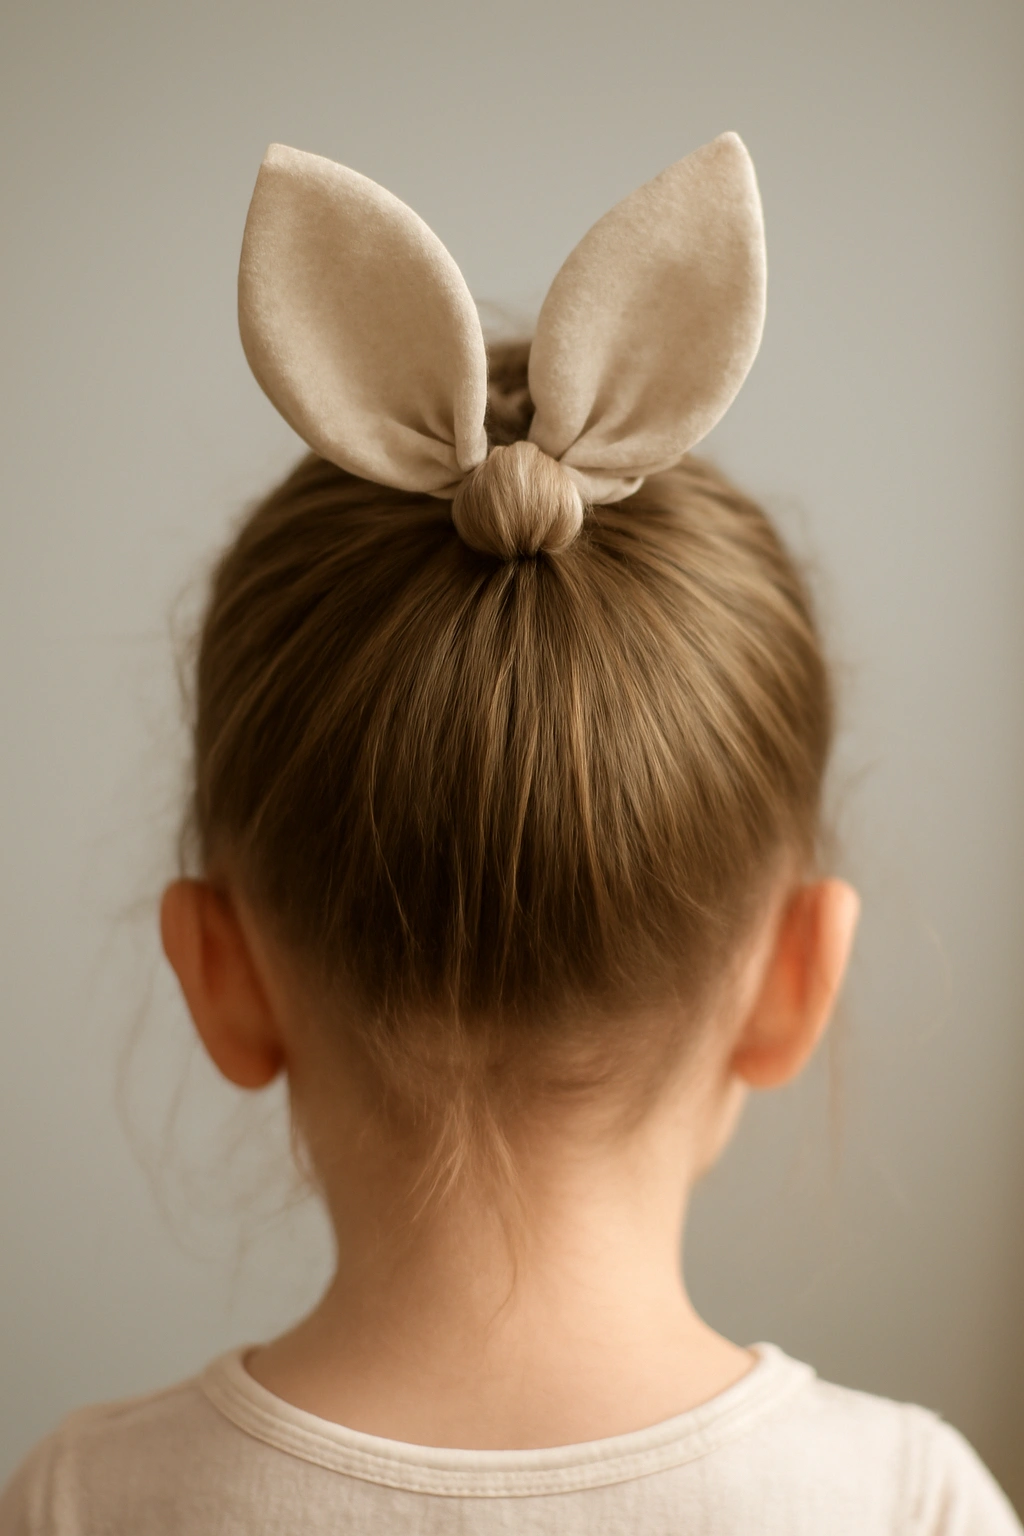
This playful style combines a high top knot with two fabric loops positioned to look like bunny ears—it’s the perfect balance of whimsical and wearable for a young child. It photographs beautifully and feels fun without being too babyish.
Why Bunny Ears Work for Easter
Let’s be real: bunny ears directly invoke the Easter bunny, so this style immediately captures the holiday spirit. The top knot keeps all the hair off her face and neck, which means fewer “my hair is in my face” complaints during the event. The loops add a dimensional, playful element that catches light and looks great from every angle.
Creating the Perfect Bunny Ear Knot
Gather all of her hair into a high ponytail at the crown of her head and secure it with a clear elastic. Divide the ponytail into two sections. Take one section and loop it back toward the base of the ponytail, securing it with a bobby pin to form one “ear.” Do the exact same thing with the second section on the other side. Smooth any baby hairs with a tiny bit of gel or hairspray. The loose ends of the ponytail will hang down the back—you can leave them flowing, curl them gently with a curling iron, or twist them and pin them into the back of the knot for a neater look.
Styling note: Use velvet ribbons or fabric scrunchies in soft pastels (mint green, blush pink, pale yellow, or lavender) to tie the ears and ponytail for an Easter-appropriate pop of color.
3. Pastel Twisted Half-Up Style
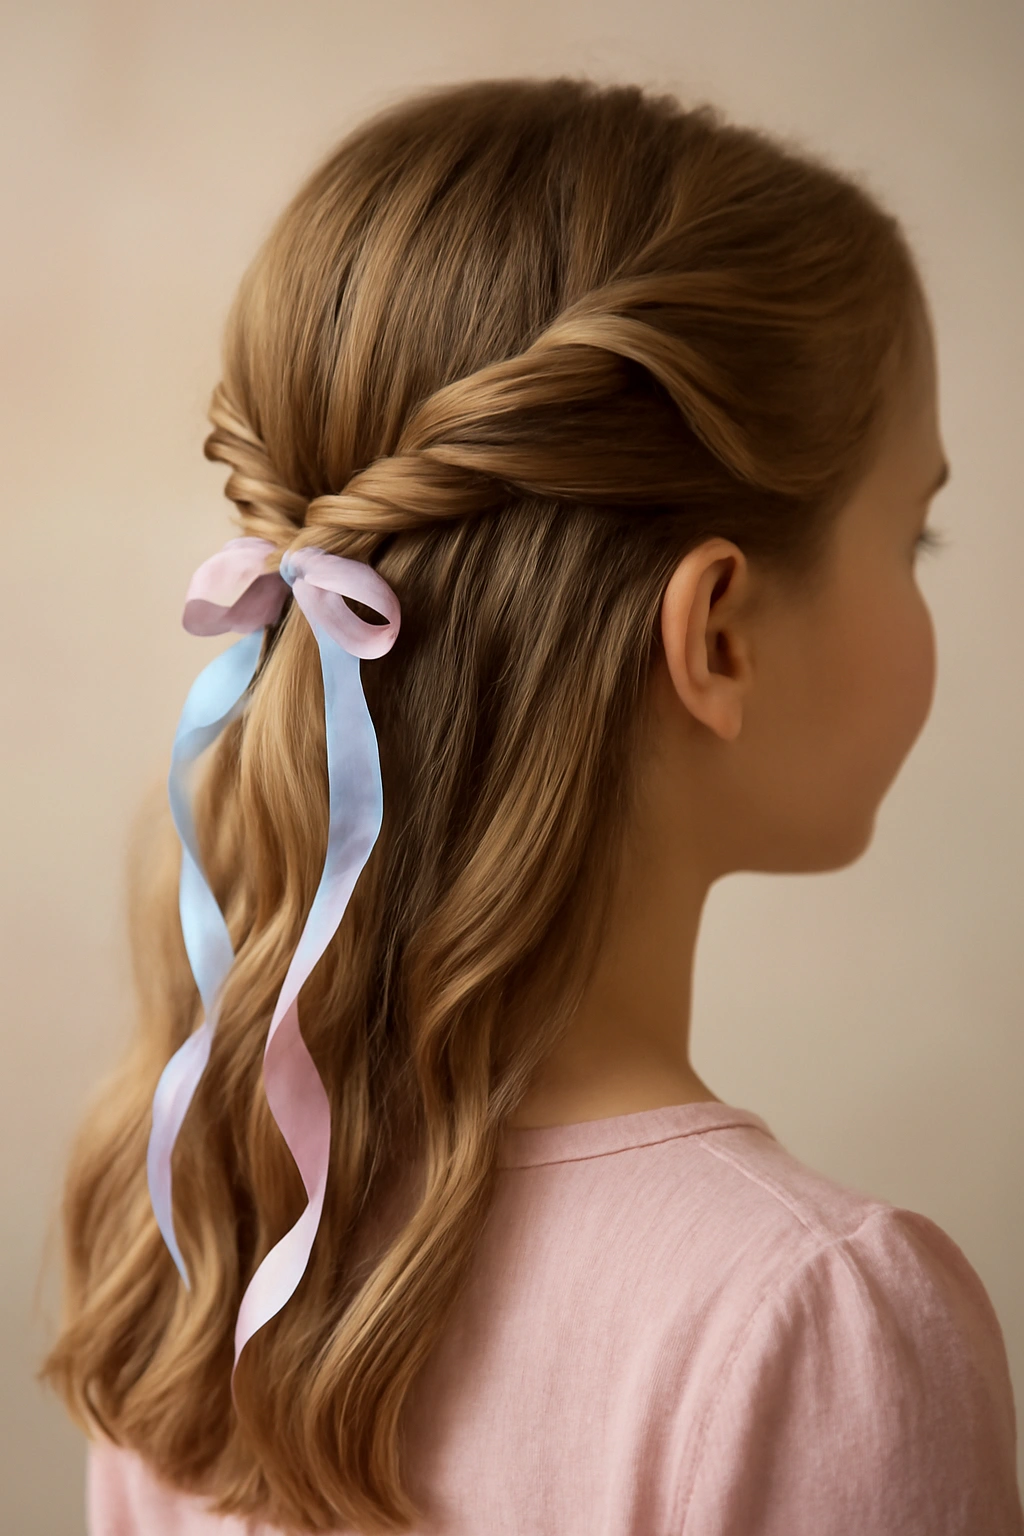
A half-up style with twisted sections offers sophisticated simplicity—perfect for girls who don’t want their hair fully up but don’t want it completely down either. Add pastels ribbons woven through the twists and you’ve got an Easter look with understated elegance.
What Makes This Style Special
This hairstyle feels grown-up and polished without being complicated. The twists add visual interest and texture, and the half-up structure means cooler air can still reach her neck (important for spring weather and comfort during longer events). It reads as intentional and styled without requiring complex braiding skills.
Step-by-Step Twisted Half-Up Tutorial
Brush her entire head smoothly. Section off a piece of hair from each side near the temples—about an inch wide. Twist each section gently from the roots all the way down. Bring both twisted sections to the back of her head and secure them together with a clear elastic or clip. For an extra touch, weave a thin pastel ribbon through each twist before you pin it back, or tie a ribbon in a bow where the two twists meet at the back.
Optional detail: Leave a few face-framing pieces untwisted to soften the look and give it a more romantic vibe. These pieces should be about one inch wide and positioned right at the sides of her face.
4. Cascading Ringlet Curls
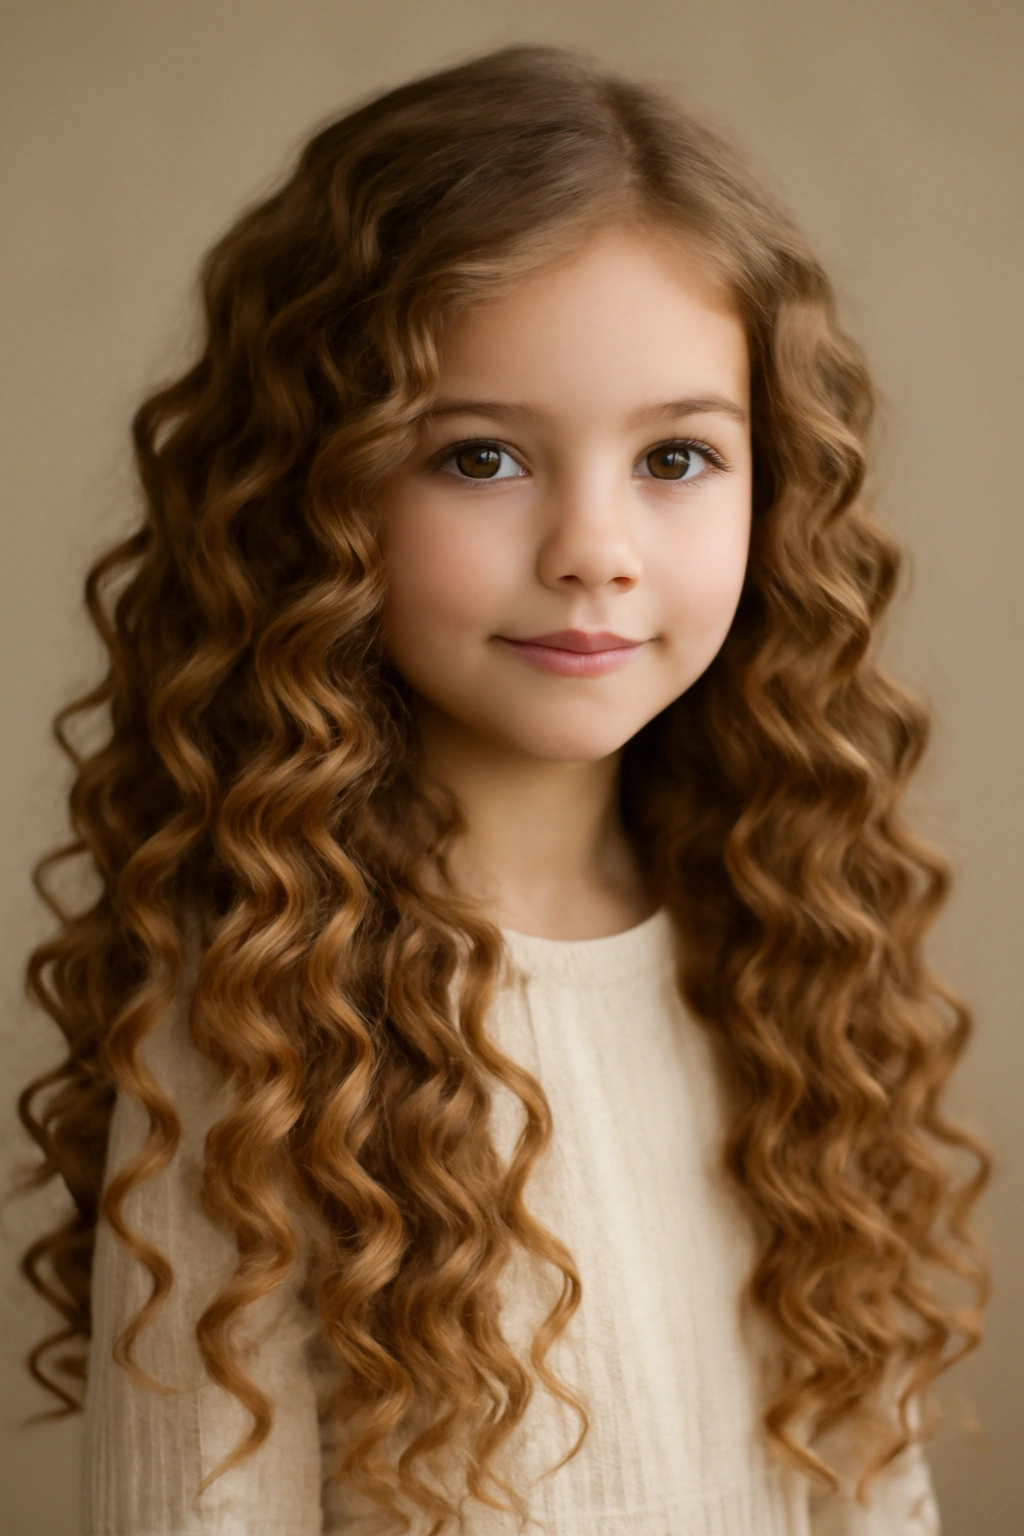
If your daughter has naturally wavy hair or you’re willing to curl her hair, cascading ringlet curls are the epitome of springtime elegance. These soft, bouncy curls feel special without looking overly formal, and they photograph beautifully in natural light.
Why Ringlet Curls Capture Easter Magic
There’s something about ringlet curls that feels inherently springy and fresh. They add volume and movement, which is visually interesting. On top of that, ringlets have a timeless, classic quality that means your Easter photos will still look lovely years down the road—not dated to a specific trend.
Curling Hair into Perfect Ringlets
Start with clean, dry (or completely dry if you use heat) hair. Work in small sections, taking about one-inch-wide pieces at a time. Wrap each section around a curling iron (a 1-inch to 1.25-inch barrel works best for ringlets) and hold for 5-8 seconds depending on your hair type. Release the curl and let it cool in your hand before moving to the next section. Once all sections are curled, use your fingers to gently separate and fluff the curls for a more natural, cascading look. Finish with a light hold hairspray.
Real talk: Ringlet curls on finer hair types work best when you add a texturizing spray or use a smaller barrel curling iron. On thicker, coarser hair, you might use a larger barrel to avoid the curls looking too tight or wiry.
5. Easter Egg Twisted Bun
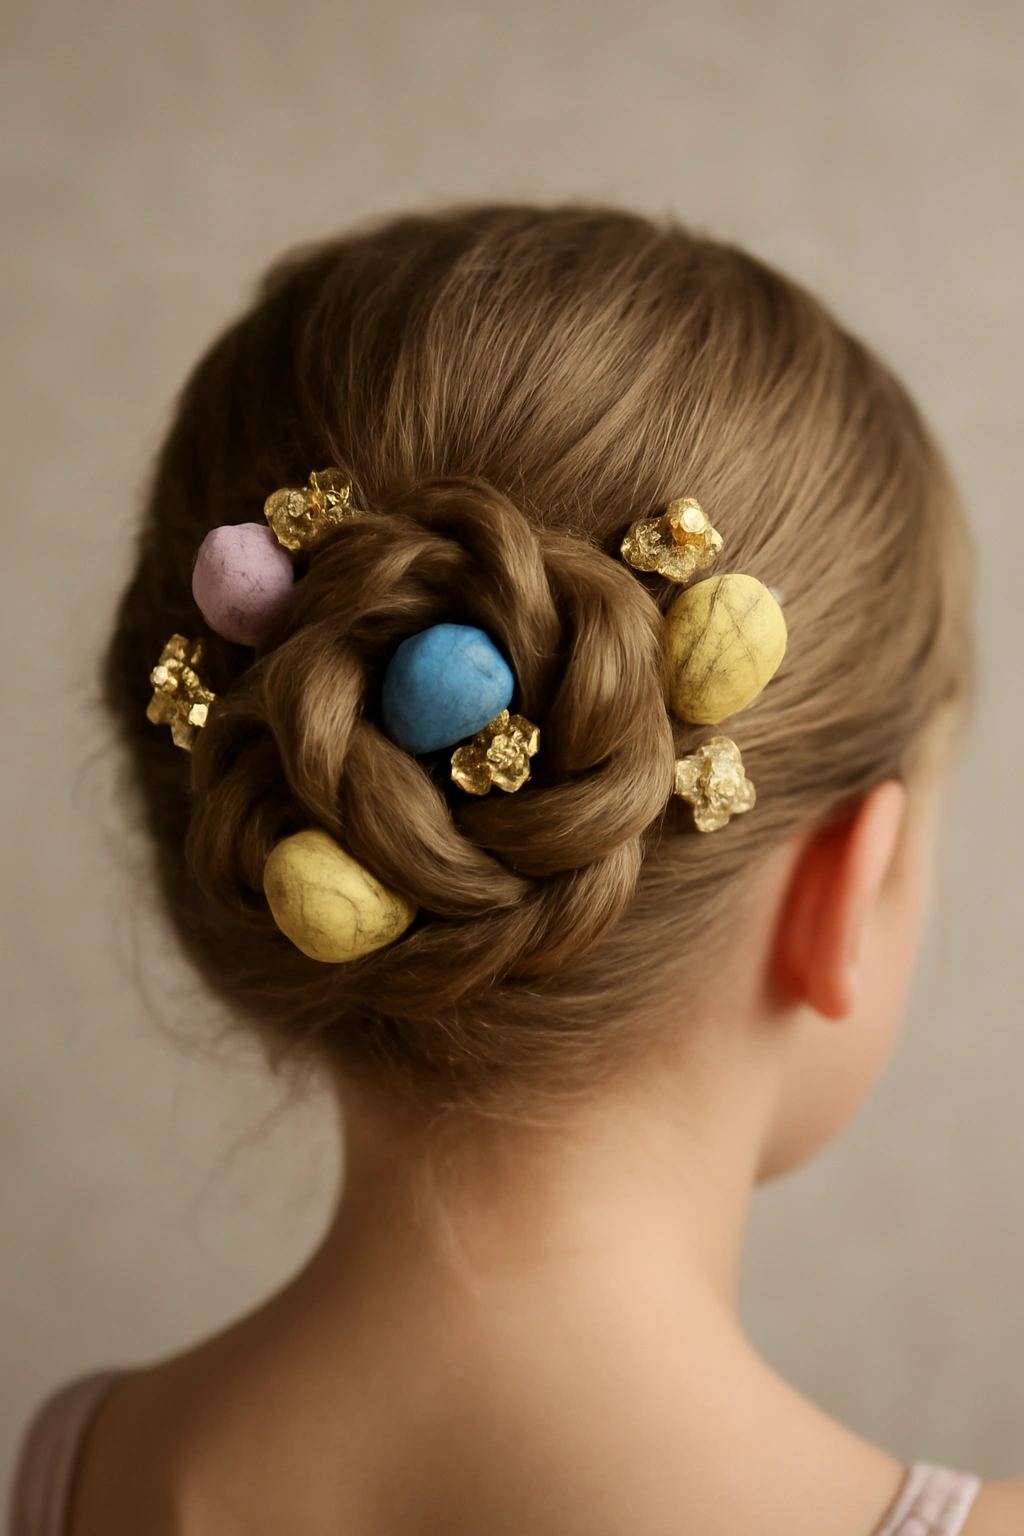
This creative style involves creating a bun from twisted sections and strategically tucking small fabric flowers or even decorative Easter eggs (the craft kind) into the twists. It’s elaborate-looking but surprisingly simple to execute.
Why This Bun Feels Festive Without Trying Too Hard
The Easter egg element directly connects the hairstyle to the holiday without relying on costume-like aesthetics. The twists create natural nooks and crannies where small flowers or embellishments can tuck in organically. It’s a one-of-a-kind look that will definitely stand out in photos.
Building Your Easter Egg Bun
Brush her hair smooth and gather it into a high ponytail at the crown. Divide the ponytail into two, three, or four sections depending on how thick her hair is. Twist each section, then wrap the twists around the base of the ponytail in a spiral pattern, pinning each section as you go with bobby pins. Tuck small artificial flowers or tiny decorative eggs (you can find plastic or foam ones at craft stores) into the twists and bun as you build. Secure anything loose with bobby pins and finish with hairspray.
Pro tip: Test the weight of any decorations before you commit to the full style. If things feel too heavy, stick with ultra-lightweight artificial flowers instead of heavier embellishments.
6. Woven Ribbon Ponytail
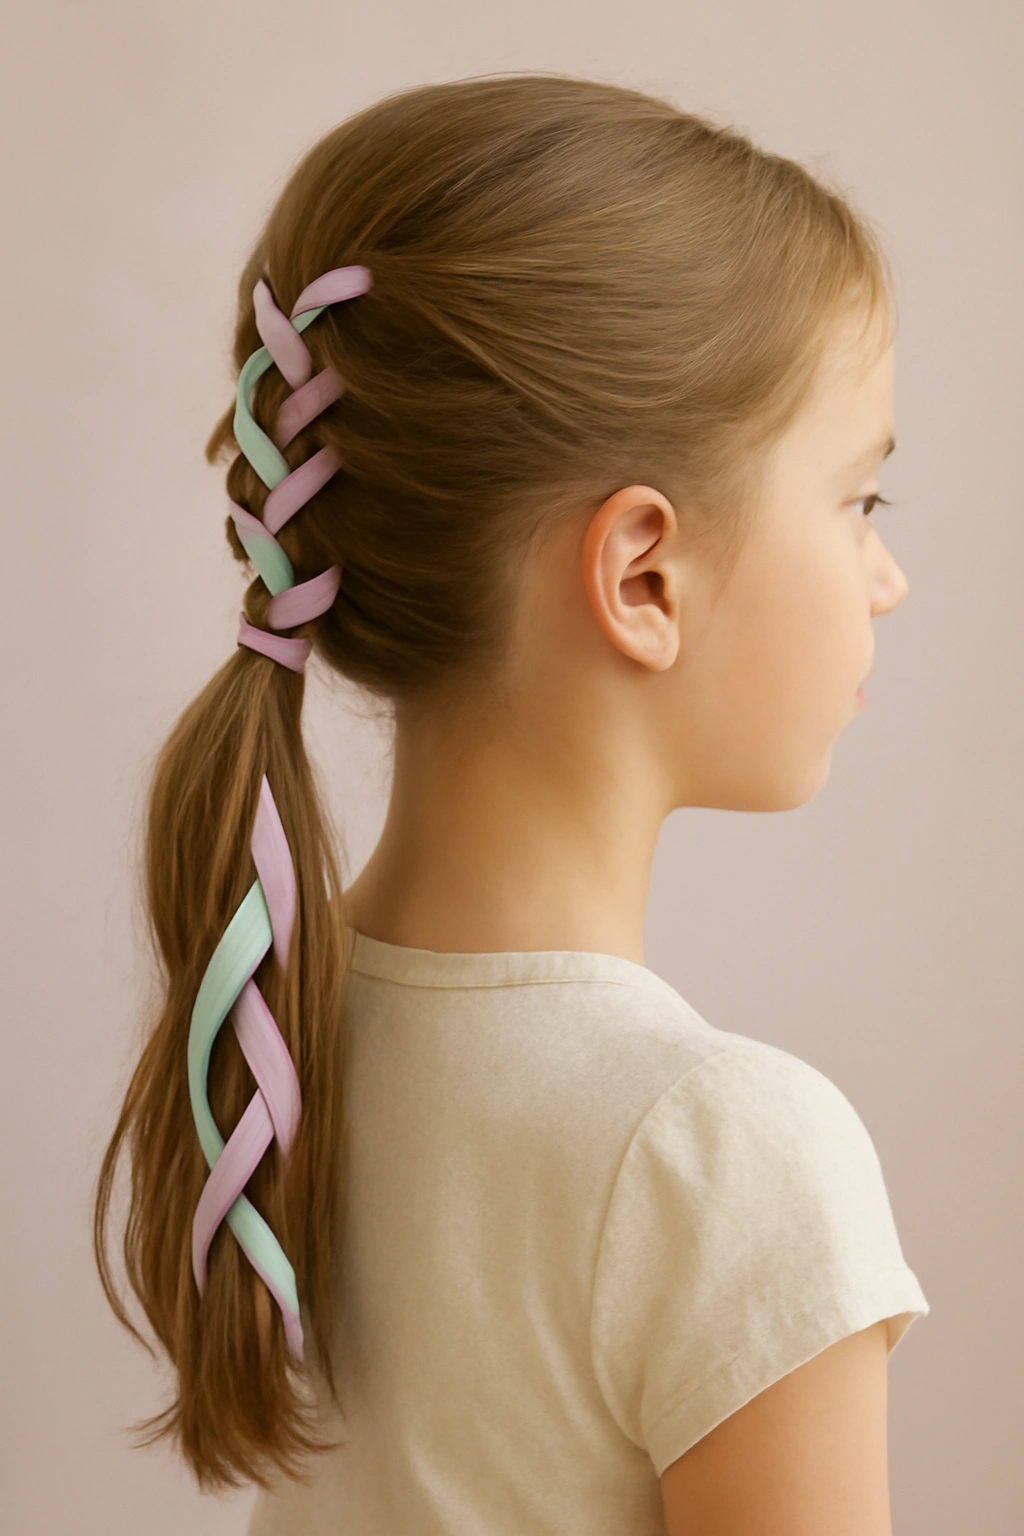
A classic ponytail gets an instant Easter upgrade when you weave ribbons through it. This style is simple enough for every parent to handle, yet it looks intentional and celebratory.
Why Ribbon Weaving Transforms a Basic Ponytail
Ribbons add color, dimension, and a handmade-but-polished aesthetic that feels springtime and special. Unlike other elaborate styles, this one stays neat and tidy even if your daughter is running around playing. It’s also comfortable for extended wear because there’s minimal pulling or heavy accessories.
Weaving Ribbons Into a Ponytail
Gather her hair into a ponytail at the back of her head and secure it with a clear elastic. Cut two or three ribbons (pastels like pale pink, mint, lavender, or soft yellow work best) each about 8-10 inches longer than the ponytail. Secure the ribbon ends to the base of the ponytail elastic by wrapping them around and securing with a bobby pin. Then braid or twist the ribbons together with sections of the ponytail. You can create a simple three-strand braid using two ribbon strands plus one hair section, or simply twist ribbons around sections of the ponytail. Secure the bottom with another elastic and trim the ribbon ends at an angle or into a fishtail shape for a polished finish.
Styling tip: Choose ribbons in coordinating pastels or metallics that either match her dress or complement her hair color.
7. Flower-Adorned Dutch Braids
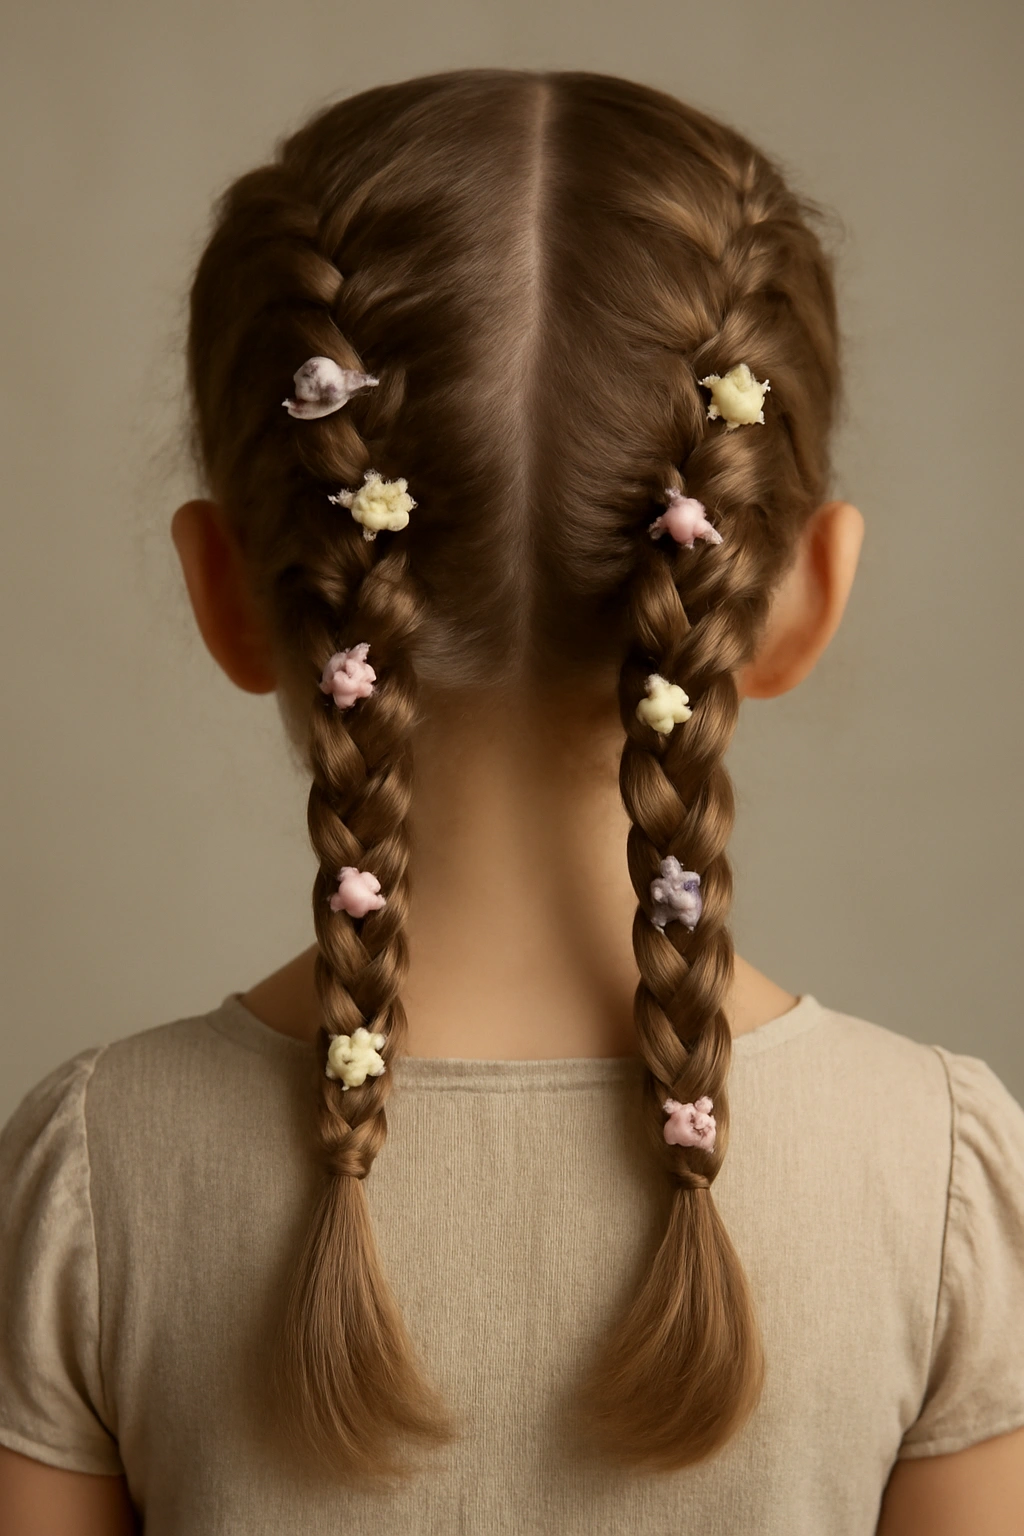
Double Dutch braids down the back of the head get their Easter moment when you tuck small flowers into the braids. This style is intricate-looking but manageable, and it keeps hair completely secure for active play.
What Makes Flower-Adorned Braids Special
Two braids are instantly more interesting visually than one, and flowers nestled into the braids add dimension and color without requiring hair to be curled or styled in complex ways. This works on most hair types and stays perfect throughout a full day of Easter activities.
Creating Dutch Braids with Flowers
Section her hair down the middle from her forehead to the nape of her neck, creating two equal halves. Starting on one side, begin a Dutch braid (braiding underhand so the braid raises above the scalp) at the crown. Braid all the way down to the bottom and secure with a clear elastic. Repeat on the other side. As you finish each braid, gently loosen it slightly by tugging on the outer edges—this creates more texture and room to tuck in flowers. Insert small silk flowers (baby’s breath, small roses, or spray flowers) into the braids throughout, securing them with bobby pins. Leave some natural hair showing between flowers for a organic, not-overcrowded look.
Real note: Loose flowers can catch on things or fall out, so skip the flower adornments if your daughter will be playing hard or crawling around during Easter activities.
8. Springtime Accessory-Laden Half-Up Bun
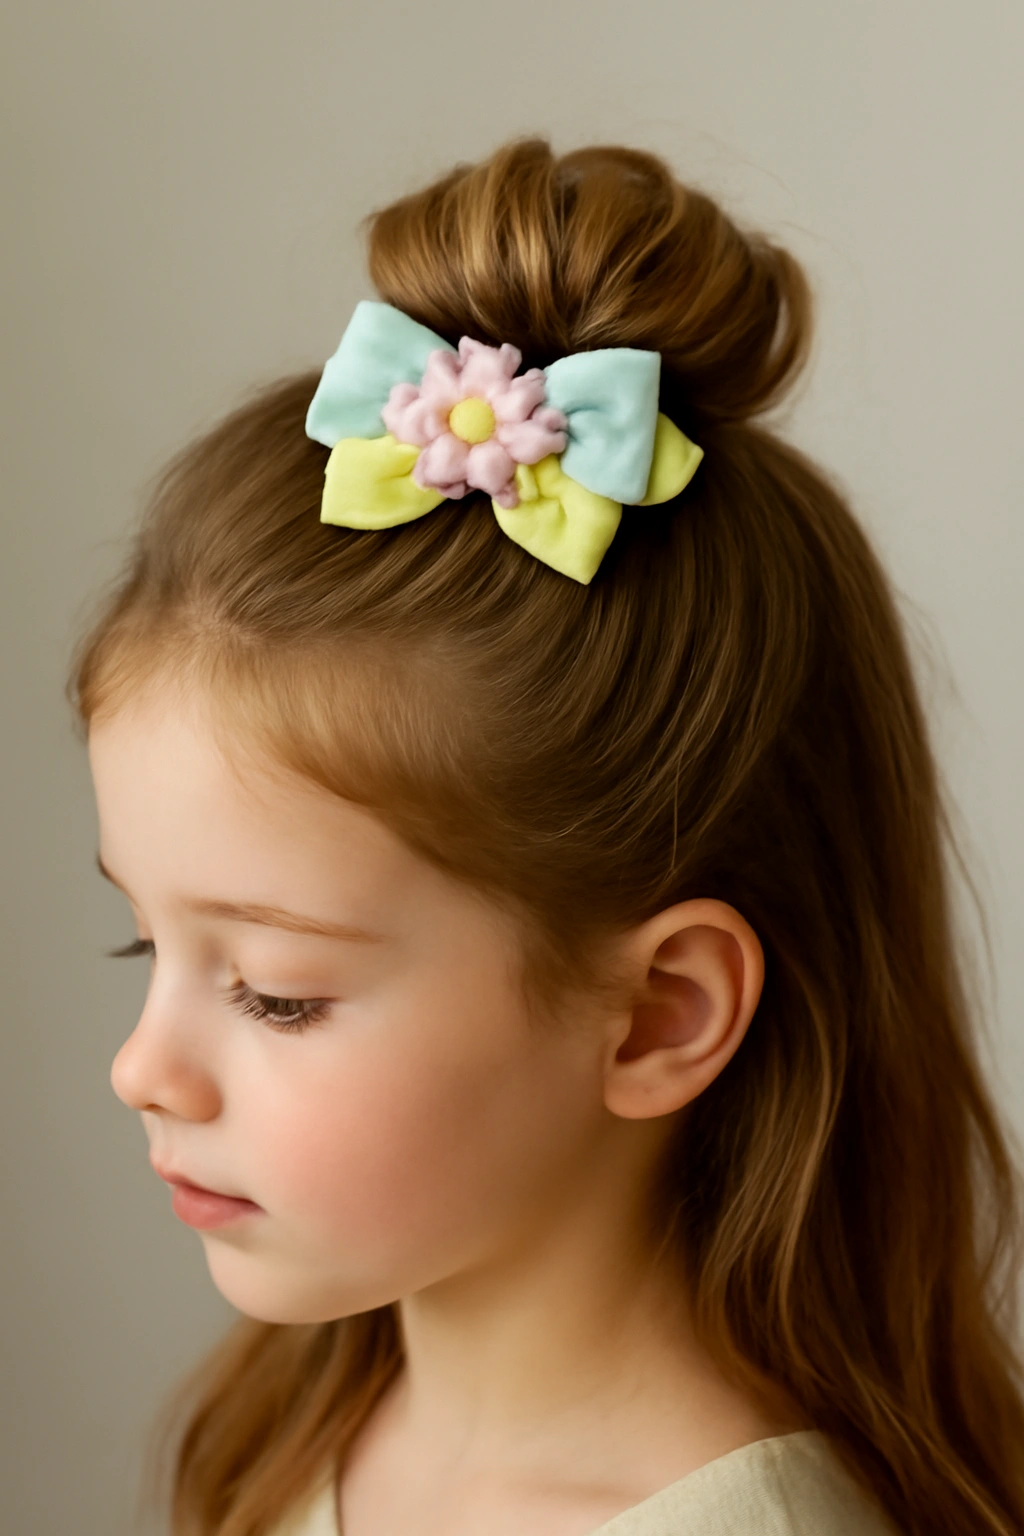
A small bun at the crown with a decorative clip, bow, or headband transforms into an elegant Easter style. This works beautifully for girls with any hair texture and stays secure throughout the day.
Why This Bun Style Feels Effortlessly Festive
The half-up format keeps hair off her face and neck while leaving the bottom half down and flowing. Adding a pretty accessory takes it from everyday to special occasion instantly. It’s grown-up enough for formal Easter church services but playful enough for casual family gatherings.
Building Your Half-Up Bun
Section off the top half of her hair (roughly from ear to ear across the top of her head) and gather it into a ponytail at the crown. Twist or braid this top section, then wrap it around itself to form a small bun at the crown. Secure with bobby pins. Slide a decorative clip, bow, or headband over the bun, positioning it so it’s visible and secure. The bottom half of her hair stays down and can be left straight, curled, or adorned with additional small clips if you’d like.
Accessory ideas: Pastel velvet bows, pearl-adorned clips, delicate headbands, or even a small fascinator-style piece work beautifully with this style.
9. Delicate Side-Swept Waves
For a soft, romantic Easter look, side-swept waves require minimal effort but create maximum impact. This style works particularly well for girls with longer hair and photographs gorgeously.
Why Waves Feel Inherently Springtime
Waves have a loose, effortless quality that feels lighter and more seasonal than straight hair. When swept to one side, they create an asymmetrical, romantic silhouette. It’s a style that feels special without looking overly formal or costume-like.
Creating Side-Swept Waves
Brush her hair smooth. Using a 1.25-inch curling iron, curl vertical sections of hair away from her face, working from one ear around to the back of her head. Don’t curl the front section that sweeps across—this should be left straighter to frame her face. Once all sections are curled, brush through the curls gently with a soft paddle brush to create soft waves rather than defined ringlets. Sweep the hair to one side and secure with bobby pins at the back if needed, or simply let it flow naturally. Finish with a light hairspray.
Optional finishing touch: Add a small clip, barrette, or flower where the side-swept section meets the other hair, securing the style in place.
10. Multi-Strand Twisted Crown
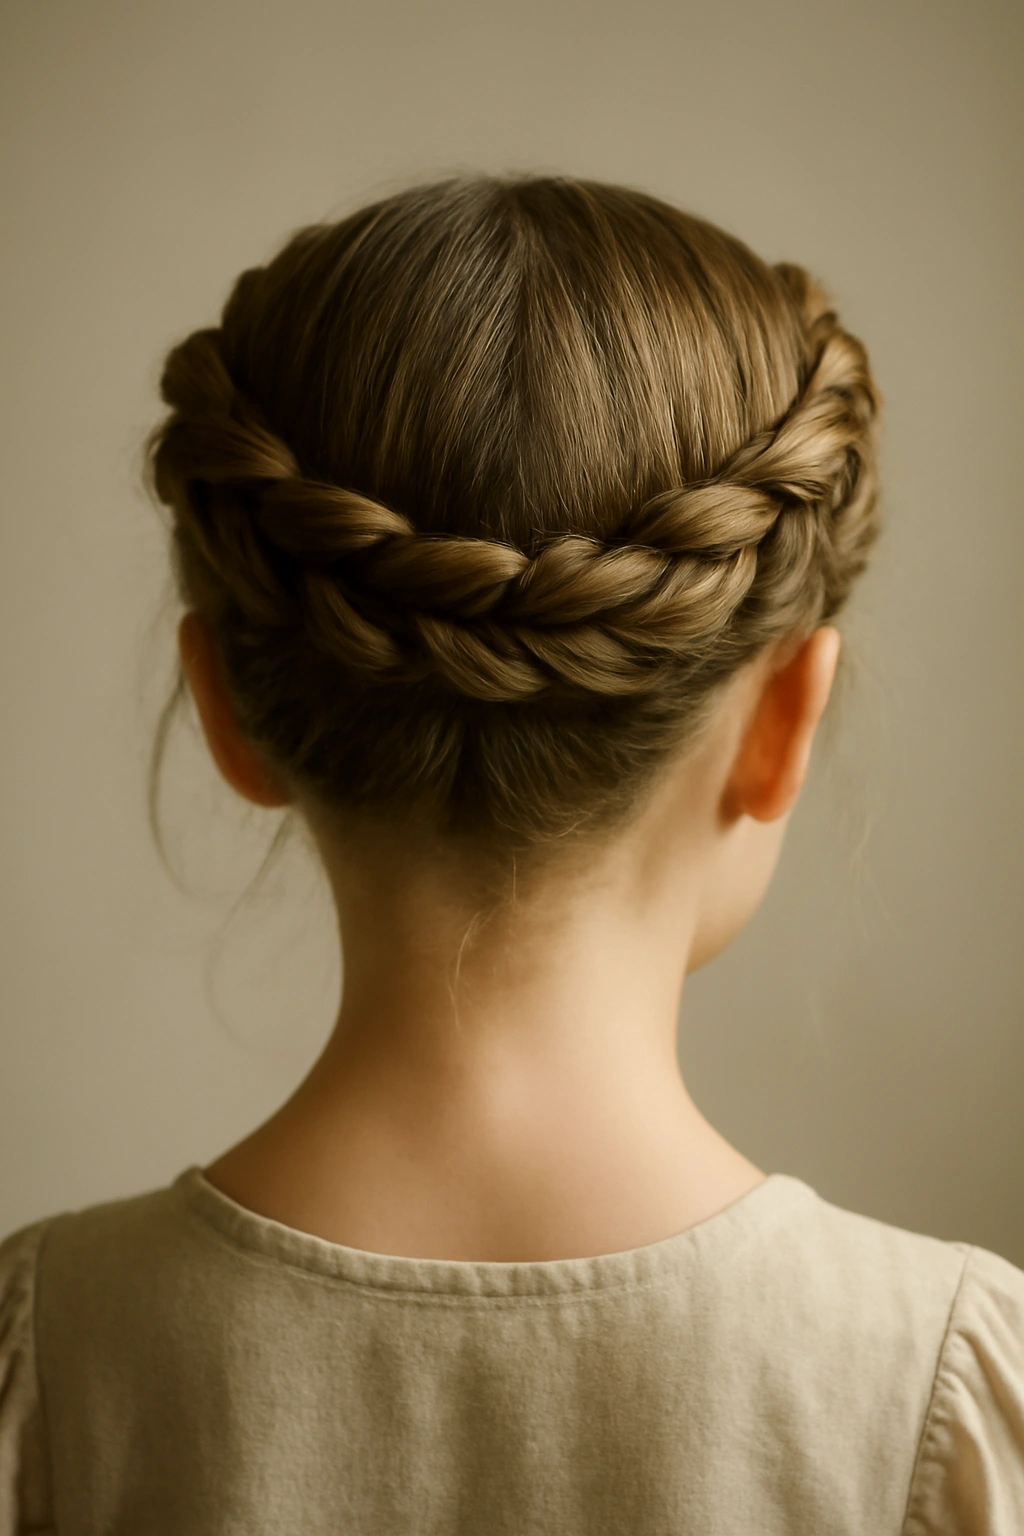
A twisted crown that circles the entire head is more complex-looking than it actually is, and it creates a dramatic, elegant silhouette that’s perfect for special Easter occasions.
What Makes a Twisted Crown Stand Out
This style sits like a halo on her head, keeping all hair off her face and creating a sophisticated, almost regal look. It stays secure throughout the day, and it works beautifully as a backdrop for a headband, crown, or tiara if you want to add one more festive touch.
Building a Multi-Strand Twisted Crown
Brush her hair completely smooth. Section the top half of her hair into three to four vertical sections from the forehead to the back of the head. Twist each section individually, starting at the roots and going all the way down. Once all sections are twisted, begin pinning them around her head like a crown, starting at one side and working around to the other. Cross the twisted sections over each other, pinning them securely with bobby pins as you go. The twisted sections should overlap slightly, creating a braided-crown appearance. Tuck any loose ends into the back of the crown and secure with additional bobby pins. Smooth any baby hairs with gel.
Real talk: This style requires more bobby pins and more patience than simpler styles, but the result is absolutely worth it for special photos or milestone Easter celebrations.
11. Colorful Ribboned French Braid
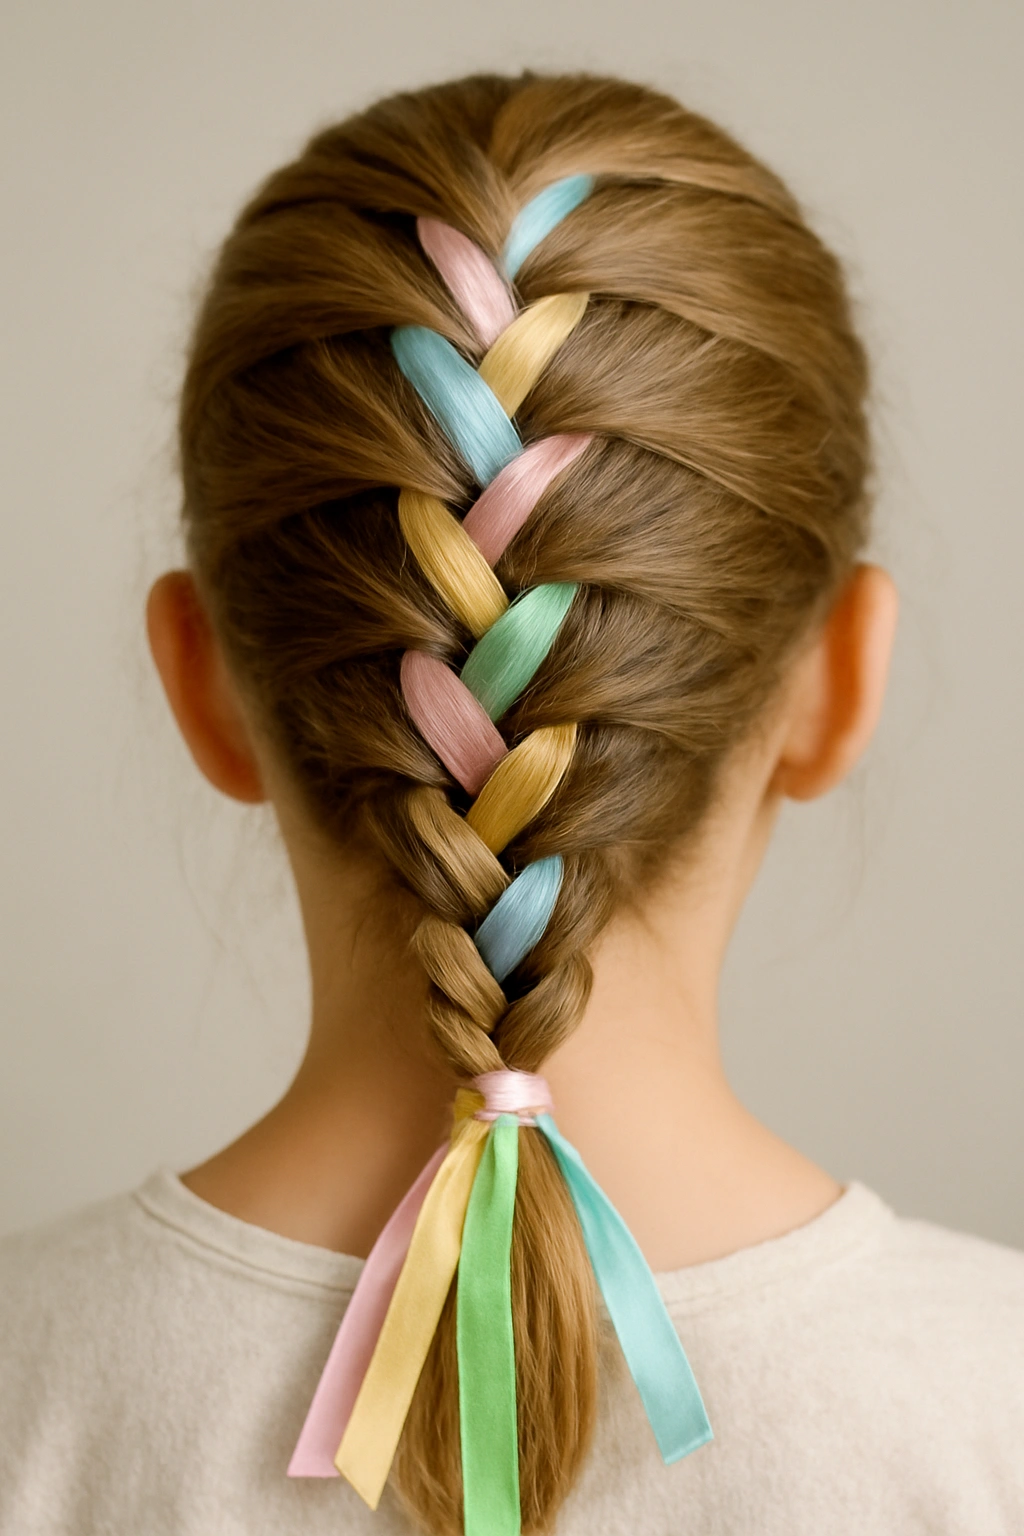
A French braid with ribbons woven throughout combines classic elegance with Easter color. This style can be as simple or as elaborate as you want to make it.
Why Ribbon-Woven Braids Work for Easter
The braid structure keeps everything tidy and secure, while the ribbons add the celebratory color and spring vibe. This style is versatile enough to work for casual family gatherings or formal church services.
Creating a French Braid with Woven Ribbons
Start at the crown of her head with a small section of hair. Begin a traditional French braid (braiding overhand and adding hair as you go down the back of her head). As you braid, simultaneously weave ribbons through the braid strands. You can use one ribbon woven through all three braid strands, or multiple ribbons woven through different braid sections. Continue braiding and weaving all the way down to the nape of her neck. Secure the braid end with a clear elastic and wrap one of the ribbons around the elastic, tying it in a bow or tassel.
Ribbon tip: Choose ribbons in coordinating pastels or in colors that match her Easter outfit. Metallic ribbons add a sophisticated touch without feeling over-the-top.
12. Floral Sprout Topknot
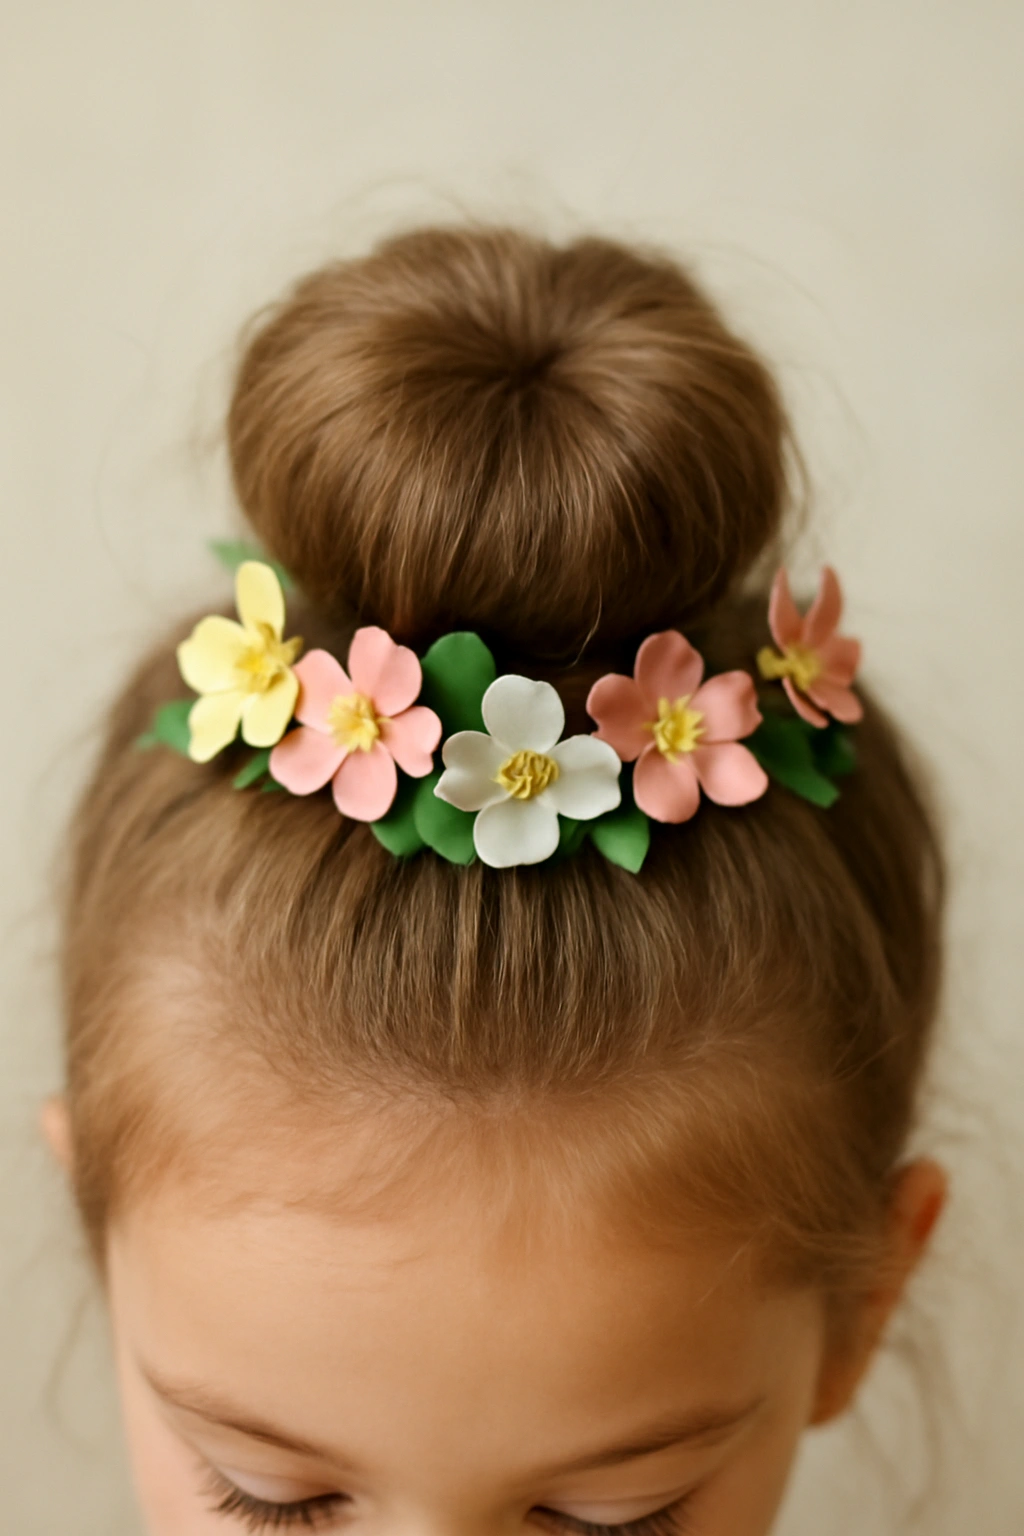
This playful, modern style gathers hair into a topknot on the very crown of her head and nestles small flowers around the base. It’s perfect for younger girls and photographs adorably.
Why Topknots Feel Fresh for Easter
Topknots have a youthful, cheerful energy that suits springtime celebrations. This version feels intentionally styled because of the flower embellishments, but the overall vibe remains fun and age-appropriate.
Styling Your Floral Topknot
Brush all of her hair up and toward the crown of her head. Gather it into a tight ponytail at the very top. Twist or braid the ponytail, then wrap it around itself to form a small, elevated bun. Secure with bobby pins. Once the bun is secure, arrange small artificial flowers (or even real clipped flowers if you refresh them throughout the day) around the base of the topknot, tucking them under the bun and securing with bobby pins. Leave some loose strands at the sides of her face for softness, or tuck them completely back for a polished look.
Real note: Topknots work beautifully on girls with thicker hair. If your daughter has finer hair, the topknot may look sparse—in that case, try a middle-parted double topknot instead, creating two smaller knots rather than one.
Final Thoughts
Choosing an Easter hairstyle for your daughter should feel fun and exciting, not stressful. The beauty of these twelve styles is that they range from quick five-minute looks to more involved designs that give you a chance to really play with her hair. Some work best on specific hair types, while others are wonderfully versatile. Some require products like hairspray and gel, while others need nothing but a brush and some bobby pins.
The real secret to a successful Easter hairstyle is doing a test run before the actual day. Let your daughter see what she’ll look like, make sure the style feels comfortable to her, and troubleshoot any bobby pins or accessories that might feel prickly or heavy. Listen to her feedback—if she hates having her hair up, forcing an elaborate updo on Easter morning will only make everyone frustrated. Sometimes the simplest style, done with love and maybe a small accessory, is the most beautiful one.
Remember that your daughter will remember how she felt while you were styling her hair more than the hairstyle itself. Take your time, chat with her, maybe play her favorite music, and enjoy those moments together. That’s the real Easter magic—not the perfect hairstyle, but the care and attention you’re giving her.