Beaded braids are hands-down one of the most charming and practical hairstyles for little girls. They’re playful, decorative, and surprisingly durable—your daughter gets a hairstyle that looks intentional and polished while the beads actually help keep the braids secure throughout the day. Beyond the obvious aesthetic appeal, there’s something special about how beads catch the light when your child moves, turning an everyday braid into something that feels almost magical.
What makes beaded braids so appealing for kids is that they work across different hair textures, can be dressed up for special occasions or worn casually to school, and hold up beautifully through active play, swimming, and general childhood chaos. The weight of the beads creates natural tension that keeps braids from unraveling, and the visual interest means your daughter gets compliments everywhere she goes. Whether you’re looking for something quick and practical or an elaborate style for a special event, there’s a beaded braid option that’ll work.
The styles in this guide range from simple single braids with minimal beads to more intricate multi-braid designs. Some are perfect for beginners—truly, if you can braid at all, you can add beads. Others require a bit more patience and practice but deliver stunning results that’ll make you look like you just came from a professional salon. Every style here can be customized with your child’s favorite bead colors, and many can be adapted based on hair length and thickness.
1. The Classic Single Braid with Scattered Beads
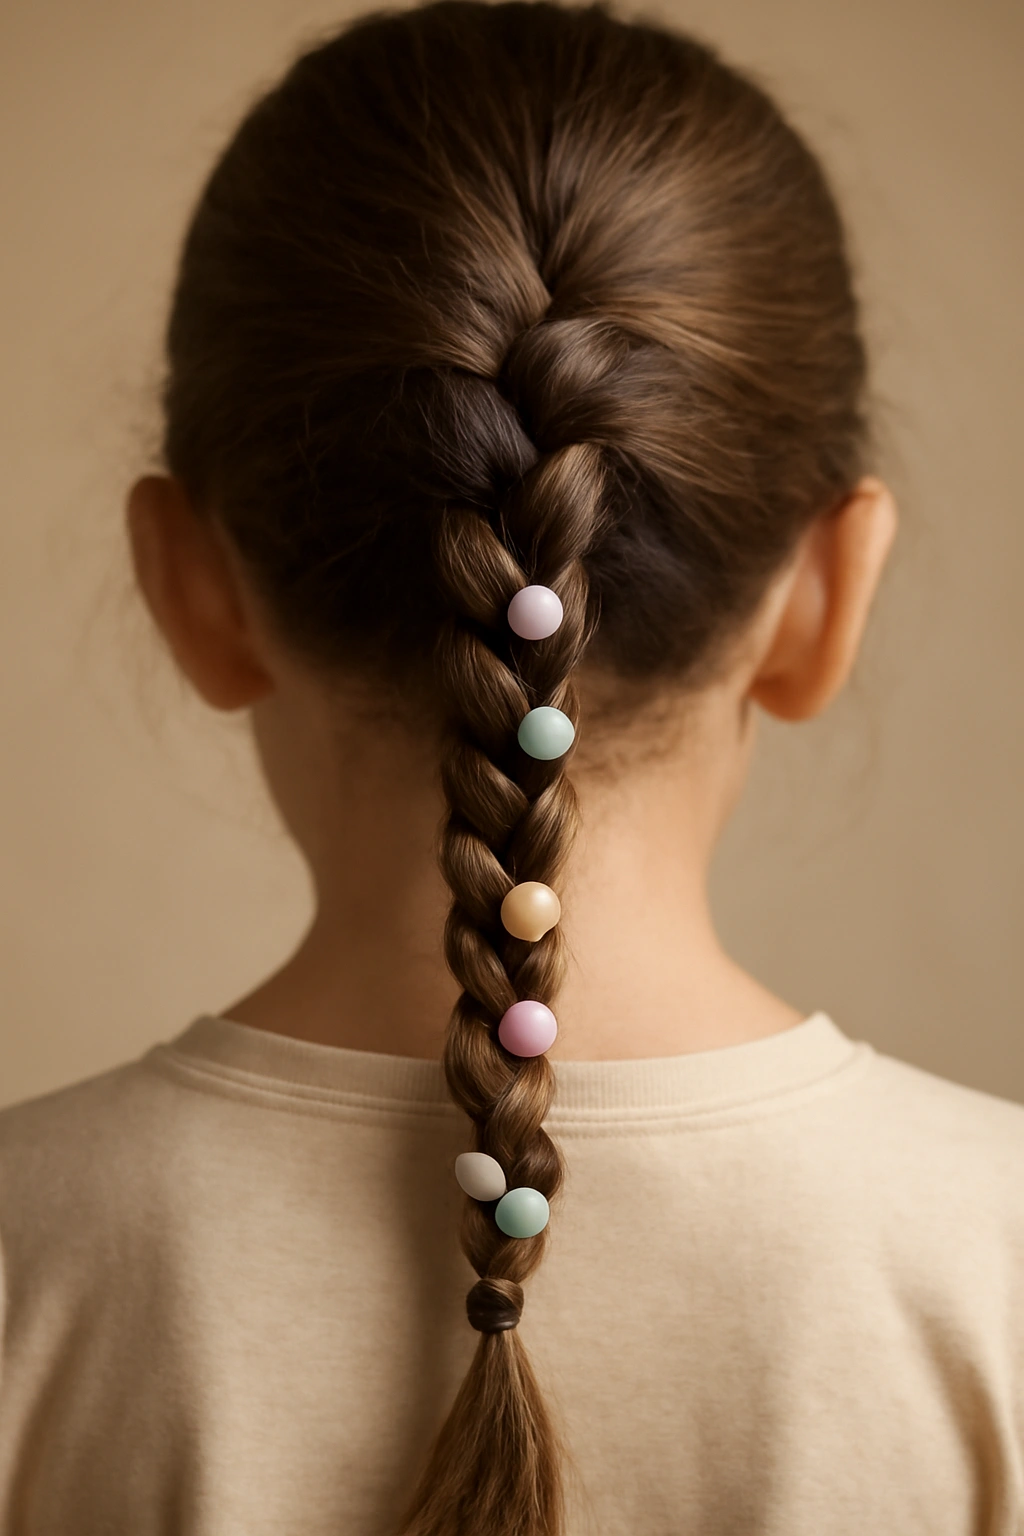
This is the easiest beaded braid style and the perfect starting point if you’re new to adding beads to braids. You’re essentially creating one standard three-strand braid down the back of the head, then threading beads onto the hair at intervals as you go—or adding them after the braid is finished by sliding them down the braid shaft itself.
Why This Style Works Best
The scattered-bead approach is forgiving because there’s no complicated pattern to follow. You can add beads randomly or space them evenly—whatever feels right to you. It takes roughly 10-15 minutes once you’ve got your rhythm down, and it holds beautifully in all hair types. The single braid keeps it looking neat and intentional rather than chaotic.
How to Create It
Start with clean, dry or lightly dampened hair brushed smooth. Take a section of hair from the crown and begin braiding downward, working all the way to the ends. Once the braid is complete and you’ve secured it with an elastic, slide beads onto the braid itself using a small pulling motion—work the bead up the braid strands until it sits where you want it. Distribute beads roughly 2-3 inches apart for a balanced look. Secure the final elastic at the bottom as usual, and you’re done.
What to know: Wooden beads, acrylic beads, and even small plastic pony beads all work beautifully. Choose colors that pop against your daughter’s hair color—metallics work with everything, pastels look sweet, and jewel tones feel more dressy.
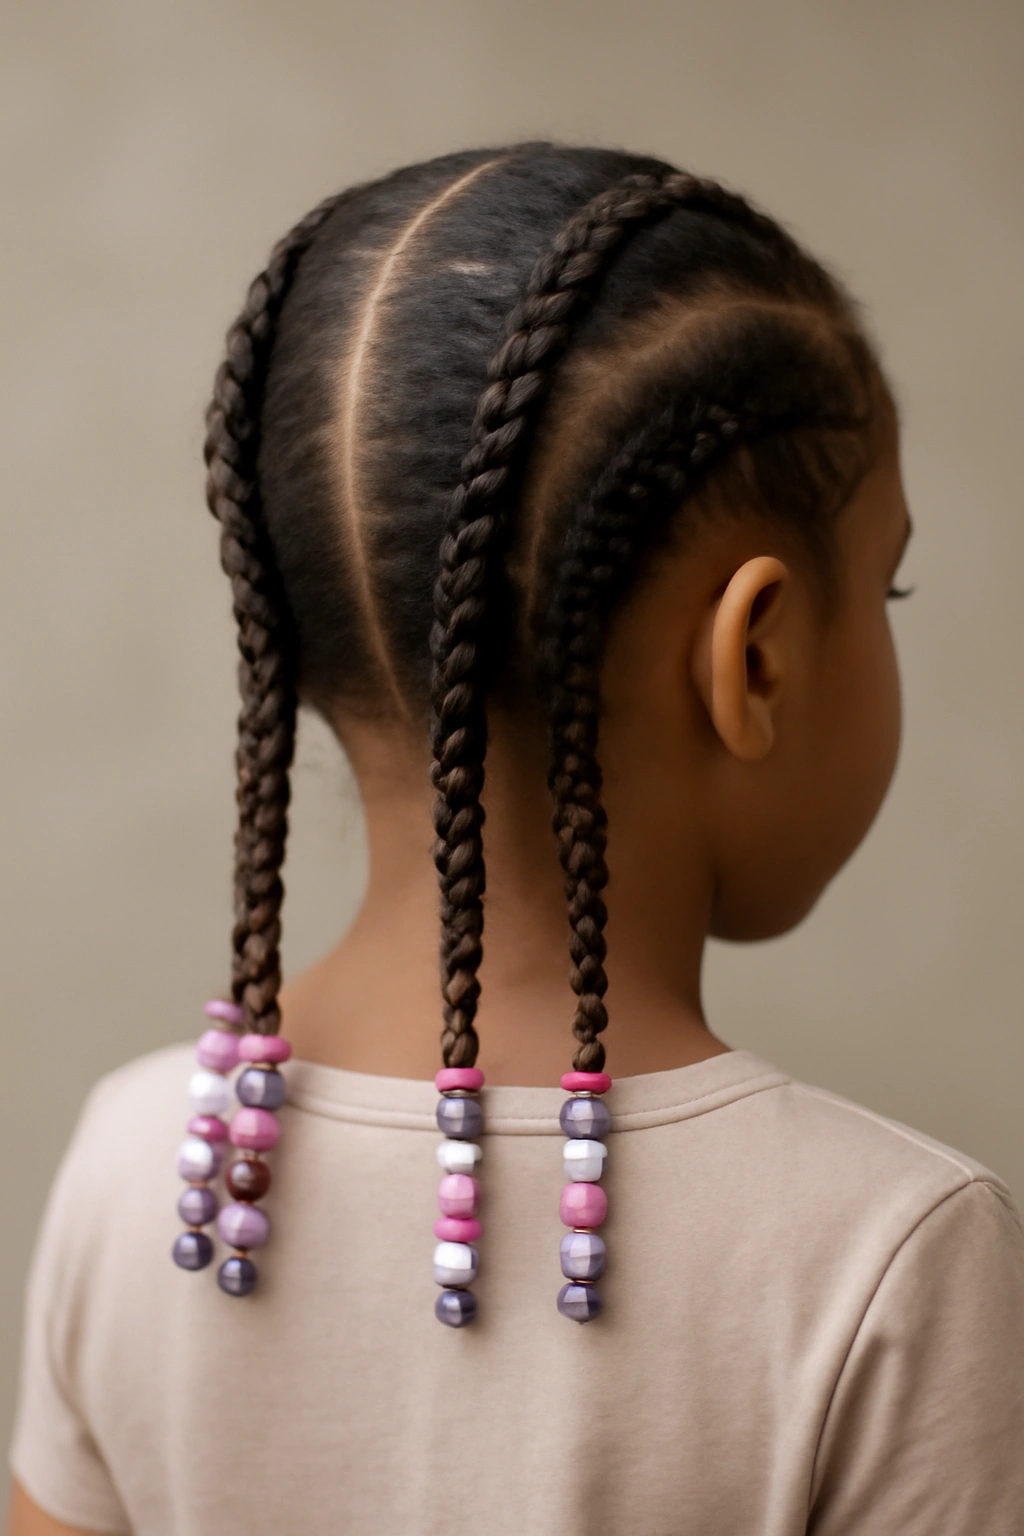
2. Twin Braids with Matching Beads
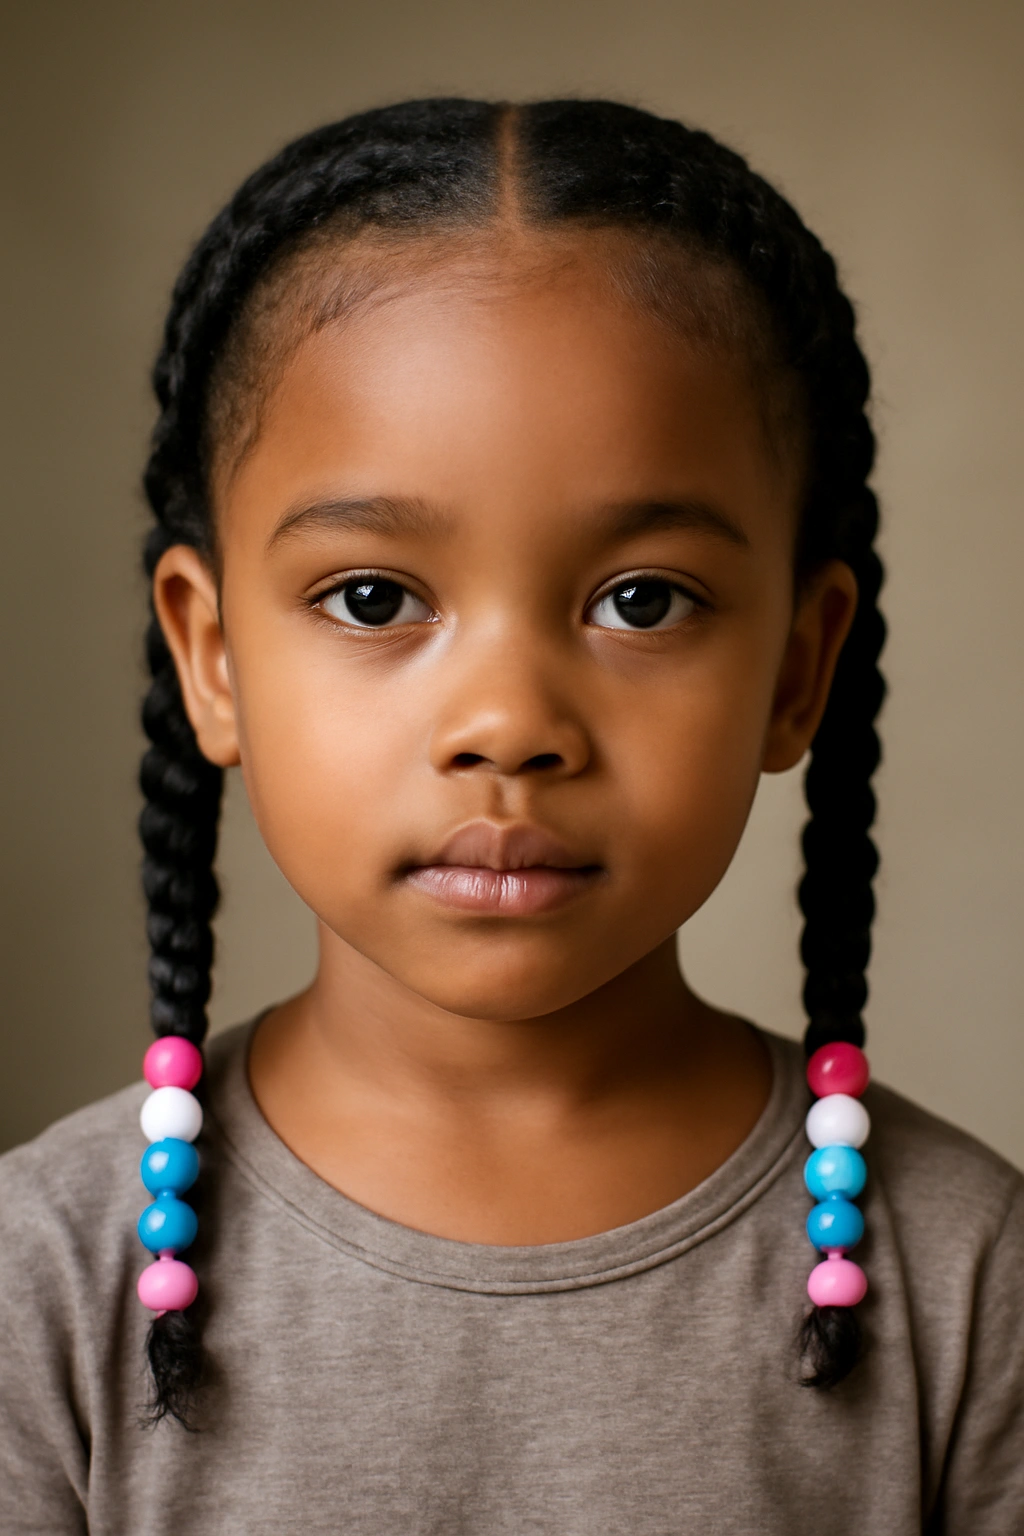
Two braids are instantly more interesting than one, and when you bead both sides with the same color scheme, you get a coordinated, polished look that feels intentional and balanced.
Why Symmetry Matters Here
Twin braids automatically read as more “styled” than a single braid, even though they’re not significantly more difficult to create. The matching beads tie the whole look together and frame the face beautifully. This style works wonderfully for school, playdates, or casual outings.
Building the Twin Braid Set
Part the hair down the middle from forehead to the nape of the neck using a fine-tooth comb. Take a section from one side of the part and braid it in the same way you’d create a single braid, adding beads as you go. Repeat on the other side, using the same bead colors and spacing for a mirrored effect. The symmetry is what makes this feel polished—if one braid has beads at 2-inch intervals, match that exactly on the other side.
Pro tip: If your daughter’s hair is thick, consider starting the braids slightly higher on the head—around the temples rather than right at the part—so the braids sit visibly on each side of the face instead of disappearing into the hair.
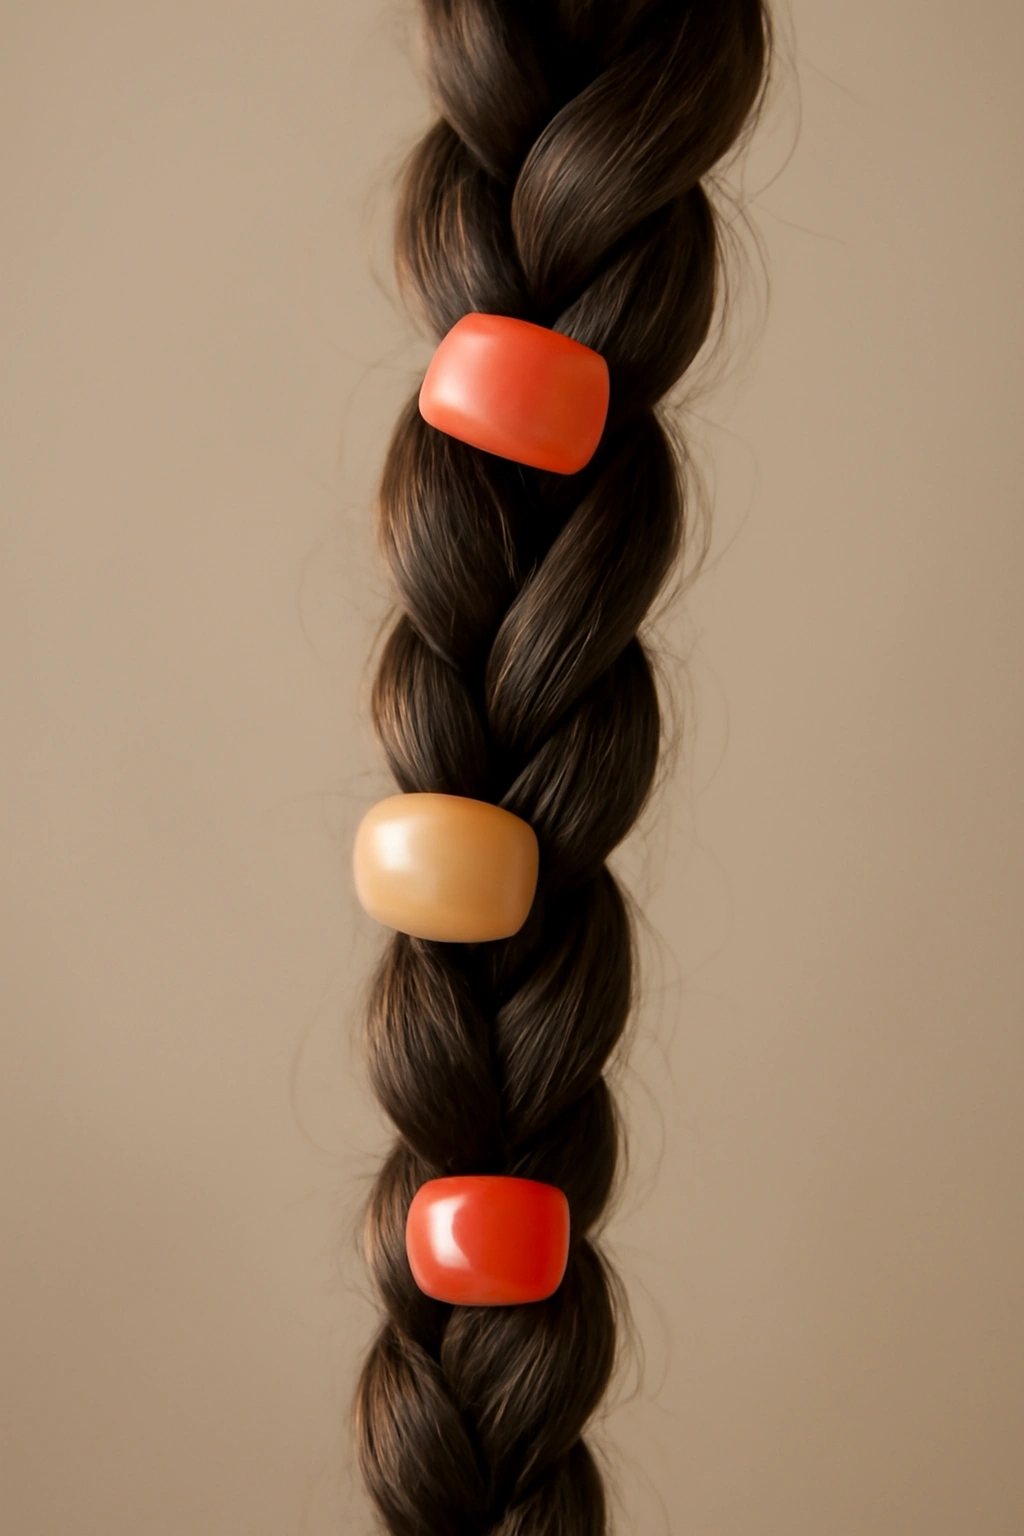
3. The Boho Side Braid with Rainbow Beads
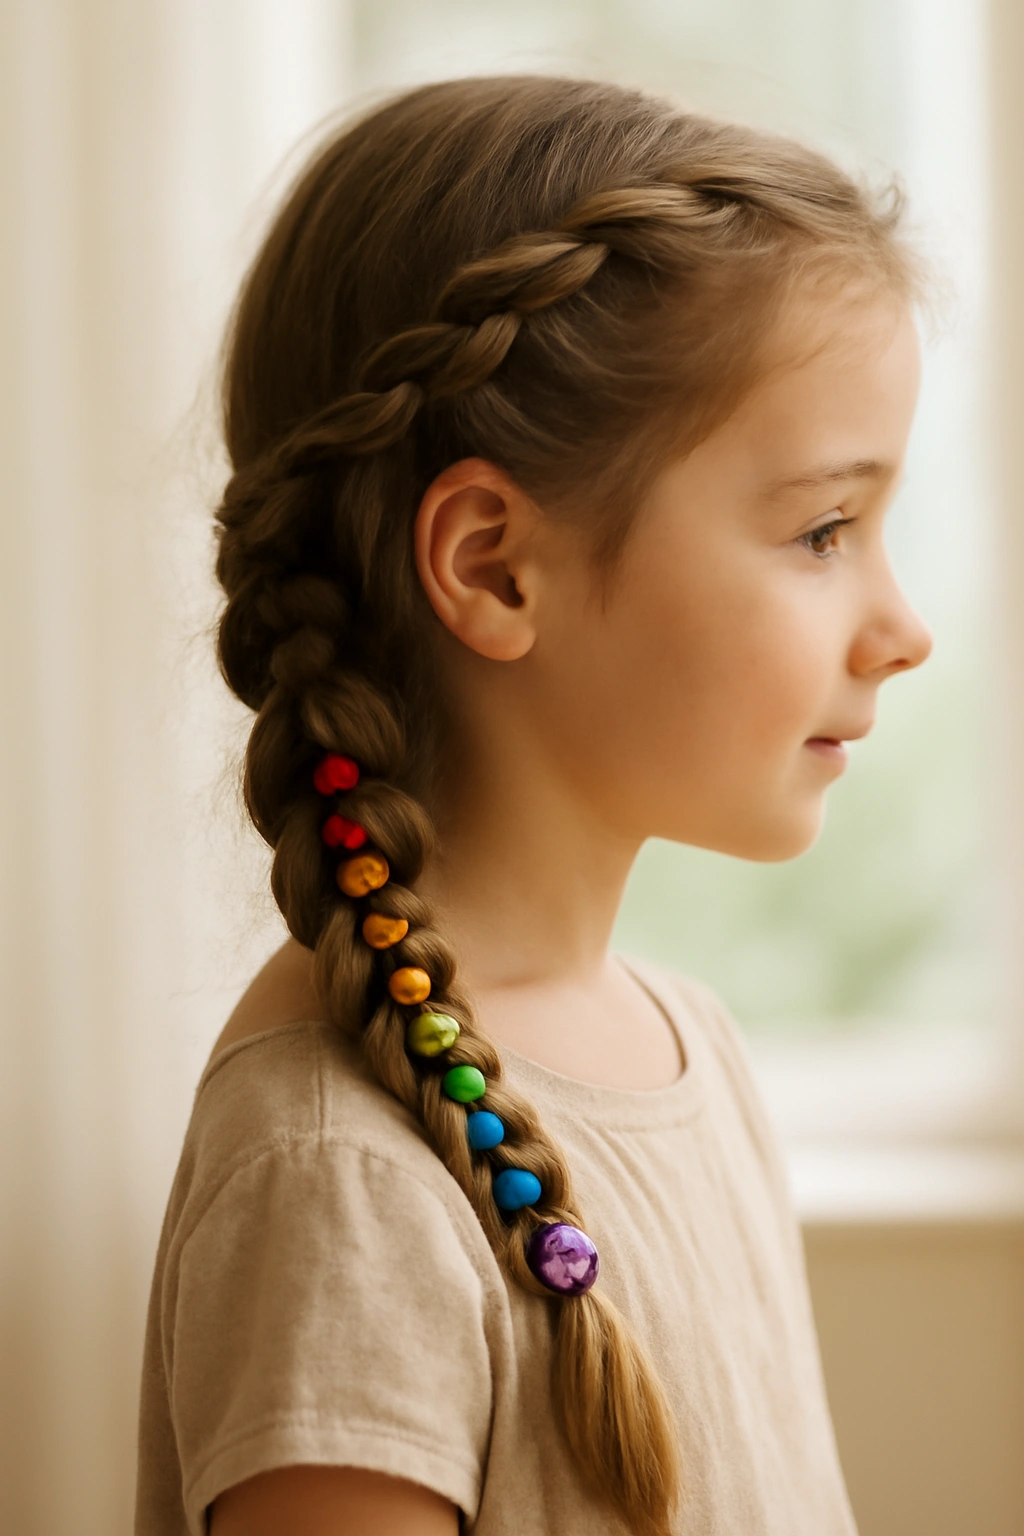
For a style that feels a bit more intentional and dressed-up, try a thick side braid (starting from one ear and braiding diagonally across the back toward the opposite shoulder) and thread it with beads in a rainbow gradient. It’s elegant and whimsical at the same time.
Creating the Rainbow Effect
Start with a small section of hair near one ear and begin braiding it loosely—loose braids photograph better and look more relaxed and bohemian. As you braid downward, add beads in a gradient: start with one color (like pale pink), transition through a few middle shades (coral, peach, orange), and finish with another color (like soft yellow). The gradient should be subtle and flow naturally rather than looking jarring.
The Technique for Volume
Side braids naturally look fuller and more textured than center braids. Work with slightly damp hair for grip, braid a bit loosely to leave room for movement, and finish by gently pulling at the braid to create a fuller, messier texture. Add beads as you braid rather than after, since you’ll have better control that way.
Real talk: This style works best on longer hair (at least shoulder-length) because the braid needs room to curve down the back without ending abruptly. On shorter hair, you might end up with a braid that’s too short to show off your bead work.
4. French Braid with Beaded Accents
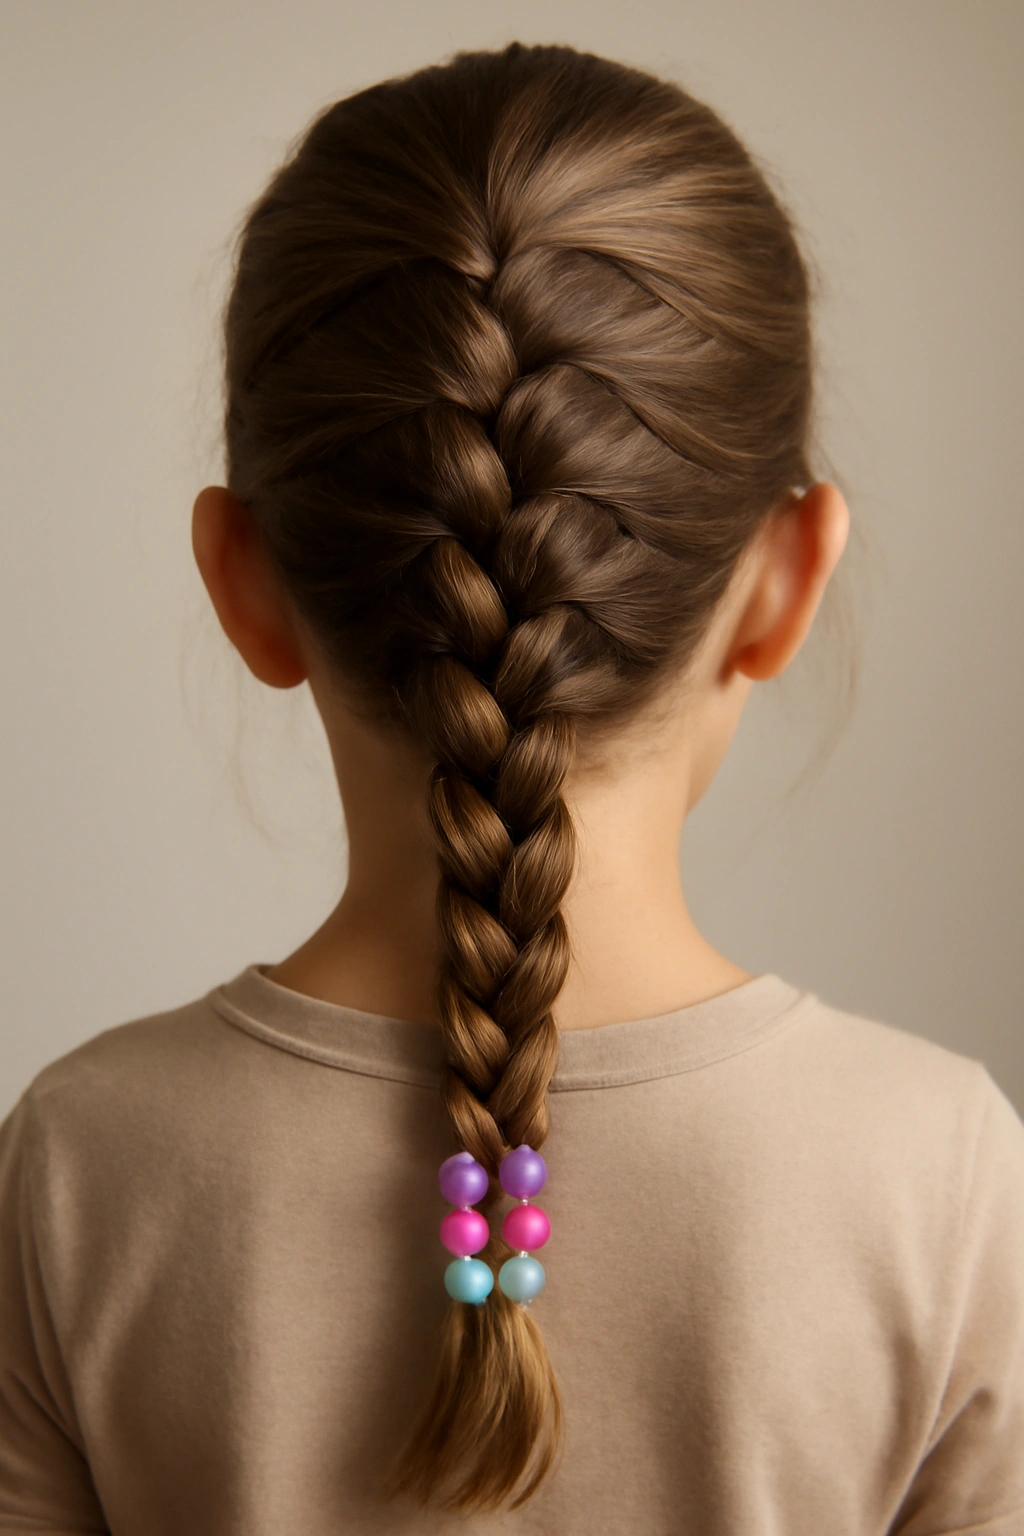
French braids look more sophisticated and sit higher on the head than regular braids. Adding beads only to the bottom section of the braid (rather than the entire length) creates a modern, artistic look that isn’t overdone.
Understanding the French Braid Foundation
A French braid starts at the crown and incorporates hair from the scalp as you braid downward, creating an intricate three-dimensional pattern. Start with a small section at the crown, braid it once, then add a thin section of hair from the left side before the next braid strand, then a thin section from the right side, continuing this pattern all the way down the head. It takes practice, but it’s absolutely worth learning because it’s the foundation for so many upscale styles.
Where to Place the Beads
Once your French braid reaches the nape of the neck and transitions into a regular three-strand braid, that’s where you add your beads. This keeps the scalp area clean and minimalist while creating a decorative focal point at the bottom of the hairstyle. Use larger statement beads here since they’re the visual anchor of the whole look.
Worth knowing: French braids actually hold better than regular braids because of how the hair is incorporated into the structure. This means your beaded section will stay put even through active play.
5. The Double Dutch with Coordinated Beads
Double Dutch braids are two French braids running parallel down the back of the head. When you add matching beads to both, you get a style that feels almost like a crown or a protective style that actually protects the hair while looking incredibly put-together.
Why Double Dutch Holds So Well
The double-braid structure distributes tension across multiple braids instead of putting all the weight on one, which means less strain on the scalp and longer-lasting braids. Each braid is independently secure, so if one bead shifts, the whole style doesn’t unravel.
Creating Symmetrical Double Dutch
Divide the hair into two equal sections with a center part from the crown to the nape. Create a French braid on one side, then replicate the exact same braid on the other side using the same bead colors and spacing. The key to this looking polished is that the two braids should be visually identical—if one is looser or tighter than the other, it’ll look unintentional.
Insider note: Double Dutch braids are perfect for active kids because they keep hair completely off the face and neck, which is ideal for sports, dance, or playground time. The braids also tend to stay neat for days if you’re careful about nighttime storage (a silk pillowcase or braid-specific wrap helps).
6. Waterfall Braid with Delicate Beads
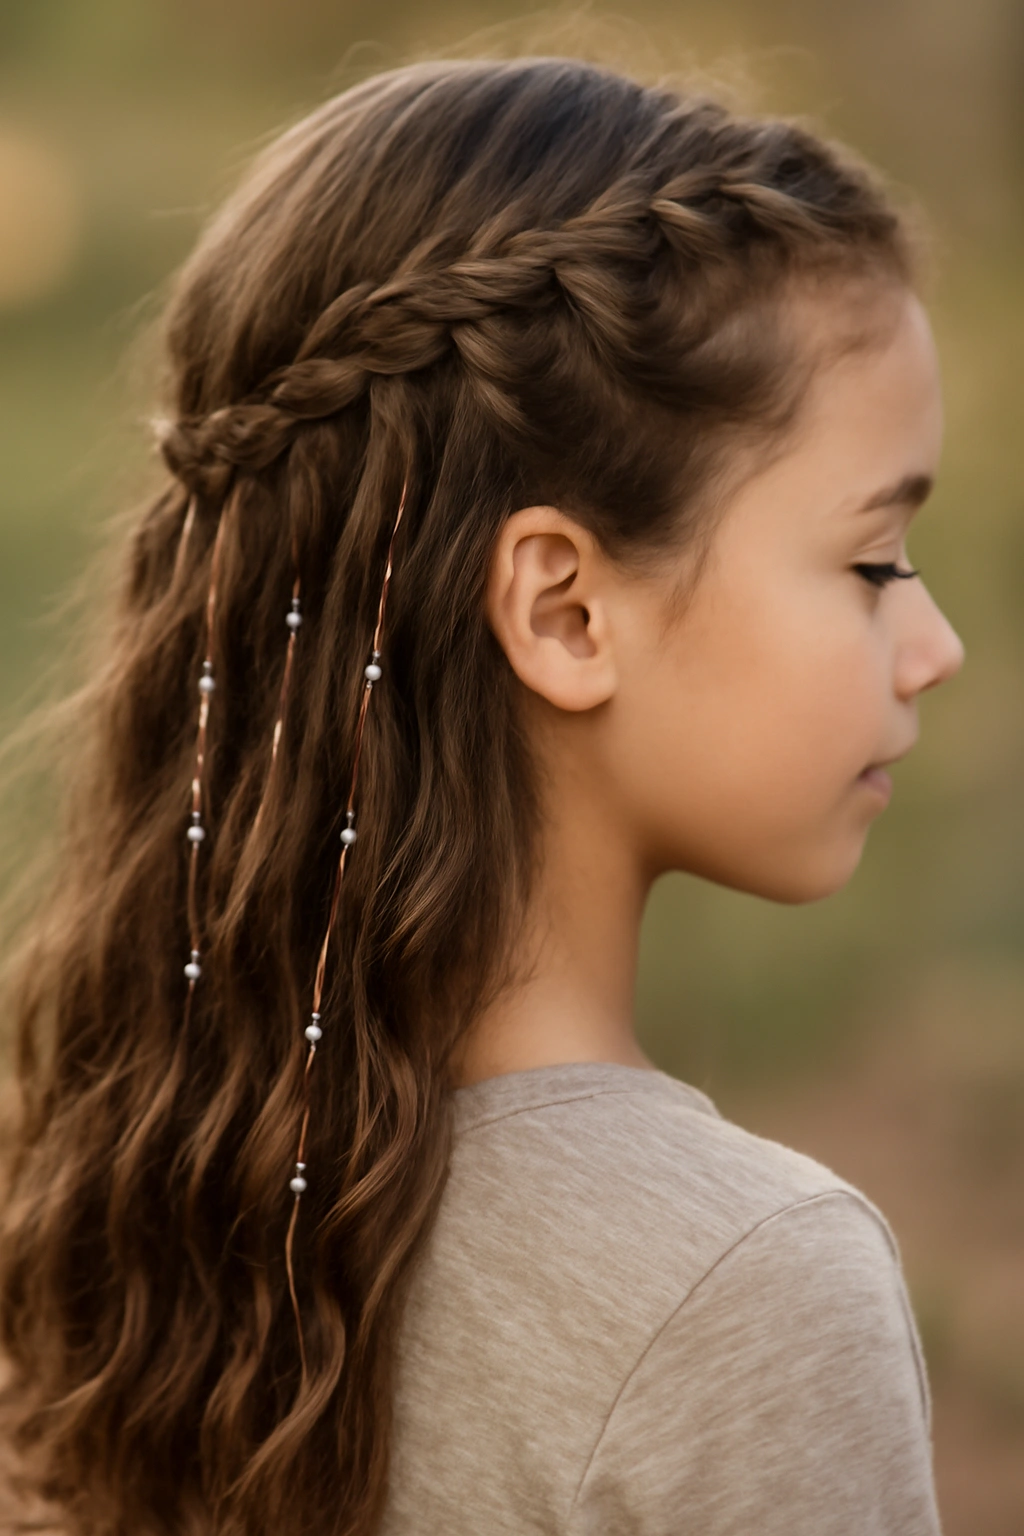
A waterfall braid is a three-strand braid where you “drop” one strand of hair as you braid, then pick up a new section from the scalp, creating the illusion of water cascading down. It’s delicate and beautiful, and when you add tiny beads to the “waterfall” sections, you create an ethereal effect.
Understanding the Waterfall Mechanic
Start with a standard three-strand braid section near one temple. Braid once normally, then drop one of the three strands and replace it with a new thin section of hair from the scalp. Continue this pattern moving downward and backward, always adding new hair from the scalp while dropping strands. The dropped strands are what create the waterfall effect—they’re the sections that cascade down and look like separate flowing pieces.
Where the Beads Go
The beads should be threaded onto the “waterfall” strands (the ones that drop out of the main braid) rather than the main braid itself. This makes the flowing sections even more visible and decorative. Use smaller, delicate beads here—tiny glass beads or small metallic beads work beautifully without weighing down the cascading hair.
Key detail: This style works best on wavy or textured hair because the texture helps define the waterfall sections and makes them more visible. On very straight hair, the effect can be subtle, so you might need more beads or larger beads to make the waterfall really stand out.
7. Fishtail Braid with Gemstone Beads
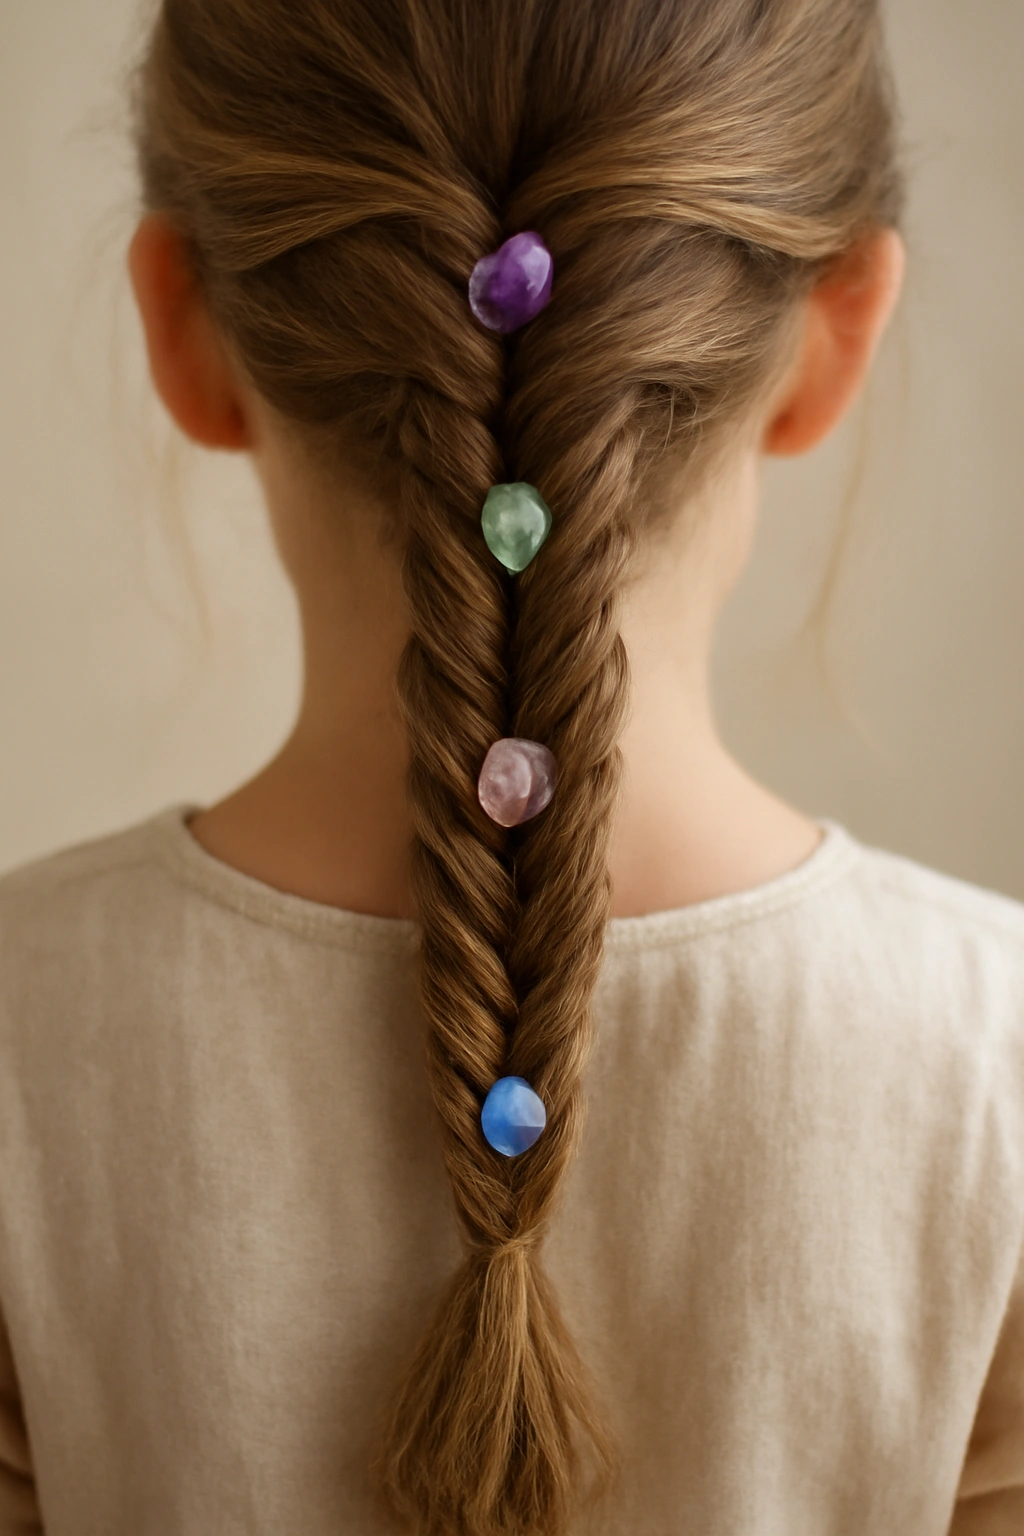
A fishtail braid is created by taking thin side sections from a two-section split and crossing them over and under each other in a specific pattern—it creates an intricate, rope-like texture that looks far more complicated than it actually is. Paired with gemstone or pearl-like beads, it feels genuinely elegant.
How to Build a Fishtail Braid
Divide the hair into two equal sections. Take a thin section (roughly 1/4 inch) from the outer edge of one section and cross it over to the other section. Repeat with the opposite side, always taking from the outer edges and crossing over. Continue this pattern all the way down. It creates a woven, braided-looking texture that’s entirely different from a three-strand braid.
Selecting Statement Beads
Fishtail braids have such an intricate visual texture that they pair beautifully with larger, more decorative beads. Pearl beads, iridescent beads, or faceted gemstone-look beads elevate the whole style. Space them further apart than you would on a simple braid—maybe one bead every 3 inches—so they stand out as intentional focal points rather than blending into the braid texture.
Real detail: Fishtail braids actually look better slightly loose and a bit textured. After you’ve finished the braid, gently pull at the sides to fluff it up, which makes the braid pattern more visible and gives it an effortlessly beautiful quality.
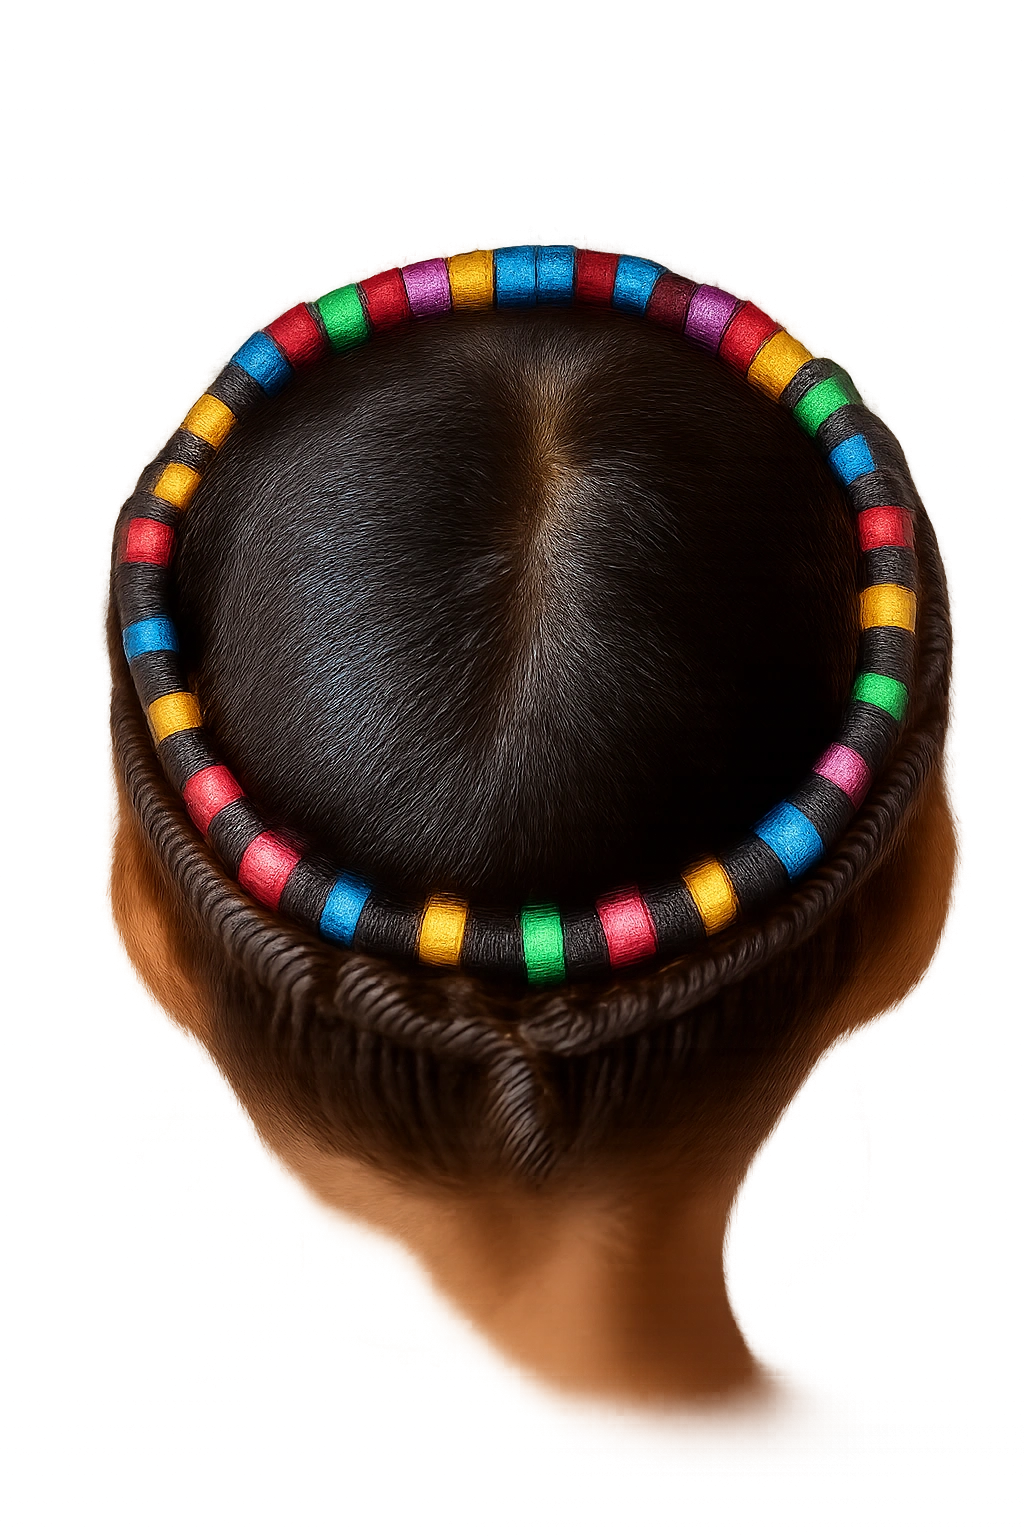
8. Crown Braid with Beads Around the Hairline
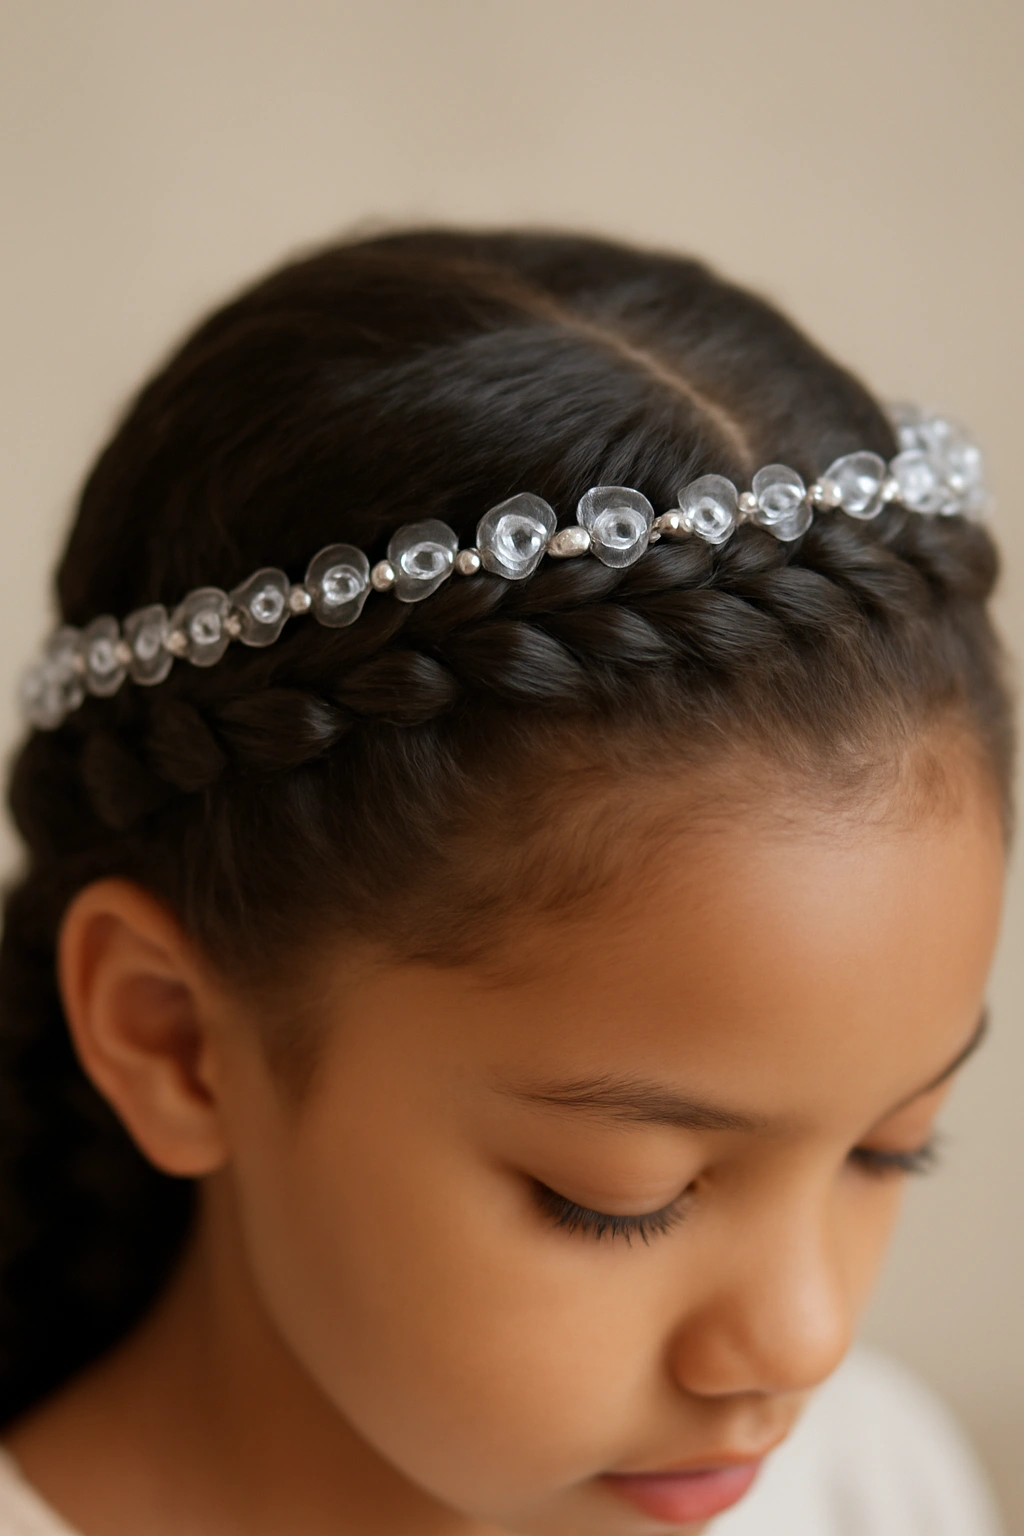
A crown braid is essentially a French braid that runs around the perimeter of the head from one ear to the other ear, following the natural hairline. When you add beads all along this crown, you create a literal crown effect that’s perfect for special occasions or when you want your daughter to feel extra special.
Creating the Crown Shape
Start with a French braid at one ear and braid it upward and backward around the head, following the curve of the hairline. Keep your tension consistent but not tight—the goal is a braid that sits visibly on the head rather than tight against the scalp. Continue the braid all the way around to the other ear, then secure it with a small elastic that’s hidden under the remaining loose hair.
Bead Placement for Maximum Impact
Add beads all along the length of the crown braid, spacing them roughly 1-2 inches apart. Use beads that have some sparkle or dimension—metallic beads, iridescent beads, or pearlescent beads catch the light beautifully as your daughter moves her head. The crown effect is especially stunning when photographed from above or from the back.
Worth doing: Pair a crown braid with loose waves or curls for the remaining hair. The contrast between the structured braided crown and the soft, loose texture below creates a really refined, special-occasion look that’d be perfect for a birthday party, holiday gathering, or photo session.
9. Halo Braid with Multi-Color Beads
A halo braid is similar to a crown braid but typically wraps all the way around the entire head in a complete circle, with the ends hidden or woven together at the back. It’s one of the most stunning protective styles you can do, and when you bead it with multiple colors, it becomes genuinely show-stopping.
Building the Full Halo
Start with a French braid at one temple and work it around the head like a crown braid, but continue it all the way around the entire circumference of the head. This requires more hair and more patience, and it’s best attempted on thicker hair or hair that’s at least shoulder-length. When you reach the starting point, tuck the end of the braid into the beginning of the braid or secure both ends together with matching elastics.
Multi-Color Bead Strategy
Instead of using one or two bead colors throughout, transition through multiple colors as you work around the head. You might start with pale pink at the front-left temple, move through coral and peach as you go around the back, then transition to gold and cream as you return to the front-right temple. The color journey creates visual interest from every angle.
Important note: Halo braids take 20-30 minutes to complete, so reserve this style for days when you have time. They’re incredibly secure once completed and can last several days without unraveling, making them excellent for long weekends or trips.
10. Twisted Braid with Staggered Beads
A twisted braid is simpler to create than a traditional braid but looks just as polished. You’re literally twisting two sections of hair around each other instead of doing a three-strand braid. When you add beads in a staggered pattern, you create visual rhythm and movement.
The Twist Technique
Divide a section of hair into two equal parts. Twist one section clockwise, then twist the other section clockwise, then wrap them around each other counter-clockwise. Continue this pattern all the way down the hair. The result is a rope-like braid that’s smooth and elegant. It’s genuinely easier than a three-strand braid once you get the hang of it, and many people find it faster.
Staggered Bead Placement
Instead of spacing beads evenly, try placing two beads close together, then skipping a larger space before placing the next pair. This creates a visual rhythm that feels more intentional and artistic. Vary the colors of the paired beads—maybe a small gold bead followed by a slightly larger pearl, then skip 3 inches and repeat with a different color combination.
Practical advantage: Twisted braids are actually easier on the hands if you have arthritis or hand strength issues compared to three-strand braids, since there’s less complex finger positioning. And they work beautifully on all hair types.
Final Thoughts

Beaded braids are one of those hairstyles that elevates any everyday look into something special without requiring salon skills or expensive products. The beauty of these styles is that they’re completely customizable—you can adjust bead sizes, colors, spacing, and placement based on your daughter’s hair type, length, and personal style. What matters most is taking a moment to do something intentional with her hair, something that says “I think you’re worth this effort.”
Start with whichever style feels most manageable for your skill level. If you’re just beginning, the classic single braid with scattered beads is your friend. Once you’re comfortable, branch out to twin braids or the boho side braid. Save the more complex styles—the halo braid, the waterfall braid, the double Dutch—for when you have time, patience, and you’ve built your confidence through the simpler styles.
The practical bonus is that beaded braids actually last longer than regular braids. Those beads create weight and tension that keeps everything in place, which means fewer touch-ups throughout the week. Your daughter gets a hairstyle that’s genuinely beautiful, genuinely practical, and genuinely hers.