The bob haircut has made a powerful comeback as a go-to choice for wedding guests and even brides themselves — and for good reason. Its versatility is genuinely impressive, and when styled thoughtfully, a bob can look absolutely stunning for a formal occasion. The challenge isn’t whether a bob can look wedding-ready; it’s knowing which specific styling techniques will complement your face shape, hair texture, and personal aesthetic while keeping your hair feeling secure and polished through hours of celebration.
Wedding day hair decisions carry real weight. You want something that photographs beautifully, stays in place during dancing and mingling, feels comfortable for the entire event, and most importantly, makes you feel like the best version of yourself. A bob gives you a fantastic foundation — it’s already sophisticated and intentional — but the styling choices you make will determine whether it reads as “effortlessly polished” or “carefully constructed wedding hair.” The good news is that bobs are exceptionally forgiving. They work with nearly every hair texture, they’re easier to manage than longer styles, and they’ve got enough length and movement to be styled in genuinely creative ways that feel elegant and special.
What makes these 10 wedding hairstyles work specifically for bobs is that they leverage the cut’s natural strengths — the structure, the frame around your face, the built-in texture and movement — rather than fighting against them. Each style here can be customized to suit your particular bob length, thickness, and wave pattern, and each one works for different wedding vibes, from ultra-formal black-tie affairs to outdoor garden celebrations.
1. Romantic Waves With Strategic Volume
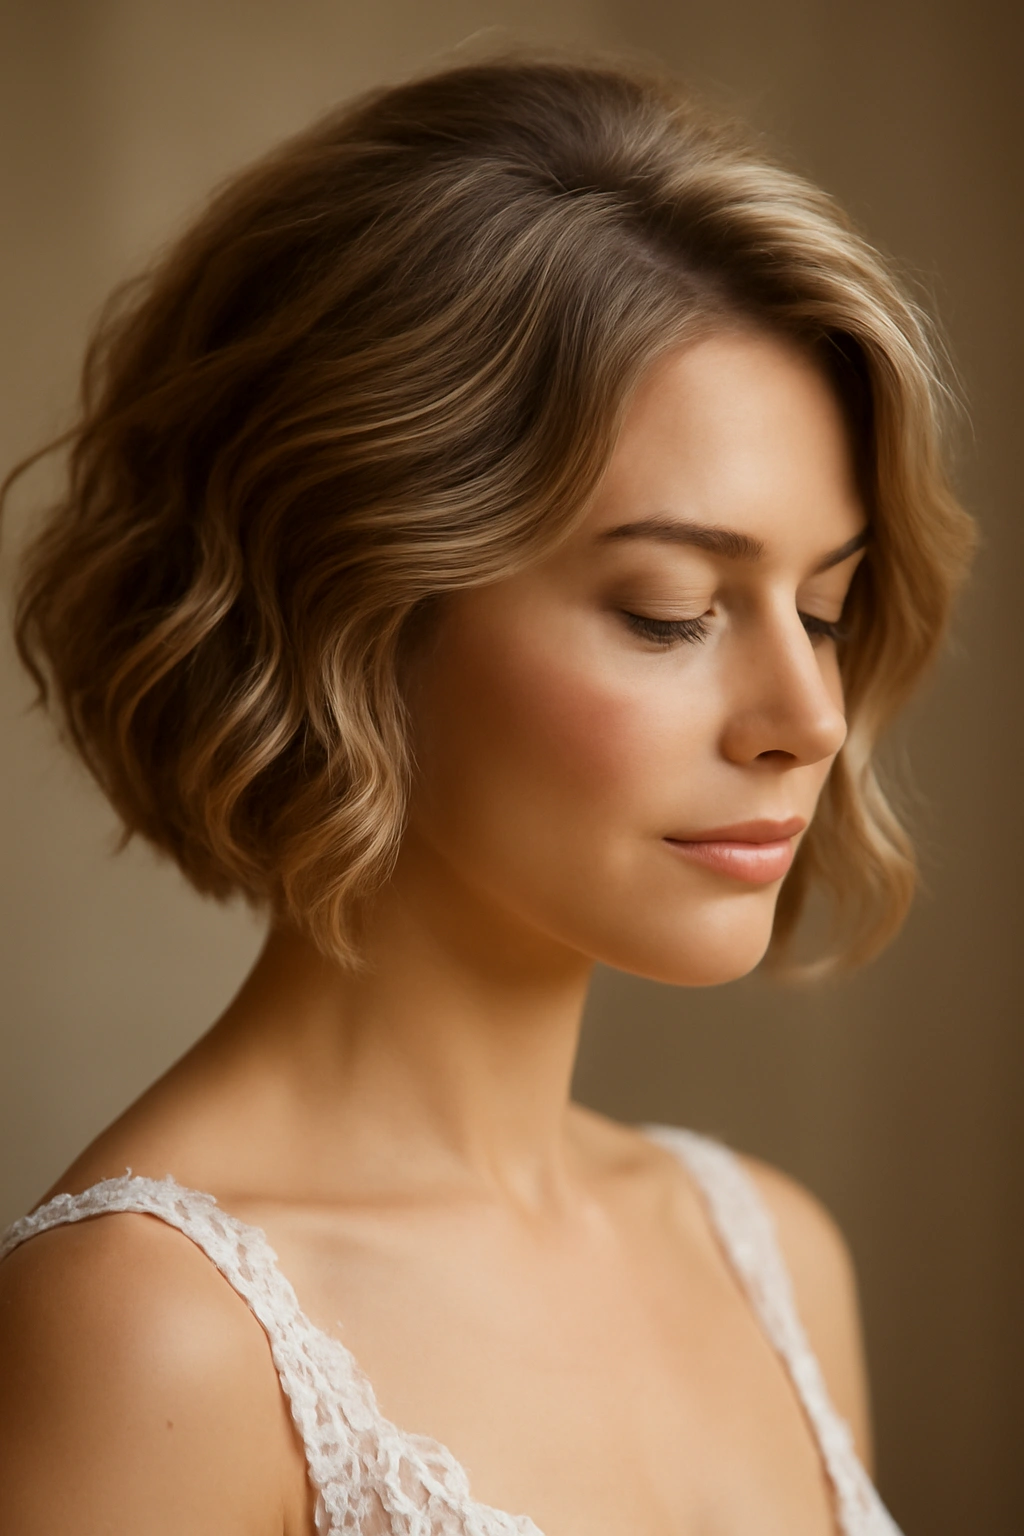
Soft, flowing waves transform a bob into something that feels almost ethereal while maintaining sophisticated structure. This style works beautifully because waves add dimension and movement that photographs wonderfully under different lighting conditions, and they’re forgiving enough to survive a few hours of wear without looking noticeably deflated. The key to making waves work for a wedding is building volume at the crown and ensuring the waves are defined enough to read clearly in photos but soft enough to feel romantic and wearable.
How to Create Lasting Romantic Waves
Texture and hold are everything for this style. Start with slightly damp hair and apply a volumizing mousse to your roots, blow-drying your hair with your head tilted upside down for maximum base volume. Once your hair is completely dry, use a 1.25-inch curling iron to create waves, taking sections from the back and curling away from your face. The secret to “romantic” rather than “sporty” waves is leaving them slightly undone — don’t comb them out completely, but gently finger-comb to soften them after they’ve cooled. Finish with a flexible-hold hairspray that won’t create crunchiness.
Pro Tips for Long-Lasting Waves
- Use a heat protectant spray before curling to keep your hair healthy and prevent heat damage
- Curl smaller sections than you think you need; thinner curls hold much better than thick ones
- Tease each wave at the root before curling for extra grip and longevity
- Set waves with a light mist of flexible hairspray between each curl rather than spraying everything at the end
- Consider adding a delicate hairpin or two near the crown to anchor the style and prevent settling
Waves work especially well on bobs with some natural texture or movement already built in, but even fine, straight hair can hold waves beautifully with proper preparation and the right products.
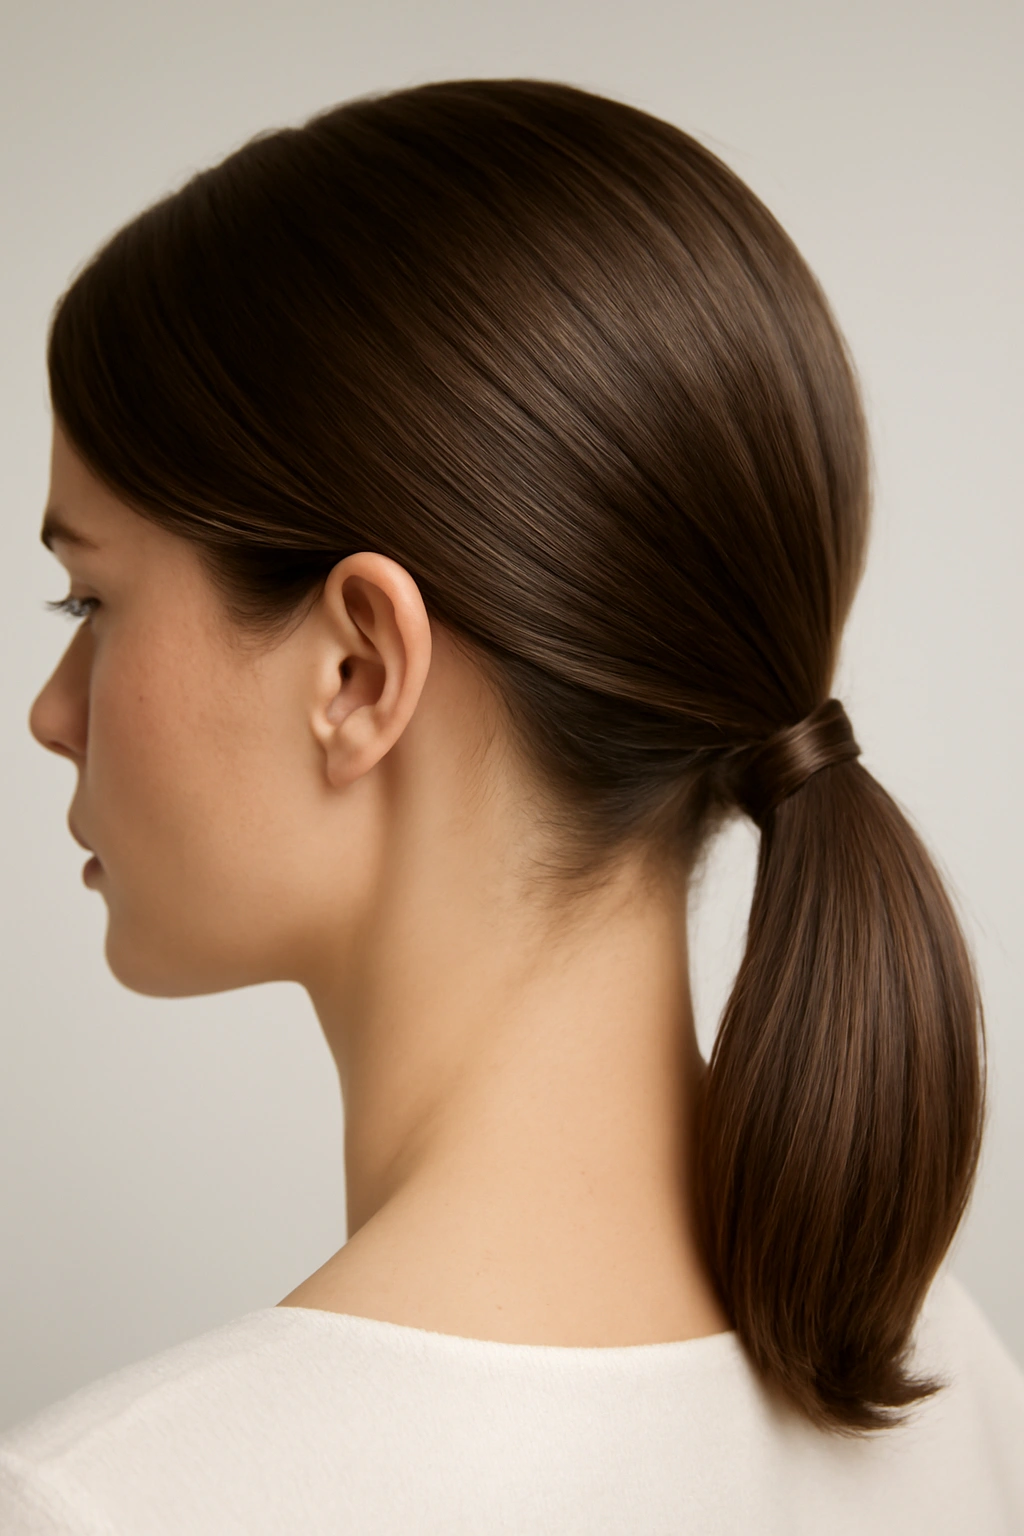
2. Sleek Low Bun With Face-Framing Wisps
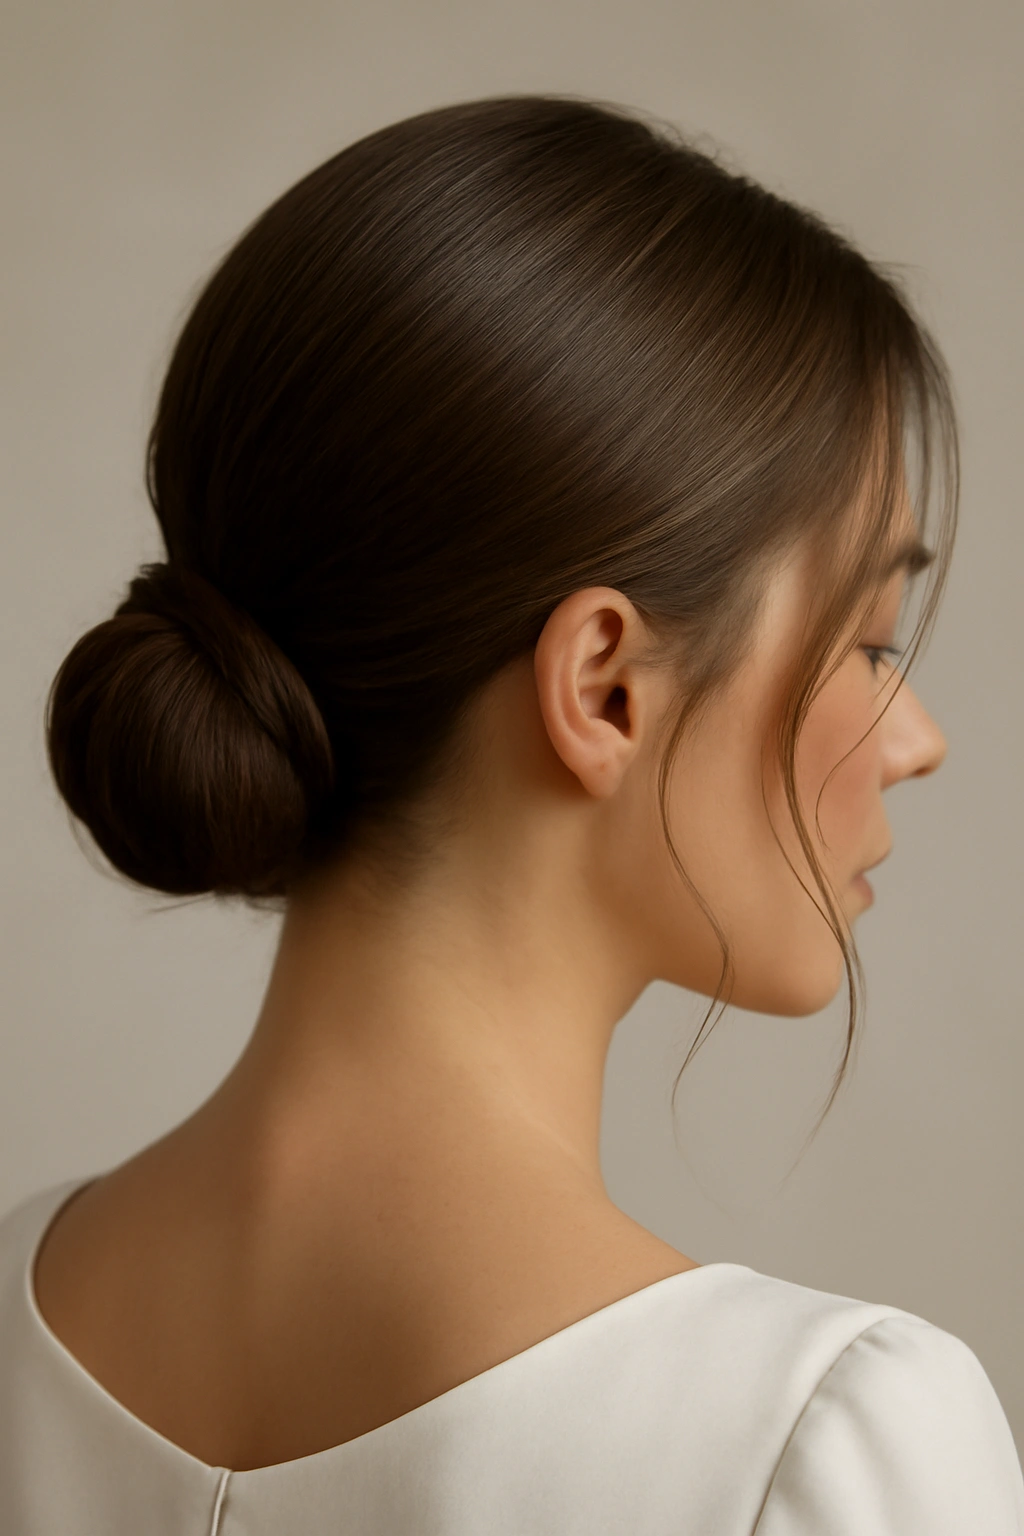
A polished low bun is the epitome of classic elegance, and on a bob it reads as intentional and modern rather than overly formal. The beauty of this style is that it’s genuinely simple to create, incredibly secure for the entire event, and works beautifully with updos embellishments like hair clips, delicate jewelry, or fresh flowers. A low bun keeps your neck and jawline visible — an important consideration for wedding photography — and the face-framing wisps prevent it from feeling severe or austere.
Building the Perfect Low Bun on a Bob
Start with hair that’s had a day or two to develop natural oils, which helps with grip and smoothness. Apply a smoothing serum to damp hair and blow-dry it completely straight. Create a deep side part, then gather your hair into a low ponytail at the nape of your neck, using a clear elastic to secure it. Twist the ponytail gently, then wrap it around the elastic to form a bun, securing the ends with bobby pins tucked underneath so they’re invisible. The critical step for a refined look is smoothing any flyaways with a flexible-hold hairspray and releasing a few face-framing pieces around your face and temples.
Styling Details That Elevate the Look
- Use a smoothing brush or spoolie to keep your part crisp and clean
- Tease gently at the crown before smoothing to add subtle lift without visible texture
- Secure your bun with at least 6-8 bobby pins in a crosshatch pattern to ensure it’s genuinely secure through hours of wear
- Consider using a small velvet scrunchie under your elastic for extra grip and a more polished appearance
- Leave just a wisp or two of hair around your face — too many pieces looks undone, but none feels too formal
This style pairs beautifully with statement earrings or an open-back dress, since your neck and ears are fully visible.
3. Half-Up Half-Down With Twisted Sections
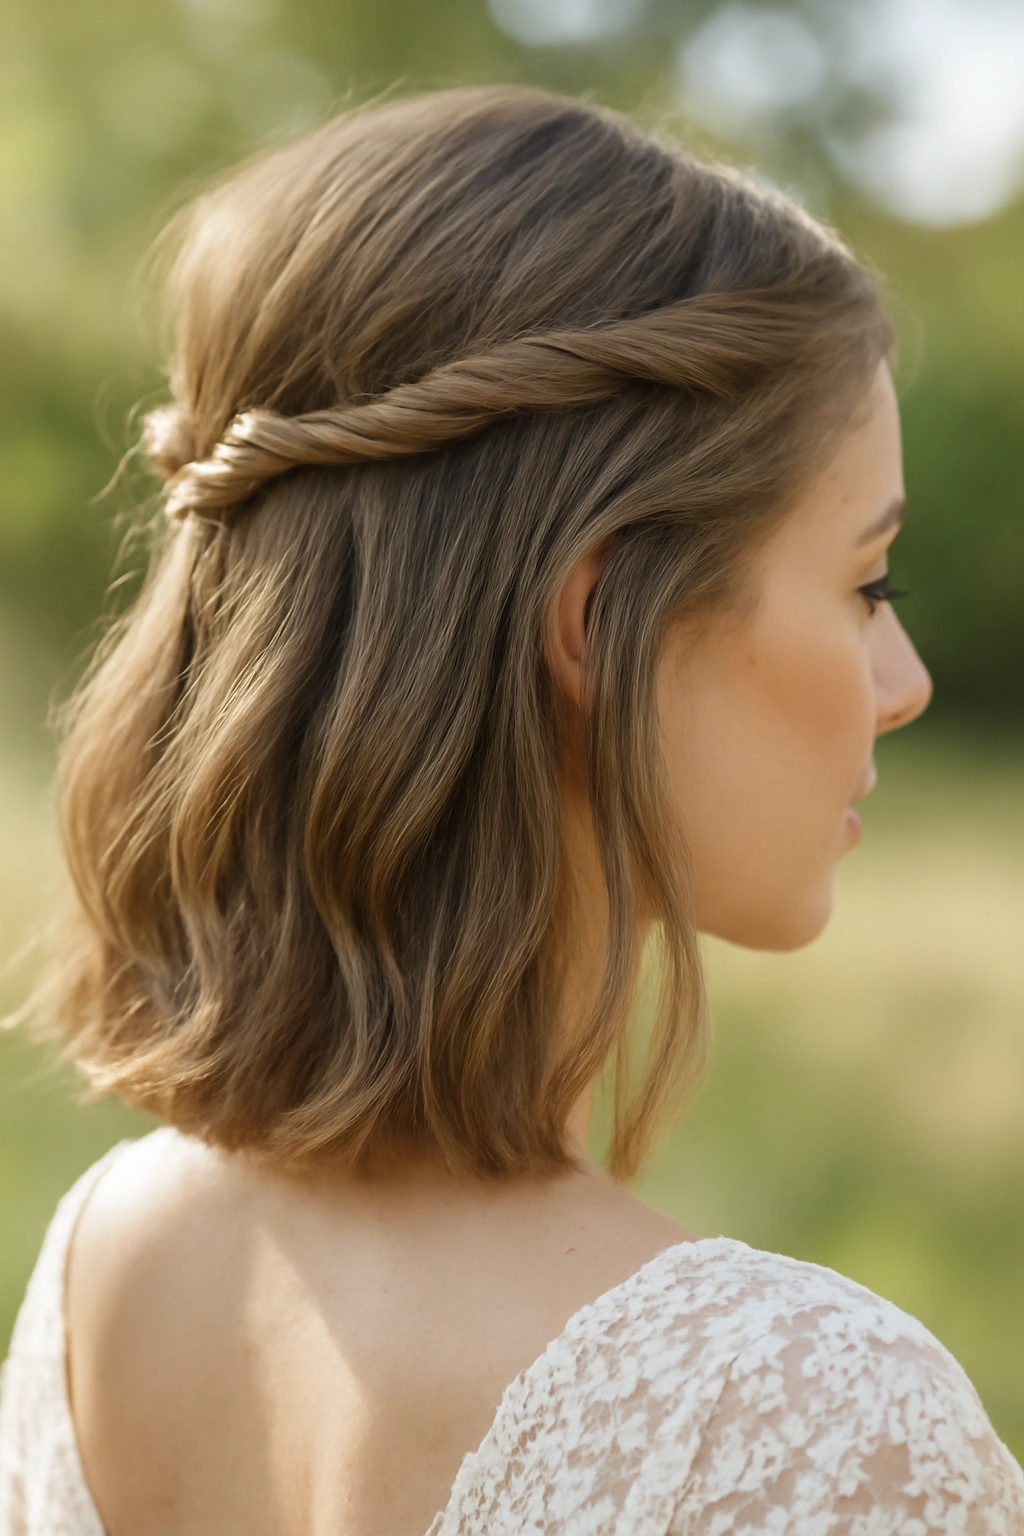
The half-up half-down style on a bob is the perfect middle ground between fully down and fully up — it gives you the softness and movement of loose hair while adding structure and keeping hair off your shoulders and neck. This works particularly well for outdoor weddings where you want some hair mobility but also some controlled styling. Twisted sections instead of braids create a more romantic, less casual vibe than traditional plaits.
Creating Structured Twisted Half-Up Style
Start with waves or curls already set in your hair, since texture holds twisted sections much better than straight hair. Take a section from one side near your temple — about 2 inches wide — and twist it gently moving back toward the crown. Do the same from the other side. Bring both twisted sections to the back of your head and secure them together with a small bobby pin or clear elastic, leaving the bottom half of your hair down to frame your face and shoulders. The twisted sections should feel slightly undone rather than perfectly neat; this creates that romantic, “I took time with this but it’s still natural” vibe.
Making Half-Up Half-Down Work for Bobs Specifically
- Shorter bobs (chin-length) work beautifully with this style but need slightly thicker twists for proportion
- Longer bobs (shoulder-length) can handle more delicate, refined twists
- Use a texturizing spray before twisting to give your hair more grip and prevent the twist from loosening
- Pin your twisted sections low enough that they won’t pull the top half of your hair down as the night goes on
- Consider adding a small decorative clip or pearl hair pin where the twists meet for an elegant focal point
This style photographs beautifully from both front and back, making it ideal for a ceremony where you’ll be facing different directions.
4. Textured Updo With Soft Face-Framing Layers
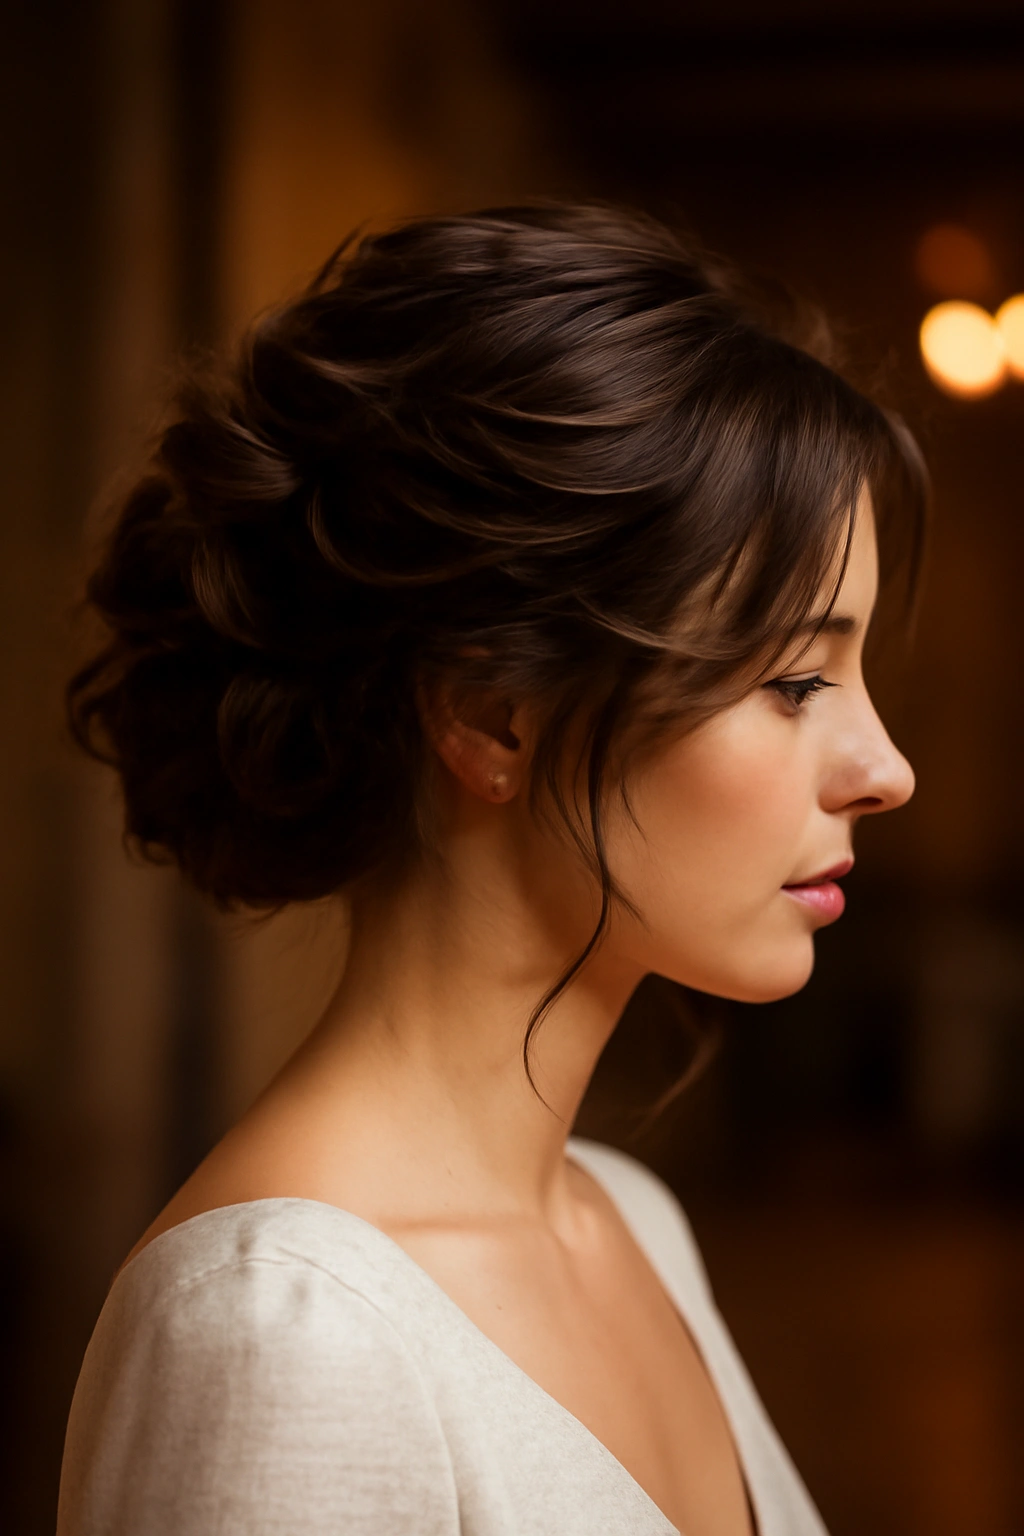
A textured updo is less rigid than a structured bun, more special than simple waves, and genuinely flattering for most face shapes. This style works on bobs because you typically have just enough length to create volume and dimension while still maintaining a polished, wedding-appropriate appearance. The face-framing layers prevent the style from feeling heavy or pulling your features downward, which matters especially if you’re wearing a wedding dress or formal gown.
Constructing a Textured Updo on a Bob Length
Begin with curled or waved hair — work with the texture rather than against it. Tease gently at the crown and throughout to add volume and dimension. Gather your hair into a loose, messy ponytail at the back of your crown, but don’t pull it tight; you want texture and movement, not sleekness. Secure with a small elastic, then take small sections of the ponytail and pin them into loose loops and swoops around the base of the ponytail, creating an intentionally undone, romantic texture. Leave several small sections unclipped to frame your face, and pull a few wisps out as you go to soften the overall effect.
Details That Transform This Into a Wedding Style
- Use thin bobby pins that match your hair color to keep them invisible
- Tease lightly with a teasing brush at the base of your crown for lift that lasts
- Incorporate a delicate hair accessory — a pearl comb, a decorative hair fork, or a small claw clip — into the updo for visual interest
- Secure everything with a flexible hairspray that allows movement without being sticky
- Keep the overall shape slightly off-center rather than perfectly symmetrical for a modern, intentional feel
The beauty of this style is its built-in forgiveness; if a few pieces come loose or shift during the reception, it actually reads as intentionally romantic rather than falling apart.
5. Sleek Side-Swept Ponytail With Tucked Ends
A low side ponytail on a bob is more sophisticated than it sounds, especially when executed with precision and elevated with subtle detail. The side-swept aspect adds drama and elegance, while keeping it low prevents the severe, sporty feeling that a higher ponytail can have. This style works exceptionally well for bobs because the length is forgiving enough to gather into a polished ponytail without looking sparse or unfinished.
Building a Polished Side Ponytail
Blow-dry your hair completely smooth, then create a deep side part on the opposite side from where you want your ponytail. Sweep your hair across and gather it into a low ponytail at the nape of your neck on the opposite side, positioning it toward the back rather than directly at the base of your skull. Use a clear or matching elastic to secure it. The polishing step is crucial: take a fine-tooth comb and smooth any flyaways, then use a small section of hair from the ponytail itself to wrap around the elastic, securing the end of that section with a bobby pin tucked underneath. This wrapping disguises the elastic entirely and creates a finished, intentional look.
Elevated Touches for Wedding Formality
- Apply smoothing serum to slightly damp hair before blow-drying for extra sleekness
- Tease minimally at the crown on the side where you’re parting for subtle lift without visible texture
- Consider curling your ponytail slightly for subtle softness that photographs beautifully
- Add a delicate hair comb, decorative elastic, or small piece of jewelry to your ponytail base
- Make sure no stray hairs are visible around your part; use a fine-tooth brush and hairspray to keep your part razor-sharp
This style is particularly flattering if you have a defined jawline you want to highlight, since it sweeps hair away from your face entirely.
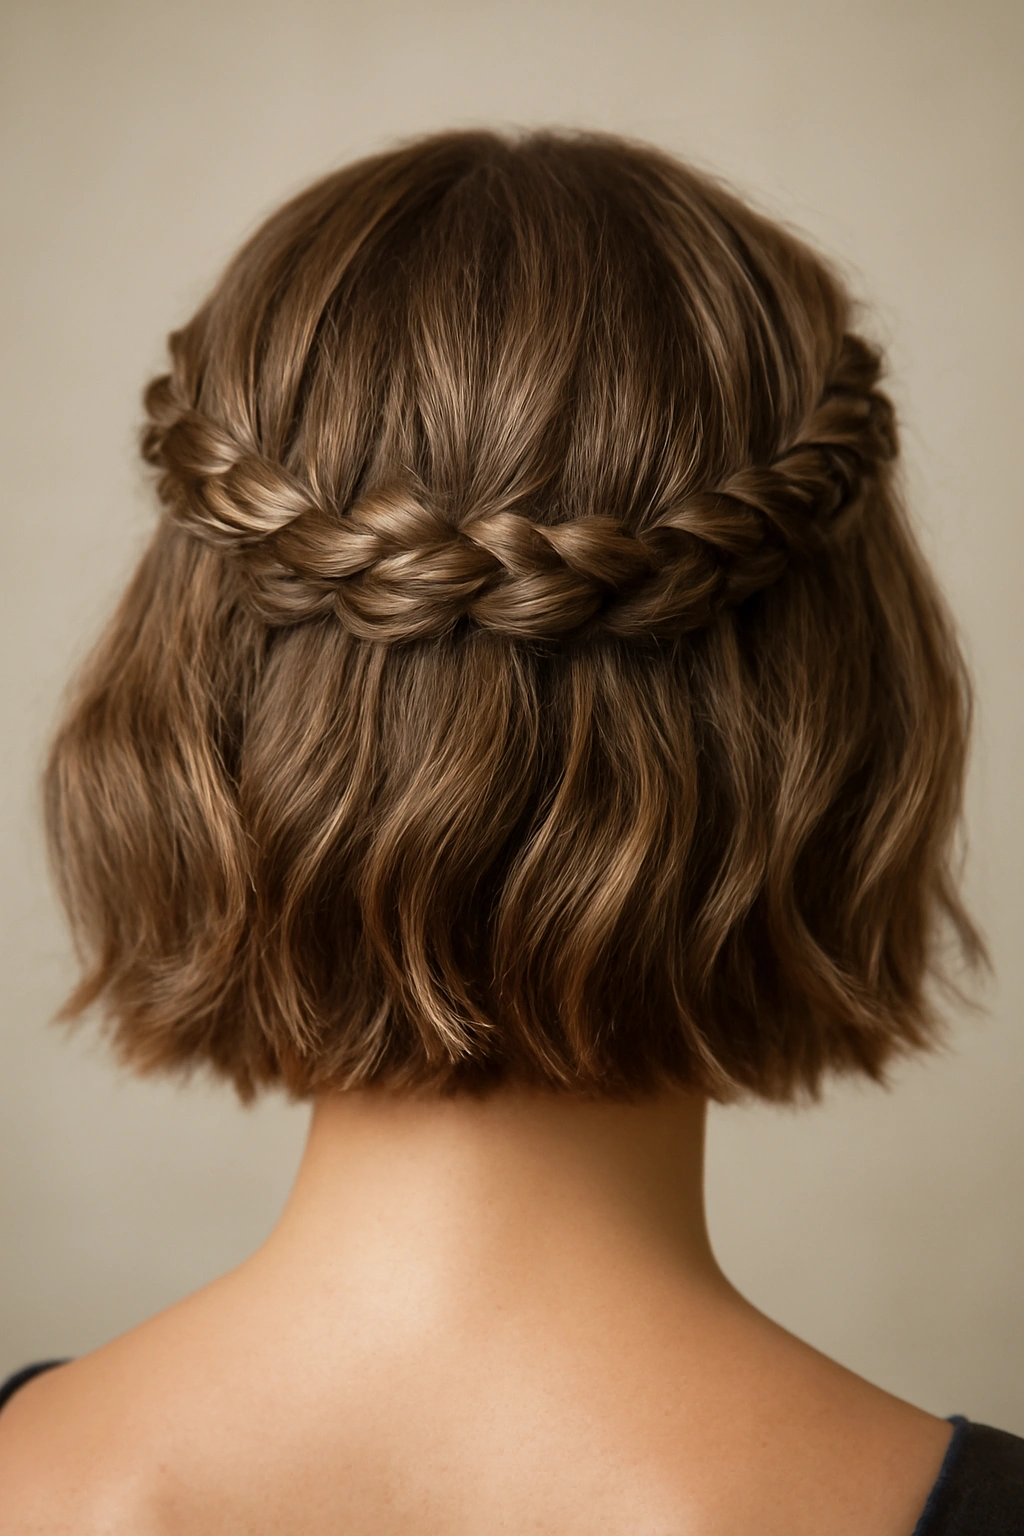
6. Twisted Crown With Cascading Back Section
A twisted crown creates the feeling of an elaborate updo while still leaving most of your hair down, which works beautifully on bobs that might not have quite enough length for a full updo. This style combines the elegance of a formal hairstyle with the softness and movement of loose hair, making it ideal if you want to feel special without looking overly done. The crown detail reads as intentional and special, perfect for a wedding ceremony or formal reception.
Creating a Twisted Crown Effect
Start with textured hair — waves or curls hold twisted crowns infinitely better than straight strands. Take a section from one temple, about an inch thick, and twist it gently moving back toward the crown. Continue adding small sections of hair to your twist as you move backward, incorporating new hair into the twist and continuing to spiral it back. Once you’ve reached the other side of your head, pin the twisted crown down with bobby pins, allowing the rest of your hair to cascade down your back. This creates the effect of an elaborate crown without requiring the length of a full updo.
Making Your Twisted Crown Wedding-Ready
- Use a texturizing spray or dry shampoo before creating your twist for better grip
- Twist slightly loosely for a romantic feel; tight twists look less polished and more sporty
- Add small wisps of hair around your face before pinning your crown for a soft, romantic frame
- Consider threading a thin piece of ribbon, baby’s breath, or delicate greenery through your twist for a botanical wedding feel
- Secure your crown at least 6-8 bobby pins to ensure it lasts through dancing and mingling
This style photographs beautifully from the back, making it excellent if your wedding dress or gown has interesting details you want to showcase.
7. Glamorous Old Hollywood Waves With Deep Side Part
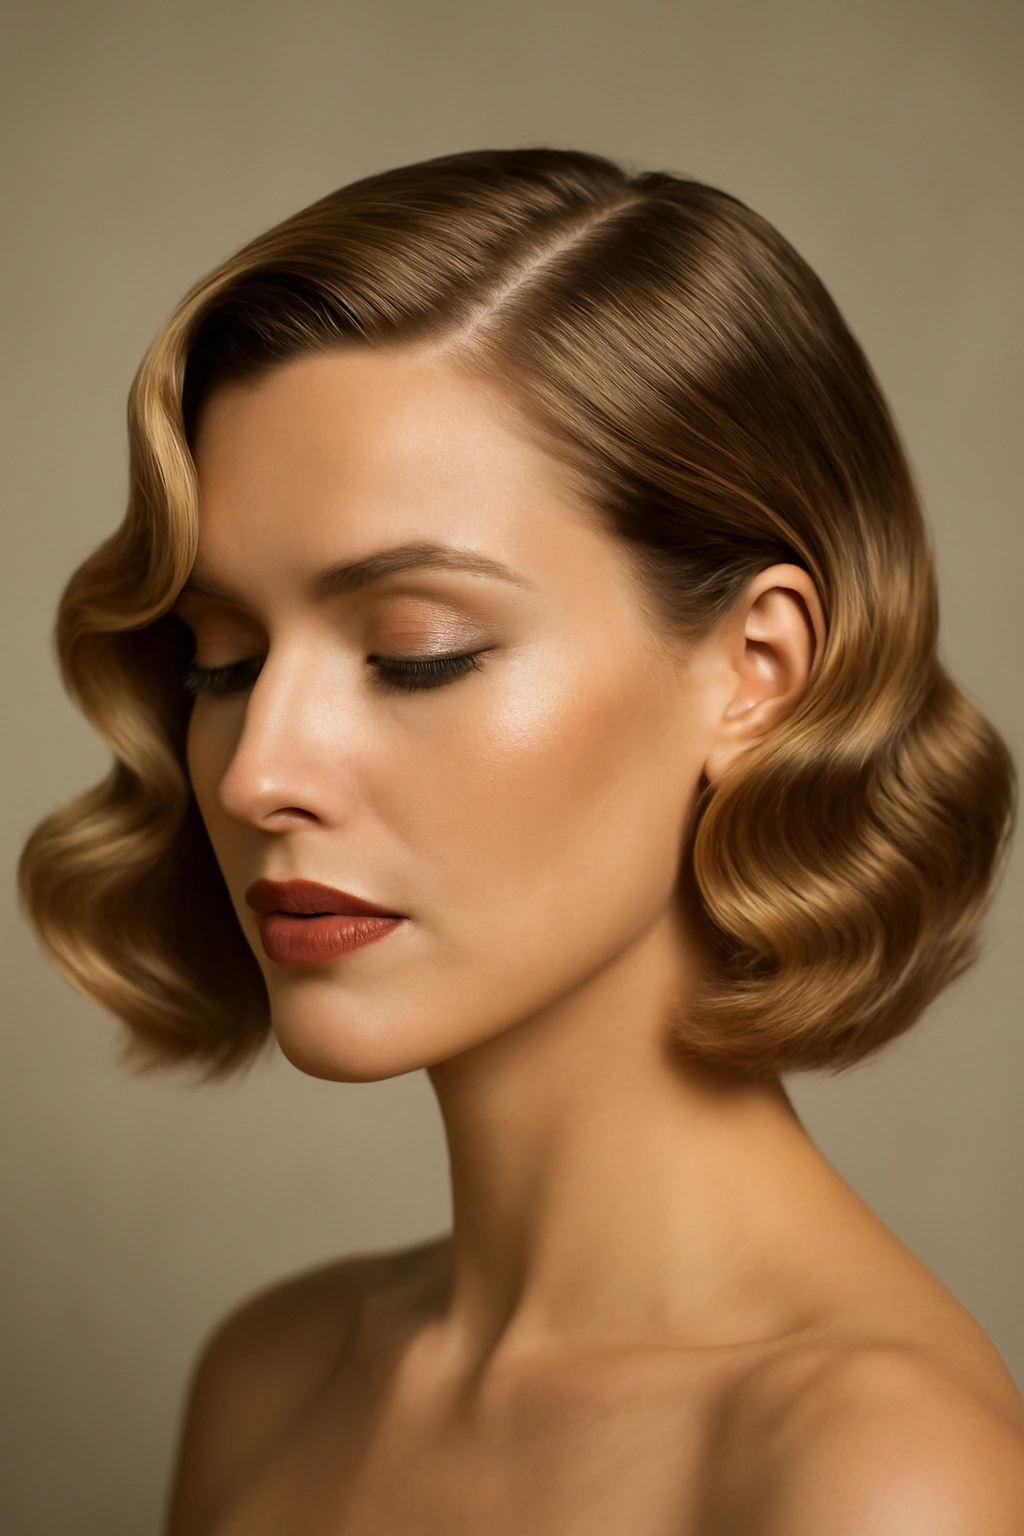
Old Hollywood waves represent the ultimate in vintage elegance — they’re romantic, incredibly photogenic, and feel genuinely special without appearing costume-y or over-the-top. On a bob, this style works because the shorter length prevents waves from looking heavy, and you can achieve that perfect balance between polished structure and soft movement. Deep side parts are inherently flattering and add visual interest without requiring additional styling steps.
Perfecting Old Hollywood Waves on a Bob Length
Begin with completely dry hair and a precise deep side part. Apply a volumizing mousse to your roots before blow-drying, and blow-dry with your head tilted slightly to the side with the deeper part for extra lift. Once dry, use a 1.5-inch curling iron to curl your hair in sections, curling each section away from your face and allowing each curl to cool before releasing it. The critical difference between messy waves and Old Hollywood waves is the combing step: once all curls are cool, use a wide-tooth comb to gently comb through them, creating soft, flowing waves rather than individual ringlets. Set everything with a medium-hold hairspray.
Signature Old Hollywood Details
- Create your deep part so that the smaller side has only a thin section of hair; this creates visual drama
- Tease very gently at your crown to create lift that makes your waves appear fuller
- Use a smaller curling iron (1.25 inches) for the first curl or two at your face for more delicate waves near your features
- Smooth the waves slightly with your comb so they blend together rather than looking like separate curls
- Consider adding a jeweled hair clip or subtle headpiece on the side of your deeper part for extra glamour
This style is particularly striking when paired with vintage-inspired makeup and jewelry, creating a cohesive Old Hollywood aesthetic.
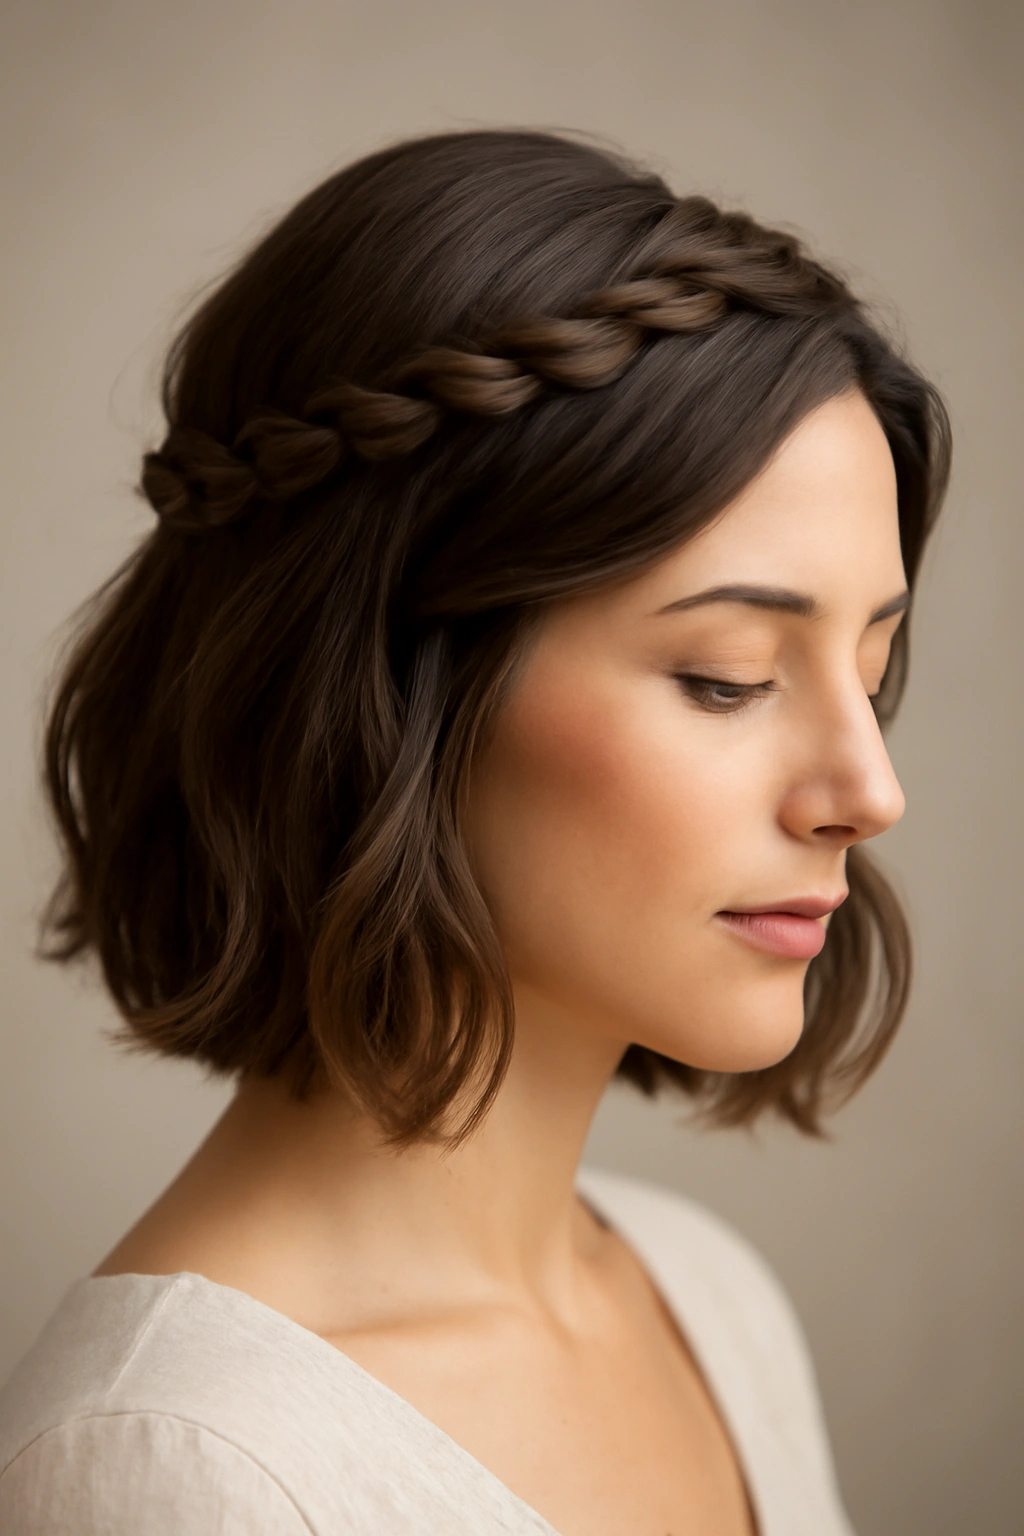
8. Braided Crown Across the Back
A braided crown is undeniably romantic and has a special, intentional feel that’s perfect for weddings. When created as a crown across the back of the head rather than around the entire perimeter, it works beautifully on bob lengths without looking like you’re missing length or doing a style your hair isn’t quite long enough for. This style works best on bobs with some natural wave or intentional curl, since braids show more texture and visual interest in textured hair.
Constructing a Back-Crown Braid
Start with curled or waved hair for visual interest. Create a side part and take a small section from one temple, then braid it moving diagonally back toward the crown — you’re creating a braid that travels from temple to the back, not all the way around. Once you reach the back of your head, secure this braid with a bobby pin. Create a second braid on the other side, starting from the opposite temple and braiding toward the back, positioning it to meet or nearly meet the first braid. Secure that braid as well, then gently tease the braids slightly to make them appear fuller and more textured.
Making Your Braid Crown Wedding-Appropriate
- Use a three-strand braid for a classic, timeless look; French or Dutch braids can look too casual or sporty
- Keep your braids slightly loose rather than tight; tight braids can look like a gymnastics style rather than a wedding style
- Don’t attempt a crown braid on completely straight hair unless you’re willing to add texture with a texturizing spray first
- Tease your braids gently after securing them to create dimension and prevent them from looking thin
- Leave soft wisps of hair around your face to soften the style and prevent it from feeling overly pulled-back
- Consider weaving a thin ribbon or small flowers through your braids for extra romance
This style is perfect for outdoor or garden weddings where a romantic, ethereal vibe suits the setting.
9. Textured Ponytail With Wrapped Section

A textured ponytail is more elegant than a standard sleek ponytail, and by adding a wrapped section — where you take a small piece of hair and wrap it around the elastic — it reads as far more intentional and polished than a casual everyday style. This works beautifully on bobs because you have just enough length to create a gathered ponytail that looks full and intentional without appearing sparse. The texture prevents it from looking severe, while the wrapped section adds that “I took time with this” detail that elevates it for formal occasions.
Creating a Textured Ponytail on a Bob
Start with hair that has natural or created texture — waves, curls, or a day or two of natural oils and body. Create a deep side part, then gather your hair into a low ponytail at the nape of your neck, positioning it slightly off-center for visual interest. Use a clear elastic to secure it. Take a very thin section of hair from underneath the ponytail base and wrap it around the elastic, tucking the end under and securing with a bobby pin. The wrapping should feel intentional but not perfectly neat; imperfection is more romantic.
Elevating the Ponytail for Wedding Wear
- Tease your hair very gently at the crown before gathering your ponytail for subtle lift
- Use a flexible-hold hairspray before gathering your ponytail to keep texture in place
- Choose a clear or pearl elastic rather than a dark one for a more refined appearance
- Consider adding a small claw clip, pearl hair fork, or decorative elastic to your ponytail base
- Pull a few face-framing wisps out after securing your ponytail to soften the overall look
- Curl your ponytail gently with a large-barrel curling iron after securing it for extra movement and softness
This style works beautifully for semi-formal weddings or outdoor celebrations where you want polish without appearing overly structured.
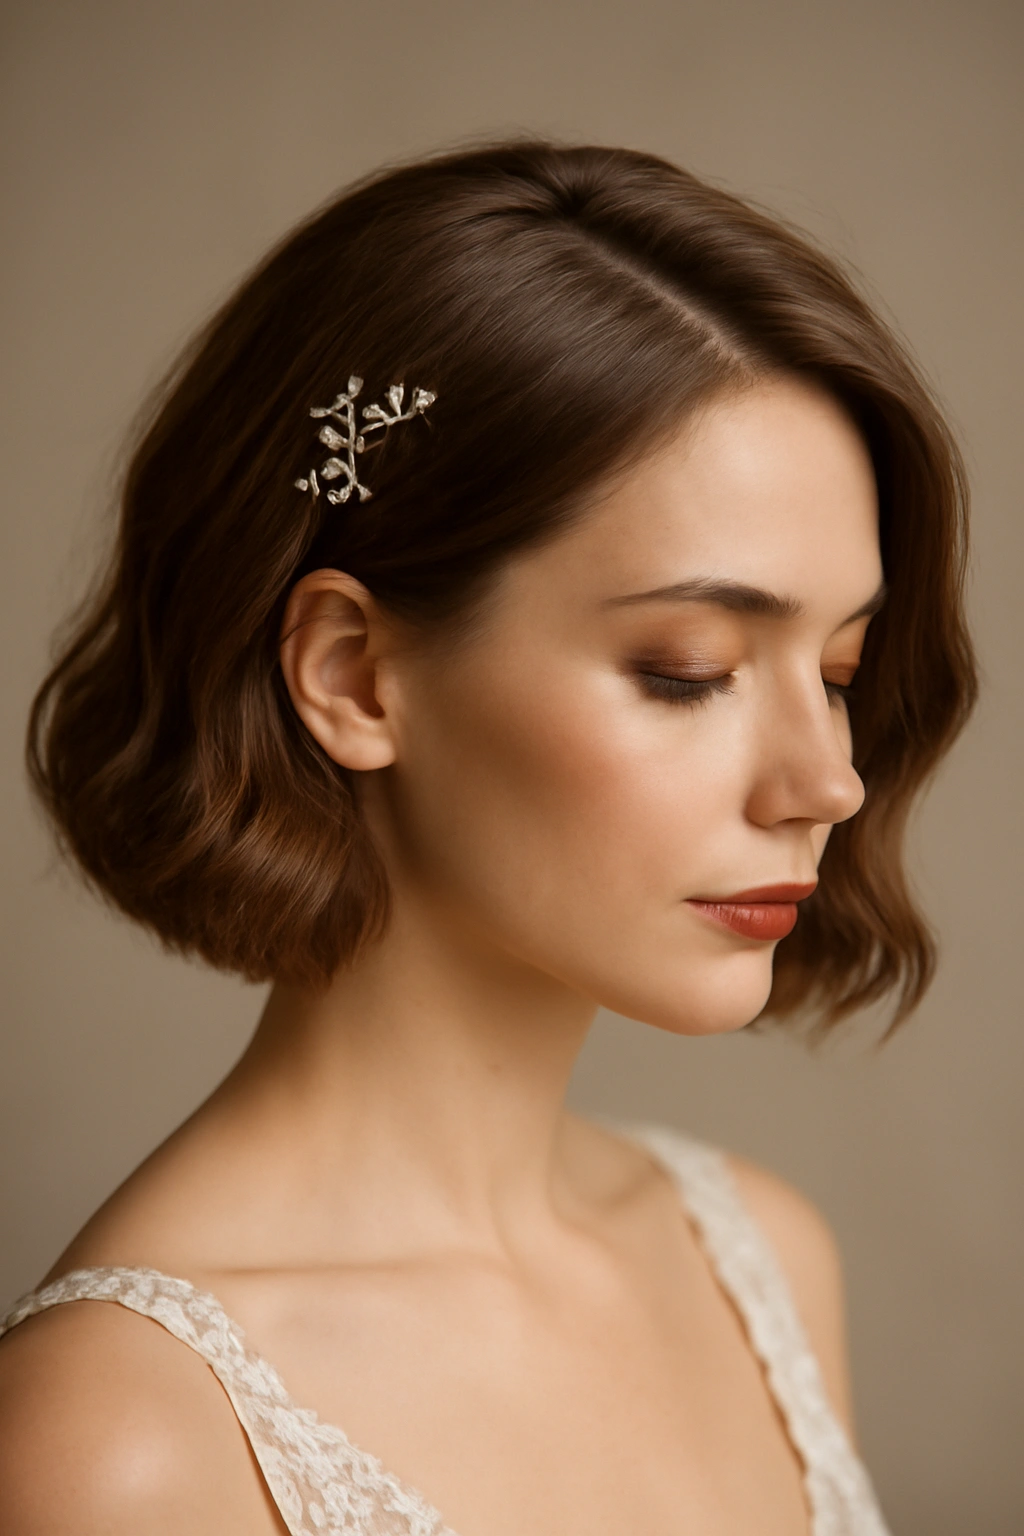
10. Accessorized Bob With Strategic Hair Clips

Sometimes the most elegant solution is to keep your bob down and use carefully chosen accessories to elevate it to wedding status. Strategic crystal clips, pearl combs, or delicate metal hair forks can transform a simple blow-out into something special without requiring complicated styling. This approach works beautifully on bobs because the cut itself is already polished and intentional; accessories simply add that extra layer of formality and celebration.
Styling Your Bob With Accessorized Elegance
Start with your bob styled in whatever way makes you feel beautiful — waves, curls, sleek and straight, or tousled texture, depending on your preference and hair type. The key is creating a finished base that photographs well. Then choose one statement accessory — a jeweled hair comb clipped into one side, crystal hair clips positioned near the crown or at the base of your ponytail, or a delicate metal hair fork positioned asymmetrically. The rule for multiple smaller clips is to position them in an off-center, slightly asymmetrical pattern rather than perfectly balanced, which reads as more intentional and modern.
Choosing and Positioning Accessories Thoughtfully
- Match your accessories to your dress and jewelry in terms of metal tone and formality level
- Position clips or combs where they’ll be visible in photos but not so prominently that they distract from your face
- Consider your hair color when choosing metals; gold tends to warm most skin tones, while silver is universally flattering
- Test your clips or combs beforehand to ensure they stay secure and don’t slip
- Choose quality accessories that feel substantial rather than cheap; this makes an enormous difference in how polished you appear
- Avoid overcrowding; one statement accessory is infinitely more elegant than three or four scattered throughout
- Consider the neckline and style of your dress when positioning accessories; asymmetrical placement suits most dress styles beautifully
This approach is perfect if you love the way your bob frames your face and want to celebrate that rather than covering it up with an updo.
Final Thoughts
A bob is genuinely one of the most versatile haircuts for special occasions, offering you the ability to go from soft and romantic to sleekly polished to glamorously vintage depending on your styling choices and the mood you want to create. The 10 styles here represent the range of possibilities — whether you prefer your hair down with texture and movement, partially up with twisted details, fully up in an elegant updo, or simply adorned with the right accessories, a bob gives you real options that feel special and intentional rather than limiting.
The common thread across all of these styles is preparation and detail work. None of them require you to have perfect hair naturally; they all depend on texture you’ve created through curling, proper products that hold what you’ve styled, and careful attention to those small touches — the face-framing wisps, the wrapped sections, the bobby pin placement — that separate “I styled my hair” from “I got professionally styled.” Most importantly, choose the style that makes you feel most confident and beautiful. Your genuine comfort and happiness shine through in photos far more than technical perfection ever will, and that’s what really makes wedding hair special.