Box braids have been a cornerstone of protective styling and creative self-expression for generations, offering both versatility and freedom to experiment with different looks. Whether you’re working with natural hair or adding extensions, the beauty of box braids lies in how infinitely customizable they are — from the length and thickness to the colors, embellishments, and final styling options. What makes box braids so compelling is that they work beautifully at virtually any length, from chin-length bobs that frame the face with understated texture to waist-length showstoppers that make a bold statement.
The range of possibilities can feel overwhelming if you’re not sure what direction to take your next protective style. Should you go bold with color or keep it classic? Do you want a practical everyday look or something that commands attention? Are you drawn to delicate micro braids or statement-making jumbo braids? The decision isn’t just about aesthetics — it’s about finding a style that aligns with your lifestyle, your hair’s needs, and how you want to feel wearing it.
This guide walks through twenty distinct box braid styles across the full spectrum of lengths and creative approaches. Each style comes with its own personality, maintenance requirements, and styling possibilities. You’ll discover options that work for first-time braiders, experimental styles for those ready to take creative risks, and everything in between. The goal is to give you a clear picture of each option so you can make an informed choice for your next protective style.
1. Classic Shoulder-Length Box Braids
Shoulder-length box braids are the perfect entry point for anyone discovering box braids for the first time or returning to them after a break. They sit right at collarbone level, which means they’re long enough to show off the beauty and texture of the braids themselves but short enough to feel manageable and lightweight. This length strikes an ideal balance — long enough to style in multiple ways (down, half-up, in a bun) but not so long that they create significant tension on your hairline or require constant protective sleeping arrangements.
Why This Length Works Best
The shoulder-length placement puts minimal tension on your hairline while still giving you the full protective styling benefits. Braids at this length typically last 6 to 8 weeks with proper care, and they’re genuinely comfortable for daily wear without the weight-related headaches that longer braids sometimes cause. You can still swim, exercise, and move freely without feeling weighed down.
What Makes This Style Timeless
- Sits at a flattering length that frames the face without overwhelming it
- Versatile enough for casual days and elevated enough for professional settings
- Requires less time and less hair extension product than longer styles
- Easy to refresh and re-braid when they start loosening at the roots after several weeks
- Works with both thicker and thinner individual braid sizes
Pro tip: Wear a silk or satin pillowcase from day one — this reduces friction at night and helps your braids maintain their definition and smoothness for weeks longer.
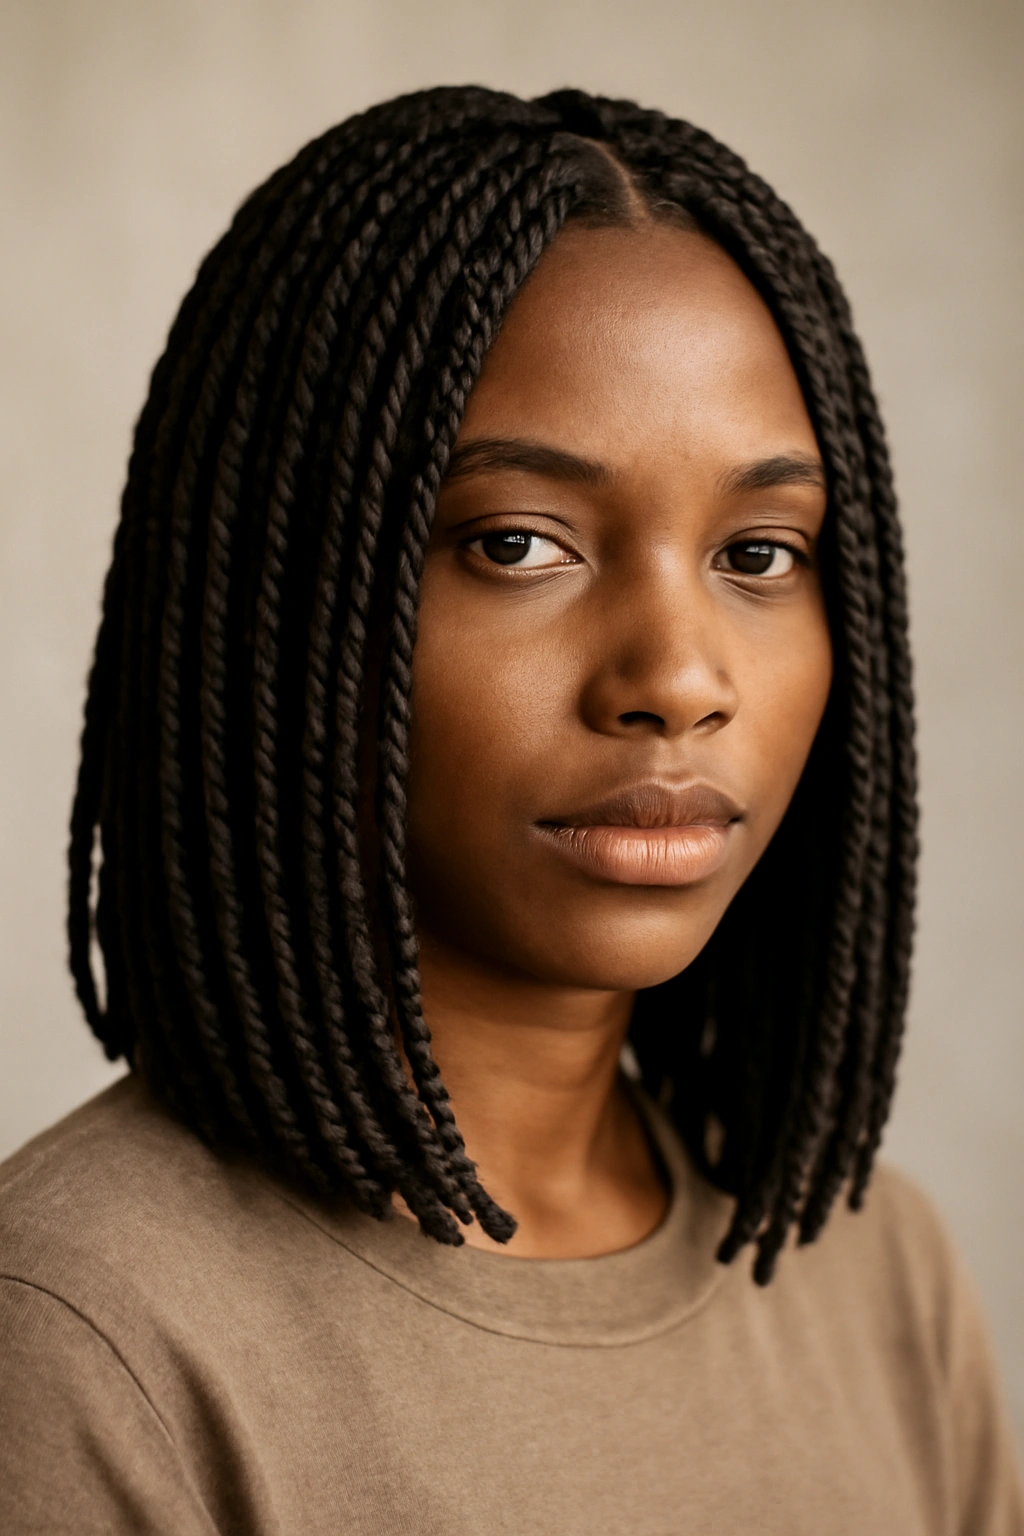
2. Micro Box Braids (Short Bob Length)

Micro box braids at chin-length or short-bob length offer a refined, almost delicate aesthetic that’s becoming increasingly popular. These braids are extremely fine — typically the thickness of a pen or thinner — which means you need far fewer braids overall to cover your head. The result is a look that’s textured and interesting without feeling heavy or overly styled. Short micro braids have a sophisticated quality that works beautifully for people who want the protective benefits of braids with a more understated appearance.
Why Short Micro Box Braids Stand Out
This length is ideal for people who want box braids but worry about commitment or comfort. You get the protective styling benefits without the length-related weight and maintenance demands. The fine braid size creates an almost thread-like appearance that’s visually interesting up close but reads as a sleek style from a distance. It’s protective styling dressed up as polished simplicity.
The Practical Side of Going Short and Thin
- Installation takes 4 to 6 hours depending on how densely you want to braid
- Lasts 4 to 6 weeks before needing refreshing at the roots
- Requires very little product and minimal extension hair
- Perfect for warm weather — the style looks light and airy
- Can be pinned up in multiple creative ways or worn down
Worth knowing: Starting with micro braids at a shorter length is genuinely one of the best ways to learn what braid maintenance looks like before committing to a longer style.
3. Jumbo Box Braids with Shaved Undercut
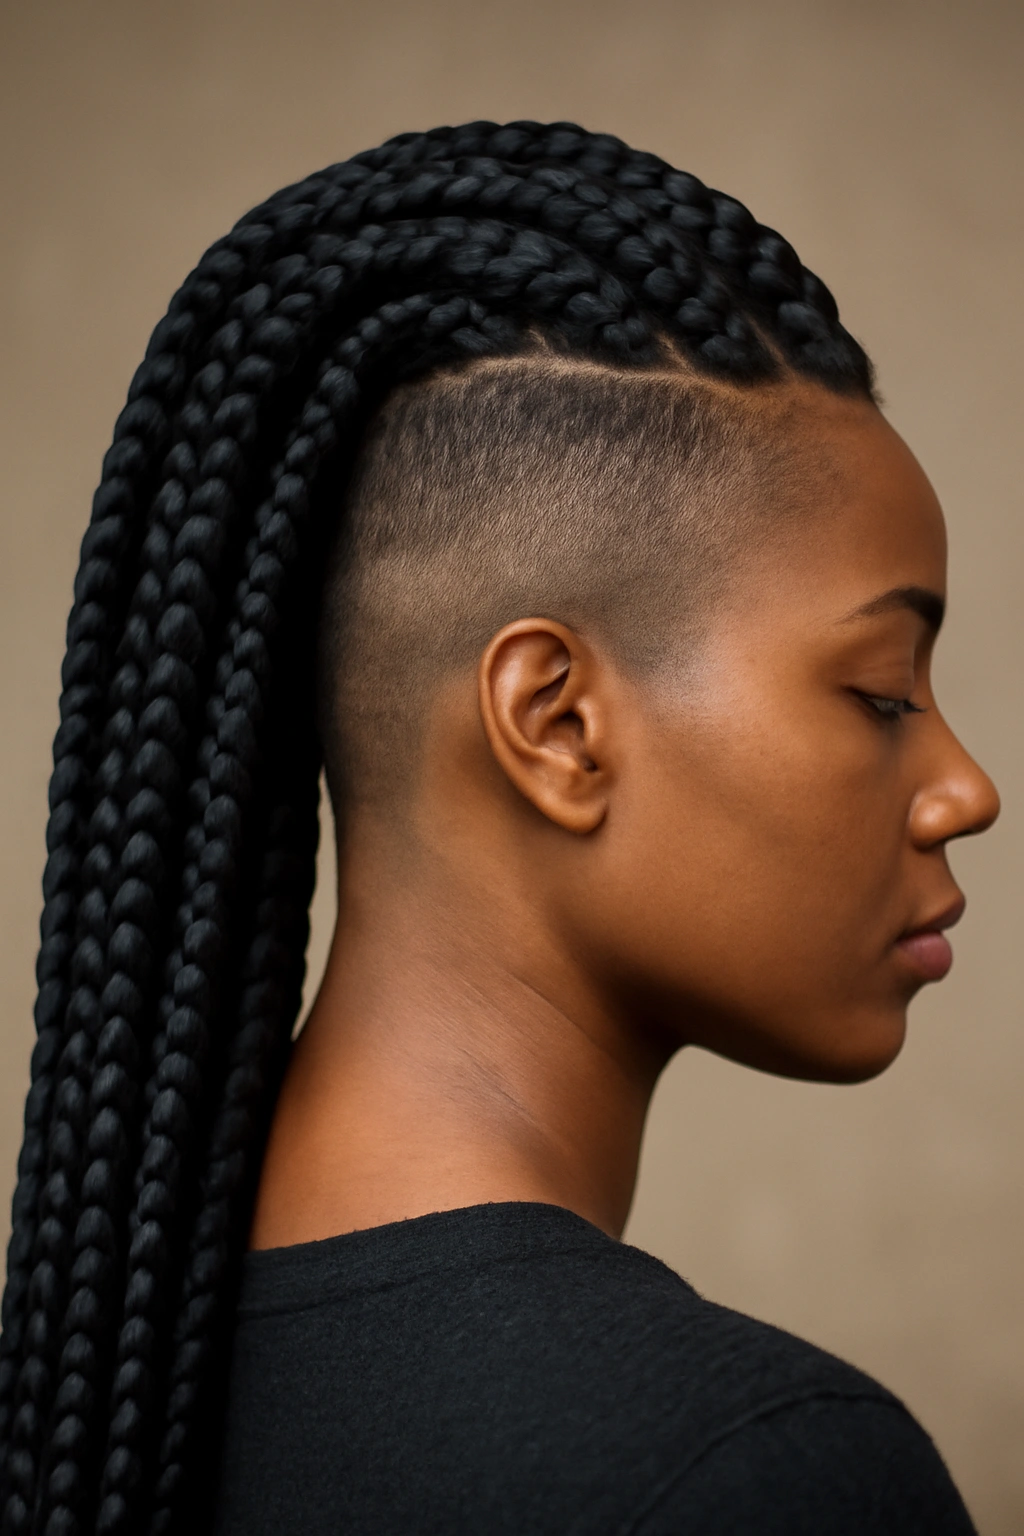
Jumbo box braids make a powerful visual statement — each braid is thick and substantial, often the width of your thumb or wider. When paired with a shaved undercut (where the hair at the nape is clipped short or completely shaved), you get a dramatic contrast that’s both edgy and intentional. The shaved undercut reveals the braids’ architecture and adds an element of bold self-expression. This combination works especially well for people who appreciate high-impact styling and aren’t afraid to be noticed.
What Makes This Combination Striking
The shaved undercut creates negative space that makes the braids appear even fuller and more voluminous. It’s a technical choice that elevates what could be a standard style into something that feels curated and deliberate. The contrast between the thick, textured braids and the clean, bare skin underneath creates visual interest from every angle. This style reads as intentional, confident, and creatively bold.
Styling and Maintenance Considerations
- Installation is faster due to fewer, thicker braids (usually 20 to 30 total braids)
- The weight sits higher on your head since you’re not covering the entire nape
- Requires regular touch-ups of the shaved section every 2 to 3 weeks to maintain the undercut’s definition
- Works beautifully with updos that showcase the undercut
- The shaved hair will grow back, so plan for this style’s evolution or commit to regular maintenance
Pro tip: Pair jumbo braids with an undercut and a statement earring on one side for maximum impact — the style already commands attention, so lean into it.
4. Colored Box Braids with Ombre Effect
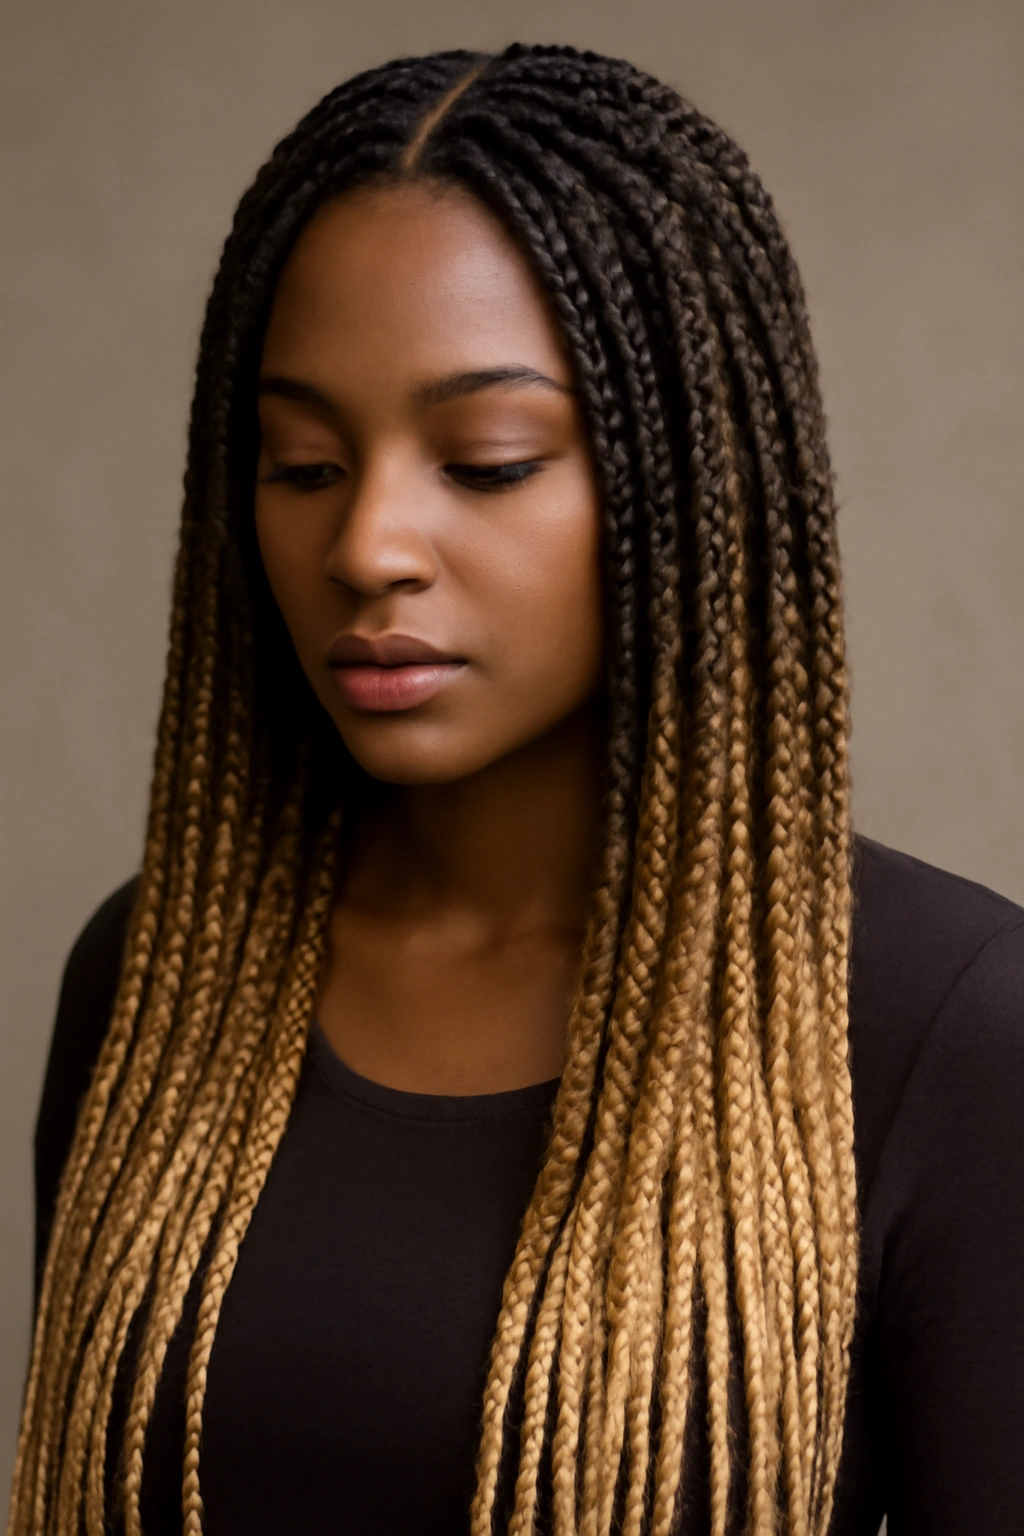
Adding color to box braids transforms them from a protective style into an artistic statement. An ombre effect — where the color gradually shifts from dark roots to lighter ends — creates dimension and visual intrigue. Ombre box braids catch light beautifully and photograph gorgeously. The gradient effect means you can use bold colors (vibrant reds, blues, or silvers) without it feeling overwhelming, since they fade into lighter tones toward the ends.
Why Ombre Adds a Creative Edge
An ombre approach gives you the boldness of color without committing fully to one shade throughout. It’s a way to experiment with colors you might not normally wear while keeping the style feeling intentional and design-forward. The color journey draws the eye down the length of your braids, making them appear longer and more dynamic. Lighter ends also tend to make the style feel lighter and more summery, even if you’re using deeper tones at the root.
Color Application and Durability
- Most colorists apply ombre using dyed hair extensions before installation
- The color fades gradually over the style’s lifespan (usually 6 to 10 weeks)
- Jewel tones (sapphire, emerald, amethyst) and metallics tend to fade more gracefully than pastels
- You can use temporary color sprays for a similar effect without the long-term commitment
- Protect colored braids from chlorine and saltwater, which accelerate fading
The ombre effect works with virtually any color combination — soft pastels over blonde, rich jewel tones over dark brown, or even a multi-color gradient that transitions through several shades.
5. Box Braids with Blonde Tips
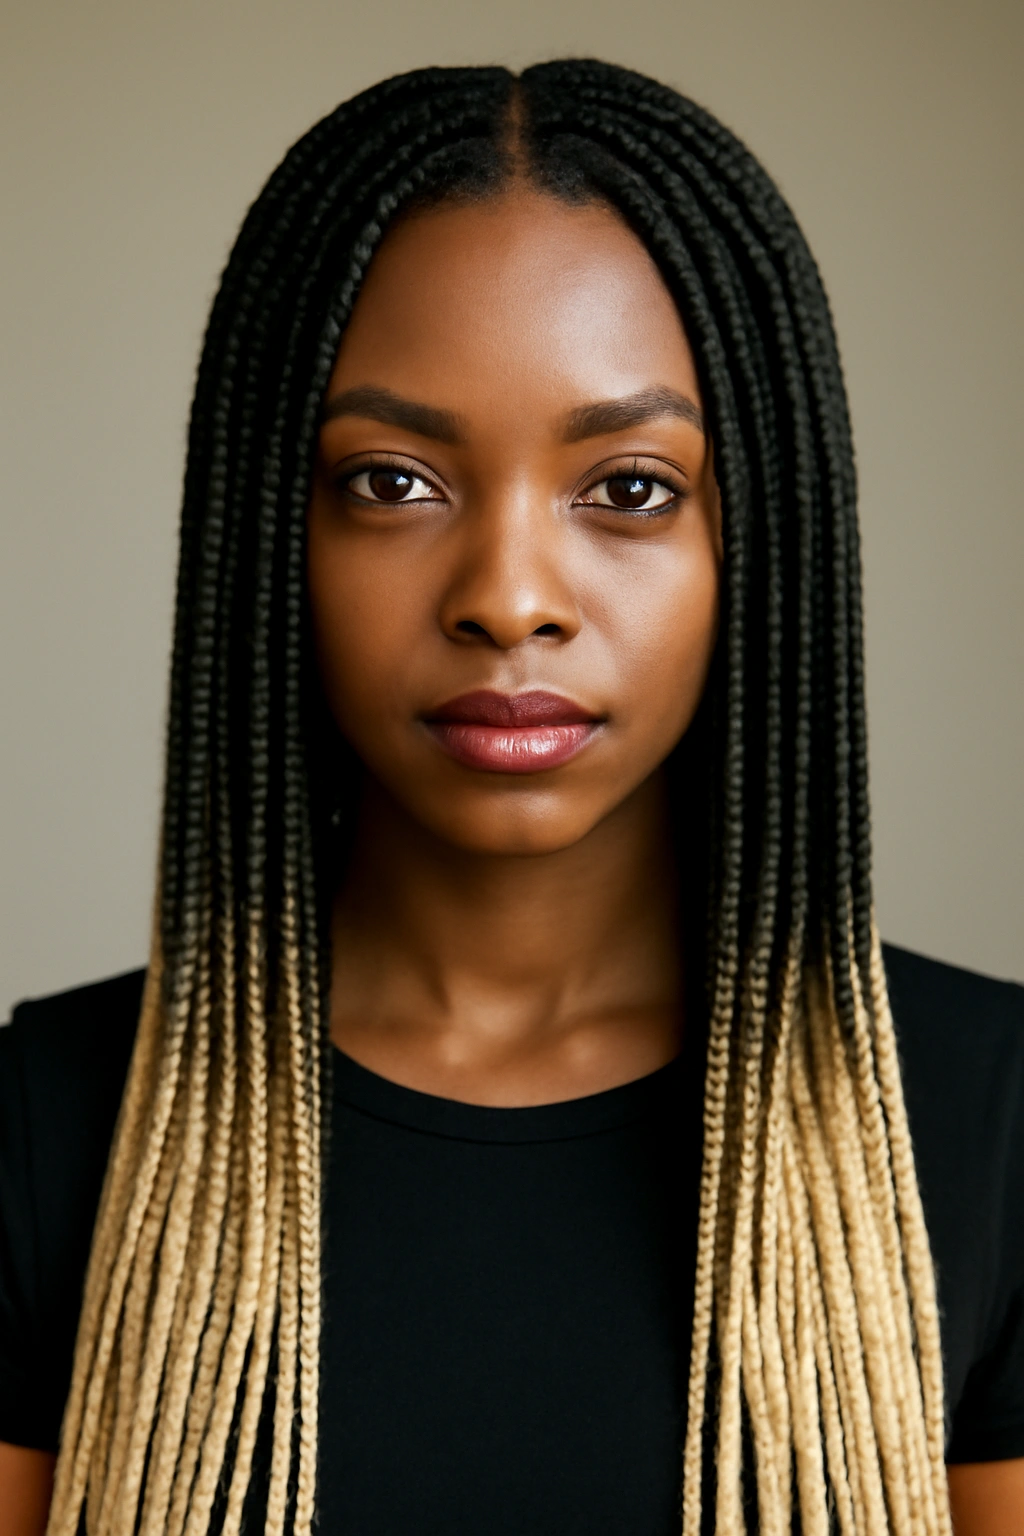
Keeping the natural color or a darker shade at the root and transitioning to blonde at the ends is a clean, elegant approach to adding color to box braids. Blonde tips create a crisp visual contrast and make your braids feel contemporary without overwhelming your natural aesthetic. This style is especially striking on deeper skin tones, where the blonde creates strong contrast and really pops visually. It reads as intentional styling rather than color accident.
The Appeal of Blonde-Tipped Braids
There’s something about blonde tips that feels both classic and modern simultaneously. It’s a style that’s been embraced across many different communities and aesthetics, which means it’s endlessly adaptable to your personal vibe. Blonde reflects light differently than darker colors, which means your braids catch light beautifully and seem to glow. The contrast between root color and blonde tips also makes each individual braid more visible and defined.
Installation and Maintenance Notes
- Can be achieved with pre-dyed blonde extensions or colored during installation
- The blonde portion typically needs refreshing or touch-up if you’re keeping the style beyond 8 weeks
- Blonde can appear brassy or yellowed if exposed to chlorine or mineral buildup from hard water
- Pairs beautifully with gold jewelry and warm-toned accessories
- Works with braids of any thickness, from micro to jumbo
Insider note: Blonde tips on shorter braids (shoulder-length or shorter) look more polished and refined, while longer braids with blonde tips feel more relaxed and free-spirited.
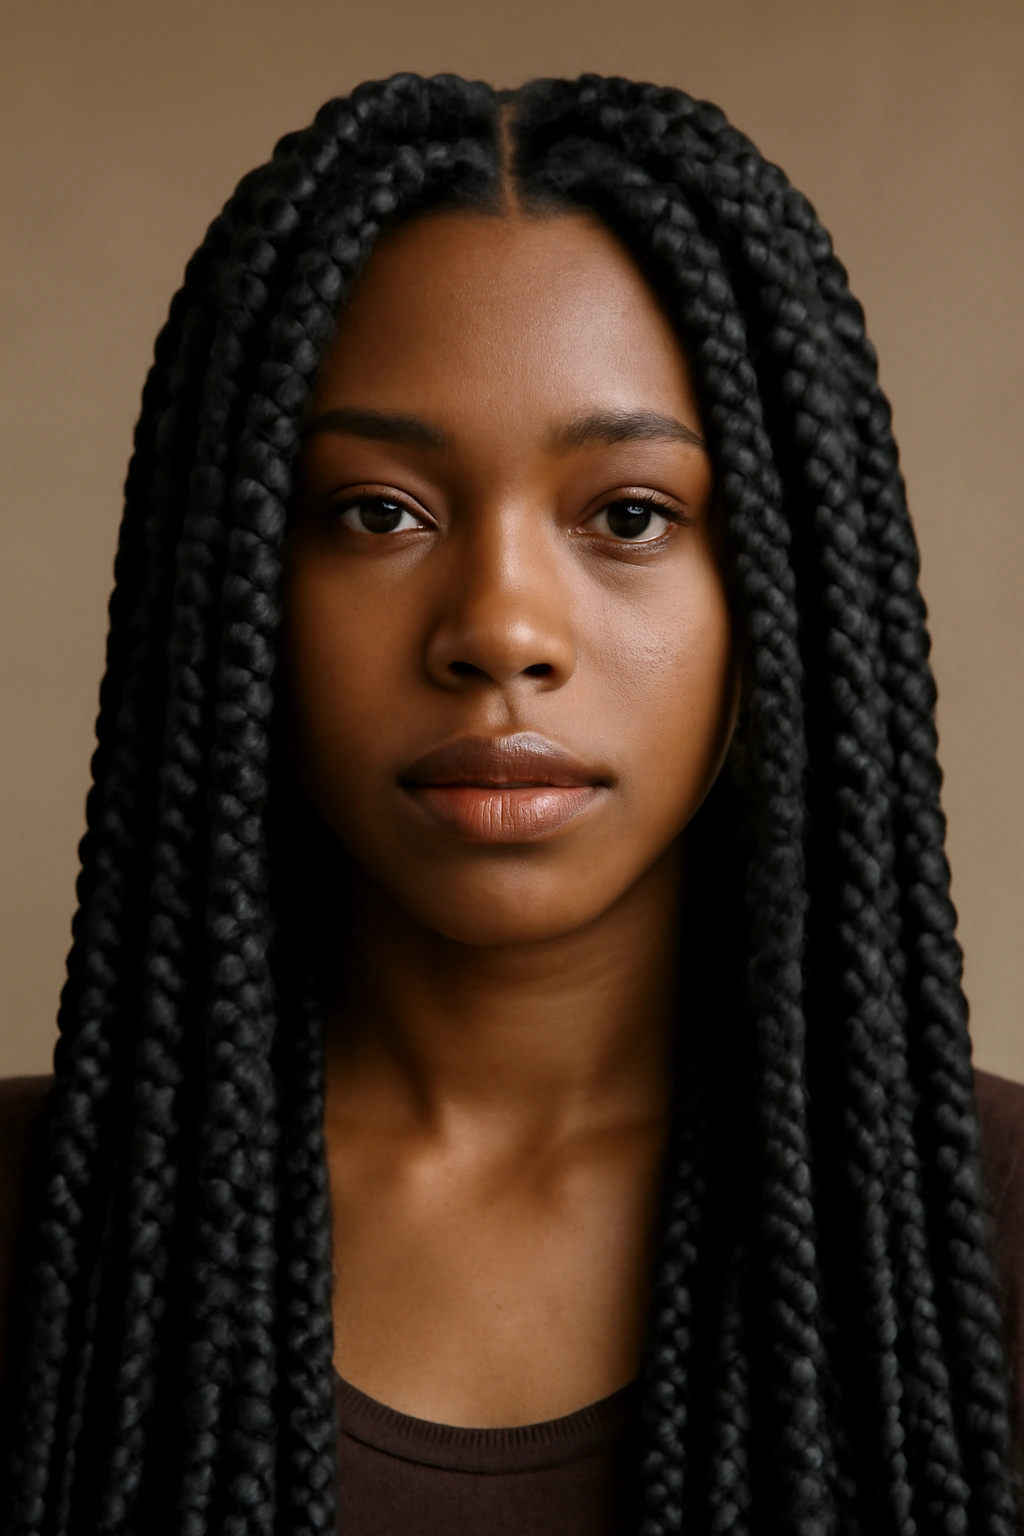
6. Waist-Length Box Braids
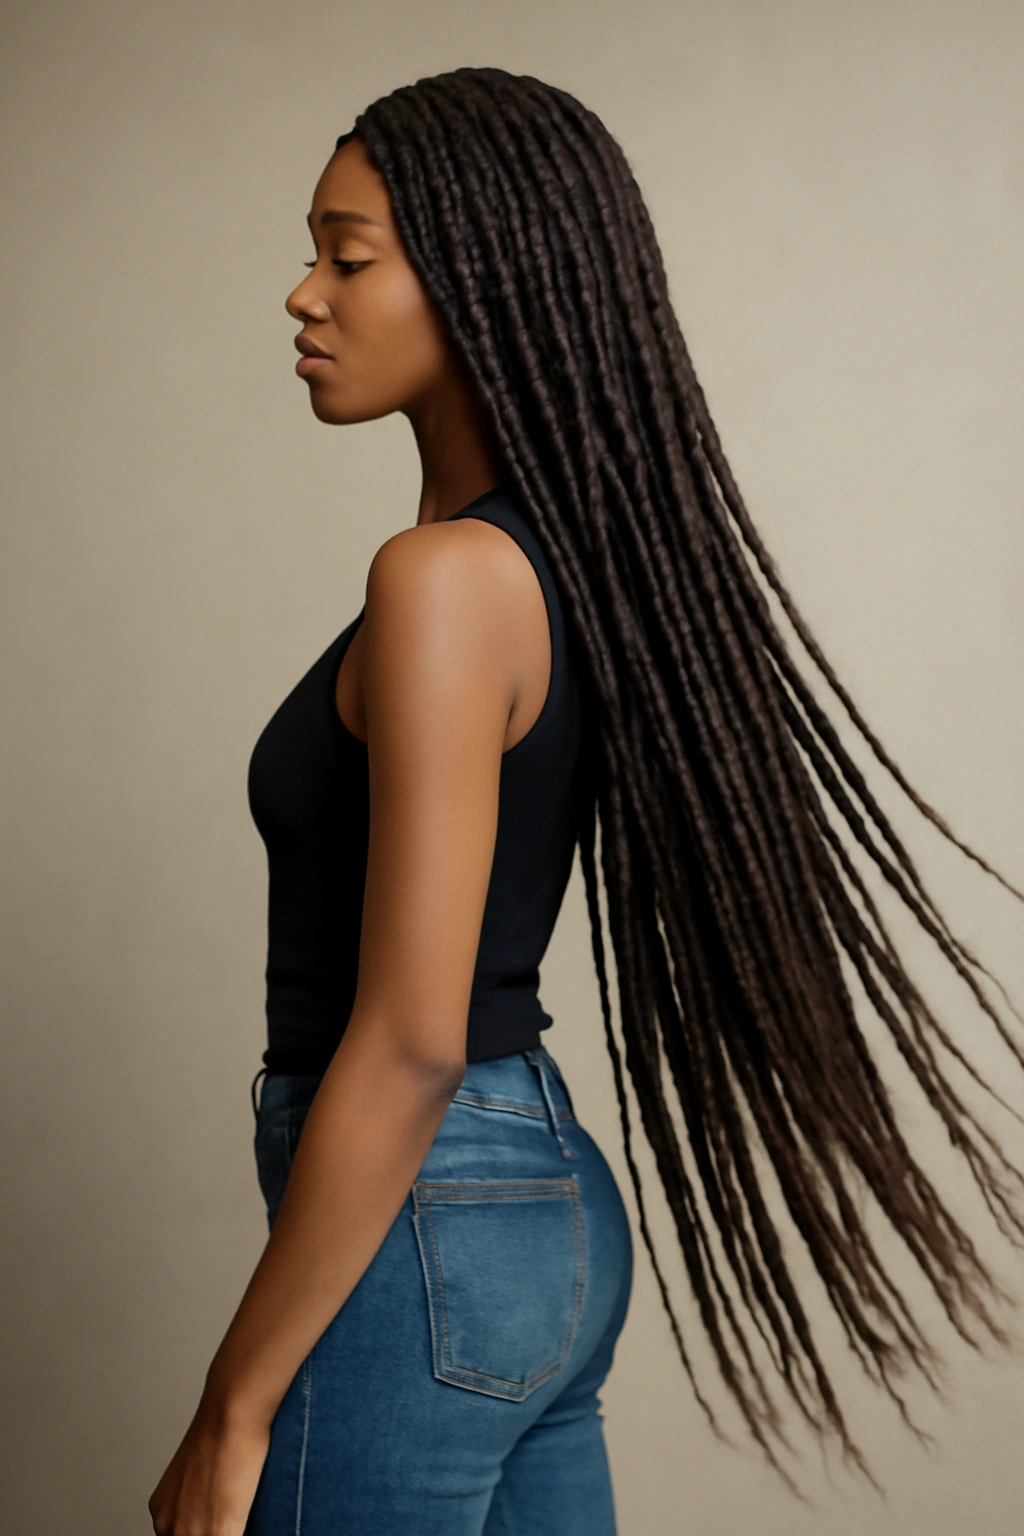
Waist-length box braids are the ultimate statement — they command attention, showcase incredible artistry, and create a dramatic silhouette. Braids that reach your waist represent a significant investment of time, hair, and money, but they’re also transformative in how they change your overall appearance and movement. Long braids move differently than short ones; they create momentum and presence that shorter styles simply can’t match.
What Long Box Braids Demand
This length requires genuine commitment to maintenance. The weight of waist-length braids means you need to be intentional about how you sleep (protect them with a bonnet or pineapple style), how you move, and how often you wash. However, the payoff is a look that feels powerful and artistic. Waist-length braids photograph beautifully and create a silhouette that’s unmistakably striking. Many people feel genuinely transformed wearing braids of this length — it changes not just how you look but how you move through the world.
The Long-Braid Experience
- Installation typically takes 8 to 12 hours depending on braid thickness and volume
- Requires a significant amount of hair extension product
- Lasts 8 to 12 weeks with diligent care and maintenance
- Weight can create tension on the hairline if not installed with a protective method like feed-in braids
- Swimming and intense physical activity require protective measures (clear cap or hairstyle that lifts braids off your shoulders)
The journey to waist-length braids is part of the appeal — it’s not something you commit to lightly, and that intentionality shows in how you wear it.
7. Box Braids with Curly Ends
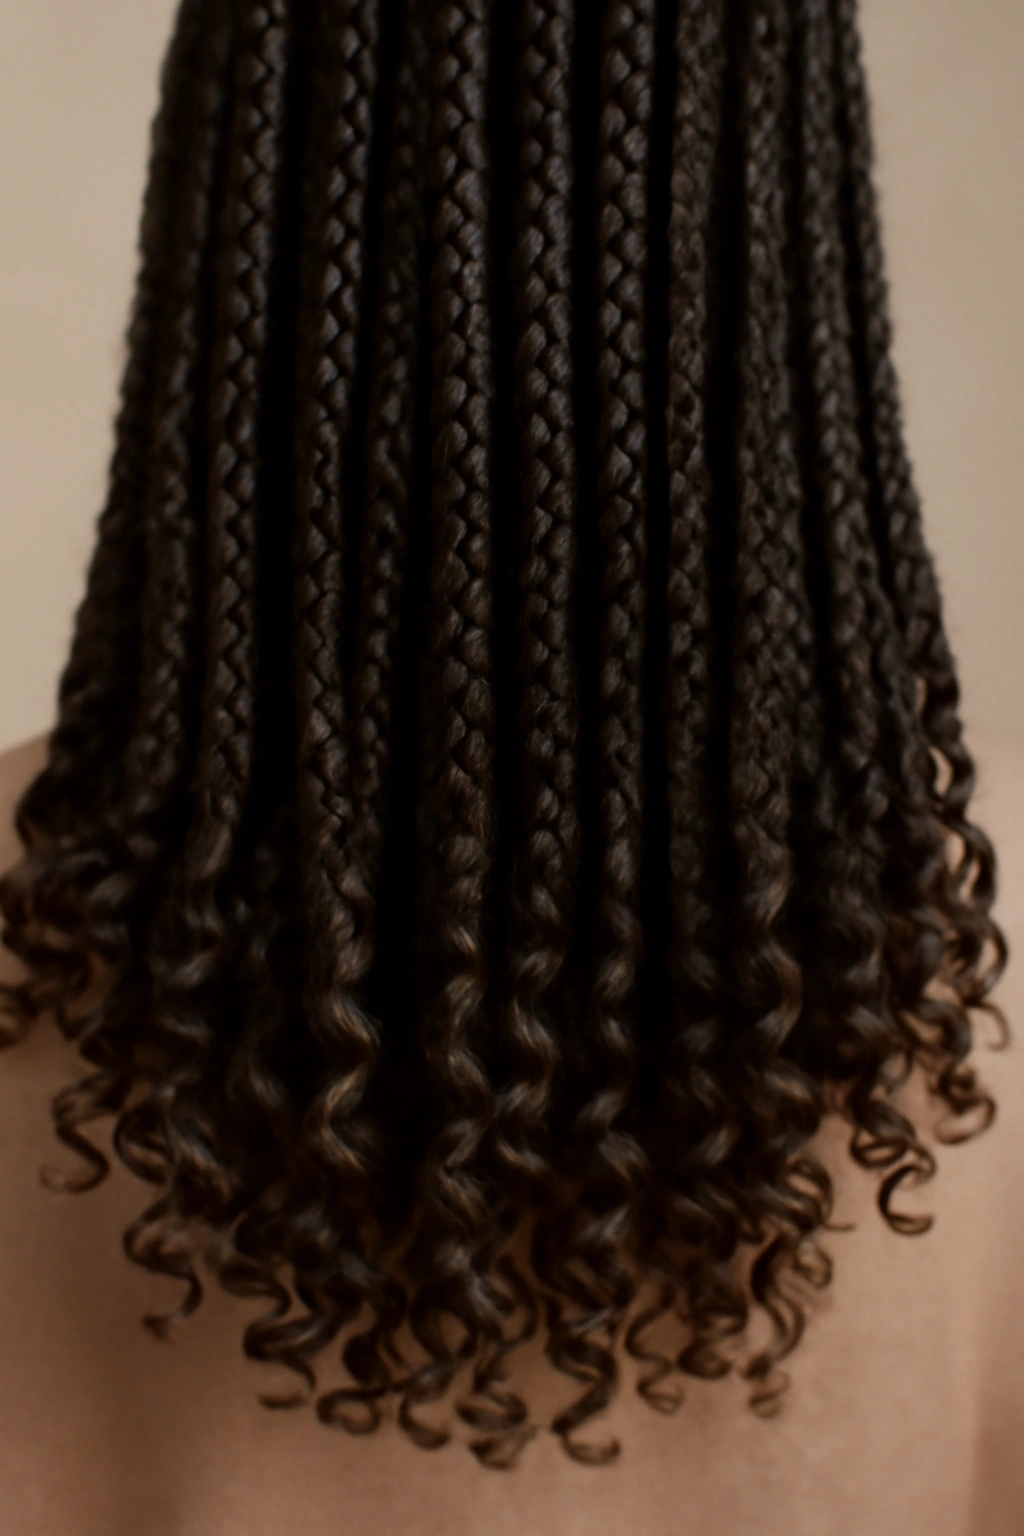
Rather than leaving braid ends straight and blunt, curling them creates a completely different aesthetic — softer, more romantic, and visually more complex. Curly-ended braids can be achieved by using curly hair extensions, by having your braids styled with a curling iron after installation, or by getting spring twists or coils at the ends instead of straight braids. The curl adds movement and visual interest that makes the style feel less structured and more organic.
Why Curly Ends Feel Different
Straight braids have a graphic, clean quality — they’re beautiful in their geometric precision. Curly ends soften that geometry and add what feels like a more relaxed, flowing energy to the style. The curls catch light differently and create shadows and dimension that make the braids appear fuller and more textured. This approach works especially well if you want braids that feel polished but not rigid, protective but not severe.
Creating and Maintaining Curl Definition
- Curly-end braids typically require 1 to 2 hours of additional styling time beyond the braid installation
- You can use a curling iron, flexi-rods, or perm rods to create curls
- The curls will gradually relax and loosen as weeks pass and friction takes its toll
- Reactivating curls with water and a light styling cream can refresh them mid-style
- Sleep in a protective style (like a bonnet or pineapple) to preserve curl definition longer
Worth knowing: If you love the curly-end look but want it to last through your entire style duration, ask your braider about setting the curls in a longer-lasting way, or plan to refresh them every 2 to 3 weeks.
8. Side-Swept Box Braids
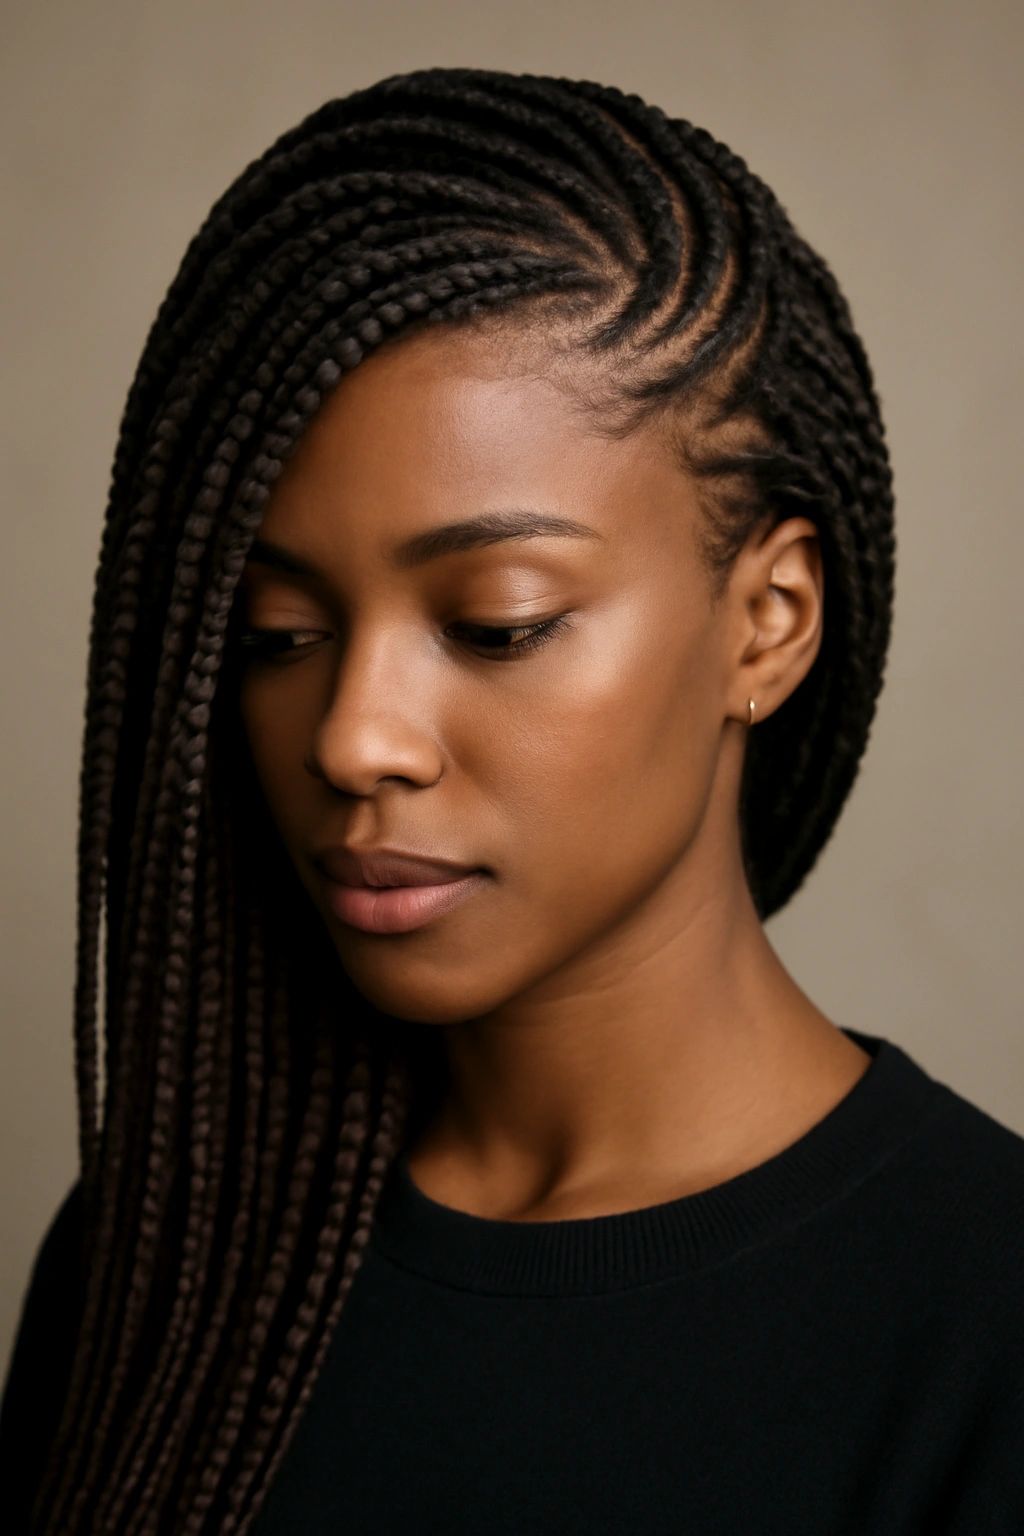
Rather than parting your hair down the center or in a traditional pattern, sweeping your braids dramatically to one side creates an asymmetrical, fashion-forward aesthetic. Side-swept braids expose one side of your scalp and face while the other side is full and voluminous. This style is striking and feels intentional — it’s a choice that commands attention and shows you’re thinking creatively about how you present yourself.
The Visual Impact of Asymmetry
A side-swept style creates a diagonal line that’s more dynamic and interesting than a centered part. It draws attention to one side of your face while creating negative space on the other, which can be strategically used if you have specific features you want to emphasize. Side-swept braids also photograph beautifully — the diagonal line is flattering and creates visual movement even in a static image. This placement works for face shapes across the spectrum.
Styling and Sleeping Considerations
- Braids can be swept all to one side or have a more flowing asymmetrical pattern
- You might need bobby pins or a small clip to keep braids in place if they’re swept very dramatically
- Sleeping on the side where your braids are swept can pressure and flatten them — use a bonnet to minimize this
- Side-swept braids work beautifully in updos that maintain the asymmetrical element
- This style is particularly striking paired with statement jewelry on the exposed side
Try a side-sweep if you’ve never done it before — it’s a small change that creates surprisingly big impact on how the whole style feels.
9. Box Braids with Gold Cuffs
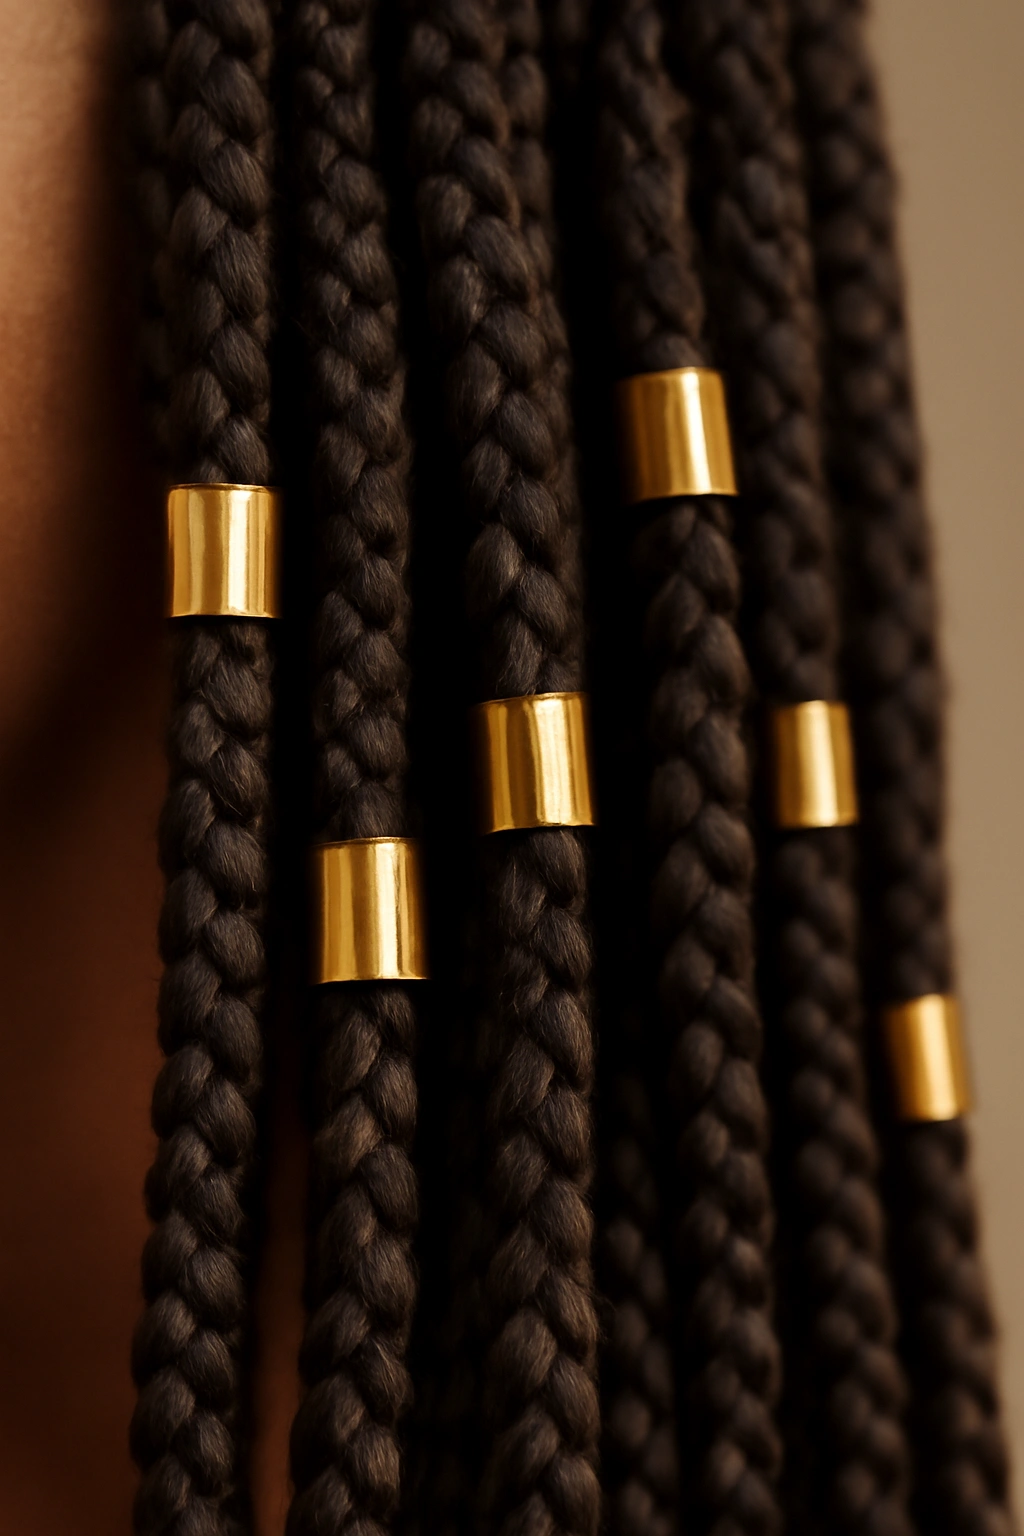
Metal cuffs added to braids elevate them from a protective style into deliberate fashion jewelry. Gold cuffs are classic and elegant — they add warmth and richness to your appearance while catching light and drawing attention to individual braids. Cuffs can be applied to just a few select braids around the face, or you can cuff many braids throughout for a more ornate, decorated effect. They’re a tangible way to personalize your braids and make them feel uniquely yours.
Why Cuffs Transform the Aesthetic
Cuffs add an element of luxury and intentionality to your style. They’re decorative without being understated, and they work across virtually every skin tone and styling context. Gold in particular has a warm quality that feels flattering and sophisticated. Cuffs also catch light and movement, so they add visual interest and dynamism to your braids. When you move, your braids move, and the cuffs shimmer and shift — it’s genuinely beautiful to watch.
Cuff Application and Practicalities
- Cuffs can be applied during installation or added after (though after installation is more common)
- They’re usually made from gold-plated or solid metal (or sometimes acrylic alternatives)
- Different cuff styles exist — simple cylindrical cuffs, ornate filigree designs, or decorative pieces with gemstones
- Cuffs add minimal weight but can catch hair if not positioned carefully
- They don’t typically affect how long your braids last or how you maintain them
Pro tip: If you’re using cuffs, apply them strategically to braids that frame your face or fall around your shoulders — this placement maximizes their visibility and impact.
10. Twisted Box Braids
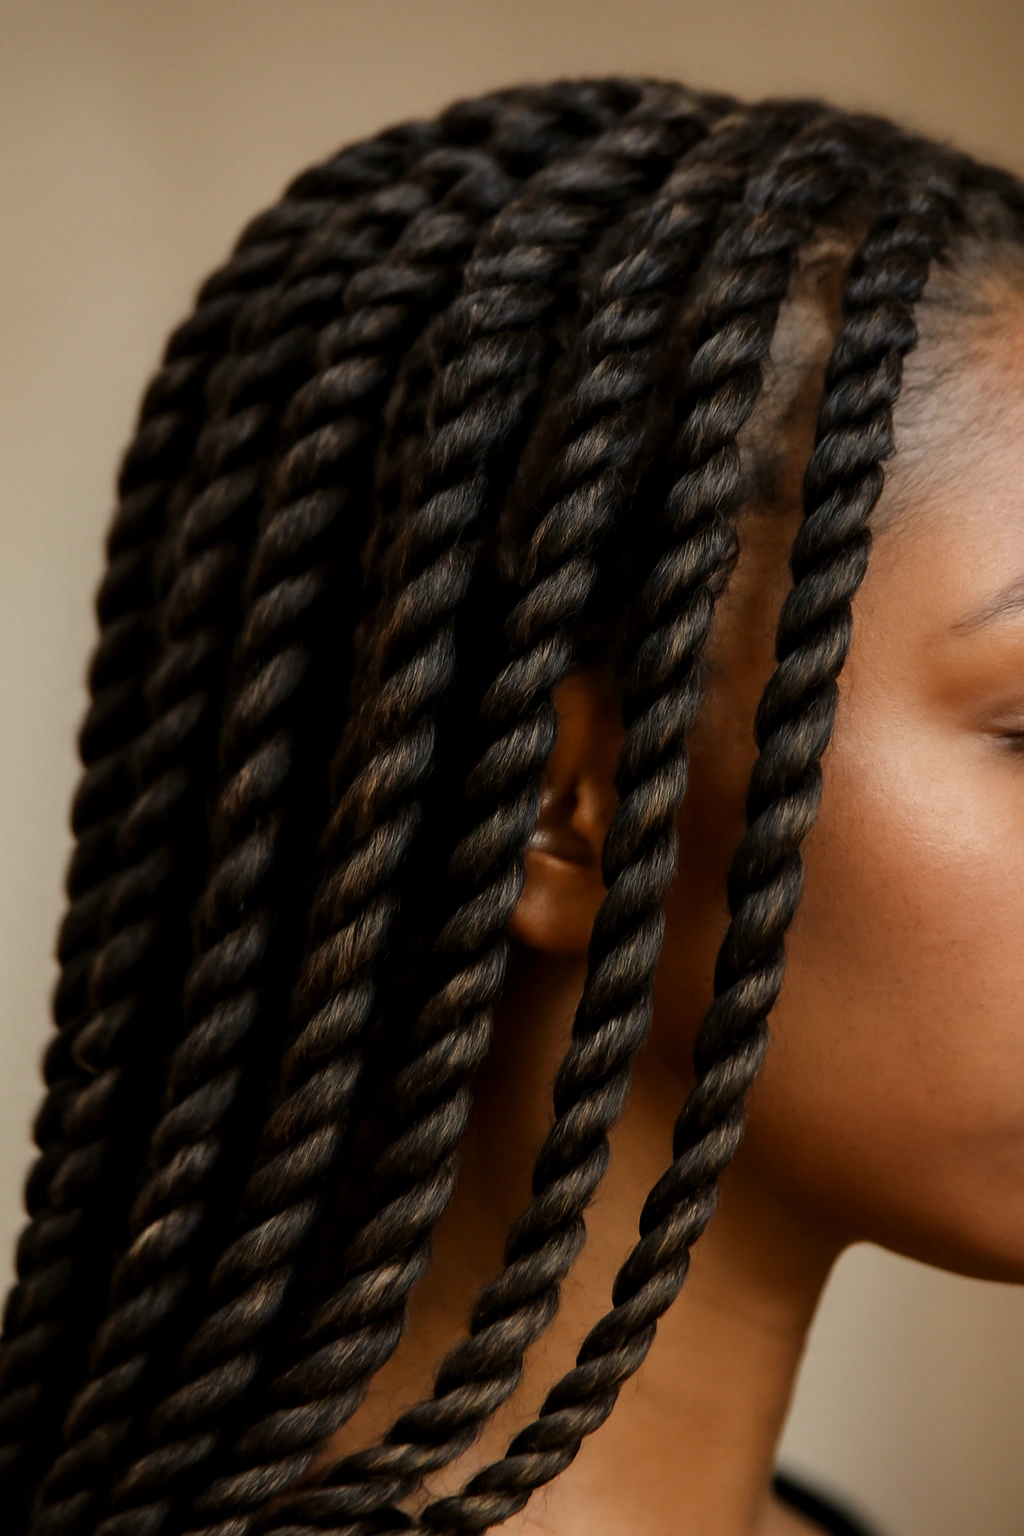
While not technically “box braids” in the strictest sense, twisted braids (where sections are twisted rather than woven into three-strand braids) offer a similar protective styling benefit with a slightly different aesthetic. Twists are faster to install than braids, create a different texture and pattern, and feel like a natural evolution if you’ve done braids before and want to try something slightly different. They’re actually braids’ stylish sibling — protective, beautiful, and endlessly versatile.
How Twists Differ Visually
Twists have a rounder, smoother appearance compared to braids, which have more defined edges and geometric precision. They create a spiral pattern that’s visually distinct and often feels more relaxed and flowing. Twists can be thicker or thinner just like braids, and they can be styled in all the same ways — up, down, with color, with cuffs, whatever you want. Many people find twists are easier to detangle after the style is complete, since there’s no three-strand weave to work through.
Installation and Duration Differences
- Twists typically install 1 to 2 hours faster than equivalent braids
- They last 6 to 8 weeks with the same maintenance as braids
- The twisting motion is gentler on delicate hairlines, making them a good choice for sensitive edges
- You can mix twists and braids in the same style for visual variety
- Twists work beautifully with color and embellishments just like braids do
Consider twists if installation time is a limiting factor for you, or if you want a protective style that feels subtly different from braids while offering the same benefits.
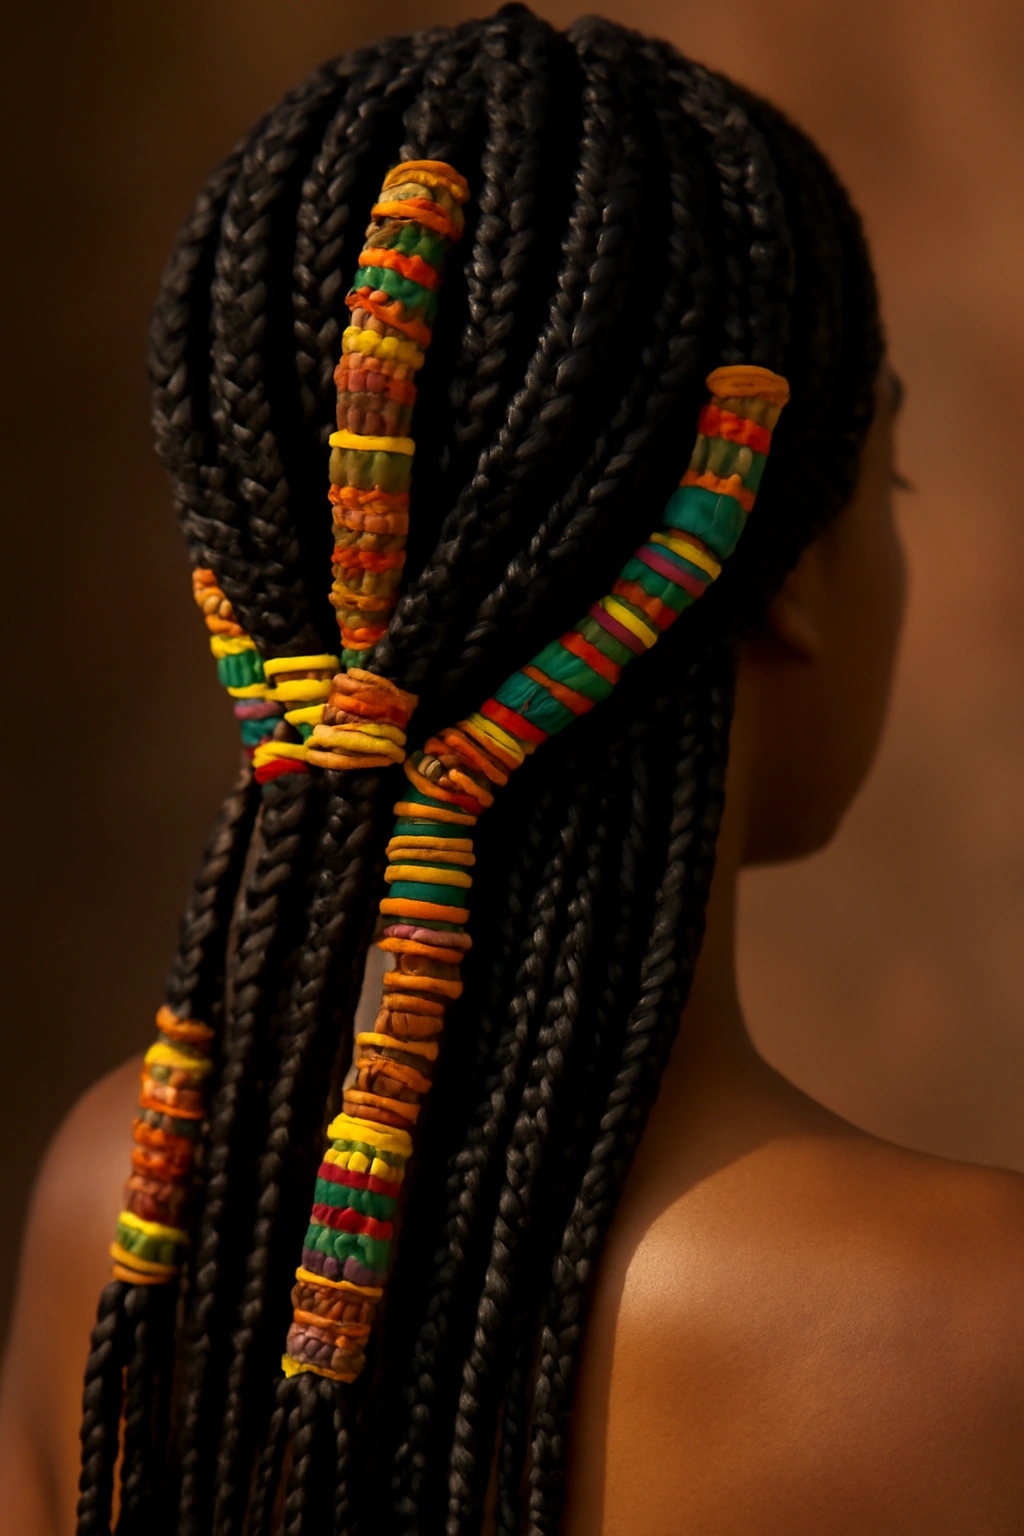
11. Box Braids with Beads

Threaded beads — wooden, ceramic, metal, or acrylic — add a playful, artistic element to box braids. Beads can be placed on a few braids or scattered throughout your entire head. They add weight, movement, and visual interest. Each time you move, the beads click softly and catch light, which creates an auditory and visual component to your style. Beads also allow you to layer different colors, materials, and sizes, creating incredible depth and personalization.
The Sensory Experience of Beaded Braids
Beaded braids engage multiple senses in a way unbeaded braids don’t. There’s the visual element of catching light and color contrast. There’s the soft sound of beads clicking together as you move. There’s the tactile sensation of reaching up to touch them and feel their smoothness. Beads also create natural anchor points in your braids, which can help keep the braids intact longer and reduce unraveling at the ends. It’s a style choice that’s both aesthetic and functional.
Bead Selection and Application
- Beads should have holes large enough to fit your braid easily without crushing the braid or stretching it
- You can use one large bead per braid, multiple smaller beads, or skip beads on some braids and use many on others
- Wooden and ceramic beads are lighter and tend to feel better for longer-term wear
- Metal beads add weight and shine but can get heavy on longer braids
- Beads can be applied during installation or added afterward
Insider note: Beads that sit near the face (perhaps threaded onto braids that frame your face) make a bigger visual impact and feel more intentional than beads scattered throughout the back of your head.
12. Half-Up Half-Down Box Braids
Rather than wearing all your braids down or gathering them entirely into an updo, the half-up half-down approach splits the difference. The top half of your braids are gathered at the crown into a ponytail, bun, or other updo style while the bottom half flows freely down your back. This styling option is incredibly versatile — you can adjust it depending on your activity level, the weather, or simply how you feel that day.
Why Half-Up Works for Daily Wear
Half-up styling keeps hair off your face and neck (which is especially practical if you’re working, exercising, or dealing with warm weather) while maintaining the length and flow of your braids. It’s a way to style the same braids dozens of different ways without actually changing the braids themselves. Half-up also works beautifully if you want to showcase the length of your braids while keeping them partially contained for practicality.
Styling Techniques for Half-Up Braids
- You can create a simple half-up ponytail or make it more elaborate with a bun, twist, or braid
- Using a silk or satin elastic (rather than a regular hair tie) minimizes stress on your braids
- Decorative clips, scarves, or hair cuffs at the half-up section make it feel more intentional and fashion-forward
- Half-up works beautifully with braids of any length — it’s just as striking on shoulder-length braids as on waist-length
- The way you gather the top section determines the overall feel — sleek and polished or more relaxed and textured
This styling approach is perfect if you’re still deciding between fully down and fully up — you get to experience both in one style.
13. Box Braids Updo or Bun
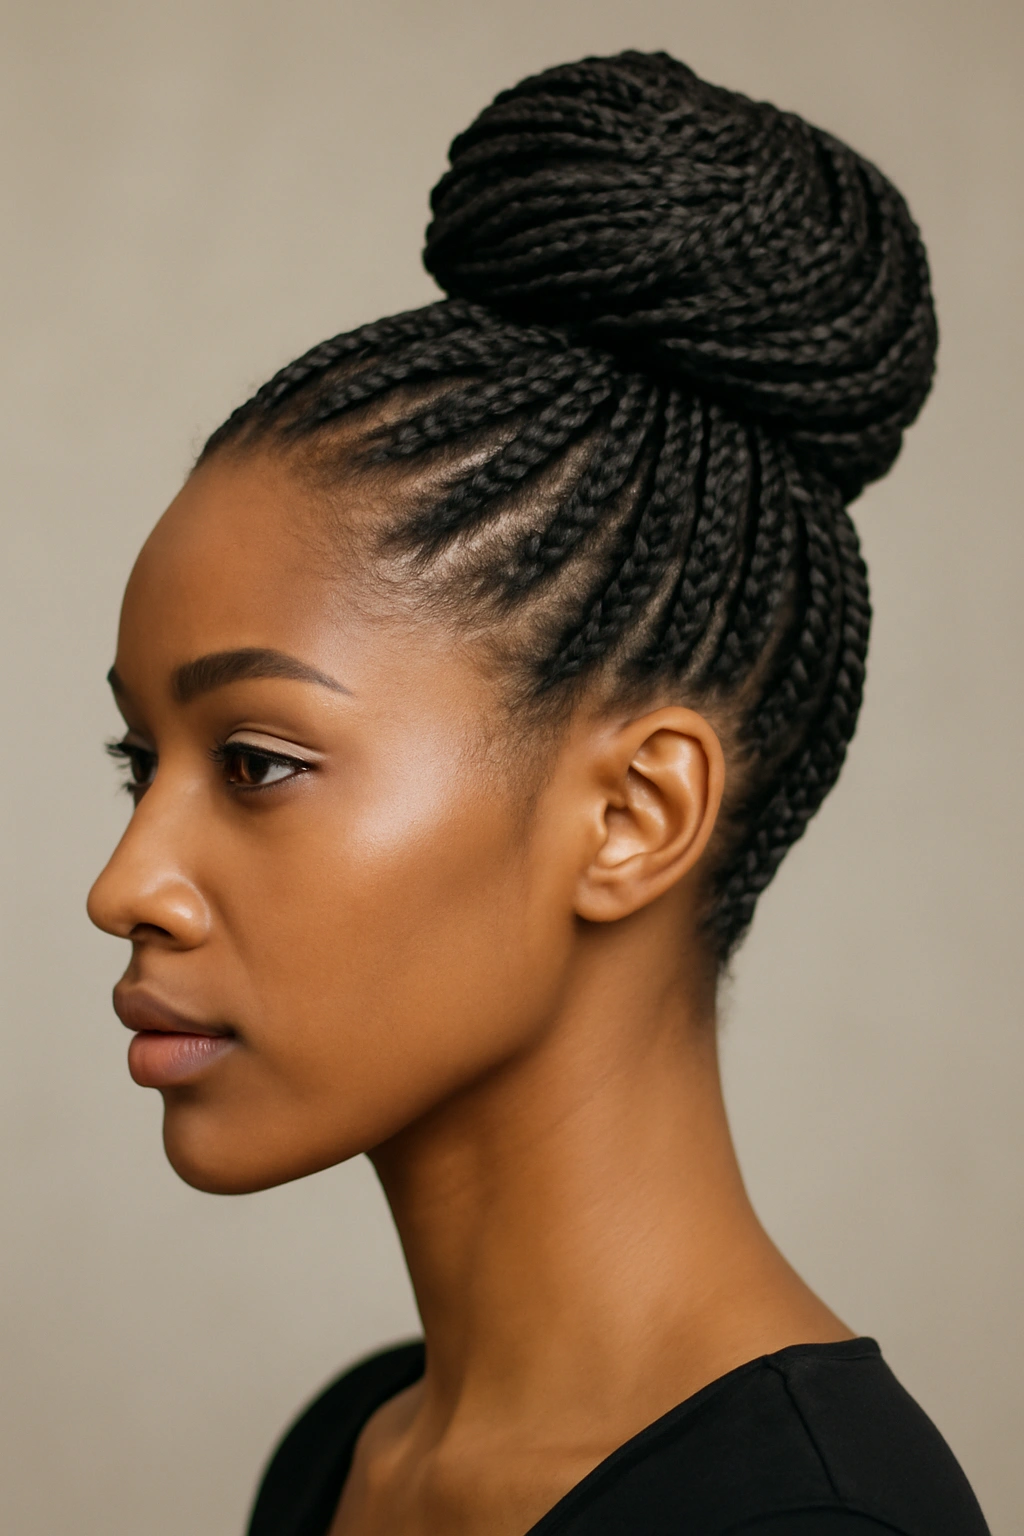
Taking all your braids up into a bun, top knot, or other updo style creates an elegant, polished aesthetic that works for virtually any occasion. An updo also protects your braid ends (where they’re most vulnerable to breakage) and provides practical benefits for work, exercise, or simply managing your braids on a daily basis. Updos are a legitimate styling choice — not just a practical holding pattern, but a beautiful, intentional way to wear your braids.
The Versatility of Braided Updos
A braided updo can be sleek and minimalist (a simple high bun), sculptural and artistic (an elaborate crown or twisted arrangement), or anywhere in between. You can create an updo in seconds using bobby pins and your fingers, or spend time crafting something more intricate. Updos also keep the majority of your braid length safe and protected, which means they can extend the lifespan of your style and give your braids time to rest.
Updo Variations and Styling
- A high bun placed at the crown is sleek and modern
- A low bun at the nape is elegant and sophisticated
- A twisted or braided updo takes more time but creates visual interest
- You can use decorative pins, clips, or scarves to embellish the updo
- An updo works beautifully on braids of any length — even shoulder-length braids can create a full, beautiful bun
Worth knowing: Sleeping in a protective bonnet over your updo helps maintain the braids’ appearance and reduces friction that could cause frizz or loosening.
14. Layered Box Braids (Mixed Lengths)
Rather than having all your braids be the same length, creating a layered effect where some braids are shoulder-length, some are mid-back, and others reach your waist produces visual complexity and artistry. This approach is more challenging to execute perfectly, but the payoff is a style that feels incredibly dimensional and creative. Layered braids catch light differently at different lengths, creating shadow and dimension that a single-length style simply can’t achieve.
Why Layering Creates Dimension
When braids are different lengths, they move independently and create a more organic, flowing silhouette. Light hits different parts of the style at different angles, creating visual depth. Layering also allows you to showcase color in interesting ways — perhaps longer braids are one color and shorter ones are another, creating visual variety and movement. A layered approach is perfect if you want your style to feel less uniform and more artistic.
Creating a Layered Look
- Some braiders specialize in layered braids — ask directly if this is something they do
- Layering requires careful planning so the different lengths look intentional rather than accidental
- You can layer just a few braids around the face (which frames your face beautifully) or create layers throughout
- Shorter layers at the front and longer in the back is one popular approach, but layering can happen at any part of your head
- Different length braids can have different colors to emphasize the layering even more
This styling approach requires more advanced skill, so discuss your vision carefully with your braider before installation.
15. Box Braids with Kente Cloth Wraps
Wrapping sections of your braids with Kente cloth — a traditional West African woven fabric with beautiful geometric patterns and rich colors — adds cultural significance and stunning visual appeal to your style. The cloth is wrapped around braids in sections, typically near the ends or scattered throughout the head. Kente cloth wraps add texture, color, and a layer of cultural connection to your braids.
The Cultural and Aesthetic Significance
Kente cloth carries deep cultural meaning and represents African heritage and craftsmanship. Using it to accessorize your braids is a way to honor and celebrate that heritage while creating something visually stunning. The geometric patterns in Kente cloth work beautifully with the pattern created by braids themselves, creating a nested visual interest. The cloth also adds movement and texture — it flows differently than hair and creates additional visual elements to notice and appreciate.
Application and Styling
- Kente cloth can be wrapped around complete braids or woven in and out of them
- Wraps are typically concentrated toward the ends of braids or clustered in specific areas
- You can use traditional Kente cloth or modern reproductions that capture the same aesthetic
- Multiple colors and patterns can be used in one style for additional visual interest
- The cloth adds minimal weight but creates maximum visual impact
Pro tip: Pair Kente cloth wraps with gold jewelry and confidence — this styling choice is a statement about honoring your heritage while expressing your personal style.
16. Chunky Box Braids
Chunky box braids are dramatically thick — sometimes as wide as a quarter or even wider. They require significantly less time to install than finer braids and use less hair extension product. Chunky braids create a bold, graphic aesthetic that’s impossible to miss. They’re particularly striking on longer lengths, where the visual weight of thick braids creates an impressive silhouette. If you want maximum impact with minimum installation time, chunky braids are the answer.
The Visual Power of Thick Braids
Chunky braids make a statement. They’re bold, sculptural, and visually dominating. They work particularly well if you have a high forehead or prominent cheekbones — the thickness of the braids balances facial proportions beautifully. Chunky braids also tend to look freshly braided longer than thinner braids, since the thicker construction makes looser roots less visually noticeable. There’s something satisfying about the graphic, clean look of chunky braids.
Installation and Wearability
- Installation typically takes 2 to 4 hours depending on your hair volume and desired braid count
- Chunky braids last 8 to 10 weeks with good maintenance
- The weight is more concentrated, so tension on the hairline depends heavily on the installation method
- Chunky braids work at any length, though they’re particularly striking on longer hair
- They photograph beautifully and create a powerful visual impression
Chunky braids are ideal if you’re short on installation time but want a high-impact style that feels intentional and bold.
17. Triangle/Feed-In Box Braids
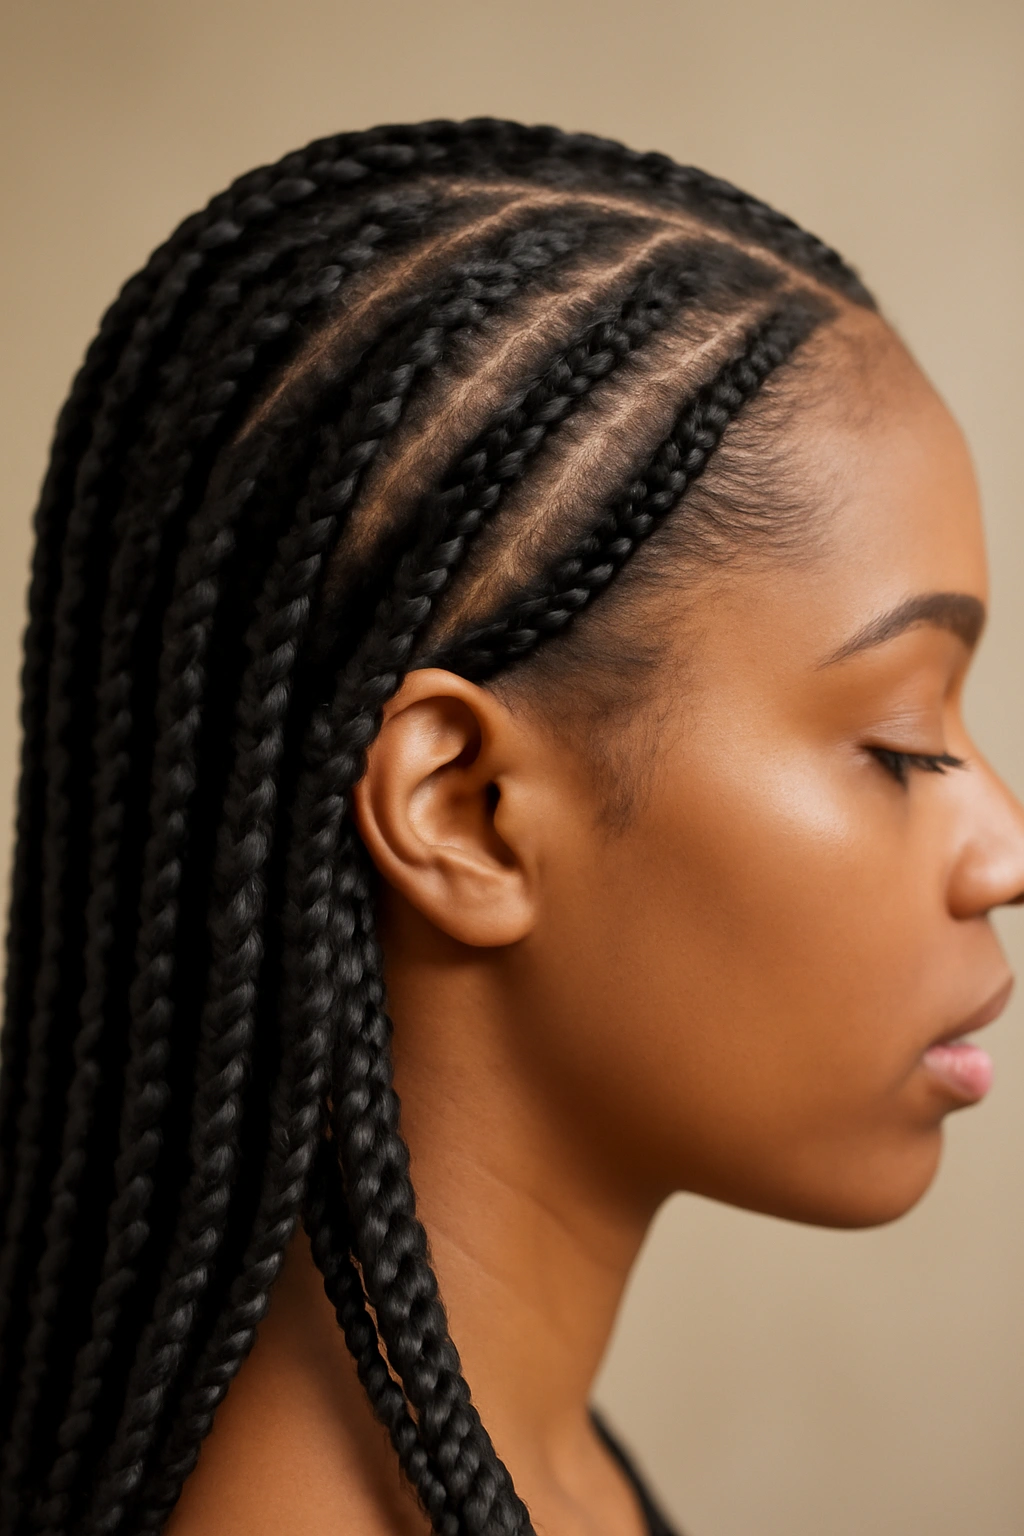
Rather than starting each braid with a consistent three-strand structure from the root, feed-in braids (also called triangle braids or freestyle braids) start at the scalp by feeding new hair gradually into the braid as you move downward. This approach creates a more seamless appearance at the roots and distributes tension more evenly across the entire hairline. Feed-in braids are technically more challenging to install, but they’re worth seeking out if you have a sensitive hairline or want a style that feels less heavy at the root.
Why Scalp Distribution Matters
Traditional braids create a concentrated point of tension at the root where the braid begins. Feed-in braids distribute that tension across a wider area as the braid is constructed, which reduces pressure on any single point. This is especially important if you have a history of tension-related hair loss or if your hairline tends to be sensitive. Feed-in braids also create a smoother, more blended appearance where your natural hair meets the braid.
Installation Considerations
- Feed-in braids require more skill and precision to execute well
- They typically cost more than traditional braids because they’re more labor-intensive
- The installation process takes longer but the result is worth the investment if scalp health is a priority
- Feed-in braids look beautiful from day one and maintain their polished appearance longer
- They work beautifully at any length or thickness
If you’ve experienced tension-related discomfort from traditional braids in the past, feed-in braids might transform your experience of wearing box braids.
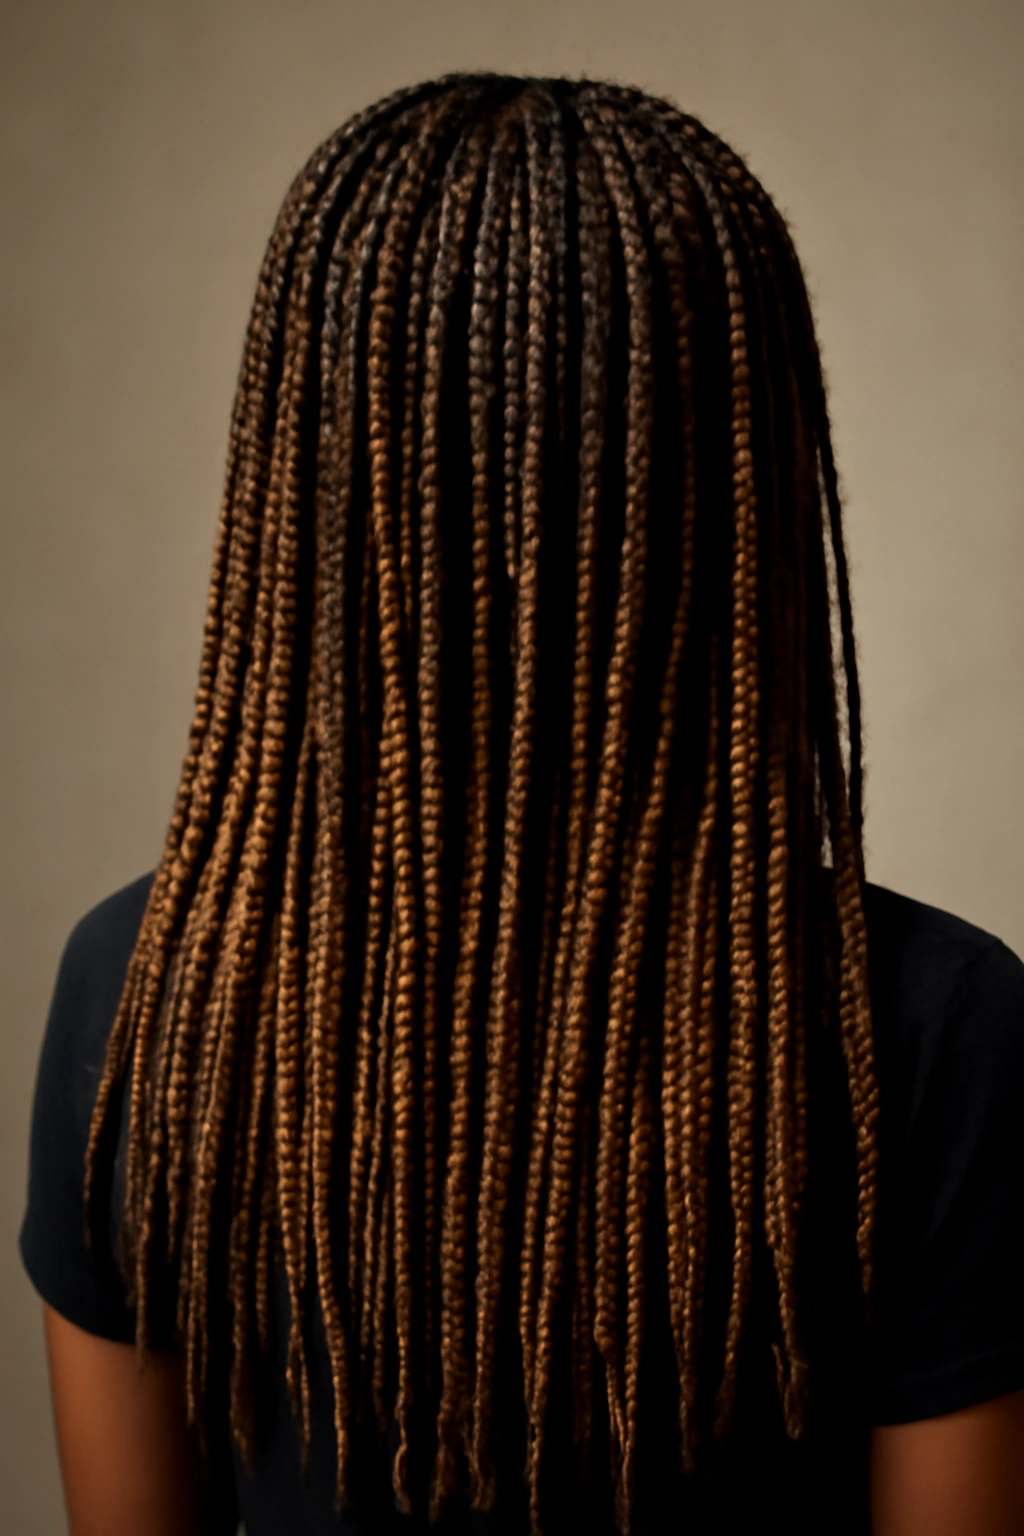
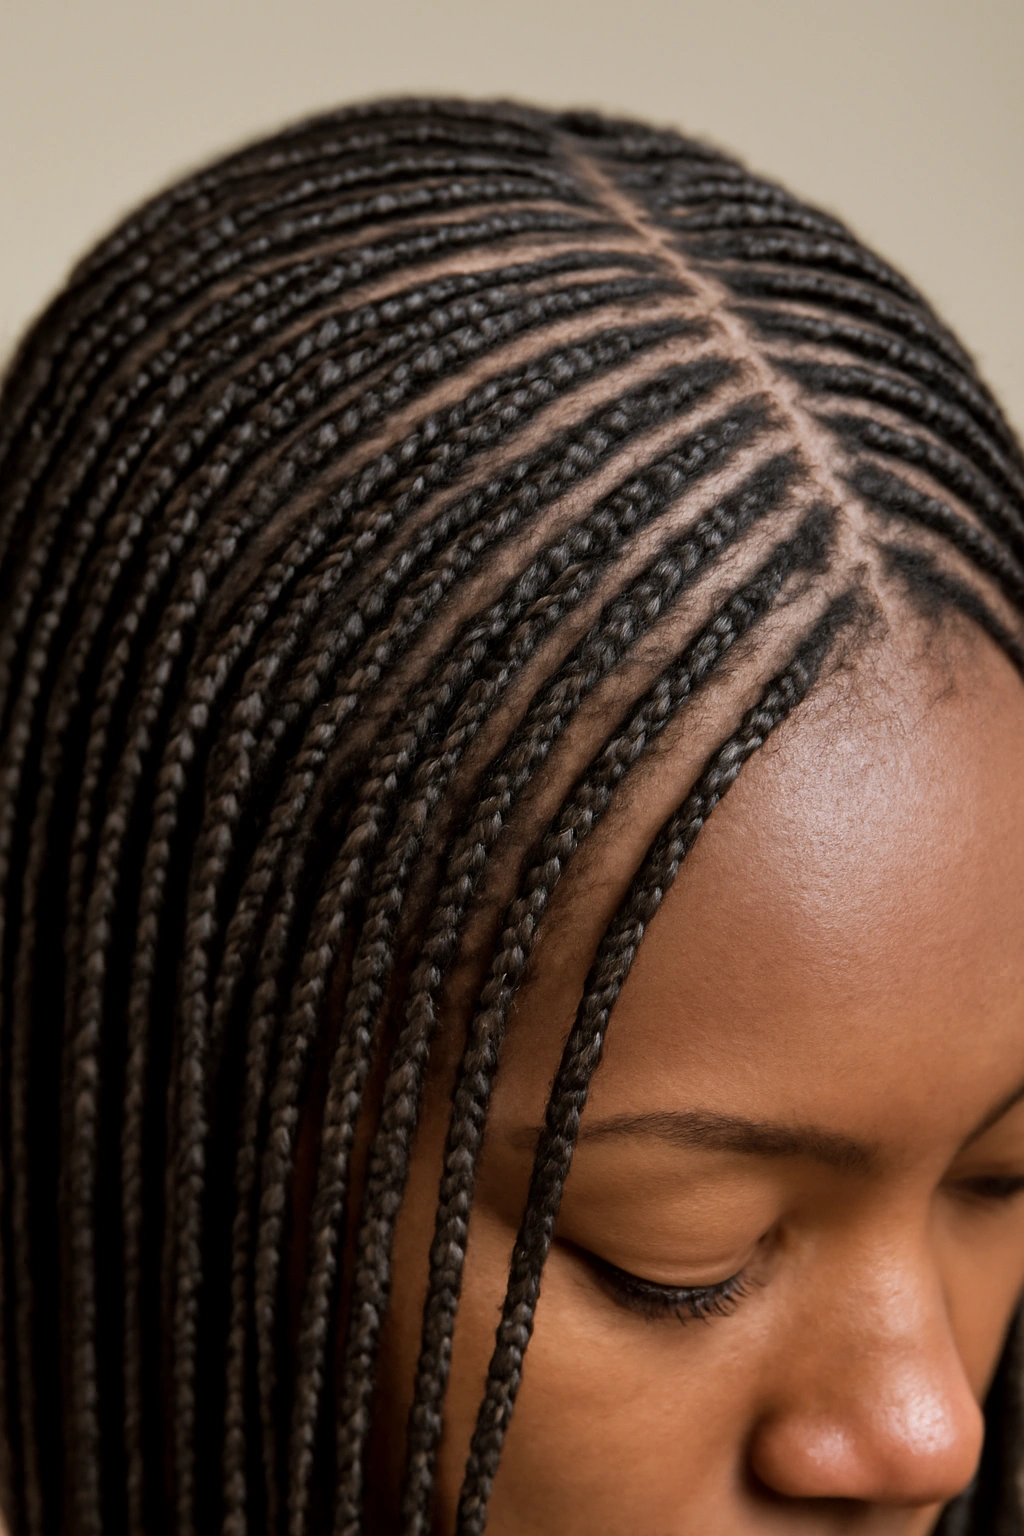
18. Box Braids with Zigzag Pattern
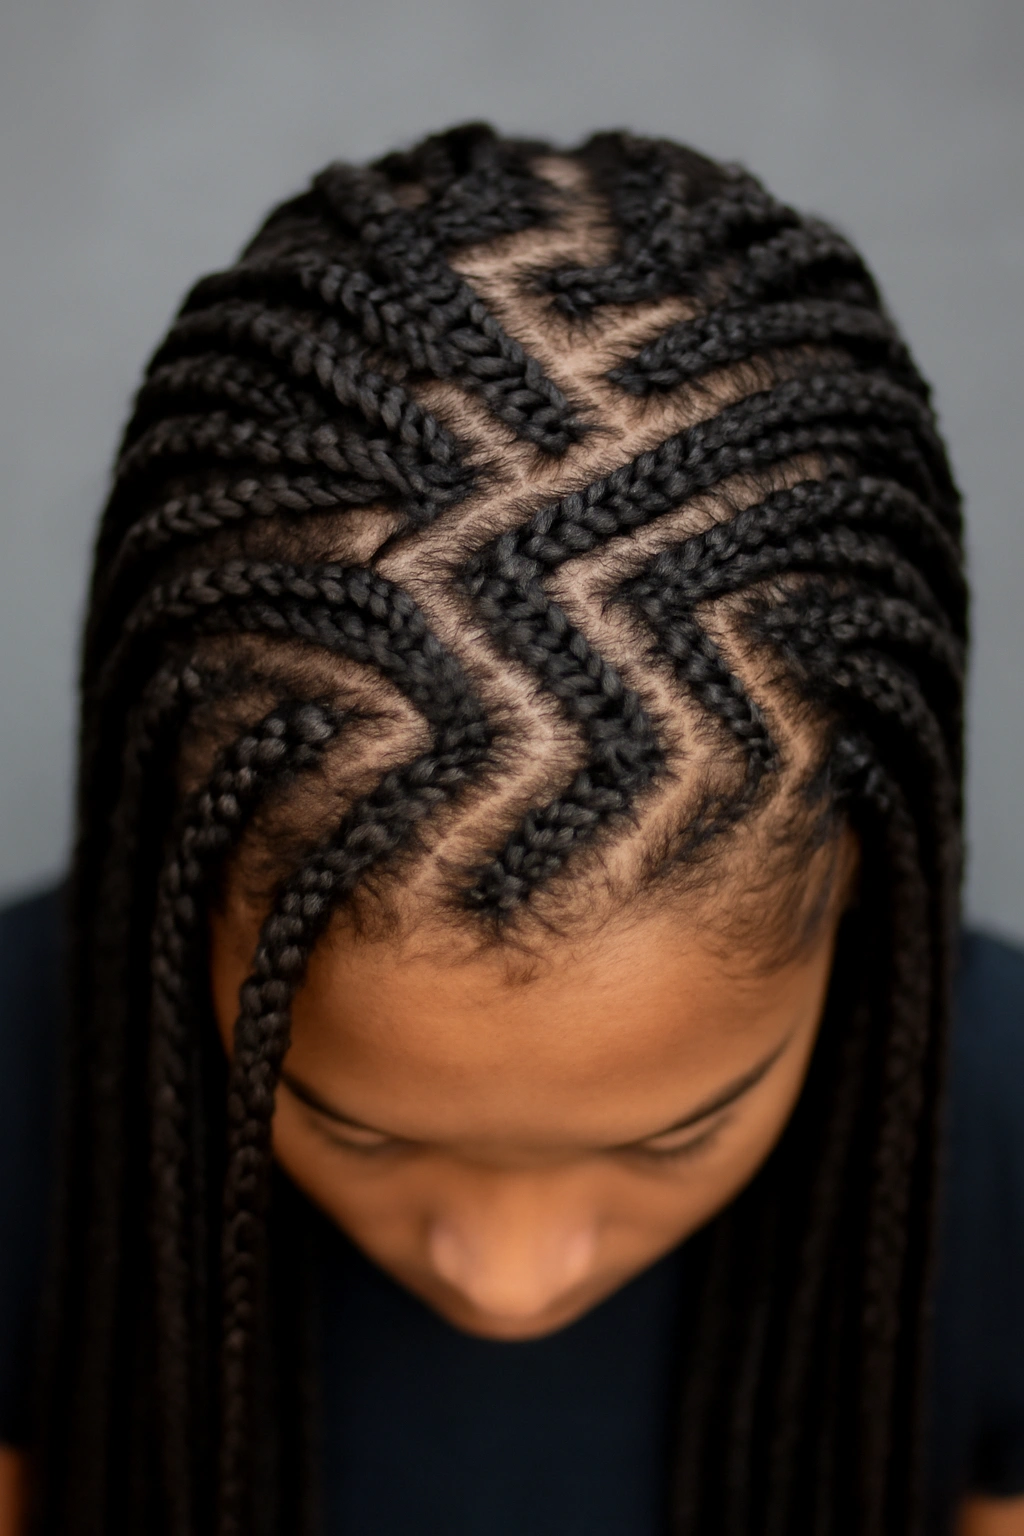
Rather than creating a traditional straight-line part pattern across your scalp, a zigzag pattern weaves back and forth across your head. This creates a visually complex, almost hypnotic pattern that’s striking when seen from above. A zigzag part makes every individual braid visible and creates a dynamic, artistic aesthetic. It’s a choice that signals you’re thinking creatively about how your braids are arranged, not just how they look once they’re installed.
The Visual Interest of Pattern
A zigzag pattern adds a layer of intentionality to your style. It’s more complex to create than a straight part, which means it signals that thoughtfulness and care went into planning this style. The pattern also creates visual movement even when you’re standing still — your eye travels along the zigzag and becomes aware of each individual braid and the overall architectural structure of the style. It’s beautiful to see and beautiful to photograph.
Creating a Zigzag Pattern
- You’ll need to discuss this with your braider beforehand — it requires planning and precision
- The pattern can be wide zigzags or tight, intricate ones
- Zigzag patterns work beautifully with color — each braid is clearly visible, so color variations show clearly
- This pattern is particularly striking on shaved or faded sides, where the scalp is visible
- A zigzag pattern works at any braid thickness or length
This is a styling choice for people who want their braids to feel like genuine artwork — because they do.
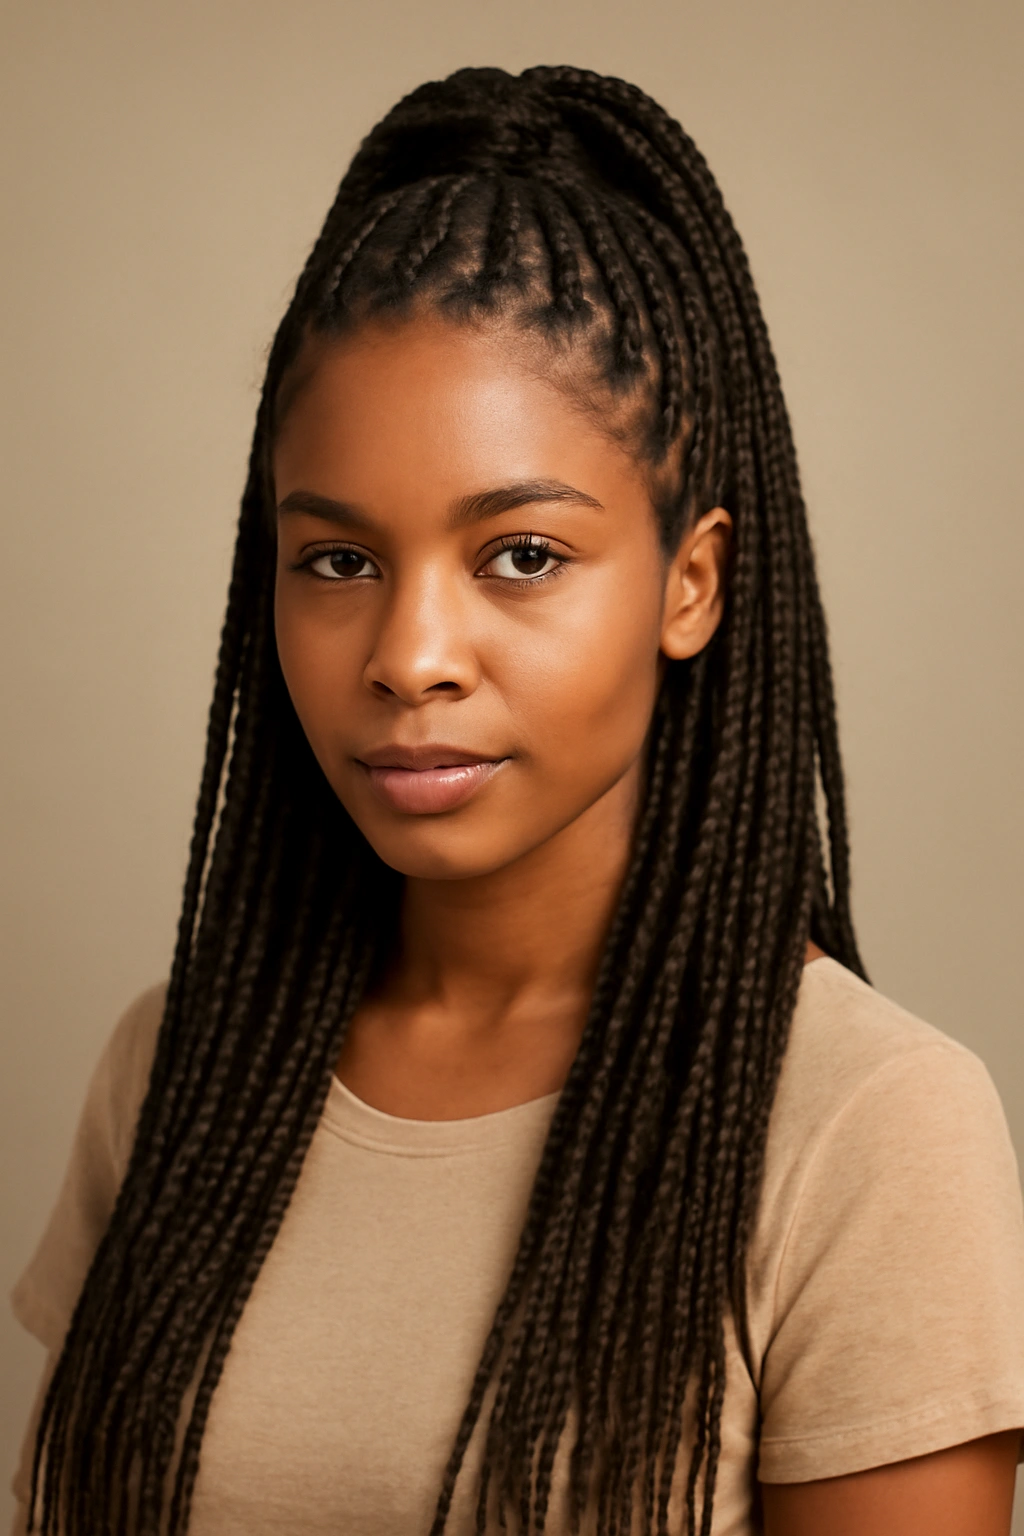
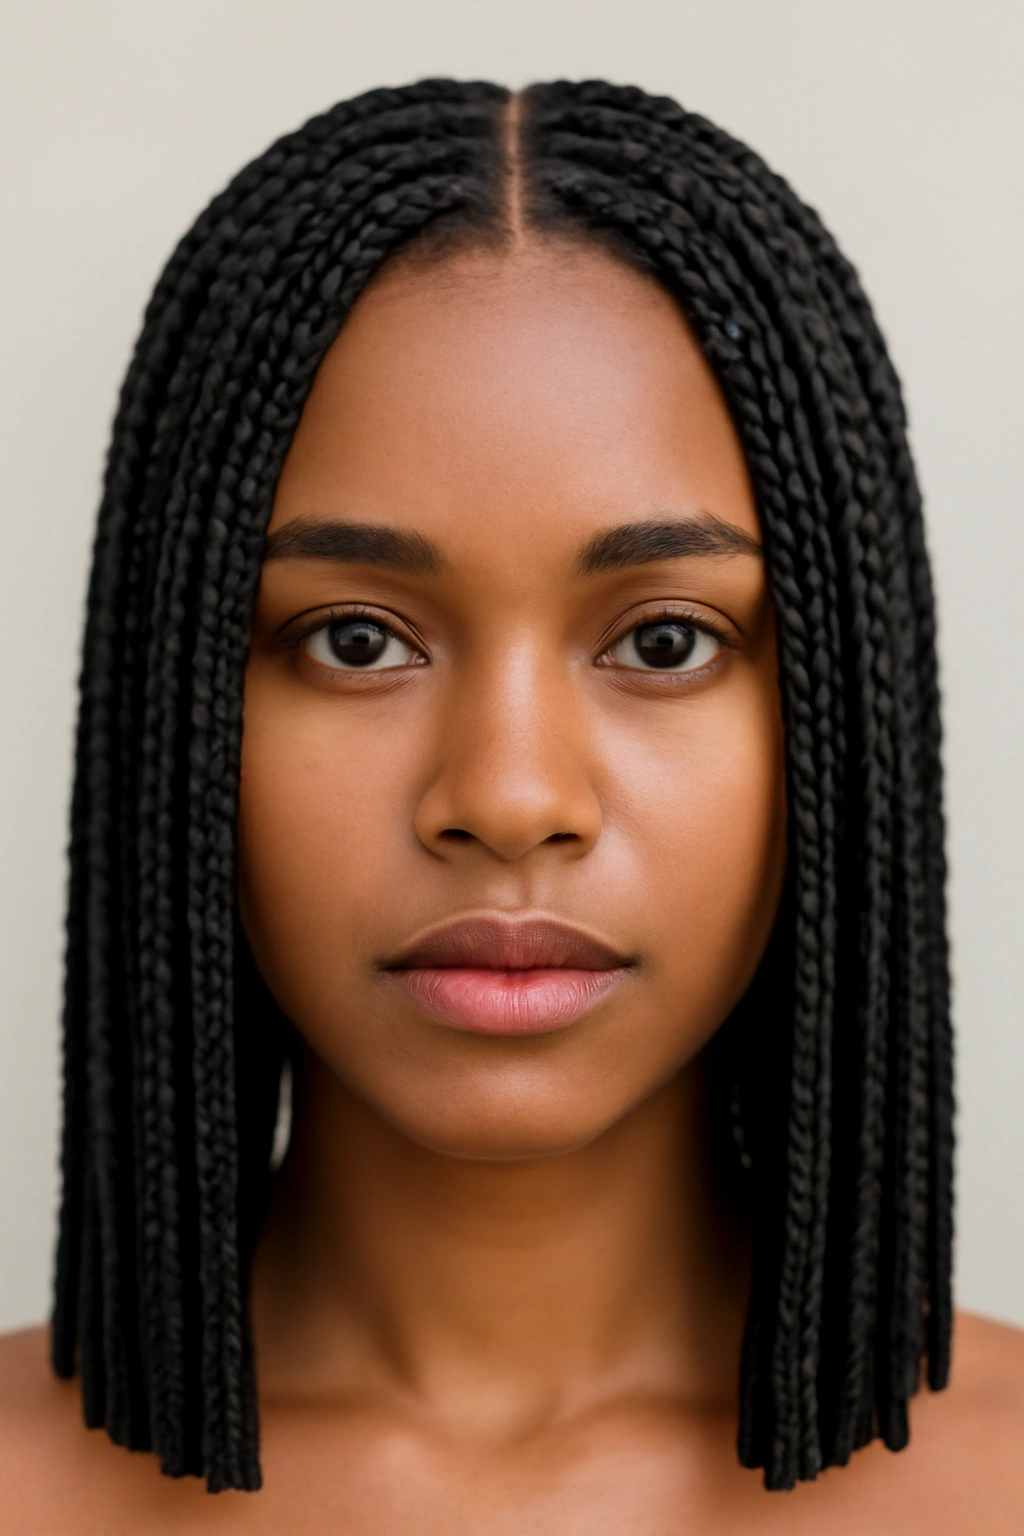
19. Thin/Pencil Box Braids
Thin braids — sometimes called pencil braids because of their slender width — create an intricate, detailed aesthetic. They require many braids to fully cover your head, which means installation takes 6 to 8 hours or longer. But the payoff is a style that’s incredibly detailed and refined. Thin braids have an elegant, almost delicate quality that contrasts beautifully with the strength and boldness of the braid texture itself.
Why Thin Braids Feel Refined
Thin braids create a visual complexity that thicker braids simply can’t match. The sheer number of them creates an intricate pattern of texture and shadow. Light travels through thin braids in interesting ways, creating depth and dimension. Thin braids also show color beautifully — if you add color, it’s visible throughout the fine strands rather than concentrated in thicker sections. There’s something about thin, densely installed braids that feels incredibly intentional and artistic.
The Commitment of Thin Braids
- Installation is a genuine time commitment — plan for 6 to 12 hours depending on hair volume
- Thin braids last 4 to 6 weeks before needing significant root touch-up
- The fine structure means they can frizz more easily than chunky braids if not protected well at night
- Thin braids work beautifully at any length, though they’re particularly stunning on longer styles
- They photograph beautifully and create a polished, refined appearance
Thin braids are for people who view their protective style as genuine artwork and are willing to invest in that vision.
20. Box Braids with Straight Perimeter
Rather than having braids end with loose hair or curly ends throughout, a “straight perimeter” style means the outermost layer of braids — especially around the hairline and face — are perfectly straight and neatly finished. The ends are sealed (using hot water or a curling iron to melt the synthetic hair extension and seal it) so they feel smooth and look polished. The interior braids can be styled however you like, but the perimeter creates a clean, intentional frame.
Why a Polished Perimeter Matters
A straight perimeter creates a defined edge that looks deliberate and polished. It frames your face beautifully and creates a clear boundary between your braids and the rest of your appearance. This approach is especially flattering if you want your braids to feel refined rather than casual. The perimeter also protects the outermost braids from fraying or loosening as quickly, since the sealed ends are more durable.
Execution and Maintenance
- Sealing braid ends requires skill — ask your braider if they offer this service
- A sealed perimeter lasts longer and maintains its appearance better throughout your style’s lifespan
- You can create a straight perimeter while the interior braids have curly ends or beads for contrast
- This approach works beautifully at any length
- The sealed ends are smooth to touch and look intentionally finished
Worth knowing: A sealed, straight perimeter is one of the most elegant ways to finish box braids if you’re aiming for a polished, refined aesthetic.
Making Your Choice

Box braids offer such remarkable range that the challenge isn’t finding an option — it’s deciding which version speaks to you right now. Your choice depends on several converging factors: how much time you can commit to installation, whether your hairline is sensitive and needs protective consideration, what kind of visual impact you’re seeking, and simply what feels right for this moment in your life.
Consider your lifestyle honestly. If you’re constantly in water (swimming, water sports), longer braids become complicated to manage. If you’re juggling a busy schedule, chunky braids installed in a few hours might be more practical than 10 hours of thin braid installation. If you have a sensitive hairline, feed-in braids are worth the extra cost and time. If you’re creative and love experimenting, mixed lengths or patterned installations let you push the artistic element further.
Think about the feeling you want to embody while wearing your braids. Do you want to feel powerful and bold? Jumbo braids with an undercut or chunky braids with a zigzag pattern deliver that. Do you want to feel refined and intentional? Thin braids with a straight perimeter or shoulder-length micro braids work beautifully. Do you want to feel creative and experimental? Layered lengths, color, beads, and cloth wraps are your playground.
The truth is that any of these styles will protect your hair, offer you styling versatility, and look genuinely beautiful. The box braid canvas is large enough to accommodate nearly any vision you have for yourself. Start with what speaks to you most strongly, knowing that you can try something completely different next time. The real power of box braids isn’t just the style itself — it’s the freedom they give you to explore different versions of how you want to present yourself to the world.