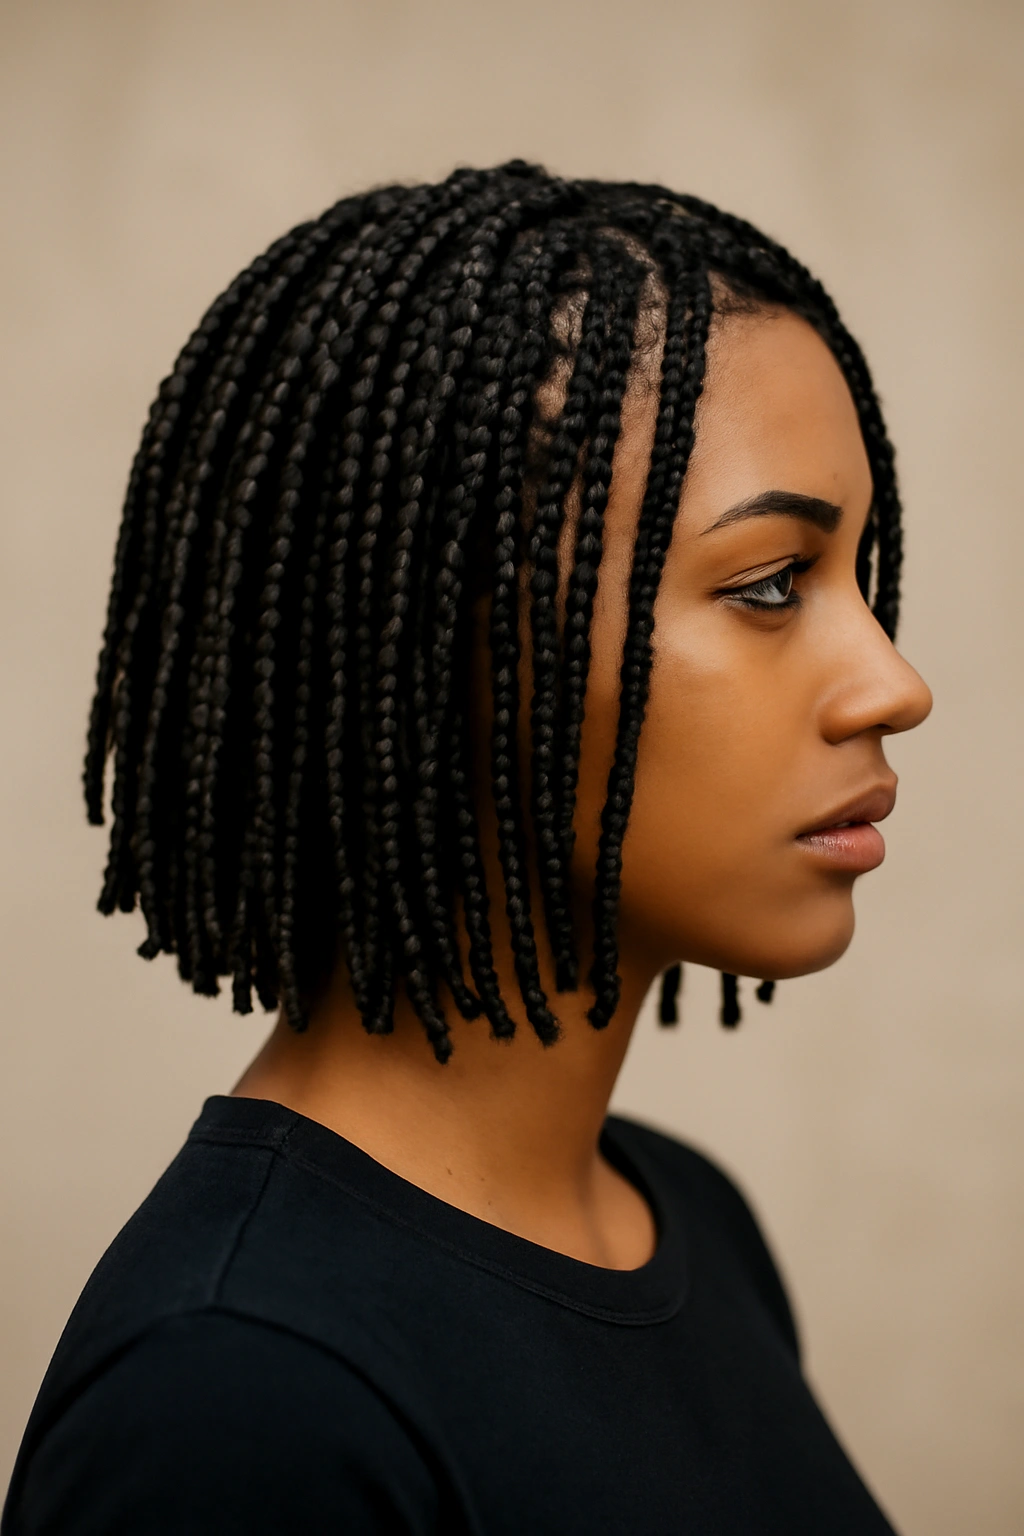
Box braids have earned their place as one of the most versatile and durable protective styles available. Short versions offer a sleek alternative to their longer counterparts—they’re easier to maintain, lighter on your hair, and surprisingly chic when styled with intention. The key difference between short box braids that look polished and ones that feel unfinished often comes down to finishing details: how you secure the ends, whether you add jewelry or color accents, and which styling direction you choose.
What makes short box braids particularly appealing is their accessibility. They work beautifully on most hair types, hold their shape for weeks when braided properly, and transition seamlessly from casual to formal settings depending on how you style them. Whether you prefer them close to the scalp or with a bit of height, adorned with beads or kept minimal, there’s a variation that fits your aesthetic. The styles below represent the most polished, intentional approaches to wearing short box braids—each one designed to look like a finished look, not just a protective style you’re passing through.
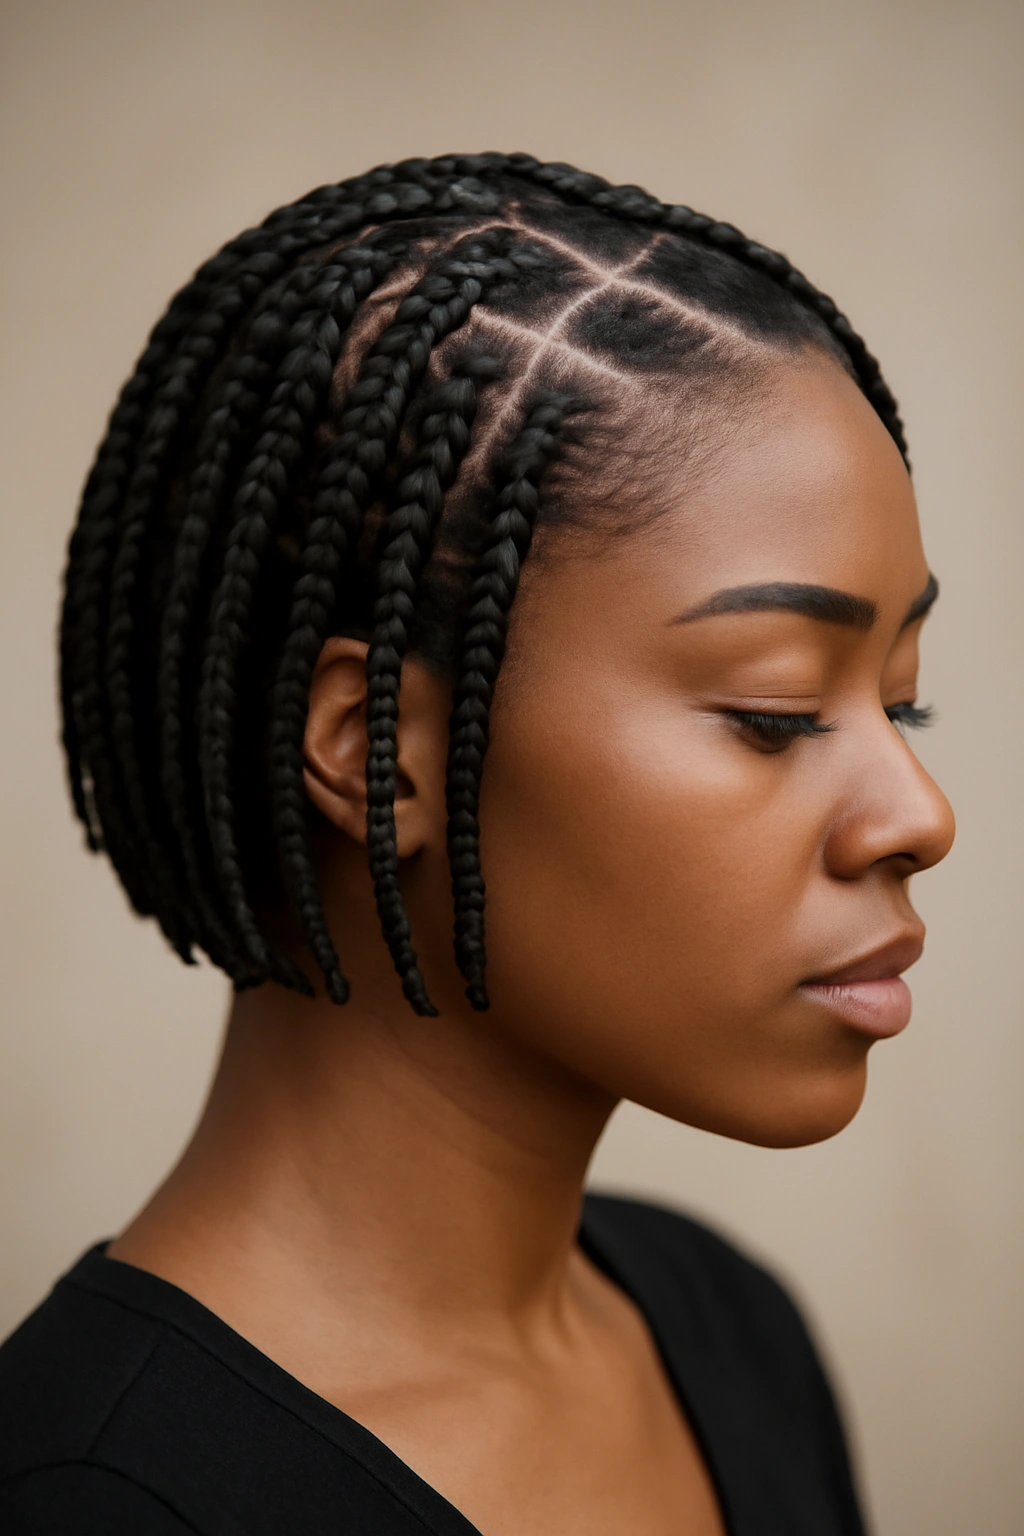
1. Classic Shoulder-Length Box Braids with Minimal Beading
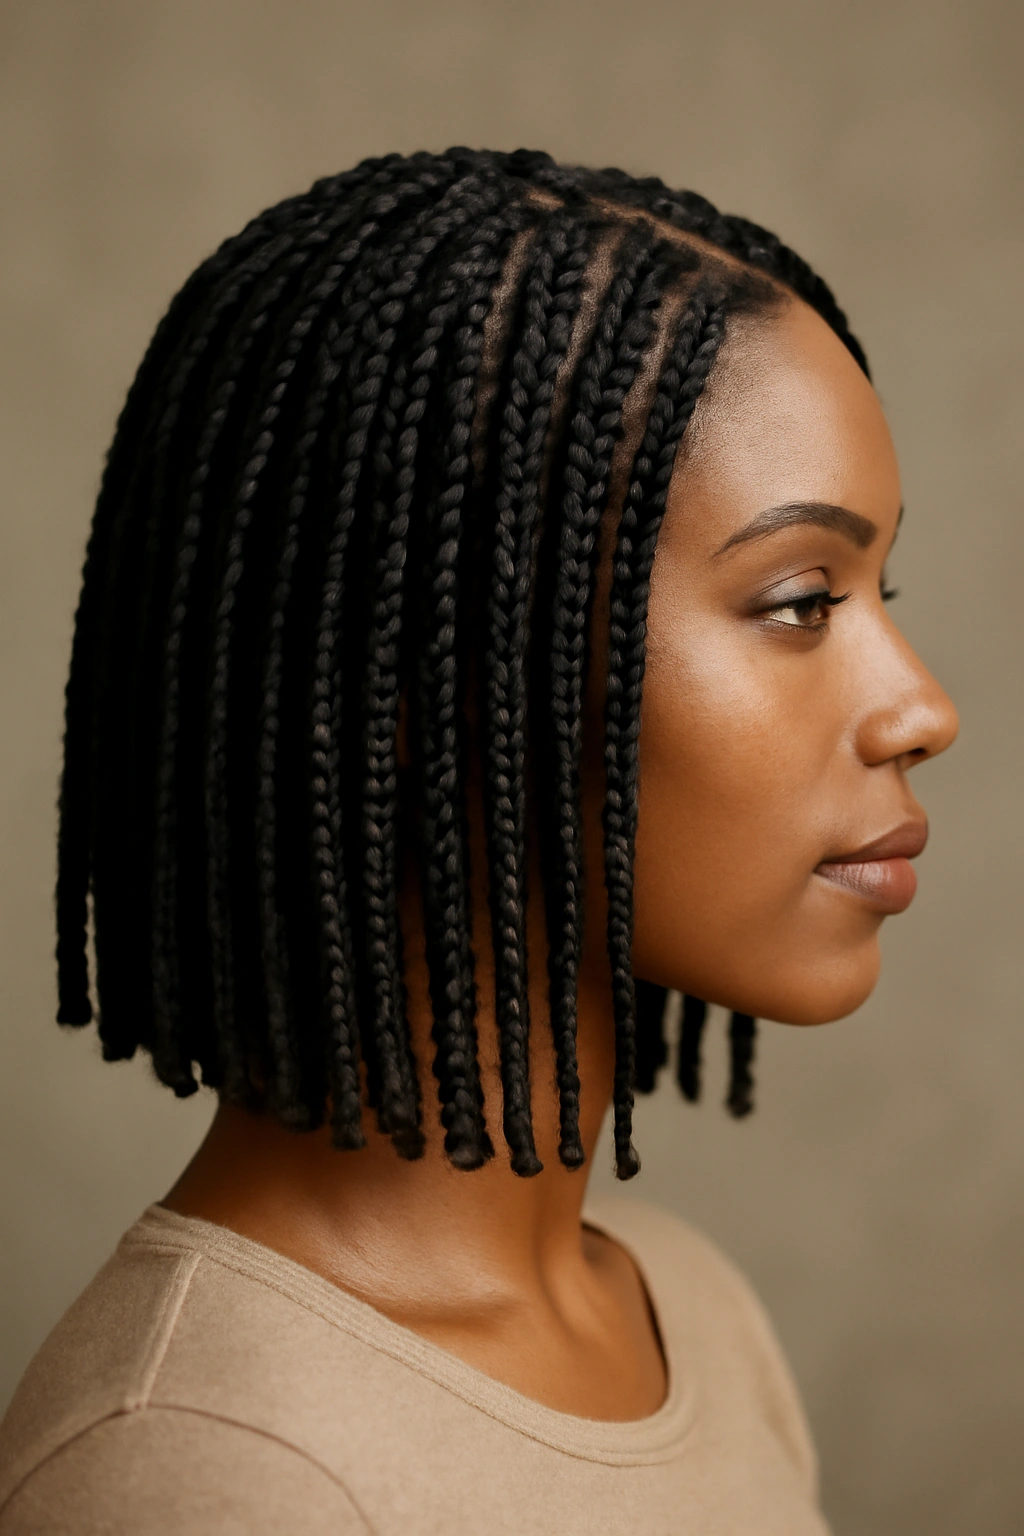
This is the foundation style that works for nearly every occasion and body type. Braids that fall just below the shoulder create an elegant silhouette without feeling overly casual. The magic is in the restraint—minimal beading, clean edges, and consistent braid size throughout.
What Makes This Style Stand Out
Classic shoulder-length braids look polished because they feel intentional rather than accidental. The length sits in that sweet spot where the style feels complete without requiring excessive styling or accessorizing. You’re not fighting the length; you’re working with it.
How to Execute It Properly
- Keep individual braid width between ¼ to ⅜ inch for a refined appearance
- Ensure all braids start at the same level along your hairline for a neat front section
- Use tension that’s firm enough to hold but not so tight it pulls on your hairline painfully
- Seal the ends with hot water or lightweight gel to prevent fraying
Pro tip: Ask your braid specialist to braid slightly past your desired ending length, then have them trim the braids to exact length once the style is complete—this creates neater, more intentional-looking ends.
2. Sleek Side-Parted Short Box Braids
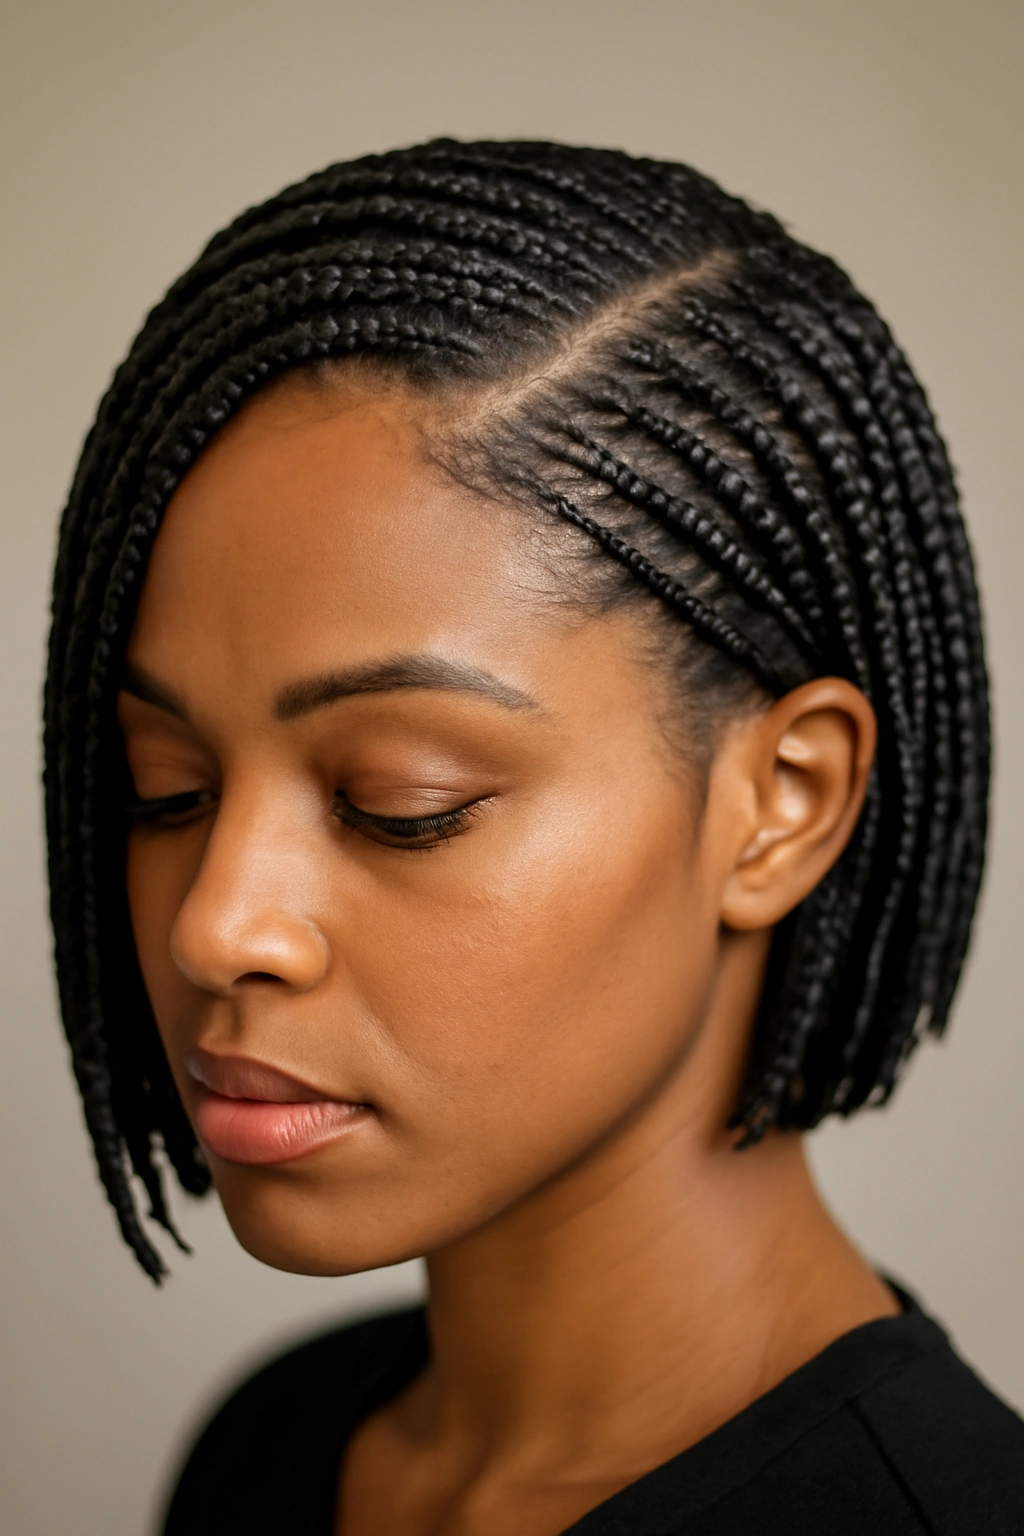
A deep side part transforms the entire vibe of short box braids from everyday to deliberately styled. This approach uses the asymmetry of the part to create visual interest while maintaining polish.
The Power of the Part
Side-parted braids draw attention to your face shape and bone structure. The part itself becomes a design element, and it automatically makes a protective style feel like you’ve put thought into your presentation.
Styling Details That Matter
- Create your part before you begin braiding—braids placed along an intentional part line look infinitely more polished than those placed randomly
- Braid the smaller section of hair tightly and smoothly; any frizz in that section shows immediately
- Use edge control on the parted sections to smooth flyaways along the part line
- Consider leaving the first inch or two of the hairline unbraid for a softer frame effect
Worth knowing: Side-parted styles photograph exceptionally well and work beautifully with gold or metallic hair jewelry because the asymmetry gives you more visual real estate to work with.
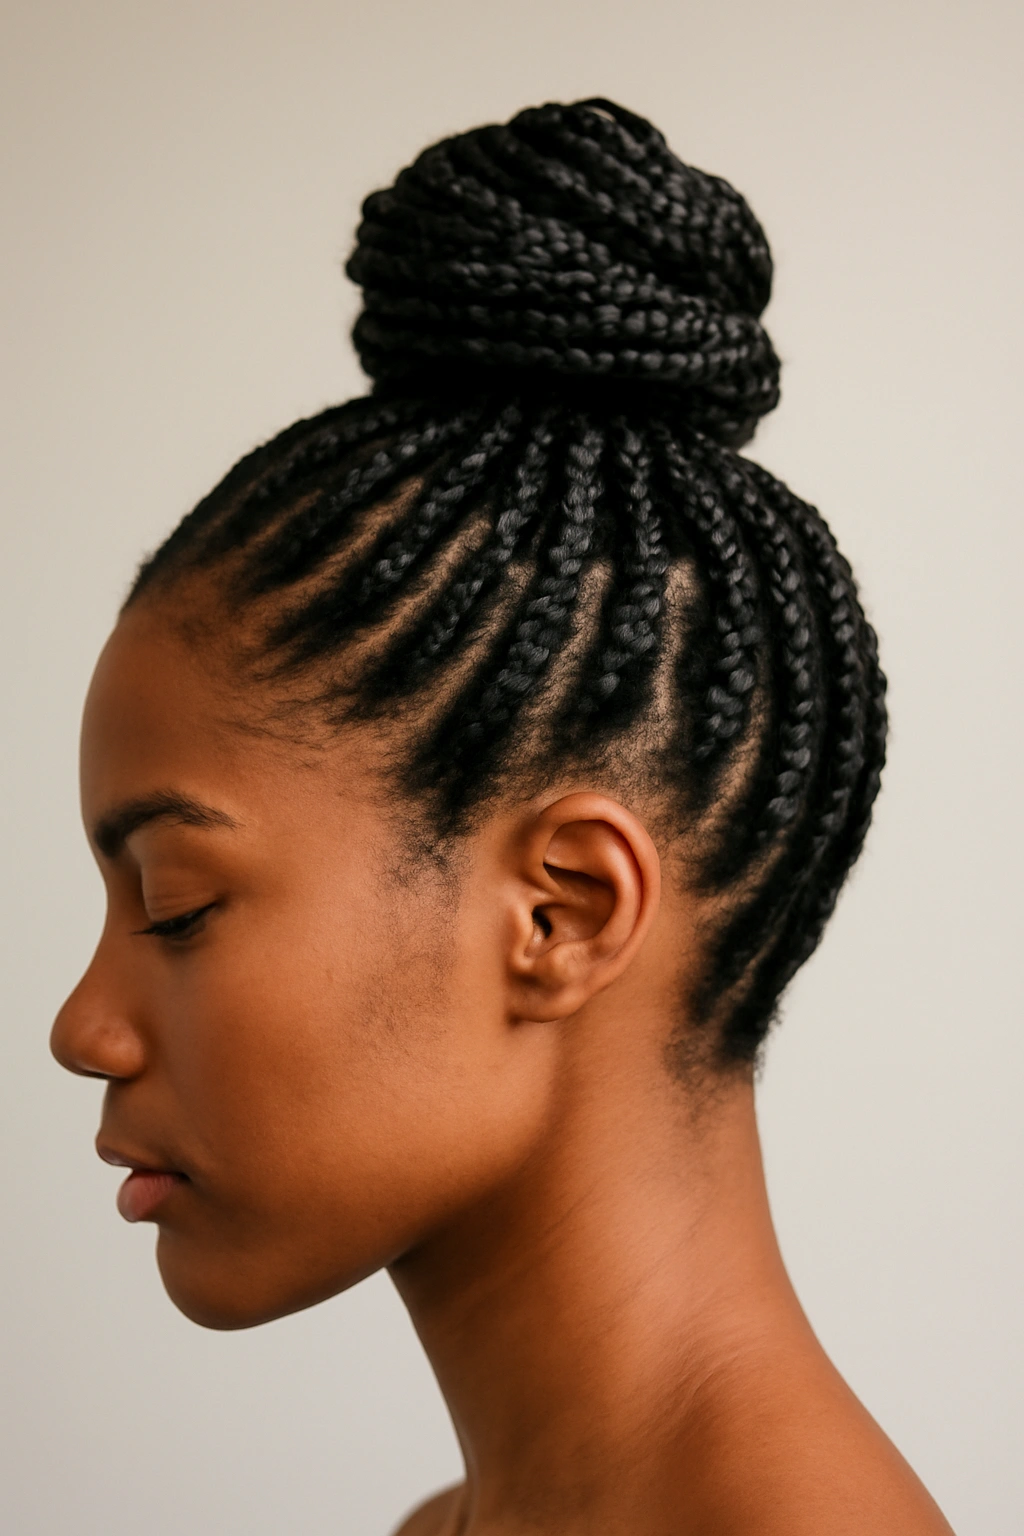
3. Box Braids Pulled Into a High Ponytail
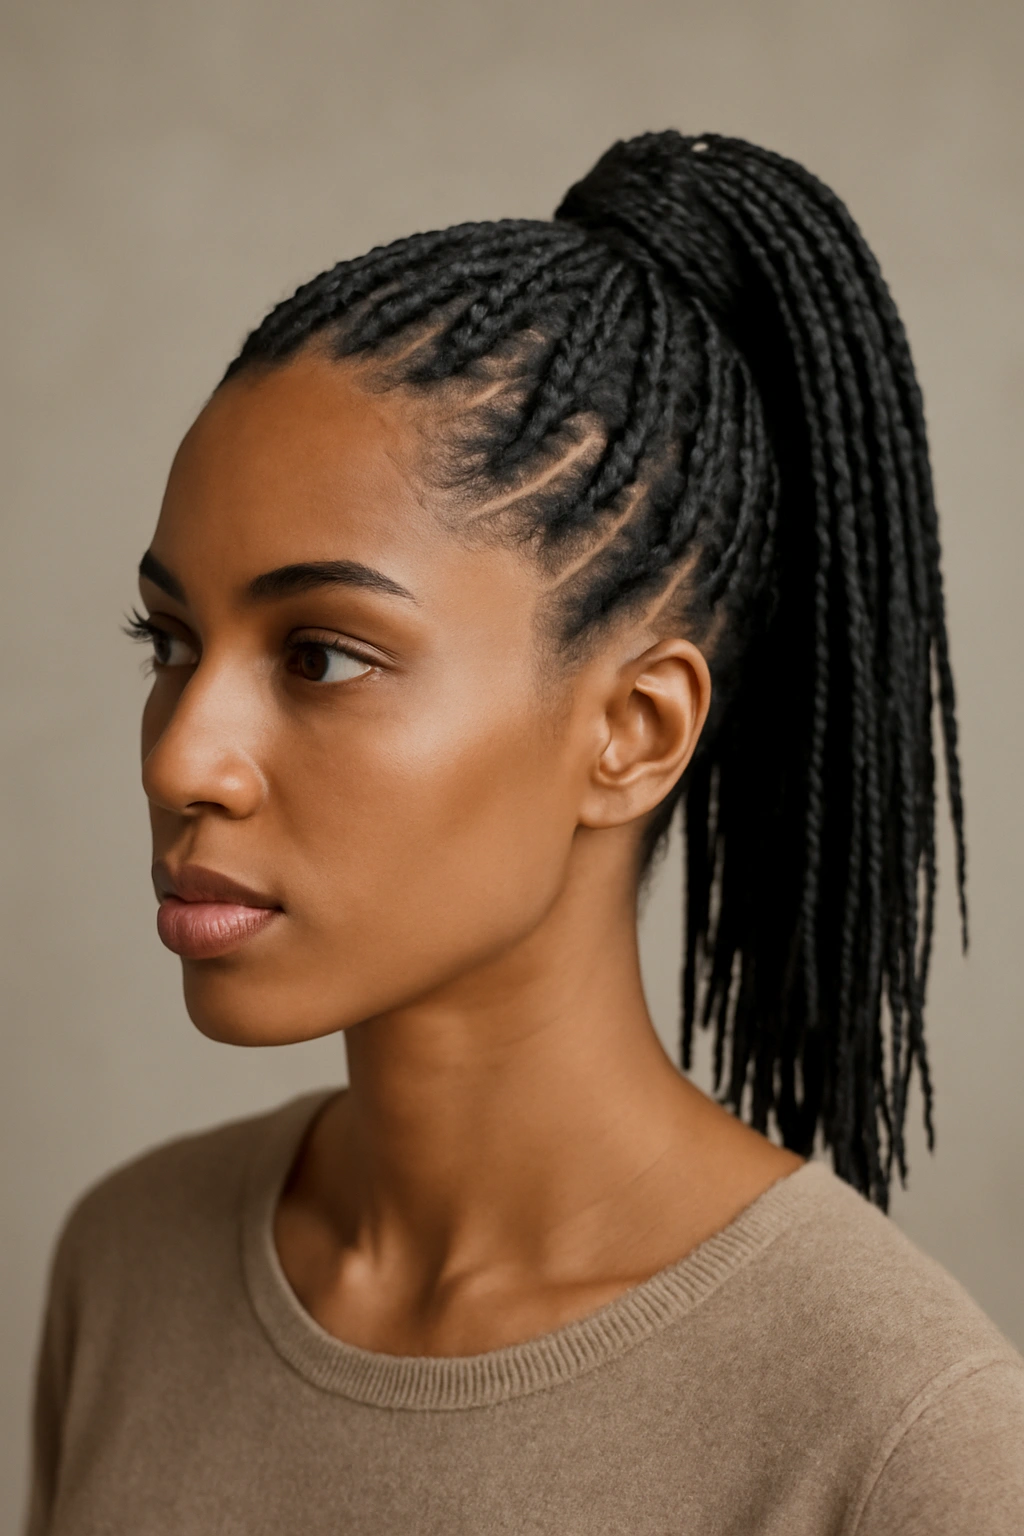
Short braids styled into a high ponytail create movement and height that reads as polished and put-together. This style works because it transforms loose braids into a cohesive, intentional shape.
Why This Creates Visual Impact
Pulling braids upward elongates your neck and face, adds a youthful energy to the style, and prevents the braids from feeling flat or unmotivated against your head. It’s the protective style equivalent of a high ponytail with straight hair—instantly more polished.
Technique and Execution
- Start with a clean ponytail base using a gel or mousse to smooth the hairline
- Gather braids at approximately mid-crown height for maximum effect
- Use a silk or fabric-lined hair tie rather than rubber bands (less breakage, smoother appearance)
- Leave 2-3 braids loose on each side of your face for a softly framed effect rather than pulling everything back
Insider note: A high ponytail with short braids works especially well if you wrap one thin braid around the base of the ponytail to conceal the hair tie—this detail elevates the entire look.
4. Braids With Colored Thread Accents

Wrapping thread through your braids adds color without committing to dyed hair. Gold, silver, burgundy, or contrasting thread colors create intentionality and polish when applied thoughtfully.
How Thread Integration Elevates the Style
The colored thread catches light as you move, adds dimension to an otherwise monochromatic style, and signals that you’ve considered your look carefully. It’s a subtle detail with outsized visual impact.
Application Methods for Best Results
- Wrap thread around individual braids in a spiral pattern starting about 2 inches from the hairline (this keeps your edges clean)
- Space wrapped braids evenly throughout your head rather than clustering them in one area
- Use waxed thread designed for hair—it holds better and doesn’t slip throughout the week
- Wrap approximately 1 out of every 3-4 braids for a balanced, polished appearance rather than every braid
Quick tip: Metallic thread works especially well with shorter braids because the metal catches light and creates visual height and dimension that compensates for the shorter length.
5. Layered Short Box Braids
Cutting some braids slightly shorter than others creates movement and dimension while maintaining the protective style benefits. This isn’t random—layering is intentional and creates a sophisticated silhouette.
The Styling Strategy Behind Layers
Layered braids move with your head rather than sitting static. The variation in length creates an interesting visual profile and works beautifully with jewelry and scarves. It’s the difference between looking like you’re protecting your hair and looking like you’ve created an intentional style.
How to Layer for Polish
- Create 2-3 distinct length variations rather than a random gradient
- Keep the longest layer at your shoulders or just below
- Place shorter layers around your face for a frame effect
- Ensure all layers are cut cleanly and sealed properly at the ends
What to watch for: Layered braids require more precision during installation because visible irregularities read as mistakes rather than intention. Work with someone experienced in this technique.
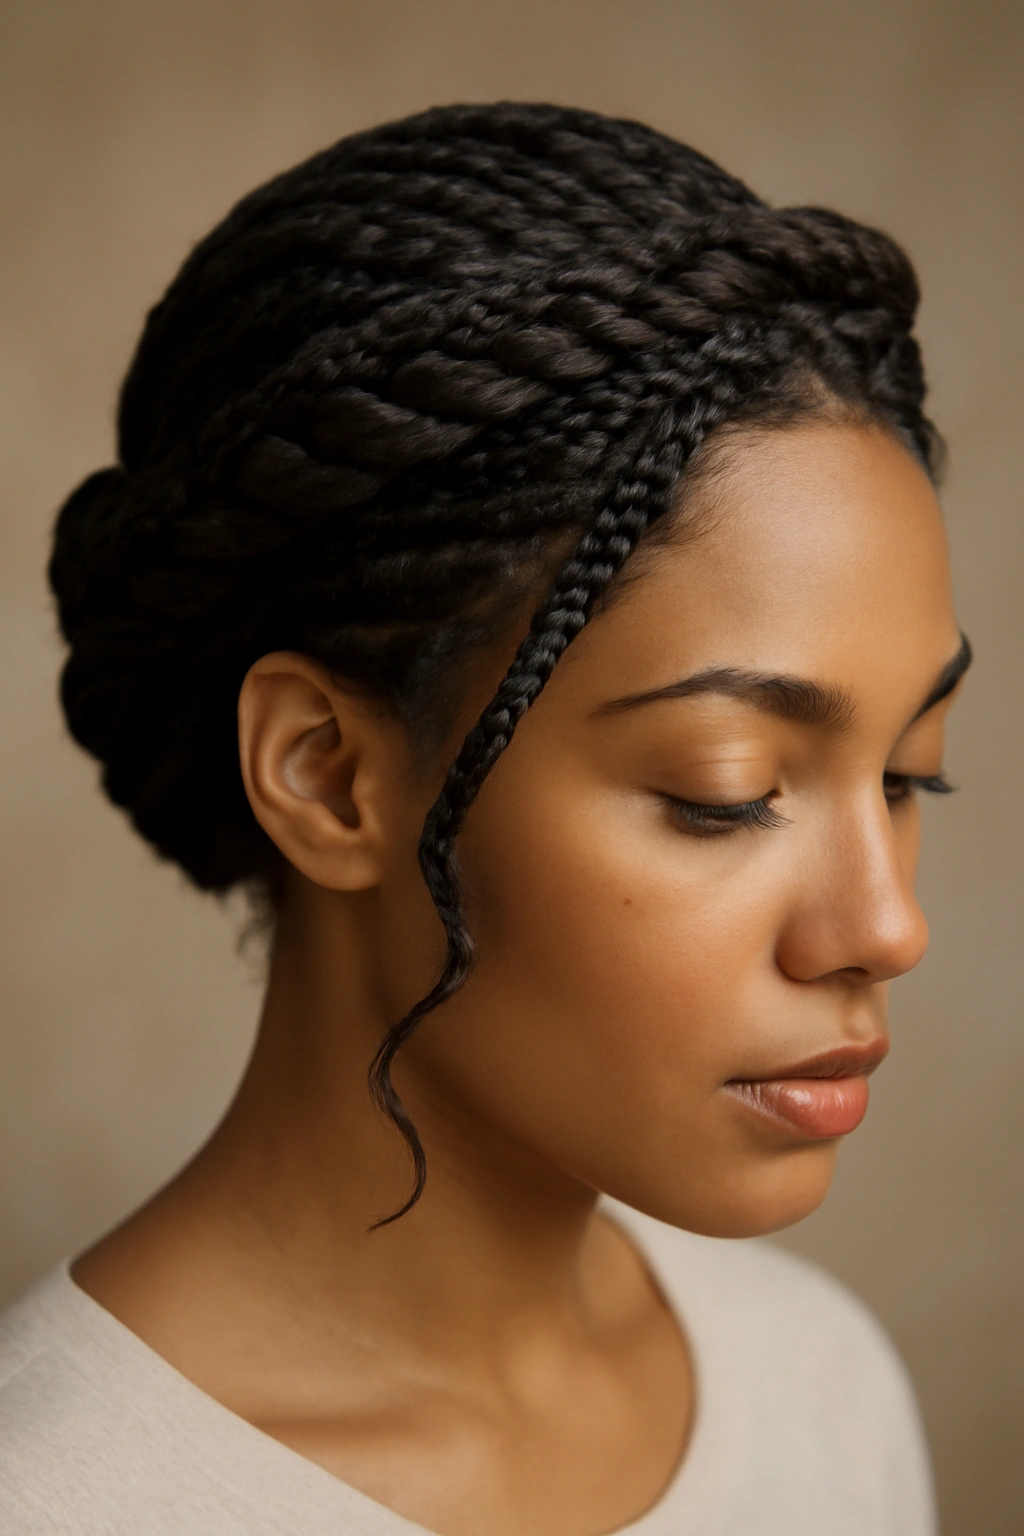
6. Box Braids Styled Into a Low Bun
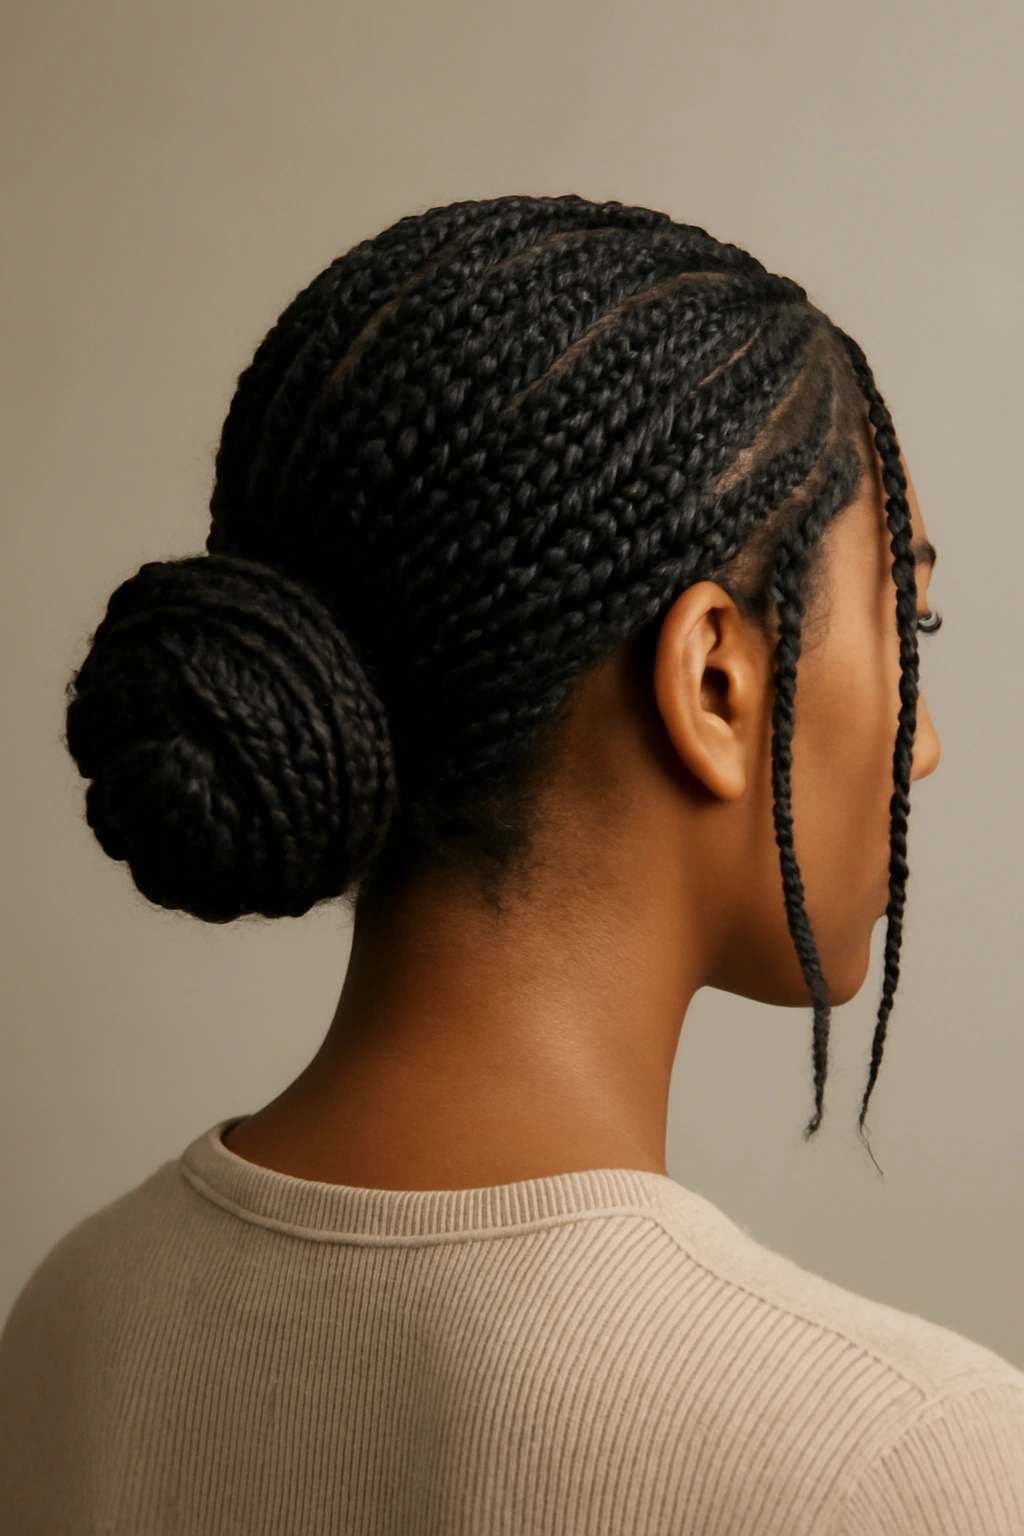
A low bun transforms short braids from loose hanging style into something infinitely more formal and polished. This works beautifully for professional settings or special occasions.
The Elegance of Containment
A bun creates a clean silhouette and keeps the braids from feeling chaotic. It’s sophisticated without reading as overly formal, and it’s surprisingly easy to execute.
Bun Technique for Maximum Polish
- Section your braids into three groups: left, right, and center
- Twist or braid these sections slightly before securing into a low bun at the nape of your neck
- Tuck the braids into themselves to create a secure bun without visible hair ties
- Use bobby pins that match your hair color to keep them invisible
- Leave 2-3 thin braids loose to frame your face softly
Pro tip: A low bun works best if you allow a few days after braiding before styling it this way—the braids have more grip and hold better than they do immediately after installation.
7. Stacked Bun With Short Box Braids
Rather than all braids converging into a single bun, create height by stacking multiple small buns throughout your head. This creates visual interest while remaining completely polished.
Why Stacked Buns Read as Intentional
Multiple small buns create a dimensional, artistic appearance that feels more curated than a traditional single bun. It’s modern and unexpected while remaining sophisticated.
How to Create Multiple Buns
- Divide your braids into 3-5 sections depending on desired effect
- Create small coils or buns with each section
- Secure with bobby pins at varying heights across your crown
- Ensure each bun sits close to the scalp for a tight, intentional appearance
Worth knowing: Stacked buns work exceptionally well if you add small hair jewelry like rings or clips to each bun—this turns what could read as scattered into clearly intentional styling.
8. Box Braids With Gold Cuff Jewelry

Gold cuffs and rings slid onto individual braids create instant polish and luxury without requiring any major styling changes. The jewelry alone transforms the vibe of your braids.
Jewelry Placement Strategy
Jewelry works best when it’s placed with intention rather than randomly scattered. Think about where your eye naturally lands when you look at someone’s hair.
Application Guidelines for Polish
- Place jewelry on approximately one-third of your braids for a balanced appearance
- Focus jewelry placement around your front hairline where it’s most visible
- Choose cuff styles that match your other jewelry (if you wear gold jewelry, use gold cuffs; silver pairs with silver)
- Mix cuff sizes rather than using identical sizes throughout
- Space jewelry-adorned braids evenly to avoid clustering
Quick fact: Heavier jewelry tends to slide down your braids over time, so lightweight cuffs and rings hold position better and look polished longer.
9. Side-Swept Short Braids Secured With a Clip
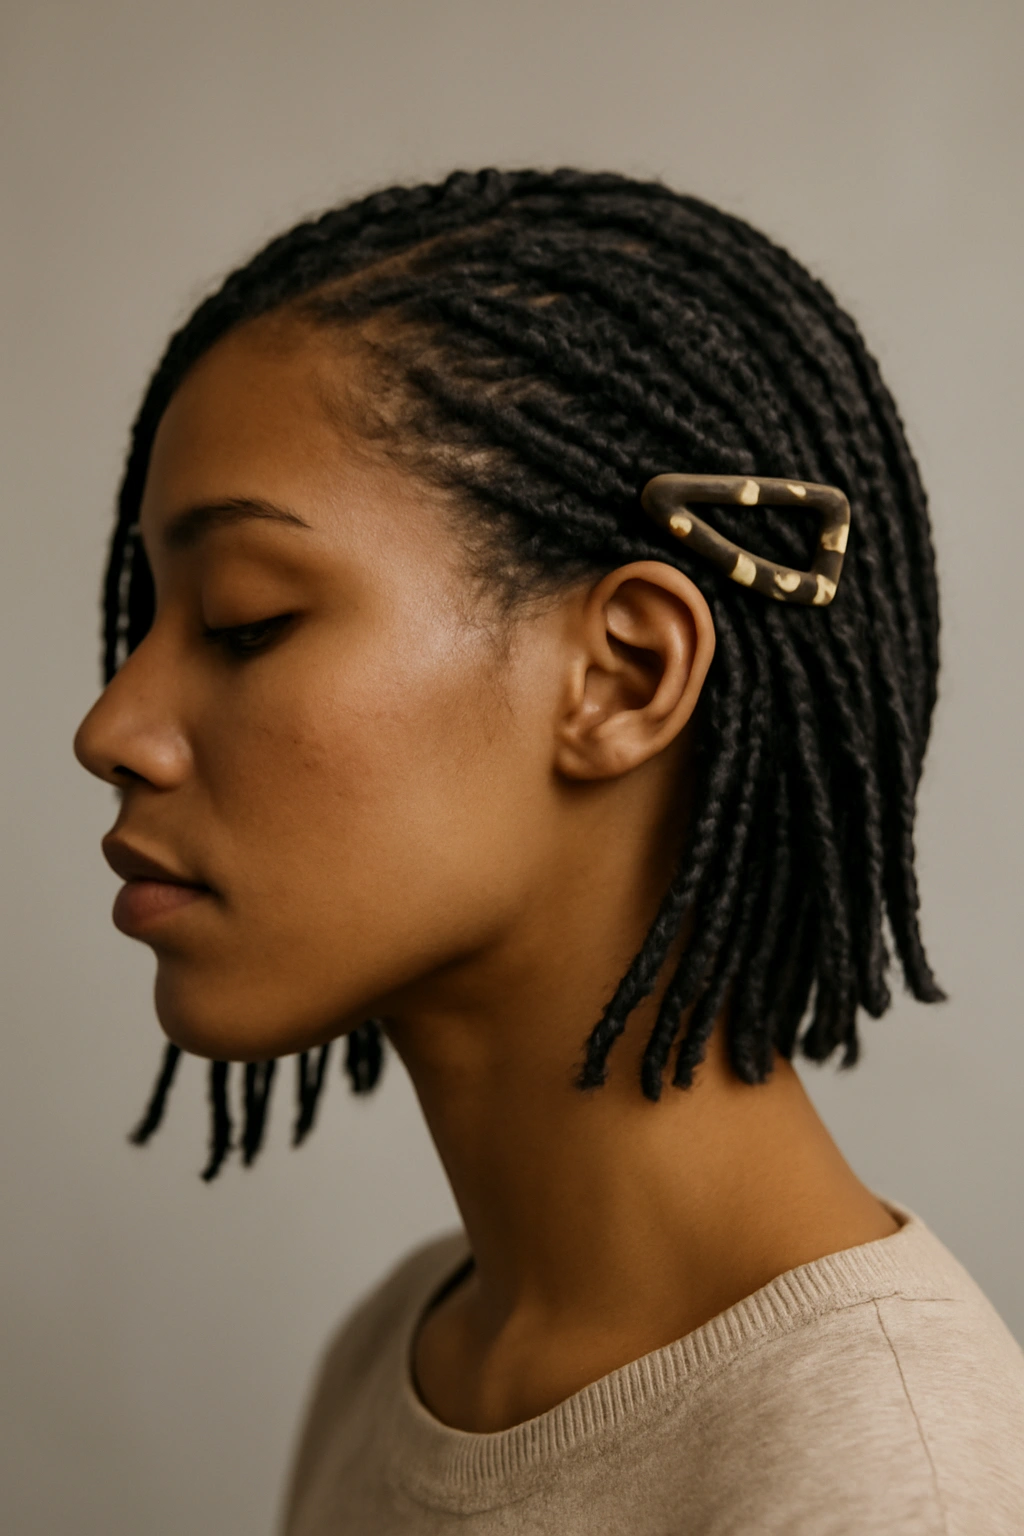
Sweeping your braids to one side and securing them with a decorative clip creates movement and intentionality while keeping braids off your face. This works beautifully for both casual and dressier occasions.
The Visual Impact of Side-Sweeping
This styling creates an asymmetrical silhouette that reads as deliberately fashionable. It’s an easy way to transform the look of your braids without creating a completely different style.
Execution for Maximum Effect
- Brush or gently manipulate your braids toward your preferred side
- Use a decorative clip large enough to secure multiple braids at once
- Position the clip at approximately ear level or just below for best visual proportion
- Leave some braids loose on the opposite side rather than securing everything
Pro tip: This style works especially well if you add height by gently backcombing the secured section before clipping—this creates dimension and prevents the look from feeling too flat.
10. Braids Styled Into Twisted Crown
Twisting braids around your head in a crown formation creates elegance and polish while completely transforming the aesthetic. This styling elevates short braids into formal territory.
Why Crown Styling Feels Special
A crown creates a finished, intentional appearance that reads as appropriate for special occasions. It requires technical skill to execute well, which signals investment in your appearance.
Crown-Styling Technique
- Start with two sections of braids from the left and right sides of your head
- Twist these sections gently around the crown of your head toward the center
- Secure the twisted braids with bobby pins as you go, tucking the ends into the twisted formation
- Leave 2-3 braids loose down the back for a romantic touch
Worth knowing: A twisted crown works best with medium-length braids (shoulder-length or slightly shorter)—if your braids are very short, this style is difficult to execute well.
11. Short Box Braids With Shaved Sides

An undercut creates dramatic visual impact and reads as intentionally fashionable. The contrast between braided sections and shaved sides immediately elevates the style into territory that feels current and deliberate.
The Confidence Statement
Shaved sides signal confidence and intention. This isn’t a protective style you’re just passing through—it’s a statement about your aesthetic choices. The effect is undeniably polished when executed with precision.
Maintenance and Styling Considerations
- Keep shaved sides moisturized and free from irritation with regular moisturizing and sunscreen
- Style your braids to sweep over or away from the shaved sections to draw attention to both elements
- Maintain the fade with regular touch-ups every 2-4 weeks
- Use edge control on the hairline above shaved sections to keep edges crisp
What to watch for: This style requires significant hair removal and isn’t reversible immediately, so it’s a commitment. Ensure you’re confident in this choice before proceeding.
12. Braids Topped With a Silk Bonnet or Headwrap
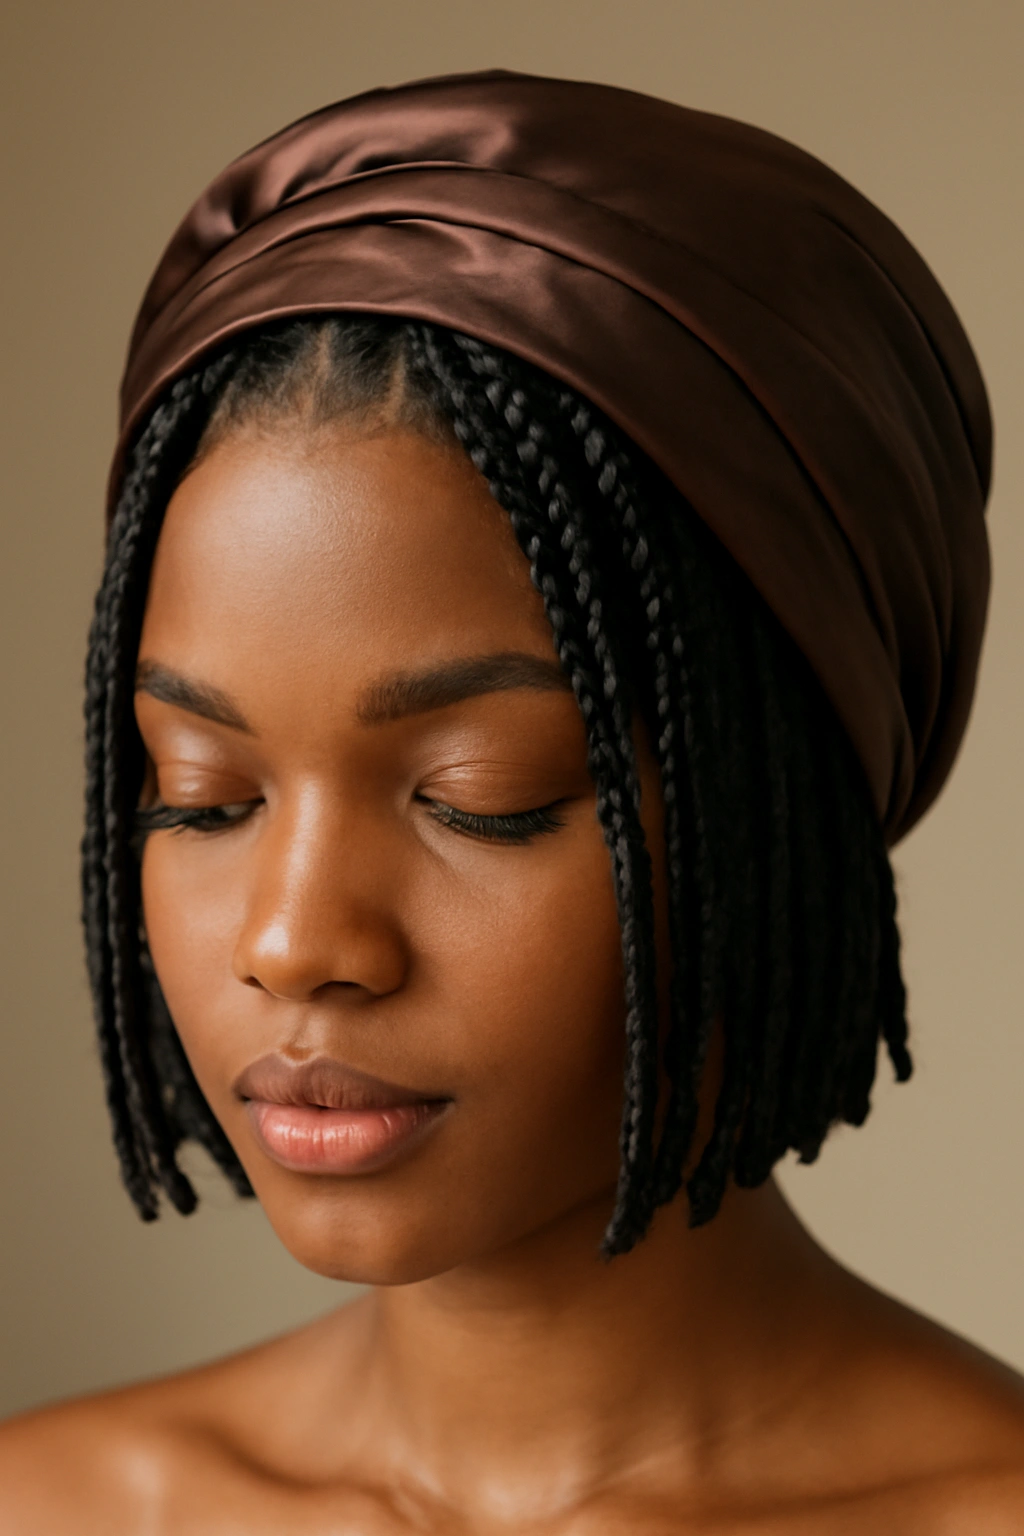
While not technically a “style,” the way you finish your braids with luxury accessories dramatically affects how polished they appear. A silk bonnet or wrapped headwrap transforms braids into an intentional, well-maintained look rather than a protective style you’re just getting through.
Accessorizing for Polish and Protection
The right accessories signal that you’re caring for your hair intentionally. Silk protects your braids while adding visual intentionality to your appearance.
Accessory Styling That Works
- Choose bonnet colors that complement your skin tone or coordinate with your wardrobe
- Wrap headscarves with intention, securing them so they frame your face or sit elegantly at the back of your head
- Use silk or satin bonnets (not cotton) to prevent frizz and maintain braid integrity
- Consider statement wraps that coordinate with your outfits
Insider note: How you wear your bonnet or wrap matters—wearing it with style and intention reads as a fashion choice rather than a protective measure, which instantly elevates the entire look.
Final Thoughts
Short box braids offer a remarkable range of styling possibilities within a single protective style framework. The difference between braids that look neat and polished versus ones that feel unfinished rarely comes down to the braids themselves—it comes down to intentionality in styling, finishing details, and how you present them.
The styles above share common threads: they all involve making deliberate choices about length, part placement, jewelry, and styling direction. None of them require significantly longer braids or more complex installation than basic box braids—they simply require thinking about the finished appearance from the start and then executing those choices with precision.
What makes a braided style feel polished is consistency with your overall aesthetic. If you typically wear minimal jewelry, gold cuffs on every braid feels mismatched—but strategic placement on a few braids reads as intentional. If you usually style your hair off your face, leaving short braids completely loose reads as incomplete. The magic isn’t in complicated technique; it’s in honoring your personal style while making deliberate choices about how your protective style looks when it’s worn out in the world.