Homecoming night has a way of putting pressure on every detail—especially your hair. You want something that feels special and polished, but not so complicated that you’re stressed about it holding up through dancing, photos, and celebration. The truth is, medium-length hair is the sweet spot for homecoming styling. It’s long enough to create volume, texture, and dimension, but short enough that elaborate styles don’t feel heavy or exhausting to wear all night.
The best homecoming hairstyles strike a balance between looking intentional and effort-free. You want your hair to frame your face beautifully, complement your dress, and stay put while you actually enjoy yourself. Medium hair gives you incredible versatility—you can do soft waves, sleek styles, romantic braids, or playful updos without needing extensions or spending hours in a salon chair.
What makes a hairstyle work for homecoming specifically is how it photographs, how it feels when you move, and whether it stays in place through the evening. A style that looks stunning in photos but falls apart after 30 minutes isn’t going to cut it. The styles here have all been tested for staying power, comfort, and that sweet spot between “I barely did anything” and “I spent all day on this.”
Whether you’re going for classic elegance, trendy and modern, romantic and soft, or playful and fun, medium hair can pull off any vibe. Let’s walk through 12 looks that’ll make you feel confident and beautiful all night long.
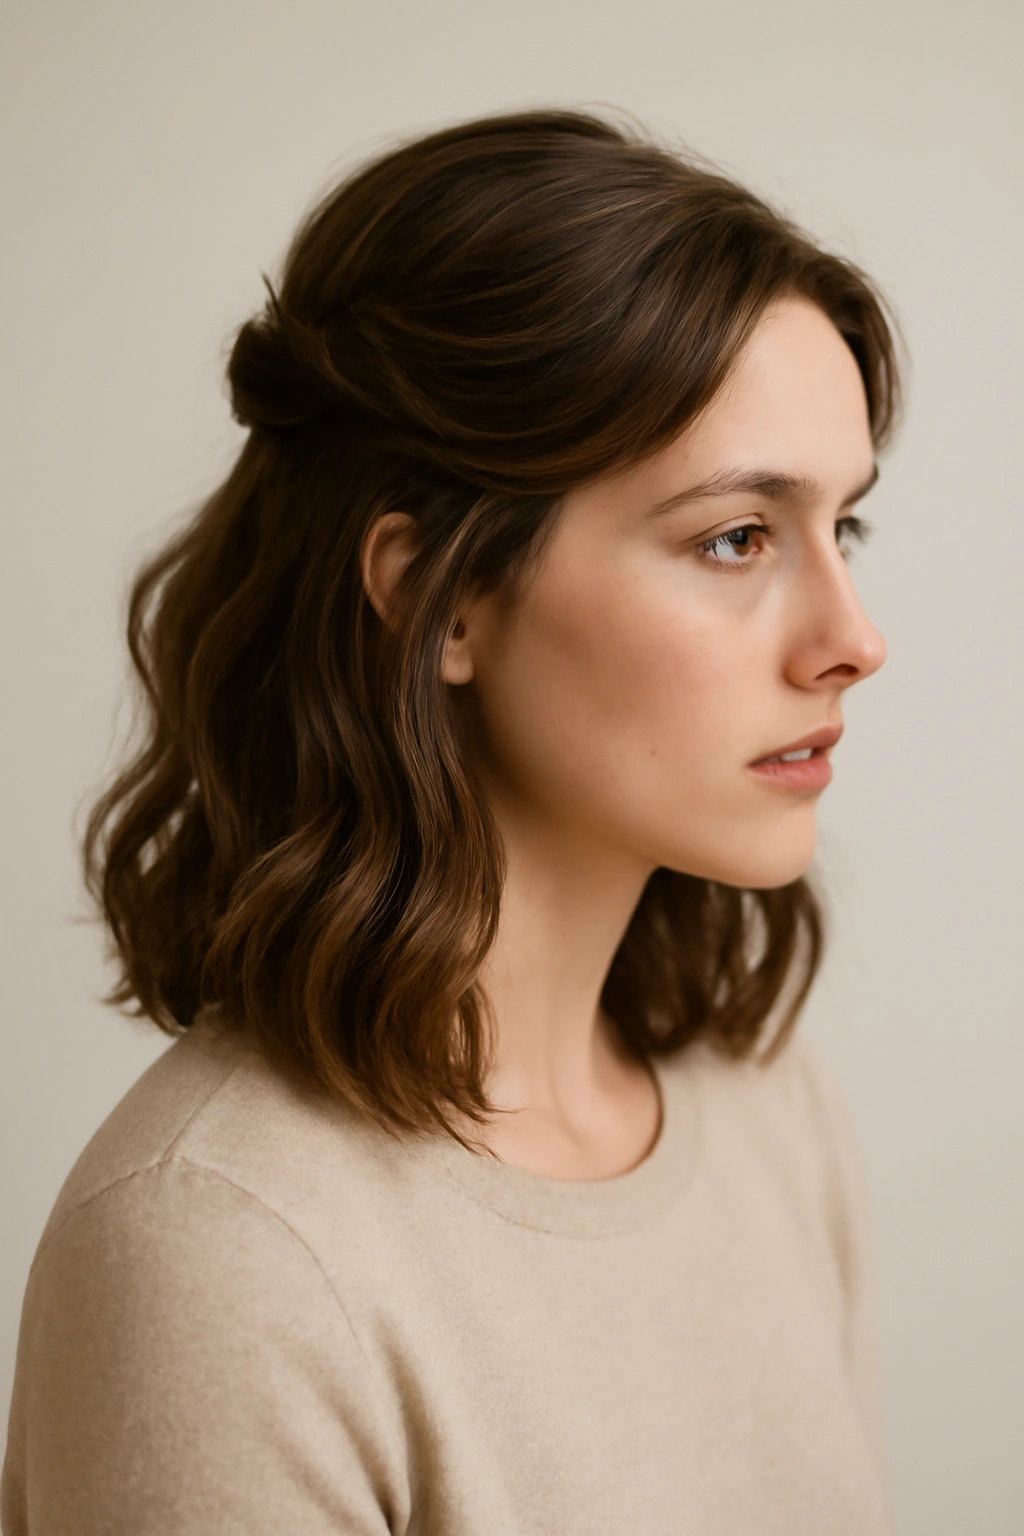
1. Soft Waves With a Half-Up Twist
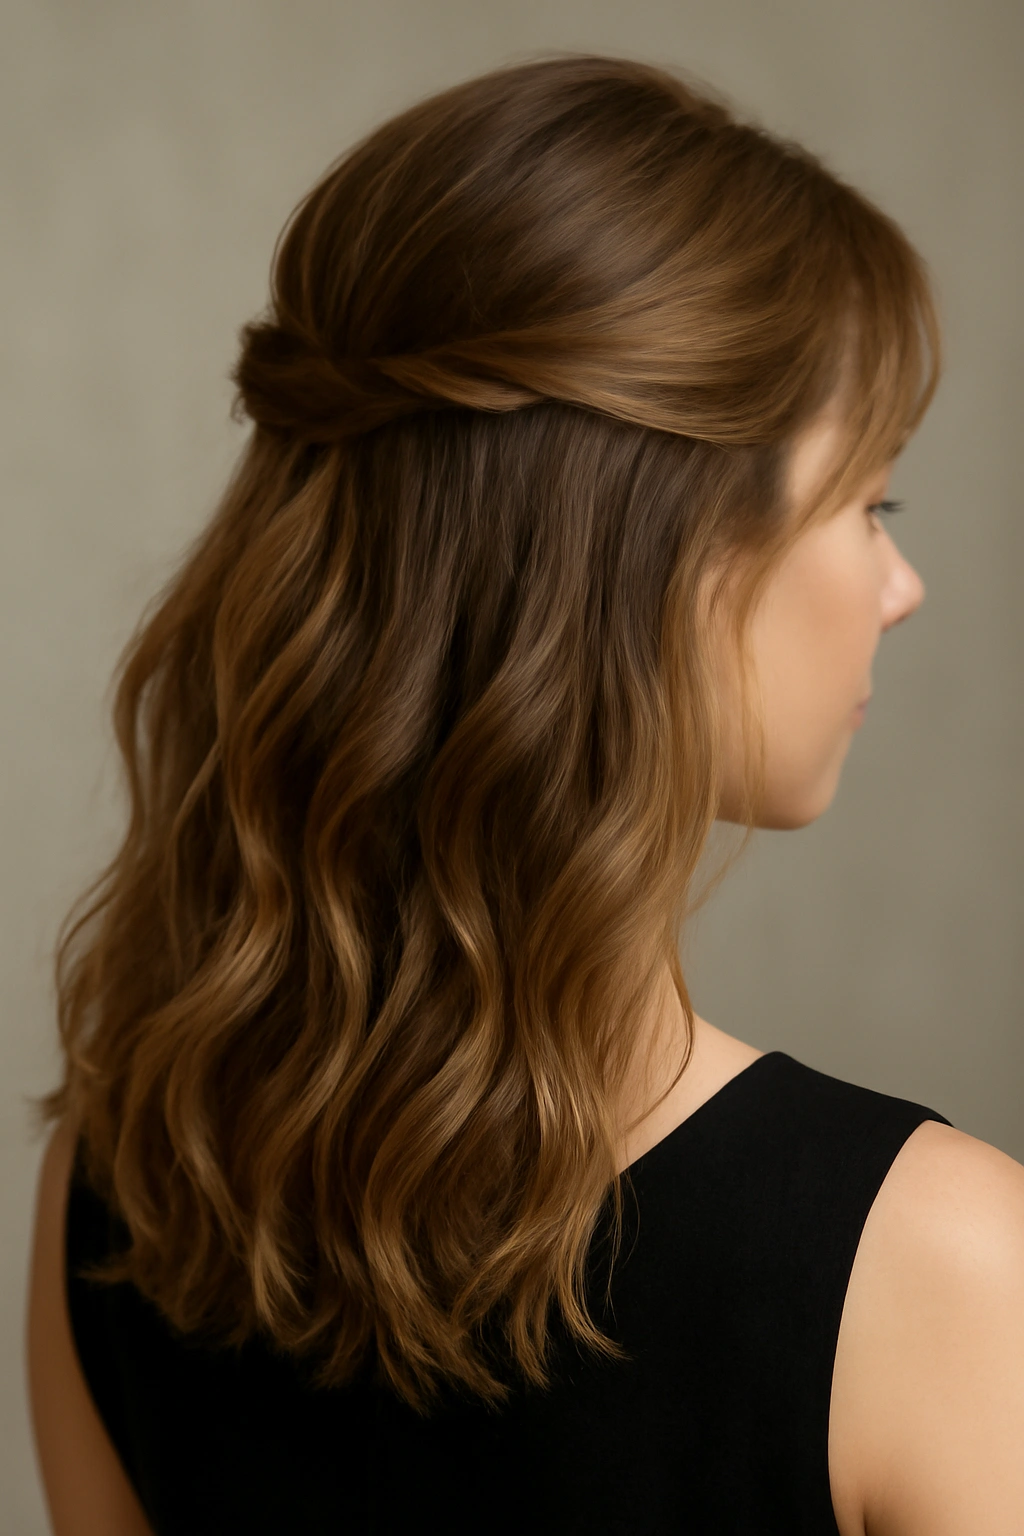
Soft waves are the homecoming staple for a reason—they work with almost every dress style and face shape, and they photograph beautifully under any lighting. A half-up twist takes this classic look and adds just enough intentionality to make it feel special without screaming “I tried too hard.”
How to Build This Look
The key to soft waves that actually last is texture. Start with damp hair and either use a texturizing spray, sea salt spray, or the old-school method of braiding your hair loosely before bed to create a natural wave pattern. Once your hair is dry, rough it up gently with your fingers—you’re going for movement and dimension, not sleek waves.
Use a 1.5-inch curling iron to curl sections of hair away from your face, curling the barrel away as you move down the length. Don’t try to make uniform waves; instead, let some sections be looser and others tighter. The variation is what makes it look natural and romantic.
Styling Steps for Half-Up Twist
- Section out hair from temple to temple across the back of your head
- Lightly tease the crown area at the roots for subtle volume (you’re not going for a dramatic poof, just dimension)
- Gently smooth the top layer with your brush
- Take the sectioned hair and twist it loosely, pinning it at the back with bobby pins that match your hair color
- Pull a few face-framing pieces out and curl them slightly around your face
- Finish with a light texture spray or sea salt spray for grip and movement
Pro tip: Skip heavy serums or shine sprays that can weigh waves down. Instead, use a flexible hold hairspray that lets your waves move naturally—this is what keeps them from looking stiff or overly styled.
2. Sleek Low Ponytail With Pearl-Accent Hair Pins
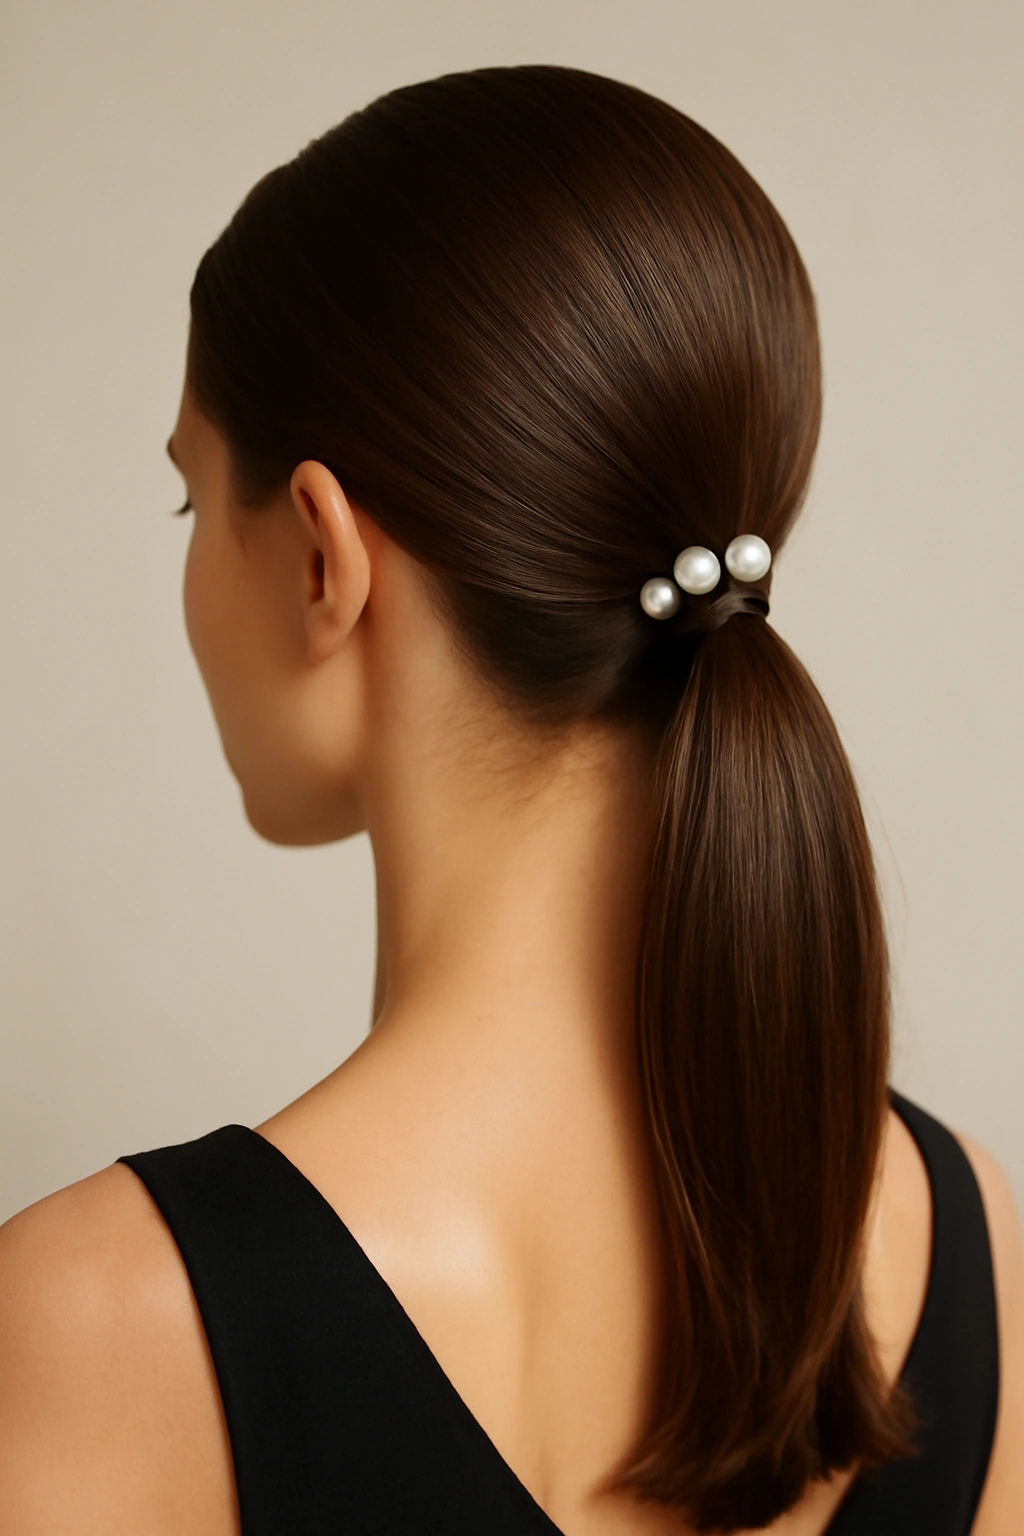
A low ponytail is the grown-up option that still feels young and current. Sleek and sophisticated, this style lets your face and dress take center stage while your hair looks polished and intentional. Pearl or rhinestone hair pins add just enough sparkle without making it feel like costume jewelry.
The Art of a Truly Sleek Ponytail
Sleekness comes from starting with the right base. Brush your hair back smoothly and use a lightweight gel or pomade—not heavy styling cream—to smooth down any flyaways. A damp brush helps catch stray pieces. The key is to use less product than you think you need; too much makes it look greasy or flat.
Gather your hair at the base of your skull (lower than you might think—this is what makes it feel elegant) and secure tightly. The tightness is important because a loose ponytail falls flat as the night goes on. Wrap a small section of hair around the elastic to hide it, then pin it in place underneath.
Customizing Your Ponytail
- Use a straightener or flat iron to make the ponytail shaft smooth and glossy
- Smooth the hairline with a fine-tooth comb and setting gel
- Add pearl bobby pins or hair clips positioned along the base of the ponytail for shimmer and detail
- Gently pull the ponytail slightly to give it a tiny bit of dimension—not frizzy, just softly textured
- Curl the tail of the ponytail loosely with a 1.5-inch curling iron for a finished look
Pro tip: A tight low ponytail reads as intentionally elegant, not rushed. Don’t worry about it feeling severe—when paired with the right makeup and your outfit, the polish reads as sophisticated, not austere.
3. Braided Halo With Soft Waves
A halo braid wraps around the crown of your head and feels romantic and ethereal—like you got dressed by a fairy godmother. The soft waves underneath add dimension and keep it from looking costume-y or too formal.
Creating the Halo Foundation
This style works best with hair that has some texture or wave to it beforehand. Start by creating loose waves or using a texturizing spray throughout your hair. Divide your hair into two sections: one from ear to ear across the front (this is your halo braid) and the rest that stays down.
Take a small section of hair from one temple and begin a loose three-strand braid, moving across the back of your head toward the opposite ear. Keep the braid relaxed—tight braids look juvenile for homecoming. Let it sit just above where you’d wear a crown. Secure the end with a small clear elastic.
Adding Dimension and Hold
- Create soft waves in the loose hair underneath the braid using a curling iron
- Pull gently at the braid to loosen it and add volume (this is called pancaking)
- Tuck small baby’s breath or white flowers into the braid for a romantic touch (optional but stunning)
- Anchor the braid with bobby pins tucked underneath so they’re invisible
- Use a flexible hold spray to keep everything in place without feeling crunchy
Pro tip: If you’re nervous about braiding, you can practice this a few times in advance. The looseness is actually key—a perfectly tight braid looks less romantic and more performed.
4. Sleek High Pony With Geometric Hair Cuff
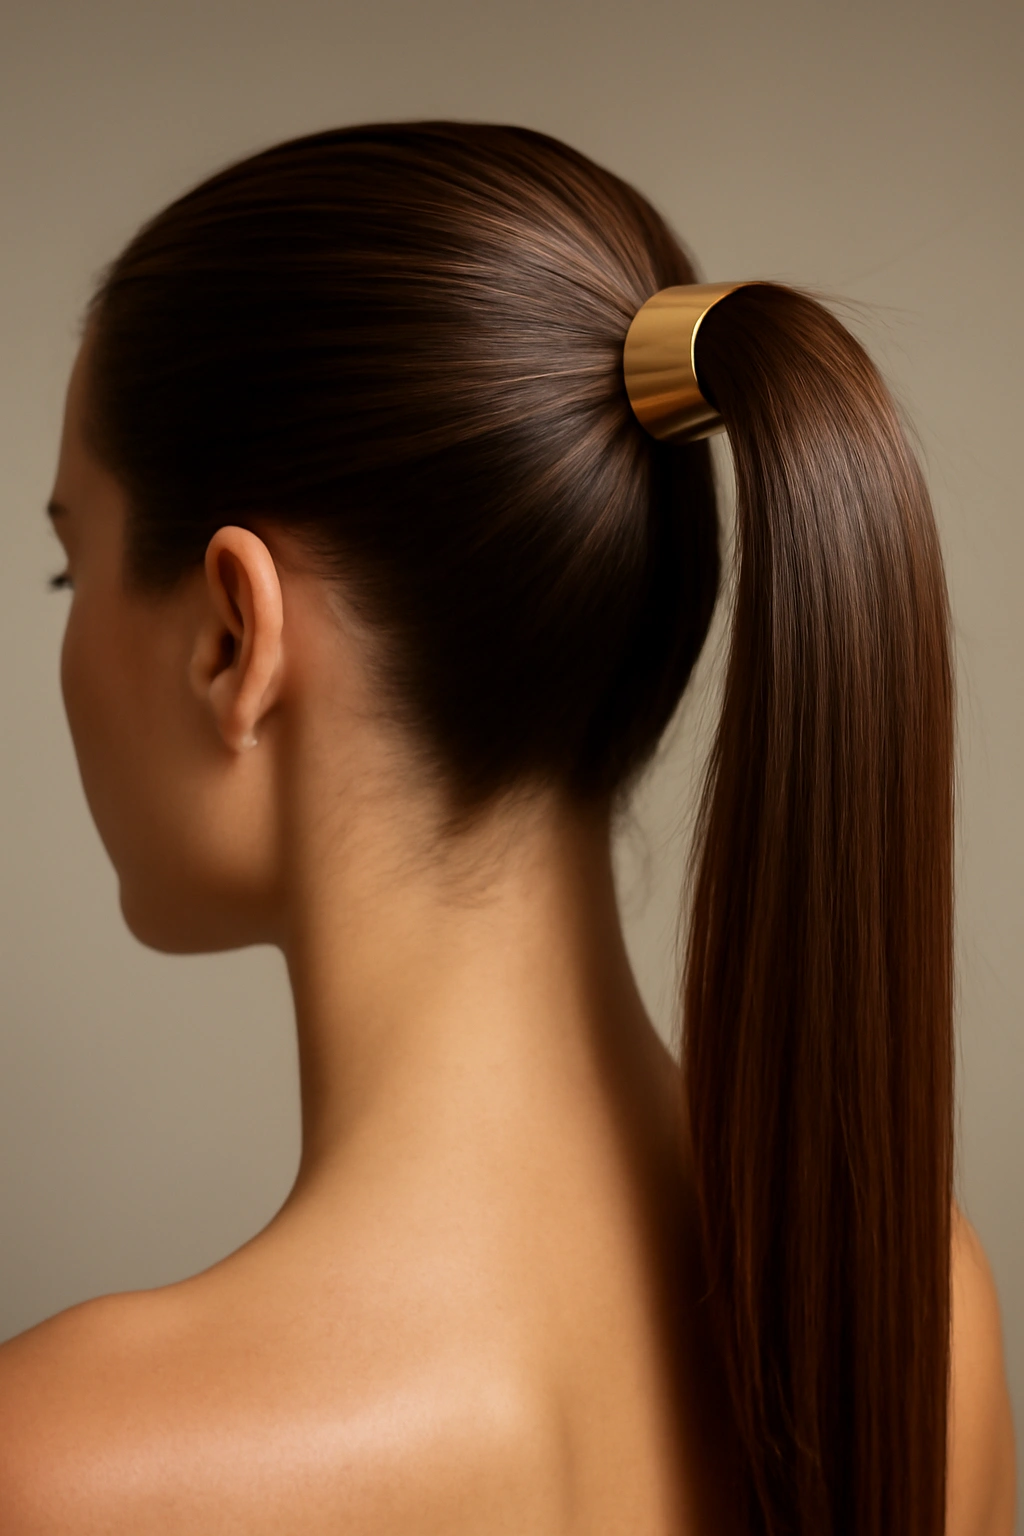
A high ponytail is more playful and youthful than a low one, and it pairs beautifully with contemporary dresses. A geometric metal hair cuff or minimalist hair clip transforms it from simple to statement-making.
Building the High Pony Structure
Gather your hair high on the crown, right where you’d tie a regular ponytail but higher up. The placement is crucial—too high and it looks childish, but positioned correctly it’s modern and chic. Use a strong-hold elastic because high ponytails need secure anchoring.
Smooth everything down with a lightweight styling cream or pomade. You want the scalp area smooth and the hairline controlled. Use a fine-tooth comb or even a small paddle brush with light pressure to smooth it down—aggressive brushing can cause breakage and frizz.
Styling the Ponytail Tail
- Straighten or curl the ponytail length depending on your preference (straight feels more modern, waves feel softer)
- Wrap a section of hair around the base to hide the elastic
- Slide a geometric or minimalist metal cuff or clip over the elastic and wrapped section
- Add volume by gently pulling at the crown area—this prevents it from sitting flat against your head
- Smooth any flyaways with a small brush and clear gel
Pro tip: High ponytails can feel too severe if everything is perfectly smooth. Pull out a tiny face-framing piece on each side and curl it gently to soften the overall look.
5. Twisted Half-Up With Floating Baby’s Breath
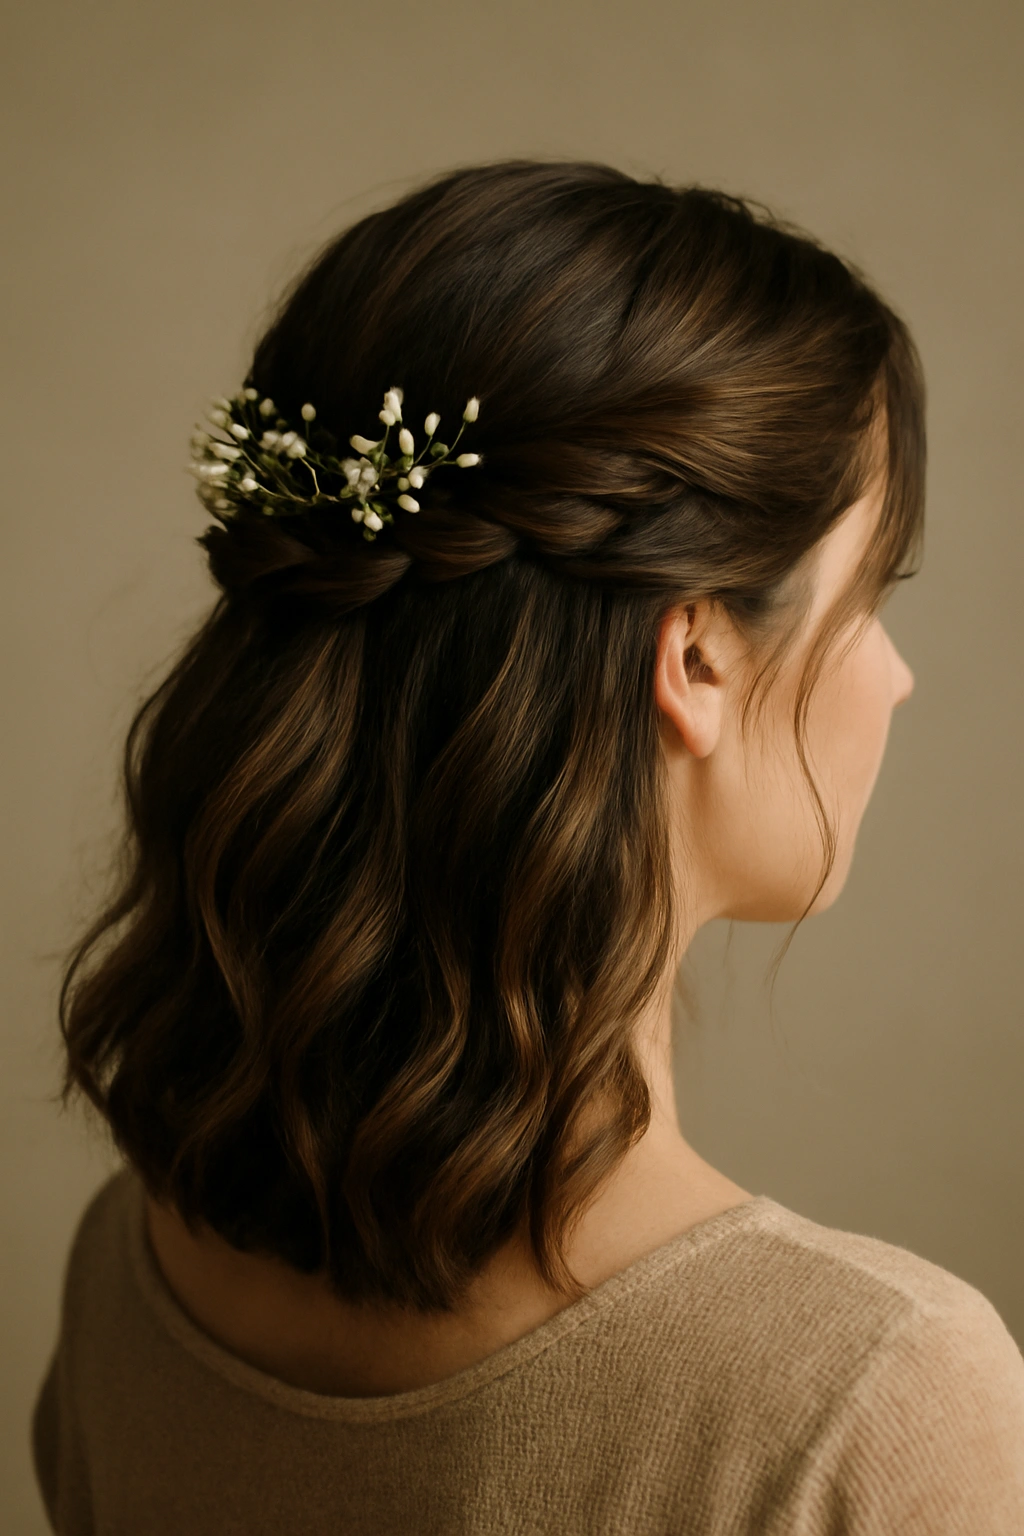
This style feels romantic and delicate without requiring you to master braiding. Twisted sections are easier to control than braids, and incorporating baby’s breath (real or faux) adds a garden-party elegance that photographs beautifully.
The Twisted-Hair Technique
Take a section of hair from one temple and divide it into two strands. Twist these strands around each other loosely (not tightly—loose is the goal). Add small sections of hair as you twist so the twist gradually incorporates more of your hair. Think of it like a twisted rope that’s gathering volume as it moves back.
Do the same from the other side. Meet the two twisted sections at the back of your head and secure them together with bobby pins. The key is keeping these twists soft and slightly undone-looking.
Finishing With Florals
- Create soft waves throughout the rest of your hair
- Secure the twisted sections with bobby pins that match your hair color
- Take a small bundle of baby’s breath and tuck it into the pin point where your twists meet
- Let a few wispy strands of hair fall naturally around your face
- Set everything with a light spray that won’t stiffen the waves
Pro tip: If you’re using real flowers, prepare them a few hours before you need them and mist with water so they stay fresh. Fake baby’s breath has the advantage of staying pristine all night and not wilting.
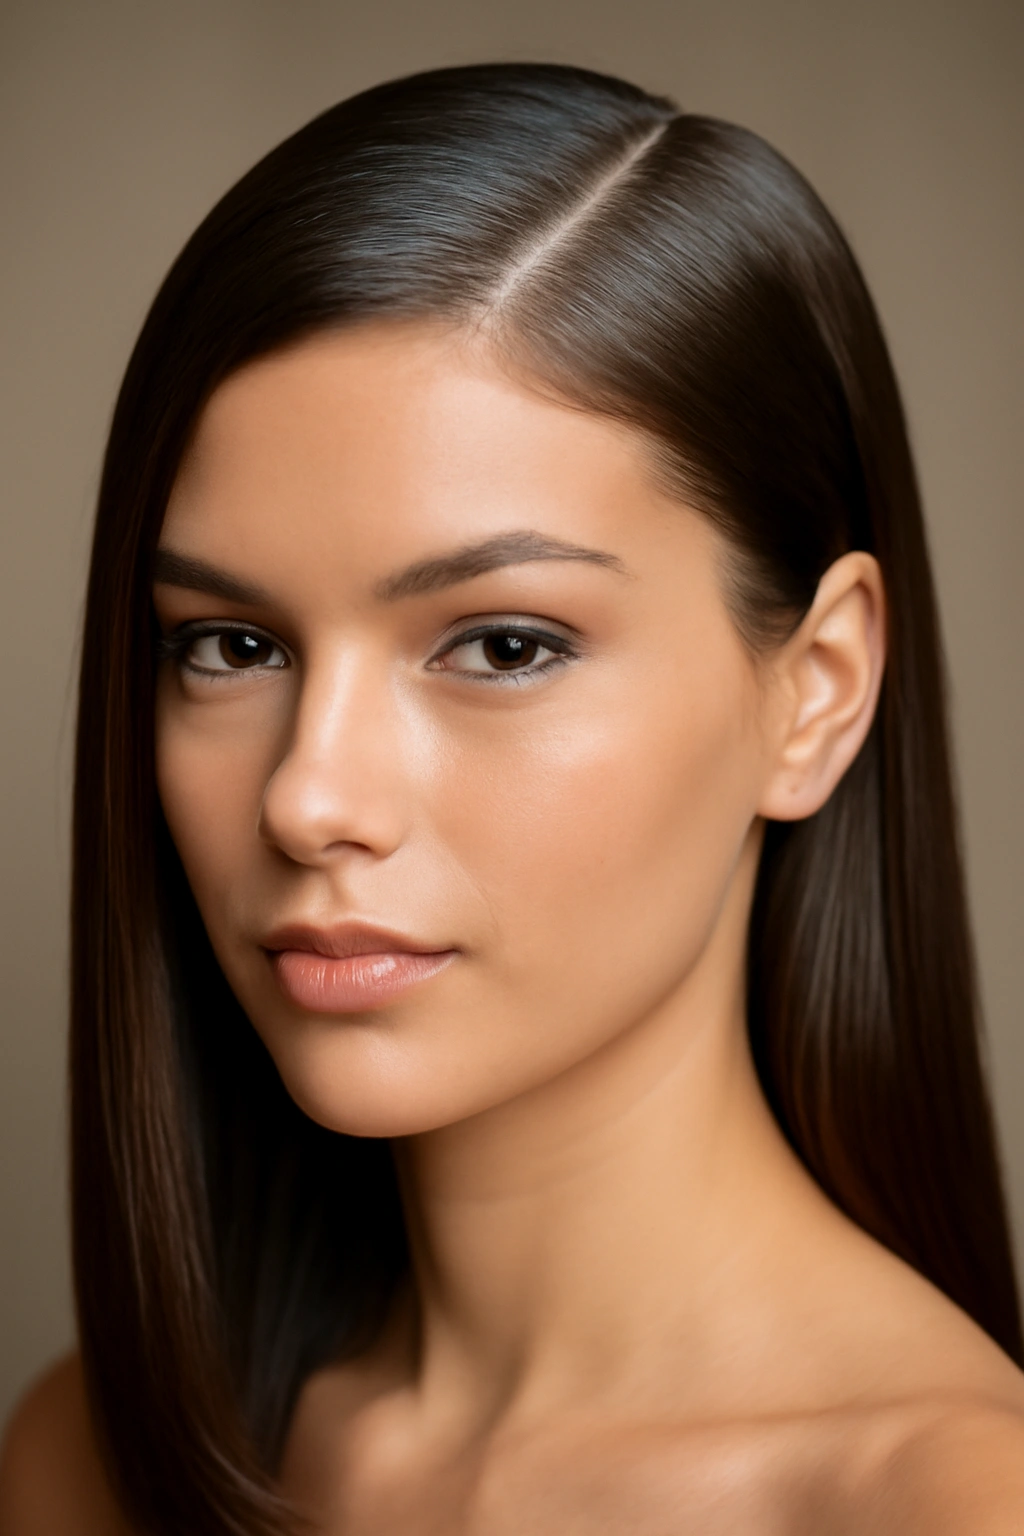
6. Sleek Center Part With Glossy Waves
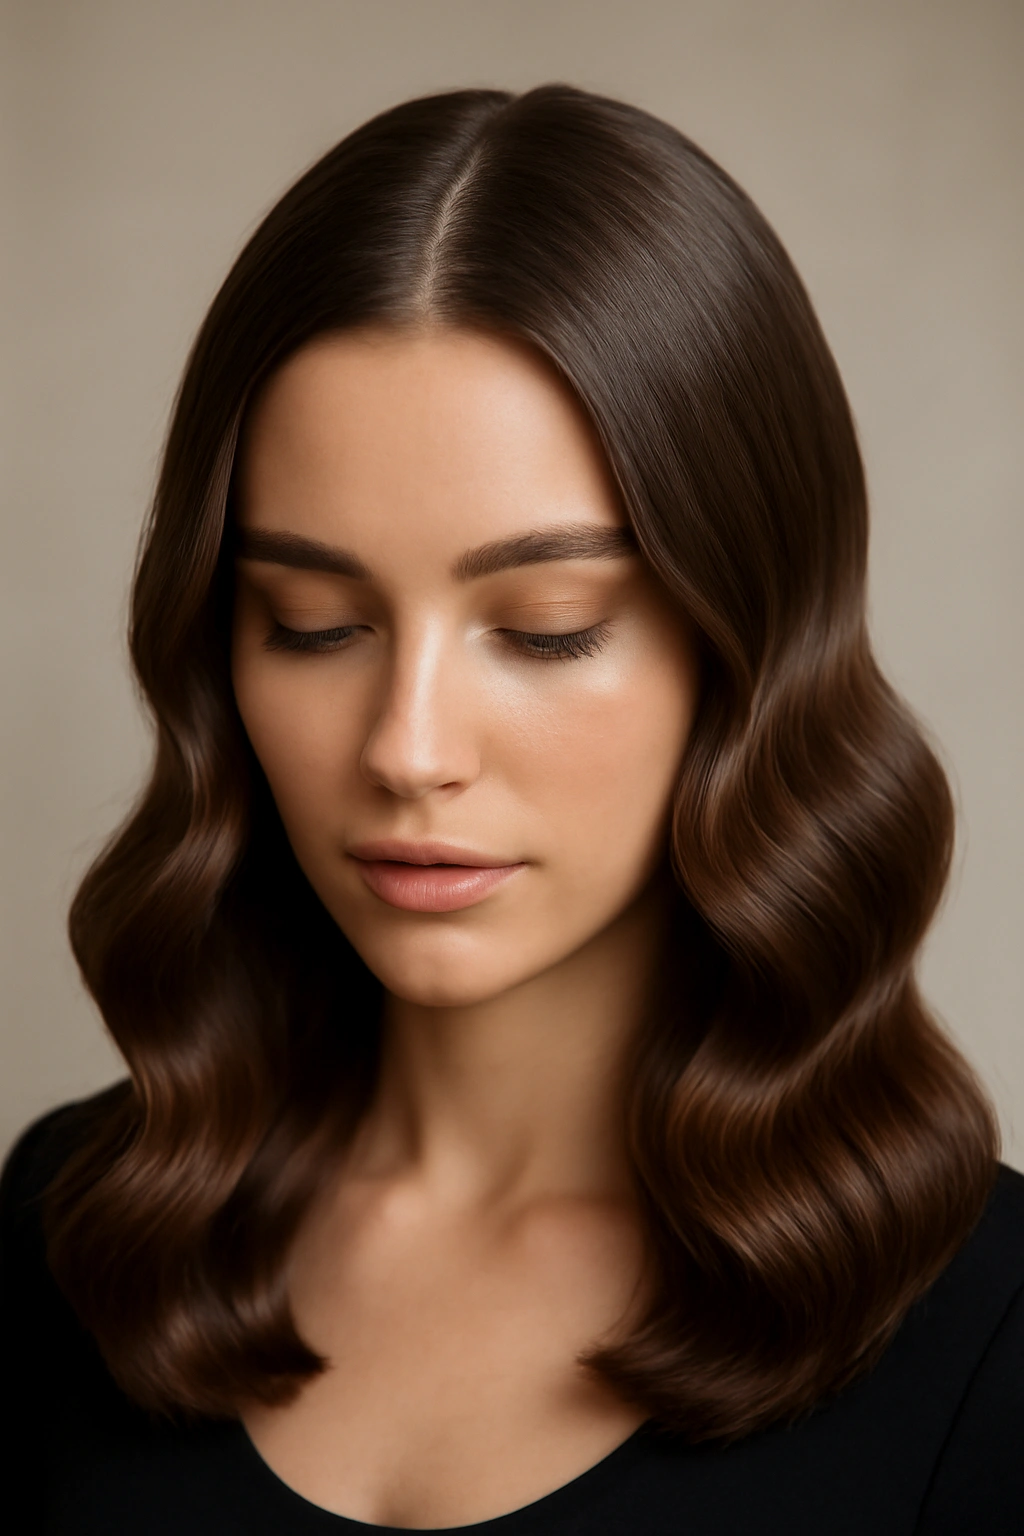
A center part is having a major moment, and when paired with glossy waves, it feels modern, confident, and polished. This style photographs incredibly well and works with both casual and formal homecoming dresses.
Creating the Sleek Center Part
The placement of your part matters more than you’d think. Use a rattail comb or the pointed end of a fine-tooth comb to create a perfectly straight line down the center of your head from your hairline to the nape of your neck. You want this line to be clean and visible, so don’t worry about it looking exaggerated.
Brush each side smoothly away from the part. Use a lightweight styling cream or gel on a fine-tooth comb to smooth any flyaways along the part line. The part itself should feel sharp and defined—this is what gives the look its modern edge.
Building Glossy Waves
- Use a 1.5-inch curling iron to create loose waves, curling away from the center part on each side
- The waves should flow naturally away from the part, not toward it
- Use a shine spray or glossy finishing spray (not a matte texture spray) to give waves dimension and light-reflection
- Pull strands gently to separate waves slightly and create movement
- Consider adding a small hair clip or pin at the base of the part on one side for subtle interest
Pro tip: Glossy waves need healthy-looking hair to truly shine. If your hair needs conditioning, do a deep conditioning treatment a day or two before homecoming so your hair has that luminous quality.
7. Textured Updo With Romantic Loose Tendrils

An updo feels special and elevated without being overly formal. The loose tendrils keep it from looking too structured or bridal, making it fresh and modern. This is the style that says you made an effort but still feel like yourself.
Building the Textured Base
Start with hair that has texture or waves—curl your hair beforehand or use a texturizing spray. Gather your hair into a loose, high ponytail. Now, instead of making a sleek pony, you’re going to twist or braid this ponytail and wrap it around itself to form a low, textured bun at the crown area.
Secure the wrapped section with bobby pins, then gently pull at the bun to loosen it and create an undone texture. You’re going for “romantic updo” not “ballet bun”—the whole point is that it looks effortlessly beautiful.
Creating the Tendril Effect
- Pull out small sections of hair around your face on both sides
- Use a 1-inch curling iron to create soft curls in these tendrils
- Let them frame your face naturally without being too neat
- Tuck in small sections of baby’s breath or tiny flowers for a romantic touch
- Use bobby pins tucked underneath to secure the tendrils without them being visible
Pro tip: Practice this style once or twice before homecoming so you’re comfortable with how much to pull out and how to position the tendrils. This is a style where a little planning pays off.
8. Side-Swept Waves With Pearl or Crystal Pins
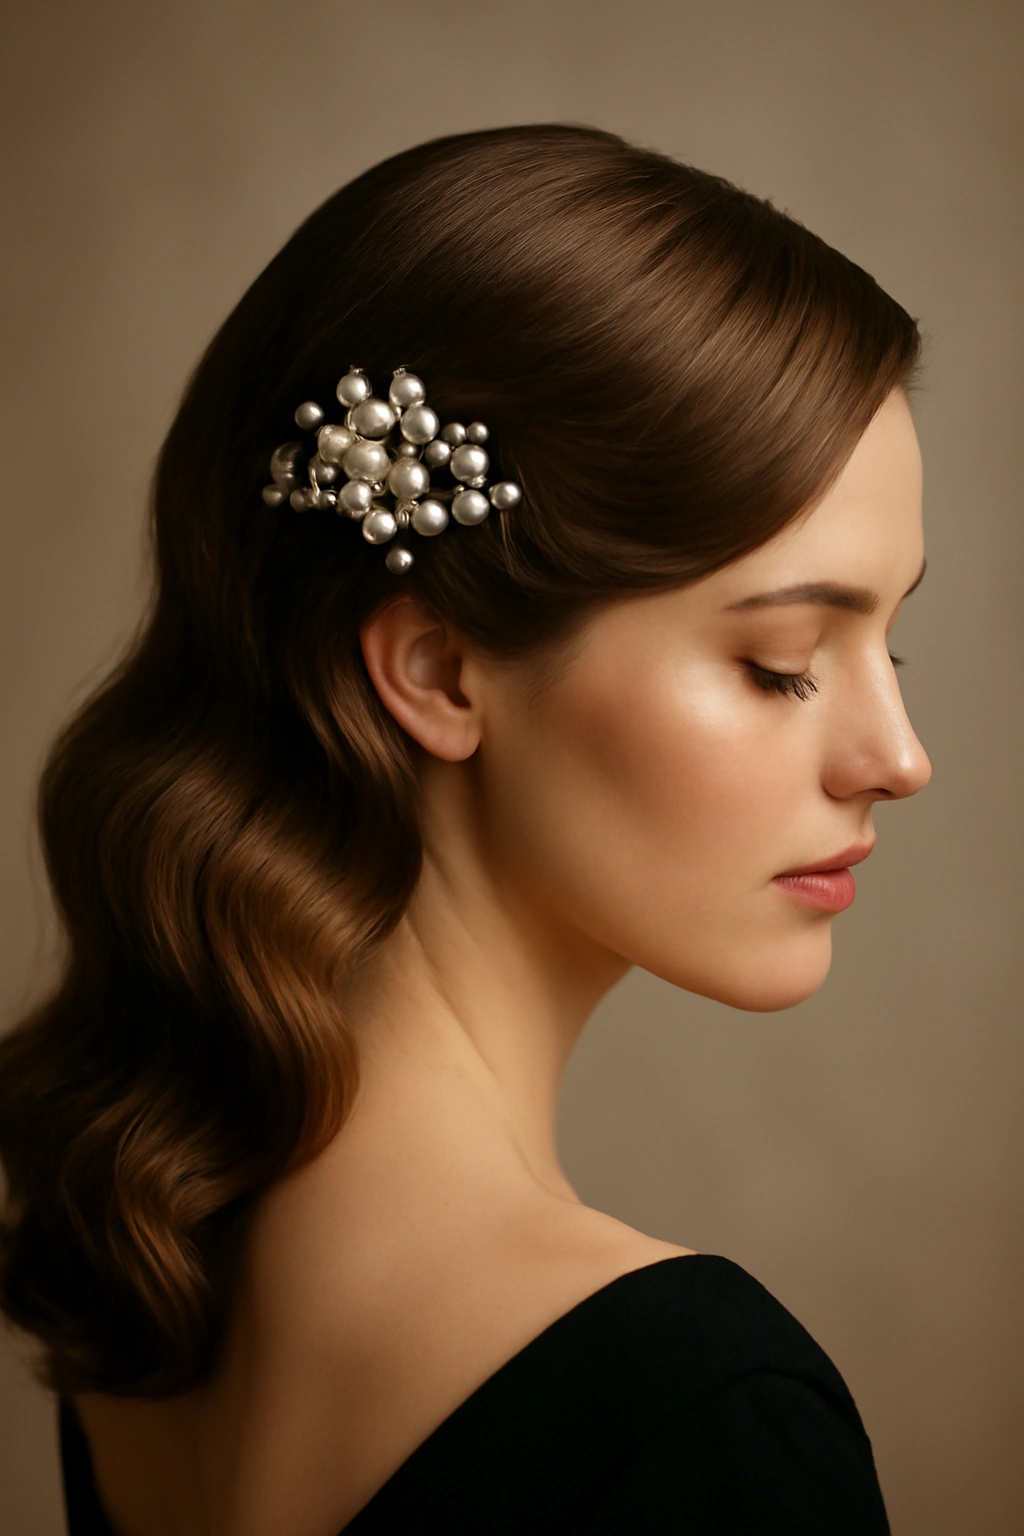
Side-swept waves are classically elegant and flattering for almost every face shape. Adding pearl or crystal pins clustered along one side elevates it from simple to special-occasion-worthy. This style is surprisingly easy to achieve and incredibly forgiving.
Creating Side-Swept Movement
Brush your hair over to one side (this is the “swept” part). You’re not doing a full side part; instead, you’re creating a gentle sweep from one side. Use a blow dryer or curling iron to encourage this direction.
Create soft waves throughout your entire head using a 1.5-inch curling iron. The waves should flow gently, not be dramatic spirals. The key to making this look romantic rather than structured is making the waves soft and allowing them to move naturally.
Anchoring With Decorative Pins
- Once your waves are set, gather a few small sections on the swept side
- Cluster 3-5 pearl bobby pins or decorative hair clips along one side of your head where the hair is swept
- The cluster should feel intentional but not too tight—space them out slightly
- Pin down some of the swept waves gently so they stay positioned but don’t feel stiff
- Let the rest of your hair flow naturally down
Pro tip: Decorative pins work best when you’re not afraid to actually use multiple ones. A single lonely pin looks forgotten; a small cluster looks purposeful and elegant.
9. Slicked-Back High Bun With Statement Earrings
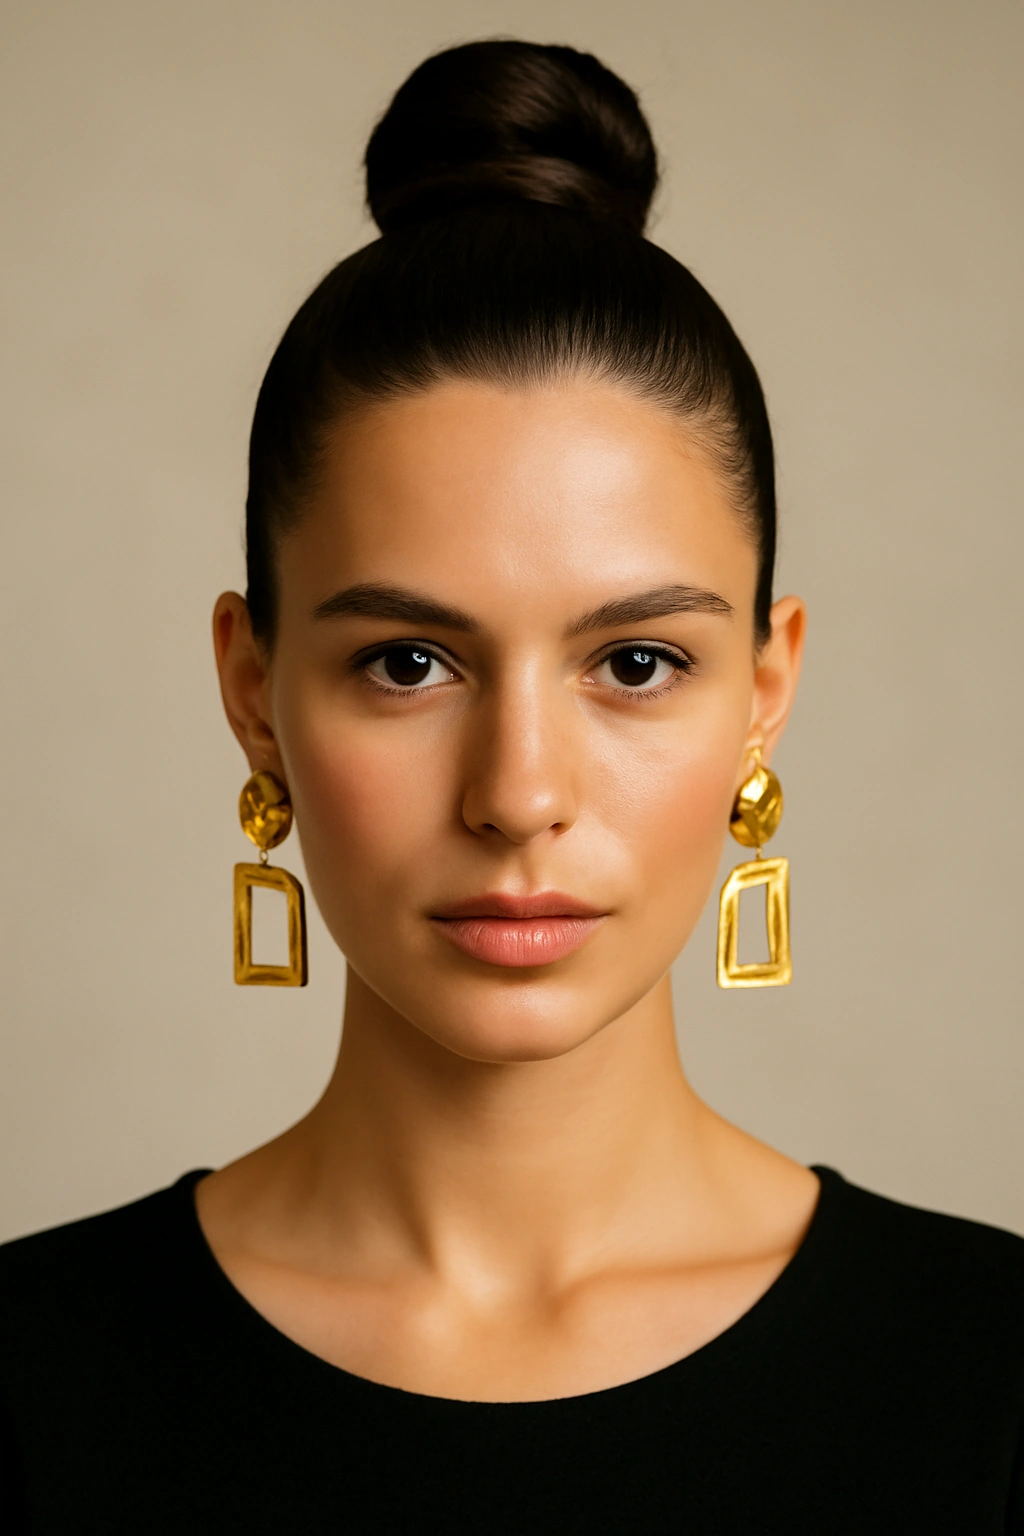
A sleek bun is bold and modern, and it’s the perfect base for showing off statement earrings or a dramatic makeup look. This style says confidence and works beautifully with contemporary or minimalist dresses.
Perfecting the Slicked-Back Look
Sleekness is everything with this style. Apply a styling gel or pomade to damp hair, then brush everything straight back tightly. Use a fine-tooth comb to ensure no pieces escape the sleek look. Every hair should be smooth and controlled.
Gather your hair into a high, tight ponytail at the crown. Wrap the ponytail around itself to form a bun at the top of your head, securing with bobby pins. This bun should be neat and polished, not messy or undone.
Making It Shine
- Smooth the finished bun with a brush to make it glossy
- Use a shine spray for luminosity
- Make sure your hairline is perfectly smooth with no flyaways
- Consider a small jeweled or pearl hair stick through the bun for an elegant touch (optional)
- Your face and neck are now the focus, so this pairs beautifully with a bold lip or statement jewelry
Pro tip: This style lasts all night because everything is secured tightly. You can dance hard without worrying about it falling apart—it’s actually one of the most practical updo options.
10. Loose Braided Ponytail With Ribbons Woven Through
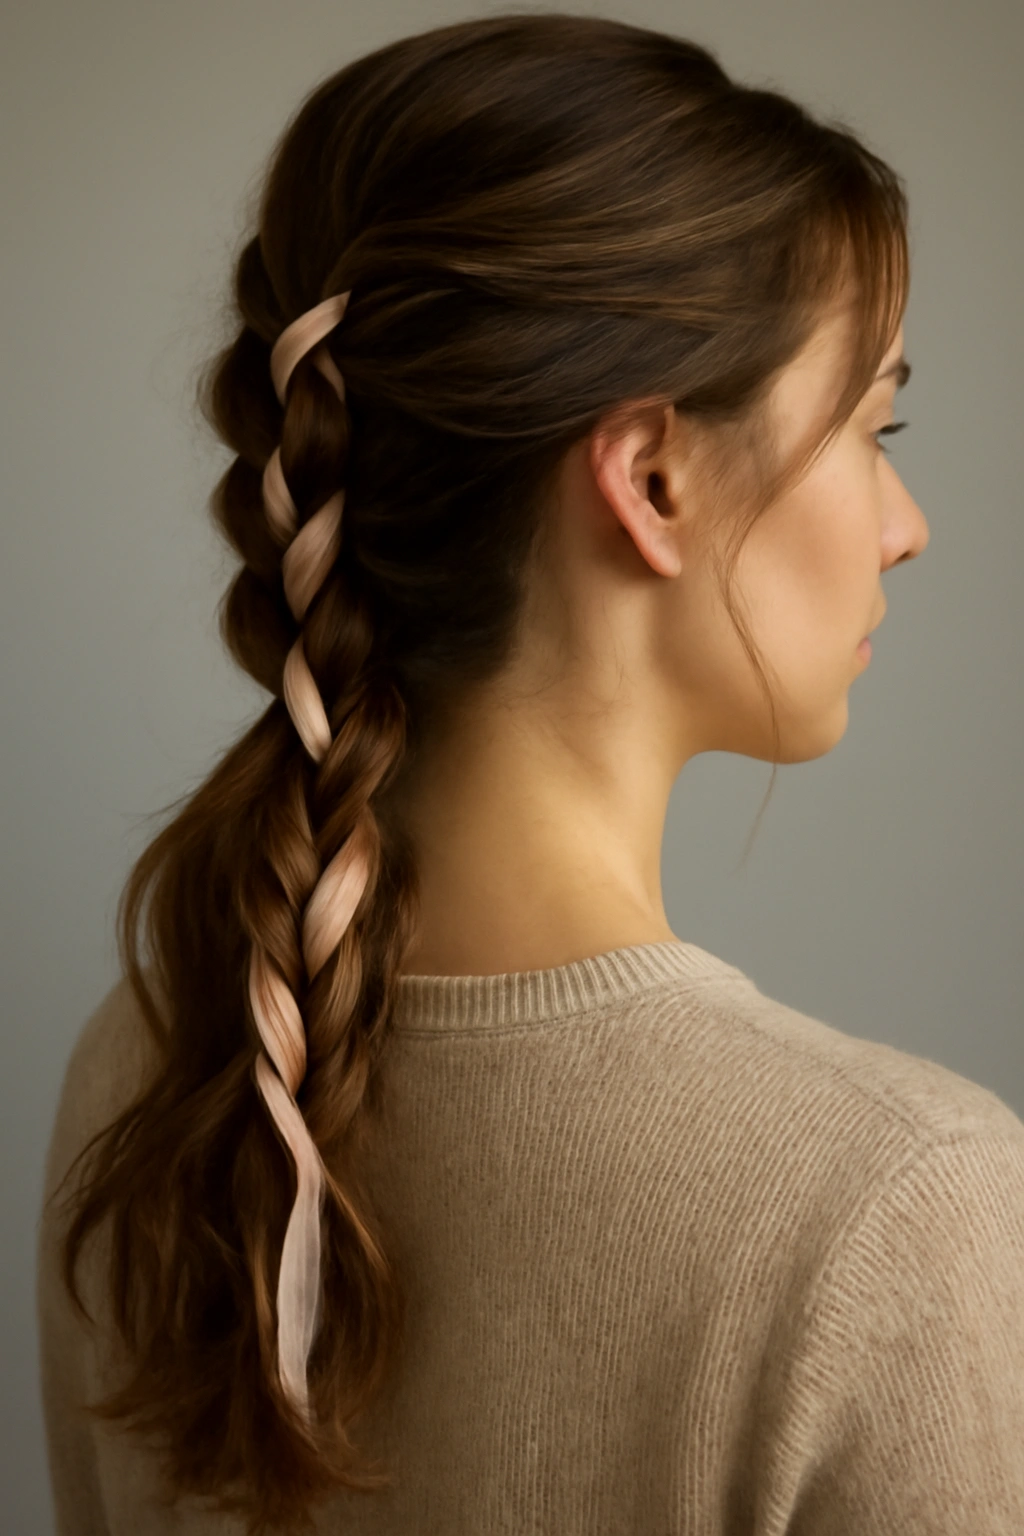
A braided ponytail is more interesting than a plain pony, and adding a ribbon woven through the braid adds a playful, romantic detail. This style works for both the girl who loves braid details and the girl who wants something a little different from the usual waves.
Creating the Braided Base
Gather your hair into a ponytail at your desired height (mid-back or low, depending on your dress). Divide the ponytail into three sections to create a three-strand braid. The key is keeping this braid loose and relaxed—tight braids can look schoolgirlish.
Weave a thin ribbon through the braid as you’re creating it, or attach it at the base of the braid and weave it through afterward. The ribbon should be delicate and coordinated with your dress or hair color. Velvet ribbons feel fancier; silk ribbons feel more romantic.
Adding Dimension
- Create the braid loosely, then gently pull at each section to loosen it further (pancaking)
- Curl the tail of the braid with a 1.5-inch curling iron for a softer finish
- Weave the ribbon throughout, letting it show but not dominate the braid
- Secure the ribbon at the bottom with a clear elastic along with your hair
- Use flexible hold spray to keep everything in place without stiffening it
Pro tip: If you’re weaving a ribbon through an existing braid, use bobby pins to anchor the ribbon strategically so it doesn’t slip out throughout the night.
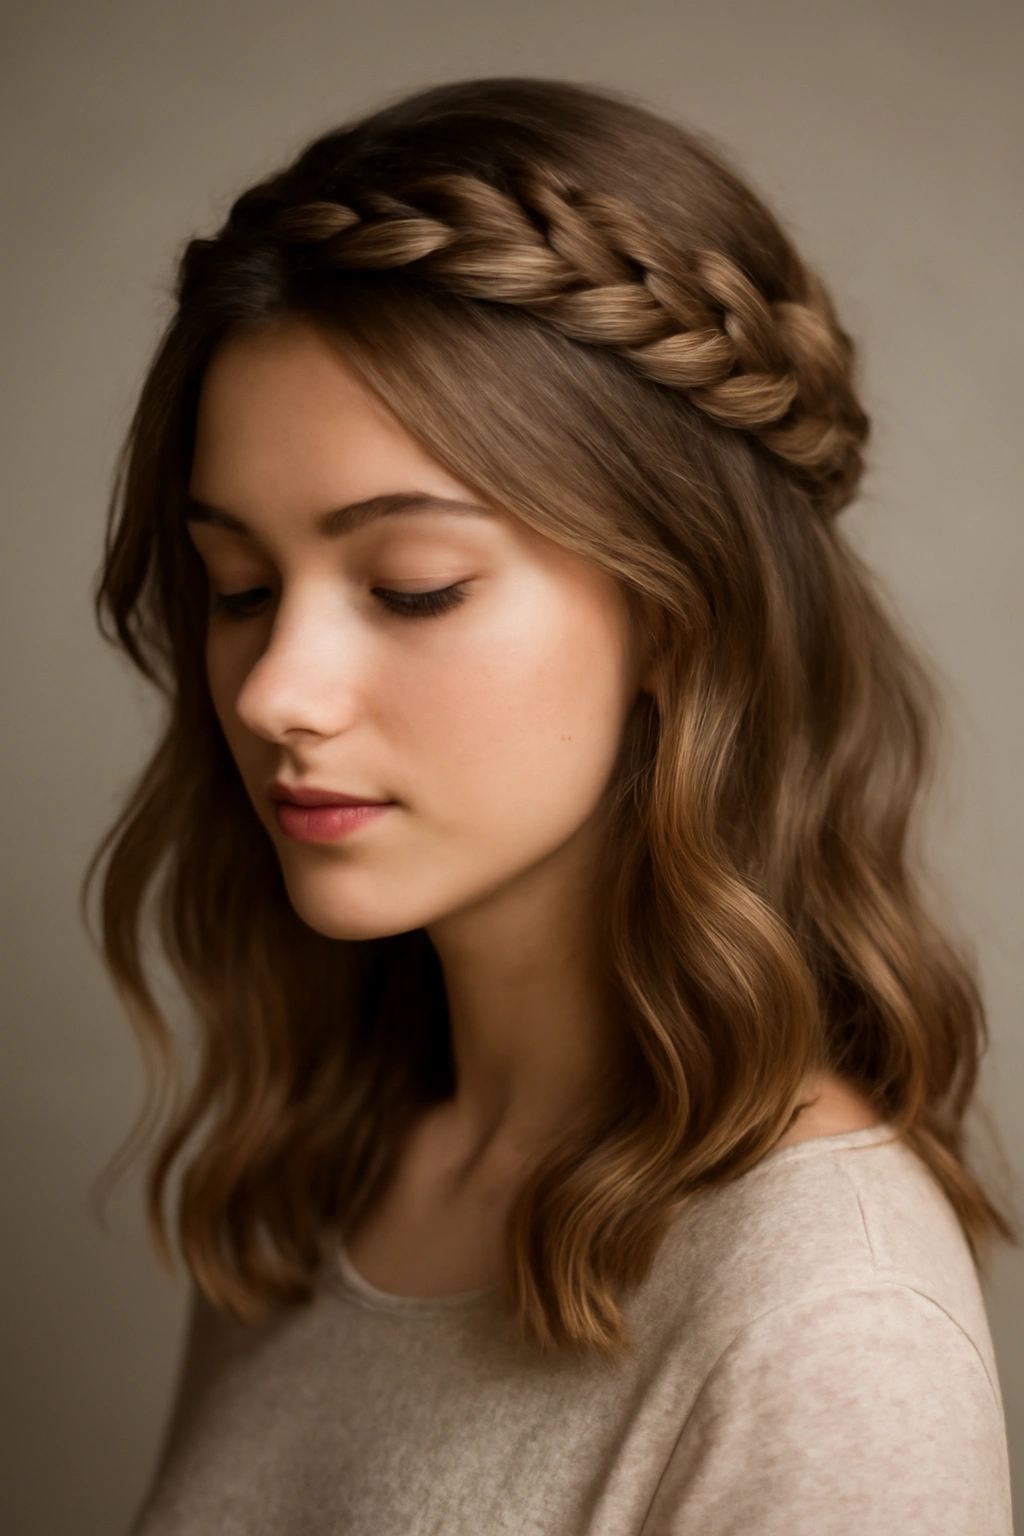
11. Voluminous Crown Braid With Face-Framing Pieces
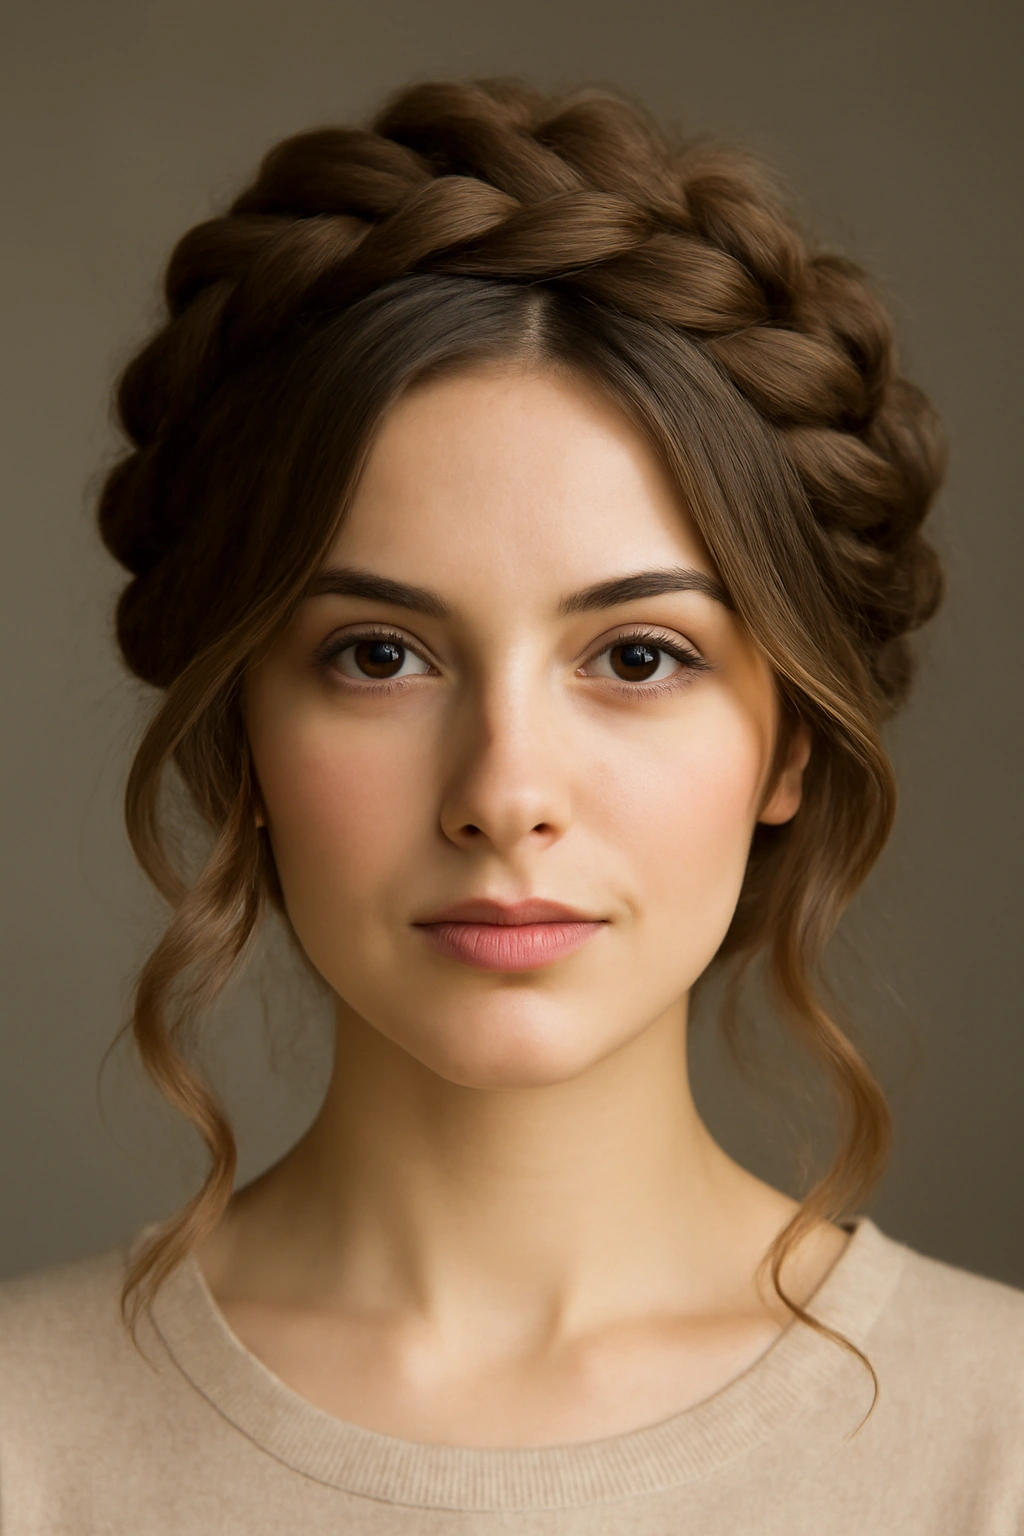
A crown braid that sits along your hairline feels special occasion-worthy and romantic. The voluminous texture keeps it from looking too formal, and the face-framing pieces soften the overall look.
Building Crown Braid Volume
Start by blow-drying your hair with texture and volume at the roots. You want your hair to have substance before you start braiding. Tease gently at the crown and smooth the top layer—this creates a foundation for the braid to sit on with dimension.
Begin your braid from one temple, taking a small section of hair and starting a loose three-strand braid. As you braid around toward the other side of your head, gradually incorporate more hair, letting the braid get slightly thicker as it moves back.
Creating the Finished Look
- Keep the braid loose and romantic, not tight
- Pull gently at the braid to pancake it and increase volume
- Stop the braid at the opposite temple and secure with a small elastic
- Pull out 3-4 small face-framing pieces and curl them softly
- Let these pieces fall naturally around your face
- Secure the braid with bobby pins tucked underneath so they’re invisible
Pro tip: This style looks stunning with loose waves underneath the braid. Curl your hair before you braid so the waves are already set, and the braid will sit beautifully over them.
12. Sleek Deep Side Part With Metallic Root Touch-Up
This is the style that walks the line between effortlessly beautiful and polished-enough-for-homecoming. A deep side part with subtle metallic root touch-up (using temporary metallic spray or shimmer powder) adds an unexpected detail that photographs beautifully.
Perfecting the Deep Side Part
A deep side part means starting your part much closer to one side than the center. It should be dramatic enough to be intentional—not subtle. Brush your hair over to the side and use a rattail comb to create a clean line from your hairline all the way back.
Smooth the hair on both sides of the part using a styling cream or light pomade and a fine-tooth comb. The part line itself should be sharp and defined. This is what creates the polished look.
Adding the Metallic Detail
- Create soft waves throughout your hair using a curling iron
- Along the part line and the exposed root area on one side, apply temporary metallic root spray or shimmer powder (champagne, rose gold, or silver all photograph beautifully)
- Apply this lightly—you’re adding a hint of shimmer, not creating a stripe
- The metallic detail catches light and adds that special-occasion feel without being over-the-top
- Set everything with a flexible hold spray
Pro tip: Temporary metallic hair spray washes out immediately, so don’t worry about commitment. Test it on a hidden section first to make sure you like how it looks and the color choice complements your skin tone.
Final Thoughts
The best homecoming hairstyle is the one that makes you feel like yourself, just elevated. Medium hair gives you the flexibility to go soft and romantic, sleek and modern, playful and textured, or anywhere in between. The styles here all have one thing in common: they’re designed to last through an entire evening of celebration, feel comfortable to wear, and photograph beautifully.
The real secret to any hairstyle working is preparation. Whether you’re doing this yourself or going to a stylist, having a clear picture in your mind of what you want—and being able to show photos if you’re at a salon—makes all the difference. Give yourself enough time that you’re not rushed, and remember that perfection isn’t the goal; confidence is.
Most importantly, choose a style that feels like you. You’ll feel most beautiful when you feel most authentic, and that confidence will shine through in every photo and moment of the evening.