Medium-length hair is the perfect canvas for balayage. It’s long enough to show off how beautifully the hand-painted highlights blend and flow through your strands, yet short enough that maintaining the look doesn’t feel like a second job. The color placement in balayage is all about creating that sun-kissed, lived-in movement — and medium lengths give you just enough surface area to play with dimension without overwhelming your face or requiring monthly root touch-ups.
The magic of balayage at shoulder-length and just-below is that it works with nearly every hair type, texture, and base color. Whether you have stick-straight locks, natural waves, or curls that hold their shape, a well-executed balayage can add visual texture, fullness, and that effortless aesthetic that makes people ask if you just got back from the beach. The key is pairing the right balayage placement with a haircut that complements the color flow — which is exactly what we’re diving into here.
What makes balayage different from traditional foils is the technique: a colorist hand-paints the highlights directly onto your hair in a sweeping motion, creating softer, more natural-looking dimension. At medium length, you can use this to your advantage with placement that flatters your specific face shape and enhances your cut. The highlights can frame your face more deliberately, blend into dimensional depth through the mid-lengths, and taper toward lighter ends that feel naturally sun-lightened rather than dramatically highlighted.
This is not just about picking a pretty color combination — it’s about understanding how a specific haircut style interacts with balayage placement to create a finished look that feels intentional, wearable, and genuinely flattering. Let’s walk through 12 medium-length haircuts that shine with balayage color.
1. The Subtle Layered Bob with Barely-There Highlights

A layered bob sits right around shoulder-length and feels instantly polished, especially when paired with a restraint balayage that focuses on the very front face-framing pieces and a hint of dimension through the crown. This cut works beautifully with a base color that’s only one or two shades lighter than your natural color, with delicate, whisper-thin highlights that catch the light without screaming “I just got my hair done.”
Why This Works So Well
The layering in a modern bob creates movement that naturally shows off subtle balayage placement. When the cut is done well, each layer catches the light differently, and even minimal color variation reads as intentional dimension rather than grew-out roots. The face-framing pieces are slightly longer than the back, which means any highlights you place there will frame your face beautifully as you move throughout the day.
How to Make It Your Own
- Start with a 2-inch shorter cut at the back nape and gradually lengthen to chin-length or just below in the front
- Ask your colorist to focus the lightest tones on a narrow panel of face-framing pieces on both sides
- Keep the crown slightly darker for depth and to minimize the appearance of fine hair or hair loss
- Refresh this look every 8 to 10 weeks to keep the face-framing pieces looking intentional
Pro tip: This cut photographs beautifully from the side — the layering and subtle highlights create dimension that’s visible from every angle, not just head-on.
2. The Textured Shag with Chunky Face-Frame Balayage

A modern shag at medium length is pure movement and attitude, especially when you pair it with chunkier, more visible balayage highlights that follow the natural texture of the cut. This style works best if you have some natural wave or curl, or if you’re willing to work a texture spray and a round brush into your styling routine.
Why This Works So Well
The shag is all about choppy layers and choppy texture, which means your balayage can be a bit more intentional and visible without feeling overdone. The pieces around your face will be much shorter than the pieces underneath, so strategically placing slightly darker roots at the front and lighting it up toward the ends creates a sun-bleached, lived-in effect that matches the shag’s rebellious vibe.
How to Make It Your Own
- Request shorter, feathery layers throughout the crown and longer layers that taper down toward shoulder-length
- Choose balayage placement that emphasizes the choppy texture — think painted pieces rather than an overall dimensional base
- Consider a slightly warmer, golden balayage if you have medium to deeper skin tones; cooler, ash tones if you’re fair-skinned
- Plan to style this with texture spray and run your fingers through while blow-drying for that signature shag movement
Worth knowing: A shag with balayage requires styling commitment. If you prefer air-drying, this might not be your cut — but if you love creating texture and movement, it’s incredibly rewarding.
3. The Blunt Cut with Bright Ends Balayage

A blunt, straight-across cut at medium length paired with balayage that pops in brightness at the very ends creates an almost graphic effect — think of it as color-blocked hair with soft blending. This style is particularly striking if you start with a darker base and finish with noticeably lighter, sun-kissed ends.
Why This Works So Well
The bluntness of the cut creates a clean line that makes your balayage placement obvious and intentional. Unlike a layered cut where highlights blend gradually, a blunt cut with balayage that lightens toward the ends creates a sophisticated ombre-meets-balayage effect. The straight line also makes it easy to see whether your balayage is still looking fresh or whether it’s time for a refresh.
How to Make It Your Own
- Request a blunt line just below the shoulders with minimal layers (you want that thick, substantial feeling)
- Ask your colorist to keep the roots and mid-lengths close to your natural color and brighten noticeably as they move toward the ends
- This works particularly well with cooler balayage tones if you’re pale, or warmer honey and caramel if you have deeper skin
- Schedule a refresh every 10 to 12 weeks, focusing mainly on the ends to keep the brightening visible
Insider note: This cut can make thinner hair look thicker because of the blunt weight at the ends. If thickness is a concern for you, this might be your perfect match.
4. The Piece-y Shoulder-Length Cut with Hidden Depth Balayage

A modern, piece-y shoulder-length cut is built on choppy, disconnected layers that give off an effortlessly undone vibe — pair it with a balayage that creates depth without being immediately visible at first glance, and you get a look that feels full of dimension the more someone looks at you.
Why This Works So Well
The shorter, choppy layers throughout this cut mean there’s a lot of surface area for your colorist to paint with balayage. Rather than concentrating highlights on the face-framing pieces, you can hide some slightly lighter tones throughout the interior layers, which means when you move or flip your hair, dimension reveals itself. It’s like a treasure hunt every time you look in the mirror.
How to Make It Your Own
- Ask for layers that are choppy and disconnected rather than blended and smooth — this creates movement and texture
- Request balayage that includes a few pop-out highlights on the face-framing pieces but mostly focuses on hidden dimension within the interior layers
- This cut works beautifully with either warm or cool balayage tones, depending on your base color and skin tone
- Style with texturizing spray and a flat iron to create piece-y definition, or let it air-dry for a more undone effect
Pro tip: Ask your colorist to place slightly warmer or lighter pieces near your roots in some sections and cooler, lighter pieces toward the ends in others. This creates natural-looking dimension that doesn’t read as a harsh grow-out.
5. The Curly Lob with Dimension-Following Balayage

A lob (long bob) at medium length with natural curls or carefully styled waves is gorgeous on its own, but pair it with balayage that follows the curve of your natural curl pattern, and you’ve got something special. The key here is working with your curl texture rather than fighting against it.
Why This Works So Well
Curly hair naturally creates dimension because of the way each curl casts a shadow — but balayage enhances this exponentially. When your colorist paints highlights that follow your curl pattern rather than applying color sections, the three-dimensional effect of your curls becomes even more pronounced. You get volume, movement, and the illusion of even fuller hair.
How to Make It Your Own
- Cut a lob that hits between chin-length and shoulder-length, with layers that enhance rather than disrupt your curl pattern
- Bring reference photos of curly-haired models to your color appointment so your colorist understands you want dimension that works with texture, not against it
- Choose balayage placement that’s intentionally chunky through the lengths — this creates definition in each curl group
- Use curl-defining products and possibly a diffuser when blow-drying to make the balayage truly shine
Worth knowing: Balayage placement on curly hair should be slightly chunkier and more visible than on straight hair, because diffusion through texture can soften placement that looks too fine on a straight cut.
6. The Choppy Pixie-Bob Hybrid with Strategic Root Placement

A choppy pixie-bob — that in-between cut that’s longer than a true pixie but shorter than a traditional bob — paired with balayage that strategically plays with root visibility creates an edgy, modern look that doesn’t require a ton of maintenance. This is for people who want statement-making dimension without the commitment of longer hair.
Why This Works So Well
This cut’s shortness means balayage reads slightly differently — you can’t hide subtle highlights in longer lengths, so instead, you lean into the contrast. Strategic placement of darker roots with brighter ends creates a faux-undercut effect or emphasizes the choppy layers. The shorter length also means your balayage stays fresher longer because there’s less hair to show grow-out.
How to Make It Your Own
- Request choppy, disconnected layers throughout with slightly longer pieces in the front to frame the face
- Ask your colorist to place slightly darker tones at the roots and around the sides, with brighter highlights concentrated on the longer front pieces
- Consider a contrast balayage if you’re feeling bold — think dark brunette roots with bleached blonde tips, or rich chocolate with caramel highlights
- This cut is ideal if you love styling with product and texture; if you prefer wash-and-go, it might feel high-maintenance
Pro tip: This cut pairs beautifully with a slight tousle or textured styling — it makes the balayage placement even more visible and intentional-looking.
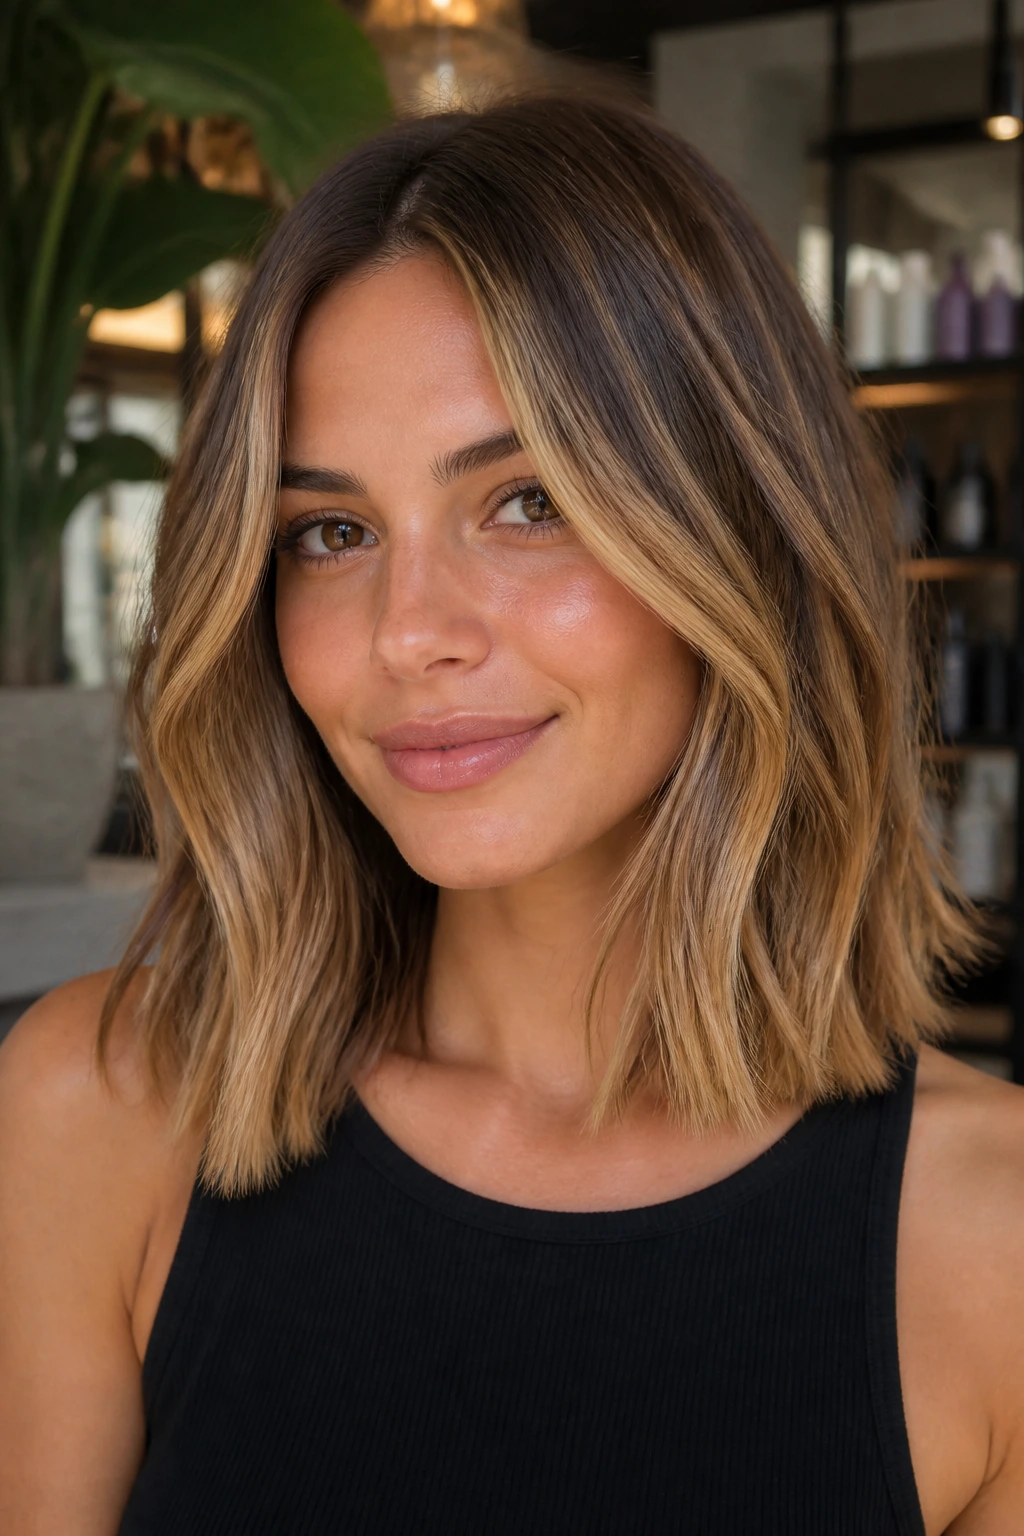
7. The Soft Waves with All-Over Dimensional Balayage

A medium-length cut with soft, loose waves throughout and a more all-over balayage placement — rather than concentrated face-framing — creates a cohesive, dimensional look that feels expensive and intentional. This approach works when your colorist is confident with their balayage hand and you’re open to a more subtle, blended approach.
Why This Works So Well
Soft waves create a romantic, flowing silhouette, and when you combine that with balayage that’s distributed more evenly throughout your hair rather than concentrated in one area, you get a look that reads as intentional dimension rather than just highlighted pieces. The waves themselves create shadow and light play that makes even subtle balayage feel dimensional and full.
How to Make It Your Own
- Cut a medium-length shape with layers designed to hold soft waves (usually that means longer lengths with medium layers)
- Request a balayage that includes lighter tones scattered throughout the crown, mid-lengths, and ends — think scattered highlighted pieces rather than a striped or concentrated placement
- Aim for a balayage with warm, honey or caramel tones if you have warm undertones, or cooler ash and blonde tones if you lean cool
- Blow-dry with a round brush and/or curl your hair with a large-barrel curling iron to enhance the wave and make the balayage shine
Worth knowing: This look requires some styling commitment — soft waves don’t happen by accident on most hair types. If you’re willing to blow-dry and curl, this is magical; if you prefer air-dry styling, look for a cut with more natural texture.
8. The Textured Crop with Modern Balayage Accents

A textured, cropped medium-length style — think chin-length or slightly shorter with lots of choppy layers — paired with strategic balayage that highlights the texture rather than trying to blend seamlessly creates an undeniably cool, modern aesthetic. This cut works particularly well if you have finer hair or less density, because the layers create volume.
Why This Works So Well
Texture is the entire point of this cut, and balayage can either enhance or undermine that texture depending on placement. Strategic placement that highlights individual choppy pieces and lighter tones that frame the face creates a cohesive look that feels intentional and editorial. The shorter length means you can go bolder with color contrast if you want to.
How to Make It Your Own
- Request choppy, textured layers throughout with shorter pieces on top for volume and slightly longer pieces in the front
- Ask your colorist to place balayage in a way that emphasizes texture — think of painting the choppy pieces rather than creating an overall blend
- Consider a slightly bolder color contrast with this cut — it can handle it because of the graphic nature of the texture
- Style with a texturizing spray and your fingers (or a flat iron for definition) to make the cut and color work together
Pro tip: This cut is excellent if you’re growing out a shorter pixie or undercut — the choppy layers help transition your hair while creating an intentional, cool aesthetic.
9. The Romantic Mid-Length Cut with Face-Framing Lights

A romantic, softer medium-length cut with emphasis on longer face-framing pieces paired with balayage that concentrates on brightening and dimension around the face creates a look that’s both flattering and distinctly feminine. This approach works for people who want clearly visible, intentional color without an overly trendy vibe.
Why This Works So Well
Face-framing pieces serve two purposes here: they flatter your features by creating softness around your face, and they’re the perfect place for your lightest, brightest balayage placement. Because these pieces are constantly moving and visible, even subtle highlights read as intentional dimension and vitality. The slightly longer overall length creates elegance and pairs beautifully with softer color placement.
How to Make It Your Own
- Request a cut that grazes the shoulders or is slightly longer, with longer, distinct face-framing layers that are clearly separate from the back layers
- Ask your colorist to place the brightest, lightest highlights specifically on the face-framing pieces and slightly darker tones throughout the rest
- Consider a soft, warm balayage with honey, caramel, or strawberry blonde tones if you have warm undertones, or cooler ash and platinum if you’re cool-toned
- Style these pieces out and away from your face to maximize their flattering effect and show off the balayage placement
Worth knowing: This cut is incredibly flattering for round or square faces because the longer face-framing pieces create length and softness. If you have a longer face shape, ask your stylist about slightly shorter face-framing pieces.
10. The Edgy Asymmetrical Bob with Color-Block Balayage

An asymmetrical bob — where one side is noticeably longer than the other — paired with balayage that roughly follows the asymmetry creates a bold, modern statement. The longer side gets brighter highlights while the shorter side stays closer to the base color, or vice versa, creating a graphic but blended effect.
Why This Works So Well
Asymmetry is inherently interesting and modern, and pairing it with balayage that’s slightly asymmetrical too creates intentionality. The varying lengths mean light hits different parts of the cut differently, and strategic balayage placement can either emphasize that difference or create balance depending on what you’re going for. It’s a look that photographs beautifully and announces that you’re not playing it safe.
How to Make It Your Own
- Request an asymmetrical cut where one side is shoulder-length or longer and the other is chin-length or shorter
- Work with your colorist to decide whether balayage will follow or balance the asymmetry
- Consider bolder color contrast with this cut — it can handle slightly stronger highlights or even dimensional blocking
- Style the longer side sleek and the shorter side with texture, or curl both sides to create cohesion despite the length difference
Pro tip: An asymmetrical cut with asymmetrical balayage is very visual and trendy — if you’re not sure whether you love the style long-term, start with a balanced cut and slightly asymmetrical color placement, then commit to the full asymmetry once you’re sure.
11. The Blunt Shoulder-Length Cut with Honey Balayage
A classic, blunt shoulder-length cut with minimal layers paired with warm, honey-toned balayage that focuses on face-framing pieces and scattered tones throughout the lengths creates a timeless, flattering look. This style is sophisticated without feeling dated and works across multiple hair types and textures.
Why This Works So Well
A blunt cut is inherently polished and feels intentional, and honey-toned balayage is universally flattering — it warms up cooler skin tones and enriches warmer ones. The combination feels expensive and like you’ve put thought into your look without screaming “trendy.” The shoulder-length hits a sweet spot where it’s long enough to feel luxurious but short enough to feel manageable.
How to Make It Your Own
- Request a blunt line right at or just below the shoulder, with minimal layers (maybe just some long layers throughout for movement)
- Ask your colorist for a warm, honey-toned balayage with emphasis on face-framing pieces and subtle scattered highlights throughout
- Consider your specific undertones — golden honey if you have golden or warm undertones, or slightly cooler caramel if you’re neutral
- Blow-dry straight or with a slight wave; this cut looks polished in both scenarios
Worth knowing: This is an excellent “first balayage” cut if you’re unsure about commitment. The warm honey tones blend beautifully as they grow out, and you can go several weeks longer between appointments than you might with cooler or blonder balayage.
12. The Wavy Lob with Lived-In Balayage

A wavy, textured lob at medium length with a balayage that looks like you’ve just returned from a beach vacation — slightly undone, with dimension throughout rather than concentrated placement — creates an effortlessly cool aesthetic. This works best if you’re comfortable with your natural texture or willing to style waves into your hair.
Why This Works So Well
A lived-in balayage is all about subtlety and movement — no harsh lines or obvious regrowth. On a wavy lob, this placement creates the illusion of natural, sun-lightened hair that’s never been near a salon. The waves create their own dimension and shadow play, and balayage adds another layer of depth. It’s the “I woke up like this” look, even if you definitely didn’t.
How to Make It Your Own
- Request a lob that hits between chin-length and shoulder-length with layers designed to enhance your natural wave pattern
- Ask your colorist for a lived-in balayage with slightly messier placement — scattered throughout rather than in defined sections
- Choose warm, natural-looking tones (honey, caramel, dimensional brunette) rather than bright or cool-toned highlights
- Style with a curl cream and scrunch method, or blow-dry with a diffuser to enhance waves and make the balayage shine
Pro tip: This look is actually lower-maintenance than it looks. Because the balayage placement is intentionally undone, it doesn’t matter as much if your regrowth isn’t perfectly blended. You can easily go 12 weeks or longer between color appointments and still look intentional.
Final Thoughts

Balayage at medium length is genuinely one of the most forgiving and flattering color techniques paired with cut options. The length gives you enough surface area to play with placement and dimension while staying manageable and easy to style. Whether you’re drawn to subtle, barely-there highlights or you want something bolder and more visible, there’s a cut-and-color combination here that’ll feel like it was designed specifically for you.
The most important thing to remember when booking your appointment is to bring reference photos of both the cut and the color placement you love. Medium-length cuts can vary dramatically in how they’re layered and constructed, and balayage placement is truly custom — two balayages with the same name can look entirely different depending on where your colorist places the lighter tones. Show your stylist exactly what you want, have a conversation about your lifestyle and styling time commitment, and be honest about how often you want to get your hair done. A beautiful balayage that you can maintain is infinitely better than a perfect color that requires appointments every six weeks if that doesn’t fit your life.