Thinning hair and lost volume are frustrating realities that sneak up on many women over time. It’s not vain to want your hair to look fuller, thicker, and more vibrant — it’s actually one of the most transformative beauty changes you can make at any age. The right cut and styling approach can completely restore dimension, movement, and that youthful bounce that gravity and time have slowly stolen away.
The good news is that a tremendous number of flattering, modern hairstyles are specifically designed to create the illusion of fuller, thicker hair without requiring expensive treatments, painful extensions, or unrealistic daily styling routines. Many of these styles actually work better on mature hair because they lean into texture, movement, and strategic layering rather than relying on density alone. What you’re really after is clever cutting, smart styling choices, and styles that celebrate what your hair can actually do.
Understanding what creates volume is the secret here. It comes down to three things: how light hits the hair (layered cuts create shadows and depth), how hair moves (textured and wavy styles look fuller than stick-straight), and how hair sits on the scalp (shorter styles and the right amount of length make a visible difference). Once you know what actually works, you can ignore the hair myths and focus on cuts and styles you’ll genuinely feel confident wearing.
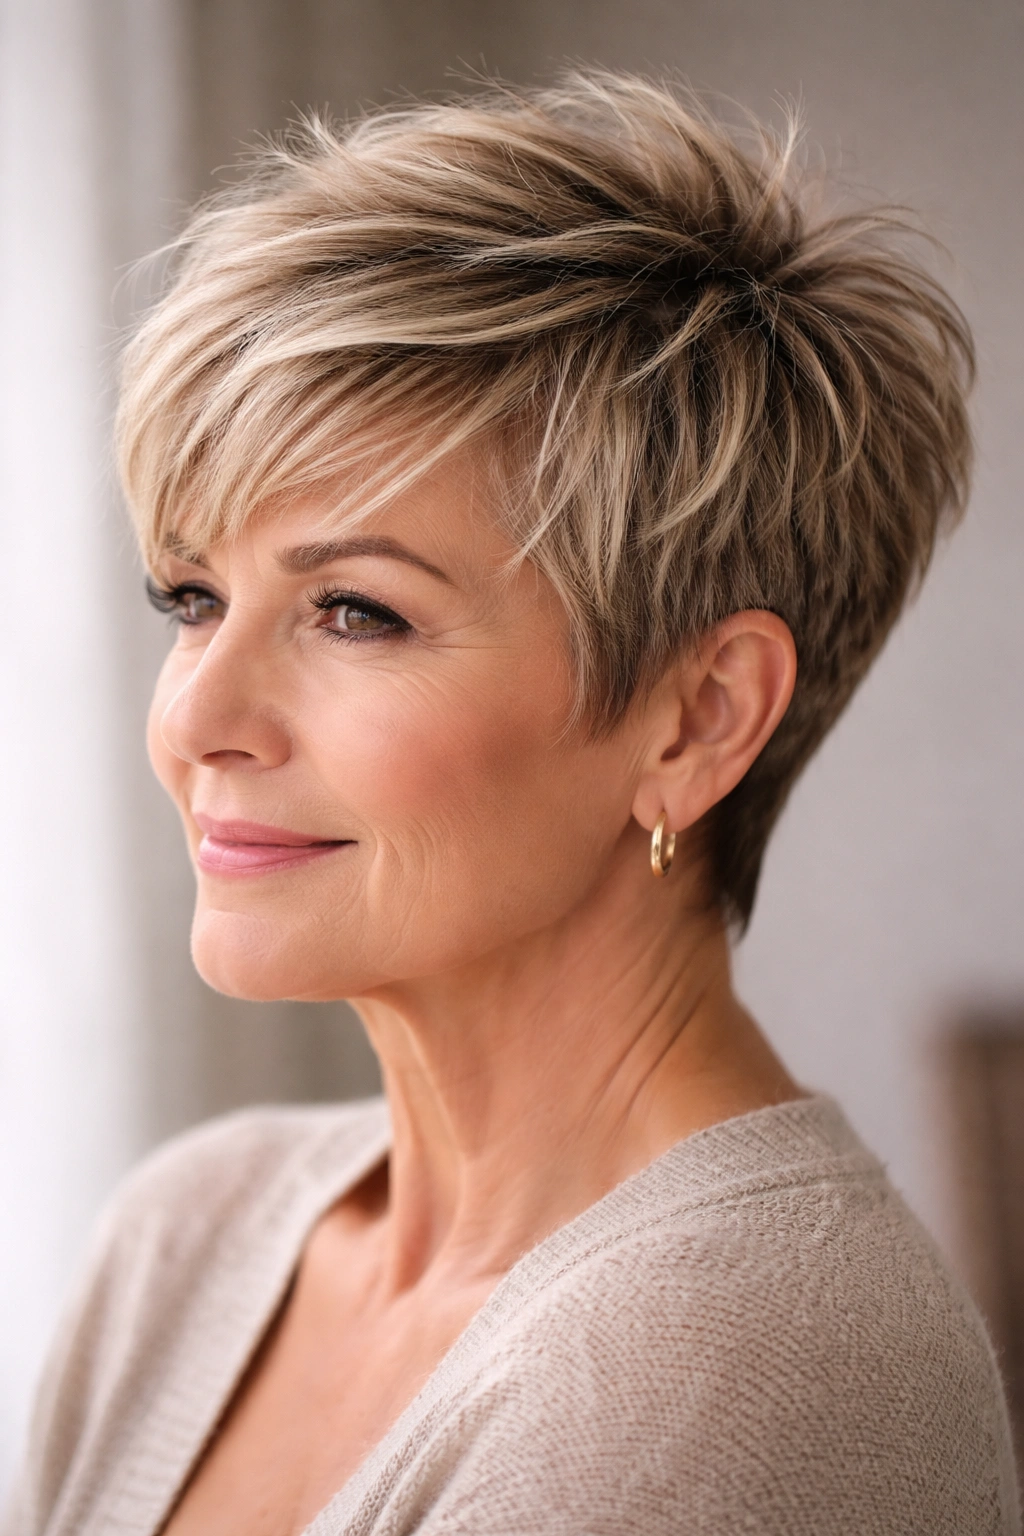
1. Textured Pixie with Side Sweep

A cropped pixie cut isn’t your grandmother’s severe, unforgiving style — modern textured pixies are soft, feminine, and remarkably flattering on women with thinning hair. The magic happens because shorter hair has nowhere to hide, which means you’re working with a smaller amount of hair on top, creating instant fullness relative to face-framing length. The shorter layers throughout the cut catch light differently and create natural texture that reads as volume, even when density is lower.
Why This Creates Maximum Visual Fullness
A textured pixie sidesteps the thinning problem by eliminating length-related weight that pulls hair down and flattens it against the scalp. Short hair stands away from the scalp more easily, and when you add texture through layering and styling, each strand gets its own visual presence. The side-swept styling direction creates movement and angles that catch light, making the hair appear thicker than it actually is. This style is especially effective if you have fine hair because the shorter length means less weight working against you.
How to Make It Work for You
- Request lots of choppy, textured layers throughout — ask your stylist for a “piecy” texture that won’t require blow-drying every day
- Keep the top slightly longer (about 2-3 inches) so you have enough hair to style with volume
- Side-sweep the longer pieces over the top to add lift and a flattering face-frame
- Use a lightweight texturizing spray or sea salt spray on damp hair to enhance texture without adding weight
- A natural wave or slight curl in the hair enhances the fullness effect dramatically
- Have the cut refreshed every 4-6 weeks so the shape stays tight and the texture remains defined
Pro tip: A textured pixie actually gets better looking between haircuts because the growing-out stage adds more texture and movement — the opposite of most short cuts. This makes it a practical choice if regular salon appointments are hard to schedule.
2. Choppy Layers with Face-Framing

Layered cuts are the gold standard for creating volume in thinning hair because they remove weight strategically and create multiple points of movement. A choppy layer with intentional face-framing is one of the most flattering approaches because the shorter pieces around your face create dimension, catch light, and draw attention upward. The choppiness itself — uneven, textured layers rather than blunt, uniform layers — creates visual texture that makes hair appear thicker.
What Makes Choppy Layers So Effective
Shorter, layered hair has less distance to travel before it’s shaped and styled, meaning it’s naturally fuller-looking. Choppy layers prevent the “helmet head” effect that can happen with longer hair on thinning hair. The face-framing shorter pieces redirect light and create shadows that add perceived dimension. This style works especially well because you’re not trying to hide thin hair — you’re actively using the shorter length to your advantage by making movement and texture the visual focus instead of density.
Best Practices for Getting This Right
- Ask for choppy, textured layers starting at chin-length or shorter — longer choppy layers sometimes read as wispy rather than full
- Request shorter face-framing pieces that begin around your cheekbones and extend to about chin-length
- Tell your stylist you want visible texture in the layers, not subtle gradations — the more obvious the choppy movement, the more volume-creating effect
- Side-part the hair or create a deeper side part so the face-framing pieces can fall across one side dramatically
- Blow-dry with a round brush, lifting the roots as you go, to maximize the bouncy effect
- Use a light mousse or volumizing spray before blow-drying for added lift
Worth knowing: This cut actually looks better with a little texture or natural wave — if your hair is very straight, you might consider a perm or regular waves to enhance the effect, since straight hair can sometimes look thinner.
3. Shag Haircut with Lots of Texture

The shag is back, and it’s absolutely perfect for adding volume to mature hair because the entire style is built on texture, movement, and deliberate unevenness. A modern shag differs from the 1970s version because it’s more refined and intentional, with strategic shorter layers on top that create lift while longer lengths remain underneath. The contrast between shorter textured layers and slightly longer lengths below creates visual fullness and movement that mimics what thicker hair naturally does.
The Volume Magic Behind the Shag
The shag works because the shorter, choppy top layers have less weight to fight gravity, so they spring up naturally and create a fluffy, full silhouette. The longer pieces underneath add length and movement without contributing weight that would flatten everything down. This layering structure means your hair is literally shaped to fall and move in ways that create volume. The textured, piecy quality means each layer catches light independently, multiplying the visual fullness effect.
How to Style a Shag for Maximum Volume
- Start with damp hair and apply a volumizing mousse or sea salt spray to the roots and throughout
- Blow-dry with your head tilted forward slightly, using your fingers or a round brush to lift sections as they dry
- Scrunch and tousle the layers as they dry to enhance texture and movement
- Use a light texturizing spray on dry hair to separate layers and maintain the shaggy, piecy look
- Avoid over-brushing, which smooths the texture — use fingers or a wide-tooth comb instead
- Tousled waves or curls look best with a shag because the movement emphasizes the layering
Insider note: Shags can look choppy or intentional depending on styling. Tousled, lived-in styling makes the cut look intentional and flattering; slicked-back or overly sleek styling can sometimes make layers look wispy. Lean into the texture.
4. Tousled Waves with Root Lift

Sometimes the simplest approach is the most effective. Tousled waves aren’t a specific cut — they’re a styling approach that works beautifully on almost any length and layer structure, especially on thinning hair. Waves and curls naturally create volume because they take up more space than straight hair, and the movement means less light passes straight through, making hair appear denser. Adding deliberate root lift — styling the hair to stand up slightly at the scalp rather than lying flat — multiplies the fullness effect dramatically.
Why Waves Create Instant Fuller-Looking Hair
Straight hair lies flat against the scalp, which exaggerates thinning and makes hair appear limp. Waves and curls bounce away from the scalp, immediately creating visible volume and movement. The rippling texture of waves means your hair occupies more three-dimensional space — it’s not just the wave itself, but the way waves create shadows, angles, and light reflection that makes hair look thicker. Root lift is the game-changer that prevents that flattened appearance at the scalp, making the whole head appear fuller.
How to Achieve Tousled Waves and Root Lift
- Blow-dry hair with a round brush, directing air upward at the roots to create initial lift
- Use hot rollers or a 1.25-inch curling iron to create loose, tousled waves throughout
- Don’t curl the entire strand — focus the curl from mid-length down, leaving the roots relatively straight so they can lift naturally
- Apply texturizing spray while hair is still slightly damp to enhance wave hold and separation
- Use your fingers to tousle and separate waves, breaking up any uniform curl pattern
- Sleep on waves loosely (don’t braid them too tightly) to maintain movement the next day
- A dry shampoo applied to roots adds texture and creates the illusion of fuller hair at the scalp
Pro tip: Waves and curls look best when they’re a little undone and not perfectly uniform — that tousled, casual look actually reads as fuller and more modern than tight, uniform curls.
5. Blunt Bob with Subtle Layers

A bob might sound counterintuitive for thinning hair, but a well-executed blunt bob with strategic subtle layers is incredibly flattering. The bluntness creates a defined shape that makes hair appear denser, while subtle layers prevent the weight from being so heavy that it flattens everything. The key is that “subtle” — you’re not going for a choppy shag here, but rather strategically placed layers that remove just enough weight to create movement without sacrificing the shape.
Why a Blunt Bob Works on Thinning Hair
The blunt perimeter creates visual fullness through clean lines and density illusion. When hair ends bluntly (rather than tapering), it reads as thicker because every strand reaches the same endpoint, making the overall shape appear fuller. Subtle layers prevent that limp, heavy quality that makes thin hair look even thinner, but they’re placed carefully so the blunt shape remains the dominant visual element. This style flatters mature faces because the definition of the shape draws attention upward while the shorter length works with, not against, thinning hair.
Best Practices for a Blunt Bob
- Request a blunt edge that hits at or just below the jawline — longer bobs can look stringy on thin hair
- Ask for subtle layers only in the crown area and face-framing pieces, not throughout
- Make sure the back has enough length and density to balance the face-framing front pieces
- Part deeply on one side so shorter face-framing pieces have space to fall across
- Blow-dry with a flat paddle brush, directing the blunt edge under slightly for a polished look
- Use a smoothing serum on damp hair before blow-drying to enhance the blunt, defined shape
- Refresh the blunt cut every 4-6 weeks so the line stays clean and sharp
Worth knowing: A blunt bob requires some styling to look intentional rather than just “getting a haircut.” It’s worth the effort because the polished, defined look is incredibly flattering, but it’s not a wash-and-go style for most hair types.
6. Long Layers with Lots of Movement

Don’t assume you need to cut your hair short to get volume — long hair can absolutely work if it’s heavily layered and styled with intention. Long layers are the key because they remove weight progressively, meaning shorter pieces on top lift and frame the face while longer pieces underneath maintain length without the dead, flattening weight of a blunt long cut. The layers create multiple points of movement and texture that make hair appear fuller throughout the entire length.
How Long Layers Create Volume Illusion
Long layers eliminate the problem of weight-related flatness by distributing weight strategically. Shorter layers on top sit away from the scalp more easily and create shape, while gradually longer layers build volume toward the bottom rather than pulling everything down with one flat weight. The multiple layers create a cascading effect that reads as fullness, and the movement from layer to layer catches light differently, multiplying the visual density. This approach lets you maintain longer hair if that’s your preference, without sacrificing the volume benefits of a shorter style.
Styling Long Layers for Maximum Effect
- Blow-dry with a round brush, lifting sections and curling the brush under to create waves and movement
- Focus blow-drying time on the roots to create lift at the scalp — this single element makes the biggest difference
- Use a texturizing spray while hair is slightly damp to enhance wave formation
- Consider adding waves or curls through hot rollers or a curling iron, focusing on movement rather than uniformity
- Use a lightweight serum rather than heavy oils, which can weigh down thin hair and reverse the volume effect
- Side-part or create a deeper side part so face-framing layers can sweep across one side
- Avoid center parts on thinning hair, as they can expose the scalp and emphasize thinness
Pro tip: Long layers work best if your hair has at least some natural texture or wave. If your hair is very straight, consider a loose perm or regular waves to enhance the movement and fullness.
7. Pixie-Bob Hybrid (Pixie Bob)

A pixie bob is the sweet spot between a pixie cut and a bob — short enough to avoid weight and flatness, but long enough to have more styling options and a less dramatic change from longer hair. The back can be slightly longer (chin-length or just below) while the top and sides remain short and textured, creating a flattering, dimension-rich style. This hybrid approach gives you the volume benefits of a short cut while maintaining a bit more femininity and versatility than a true pixie.
Why the Pixie Bob Works So Well
The pixie bob solves the “too short” problem some women have with pixies by maintaining enough length in the back and sides to feel like a “real” haircut rather than just a crop. The short, textured top creates automatic volume and lift, while the slightly longer back pieces add movement and a softer silhouette. You get the best of both worlds: the volume-boosting benefits of a short cut without the commitment or dramatic change. This style works on most face shapes because the length variation can be customized to your proportions.
How to Style a Pixie Bob
- Request choppy texture throughout the top and sides, with slightly longer pieces in the back
- Ask for subtle face-framing layers that can be swept to one side
- Blow-dry with your head forward to maximize root lift and texture
- Use a round brush or your fingers to style, separating layers as you dry
- Texturizing spray is your friend — it enhances the textured, piecy quality the cut is designed for
- You can wear this sleek and polished or tousled and textured, depending on the occasion
- The back can be styled smoothly or can have more texture and movement
Insider note: A pixie bob is much more forgiving than a true pixie because styling options are broader and the length variation hides minor growth patterns. It’s a great transition style if you’re moving from longer hair toward something shorter.
8. Wavy Lob with Side Part

A lob (long bob) hits that magical length sweet spot — long enough to feel like “real” hair, but short enough that it doesn’t weigh everything down with length-related heaviness. When a lob has waves and a strategic side part, it becomes incredibly flattering on thinning hair because the waves create volume, the side part prevents the scalp from looking exposed, and the shorter length prevents the dreariness of very long, thin hair. This is a style that looks effortlessly chic while actively boosting the appearance of fullness.
The Volume Power of a Wavy Lob
Waves naturally create volume through texture and movement, and the lob length means those waves have room to move without the weight of longer hair pulling them flat. A side part on a lob is particularly flattering because it creates an asymmetrical shape that catches light differently and prevents the middle part from exposing a thinning scalp. The combination — waves plus side part plus lob length — creates a trifecta of volume-boosting elements that work together. This style reads as intentional and polished rather than “trying to hide thinning hair,” which is an important distinction.
How to Get and Maintain a Wavy Lob
- Request a lob that hits around shoulder-length or just below, with layers throughout
- Ask for longer face-framing pieces that begin around cheekbone height
- Deep side part is essential — ask your stylist to show you how to position it
- Blow-dry with waves using a round brush or hot rollers, starting at the roots and moving down
- Apply texturizing spray while hair is slightly damp to enhance wave hold
- Sleep on waves loosely (don’t braid them) to maintain movement
- Dry shampoo the next day adds texture and volume to the roots and throughout
- Tousle with your fingers to create that lived-in, undone wave appearance
Worth knowing: A wavy lob is one of the most low-maintenance volume-boosting styles because waves are forgiving and natural-looking, and the side part does a lot of the visual heavy lifting for you. You don’t need perfect, uniform waves — tousled and varied looks better.
9. Sheared Undercut with Longer Top

An undercut — where the sides and back are cut very short while the top is left longer — is an unexpected but highly effective volume solution for thinning hair. The short sides eliminate weight and prevent that limp, pulled-back appearance, while the longer top has less weight to fight at the roots, creating automatic lift. The visual contrast between the cropped sides and longer top creates a modern, intentional look that works beautifully when styled with texture and movement on top.
Why Undercuts Create Surprising Volume
The genius of an undercut is that it removes weight from areas where it does the most damage to volume — the sides and back — while leaving length where you want lift and movement. The scalp around the crown and top isn’t weighed down by side and back length, so the hair naturally stands away from the scalp more easily. This creates a fuller appearance at the crown (where you need it most) without sacrificing overall hair length. The undercut also creates a bold, intentional statement that reads as a choice rather than a result of thinning hair.
How to Style an Undercut
- Request a fade or taper on the sides and back — the shorter the better, from a volume perspective
- Keep the top significantly longer (at least 3-4 inches) to create contrast
- Ask your stylist for choppy layers throughout the top to add texture and movement
- Blow-dry the top sections upward and back, using a round brush to create lift at the roots
- Texturizing spray is essential with this style to enhance the piecy, textured quality
- You can wear the top down and tousled, or sweep it back and to the side for a more polished look
- The short sides require touching up every 4-6 weeks to maintain the clean contrast
Pro tip: An undercut is a statement style, so it works best if you’re comfortable with something modern and intentional-looking rather than trying to disguise thinning hair. It’s a great choice if you want to lean into the styling choice rather than hide behind it.
10. Tousled Waves with Volume at Crown

This is a styling approach more than a specific cut, but it’s worth highlighting because it’s incredibly effective and works on almost any hair length or cut. The key is deliberately creating volume at the crown — the area where flatness is most visible and where strategic fullness makes the biggest difference — combined with tousled waves throughout that create movement and texture. This combination addresses the core issue of thinning hair: lack of volume and movement.
Why Crown Volume Is Non-Negotiable for Thinning Hair
The crown is where age-related hair loss and thinning are most visible, so adding volume specifically to this area creates an immediate difference in how full your hair looks overall. When the crown has lift and fullness, it draws attention upward and makes the entire head appear thicker, even if the sides and back are thinner. Tousled waves throughout create the illusion of density through texture and movement, while waves at the crown specifically create the lift you need. This approach works because it addresses the specific problem area rather than trying to hide it with length or color.
How to Create Crown Volume and Tousled Waves
- Blow-dry with your head tilted forward to create initial root lift, then tilt back and direct air upward at the crown
- Use a round brush or hot rollers at the crown area, curling the hair upward and backward to create lift that lasts
- Apply volumizing mousse to damp hair before blow-drying, focusing on the crown and roots
- Use texturizing spray on slightly damp hair to create waves and enhance texture throughout
- Tousle the waves with your fingers to create that undone, full appearance
- Avoid sleek, smoothed-back styles which emphasize flatness at the crown
- Sleep on waves loosely to maintain the texture and movement through the next day
Insider note: This is the single most transformative styling change you can make on existing hair, regardless of length or cut. Adding deliberate crown volume changes how people perceive your hair density immediately.
11. Mullet-Inspired Modern Cut

The modern mullet is nothing like the 1980s version — it’s a sophisticated cut that’s shorter and textured on top and sides, with gradual length increase toward the back. This structure is perfect for thinning hair because the top and sides avoid weight while the back can have movement and slightly more length. The mullet creates visual dimension through the length variation and textured layers throughout, making it a surprisingly flattering choice for volume.
Why a Modern Mullet Works
The modern mullet solves multiple problems at once: the short, textured top and sides avoid the flatness of full length while creating lift and shape, and the slightly longer back adds movement and dimension without the dead weight of a blunt long cut. The textured quality throughout — layers that are piecy and choppy rather than smooth — creates the illusion of density through texture. This style is especially effective because it’s intentional and modern-looking, not trying to hide thinning hair but rather using strategic length variation to create visual fullness.
How to Style a Modern Mullet
- Request choppy, textured layers throughout, with the top and sides significantly shorter than the back
- The back should be longer at the nape (perhaps 4-6 inches) and gradually increase in length toward the occipital bone
- Ask for face-framing pieces around the sides that you can style forward or sweep back
- Blow-dry with texture throughout — use a round brush to create movement and separate layers
- Texturizing spray is essential to enhance the piecy, textured quality the cut is designed for
- You can wear this tousled and casual or more polished depending on styling
- The back can be worn down with movement or styled with subtle waves
Worth knowing: A modern mullet is definitely a fashion-forward choice, and it works best if you’re comfortable with something that gets noticed. It’s a great option if you want to make a statement with your hair rather than play it safe.
12. Sleek Crop with Subtle Texture

A sleek crop is a polished, minimal approach to the short-hair volume solution — it’s not choppy or textured necessarily, but rather a clean, well-defined short cut that sits away from the scalp naturally. When executed well, a sleek crop looks intentional and effortless, with volume coming from the natural shape and lift of shorter hair rather than from aggressive texturizing. This works beautifully on women who prefer a more polished, minimal aesthetic while still solving the thinning hair volume problem.
Why a Clean Crop Creates Volume
A sleek crop works because short hair simply sits further away from the scalp than longer hair, creating automatic volume through positioning rather than texture. The clean lines and polished shape read as intentional and high-maintenance (in a good way), which shifts perception away from thinning hair toward a chosen, sophisticated style. The minimal approach works especially well on women with mature bone structure because the close crop highlights facial features and bone definition. This style celebrates simplicity rather than trying to create volume through aggressive layering.
How to Achieve and Maintain a Sleek Crop
- Request a crop that’s short and clean, with minimal layering — aim for 1.5 to 2 inches on top
- Ask for a subtle taper on the sides and back rather than a dramatic undercut
- Keep the top smooth rather than heavily textured, but ask for enough texture that it doesn’t look severe
- Blow-dry with a round brush, directing hair upward and back to create natural lift
- Use a lightweight styling cream rather than heavy products, which can weigh down the short hair
- A side part or swooped-back styling adds dimension and prevents the look from being too severe
- Refresh the cut every 4-6 weeks to maintain the crisp, polished shape
Pro tip: A sleek crop is wonderful if you want low daily-styling demands combined with a polished, intentional look. It’s a great choice if you prefer minimalism over elaborate texture and movement.
13. Textured Lob with Choppy Bangs

A lob with textured layers and choppy bangs is one of the most flattering options for thinning hair because it combines multiple volume-boosting elements: shorter face-framing through the bangs, overall shorter length reducing weight, textured layers creating movement, and the strategic styling of bangs that draws attention to your eyes and upper face. The bangs are particularly powerful because they create fullness at the hairline and crown, areas where thinning is often most visible.
Why Choppy Bangs Change Everything
Choppy, textured bangs create instant volume at the crown and hairline by adding shorter pieces that sit away from the scalp. Bangs draw attention to your eyes and upper face, away from any thinness in the crown area. The texture and movement of choppy bangs — rather than blunt, heavy bangs — creates dimension and prevents the weighted-down look. Combined with a textured lob, choppy bangs create a multidimensional style that reads as intentional and flattering, not like an attempt to hide thinning hair.
How to Get Choppy Bangs and a Textured Lob
- Request choppy, textured bangs that hit around eyebrow height or slightly longer
- Make sure the bangs have texture and movement, not a blunt, solid edge
- Combine with a lob that has layers throughout and longer face-framing pieces
- The lob should be shorter (around shoulder-length) to avoid weight that pulls everything down
- Deep side part so the face-framing pieces can sweep across one side
- Blow-dry bangs with a round brush, directing them upward and to one side
- Use texturizing spray to enhance the choppy, piecy quality of both the bangs and the lob layers
- Tousle the entire style with your fingers to create that lived-in, full appearance
Worth knowing: Choppy bangs require regular trims (every 4-6 weeks) to maintain their shape and texture, but they’re worth the maintenance because they create such a dramatic difference in perceived volume.
14. Braided or Twisted Crown Detail

This is a styling technique rather than a specific cut, but it’s incredibly effective for creating the appearance of fullness while also adding dimension and visual interest. Creating a braid or twist that wraps around the crown — either incorporated into an updo or as a detail in a half-up style — draws attention to the crown area and adds volume illusion through texture and dimension. This approach works beautifully on any hair length and is especially effective on days when your hair isn’t cooperating or when you want a more intentional, styled look.
How Crown Braids Create Volume Illusion
A braid or twist around the crown visually fills the crown area with texture and dimension, making the head appear fuller and rounder. The braid itself adds perceived volume through its textured, dimensional quality, and positioning it at the crown draws attention to that area specifically. This technique is powerful because it’s an active styling choice that frames the face beautifully while also addressing the specific fullness concern of the crown. The result looks intentional and elegant rather than like an attempt to hide thinning hair.
How to Create a Crown Braid
- Start with wavy or textured hair — this creates volume in the braid itself
- Create a three-strand braid starting at one side of the crown, pulling it loosely so the braid itself appears full
- Wrap the braid toward the back of the head, securing it with bobby pins that match your hair color
- Gently pull and loosen the braid slightly after securing it — this creates a fuller, more textured appearance
- Leave the rest of your hair down and wavy, or style the back into a half-up twist or ponytail
- Texturizing spray applied before braiding enhances the texture of the braid and remaining hair
- This works beautifully as an occasional styled look or as a daily style on tousled wave days
Pro tip: Loose, textured braids always look fuller and more intentional than tight braids. Spend a moment gently pulling and loosening the braid after securing it for maximum effect.
15. Tousled Waves with Clip-In Extensions (Strategic Placement)

Clip-in extensions specifically for adding volume at the crown and through the crown area (rather than adding length) are an underrated tool for women with thinning hair. Quality clip-in extensions designed for volume — usually shorter pieces that blend seamlessly with your existing hair — can instantly boost perceived fullness without the commitment of permanent extensions. When positioned strategically at the crown and blend points, they create the appearance of naturally fuller hair while allowing you to remove them for deep conditioning and scalp care.
Why Strategic Volume Extensions Work
Clip-in extensions positioned for volume rather than length work because they layer into your existing hair and create the illusion of density. Unlike trying to fake volume with styling alone, extensions actually add hair to the crown area where you need it most. Quality extensions that match your hair texture and color blend seamlessly, so the result looks like your natural hair is actually fuller. This approach is especially effective on days when you want maximum impact or when your own hair isn’t cooperating with styling.
How to Use Clip-In Extensions for Volume
- Invest in quality extensions designed for volume, not length — usually 8-12 inches maximum
- Choose extensions that match your hair color and texture as closely as possible
- Clip 2-3 pieces at the crown area (where you need the most volume) and blend points
- Style your hair and extensions together with waves or texture to create cohesion
- Texturizing spray helps blend extensions with your natural hair
- Remove extensions before sleeping to avoid stress on your scalp and hair
- Deep condition your natural hair regularly since adding extensions requires good hair health
- Clip extensions last 6-12 months with proper care
Worth knowing: Quality matters tremendously with clip-in extensions — cheap extensions look cheap and don’t blend well. Investing in good extensions that you’ll actually wear and maintain is worth the cost.
16. Asymmetrical Crop with Longer Swoops

An asymmetrical crop — where one side is shorter than the other — creates visual fullness through the length variation and the strategic use of longer pieces that sweep across. One side might be cropped close to the scalp while the other side is longer and can be styled into swoops and waves that frame the face. This creates tremendous visual interest and makes hair appear fuller through the contrast and dimension.
Why Asymmetry Creates Volume Illusion
An asymmetrical cut tricks the eye into perceiving fullness through visual contrast and dimension. The longer, swooping pieces create movement and catch light differently than uniform length would. The varying lengths mean different parts of your hair are at different distances from the scalp, creating a fuller silhouette overall. This style is especially powerful because it’s modern, intentional, and draws attention through design rather than through trying to hide thinning hair. The result looks editorial and fashion-forward.
How to Style an Asymmetrical Crop
- Request one side significantly shorter (perhaps 1-2 inches) and the other side noticeably longer (3-5 inches)
- Ask for choppy layers throughout the longer side so it has movement and texture
- The longer side should have face-framing pieces that you can style with waves
- Blow-dry the short side smooth and the longer side with movement and waves
- Use a texturizing spray to enhance texture on the longer side
- Deep side part so the longer side can sweep across your face dramatically
- You can wear this tousled or more polished depending on styling
Insider note: Asymmetrical cuts require a stylist who’s comfortable with editorial, fashion-forward work. They’re not the safest choice, but they’re incredibly effective for creating a fashionable, intentional volume illusion.
17. Voluminous Curled or Permed Waves

If your hair is naturally straight and thin, a permanent wave (perm) or regular wave treatments can be transformative because waves and curls create inherent volume through texture. Modern perms are much gentler than they used to be, and they create soft, tousled waves rather than tight ringlets. Waves created through a perm maintain volume even without daily styling, because the wave structure itself takes up more space than straight hair. Combined with a good cut designed for thin hair, waves create a genuinely full appearance.
How Perms Create Lasting Volume
A permanent wave restructures the hair’s protein bonds to create lasting texture, meaning you get volume from the wave structure itself rather than from daily styling efforts. Waves naturally create the illusion of fullness because they occupy more three-dimensional space than straight hair. A perm eliminates the daily styling requirement of creating waves with hot tools, making it a practical solution if you want lasting volume without the time investment. Modern perms can be customized from loose, tousled waves to more defined curls, depending on your preference and hair type.
How to Get and Maintain Permed Waves
- Have a thorough consultation with your stylist about the wave size and pattern you want
- Request a gentle wave treatment rather than a tight perm — you want tousled waves, not ringlets
- A good perm combined with a textured cut creates the best results
- Condition deeply after a perm because the chemical process can be drying
- Use a wave-enhancing mousse or cream on damp hair to refresh waves between salon visits
- Sleep on waves loosely to maintain texture and movement
- Refresh the perm every 6-12 months as the wave relaxes naturally
- Use a sulfate-free shampoo designed for curly or wavy hair to maintain the wave
Worth knowing: A perm is a commitment, but for straight-haired women with thinning hair, it can be genuinely transformative. The volume created by the wave structure itself means you get fullness without constant styling.
18. Textured Pixie with Longer Crown
A textured pixie that’s strategically longer at the crown creates maximum volume at the area where you need it most while maintaining the short, low-weight benefits of a pixie cut elsewhere. The crown can be 1-2 inches longer than the sides, creating a shape that’s full on top and tapered on the sides. This version of the pixie gives you more styling options than a traditional pixie while still solving the thinning hair volume problem.
Why Crown Length Matters in a Pixie
A pixie with longer crown length leverages the volume benefits of short hair (which sits away from the scalp naturally) while maximizing fullness exactly where your hair is likely thinnest. The longer crown creates a rounded shape that looks full and feminine, while the short sides avoid the weight that flattens everything. You get the styling versatility of slightly longer hair on top combined with the low-maintenance, volume-boosting benefits of a short cut. The textured quality throughout creates the illusion of even more density.
How to Get and Style a Textured Pixie with Crown
- Request a pixie with the crown (top and back crown area) noticeably longer than the sides
- Ask for choppy, textured layers throughout, especially at the crown
- The crown should have enough length (1.5-2.5 inches) to style with a bit of movement
- Blow-dry the crown area upward and back to maximize lift
- Use a round brush or your fingers to create textured, piecy styling at the crown
- Texturizing spray enhances the piecy, textured quality
- Sides and back can be sleek and smooth or slightly textured, depending on your preference
- This style requires touching up every 4-6 weeks to maintain the shape
Pro tip: A textured pixie with crown length gives you the best of both worlds — the low-maintenance benefits of a short cut combined with more visible volume and styling options than a traditional pixie.
19. Soft Waves with Volumizing Products and Styling

Sometimes the best volume solution isn’t about the cut — it’s about using the right products and styling techniques to maximize whatever hair you have. Soft waves combined with strategic product use (volumizing mousse, texturizing spray, lightweight serums) and deliberate styling (especially at the roots and crown) can create genuinely impressive fullness on any cut. This approach works because you’re working with the hair’s natural tendency to move and maximizing it through smart products and technique.
How the Right Products Multiply Volume
Volumizing mousse applied to damp roots and blown dry upward creates a foundation of lift that lasts all day. Texturizing spray adds grip and texture to hair, making it appear denser and fuller. Lightweight serums enhance shine without adding weight that flattens. Dry shampoo refreshes volume the next day and adds texture throughout. The combination of these products used strategically creates visible fullness without requiring a dramatic cut or extensive daily styling. This approach is especially effective because it works on existing hair without requiring expensive treatments or cuts.
How to Use Products for Maximum Volume
- Apply volumizing mousse to damp roots before blow-drying, focusing on the crown and hairline
- Blow-dry with your head tilted forward initially, then upward to create root lift
- Use a round brush to curl sections under as you dry, creating waves and movement
- Apply texturizing spray to slightly damp hair throughout, focusing on the crown and roots
- Sleep on waves loosely to maintain movement and add texture
- Use dry shampoo the next day, applying it to the roots and throughout for texture and volume
- Use a lightweight serum rather than heavy oils, which can weigh down thin hair
- Refresh waves or curls with a curling iron if needed, focusing on movement rather than tight curls
Worth knowing: Quality products make a tremendous difference. Investing in good volumizing mousse, texturizing spray, and a lightweight serum is more effective than using multiple cheap products.
20. Textured Cut with Intentional Styling

This final option is really a philosophy rather than a specific style: choose a cut designed for volume (layered, textured, shorter), and then commit to styling it intentionally rather than trying to make it work as a wash-and-go. A textured cut that’s blown-dry with purpose, styled with waves or texture, and refreshed with texturizing spray and dry shampoo will always look fuller than the same cut styled casually or not at all. The cut creates the foundation, but the styling multiplies the volume effect dramatically.
Why Styling Matters as Much as the Cut
The most flattering cut in the world won’t create volume if you’re not styling it to take advantage of its design. A textured, layered cut is designed to move and catch light — but only if you blow-dry it with intention and maintain the texture and movement. Conversely, even an average cut looks much better when you add waves, texture, and deliberate styling. The combination of a good cut plus intentional styling creates the maximum volume effect.
How to Commit to Styling for Volume
- Choose a cut designed for volume (layered, textured, appropriate length)
- Blow-dry daily with a round brush, focusing on root lift and creating waves or movement
- Apply products strategically: mousse before blow-drying, texturizing spray during styling, dry shampoo for refreshing
- Use hot tools (curling iron, hot rollers) on days when you want extra volume or when your hair isn’t cooperating
- Tousle and separate layers with your fingers to enhance texture and movement
- Refresh your styling the next day with dry shampoo and minimal product rather than washing again
- Keep your cut maintained with trims every 4-6 weeks so the shape stays intentional
- Remember that this is a styling commitment — you’re working with your hair’s natural properties, not against them
Insider note: Women who consistently style their hair intentionally (even if that styling takes 15-20 minutes) almost always have better-looking, fuller-appearing hair than women with longer, less-maintained cuts that require no styling. The time investment in styling is worth the dramatic difference in results.
Final Thoughts

The right hairstyle can genuinely transform how you feel about your hair and how full it appears, even when density is lower than it used to be. The common thread running through all these options is this: shorter lengths work better than longer ones because less weight means more lift, textured and layered cuts work better than blunt and smooth because movement and texture create volume illusion, and intentional styling always works better than leaving hair to its own devices. None of these styles require you to accept thinning hair or settle for a style you don’t love — they’re all flattering, modern, and designed specifically for the realities of mature hair.
The best style for you personally depends on your face shape, hair texture, how much time you want to spend styling, and what makes you feel confident and like yourself. A good stylist who understands volume-boosting techniques and has experience working with thinning hair can customize any of these approaches to work specifically for you. The key is choosing a stylist who gets it — someone who understands that you’re not looking to disguise thinning hair but rather to work with it intelligently and create a style that makes you feel like the best version of yourself.
Your hair is still an important part of how you present yourself to the world, and you deserve to feel genuinely good about how it looks. Whether you choose something bold and short, textured and layered, or a styling approach that maximizes what you have, the goal is the same: a style that makes you walk out of the salon feeling confident and keeps looking good throughout your day and beyond.