Arab women’s hairstyling celebrates incredible diversity—from classic elegance to modern flair, from long flowing locks to intricately braided designs. Whether you’re preparing for a wedding, a family gathering, a formal event, or simply want to refresh your everyday look, the possibilities are genuinely endless. The beauty of Arab hairstyles lies in their ability to blend cultural tradition with contemporary trends, incorporating luxurious textures, thoughtful accessories, and techniques that work beautifully with different hair types and face shapes.
What makes hairstyling for Arab women so special is the emphasis on volume, movement, and personalization through jewelry and embellishments. Many of these hairstyles are designed to complement the elegance of traditional dress, hijabs, and formal wear while also standing alone as stunning everyday styles. The key is understanding what works with your hair texture, face shape, and personal style—then executing it with confidence.
Throughout this guide, you’ll discover 12 hairstyles that range from romantic and soft to bold and statement-making. Each one can be adapted to suit your specific hair type, length, and the occasion you’re dressing for. Whether you prefer your hair down, partially up, or fully secured, there’s a style here that will make you feel beautiful and put-together.
1. Layered Hijab-Friendly Waves
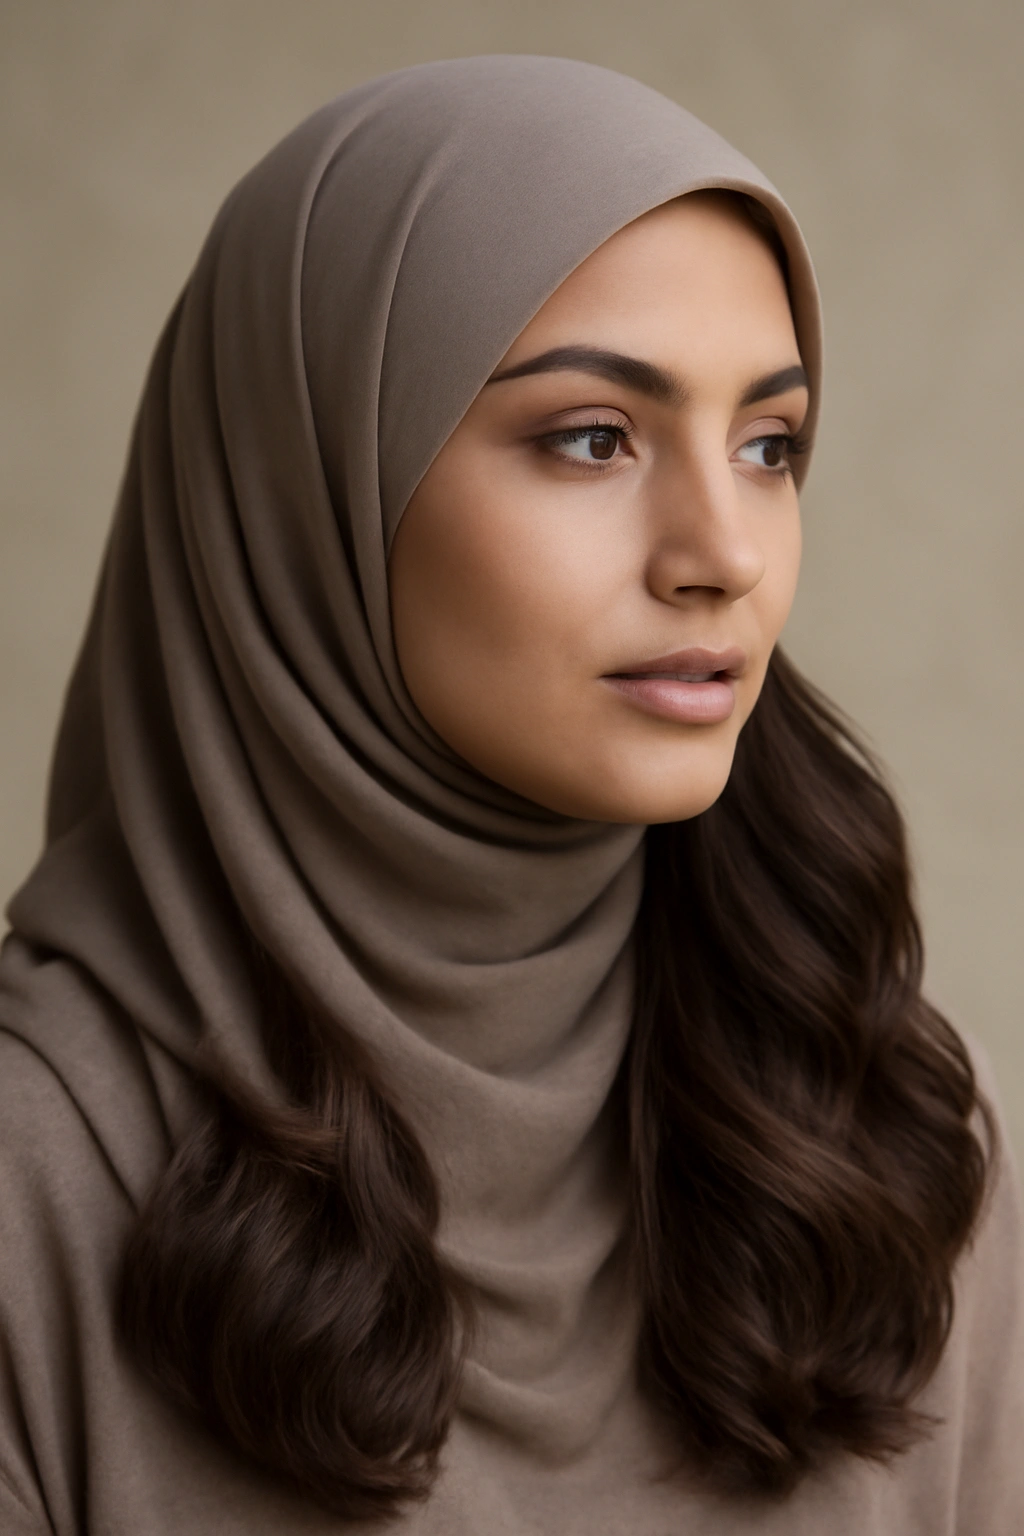
Layered waves are a cornerstone of modern Arab hairstyling, offering the perfect balance of elegance and practicality, especially if you wear a hijab regularly. This style focuses on creating movement and dimension throughout your hair, starting from the roots and cascading down in soft, bouncy waves. The key advantage is that layers add texture and body, making even fine hair appear fuller, and the waves frame the face beautifully when hair is worn down for special occasions.
Why This Style Works Beautifully
Layered waves work because they create natural-looking movement that catches light and adds sophistication without requiring your hair to be pulled tightly. The soft waves are forgiving—they actually look better with a bit of texture and don’t demand perfect sleekness. If you wear a hijab, the layers underneath create a flattering shape under the hijab without bulk, and the waves fall perfectly when you remove it. This style also transitions seamlessly from day to evening, from casual to formal, making it genuinely versatile.
How to Achieve Layered Waves
- Get a professional cut first: Layers should be cut by someone experienced with Arab hair textures. Ask for long layers starting around mid-length, with shorter layers around the face and collarbone for dimension and framing.
- Use a curling iron or wand: Work in 1-2 inch sections, wrapping hair around a 1.25-inch barrel for loose waves. Alternate the direction you wrap (away from face, then toward face) for a more natural result.
- Apply texturizing spray before styling: This gives the waves grip and makes them last longer throughout the day, even under a hijab.
- Let waves cool completely: This sets them and makes them bouncier and more defined.
Pro tip: Sleep in loose braids the night before you need waves—you’ll wake up with natural-looking texture that requires minimal heat styling.
2. Long Braids with Gold Accessories
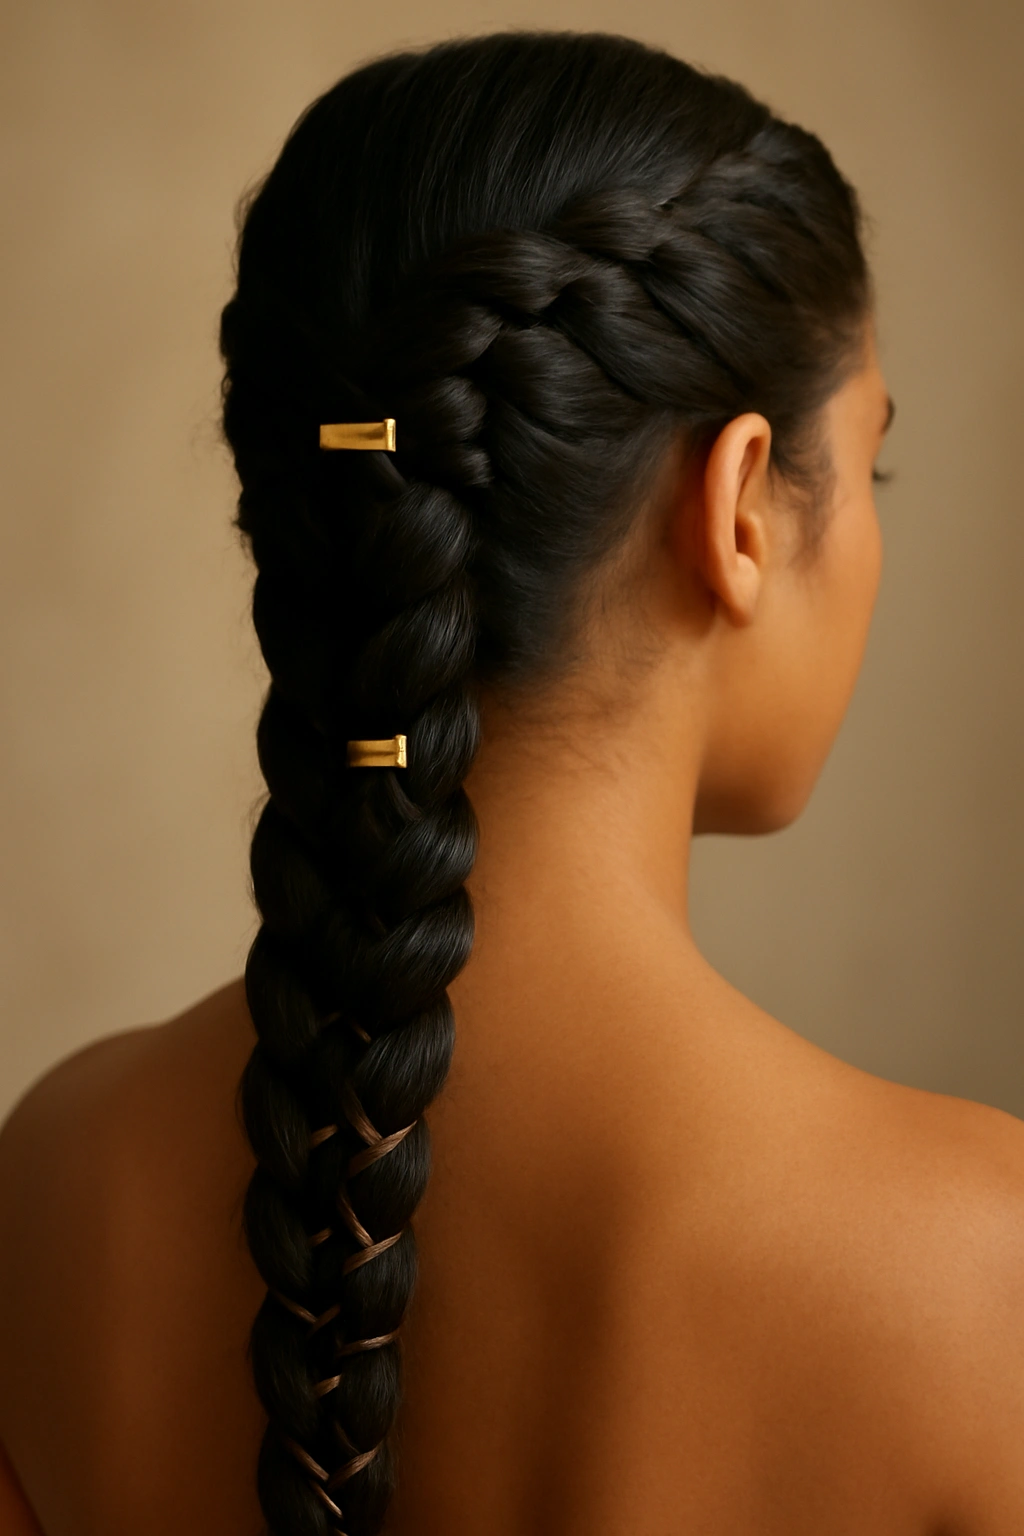
Long braids represent timeless elegance in Arab hairstyling traditions, and when adorned with gold accessories—clips, rings, or threaded through the braid itself—they become genuinely showstopping. This style works exceptionally well for women with long, thick hair and is particularly popular for weddings, formal celebrations, and events where you want to make a statement. The beauty of braids is that they’re protective, they keep hair secure all day, and they look increasingly more beautiful as the day goes on.
Why This Style Is So Popular
Braids have been central to Arab beauty traditions for generations, and for good reason. They’re practical, stunning, and incredibly photogenic. When you add gold accessories—whether delicate chains woven through the braid, ornamental clips securing sections, or metallic bands—the style immediately elevates from casual to formal. Long braids also showcase healthy, shiny hair and create a sense of movement and flow that’s distinctly feminine and elegant.
Creating Perfect Long Braids
- Start with moisturized hair: Apply a leave-in conditioner or hair oil to damp hair before braiding. This prevents breakage and makes the braids smoother and shinier.
- Try a fishtail or Dutch braid for texture: A regular three-strand braid is classic, but a fishtail braid looks more intricate and catches light beautifully, especially with gold accessories woven through.
- Braid while hair is still slightly damp: This helps the braid hold its shape better and look neater throughout the day.
- Add gold accessories strategically: Thread delicate gold chains through the braid at intervals, use ornamental clips at key points, or wrap thin gold ribbon around sections of the braid.
- Gently pancake the braid: After braiding, pull gently on sections of the braid to make it wider and more textured—this looks more intentional and romantic.
Worth knowing: Braids actually last better if you do them the night before or several hours before your event, allowing them to settle and tighten slightly.
3. High Ponytail with Volume
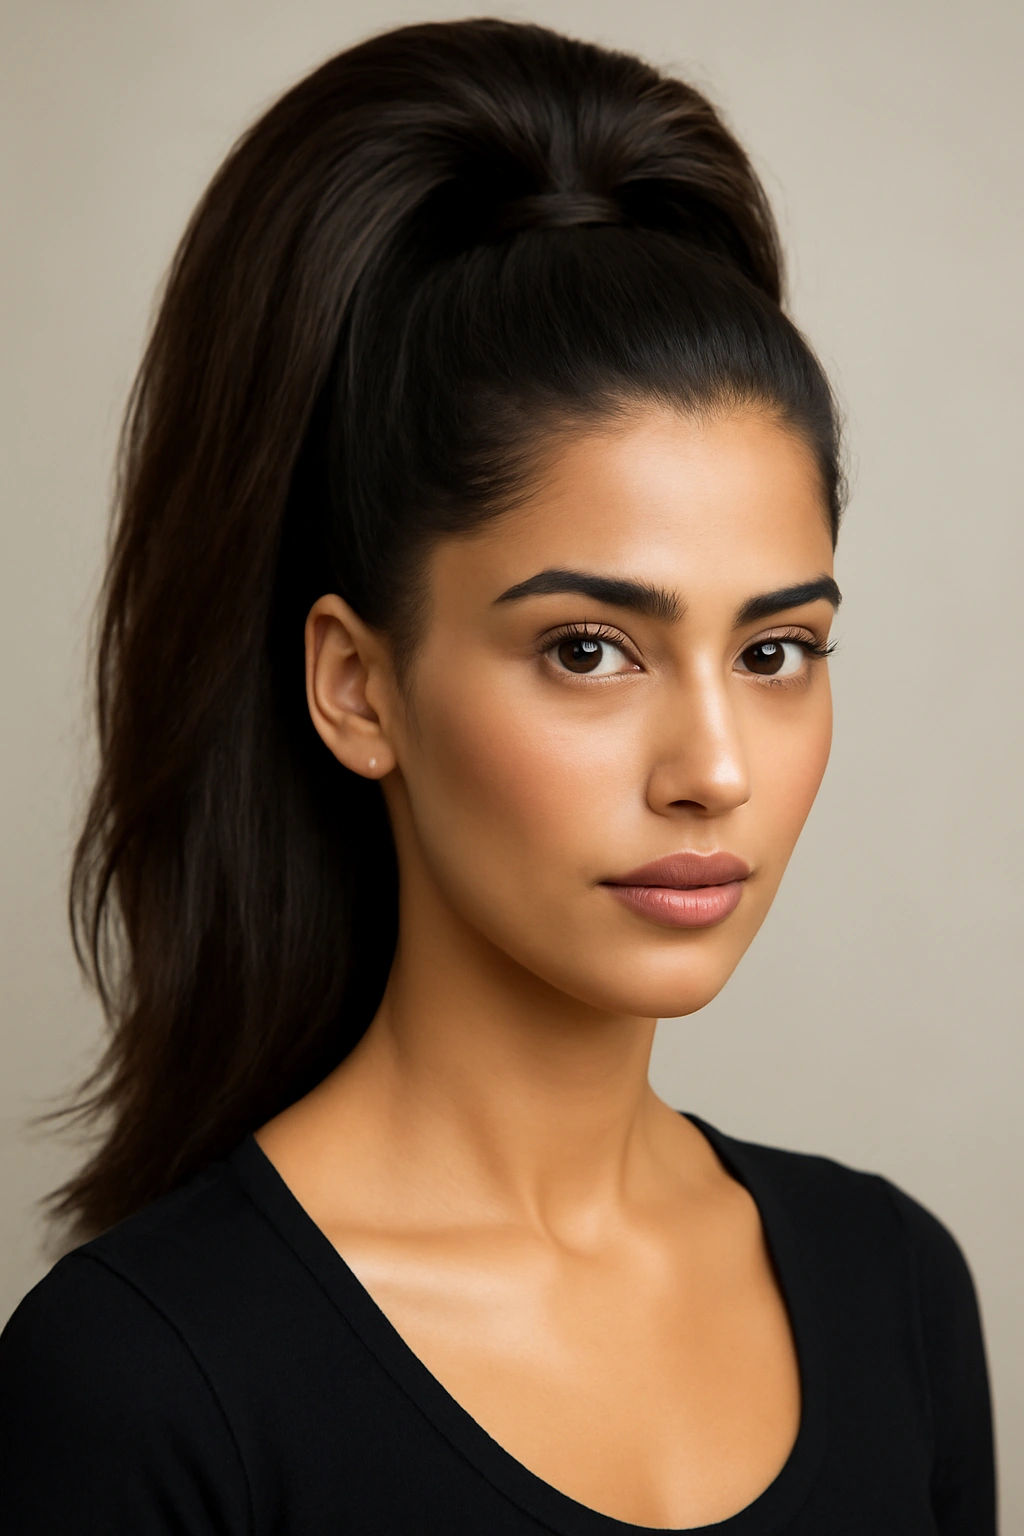
A high ponytail is a go-to style for Arab women who want something polished, modern, and effortlessly chic—but with a crucial difference from other ponytails. The Arab take on this style emphasizes serious volume, either through teasing at the crown, layering thick hair sections, or using extensions if needed. A sleek or slightly textured high ponytail pulls the face back beautifully, elongates the neck, and works perfectly with formal wear, hijabs, or statement earrings.
What Makes This Ponytail Special
Unlike a tight, severe ponytail, this version celebrates fullness and movement. Volume at the crown creates a flattering silhouette that frames the face and gives off an air of confidence. The height of the ponytail draws attention upward and can make your entire face appear lifted. This style is particularly stunning with women who have strong facial features or high cheekbones, as it accentuates these naturally.
Steps to Create the Perfect High Ponytail
- Tease the crown section first: Take a section of hair from your crown (roughly 2 inches back from your hairline) and backcomb it gently to create a cushion of volume. Don’t make it messy—just enough texture for grip and lift.
- Brush the top layer smooth: After teasing, smooth the top layer gently so it looks polished while the volume underneath remains.
- Gather hair into a high position: Bring all hair into a ponytail positioned high on your head, securing with a strong elastic. The ponytail should sit at the crown, not lower.
- Wrap a section of hair around the elastic: Take a thin section from the ponytail, wrap it around the elastic to hide it, and pin it in place. This looks infinitely more finished than a visible elastic.
- Add texture to the ponytail: Use a curling iron to add waves to the ponytail itself, or tease it slightly for a fuller appearance.
Pro tip: Use a fine-tooth comb to smooth any flyaways around your face and at the crown—sleekness at the top contrasts beautifully with the volume you’ve created.
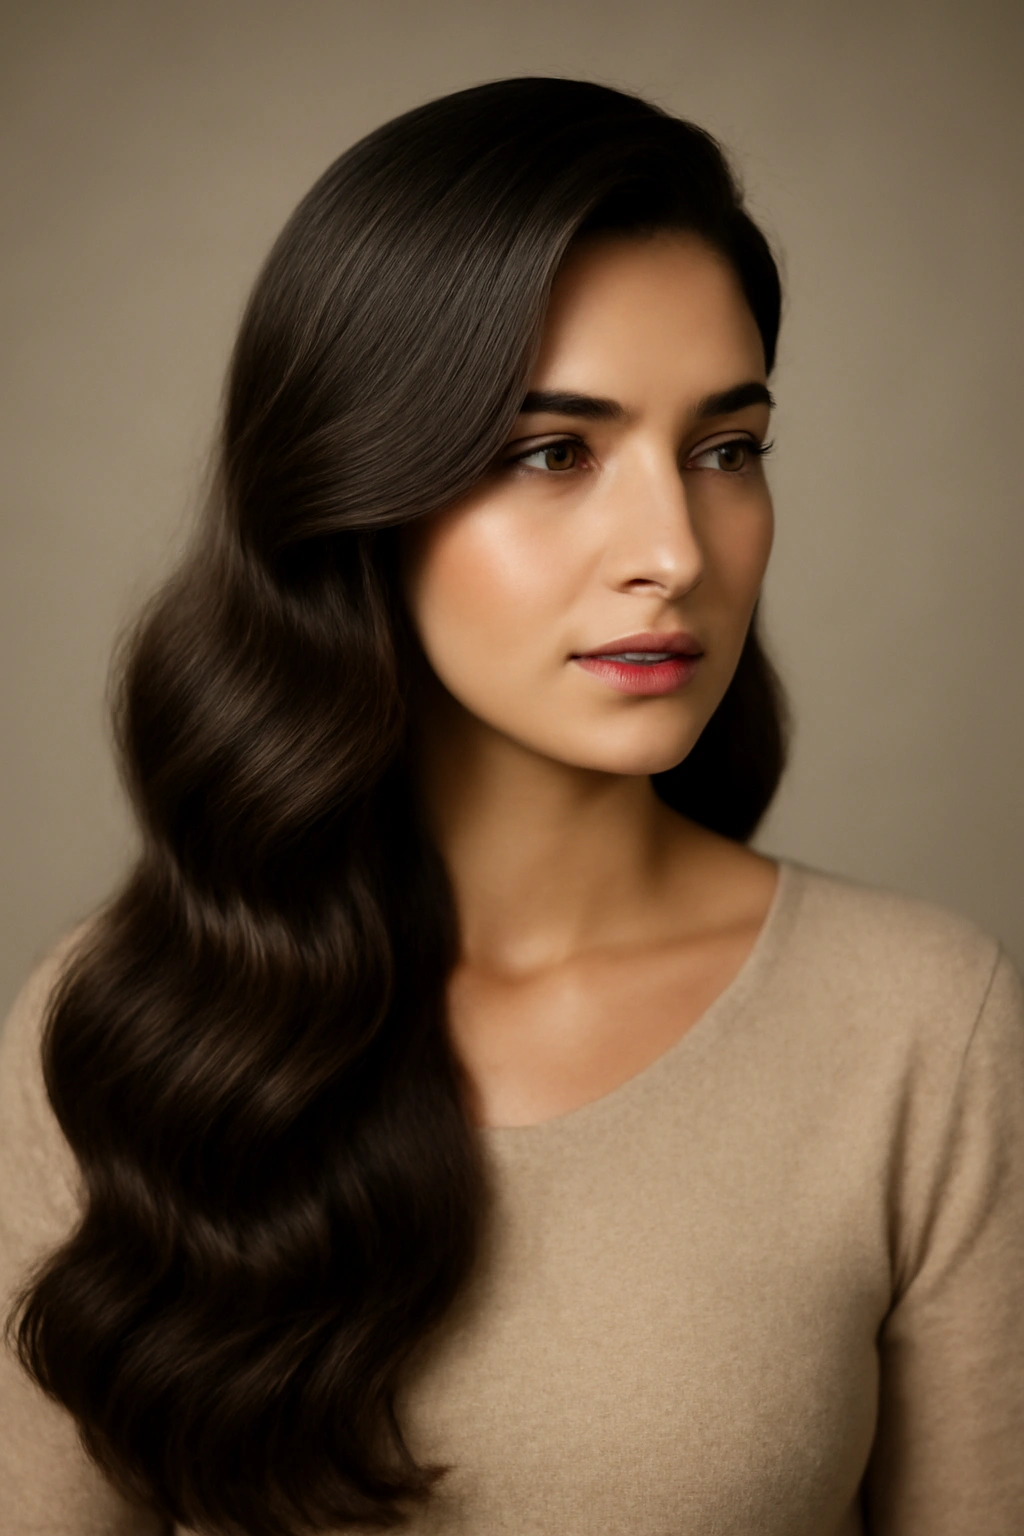
4. Sleek Center Part

A sleek, razor-sharp center part is a modern Arab hairstyle staple that exudes confidence and sophistication. Whether worn straight or with gentle waves, a well-executed center part frames the face symmetrically and suits most face shapes. This style is particularly striking on women with strong, angular features, though it works beautifully across the board. The key is achieving genuine sleekness—not just brushed hair, but polished, intentional smoothness from root to tip.
Why Sleekness Matters
A sleek center part is all about precision and control. The contrast between the smooth, ordered hair and your face creates a focusing effect that draws attention to your features. It’s modern without being trendy, elegant without being fussy, and it photographs beautifully. This style also works wonderfully under a hijab because the sleekness prevents bumps or awkward shapes underneath, and it looks equally stunning when the hijab comes off.
Achieving Genuinely Sleek Hair
- Use a smoothing shampoo and conditioner: These products are designed to reduce frizz and enhance shine, which are essential for a sleek look.
- Apply a smoothing serum or oil to damp hair: Work it through mid-lengths and ends, concentrating on any areas prone to frizz. This creates a slick base for styling.
- Blow-dry with a paddle brush: Use a large paddle brush to smooth hair down as you dry. Work in sections, directing hair down and away from the roots to prevent volume.
- Use a flat iron to perfect the sleekness: Even if your hair is naturally straight, a flat iron gives you control and eliminates any subtle waves or bumps.
- Create a deep center part: Use a rattail comb or the end of a fine-tooth comb to create a perfectly straight line down the center of your scalp.
- Finish with a light-hold hairspray: Mist the finished style lightly—you want hold without crunchiness or weight.
Insider note: If you have naturally curly or wavy hair, a smoothing treatment or temporary smoothing product (like a smoothing cream) applied to damp hair before blow-drying makes achieving sleekness much easier.
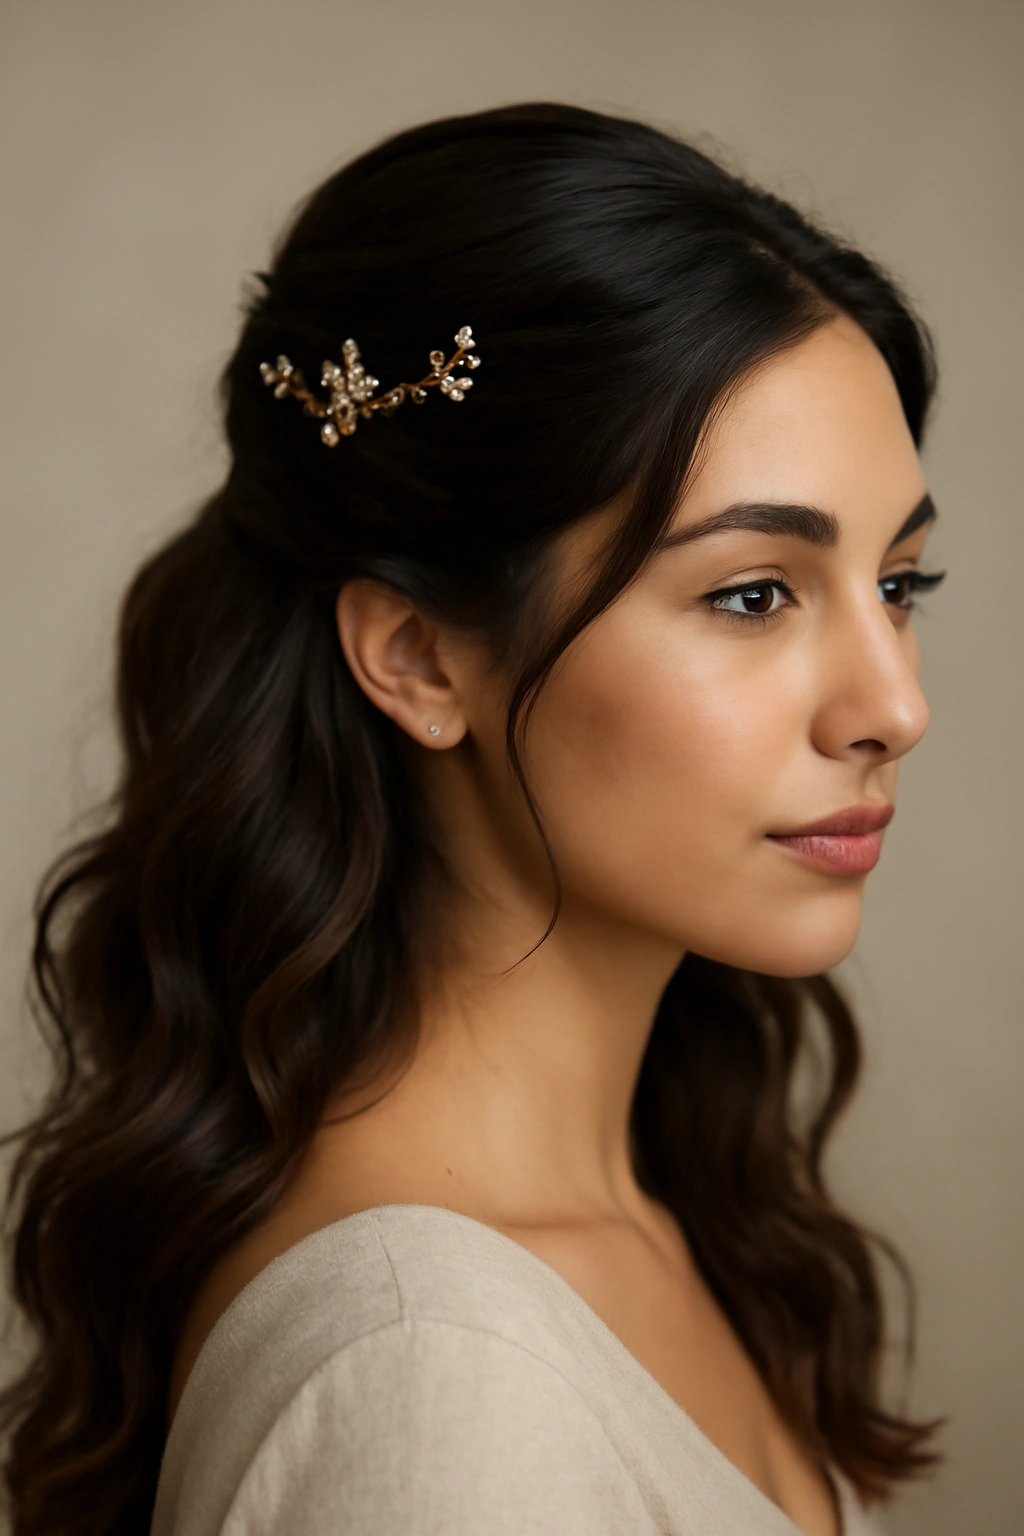
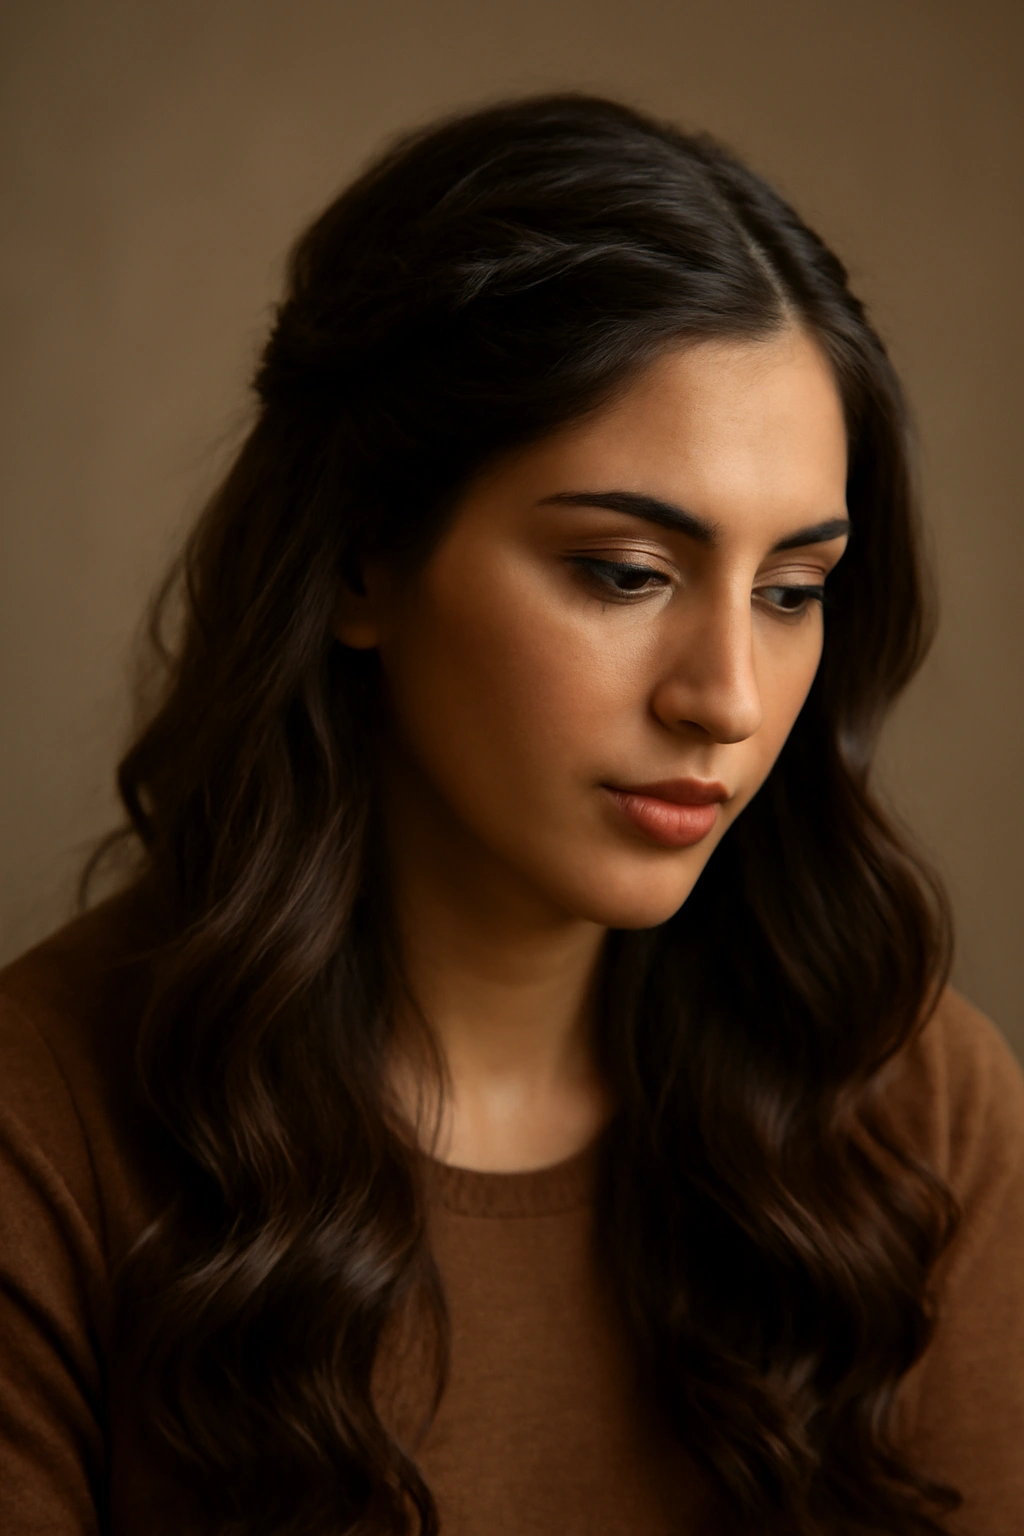
5. Romantic Curls with Headpiece
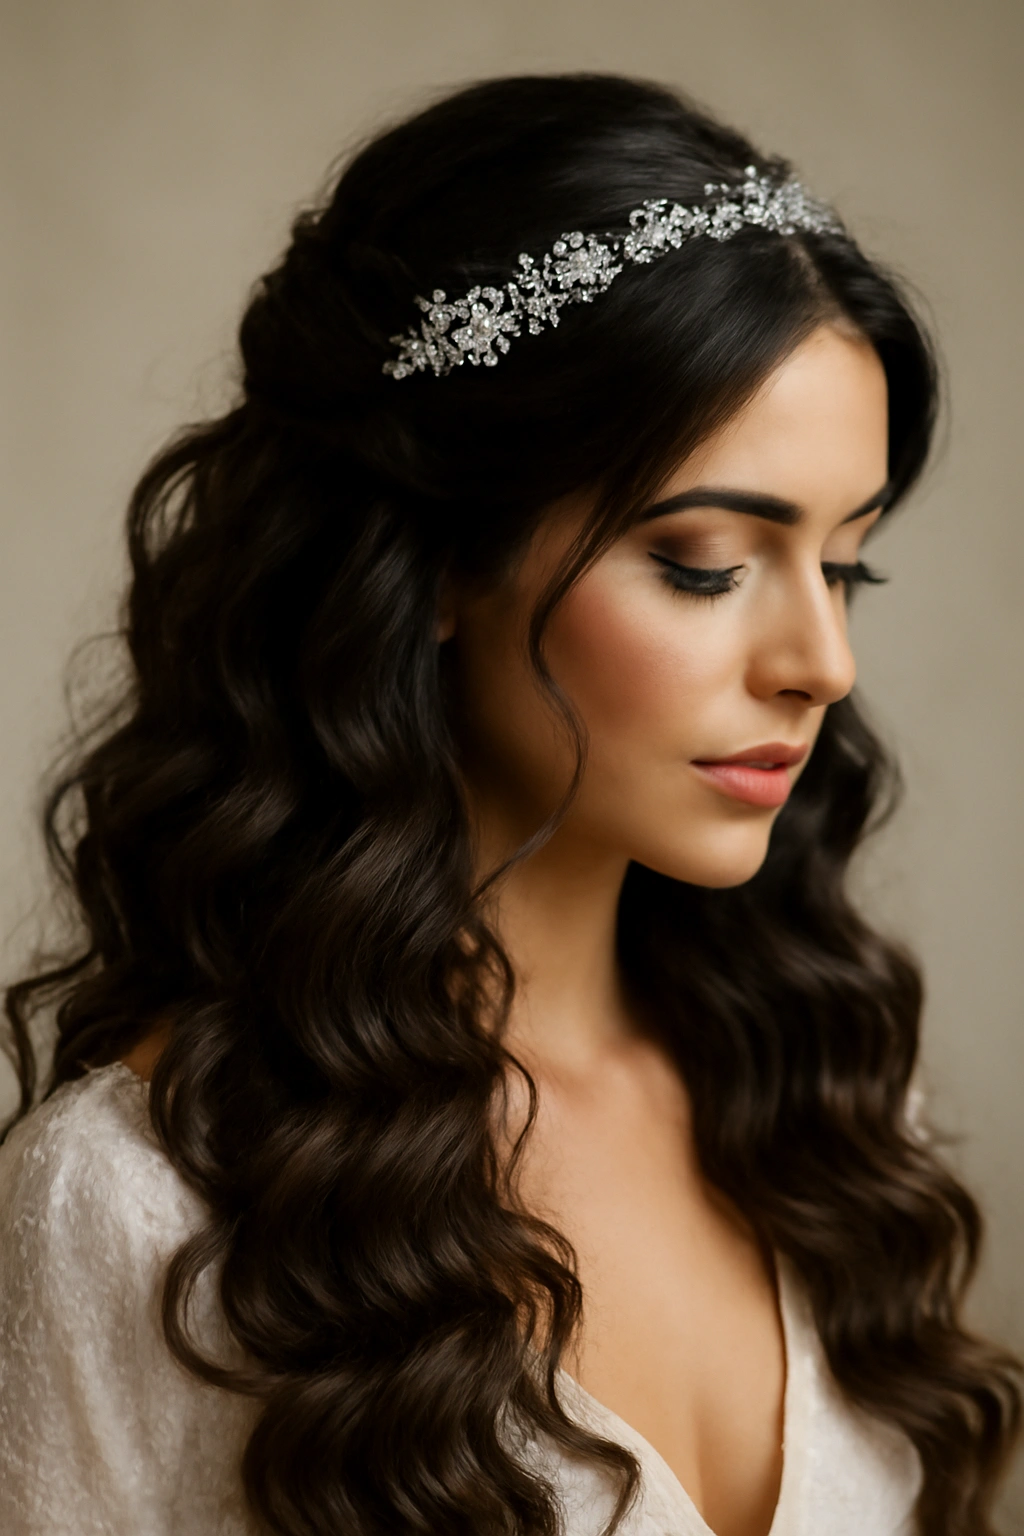
Romantic, flowing curls paired with an ornamental headpiece represent the pinnacle of bridal and formal Arab hairstyling. This style celebrates feminine beauty, showcasing thick, bouncy curls that cascade past the shoulders, often worn partially up to expose the face and neck. A decorative headpiece—whether a jeweled crown, a delicate tiara, a gold band, or an intricate headscarf accent—elevates the look from beautiful to absolutely stunning.
The Magic of This Combination
The pairing of romantic curls with a headpiece works because both elements speak to elegance and intention. The curls are soft, approachable, and timelessly feminine, while the headpiece adds sparkle, heritage, and a sense of occasion. Together, they create a look that’s both traditional and modern, classic and striking. This style is quintessentially romantic—perfect for weddings, engagement parties, formal celebrations, or any occasion where you want to feel absolutely gorgeous.
How to Create Romantic Curls with a Headpiece
- Start with a solid curl: Use a curling iron (1.25 to 1.5-inch barrel) or a blow dryer with a curling attachment to create defined curls. Work through your hair in sections, wrapping around the barrel and holding for a few seconds before releasing.
- Alternate curl direction: Wrap some curls away from your face and others toward it. This creates dimension and prevents all the curls from falling the same direction.
- Let curls cool completely: As they cool, they set and become bouncier and more defined. This is non-negotiable for long-lasting curls.
- Gently finger-comb or tousle the curls: Once fully cooled, gently separate and arrange the curls with your fingers. Avoid brushing (which can disrupt the curl shape) but do make sure they’re arranged how you want them.
- Apply curl-holding spray: A good texture spray or light hairspray will keep the curls intact without making them look stiff.
- Choose your headpiece: Consider the scale and weight of your curls. Delicate curls pair well with ornate, detailed pieces, while thicker, bouncier curls can handle bolder statement pieces.
- Position the headpiece after the curls are set: Place your headpiece and secure it with bobby pins. If wearing a crown or tiara, ensure it sits evenly and securely without creating tension on any one section.
Worth knowing: Romantic curls look better the second day—curls from yesterday tend to have more texture and hold their shape longer than fresh-from-the-iron curls.
6. Twisted Crown Braid
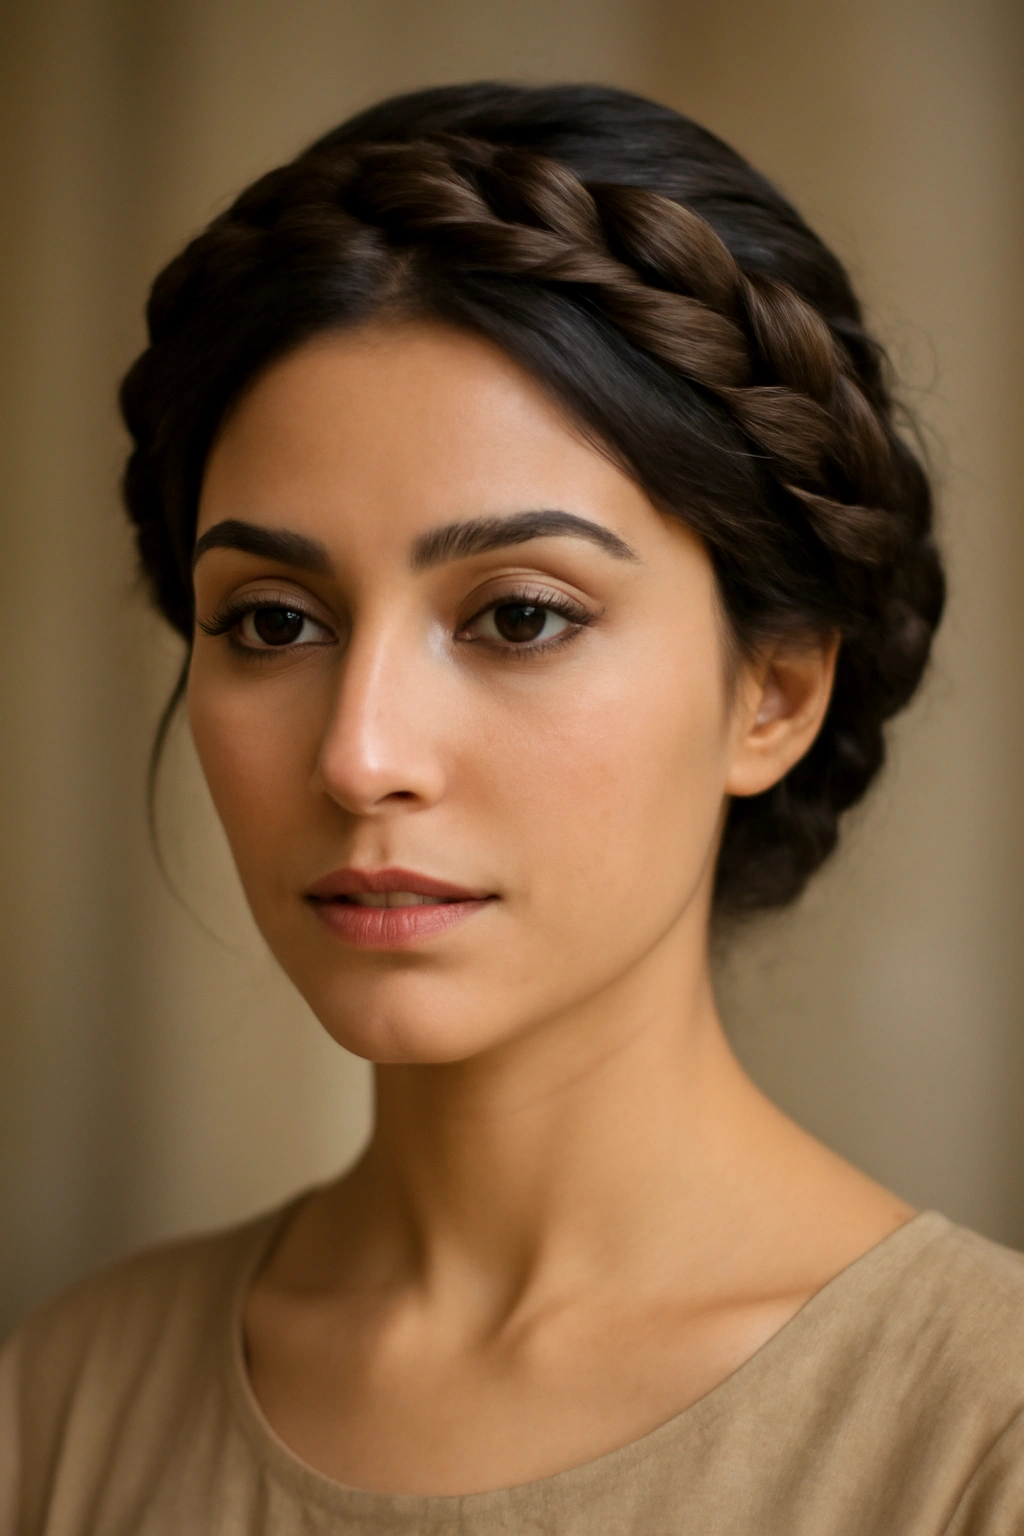
A twisted crown braid wraps elegantly around the head like a halo, creating a regal, romantic style that’s both intricate-looking and surprisingly manageable to execute. This style pulls hair away from the face while maintaining a romantic, feminine aesthetic. It works beautifully for formal events, weddings, engagement parties, and any occasion where you want an updo that feels special without being severe. The twisted crown braid also works well if you’re wearing a hijab and want something elegant for when you remove it.
Why a Crown Braid Is Timelessly Elegant
A crown braid instantly makes you look put-together and intentional. It’s the kind of style that photographs beautifully from every angle and stays looking fresh throughout an entire evening. The braid crowning your head draws the eye upward and flatters almost every face shape. It’s also a style that feels heirloom-quality—something you could wear to your own wedding, your sister’s wedding, or a formal family gathering.
Creating a Twisted Crown Braid
- Start with textured hair: Braids hold much better in second-day hair or hair with texture. If your hair is freshly washed and slippery, apply a light texturizing spray before starting.
- Section off one side: Take a section of hair from one side of your head, starting near the temple.
- Create a two-strand twisted braid: Divide the section into two strands and twist them around each other instead of braiding (this creates a slightly more delicate look than a traditional braid). As you twist, gradually add more hair from the side of your head.
- Continue around the head: Keep the twisted braid moving around the side and back of your head, continuing to add hair as you go, similar to a crown braid technique.
- Secure at the other side: When you reach the opposite side of your head, secure the braid with bobby pins, tucking the end underneath the braid so it’s hidden.
- Gently pancake the braid: Pull gently on sections of the twisted braid to make it wider and more romantic-looking.
- Add embellishments: Thread delicate gold or silver pieces through the braid, or tuck in fresh flowers for a wedding-day touch.
Pro tip: Practice this style a few times before the actual event—twisted braids are easier than they look once you get the rhythm down.
7. Half-Up Half-Down with Embellishments
The half-up half-down hairstyle offers the best of both worlds—the elegance of an updo combined with the romantic appeal of hair down. This style pulls hair back from the face and crown, securing it with clips, pins, or accessories, while allowing the length to flow freely down the back and sides. It’s infinitely customizable, works with straight hair, waves, or curls, and accommodates different hair lengths beautifully. For Arab women, this style is often enhanced with gold clips, jeweled pins, or ornate hair accessories that add glamour and cultural flair.
Why This Style Is So Versatile
Half-up half-down works because it flatters almost everyone—it opens up the face and neck while maintaining the romantic appeal of long hair. You can dress it up or down depending on the occasion, and you can style it in countless ways. The embellishments you choose completely change the vibe—delicate gold clips feel romantic and bridal, while bold statement pieces feel edgy and modern.
Styling Half-Up Half-Down
- Choose your foundation: You can start with straight hair, waves, curls, or even braids in the down portion. The up portion should be smooth and intentional.
- Section the top half: Take hair from your temples back toward the crown, creating a horizontal section about 2 inches from your hairline.
- Tease for volume (optional): If you want fullness at the crown, gently backcomb the section before securing it.
- Secure with bobby pins or clips: Use a claw clip, ornamental clips, or bobby pins to secure the pulled-back section. Position them at the crown or slightly off-center for a more modern look.
- Hide the securing mechanism: If using bobby pins, tuck them behind the secured hair so they’re not visible. If using a clip, make sure it’s positioned centrally for visual balance.
- Arrange the down portion: Make sure the hair in the down portion sits smoothly and attractively—arrange waves or curls so they frame your face and fall evenly.
- Add embellishments: Clip jeweled or gold pieces along the secured section, or scatter them through the down portion for sparkle and movement.
Worth knowing: The placement of your half-up section changes the overall effect—pulled higher creates drama and elongates the face, while lower placement feels more relaxed and romantic.
8. Thick Waves with Metallic Clips
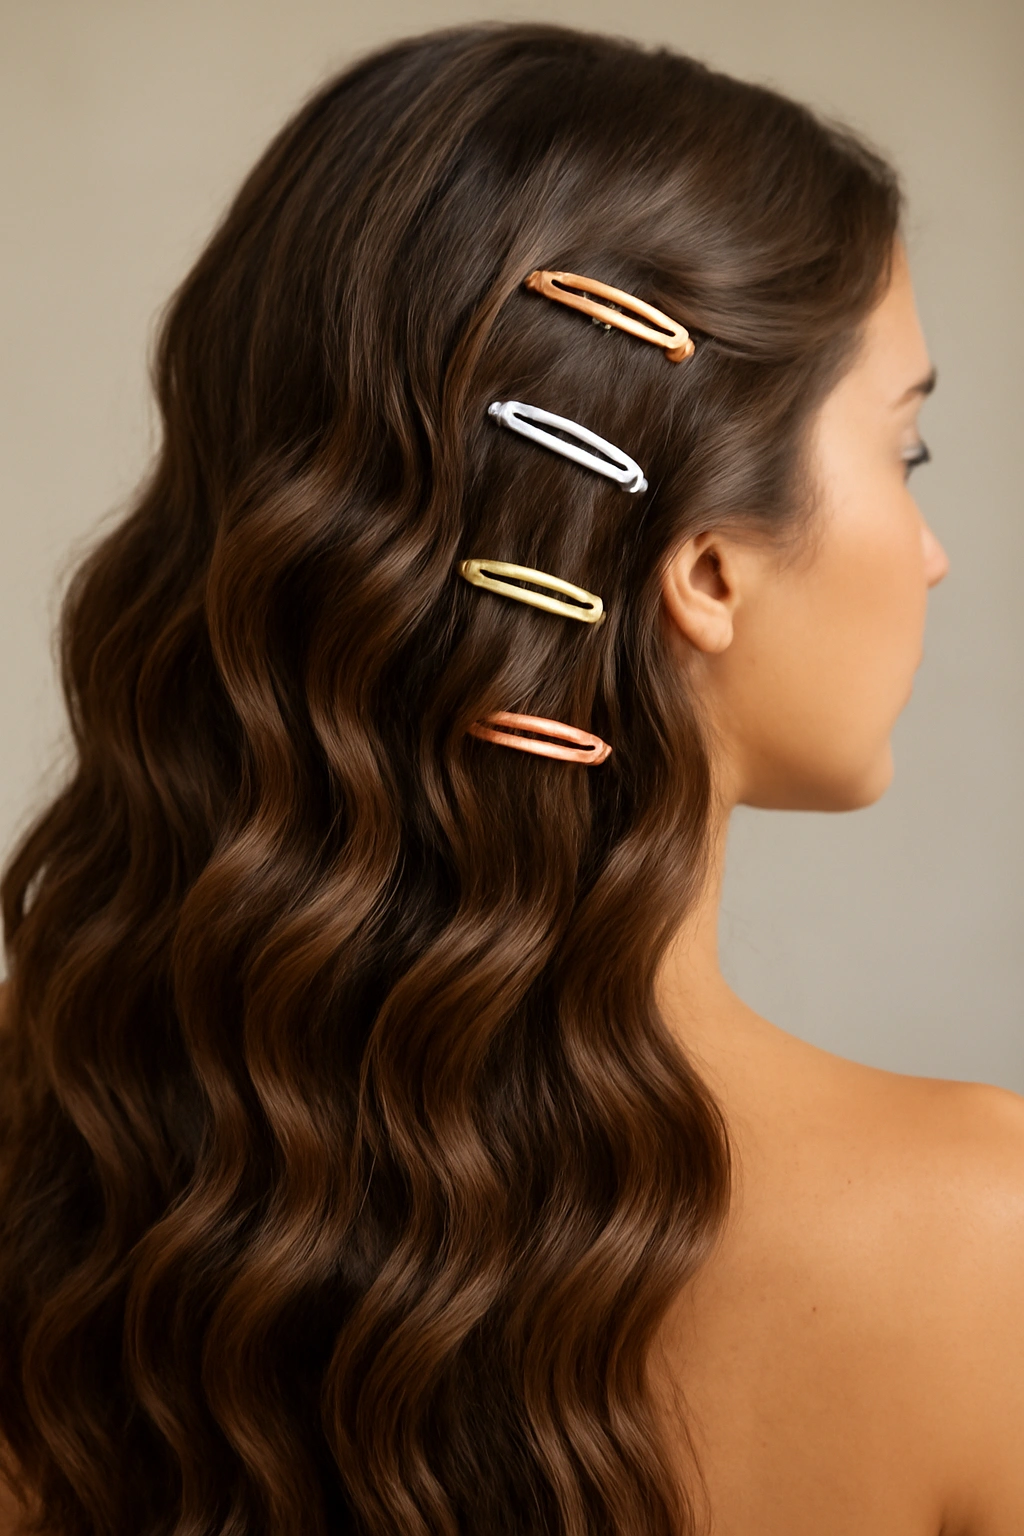
Thick, voluminous waves are a signature Arab hairstyle, and when paired with metallic clips—gold, silver, or rose gold—they become absolutely stunning. This style celebrates hair texture and volume, working beautifully for women with naturally thick or curly hair, or for anyone willing to tease and style for impact. The metallic clips add a contemporary edge while honoring the cultural aesthetic of adornment and embellishment that’s central to Arab hairstyling.
What Makes Thick Waves So Striking
Thick waves are confident, bold, and undeniably beautiful. They showcase healthy, shiny hair and create a sense of movement and life. When you add metallic clips—whether geometric pieces, ornate designs, or simple bars—the style becomes intentional and editorial. The contrast between the soft, organic waves and the hard, shiny clips is visually striking and deeply photogenic.
Creating Thick, Voluminous Waves
- Tease for volume: Use a fine-tooth comb or a specific teasing brush to backcomb hair throughout the crown and mid-lengths. This creates the foundation for thick waves that hold their shape.
- Use a larger barrel curling iron: A 1.5 to 2-inch barrel creates bigger, thicker waves than smaller barrels. Wrap each section around the barrel and hold for several seconds before releasing.
- Wrap larger sections: Take thicker sections of hair (1.5 to 2 inches) to create waves with more visual impact.
- Alternate direction deliberately: Curl some sections toward your face and others away, but be intentional about the pattern—this prevents uniformity and creates more movement.
- Let waves cool completely: This is essential for longevity and bounce.
- Separate the waves gently: Finger-comb through the cooled waves to break up the curl pattern and create a thicker, messier wave texture.
- Apply texturizing spray or light hairspray: This keeps everything in place without weighing it down.
- Place metallic clips strategically: Position clips along the crown, through the sides, or even scattered through the waves. Odd numbers (3, 5, 7) tend to look more balanced than even numbers.
Pro tip: Thick waves actually look better slightly messed up—don’t aim for perfect ringlets, but rather a tousled, lived-in texture.
9. Ombre or Balayage with Dimension
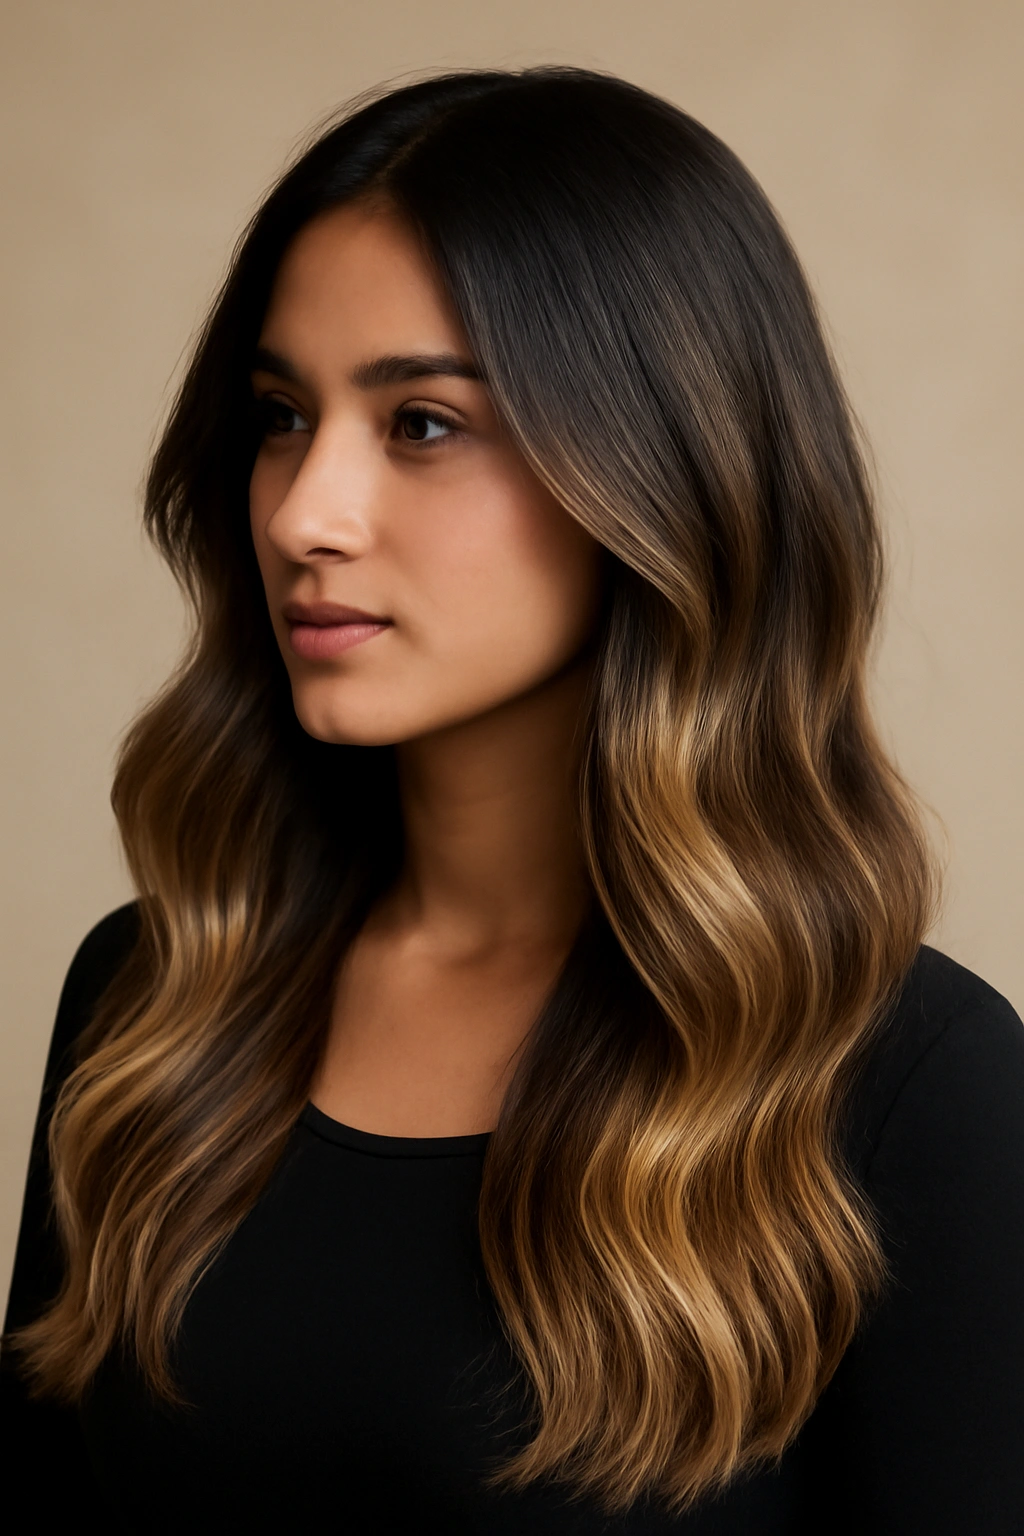
While technically a color technique rather than a hairstyle, ombre and balayage create such striking dimension and movement that they fundamentally change how any hairstyle appears. These highlighting techniques—where color gradually shifts from darker roots to lighter ends (ombre) or where lighter color is painted strategically through the hair (balayage)—add depth, texture, and a sense of dimension that makes even simple hairstyles look expensive and intentional. For Arab women with naturally dark hair, these techniques create stunning contrast and catch light beautifully.
How Color Creates Visual Impact
Ombre and balayage work because they create the illusion of movement and dimension, even if your hair is styled simply. The lighter pieces catch light and create highlights and shadows that make hair appear thicker and more textured. These techniques photograph beautifully, especially in natural light, and they allow you to experiment with color without committing to an all-over dye job. For women with dark hair, strategic lighter pieces create a striking contrast that feels modern and sophisticated.
Popular Color Combinations
- Dark brown to caramel: A warm, honey-toned progression that feels natural and flattering on most skin tones.
- Black to rich chocolate: Subtle and sophisticated, with enough contrast to create dimension without feeling dramatic.
- Dark brown to blonde: A more dramatic contrast that creates serious visual impact and photographs gorgeously.
- Black to copper or burgundy: A bold, warm contrast that celebrates richer skin tones and adds personality.
- Dark roots with sun-kissed ends: Balayage that looks like natural sun-lightening, where lighter pieces are concentrated around the face and throughout the top layers.
Maintaining Ombre or Balayage
- Invest in color-safe shampoo and conditioner: These products are formulated to preserve color and prevent fading.
- Use a purple or blue-toning conditioner: If you have cooler-toned lighter pieces, a toning conditioner keeps them from turning brassy.
- Limit heat styling: Less heat means less damage and longer-lasting color.
- Get touch-ups every 8-12 weeks: Root touch-ups keep the ombre or balayage looking intentional, and toning appointments maintain color vibrancy.
Worth knowing: Ombre and balayage look increasingly beautiful as they fade slightly—the softening of the contrast often looks more natural and flattering than freshly done color.
10. Intricate Braided Bun
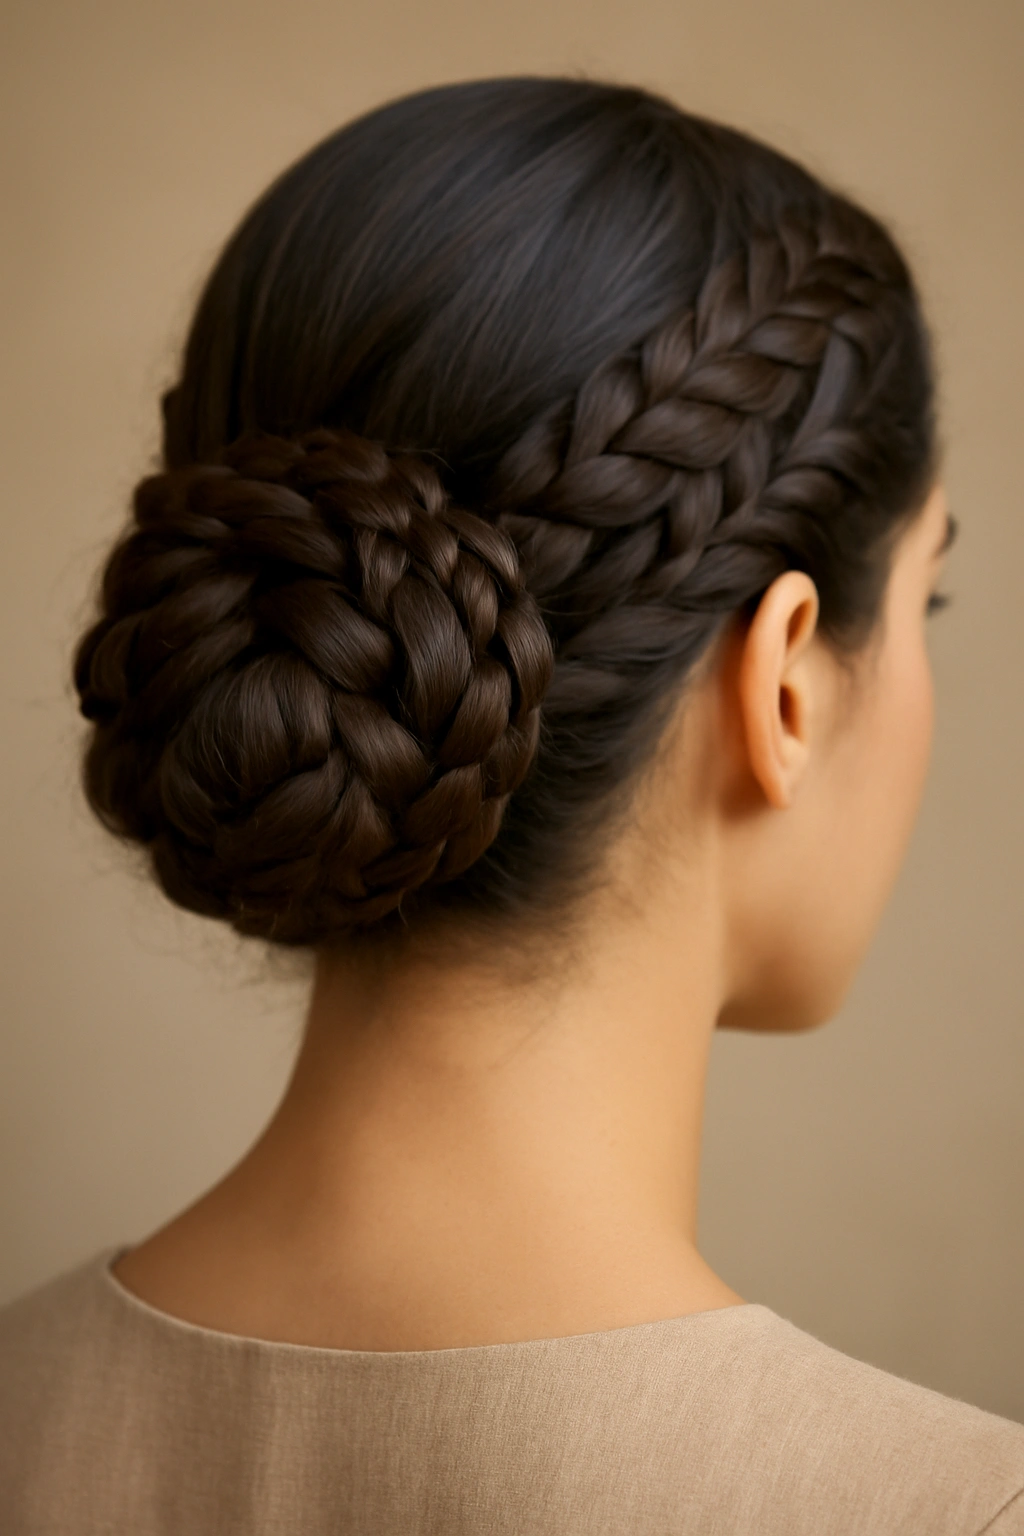
An intricate braided bun elevates the classic updo into something genuinely special—combining the security and elegance of a bun with the visual interest and sophistication of braided detail. This style works beautifully for formal events, weddings, and occasions where you want something that’s both practical and absolutely stunning. The beauty of a braided bun is that it showcases your hair’s texture and length while keeping everything secure and polished throughout the day.
Why Braided Buns Are So Effective
A braided bun combines multiple elements that work together beautifully—the intricate, eye-catching detail of braids with the timeless elegance of a bun. The braid adds visual interest and makes the style feel intentional and high-effort (even though they’re surprisingly manageable). A braided bun photographs beautifully from every angle and maintains its polish throughout an entire evening of celebration.
Creating an Intricate Braided Bun
- Blow-dry your hair smooth: Start with smooth, manageable hair. A light texturizing spray helps the braids grip without being slippery.
- Create a Dutch braid or French braid: Begin braiding from your crown and continue down the center back (or one side) of your head, incorporating all your hair as you go.
- Stop braiding once you reach the nape: You want enough loose hair remaining to form the bun itself.
- Twist the remaining hair into a bun: Take the loose hair at the bottom and twist it around itself, forming a spiral bun shape. Secure with bobby pins.
- Wrap the braid around the bun: Take the finished braid and wrap it around the base of the bun in a coil, securing with additional bobby pins. The braid forms a band around the bun’s perimeter.
- Secure everything thoroughly: Use enough bobby pins that the bun is completely stable—no wiggling or sliding, even if you’re dancing or moving around.
- Add embellishments: Tuck gold or jeweled pins into the bun, or thread delicate chains through the braided portion.
Pro tip: If your hair is fine or you’re worried about the bun being too small, use a hair donut (a round, cushioned pad) as the foundation. This gives you a fuller-looking bun and adds security.
11. Side-Swept Long Waves
Side-swept long waves offer unparalleled romance and femininity—hair cascading over one shoulder in thick, voluminous waves creates a stunning silhouette and photographs beautifully. This style works exceptionally well for women with long hair and creates an asymmetrical, elegant look that’s both classic and contemporary. The side-sweep flatters most face shapes, as it can frame one side of your face while creating visual interest on the other.
The Appeal of a Side-Swept Style
Side-swept hair is inherently romantic and draws the eye along the length of your hair. The asymmetry makes the style feel more modern than a centered style, while the waves maintain a soft, feminine aesthetic. This is an excellent choice for formal events, bridal hairstyles, or any occasion where you want to feel absolutely beautiful. The swept-to-the-side placement also works beautifully with statement earrings on the non-swept side.
Executing Perfect Side-Swept Waves
- Determine which side to sweep: Generally, sweeping toward your better side (or whichever side you prefer) is the way to go. Experiment to see what feels most balanced and flattering.
- Create full-head waves: Using a curling iron (1.25 to 1.5-inch barrel), curl your entire head in waves, allowing them to cool completely.
- Create a deep side part: Use a fine-tooth comb to part your hair dramatically to one side—the part should start near one temple and angle back toward the opposite side of your crown.
- Sweep the larger section: The larger section of hair (on the side away from your part) should be swept across and down over your shoulder. Secure underneath with bobby pins so the pins aren’t visible.
- Arrange the waves: Let the waves fall naturally, then arrange them to ensure the side-swept section falls gracefully and frames the side of your face beautifully.
- Lock it in place: Use a light- to medium-hold hairspray so the swept section stays in place throughout the day without feeling stiff.
- Consider adding a hair piece: A decorative clip, comb, or headpiece positioned on the swept side adds glamour and helps secure the sweep.
Worth knowing: Side-swept styles look increasingly beautiful as the day goes on and the waves relax slightly—they appear fresher and more romantic when they’re slightly softer than when first styled.
12. Statement Curls with Decorative Pins
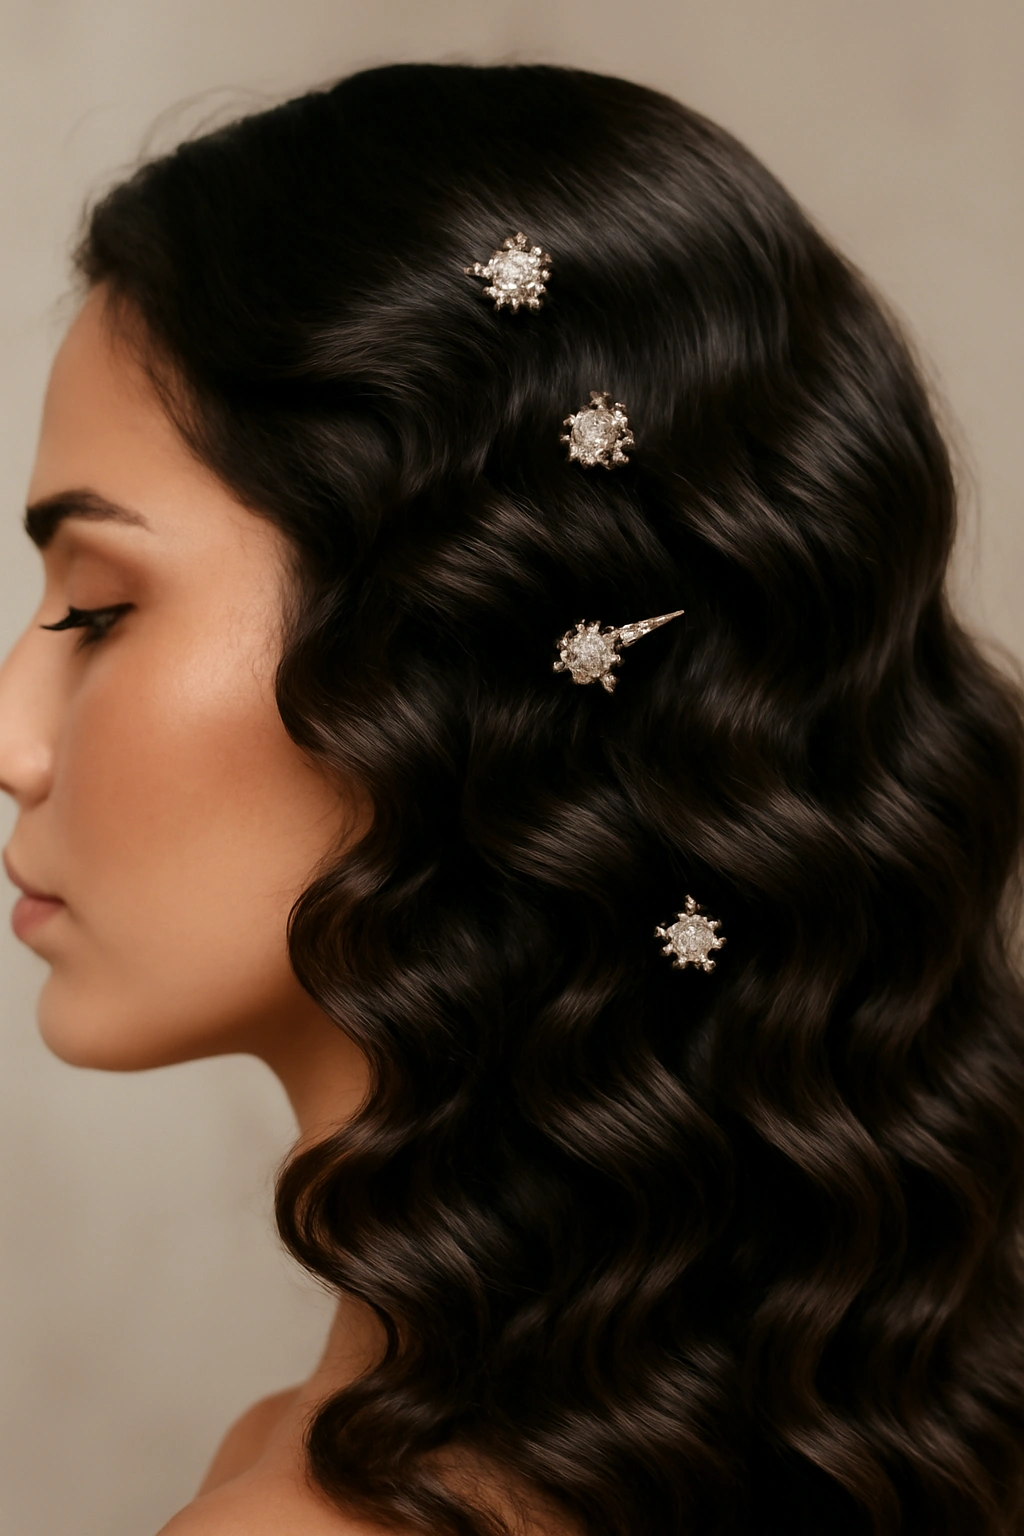
Statement curls are bold, voluminous, and unapologetically beautiful—tight, defined curls that celebrate texture and make a genuine statement. When paired with decorative pins (jeweled, metallic, or intricately designed), this style becomes editorial and utterly stunning. This approach works beautifully for women with naturally curly or textured hair, or for anyone willing to use heat tools and products to create intentional curl definition. The decorative pins add sparkle and intention without requiring the curls to be styled into any particular shape.
Why Statement Curls Command Attention
Statement curls are confident and bold—they celebrate hair texture rather than fighting it. When you add decorative pins, you’re intentionally drawing attention to your hair and saying “this is part of my look.” This style works beautifully for women who want to showcase their natural texture or create defined, bouncy curls that feel powerful and present. It’s particularly stunning on women with medium to deep skin tones, where the contrast between dark hair and metallic or jeweled pins is absolutely striking.
Creating Defined Statement Curls
- Use a small-barrel curling iron: A 0.75 to 1-inch barrel creates tight, defined curls with serious impact.
- Curl small sections: Take thin sections (about ¾ inch to 1 inch) to create curls with clear definition. Thicker sections create looser, less defined curls.
- Hold each curl longer: Wrap hair around the barrel and hold for 5-10 seconds, depending on your hair’s texture and how much heat it needs.
- Curl in one consistent direction: For statement curls, curling all sections the same direction (away from your face or toward it) creates a more intentional, cohesive look than alternating directions.
- Allow curls to cool: Let each curl cool for 30 seconds to a minute before releasing. This sets the curl shape and increases longevity.
- Separate curls minimally: Unlike romantic waves where you want some texture and separation, statement curls look best with more definition. Avoid breaking them up too much.
- Apply strong-hold curl cream or spray: Statement curls need hold throughout the day and should resist humidity and movement.
- Place decorative pins strategically: Position pins around the crown, along the sides, or scattered throughout for visual interest. Space them evenly (odd numbers like 3, 5, or 7 tend to look most balanced).
Pro tip: Statement curls look most impactful when left to set for several hours or overnight—curls are bouncier and more defined after they’ve fully cooled and set.
Final Thoughts
The beautiful reality about hairstyles for Arab women is that there’s genuinely no single “right” way to wear your hair. Whether you’re drawn to the romantic softness of waves and curls, the structured elegance of braids and buns, or the bold confidence of statement styles, your choices reflect your personality, your heritage, and your individual beauty. Each of the 12 styles covered here can be adapted to suit your specific hair texture, length, face shape, and the occasion you’re dressing for.
The key to making any of these styles work is understanding your hair’s natural texture and needs. Do you have thick, coarse hair that loves volume? Play up statement curls and thick waves. Fine or thin hair? Layered waves and half-up styles create the illusion of density without overwhelming your features. Naturally curly or textured hair? Embrace those curls with statement styles and let your natural texture shine through with minimal heat manipulation.
Remember that hairstyling is genuinely an art, and like any art, it takes practice and experimentation. The first time you try a twisted crown braid or an intricate braided bun might not be perfect—but by the third or fourth attempt, you’ll develop the muscle memory and confidence to execute it beautifully. And honestly, imperfection often reads as more intentional and romantic than flawlessness ever could.
Most importantly, choose styles that make you feel confident and beautiful. The best hairstyle isn’t necessarily the most complicated or trendy one—it’s the one that makes you walk into a room feeling like yourself, just the absolute best, most polished version of yourself. Whether that’s thick waves with metallic clips, an intricate braided bun, or romantic curls with a headpiece, own it completely. Your hair is one of your most visible features, and styling it with intention, care, and personality is one of the most powerful forms of self-expression available.