Short hair at a wedding doesn’t mean settling for a simple ponytail or leaving it down as-is. The truth is, short hair offers some of the most chic, modern, and effortlessly elegant bridesmaid options—and with the right style, you can look polished, photogenic, and perfectly put-together without compromising your hair length or fighting against what you naturally have. The challenge isn’t finding a style; it’s choosing from the many directions you can go.
Whether you’re working with a sleek pixie, a textured bob, a layered crop, or a chin-length style, your short hair is actually an asset when you know how to work with it. Short styles photograph beautifully, require less heavy styling that can damage hair during a long wedding day, and allow your face and features to shine—which means more focus on the bride and less on a distracting frame of hair. The key is understanding which techniques, textures, and finishing touches transform short hair into something wedding-worthy.
In this guide, you’ll find twelve distinct directions you can take your short hair as a bridesmaid. Some are romantic and soft, others modern and architectural, and a few are surprisingly glamorous. Each style works with short hair’s natural texture and length rather than fighting it. You’ll also find the practical reality of each look—how long it takes to style, what products matter, and whether it’ll survive hours of dancing and humidity.
1. Sleek and Polished Low Side Knot

A low side knot is deceptively sophisticated and works beautifully on short hair when you have just enough length to gather and twist at the nape of your neck. This style pulls your hair away from your face while maintaining an undone-but-intentional aesthetic that photographs incredibly well. The side placement makes it feel feminine and modern rather than too severe.
Why This Works for Short Hair
Short hair often has texture and movement built in—use that to your advantage. A side knot doesn’t need every strand perfectly slicked down; in fact, a few face-framing pieces and some natural texture make it feel less rigidly formal. The knot sits low enough that you’re not straining to gather very short layers, and it creates visual interest without height that would look odd on a short cut.
How to Achieve It
- Use a lightweight texturizing spray or dry shampoo on damp hair to create grip and prevent slipping
- Blow dry your hair with a slight tousle for movement—don’t aim for flat smoothness
- Create a deep side part, then gently sweep the longer side back and gather at the base of your neck
- Twist the gathered section loosely and wrap it around itself to form a knot shape, securing with bobby pins
- Leave a few pieces loose around your face and ears for softness
- Finish with a flexible-hold hairspray that won’t feel stiff or crunchy
Pro tip: Keep a small bobby pin handy for the ceremony—if the knot loosens even slightly, you can quickly adjust it without looking fussy.
2. Textured Tousled Waves
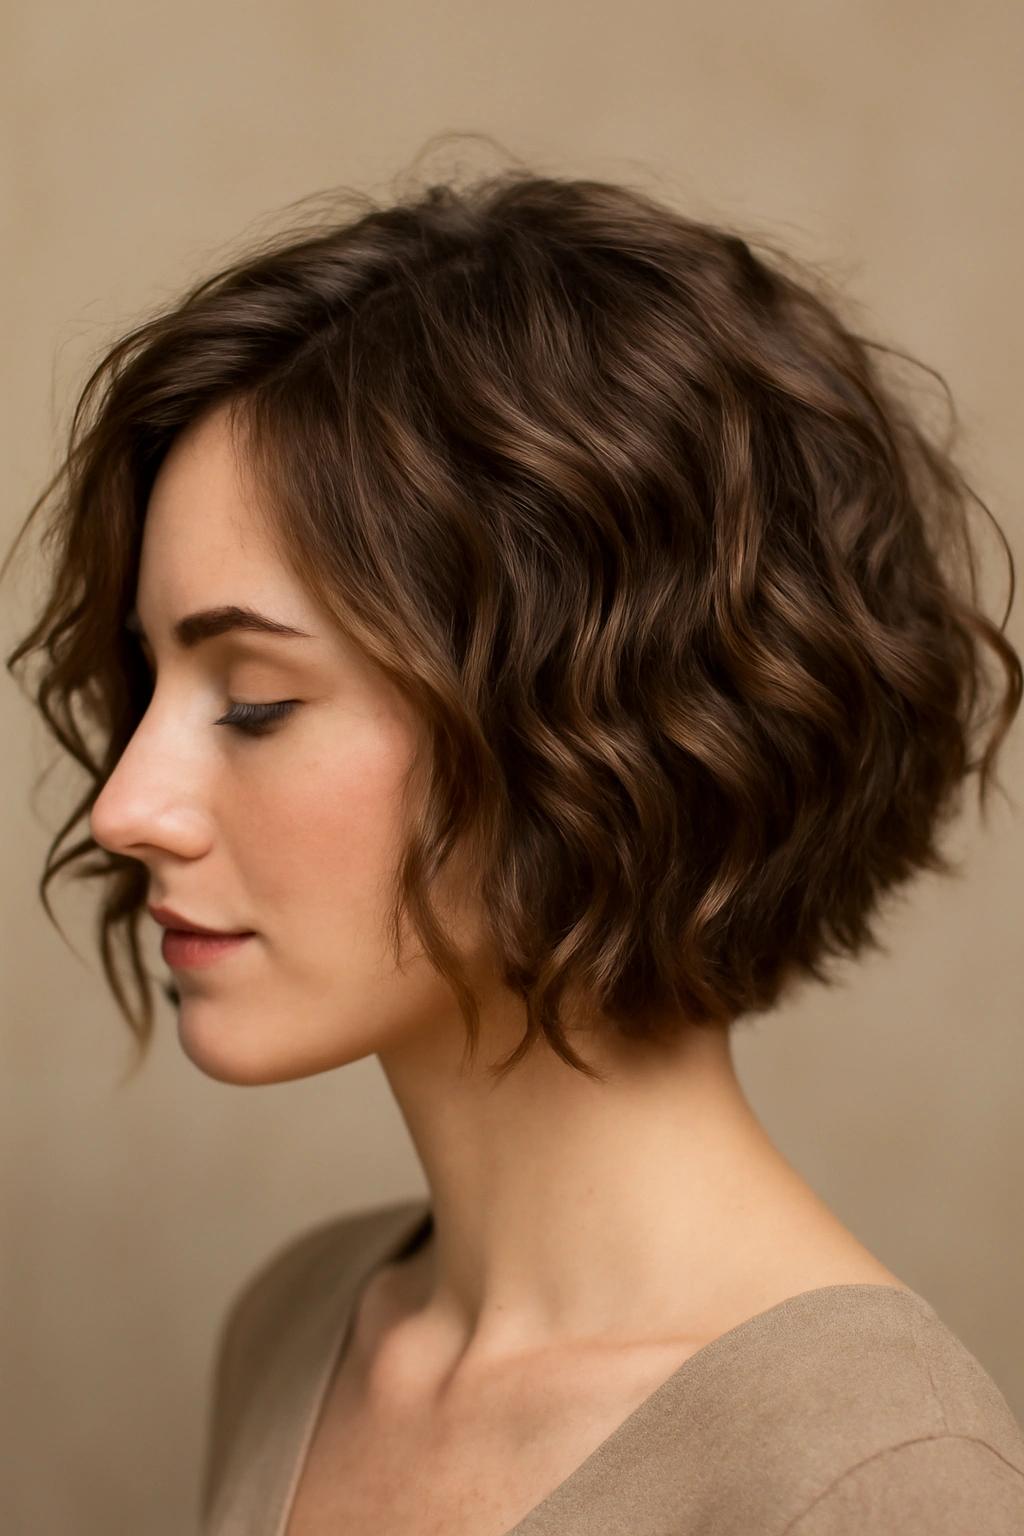
This is the “I woke up like this but actually I didn’t” option—relaxed, touchable waves that look effortless but require intentional styling. On short hair, these waves create dimension, catch light beautifully in photos, and can actually last longer than you’d expect if you use the right technique and products.
What Makes This Different from “Just Letting Your Hair Down”
The distinction is in the deliberate undulation and separation. Rather than hair just being curly or wavy naturally, you’re creating consistent, intentional waves throughout with direction and movement. This gives short hair structure without rigidity, making it feel styled and special while still being casual enough for a daytime wedding or a relaxed reception.
Creating Lasting Waves on Short Hair
- Apply a heat protectant and texturizing spray to damp hair
- Blow dry with a round brush, creating curves and direction as you go
- Use a 1-inch curling iron to curl small sections, wrapping hair around the barrel and holding briefly
- Let curls cool before releasing them
- Gently run your fingers through once everything has cooled to separate and tousle the waves
- Use a dry texture spray or lightweight hairspray to set
Quick fact: Shorter hair holds waves better than you’d think because there’s less weight pulling them down—you might find your waves last through the entire reception without touching them up.
3. Deep Side Part with Tucked Styling
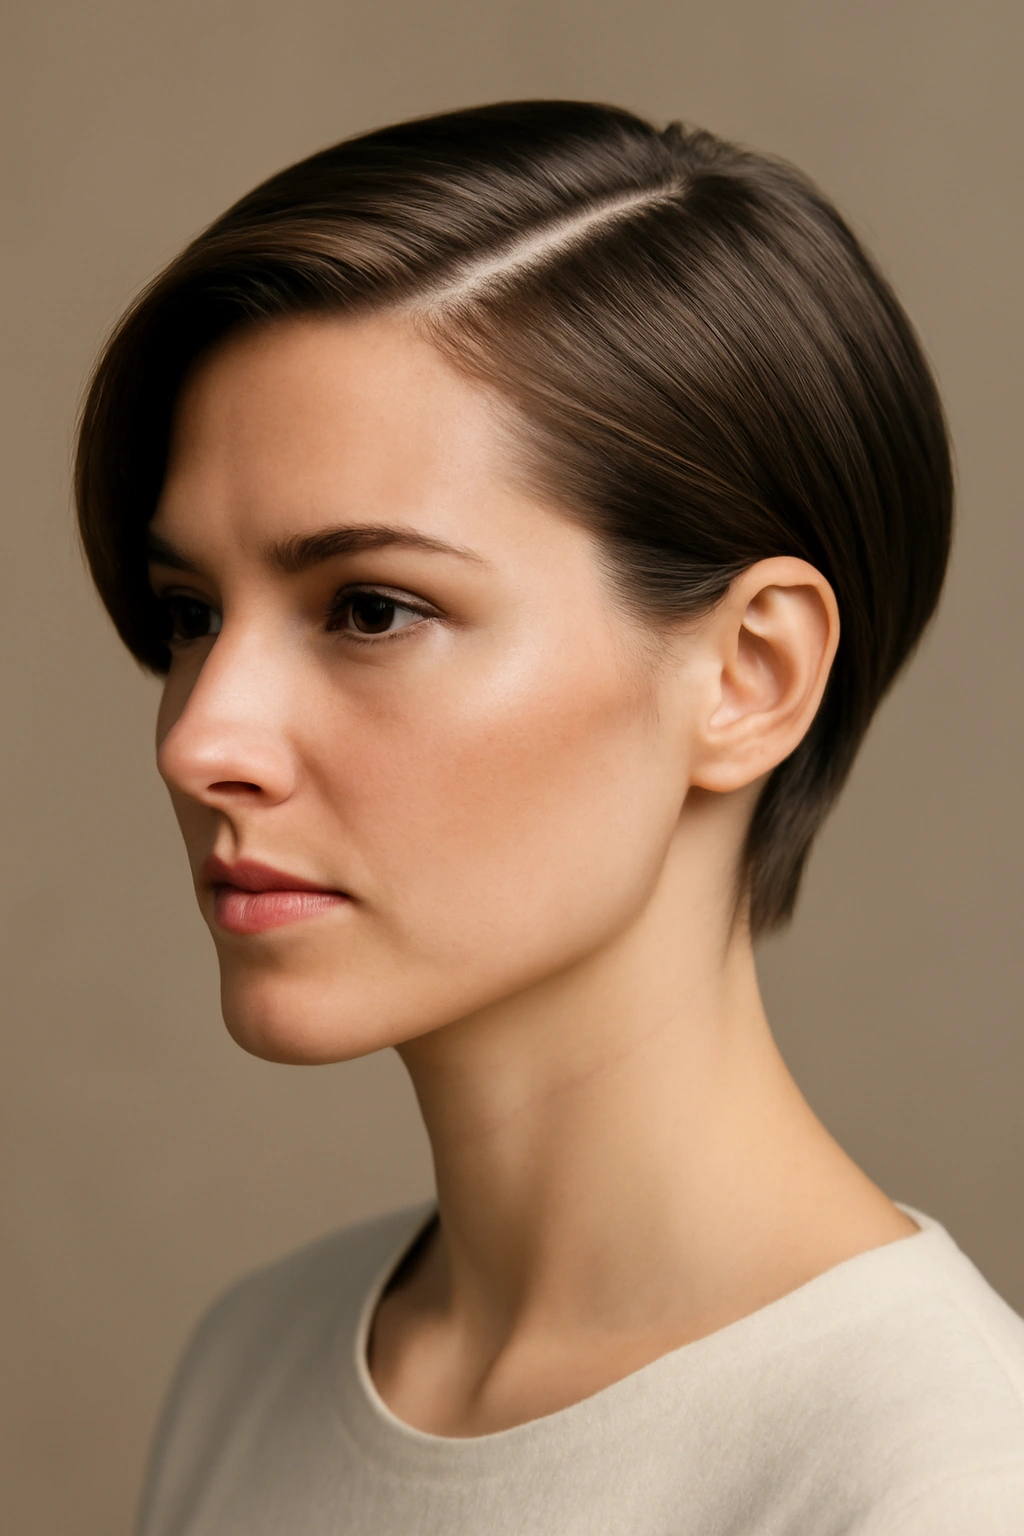
A dramatic side part paired with one side smoothly tucked behind the ear is a timeless, flattering option that instantly elevates short hair. This style is particularly striking with hair that has some texture or movement, and it’s simple enough that you can maintain it throughout the day without constant attention.
The Flattery Factor
A deep side part elongates the face and creates an asymmetrical, elegant line that photographs beautifully from almost any angle. Tucking one side shows off your cheekbones and jawline, and it’s a subtle way to frame your face without the heaviness of longer hair. The style feels refined but not overdone.
Execution and Longevity
- Create a deep, asymmetrical side part—further to one side than your natural part for maximum impact
- Blow dry the longer side with a paddle brush to smooth it down gently
- Use a small amount of pomade or smoothing cream on the longer side to keep it sleek
- Tuck that side smoothly behind your ear and secure with one or two bobby pins that match your hair color
- Consider a delicate bobby pin, comb clip, or decorative pin to anchor and embellish the tuck
- Lightly brush the texture on the shorter side for dimension
Worth knowing: This works on nearly every short hair length—the deeper the part, the more dramatic and formal the effect.
4. Slicked Back Gel Look
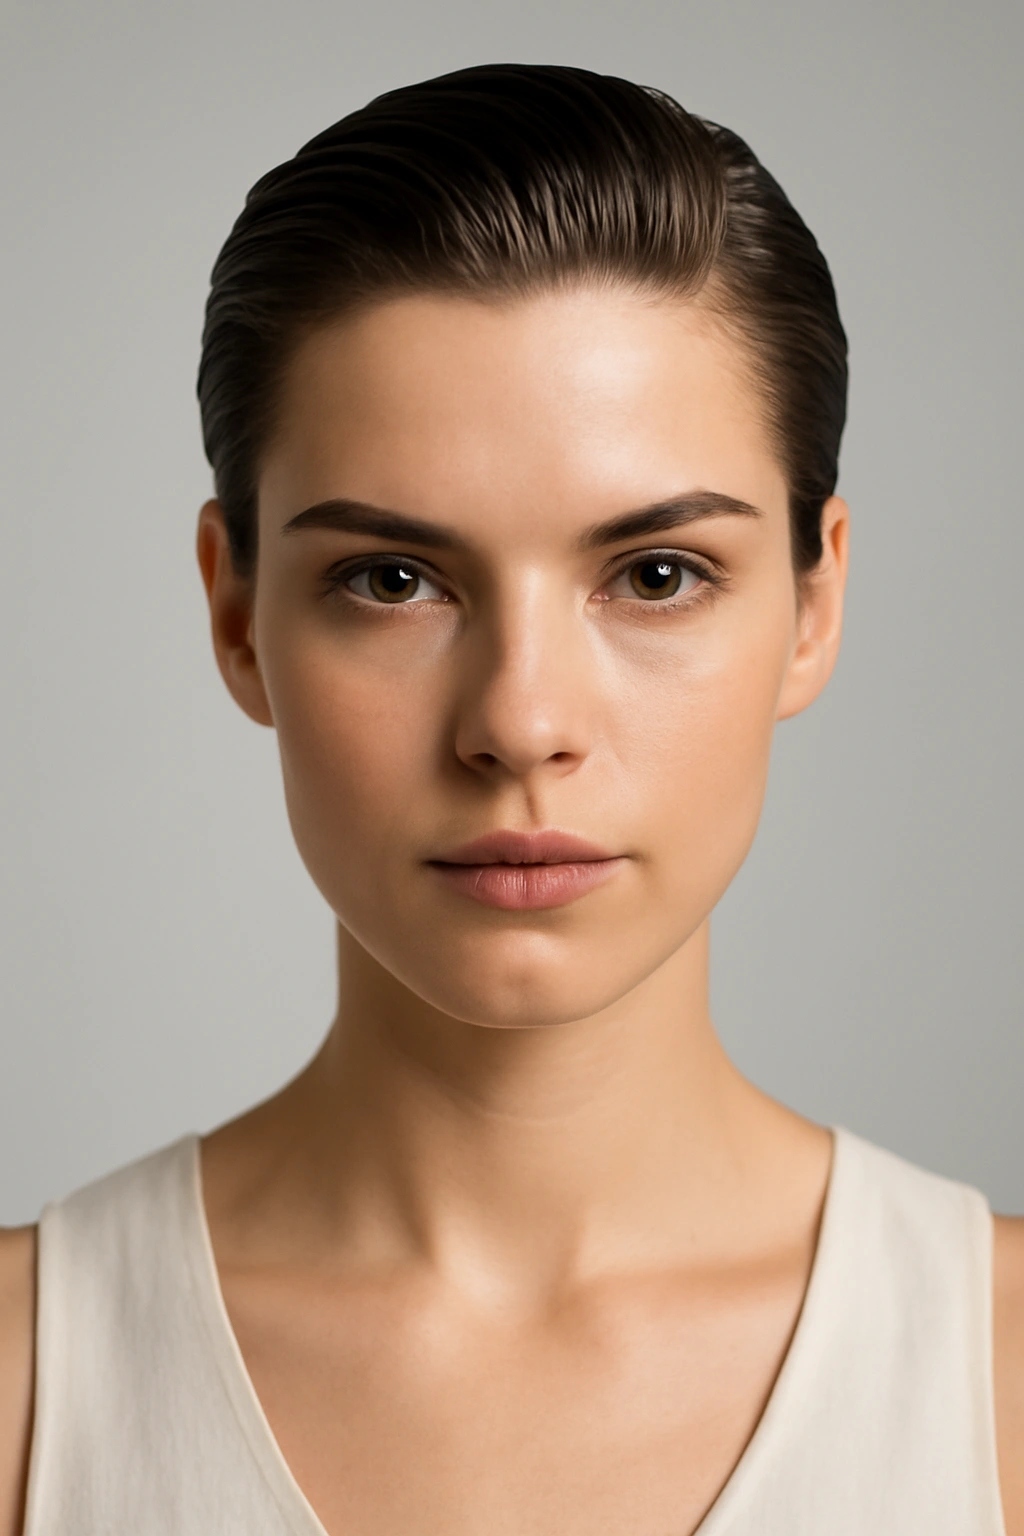
A slicked-back style brings runway energy to a wedding and is shockingly elegant when done intentionally rather than just appearing wet. This works especially well on close-cropped cuts or pixies and creates a bold, confident look that’s perfect for a bridesmaid who wants to make a subtle style statement.
Why Short Hair Owns This Look
Longer hair slicked back can feel severe or weighed down, but on short hair, a slicked-back style showcases your bone structure, your face, and your features. It’s modern, it’s fashion-forward, and it removes all distraction from your eyes and smile. The key is using the right product so it looks intentional and shiny rather than greasy.
Product and Application
- Use a water-based gel or pomade specifically formulated for a flexible, natural finish (not a crunchy sports gel)
- Apply to damp hair, working it through from roots to ends
- Use a fine-tooth comb or your fingers to smooth everything back and away from your face
- Comb it back smoothly in the direction of your hair growth
- If you have any flyaways, smooth them down with a small dab of gel and a firm hand
- The shine should be glossy and intentional, not wet-looking
Pro tip: Do a test run before the wedding day—products that work beautifully on your hair type may vary, and you’ll want to know exactly which gel gives you the look you’re after.
5. Soft Romantic Curls Throughout

If you have naturally wavy or curly hair, or if you’re willing to put in the styling work, soft, romantic curls on short hair are absolutely stunning. These are not tight ringlets but rather loose, flowing waves that create softness and movement. On short hair, they feel feminine and special without looking overdone.
The Advantage of Short, Curled Hair
Curls have more bounce and definition on short hair because there’s less weight pulling them down. You can achieve a fuller, more voluminous look than you might with longer curled hair, and curls are far less likely to fall flat throughout a long day. They also photograph beautifully, catching light and creating dimension in every shot.
Creating Soft Curls That Last
- Apply a curl-defining mousse or light gel to damp hair
- Blow dry with a diffuser attachment on low to medium heat, scrunching sections as you go
- For extra definition, use a 1.25-inch curling iron on small sections, curling away from the face
- Let curls cool completely before touching them
- Once cooled, gently rake your fingers through or use a wide-tooth comb to soften and separate the curls
- Finish with a flexible-hold hairspray
Quick fact: Shorter curled hair looks fuller and more voluminous than long curled hair—this is your advantage, so lean into it.
6. Half-Up Twisted Crown
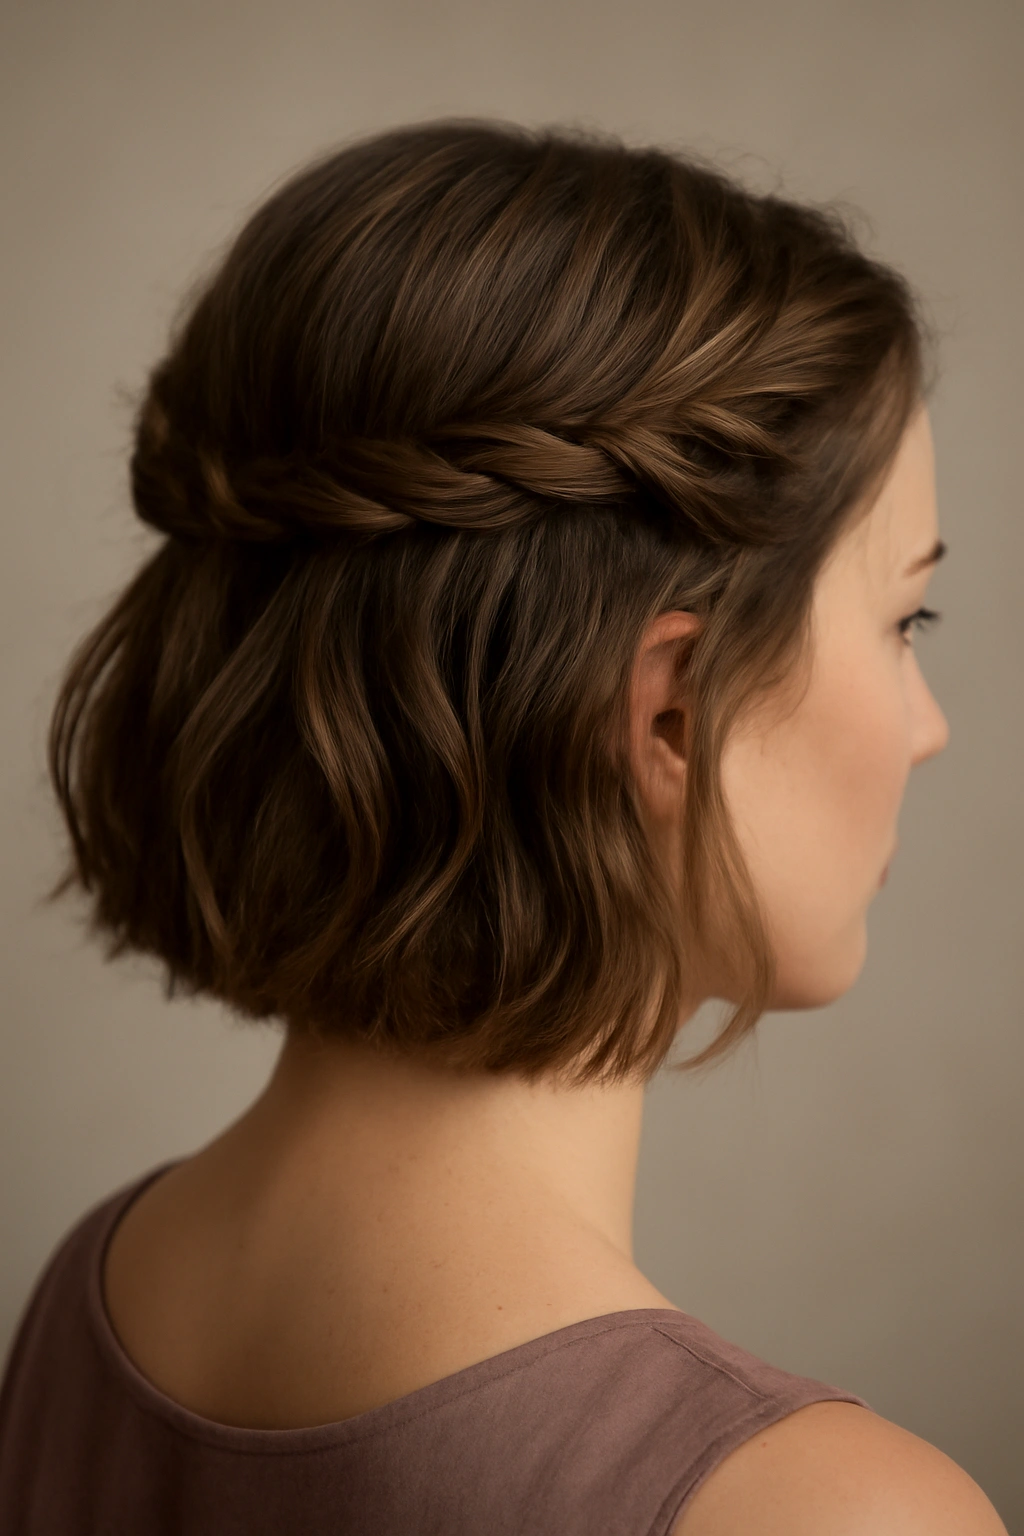
A half-up style instantly adds formality and elegance to short hair without pulling everything back into a full updo. By twisting sections from both sides of your head and securing them at the crown, you create a romantic, bridesmaid-appropriate look that still shows off your face and hair texture.
Why Half-Up Works on Short Hair
Short hair often isn’t long enough for traditional half-up styles with smooth, full sections. But a twisted half-up crown uses what you have and creates visual height and interest at the crown—drawing the eye upward and creating a more polished silhouette. It’s formal enough for a wedding but not so pinned-up that it feels unnatural on shorter length.
Creating the Twisted Crown
- Create a center part from your forehead to the back of your neck
- Take a small section of hair from one side near your ear and begin twisting it loosely toward the back
- Twist slowly and deliberately, gradually incorporating more hair as you go (like a rope braid)
- Secure the twist at the back of your head with bobby pins
- Repeat on the other side, twisting the section from your other ear toward the back
- Bring both twisted sections together at the crown and secure them together with bobby pins
- Leave a few pieces loose around your face and at the nape for softness
- Smooth any flyaways with a light smoothing serum
Pro tip: Practice this style at least once before the wedding day—the technique is straightforward, but securing the twists takes practice to make them look intentional rather than accidental.
7. Slicked Low Bun at the Nape
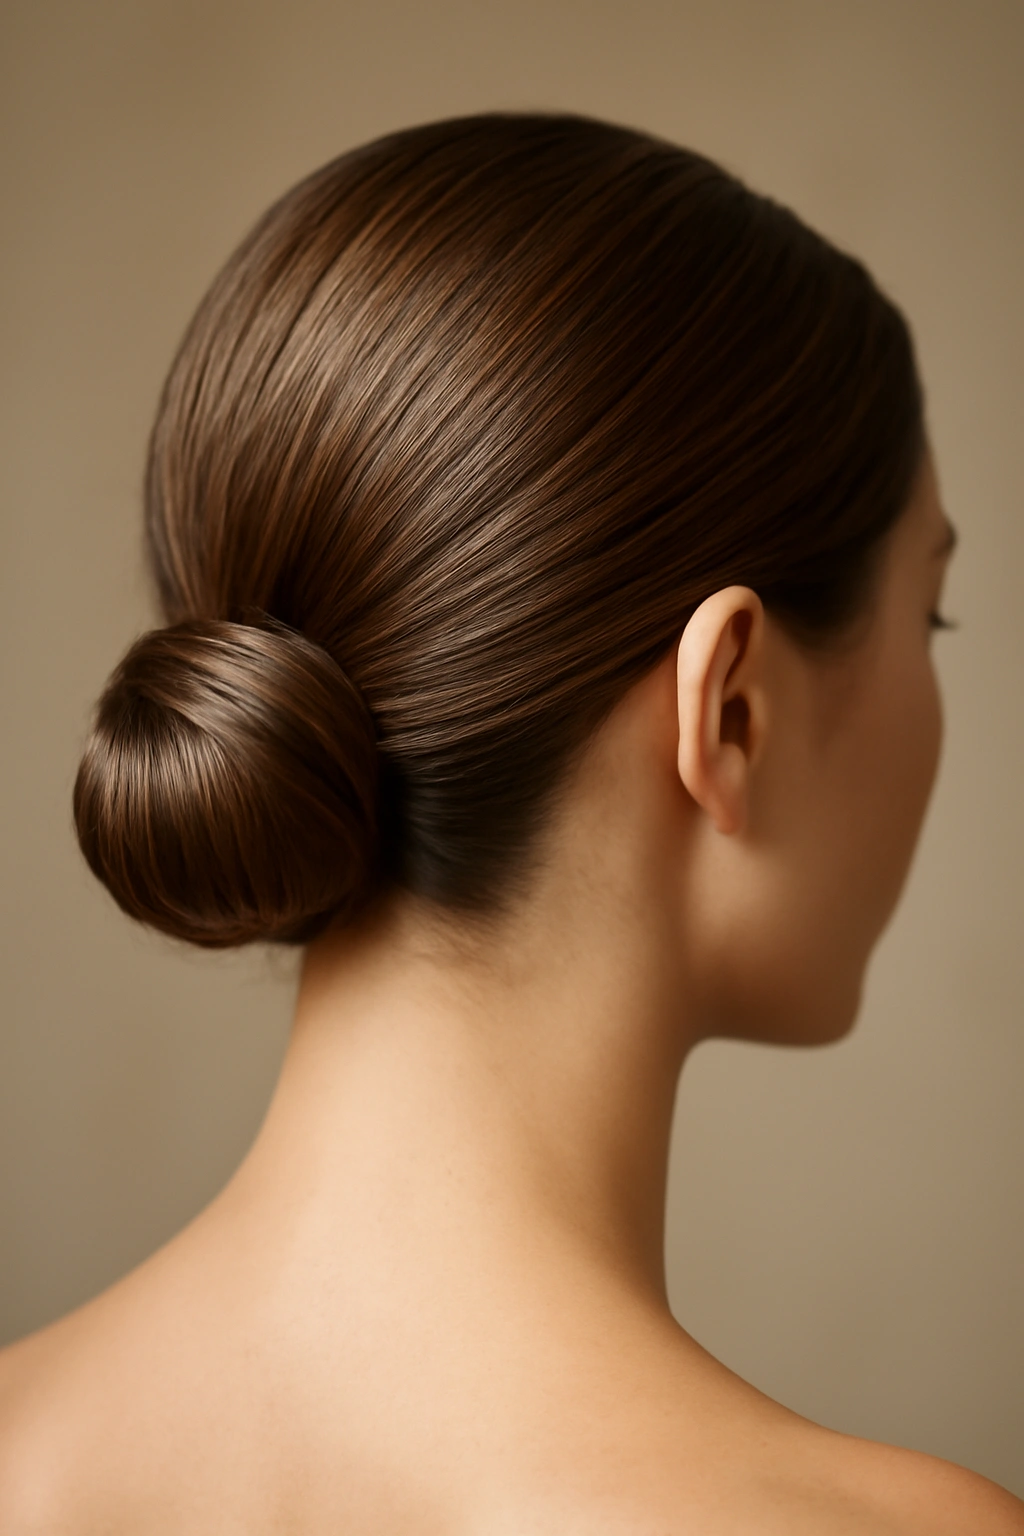
A low bun at the very nape of your neck is achievable on short hair when you have enough length to gather, and it’s an incredibly polished, formal option for a bridesmaid. This style is particularly striking when paired with accessories like a decorative comb, pearl pins, or a delicate hair vine.
The Elegance of a Low Nape Bun
A bun this low reads as intentionally chic rather than struggling to contain short hair. It’s formal and refined, it won’t move around all day, and it puts all the focus on your face, neck, and collarbone—which is particularly flattering if you’re wearing a halter or sweetheart neckline. The style is also incredibly practical for a long wedding day.
How to Build a Secure Low Bun on Short Hair
- Apply a smoothing cream or lightweight pomade to damp hair
- Blow dry your hair with a paddle brush for smoothness
- Create a low ponytail at the very nape of your neck, using bobby pins to tighten and secure the base
- Gather the ponytail section and twist it loosely
- Wrap the twisted section around the base of the ponytail in a circle, tucking the ends under
- Secure with bobby pins, hiding the pins underneath the twist
- Smooth flyaways with pomade and a fine-tooth comb
- Consider adding a decorative comb, hair pin, or pearl pins for a finished touch
Quick fact: A low bun looks more intentional and secure on short hair than a mid-crown bun would—work with your length by positioning it exactly at your nape.
8. Soft Waves with a Decorative Clip
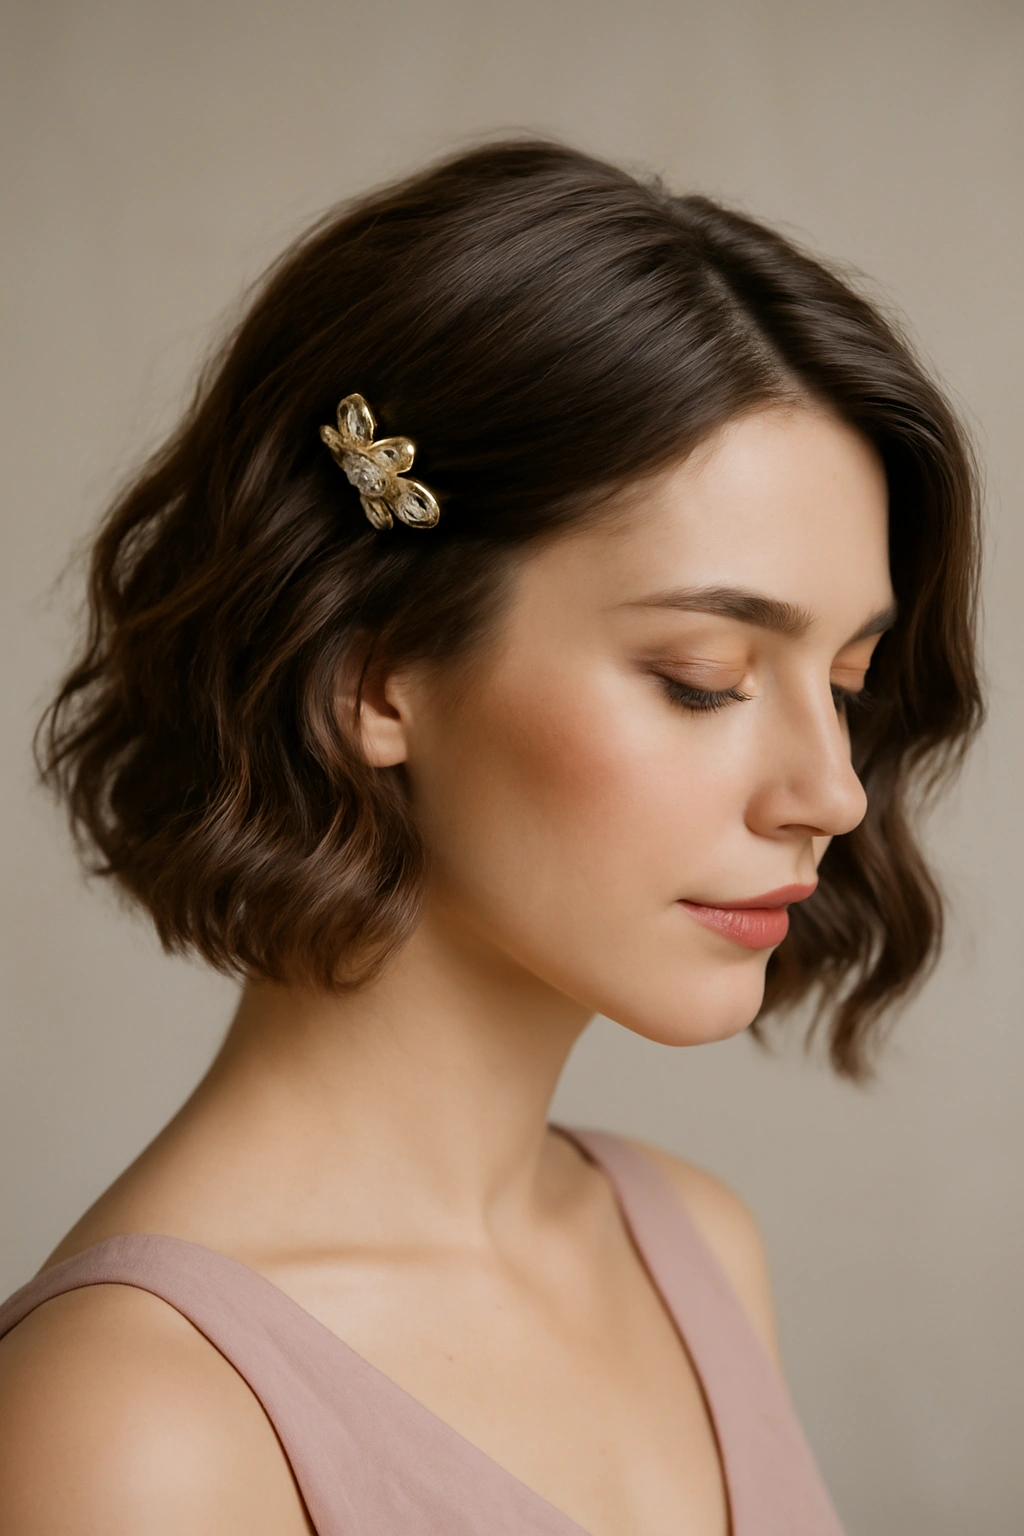
A decorative clip pulled through soft waves combines effortless movement with a touch of glamour. This style is perfect if you want your short hair to feel special and styled without looking overly formal or requiring intense styling effort. The clip becomes an accessory that elevates the whole look.
What the Clip Does for Short Hair
A clip on short hair is visible, intentional, and acts as a focal point that says “this is styled for an occasion.” It catches light, adds sparkle or shine, and creates a polished moment without requiring your hair to be pulled back completely. This is the sweet spot between casual waves and fully formal styling.
Styling Waves and Adding a Clip
- Apply a texturizing spray to damp hair
- Blow dry with a round brush or your fingers for soft movement
- Use a 1.25-inch curling iron to create loose waves, wrapping hair around the barrel and rotating away from your face
- Let waves cool
- Gently run your fingers through waves to separate and tousle
- Gather a small section of hair from one side—not too tight, just a gentle gathering
- Slide a decorative clip (pearl, geometric, gold, or jeweled) into place through that gathered section
- Finish with flexible-hold hairspray
Pro tip: Choose a clip that complements your bridesmaid dress color or the wedding’s metal tones (gold, silver, rose gold) for cohesion.
9. Styled with a Delicate Headpiece or Hair Vine
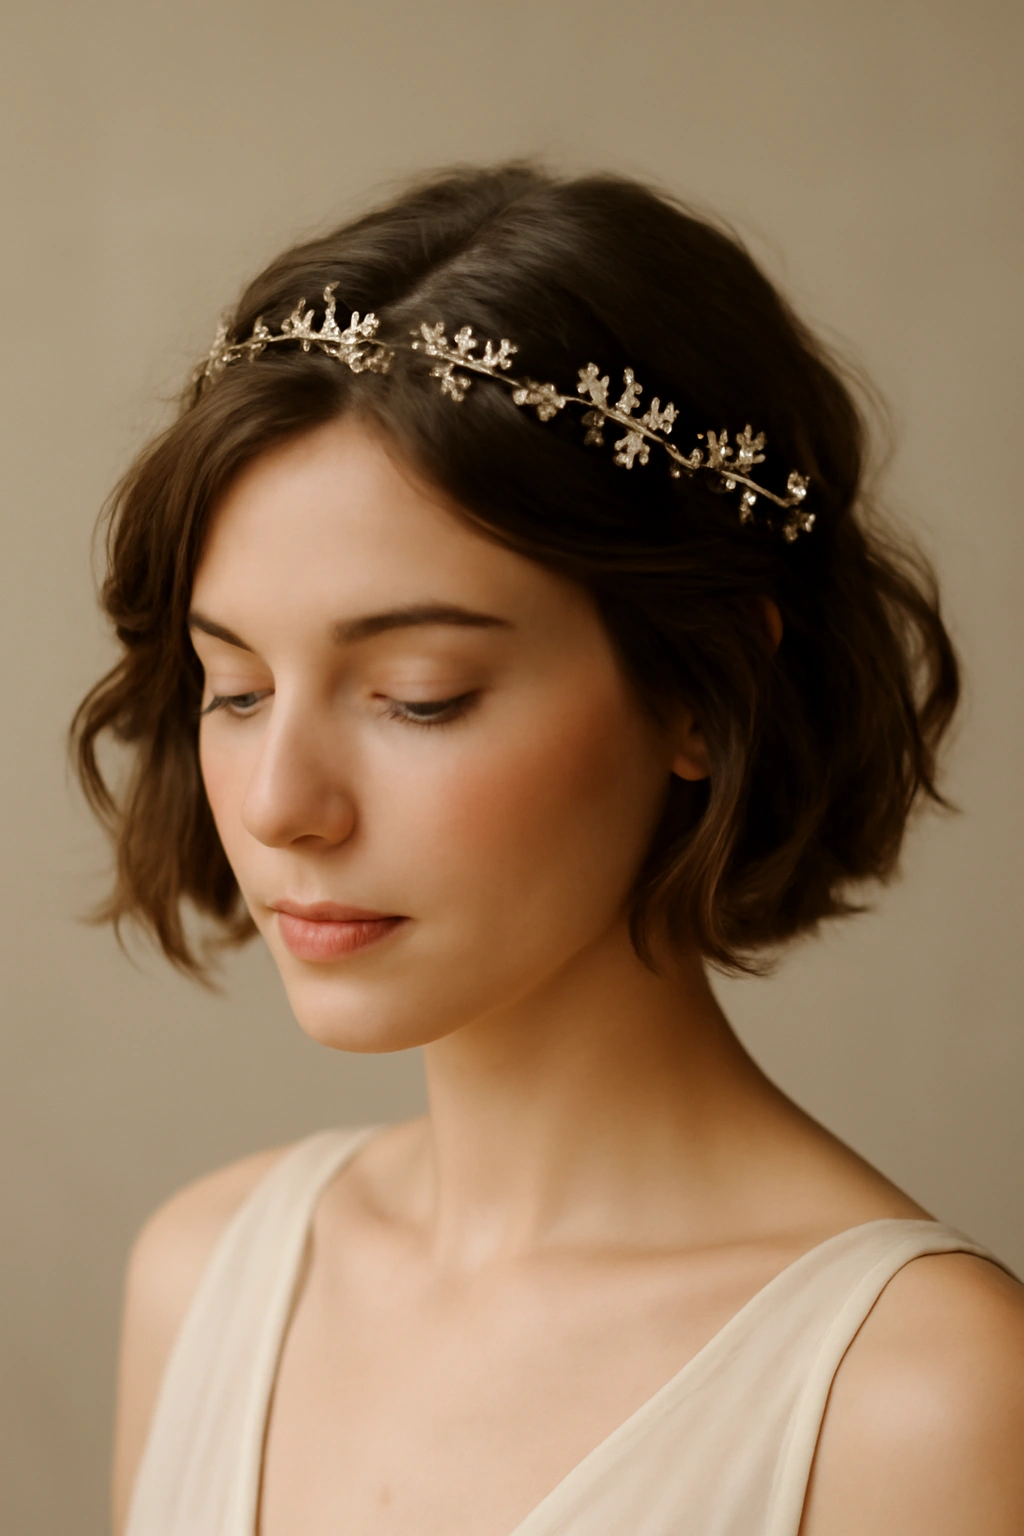
If the wedding’s aesthetic allows for it, a delicate flower crown, hair vine, or decorative headpiece transforms short hair into something ethereal and elegant. This works beautifully for outdoor, garden, or boho-inspired weddings and is particularly striking when your hair is styled in soft waves or natural texture.
Making Headpieces Work on Short Hair
Short hair is actually ideal for headpieces—they’re more visible, they sit more securely, and they create an intentional, styled moment without requiring elaborate pinning. A hair vine or flower crown on short hair feels modern and fresh rather than trying too hard, and it photographs beautifully from every angle.
Pairing Headpieces with Short Hair Styling
- Style your hair in soft waves or textured pieces
- Position the headpiece where it feels balanced—typically across the crown or slightly to one side
- Use bobby pins that match your hair color to secure the piece firmly
- Make sure the positioning doesn’t look like the headpiece is slipping or sitting awkwardly
- For flower crowns, ensure flowers face forward and are securely wired or pinned
- Leave face-framing pieces loose for softness
- Test the headpiece during your trial run to ensure it stays secure
Quick fact: Headpieces stay more securely on short hair than on longer styles because there’s less weight pulling them down and they have more surface area to pin to.
10. Sleek with Face-Framing Pieces
This style is essentially short hair styled smoothly overall, but with intentional face-framing pieces left out on both sides. It’s refined, modern, and flatters almost every face shape. The face-framing pieces add softness while keeping the overall look polished and intentional.
Why Face-Framing Pieces Matter
On short hair, a few loose pieces around your face completely transform the look from severe to soft. They break up a line that might feel too stark, they create movement and dimension, and they’re the difference between “slicked back” and “elegantly styled with intention.” This small detail makes a massive difference in how the look photographs and feels.
Creating the Look
- Blow dry your hair smooth with a paddle brush
- Leave slightly longer sections of hair on both sides of your face—don’t tuck them behind your ears or pin them back
- Use a smoothing cream on the main body of your hair for sleekness
- Lightly curl the face-framing pieces on a small curling iron for a subtle bend
- Create a deep side part to add sophistication
- Use hairspray to hold the smooth sections while letting the face-framing pieces move slightly
Pro tip: This style works on nearly every short hair length and face shape—it’s endlessly versatile and universally flattering.
11. Textured Shag with Intentional Styling
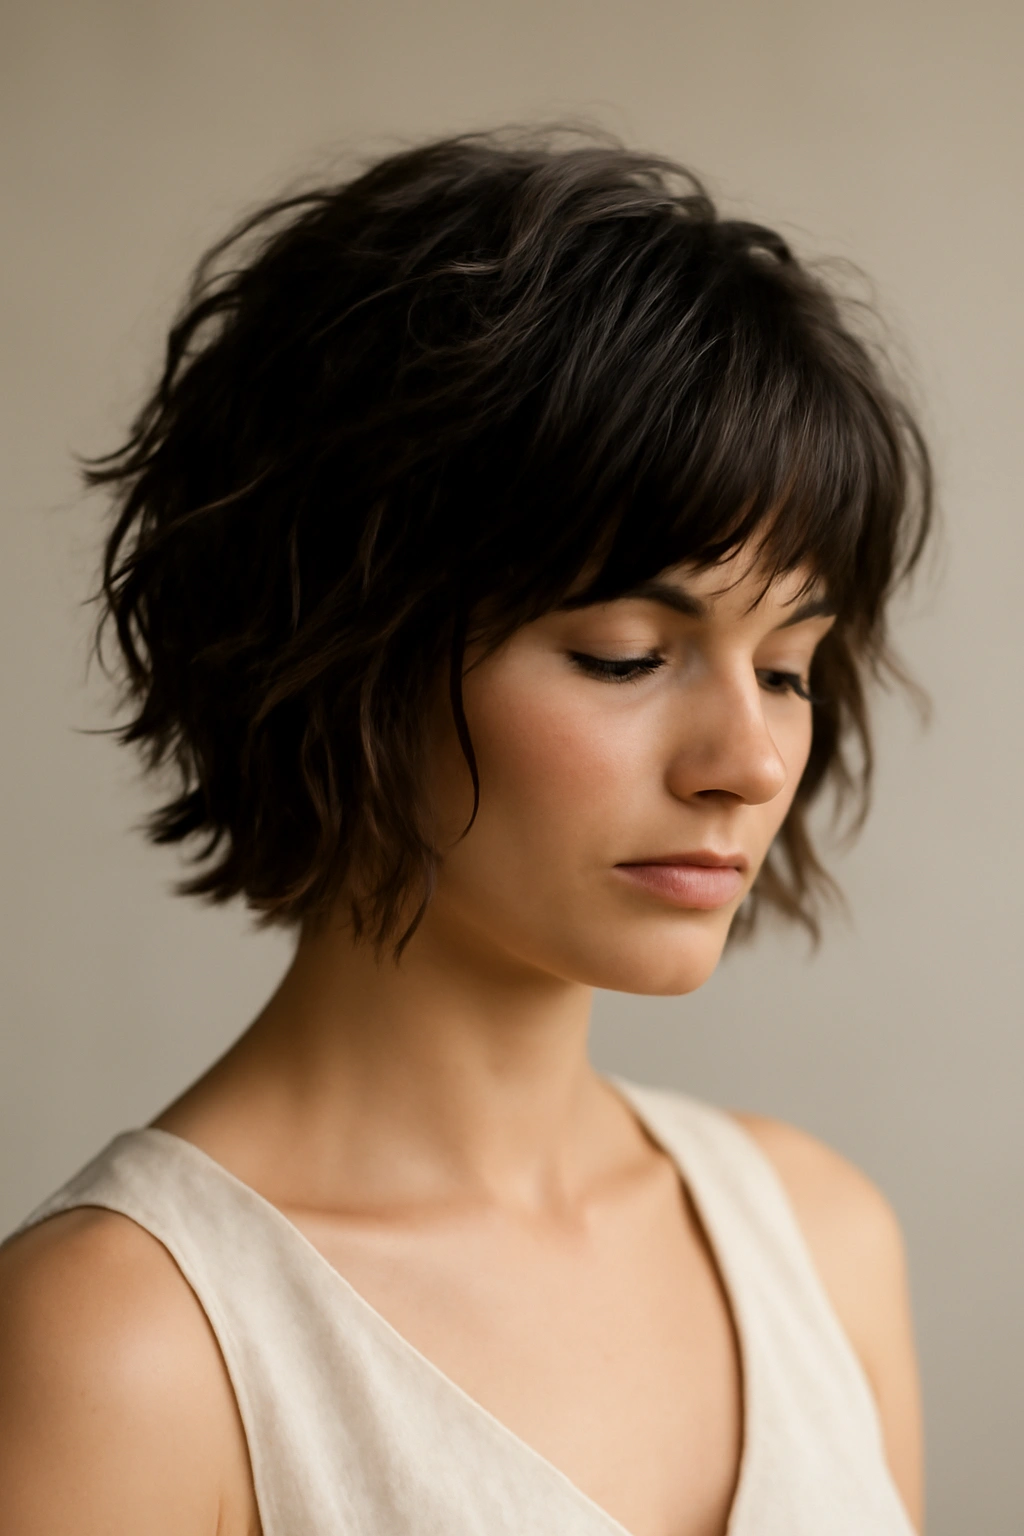
If you have or are growing a textured shag cut, styling it intentionally for a wedding means leaning into the layers and texture rather than trying to smooth them down. Use products and styling to separate and define the layers, creating a modern, fashion-forward bridesmaid look that’s undeniably chic.
Making a Shag Look Bridesmaid-Appropriate
A shag’s inherent texture and layers are an asset, not a liability. The key is making sure the texture looks intentional and styled rather than like you just woke up. Products matter here—you’re not smoothing down the cut but rather defining and separating the layers so the style looks crisp and deliberate.
Styling a Textured Shag
- Apply a texturizing mousse to damp hair
- Blow dry while tousling with your fingers, separating layers as you go
- Use a flat iron or curling iron to curl individual layers, creating definition and separation
- Work through different layers, curling some away from your face and some toward it for dimension
- Once styled, use your fingers (not a comb) to separate and tousle the layers further
- Finish with a flexible, lightweight hairspray that won’t weigh down the texture
Quick fact: A shag actually photographs beautifully because the natural layers create dimension and movement that catches light in every photo.
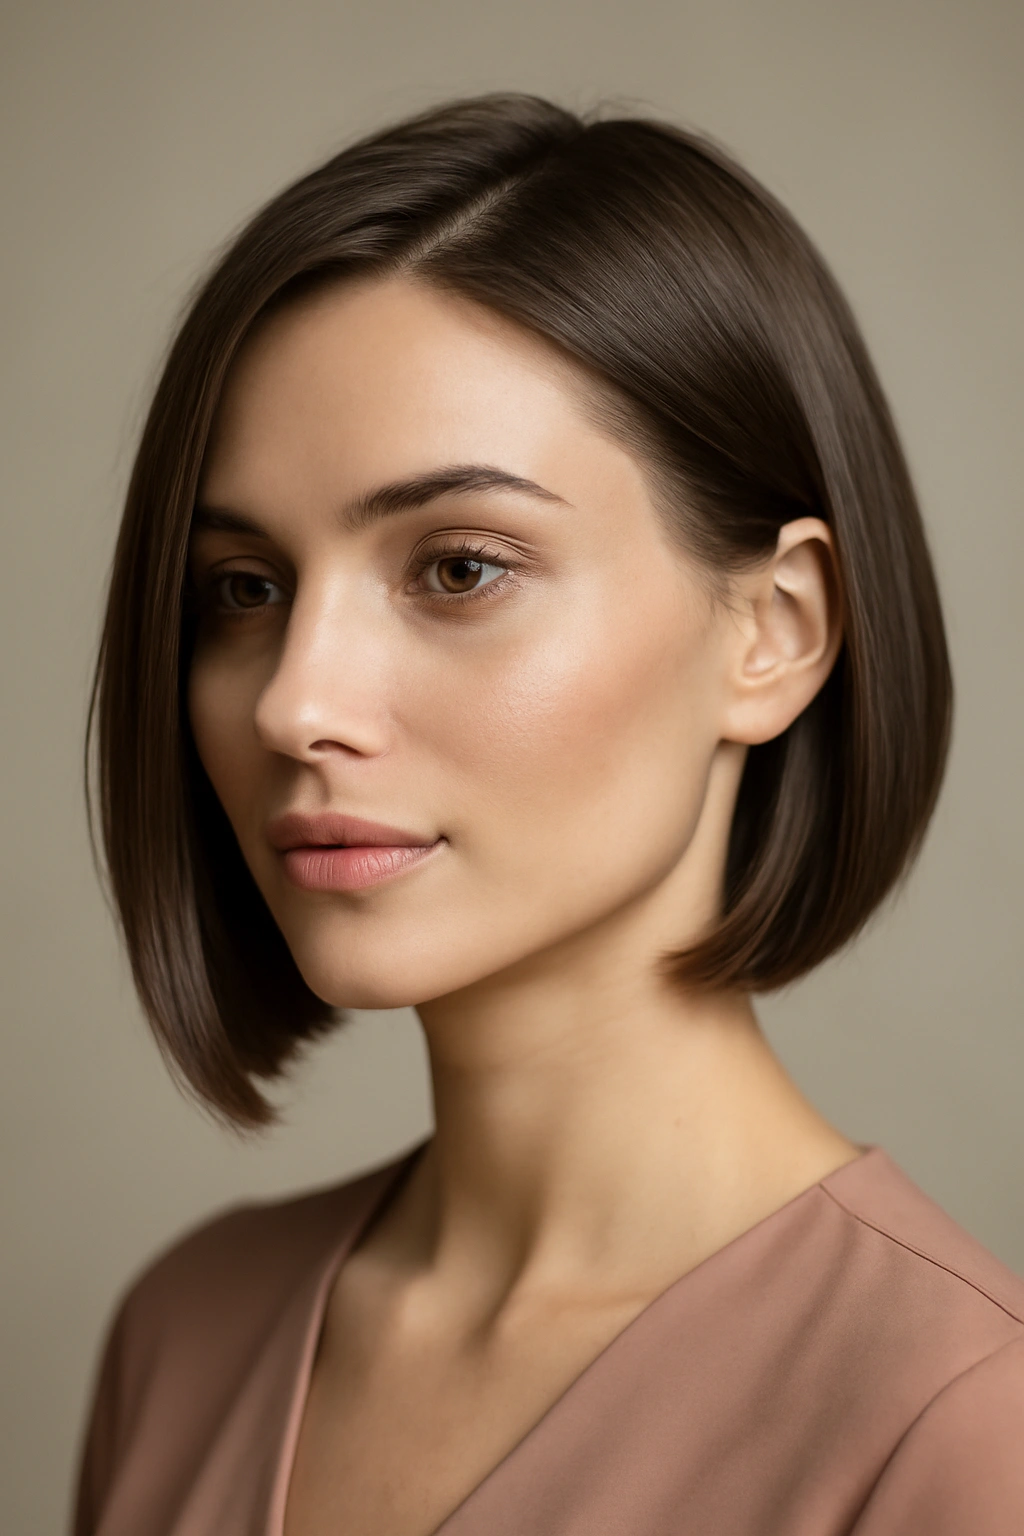
12. Sleek Straight with a Geometric Edge Definition
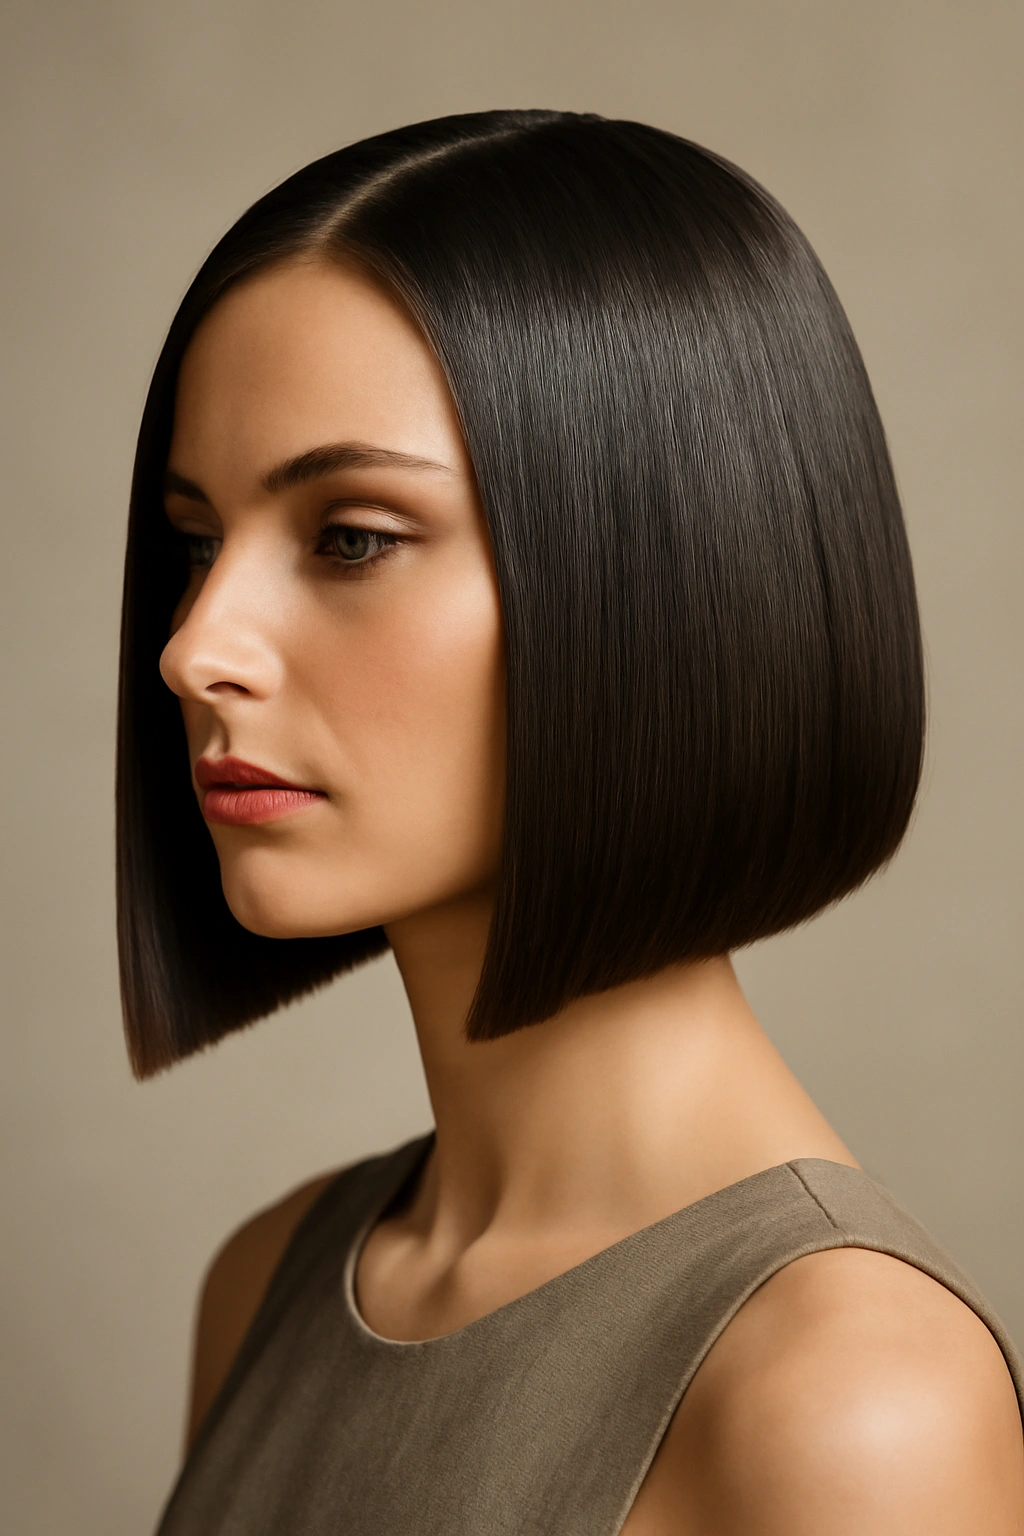
This style plays up the clean lines of a short cut by keeping hair completely straight and smooth while defining the geometric shape of your cut with intentional precision. It’s modern, architectural, and stunning—particularly striking on pixies, bobs, or precise short layers.
The Power of Geometric Definition
Instead of trying to soften a short cut’s lines, this style embraces them. By keeping everything sleek and smooth and paying careful attention to the shape and edge of your cut, you create something almost sculptural. It’s fashion-forward and confident, perfect for a bridesmaid who wants her style to make a subtle, sophisticated statement.
Achieving Geometric Precision
- Apply a smoothing cream to damp hair
- Blow dry with a paddle brush, paying careful attention to the direction and shape of your cut
- Use a flat iron on small sections to create absolute smoothness and shine
- Work in the direction of your natural hair growth to enhance the cut’s geometry
- Pay particular attention to edges—smooth them carefully to define the shape
- Use a firm-hold pomade on any shorter pieces or edges to keep them in place
- Finish with a strong-hold hairspray to maintain the sleek, smooth finish
Pro tip: This look benefits enormously from a fresh cut right before the wedding—sharp lines and clean edges are essential for this style to shine.
Final Takeaway

Your short hair is an advantage at a wedding, not something to work around. These twelve styles prove that short hair can be elegant, romantic, modern, glamorous, and effortlessly chic—sometimes all at once. The secret is choosing a style that works with your hair’s natural texture and length rather than fighting it, and then executing it with intention and the right products.
Whichever style you choose, do a practice run before the wedding day. Bring photos to your hairstylist if you’re having it done professionally, or test your own styling technique at home. This isn’t just about nailing the look—it’s about feeling confident and comfortable so you can focus on celebrating the bride instead of worrying about your hair.
Short hair steals the show at weddings when it’s styled well. Own it.