The beauty of a good five-minute hairstyle is that it doesn’t require magical skills or fancy tools—just the right technique and a clear sense of what actually works when you’re rushing out the door. Whether you’re dealing with second-day hair, trying to look polished for a meeting, or simply tired of your regular routine, having a handful of go-to styles that you can execute on autopilot makes mornings infinitely less stressful. The styles that work best are ones that embrace what your hair naturally wants to do rather than fighting against it, which is exactly why five-minute styles tend to look fresher and more effortless than elaborate updos that take twenty minutes anyway.
Most people assume quick hairstyles mean low-effort or boring, but that’s not true at all. A high ponytail with texture, a sleek half-up twist, or a tousled bun can look just as intentional and put-together as something that took twice as long—you’re just using smart shortcuts and understanding the mechanics of how hair actually holds together. The difference between a five-minute style that looks rushed and one that looks intentional often comes down to one small detail: a few strategically placed bobby pins, a light texture spray, or the way you section the hair before you begin.
The styles below are organized from super simple (genuinely two-minute territory) to slightly more involved (still well under five minutes, but with a touch more complexity). Each one comes with the specific techniques that make the difference between mediocre and “wait, you did that in five minutes?” The goal is to build your personal rotation of go-to styles so that whatever your hair situation is on any given morning, you’ve got something that works.
1. The Sleek Pony with a Twist
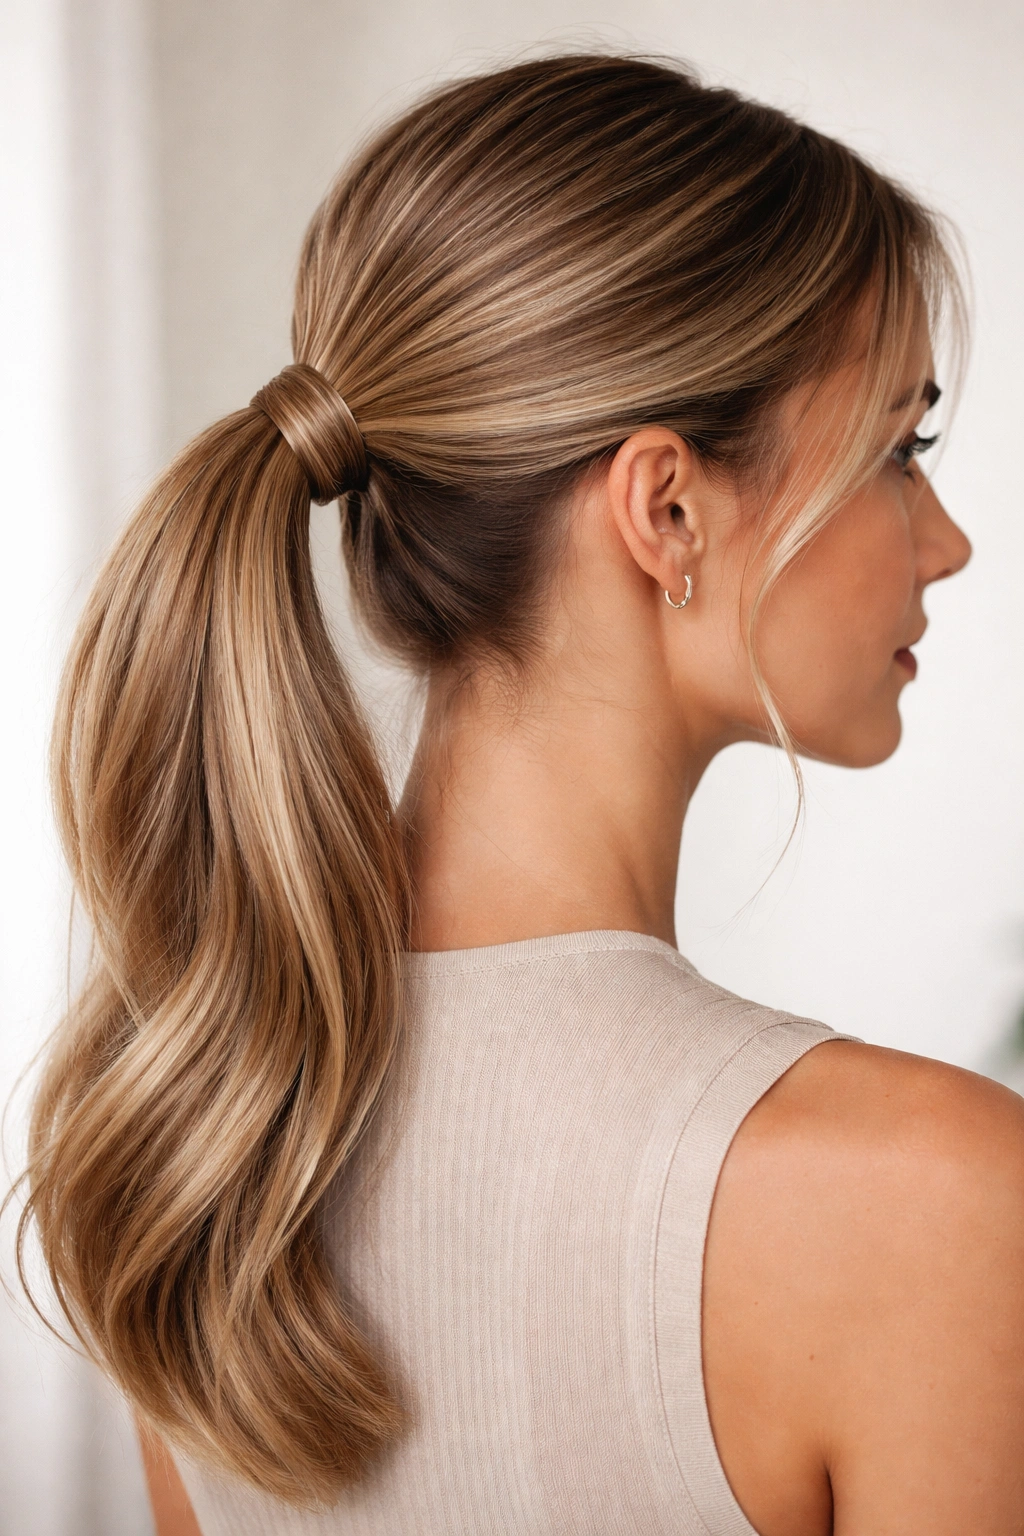
This style looks polished enough for work or running errands, but it requires almost no blow-drying or prep. Start with hair that’s either naturally straight or slightly damp from the shower, and brush it back into a smooth, tight ponytail at the base of your head—somewhere between your crown and the nape of your neck, depending on the vibe you’re going for.
Why This Works for Almost Any Hair Type
The magic of this style is that it doesn’t require your hair to be perfectly smooth or styled in advance. Even slightly textured or second-day hair looks intentionally tousled rather than messy. The key is the precision of the ponytail itself—the tighter and smoother the base, the more polished the whole look feels. A few loose strands framing your face actually add to the sophistication rather than detracting from it.
How to Execute It Perfectly
- Brush or use a fine-tooth comb to smooth the hair back from your face, gathering it into a low ponytail
- Secure with a standard elastic, then take a small 1-inch section from the underside of the ponytail and wrap it around the base to cover the elastic completely
- Pin that section underneath where the wrapped hair meets the elastic, and you’ve instantly elevated the look from “quick ponytail” to “intentional style”
- If your hair is dry and you have a few seconds, quickly run a texture spray or light hairspray over the back of the ponytail to add grip and prevent flyaways
Pro tip: The wrapped-base trick is the entire difference between a lazy ponytail and a polished one—this single detail takes 30 seconds and changes everything.
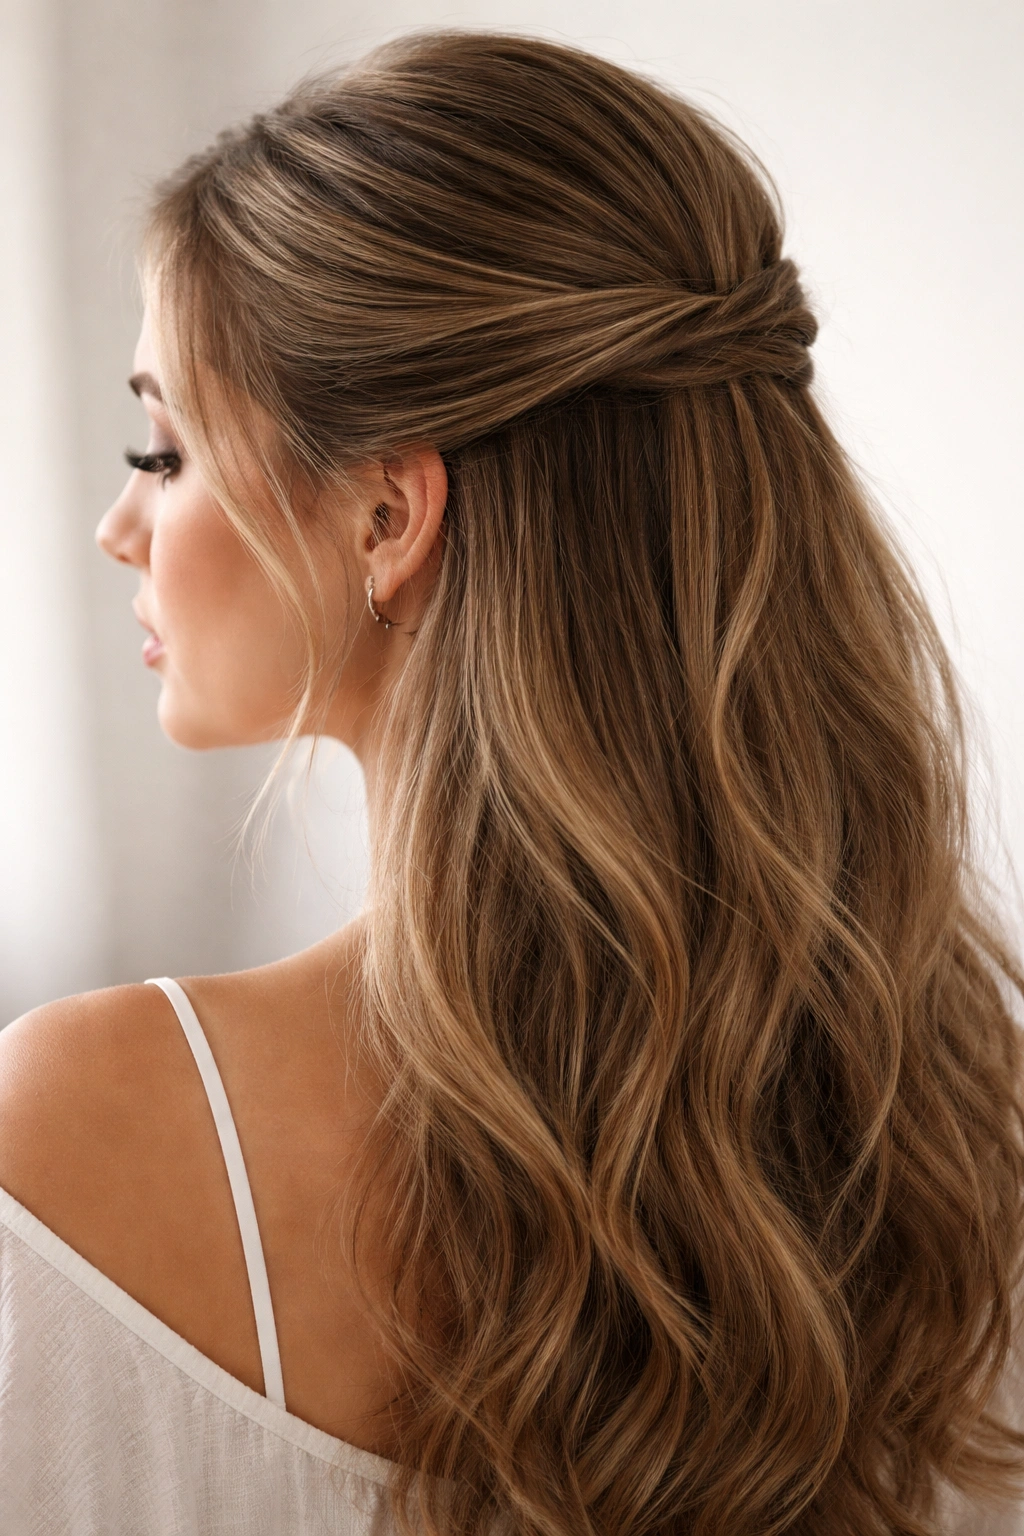
2. The Half-Up Half-Down Twist
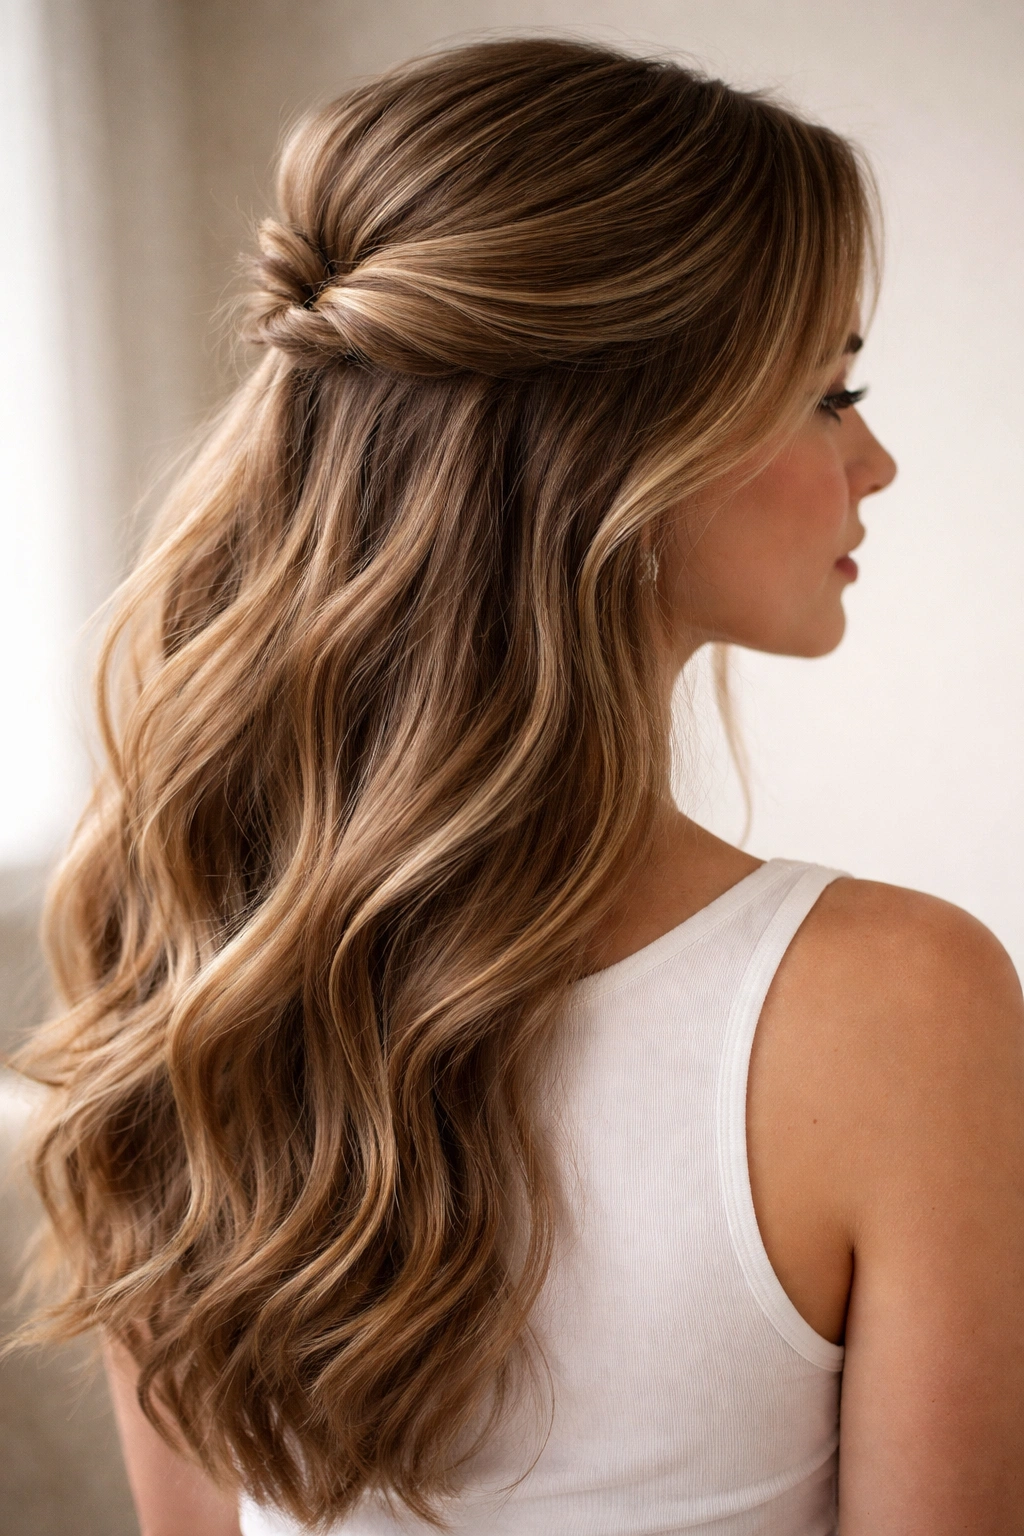
This style sits perfectly between “I actually did something with my hair” and “I barely did anything,” which is why it’s endlessly practical for days when you want volume without committing to a full updo. Gather the top half of your hair starting from one temple, twist it gently as you go back, and pin it at the crown.
The Genius of Keeping Half Down
Half-up styles work because they solve the fundamental tension of trying to look polished while keeping your hair down. You’re pulling the hair back just enough to show your face and prevent a sweaty forehead, but the length and volume of the lower half soften everything so it doesn’t read as severe. This style works on second-day hair, freshly washed hair, and everything in between because the twist adds intentional texture.
Steps to Nail the Technique
- Section off the top half of your hair by starting at one temple and gathering back toward the crown—this doesn’t need to be perfectly precise; slightly uneven actually looks more modern
- Twist the section loosely as you gather it, which automatically creates texture and makes the style look less flat
- Secure with a bobby pin or small elastic at the crown, then use your fingers to gently loosen and separate the twisted section for a softer, messier look
- Leave a piece or two of hair loose around your face for balance—a completely tight half-up can look severe if you’re not careful
Worth knowing: The looser and more textured your twist, the more forgiving the style is if you don’t have time to blow-dry. Intentional messiness hides imperfections.
3. The Five-Minute Bun
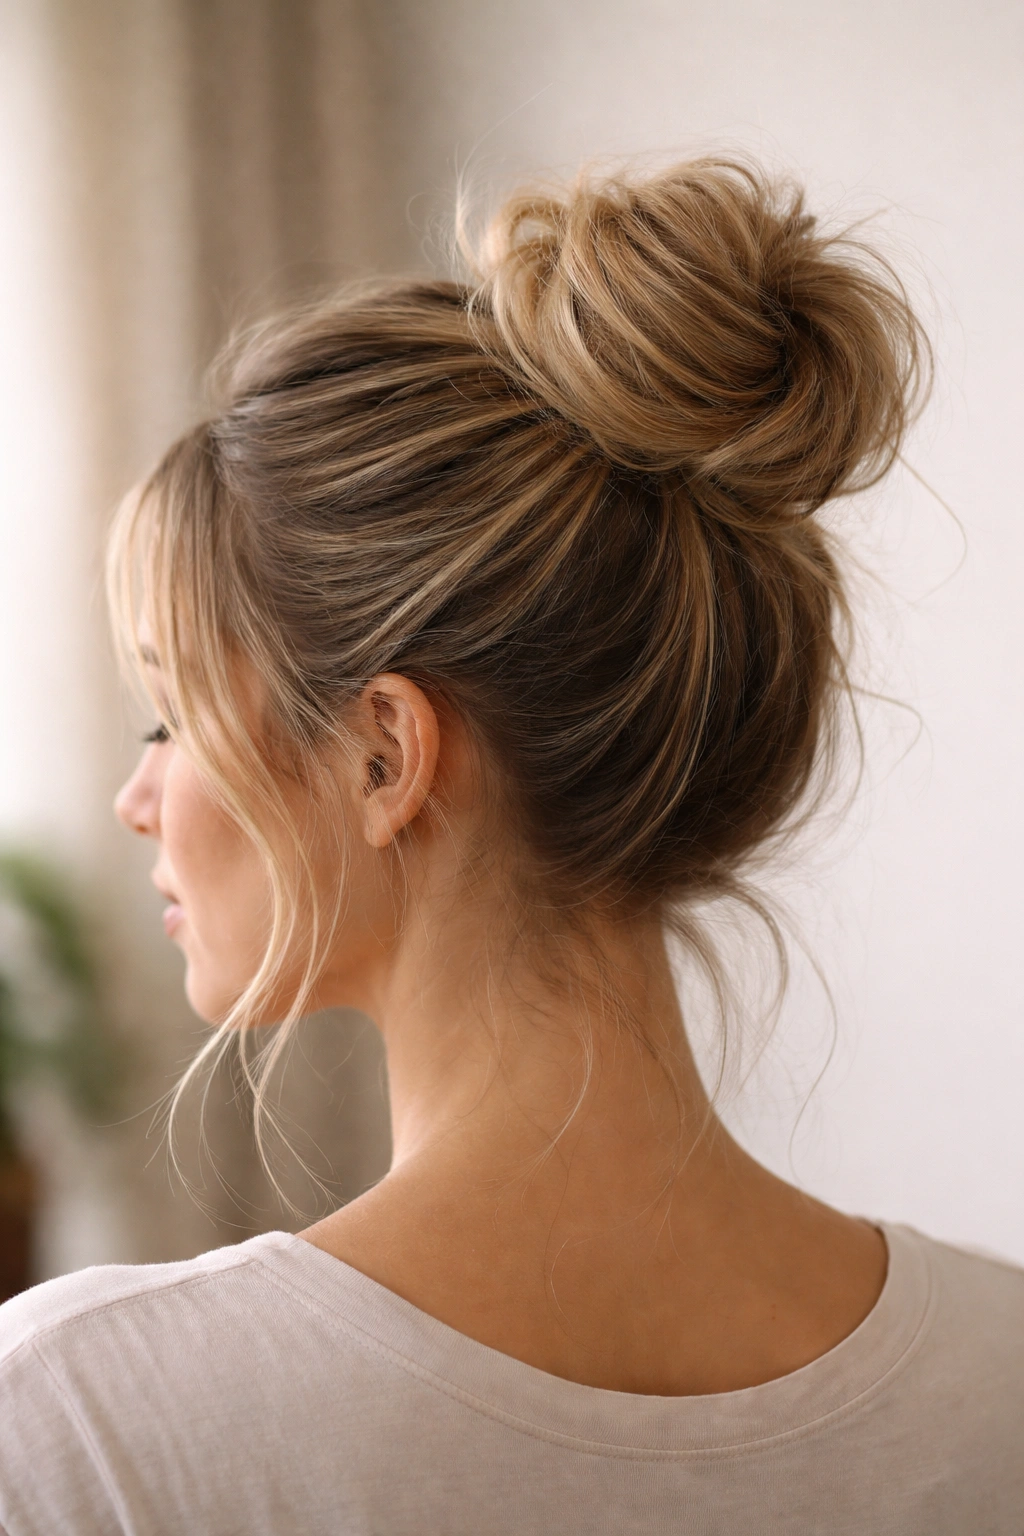
A bun done right looks effortless and intentional, not like you just threw your hair up in frustration. The secret is creating a bit of texture and height rather than pulling everything back into a flat, tight knot at the base of your skull. This works best if your hair has some natural wave or if you quickly twist it before wrapping it into a knot.
Why Texture Changes Everything
The difference between a sloppy bun and a polished one isn’t time—it’s texture and the height at which you place it. A bun positioned higher on the crown, with softness and a few intentional pieces loose, reads as deliberately styled. A flat, tight bun at the nape of your neck reads as “I don’t have time for hair today,” even if you spent the same amount of time on it.
The Actual Technique That Works
- Apply a small amount of texture spray or sea salt spray to your hair while it’s down (even a light misting helps)
- Gather your hair into a high ponytail at the crown using a clear elastic
- Twist the ponytail into a rope, then coil it into a bun shape and secure with bobby pins
- Use your fingers to gently loosen and separate the coils so the bun has a soft, lived-in texture rather than appearing sculptural
- Leave a small face-framing piece loose on each side and let a few shorter pieces come down from the bun naturally
Pro tip: Hold the finished bun loosely in one hand while you use bobby pins with the other, so the bun stays soft instead of getting pinned too tight.
4. The Slicked-Back Topknot
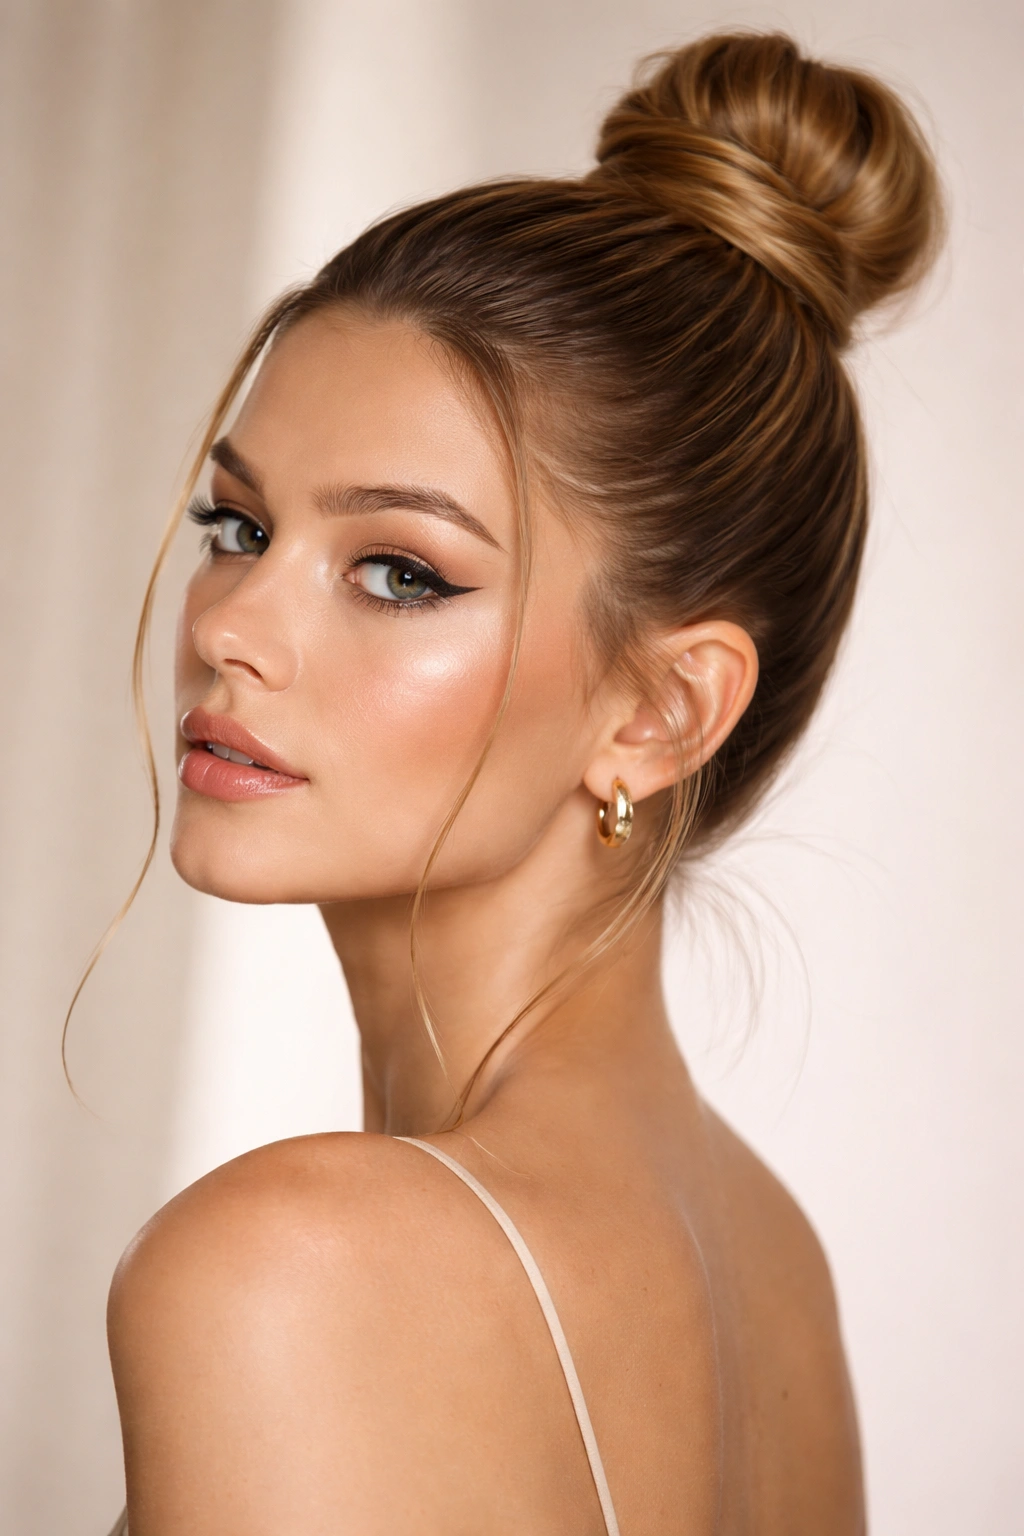
This is the five-minute style that feels the most deliberately styled, partly because a slicked-back topknot reads as fashion-forward by default. You’ll need a strong-hold gel or mousse for this one, plus a few bobby pins and a small elastic. The look is especially striking if you let a few tendrils come down around your face.
Slicked-Back Versus Messy: Which Read You’re Going For
A slicked topknot is inherently more dramatic and modern than a casual bun because of the smoothness and control at the back. This works brilliantly if you’re going for a polished, almost editorial vibe, but it can read as severe if your face is very round or angular. That’s why leaving face-framing pieces is critical—it softens the severity of the slick-back and makes the style work with more face shapes.
Steps to Execute It
- Apply a smoothing gel or mousse to damp or slightly damp hair, working it through from roots to ends
- Brush everything back firmly from your face, using a fine-tooth comb to smooth any bumps or texture
- Gather into a high ponytail and secure with a small elastic
- Coil the ponytail into a knot and pin it securely at the crown
- Use a fine-tooth comb to smooth down any flyaways and lock everything in place with a light hairspray
- Pull out two small pieces from the front to frame your face, even if your whole look is otherwise slicked back
Insider note: The smoother and more controlled your slicked-back topknot, the less product you actually need—precision and technique matter more than gobs of gel.
5. The Low Twisted Braid
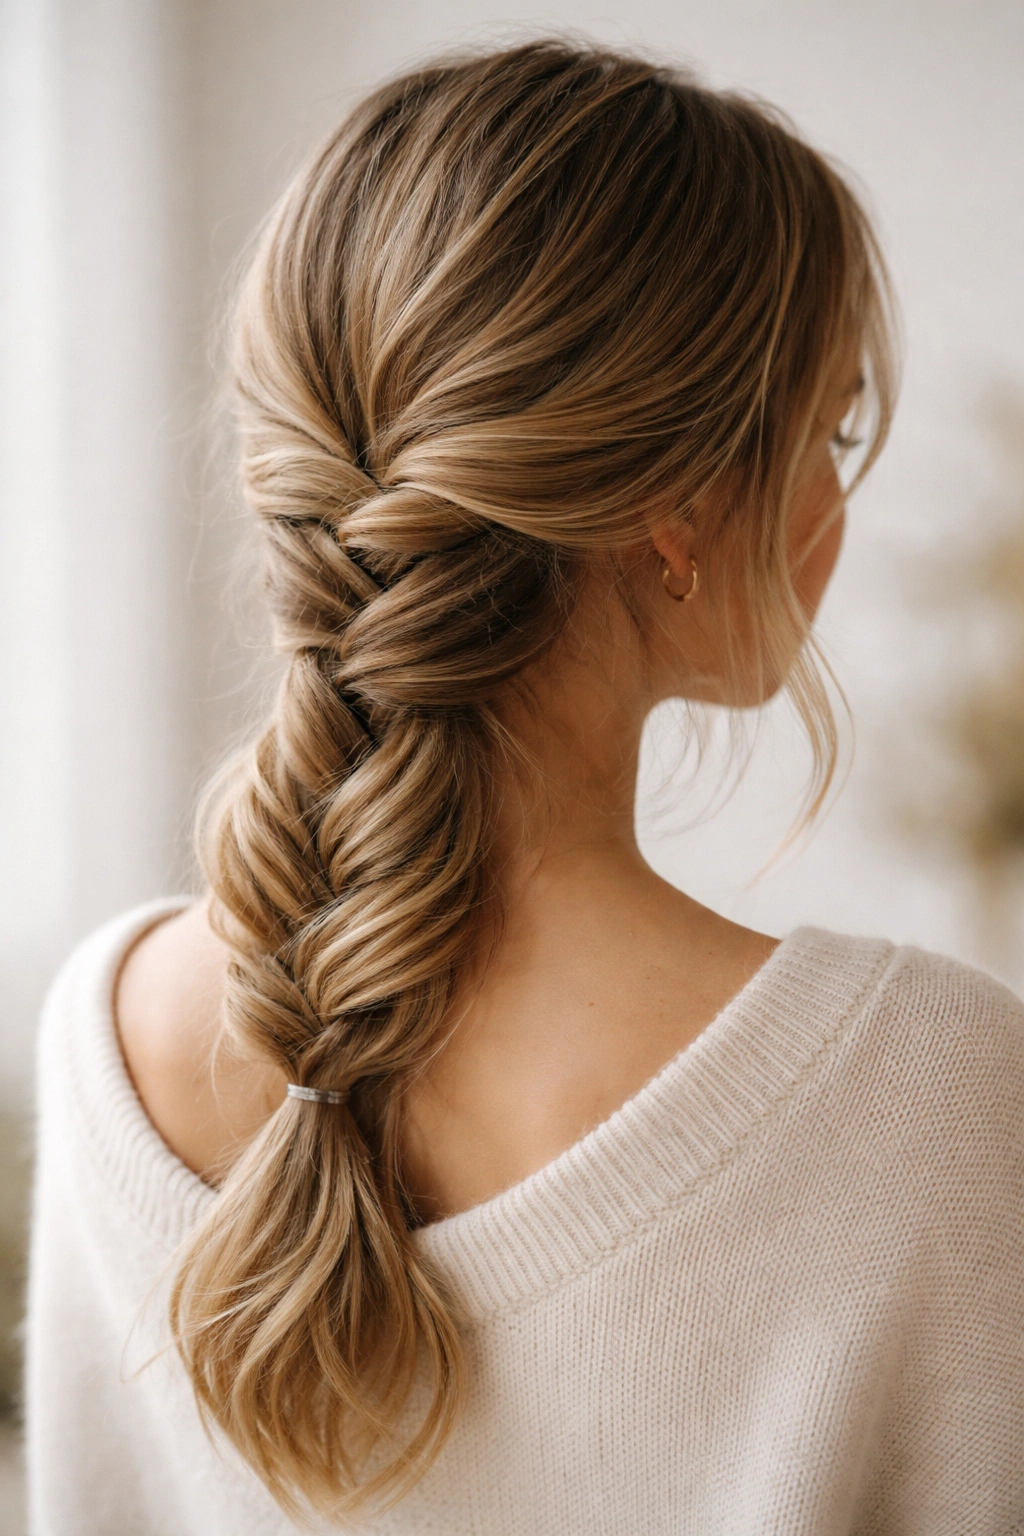
If your hair is long enough for a braid and you have five minutes, a low twisted braid is one of the easiest upstyles that still looks intentional. This isn’t a traditional three-strand braid; it’s actually much simpler—you’re just twisting two sections of hair around each other, which is infinitely faster and gives a softer, more romantic look.
Two-Strand Twist Versus Traditional Braid
A two-strand twist is genuinely faster than a traditional three-strand braid because you’re only tracking two pieces of hair at a time rather than three. The texture also looks more organic and current than a tight, perfectly structured braid—it reads as effortless even though it requires exactly the same amount of time. The downside is that a two-strand twist won’t hold quite as long throughout the day if you have very fine or slippery hair, so you may need a light hairspray to set it.
How to Create It Quickly
- Gather your hair into a low ponytail or even just loosely hold it in your hands at the back of your head
- Divide the section into two equal strands
- Cross one strand over the other, then cross the other strand over that one—keep repeating this twist motion all the way down
- Secure the end with a small elastic
- Use your fingers to gently pull and loosen the twist so it looks soft and textured rather than tight
- A few wisps falling loose around your face add to the effortless vibe
What to watch for: If your hair is very fine or freshly washed and slippery, twist slightly tighter than you think you need to, because two-strand twists loosen significantly throughout the day.
6. The Messy Side Ponytail
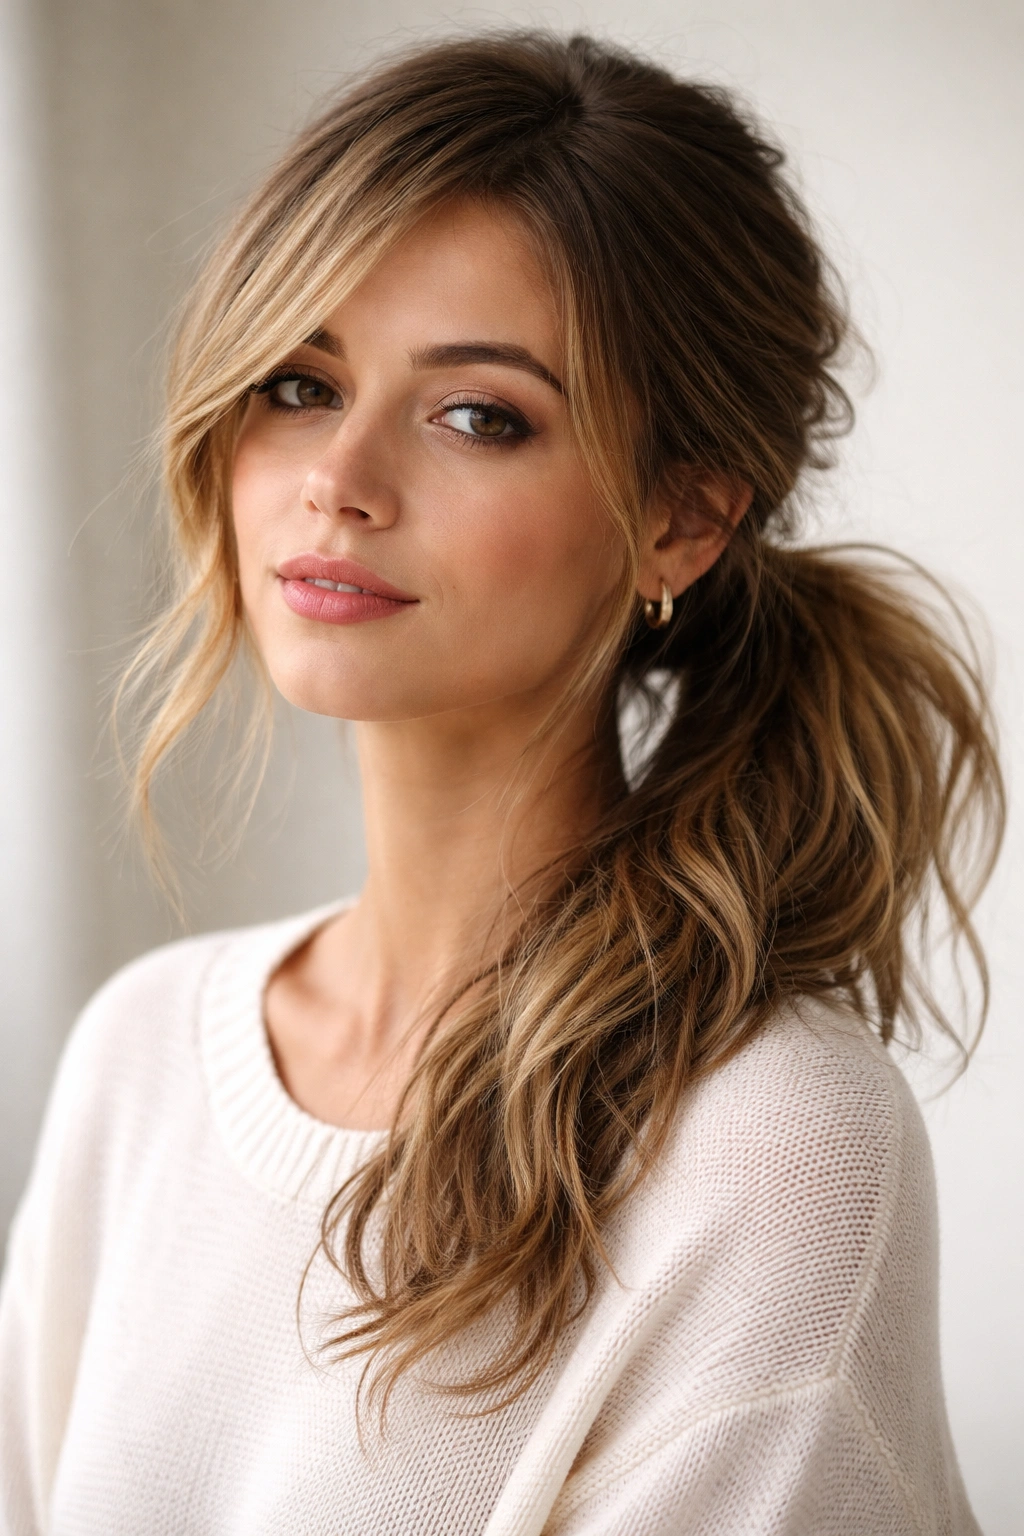
A side ponytail reads as casual and fun, not formal, which makes it perfect for days when you want to look like you tried without actually trying that hard. The “messy” part is intentional—you’re deliberately creating texture and leaving pieces loose rather than making everything perfectly smooth and sleek. This style works beautifully on day-two or day-three hair that already has texture and isn’t falling completely flat.
Why Side Ponytails Work on Lazy Hair Days
One of the advantages of a side ponytail is that imperfection actually adds to the vibe. Loose strands, slight waves, and a slightly uneven gather all read as deliberately casual rather than sloppy. You can do this style in genuinely three minutes on days when your hair is cooperating, and it looks intentionally effortless rather than rushed.
The Technique That Looks Soft Instead of Sloppy
- Create subtle texture by spraying your hair lightly with sea salt spray or scrunching it with your hands if it’s damp
- Flip your head to one side and gather your hair loosely at the side of your neck—don’t go for perfect smoothness; slightly uneven and undone is the point
- Secure with a small elastic
- Take a thin section from the ponytail and wrap it around the base to hide the elastic
- Gently loosen and separate the ponytail with your fingers so it has volume and movement rather than appearing tight
- Let several pieces frame your face on the front and sides
Pro tip: A side ponytail looks better the more you move it around with your fingers after you’ve secured it—this creates softness and texture that reads as intentional.
7. The Sleek Low Bun with Flyaway Control
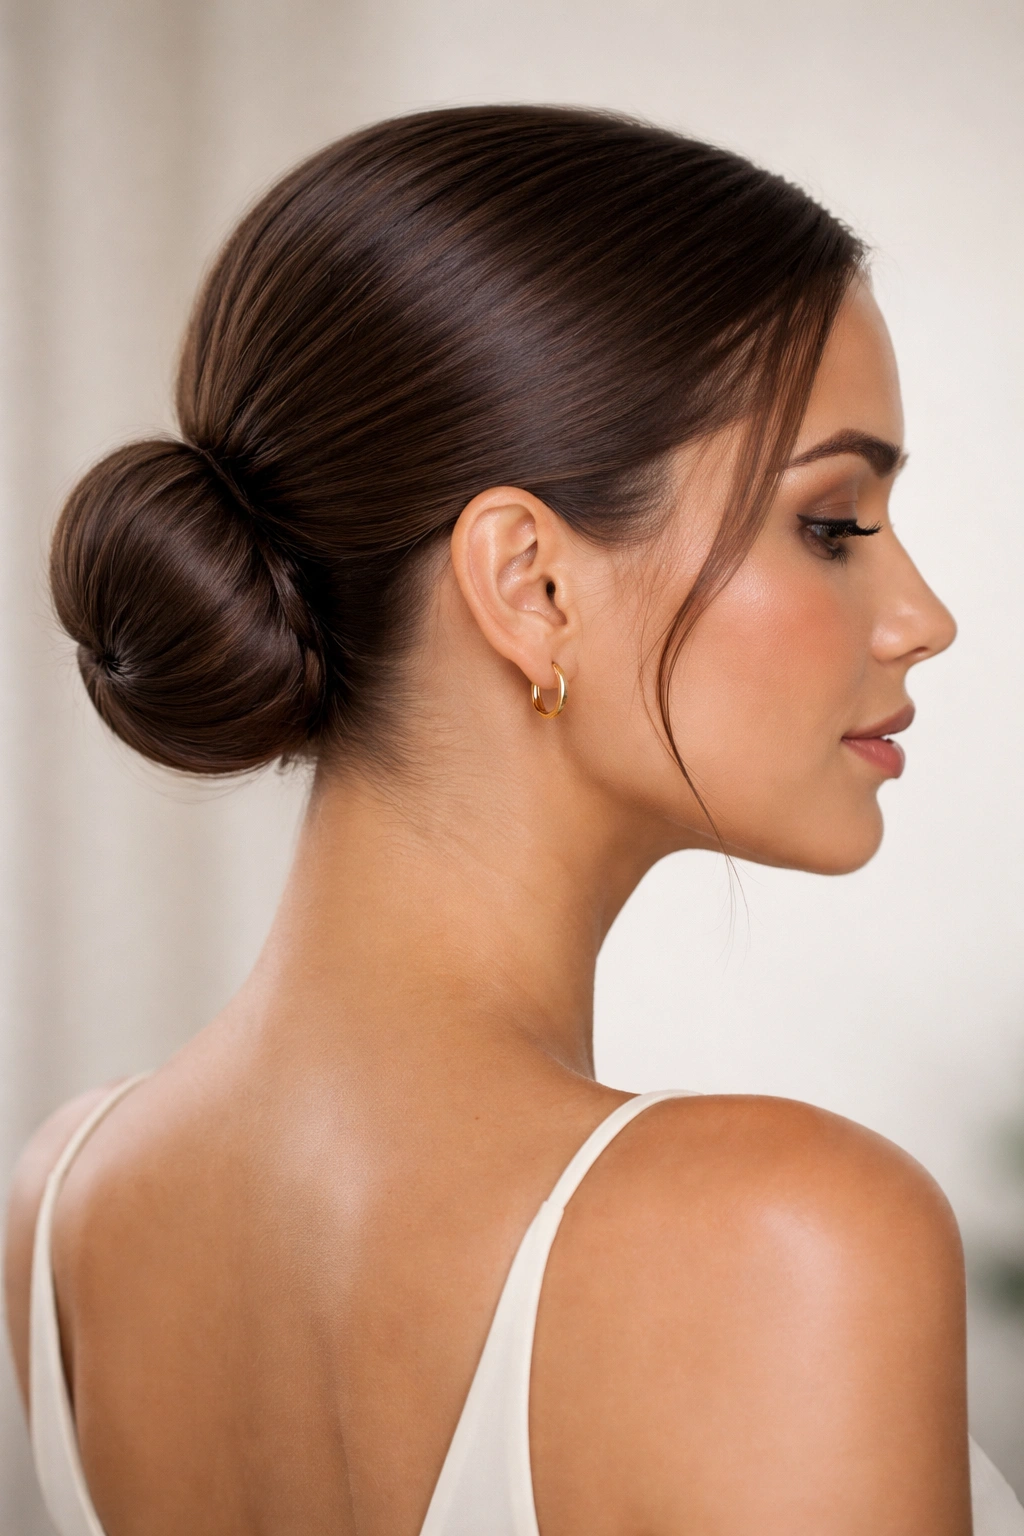
This is the classic, timeless low bun that works for almost any occasion—work, dinner, casual hangouts—and it’s polished without feeling fussy. The only trick is controlling flyaways so it looks intentionally sleek rather than frizzy and unfinished. If you have a smoothing cream or anti-frizz serum, this is where those products earn their keep.
Why This Is Your Failsafe Upstyle
A sleek low bun is the most versatile five-minute style because it reads differently depending on how you style it and what you pair it with. Wear it with a button-up and it looks professional. Wear it with a leather jacket and it looks edgy. The key is nailing the execution so it actually looks polished and not like you just shoved your hair up without thinking.
Steps for a Actually-Polished Finish
- Apply a small amount of smoothing cream or serum to slightly damp or dry hair, focusing on the mid-lengths and ends
- Brush your hair straight back into a low ponytail at the nape of your neck
- Secure with an elastic, then divide the ponytail into two sections
- Twist each section and coil them around the base of the ponytail, pinning as you go
- Use a fine-tooth comb to smooth any bumps and catch any flyaways
- Lock everything in place with a light hairspray
Worth knowing: The smoother your hair is at the back of your head before you twist and coil, the easier the whole process is and the more polished the result.
8. The Braided Crown
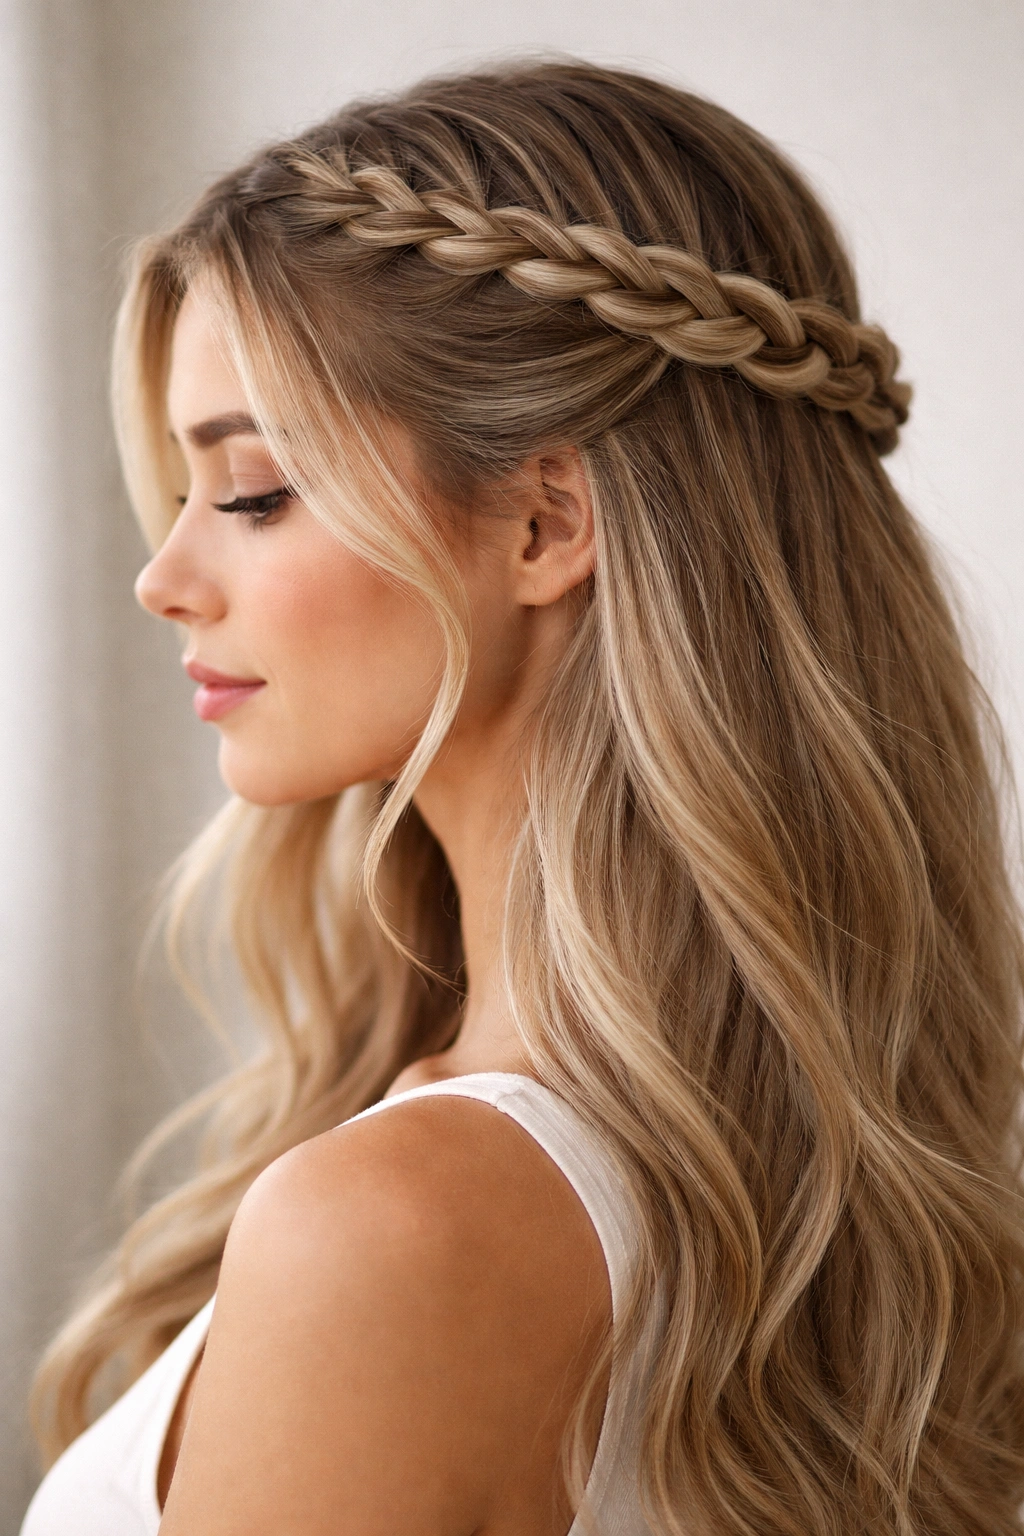
A braided crown instantly reads as intentional and a little bit special—like you actually cared about your hair today—even though it takes about the same amount of time as a regular ponytail. The style works because you’re braiding just the top section of hair and then pinning it around the crown, leaving the rest of your hair down for volume and movement. This is especially beautiful if you have long hair.
What Makes This Style Feel Elevated
The braided crown feels more special than a half-up style because of the circular motion and the fact that the braid frames your entire head. It’s more interesting visually than a simple half-up twist, and it doesn’t require your hair to be perfectly straight or styled in advance—slight texture actually helps the braid have more grip and definition.
How to Create a Five-Minute Braided Crown
- Section off the hair along the top of your head from temple to temple
- Create a three-strand braid (or a two-strand twist if you’re moving even faster) from one temple toward the back of your head
- Secure the end loosely with a small elastic
- Repeat the braid or twist on the other side of your head
- Cross both braids toward the back and pin them in place at the crown, creating a crown effect
- Leave the rest of your hair down, and gently loosen the braids with your fingers for a softer, more textured look
Pro tip: You don’t need to complete a full circle—braiding just the top section and pinning it at the back gives you the elegant effect in half the time.
9. The Tucked and Pinned Half-Up
This style is the essence of “effortless chic”—you’re folding sections of hair and pinning them, which takes genuinely no time and creates a sophisticated silhouette. It works on straight hair and wavy hair equally well, and it doesn’t require any twisting or braiding skills. The key is using bobby pins that match your hair color so they’re basically invisible.
Why Tucking and Pinning Is Underrated
Tucking sections of hair back and pinning them is one of the fastest ways to create a styled look, and yet most people don’t think to do it. It’s often easier than trying to twist or braid, and the result is actually more modern than a traditional half-up style. The randomness of where the pins are placed, as long as they’re secure, looks intentionally undone rather than haphazard.
The Quick Execution
- Take a small section of hair from one temple and gently pull it back toward the crown
- Pin it with a bobby pin that matches your hair color, inserting the pin horizontally so it has maximum grip
- Repeat on the other side
- If you have longer hair, you can tuck additional sections from behind your ears and pin those too
- The result should look like pieces of your hair are gently pulled back, not like everything is rigidly controlled
Insider note: Match your bobby pins to your hair color—this small detail makes the whole style look more intentional and less “I just pinned something down.”
10. The Twisted Ponytail with Texture
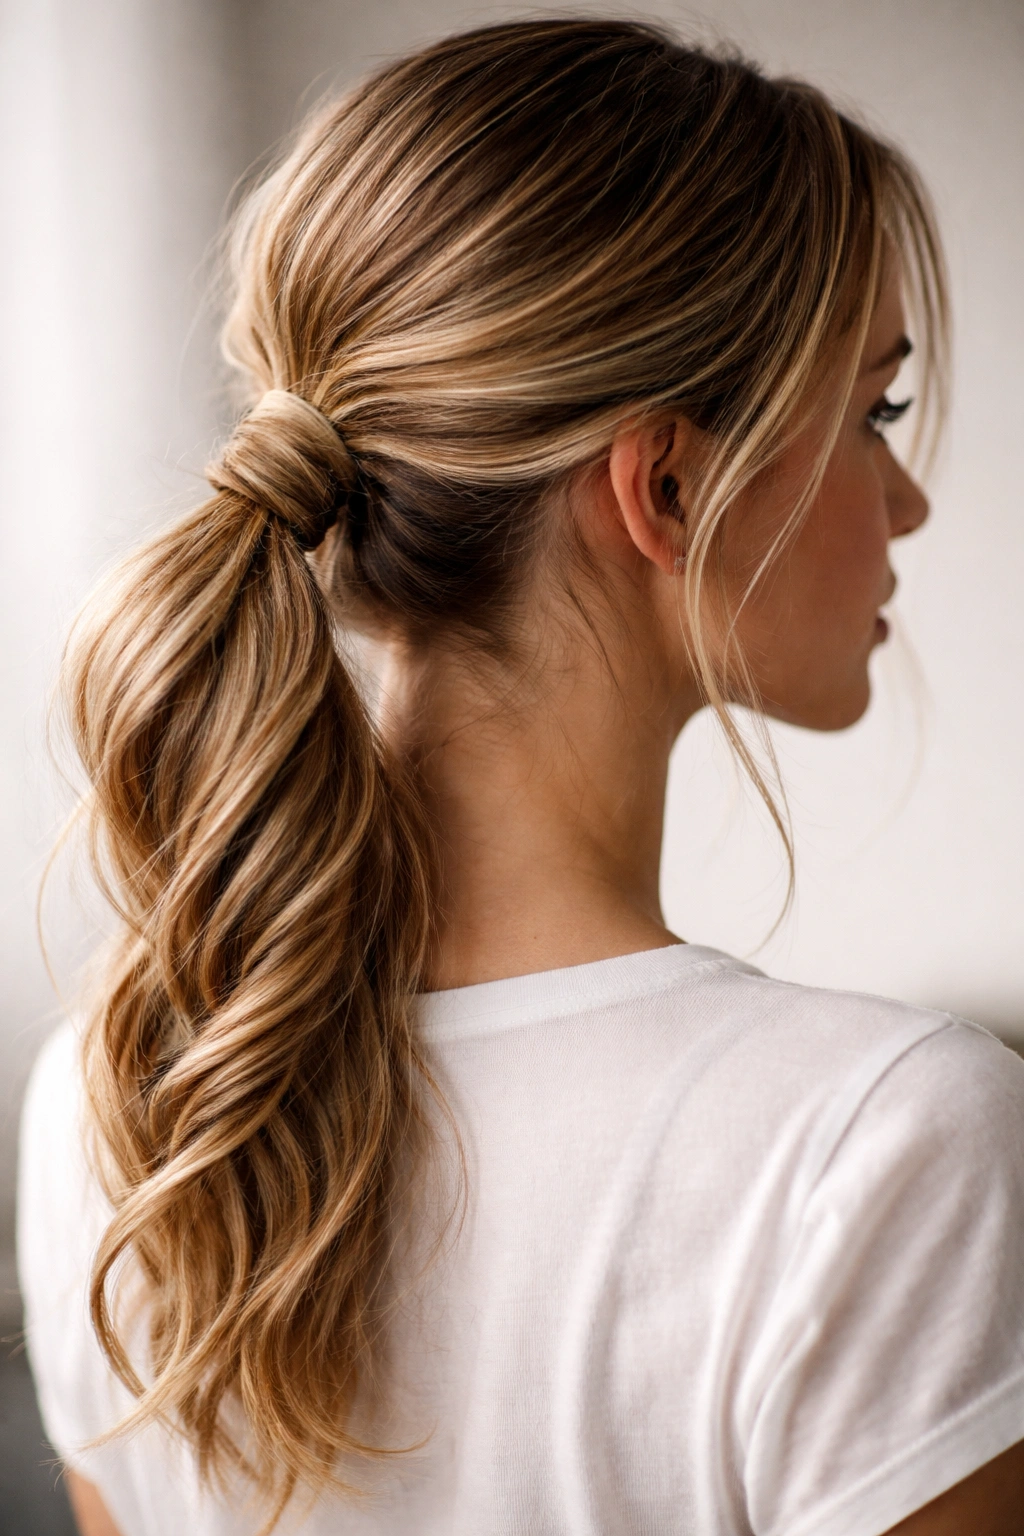
This is a regular ponytail with one extra step that elevates it from basic to “you actually did that?”—you’re twisting the ponytail before securing it, which adds visual interest and makes it look more intentional. This works especially well if your hair has natural texture or wave, and it takes maybe 30 seconds longer than a regular ponytail.
The One-Step Upgrade That Changes Everything
The difference between a regular ponytail and a twisted ponytail is negligible in terms of time, but the visual difference is significant. The twist adds depth and texture, it hides imperfections in how smoothly you pulled the hair back, and it looks more deliberate. This is one of those techniques that seems too simple to actually make a difference, but it genuinely does.
How to Do It
- Gather your hair into a regular ponytail at whatever height you prefer—crown, mid-back, or low
- Before securing with an elastic, twist the entire gathered section with your hands, so you have a rope-like shape
- Secure the twisted section with an elastic
- Gently separate and loosen the twist slightly so it has texture and doesn’t look overly tight
- A few flyaways and loose pieces actually add to the texture rather than detracting from it
What to know: A twisted ponytail holds better throughout the day than a smooth one because the twist creates texture that grips your hair, even if you don’t use any products.
11. The Quick Bubble Ponytail
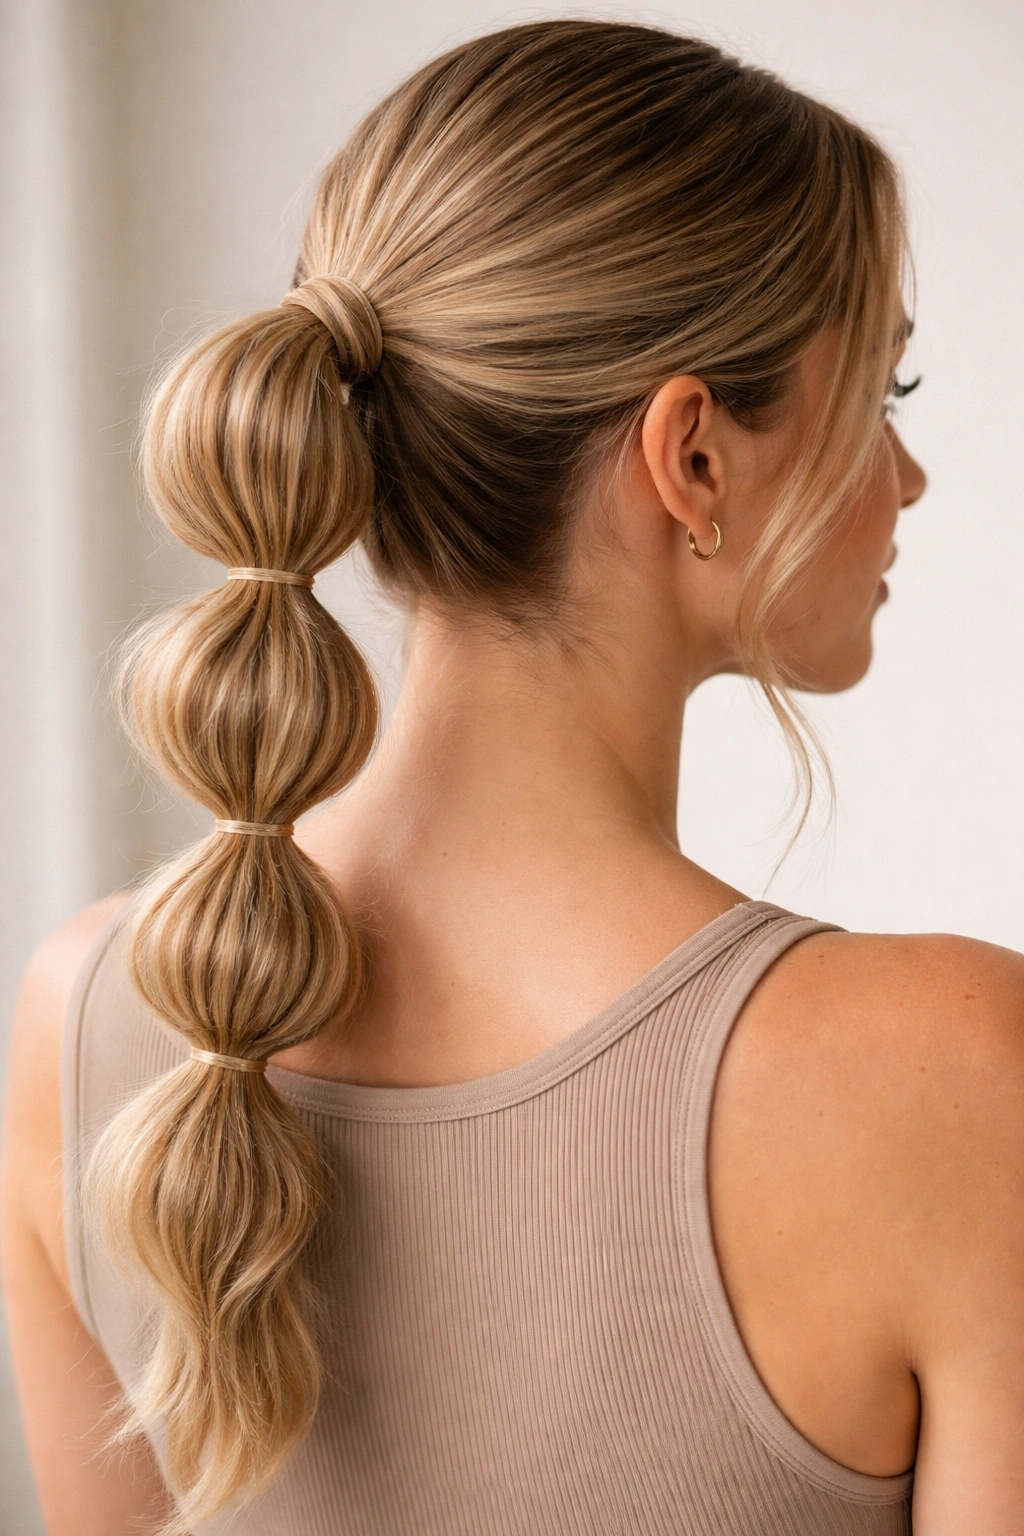
The bubble ponytail is genuinely faster than it looks and reads as playful and fun without being childish. You’re essentially creating a regular ponytail and then dividing it into sections with smaller elastics, which creates a stacked bubble effect. It’s eye-catching enough to feel intentional, and it works on almost any hair length.
Why This Style Reads as Modern
A bubble ponytail doesn’t look like something your mom wore in 2010—the modern version is sleeker and more subtle, with smaller bubbles and softer separation between them. It’s playful without being costume-y, and it works for casual days, workouts, or literally any situation where you want your hair up.
Steps to Create It Quickly
- Create a regular ponytail and secure it with an elastic
- Place another elastic about 1-2 inches down the ponytail, creating a small bubble of hair between the two elastics
- Repeat this process down the length of your ponytail, spacing the bubbles evenly—you can create 3-4 bubbles depending on your hair length
- Gently fluff and loosen each bubble slightly by pulling on the hair section to create volume
- Mist lightly with hairspray to hold the bubbles in place if your hair is slippery
Pro tip: The key to a modern bubble ponytail is keeping the bubbles relatively subtle and not oversized—this makes it look intentional rather than theatrical.
12. The Face-Framing Layers Half-Up
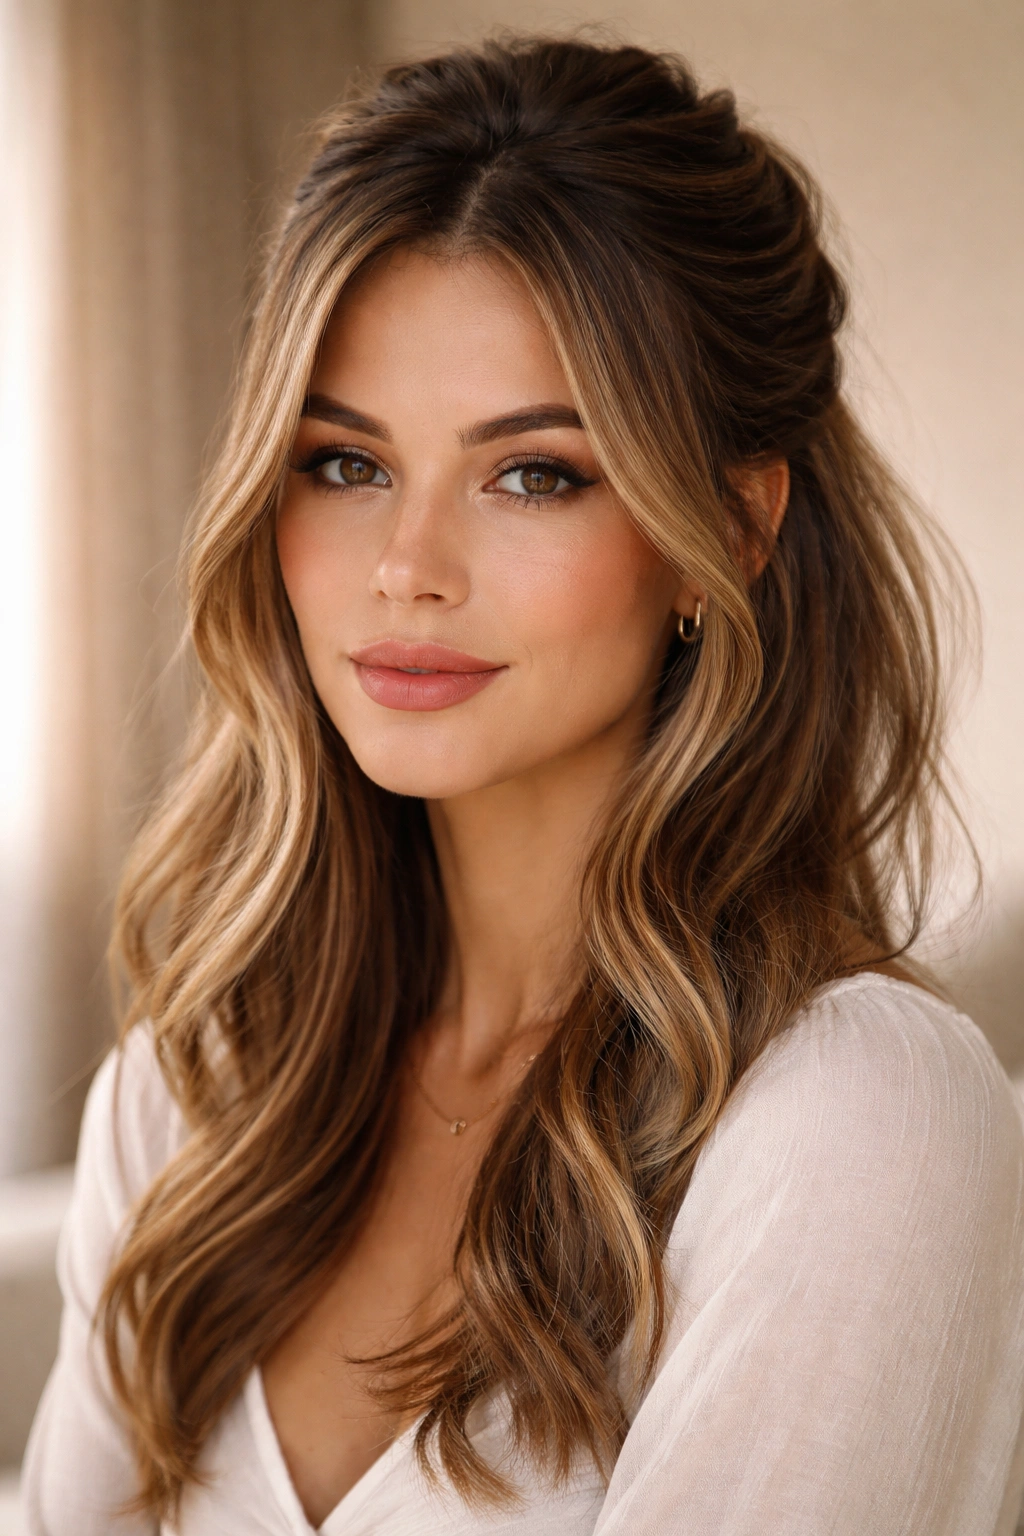
This final style takes advantage of any existing layers or lengths you already have and creates a pretty, soft look that frames your face nicely. You’re essentially gathering the top half of your hair with a few intentional pieces left out on each side. This style works beautifully on medium to long hair and doesn’t require any twisting or braiding skills.
The Beauty of Working With Your Hair’s Natural Shape
Rather than fighting against your hair’s length and layers, this style embraces them. If you have bangs or shorter pieces around your face, leaving them completely loose while you gather the back actually creates a more harmonious look than pulling everything back. This is one of the few styles where asymmetry and imperfection are actual features, not bugs.
How to Assemble It
- Decide which pieces you want to frame your face and leave those completely loose
- Gather the top section of hair from roughly above your temples toward the back
- You can twist this section, braid it loosely, or just smooth it back—any of these options work
- Pin or secure it at the crown with a small elastic
- Make sure the face-framing pieces are visibly separate from the gathered section so they read as intentional
- Mist with light texture spray if you want added dimension and grip throughout the day
Worth knowing: This style is especially flattering if you have shorter pieces around your face naturally—don’t feel like you have to smooth them back and tuck them away.
Final Thoughts
The real magic of five-minute hairstyles isn’t that they’re effortless—it’s that they’re efficient. You’re not skipping steps or cutting corners; you’re using techniques that actually work with your hair’s natural texture and behavior rather than fighting against it. The styles that look the best are often the ones that embrace a little bit of imperfection, a few loose pieces, and the reality of how your hair actually behaves on any given day.
Building a rotation of go-to styles means you’re never standing in front of the mirror frustrated because nothing is working. Some days your hair will cooperate with a sleek look; other days a textured twist or a messy bun is exactly what the situation calls for. The point is having options that you can execute without thinking, so you can spend your morning doing literally anything else and still feel like your hair is part of the plan rather than an obstacle. Once you get good at even three or four of these styles, you’ll notice that getting your hair done stops feeling like a chore and starts feeling like you’re giving yourself a small, intentional moment of care before the day begins.