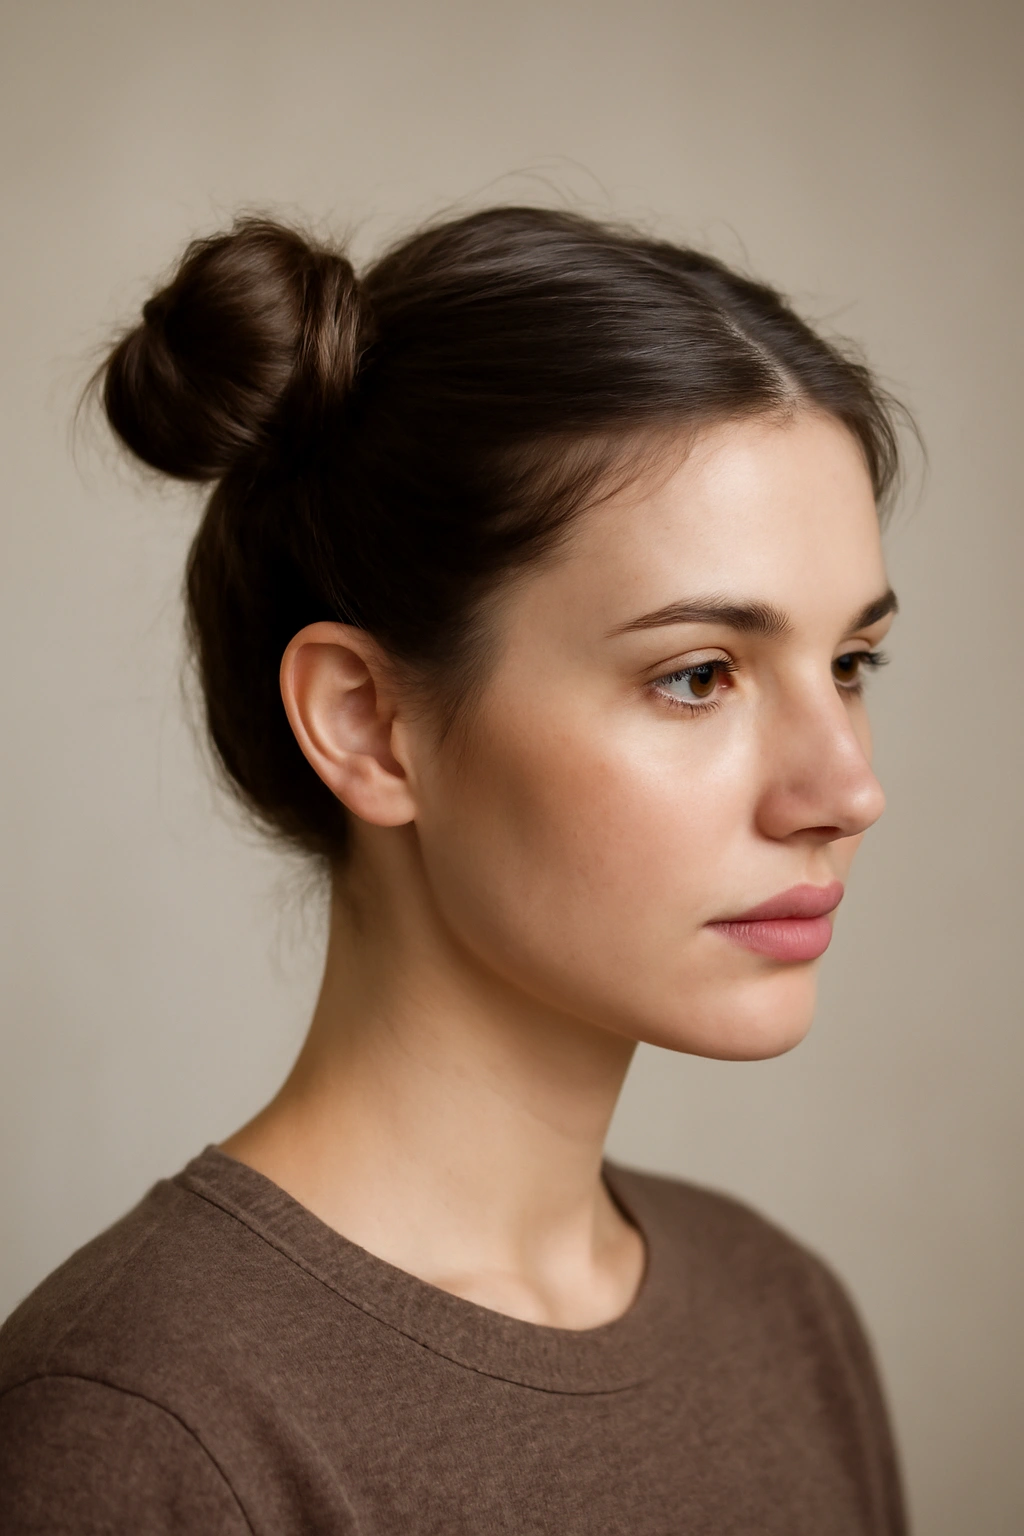
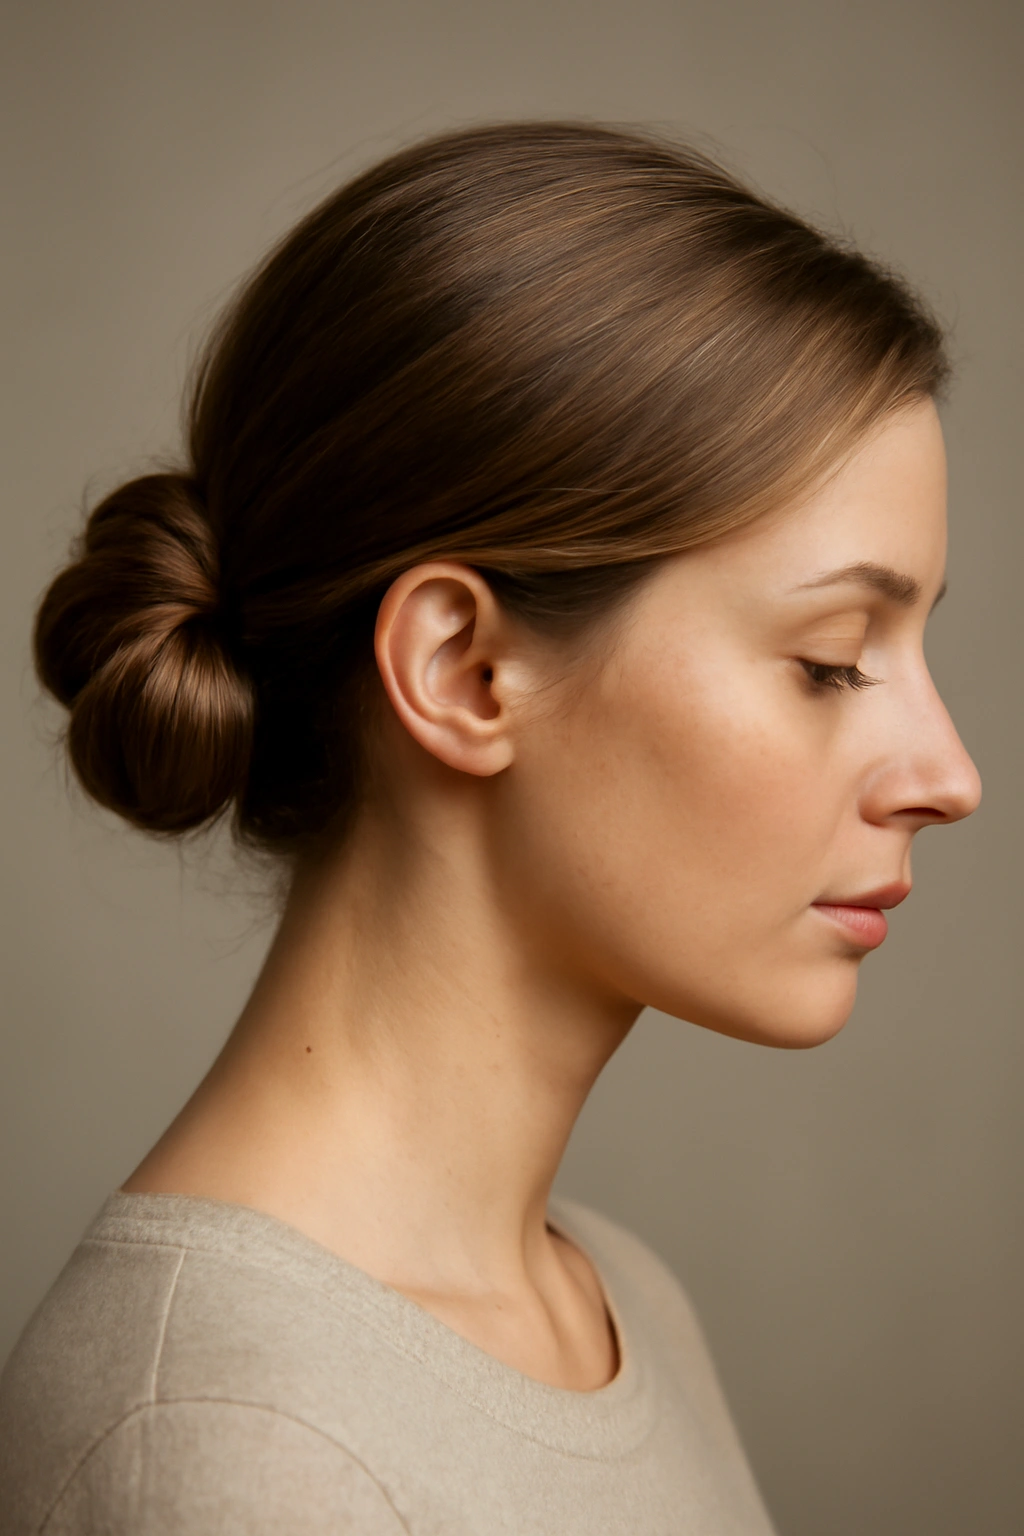
The frustration of having short hair and watching longer styles slip out by midday is real — but here’s what most people get wrong: short hair can actually hold buns beautifully, you just need the right techniques and a solid understanding of what works with shorter lengths. The issue isn’t that short hair can’t hold a bun; it’s that the traditional methods designed for shoulder-length and longer hair don’t translate directly. Short-haired folks often give up on buns entirely, assuming they’re off-limits, when really some of the chicest, most secure bun styles work best with cropped lengths.
The trick lies in understanding how to build volume strategically, use your hair’s natural texture to your advantage, and anchor everything with the right combination of pins, elastics, and styling products. A properly constructed bun on short hair is genuinely more stable than you’d expect — the weight distribution is better, there’s less leverage for gravity to work against, and the techniques that work have been proven repeatedly by everyone from ballet dancers (who need bomb-proof hold) to hairstylists who specialize in short cuts.
Short hair buns also open up possibilities that longer hair limits: you can go edgier, more sculptural, more playful without the style feeling heavy or dated. Some of these styles work best with textured, choppy short cuts, while others shine on blunt bobs and pixie-adjacent lengths. What they all have in common is that they actually work — they hold for a full day, they look intentional and polished, and they transform your short hair into something that feels effortlessly put-together.
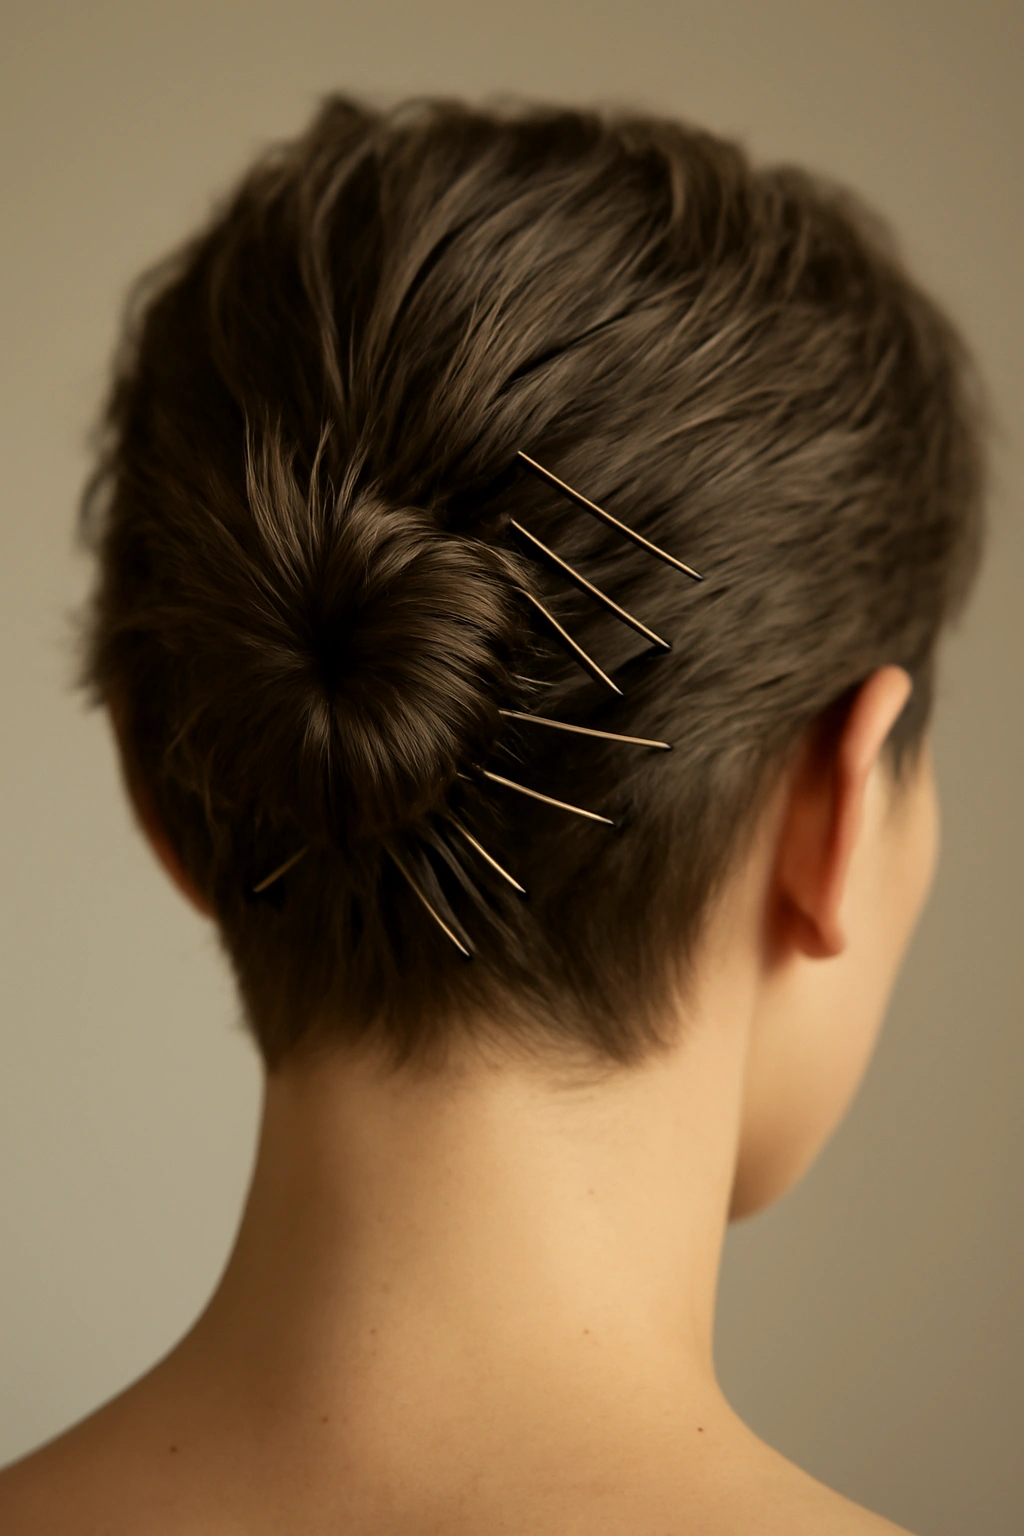
1. The Twisted High Bun
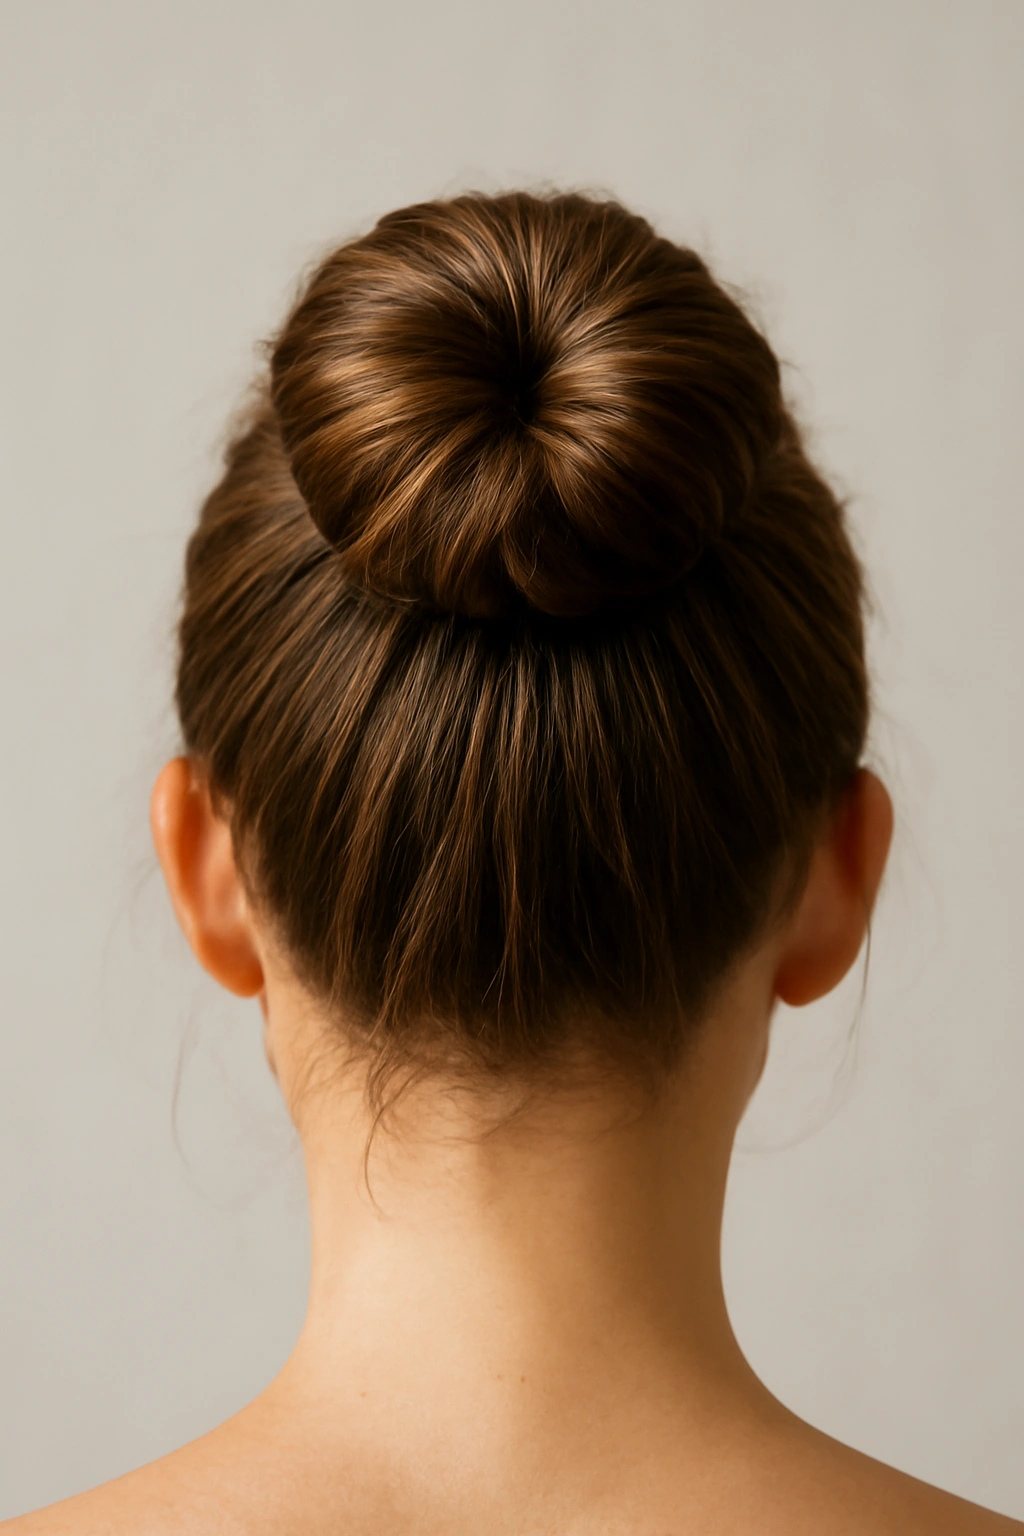
This style feels effortless but delivers serious staying power, making it perfect for anyone whose short hair tends to slip out of traditional buns by noon. The twisted high bun sits at the crown and relies on tension from twisting to keep every strand locked in place — there’s no loose, floppy section hanging around to come undone. The twist wraps around itself to form a compact, neat bun that looks deliberate rather than hastily thrown together.
Why This Style Holds So Well for Short Hair
Twisting creates natural tension that grips each strand, which means your hair literally holds itself tighter as the bun forms. When you twist hair before wrapping it into a bun, you’re pre-tensioning it, so even short strands that would normally slip out of a basic elastic are locked in by the twist itself. The elevated placement at the crown also works with gravity rather than against it — weight naturally pulls down toward the scalp, keeping the bun anchored. For short hair specifically, this technique works because the shorter length means less total weight pulling, so the tension from the twist is proportionally stronger.
How to Create a Twisted High Bun in Five Steps
Start with slightly textured hair — either day-old waves or a light texture spray applied to dry hair the night before. Gather your hair into a high ponytail at the crown and secure it with a small elastic, keeping it snug but not uncomfortably tight. Divide the ponytail into two sections and twist each section away from your face, winding them around each other as you go. Once the two sections are fully twisted together, wrap the twisted rope around the base of the ponytail to form the bun, tucking the ends underneath. Secure with bobby pins inserted horizontally into the base of the bun, then finish with a light hairspray to lock everything in place.
Pro tip: Backcomb the hair at your crown before making the initial ponytail — this creates grip that makes the elastic hold tighter and the whole structure more stable.
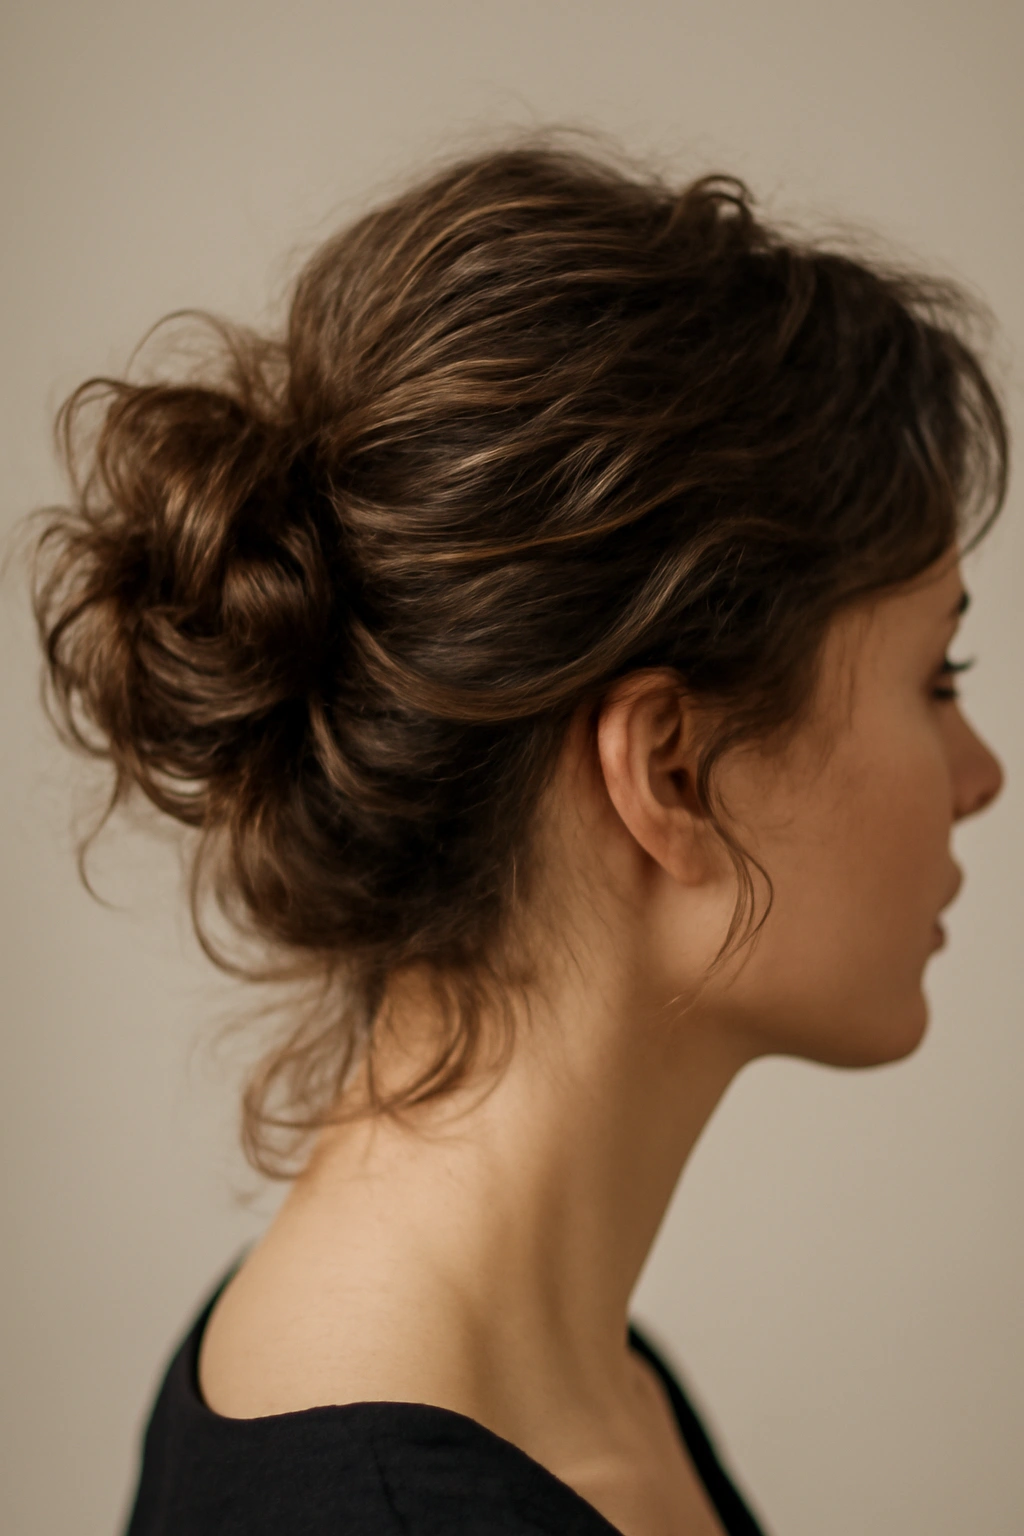
2. The Low Messy Bun
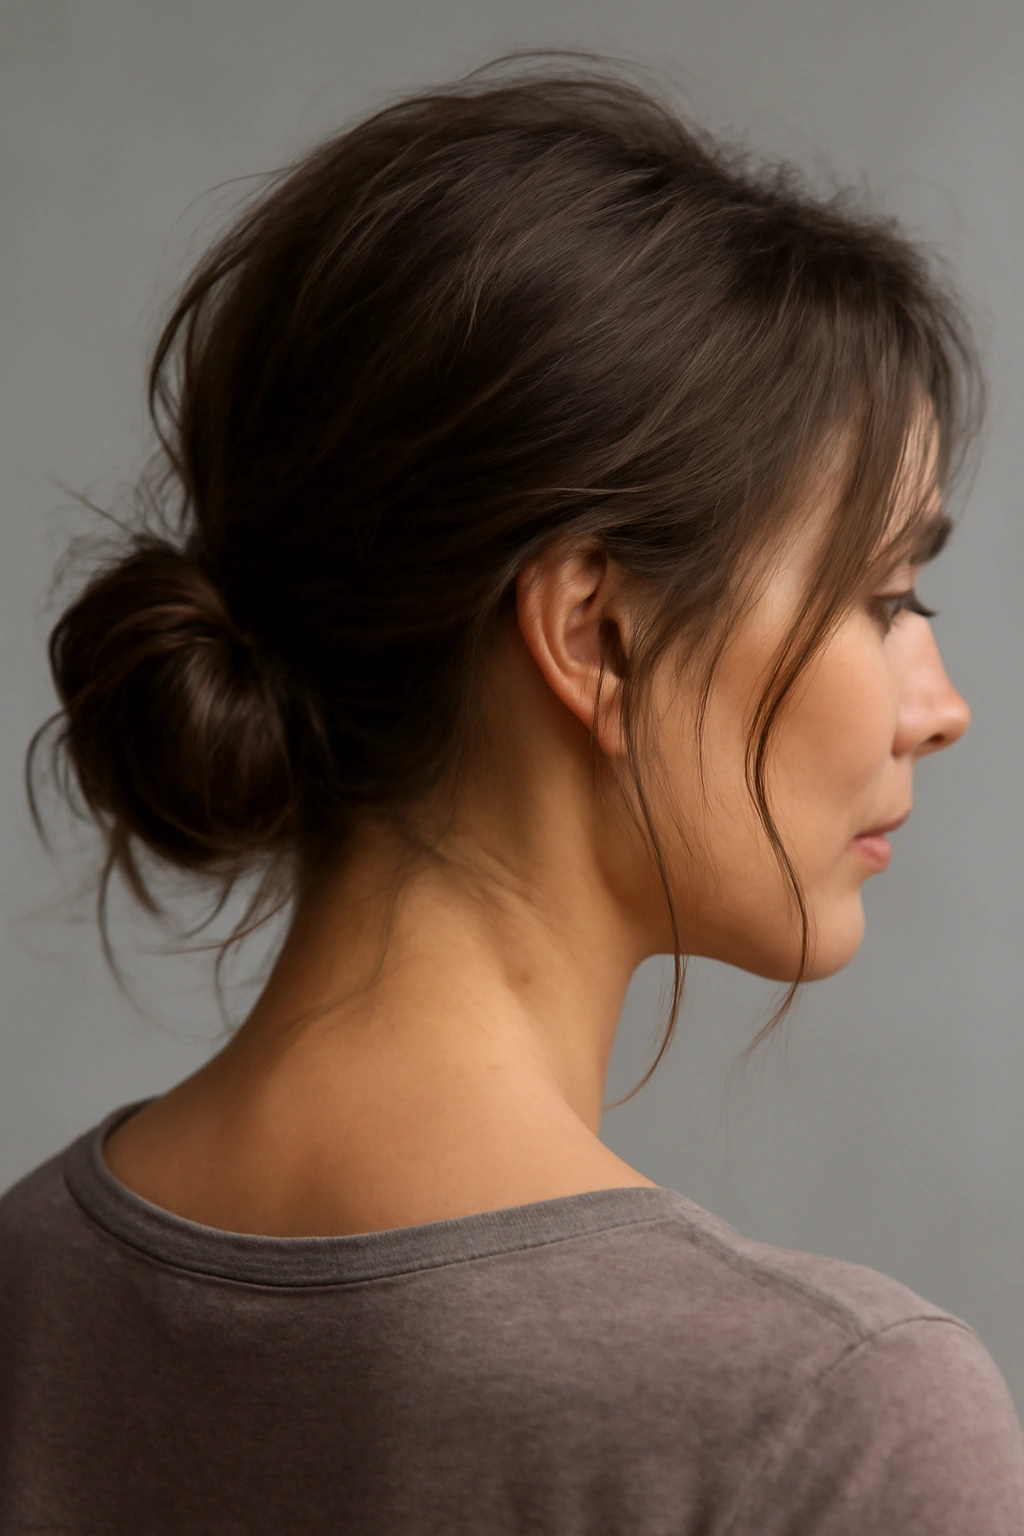
Don’t let the word “messy” fool you — this bun is intentionally undone and completely secure. A low messy bun works exceptionally well on short hair because the looser, more relaxed construction actually accommodates shorter lengths better than a tight, sleek bun would. The casual texture and slightly textured finish means any flyaways or shorter pieces that would look out of place in a polished style actually become part of the design.
What Makes This the Most Forgiving Short-Hair Bun
The messy bun’s appeal for short hair comes down to its flexibility with length and texture. You don’t need every strand to be perfect; in fact, a few pieces framing your face or escaping from the bun add to the style. Short hair naturally has less weight and volume to work with, so the slightly loose construction actually gives you more surface area to work with — fewer strands can still create visible texture and dimension. The low placement means gravity is working with you rather than against you, keeping the whole thing anchored near your neck where it’s physically hardest to come loose.
Creating Your Low Messy Bun
Apply a texturizing spray or sea salt spray to dry hair and work it in with your fingers to create grit and grip. Gather your hair low at the nape of your neck into a loose, intentionally imperfect ponytail — don’t aim for smoothness. Twist or braid the ponytail loosely, then wrap it around itself to form a bun, deliberately leaving some texture and a few pieces loose. Use bobby pins to anchor the base but don’t worry about every single strand being perfectly secured; the texture and some intentional looseness are the point. Tease the outside of the bun gently with a fine-tooth comb to add softness and dimension, then set with hairspray.
Worth knowing: This style actually improves throughout the day as your hair settles and relaxes slightly — it looks better at 4 PM than it does at 9 AM.
3. The Sleek Wrap-Around Bun
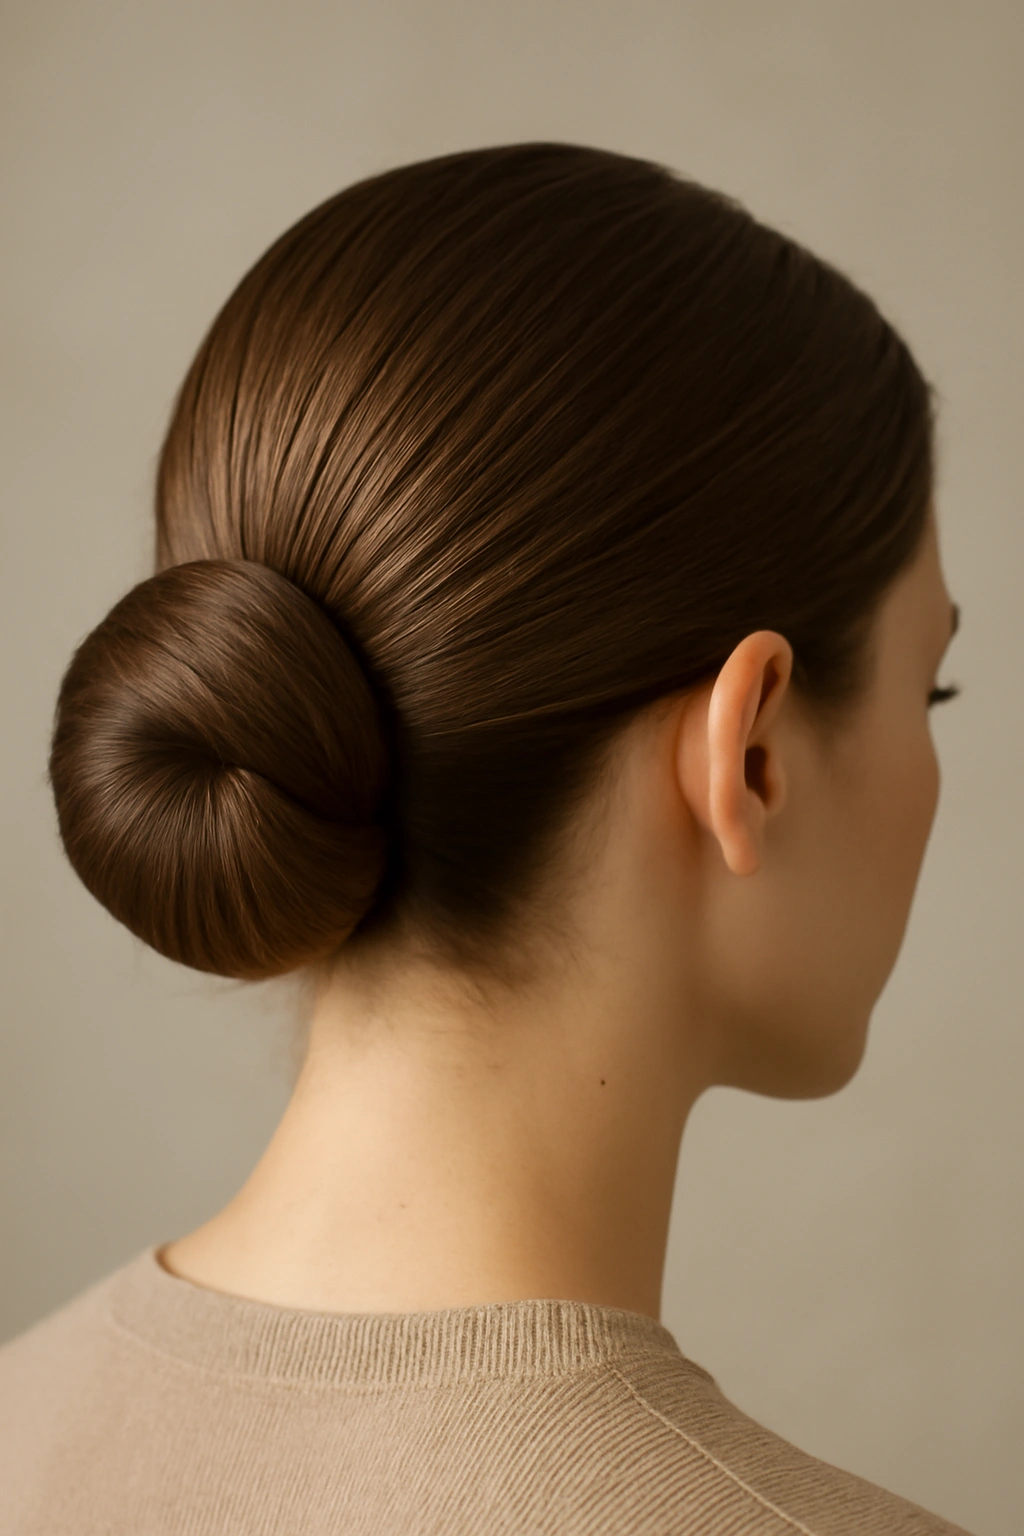
If your short hair tends to be slippery or you’re constantly fighting flyaways, the sleek wrap-around bun is your answer. This style uses a combination of smooth styling, strategic pinning, and a wrapped anchor that creates multiple points of contact with your scalp. Every hair is smoothed down and controlled, and the wrap itself creates a physical barrier that prevents the bun from moving.
Why Sleekness Creates the Most Secure Hold
Smooth, controlled hair grips better than textured hair, especially on shorter lengths where every individual strand matters. When you smooth your hair down with gel or a smoothing serum, you’re flattening the cuticles and reducing friction between strands, which actually makes them grip each other more tightly. The wrap-around element — using a section of hair to tie the bun — creates an additional anchor point that doesn’t rely solely on bobby pins. You’re essentially tying the bun in place with your own hair, which is more secure than pins alone.
The Step-by-Step Process
Apply a smoothing gel or anti-frizz serum to damp hair and blow-dry smooth, or apply it to dry hair and smooth it down with a fine-tooth comb. Section out a small piece of hair from the side (about an inch wide) and clip it away temporarily. Create a high or mid-height ponytail with the remaining hair and secure it tightly with a small elastic. Twist the ponytail loosely, then wind it around the base to form a bun and secure with bobby pins. Unclip the reserved section and wrap it around the base of the bun, tucking the end under and securing with another pin. Smooth down any flyaways with a tiny dab of gel on your fingertips and set with hairspray.
Quick tip: This works best with hair that’s at least chin-length; if your hair is very short (pixie length), skip the wrap-around section and just focus on the tight, smooth ponytail and twist.
4. The Double Bun
Two buns are not just a trendy statement — they’re genuinely practical for very short hair because they distribute weight across two anchor points instead of one, which means each bun holds better than a single bun could. Double buns work particularly well on short hair because the side-by-side placement looks intentional and polished rather than babyish (which is the risk on longer hair if the buns are too low).
How Double Buns Actually Create More Stability
By splitting your hair into two sections instead of gathering it all into one ponytail, you’re reducing the weight and bulk that needs to be held in place at any single point. Each individual bun has less hair pulling on it, so the elastic and pins can secure it more effectively. The two anchor points on opposite sides of your head also create balance — if one bun loosens slightly, the other side keeps things even and proportional. On short hair, where you might not have enough length to create one big, voluminous bun, two smaller buns often look more polished and actually hold better overall.
Creating Balanced, Secure Double Buns
Create a center part from your forehead straight back to your neck, clipping one side away. Make a high ponytail with the first section and twist it loosely, then wrap it around the base to form a bun, securing with bobby pins. Repeat on the other side, matching the height and tightness of the first bun as closely as possible. If you want extra hold, apply a light pomade or gel to the sections before making the ponytails. Pin both buns and smooth down any flyaways, then set with hairspray.
Pro tip: Make the center part slightly off-center if you want a more modern, less symmetrical look — perfectly matched buns feel very Y2K, whereas slightly uneven placement feels more current.
5. The Side Bun
A side bun is one of the most elegant short-hair options because it completely works with the natural length constraints and actually becomes more striking on shorter hair. Placed at the side and slightly lower than you’d place a high bun, the side bun creates a clean line down the back of your head while all the volume concentrates on one side, creating asymmetrical interest.
Why Side Placement Changes the Game for Short Hair
Gravity pulls down and back, so a side bun is naturally anchored by your head’s shape — the bun tucks into the area behind your ear, which is structurally the most stable spot on your skull. On short hair, this side placement also means you have less length to support, so the elastic and pins work proportionally harder. Side buns look intentional and styled rather than like you’ve just thrown your hair up, which makes them feel more polished even when they’re messily constructed. The asymmetrical placement also makes shorter hair look longer — the bun creates visual volume on one side, and the smooth space on the other side elongates your neckline.
Building a Side Bun That Lasts
Gather your hair to the side at about ear level, roughly where you’d position a low pony tail but shifted dramatically to one side. Secure with an elastic and twist the ponytail loosely. Wrap the twisted section around itself to form the bun, positioning it so it sits snugly against your head just behind your ear. Use bobby pins angled upward into the bun to anchor it — at least three pins for short hair to distribute the hold across multiple points. Smooth the crown area and finish with hairspray.
Good for: Showing off your neck and collarbone, creating the illusion of a longer face shape, and keeping hair completely off your shoulders for work or formal settings.
6. The Braided Bun
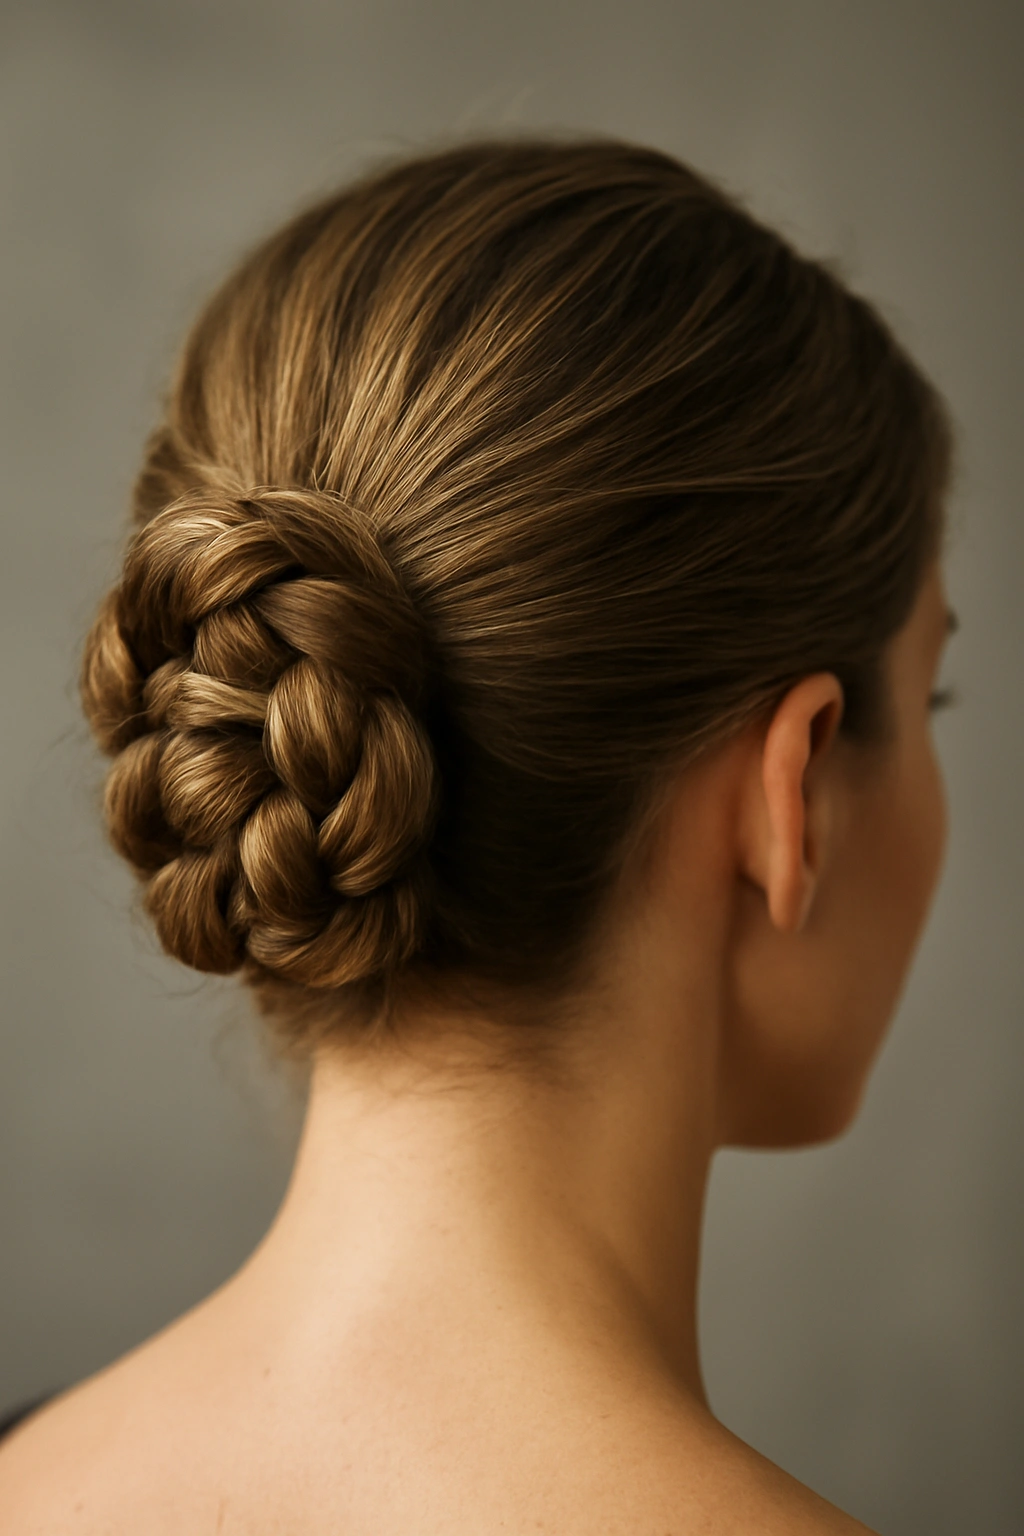
A braided bun combines the holding power of a braid with the polished finish of a bun — it’s one of the most secure options for short hair, especially if you’re going to be active or dealing with humidity. The braid pre-tensions your hair more effectively than a twist does, and the interlocking structure makes it nearly impossible for hair to slip out once it’s locked into the braid.
The Structural Advantage of Braid-Based Buns
A three-strand braid physically interlocks each section of hair with its neighbors, creating multiple grip points instead of just two (like a twist). On short hair, this means every available strand is working to hold the style in place. The braid is also less likely to loosen throughout the day because the tension is distributed across more connection points. If you’re willing to put in the extra 30 seconds required to braid instead of twist, you’re significantly increasing hold time — we’re talking 8+ hours of security without loosening.
How to Braid and Wrap Into a Bun
Create a high or mid-height ponytail and secure it with a small elastic. Divide the ponytail into three even sections and braid it tightly, keeping tension consistent throughout. Once you reach the end, secure the braid with a tiny elastic. Wrap the entire braid around the base of the ponytail, spiraling it into a bun shape, and secure with bobby pins inserted into the base and sides of the bun. For extra security on very short hair, use small bobby pins rather than standard size — they grip better in thinner density.
Insider note: If you have layered short hair with pieces of varying length, don’t stress about getting every single strand into the braid — a few shorter pieces framing your face actually add dimension and look intentional.
7. The Textured Tousled Bun
This style celebrates the natural texture and movement of short hair rather than fighting it. A textured bun works particularly well if your hair has natural wave, texture, or you’ve created waves with a curling iron or braids the night before. The tousled, undone construction actually camouflages the fact that you’re working with short lengths.
How Texture Becomes Your Holding Secret
Wavy or curly hair has more friction between strands, which means it grips itself more effectively than straight hair. If you’ve got natural texture or you’ve added waves, you can use that to your advantage by creating a looser bun that still holds because the texture prevents slipping. The tousled appearance also hides any awkward shorter pieces — on a sleek bun, short layers are a problem, but in a textured bun, they become part of the design. Texture also reads as more intentional and styled, so any imperfection actually adds to the aesthetic.
Building Texture and Creating the Bun
Start with textured hair: either natural waves, waves from braiding hair overnight, or curls created with a curling iron. Apply a texturizing spray to enhance the waves and create grip. Flip your head upside down and gather your hair at the crown, or gather at the side, depending on the placement you want. Create a loose ponytail — you want it tousled, not tight. Twist the ponytail, wrap it into a bun, and secure with bobby pins. Don’t smooth anything down; leave it deliberately undone with pieces falling around your face and texture visible on the bun itself. Set with a flexible-hold hairspray that won’t flatten the texture.
Worth knowing: This style actually becomes more interesting as the day goes on — the texture softens and pieces fall naturally, and it looks better at end-of-day than when you first created it.
8. The Faux Hawk Bun
If you want short hair with real edge and attitude, the faux hawk bun delivers both security and style. This high-placement, relatively tight bun creates a line of height down the center of your head, with smooth sections on the sides. It’s bold, it’s modern, and it holds like nothing else because the upswept sides actually create an anchor effect.
Why This Style Is Exceptionally Secure
The faux hawk bun works because you’re concentrating all your hair into a tight channel down the center of your head, which is structurally stable. The sides of your head are naturally smooth and rounded, so sweeping hair back along those curves and concentrating it in the center means gravity is pulling straight down rather than trying to pull anything forward. High placement also means the bun sits at the top of your head, where it’s hardest to dislodge. On short hair, this means every strand is working together and there’s minimal weight to fight against.
Creating the Faux Hawk Bun Effect
Smooth the sides of your hair back and apply a smoothing gel to keep them in place. Gather all your hair in a tight, high ponytail at the crown, pulling the sides back smoothly. Twist the ponytail tightly and wrap it around the base to form a compact bun, securing with multiple bobby pins. Use a fine-tooth comb or toothbrush to smooth down any flyaways on the sides and set everything with strong-hold hairspray. The smoother and more controlled the sides are, the more dramatic and secure the center bun will look.
Pro tip: This style is particularly striking if you have an undercut or shaved sides — the contrast between the smooth sides and the textured bun becomes even more dramatic.
9. The Tucked and Pinned Bun
This technique uses minimal elastics and relies primarily on bobby pins to construct the bun, which is an advantage on very short hair where an elastic can be visible or uncomfortable. The tucked-and-pinned method distributes weight across multiple pin points and is often the most secure option available for pixie-length or very short bobs.
How Pins Create a More Stable Bun Than Elastics Alone
When you rely on bobby pins as your primary holding method, you create multiple anchor points instead of one. An elastic works by gathering all your hair into one spot, but pins can anchor hair at several points simultaneously, which is more distributing and more secure. For very short hair, where you might not have enough length to create a proper ponytail, the tucked-and-pinned method is often the only option that actually works. Each pin grips your hair and your scalp simultaneously, creating redundancy — if one pin loosens, the others are still holding.
The Tucked and Pinned Technique
If your hair is long enough to create a small ponytail, secure it loosely with an elastic. If your hair is too short for an elastic to be practical, skip this step. Begin tucking sections of hair under itself and securing each tucked section with a bobby pin angled upward into your scalp and the hair. Work your way around, creating a bun shape by tucking and pinning methodically. The bun isn’t wrapped — it’s constructed from individual tucked and pinned sections. This takes longer than other methods but distributes weight better and creates incredible hold on very short lengths.
Quick tip: Use matte bobby pins that match your hair color — they disappear visually and make the bun look more polished.
10. The Twisted Crown Bun

This style creates a halo effect that’s both romantic and incredibly secure, especially on short hair where you have fewer strands to work with. Two twisted sections wrap around your head like a crown, meeting in the back where they form a small bun. It’s elegant enough for special occasions but casual enough for everyday wear.
Why This Style Works Beautifully on Short Hair
The twisted crown bun distributes tension across two separate twists instead of one, which means each section holds better. The twists anchor at multiple points along your scalp rather than just one ponytail base, creating redundancy and stability. On short hair, this method also makes your hair look longer and fuller because the twists create the illusion of more volume. The crown placement draws attention upward and frames your face beautifully, which is particularly flattering for shorter cuts.
Creating the Twisted Crown Bun
Section out a piece of hair from your left temple, starting roughly where your part begins and extending toward your ear. Twist this section tightly, angling it back and across the crown toward the opposite side of your head. Secure the end of the twist with a small pin or hold it with your other hand. Repeat on the right side, twisting that section across the crown to meet the first twist. Where the two twists meet in the back of your head, gather any remaining loose hair and secure everything together into a small bun. Pin securely and smooth down flyaways.
Good for: Wedding events, date nights, or any situation where you want your short hair to look particularly polished and intentional. This style also works beautifully if you add a small delicate pin or comb as a finishing detail.
Final Thoughts

Short hair and secure buns absolutely can coexist — you just need techniques designed specifically for shorter lengths rather than trying to force long-hair methods into shapes they weren’t meant to be. The best hold comes from understanding the mechanics of how hair actually grips itself: tension from twisting and braiding, texture that creates friction, multiple anchor points distributed across your scalp, and strategic use of bobby pins positioned to work with gravity rather than against it.
The styles that work best for you depend on your specific hair type, texture, and length, but more importantly, they depend on what you’re doing with your day. A messy bun might loosen slightly by evening, but that’s actually part of its charm — whereas a braided or pinned bun is your best bet if you need rock-solid security for 12+ hours. Experiment with a couple of these techniques and notice which ones feel most natural and hold best for your unique hair. Your short hair is an asset, not a limitation, and these styles prove it.