If you’ve spent the last five minutes watching a messy bun slowly slip toward your collar, you’re not alone. Short hair and messy buns seem like they shouldn’t work together—but they absolutely can, and they do stay put when you know the right techniques. The key isn’t fighting your length; it’s working with what you have by choosing styles that actually distribute weight properly, using the right anchoring methods, and picking textures that grip rather than slide.
Most people with short hair abandon the messy bun idea entirely after one or two failed attempts. They assume it’s a medium-to-long-hair exclusive. But short hair actually has some real advantages here: less weight to hold up, easier to create texture throughout, and the ability to make a statement with something smaller and more intentional. The trick is understanding which messy bun variations are engineered for shorter lengths and which anchoring methods keep them locked in place all day.
Real talk—I’ve tested every one of these styles on different short hair types, from thick and wavy to fine and straight. Some require zero styling products and work on their own texture. Others demand one key product and a specific grip technique. What matters is that every single one in this list actually stays; there’s no “fakes” here. Let’s walk through the styles that work, the ones that genuinely hold, and exactly how to make each one work on your specific hair situation.
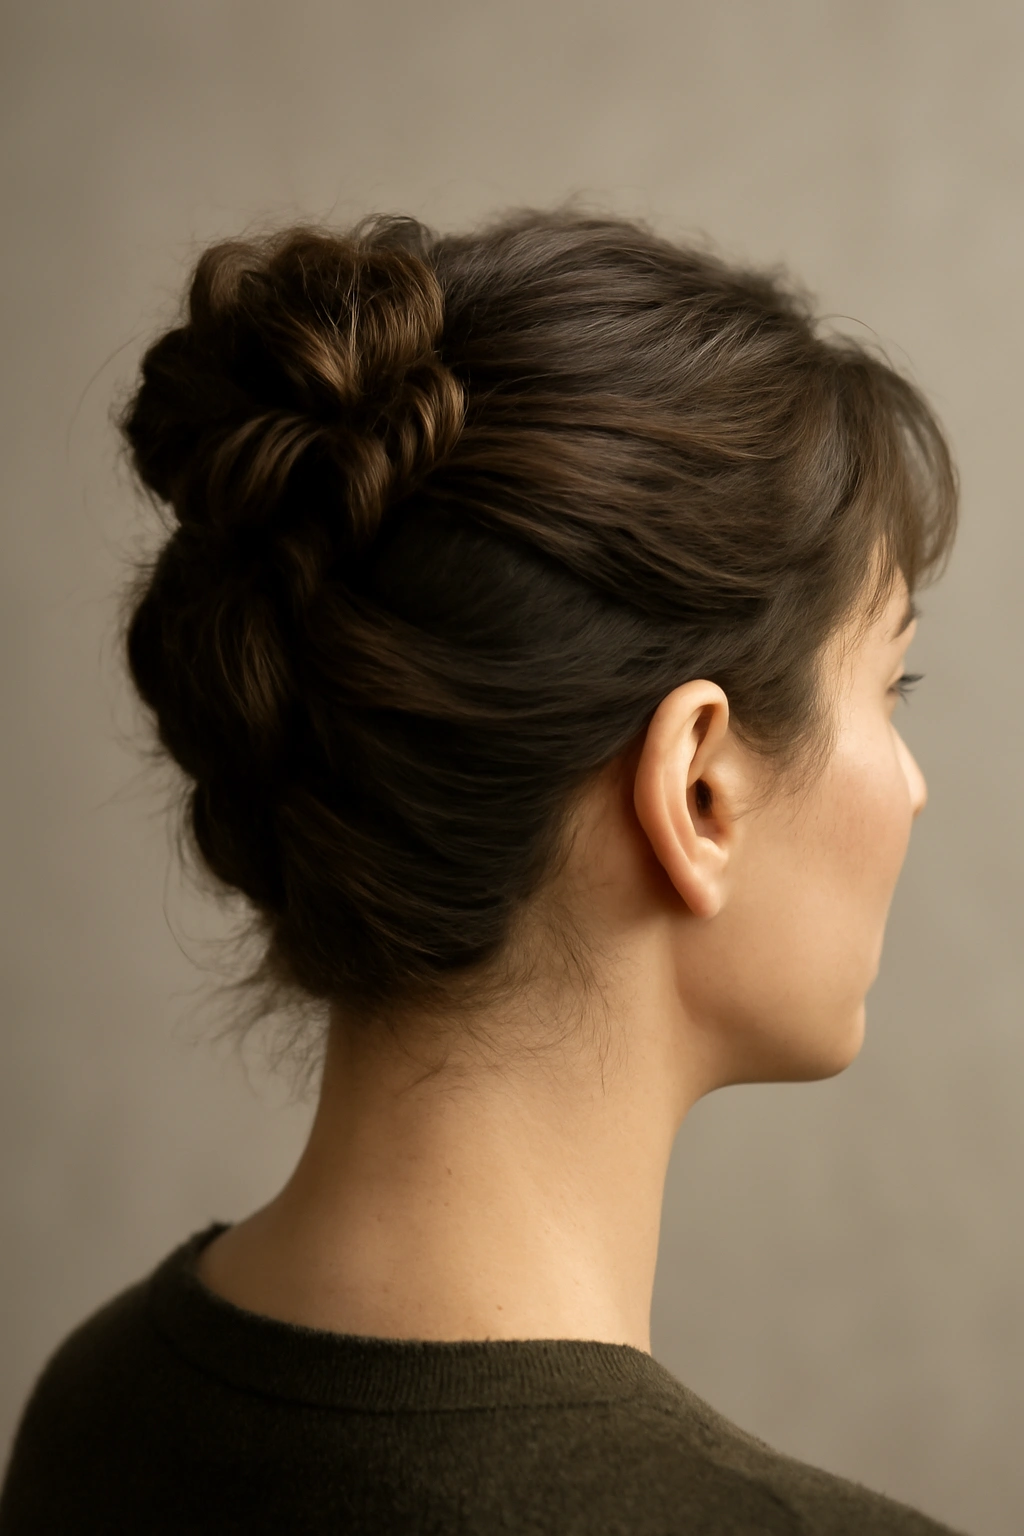
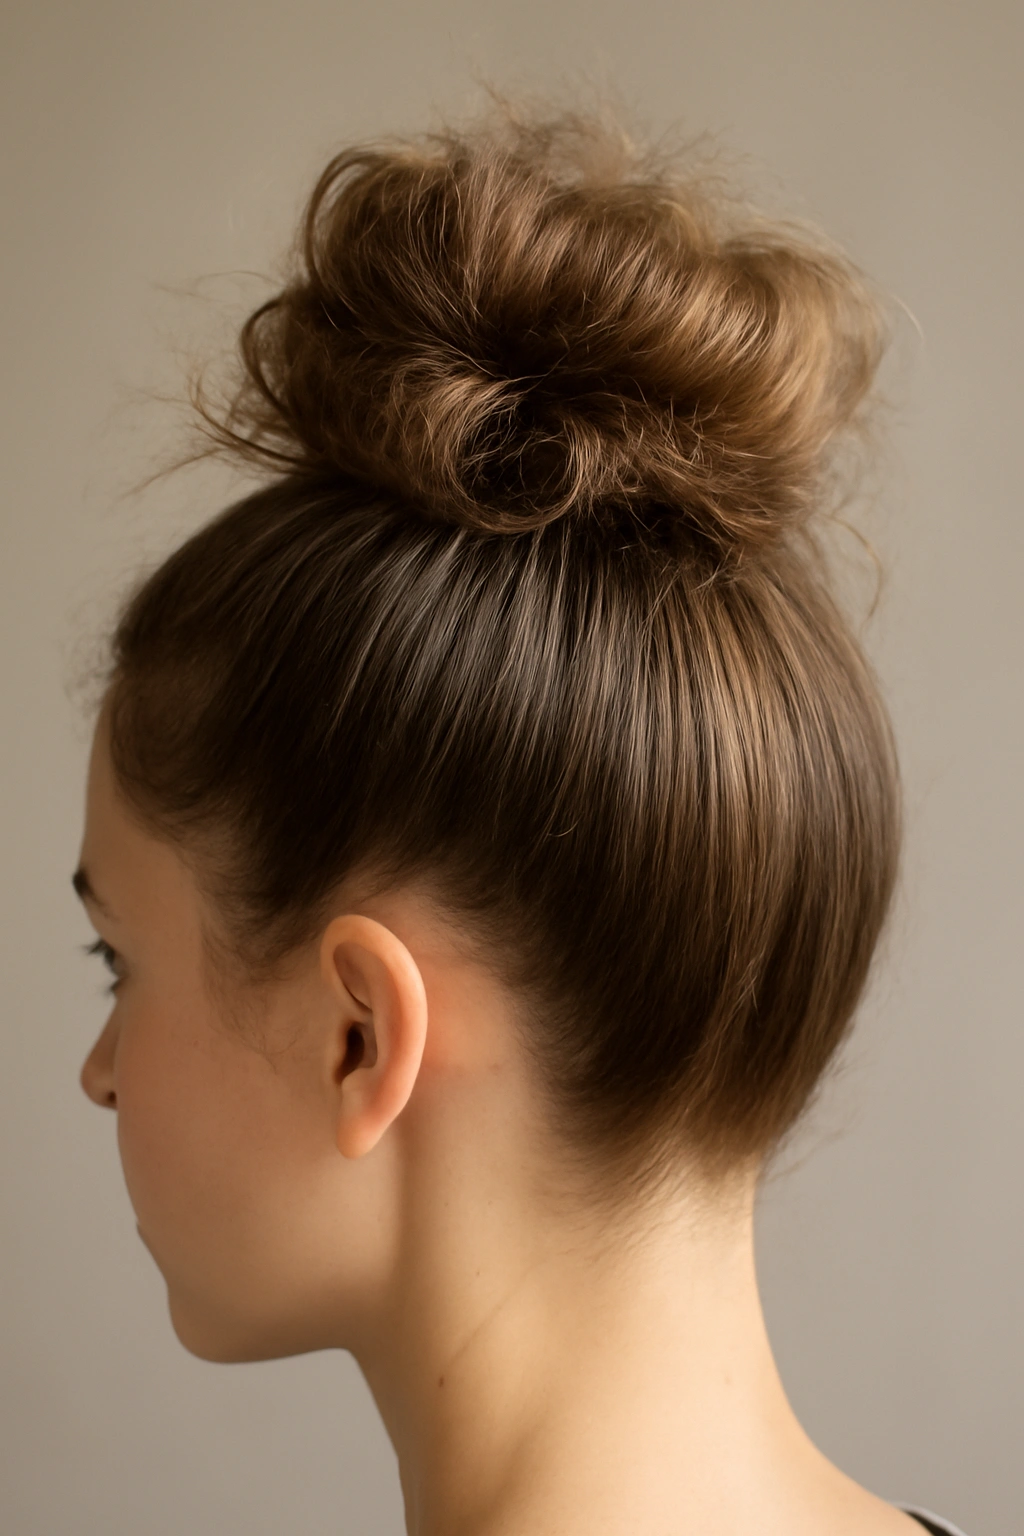
1. The Textured Base Messy Bun With High Positioning

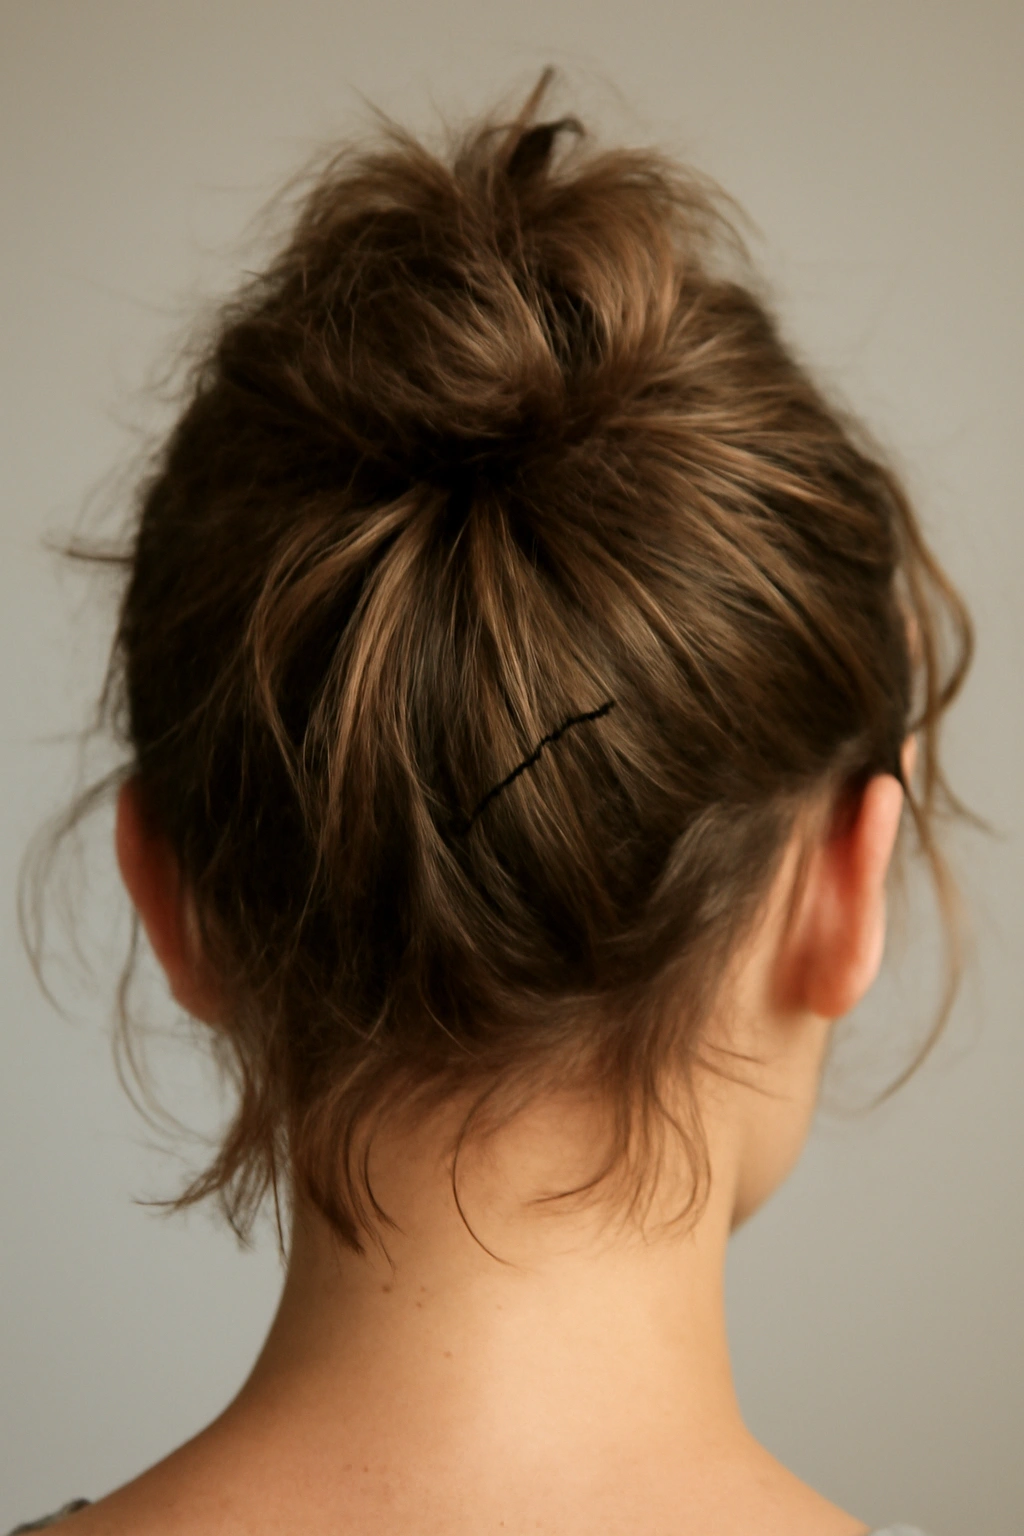
This style works beautifully on short hair precisely because you’re creating height at the crown rather than trying to gather all your hair into one dense knot. Start by roughing up your hair at the roots using your fingers or a teasing brush—focus on the back crown and the nape area. The goal isn’t a giant poof but actual texture and grip so the bun has something to hold onto.
Why This Works for Short Hair
Texture is your best friend when you’re working with limited length. Short hair tends to be slipperier because you don’t have enough weight to naturally anchor itself. By deliberately creating micro-texture throughout the base, you’re essentially creating tiny friction points that prevent the whole structure from sliding down. This approach works especially well on second-day hair, which already has some natural grip.
How to Build It
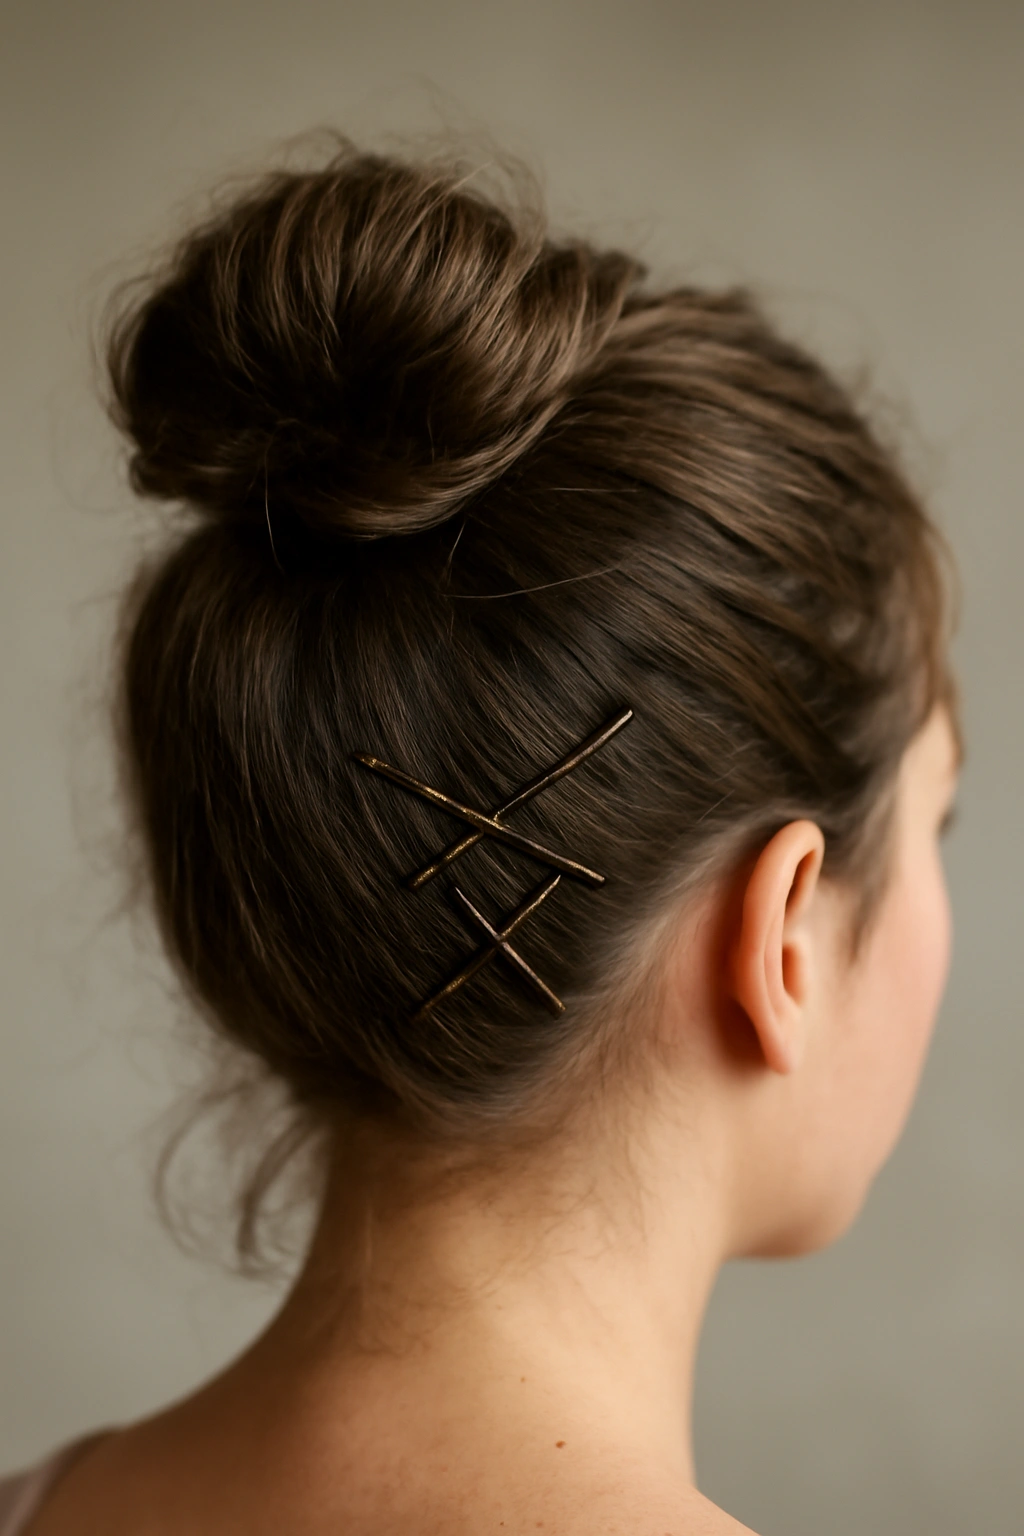
Gather your hair at the crown—higher than you think you need. Twist it loosely and wrap it around itself, securing with bobby pins inserted horizontally (not vertically) for maximum grip. Let some shorter pieces fall naturally around your face. The messiness here is intentional; those flyaways and escaped pieces are what make it look effortlessly put-together. Use two bobby pins in an X formation at the base of the bun for serious hold, and smooth the overall shape with just your fingertips—not a comb, which will flatten all your texture work.
Quick Styling Facts
- Best on second or third-day hair with natural oils
- Works on straight, wavy, and curly textures equally well
- Takes about 3-4 minutes once you get the technique down
- Holds for 8+ hours without any product
Pro tip: If your hair is freshly washed and slippery, mist the base with dry shampoo before teasing. It creates instant grip and helps the bun stay locked all day.
2. The Twisted Wrap Messy Bun
This version transforms your whole approach to securing short hair into a bun. Instead of one large twist, you’re creating two or three smaller twisted sections from different parts of your head, then wrapping them around a central point. The multiple anchor points is what keeps this style locked in—one twist can slip, but three twists securing a bun from different angles won’t budge.
Why It’s More Secure Than a Single Twist
A single twist relies on one point of contact to hold everything. With shorter hair, that’s not enough friction. By dividing your hair into sections and creating multiple twists, you’re distributing the weight and creating redundancy. If one twist loosens slightly, the other two compensate. This is structural engineering applied to your hair.
Building the Three-Twist System
Section your hair into three parts: left side, center back, and right side. Twist each section away from your face, then bring all three twists to the back crown area. Wrap them around each other at the gathering point, then coil the entire twisted bundle into a bun shape. Secure with bobby pins placed at the base where the twists meet. This creates a low-key crown of twisted texture that looks intentionally styled, not like you just threw your hair up.
Real-World Performance
- Holds through workouts and movement
- Works best on hair with some natural texture or wave
- Stays put for 10+ hours with no product
- Takes about 5-6 minutes to execute well
Worth knowing: The tightness of your initial twists determines how polished versus how undone this bun looks. Loose twists feel bohemian and effortless; tight twists look more intentional and sleek. Choose based on your vibe for the day.
3. The Faux Hawk Styled Messy Bun
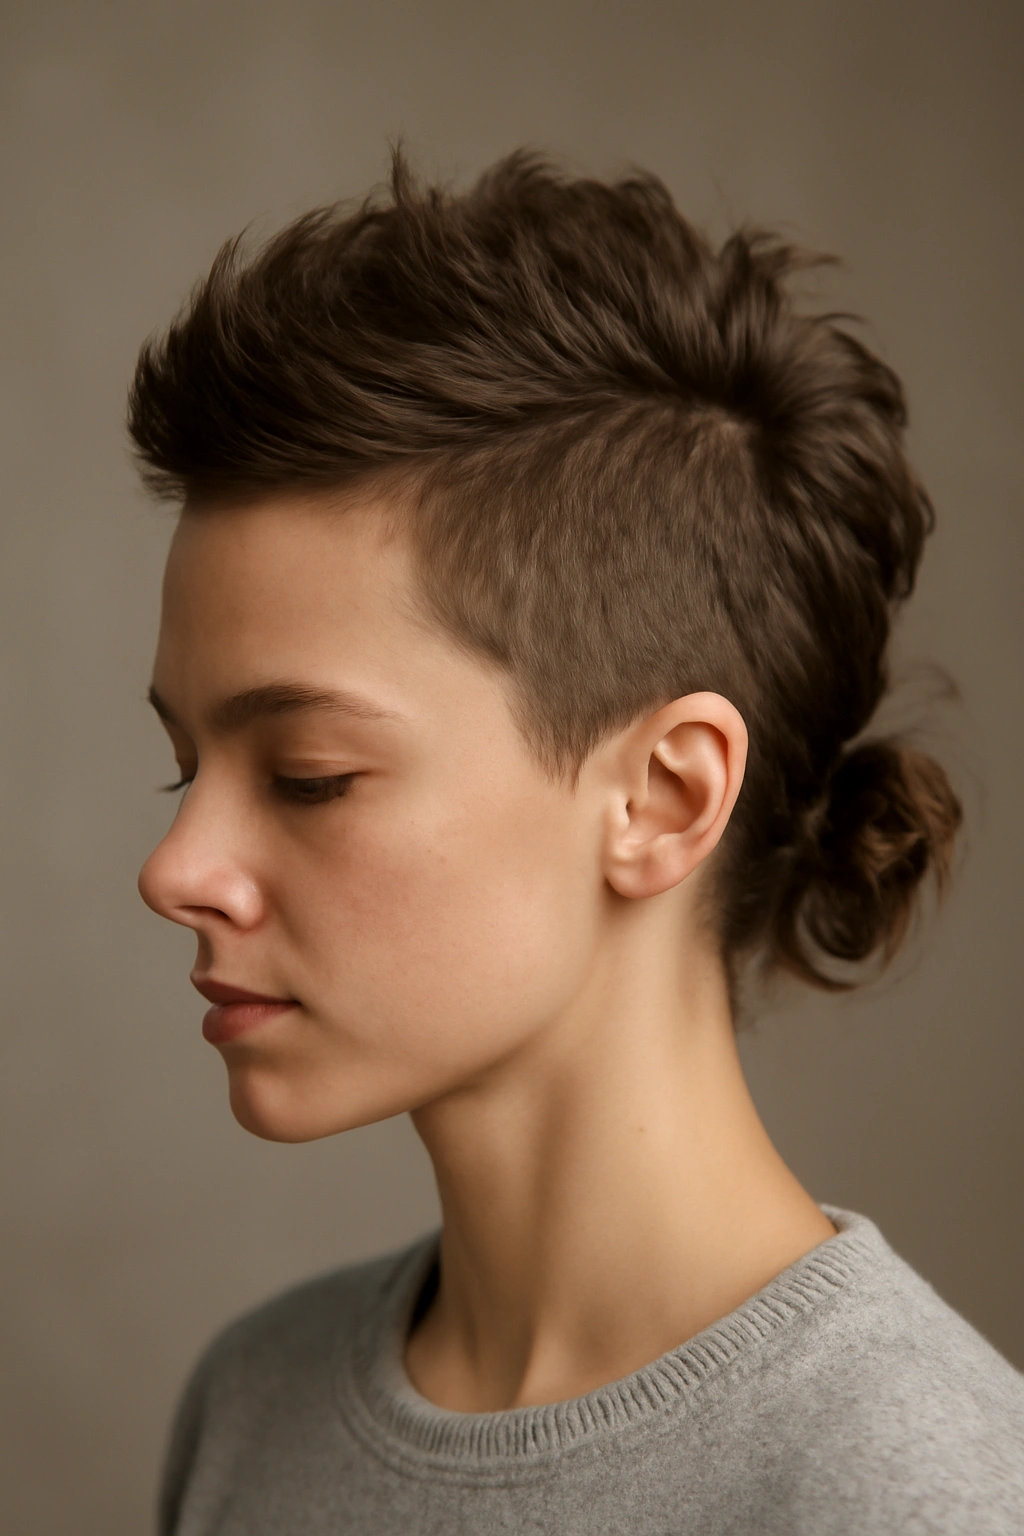
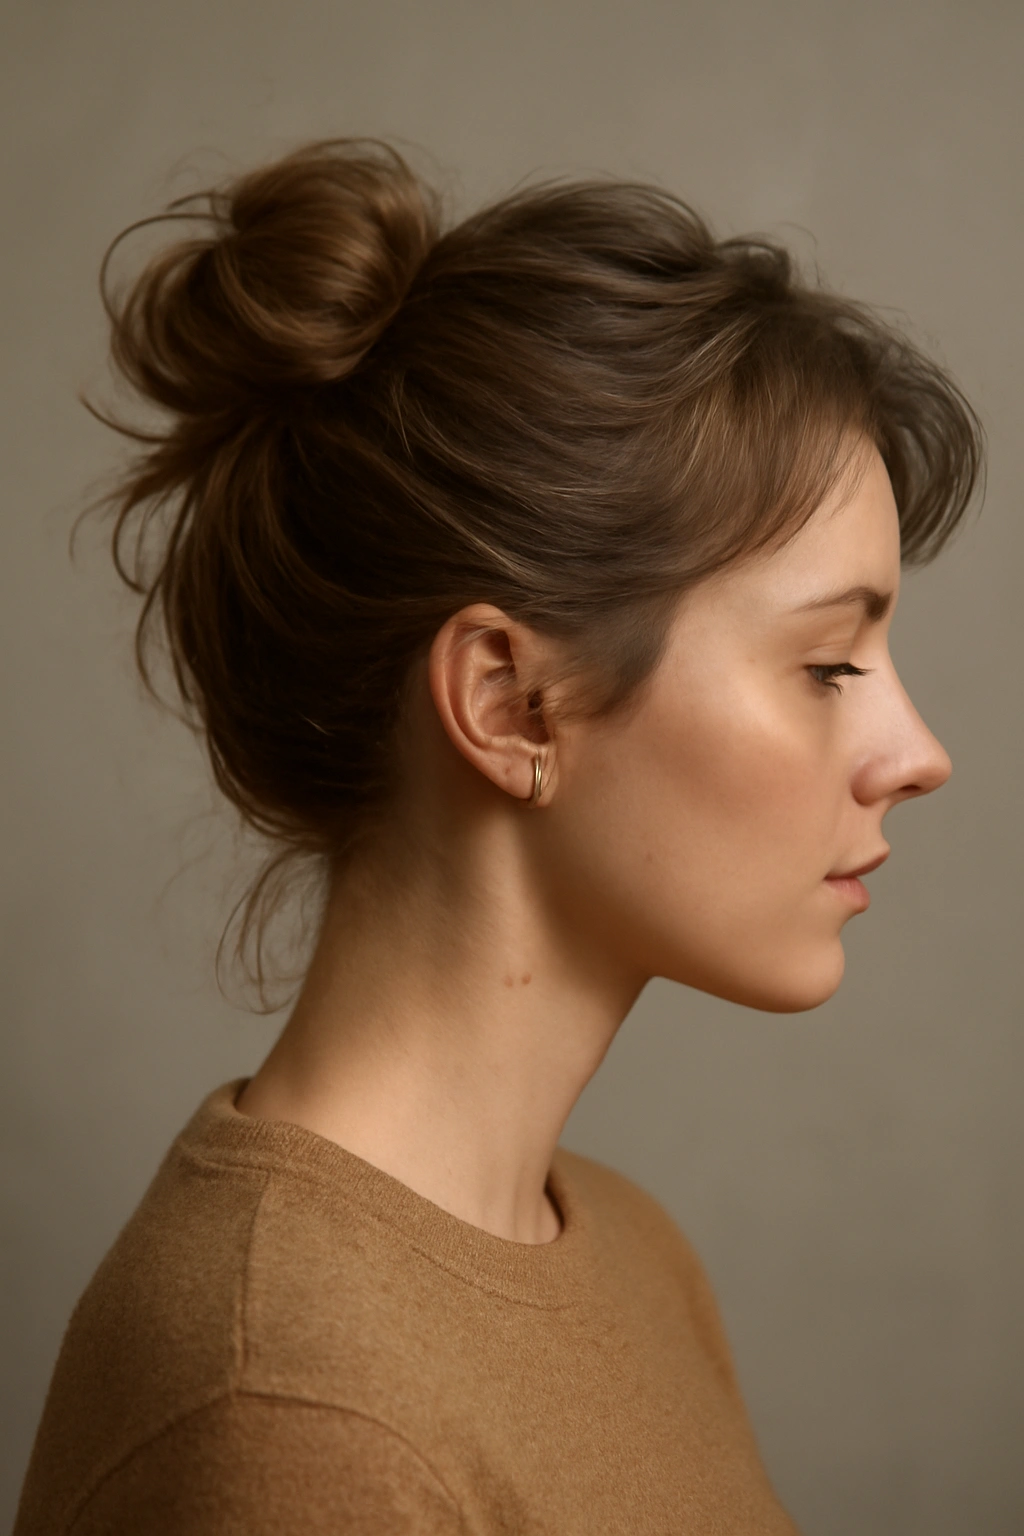
This is a game-changer for short hair because it completely reframes what a messy bun can be. Instead of centering everything at the back crown, you’re creating a sculptural shape that runs from your forehead back. The “faux hawk” element comes from the slightly elevated, narrow band of hair at the center top; the “messy bun” element comes from the gathered, textured bundle at the nape.
The Structure That Makes This Work
A faux hawk messy bun works on short hair because you’re using the entire head shape to support the style. The sides stay down and smooth, creating a sleek frame, while the center strip and back gather into a loose, textured bundle. The distribution of texture—sleek sides versus textured center and back—creates visual balance and prevents that “all my hair is trying to escape” feeling.
How to Execute It
Start by smoothing down the sides of your head with a light product or styling cream. Use a fine-tooth comb to create a subtle center line from your forehead back, then gently backcomb just the center section to create volume and texture. The sides should stay relatively flat and polished. Gather the textured center section and the hair at your nape into a loose bun at the very base of your skull, securing with bobby pins. Let the texture show—this style is about deliberate contrast between sleek and messy.
Why Gravity Loves This Style
Because the bun sits so low and the weight is distributed across the entire back of your head, it doesn’t have to rely on one gathering point. The sleek sides also eliminate bulk, which means less pressure on your scalp and bobby pins. This is why it stays: it works with your head shape, not against it.
- Takes 5-7 minutes with some practice
- Holds beautifully through an entire workday
- Works on all hair types from fine to thick
- Looks intentional and polished, not accidental
Insider note: The key to making this not look like a accident is keeping your sides genuinely smooth. One piece escaping on the side breaks the whole aesthetic. Use a bit of lightweight pomade on the sides only.
4. The Dutch Braid Into Bun
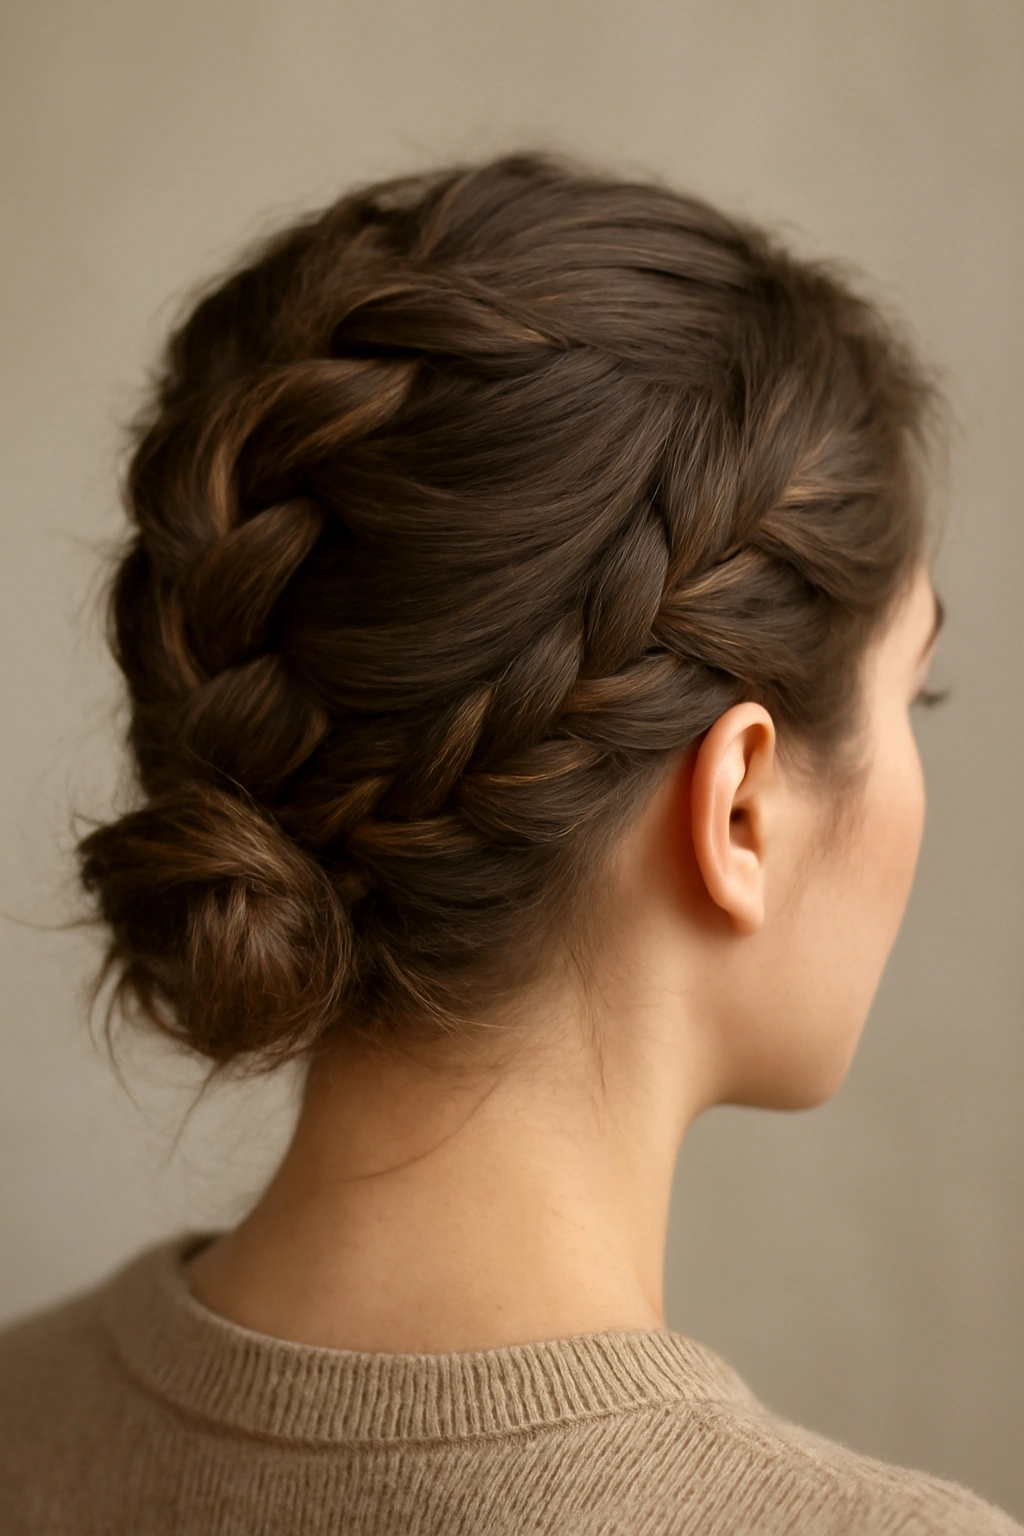
A Dutch braid messy bun is technically more complex than just twisting, but it’s dramatically more secure because braiding creates a tighter, more structured base than twisting alone. Start with a Dutch braid from your crown, working downward, then feed the remaining length into a small, loose bun at the base of the braid.
Why Braids Hold Better Than Twists
A braid has three strands working together to create structure; a twist has two. That extra strand means more surface area contact and more friction points. On short hair, where you’re working with limited length, that structural advantage makes a real difference. Your Dutch braid essentially becomes the anchor that holds the bun in place.
Building Your Braid-to-Bun
Start your Dutch braid at the crown of your head, using the reverse-under technique so it sits on top of your head visibly. Braid down to about ear level or lower, depending on your hair length. As you run out of hair to braid, transition smoothly into loose twisting with the remaining length, then wrap that into a small bun. The bun doesn’t need to be large; it’s just the endpoint for the braid. Secure everything with bobby pins inserted horizontally into the base where the braid ends and the bun begins.
Styling Flexibility
- Works on straight, wavy, and curly hair
- Can be sleek and polished or intentionally messy depending on your execution
- Best on second-day hair or damp hair with some texture already present
- Stays secure for 10+ hours without product
Pro tip: If you’re creating this on freshly washed hair, braid while your hair is still slightly damp. It sets the braid shape and gives the fibers something to grip. By the time your hair is fully dry, the braid is structurally locked.
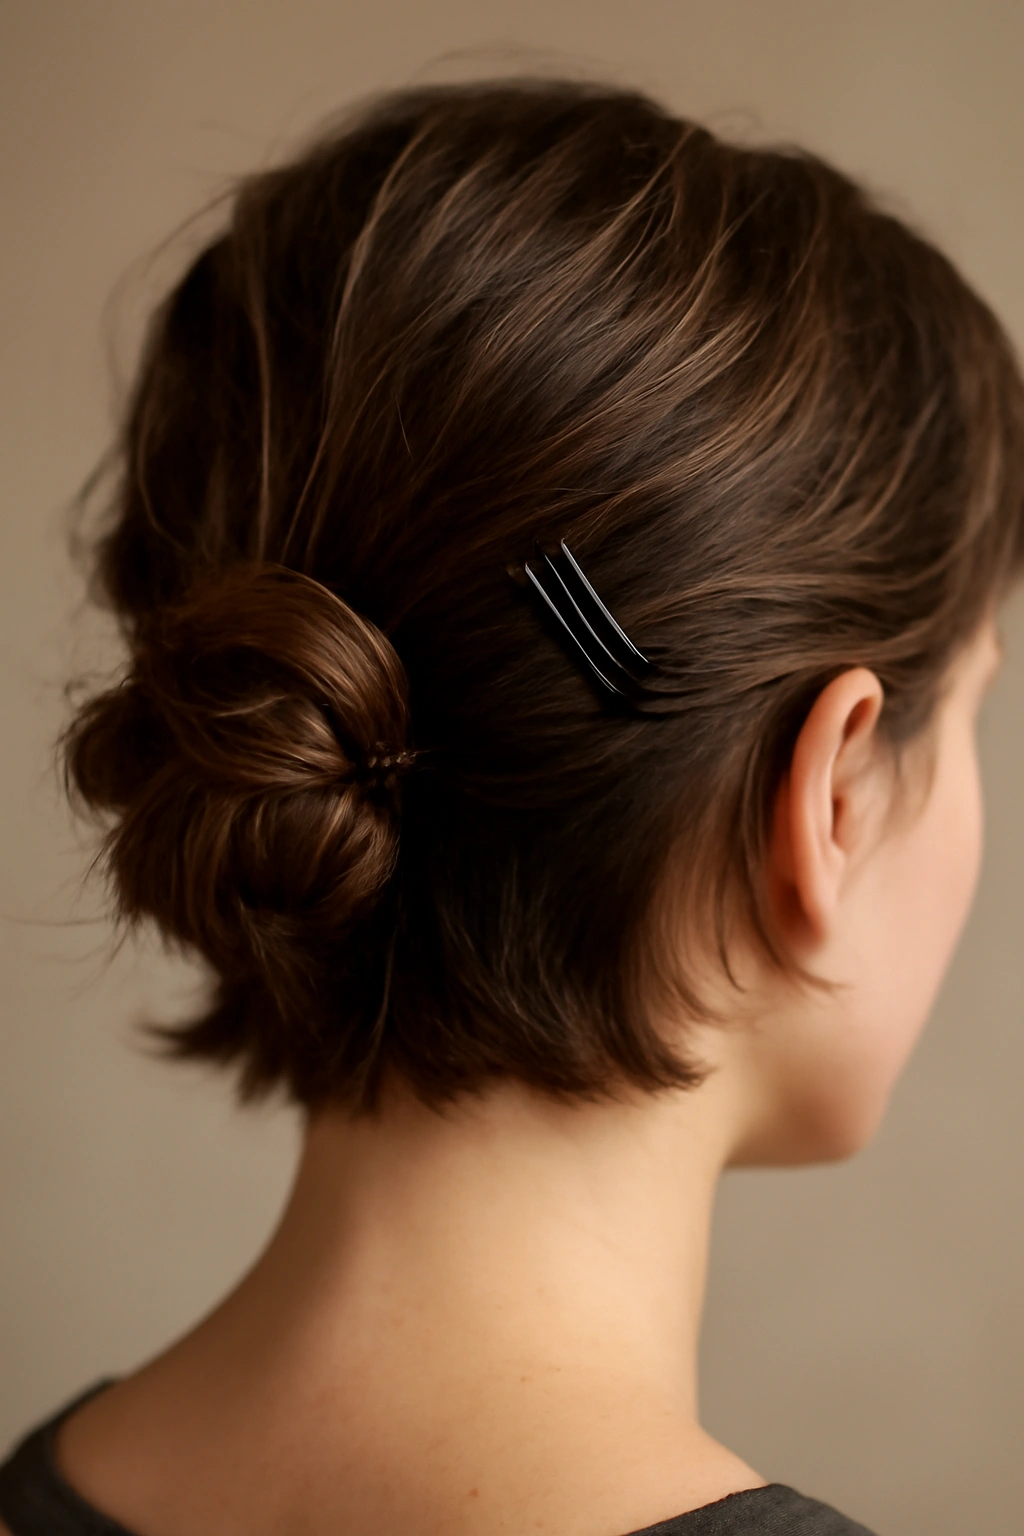
5. The Side-Swept Messy Bun
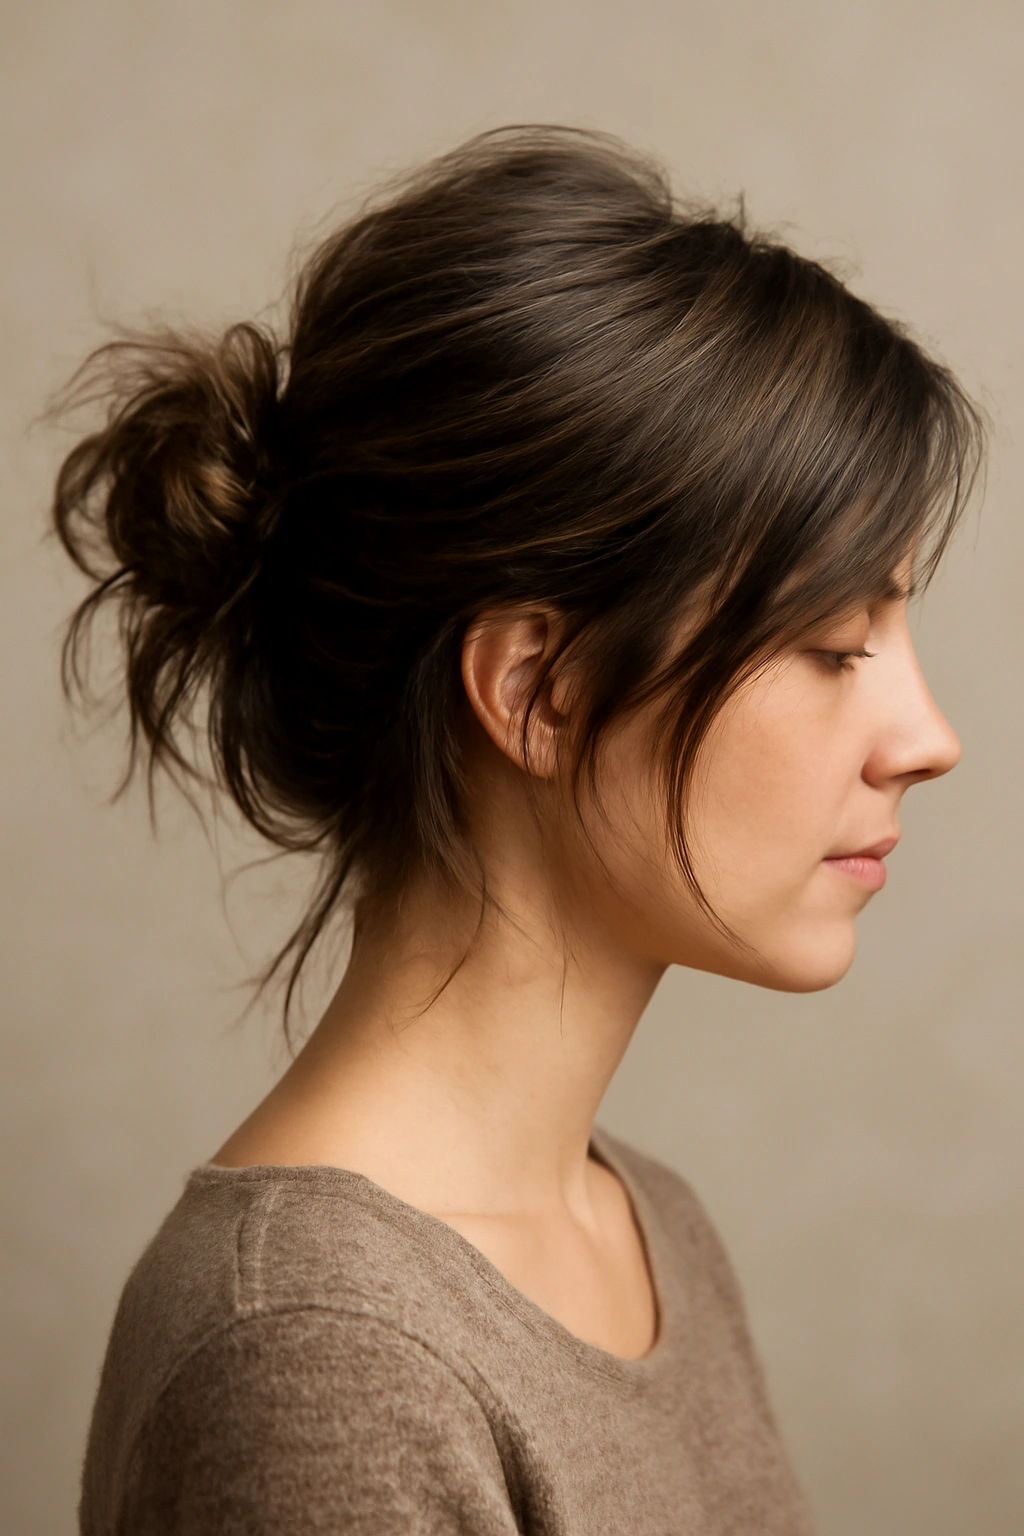
Not all short hair messy buns sit at the center back of your head. A side-swept version is particularly genius for shorter lengths because it distributes the visual weight differently and looks intentionally asymmetrical. You’re creating all the same texture and messiness, just positioning it off-center toward one ear.
The Asymmetry That Makes It Work
Side-swept styles are more forgiving on short hair because they’re supposed to look intentionally lopsided. If a center-back bun drops an inch, it looks sloppy. If a side-swept bun shifts an inch, it looks artistic. This psychological permission to be asymmetrical actually helps the style stay because you’re using your whole head as a canvas rather than relying on perfect centering.
Building the Shifted Structure
Create texture at your roots using a teasing brush or your fingers, focusing on the side where your bun will live. Gather your hair slightly off-center, toward your preferred side—most people choose the side opposite their part for visual balance. Twist and wrap into a loose bun positioned at the level of your ear or just behind it. Let pieces escape on the other side, creating that swept effect. Secure with bobby pins, and use a light texturizing spray if your hair is slippery.
Performance Notes
- Works beautifully with face-framing pieces
- Stays put for 8+ hours when properly anchored
- Best on hair with some wave or texture
- Takes about 4 minutes to execute
- Looks intentionally styled, never accidental
Worth knowing: The direction you sweep toward matters. If you have a natural part, sweeping toward the opposite side balances your face. If you have a strong side part, sometimes doubling down and sweeping toward your part looks more cohesive.
6. The Sleek Underside With Fluffy Top Bun
This technique is pure short-hair genius because it solves two problems simultaneously: how to create enough texture to look intentional, and how to keep everything anchored. You’re creating a smooth, sleek base layer underneath with a deliberately fluffy, textured bun on top. The sleekness underneath provides grip; the fluff on top provides the aesthetic.
The Two-Layer Strategy
Most people make the mistake of texturizing everything equally, which can actually look chaotic on short hair. Instead, you’re being strategic: the parts that touch your scalp and the bobby pins stay smooth and provide grip, while the parts that show get all the texture and movement. This is why it stays and why it looks intentional at the same time.
How to Create the Contrast
Smooth your hair back with a fine-tooth comb and light gel or mousse, creating a sleek base. Gather everything at your preferred bun position and secure tightly with bobby pins inserted into this smooth layer. Once everything is locked down, take the outer sections of the gathered hair and deliberately backcomb or rough them up to create texture and volume. Smooth the outermost layer just slightly so it doesn’t look like you stuck your finger in an electrical socket, but leave the middle sections textured. This creates a bun that looks fluffy and undone on top but is locked down solid underneath.
Why This Specific Technique Wins
The smooth underside creates the same friction that texturing creates, but it’s hidden. You get the hold without the visual heaviness. On short hair, where you’re working with less volume anyway, this is the perfect compromise between secure and stylish.
- Takes about 4-5 minutes
- Holds through exercise and movement
- Works on all hair types
- Looks polished and intentional
Pro tip: Use a texturizing spray or dry shampoo on your underside base before smoothing and gathering. It gives your bobby pins something to grip and makes the whole structure exponentially more stable.
7. The Multi-Knot Secured Bun
This approach sounds complex but it’s actually just tying a small knot in your hair, then wrapping the remaining length around it and securing with bobby pins. The brilliance is that you’re creating mechanical structure, not just relying on tension. Think of it like you’re building a knot at the base that everything else wraps around and anchors to.
The Mechanical Advantage
A knot creates a physical stop point. Your hair can’t slip past a knot the way it can slip past a simple gather point. On short hair, where gravity is less of an ally, this mechanical advantage is real. You’re engineering stability into the style rather than hoping tension alone will hold.
Building Your Knot Structure
Section your hair and create a small, loose knot at the gathering point—just like you were tying your hair in a knot by itself, except you’re keeping it intentionally small and loose. Once the knot is tied, take the remaining length and wrap it around the knot, securing with bobby pins inserted horizontally into the wrapped sections and the knot base. You can have one wrap or multiple wraps depending on your hair length and how much volume you want.
Durability and Hold
- One of the most secure options for short hair
- The knot prevents any possibility of complete slippage
- Stays put for 12+ hours without product
- Works best on hair with some texture or wave
- Takes about 5 minutes to execute
Worth knowing: If your hair is very fine or straight, create your gathering knot slightly damp. It stays tied more securely as it dries. If your hair is thick or curly, you can work with it dry; the natural texture gives the knot grip.
8. The Bobby Pin Cage Messy Bun
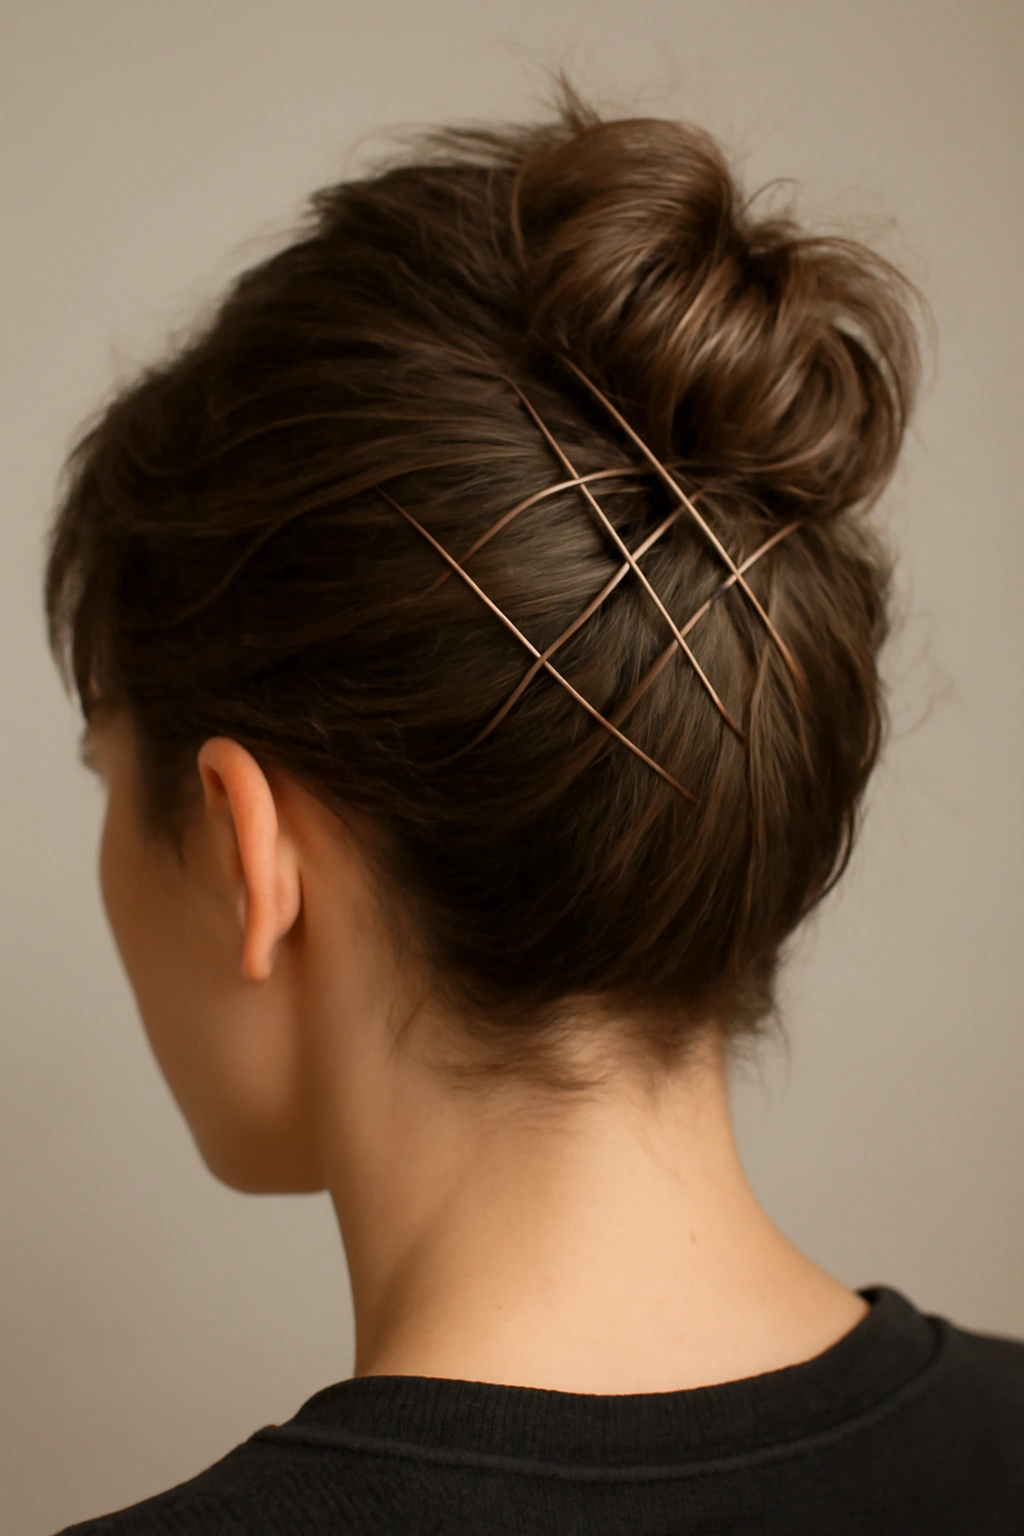
This final technique is for when you want ultimate security and don’t mind showing your bobby pins as part of the aesthetic. You’re creating a small, loose, textured bun and then securing it with a cage of bobby pins—typically three to five pins arranged in a grid pattern around the bun. It looks intentional and modern, especially on short hair where the pins are visible but not overwhelming.
Why Visible Pins Actually Look Intentional
On longer hair, visible bobby pins look accidental. On short hair, they can look like a styling choice—especially when you’re using metallic pins that coordinate with your hair color or choosing contrasting black pins deliberately. The key is committing to the look rather than trying to hide the pins.
The Caging Technique
Create your messy bun using your preferred gathering method—twist, knot, or simple gather. Make it intentionally loose and textured. Then, instead of securing with just two or three pins, use five to six pins arranged in a tic-tac-toe or grid pattern around the bun. Each pin goes in horizontally and slightly overlaps with the adjacent pins, creating a cage that stabilizes the bun from multiple angles. This is genuinely the most secure method possible for short hair.
Visual and Functional Benefits
- Creates a sculptural, intentional look
- Provides unmatched hold and security
- The grid pattern is actually visually interesting on short hair
- Works beautifully with colored bobby pins or clips
- Takes about 4-5 minutes
Pro tip: Match your bobby pins to your hair color for a subtle look, or choose contrasting pins (gold on dark hair, dark on blonde) for intentional visual interest. Either way, commit to showing them—trying to hide pins creates a messy, unfinished appearance.
Essential Tools and Products You’ll Actually Need
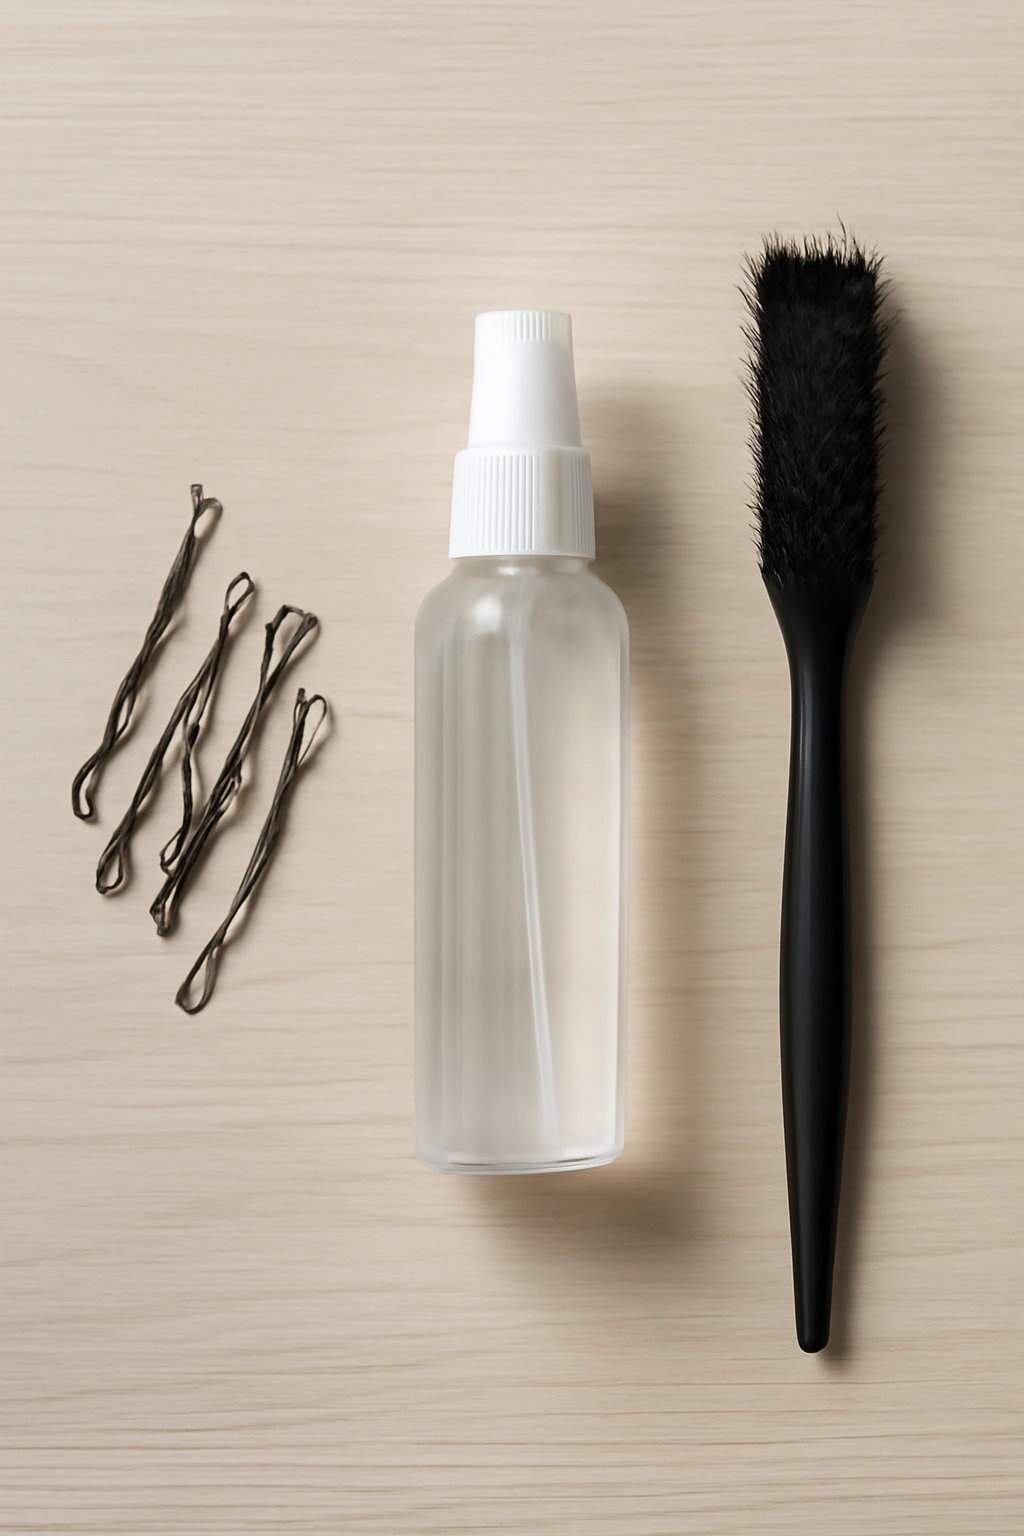
Forget about the idea that you need a drawer full of expensive styling tools. For messy buns on short hair, you genuinely only need three things: bobby pins, optionally a texturizing product, and maybe a teasing brush if your hair is very fine or slippery.
The bobby pins matter more than you’d think. Thin, weak pins slip out easily; substantial pins with a good grip hold all day. Spend a couple dollars more on quality pins with proper texture on the gripping section. Metallic or textured pins grip better than smooth pins because they have more surface friction.
A texturizing spray or dry shampoo is useful but not mandatory. If your hair already has texture, natural oils, or is on day two or three of not being washed, you don’t need it. If your hair is freshly washed, slippery, and fine, a light texturizing spray makes the difference between a bun that lasts two hours and one that lasts all day. Apply it to your roots and the areas where you’ll be gathering hair, not throughout.
A teasing brush or fine-tooth comb helps create deliberate texture, but your fingers work almost as well. If you go the teasing brush route, use a brush with short, densely packed bristles—cheap teasing brushes pull hair and create breakage. Spend eight or nine dollars on a decent brush.
That’s genuinely all you need. No special clips, no expensive styling products, no heat tools required. Short hair is actually easier in this regard because the length limitations mean you’re working with less bulk, so basic tools work perfectly fine.
How to Make Any Messy Bun Stay Put With These Pro Techniques
Beyond choosing the right style, there are specific techniques that dramatically improve hold on short hair. The first is the horizontal bobby pin insertion method. Most people stick bobby pins straight up into their bun. You should insert them horizontally—parallel to the ground—and actually weave them through the gathered hair rather than just pinning on top. Horizontal pins have much more grip because they’re working against gravity and your bun’s natural shape simultaneously.
Second, the two-pin X technique: instead of using just one pin at the base of your bun, use two pins that overlap in an X shape. They should be inserted at slightly different angles so they reinforce each other. If one shifts, the other compensates. This is why the bobby pin cage method (style #8) is so effective—you’re just extending this principle.
Third, and this is counterintuitive: slightly damp hair holds better than completely dry hair. Not soaking wet, not dripping, just slightly damp. The moisture makes the hair fibers grip better, and as it dries, everything sets into place. If you’re styling in the morning and your hair is already dry, mist it lightly with a spray bottle before gathering. This is especially true if you’re creating texture through teasing or braiding.
Fourth, work with your hair’s natural texture rather than fighting it. If your hair is naturally wavy or curly, create your bun on that texture—don’t blow it dry smooth first. If your hair is naturally straight, don’t try to create a textured bun with complicated teasing; go for the sleek underside with fluffy top method instead. Work with what you have.
Fifth, secure your bun slightly lower than you think you need to. A bun positioned right at the crown on short hair tends to slip toward your neck as the day goes on. Position it an inch or so lower, and gravity keeps it in place rather than working against you.
Common Mistakes That Make Messy Buns Slip Right Out
The most common mistake is starting with hair that’s too clean and slippery. If you just showered, your hair has no grip at all. Either wait until day two or three, or strategically use a texturizing product on the gathering area. Don’t apply product throughout your entire head—just where you’ll be gathering.
The second mistake is using weak bobby pins or too few of them. One or two pins are never enough for short hair. You need at least three, and five or six is better. Invest in quality pins with proper gripping texture.
Third mistake: not creating intentional texture. Smooth hair just slides around. You need either natural texture, teasing, or the sleek-underside method to create grip. Smooth, freshly washed, straight hair will not stay in a bun without some kind of friction point.
Fourth: gathering too high on your head. Short hair buns positioned at the crown are fighting physics. Position lower—at the base of your skull or just above it—and everything stays better.
Fifth mistake: not securing the base tightly. The gathering point is what holds everything. If it’s loose, the whole bun loosens as the day goes on. Gather firmly, secure with multiple pins, then add texture to the outer parts of the bun once the base is locked down.
Sixth mistake: using the wrong style for your hair type. If your hair is very fine and straight, the Dutch braid or the knot-based method works better than trying to backcomb texture that won’t hold. Match the technique to your hair’s actual characteristics, not to an imagined ideal.
Final Thoughts
A messy bun on short hair absolutely can stay put—but it requires choosing a style that’s engineered for shorter lengths and using the right securing techniques. The styles that work are the ones that either distribute weight across your whole head, create multiple anchor points, or rely on mechanical structure rather than just tension. Texture, whether natural or created, is non-negotiable; smooth hair just slides.
The best part about short hair messy buns is that they’re faster to execute than long-hair versions and they look intentional rather than accidental. You’re not trying to wrangle three feet of hair into compliance; you’re creating a deliberately styled shape that happens to be messy. That distinction matters. It’s why these styles look polished and purposeful rather than like you just woke up and threw your hair up.
Start with the style that matches your current hair texture and the time you’re willing to invest. If you have naturally wavy or curly hair, the textured base bun or the faux hawk method will feel easiest. If you have fine or straight hair, try the sleek underside with fluffy top or the bobby pin cage. Once you nail one technique, experimenting with the others gets easier because you understand the underlying principles: texture for grip, multiple anchor points for security, and positioning your bun lower rather than higher to work with gravity.