Asian hairstyles have taken over social media, and for good reason — they combine elegance, innovation, and practicality in ways that feel both timeless and fresh. From delicate braids to textured bobs that defy gravity, these styles celebrate volume, movement, and dimension while working beautifully across different hair types and face shapes. Whether you’re scrolling through Pinterest at 2 a.m. or sitting in your stylist’s chair deciding on something new, Asian hairstyles offer an incredible range of options that balance sophistication with wearability.
What makes these styles so compelling is that they’re designed with real-world versatility in mind. These aren’t trends that disappear in a season — they’re foundational styles that evolve and adapt. Many of them work equally well on thick, straight hair as they do on textured or wavy hair. They transition seamlessly from professional settings to casual weekend plans, and many can be styled up for special occasions without requiring a complete transformation. The styling techniques behind these hairstyles also reveal something fascinating: they often prioritize scalp health, minimize heat damage, and showcase natural hair texture in ways that Western beauty standards sometimes overlook.
If you’ve been bookmarking hairstyles on Pinterest but aren’t sure where to start, this guide walks you through 15 of the most pinned, most beloved Asian hairstyles for women — the ones that have staying power, work across hair types, and actually look as good in real life as they do in photos.
1. The Blunt Shoulder-Length Bob
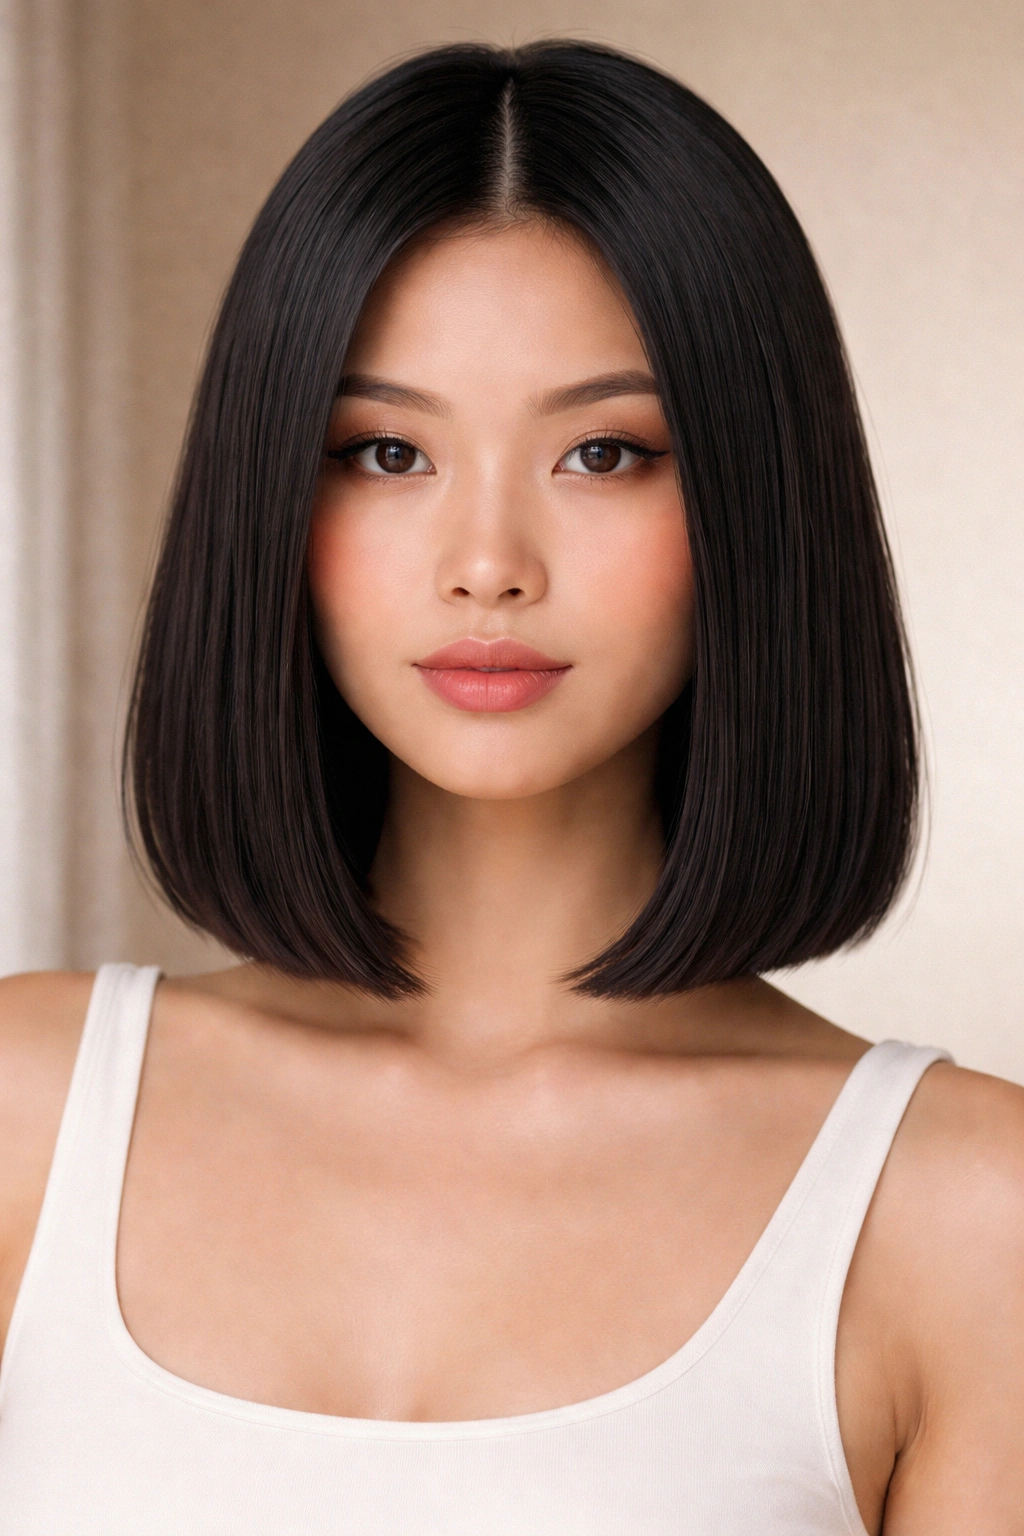
The blunt bob is having a moment that shows no signs of stopping, and the shoulder-length version strikes the perfect balance between low-maintenance and polished. This cut features a perfectly straight hemline that lands right around shoulder length, usually with minimal layers and a clean, geometric silhouette. The magic of this style lies in its simplicity — it requires precise technique from your stylist and commitment to regular trims every 6-8 weeks, but the payoff is a sophisticated look that works for almost every face shape and occasion.
Why This Style Stands Out
The blunt bob photographs beautifully because the clean lines create visual impact without requiring elaborate styling. It’s the kind of hairstyle that commands attention simply through its precision — no fluffy layers or trendy texture needed. For many Asian women, this cut works particularly well because it often flatters smaller or rounder face shapes, creating a lengthening visual effect. The straight hemline also means you can wear your hair down and get a sleek, intentional look without spending 20 minutes on a blow-dry.
Styling Tips for Maximum Impact
- Keep a smoothing serum or lightweight oil handy for days when humidity threatens the bluntness — a quick pass-through adds shine and maintains the cut’s visual edge
- A round brush and blow-dryer can help you create subtle inward flicks at the ends, softening the bluntness while maintaining the overall geometric shape
- On days you want texture, try a salt spray or dry shampoo — these products add grip without compromising the clean lines
- The blunt bob looks particularly striking with a deep side part or a center part, depending on your face shape
Pro tip: If you have naturally straight hair, you’re already 80% of the way there — just request that your stylist leave minimal texture so the bluntness stays crisp longer between trims. If you have wavy or textured hair, you’ll want a stylist experienced with blowout techniques to achieve this look consistently.
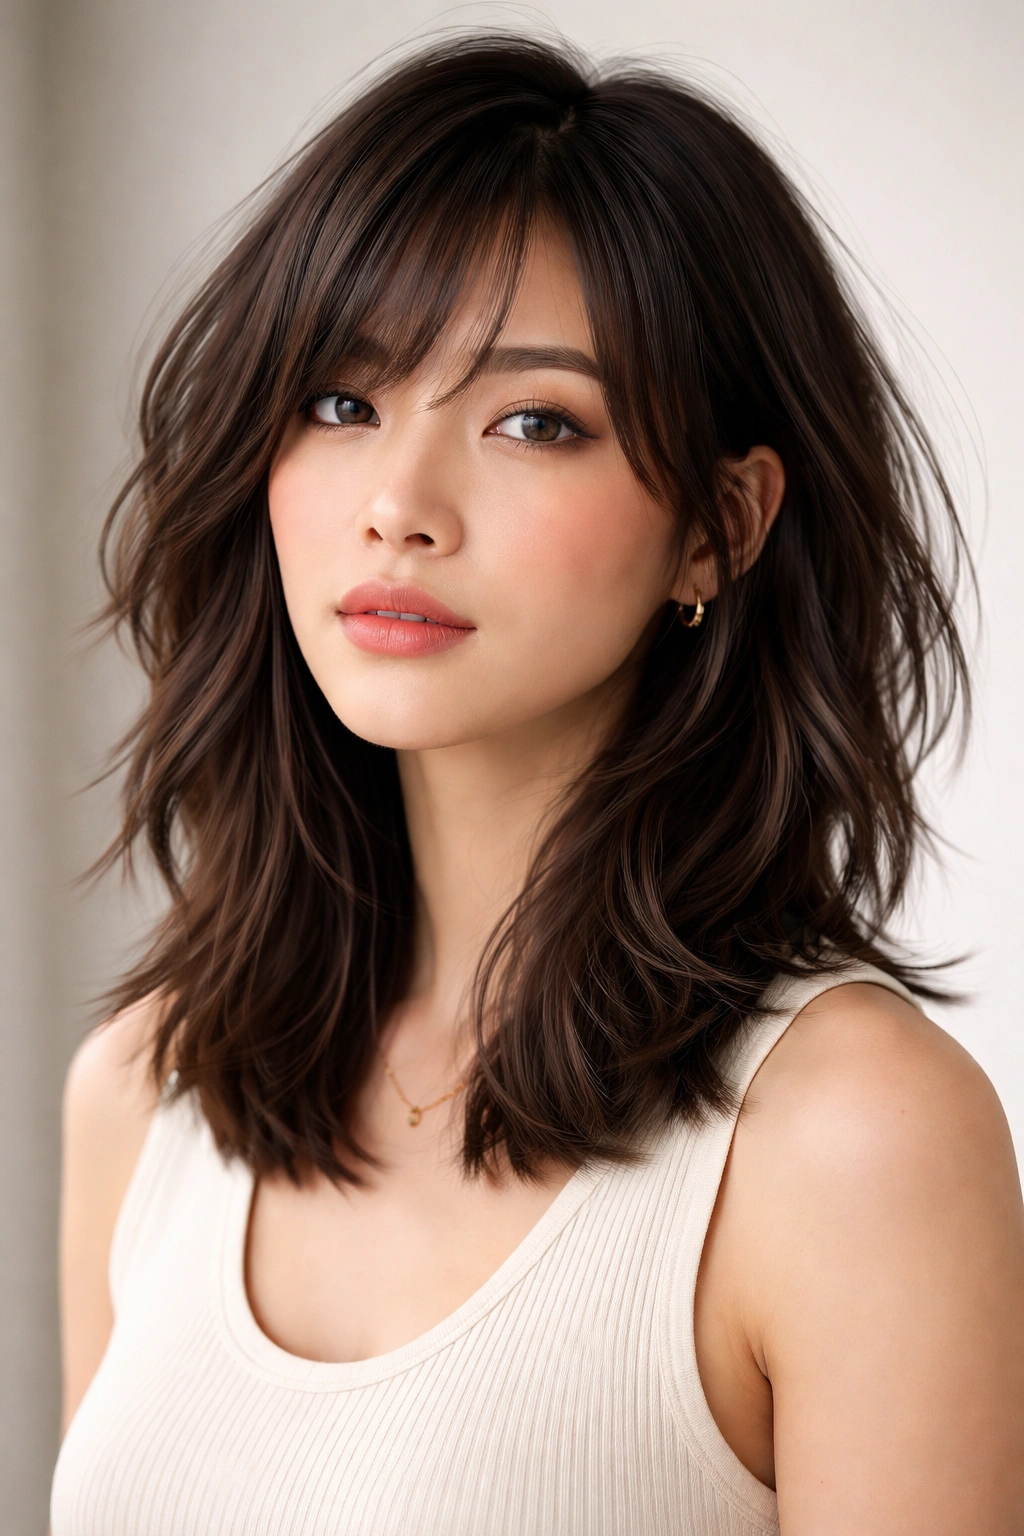
2. Layered Long Hair with Curtain Bangs
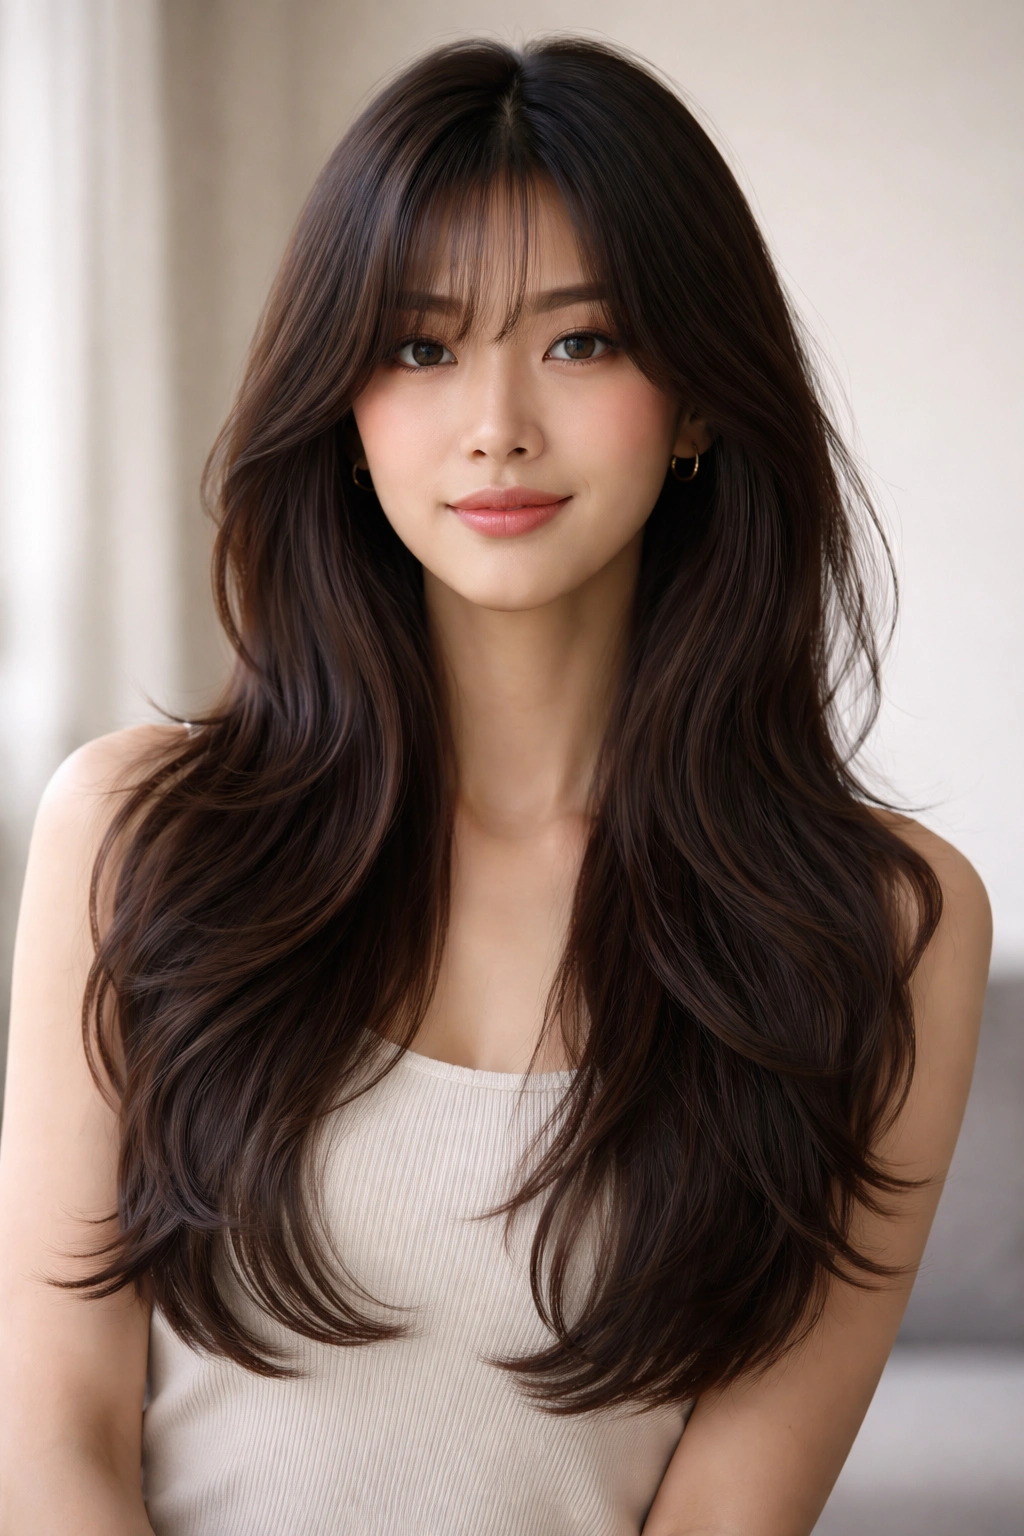
Long, layered hair with curtain bangs captures something magical: movement without fuss, dimension without overwhelming texture, and face-framing softness that feels effortless. The layers begin gradually, often starting around the cheekbones or slightly below, and increase in length toward the back. The curtain bangs frame the face on both sides, parting naturally down the middle and falling away from the face. This combination creates the illusion of volume while actually requiring less daily styling than it might seem.
Why Curtain Bangs Changed Everything
Curtain bangs work because they’re impossible to get wrong — even on bad hair days, they fall naturally into a flattering shape. They frame the cheekbones, balance wider foreheads, and create definition without cutting across the eyes. Unlike blunt bangs, which require frequent trims, curtain bangs grow out gracefully and can blend into the surrounding layers as they get longer. Many women find this style lets them feel like they’ve cut their hair dramatically without actually committing to anything permanent.
Maintaining Layers and Movement
- Layered hair benefits tremendously from a lightweight haircut cream or mousse applied to damp hair before blow-drying — this defines each layer without weighing the hair down
- A diffuser attachment on your blow-dryer helps emphasize the layers and creates soft waves naturally, without requiring a curling iron
- Heat protectant spray is non-negotiable here, especially if you’ll be blow-drying regularly — layers mean more surface area exposed to heat
- Trimming every 8-10 weeks prevents layers from becoming scraggly or looking unhealthy as they grow out
Worth knowing: This style photographs beautifully in natural light because the layers catch the light differently, creating dimension that shows up clearly in photos but feels natural in person.
3. The Sleek Straight Ponytail
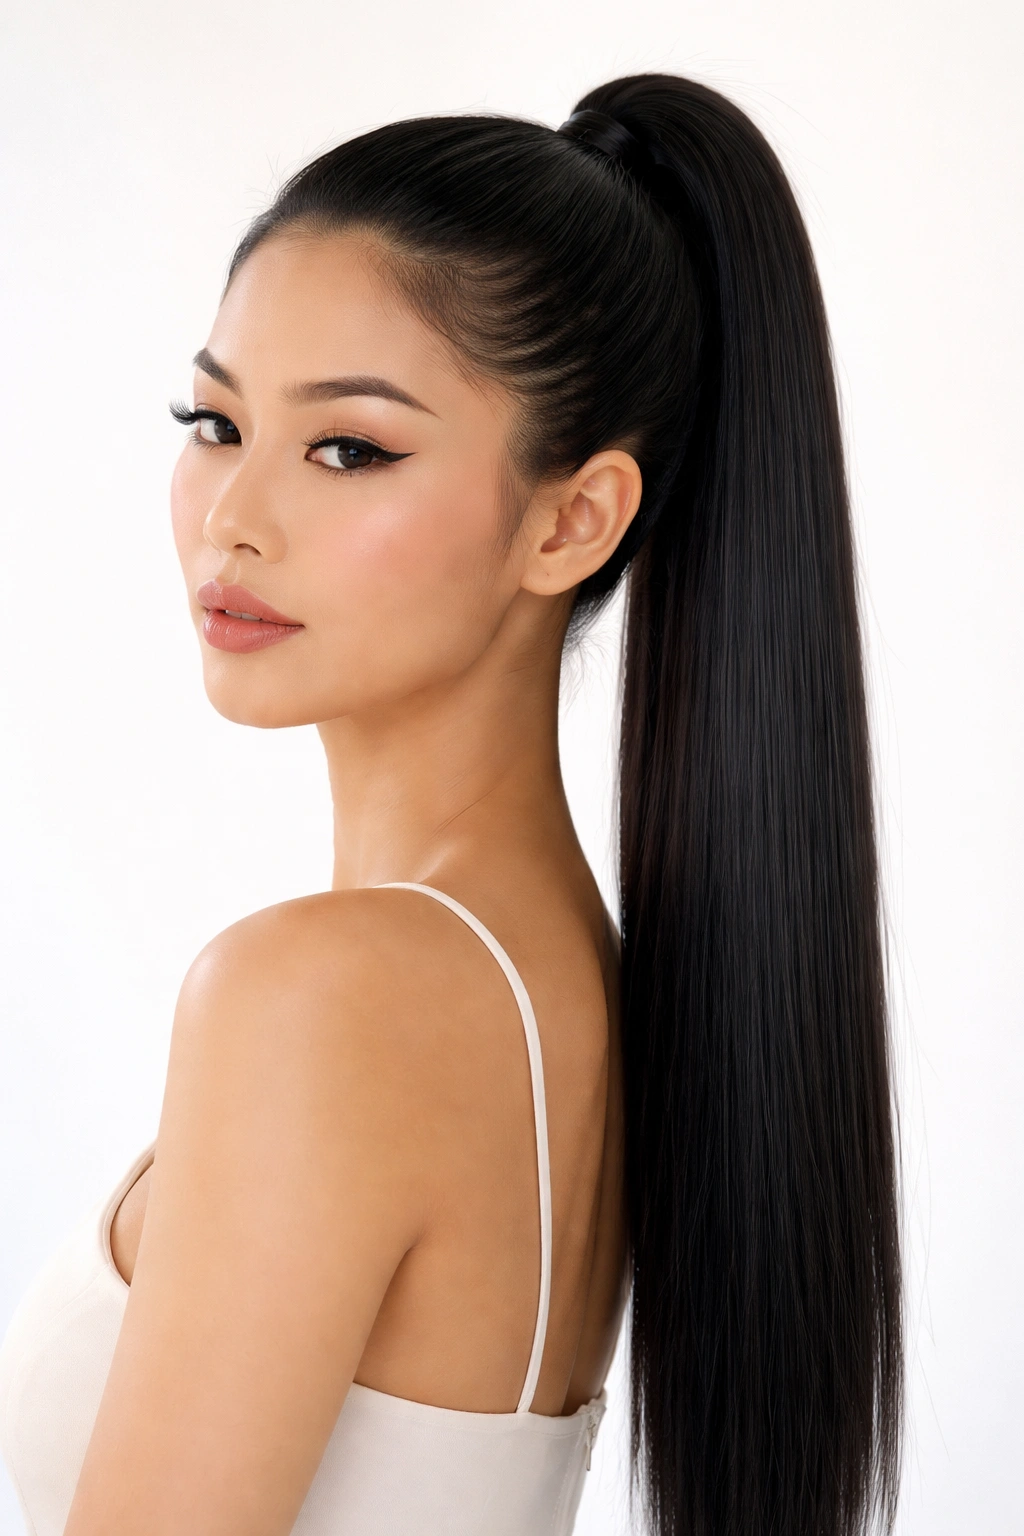
There’s something confidently minimal about a perfectly executed sleek ponytail — no wisps, no texture, just clean, sharp lines pulled into a high, mid, or low position. This style requires precision in the execution but practically zero styling time once you’ve perfected your technique. The key is achieving the sleekness without damaging your hairline or creating an overly tight ponytail that causes tension and breakage.
How to Create the Sleek Effect Without Damage
The sleekness comes from two things: smooth strands and the right products. A smoothing serum or silicone-based straightening product applied to damp hair before blow-drying creates the foundation. A light-hold gel specifically formulated to smooth flyaways without flaking gives you the crisp edges without the crunchiness of traditional edge control products. A fine-tooth comb (not a brush) helps gather the hair smoothly into the elastic without creating friction and breakage.
Protecting Your Hairline
- Use elastic hair ties that are covered in fabric, never bare metal elastics — fabric spreads the tension across a larger area
- Don’t pull the ponytail so tight that you feel tension at your scalp — the style should feel secure but comfortable
- Alternate your ponytail position daily (high one day, mid the next) to distribute tension across different parts of your hairline
- Apply a lightweight conditioner or hair oil to your hairline before styling to protect the delicate hairs
Insider note: The sleek ponytail looks most polished when paired with a deep side part, and it photographs especially well when you position the ponytail slightly off-center rather than dead center on the back of your head.
4. Braided Crown with Loose Waves
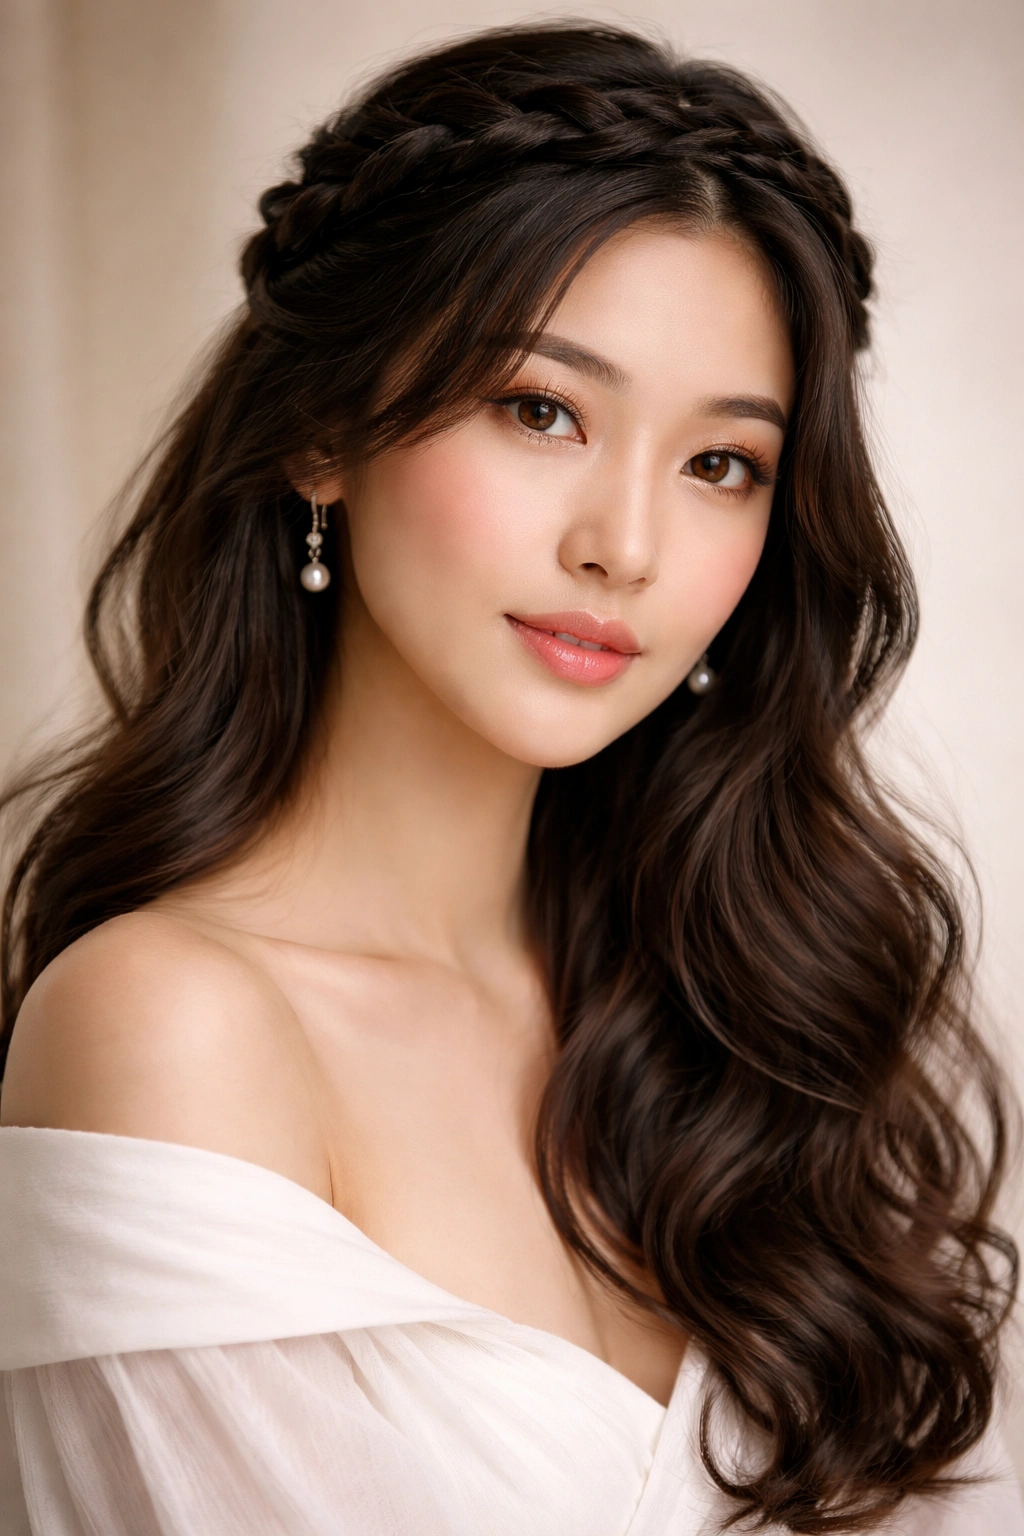
A braided crown combines the romance of a braid with the effortless beauty of loose waves — picture two braids (or sometimes just one, depending on thickness) wrapping around the back of the head like a crown, with the rest of the hair left loose and waved. This style feels special enough for events but casual enough for everyday wear. The braids hold the hair back from your face while the waves provide movement and softness, striking a balance that makes the overall look feel intentional without appearing overdone.
The Braiding Technique
Start your braid at one temple and braid slowly across the back of the head, incorporating hair as you go in a style that’s somewhere between a traditional braid and a more relaxed, textured braid. The goal is for the braid to sit visibly against the back of the head without pulling too tightly. Some versions use two braids that meet in the middle at the nape of the neck, while others feature a single thicker braid that wraps across the back. The second option works better for finer hair, while thicker hair can handle two braids without looking overwhelming.
Creating Waves That Complement the Braids
- Apply a sea salt spray or texturizing spray to damp hair before blow-drying — this gives the waves something to hold onto and prevents them from looking too constructed
- Braid the crown first, then use a curling iron on the loose hair to create soft waves, or braid the braids into damp hair and allow them to air-dry for a more organic wave pattern
- The waves should feel loose and undone, not perfectly uniform — your goal is soft movement, not a rigid curl pattern
- A light hairspray (not heavy-hold) keeps the waves in place without making them feel stiff
Pro tip: This style works beautifully with a small delicate accessory hidden where the braids meet — a tiny claw clip, a jeweled pin, or a silk hair ribbon — adding elegance without overwhelming the style.
5. The Textured Lob with Choppy Layers
A lob (long bob) with choppy, textured layers creates movement and visual interest while landing at the perfect length — usually between the shoulders and mid-chest. Rather than the blunt, geometric lob, the textured version features shorter layers throughout, especially toward the face and crown, creating what stylists call “choppy texture.” This cut works beautifully for women who want the sophistication of a shorter cut but don’t want to commit to actually short hair.
Why Choppy Layers Create the Illusion of Volume
The choppy texture works especially well for finer hair or hair that naturally falls flat because each layer lifts independently, creating the appearance of thickness and movement. The shorter pieces also move faster when you walk or move your head, giving the entire style a more dynamic, energetic feel. For thick or textured hair, choppy layers prevent the lob from looking bulky at the ends while maintaining length in the middle and back sections.
Styling the Textured Lob
- A texturizing spray or salt spray applied to damp roots adds grip and helps the layers separate naturally as your hair dries
- Blow-dry with a round brush to smooth the layers while they’re still damp, then rake your fingers through the ends to separate and emphasize the choppy texture
- On days you want more definition, try a matte cream or wax product worked through the mid-lengths and ends — this emphasizes the individual layers without making the hair look wet or overly product-heavy
- A diffuser attachment helps create soft waves that work with the choppy texture rather than against it
Worth knowing: This style looks particularly striking when your stylist uses a sharpening technique called “point cutting” at the ends of each layer, creating visible texture and movement with surgical precision.
6. Half-Up, Half-Down with Twisted Sections
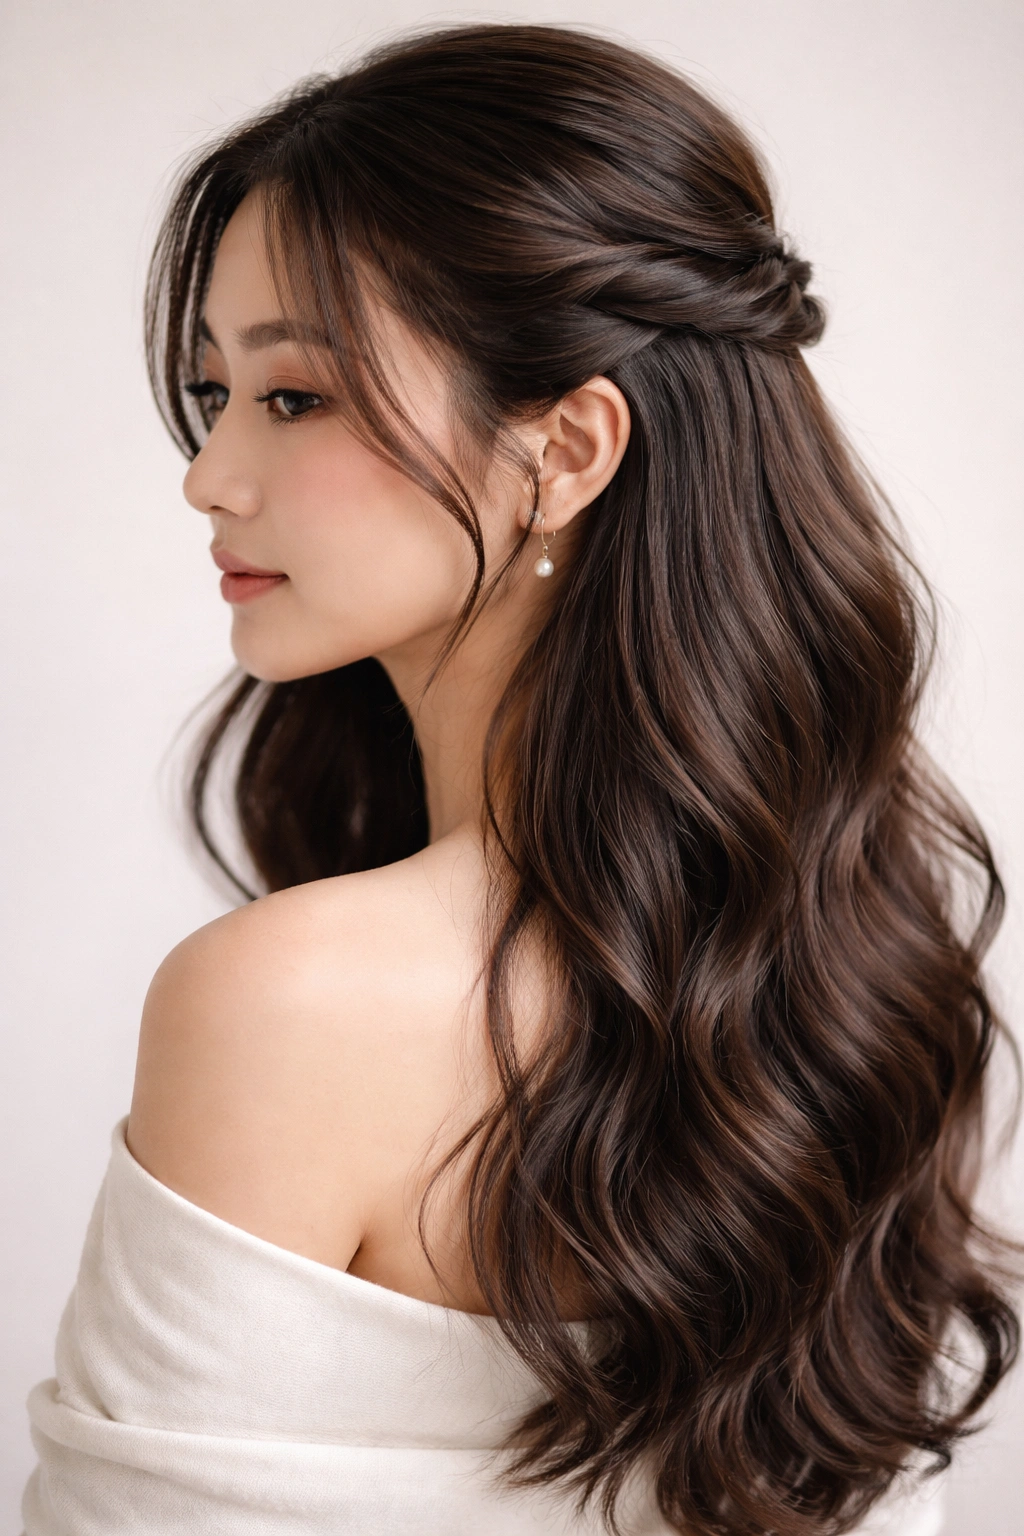
The half-up, half-down style with twisted sections offers the best of both worlds: your face is framed by soft, loose waves while the top section stays neatly secured and off your face. Rather than a simple half-up pony, this version features one or two twisted sections that wind around the back of the head before being gathered and pinned. The twists look more interesting than a standard half-up style while being significantly easier to execute than braids.
Perfecting the Twist Technique
Divide the top section of your hair into two pieces — one starting at each temple. Twist each section slowly and loosely, incorporating small sections of hair from behind your ear as you twist toward the back of the head. The twists should feel relaxed, not tight, with some texture visible in the spirals. Once both twists meet at the back, pin them together with bobby pins hidden underneath, then fluff the twisted sections slightly to emphasize their texture.
Styling the Loose Waves
- Apply a curl-enhancing or wave-enhancing product to damp hair before blow-drying for waves that hold better throughout the day
- Use a large barrel curling iron to create soft waves in the down section, curling away from the face on both sides for a flattering frame
- Let the waves cool completely before touching them — this helps them last longer
- A light hairspray holds everything in place without making the style feel stiff or over-done
Pro tip: This style looks best when there’s some volume at the crown — apply volumizing mousse to your roots while your hair is still damp, then blow-dry with an upside-down technique to build lift where the twists begin.
7. Sleek Side Braid into a Low Bun
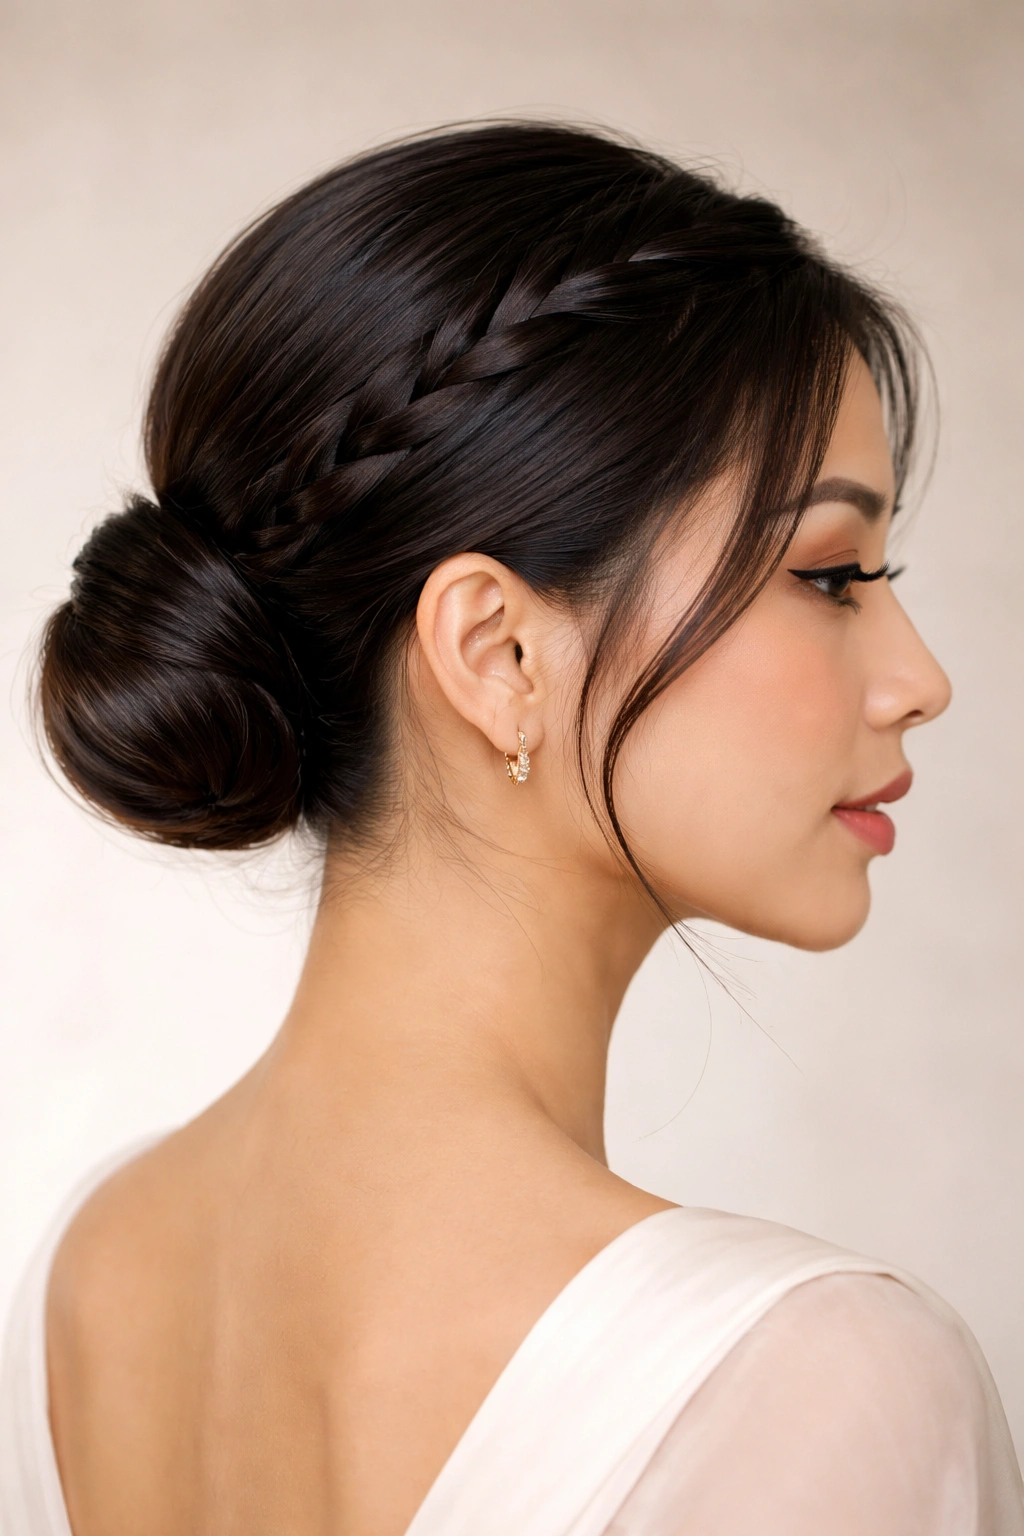
A sleek side braid that feeds directly into a low bun at the nape of the neck creates an elegant, almost sculptural hairstyle that’s surprisingly versatile. The braid starts at the crown and travels diagonally across the back of the head, with hair continuously incorporated, before the remaining length is gathered into a small, neat bun. This style requires some practice but becomes meditative once you’ve mastered the technique.
Mastering the Side Braid-to-Bun Transition
Start the braid at the crown on one side, using a three-strand Dutch braid (braiding under rather than over, which creates a braid that sits on top of the scalp). As you braid, gradually move toward the opposite side of the head, angling toward the nape of the neck. Once you reach the back, you’ll have a beautiful, dimensional braid running diagonally, and your remaining hair falls into a natural ponytail at the nape. Twist or braid this tail, then wrap it around the base to form a bun, securing with bobby pins.
Finishing Touches for a Polished Look
- Use a smoothing serum or edge control around your hairline to eliminate flyaways and create a finished appearance
- A few small face-framing pieces can be left loose for softness, or you can keep everything taut for a more dramatic, structured look
- Secure the bun with a silk hair elastic rather than a standard rubber band — this prevents snags and breakage
- A simple hair stick or decorative pin through the bun center adds elegance without being fussy
Insider note: This style is actually easier to execute on hair that’s been styled the day before, as second-day hair has a bit more grip and texture, making both the braid and the bun hold more securely.
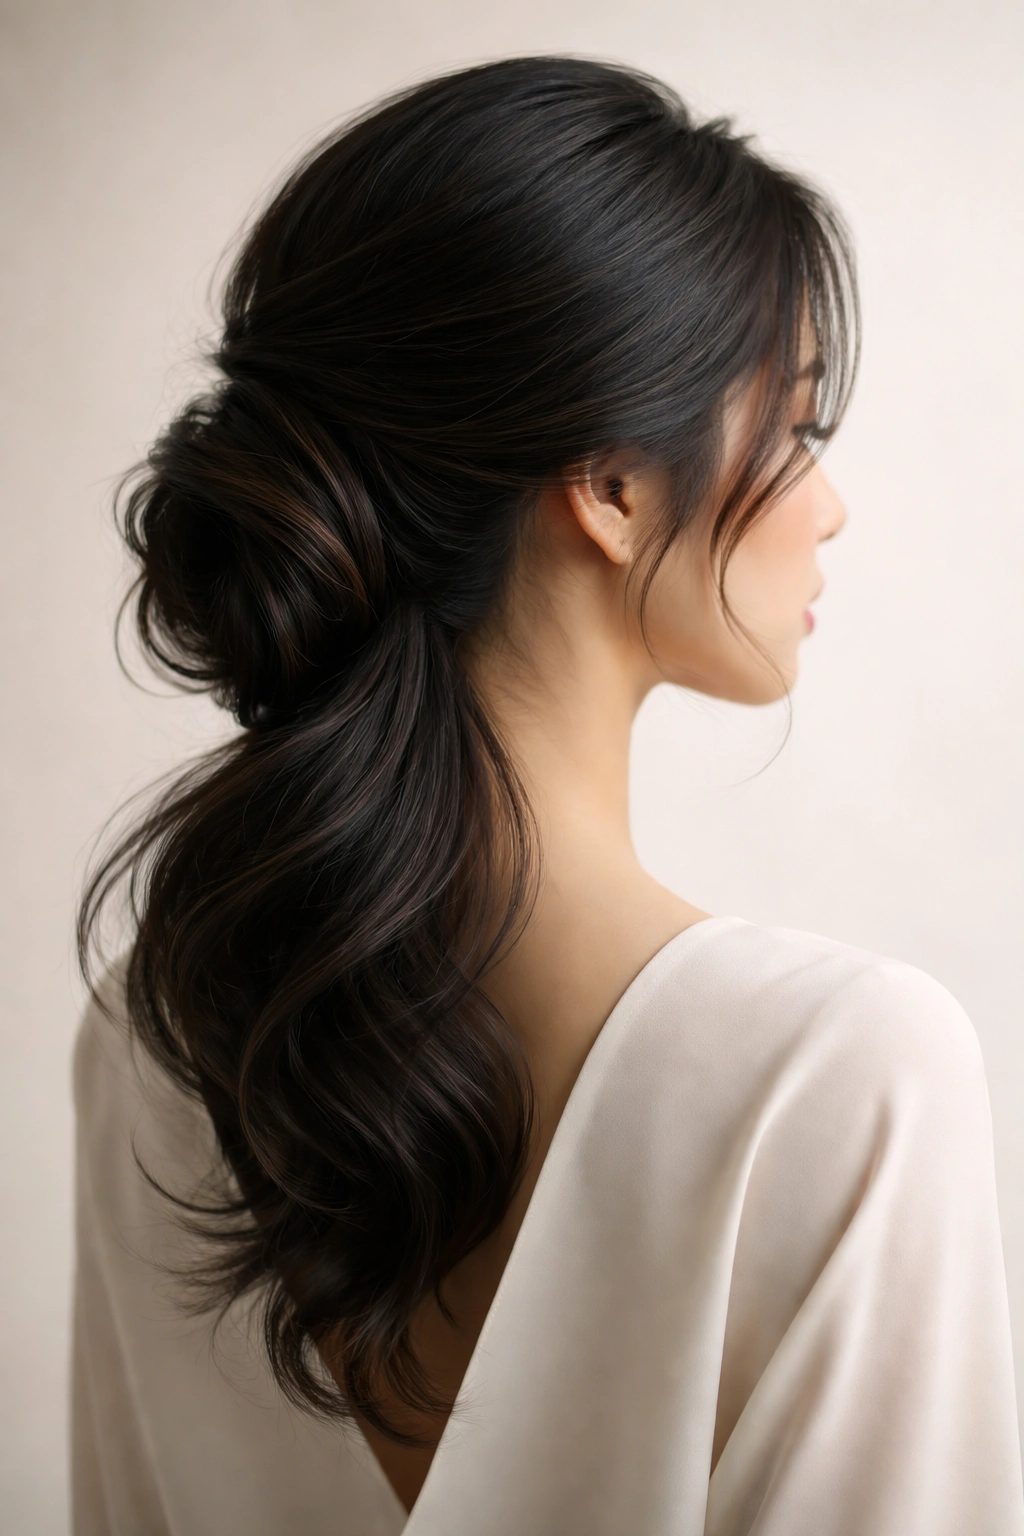
8. Soft Permed Waves (Digital Perm)
A digital perm, also called a C-perm or digital wave perm, creates soft, cascading waves that look natural and feel bouncy without requiring a curling iron every morning. Unlike traditional perms, which can look tightly curled and processed, digital perms use precise heat control to create waves that feel more relaxed and organic. This is a chemical treatment, so it requires professional application and careful maintenance, but the daily styling payoff is worth the commitment.
What Digital Perm Actually Does
The process uses heated ceramic rods at specific temperatures to reshape your hair’s protein structure into wave patterns. Unlike traditional perms that affect the entire hair shaft uniformly, digital perms allow stylists to customize the wave pattern — tighter waves at the crown for volume, looser waves toward the ends for movement. The result is waves that feel natural, not processed, and that hold their shape even on humid days.
Caring for Digitally Permed Hair
- Wait at least 48 hours after the perm before shampooing — the wave pattern needs time to fully set
- Use sulfate-free shampoo and conditioner specifically formulated for permed or chemically treated hair
- Apply a deep conditioning treatment weekly, as permed hair requires extra moisture to stay healthy and bouncy
- Air-dry whenever possible, or use a diffuser on low heat — this maintains the wave pattern and prevents heat damage
- Avoid flat-ironing or heavily blow-drying straight, as this can disrupt the wave pattern over time
Worth knowing: Digital perms typically last 3-5 months, depending on your hair growth rate and how you style your hair. The waves gradually relax as new growth comes in, but they don’t disappear suddenly.
9. Space Buns with Wispy Tendrils
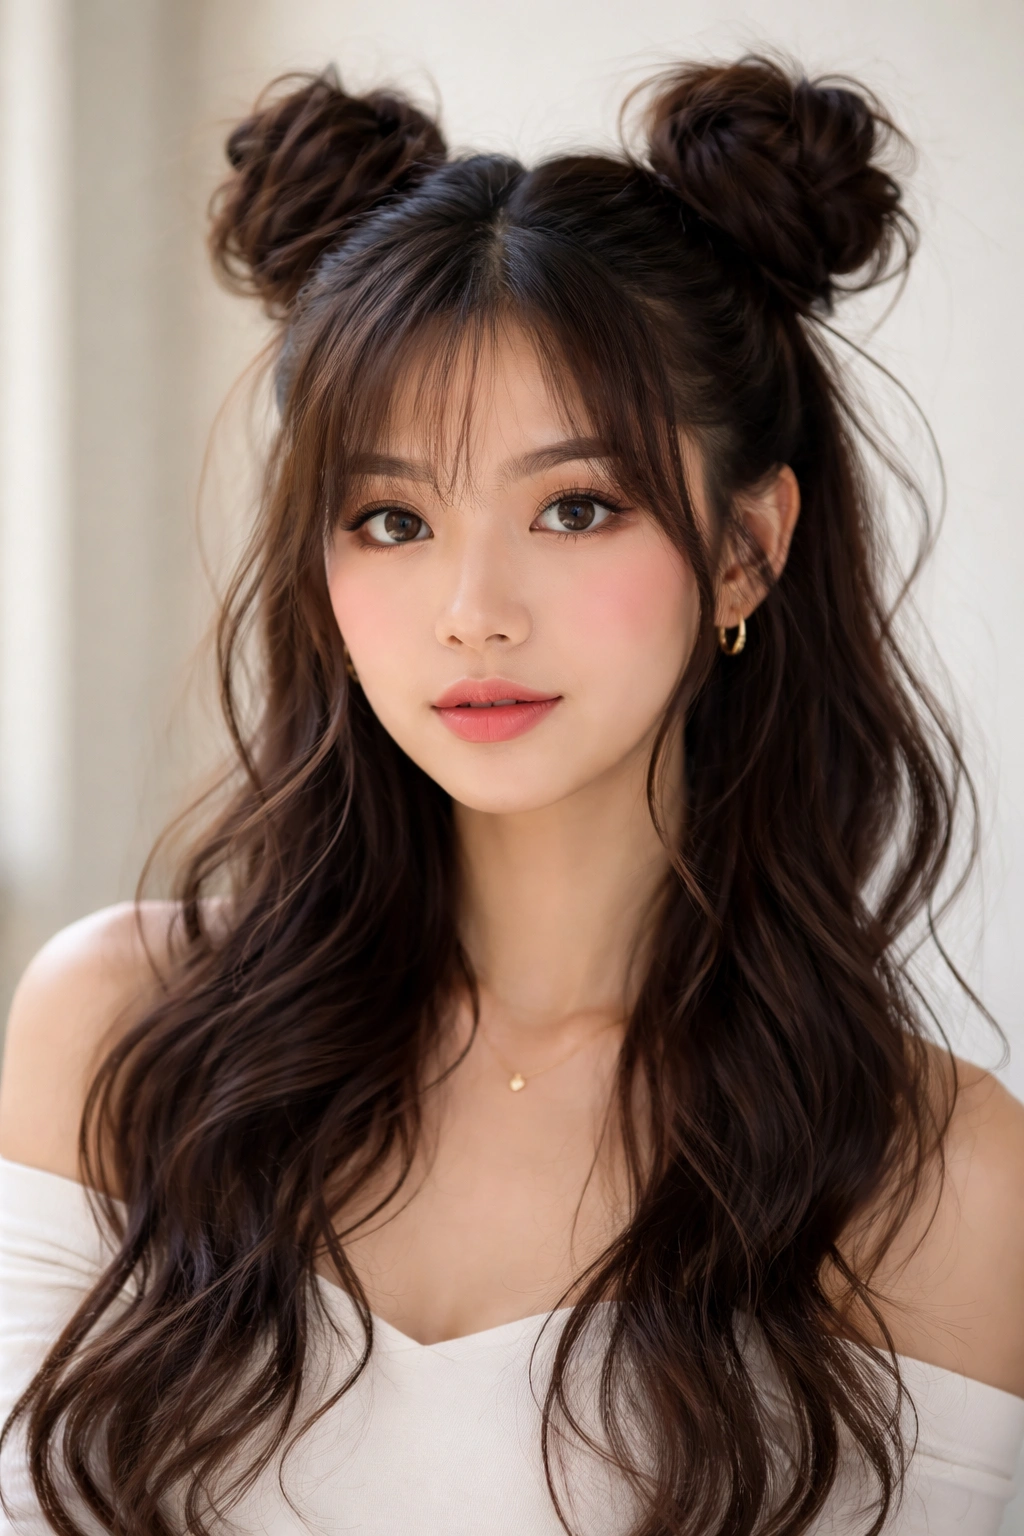
Space buns — two buns positioned on top of the head — have evolved from a purely playful style into something genuinely chic when executed with intention. The modern version features buns that sit high but not cartoonishly so, with soft, wispy tendrils framing the face and loose waves falling from where the buns are secured. This style works for casual outings, photoshoots, or any situation where you want to feel playful without sacrificing sophistication.
Positioning and Proportions
Divide your hair into two equal sections with a center part. Create a high ponytail on each side, positioning them roughly where your ears are when looking straight ahead — higher than traditional pigtails but not at the very crown. Twist or braid each ponytail and wrap it around its base to form a bun, securing with bobby pins. The buns should be neat but not overly tight, with some hair left out at the front to create face-framing tendrils.
Styling the Tendrils and Loose Waves
- The tendrils in front should fall naturally from your face, so don’t pin them back or tuck them away — they’re essential to the style’s softness
- Curl the loose waves lightly with a curling iron for movement, or use a wave spray and air-dry for a more undone look
- A light hairspray keeps everything in place without weighing down the tendrils
- Consider adding a delicate ribbon, thin scarf, or small hair clips to each bun for added visual interest
Pro tip: This style looks best on hair with some texture or waves — if your hair is stick-straight, applying a texturizing spray before styling helps the buns and waves feel less heavy.
10. Straight Hair with Subtle Highlights and Side Parting

Sometimes the most striking hairstyles are the simplest ones — perfectly straight hair with subtle, strategically placed highlights and a deep side part. The straightness comes from either naturally straight hair or a keratin treatment, and the highlights are placed to add dimension and depth without looking chunky or high-contrast. A deep side part creates asymmetry that’s visually interesting and flattering on most face shapes.
Creating Natural-Looking Dimension with Highlights
The best highlights for this style are those that mimic where the sun would naturally lighten your hair — around the face, the part line, and the crown. Rather than full foil highlights, consider balayage, which hand-paints color onto specific sections for a more blended, dimensional result. If you have dark hair, rich caramel or honey tones create beautiful depth without the starkness of platinum or ash tones. The goal is for the highlights to feel like a natural extension of your hair, not a separate color.
Maintaining the Straightness and Shine
- A smoothing serum applied to damp hair before blow-drying creates sleekness without the need for a flat iron
- If you do use a flat iron, apply heat protectant first and keep the iron moving to avoid damage
- Weekly deep conditioning treatments keep straight hair hydrated and shiny — this is crucial if you’re using heat tools
- A silk pillowcase reduces friction and keeps your straight style smooth overnight
- The deeper your side part, the more dramatic the asymmetry — experiment with the depth to find what flatters your face shape best
Insider note: This style looks particularly striking with a bold lip color or statement earrings on the side where your hair is parted away from your face, as the asymmetry naturally draws attention to that side.
11. Sleek High Ponytail with Wispy Face-Framing
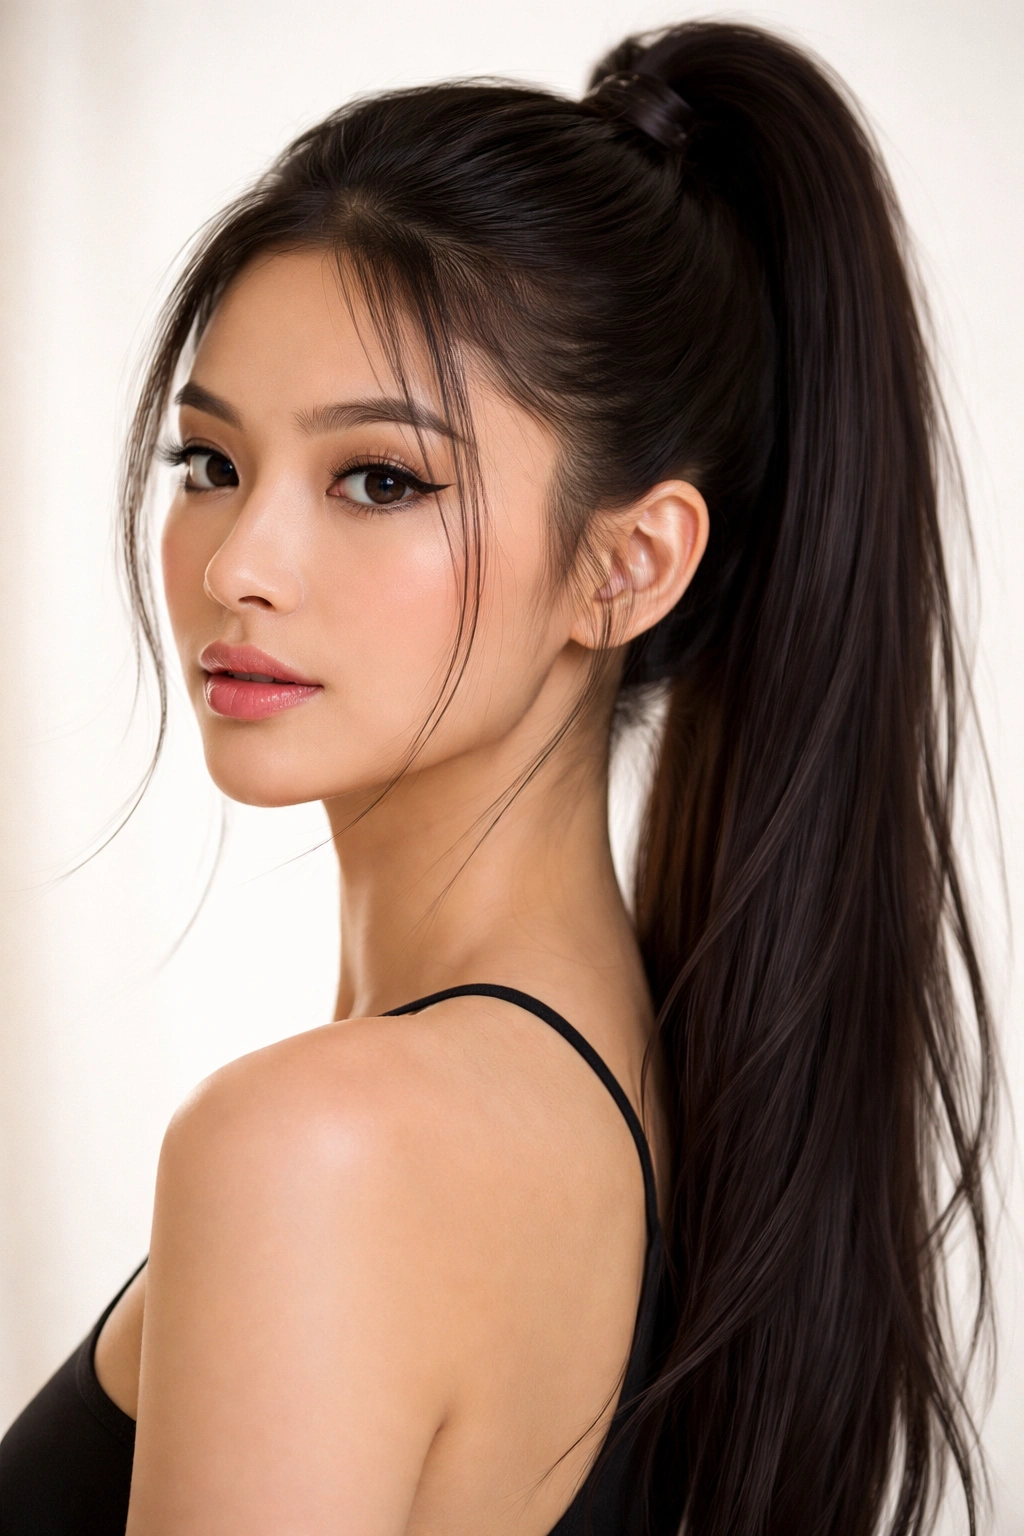
A high ponytail pulled so taut that it almost lifts your eyebrows is undeniably bold, but adding a few strategically placed wispy pieces around the face softens the severity and creates a more balanced, modern look. The ponytail sits at the crown, sleek and smooth, while three or four very thin sections are left out near the temples and cheekbones. These wisps frame the face gently, adding softness without compromising the clean lines of the style.
Creating the Perfect High Ponytail Base
Use a smoothing serum or lightweight gel to gather your hair into a high ponytail at the crown, securing with a fabric-covered elastic. The tightness should be snug but not painful — you want the lift without the tension headache. If you have baby hairs or a longer face, you can smooth everything back tightly; if you have a rounder face, leaving just a hair’s worth of face-framing can be more flattering.
Styling the Wispy Pieces
- The wisps should be extremely thin — think individual strands or very small sections, not chunks of hair
- Curl them lightly with a small-barrel curling iron for soft waves that frame the face without looking bulky
- These pieces should feel delicate and natural, as if they accidentally escaped the ponytail
- A light hairspray keeps the wisps in place without making them feel stiff
Pro tip: Position the elastic slightly lower than the very crown of your head — this creates a slightly softer, more modern silhouette than a ponytail that sits directly at the top, which can look overly pulled-back or severe.
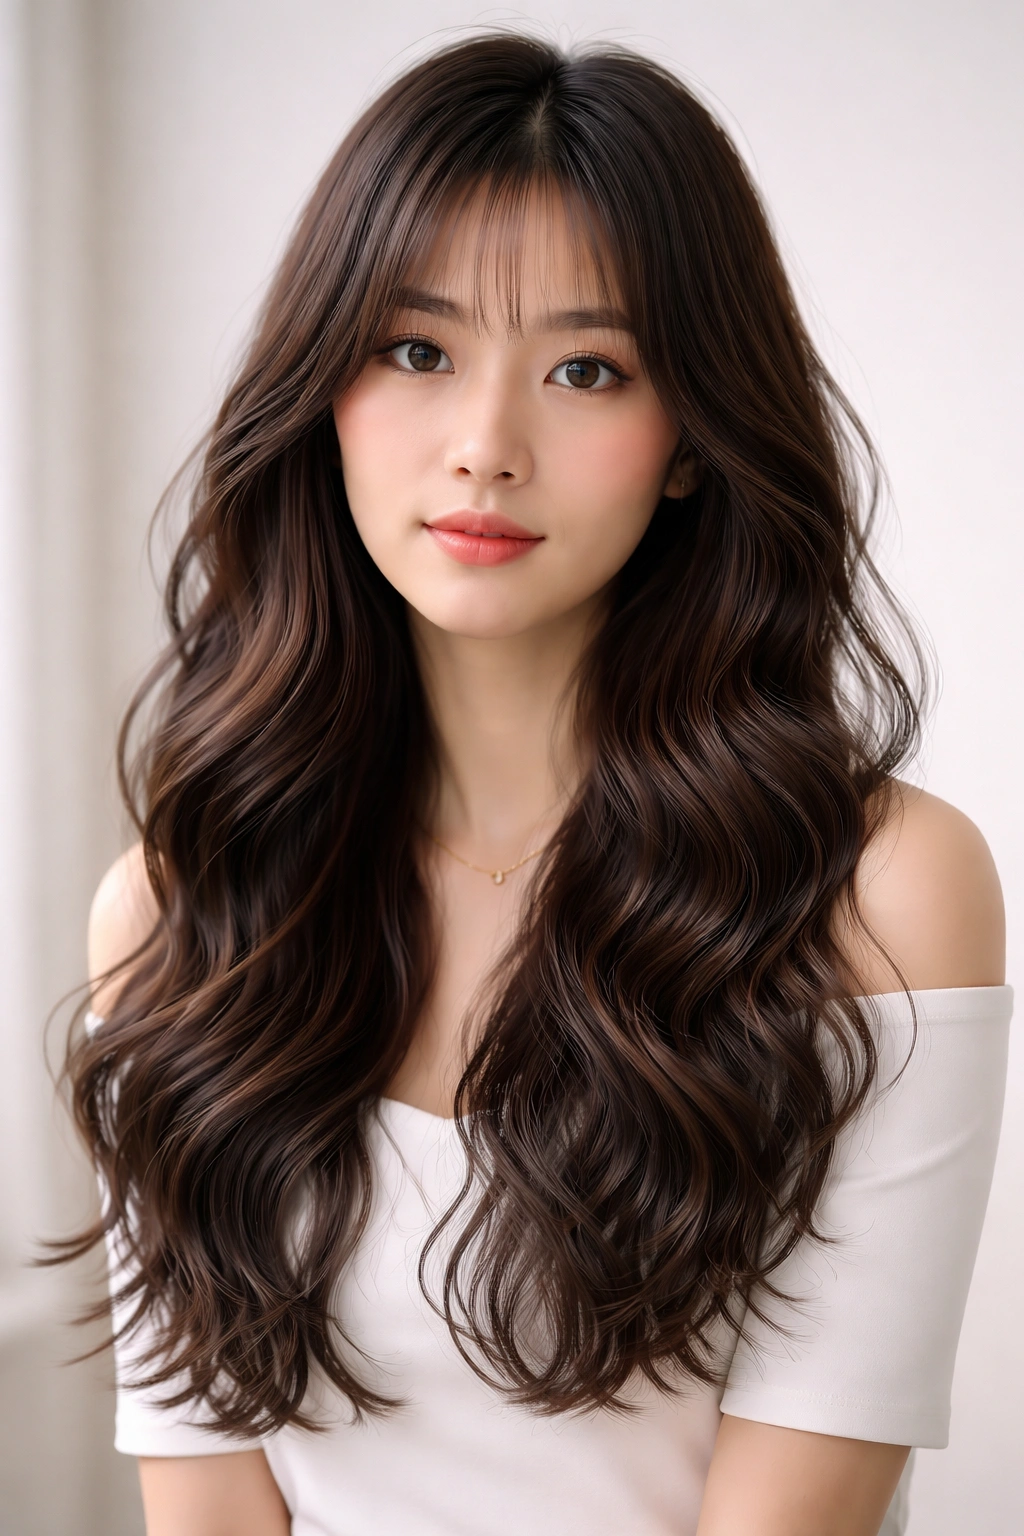
12. Long Layers with Wispy Bangs
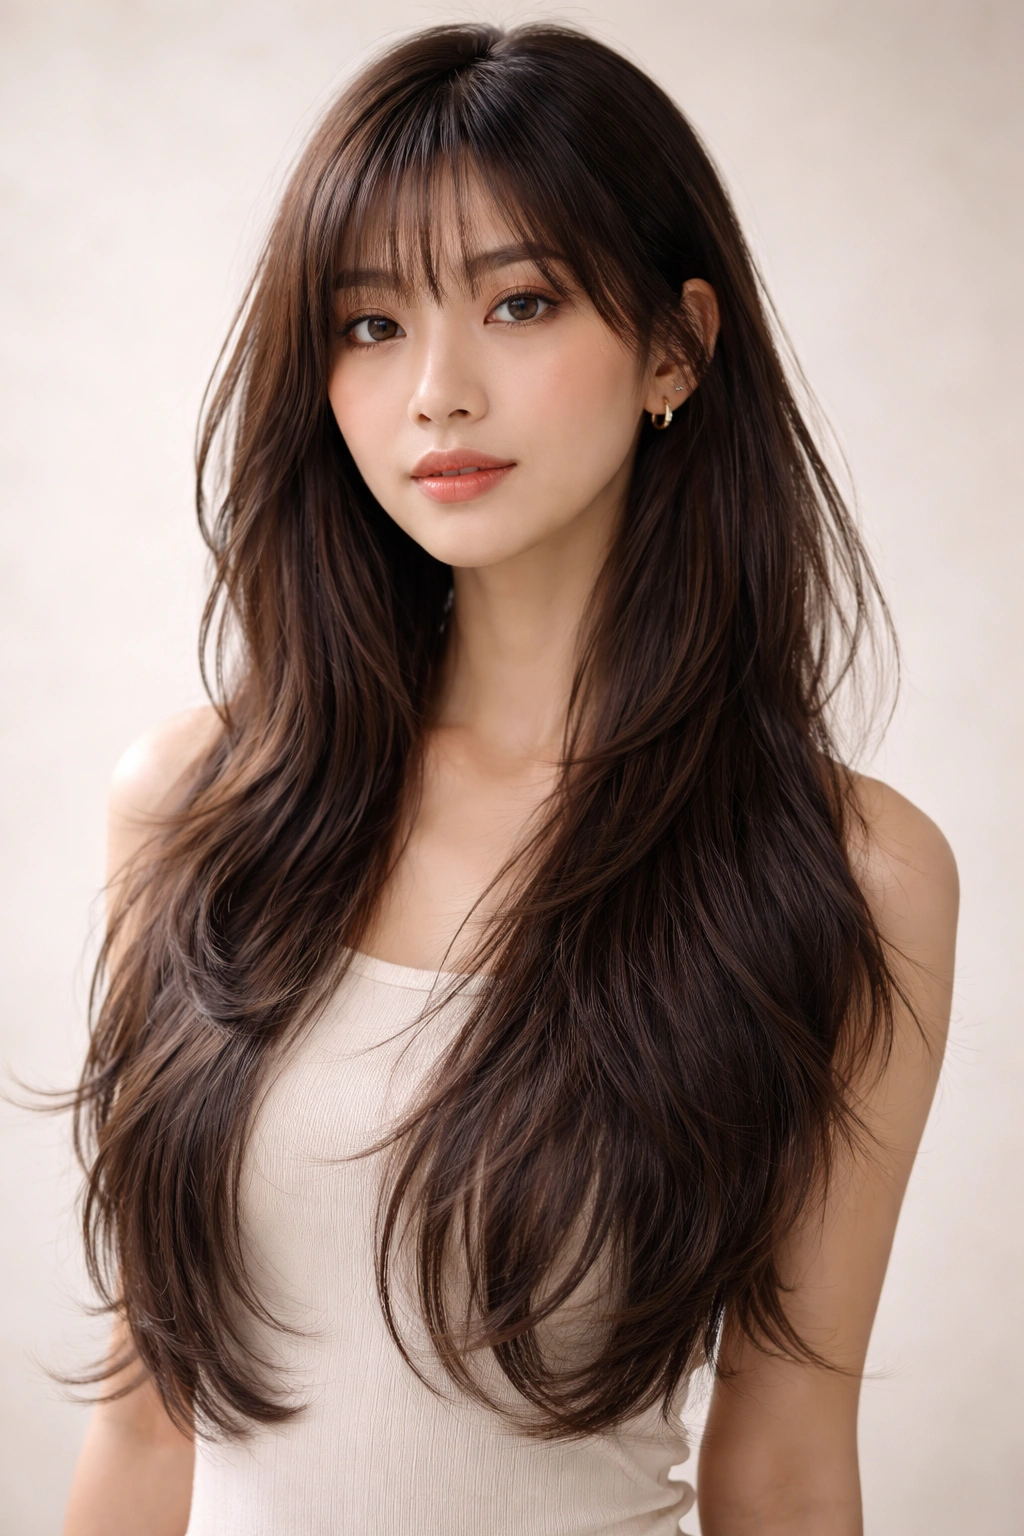
This is the hairstyle that works on almost everyone — long hair with gradual, subtle layers and soft, wispy bangs that barely skim the eyebrows. The layers create movement and the illusion of volume without requiring any particular styling technique. The bangs are wispy enough that they move with your hair rather than sitting like a solid block of hair across your forehead, which makes them far more versatile and forgiving than blunt bangs.
Layering for Natural Movement
The best approach is to ask your stylist for face-framing layers starting at the cheekbones, with layers gradually increasing in length toward the back. This creates a flattering shape without making the ends look thin or wispy in an unintended way. The layers should feel subtle — you’re not going for choppy or heavily textured, but rather soft dimension and movement.
Perfecting Wispy Bangs
- Wispy bangs should be cut at an angle, longer on the outer edges and slightly shorter in the center, so they naturally fall away from the face
- They work best on hair that has slight texture or waves — if your hair is perfectly straight, they can look limp and fall into your eyes
- A lightweight texturizing spray applied to damp bangs before blow-drying helps them hold their shape and separate naturally
- Trim your bangs every 4-6 weeks to maintain the wispy shape; as they grow out, they quickly go from wispy to heavy
Worth knowing: This style is incredibly forgiving — even on days when you don’t style your hair, the layers and bangs create shape and movement naturally.
13. Styled Waves with a Sleek Headband or Hair Clip
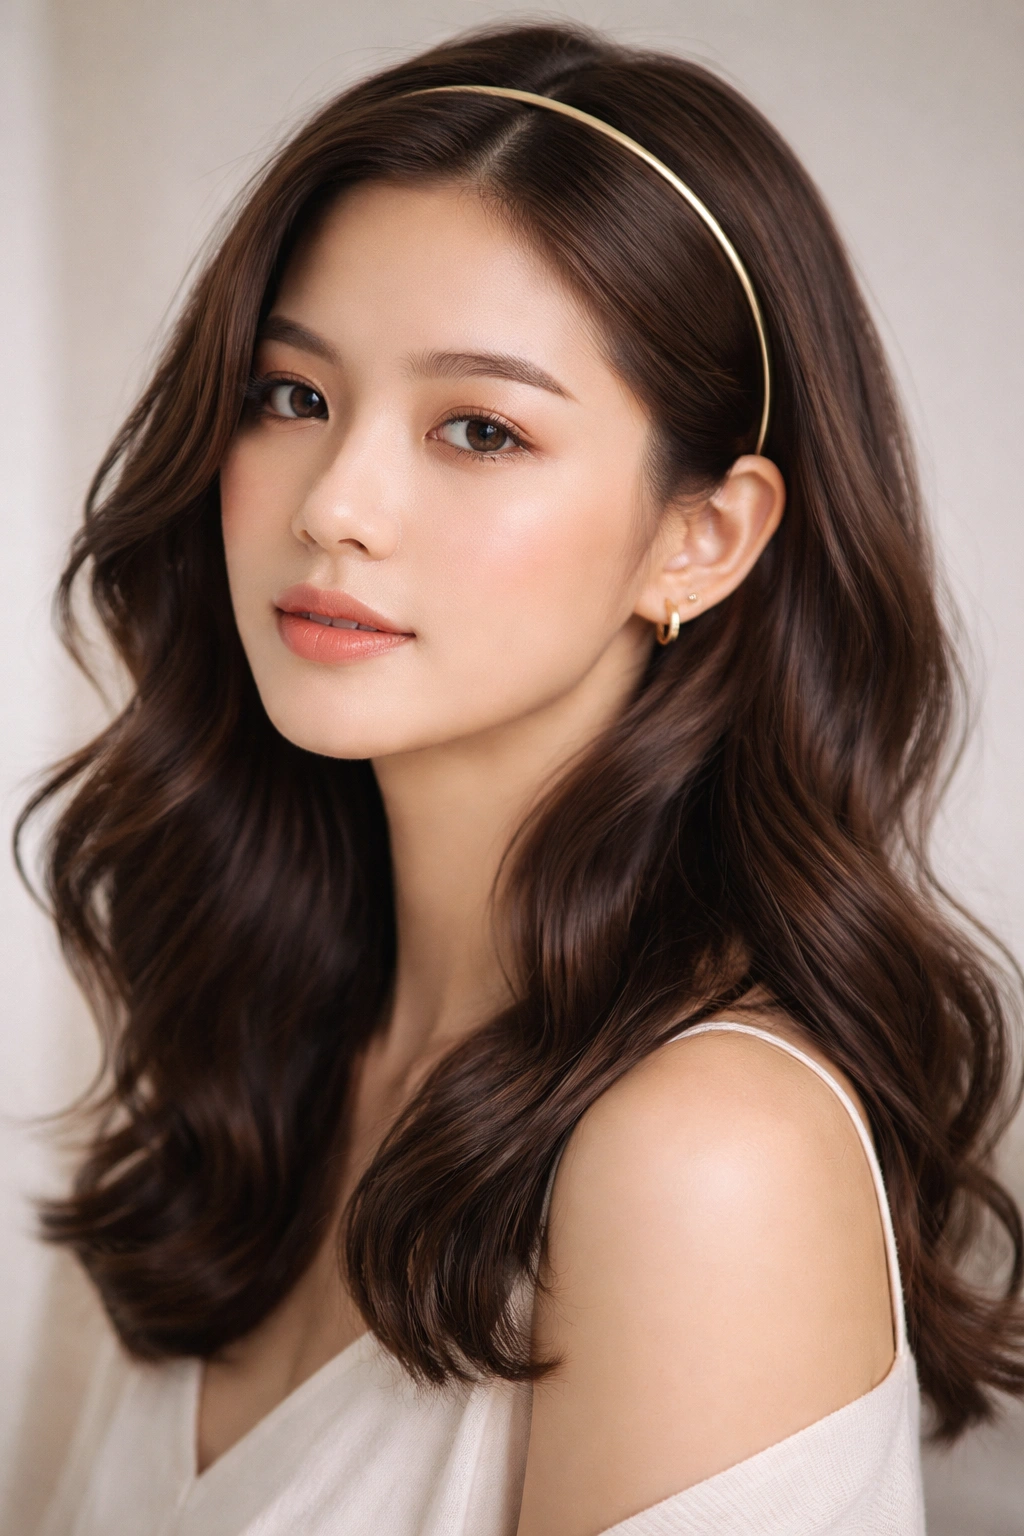
Soft, touchable waves paired with a sleek accessory like a minimalist headband or an architectural hair clip creates a look that feels both polished and effortless. The waves should feel lived-in and natural, not perfectly uniform, and the accessory should be chosen specifically to complement your face shape and overall aesthetic. A headband pulls the hair back slightly, adding structure, while a clip can sit at the base of a ponytail or just off to one side for a more asymmetrical look.
Creating Waves That Feel Natural
- Apply a curl-enhancing or texturizing spray to damp hair — this gives the waves grip and helps them hold their shape
- Use a large-barrel curling iron or waving iron, curling random sections rather than curling every strand the same way
- Once you’ve curled all your hair, let the curls cool completely, then run your fingers through them to break up the curl pattern and create soft waves
- Avoid brushing the waves once they’re cool, as this flattens them; instead, finger-comb or use a wide-tooth comb if necessary
Choosing the Right Accessory
- A slim, metallic headband works for almost every hair type and face shape, creating a modern, minimalist vibe
- Claw clips or tortoiseshell clips work best on thicker hair, where they have enough to grip; they can look out of proportion on fine hair
- Pearl or beaded hair clips add a touch of elegance and work beautifully with both casual and dressed-up looks
- Position the accessory after you’ve styled your waves, so you can see exactly where it will sit and make adjustments
Pro tip: This is an excellent style for second-day hair, as waves hold better on hair that’s been styled previously and has a bit of texture and product in it.
14. Braided Pigtails with Cascading Waves
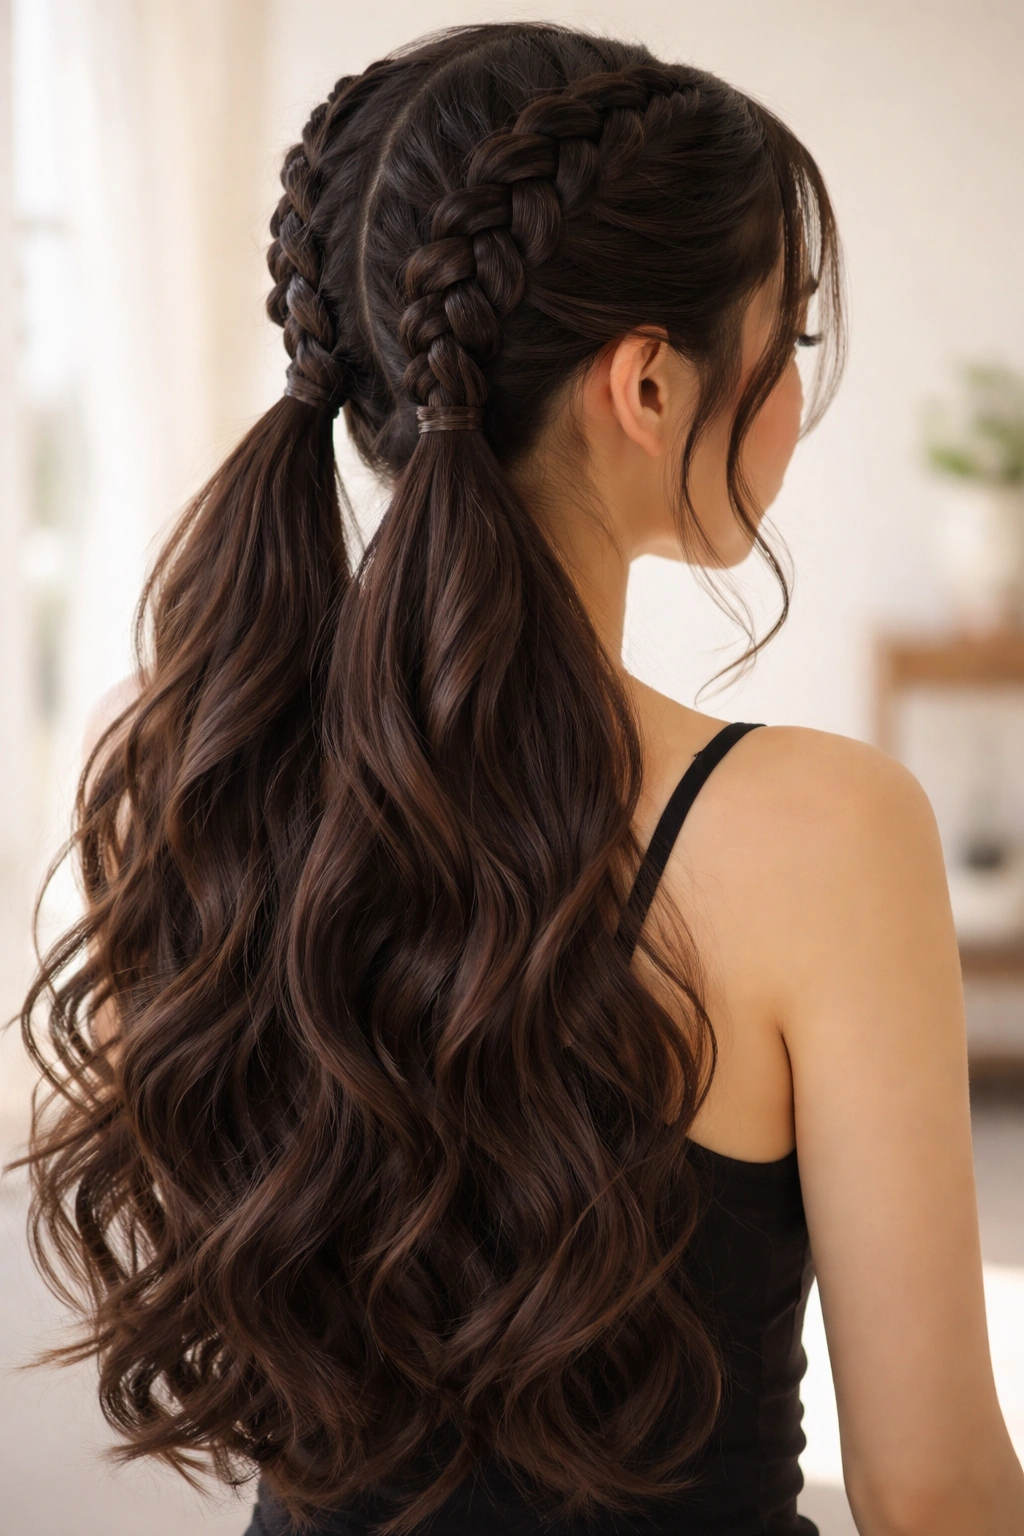
Braided pigtails might sound childish, but styled with care — loose, thick braids paired with long cascading waves — they become a genuinely sophisticated style with playful energy. Each braid starts at the crown on its respective side and travels toward the back, with hair continuously incorporated. The remaining length falls into loose, touchable waves that cascade down your back. This style feels especially beautiful on long hair and photographs exceptionally well.
Executing Full, Thick Braids
- Start each braid at the crown with a three-strand French or Dutch braid, incorporating hair as you move toward the back
- Keep the braids relatively loose — tight braids look juvenile, while loose braids feel romantic and intentional
- The braids should be substantial, not thin and delicate; they’re meant to be visually prominent
- Continue braiding until you reach the nape of the neck, then secure each braid with a small elastic in a matching hair color
Cascading Waves That Complete the Style
- Apply a wave spray or curl-enhancing product to damp hair before blow-drying
- Use a large-barrel curling iron on the loose sections, or braid the hair while damp and allow it to air-dry for more organic waves
- Finger-comb the waves once they’re dry to break up the curl pattern and create movement
- The waves should feel soft and undone, almost like they happened naturally rather than being intentionally styled
Insider note: The key to making this style feel adult rather than juvenile is keeping the braids loose and the waves full and voluminous — tight braids with sleek waves will read as younger, while loose braids with touchable waves feel sophisticated.
15. Textured Shag with Choppy Layers and Side-Swept Bangs
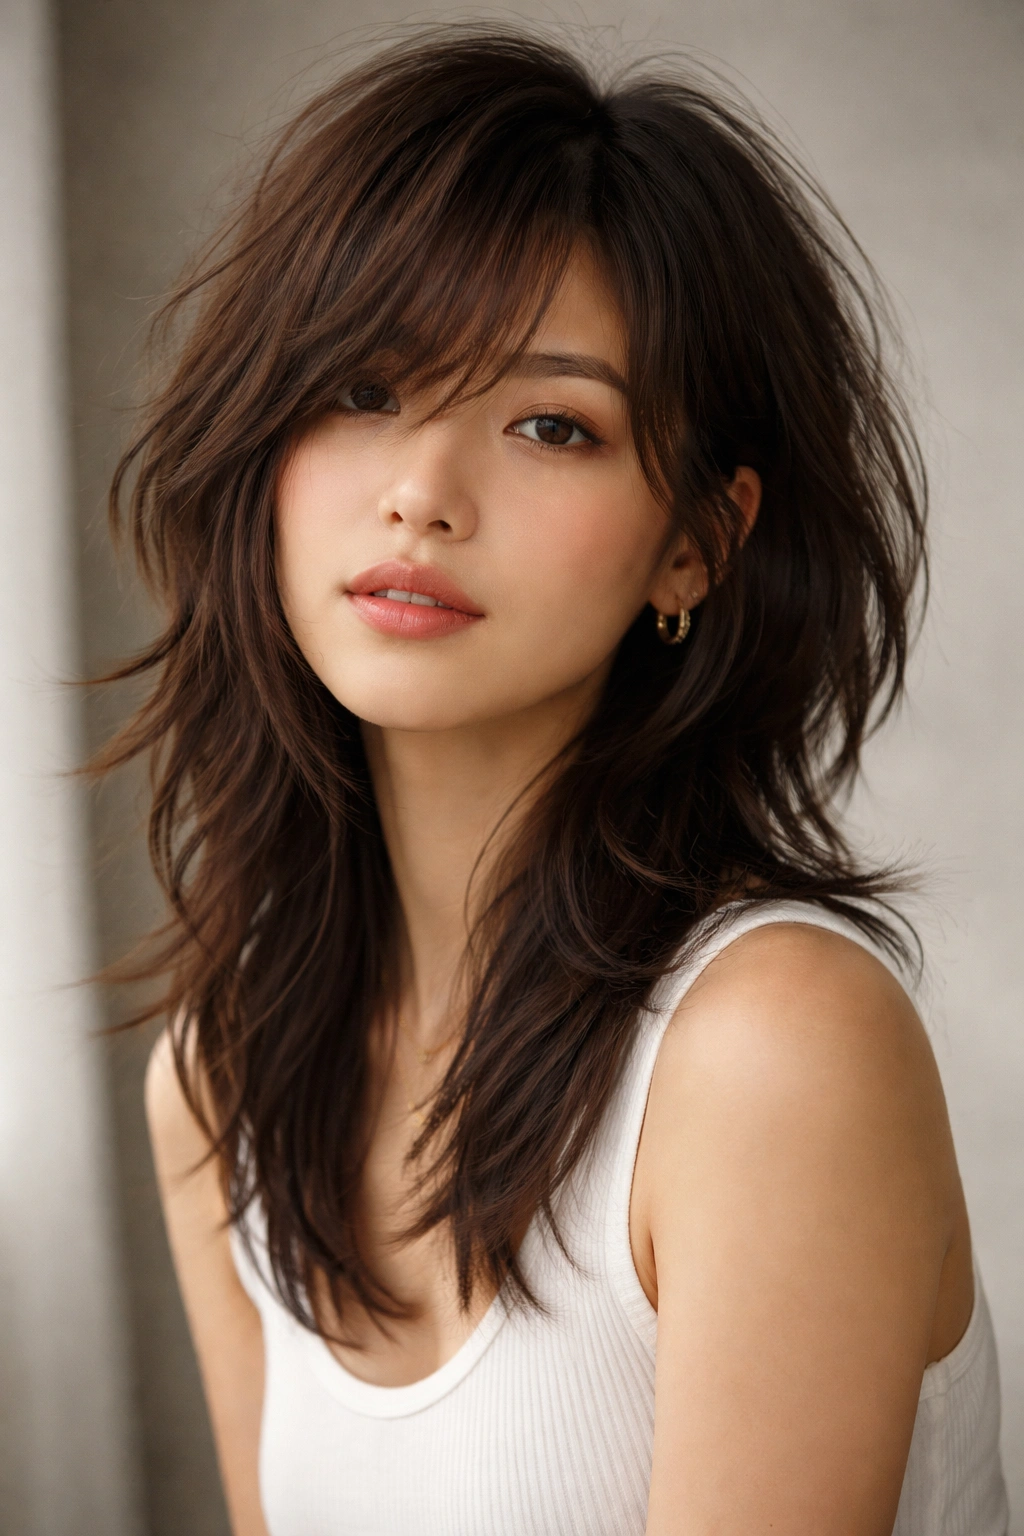
A modern shag — short and textured with choppy, all-over layers and side-swept bangs — is one of the most versatile, effortless hairstyles available. The cut features layers throughout, creating movement and texture naturally, with the shortest layers at the crown and gradually longer pieces toward the back and underneath. Side-swept bangs frame the face while maintaining the overall choppy texture. This style works beautifully on almost every hair type and requires minimal daily styling.
What Makes a Modern Shag Different from the ’70s Version
The modern shag is edited and intentional, with strategically placed shorter pieces that create visual interest without looking overly choppy or unkempt. The layers are shaped rather than randomly cut, and the overall silhouette should feel cohesive rather than chaotic. This is a cut that requires a skilled stylist — the placement of every layer matters for the final shape and movement.
Styling the Shag for Maximum Texture
- A texturizing spray applied to damp hair activates the layers and helps them separate naturally
- Blow-dry with a diffuser attachment for soft waves and texture, or blow-dry straight with your fingers for a sleeker version
- On days you want more edge, work a matte cream or wax through the mid-lengths and ends to emphasize the choppy texture
- The side-swept bangs should fall naturally across your forehead without requiring excessive pinning or tucking
Pro tip: This style looks best when you embrace the texture rather than fighting it — if your hair is naturally wavy or textured, a shag is the perfect style because it works with your hair’s natural tendencies rather than against them.
Conclusion
The diversity of Asian hairstyles showcases an incredible understanding of how hair can be shaped, textured, and styled to work with individual face shapes, hair types, and personal aesthetics. These fifteen styles aren’t just trends that will disappear — they’re foundational approaches to hair design that evolve and adapt while remaining timelessly elegant. Whether you’re drawn to the geometric precision of a blunt bob, the romantic softness of braided styles, or the texture and movement of a modern shag, there’s an Asian hairstyle that perfectly matches your vision.
The most important thing to remember when choosing a new style is that it should make you feel confident and like yourself — not like you’re forcing your hair into a shape that doesn’t suit you. Bring reference photos to your stylist showing not just the hairstyle you love, but also details about the styling, the texture, and how it’s worn day-to-day. A great stylist can adapt these classic styles to your specific hair type, face shape, and lifestyle, creating something that’s both inspired by these beautiful examples and uniquely yours.
The journey to finding your signature hairstyle is personal, and these styles serve as inspiration and possibility rather than rigid rules. Experiment, try new things, and don’t be afraid to adapt and adjust until you find the look that makes you feel like the best version of yourself.