Short hair doesn’t limit your updo options — it actually opens a whole world of quick, elegant styles that work perfectly for weddings, cocktail parties, date nights, and everything in between. The beauty of short hair updos is that they require minimal products, take less time to create than their long-hair counterparts, and often hold better throughout the day because you’re working with less weight and fewer strays to manage. Whether you’re rocking a pixie cut, a short bob, a shag, or any length above the shoulders, there’s a polished updo that fits both your hair type and the occasion you’re dressing for.
The trick to mastering short hair updos is understanding that they work differently than long hair styles — you’re focusing on texture, height, and strategic pin placement rather than elaborate twists and braids. Most of these styles can be achieved with just a few bobby pins, a flexible styling product like texturizing spray or light pomade, and about five to ten minutes of your time. You don’t need special skills or expensive tools. In fact, the best short hair updos embrace the natural texture and shape of your cut rather than fighting against it.
This collection covers fifteen different updos, from minimalist and modern to romantic and embellished, all designed to work beautifully on short hair. Each style includes exactly what you need to know to pull it off, common mistakes to avoid, and how to adapt it based on your hair texture and the specific occasion. By the end, you’ll have real options for every event on your calendar.
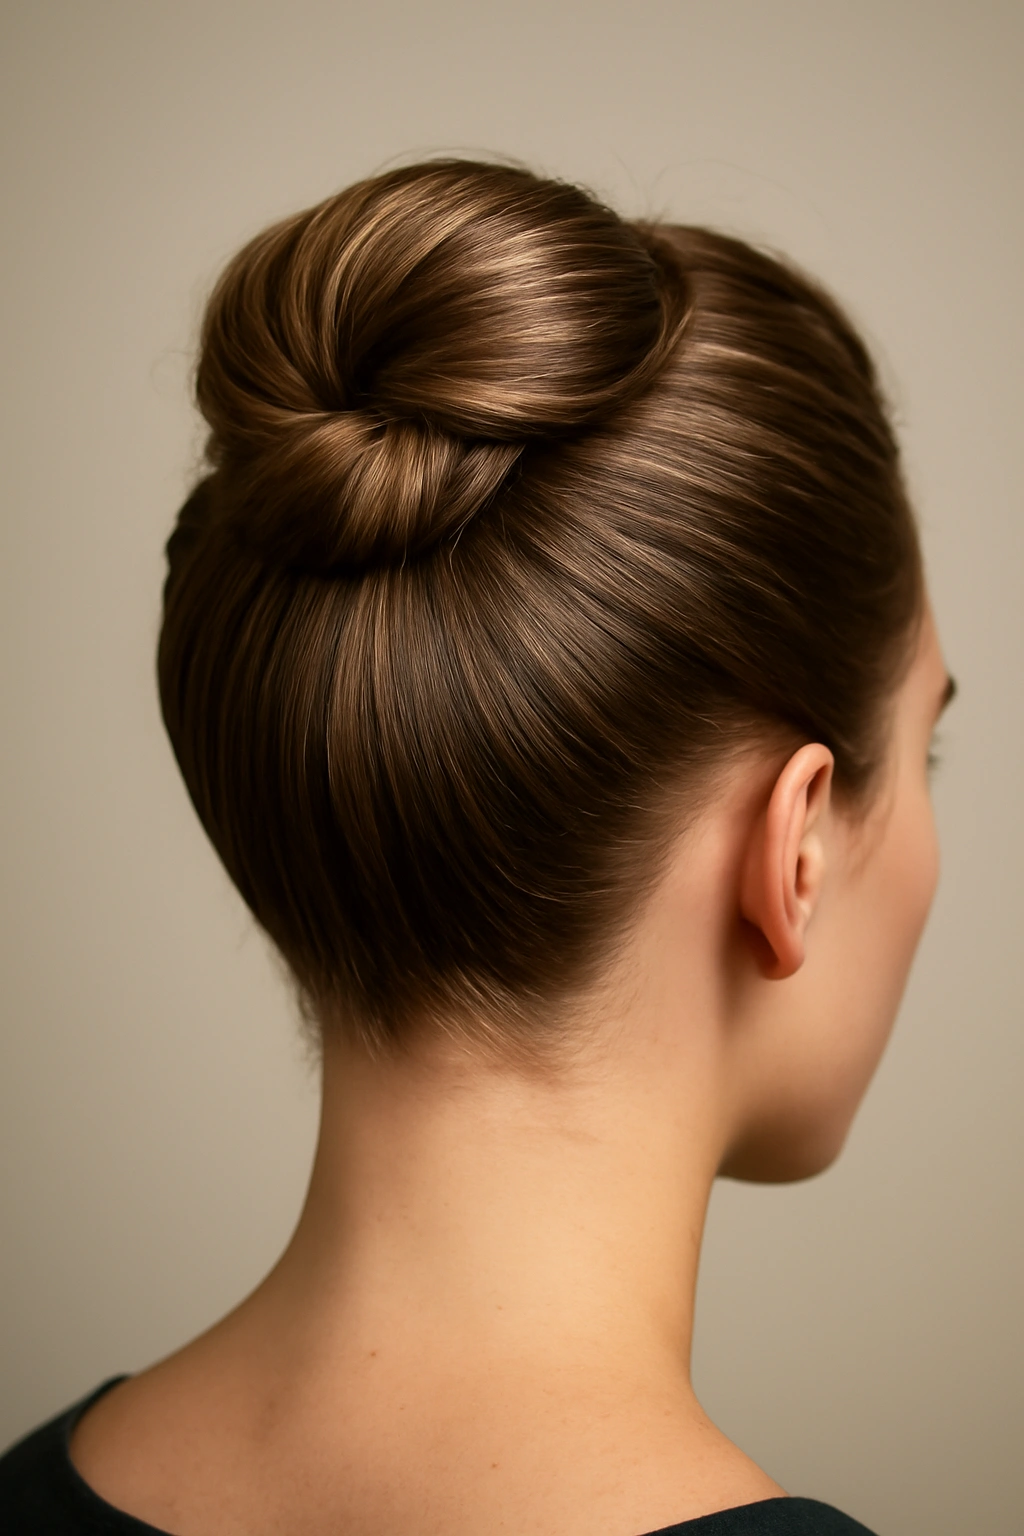
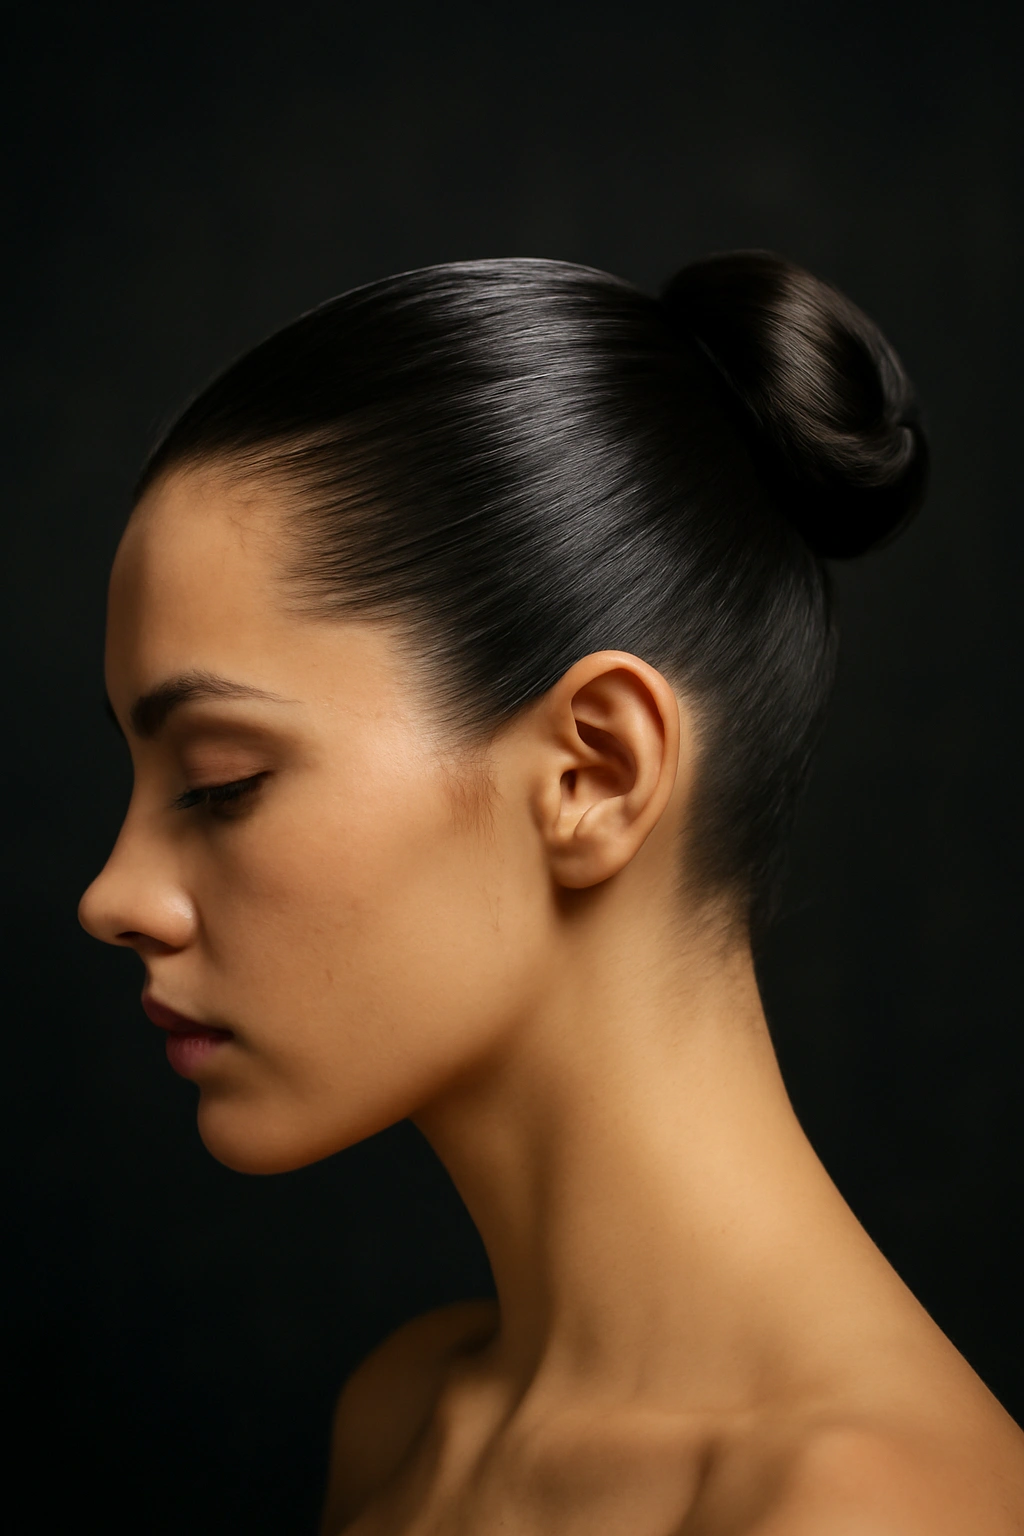
1. The Sleek Low Bun

The sleek low bun is the sophisticated foundation of short hair styling — it works for professional events, formal dinners, and anywhere you want to look polished without appearing overdone. This style sweeps your hair back and anchors it at the nape of your neck in a compact, elegant knot. It’s the kind of updo that instantly elevates your whole appearance and pairs beautifully with statement earrings and a clean makeup look.
Why This Works for Short Hair
Short hair makes the low bun feel effortless and refined. Because you’re not dealing with excessive length or weight, the bun sits naturally at the perfect proportion to your head and face. A low bun on short hair reads as intentional and chic rather than trying too hard, which is exactly the vibe you want for formal occasions. The style also showcases your face, neck, and shoulders completely, making it ideal for wearing bold lipstick or statement jewelry.
How to Create It
- Apply a smoothing serum or lightweight pomade to damp hair and blow dry it straight for a polished base
- Brush your hair back into a low ponytail at the nape of your neck — aim for placement about two inches above where your neck meets your shoulders
- Twist the ponytail loosely and wrap it around itself to form a small, compact bun
- Secure with 2-3 bobby pins inserted horizontally through the base of the bun for maximum hold
- Use a fine-tooth comb and hairspray to smooth down any flyaways around your hairline
- Finish with a light mist of flexible-hold hairspray so the style doesn’t feel stiff or crunchy
Pro tip: Create texture by gently pulling a few tiny sections from the bun to soften the look — it prevents the style from feeling too severe and adds visual interest without sacrificing polish.
2. The Textured Pixie Knot

The textured pixie knot takes your short cut and bunches it up at the crown in a casual, undone way that feels modern and intentional. This updo works wonderfully for casual weddings, brunch events, and any occasion where you want to look put-together but not stiff. It’s especially flattering for pixie cuts and very short bobs because it adds dimension and draws attention upward.
Why This Style Stands Out
This updo celebrates texture rather than fighting it, which means it actually looks better on hair that has some natural wave or movement. The bunched-up knot at the crown creates an effortless, almost tousled aesthetic that reads as “I woke up like this” even though you’ve clearly put thought into your appearance. It’s the kind of style that photographs beautifully and holds up well throughout an event because the messiness is intentional.
Building the Texture
- Start with second-day or slightly textured hair — don’t wash it the morning of your event if possible
- Apply a texturizing spray or dry shampoo throughout your hair to add grip and separation
- Flip your head upside down and work the product through with your fingers, breaking up any clumps
- Flip back up and gently gather the top section of your hair (from temple to temple across the crown) loosely in your fingers
- Twist this section once and pin it to the crown of your head with 2-3 bobby pins
- Leave the lower layers and sides softer and slightly undone — this contrast is what makes the style work
- Mist lightly with flexible-hold spray and gently pull sections to add more texture and dimension
Worth knowing: This style actually improves if you let it loosen slightly throughout the event — you want it to feel lived-in, not rigid.
3. The Twisted Crown
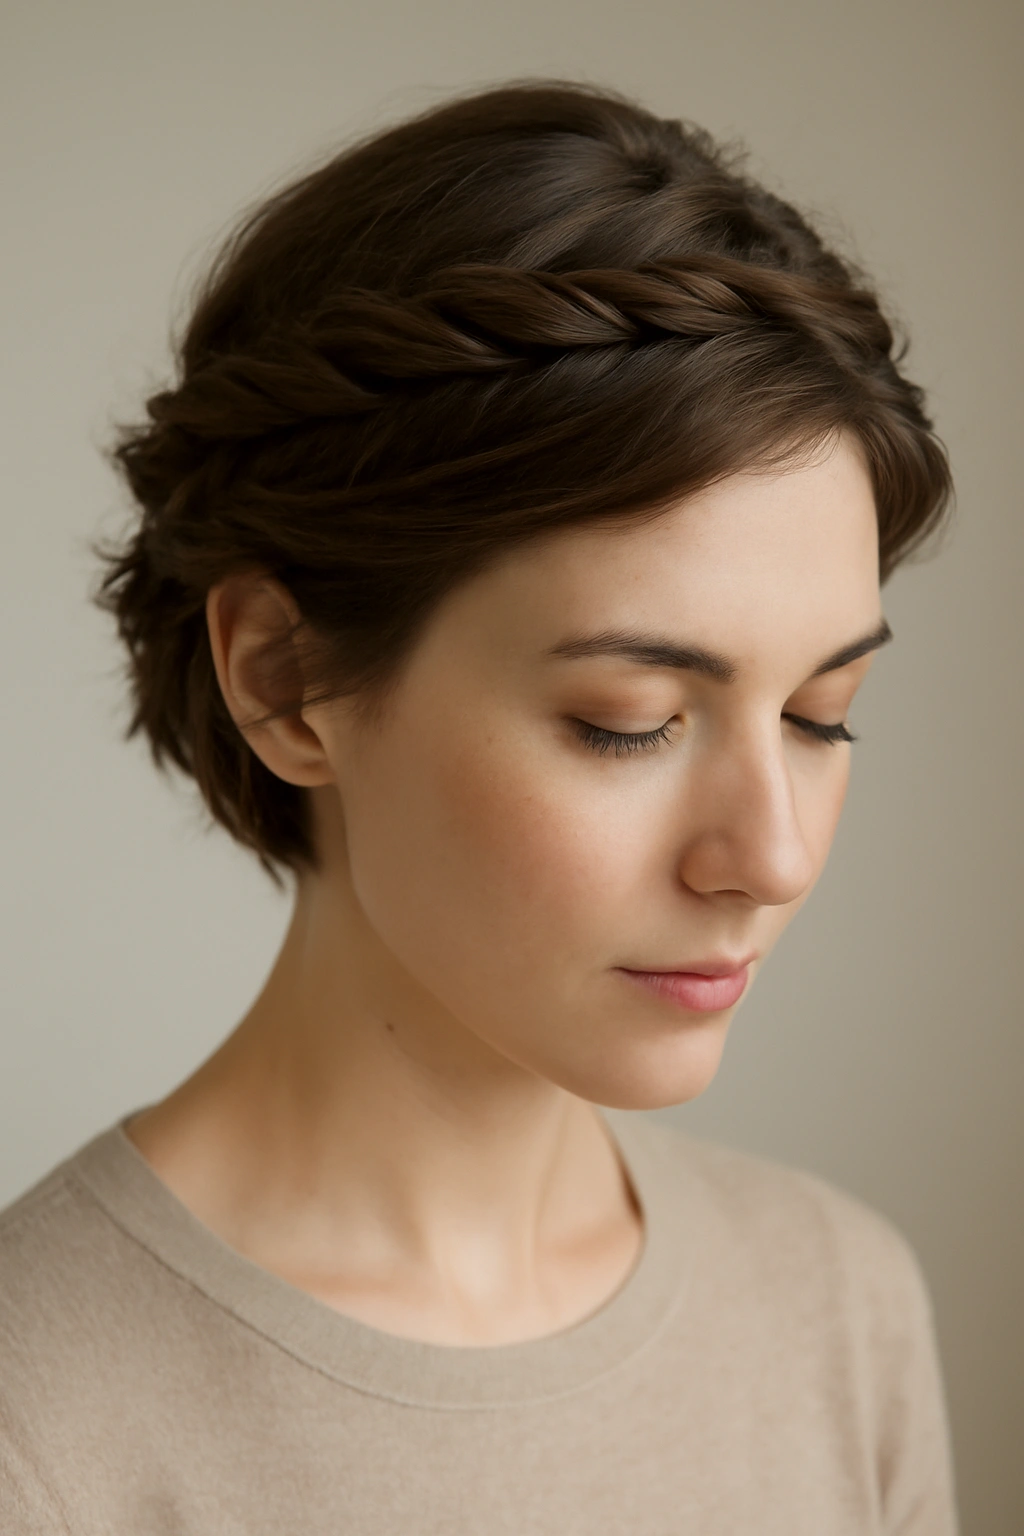
The twisted crown creates a romantic halo effect by wrapping twisted sections of hair around the top and back of your head. This updo is perfect for garden parties, bridal events, date nights, and any occasion where you want to look soft and feminine without being overly formal. It works beautifully on short bobs and pixie cuts because the twists frame your face while the style sits elegantly on top of your head.
What Makes It Romantic Without Being Over-the-Top
The twisted crown borrows from bohemian styling but stays refined enough for formal events. Because you’re only twisting sections of hair rather than incorporating all of it, the style feels intentional and balanced on short hair. It’s the perfect bridge between casual and dressy, which makes it incredibly versatile. The twists also naturally soften your features and create movement even though your hair is secured.
Creating the Twisted Halo
- Start with hair that has some texture — if your hair is very straight, apply a light texturizing spray beforehand
- Take a small section of hair from one temple and twist it loosely back toward your ear
- Secure the end of this twist with a bobby pin at the back of your head
- Repeat on the opposite side, twisting the other temple section and pinning it to meet the first twist
- Take a third small section from the back of one side and twist it up toward the crown
- Pin this third twist to connect with your other pinned twists, creating a crown effect
- Gently pull the twists to loosen them slightly — this adds texture and makes the style look softer
- Secure any loose pieces with bobby pins and finish with flexible-hold hairspray
Pro tip: Use texture rather than slickness — matte texturizing spray holds twists much better than shiny serums, which can cause pins to slip.
4. The Half-Up Twist
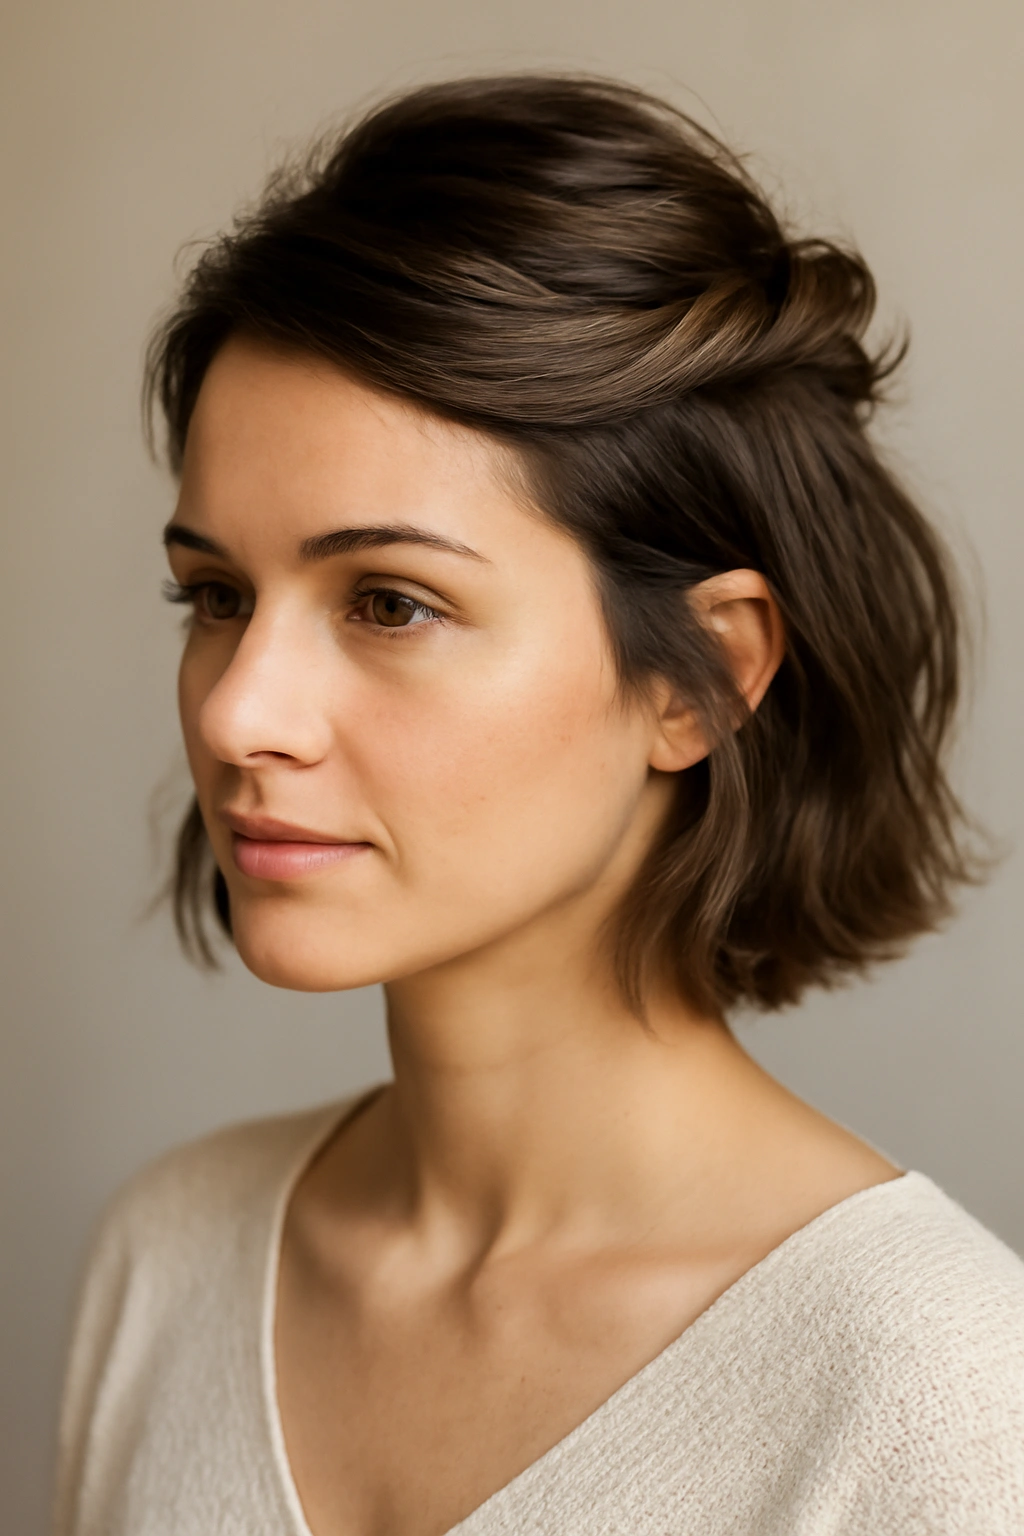
The half-up twist is the perfect bridge between a full updo and wearing your hair down, making it ideal for casual events where you still want to look intentional. This style pulls the top half of your hair back and twists it into a knot or secured loop at the crown, while leaving the bottom half down. For short hair, this creates unexpected dimension and shows off both the texture of your cut and the shape of your face.
Why Half-Up Works for Short Hair
Half-up styles on short hair feel modern and effortless because there’s less bulk to manage. Instead of looking like you’ve done too much to your hair, a half-up twist on short hair reads as a deliberate style choice. It’s especially flattering if you have layers or texture in your cut, because it showcases those details while keeping your look from feeling heavy. This style works for everything from casual brunches to semi-formal afternoon events.
The Mechanics of the Half-Up Twist
- Brush the top half of your hair back gently — this should be roughly from your temples back to the crown
- Gather this section loosely in your fingers at the back of your head
- Twist this gathered section once or twice, creating a loose spiral
- Pin the twisted section to your scalp with 2-3 bobby pins, positioning them horizontally for maximum hold
- Let the twist slightly unfurl for a soft, undone look
- Smooth any flyaways around your face with a fine-tooth comb and flexible-hold hairspray
- Consider adding a hair clip or small decorative pin to elevate the style for fancier events
Insider note: The looser your twist, the more romantic and effortless it looks — this is one style where perfection actually works against you.
5. The Wrap-Around Bun
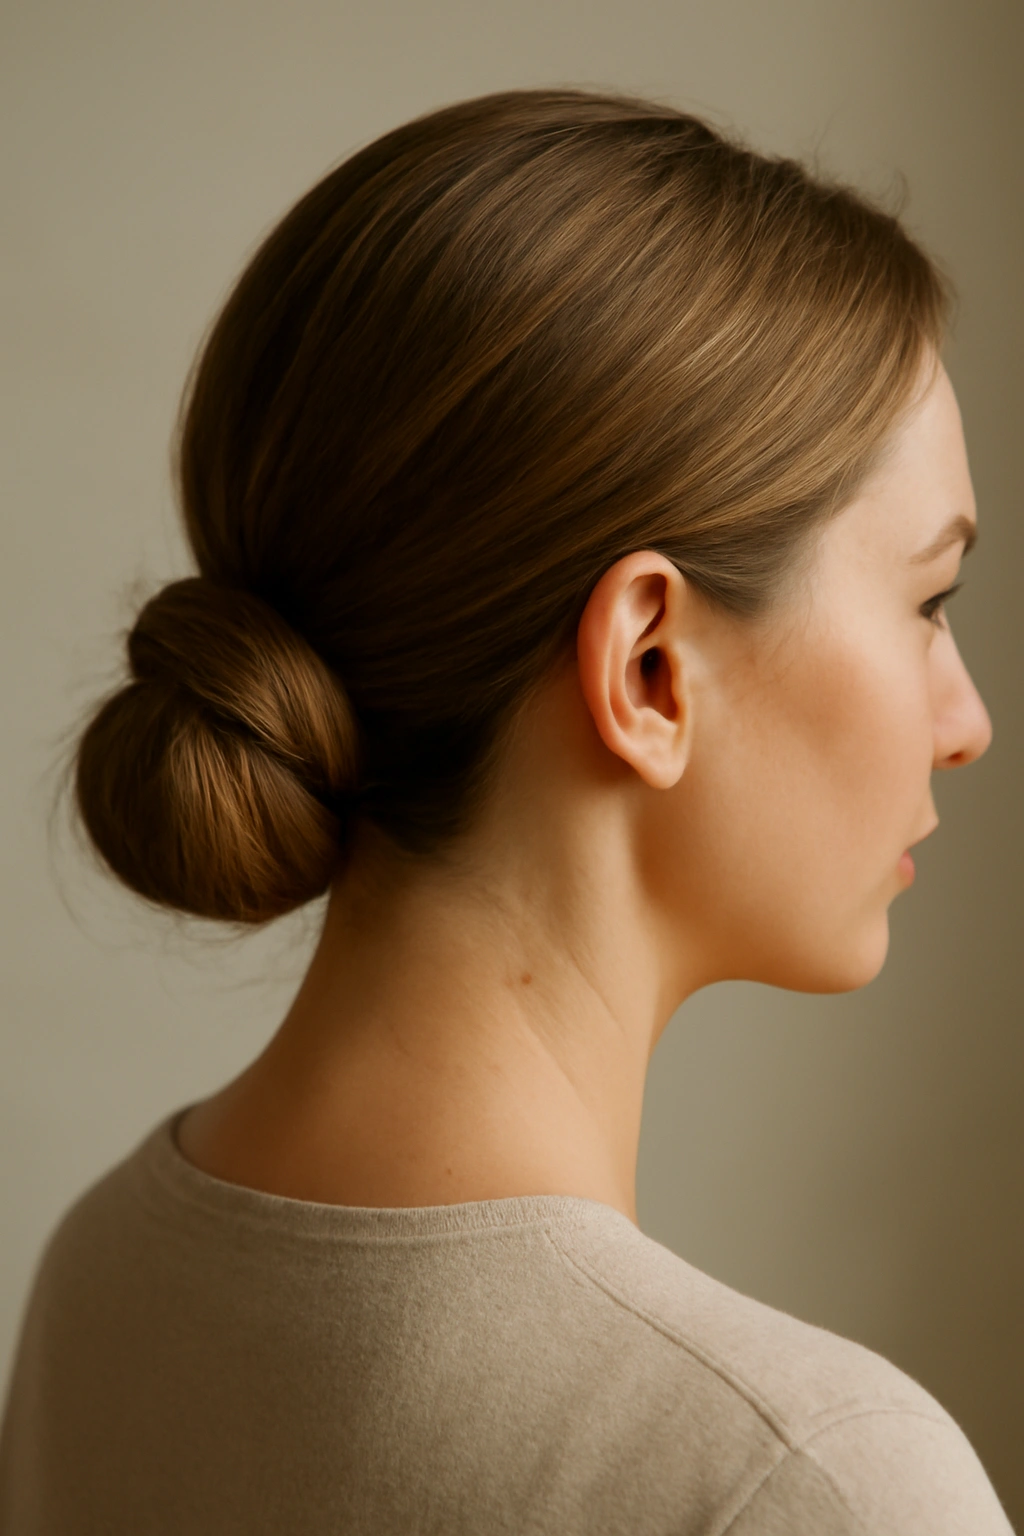
The wrap-around bun creates a modern, almost architectural look by pinning a twisted section of hair around the base of a low ponytail. This style is surprisingly easy but looks intentional and fashion-forward, making it perfect for cocktail parties, gallery openings, and any event where you want to look current and a bit edgy. It works especially well on short bobs and pixies because the graphic quality of the wrapped section creates visual interest.
Why This Style Photographs Beautifully
The wrap-around bun has clean lines and geometric appeal that translates beautifully in photos. From the front, you see a polished face and possibly statement earrings. From the back and sides, the wrapped detail is clearly visible and shows that you’ve put effort into your appearance. It’s the kind of style that people will ask you how you did, because it looks more complicated than it actually is.
Building Your Wrap-Around Bun
- Brush your hair back into a low ponytail positioned at the nape of your neck
- Secure the ponytail with a small elastic
- Take a thin section of hair from the bottom of the ponytail and twist it tightly
- Wrap this twisted section around the base of the ponytail, covering the elastic completely
- Pin the end of the twisted section underneath the bun with a bobby pin
- For added texture, gently pull a few tiny wisps from the bun to soften the geometry
- Secure any loose pieces and finish with flexible-hold hairspray
- Optional: Add a decorative hair stick or metallic pin through the wrapped section for extra polish
Quick note: Keep your initial ponytail very tight and low — this makes the wrap-around section sit neatly without puckering or pulling.
6. The Braided Side Sweep
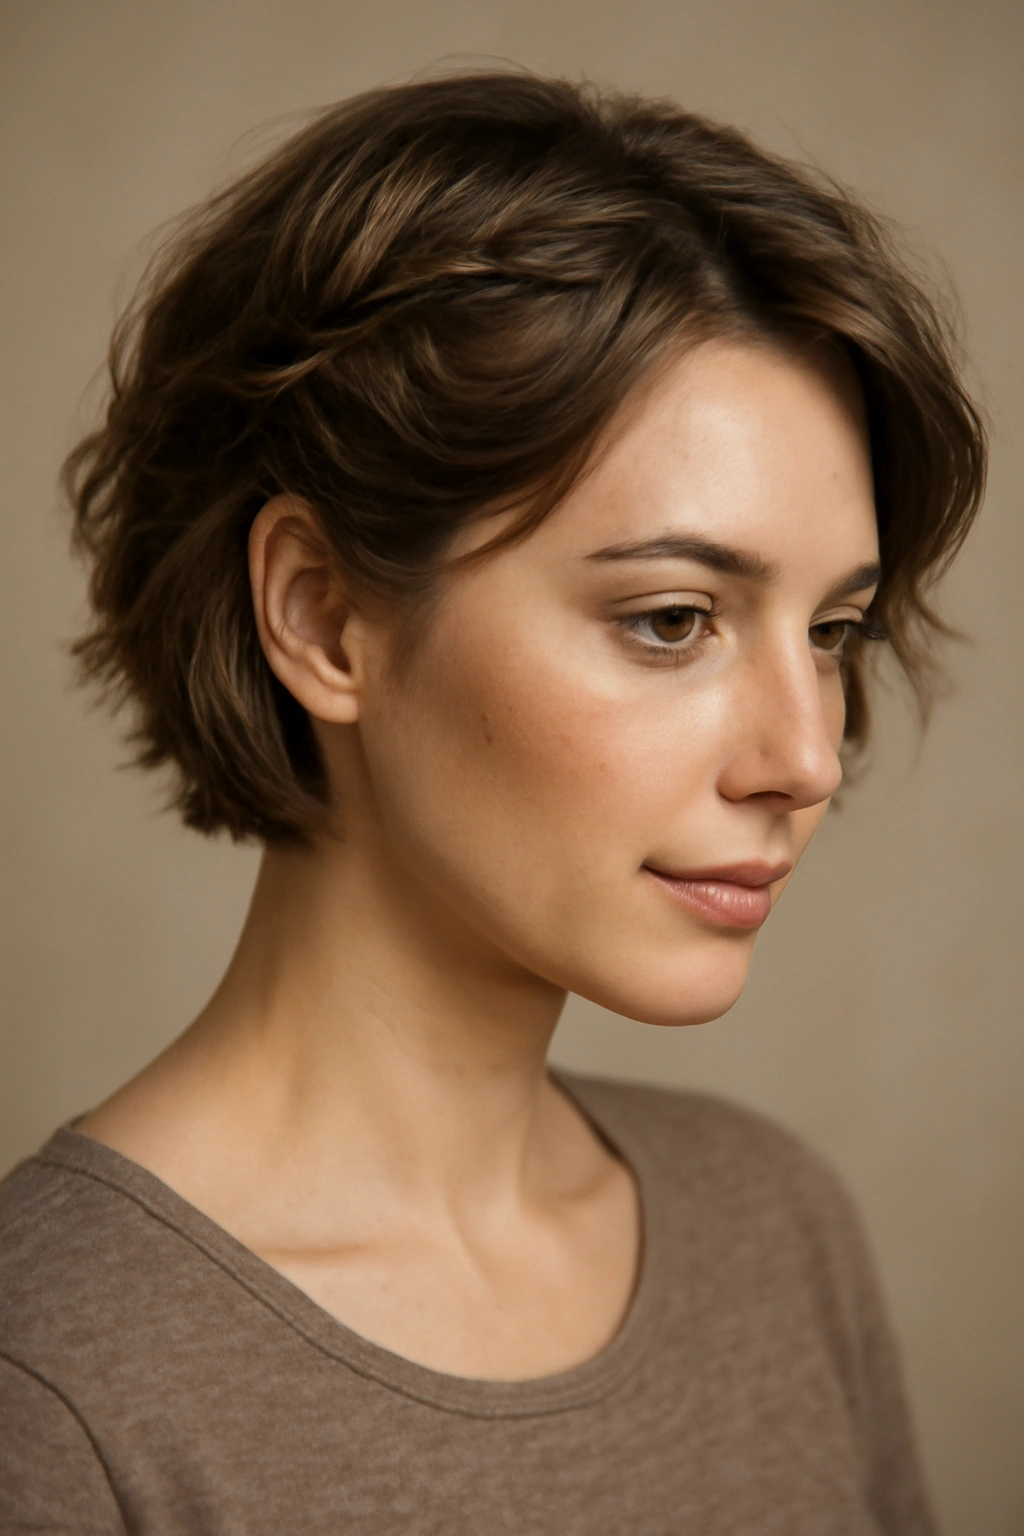
The braided side sweep takes a small braid from one side of your head and pins it across the back, creating a romantic yet modern look. This updo is perfect for outdoor events, casual weddings, garden parties, and any occasion where you want an effortless-looking style with just a touch of detail. On short hair, the braid becomes a decorative element rather than a structural component, which makes it feel fresh and contemporary.
What Makes This Style Versatile
The braided side sweep works on almost any short hair length because the braid is meant to be loose and decorative, not load-bearing. It pairs beautifully with soft waves or natural texture, and it looks equally good worn slightly messy as it does perfectly polished. The style doesn’t require all your hair to be involved, so people with very pixie-short cuts can still create a version using just the longer side-sweep sections.
Creating the Braided Sweep
- Create a deep side part, angling it toward whichever side has more hair or volume
- Take a small section of hair from the temple on your fuller side
- Braid this section loosely — a loose, textured braid looks more romantic than a tight, neat one
- Continue the braid toward the back of your head, following the natural curve of your skull
- Secure the end of the braid with a small elastic
- Pin the braid to the opposite side of your head, securing it with 2-3 bobby pins
- Gently pull the braid to loosen the weave and add texture
- Smooth your hairline with flexible-hold spray and let a few face-framing pieces stay loose for softness
Pro tip: A slightly damp braid holds better than a completely dry one — if your braid keeps slipping, lightly mist it with water before pinning.
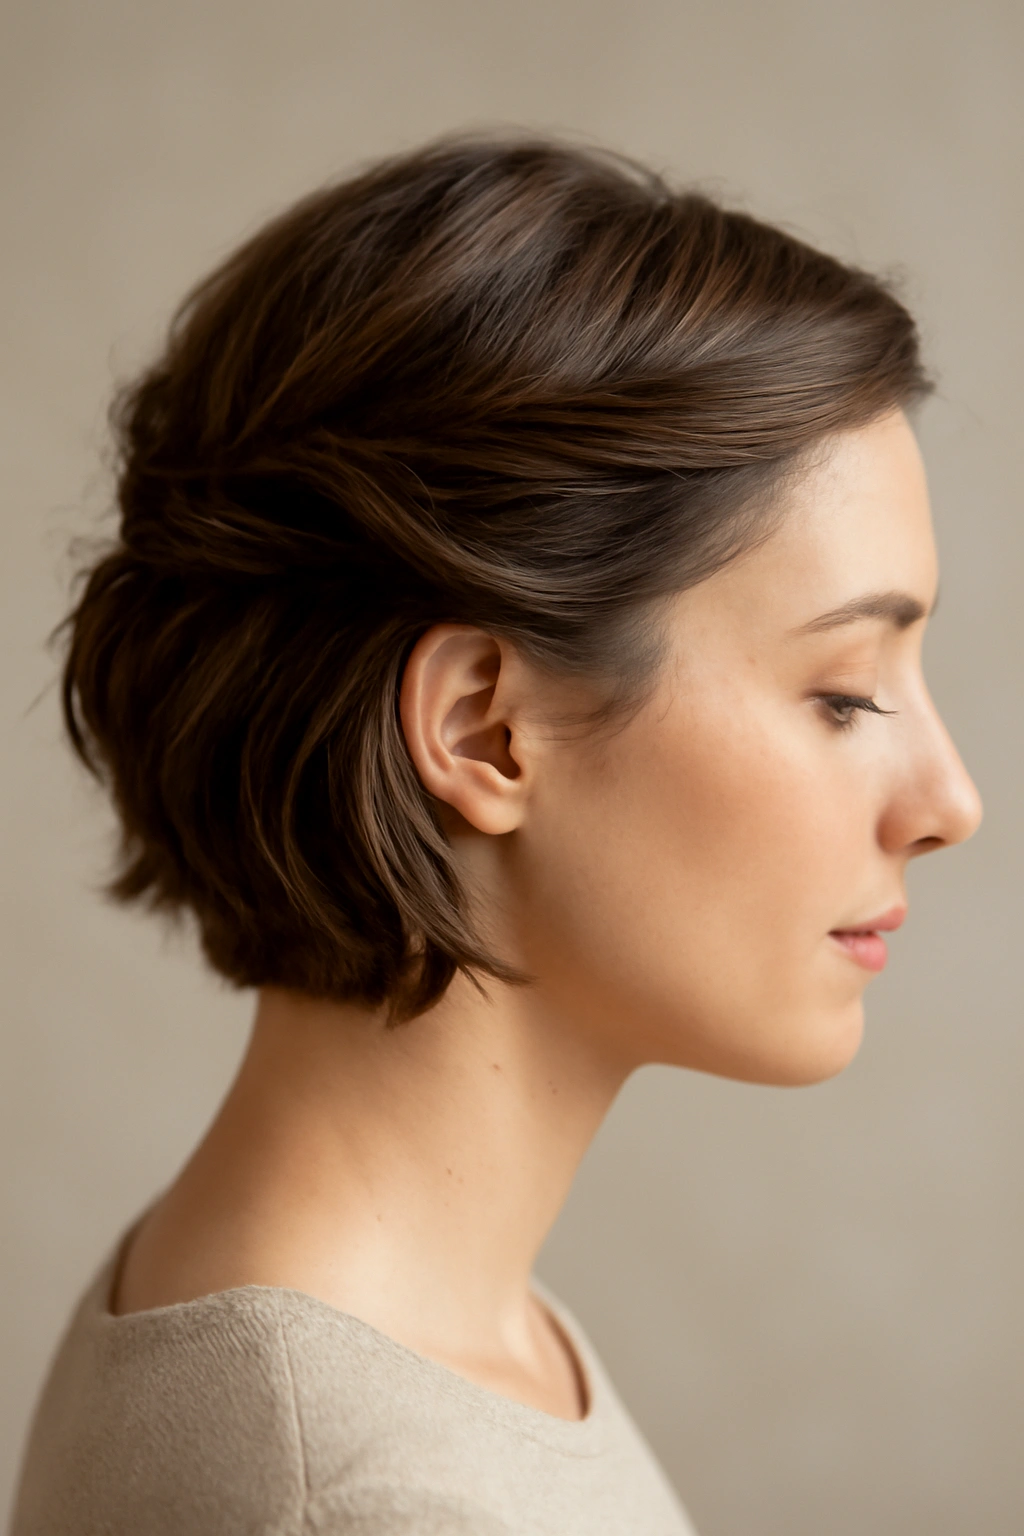
7. The Tucked-Back Pixie
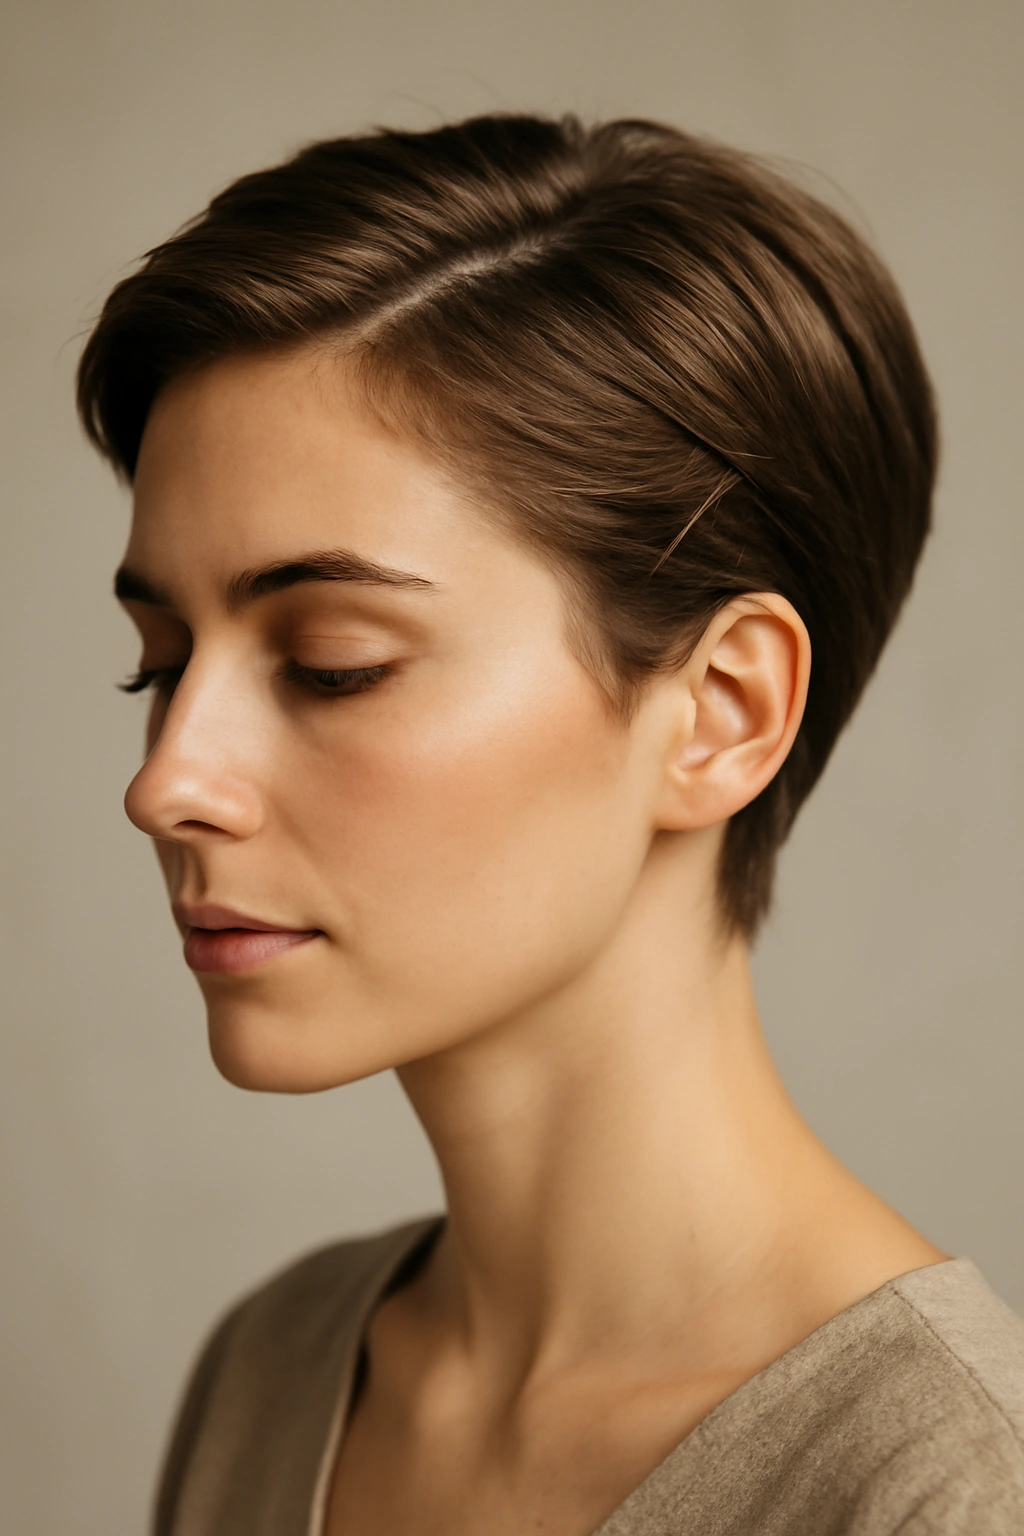
The tucked-back pixie transforms a standard pixie cut by sweeping the longer front and side sections back and pinning them at the crown. This style is perfect for formal events, professional photos, or any time you want to show off your face and the clean lines of your cut. It’s quick to create and takes just two bobby pins, making it ideal for people who are short on time but want a polished look.
Why This Works on Super-Short Hair
On very short cuts, you can’t create complicated styles, so the tucked-back pixie embraces simplicity as elegance. By just pinning back what would normally fall forward, you’re essentially grooming your cut and creating intentional dimension. The style highlights your facial features and bone structure, which is why it’s so flattering. It also keeps hair off your face all day without requiring the hold of a headband or the slip of a clip.
The Simple Steps
- Apply a light texturizing spray to your hair for grip and natural-looking texture
- Brush or comb the slightly longer front and side pieces back
- Gather these pieces toward the crown of your head
- Pin them securely with 2-3 bobby pins inserted horizontally
- Smooth any flyaways with a fine-tooth comb and flexible-hold spray
- This is literally all you need — the style comes from letting the rest of your cut stay as-is
- Consider adding a small decorative pin if you’re heading to a formal event
Worth knowing: This style works best if you have the slightly longer hairline version of a pixie, not an ultra-cropped cut where nothing comes forward.
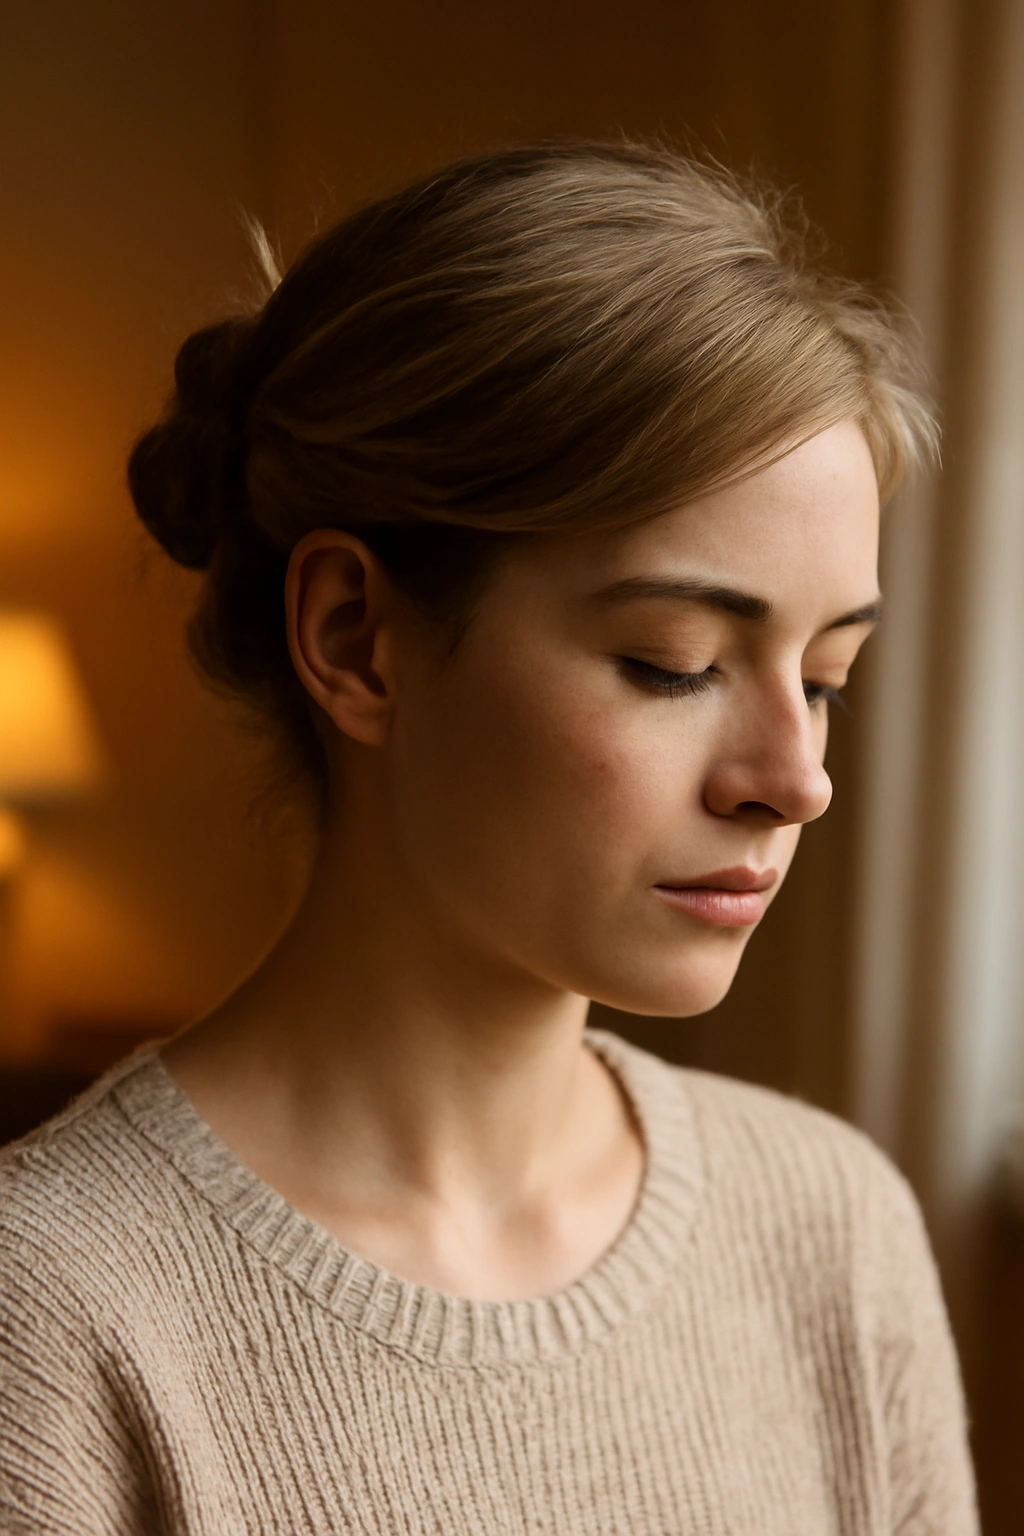
8. The Low Twisted Ponytail
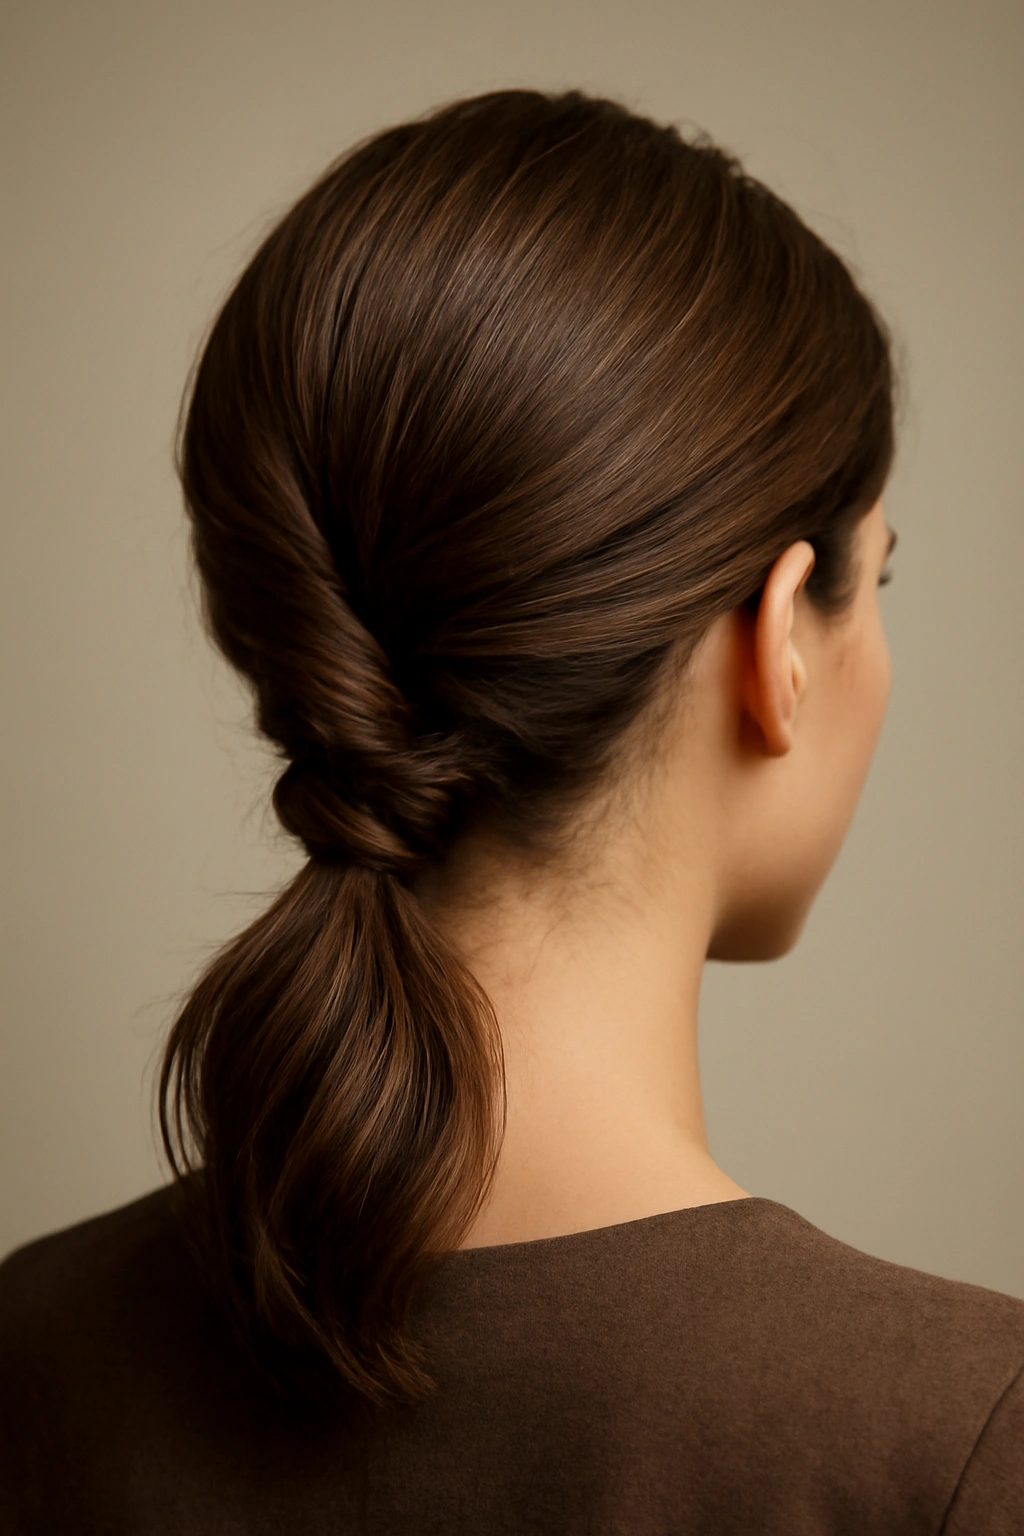
The low twisted ponytail bridges the gap between a casual ponytail and a formal updo by creating twists within the ponytail itself. This style works beautifully on short bobs and shorter lengths because the ponytail sits at a flattering proportion, and the twisted detail adds sophistication without complexity. It’s perfect for semi-formal events, date nights, and professional settings where you want to look polished but approachable.
Why Twisting Elevates a Simple Ponytail
A regular low ponytail on short hair can sometimes look too casual or unfinished. Adding twists within the ponytail transforms it from simple to intentional. The twists create texture and visual interest, and they also help the style hold better throughout the day. It’s a small change that makes a significant impact on how polished you appear.
Building the Twisted Ponytail
- Brush your hair back and gather it into a low ponytail at the nape of your neck
- Secure with a small elastic
- Divide the ponytail into 2-3 equal sections
- Take one section and twist it loosely from the elastic to the end
- Wrap this twisted section around the other untwisted sections
- Repeat with the remaining sections, creating a braided or twisted effect within the ponytail
- Pin any loose ends underneath the ponytail base
- Gently pull sections to add texture and softness
- Finish with flexible-hold hairspray
Pro tip: Don’t twist too tightly — loose, textured twists hold better than tight ones and look more romantic.
9. The Faux Hawk Updo
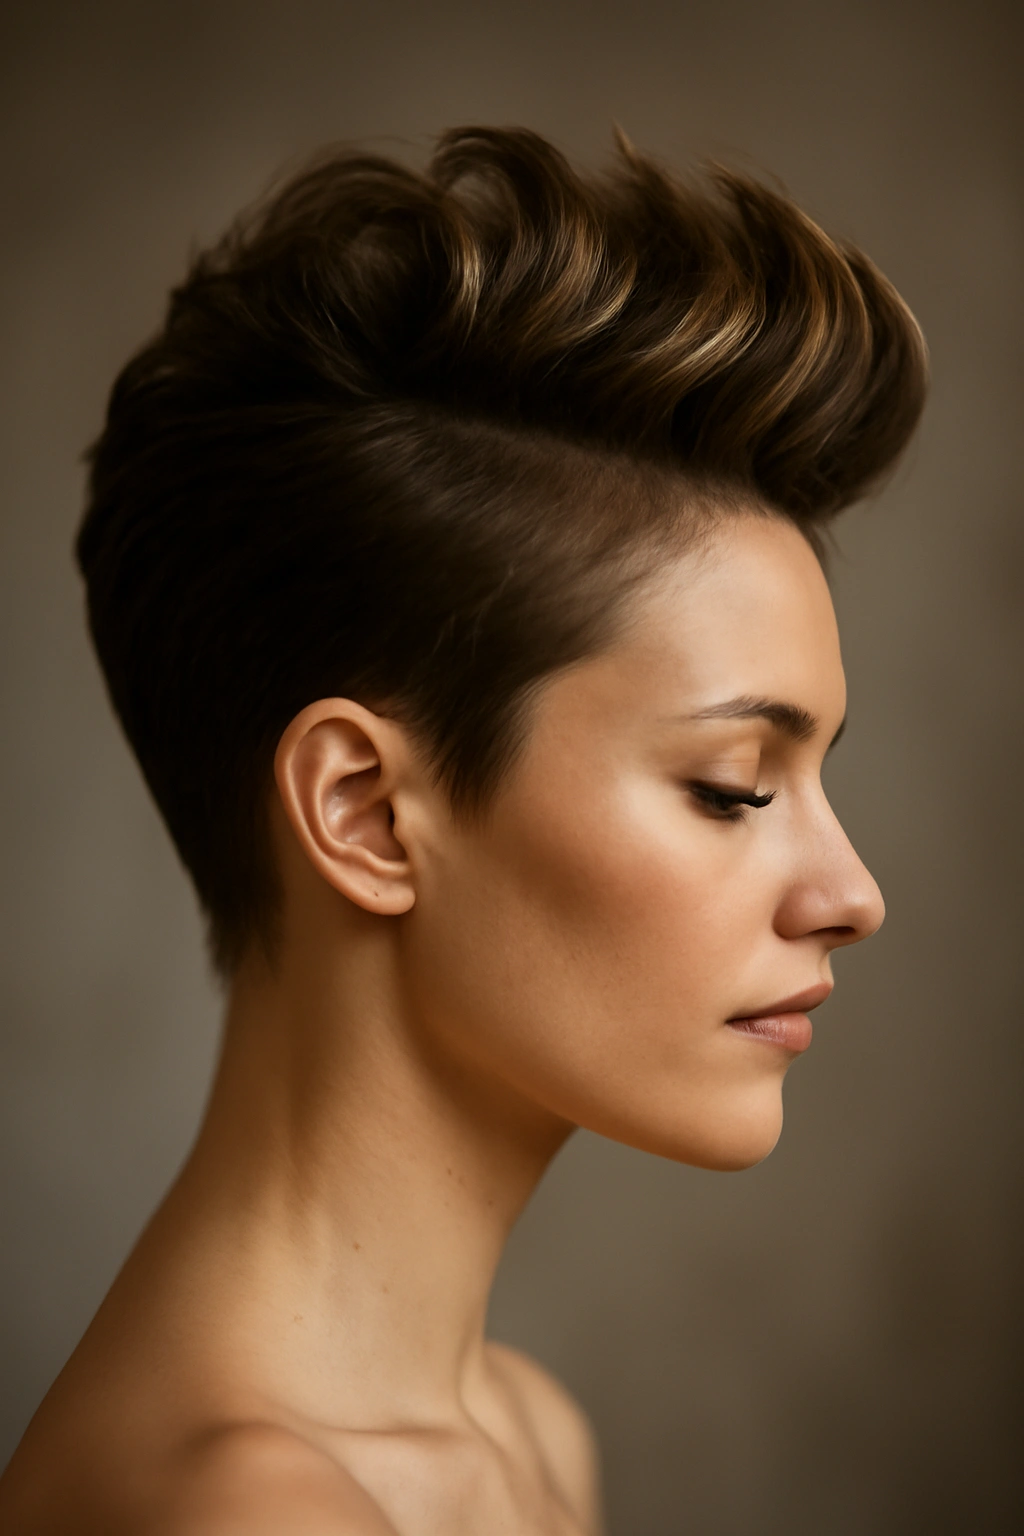
The faux hawk updo creates height and drama at the crown while keeping the sides and back neat and secure. This style is bold enough for fashion events, parties, and any occasion where you want to make a statement with your hair. On short hair, the faux hawk is actually easier to execute than on long hair, and it creates a striking silhouette that’s memorable and modern.
Why This Edgy Style Works for Short Hair
The faux hawk has become mainstream enough that it reads as fashionable rather than extreme, especially on short hair where the overall look stays balanced. Because you’re working with less overall hair, the hawk portion doesn’t overwhelm your face. The style is also surprisingly practical — it keeps hair off your neck and face while creating visual drama. It works for everything from nighttime events to creative industries where bold styling is appreciated.
Creating the Faux Hawk
- Start with hair that has texture or slight wave — apply texturizing spray if needed
- Apply a light pomade or styling cream through your hair for control and shine
- Section your hair from temple to temple across the crown — this will become your hawk
- Brush this crown section upward and backward, creating height
- Use bobby pins to secure the hawk section to your scalp, positioning them vertically along the center line
- Smooth and pin down the side sections, tucking them neatly behind or below the hawk
- Gently pull the hawk section for texture and dimension
- Smooth the sides with pomade or serum for contrast between the textured hawk and smooth sides
- Finish with flexible-hold hairspray on the hawk and a final smoothing spray on the sides
Insider note: The texture on top makes the style look intentional and fashion-forward rather than harsh.
10. The Vintage-Inspired Roll
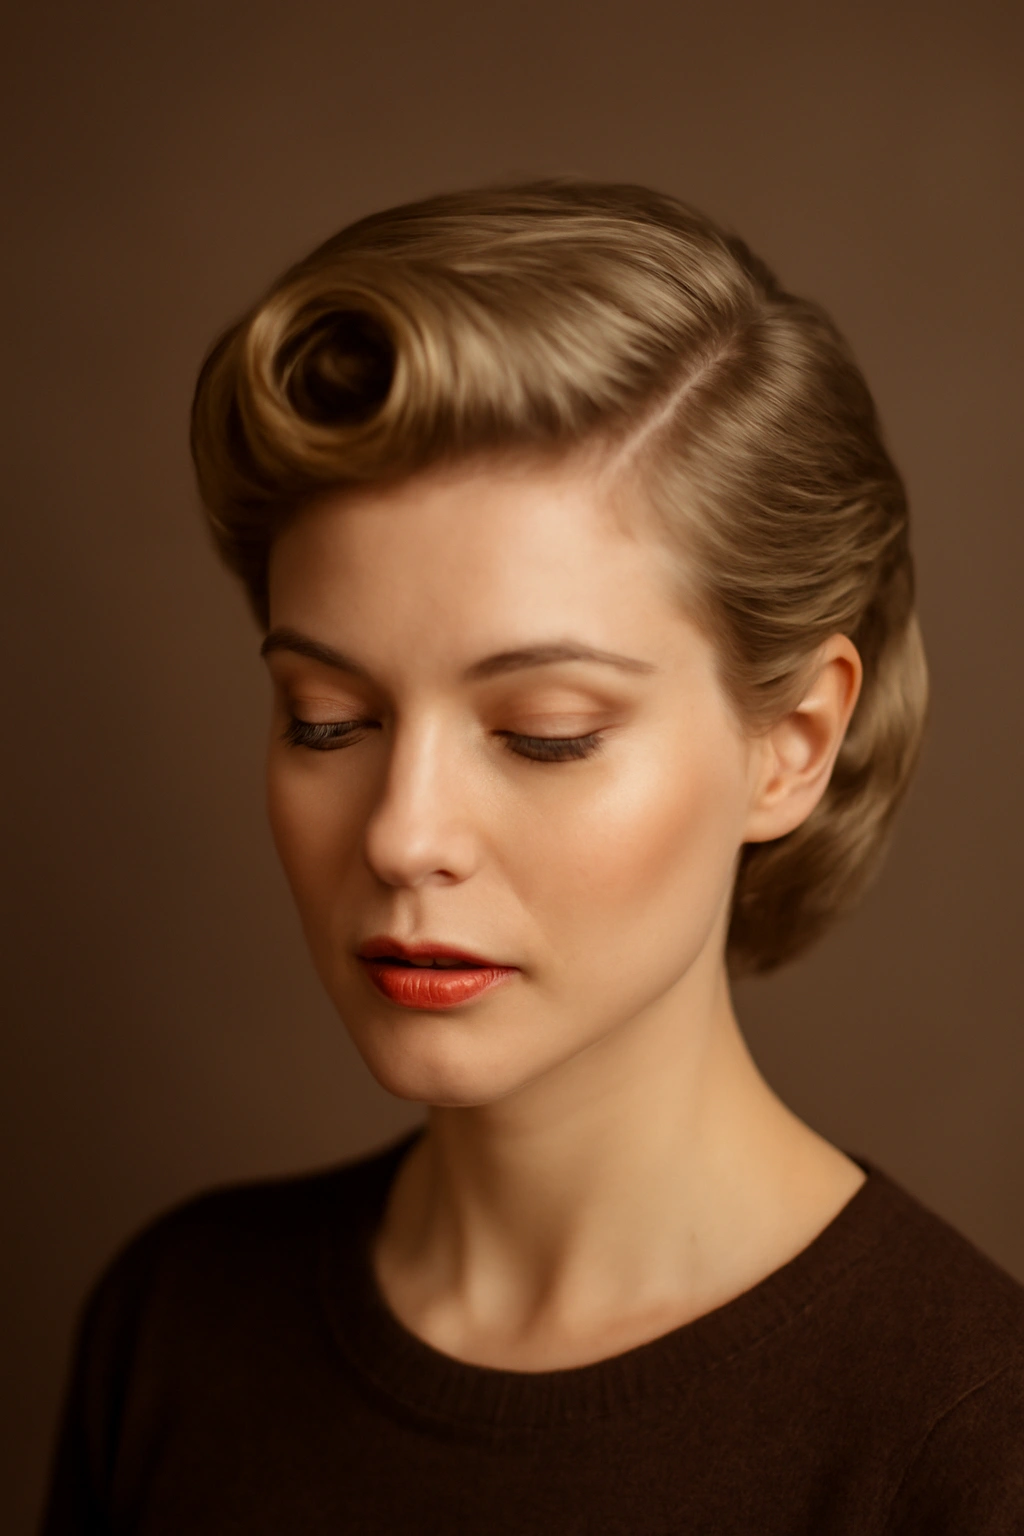
The vintage-inspired roll creates a sophisticated, retro-looking updo by rolling a section of hair along your hairline and pinning it in place. This elegant style is perfect for formal events, vintage-themed parties, and any occasion where you want to look timeless and polished. On short hair, the roll becomes a delicate detail rather than an overwhelming element, which makes it feel modern and wearable.
What Makes This Style Eternally Elegant
The vintage roll has an inherent polish and femininity that works for both classic and contemporary styling. Because it focuses on the front and side sections rather than incorporating all your hair, it’s manageable on short lengths. The style also shows off your face and facial features beautifully, making it ideal for showcasing makeup or a bold lip. It photographs beautifully in all lighting and has a timeless quality that means you’ll still love the photos years later.
Building the Vintage Roll
- Start with hair that has some texture or wave — if your hair is very straight, create soft waves with a curling iron
- Take a section of hair from one temple
- Roll this section forward and inward along your hairline, creating a neat, tubular roll
- Pin the rolled section with 2-3 bobby pins inserted parallel to the roll for maximum security
- Repeat on the opposite side if desired
- Leave the rest of your hair down with soft waves, or pin it back for a fuller updo
- Smooth the roll with a fine-tooth comb and flexible-hold hairspray
- Add a vintage clip, pearl pin, or comb for an authentic touch if wearing this to a formal event
Pro tip: Slightly damp hair rolls better than bone-dry hair — lightly mist your section before rolling it.
11. The Sleek Sculpted Top Knot
The sleek sculpted top knot sits at the crown of your head in a compact, graphic style that’s perfect for athletic events, modern weddings, and any occasion where you want a contemporary, intentional look. This updo is bold and fashion-forward while remaining practical — it keeps all your hair secure and off your face, and it creates a striking silhouette. On short hair, the top knot is proportionally flattering and looks effortlessly chic.
Why This Modern Style Flatters Short Hair
A top knot on short hair doesn’t overwhelm your face the way it sometimes can on longer hair. Instead, it creates a balanced proportion between your head and your face. The style also showcases your bone structure, facial features, and neck beautifully, making it ideal if you’re wearing statement jewelry or have a great makeup look. It reads as intentional and current without feeling like you’ve tried too hard.
Sculpting Your Top Knot
- Brush all your hair straight back and gather it at the crown of your head
- Secure tightly with a small elastic
- Twist the ponytail loosely and wrap it around itself, creating a knot shape
- Pin the knot securely with 3-4 bobby pins, ensuring they’re inserted horizontally for stability
- Smooth down your hairline and temples with a smoothing serum or pomade
- Use a fine-tooth comb to eliminate flyaways
- Finish with flexible-hold hairspray — this style needs moderate hold to stay put all day
- Optional: Apply a tiny dot of pomade to the front edges of your knot to emphasize the sculpted quality
Worth knowing: A slightly wet hair knot holds better than completely dry hair — damp (not wet) is the sweet spot.
12. The Side-Pinned Twist
The side-pinned twist takes your hair, twists a large section on one side, and pins it to the opposite side, creating an asymmetrical, romantic look. This updo is perfect for cocktail parties, first dates, and any occasion where you want to look effortlessly beautiful without appearing overdone. On short hair, the twisted detail becomes the focal point, creating visual interest without bulk.
What Makes This Style Timelessly Romantic
The side-pinned twist has a soft, feminine quality that flatters most faces and hair types. Because the twist is off-center, it’s flattering for most face shapes — you can position the twist on the side that’s most flattering to your particular features. The style is also incredibly versatile: you can make it look more casual and undone by loosening the twist, or more polished by keeping it neat and tight.
Creating the Side-Pinned Twist
- Brush your hair to one side, creating an asymmetrical look with more hair on one side
- Take the fuller side section and twist it loosely from the temple back
- Continue the twist toward the opposite side of your head, following the natural line of your skull
- Pin the twisted section to the opposite side of your head with 2-3 bobby pins
- Gently pull the twist to loosen the weave and add texture
- Let a few face-framing pieces stay down for softness
- Smooth your hairline with flexible-hold spray
- Consider leaving the back and lower layers down for a half-updo effect, or pin them up for a fuller style
Pro tip: The looser your twist, the more forgiving it is throughout the day — overly tight twists can loosen unevenly.
13. The Braided Crown with Loose Ends
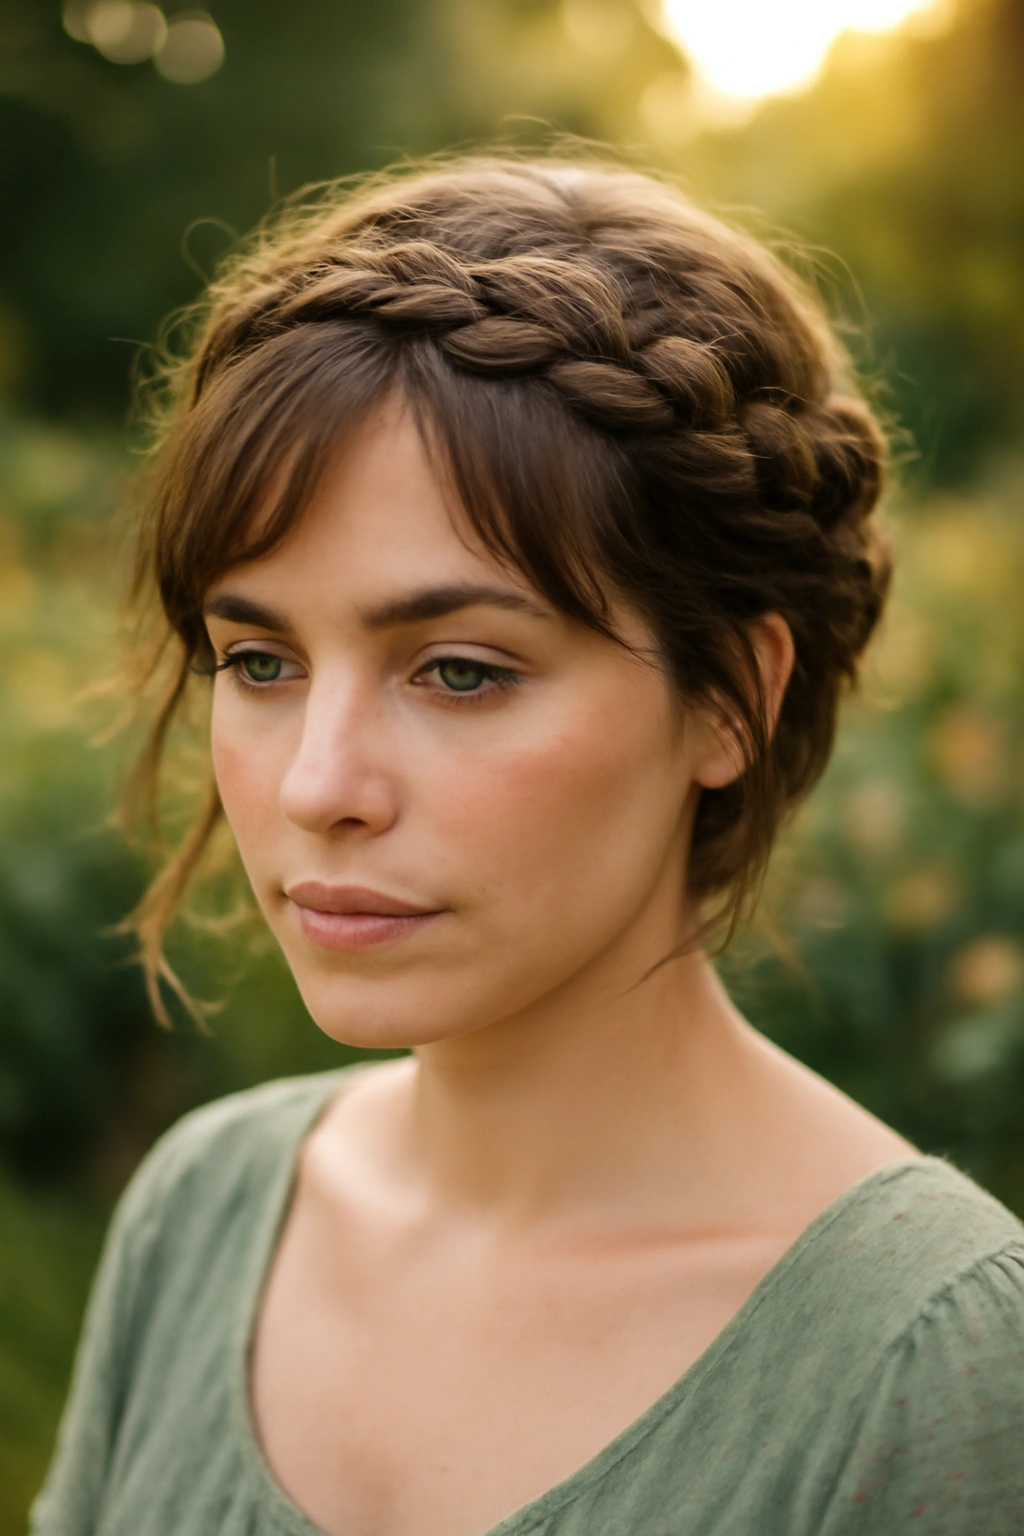
The braided crown with loose ends incorporates a braid that circles your head like a crown while allowing the interior hair and possibly face-framing pieces to stay down or slightly loose. This style is romantic, bohemian, and perfect for garden parties, casual weddings, outdoor celebrations, and any event where you want to look effortlessly beautiful. On short hair, the braid becomes purely decorative, creating an elegant frame without the weight.
Why This Bohemian Style Works on Any Hair Length
The braided crown is one of the few updos that works beautifully even on very short hair because the braid is meant to be a decorative element sitting on top of your head rather than a structural component holding everything up. The style has an inherent romance and artistry that photographs beautifully. It’s also flexible — you can make it as loose and textured as you want, which means it’s forgiving if your braid skills aren’t perfect.
Building Your Braided Crown
- Start with textured or slightly wavy hair — the braid holds better and looks more romantic on texture
- Apply a light texturizing spray throughout your hair
- Take a small section of hair from one temple
- Begin braiding this section loosely, working it back along your hairline
- As you continue the braid, gradually incorporate tiny sections from your hairline, adding them to the braid as you go
- Continue this crown braid around the back of your head toward the opposite temple
- Secure the end of the braid with a small elastic
- Pin the braid to blend it into your hairline, tucking the elastic underneath
- Gently pull the braid throughout to loosen it and add texture
- Let any interior hair stay down naturally, creating a contrast between the decorative crown and the softer interior
Insider note: Slightly damp hair braids more neatly, and you can let it dry slightly while you’re finishing the rest of the style.
14. The Polished Pixie Twist
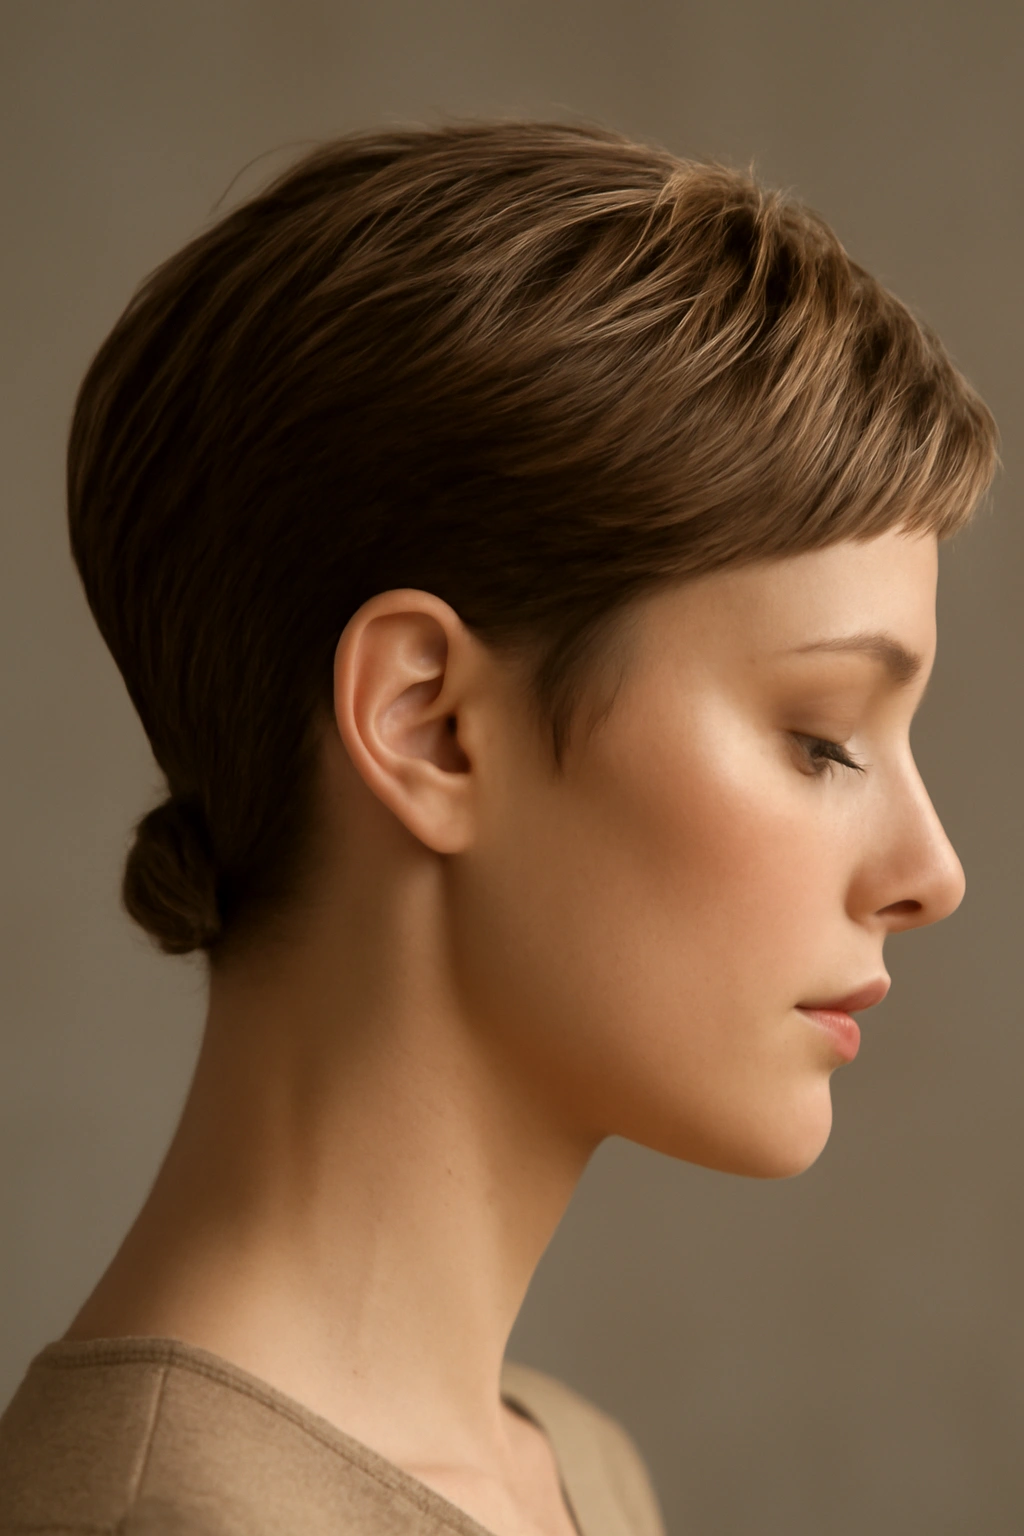
The polished pixie twist takes your pixie cut and creates a small twisted detail at the back or side, adding just enough visual interest to elevate your look for formal events. This style is perfect when you want to maintain the effortless quality of a short cut while showing that you’ve dressed up for the occasion. On very short hair, sometimes just a single twisted detail is enough to signal that you’ve styled intentionally.
Why This Minimal Approach Is Powerful
Sometimes less is more, and the polished pixie twist proves it. Instead of trying to do too much with minimal hair, this style embraces the shape and texture of your cut and adds just a single refined detail. It’s perfect for people who like their short hair for its low-maintenance nature but occasionally want to appear more formal. The twist adds sophistication without requiring pins, products, or complex techniques.
Creating the Polished Twist
- Start with clean, textured pixie hair
- Apply a light pomade or styling cream for control and shine
- Take a small section from behind one ear
- Twist this section loosely, working it toward the back of your head
- Pin the twisted section to your scalp with 1-2 bobby pins
- Smooth down your hairline with a smoothing serum or pomade
- Use a fine-tooth comb to eliminate flyaways
- Let the rest of your cut stay natural and textured for contrast
- Finish with flexible-hold hairspray on the twist and a shine spray on the rest of your hair
Pro tip: One twisted detail is actually more modern and flattering than multiple small twists on a very short cut — embrace simplicity.
15. The Sleek Festival Bun
The sleek festival bun creates a tight, graphic bun at the crown or back of your head, elevated with a slick smoothing technique that makes it look intentionally polished and fashion-forward. This style is perfect for festivals, concerts, sporting events, casual brunches, and any occasion where you want your hair completely secure and your look edgy and current. On short hair, the sleek bun is easier to execute and looks less extreme than it might on longer hair.
Why This Style Is Surprisingly Versatile
The sleek bun reads as casual and athletic in the daytime but becomes edgy and fashion-forward when paired with evening makeup and clothing. It’s one of the few updos that works equally well for a farmers market trip and a nightclub. The tight, smooth quality makes it look intentional and modern, not like you just threw your hair up. On short hair, it’s actually the easiest bun variation to create because there’s less hair to manage and smooth.
Building Your Sleek Bun
- Apply a strong-hold smoothing gel or pomade to damp hair — this is key for the sleek quality
- Blow dry your hair straight, using a flat iron to smooth any texture or wave
- Brush your hair back into a tight, low ponytail at the nape of your neck
- Secure with a small elastic
- Twist the ponytail and wrap it into a bun shape
- Pin securely with 3-4 bobby pins inserted horizontally
- Apply additional smoothing gel to your hairline and use a fine-tooth comb to smooth every piece
- Use a soft brush or cloth to smooth the bun itself, making it look polished and intentional
- Finish with flexible-hold hairspray to keep everything in place without making it crunchy
- Optional: Use a gel stick or extra product to tame your hairline for an extra-sleek look
Worth knowing: This style requires a stronger-hold product than some others — flexible-hold spray alone won’t keep it smooth all day.
Final Thoughts
Short hair updos offer speed, practicality, and surprising sophistication. The styles that work best for your hair will depend on your specific texture, cut, and the occasion you’re dressing for — but the core principle remains the same: embrace your hair’s natural qualities rather than fighting against them, use just enough product and pins to create intentional styling without overworking your hair, and remember that slightly undone and textured looks more modern and wearable than overly polished perfection.
The real advantage of short hair updos is that they rarely take more than five to ten minutes to create, which means you can experiment freely without significant time commitment. Try these styles with your everyday hair first to build confidence, then adapt them slightly for specific occasions. Add decorative pins, try different textures by changing your part, or loosen sections throughout the day to evolve your look — your short hair is a canvas for creativity, and these updos are just the beginning of what’s possible.