Wavy hair is having a moment — and the best part? You don’t need a curling iron, flat iron, or any heat styling tool whatsoever to get gorgeous waves. If you’ve been hesitant about heat damage, time constraints, or simply prefer a more natural approach to styling, heatless waves are your answer. The beauty of these methods is that they work with your hair’s natural texture rather than fighting against it, which means better results, healthier hair, and styling techniques that feel almost effortless once you nail them.
The real secret to mastering heatless waves isn’t buying expensive products or having naturally curly hair to begin with. It’s understanding how tension, moisture, and time work together to create wave patterns that actually hold. Whether your hair is fine and straight, thick and coarse, or somewhere in between, there’s a heatless method that’ll work for your specific texture and lifestyle. Many of these styles can be set up in the evening and worn the next day, which means you’re literally styling your hair while you sleep — what could be better than that?
1. Overnight Braids for Effortless Waves
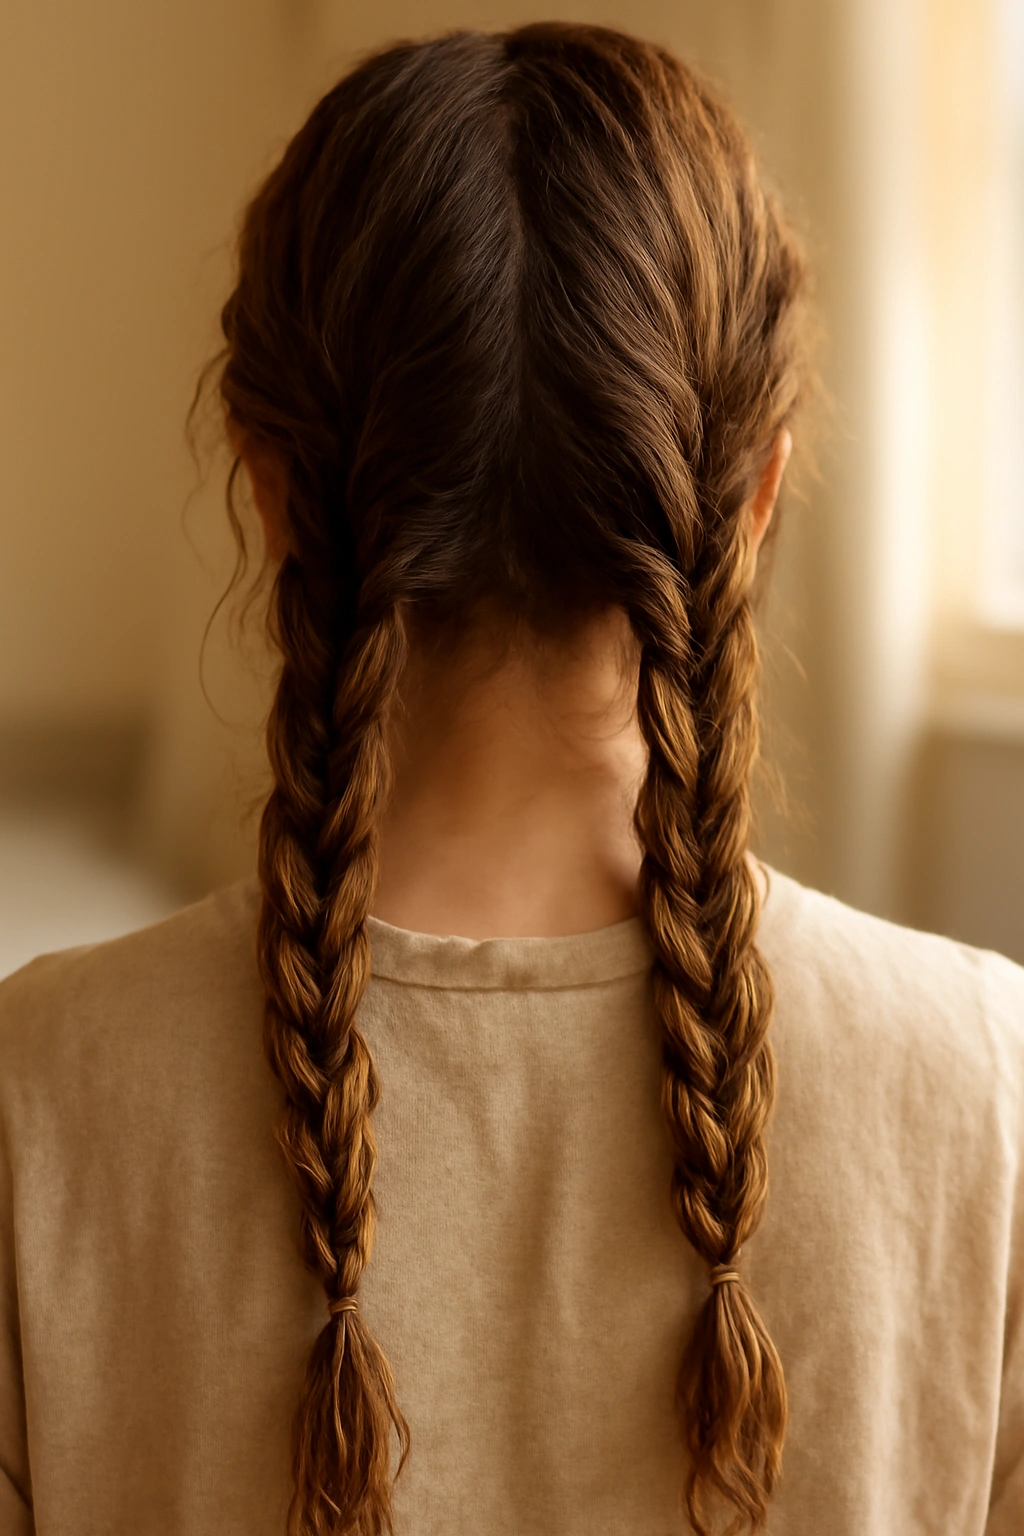
Three-strand braids are the classic heatless wave method, and they work because braiding creates consistent tension that trains your hair into a wave pattern overnight. This is probably the easiest method to start with if you’ve never tried heatless styling, since braiding is a skill most people already have. The waves you get from braids are loose and romantic, perfect for a casual, undone vibe that looks like you just woke up looking gorgeous.
Why This Method Works So Well
Braiding your damp hair creates a mold that your hair sets into as it dries. The tighter you braid, the more defined your waves will be — but loose braids create softer, more flowing waves that feel romantic rather than styled. Your hair stays in that braided position for 8-10 hours, which is plenty of time for damp hair to set into a wave pattern that lasts all day. The beauty is that this works on virtually every hair type and texture.
How to Braid for Maximum Wave Definition
- Start with damp hair (not soaking wet, but noticeably moist — about 10 minutes after showering is ideal)
- Apply a lightweight styling cream or mousse to add hold without weighing hair down
- Divide your hair into 2-4 sections depending on thickness (thicker hair benefits from more sections)
- Braid each section loosely but consistently, using even tension throughout the entire braid
- Secure the end with a small elastic that won’t crease your hair (silk scrunchies work best)
- Leave braids in overnight or for at least 8 hours before gently unraveling
- Finger-comb through the waves to break them up and create that soft, undone texture
Pro Tips for Better Results
The tightness of your braids directly controls wave definition — loose braids give soft waves, tight braids create more dramatic texture. If you have fine hair that doesn’t hold waves easily, try dampening your braids slightly with a light mist of water right before bed to help set them. For thick, coarse hair that holds waves naturally, you can braid drier hair and still get gorgeous results.
2. Twist-Out Method for Defined Texture

A twist-out is just what it sounds like: you twist sections of damp hair and let them set overnight, then untwist them to reveal defined waves and texture. This method creates tighter, more pronounced waves than braids, making it perfect if you want something with more dimension and movement. It’s slightly more time-intensive on the front end, but the payoff is definitely worth it.
Why Twist-Outs Create Such Defined Waves
When you twist two strands of hair around each other under tension, you’re creating a spiral pattern that your hair remembers as it dries. Twists hold their shape even tighter than braids because the spiral creates multiple points of tension rather than just the single braid structure. The result is waves with visible definition and texture throughout — this is the method to choose if you want people to notice your waves.
The Complete Twist-Out Process
- Shampoo and condition, then apply a leave-in conditioner while hair is still very damp
- Apply a styling cream or gel to add hold and definition
- Divide damp hair into 4-8 sections using clips (more sections mean tighter waves)
- Take two strands from the first section and twist them together, wrapping around each other consistently
- Twist all the way to the ends, maintaining even tension throughout
- Secure the twisted section with a small elastic at the end
- Repeat for all sections, then let hair air dry for 8-12 hours or overnight
- Untwist each section gently by unraveling from the bottom up, starting when hair is completely dry
Making Twist-Outs Work for You
Start with damp hair that’s been treated with a leave-in conditioner — this gives your hair the slip it needs to twist smoothly without breaking. If your hair is prone to dryness, a curl-defining cream will help maintain moisture while you’re setting the twist-out. The key mistake people make is untwisting before hair is completely dry — wait until it’s 100% dry or you’ll lose all the wave definition immediately.
3. Bun Overnight Set for Soft Waves
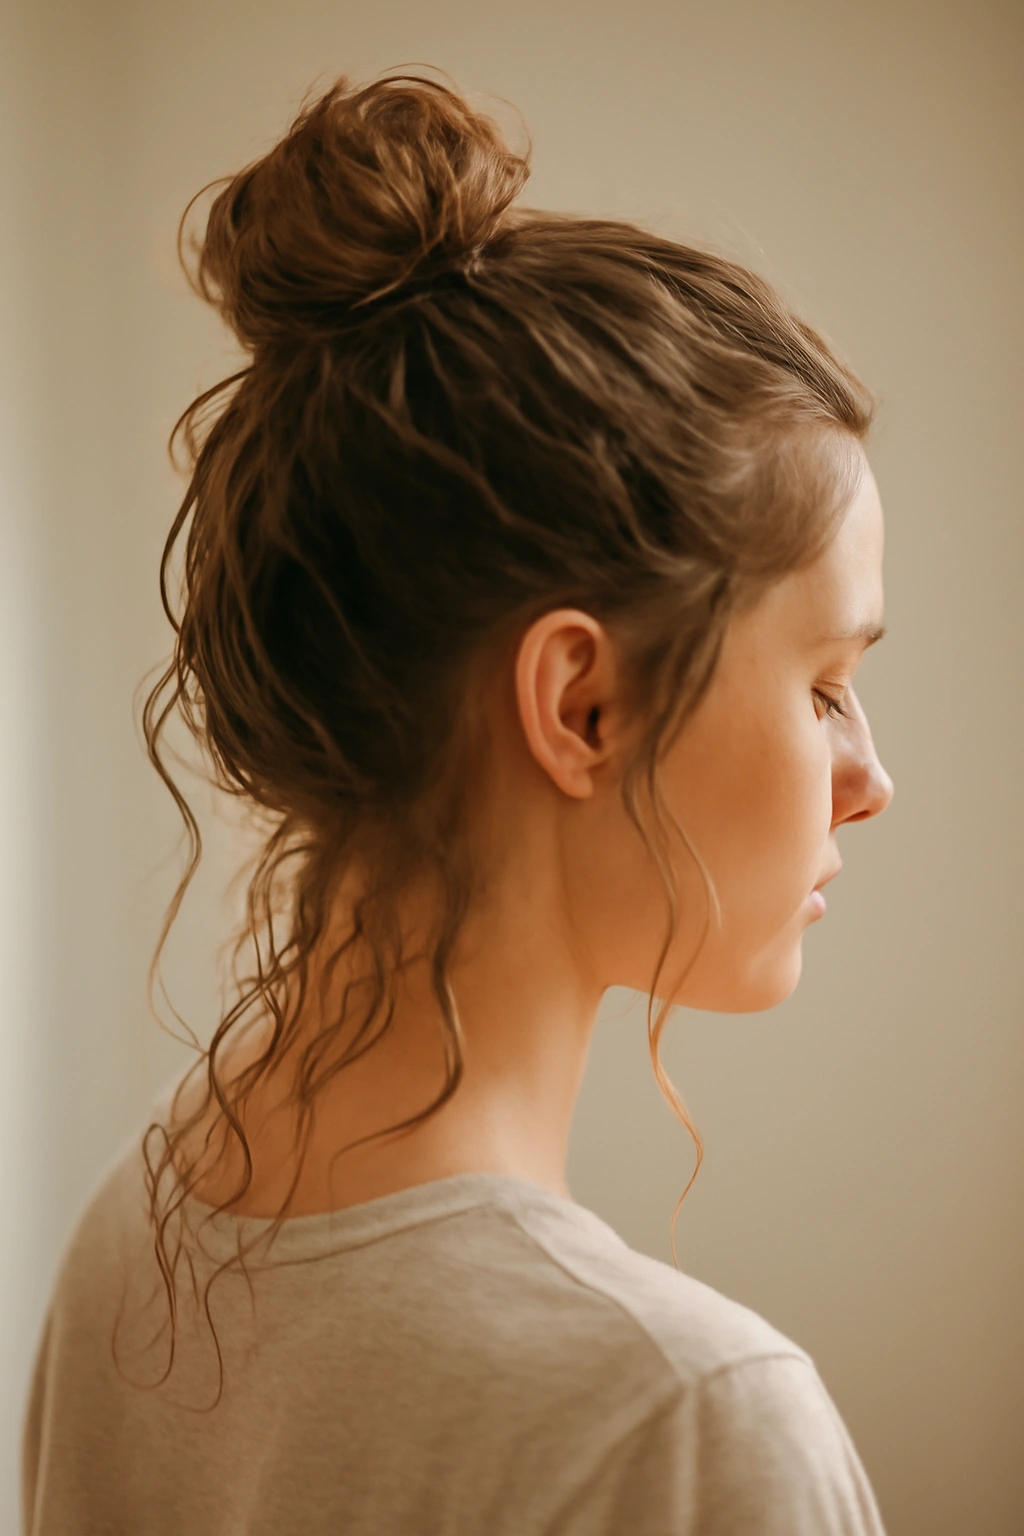
This is perhaps the fastest method to set up, and it creates the softest, most gentle waves of all the heatless methods. You basically just put your damp hair in a bun, leave it overnight, and wake up with waves. It’s stupidly simple, which is why so many people overlook it — but don’t, because it genuinely works.
Why a Bun Creates Such Soft Waves
When you gather damp hair into a bun on top of your head, you’re creating a large curved form that your hair sets into as it dries. The waves you get are typically quite soft and flowing rather than tight and defined, perfect if you like the beachy, undone aesthetic. The technique works best on hair that’s moderately thick to thick, since finer hair might not hold the wave shape as easily.
Setting a Bun for Overnight Waves
- Start with damp hair — about 30-40% damp is ideal, not soaking
- Apply a lightweight styling product for hold
- Gather hair high on your head and twist or braid it slightly before wrapping it into a bun shape
- Use a silk scrunchie or fabric hair tie (avoid elastic that grips tightly, which will create a crease)
- Secure the bun so it’s snug but not painfully tight
- Leave it in for 8-12 hours, preferably overnight
- Gently unwind the bun and let your hair fall, then finger-comb through the waves
Getting the Softness Right
The location of your bun affects the wave shape — a bun at the very crown creates waves that radiate downward, while a bun more toward the back of your head creates waves that start lower. If you have thick or coarse hair, you might need to wrap the bun more deliberately and secure it more firmly. For fine hair, keep the bun position higher and looser so gravity helps create the wave pattern.
4. Two-Strand Twist Out for Defined Curls
Two-strand twists are basically a more refined version of the twist-out method, creating even tighter, more uniform waves and curls. This method takes a bit longer to set up, but if you’re looking for waves with serious definition and bounce, this is your answer. The results look polished and intentional rather than accidental.
How Two-Strand Twists Create Consistent Texture
A two-strand twist is simply two sections of hair wrapped around each other repeatedly. Unlike a three-strand braid which has three lines of tension, a two-strand twist creates a spiral with just two strands, which actually locks the curl pattern more tightly. This is why two-strand twists hold their shape longer and create more defined, bouncy waves than larger braids.
Setting Two-Strand Twists the Right Way
- Apply leave-in conditioner to damp hair for slip and hold
- Use a curl-defining cream or gel for maximum definition
- Section hair into 6-10 manageable sections using clips
- Take two strands from the first section and twist them together consistently
- Continue twisting all the way to the ends with even, steady pressure
- Wrap the twisted section around itself into a spiral pin curl shape
- Secure with a small clip or pin
- Leave overnight or for 8-12 hours until completely dry
- Remove clips and gently unwind each two-strand twist to reveal bouncy waves
Pro Tips for Lasting Definition
The tighter you twist, the tighter the resulting waves will be — loosen your tension slightly if you want softer waves. Make sure you’re twisting consistently in the same direction throughout each section, or the curl pattern will be uneven. For hair that tends to frizz, apply a light serum after untwisting to seal the cuticle and add shine.
5. Plopping Technique for Natural Texture
Plopping is a method where you wrap your wet hair in a T-shirt or microfiber towel for an extended period, and it’s fantastic for enhancing your hair’s natural wave pattern. This method is less about creating waves from scratch and more about encouraging the waves already in your hair to set beautifully. It’s particularly effective if your hair has some natural texture or slight waves to begin with.
Why Plopping Brings Out Natural Waves
When you plop, you’re using the fabric to absorb excess water while keeping your hair in a bunched, scrunched position. This scrunched position encourages your hair to form waves rather than drying straight. The microfiber or cotton creates just enough friction to enhance the wave pattern without creating frizz. Most importantly, plopping is gentle on your hair because you’re not creating tension — you’re just supporting the natural texture.
The Plopping Method Step-by-Step
- Apply a curl-enhancing or wave-defining product to soaking wet hair
- Take a microfiber towel or cotton T-shirt and spread it out flat
- Flip your head upside down and gather all your hair into the center of the towel
- Wrap the towel around the bundle of hair so it’s completely enclosed
- Secure the towel by tying the ends or tucking them so the bundle stays in place
- Keep your hair plopped for 15-30 minutes while you get ready for your day
- Gently unwrap and let hair air dry, or you can plop for longer (even overnight) for more defined waves
- Once dry, scrunch with your hands to break up any defined ridges and create soft waves
Getting the Most From Plopping
Use a cotton T-shirt rather than a regular towel for less frizz and gentler handling. If you’re plopping overnight, make sure you use a microfiber towel or T-shirt that won’t absorb all your moisture and leave hair dry and crunchy. For best results, apply your styling product before plopping while hair is very wet — this gives the product time to set the wave pattern.
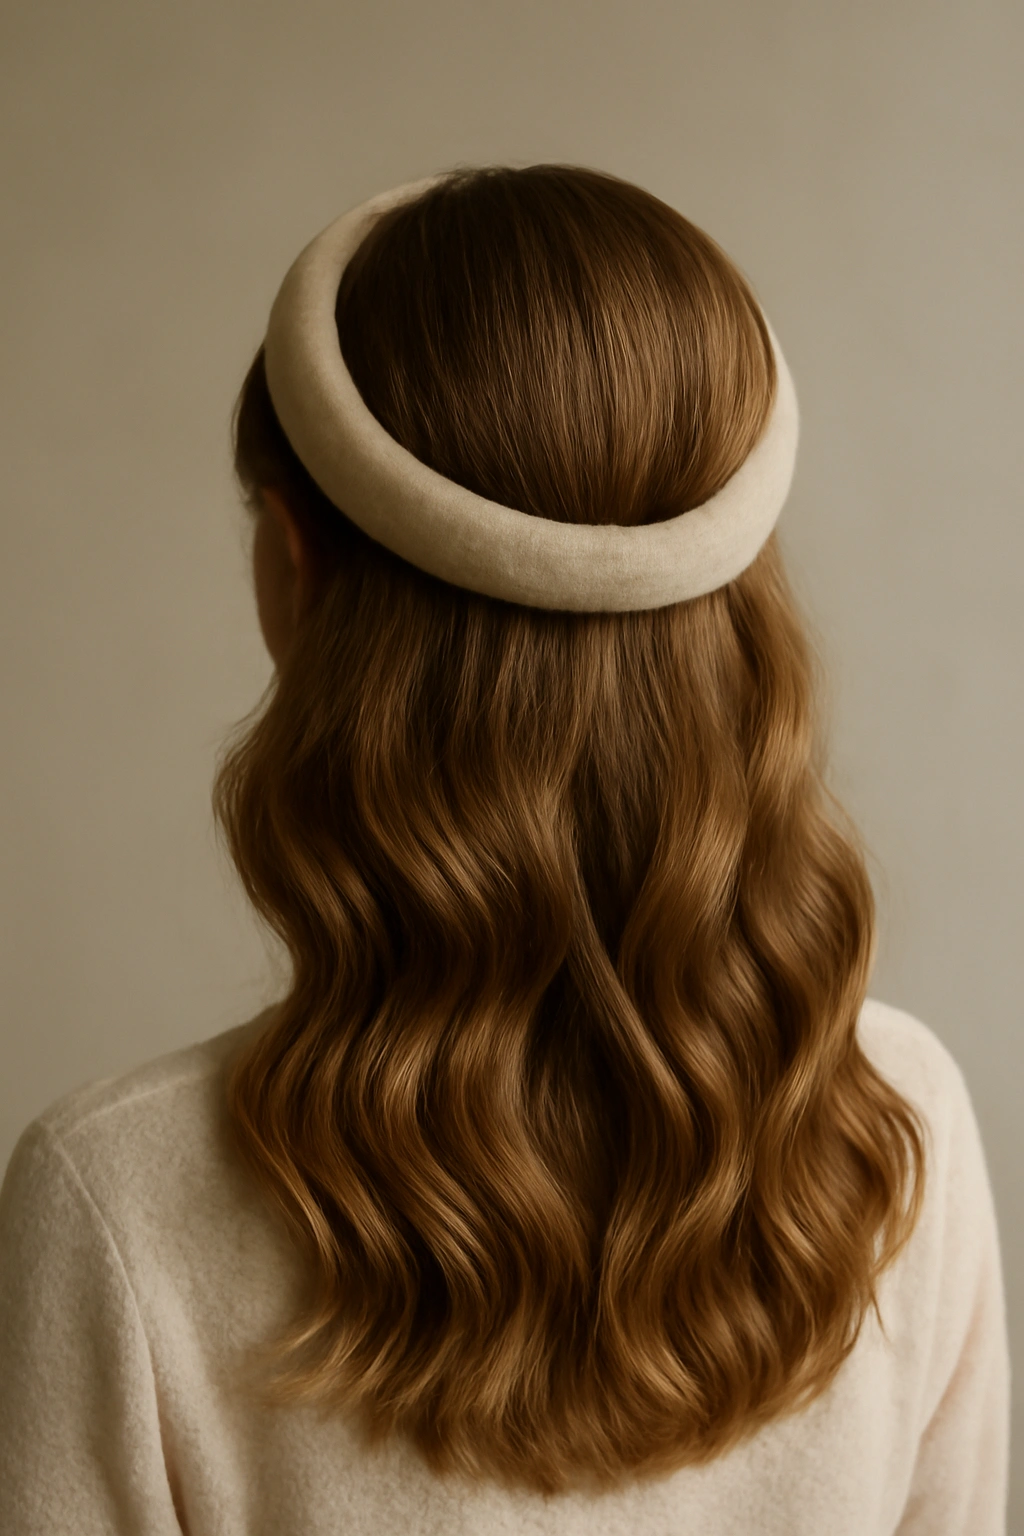
6. Bandeau Waves for Soft, Gentle Curves
A bandeau (or padded headband) creates incredibly soft, flowing waves when you wrap your damp hair around it and let it set overnight. This method is especially good if you have fine or delicate hair that you want to avoid putting tension on, and the waves you get are genuinely beautiful — soft curves that look effortlessly romantic.
Why a Bandeau Creates Such Beautiful Soft Waves
A bandeau works by creating a curved form for your hair to set into while it dries. The diameter of the bandeau determines the size of your waves — a thicker bandeau creates bigger, looser waves, while a thinner bandeau creates tighter texture. Because the bandeau is padded and soft, there’s minimal tension on your hair, which means less breakage and less stress on delicate strands.
How to Use a Bandeau for Perfect Waves
- Start with damp hair that’s about 50% dry
- Apply a lightweight styling cream or mousse for hold
- Place the bandeau around your head like a headband, positioning it where you want the wave pattern to start
- Take sections of hair and wrap them around the bandeau, overlapping each section as you go
- Work your way around your head until all your hair is wrapped around the bandeau
- Secure any loose ends by tucking them under or clipping them
- Leave overnight or for 8-10 hours until hair is completely dry
- Gently unwrap your hair from the bandeau and finger-comb through the waves
Making Bandeau Waves Last All Day
Choose a padded bandeau or headband that’s at least 1.5 inches wide — thinner bandeaus won’t hold the wave shape as effectively. If you have very fine hair, start with damp but not wet hair, since overly wet hair might be too heavy to hold the curved shape. The beauty of this method is that it’s so gentle you can even do it with damp hair mid-day and still get waves by evening.
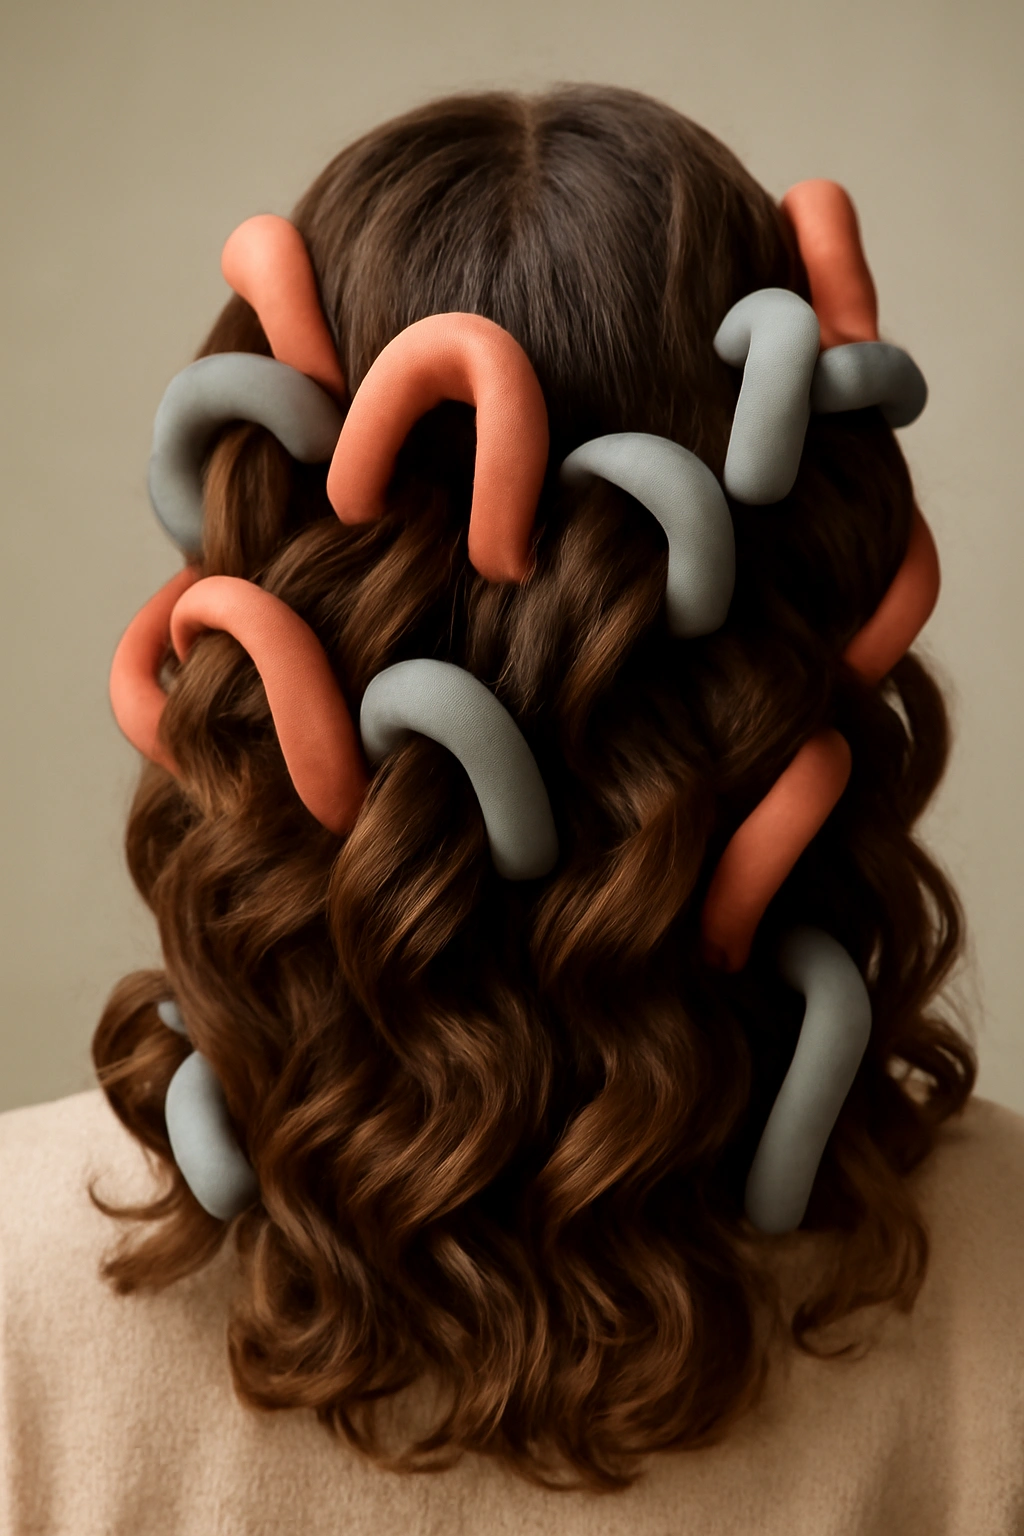
7. Spiral Roll Method for Springy Waves
Spiral rolls are basically cylindrical curlers that you use without heat — you wrap sections of damp hair around them and let them set overnight. The result is springy, bouncy waves with tons of body and movement. This method creates some of the most voluminous waves you can get with heatless styling.
How Spiral Rolls Create Bouncy, Voluminous Waves
A spiral roll is a barrel-shaped curler that you wrap damp hair around vertically. As your hair dries in that rolled position, it takes on the cylindrical shape of the curler, which translates to springy, bouncy waves when you unroll. The tighter you roll and the smaller the curler, the tighter your waves will be. Spiral rolls are the secret weapon for creating waves with serious volume and movement.
Setting Your Hair on Spiral Rolls
- Shampoo and condition, then apply a mousse or styling cream while hair is very damp
- Divide hair into 8-12 sections depending on the thickness and how much volume you want
- Start at the roots and roll each section around a spiral roll, rolling toward your scalp
- Secure the roll in place by sliding it down slightly so the tension holds it
- Continue with all sections until your entire head is covered in rolls
- Leave the rolls in overnight or for 8-10 hours
- Once hair is completely dry, gently unroll each roll by pushing it up and away from your hair
- Flip your head upside down and finger-comb through the waves to create that soft, undone texture
Pro Tips for Voluminous Waves
Smaller spiral rolls create tighter waves with more volume, while larger rolls create looser, wavier texture. If you have fine hair that doesn’t hold volume well, use smaller rolls and make sure your hair is damp (not dry) when you set them. For thick hair, larger rolls often work better and actually stay in place more securely throughout the night.
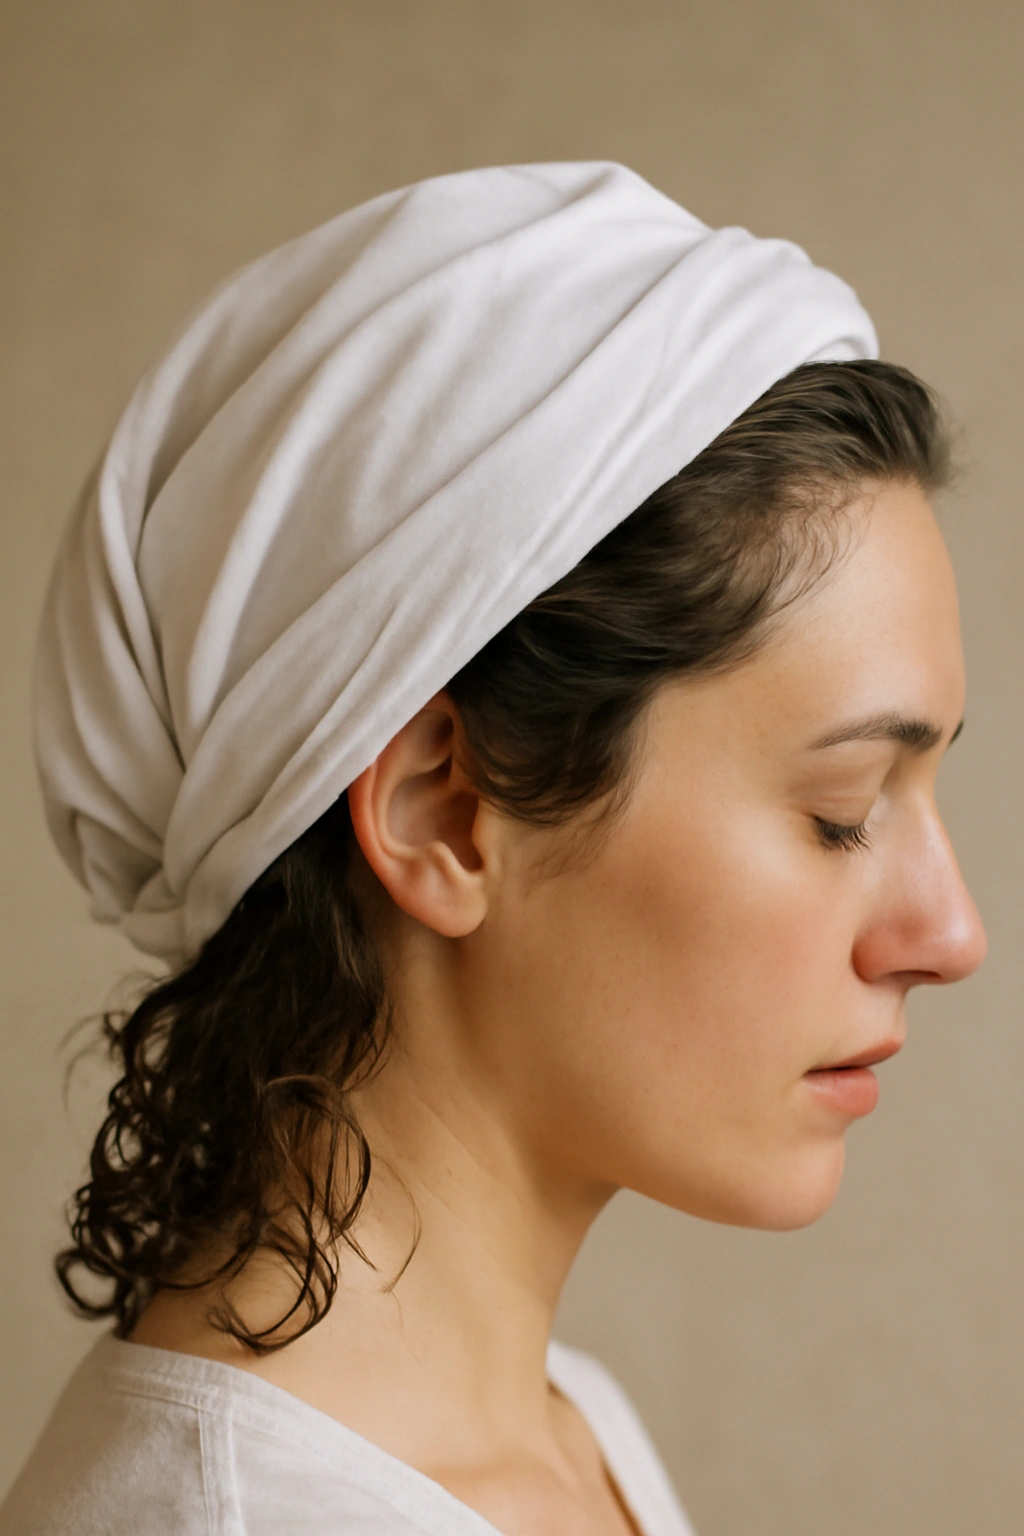
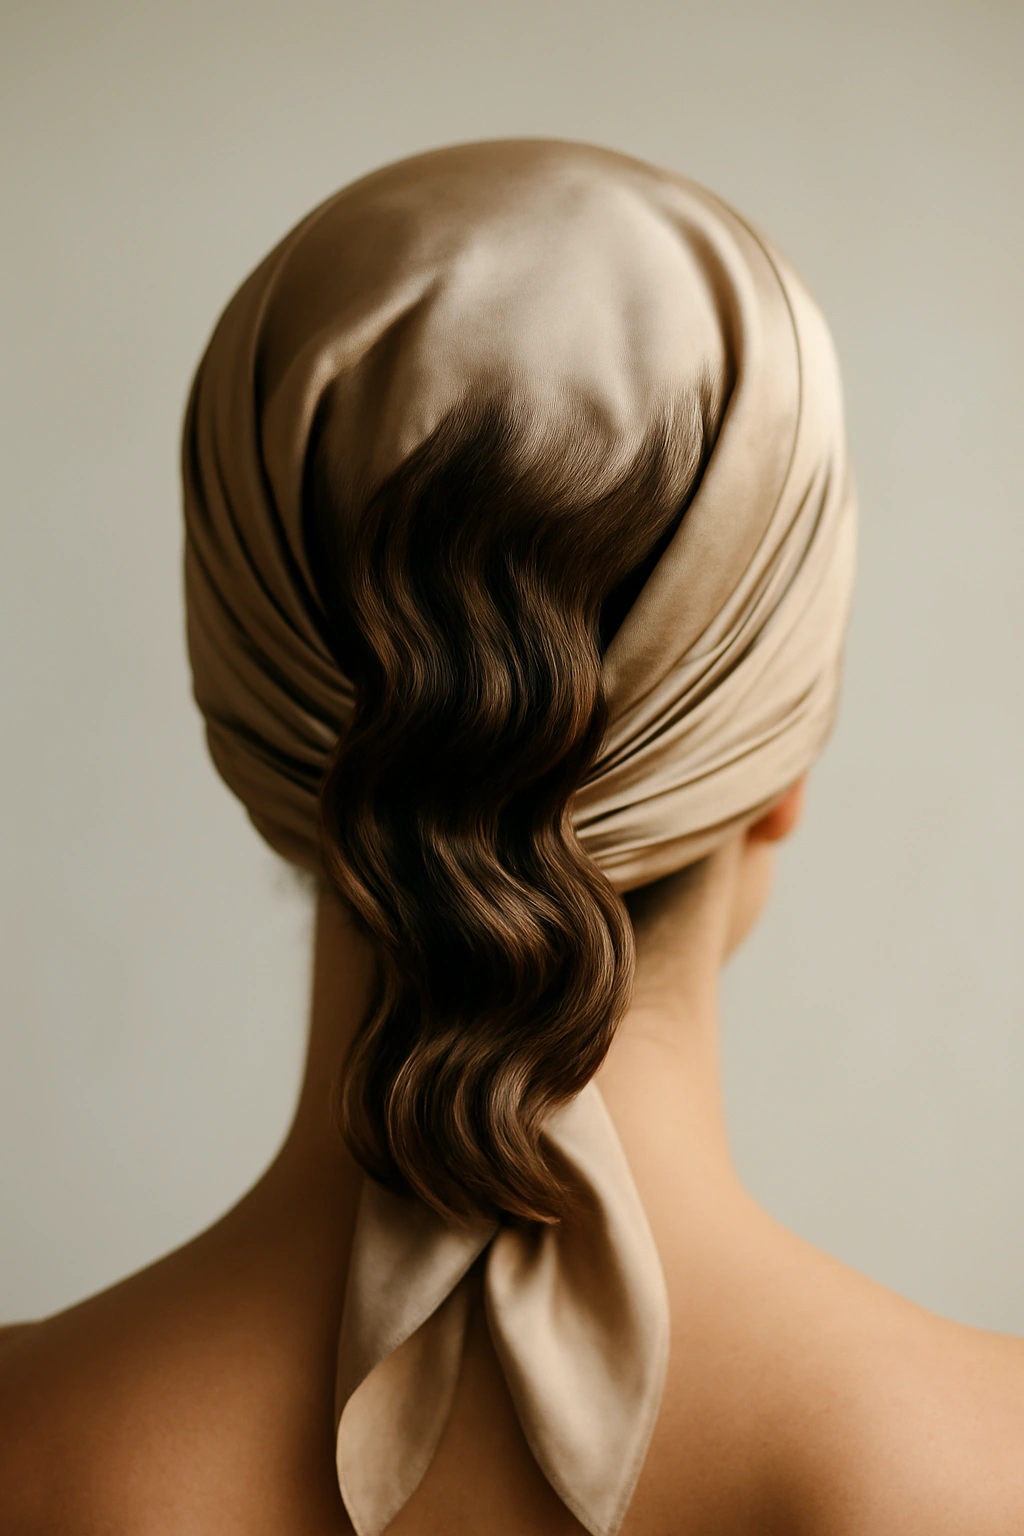
8. Cloth Wrap for Sleek Waves
A cloth wrap is an ancient technique where you wrap your entire dampened head in a cloth or fabric and let it set. This creates sleek, defined waves that sit close to your scalp and flow down your hair length. It’s particularly effective for creating waves that look intentional and polished rather than casual.
Why a Cloth Wrap Creates Such Sleek Definition
When you wrap cloth tightly around your head, you’re creating compression that smooths the cuticle while simultaneously encouraging a wave pattern. The fabric creates a mold that shapes your hair as it dries, and the tightness of the wrap determines how sleek and defined those waves are. This method works beautifully on all hair types, but particularly on hair with some natural texture to begin with.
Wrapping Your Hair for Perfect Waves
- Start with damp hair that’s been treated with a styling cream or leave-in conditioner
- Comb or brush your hair back smoothly away from your face
- Take a long piece of cloth (a silk scarf works beautifully) and place it against your hairline
- Wrap the cloth around your head, pulling gently to create tension, moving from front to back
- Once you’ve wrapped around once, continue wrapping to create multiple layers
- Tie or tuck the ends of the cloth to secure it
- Leave the wrap in for at least 6-8 hours, but overnight is ideal
- Gently unwrap and let your hair fall, then use your fingers to arrange the waves
Getting Sleek, Defined Waves
Use a silk or satin cloth rather than cotton, which will create more friction and frizz. The tension of the wrap should be snug but not uncomfortably tight — you should be able to fit a finger underneath the wrap. If you want more defined waves, wrap tighter; if you prefer softer waves, wrap with less tension.
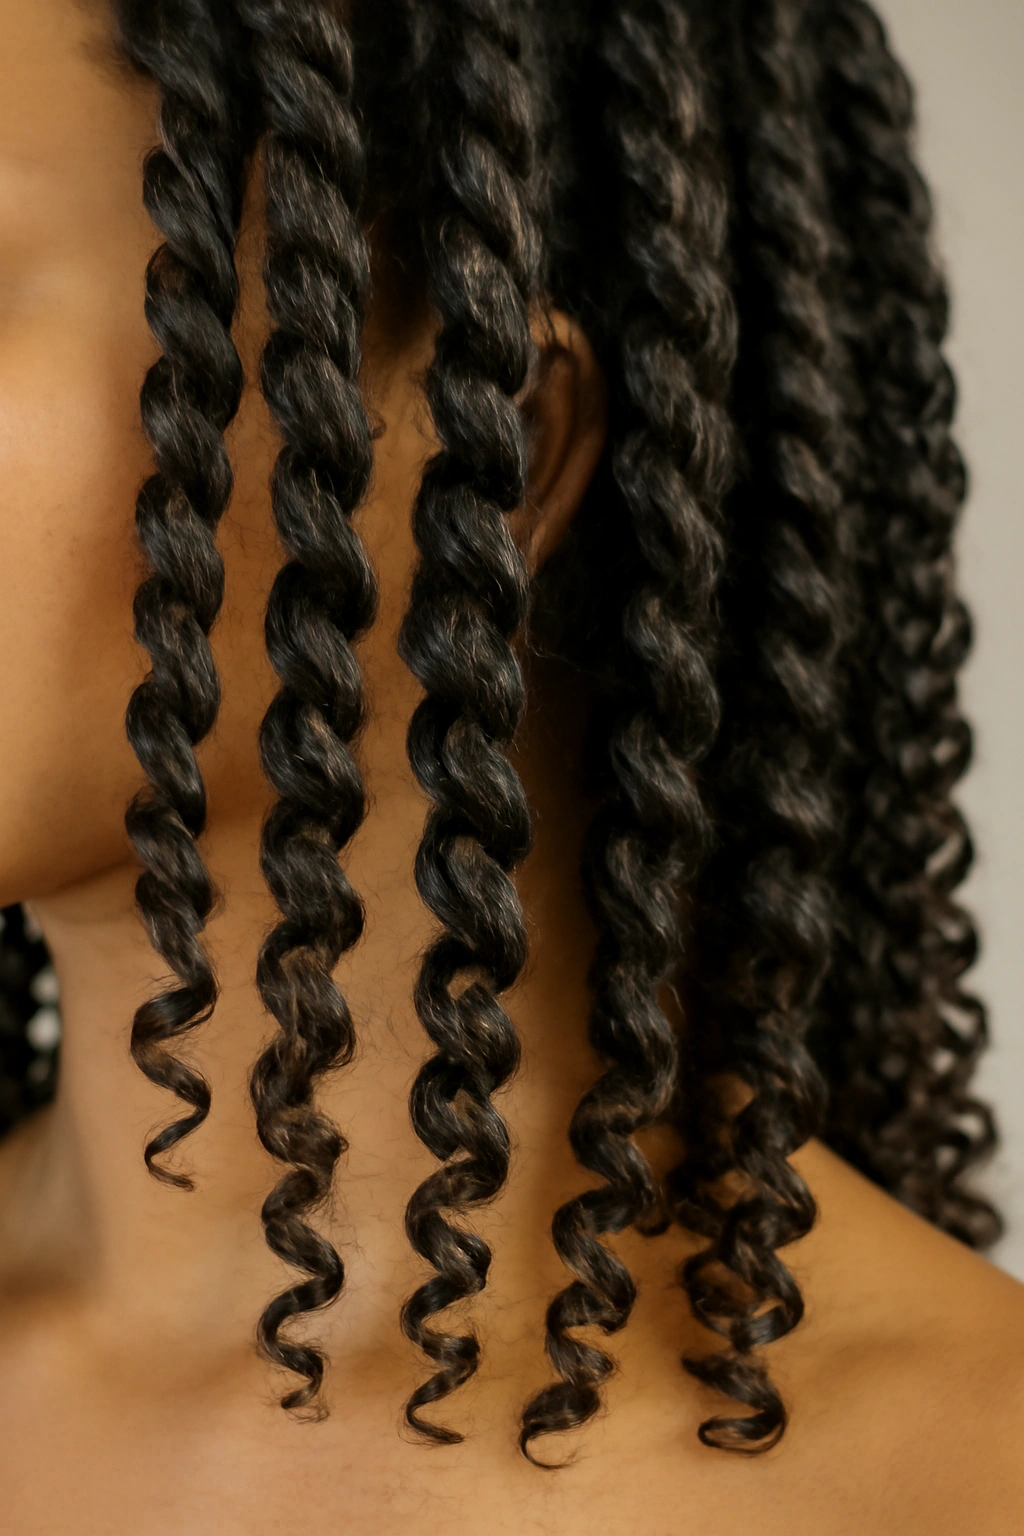
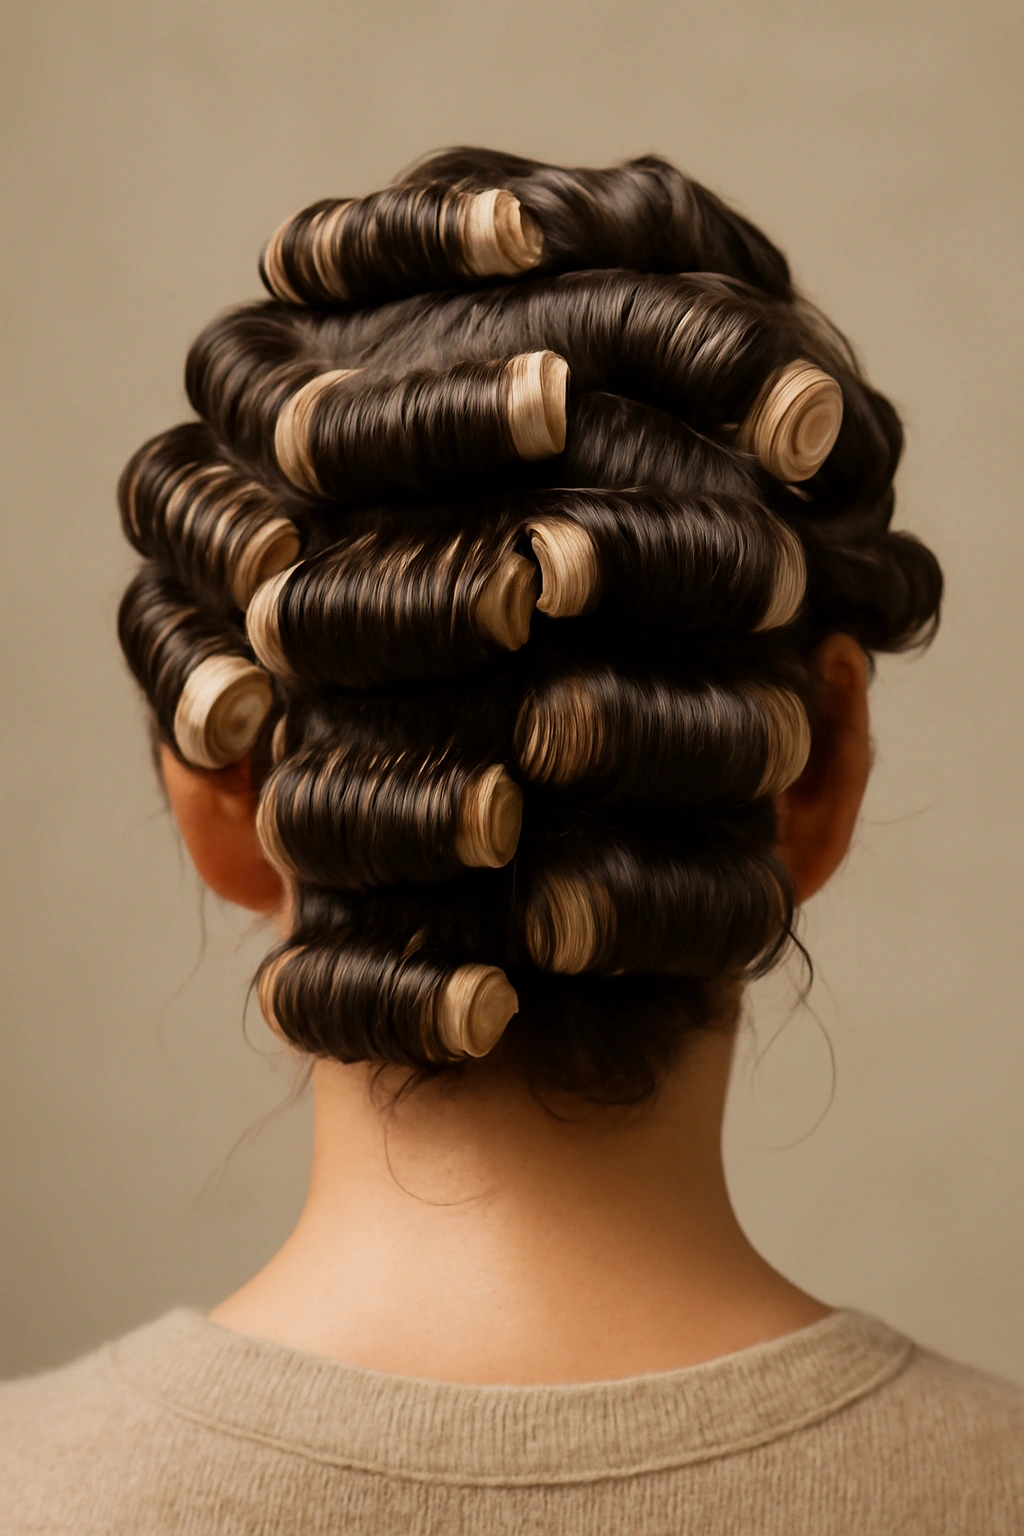
9. Perm Rod Waves for Vintage Curls
Perm rods are small, flexible rods that you wrap damp hair around to create tight waves and curls. Unlike spiral rolls which are larger, perm rods create smaller, tighter, more defined waves with a distinctly vintage or glamorous look. This method takes a bit longer to set up, but the results are absolutely stunning.
The Appeal of Perm Rod Waves
Perm rods create waves with amazing definition and shape because the rods are smaller and allow for tighter wrapping. The result looks intentional and styled, rather than casual and undone — perfect if you’re going for a more polished, glamorous aesthetic. Small perm rods can even create curl patterns that look similar to a traditional perm, but without any chemical processing or heat.
Setting Your Hair on Perm Rods
- Apply a styling mousse or gel to very damp hair for maximum hold
- Section hair into small, manageable pieces
- Take a small section and wrap it around the perm rod, starting from the middle and rolling toward your scalp
- Secure the rod by sliding the end piece into place
- Continue with all sections until your entire head is covered
- Leave the rods in overnight or for 10-12 hours
- Once hair is completely dry, gently release each rod by sliding it out from the end
- Finger-comb through your hair to soften the curl pattern if desired, or leave the curls defined
Making Perm Rod Curls Work for You
Smaller rods create tighter, tighter curls, while larger rods create looser waves. If you have fine hair, use smaller rods and avoid using product that’s too heavy, which will weigh down the curls. For thick hair, larger perm rods often work better and are easier to manage throughout the night.
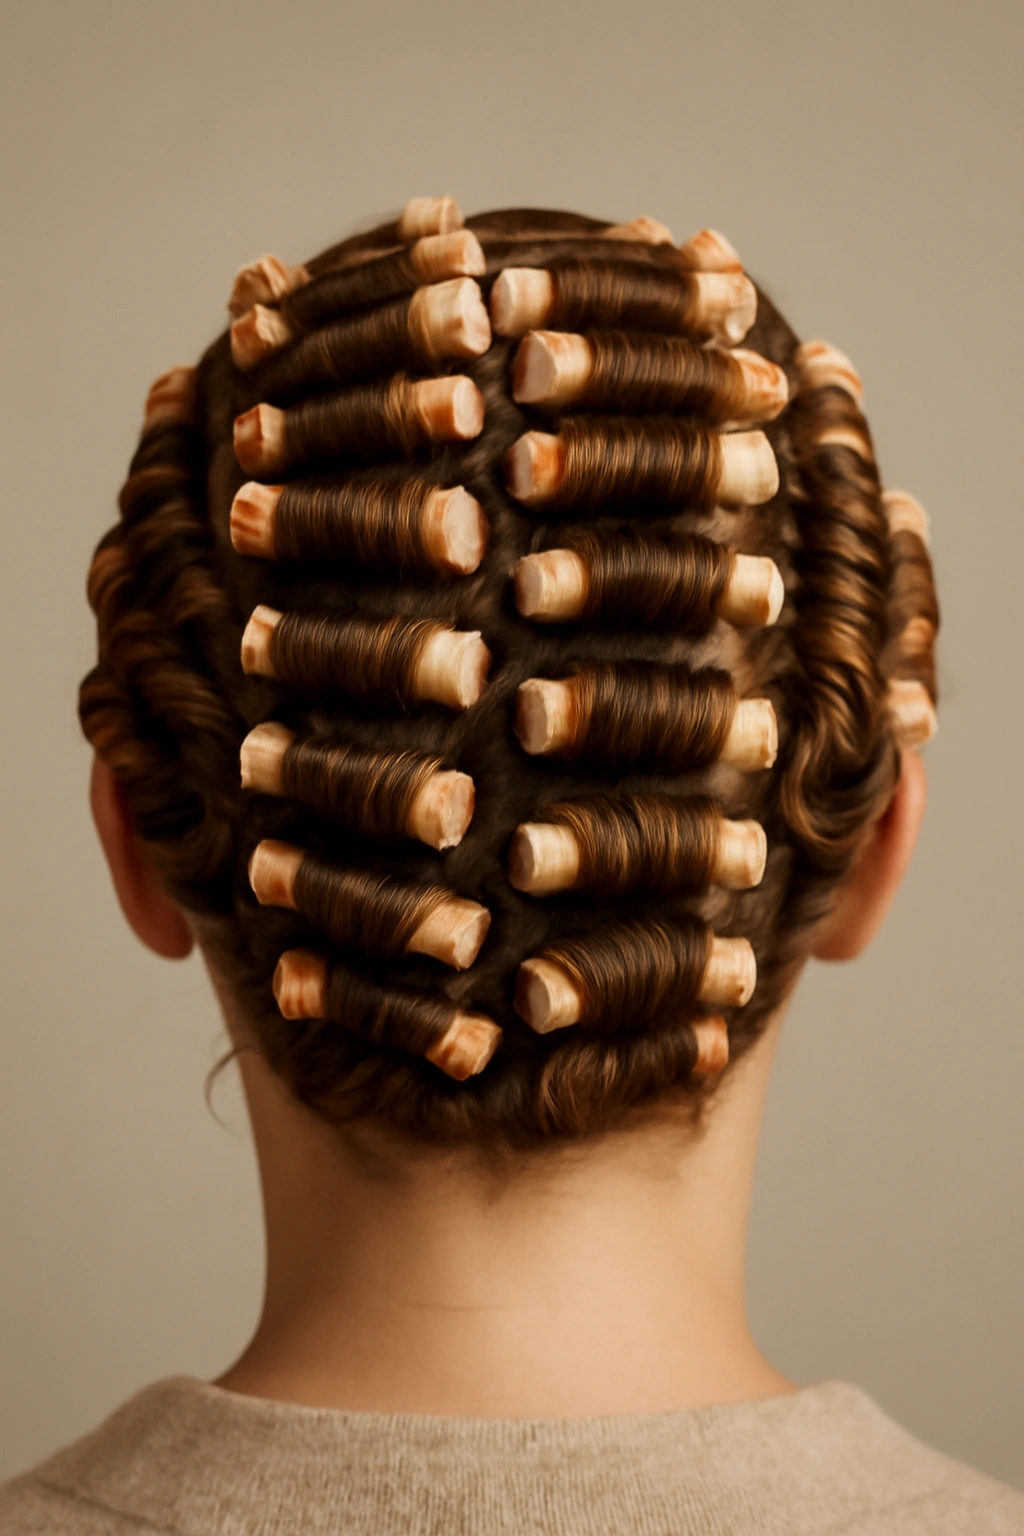
10. Flexi-Rod Styling for Bouncy Waves
Flexi-rods are soft, flexible foam rods that you wrap damp hair around — they’re essentially the gentler, more comfortable version of hard perm rods. They stay in your hair comfortably overnight and create bouncy, defined waves without any of the tension or discomfort of traditional curlers.
Why Flexi-Rods Are So Effective for Waves
Flexi-rods are designed to be worn for extended periods, making them perfect for overnight styling. The soft foam doesn’t create pressure points or leave marks on your scalp, and they’re flexible enough to bend when you sleep without losing their shape. They create waves with excellent definition and bounce — this is professional-level styling without heat or effort.
Using Flexi-Rods for Perfect Waves
- Apply a styling mousse or curl cream to very damp hair
- Divide hair into 8-12 sections depending on desired wave size
- Take a section of hair and wrap it around the flexi-rod, rolling from the ends toward your scalp
- Once the hair is wrapped, gently bend the rod to secure it in a loop shape
- Repeat with all sections until your head is covered in curved rods
- Leave overnight or for 8-10 hours until hair is completely dry
- Gently unbend each rod and slide it out carefully
- Finger-comb through your hair to create soft, bouncy waves
Pro Tips for Flexi-Rod Success
Use a styling product that offers hold without crunchiness — a mousse or gel works better than a heavy cream. If flexi-rods feel uncomfortable when you sleep, try positioning them more toward the sides and back of your head rather than directly on top. Larger flexi-rods (around 1.5 inches in diameter) tend to be more comfortable overnight and still create beautiful waves.
11. Scarf Wrap Method for Defined Waves

A silk or satin scarf wrapped loosely around your hair creates beautiful, defined waves while also protecting your hair from friction and breakage. This method is gentler than many others while still delivering impressive wave definition, and it has the added benefit of promoting overall hair health.
How a Scarf Creates Defined Waves While Protecting Hair
A silk or satin scarf creates minimal friction compared to cotton, which means less frizz and less damage to your hair cuticle. When you wrap it around damp hair with some light tension, you’re gently guiding your hair into a wave pattern while simultaneously protecting it. The smoothness of the fabric allows your hair to glide rather than catch, which means you wake up without the creases and breakage that come with rougher fabrics.
The Scarf Wrap Technique for Best Results
- Apply a leave-in conditioner or styling cream to damp hair
- Take a silk or satin scarf and place one corner at the top of your head
- Wrap the scarf around your head in a smooth motion, creating gentle tension
- Continue wrapping around your head several times until you’ve created a secure wrap
- Tie the ends of the scarf to keep it in place
- Leave the scarf in overnight or for 6-8 hours
- Unwrap carefully and let your hair fall into soft, defined waves
- You can finger-comb through the waves or leave them as they are
Choosing the Right Scarf and Tension
A large silk or satin scarf (the bigger, the better) gives you more flexibility in how you wrap and allows you to adjust the tension easily. Silk is preferable to satin because it’s even smoother and gentler on your hair. The key is finding the right tension — tight enough to guide your hair into waves, but loose enough that it doesn’t cut off circulation or create uncomfortable pressure.
12. Side-Sweep Waves with a Headband
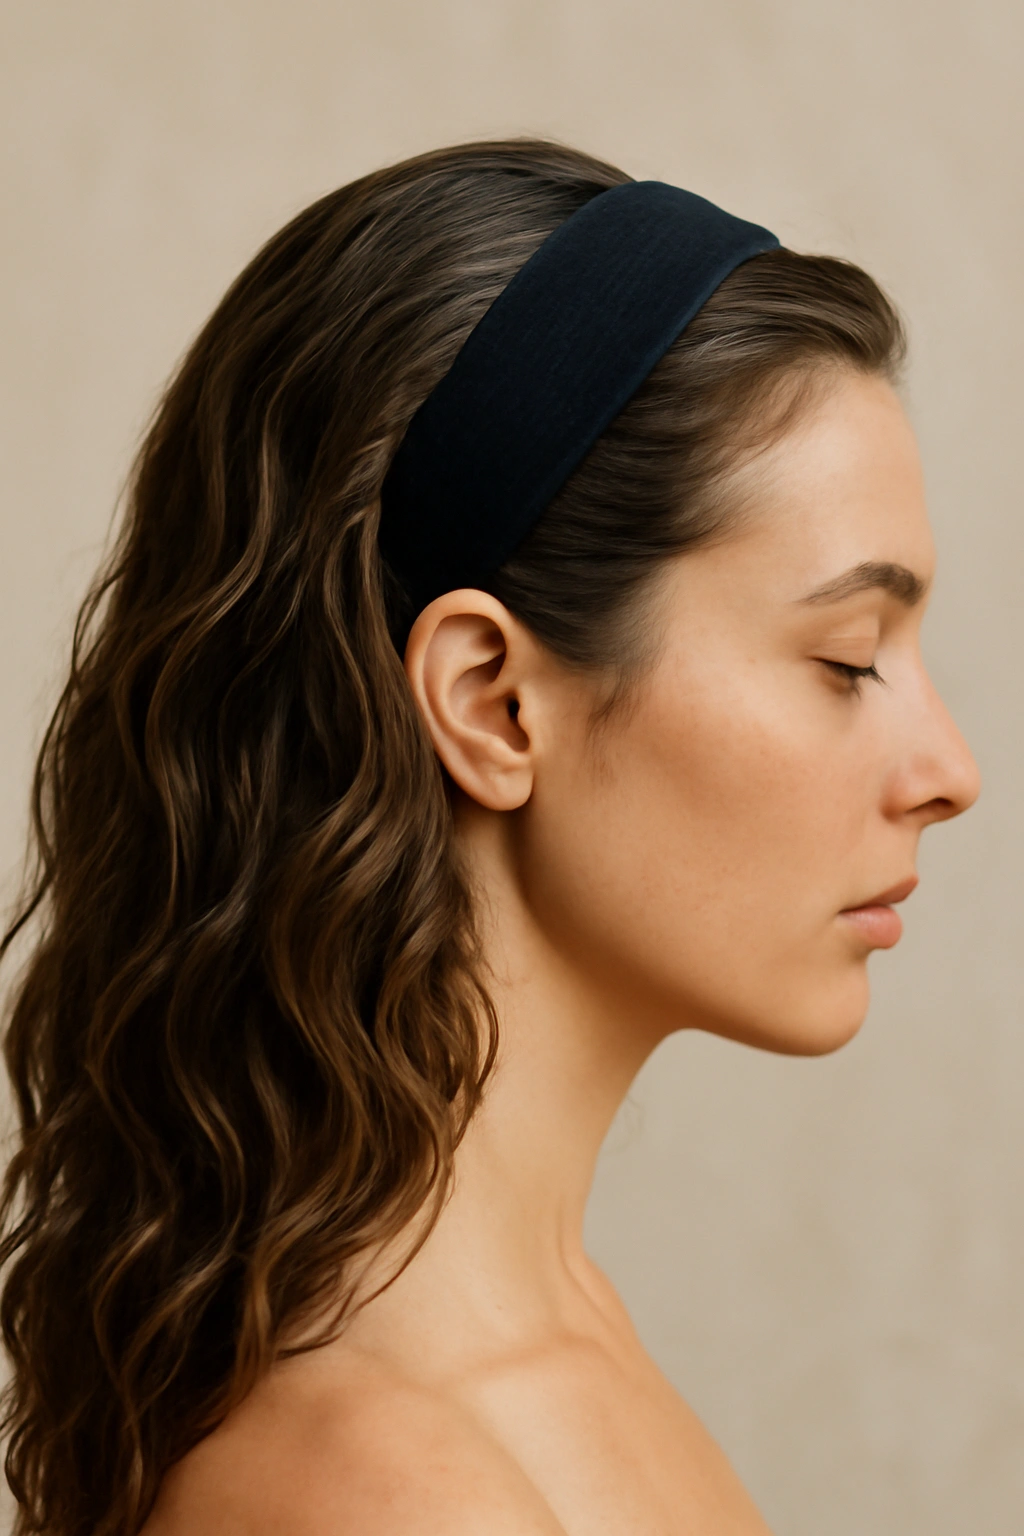
Using a headband or elastic headwrap to pin damp hair to the side creates sweeping waves that flow beautifully across your head. This method creates an asymmetrical, glamorous wave pattern with lots of dimension and movement. It’s particularly effective for creating waves that have direction and intentional styling.
Why Side-Sweep Waves Look So Glamorous
When you pin your damp hair to one side using a headband or wrap, you’re creating a dramatic curved mold that your hair sets into as it dries. The result is waves that sweep across your head with natural-looking dimension and movement. This technique works especially well if you have longer hair or hair with some natural texture already present.
Creating Side-Sweep Waves
- Start with damp hair and apply a lightweight styling cream
- Put on a wide headband or use a silk scarf to create a headwrap
- Gather your hair and pin or tuck most of it to one side of your head using bobby pins
- Make sure the headband or wrap is secure enough to hold everything in place overnight
- Leave your hair pinned to the side for 8-10 hours
- Release your hair carefully and let it fall, then gently arrange the waves
- The waves should sweep across your head from where you pinned them
Making Side-Sweep Waves Work for You
This method works best on hair that’s at least shoulder-length, since shorter hair doesn’t have enough length to create that dramatic sweep. If you have fine hair that doesn’t hold curves easily, use a slightly heavier styling product and pin the hair very carefully so it doesn’t slip. For thick hair, even a light hold product works beautifully.
13. Pin Curl Setting for Romantic Waves

Pin curls are small curls pinned flat against your scalp that create gorgeous, romantic waves when released. This is a classic styling technique that’s been around for decades, and it absolutely still works for creating beautiful, defined waves without any heat.
The Charm of Pin Curl Waves
Pin curls create waves that have serious definition and glamour — they’re perfect if you want that vintage-inspired, intentionally styled look. The smaller you make your pin curls, the tighter your waves will be. The beauty of this method is that you can customize exactly how much wave definition you want by adjusting your curl size.
Setting Pin Curls the Classic Way
- Apply a styling mousse or light gel to damp hair
- Section hair into small pieces
- Curl each section around your finger to create a ringlet shape
- Gently lower the curl and pin it flat against your scalp using a bobby pin
- Continue pinning curls all over your head until all your hair is curled
- Leave the pins in overnight or for 8-10 hours while hair dries completely
- Carefully remove all the pins one at a time
- Finger-comb gently through the curls to create soft, romantic waves
Pro Tips for Gorgeous Pin Curls
Use small- to medium-sized curls for the most flattering wave pattern — tiny curls can look overly tight and old-fashioned if you’re not going for that intentional vintage look. Make sure your bobby pins are tight enough that curls don’t slip during the night. The key to avoiding that “tight perm” look is to gently finger-comb through the curls after releasing the pins, which softens the pattern and creates a more modern, romantic aesthetic.
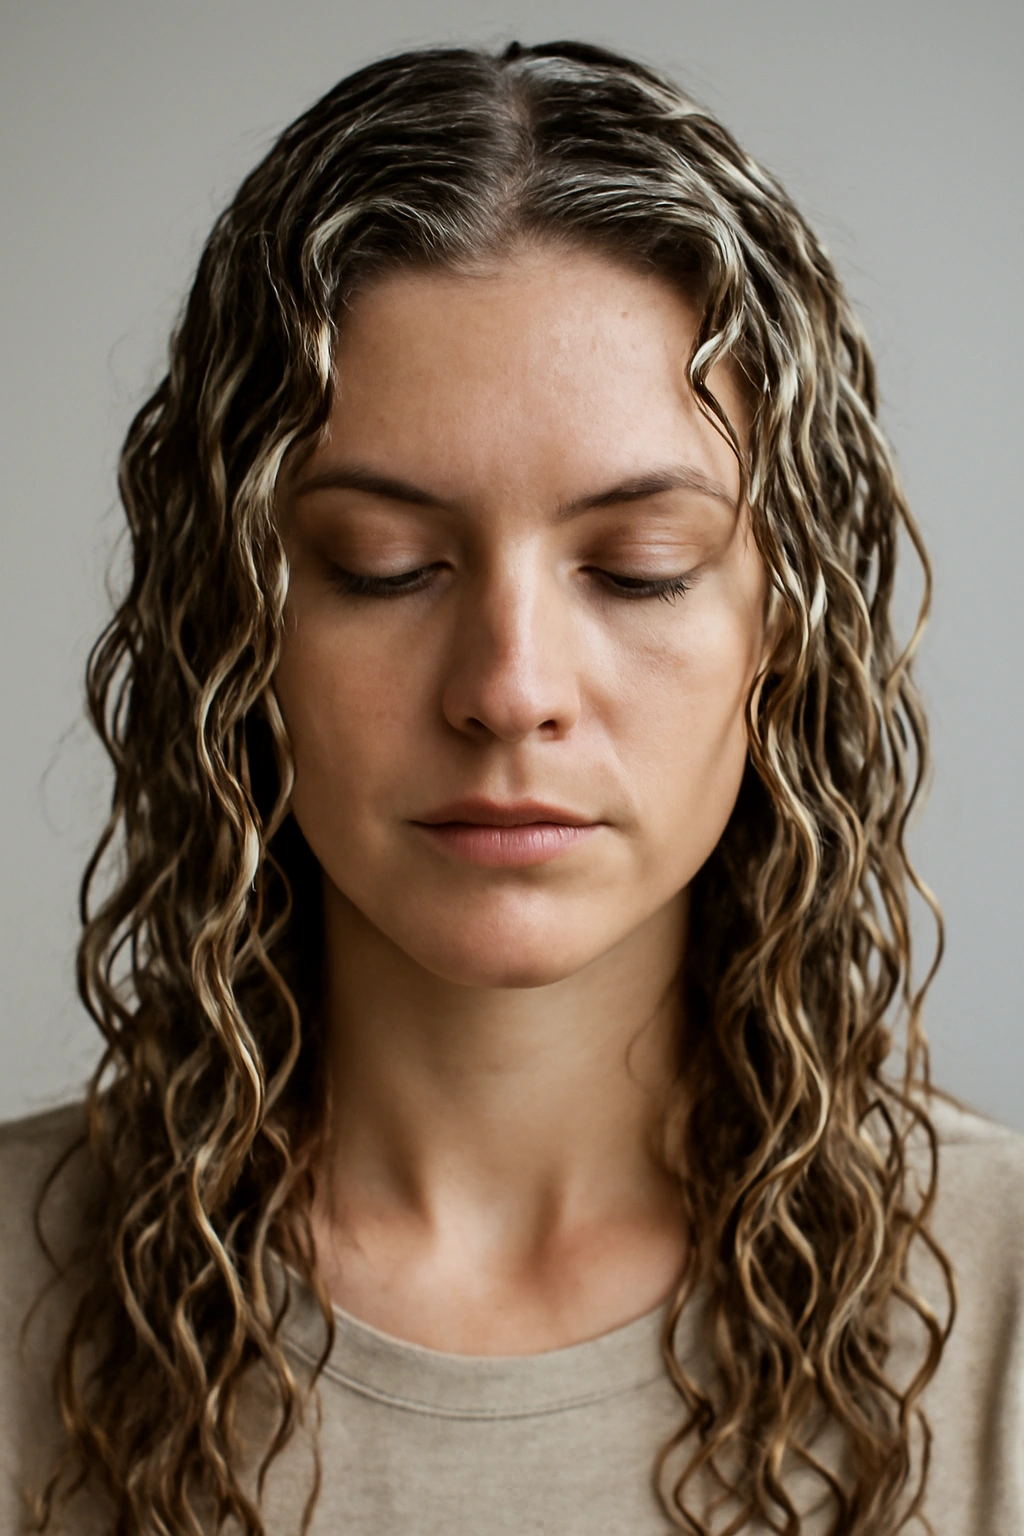
14. Beach Salt Spray and Air-Dry Waves

Beach salt spray is a product that mimics the effect of ocean water and salt air on your hair, encouraging waves and texture to form as you air-dry. While this method does rely on a product, it’s not a heat styling tool, and the product simply enhances your hair’s natural ability to form waves.
Why Salt Spray Creates Such Believable Waves
Salt spray works by adding texture to your hair and creating friction between strands, which encourages waves to form naturally. It works best if your hair already has some wave potential or natural texture. The salt also helps absorb oils from your scalp, which can actually make waves more defined.
Using Salt Spray for Effortless Waves
- Shampoo and condition with products designed for wavy hair
- Towel-dry your hair until it’s about 60% damp
- Apply a salt spray evenly throughout your hair, focusing on the mid-lengths and ends
- Scrunch the salt spray into your hair with your hands to encourage wave formation
- Either let your hair air-dry naturally, or use a diffuser attachment on a cool setting if you want to speed things up
- Once your hair is dry, scrunch and massage it gently to break up any crunchy texture from the salt spray
- The waves should form gradually as your hair dries
Getting the Most From Salt Spray
Use salt spray on damp hair, not dry hair — this is what creates the wave pattern. Don’t use too much product or your hair will feel stiff and crunchy. This method works best on hair that already has at least some natural wave or texture to begin with.
15. Wet-Set Waves with Mousse and Time
A wet-set is perhaps the most classic heatless styling method — you apply mousse to very wet hair, blow-dry on a cool setting (or air-dry), and let your hair’s natural texture form waves as it dries. This method is all about letting your hair’s natural wave pattern emerge without forcing it.
Why Wet-Setting Creates Natural-Looking Waves
Wet-setting works because you’re applying product while your hair is most malleable and then allowing it to dry in a state that encourages wave formation. Mousse adds lift and texture, which helps waves form more readily. The waves you get from wet-setting feel natural because they’re working with your hair’s inherent texture rather than against it.
The Wet-Set Process
- Shampoo your hair thoroughly and apply a moisturizing conditioner
- Rinse with cool water, which helps close your hair’s cuticle
- While hair is soaking wet, apply a mousse throughout, working it in with your fingers
- Gently scrunch your hair upward to encourage wave formation
- Either air-dry completely or use a blow-dryer on a cool setting with a diffuser attachment
- Once dry, you can touch your waves up with a curl-enhancing spray if needed
- Gently finger-comb through your waves to break up any defined ridges
Making Wet-Set Waves Last
Use a mousse specifically designed for wavy or curly hair rather than a generic styling mousse. If your hair tends to lose waves quickly, apply a light curl-enhancing spray once your hair is dry. This method works best on hair that naturally waves or has texture — if your hair is very straight, you might want to combine this method with one of the setting techniques like braids or pin curls for added wave definition.
Final Thoughts

Heatless waves aren’t just a gentler alternative to heat styling — they’re actually a more creative, customizable approach to getting the waves you want. Whether you choose overnight braids for their simplicity, perm rod curls for their glamorous definition, or salt spray for their natural effortlessness, you’re working with your hair’s natural texture and giving it time to set properly. The beauty of these methods is that many of them happen while you’re sleeping, which means you’re essentially getting professionally styled waves without any active styling time.
The perfect heatless method for you depends on your hair type, how much wave definition you want, and how much time you’re willing to spend on setup. Fine hair often responds beautifully to gentler methods like bun sets and bandeau wraps, while thick, coarse hair can handle tighter techniques like two-strand twists and perm rods. The real magic happens when you find the method (or combination of methods) that works with your hair’s natural texture rather than against it.
Start experimenting with the techniques that sound most appealing to you, and remember that it might take a few tries to dial in the perfect tension, product type, and timing for your specific hair. Once you find your method, you’ll have gorgeous waves ready whenever you need them — without damaging heat or expensive tools.