Naturally wavy hair is a blessing and a challenge all at once. You’ve got that enviable texture that holds volume and catches light beautifully, but styling it for everyday wear without relying on heat tools or spending thirty minutes with a straightener can feel like solving a puzzle. The secret? Work with your waves instead of against them, and lean into hairstyles that actually celebrate the texture you already have.
The best everyday hairstyles for wavy hair aren’t complicated or high-maintenance — they’re the ones that take your natural wave pattern and enhance it with minimal effort. Whether you’re heading to the office, running errands, or just trying to look put-together on a day when you didn’t have time for a full routine, the right hairstyle can make all the difference. These styles work because they don’t fight your hair’s natural tendencies; they amplify them.
What makes a hairstyle work for wavy hair is understanding that waves have built-in texture and movement. You don’t need to create volume from scratch or fight frizz if you’re using techniques that complement your wave pattern. Most of these styles can be done in under ten minutes once you get the hang of them, and they actually look better if your hair isn’t perfectly polished. A little texture, a little imperfection — that’s the whole point.
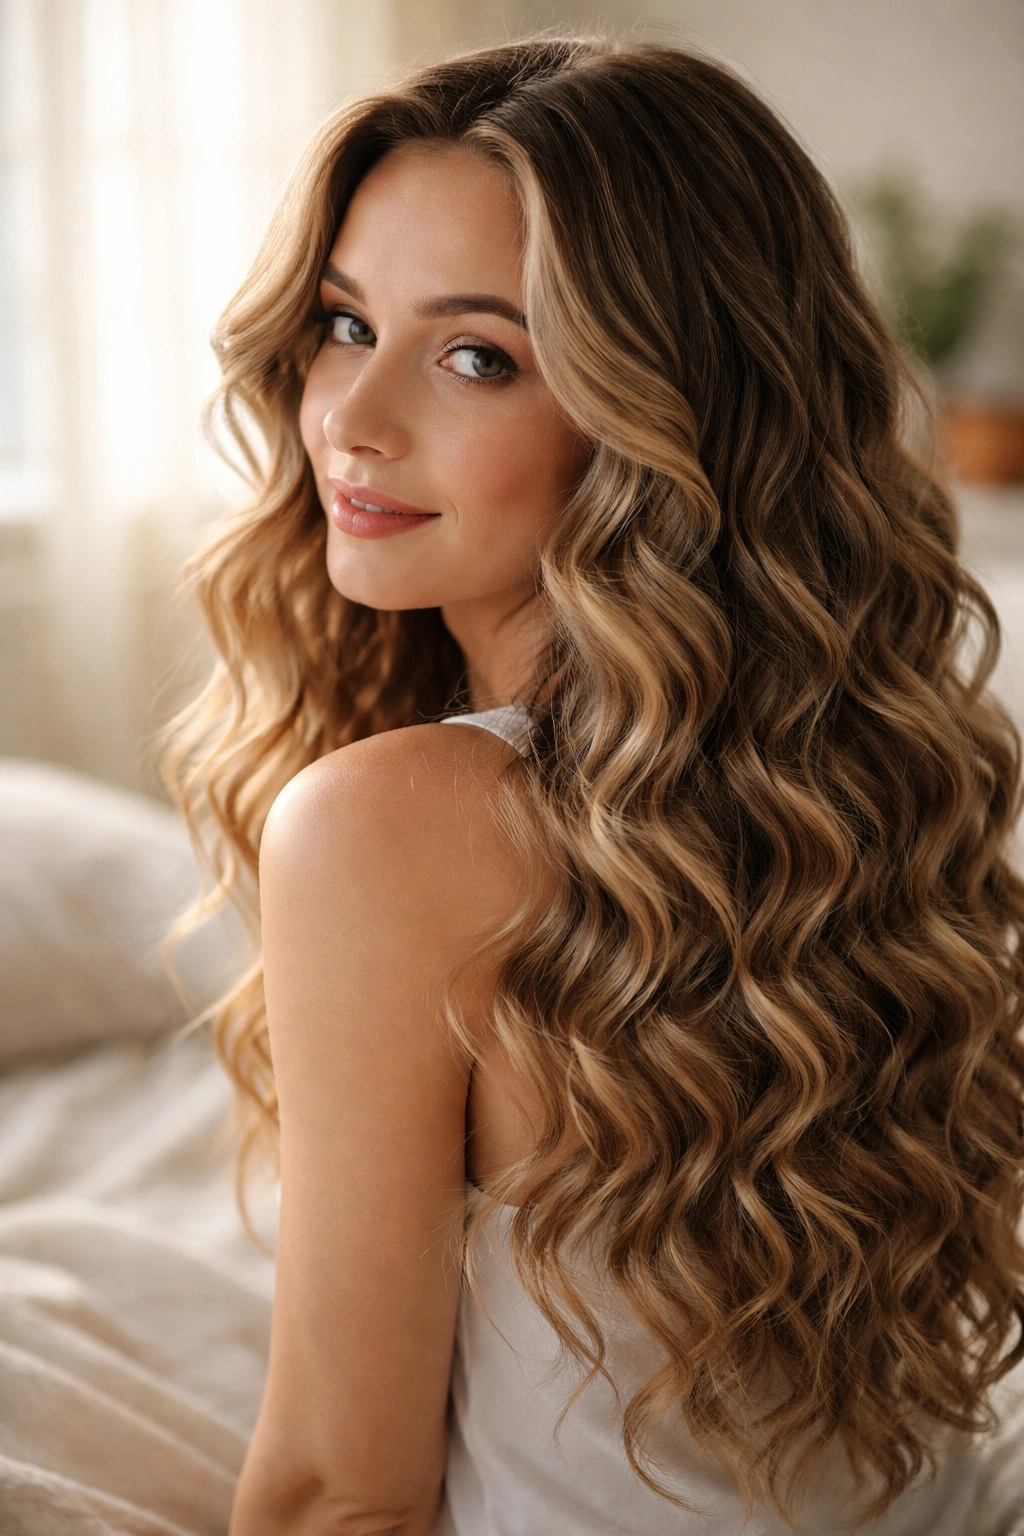
1. Beachy Waves with Sea Salt Spray
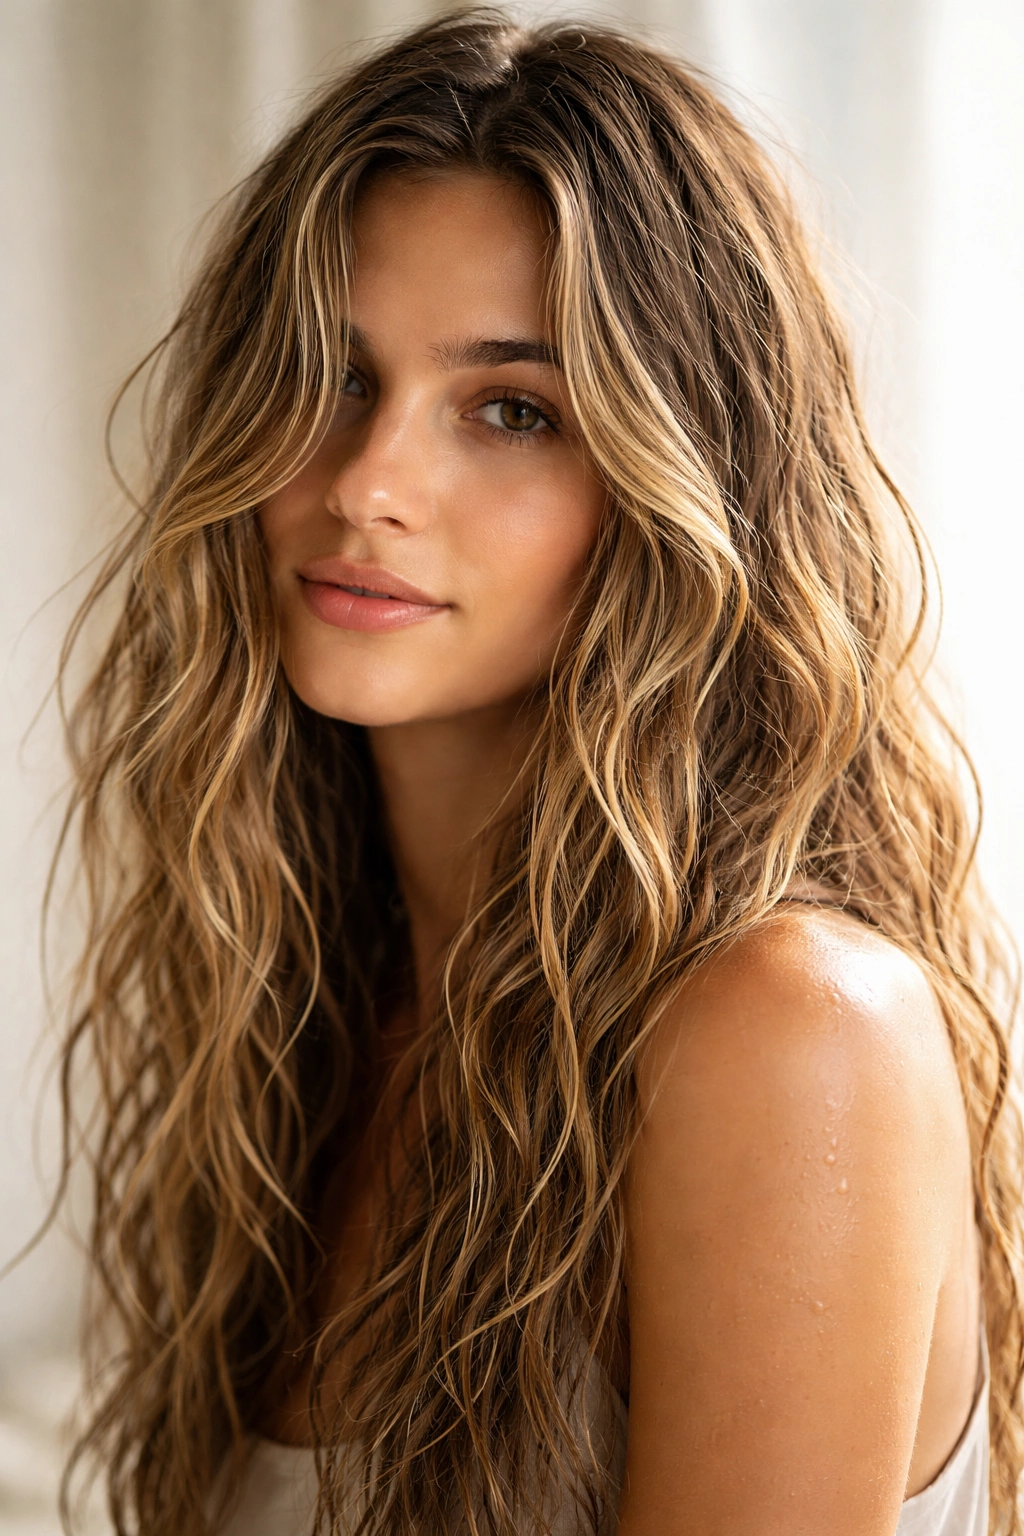
This is the foundation style for wavy hair. Sea salt spray mimics the natural texture and grit that ocean water creates, making your waves more defined and touchable without any heat styling. The beauty of this approach is that it works whether your waves are loose and subtle or tight and pronounced — the spray just enhances what’s already there.
Why This Works for Wavy Hair
Sea salt spray works on wavy hair because it adds grip and texture to each wave without weighing it down the way some styling products do. The salt crystals coat each strand individually, creating that beachy, lived-in look that actually suits wavy texture perfectly. Unlike heavy creams or oils that can make waves look greasy or limp, sea salt spray actually makes waves appear more dimensional and intentional. Your natural waves become a style rather than something you need to apologize for.
How to Style It
Start with damp hair — not soaking wet, but genuinely damp to the touch. Spray the sea salt spray throughout your hair, working from the roots down to the ends and focusing on the mid-lengths and ends where waves are most pronounced. Use your fingers or a wide-tooth comb to distribute the product evenly. Let your hair air-dry completely, or speed it up with a diffuser on low heat if you’re in a rush. Once dry, scrunch the waves with your hands to break up any heavy sections and add more separation.
Pro Tips
- Use sea salt spray on second-day hair for even better texture — the natural oils from your scalp will make waves more cohesive
- If sea salt spray leaves your hair feeling sticky or crunchy, you’re using too much; start with 3-4 spritzes and build up
- Layer texturizing spray or dry shampoo under the sea salt spray for extra hold and volume that lasts through the day
2. Half-Up Half-Down Topknot
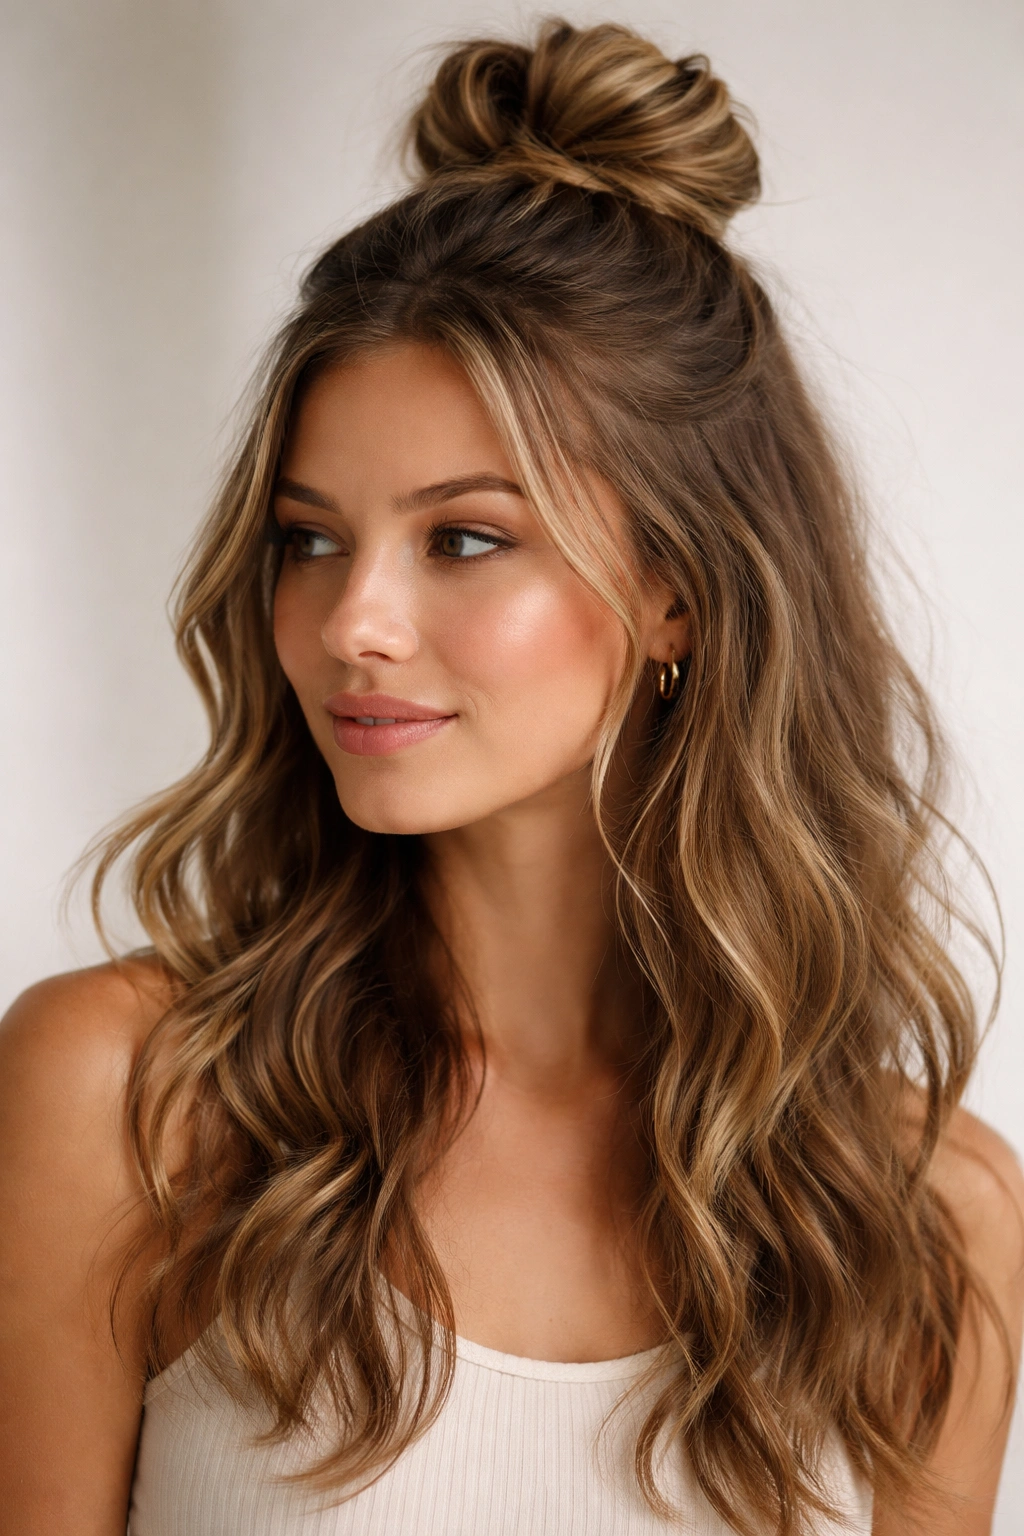
The half-up half-down topknot is deceptively simple but looks intentional and put-together. It keeps hair off your face and neck without committing to a full updo, making it perfect for days when your waves need a little wrangling but you still want to show them off. This style works equally well on second-day hair and freshly washed waves.
Why This Works for Wavy Hair
A half-up topknot actually showcases your waves because the bottom section stays loose and can move freely, displaying your natural texture. The knot at the top gives the style structure and polish, while leaving the underneath loose prevents that pulled-back feeling that can make wavy hair look flat. The contrast between the secured top and the flowing bottom creates visual interest and dimension. Plus, once your topknot is in place, the rest of your hair does its own thing — no styling needed.
How to Style It
Brush through your hair gently with your fingers or a wide-tooth comb to create some separation in your waves. Take a section from each temple and bring it back toward the crown, securing loosely with a hair tie. Don’t pull it tight — leaving it slightly loose and messy actually looks better. Take that secured section and twist it into a loose knot or bun, anchoring it with bobby pins tucked underneath where they won’t show. Pull a few face-framing pieces loose and let your lower waves fall naturally.
Pro Tips
- Use a silk or velvet hair tie instead of elastic; it grips wavy hair better without creating a kink that’s hard to hide later
- Leave the topknot imperfectly formed — a slightly messy knot looks more modern and interesting than one that’s too tight or too polished
- Tease gently at the base of your topknot before securing it; this gives it more dimension and makes it look fuller and more intentional
3. Loose Braided Crown
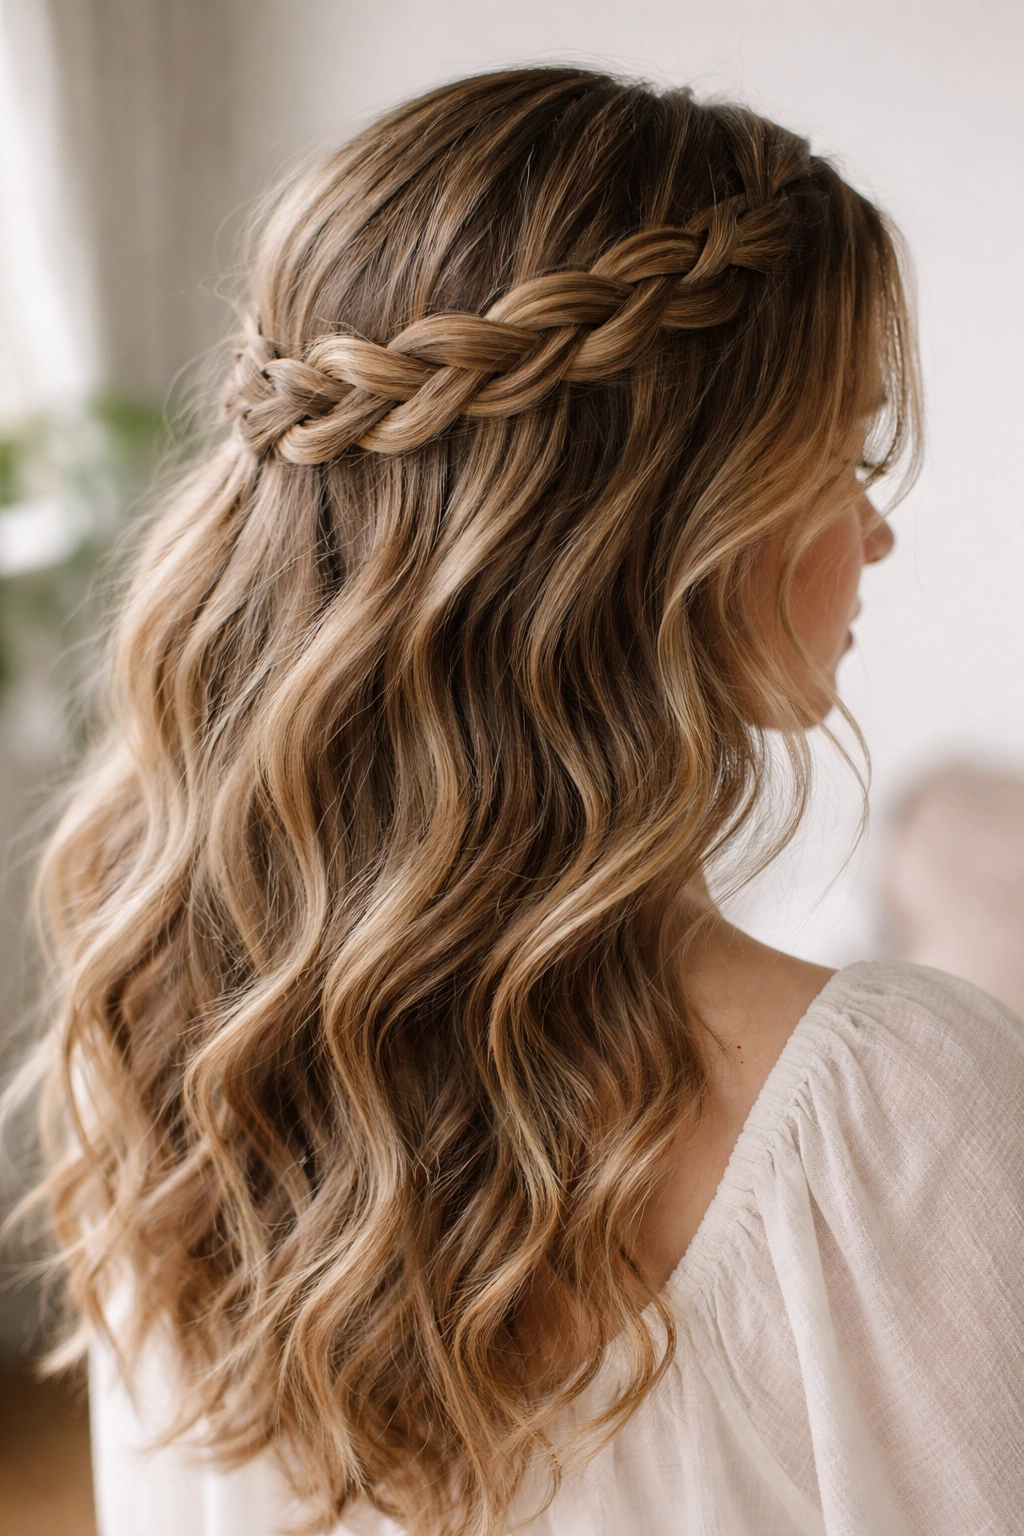
A braided crown sounds fancy, but it’s surprisingly easy and becomes second nature after a few tries. The braid winds around your head like a halo, securing loose waves at the back and creating a romantic, effortless look. This style is particularly striking because the braid shows off your wave texture against the structured lines of the braid itself.
Why This Works for Wavy Hair
A loose braid looks intentional on wavy hair because the braid itself provides structure, while the waves around it retain their natural movement. The braided crown draws the eye upward and creates a flattering frame for your face, especially if you have loose, gentle waves. Because the braid is woven through the back section of your hair, it actually holds your waves in place without feeling restrictive. Your waves stay exactly where you want them while the braid does the work of looking polished.
How to Style It
Start with hair that has natural waves — second-day hair works beautifully here. Take a section from one temple and begin a loose three-strand braid, picking up hair as you go and moving the braid back toward the opposite temple. Keep the braid intentionally loose and slightly messy; tight braids look more formal and less suited to everyday wavy texture. Once the braid reaches the opposite temple, secure it with a small bobby pin tucked underneath. Pull a few waves free at the front and sides to frame your face, and gently tease the braid slightly to add texture and dimension.
Pro Tips
- French braid if you want more hold, or do a simple side braid if you prefer something looser and more relaxed
- Braid slightly damp hair; it holds the braid better as it dries than hair that’s completely dry
- Leave the first few inches of hair unbraided at the starting point for a messier, more romantic look
4. Wet-Look Sleek Waves
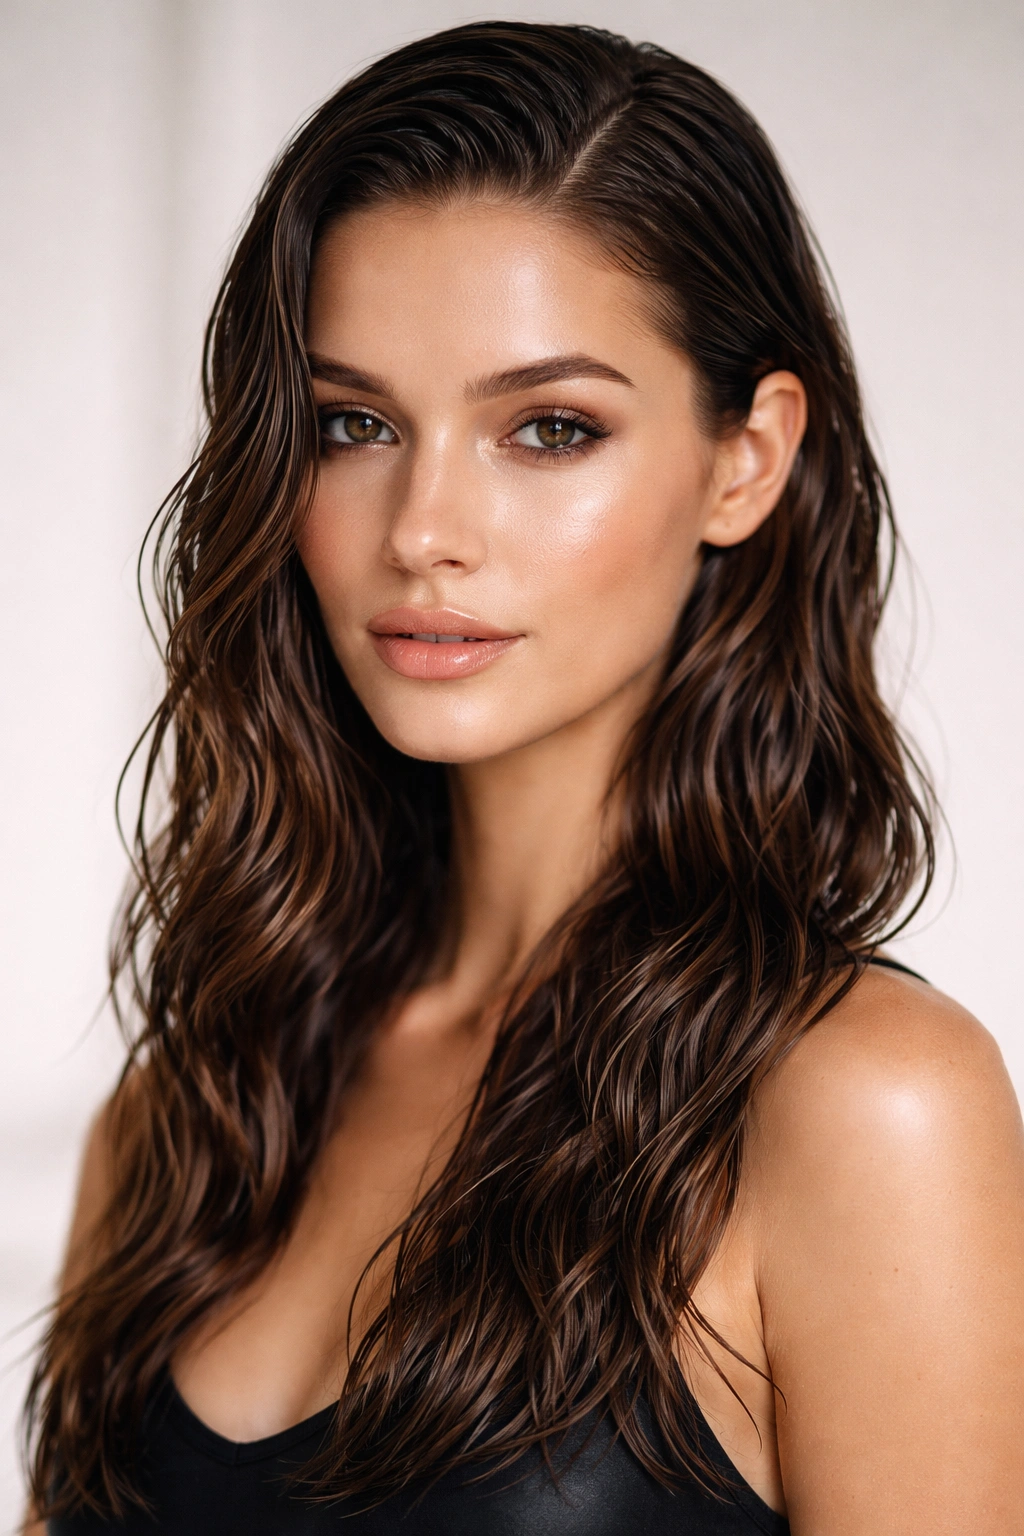
This style uses a sleek gel or mousse to create a polished, almost wet appearance while still maintaining your natural wave pattern. It’s modern, a little edgy, and works whether you’re dressing up or dressing down. The trick is using the right product in the right amount — too much and it looks like you haven’t washed your hair, too little and you lose the effect entirely.
Why This Works for Wavy Hair
The wet-look style actually complements wavy hair by emphasizing the individual waves and creating definition. When you apply a smoothing gel or mousse to damp wavy hair, it holds each wave in place while still allowing movement and bounce. The sheen from the product makes waves look more dimensional and intentional rather than accidental. This is one of the rare styles where appearing slightly wet is the entire aesthetic — and it works because wavy hair naturally wants to have that kind of texture and movement.
How to Style It
Start with damp hair and apply a lightweight smoothing mousse or gel to your roots and throughout your hair. Use a wide-tooth comb to distribute the product evenly, combing through gently to encourage your natural waves to form. Let your hair air-dry to 70-80% dry, then use your fingers to scrunch and reshape waves as needed. Once fully dry, you’ll have defined, shiny waves with a modern, intentional look. If you want extra shine, apply a tiny amount of lightweight hair oil or serum to your ends.
Pro Tips
- Use a gel or mousse specifically formulated for wavy hair; these are designed to enhance texture without making hair crunchy
- Apply product to damp hair, never soaking wet, for the best results — water that drips off dilutes the product
- Refresh this style on day two by misting lightly with water and re-scrunching your waves
5. Textured Ponytail
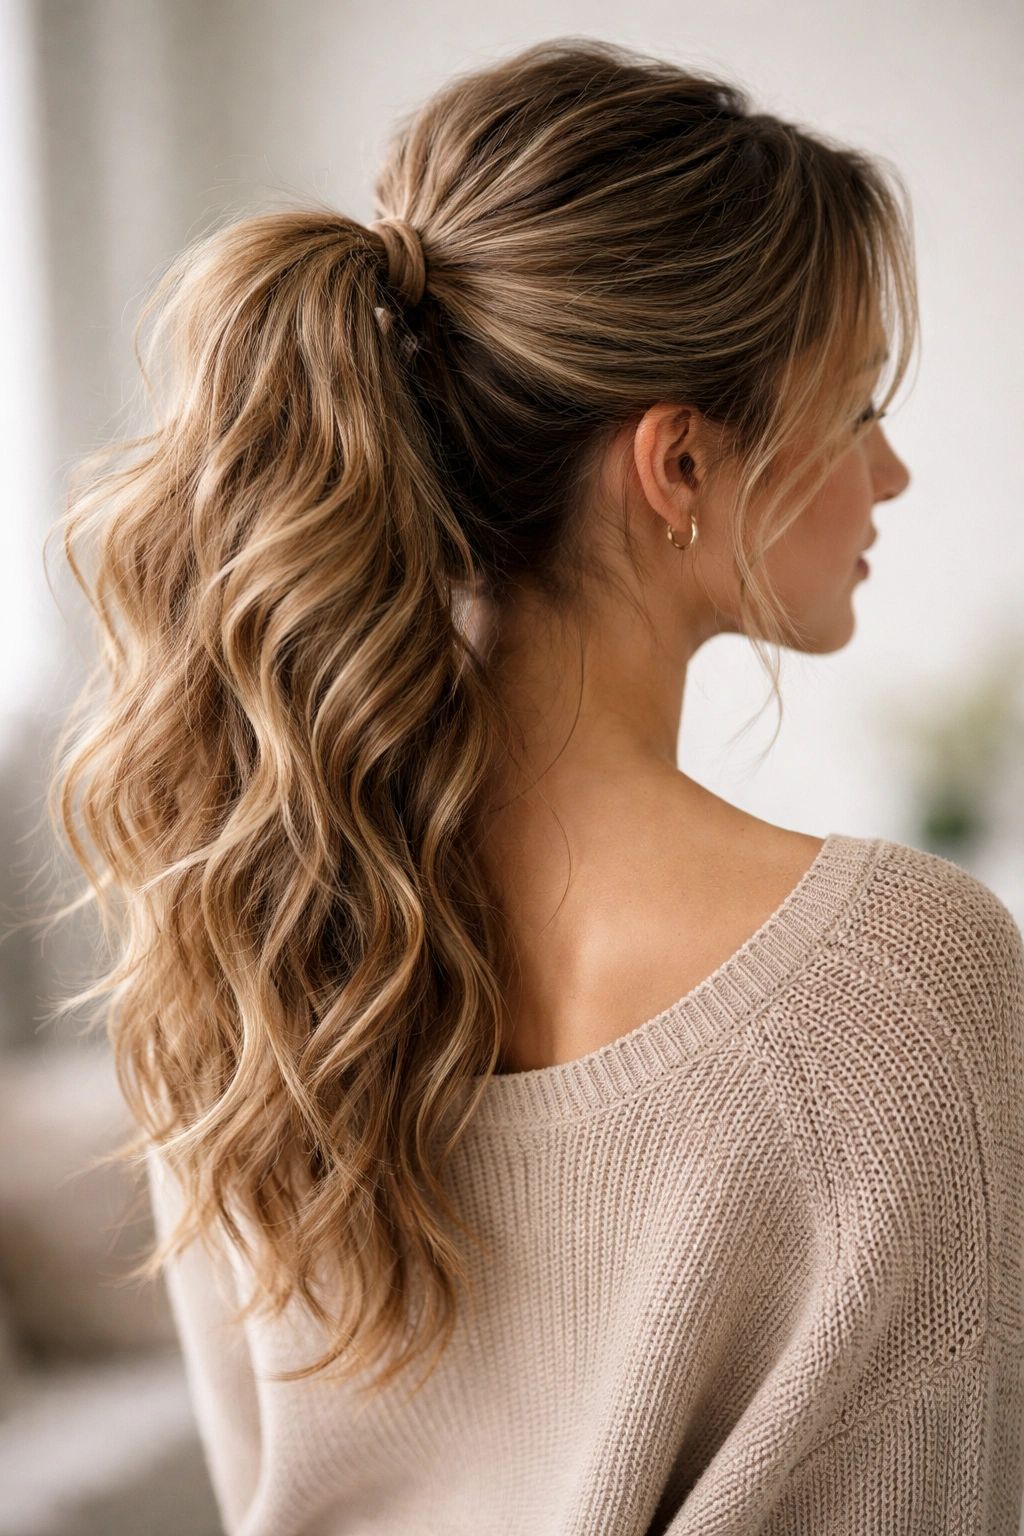
A textured ponytail transforms your everyday waves into something intentional and elevated. Unlike a sleek ponytail that requires a straightener or smoothing serum, a textured ponytail celebrates your wavy hair and actually looks better when your hair has genuine texture and movement. This works whether you’re wearing it high at the crown or low at the nape of your neck.
Why This Works for Wavy Hair
A textured ponytail is designed for wavy hair, not in spite of it. The waves create visual interest and dimension that a sleek ponytail just can’t achieve. Each wave remains visible and adds to the overall texture of the ponytail, making it look fuller, thicker, and more deliberately styled. Your waves do the heavy lifting here — you’re just gathering them and letting them do what they naturally do. This is honestly easier than trying to smooth your waves into submission for a sleek pony.
How to Style It
Gather your hair loosely at either the crown (high ponytail) or the nape of your neck (low ponytail), depending on your preference and what suits your face shape. Secure with a hair tie, but don’t pull it tight — leave it slightly loose so the waves can breathe and maintain their shape. Take a small section from the ponytail and wrap it around the base of the tie, pinning it underneath to hide the tie and add polish. Gently tease the ponytail itself by running your fingers through it to add volume and texture, and pull a few face-framing pieces loose to soften the look.
Pro Tips
- Use a matte hair tie in a color that matches your hair; shiny ties draw attention to the tie itself rather than the ponytail
- Slightly dampen your hair before gathering it; this helps waves hold their shape once secured
- Finish with a light texturizing spray to emphasize the waves in your ponytail and add grip throughout the day
6. Twisted Side Bun
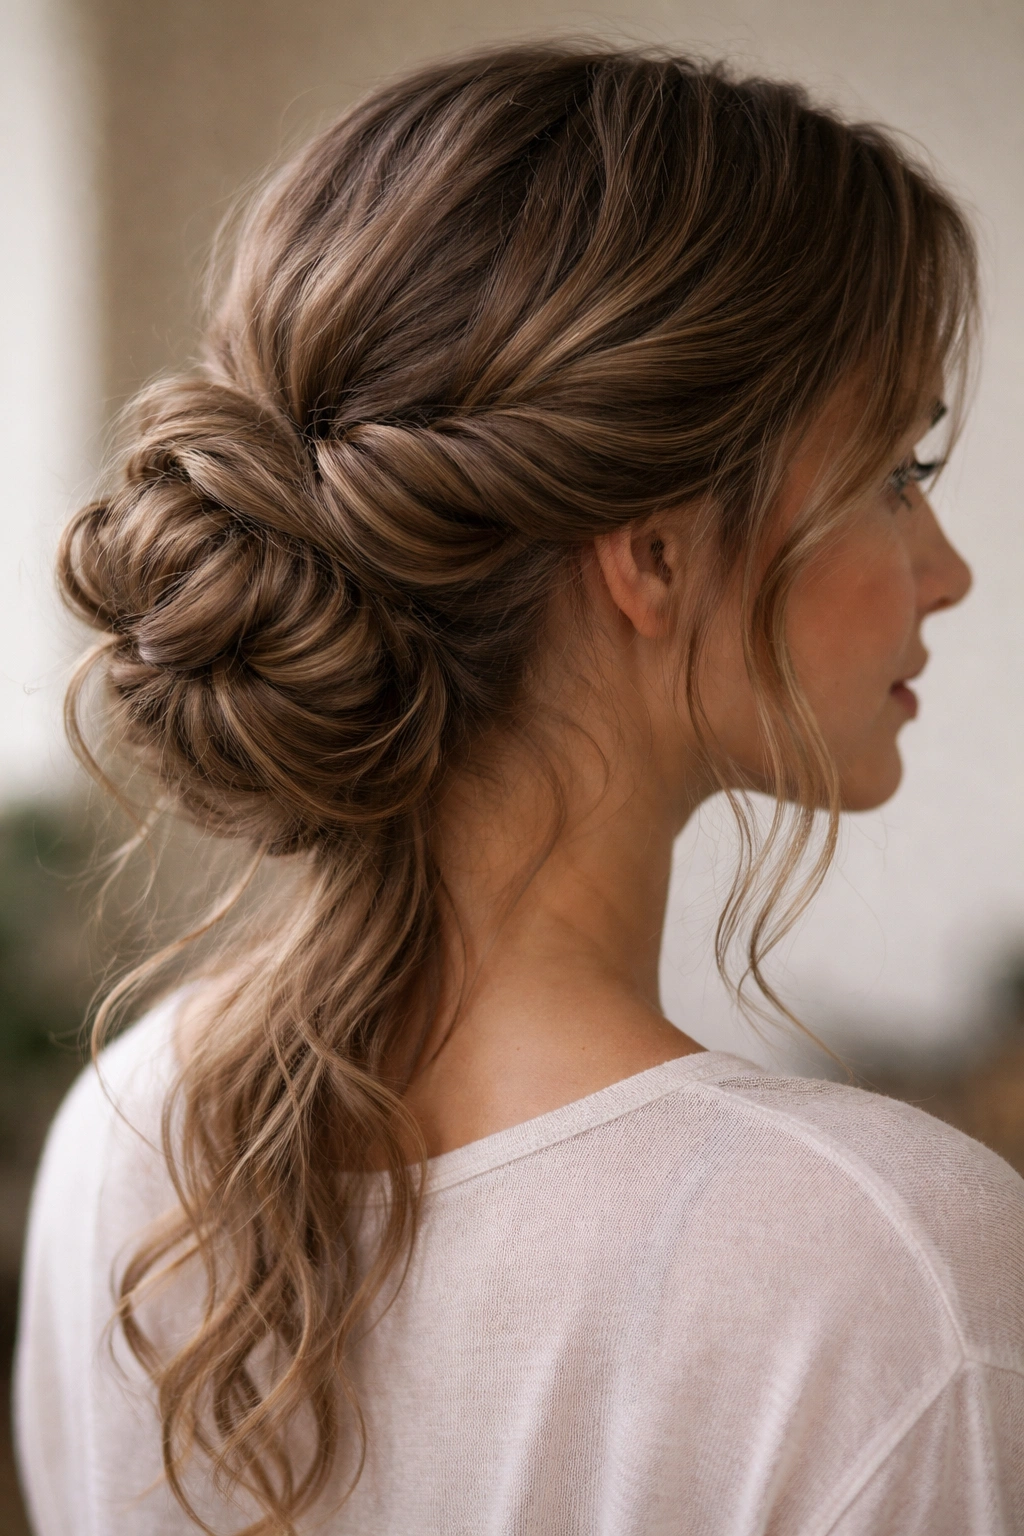
A side bun is a classic, but when you add twists instead of a smooth section of hair, it becomes something far more interesting. The twists create visual texture and movement, and this style works beautifully whether you’re going casual or dressing it up. A twisted side bun can be as simple or as intricate as you want it to be.
Why This Works for Wavy Hair
Twists look naturally textured on wavy hair because they echo your wave pattern and create dimension. Instead of pulling your hair into a smooth, tight section that emphasizes any frizz or irregularities, twists actually use your texture to create something beautiful. The twists wrap around each other and interact with your waves to create a cohesive, intentional look. Side-swept styles also flatter most face shapes and work whether your waves are loose and gentle or tighter and more defined.
How to Style It
Take a generous section of hair from one side of your head at about the temple. Divide it into two strands and twist them around each other loosely as you move back toward the ear and down toward the nape of your neck. Once you’ve twisted as far as you want to go, gather that section along with the rest of your hair at the side of your head, just behind your ear or slightly lower depending on where you want the bun. Secure everything into a loose bun and pin it in place. Pull a few waves free at the front for a softer, more romantic look.
Pro Tips
- Twist loosely; tight twists can look harsh on wavy hair and pull texture taut
- Tease the base of your bun before pinning to give it more volume and dimension
- This style works beautifully on second or third-day hair when waves have settled and have more texture and grip
7. Piece-y Shag Waves
A piece-y shag wave is less a specific style and more an approach to styling that emphasizes separation and texture. Instead of smooth waves that blend together, you’re deliberately creating distinct, individual wave pieces that look modern and intentional. This works with a texture spray, a texturizing mousse, or even just strategic finger-combing.
Why This Works for Wavy Hair
Piece-y waves celebrate the natural separation that wavy hair creates. Instead of trying to blend your waves into one cohesive look, you’re emphasizing each individual wave and making that separation a feature rather than a bug. This style is incredibly forgiving because the more textured and piece-y your hair looks, the better it reads as intentional styling. Wavy hair naturally wants to separate into distinct strands, so you’re working with your hair’s nature here.
How to Style It
After shampooing and conditioning, apply a lightweight texturizing spray or mousse to damp hair. Using your fingers rather than a brush, scrunch and separate your hair as it dries, deliberately creating distinction between different sections and wave pieces. Rough-dry with a diffuser if you have time, or let it air-dry while you continue scrunching and separating with your fingers. Once dry, apply a tiny bit more texturizing spray and continue scrunching and separating. The key is using your fingers to create intentional gaps and definition rather than smoothing everything together.
Pro Tips
- Use a dry shampoo or texturizing spray with some hold; volumizing products alone won’t create enough definition
- Avoid running a comb or brush through piece-y waves — fingers only to maintain separation
- This style actually improves throughout the day as you move around and your hair naturally settles into more defined pieces
8. Tousled Beach Bun
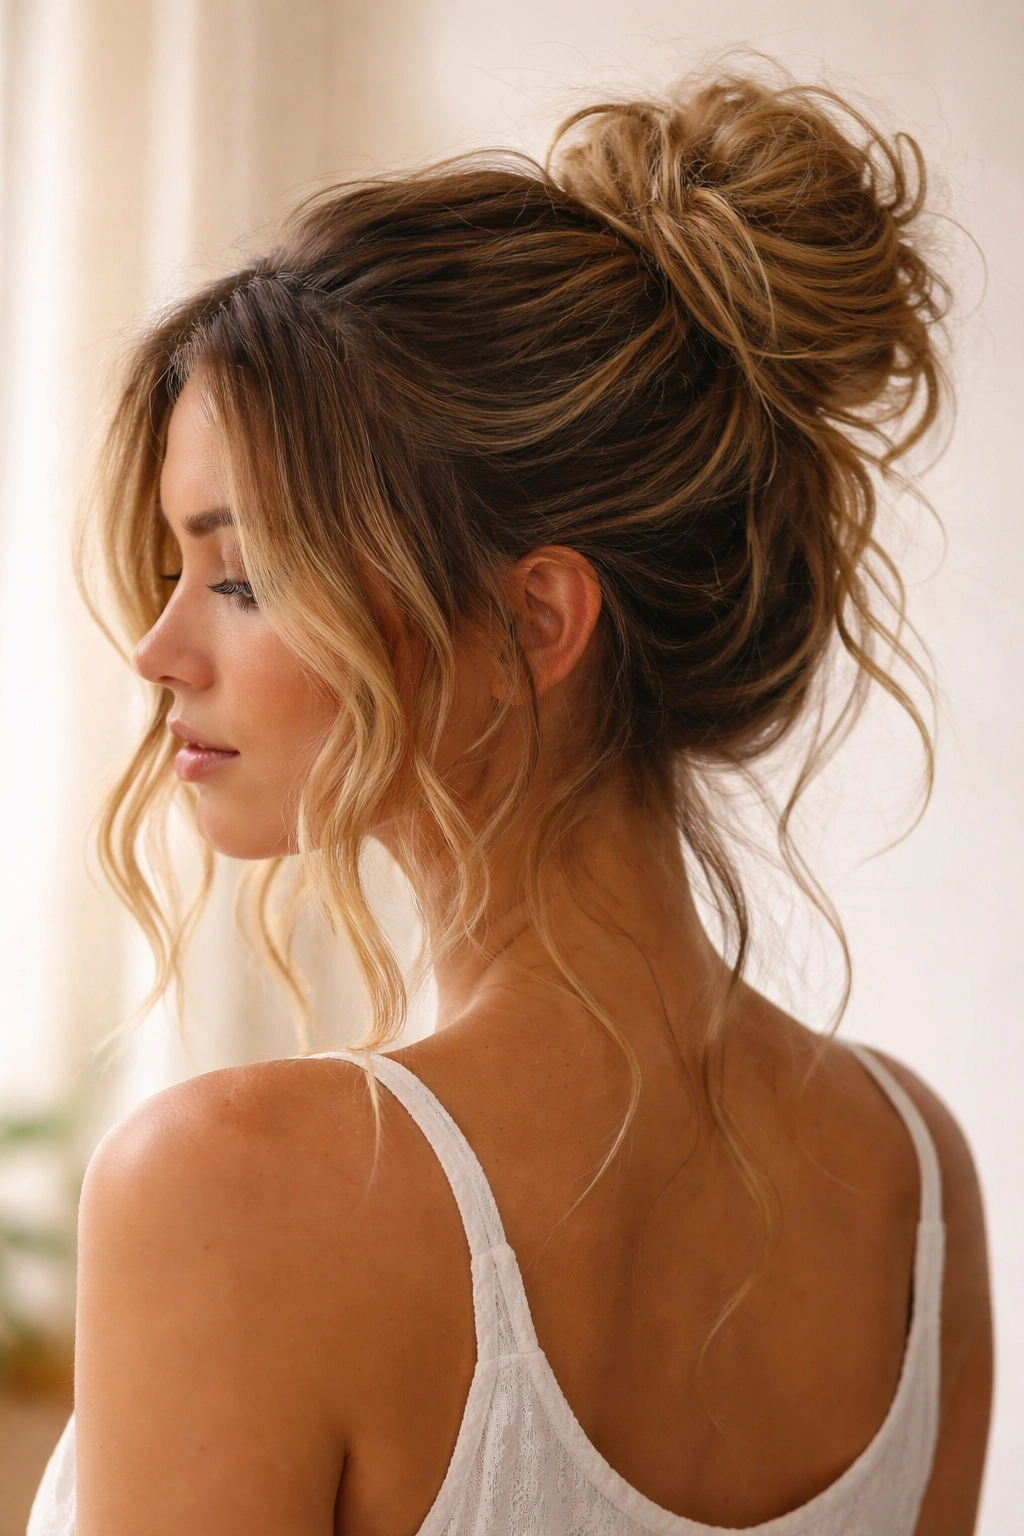
A beach bun sounds beachy and effortless, and it absolutely is — it’s one of the easiest styles for wavy hair because it doesn’t require any precision or particular skill. The messier and more textured it is, the better it looks. You can throw this together in under two minutes once you get the basic technique down.
Why This Works for Wavy Hair
Beach buns work on wavy hair because they’re supposed to look slightly undone. The more your bun is textured and piece-y, the better it reads as intentional. Your waves contribute to the overall aesthetic of tousled casualness, and this is one of the few styles where having slightly frizzy or piece-y hair is actually perfect. The bun holds your hair off your face and neck while keeping the styling incredibly minimal.
How to Style It
Gather your hair loosely at the crown or the nape of your neck — wherever is most comfortable. Don’t secure with a hair tie yet; instead, hold the section in your hand and twist it into a loose coil. Wrap that coil into a loose, imperfect bun and secure it with bobby pins tucked underneath. Pull strands loose deliberately from around the crown and sides to frame your face. The more piece-y and deliberately undone it looks, the better. If you want extra hold or texture, spray lightly with a texturizing spray before gathering.
Pro Tips
- Use bobby pins that match your hair color — they’re almost invisible and won’t show in your bun
- Don’t worry about smoothness; this style celebrates texture and imperfection
- Works beautifully on second-day hair, or spray your hair lightly with water before styling if you’re working with freshly washed hair
9. Curled Heatless Waves
Heatless curling methods work surprisingly well on wavy hair because you’re starting with a texture base and simply enhancing it. Methods like braiding, twisting, or using a curling rod or foam rollers overnight can intensify your natural waves into more defined curls, giving you styling options without any heat damage.
Why This Works for Wavy Hair
Since you already have wave pattern in your hair, you’re not starting from scratch trying to create curls from straight hair. You’re enhancing waves that are already there, which means the curls set faster, last longer, and look more natural. Heatless methods are gentler on your hair and actually create more longevity than heat styling because they don’t disrupt your hair’s natural moisture balance. You can choose the intensity — light braids for subtle enhancement, or tighter braids for more pronounced curls.
How to Style It
Before bed, divide your damp hair into 4-6 sections and braid each section loosely. Leave the braids in overnight as your hair dries. In the morning, carefully unbraid your hair and use your fingers to separate and shape the waves and curls. If you want more definition, scrunch gently with a texturizing spray. The longer you leave the braids in, the tighter and more pronounced your curls will be — experiment to find the level of curl you prefer. You can refresh this style by misting with water and re-scrunching the next day.
Pro Tips
- Braid on damp hair, not soaking wet, so the braids hold their shape as your hair dries
- Thinner braids create tighter curls; thicker braids create looser waves
- Don’t unbraid in the morning and immediately brush — let the curls set for 30 minutes or so first for the best hold
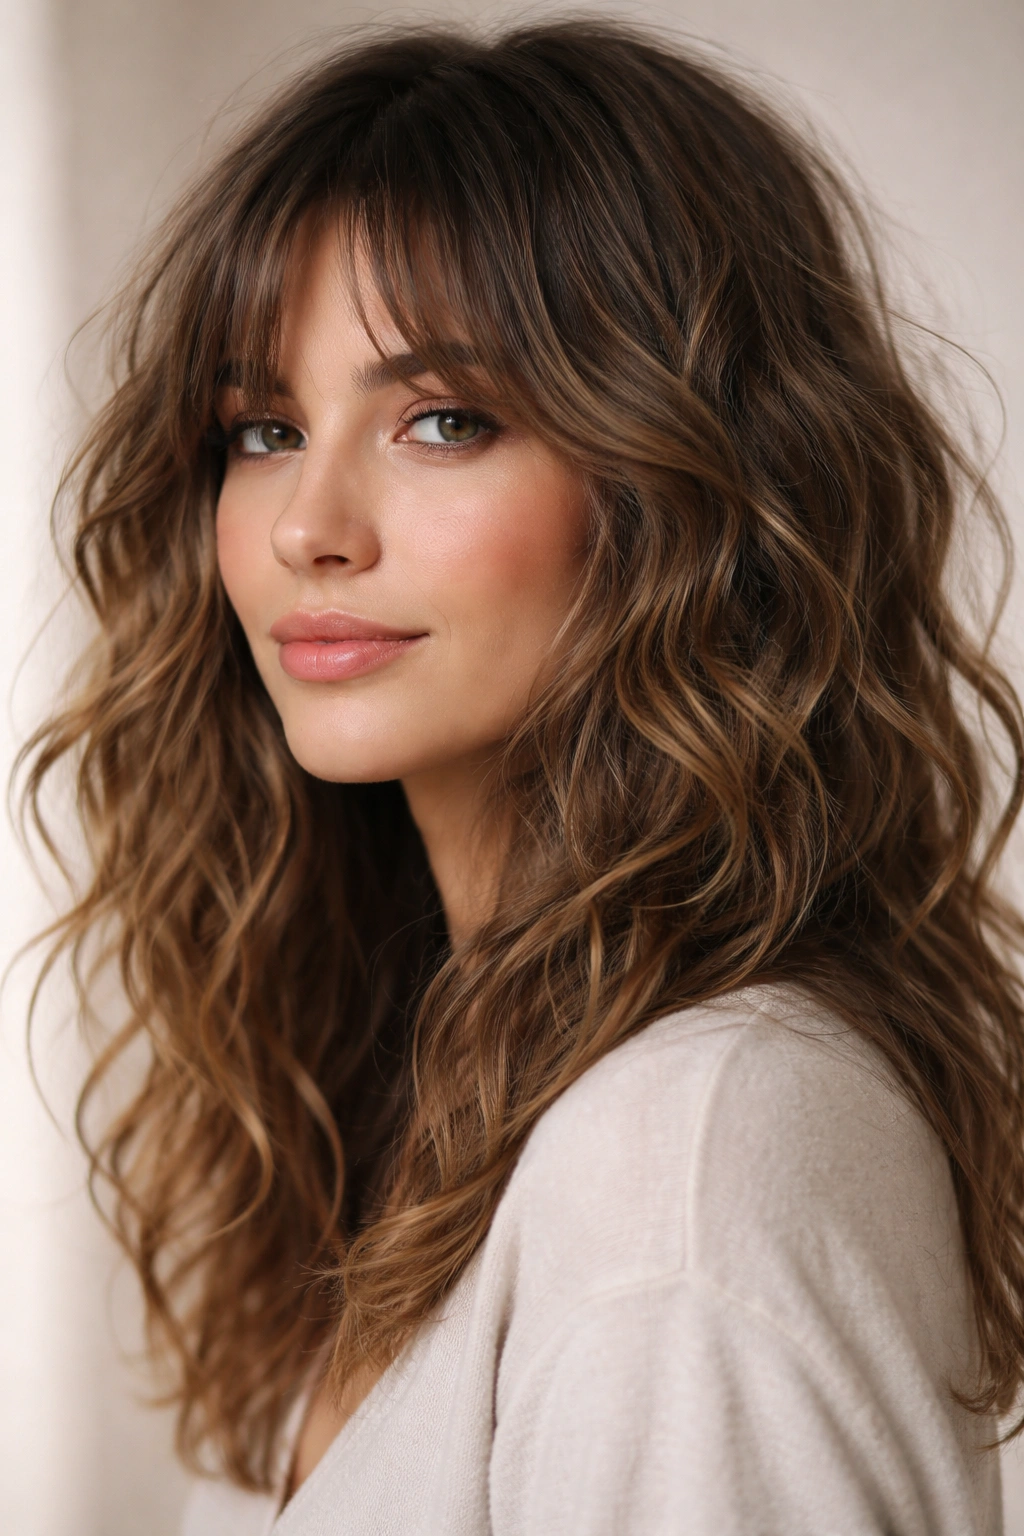
10. Soft Romantic Waves
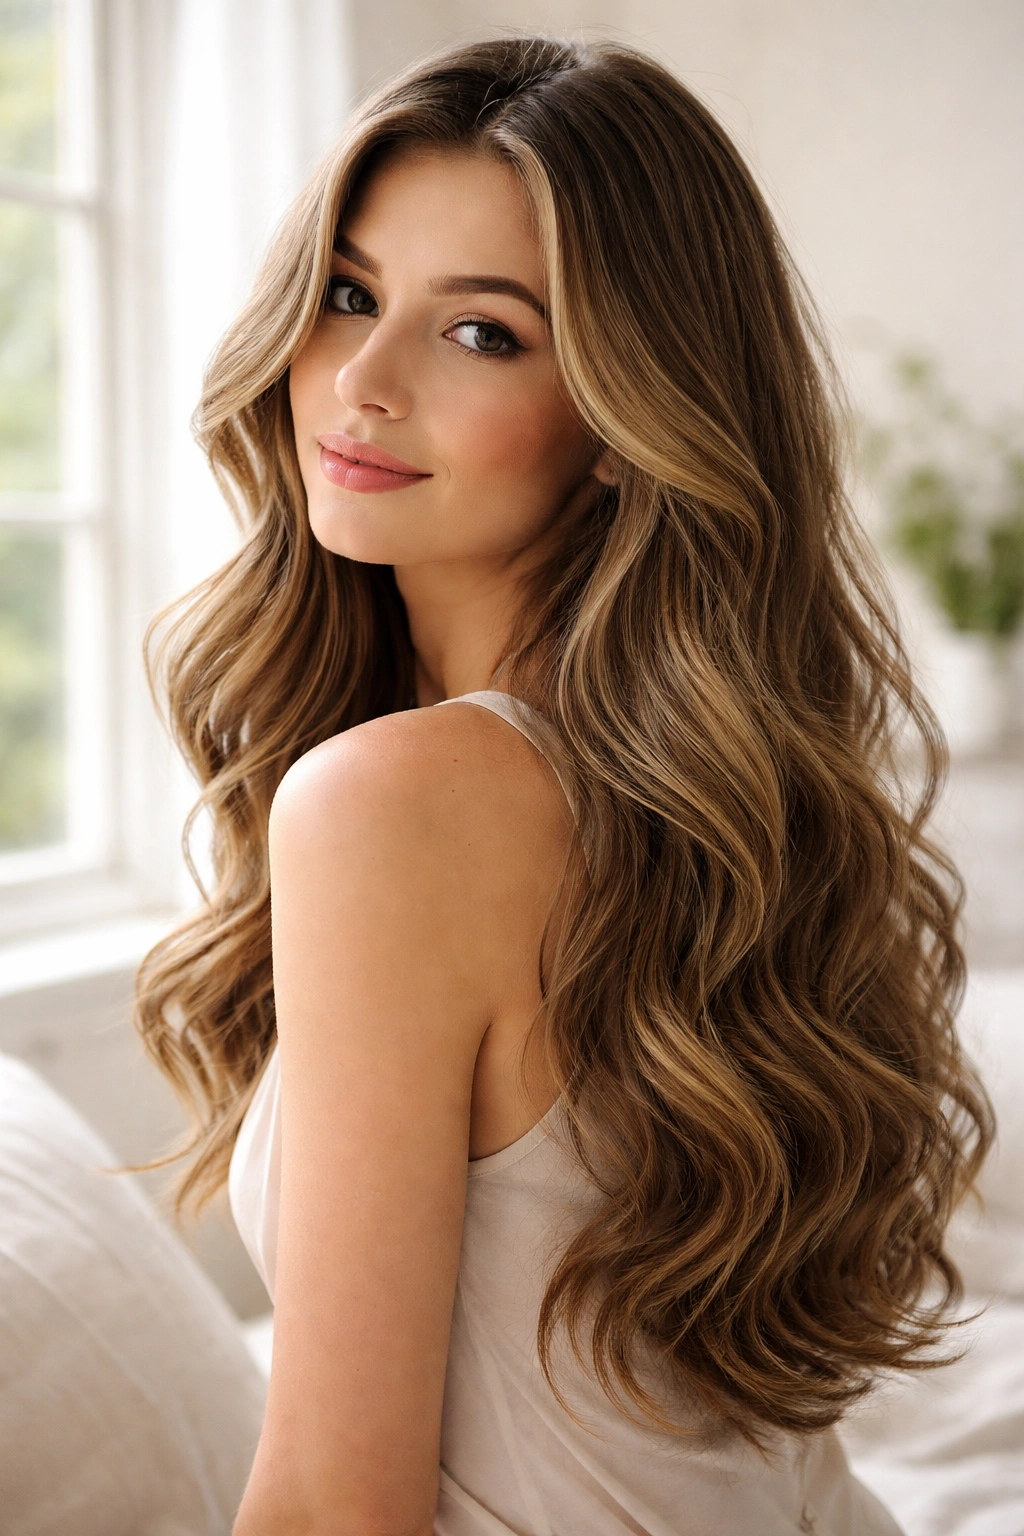
Soft romantic waves are looser, more elegant waves that work beautifully for both casual and dressed-up occasions. This style emphasizes gentle movement and fluidity rather than defined texture, creating a romantic, approachable look that flatters most face shapes.
Why This Works for Wavy Hair
Wavy hair naturally creates the kind of dimension and movement that makes romantic waves look effortless rather than trying-too-hard. You’re not creating tight, structured waves; you’re just enhancing and directing your natural wave pattern to flow in a particular way. The softness of this style suits wavy hair perfectly because it celebrates the hair’s natural tendency toward gentle movement and texture.
How to Style It
On damp hair, apply a lightweight styling cream or mousse designed for waves. Using a wide-tooth comb, gently comb through your hair to encourage waves to form in a particular direction — typically side-swept for romantic styling. Allow your hair to air-dry completely, or use a diffuser on low heat to speed up the process. Once dry, you can finger-comb gently or use a wide-tooth comb to separate waves slightly if needed. Don’t overscrunch or overwork — the goal is soft, flowing movement, not maximum texture.
Pro Tips
- Apply product to damp hair rather than soaking wet; your hair holds the product better and dries with more defined waves
- Dry your hair 80% of the way air-dry and finish with a diffuser; this combination gives you better wave definition than full air-dry or full heat dry
- Use a lightweight serum or oil on your ends to enhance shine and create that polished, romantic look
11. Layered Waves with a Hair Clip
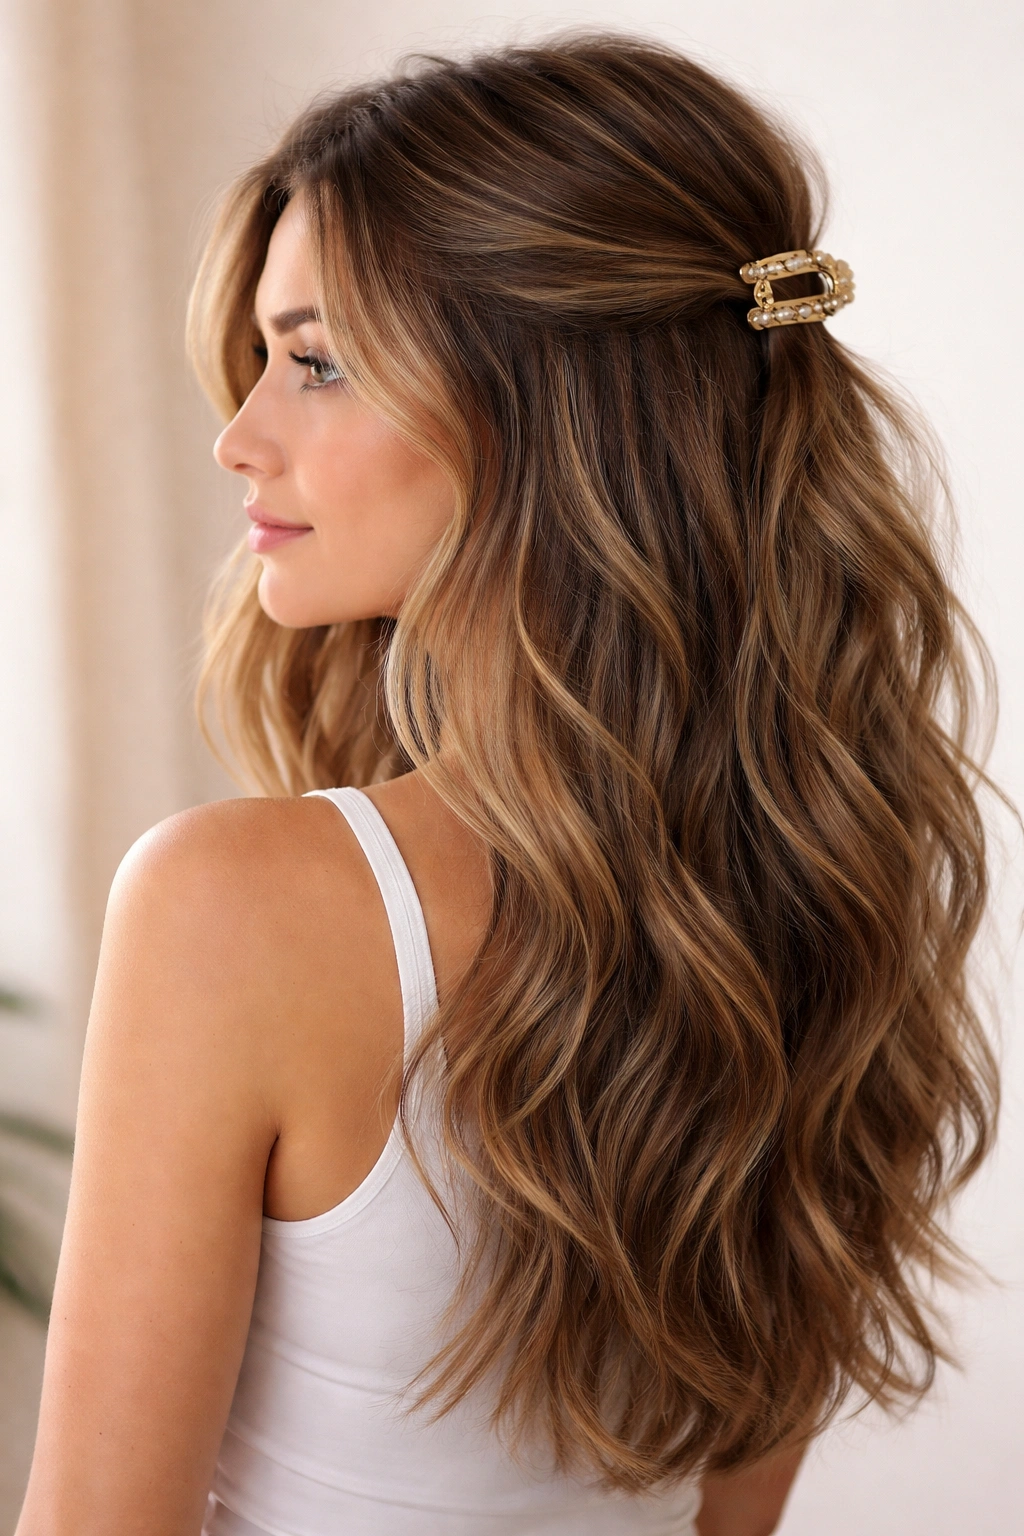
A hair clip transforms everyday waves into something that feels more intentional and polished. This simple accessory gathers a section of your hair while leaving the rest free, creating visual interest and dimension. Hair clips work with any wave pattern and instantly elevate a casual hairstyle.
Why This Works for Wavy Hair
A hair clip works beautifully on wavy hair because it draws attention to the texture and movement rather than fighting it. The clip gathers a section neatly while the rest of your waves remain free and flowing, creating a balanced look that’s interesting without being overdone. The contrast between the clipped section and the flowing section below emphasizes the natural waves in both areas. Plus, hair clips come in endless styles and colors, so you can match your mood or outfit.
How to Style It
Style your hair with your normal wave routine — sea salt spray, texturizing mousse, or however you typically enhance your waves. Once your hair is dry and styled, gather a section from one side of your head (starting at the temple or slightly behind it) and secure it with a hair clip at the back of your head or slightly off-center. Leave the section you’ve clipped slightly loose and textured rather than sleek — you want to see the waves and texture in the clipped section. Let your bottom layers flow freely beneath the clipped section.
Pro Tips
- Use a clip in a color or material that complements your hair and outfit — tortoiseshell, metal, or colored acrylic all work depending on your style
- Don’t pull the clipped section too tight; leaving it slightly loose maintains the texture and looks more modern
- This works beautifully as a second-day hairstyle refresh — just add a clip to section that’s slightly flattened
12. Sleek Low Ponytail with Waves
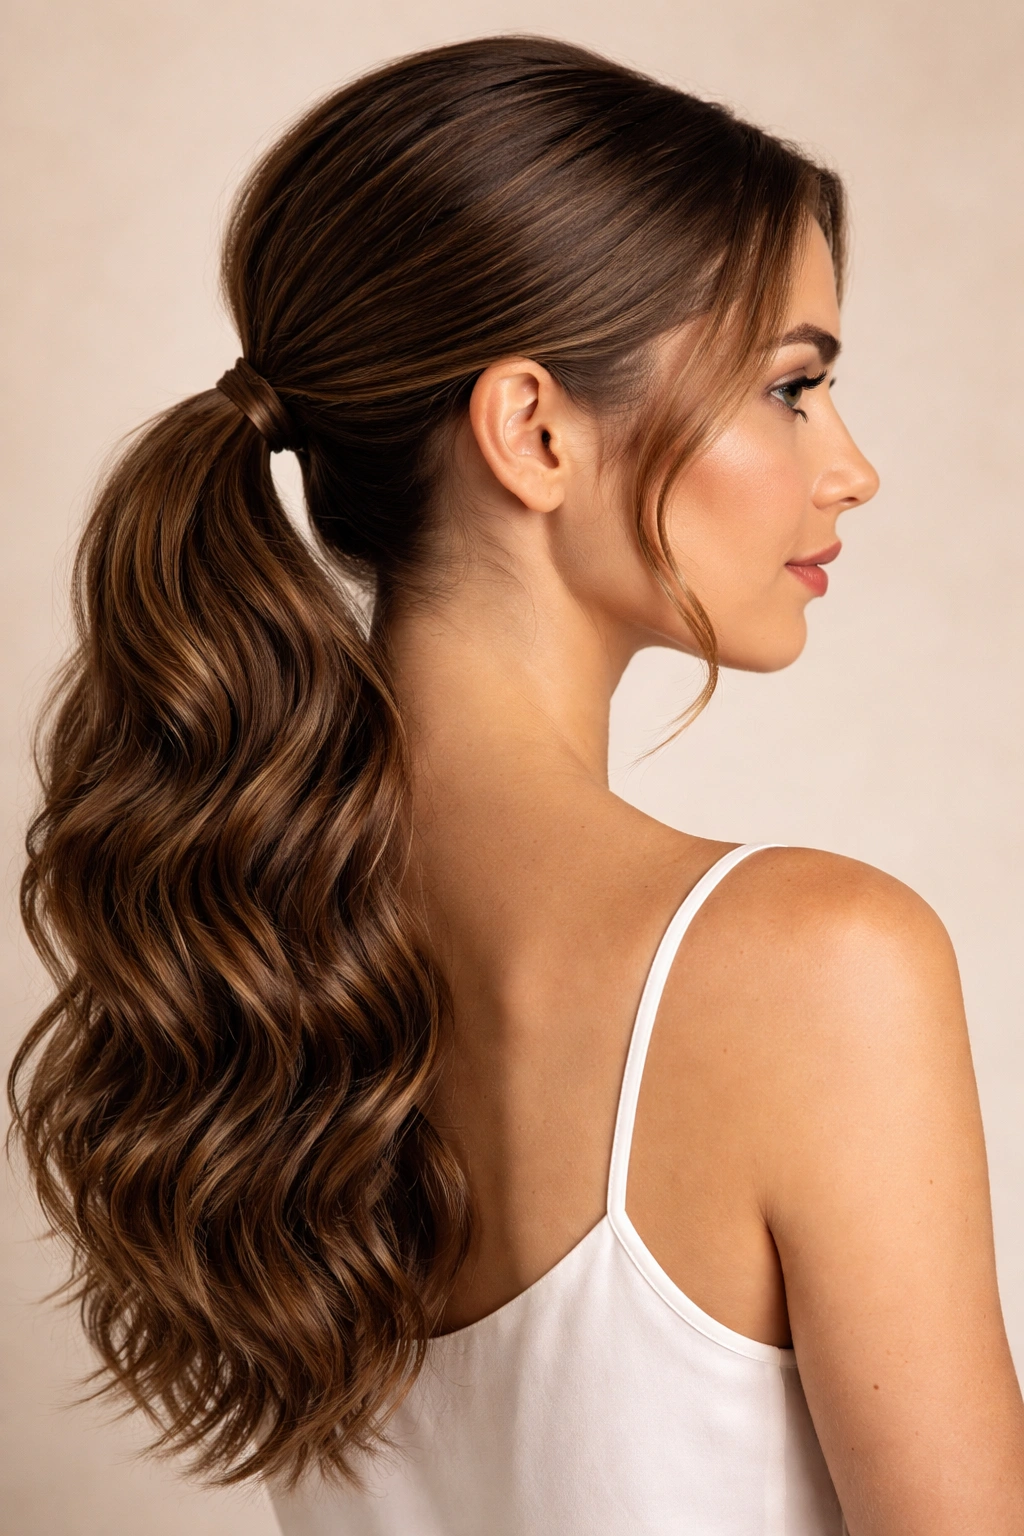
A low ponytail combines the polish of a ponytail with the beauty of your natural waves. Unlike a high ponytail that requires all your hair to be gathered, a low ponytail lets your waves cascade down while keeping the base of your hair neatly secured. This style works for both casual and professional settings.
Why This Works for Wavy Hair
A low ponytail positioned at the nape of your neck shows off your wave texture beautifully because the waves flow freely below the secured section. Your ponytail has structure and polish, but it’s not so high or tight that it disrupts your natural wave pattern. The waves in the ponytail itself add dimension and visual interest, and the ponytail doesn’t compete with your face or overwhelm it the way a high ponytail sometimes can.
How to Style It
Brush through your hair gently with a wide-tooth comb to create some wave definition and separation. Gather your hair loosely at the nape of your neck — not at the base of your skull, but lower, just above where your neck meets your shoulders. Secure with a matte hair tie and wrap a small section of hair from the ponytail around the base of the tie, pinning underneath to hide the tie and add polish. Use your fingers to gently tousle and separate the waves in your ponytail, adding a light texture spray if you want extra hold and definition throughout the day.
Pro Tips
- Leave this ponytail slightly loose rather than pulling it tight; the waves hold better and the style looks more modern
- Tease gently at the base before securing for a fuller, more voluminous ponytail
- This style looks intentionally polished when you pair it with a few face-framing pieces pulled loose around your temples
Key Takeaways
Every single one of these styles works because they embrace your wavy hair rather than fighting it. The common thread across all of them is that you’re using your natural texture as an asset, not treating it like something to hide or overcome. The best everyday hairstyle for your wavy hair is the one that takes the least effort, requires the fewest products, and actually plays to your hair’s natural strengths.
Experiment with these styles and pay attention to which ones you actually reach for over and over. Maybe it’s the sea salt spray waves because they take literally five minutes, or the textured ponytail because it works on days when your hair’s texture is more pronounced. Your everyday hairstyle should be something you can create reliably in under ten minutes, ideally without heat styling or complicated techniques. The more you practice these styles, the faster they become — and the better you’ll get at reading your hair on any given day and choosing the style that’ll work best with what you’re working with.