Shaggy hair is having a major moment, and for good reason. There’s something undeniably effortless about the texture, movement, and lived-in aesthetic that makes shaggy layers so appealing. But here’s the thing most people get wrong: shaggy doesn’t mean lazy or high-maintenance in a bad way. The right shaggy cut with intentional layers and textured ends gives you a hairstyle that actually looks better when it’s slightly undone—messy bedhead becomes intentional styling.
Medium length is the sweet spot for shag haircuts. You get enough hair to work with for volume and movement without the weight that pulls down shorter styles or the time commitment that comes with extra-long hair. A well-executed medium shag sits somewhere between your chin and shoulders, with layered sections throughout that create natural texture and dimension. The beauty of this length is that it photographs gorgeously, works with most face shapes, and adapts to your personal style—whether you want something more polished and controlled or deliberately tousled and undone.
What makes texture-packed shag styles so appealing is the dimension they create with light and shadow. When layers are cut at varying lengths and angles, they catch light differently at each level, making your hair appear fuller and more voluminous than it actually is. Add in strategic choppy ends, piece-y layers, and sometimes even a perm or waves, and you’ve got a hairstyle with serious visual interest. The best textured shags aren’t just cut well—they’re styled in a way that emphasizes those choppy layers and lets each section move independently.
1. Classic Choppy Shag with Wispy Bangs
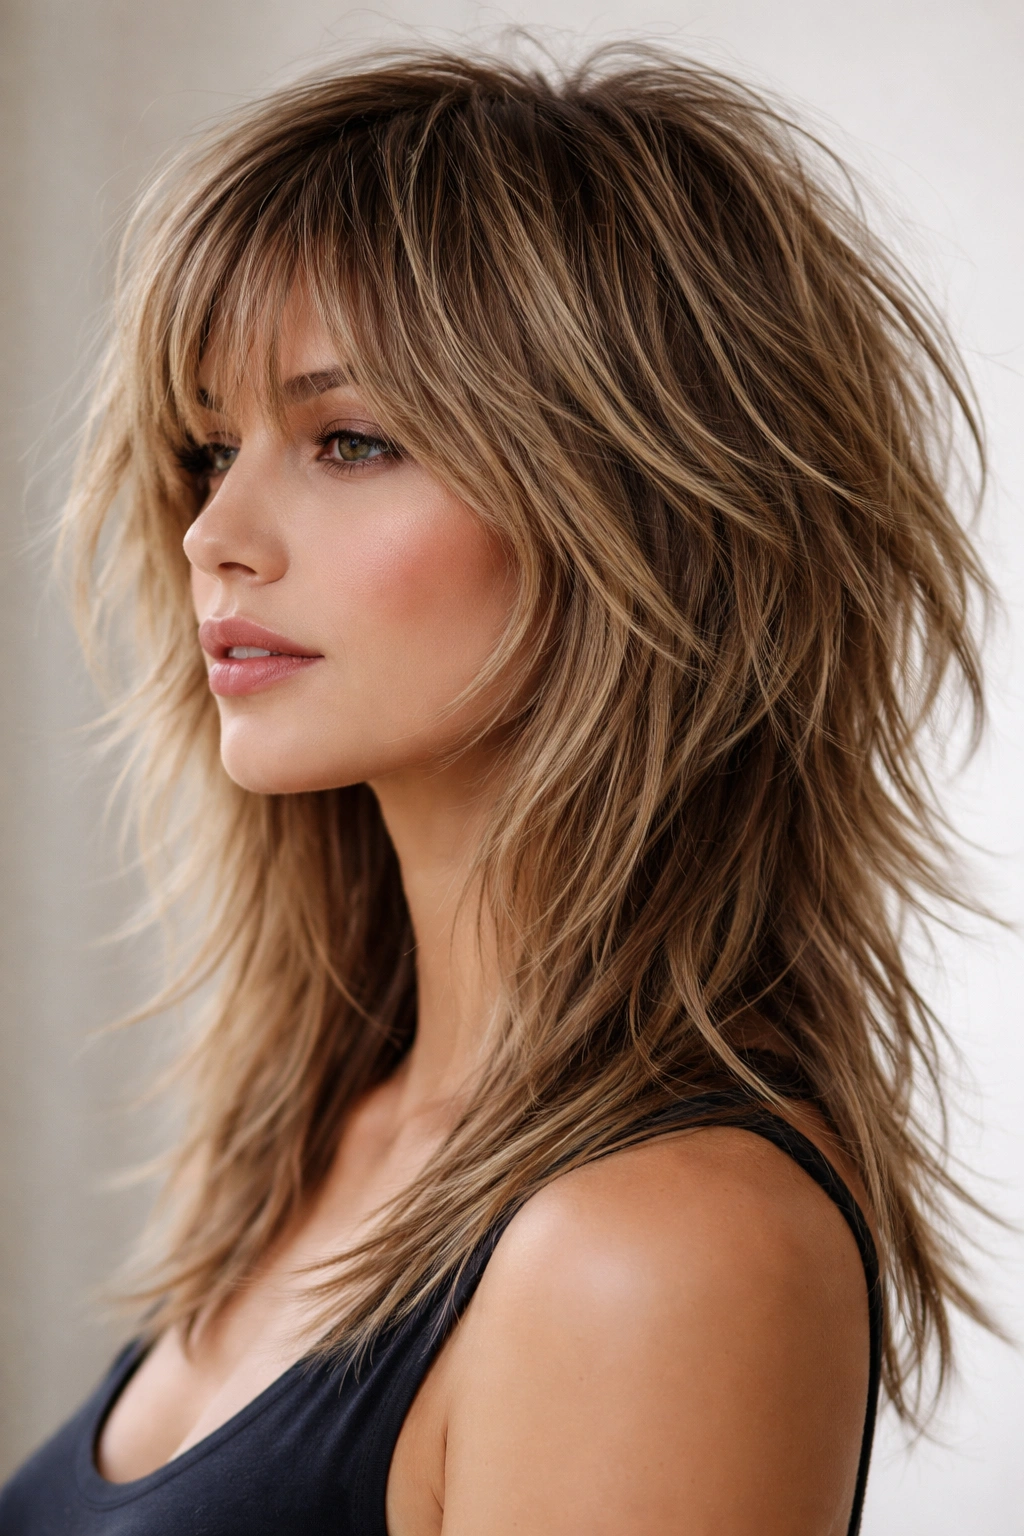
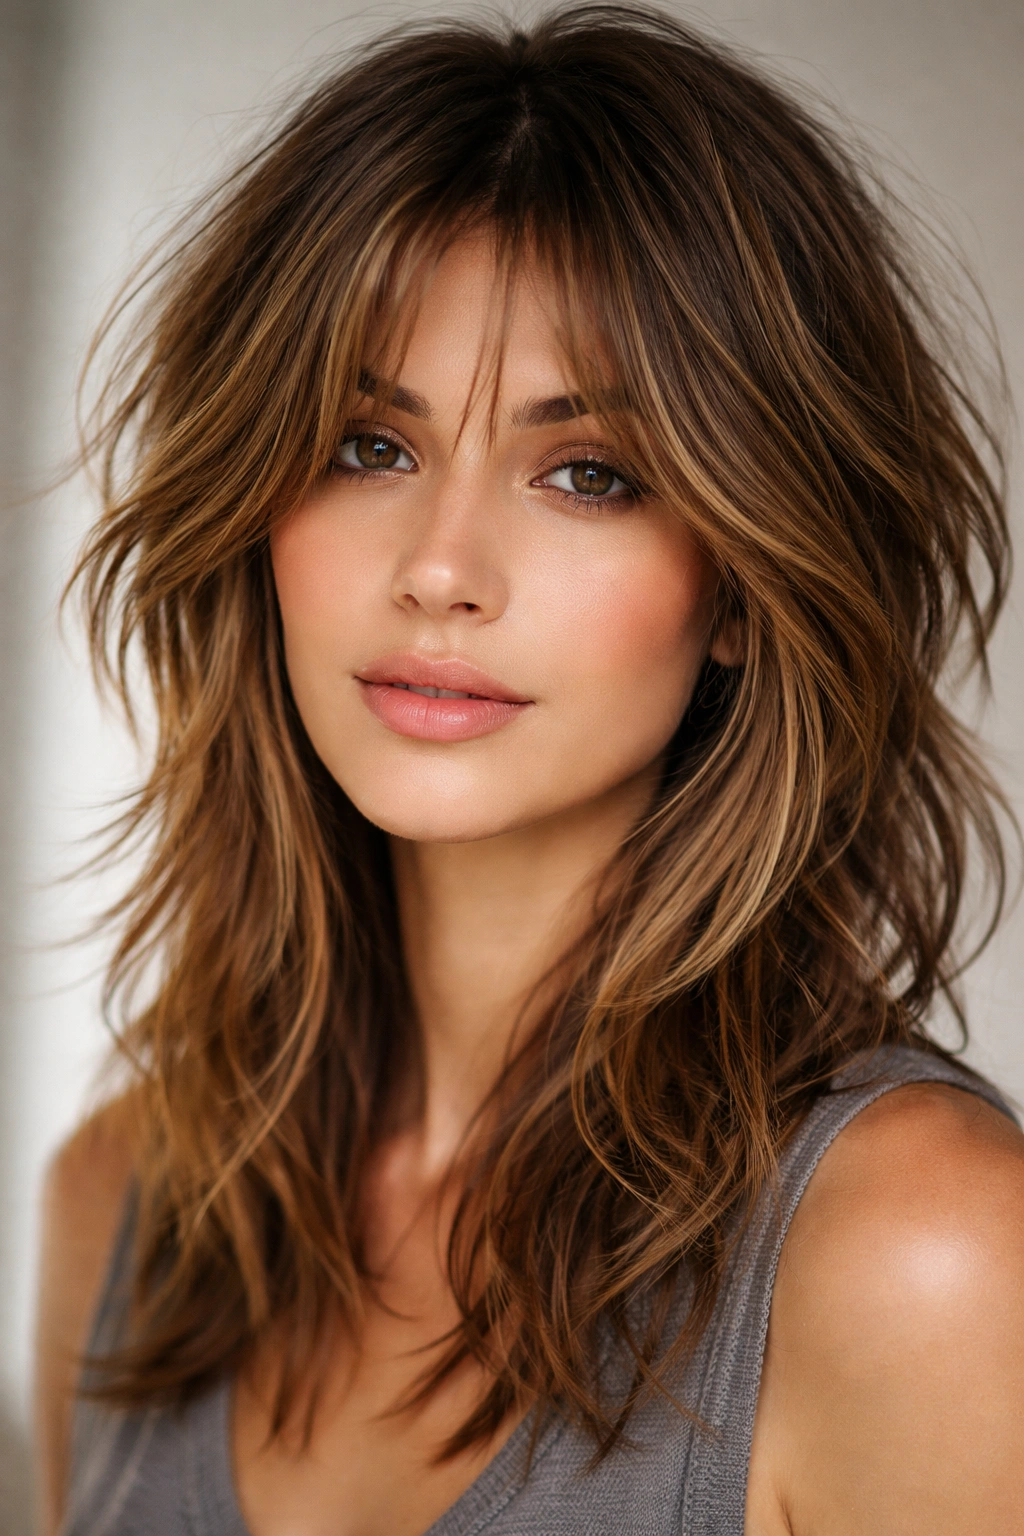
This is the shag that started the modern revival—short, choppy layers throughout with wispy, side-swept bangs that graze your eyes. The defining feature is how severely textured the ends are; instead of blunt cuts, your stylist uses point-cutting or razor techniques to create separated, choppy pieces that move independently. The top stays slightly shorter and fuller for lift, while the bottom layers are longer and feathered, creating a graduated effect.
What Makes This a Timeless Choice
The classic choppy shag works because it’s incredibly flattering across face shapes. The wispy bangs create a soft frame while the layers at the sides can be positioned to contour your face. For fine hair, the choppy texture creates the illusion of density without needing actual thickness. For thick hair, the choppy ends prevent bulk while preserving volume. The movement is natural and doesn’t require styling—you can literally wash and go, though styling it intentionally elevates the look.
Key Styling Details
- Bangs length: Wispy bangs should fall between your eyebrow and mid-eye when brushed forward; they’re not a blunt line but feathered throughout
- Layer placement: Shortest layers start around ear level, with longer pieces underneath creating a graduated transition to your ends
- Texture technique: Razor or point-cutting creates the signature choppy separation rather than scissor-over-comb blending
- Best face shapes: All face shapes, though especially flattering for round and square faces where the side layers contour the jawline
Pro tip: Blow-dry with a round brush to add volume at the crown, then tousle the layers with your fingers for that effortless texture. You’re not trying to “smooth” this cut—you’re enhancing the natural separation.
2. Textured Shag with Face-Framing Curtain Bangs
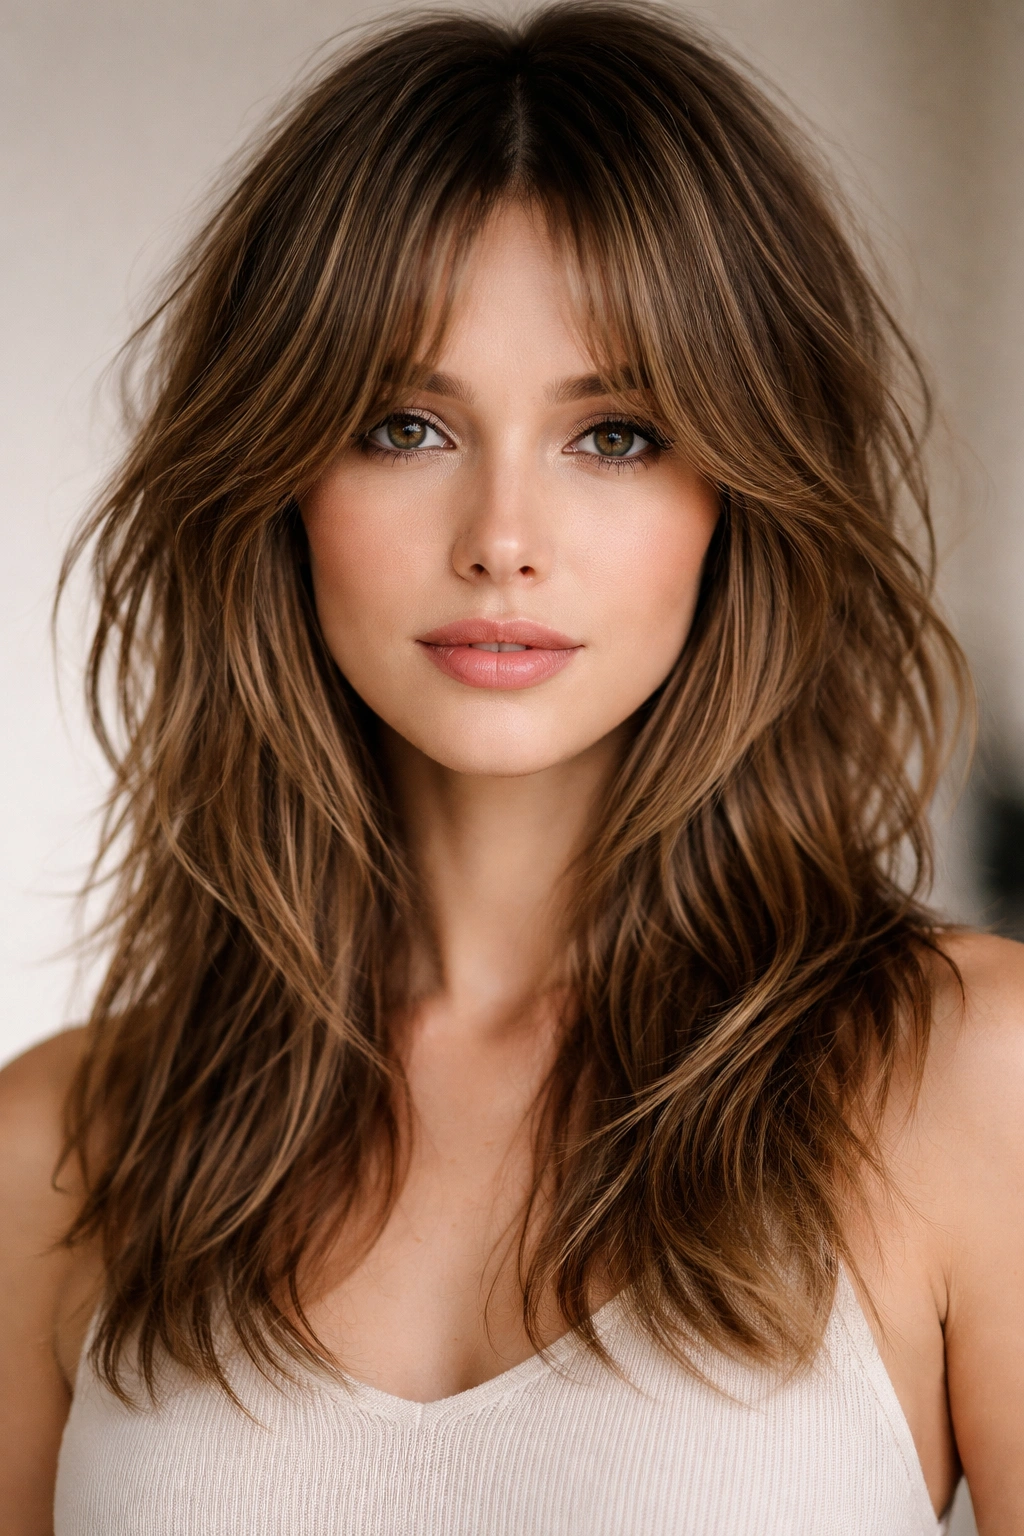
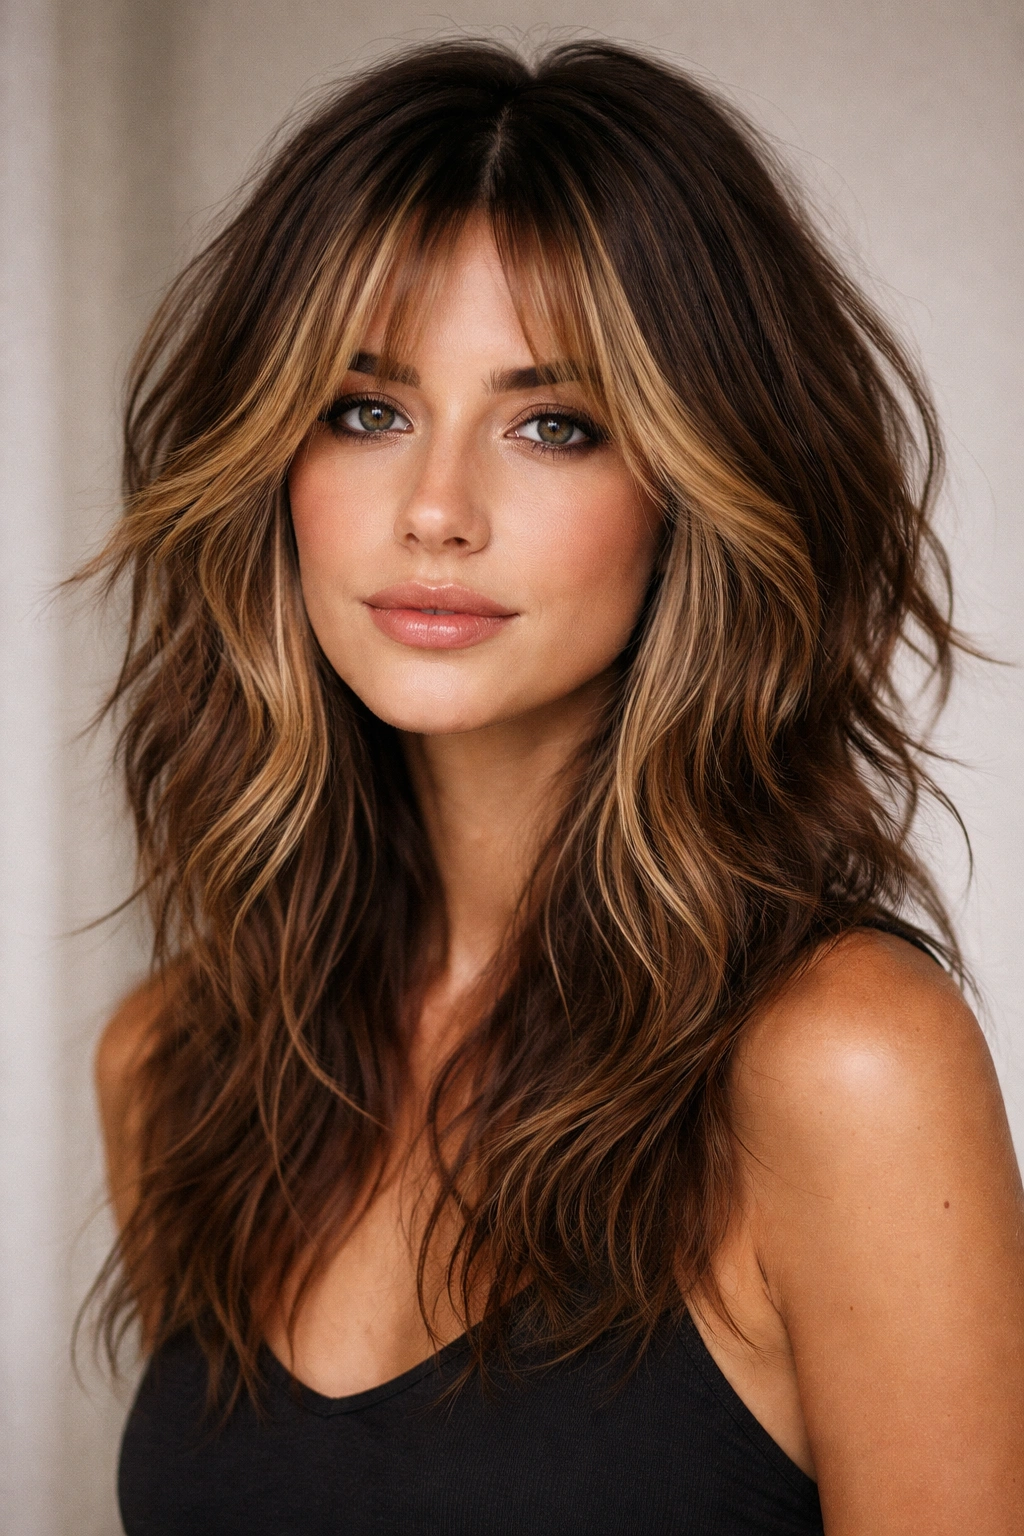
Take the shag concept and swap the wispy bangs for longer, center-parted curtain bangs that frame your face dramatically. This version feels slightly more modern and sophisticated than the classic choppy shag, while keeping all the textured movement. The bangs are longer—usually hitting around cheekbone or slightly below—which means they work beautifully with a center part and let you see your entire face while still providing soft framing.
Why This Version Feels More Modern
Curtain bangs hit differently than wispy straight bangs; they create a dramatic frame while maintaining visibility and sophistication. Because they’re longer and parted, they look intentional rather than accidental. The face-framing effect is more pronounced, making this version particularly flattering for people who want shag texture without as much commitment to frequent bang maintenance. The longer curtain bangs also work with various textures—straight, wavy, or curly—whereas wispy bangs work best on straighter hair.
Styling and Maintenance Notes
- Bang styling: Curtain bangs dry naturally into their frame, but you can blow-dry them with a round brush if you want more volume or curl them slightly under
- Layer integration: The layers underneath the curtain bangs should blend seamlessly; they shouldn’t be so short that you see a harsh line between bangs and the next layer
- Texture products: This style benefits from texture spray or salt spray on damp hair to encourage the natural separation and movement
- Parting flexibility: While center-parted looks most intentional, you can also sweep the bangs to one side for a different vibe
Worth knowing: This style requires more frequent bang trims than a fully blended shag because the face-framing layers grow out faster than body layers and can start to obscure your vision.
3. Permed Shag with Permanent Waves
If texture is the goal, why not bake it in? A permed shag starts with the classic layered shag cut, then adds a permanent wave to every section. You get the choppy layers of a textured shag plus built-in wave and curl that means you’ll never have a flat day. The perm creates consistent texture throughout, so even on second-day hair or when you’re not styling at all, your hair has dimension and movement.
How Perming Enhances Shag Texture
A perm doesn’t make your hair curly in the traditional sense—it creates a wave pattern and texture throughout. For shags specifically, this is brilliant because the waves enhance the choppy, separated feeling of the layers. Each section holds its own shape, making the cut more visible and textured. The chemical process sets the texture permanently, so your hair maintains movement and body even without daily styling effort. This is especially valuable if you have naturally fine or straight hair that’s hard to make look textured.
The Practical Side of Permed Shags
- Wave pattern: Looser waves look more modern than tight curls; work with your stylist to choose a wave size that complements your face shape
- Upkeep required: You’ll need regular trims every 6-8 weeks to maintain the shag shape as it grows out, and the ends benefit from frequent moisture treatments
- Product needs: Wavy shags need curl-enhancing or wave-defining products; heavy silicone serums weigh down the texture
- Styling time: While you can air-dry and have decent texture, scrunching in product and diffusing takes the look from pretty good to genuinely beautiful
Insider note: The regrowth on a permed shag is more forgiving than a permed straight style because the layers and texture naturally blend the transition between textured and new growth.
4. Choppy Shag with Long Textured Layers
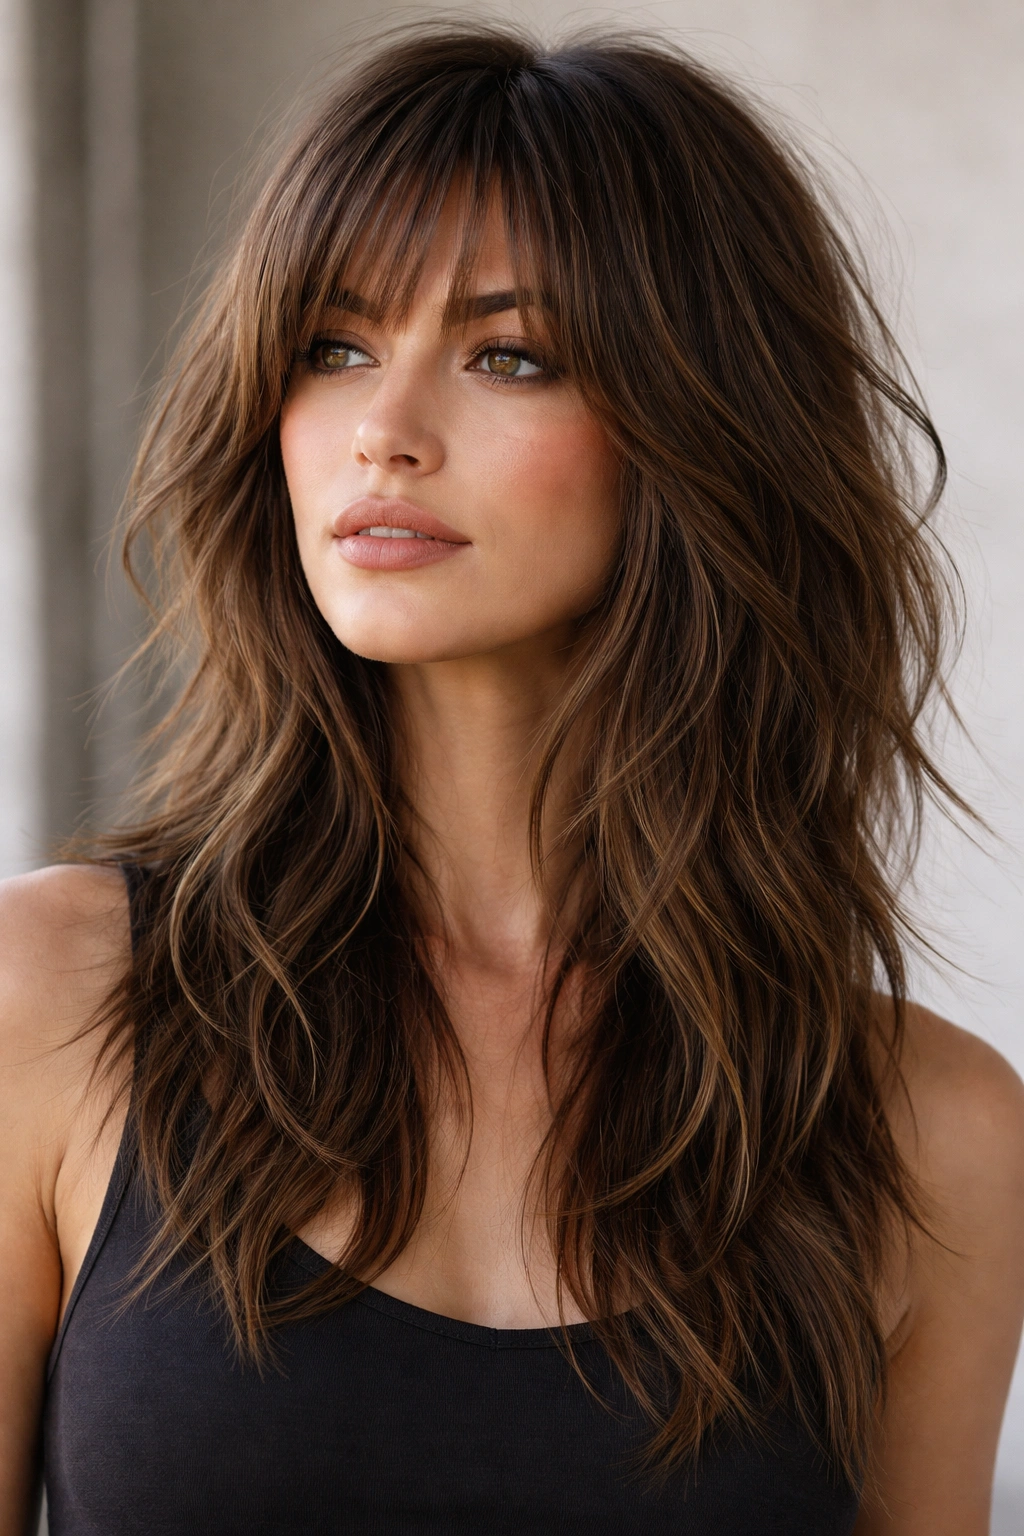
Scale up the length for a medium shag that sits closer to shoulder-length, maintaining the choppy texture throughout but with longer overall lines. This version gives you more hair at the bottom while keeping those separated, textured layers that create movement. It’s shag without the super-short crown, making it appealing if you want more length while still keeping the effortless texture aesthetic.
Why Longer Shag Layers Still Create Movement
The key to texture at longer lengths is that the layers need to be more dramatically layered. Instead of subtle graduation, you’re creating sections that are noticeably different in length so that the shorter upper layers have lift while the longer bottom layers have movement. Choppy point-cutting at every layer—not just the bangs—ensures that even with more length, you get that separated, piece-y feeling rather than one blended mop of hair.
Styling Approach for Longer Shags
- Volume placement: Because there’s more hair, you need lift at the crown; blow-dry upside down or use volumizing mousse for staying power
- Layer blending: Longer shags work best when layers blend smoothly from top to bottom, creating a graduated effect rather than distinct chunks
- Wave integration: Adding subtle waves or using a curling iron on the bottom sections enhances the movement and separates the layers visually
- Product weight: Heavier products can make longer shags look limp; stick with lightweight styling creams or sprays
Pro tip: Use a flat iron or straightener to create subtle flicks and separation at the ends of longer shag layers—you’re not straightening the whole length, just crisp-cutting the layer lines for more visual texture.
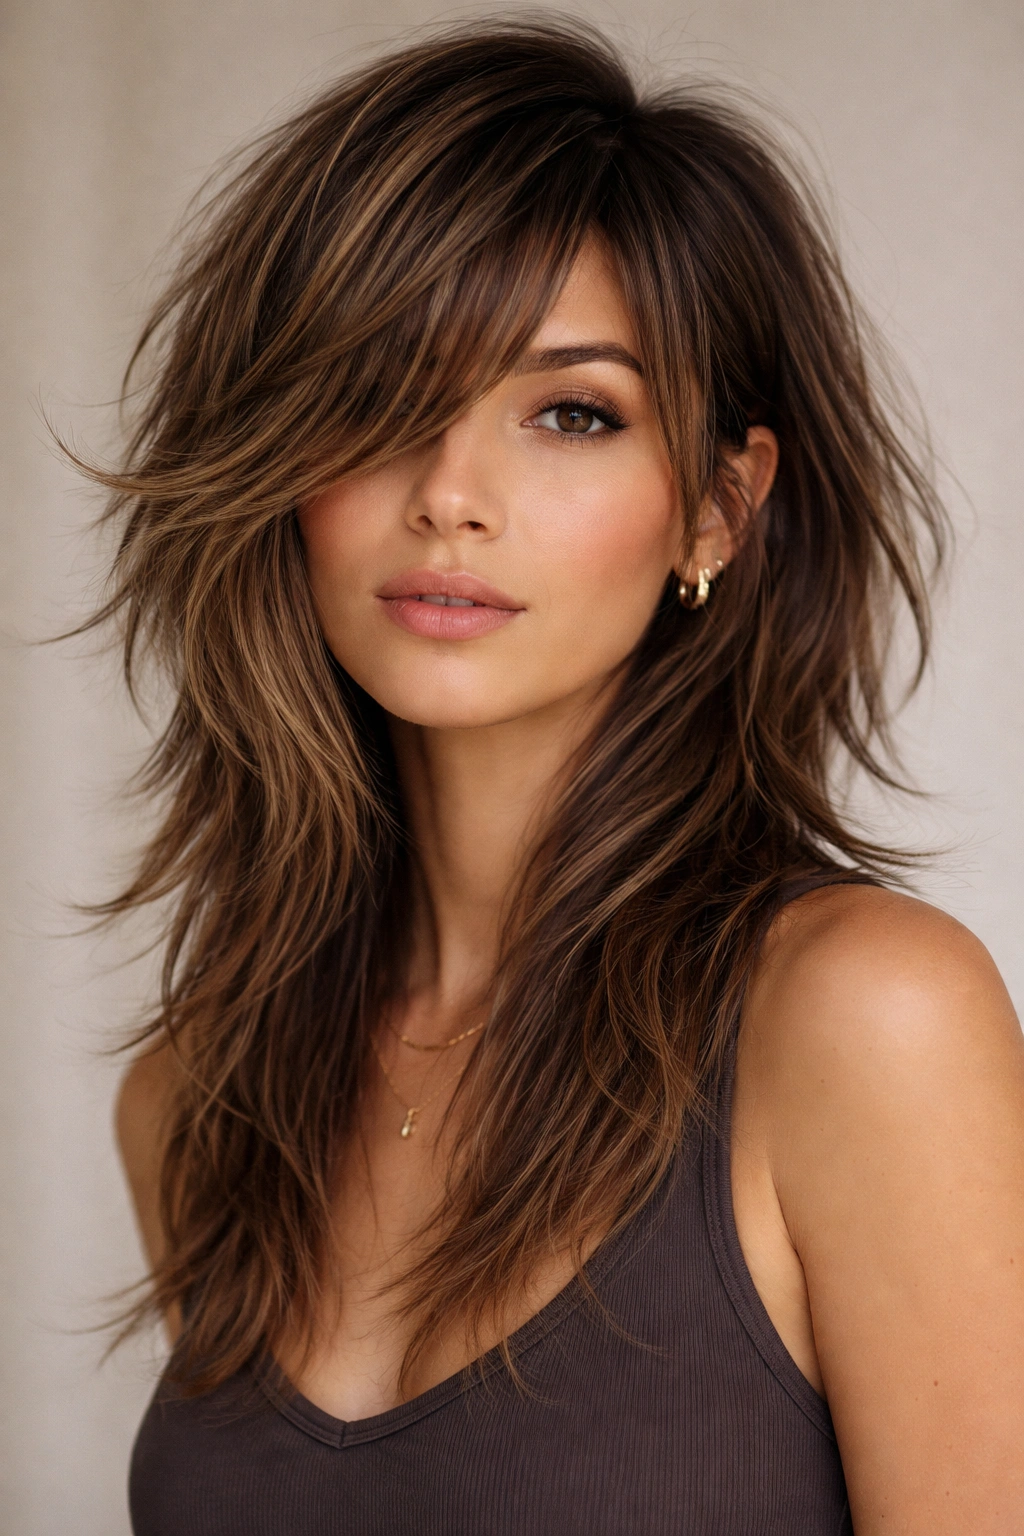
5. Shag with Highlighted Face-Framing Pieces
Texture comes in many forms, and here color does the lifting. Start with a textured shag cut, then add highlights to the face-framing layers and some scattered pieces throughout. The color variation creates visual texture even if the cut alone is subtler—the eye reads the lighter pieces as separate layers, amplifying the textured effect. This version works beautifully for people who want shag texture but prefer slightly less choppy cutting.
How Color Creates Texture Perception
Highlights and lowlights create dimension that reads as texture from a distance. Lighter pieces catch light and appear to sit forward, while darker pieces recede, creating depth that makes hair look more voluminous and textured than a flat, single-color cut might. Face-framing highlights specifically draw attention to those outer layers, making the shag shape more visually obvious. This is especially effective if you have fine hair, where the actual cut can’t create as much movement.
Color and Texture Combination Tips
- Highlight placement: Focus warmest or lightest tones on face-framing pieces and the top layers; deeper tones work for underneath pieces
- Frequency of highlights: Every 6-8 weeks maintains brightness without excessive damage; root shadows also enhance the layered appearance
- Complementary cuts: This works best with a cut that has clear layer lines; super-blended shags don’t show off color as dramatically
- Maintenance products: Color-treated textured hair needs sulfate-free shampoo and regular deep conditioning to stay healthy and shiny
Worth knowing: Balayage or money-piece highlights age more gracefully than traditional foils because the roots grow out naturally and look intentional rather than exposing a harsh regrowth line.
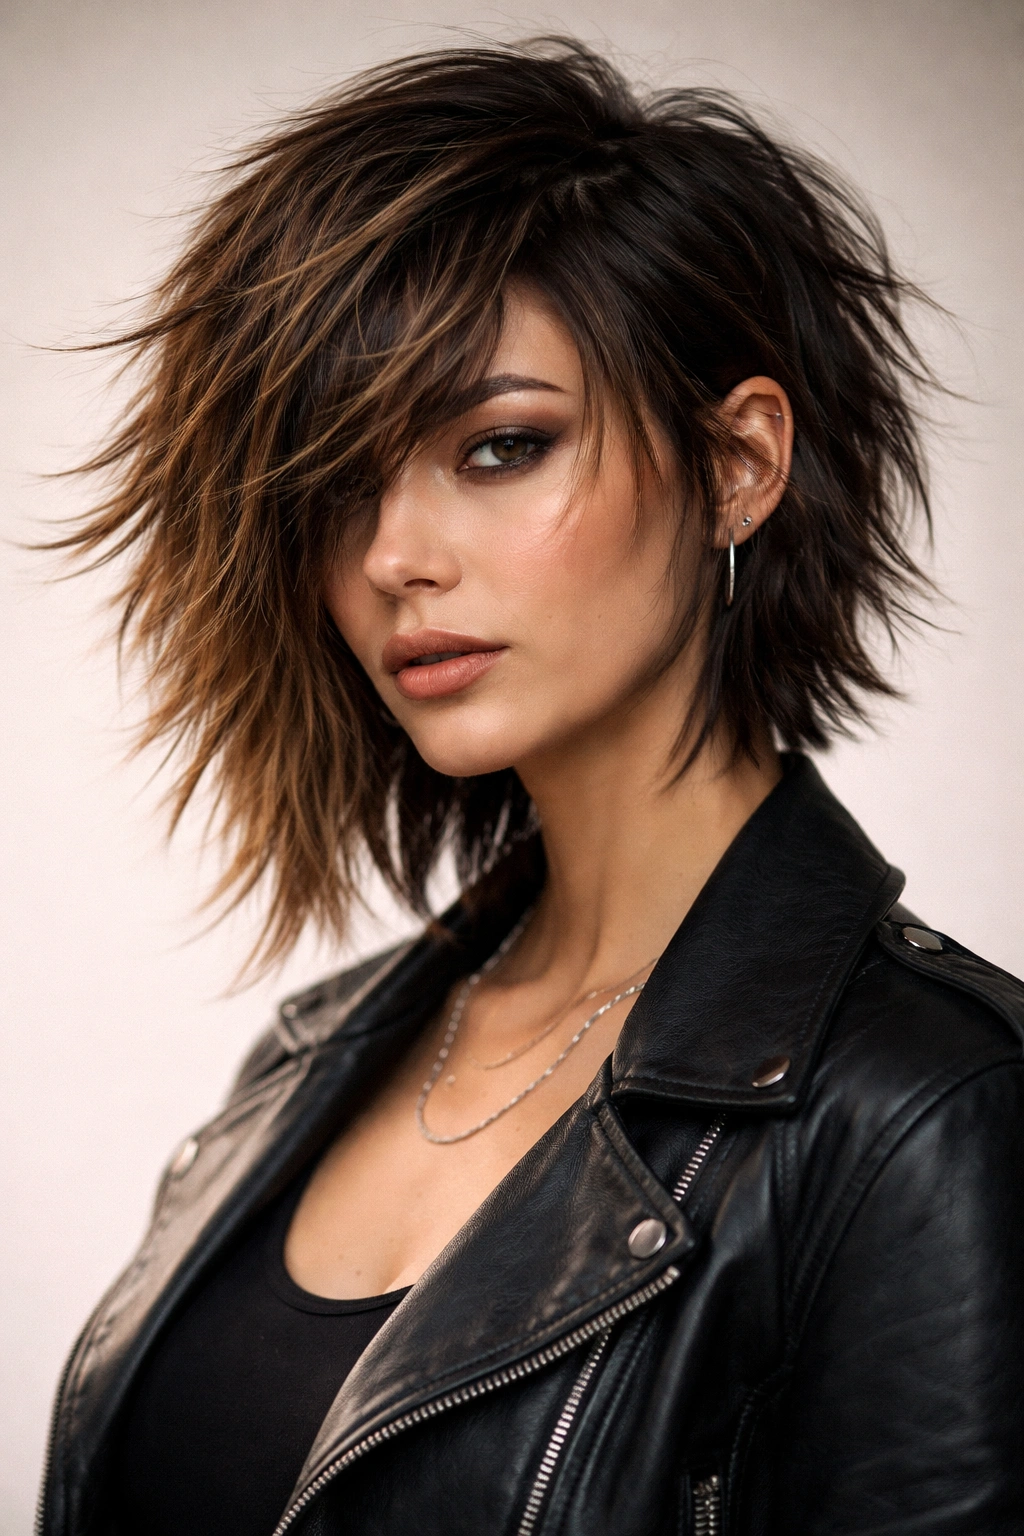
6. Tousled Shag with Piece-y Front Layers
This version emphasizes the “tousled” aspect—the cut creates individual, separated pieces especially in the front around the face. Instead of a cohesive layer pattern, you’re creating distinct sections that can be moved and styled independently. The front pieces are specifically cut short and choppy so they move away from the face, creating movement that looks intentionally styled even when it’s not.
The Art of Piece-y Layering
Piece-y layers aren’t longer or shorter—they’re cut at angles that make each section sit at a different angle and catch light independently. A stylist creates this by cutting hair at sharp angles rather than straight across, so each piece has its own direction. For a shag, this means the front sections especially are cut in ways that make them want to fall away from the face rather than stick straight down. When you run your fingers through or style them, each piece moves separately, creating that effortless, undone texture.
Styling to Enhance Piece-y Texture
- Finger-styling technique: Skip the brush for piece-y shags; use your fingers or a wide-tooth comb to enhance separation
- Texture spray: Apply to damp hair before blow-drying to encourage pieces to separate rather than clump
- Blow-dry method: Direct the front pieces away from your face as you dry; don’t smooth them flat
- Tousling finishes: Once dry, use a light texturizing paste or pomade on your fingertips to enhance individual piece definition
Pro tip: Intentionally muss this cut in different directions—don’t always style it the same way. The beauty of piece-y layers is that they look good styled multiple ways depending on your mood.
7. Mullet Shag with Short Crown and Long Back
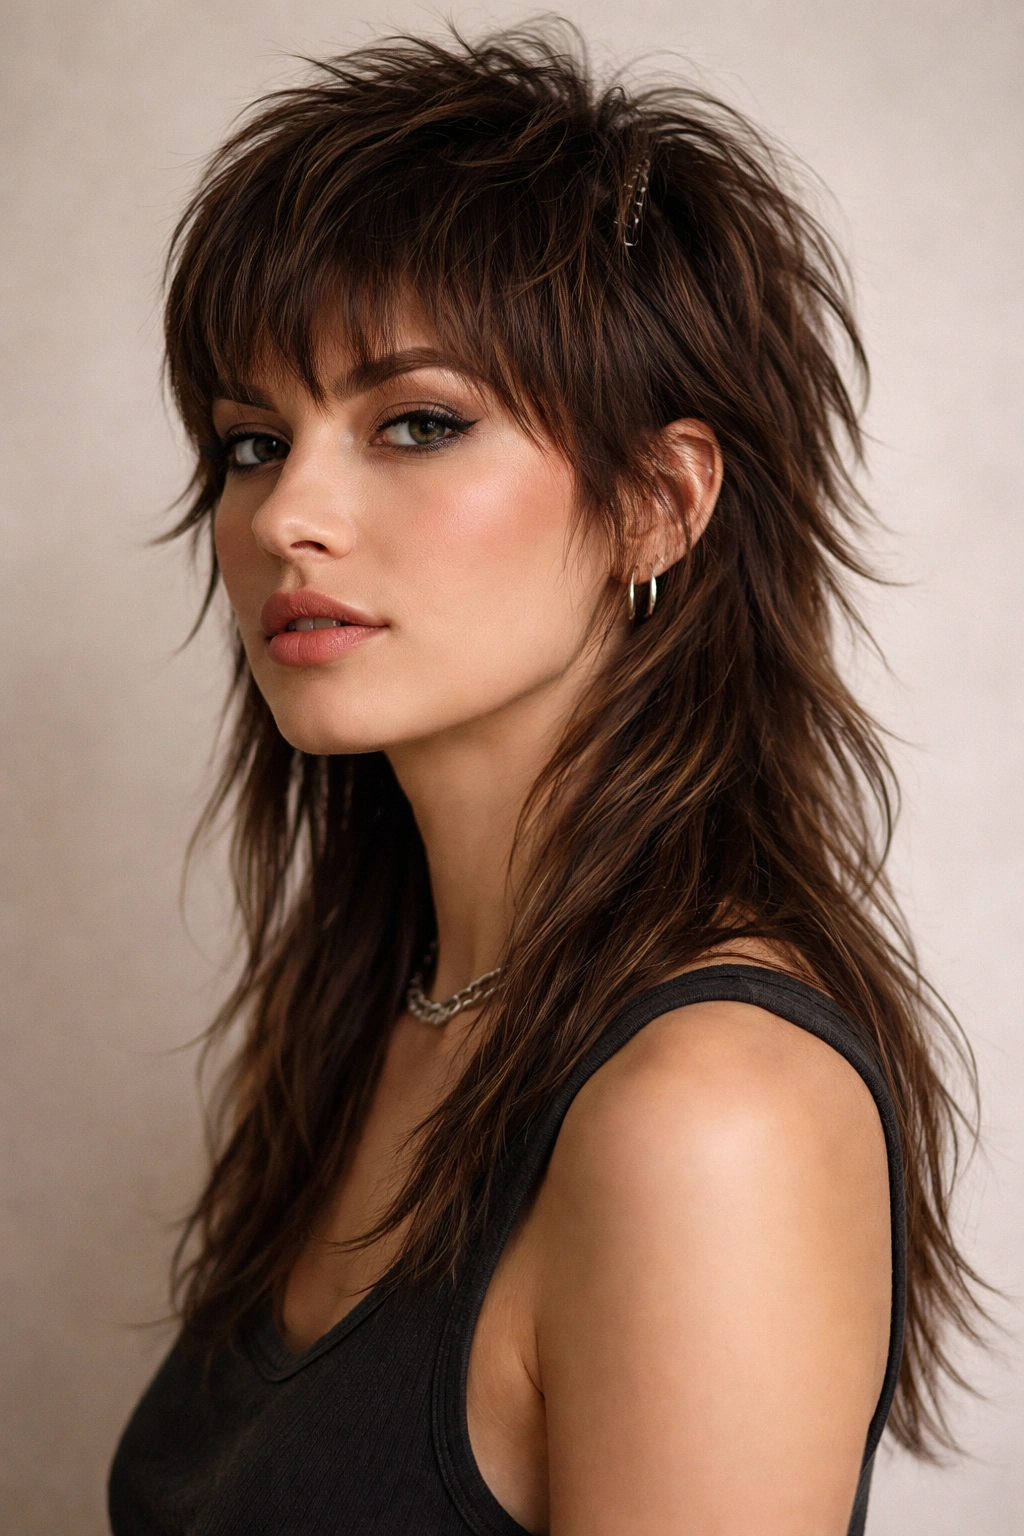
For the bold and fashion-forward, a mullet shag takes the party-in-the-back concept and combines it with modern shag layering. The crown is cut short with texture and movement, the sides are medium, and the back is noticeably longer—sometimes much longer than your shoulders. Rather than the harsh contrast of a traditional mullet, shag layering makes the transition feel intentional and blended.
Why Mullet Shags Feel Modern
A mullet shag works because the layers throughout create a softer, more intentional transition than a blunt mullet. The texture and movement of the cut make it feel fashion-forward rather than retro. You get the edgy, statement-making aspect of a mullet with the effortless texture of a shag. This is for people who want their haircut to be noticed and who aren’t afraid of strong style choices.
The Commitment Level of Mullet Shags
- Maintenance: Frequent trims every 5-6 weeks to maintain the shape and prevent the longer back from looking scraggly
- Styling commitment: Mullet shags usually require intentional styling to look their best; they’re not wash-and-go cuts
- Face shape consideration: Works well for oval and heart-shaped faces; can overwhelm round or square faces depending on how the layers are placed
- Versatility: You can style it sleek and straight, wavy and textured, or even half-up to change the proportion
Insider note: The transition from short crown to long back matters enormously—your stylist should create subtle layers in the side sections so you don’t have a harsh line between the two lengths.
8. Textured Shag with Permed Bangs
Keep the cut relatively straight and textured, but add a perm specifically to the bang section for dramatic, bouncy waves or curls. This version gives you movement without committing your entire head to permanent texture. The permed bangs create instant visual interest and texture where the eye looks first—your face—while you maintain the flexibility to style or straighten the rest of your hair.
The Strategic Beauty of Permed Bangs on Shags
Permed bangs on a shag create a stunning focal point of movement and texture. Because bangs are short, a perm creates tight, defined texture in that section, and the movement is especially noticeable. This gives you the benefits of textured hair (movement, dimension, effortless styling) without the commitment or maintenance of a full perm. If you’re curious about texture but not ready to commit, permed bangs are a perfect testing ground.
Permed Bang Maintenance and Styling
- Perm size: Tighter curls on bangs translate to more defined bounce; looser waves create softer framing
- Trim frequency: Bangs grow fast and permed texture grows out quickly, so plan for bang trims every 4-5 weeks
- Daily styling: Permed bangs dry somewhat on their own, but scrunching in product and diffusing enhances the curl definition
- Weather challenges: Humidity affects permed bangs noticeably; have a humidity-taming strategy ready
Worth knowing: If you have fine or thin hair, a perm can make bangs look thin or wispy; thicker hair holds permed texture better.
9. Shag with Asymmetrical Shorter Side
Create drama and edge by cutting one side significantly shorter than the other. One side might hit your chin while the other grazes your shoulder, with choppy, textured layers throughout. The asymmetry creates visual interest and an undeniably fashion-forward aesthetic. This works beautifully with the shag because the texture and choppy layers make the asymmetry feel intentional rather than accidental.
The Visual Impact of Asymmetrical Shag
Asymmetrical cuts draw the eye and create the illusion of face contouring. The shorter side can frame a round face and add definition, while the longer side creates balance. The choppy, textured layers of a shag make the asymmetry feel modern and intentional rather than awkward. You’re not going for a straight line of different lengths—you’re creating textured, layered asymmetry that reads as editorial and bold.
Styling an Asymmetrical Shag
- Side-parting: Usually, you part on the side with more length, letting the longer side fall forward and the shorter side frame the other side of your face
- Symmetry flexibility: On some days, you can style both sides similarly; on others, emphasize the asymmetry by sleeker styling on the short side and texture on the long
- Layer blending: The layers throughout should blend the two lengths gradually so you don’t have a harsh cutoff point; the transition is textured and intentional
- Face shape compatibility: Works best for oval, heart, and oblong faces; can make round faces appear wider if not styled strategically
Pro tip: Play with which side you part to change your entire look—part on the opposite side occasionally to see how different the style can feel.
10. Modern Shag with Curtain Layers

Instead of distinct choppy layers, create a shag where each layer gradually transitions to the next, creating a curtain effect. The layers flow into one another rather than appearing as separate chunks. This modern approach to shag maintains the texture and movement while feeling slightly more refined and intentional than a super-choppy version.
Blended Layering for a Modern Feel
Modern shags often favor blended layering over harsh choppy cuts. Instead of dramatic differences in length between layers, you create gradual transitions. Point-cutting softens the ends rather than creating severe, separated pieces. The result is a hairstyle that still has incredible movement and texture but feels more cohesive and less “2000s shag.” You get the effortless movement without looking like you’re channeling a specific era.
Styling Modern Blended Shags
- Blow-dry technique: Work section by section, directing the layers to fall away from your face; use a round brush for subtle volume
- Product choice: Lightweight texture sprays enhance movement without weighing hair down; cream products can weigh blended layers too much
- Wave addition: Adding subtle waves with a curling iron amplifies the blended layers without changing the cut itself
- Tousling approach: Work through with your fingers rather than a brush; this enhances the layer lines without disrupting the blend
Insider note: This version works beautifully for people with naturally straight hair because the blended layers still create plenty of movement and texture without the harshness of choppy cutting.
11. Textured Shag with Undercut Sides
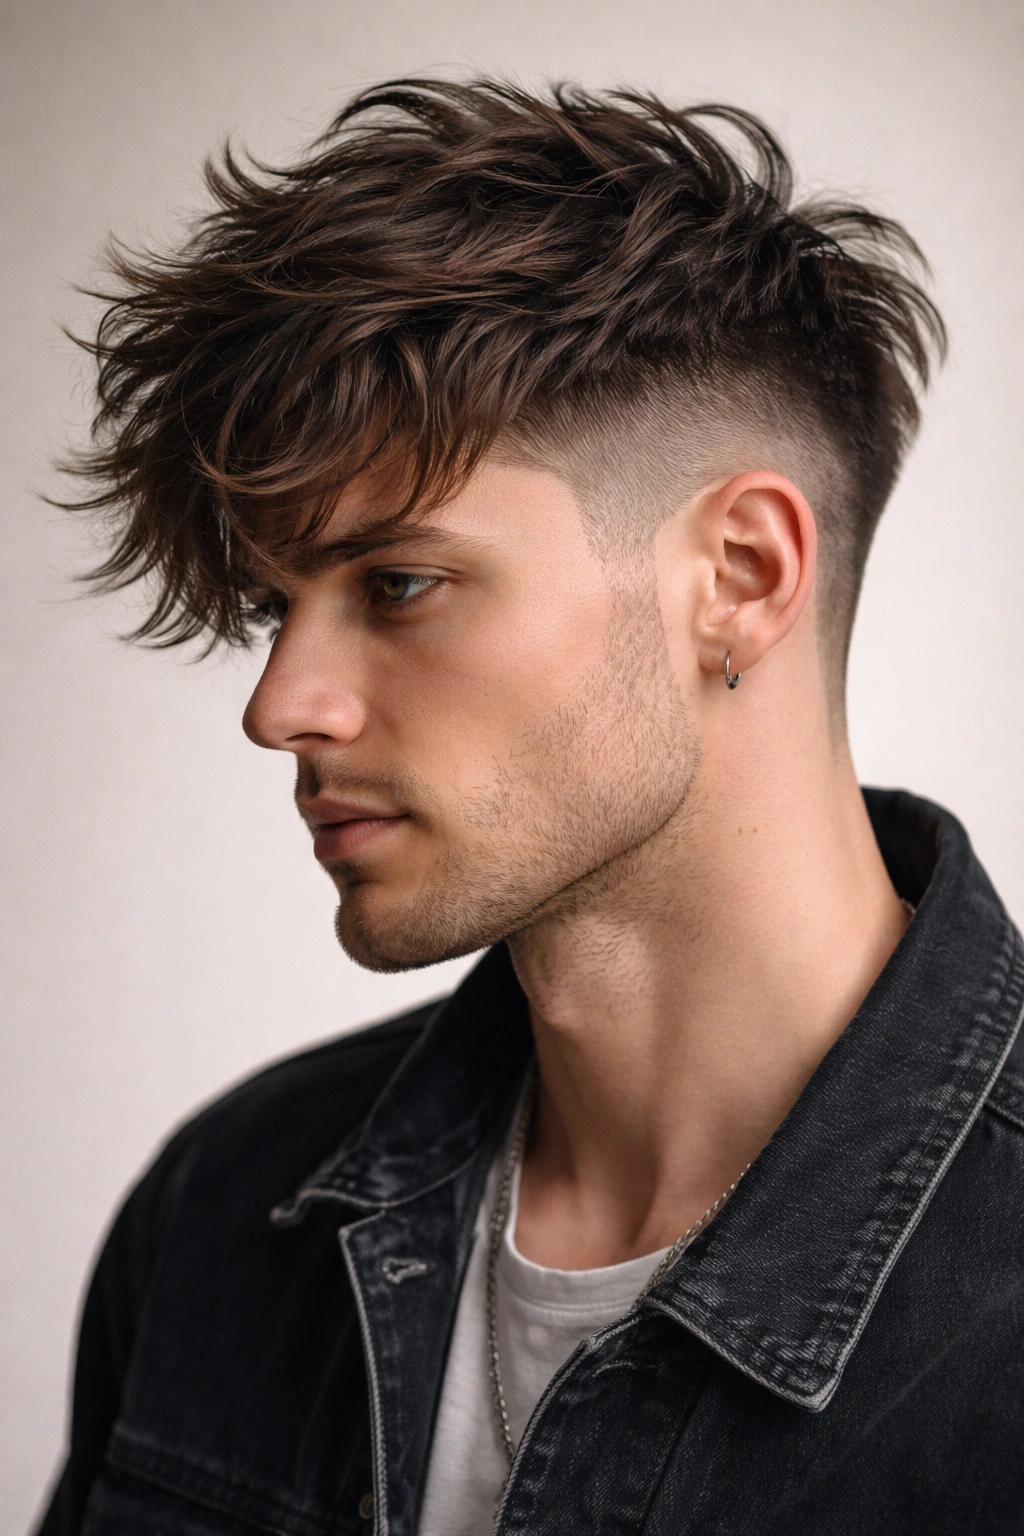
For an edgy, contemporary take on shag, add an undercut—closely shaved or very short sides—while keeping the top and back longer and textured. The contrast creates dramatic visual impact while the textured top maintains that effortless shag aesthetic. This version is statement-making and clearly shows every layer of the cut because the undercut puts them on full display.
Why Undercut Shags Feel Modern and Bold
An undercut immediately modernizes a shag cut, pushing it from retro-inspired to clearly contemporary. The shaved or very short sides create contrast that showcases the texture and layers on top. The clean undercut also creates a different line than traditional side-layered shags, making you look fashion-forward and confident. This works especially well for people with thick hair, where an undercut helps manage volume while keeping textured length on top.
Undercut Maintenance and Styling
- Fade style: Choose between a sharp fade (clean line) or a blended fade (gradual transition); both work with textured tops
- Shaving frequency: Undercuts need touching up every 2-3 weeks to maintain the clean look
- Top styling: The textured top can be tousled, slicked back, or styled in any direction; the undercut doesn’t dictate styling
- Hair type consideration: Works best on thick or medium-textured hair; very fine hair can look thin with an undercut
Pro tip: An undercut is a bold move—make sure you’re ready for the statement before committing. You can also try it with a temporary buzz or very short clipper cut before going to an actual undercut if you want to preview the look.
12. Shag with Choppy Highlights and Lowlights
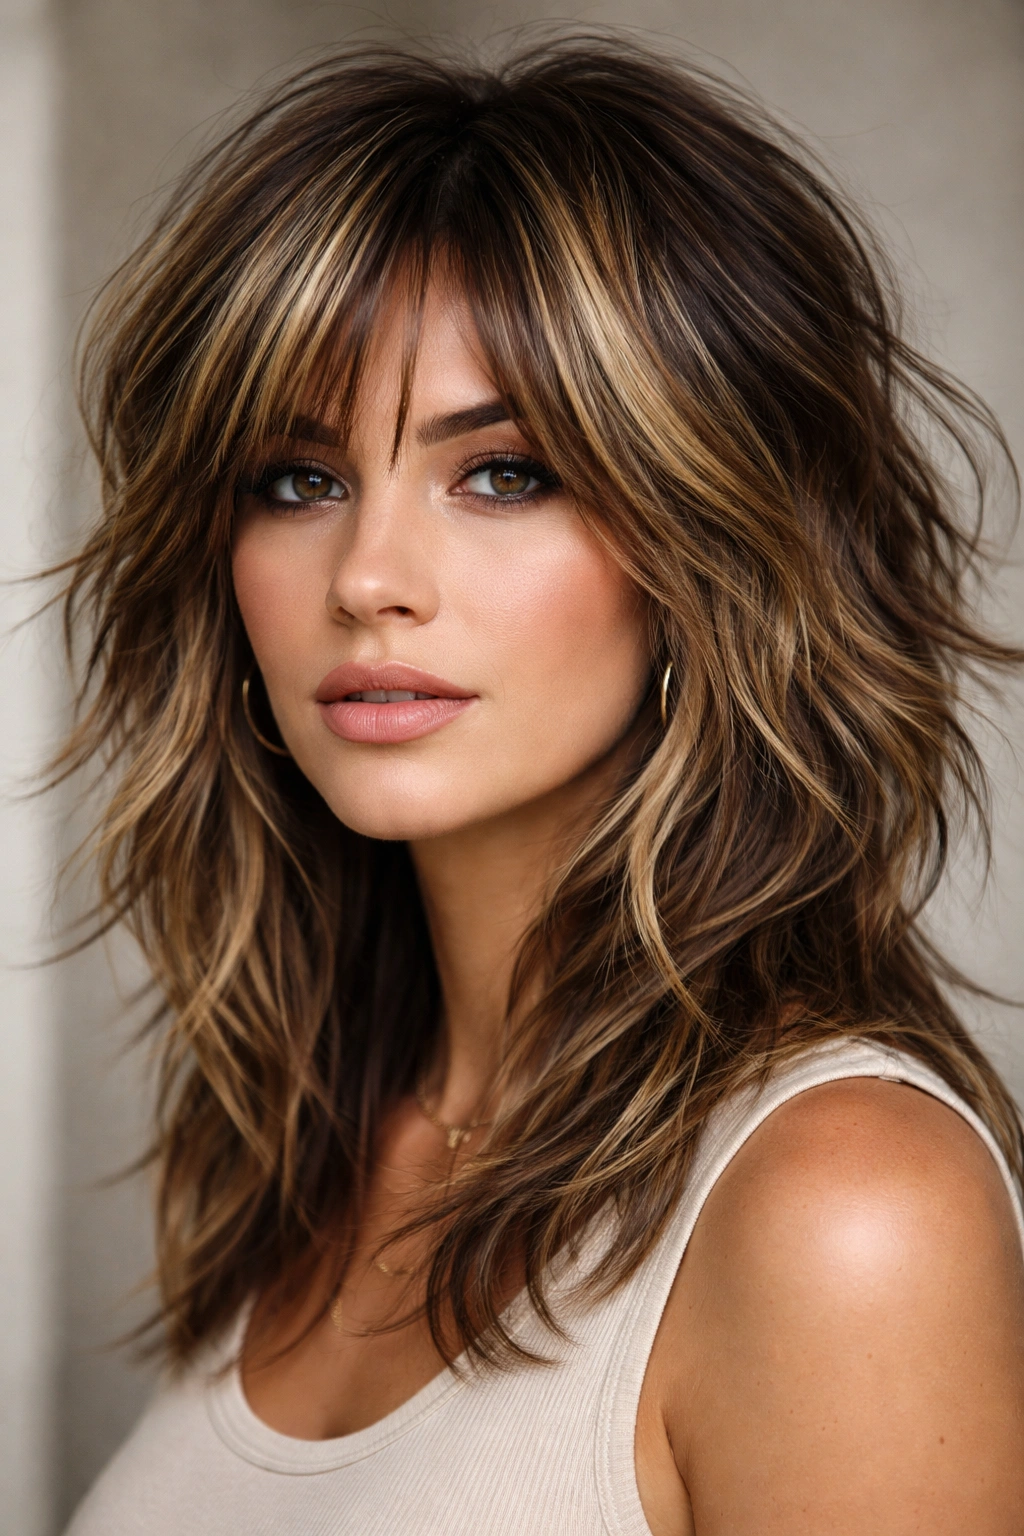
Combine the texture of a choppy shag with dimension created by chunky highlights and lowlights. The two-toned or multi-tonal color creates visual layers that enhance the textured cut. Choose contrasting colors—like dark brunette with warm honey highlights, or blonde with cool ash lowlights—so the color variation reads as intentional texture. The color and cut work together to create incredible dimension.
Using Color to Amplify Texture Perception
Color has as much impact as cut on how textured your hair appears. Highlights catch light and appear to sit forward, while lowlights recede and create shadows. On a choppy shag cut, this color dimension is even more dramatic because the actual layers already exist—the color just emphasizes them further. A single-color shag looks textured; a multi-tonal shag with choppy highlights and lowlights looks incredibly dimensional and carefully styled.
Color + Cut Maintenance Strategy
- Color application: Place highlights in the shorter, choppy pieces and around your face; lowlights can go in the underneath pieces
- Tone choices: Warm tones appear to sit forward and catch light; cool tones recede; use this to your advantage
- Maintenance schedule: Plan for color touch-ups every 6-8 weeks; root regrowth affects the overall dimension
- Brassiness prevention: Textured hair with highlights needs purple or blue toning shampoo to prevent warmth from showing
Worth knowing: Chunky highlights and lowlights in a choppy shag require color commitment and upkeep; this isn’t a low-maintenance hair color situation.
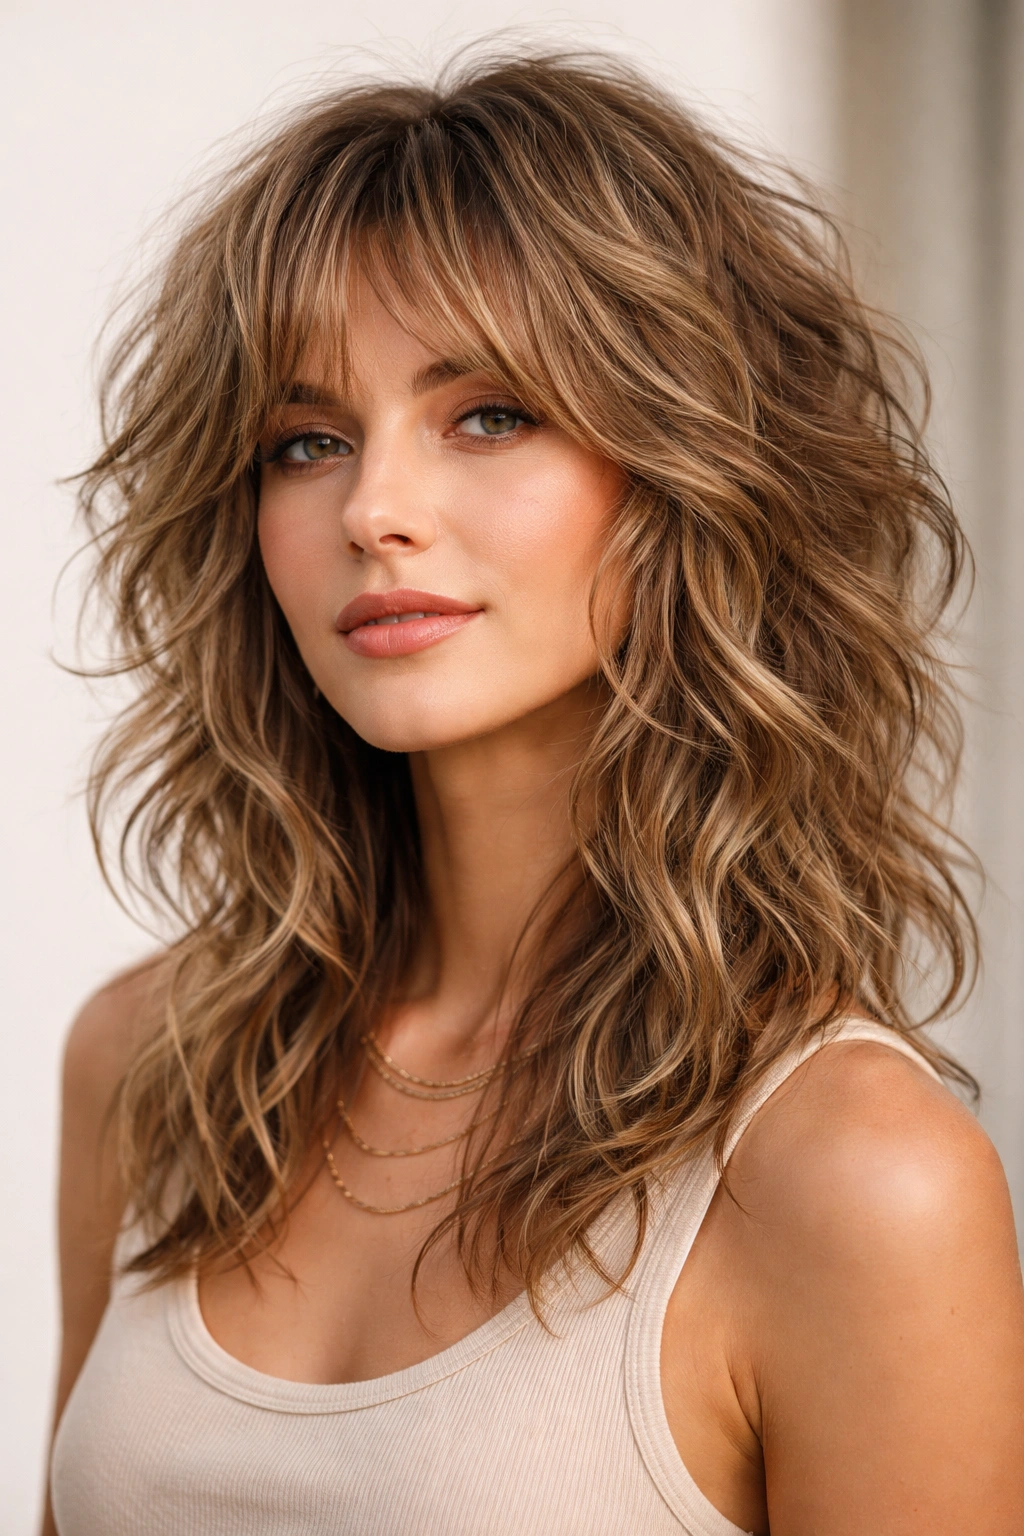
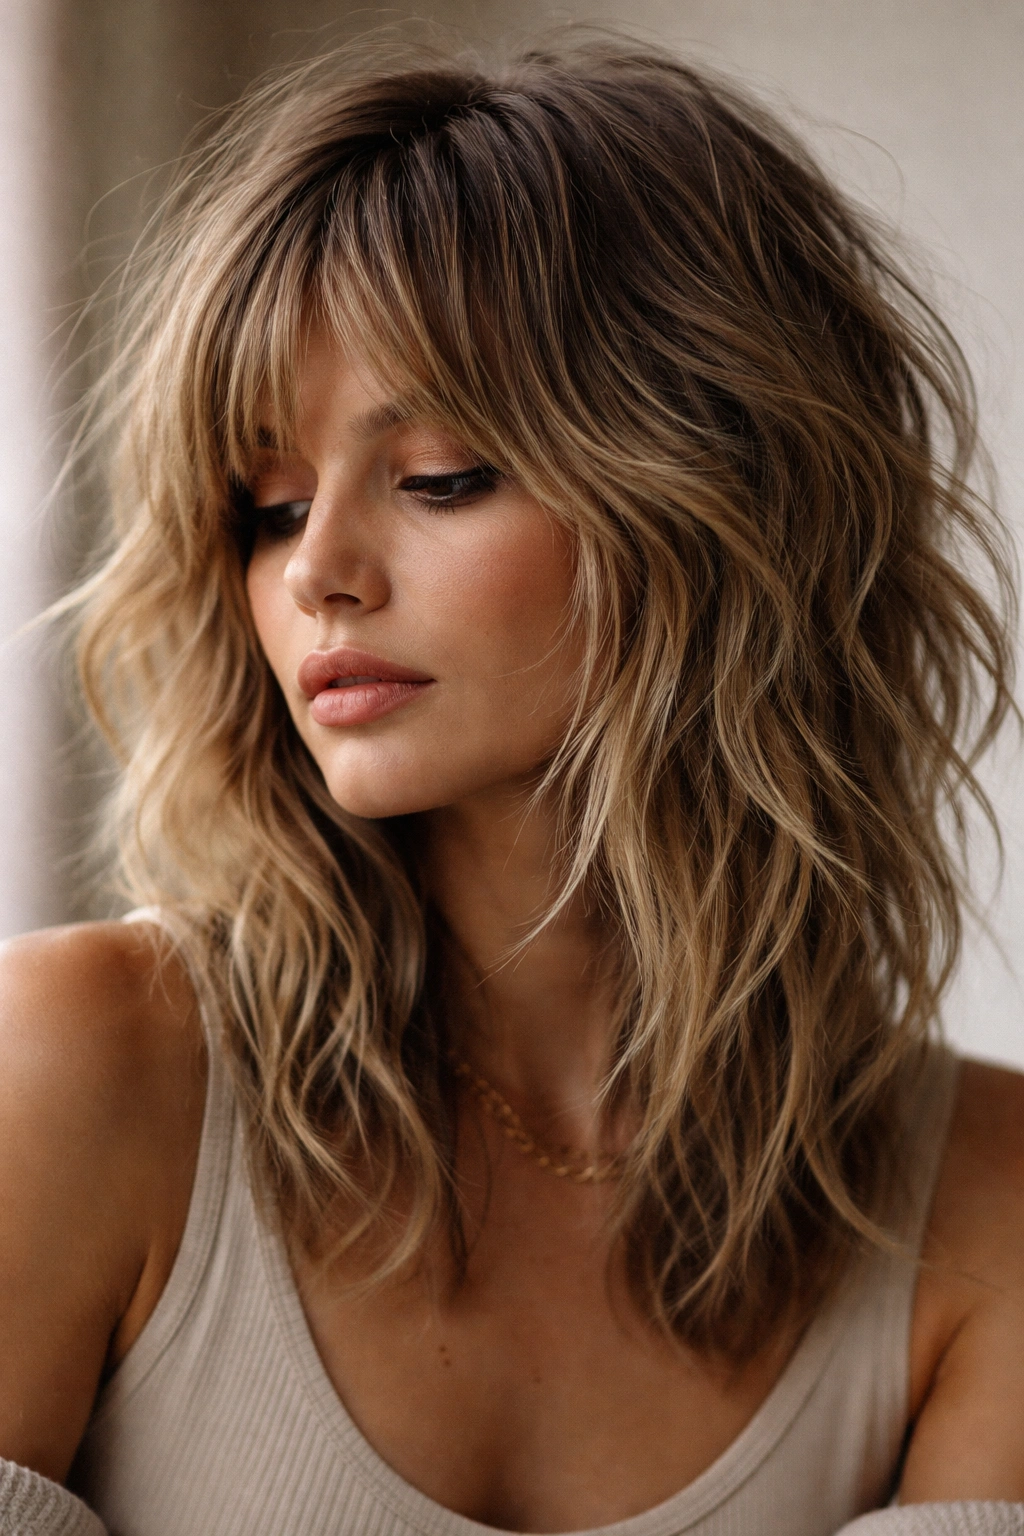
13. Beachy Wavy Shag with Tousled Texture
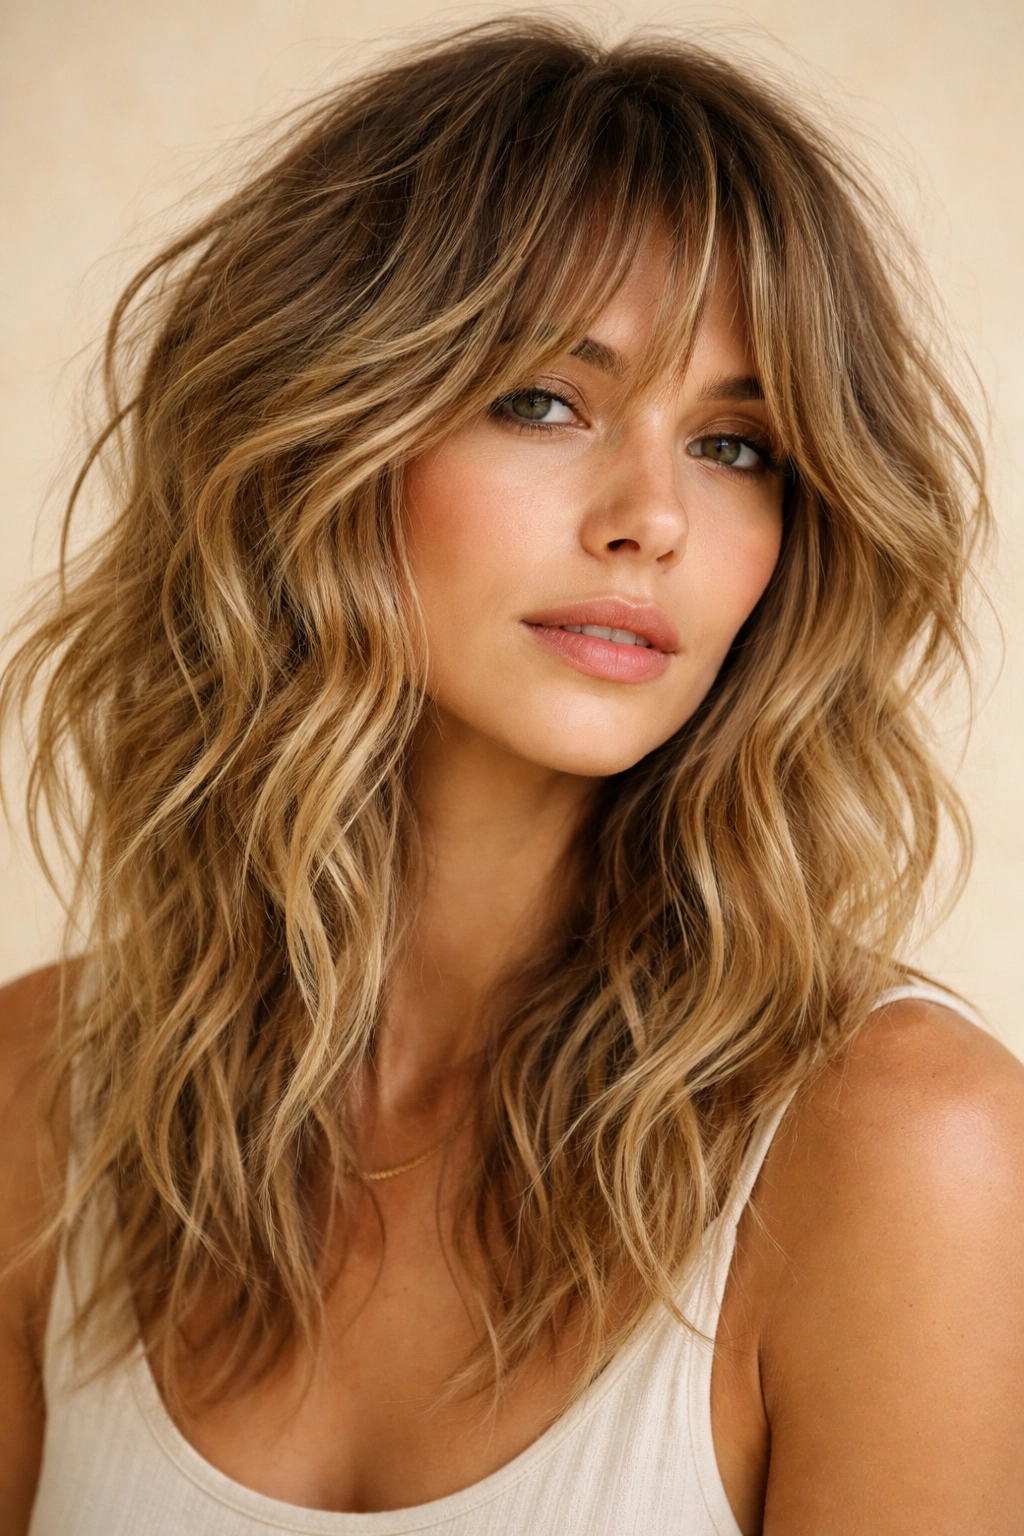
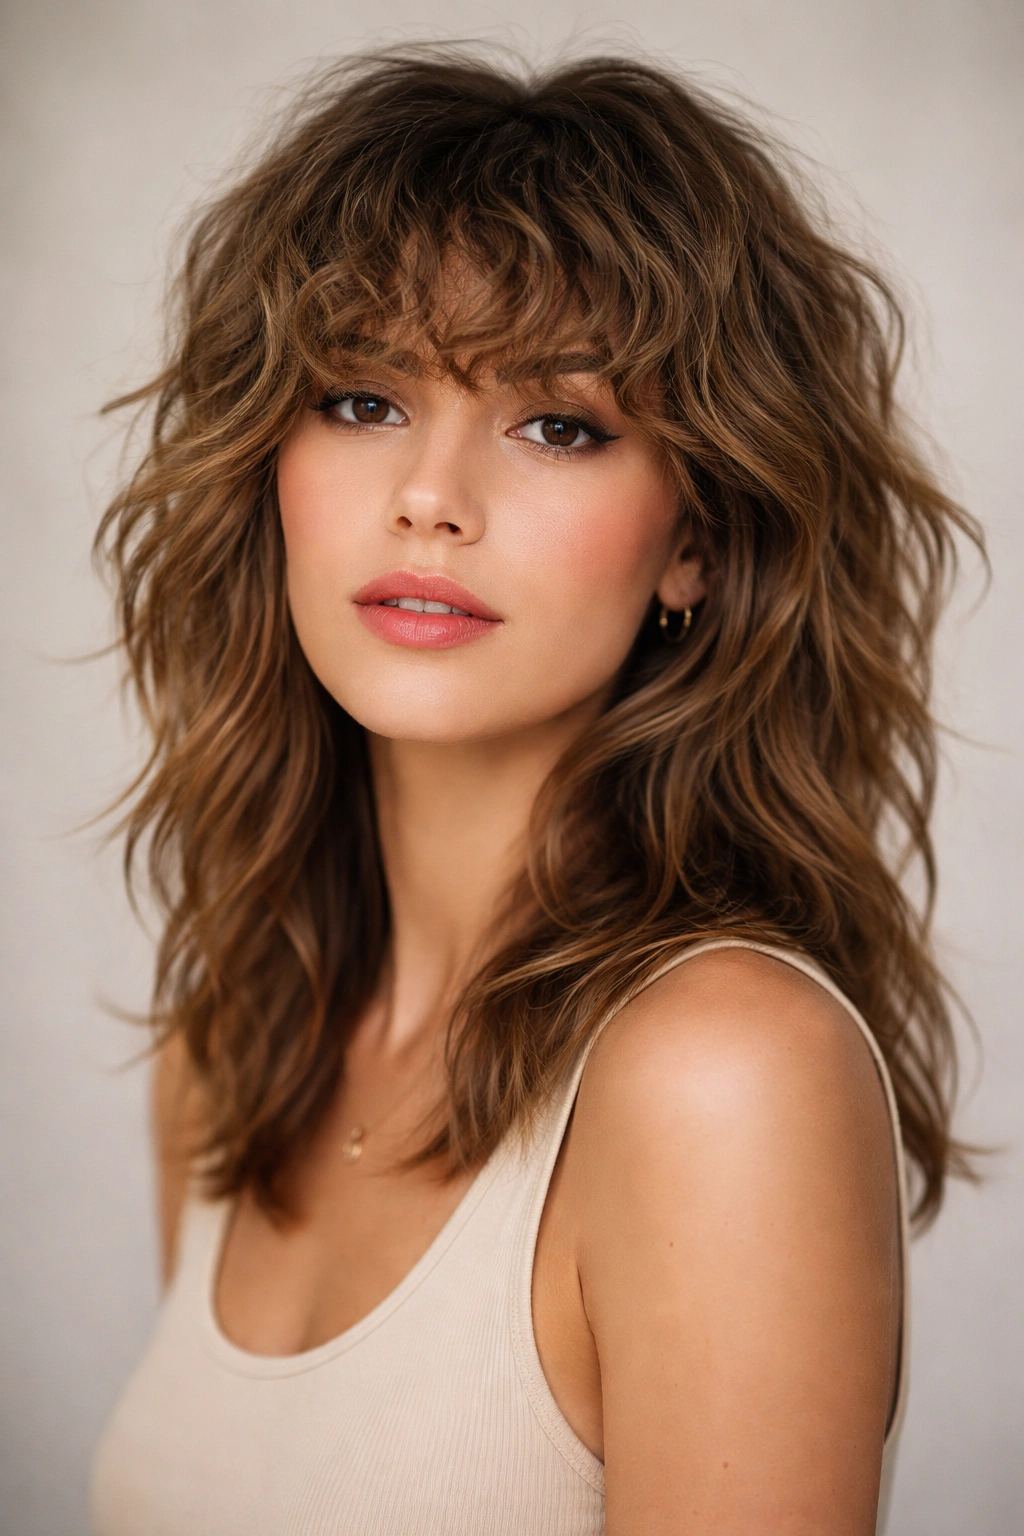
Start with a textured shag cut and add waves—either through curling with a wand or barrel iron, or through a loose perm—to create a beachy, undone texture. This version feels relaxed and effortless while maintaining serious visual interest. The waves enhance the separated, choppy feeling of the shag layers, making each section more distinct and textured.
Creating Beachy Texture on Shag Layers
Beachy waves on a shag work because the waves naturally separate the layers and create movement at every section. You’re not going for uniform waves—you want choppy, inconsistent texture that looks like you spent a carefree day at the beach. Looser waves and piece-y texture layers complement each other perfectly, with the waves adding softness to the choppiness of the cut.
Styling Beachy Shags Daily
- Wave-creation method: A 1.25-inch barrel iron creates soft waves; work through sections haphazardly rather than systematically
- Texture products: Salt spray and texture paste enhance the beachy, undone feeling while helping waves hold
- Blow-dry texture: Blow-dry damp hair with your fingers for extra texture before adding waves, or air-dry partially and wave
- Refresh method: On day two, mist with sea salt spray, scrunch with your hands, and let it air-dry for even more undone texture
Pro tip: Don’t try to make beachy waves perfect—the beauty is in the imperfection. Uneven waves and slightly frizzy texture actually enhance the look.
14. Shag with Side-Swept Longer Layers
Create a shag where the layers on one side are noticeably longer than the other, creating an asymmetrical sweep. One side might have layers hitting your chin while the other side has longer pieces grazing your shoulder. The longer, side-swept pieces create drama and movement while maintaining the textured, choppy aesthetic of a shag.
The Visual Flattery of Side-Swept Asymmetry
Side-swept asymmetry flatters most face shapes because you can position the longer pieces to frame and contour your face. If you have a round face, the longer side-swept pieces create the illusion of a longer face. If you have a square face, the movement of longer layers softens hard angles. The choppy texture throughout ensures the asymmetry feels intentional and modern rather than lopsided.
Styling Asymmetrical Side-Swept Shags
- Side-parting: Part on the side where you want the longer pieces to fall forward; this creates the most dramatic effect
- Volume placement: Add volume at the crown and let the side-swept pieces fall forward and away
- Wave integration: Waves or curls on the longer, side-swept pieces enhance the movement and drama
- Opposite-side styling: You can occasionally style it with your part on the opposite side for a different look, though the original side is more striking
Insider note: This works beautifully with face-framing highlights on the longer side pieces—the color and length together create maximum impact.
15. Textured Shag with Razored Choppy Ends
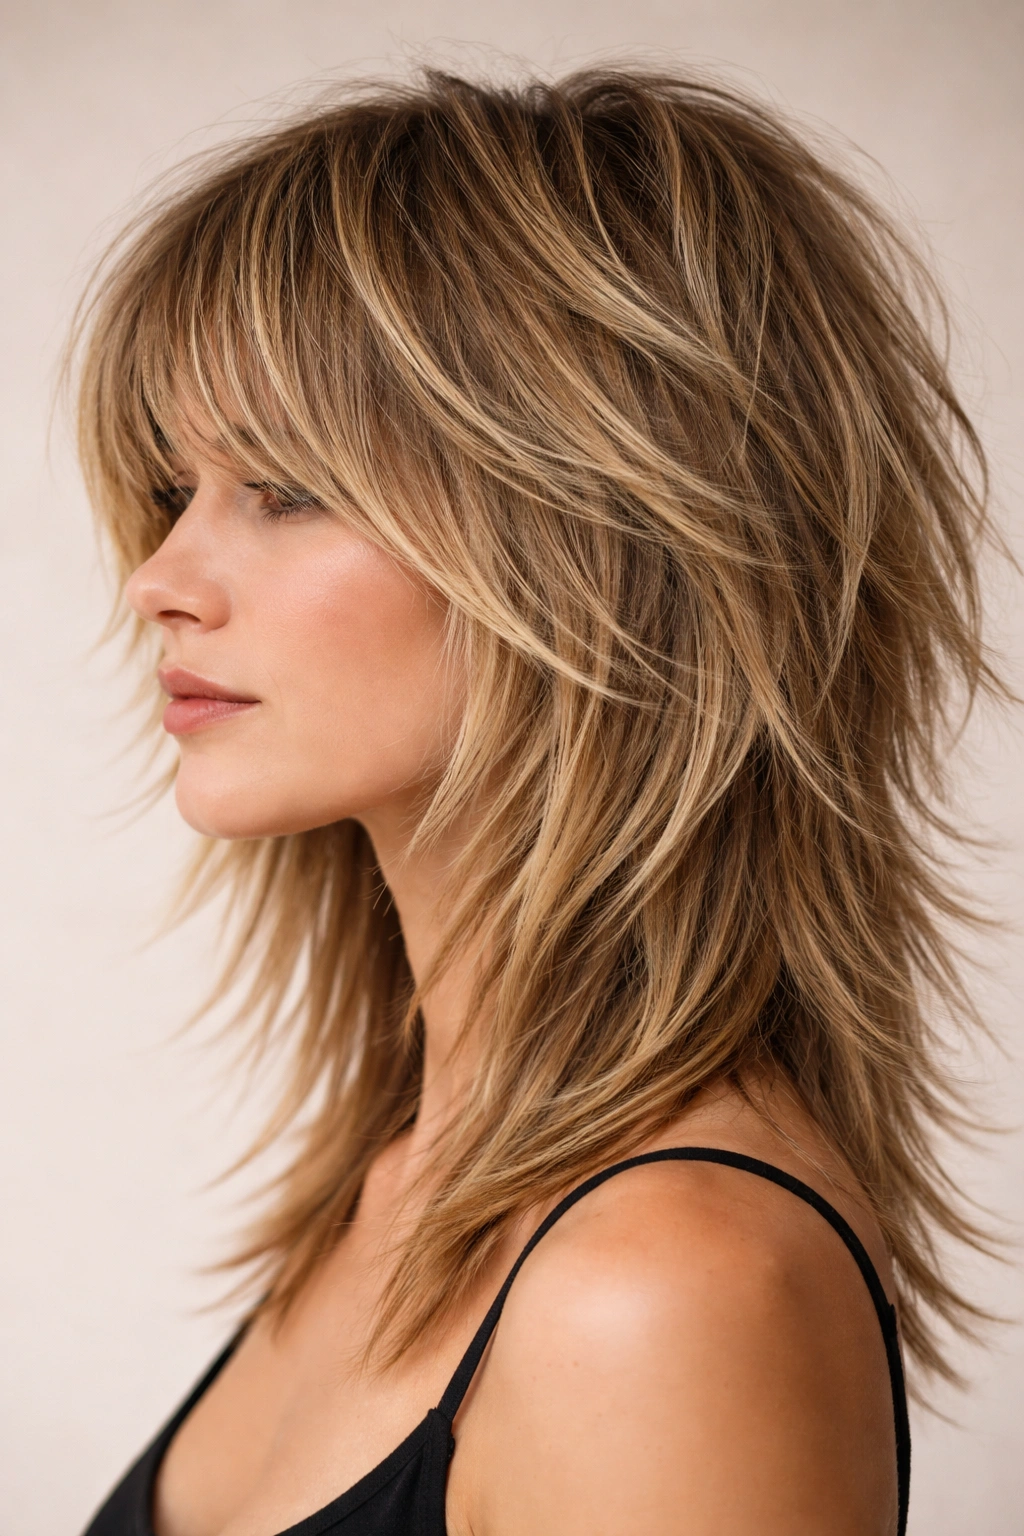
For maximum texture and movement, choose a razor-cut shag where every single layer is cut at sharp angles with point-cutting throughout. Razoring creates separated, choppy pieces at every level rather than blunt, blended ends. This creates maximum texture and movement because each piece can move independently. The razor technique defines the shag aesthetic more than any other cutting method.
Why Razored Cuts Create Superior Texture
A razor cuts hair at angles, creating separated pieces and texture throughout. Scissors create blunt ends that tend to stick together, while razoring creates choppy, feathered ends that naturally separate. On a shag, razoring throughout the entire cut—not just the bangs—ensures that every layer has that choppy, piece-y quality. The movement is more dramatic and the texture is more visible because the individual pieces are clearly separated.
Maintaining Razored Shag Texture
- Trim frequency: Razored ends dull faster than scissor-cut ends; plan for trims every 5-6 weeks to maintain sharpness
- Heat styling: Heat can dull razored ends faster; use heat protectant and avoid excessive heat styling
- Styling products: Use lightweight products that enhance separation rather than weigh layers together
- Texture enhancement: Texture spray on damp hair before blow-drying emphasizes the razored separation throughout
Pro tip: Take photos of your cut to your next appointment so your stylist can refresh the razored angles; explaining “I want choppy texture” is less precise than showing exactly how separated and piece-y you want it.
Final Thoughts
A textured medium shag is one of those rare hairstyles that manages to be both effortless and editorial, casual and statement-making. Whether you choose choppy razor-cut layers, a permed texture, color dimension, or an undercut twist, the foundation remains the same: intentional layering that creates movement and separation. The best shag for you depends on your hair type, face shape, styling commitment level, and personal aesthetic. Fine hair might benefit from the illusion of texture that highlights create, while thick hair can handle dramatic choppy cutting. Round faces might prefer side-swept asymmetry, while square faces might embrace the framing of curtain bangs.
The key to making any shag texture work is understanding that this cut lives in the space between polished and messy. It’s not meant to be perfectly smooth and blended—the texture and separation are the entire point. This means embracing your hair’s natural movement rather than fighting it, using texture-enhancing products rather than smoothing serums, and styling with your fingers instead of a brush. A great shag cut actually looks better when it’s slightly undone, which is why so many people fall in love with the style once they commit to it.
Regular maintenance matters more with shags than with blunter cuts because the layers need refreshing as hair grows out. Every 6-8 weeks is standard for keeping the shape and texture intentional rather than letting it grow out into something formless. Between appointments, embrace heat-free styling days, use dry texture spray, and sleep on a silk pillowcase to minimize frizz. The investment in maintenance is worth it because a well-maintained shag consistently looks like you just walked out of the salon, even when you’ve done minimal styling.