A good messy top knot is one of the most deceptively simple hairstyles — it looks effortlessly thrown together, yet it actually requires just enough intention to work on almost any hair type and length. The magic of a great topknot isn’t in perfection; it’s in that intentional imperfection that makes you look polished enough for a coffee run but relaxed enough that you didn’t spend twenty minutes on your hair. Whether you’re working with fine, delicate strands that slip out of everything, thick waves that seem to have their own agenda, or anywhere in between, there’s a messy knot technique that’ll become your go-to.
The real advantage of mastering a few different topknot styles is flexibility. You can grab your hair differently depending on what your hair’s actually doing that day — whether it’s freshly washed, two-day texture, heavily styled, or that frustrating in-between where it refuses to cooperate with anything. A topknot that works brilliantly on one texture might completely fail on another, which is why having several techniques in your back pocket transforms this from a “sometimes it works” style into something you can rely on. Once you understand the core principles — how much tension you’re using, where you’re anchoring the knot, and what makes it stay versus fall apart — you’ll start adapting these techniques instinctively based on what your hair needs that day.
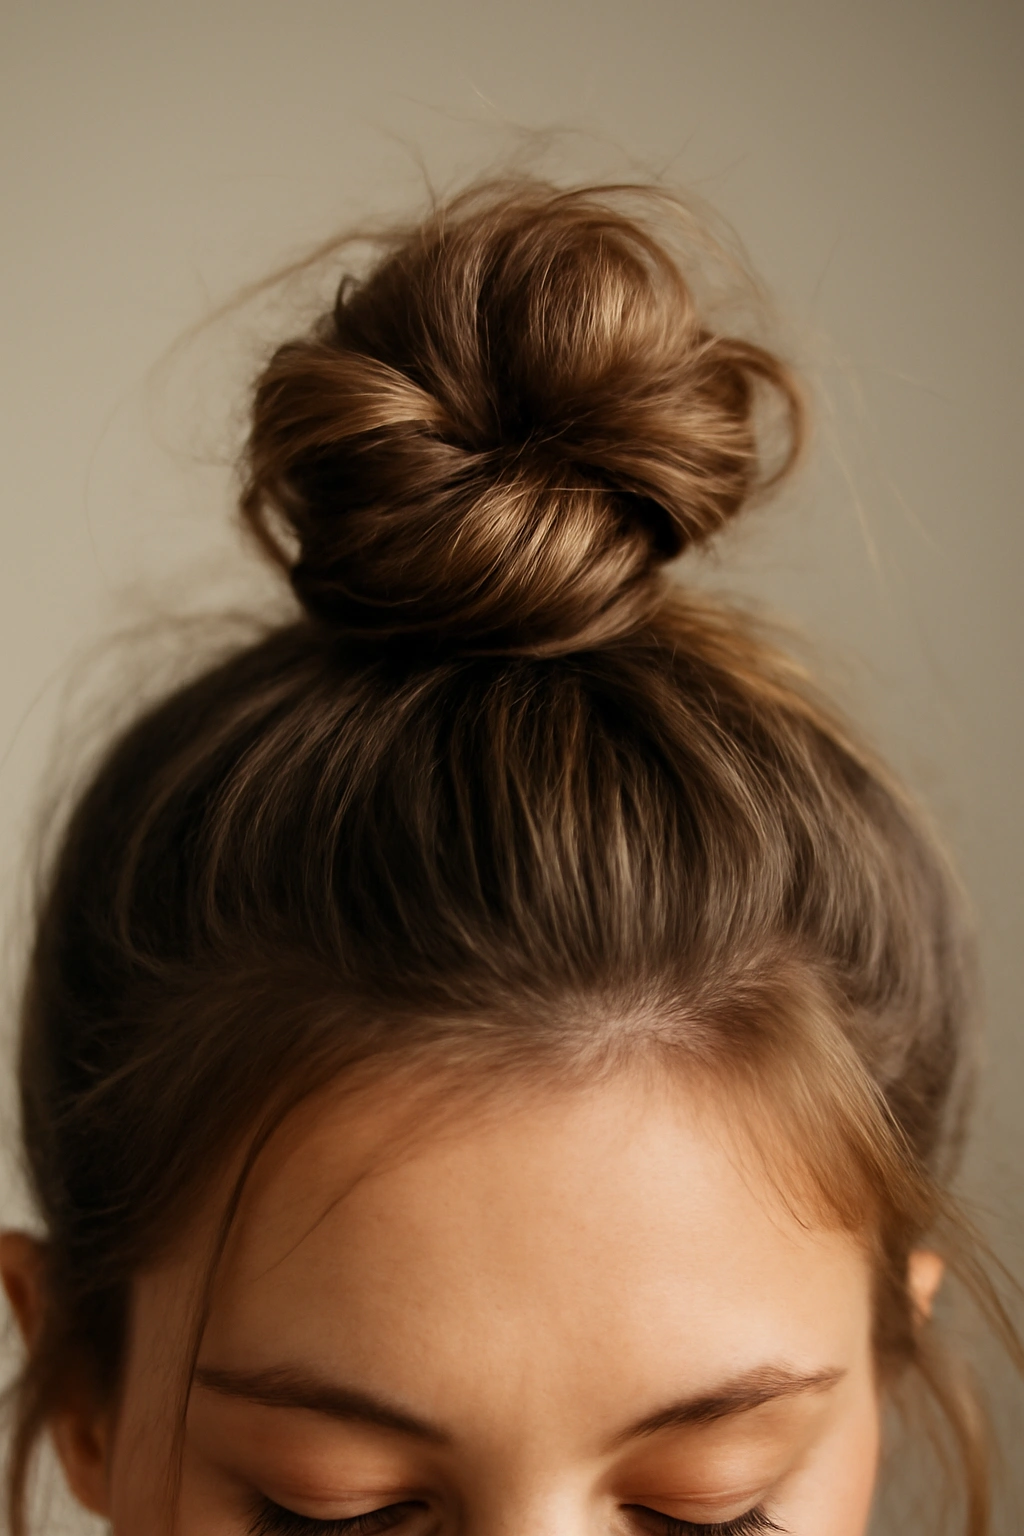
1. Classic Casual Knot
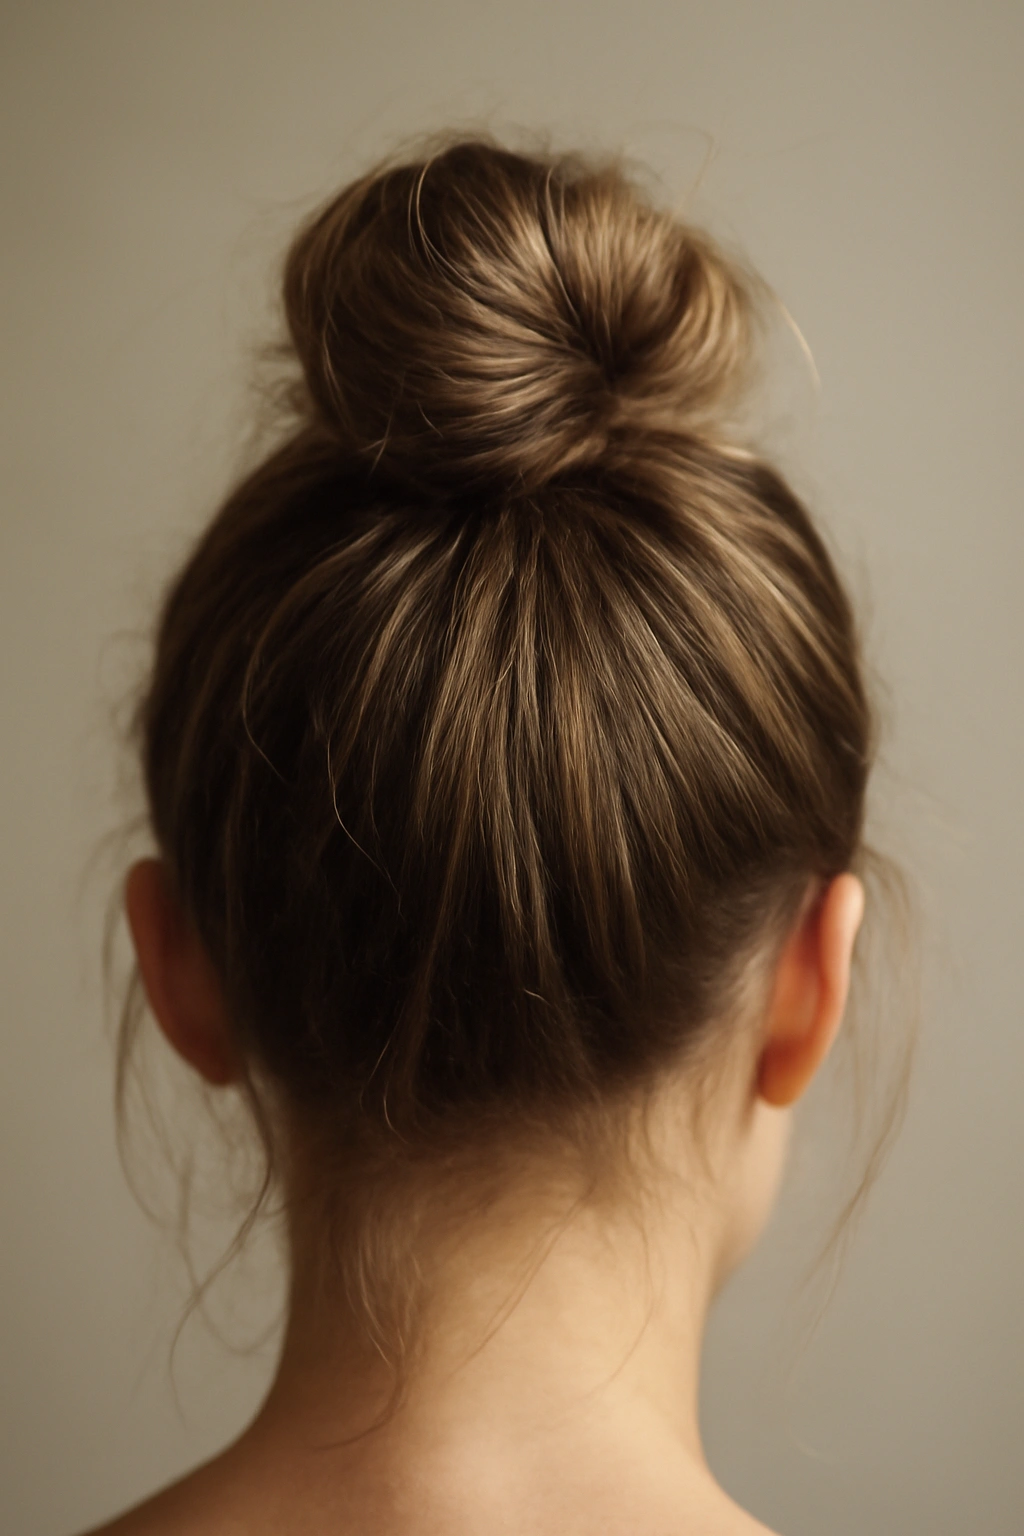
This is the foundational messy knot that works whether your hair is freshly styled or hasn’t seen shampoo in four days. The classic casual knot sits high and centered on your head, and the beauty is in how you can dial the messiness up or down depending on how intentional you want to be. Start with hair gathered at the crown — not pulled aggressively tight, but gathered with enough control that you’re working with a cohesive section rather than strays flying everywhere (though a few face-framing pieces actually improve the final look).
The Straightforward Technique
Take a standard hair tie and wrap it once loosely around your gathered ponytail at the crown. Before tightening completely, create a loop — don’t pull the ponytail all the way through the elastic, leaving about a 4-6 inch tail of hair hanging. Tighten the elastic so the loop is secure but not strangling-tight (you want this to look casual, not severe). Take that hanging tail and wrap it gently around the base of your knot loop, tucking the end underneath and securing with bobby pins. This wrap disguises where the elastic sits and adds that polished-yet-undone quality that makes it feel intentional rather than lazy.
What Makes This Version Work
- The half-through technique creates automatic volume and texture without backcombing or teasing
- Works equally well on straight hair (where it looks sleek and contemporary) and wavy or curly hair (where it reads as effortlessly textured)
- Stays put for 8+ hours without adjustments once the bobby pins are secured
- Quick enough to do while your coffee brews or your shower water heats up
- The wrap-around tail hides elastic marks and gives your hair a finished edge
Pro tip: If you have fine hair that tends to slip out of knots, use a slightly tighter elastic and don’t leave quite as long a tail — you want enough structure that strays don’t cascade down mid-morning. Conversely, if you have thick, textured hair, go looser on the elastic and create a longer tail so you have enough length to wrap and secure it properly without leaving visible gaps.
2. Textured Boho Knot
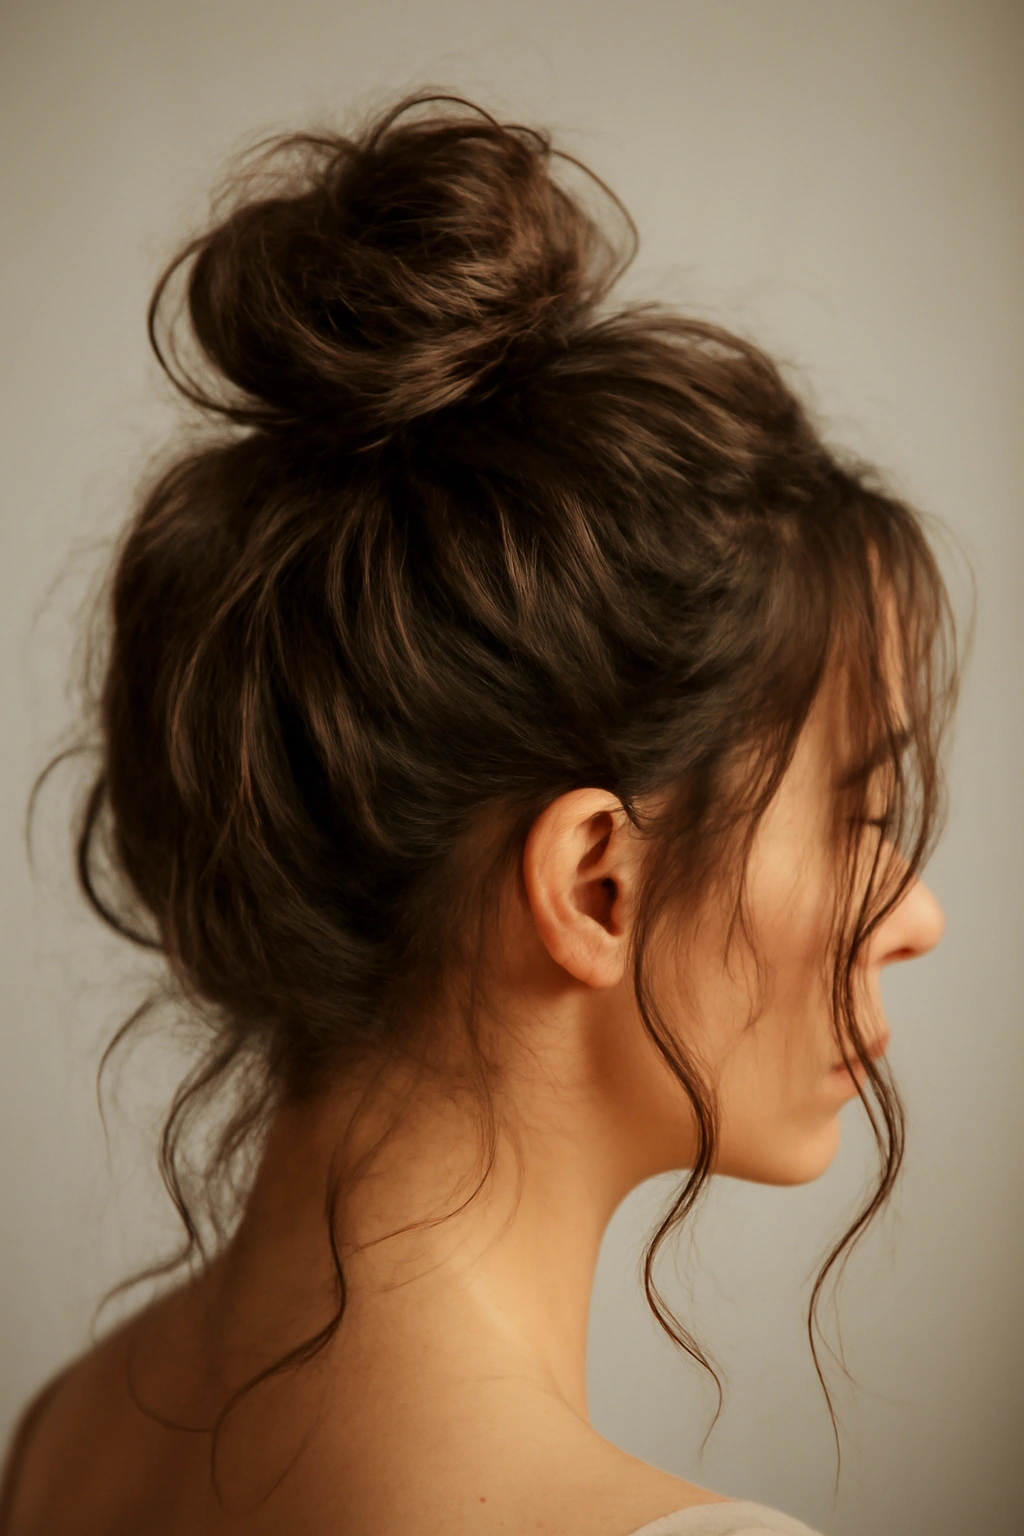
This style is perfect when you actually want the messiness to be the main event rather than trying to hide it. The boho knot celebrates texture, movement, and that “I woke up like this” quality that only works if you’re actually leaning into pieces coming loose. This version is your best bet if you have naturally wavy or curly hair, or if you’ve prepped your straight hair with a light texture spray or salt spray to give it grip and dimension.
Building Texture First
Before you even pull your hair up, work a texture product through the mid-lengths and ends. A sea salt spray, dry texture spray, or even a lightweight mousse (applied to damp roots then rough-dried) creates tooth that holds a messy knot together way better than slick hair. Rough up your hair with your fingers as you apply the product — you’re not trying to create uniform texture but rather enhance whatever natural pattern your hair already has. Once the product is in, let your hair dry completely (or mostly) before styling. A damp messy knot can turn into a drooping disaster by lunchtime, but one with texture holds surprisingly well.
The Purposefully Imperfect Assembly
Flip your head upside down and gather your hair loosely at the crown, letting pieces escape as you go — this isn’t about precision gathering. Flip back upright and twist this gathered section into a loose rope, the way you’d loosely braid something without actually braiding it. Wrap this twisted rope into a circle and secure with bobby pins. Don’t worry about tucking the ends in perfectly; let a few wispy pieces stick out. Pull a few larger sections from around the knot itself, gently loosening them so they frame your face and break up the knot’s outline.
Why Boho Knots Have That Special Ineffable Quality
- The upside-down gathering creates natural fullness and dimension that’s nearly impossible to fake
- Texture products add hold without product buildup or crunchiness — your hair stays soft but secure
- The loosely twisted core is stronger than it looks because the fibers catch on each other
- Intentionally pulled-out pieces photograph beautifully and create movement when you turn your head
- This style is actually more comfortable than a tight knot — less tension on your scalp after a long day
Worth knowing: Boho knots look best when not all your hair is twisted up. Leave maybe 20-30 percent of your hair down or loosely incorporated into the knot so there’s movement around your face and neck. If everything is slicked back and knotted, it reads severe rather than effortless.
3. Sleek and Polished Knot
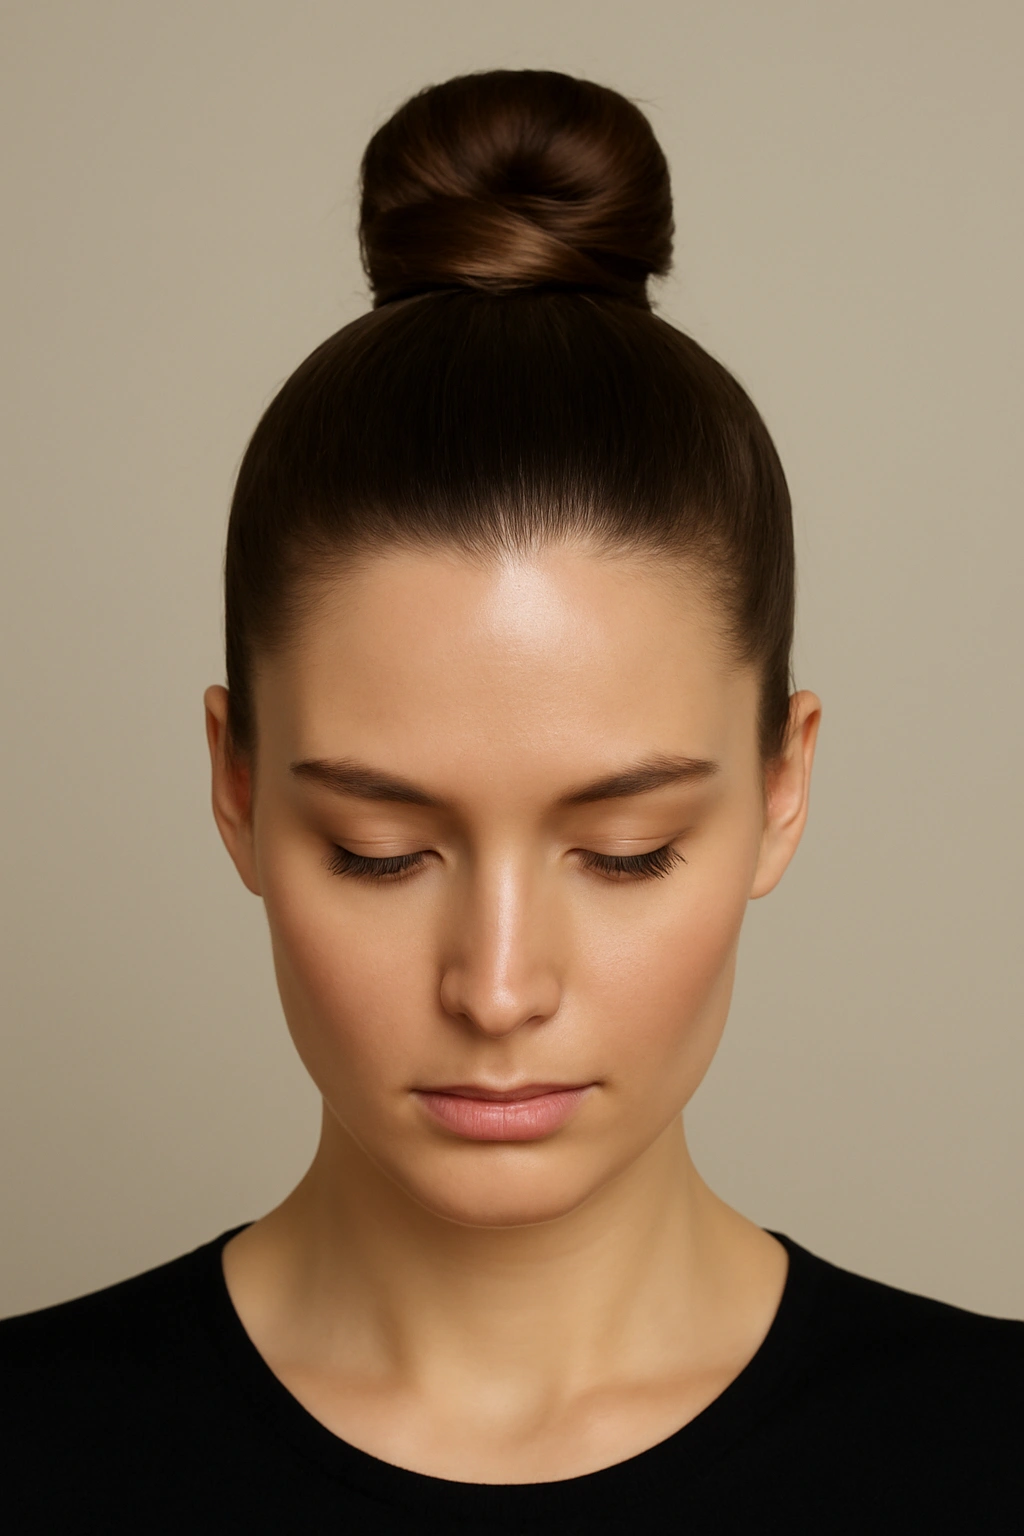
When you need to look intentional and put-together — whether for a work setting, a professional event, or just a day when you want to feel more polished — the sleek knot is your move. This version uses tightness and smoothness strategically to create that “I spent actual time on this” impression while still maintaining the casual vibe. It’s also genuinely easier to execute than it looks, because the tightness actually means fewer pieces escape and fewer adjustments you’ll need to make throughout the day.
Smoothing and Securing
Start with either naturally smooth hair or hair you’ve blow-dried straight. Apply a smoothing serum or lightweight gel to the crown and top sections where you’re gathering your hair — not so much that it looks wet or flat, but enough that flyaways and texture settle down. Use a fine-tooth comb or a wet brush to gather your hair into a tight, high ponytail at the very crown, combing out any texture or bumps as you work. This is where you’re actually paying attention to precision; the payoff is that the finished knot looks intentional and controlled rather than haphazard.
Wrap the ponytail into a tight spiral and pin it securely to create a smooth, defined knot shape. Take one or two bobby pins and slide them horizontally through the base of the knot, under where the elastic sits, so they anchor the whole structure. Finish with a light hairspray — not enough to make it crunchy, but enough to set flyaways and keep the sleekness intact for 10+ hours.
The Science of Making Smooth Knots Actually Hold
- Tightness is your friend here — tension creates friction that keeps everything in place
- Pinning horizontally (perpendicular to the direction of the knot) is stronger than pinning vertically
- A light smoothing serum won’t weigh down fine hair the way pomades or waxes do
- The high crown placement makes this style read as intentional rather than lazy
Styling note: Pair this knot with a deep side part or a middle part to maximize the sleekness and showiness. The smoothness of the knot pairs beautifully with a clean part, whereas a boho knot looks better with softer parting or no distinct part at all.
4. Twisted Crown Knot
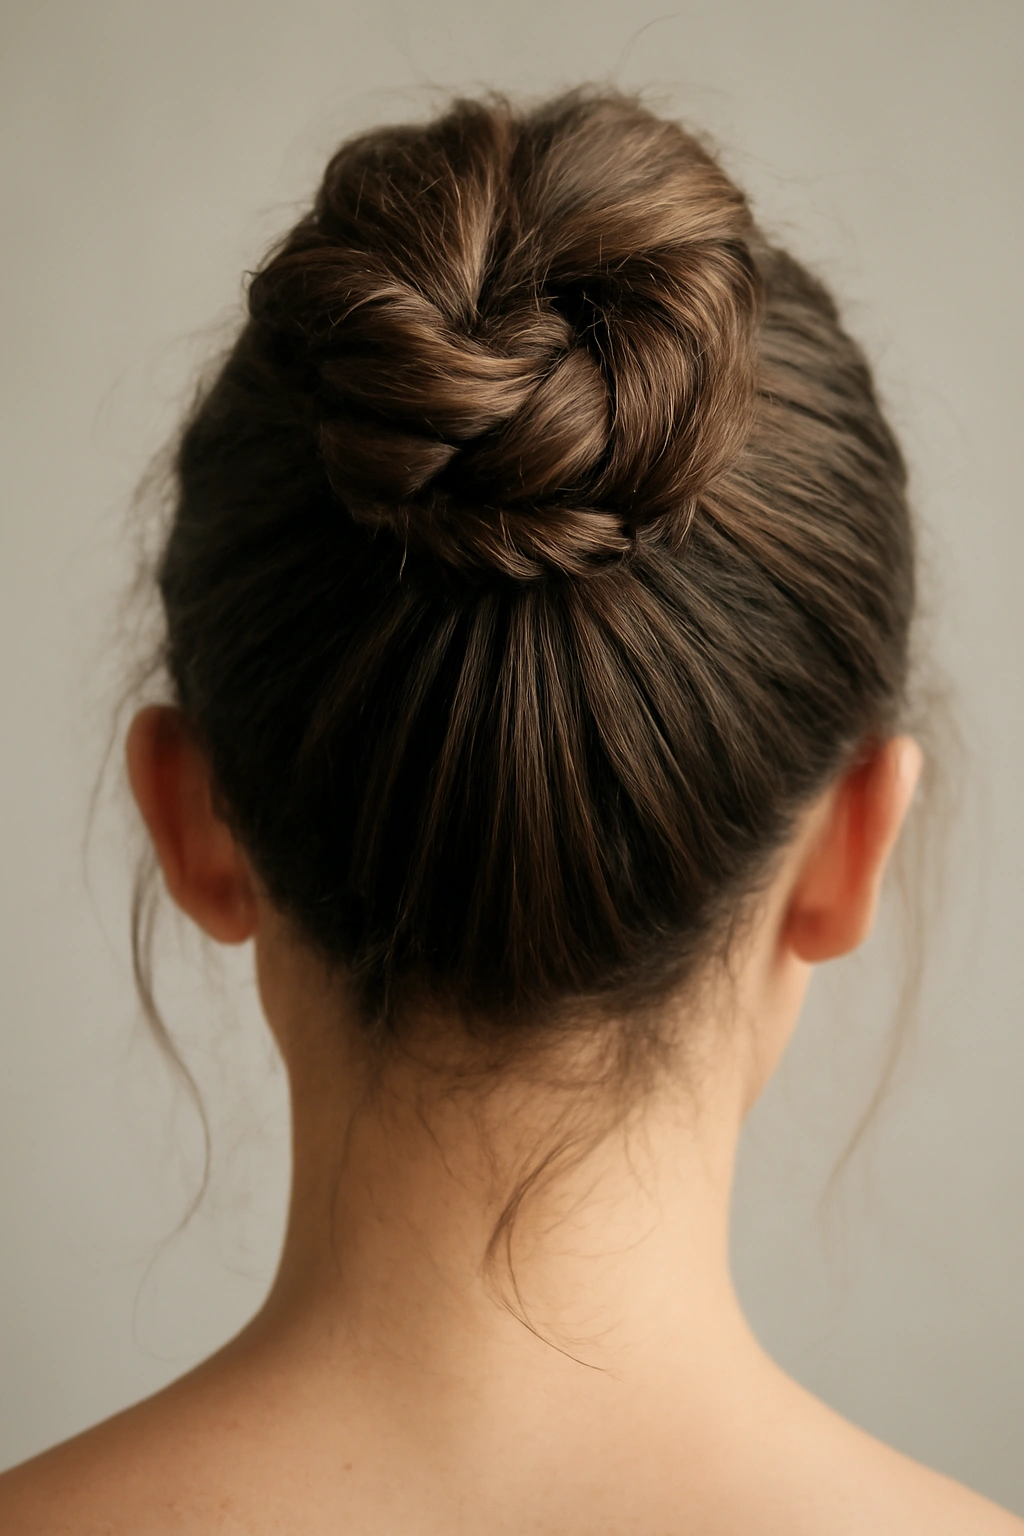
This style splits the difference between the casual ease of a regular topknot and the structured control of a sleek one. The twisted crown knot takes advantage of the way hair naturally locks together when you twist it, creating a knot that looks more intentional than a basic casual knot but doesn’t demand the flawlessness of a fully polished version. It’s also genuinely interesting to look at — the twisted texture adds visual interest rather than reading as blah or one-dimensional.
Creating the Twist Structure
Gather your hair into a high ponytail and secure it with an elastic. Here’s where the crown twist comes in: divide the ponytail into two thick sections. Twist each section tightly, the way you’d twist a piece of rope. Cross the two twisted sections over each other a couple of times so they’re wrapping around each other in a spiral pattern. As the twisted sections spiral together, they naturally create texture and movement. Wrap this double-twist into a knot and secure with bobby pins. The interior of the knot has all this spiral texture, so even from a distance it looks more deliberately crafted than a basic knot.
Why Twisted Structures Are Stronger Than They Seem
- The twist creates friction between hair fibers that locks them together without needing extreme tightness
- A double-twist is inherently three-dimensional, so the knot sits fuller and rounder than a simple rolled knot
- Even with fine hair, a twisted structure holds better than a loosely gathered knot because the twist adds gripping power
- The visible spiral texture reads as intentional and modern rather than accidental
Helpful detail: As you’re twisting, don’t try to make the twists uniform or perfect. Slightly loose, slightly irregular twists actually look better because they’re easier for the twist to lock together with good grip. A perfectly tight, uniform twist can actually slip out more easily than one with some relaxed variation in tension.
5. Messy Finger-Twisted Knot
This is the no-tools, almost-no-setup version for when you need a knot but didn’t plan ahead. It’s also surprisingly strong, because you’re using the friction and locking created by multiple small twists rather than relying on a single structural element. This version is perfect for the shower-to-coffee-run window when you don’t have time for careful pinning, and it actually looks more modern and intentional than you’d think given how little effort it requires.
The Finger-Twisted Assembly
Gather your hair loosely at the crown — you don’t need an elastic for this step yet. Divide your hair into three or four thick sections. Using just your fingers (no tools), twist each section until it locks, the way you’d twist a piece of yarn around your finger. Once each section is twisted, coil these twists around each other to form the knot itself. The beauty is that your fingers are creating friction and locking as you go, so by the time everything is coiled, it’s already holding fairly well. Secure the whole structure with a single elastic at the base and a couple of bobby pins driven through the center so the pins anchor the twisted sections to your head rather than just cinching the elastic.
Why Finger-Twisting Actually Creates Surprising Hold
- Multiple twisted sections interlock differently than a single twist, creating more gripping points
- Your fingers naturally vary the tightness slightly as you twist, which creates variations in lock-points that make slipping less likely
- The friction created by finger-twisting is different from elastic tension — it’s mechanical rather than compressive
- This method works especially well on hair with any texture; perfectly straight hair is actually the only texture where it struggles slightly
Real-world advantage: You can do this while half-watching your kids, on a Zoom call (with camera off), or literally anywhere without needing to look in a mirror. Once you understand the three-twist-into-a-knot sequence, it becomes automatic, and you’ll be able to do it in about 90 seconds without any thought.
Final Thoughts

The magic of mastering these five topknot styles isn’t about having a different elaborate hairstyle for every occasion — it’s about having options depending on what your hair is actually doing, how much time you have, and what vibe you’re going for. Some mornings you’ll wake up and know immediately that your hair wants the boho treatment; other days a sleek knot is the only thing that’ll work. The casual knot becomes your fallback when you’re not sure, and the twisted versions are your secret weapons when you want something that looks more deliberate than basic.
What matters most is that you stop thinking of topknots as a lazy default and start seeing them as an actual styling technique with real flexibility. Spend one day actually trying each of these five — not reading about them, but actually doing them with your own hair in front of a mirror. You’ll quickly figure out which two or three feel most natural to your hands and which work best with your actual hair texture. Once you’ve done that, you’ll have a genuinely reliable hairstyle that works on good hair days and bad ones, that photographs well, that lasts all day, and that takes about three minutes to execute. That’s not settling for a low-effort style — that’s actually expert-level hair styling, because it meets the reality of your life rather than expecting your life to meet the demands of a complicated hairstyle.