Short hair at a wedding doesn’t mean sacrificing elegance or romantic flair — it means getting creative in ways that longer-haired brides often can’t. A pixie cut is actually a blank canvas for bridal styling, offering the freedom to play with texture, accessories, height, and drama in ways that command genuine attention. The challenge isn’t making a pixie work for a wedding; it’s deciding which of the many stunning options suits your wedding vibe, face shape, and personal style best.
The real advantage of styling a pixie cut for a wedding is that you’re not fighting against length or weight. Instead, you’re building texture, using strategic styling techniques, and leveraging accessories to create focal points that draw the eye and photograph beautifully. The key is understanding that pixie wedding looks aren’t scaled-down versions of long-hair styles — they’re their own category entirely, with their own aesthetic rules and styling tricks that create impact through precision rather than volume.
Whether you’re planning an intimate garden ceremony, a formal black-tie affair, or a modern minimalist celebration, there’s a pixie styling option that will make you feel like the most confident, beautiful version of yourself walking down the aisle. The styles below showcase the full range of what’s possible with a pixie cut on your wedding day, from subtle romantic touches to bold, unapologetic statements.
1. Textured Pixie with Romantic Waves
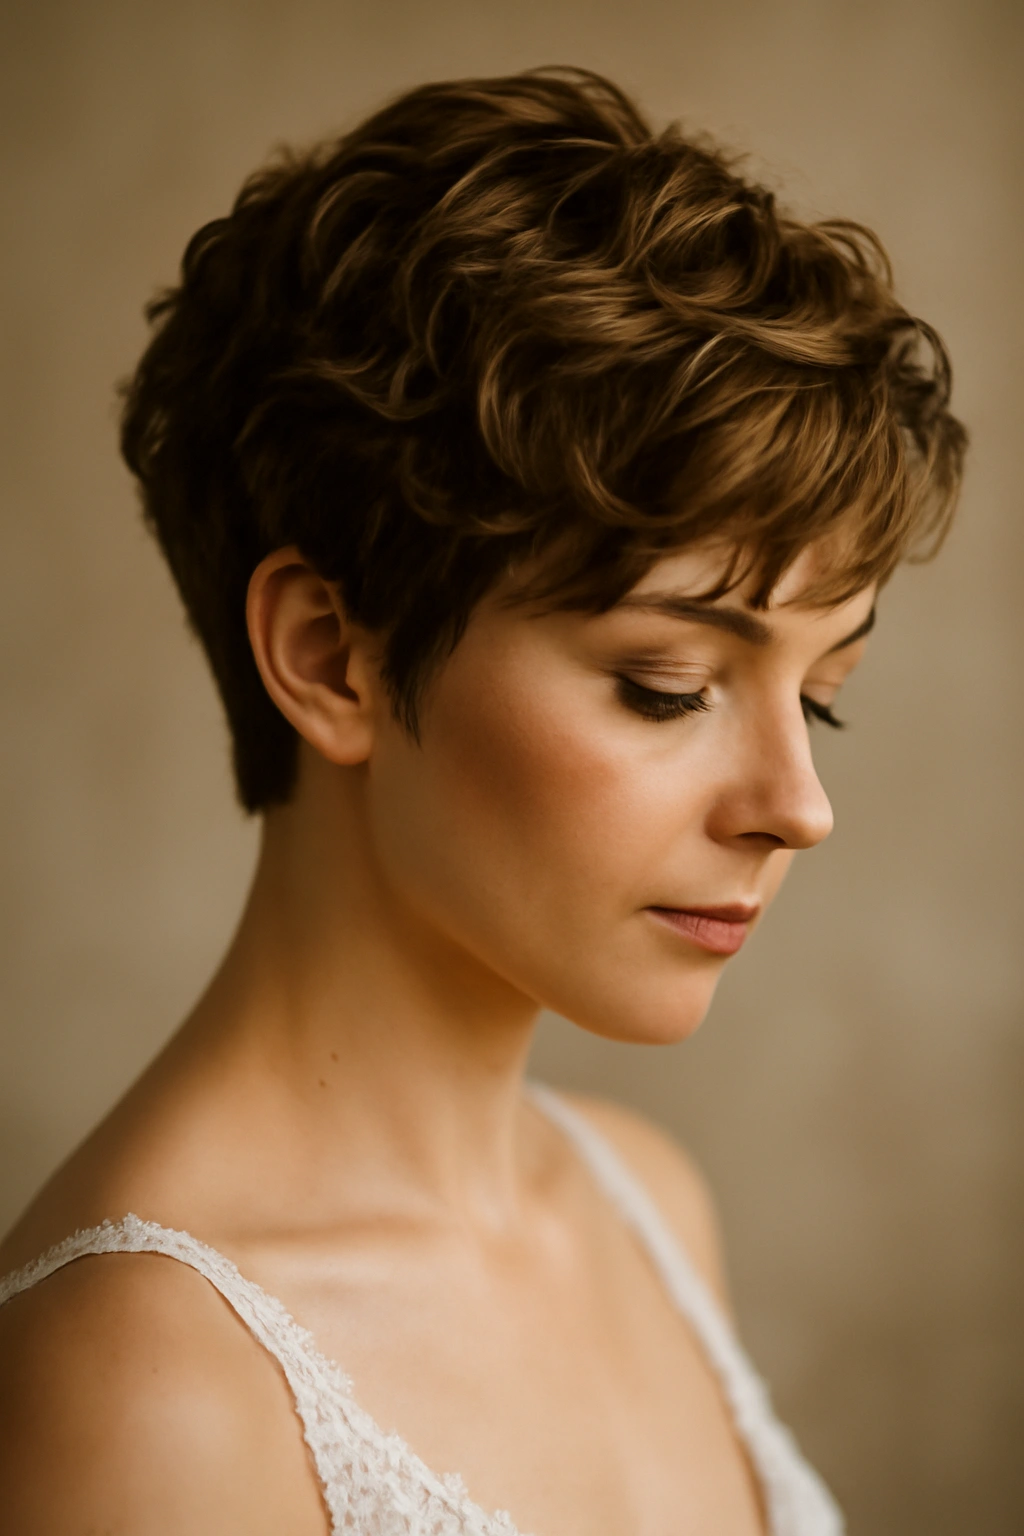
This style takes the natural movement potential of a pixie and amplifies it with careful texturing and soft, tousled waves throughout. The result feels effortlessly romantic while still maintaining the sharp, architectural cleanness that makes pixies so striking. By working with a stylist who understands how to layer and texturize shorter hair, you can create dimension and movement that catches light beautifully in photos.
Why This Works for Weddings
The textured wave approach brings femininity to a pixie without requiring length or heavy styling products that can weigh down short hair. The waves create visual softness that balances the geometric precision of the cut itself, making it feel wedding-appropriate while staying true to the low-maintenance appeal that drew you to a pixie in the first place. This style photographs incredibly well from every angle because the texture creates shadow and dimension that translates beautifully in images.
How to Style It
- Schedule a consultation with your stylist at least two weeks before the wedding to discuss textured layers and styling approach
- Ask your stylist to create staggered layers throughout the crown and sides that will hold waves naturally
- On wedding day, apply a lightweight texturizing spray or sea salt spray to damp hair as your base
- Blow dry with a small barrel brush, directing hair away from the face and creating soft movement at the crown
- Use a small curling iron (around 1 inch) to gently wave sections, working in the direction that flatters your face
- Finish with a flexible hold hairspray that won’t make the texture feel stiff or crunchy
Pro tip: Do a trial run at least one week before the wedding so you and your stylist can nail the exact level of texture and wave you want. Take photos under different lighting conditions to see how the style translates in various settings.
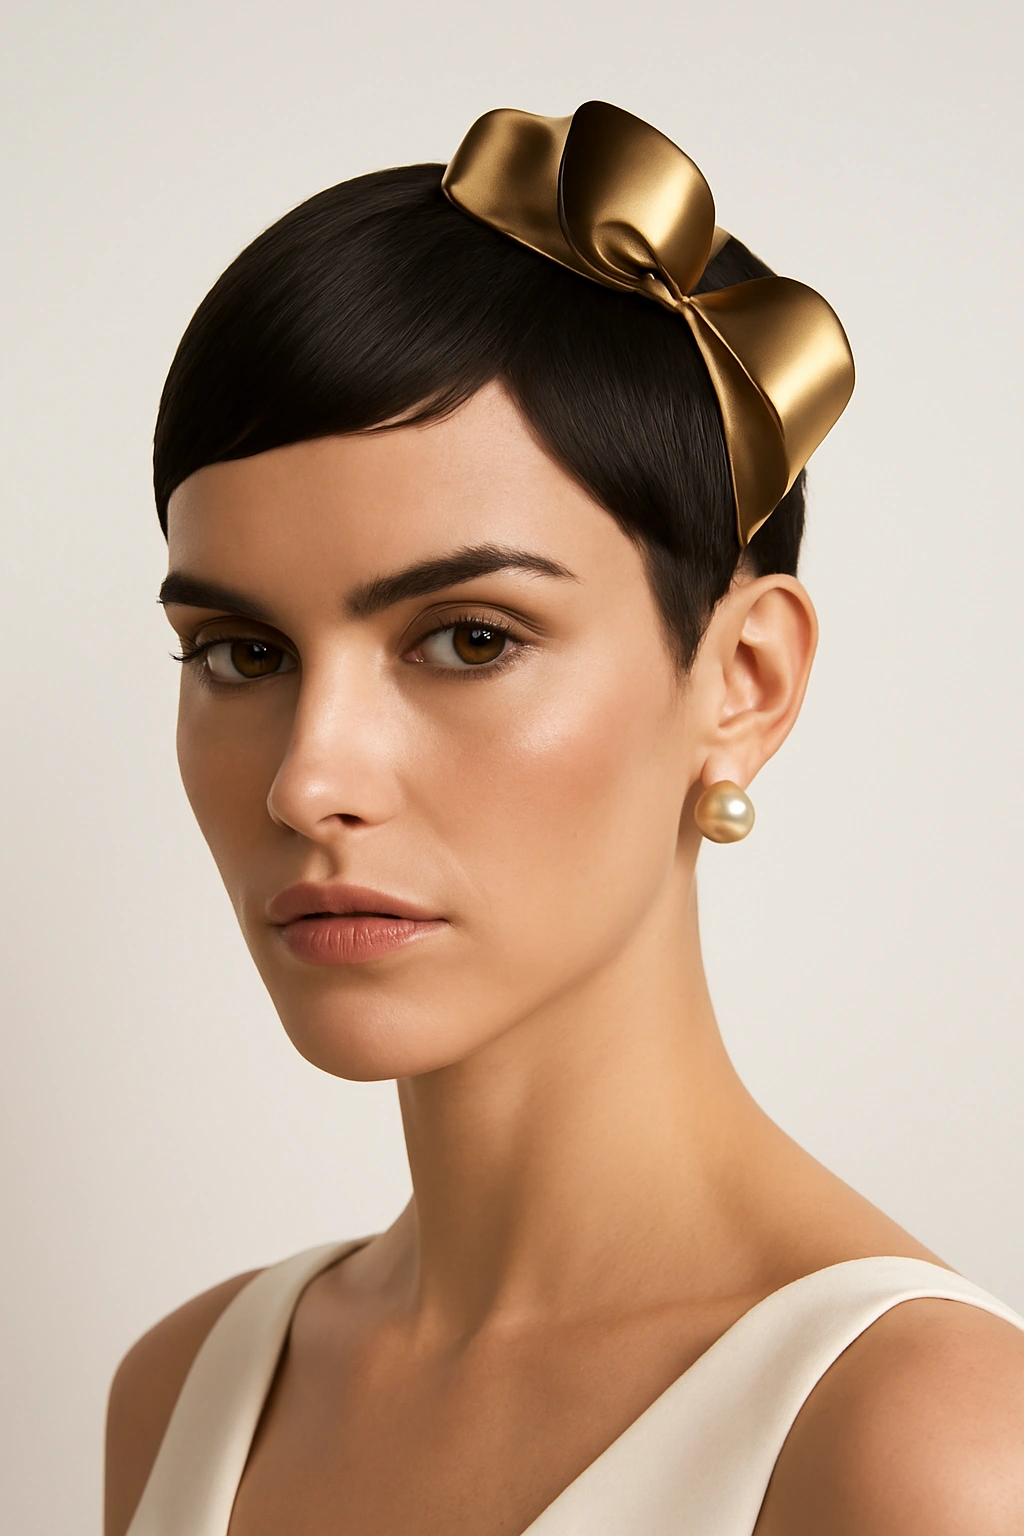
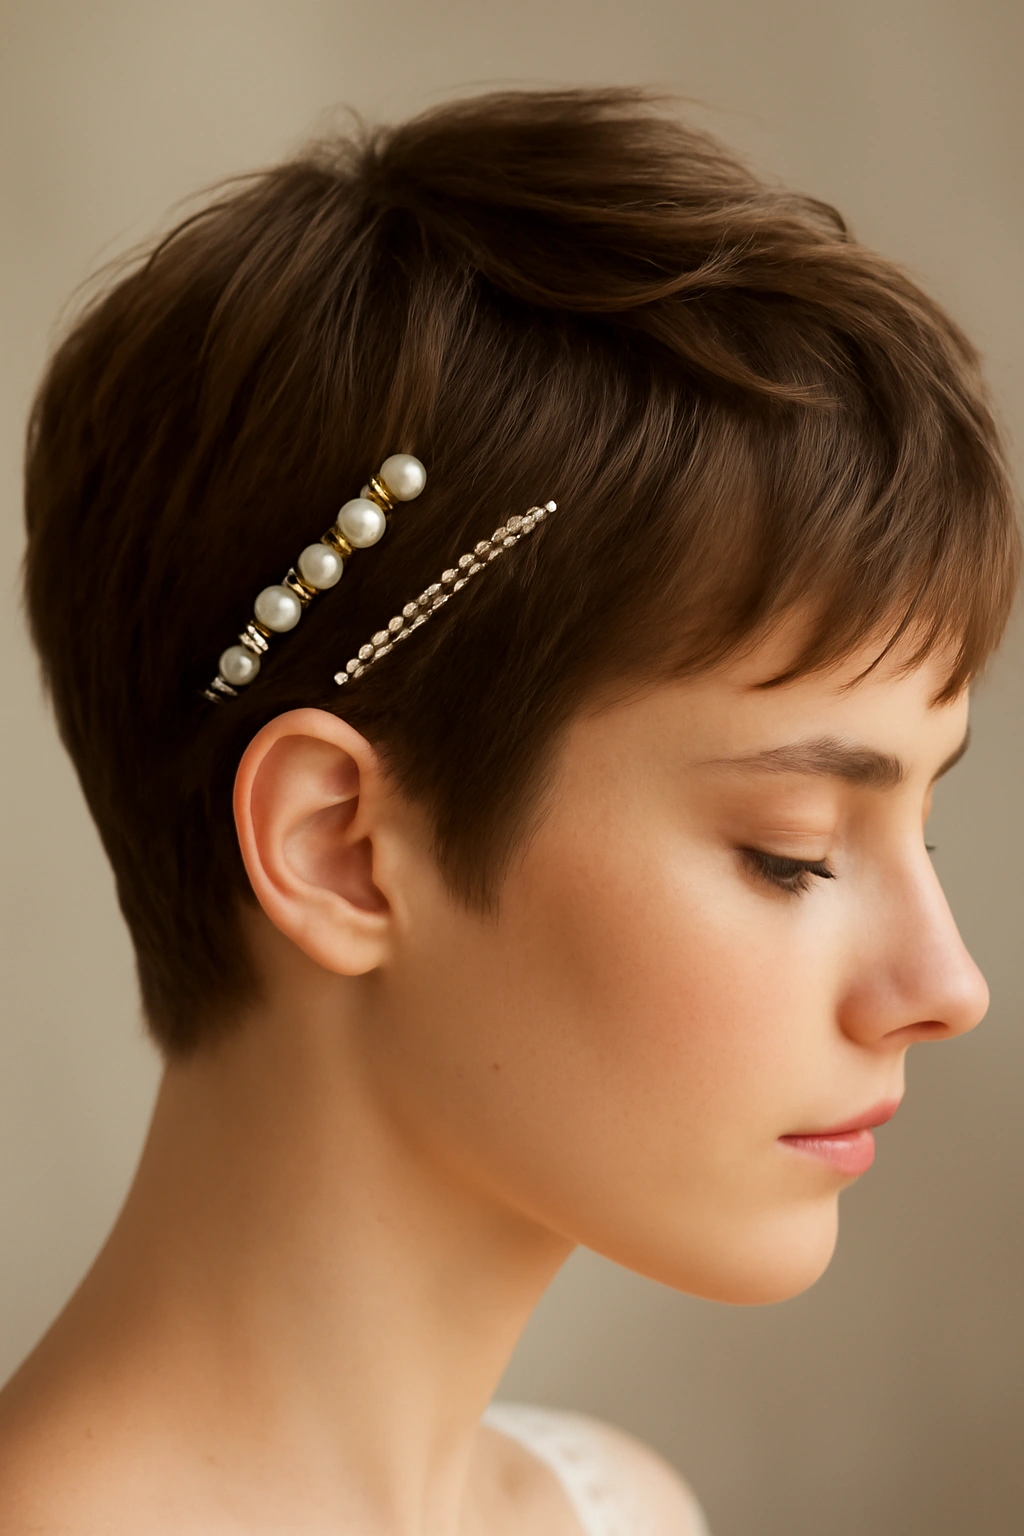
2. Sleek Geometric Pixie with Bold Accessories
For brides who love clean lines and modern aesthetics, a precisely sculpted pixie paired with a statement hair accessory creates an unforgettable look that feels both contemporary and special-occasion-worthy. The sharpness of a geometric pixie is its own kind of elegance — it doesn’t need softness to feel bridal; it needs confidence and the right adornment to make it feel intentional and striking.
Why This Works for Weddings
A sleek pixie with minimal wave or texture is an unexpectedly chic bridal choice because it communicates confidence and style. When paired with a bold accessory — a vintage clip, a delicate chain headpiece, geometric ear cuff, or sculptural comb — it shifts from everyday to ceremonial instantly. This approach works particularly well for modern, minimalist, or fashion-forward weddings where the bride wants to look like herself, just elevated and polished.
How to Style It
- Keep the cut very sharp and clean, with precise fades on the sides and a slightly longer crown that can be styled sleek or with subtle texture
- Apply a smoothing serum or shine spray to clean, damp hair before blow drying
- Blow dry with a paddle brush for maximum smoothness, directing hair flat against the scalp
- Use a flat iron if needed to create absolutely smooth sides and crown
- Style your chosen accessory into place — either woven through the longer crown section or clipped into the side
- Set with a light hairspray that adds shine without creating stiffness
- Consider a bold lip color or eye makeup to balance the graphic nature of the style
Worth knowing: This look requires your hair to be freshly cut and the edges sharp just days before the wedding. If you get your cut too far in advance, the precise edges may grow out slightly and lose their impact.
3. Tousled Bedhead Pixie with Floral Crown
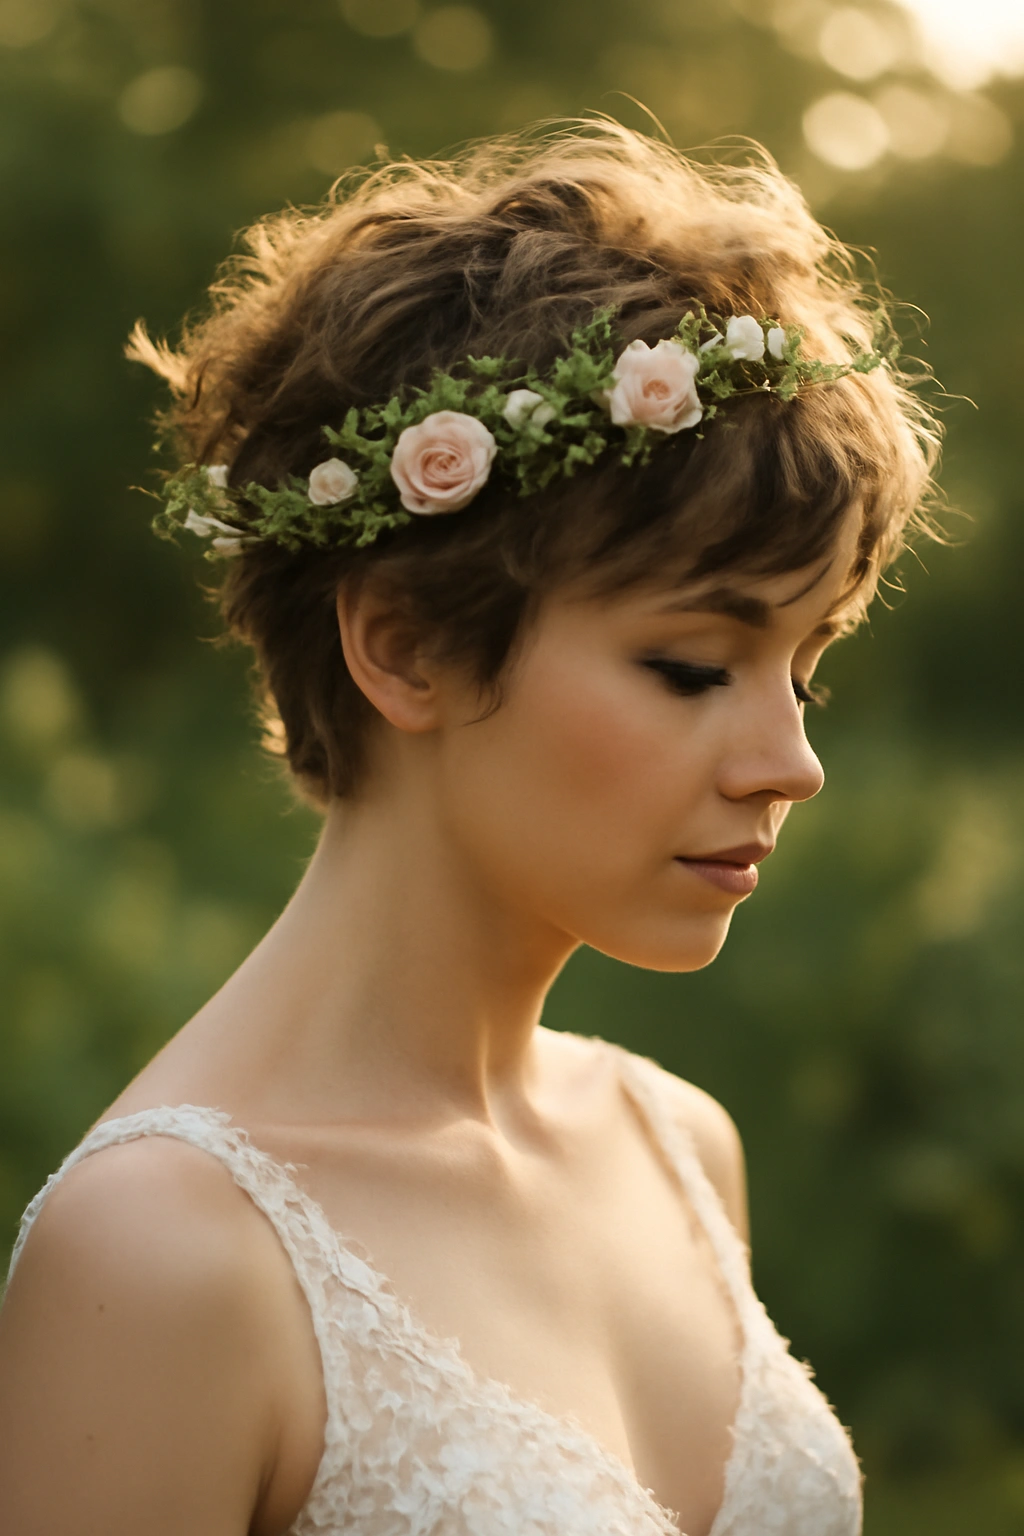
This playful, romantic approach embraces the slightly undone aesthetic while framing the face with a delicate floral crown. The tousled texture makes the pixie feel whimsical and approachable rather than severe, creating an overall look that’s perfect for outdoor ceremonies, bohemian aesthetics, or any bride who wants her wedding style to feel organic and natural rather than heavily styled.
Why This Works for Weddings
The combination of tousled texture and florals is inherently romantic and wedding-appropriate, yet the pixie keeps it modern and prevents it from feeling costume-like. This style works beautifully for garden ceremonies, beach weddings, or any setting where a softer, more bohemian vibe feels right. The floral crown draws attention upward to your face and adds dimension without requiring extensions or additional bulk that can look odd on very short hair.
How to Style It
- Have your stylist create lots of texture and layers throughout the pixie so you have plenty of surface area for tousling
- On wedding day, apply texturizing spray or dry shampoo to dry hair to create grip and movement
- Work the spray through with your fingers, ruffling and separating sections to create intentional bedhead texture
- Use a small curling iron to add subtle waves and direction where needed, but leave some sections deliberately unstyled
- Position the floral crown to sit naturally on the crown of your head, securing with bobby pins that match your hair color
- The florals should feel like they’re nestled into your hair rather than sitting on top of it
- Finish lightly with hairspray, avoiding anything that will make the texture feel stiff
Pro tip: Choose flowers for your crown that actually complement your hair color and skin tone rather than just matching your bouquet. White or cream florals tend to read better against most hair colors and skin tones.
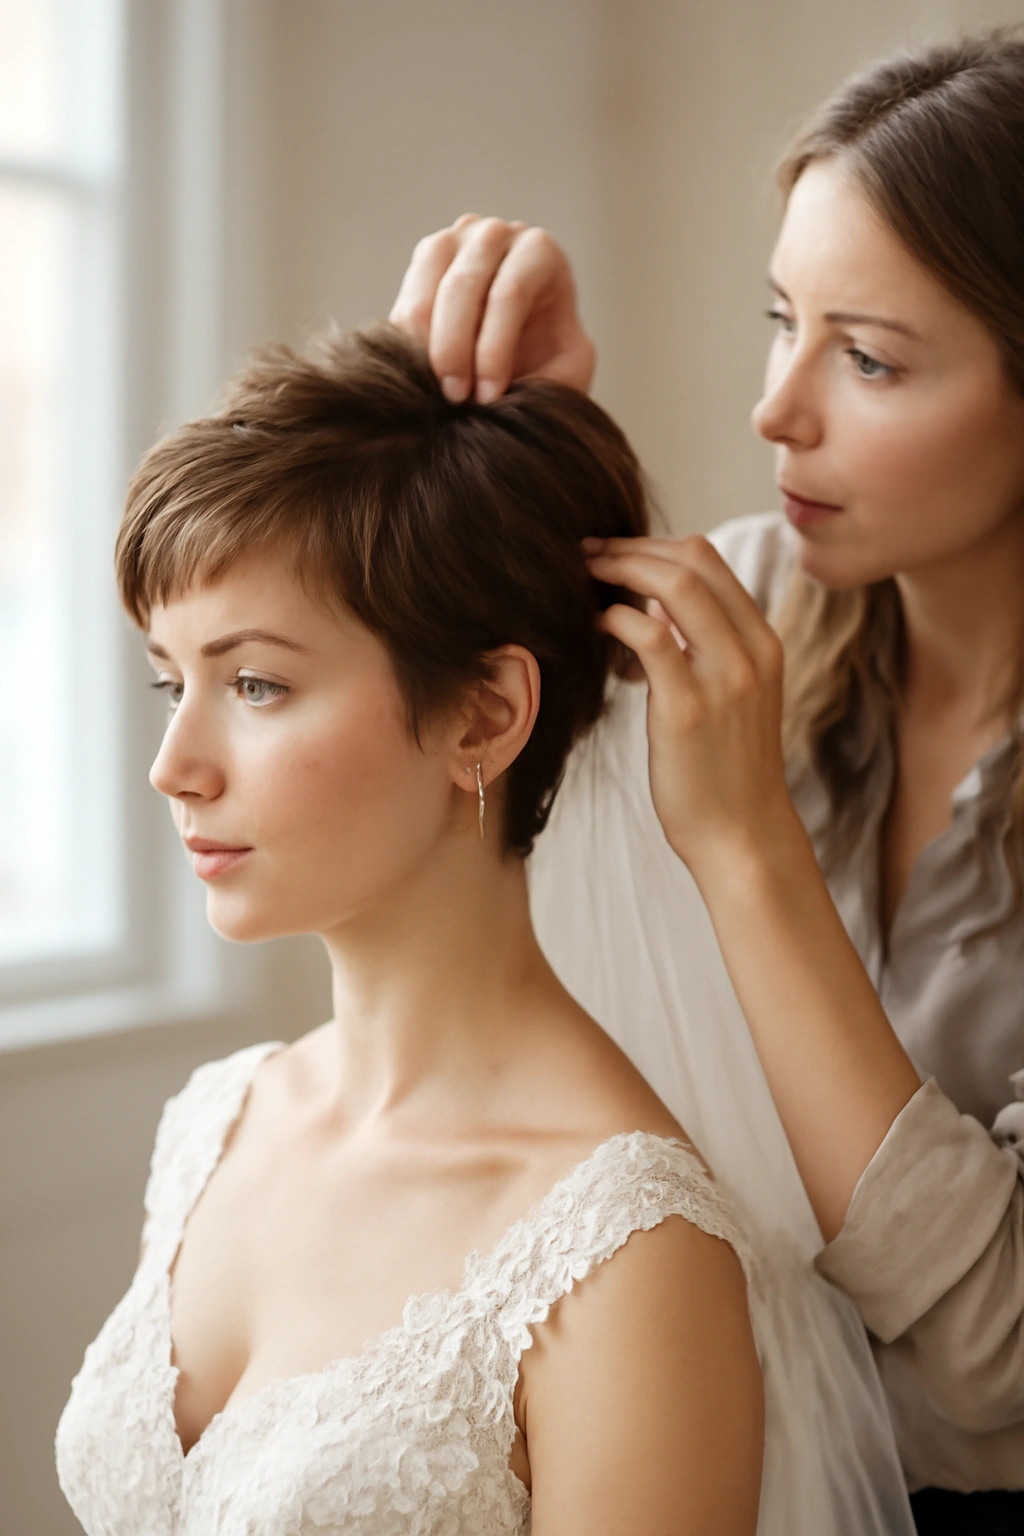
4. Undercut Pixie with Intricate Updos
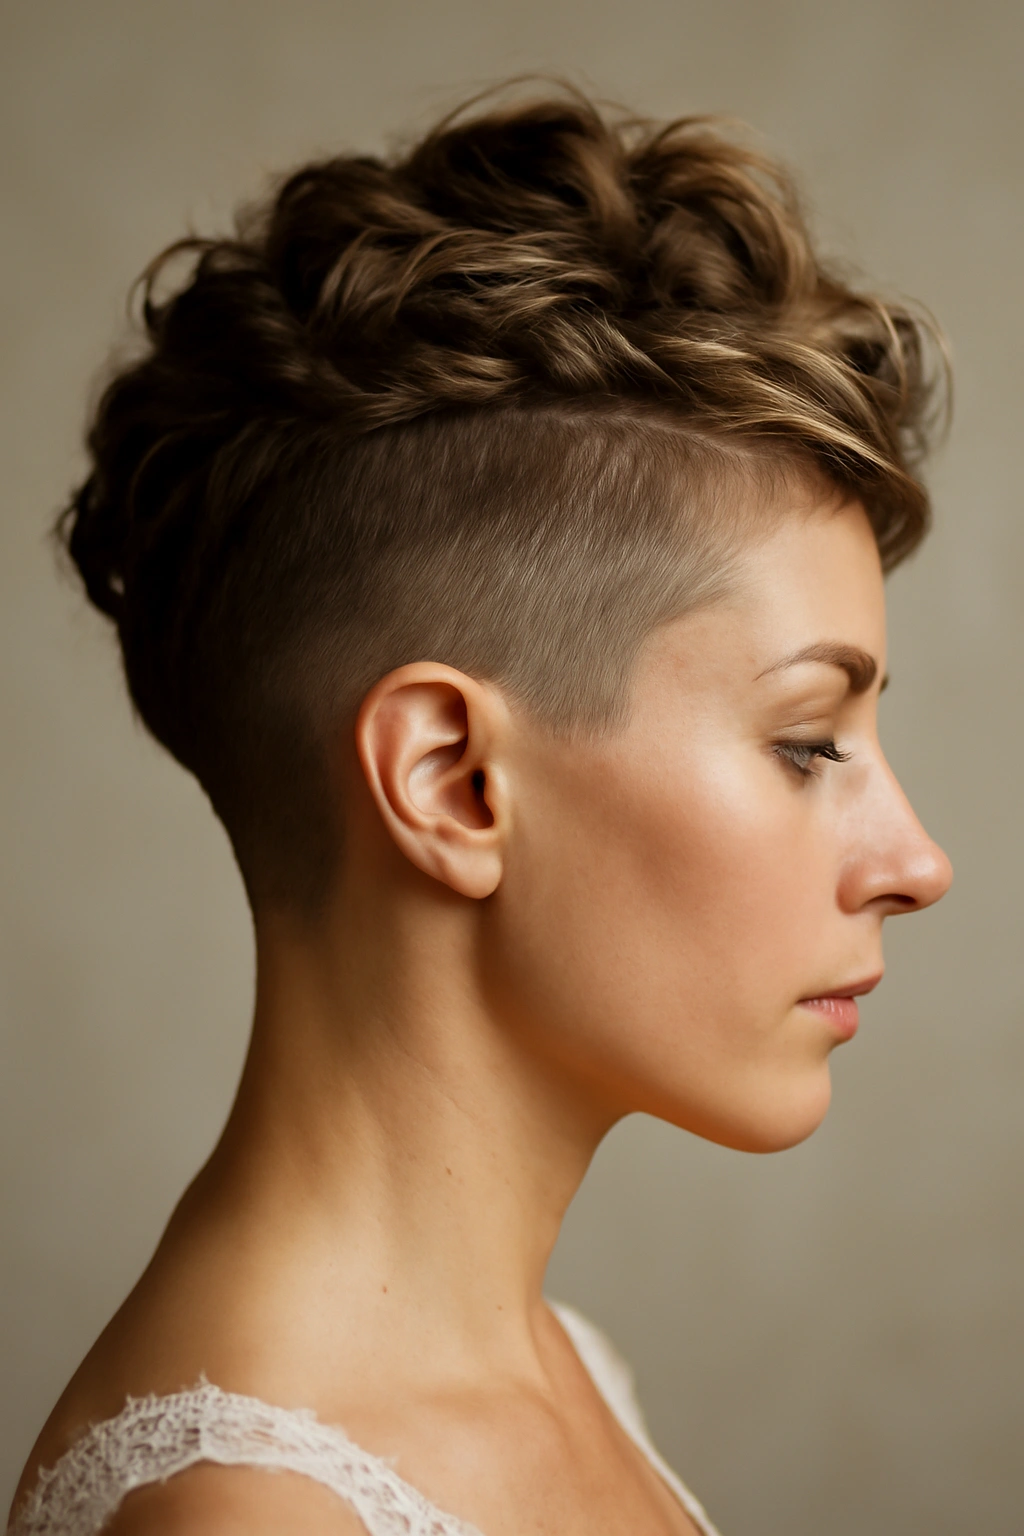
If your pixie has an undercut or shaved detail on the sides or back, you can absolutely showcase this architectural element in a bridal context by styling the longer crown sections into a small, intricate updo while leaving the undercut visible. This creates an element of surprise and visual interest that reads as intentional and design-forward rather than casual.
Why This Works for Weddings
An undercut pixie with a partial updo is a statement — it’s unapologetically modern while incorporating the delicate details (braids, twists, intricate pinning) that feel wedding-appropriate. This approach is perfect for brides who want their wedding look to feel authentic to who they are rather than conforming to conventional bridal expectations. The contrast between the shaved clean lines and the detailed styling creates visual intrigue that photographs beautifully.
How to Style It
- Work with a stylist experienced in updos on very short hair to plan the exact placement and technique
- The updo should incorporate the longer sections on top and crown, potentially using tiny braids or twisted sections for texture
- Use bobby pins that match your hair color and secure them so they’re not visible from the front
- Consider adding small, delicate pieces of jewelry or hair jewelry woven into the updo itself
- Keep the undercut clean and sharp — shave or trim it 2-3 days before the wedding so it looks fresh
- Use a lightweight hairspray that won’t weigh down the delicate updo details
- The style should look intentional and polished, not accidentally unfinished
Worth knowing: This style requires excellent communication with your stylist about your comfort level with visible undercut areas. Some brides love the edgy aesthetic; others prefer more coverage.
5. Colored Pixie with Metallic Accents
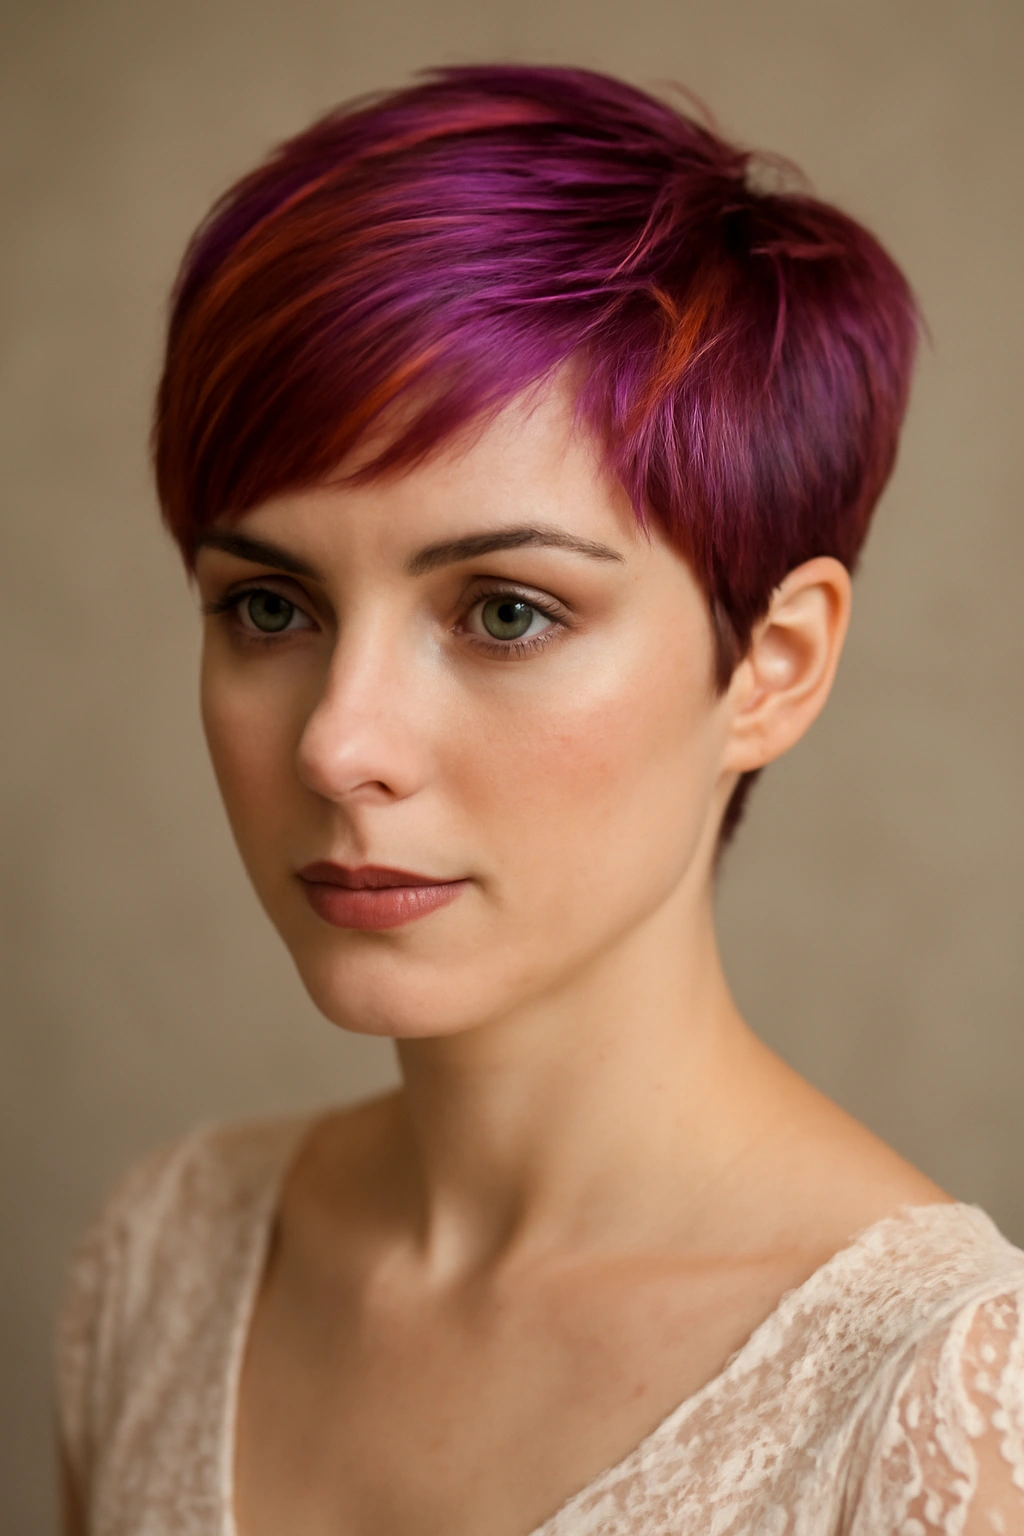
A pixie cut is the perfect canvas for bold color — whether you’re going for a subtle blonde highlight, a full vivid color, or subtle color melt. When combined with metallic hair accessories or subtle metallic styling details, a colored pixie becomes a truly memorable bridal statement that feels modern and intentional.
Why This Works for Weddings
A colored pixie signals that you’re making a choice — you’re not following convention, you’re creating a look that’s distinctly you. This approach works for brides who already have colored hair and want to lean into it, or brides who’ve always wanted to try a bold color and decided the wedding is the perfect occasion. The metallic accents elevate the color and tie it into a bridal context without requiring traditional floral or sparkly accessories.
How to Style It
- Color maintenance is critical, so plan your color appointment 3-5 days before the wedding to ensure optimal vibrancy
- If you’re trying a new color for the wedding, book a trial appointment at least one month in advance
- Invest in color-safe shampoo and conditioner to keep color vibrant right up to the wedding day
- Style the pixie with lots of texture and movement to show off the color dimension
- Apply a shine-enhancing spray or gloss spray right before the ceremony to make the color pop
- Add metallic hair clips, a delicate chain through the hair, or a minimalist metallic headpiece
- Consider metallic nail polish or subtle metallic makeup to tie the look together
- Bring a small bottle of touch-up spray or dry shampoo to the venue in case you need to refresh texture during the reception
Pro tip: If you’re going for a vivid color, choose one that complements your skin tone and the overall color scheme of your wedding. A pink-toned person might choose jewel tones, while a cool-toned person might go for silvers and cool-based colors.
6. Voluminous Vintage Pixie
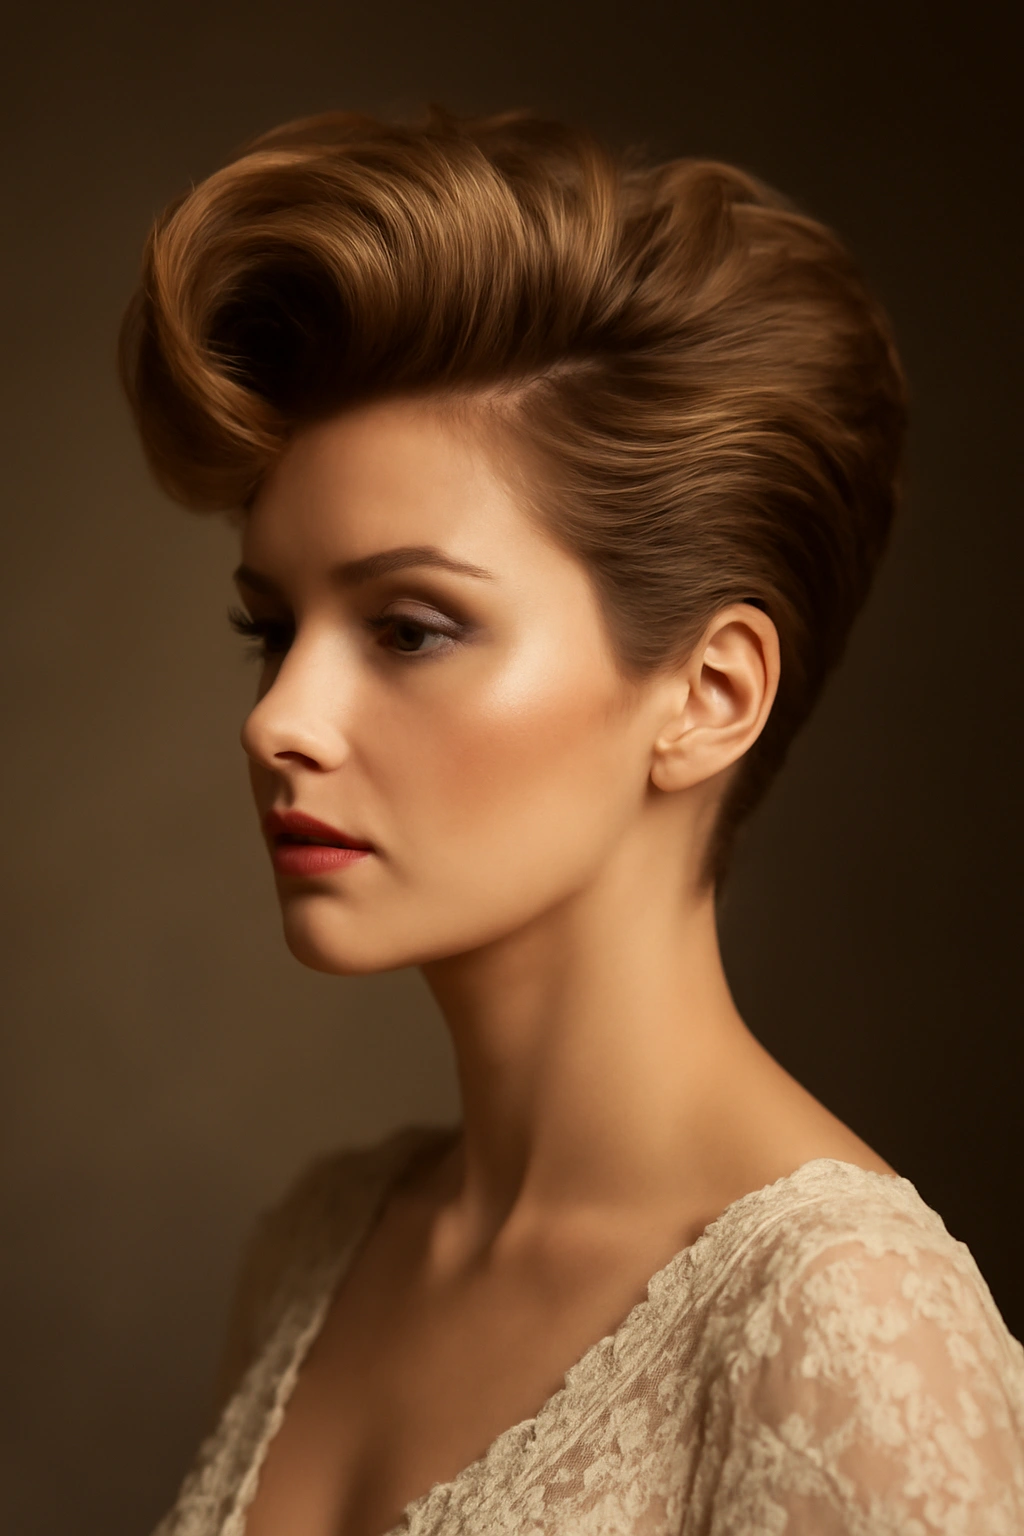
This style takes inspiration from classic 1950s and 1960s styling, creating height and volume at the crown while maintaining the pixie’s clean edges. The result feels timelessly elegant and unexpectedly romantic, proving that vintage aesthetics can absolutely work with a modern pixie cut.
Why This Works for Weddings
Vintage volume reads as inherently elegant and special-occasion appropriate without feeling dated when executed well. The lifted, structured styling gives the pixie a more dramatic presence while the short length keeps it modern. This approach works beautifully for formal weddings, vintage-inspired celebrations, or any bride who loves classic Hollywood glamour and wants to translate that into her own contemporary style.
How to Style It
- Have your stylist cut the pixie slightly longer on top than a traditional pixie — aim for about 2-3 inches of length in the crown area
- Ask for layers throughout the crown to create texture that will support volume
- On wedding day, blow dry against the direction of growth to create lift at the roots
- Use a paddle brush and concentrator nozzle to direct heat and air upward, building height as you dry
- Once dry, use a small velcro roller or your fingers to tease gently at the crown, creating a subtle bouffant effect
- Smooth the outer surface with a fine-tooth comb so it looks polished, not fuzzy
- Add a delicate vintage clip, low comb, or headpiece to secure the volume and add elegance
- Finish with a flexible hold hairspray that will keep the volume without feeling stiff
Worth knowing: This style requires more daily maintenance than a sleek pixie, but it photographs beautifully and feels incredibly feminine and bridal.
7. Braided Pixie Hybrid with Extensions
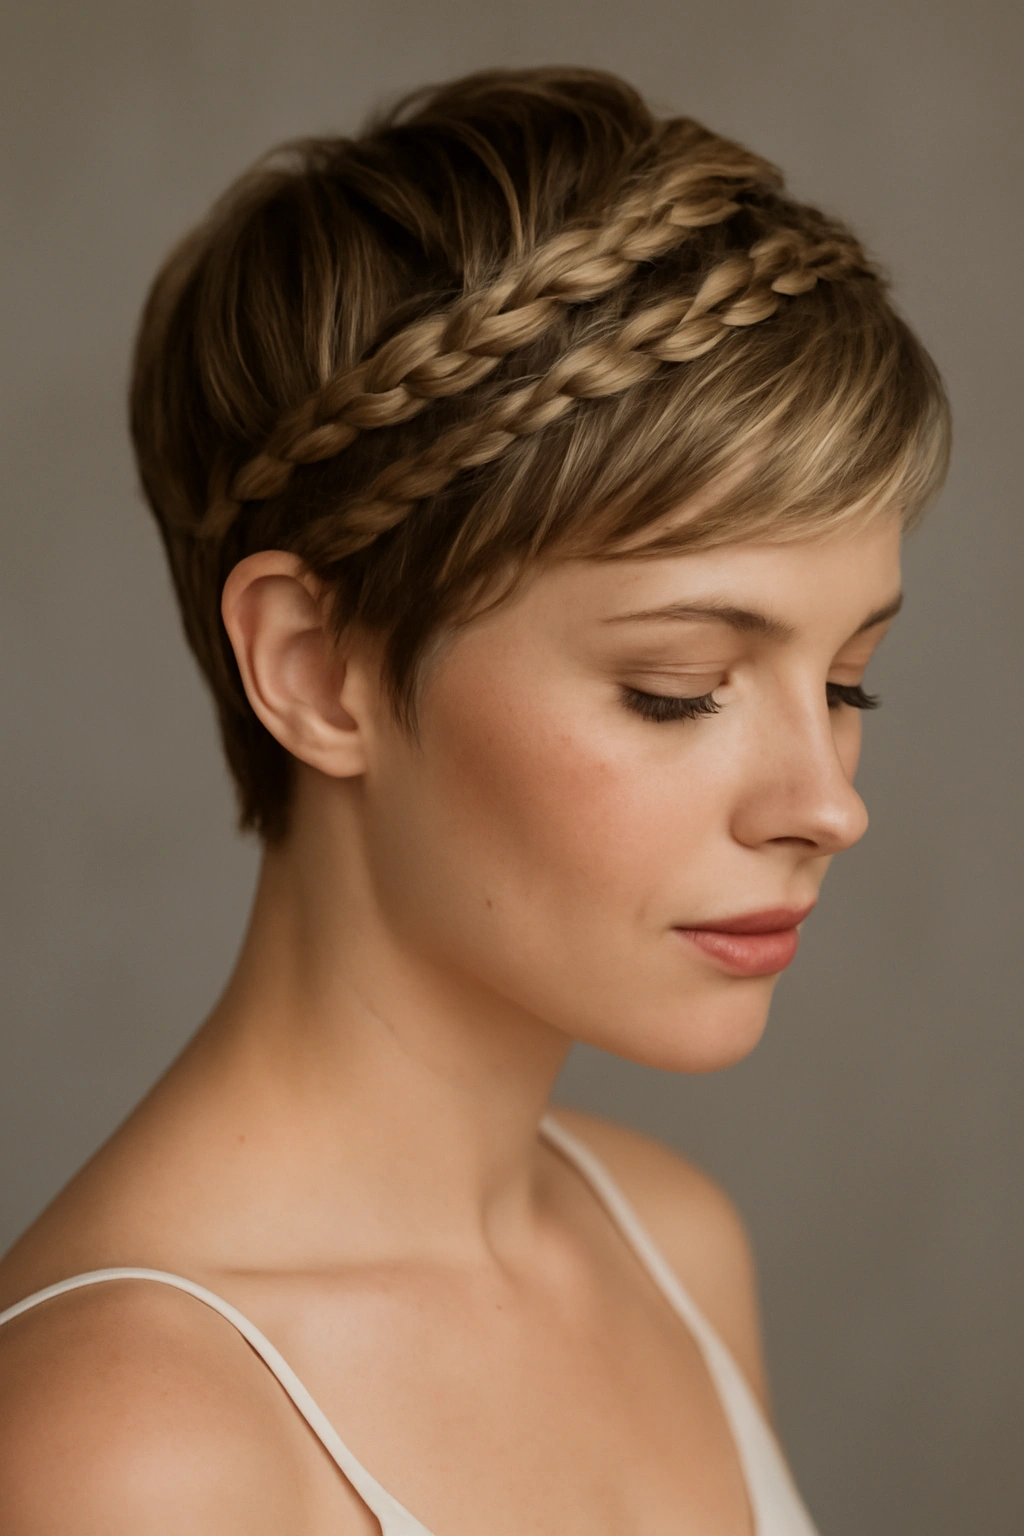
For brides who love the idea of braids but have a pixie cut, temporary hair extensions strategically placed can allow for small, intricate braids that weave through and around the pixie. This creates a hybrid style that incorporates braiding details without requiring you to grow your hair out.
Why This Works for Weddings
Braids are inherently romantic and wedding-appropriate, and adding them to a pixie through extensions creates a style that feels personalized and special. The delicate braids woven through short hair read as modern and unexpected rather than traditional, making this a great option for brides who want romantic details with contemporary edge. This approach requires a skilled stylist but creates a uniquely bridal look you couldn’t achieve any other way.
How to Style It
- Schedule a consultation with an experienced braiding specialist who’s worked with short hair and extensions
- Discuss placement of extensions (typically small sections that will be braided) and the exact braiding pattern
- Extensions should match your hair color and texture as closely as possible
- Have extensions applied the morning of the wedding or the evening before
- The braids can incorporate the extensions, the natural pixie hair, or both, depending on the design
- Small braids can be woven through the pixie in a geometric pattern, or placed as accents near the face
- Use bobby pins and hairspray to secure the braids and integrate them seamlessly with the rest of the pixie
- Plan this style well in advance because it requires a stylist with specific skills
Pro tip: Do a full trial of this style at least one week before the wedding. It’s a more complex styling approach, and you’ll want to know exactly how it looks on you and how long it takes to create.
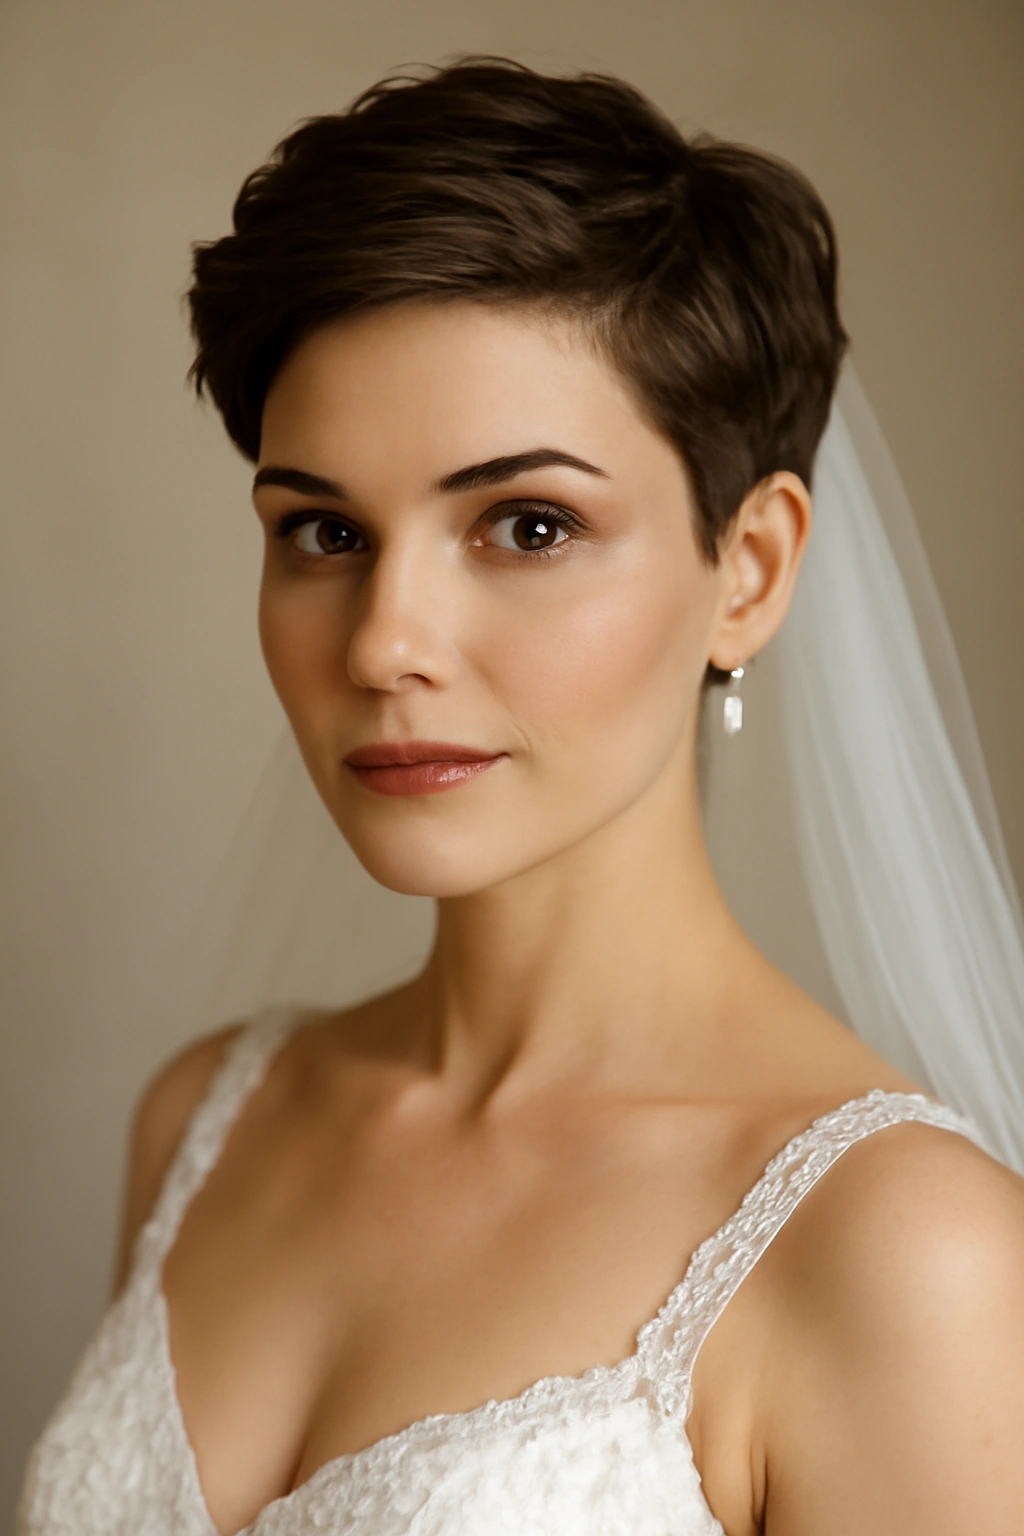
8. Slicked-Back Pixie with Statement Earrings
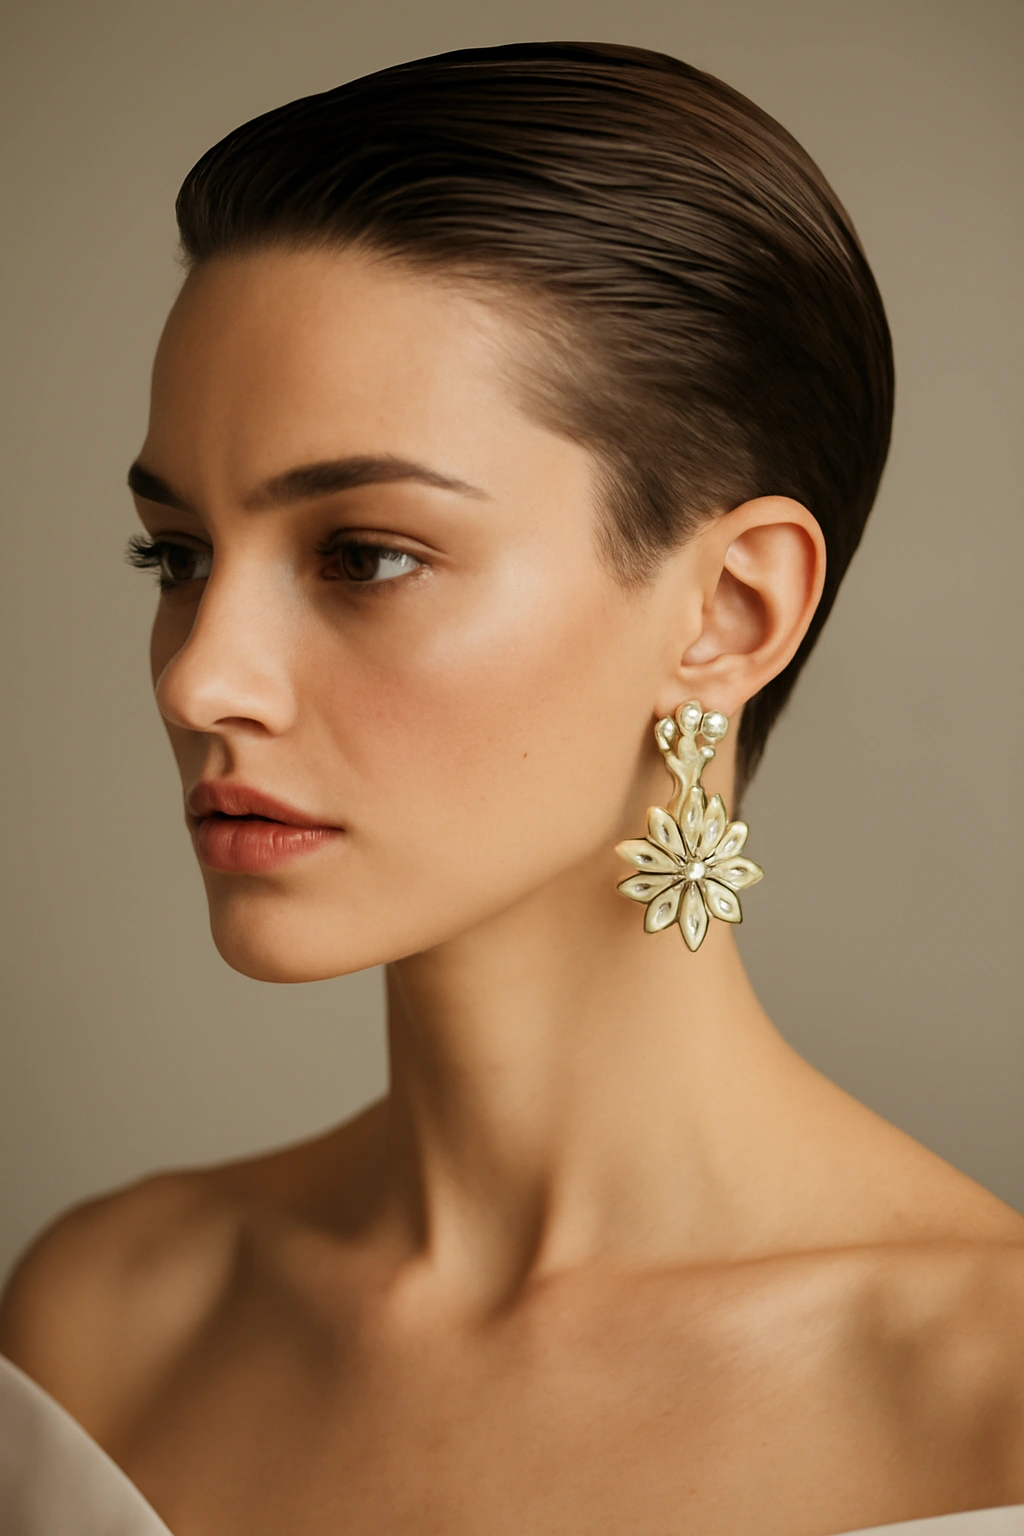
This is the bold, architectural approach — style the pixie completely smooth and slicked back from the face, creating a clean canvas that puts maximum focus on your facial features, earrings, and neck. This style is impossibly chic and requires no additional products or styling tricks beyond a good slicking cream and confidence.
Why This Works for Weddings
A slicked-back pixie is paradoxically both edgy and elegant. It feels fashion-forward and intentional, and it photographs beautifully because there’s nothing distracting the viewer from your face and expression. This style is perfect for modern, minimalist, or high-fashion weddings, and it’s the ideal choice if you have great bone structure you want to showcase or if you want to wear statement earrings that become the main visual focus of your overall look.
How to Style It
- This style requires a very sharp, clean pixie cut with precise edges — schedule your cut for just a few days before the wedding
- On wedding day, apply a lightweight slicking cream, gel, or pomade to damp hair
- Comb all hair back from the face with a fine-tooth comb, creating a smooth, sleek surface
- Use your fingers or a comb to direct every piece backward, avoiding any flyaways
- Make sure the hairline and temples are completely smooth — no wisps or strays
- Apply a flexible-hold hairspray to set everything in place
- This is the moment to wear your boldest earrings — the completely open face creates the perfect frame for jewelry
- Consider a strong brow, defined eye makeup, and bold lip color to balance the architectural nature of the style
Worth knowing: This style requires your hair to cooperate, so if you have very curly, thick, or textured hair, ask your stylist about pre-styling options or whether a gel-based slicking product will work better than a cream.
Planning Your Pixie Wedding Style
Choosing the right pixie hairstyle for your wedding isn’t just about picking something that sounds pretty — it’s about understanding what works with your hair texture, your face shape, and the overall aesthetic you’re creating. A pixie that’s textured and romantic might overwhelm a very delicate, feminine face, while a severely slicked-back pixie might feel too harsh against softer features. This doesn’t mean you can’t pull off any of these styles; it means the execution and modifications should be personalized to you.
Your hair texture plays a huge role in which styles will feel natural and manageable on your wedding day. If you have naturally straight hair, you have freedom to go either direction — sleek and smooth or textured with waves. If your hair is naturally curly or textured, leaning into that texture rather than fighting it usually produces the most beautiful, manageable result. A stylist who knows your hair well and has styled pixie cuts before understands how to work with your specific texture to enhance it rather than battle it.
The scale and shape of your face should guide your choices too. If you have a longer face, styles with more height at the crown (like the voluminous vintage pixie) can balance proportions beautifully. If you have a rounder face, clean lines and sleekness (like the geometric pixie) can be incredibly flattering. If you have a square jawline, softer textures and waves can complement your angles. These aren’t hard rules — they’re guidelines that help you feel confident and comfortable in your styling choices.
Accessory Choices That Elevate Pixie Wedding Styles
The right accessory can completely transform how a pixie cut reads on your wedding day. For a romantic, soft look, delicate flowers, pearl hair clips, or a simple comb in an heirloom metal can feel perfect. For a modern aesthetic, geometric hair clips, minimalist headpieces, or structured metallic pieces add intentional polish. For bohemian vibes, a floral crown, delicate chain, or beaded hair jewelry works beautifully.
Consider how accessories will photograph. Something delicate that sits directly on your hair might not be visible in photos, while something positioned higher or with more visual weight will read clearly from across the room and in images. Don’t feel like you need to wear a traditional bridal accessory — choose something that feels authentically you while still marking the occasion as special. A pixie cut makes this easier because there’s no heavy veil to attach to or weight distribution to consider; you have complete freedom in what you choose.
Trial Runs and Timeline Recommendations

The absolute most important step in finalizing your pixie wedding hairstyle is doing at least one full trial, ideally two weeks before the wedding. This isn’t optional — it’s where you’ll discover whether your vision actually works with your hair, learn the exact styling techniques your stylist uses, and identify any adjustments needed. During the trial, have photos taken under various lighting conditions. Natural light, indoor lighting, and flash all reveal different things about how a style actually looks.
Beyond the trial, schedule your cut for no more than 5-7 days before the wedding. If you get it cut too far in advance, the edges can grow out slightly and lose their sharpness. For styles that require extensions or specific styling techniques, build in extra time on your wedding morning or have styling done the evening before if your timeline allows.
The night before your wedding, focus on hair maintenance rather than experimentation. Use a silk pillowcase to prevent creasing, and if you’re styling your hair the morning of, plan to wake up early enough that you’re not rushing. Rushing leads to stress, and stress shows in your photos and in how you feel walking down the aisle.
Final Thoughts
A pixie cut on your wedding day is a decision that says something powerful about who you are — confident, modern, comfortable in your own skin, and uninterested in conforming to conventional expectations about how a bride “should” look. That confidence is your most beautiful accessory, and the right hairstyle simply amplifies it.
The pixie styles above showcase just how much range and romance is possible with short hair, but the one you choose should feel distinctly yours. Not because it’s trendy or because someone told you it would look good, but because when you picture yourself walking down the aisle in that style, you feel like the most beautiful, confident version of yourself. That’s the style worth choosing. Work with a stylist who understands pixie cuts, trust the process of trial runs and adjustments, and then step into your wedding day knowing your hair looks exactly like you.