Claw clips have become an absolute game-changer for Black hair styling, and if you’ve been hesitating to jump on this trend, it’s time to reconsider. Unlike tiny clips that slip right through textured hair, large and medium-sized claw clips grip natural curls, coils, and kinks with actual staying power—no bobby pins, no rubber bands that cause breakage, and no fighting with your hair for the next six hours. The best part? You can go from wash day to styled in minutes, and the clip itself becomes a statement accessory that works with any outfit or occasion.
What makes claw clips so perfect for Black hair is their ability to hold substantial volume without flattening your natural texture. Whether you’re working with loose waves, tight coils, type 4c hair, or anything in between, a quality claw clip grips from the inside out, meaning your curls stay exactly as voluminous and defined as you’ve styled them. You’re not forced into slicked-back styles or tight updos that put tension on your hairline—instead, you get holding power with softness and freedom.
The versatility is honestly stunning. The same clip can create five completely different looks depending on how you section your hair, where you place it, and what texture work you do beforehand. Some days you want polished and intentional; other days you want lived-in and tousled. A claw clip makes both possible. Let’s walk through the specific styles that look incredible on Black hair and actually hold throughout your entire day.
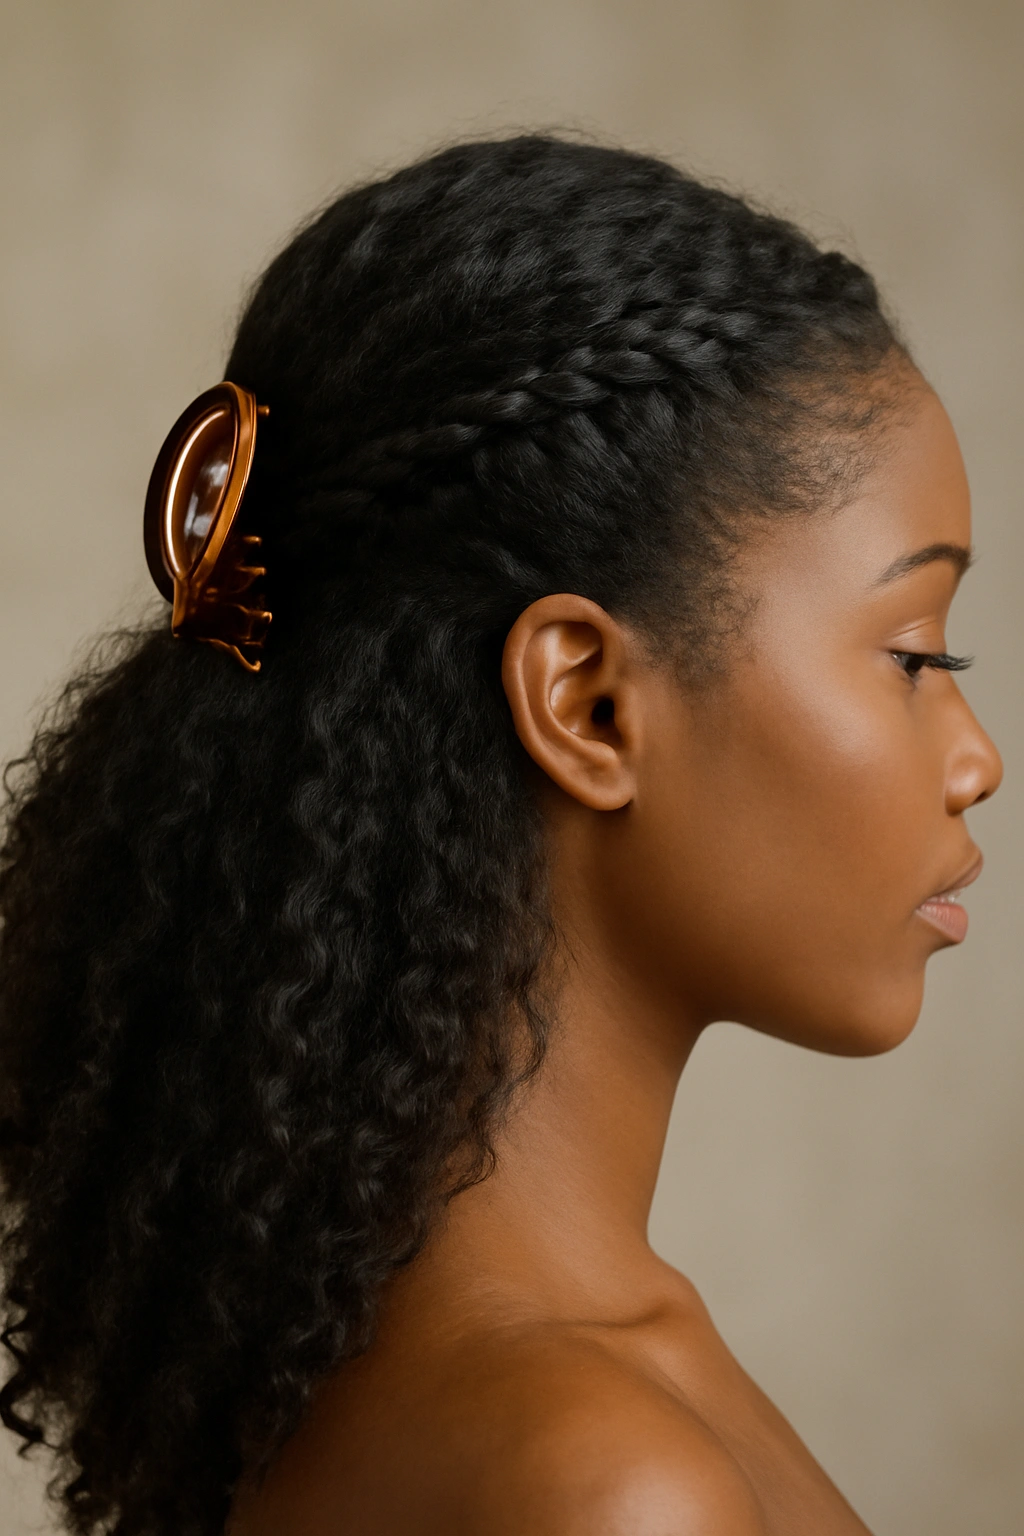
1. The Sleek Low Bun with Side Sweep
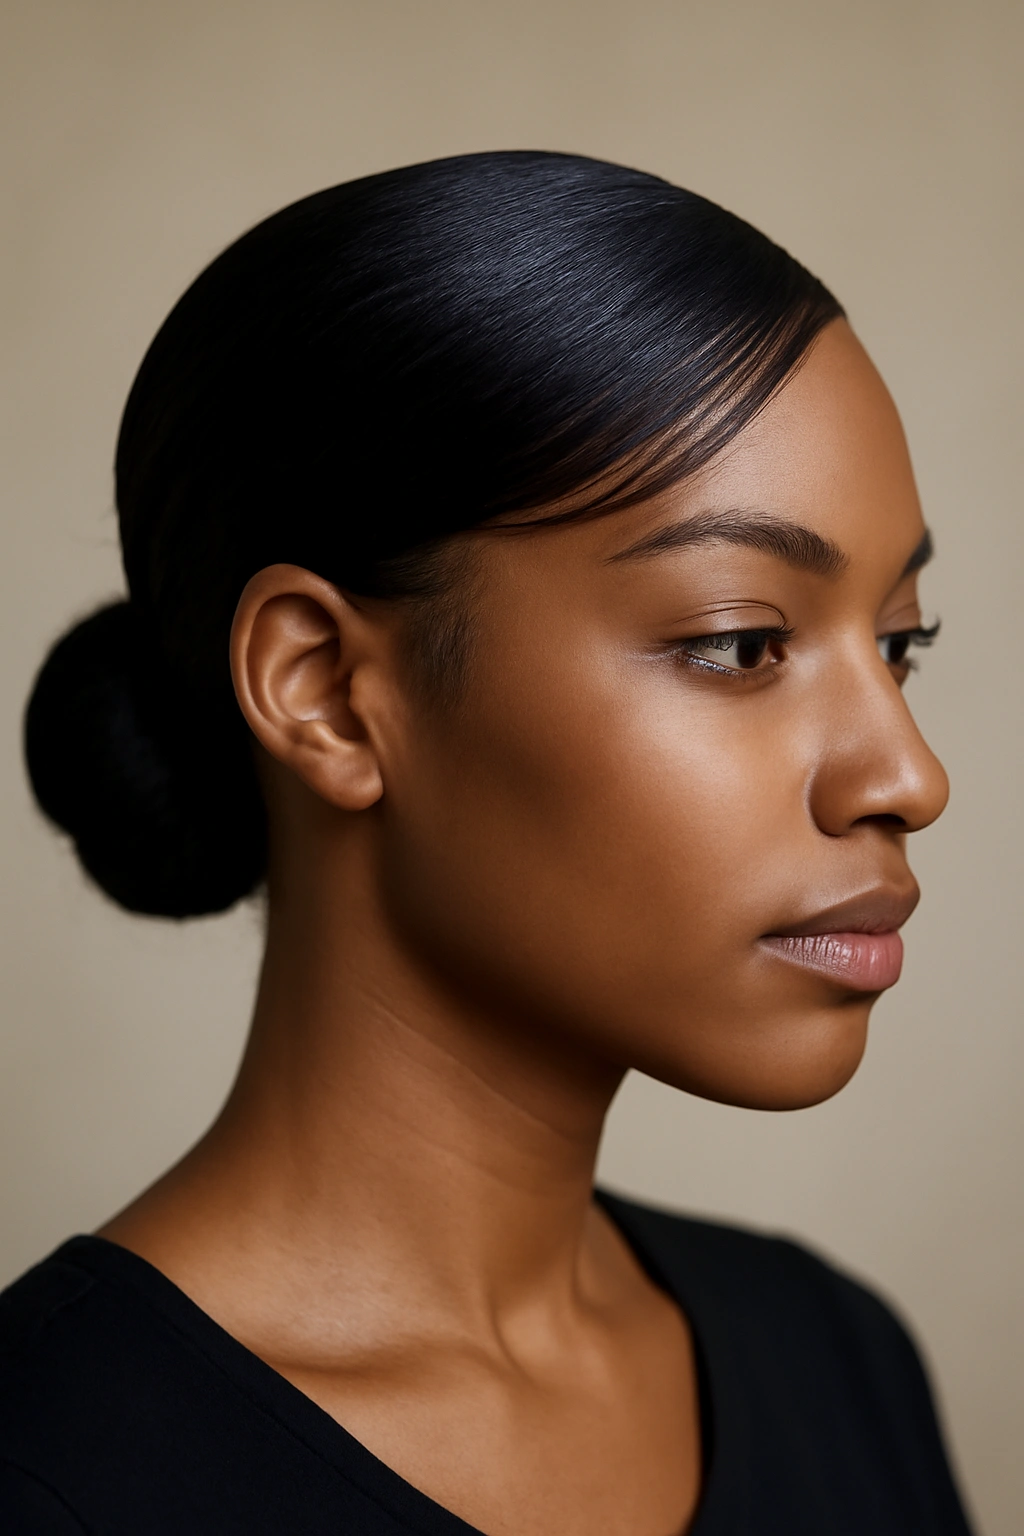
This is the style you reach for when you want something that looks professionally polished without looking overly done. The key is creating a smooth, gathered base that shows off your hairline and has movement at the sides rather than being pulled so tight it screams “protective style anxiety.”
How to Create Clean-Looking Texture Control
Start with slightly damp or lightly moisturized hair and apply a lightweight styling cream or edge control to your edges—just enough to define them without the crunchy feel. Use a fine-tooth comb or your fingers to gently gather your hair toward the back-left or back-right of your head, depending on which way you prefer the sweep to fall. The gathered section should be low, sitting at the nape of your neck or slightly above. Don’t aim for absolute smoothness everywhere; instead, let a few face-framing pieces fall naturally, which actually makes the style look more intentional and less severe.
The Placement and Finishing Details
- Secure your gathered section with the claw clip positioned horizontally, with the open end facing downward—this creates a visual break that reads as intentional rather than accidental
- Leave 2-3 inches of loose hair below the clip to create a soft tail that you can manipulate for texture and shape
- Use your fingers to gently tousle and shape the hair at the back, creating a relaxed bun rather than a tightly twisted one—Black hair looks best when it has dimension and movement rather than the compressed look of an extremely tight bun
- If you want extra grip and hold, twist the tail section once before wrapping it around and tucking it back into the clip
Pro tip: The side sweep is what elevates this from basic to intentional, so spend thirty seconds really positioning a few pieces around your face and collarbone to frame them nicely. This takes the style from “I threw my hair up” to “I chose this.”
2. The Twisted Crown Updo
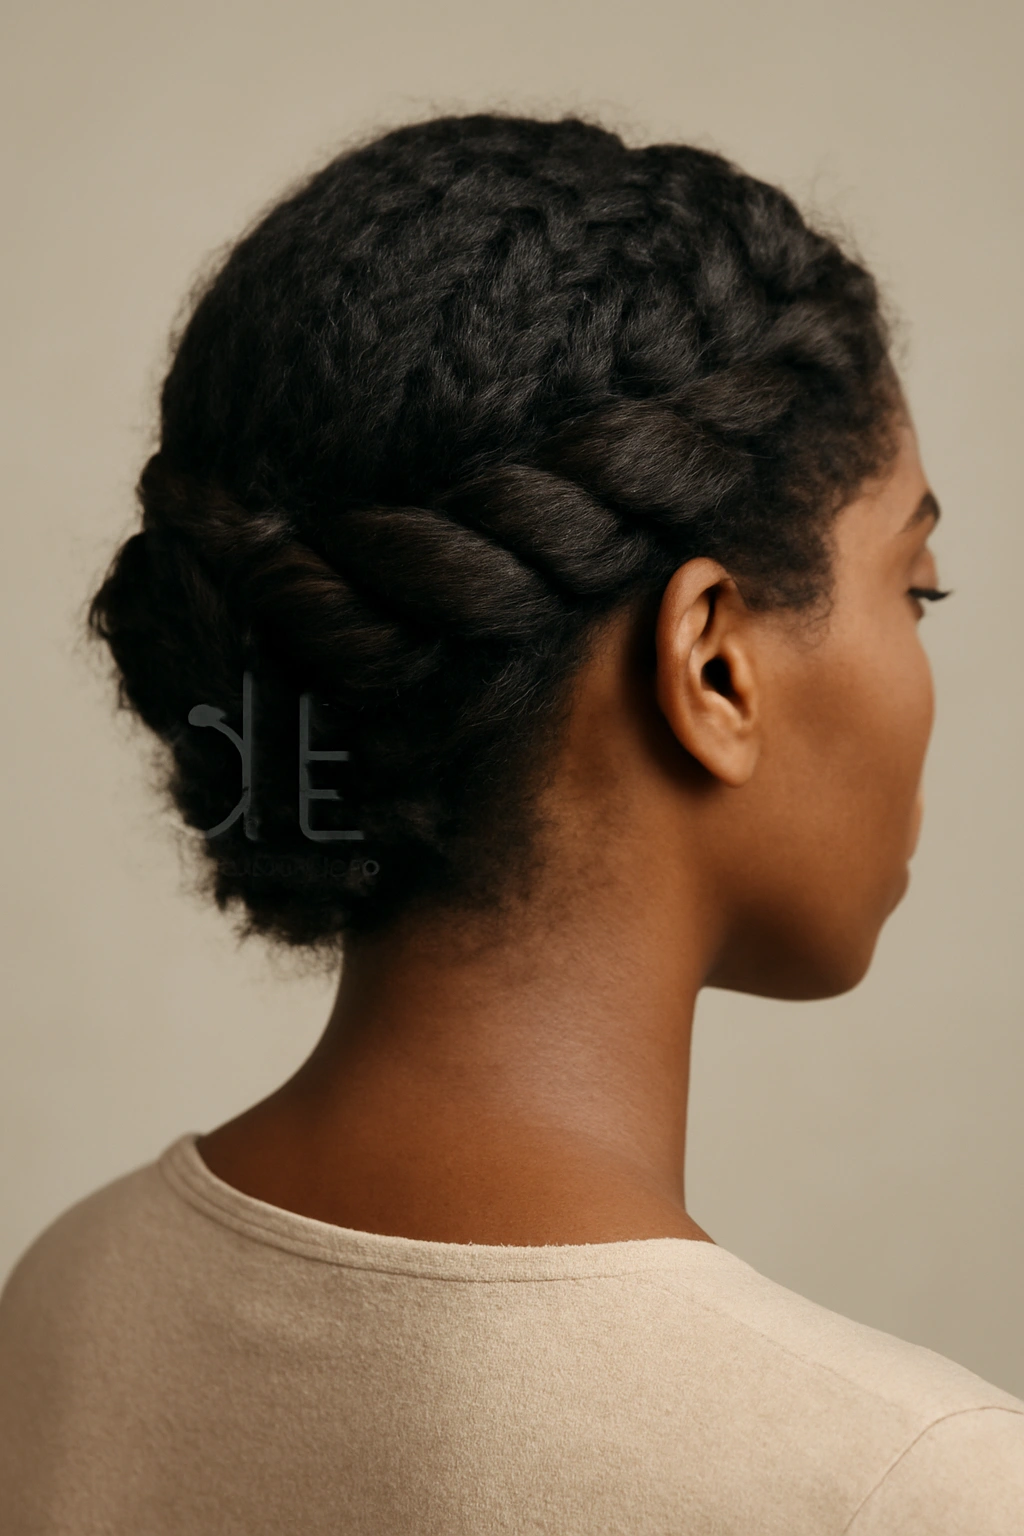
This hairstyle is what you make when you want to feel like you got your hair professionally done without actually spending an hour getting it done. The twisted crown wraps partially around your head and is secured with a single claw clip positioned at the back, creating a soft, romantic shape that looks feminine and polished without being overdone.
Building the Twist from Side to Side
Begin with moisturized hair and create a deep side part. Take a 2-inch section from your deeper side (the side with less hair) and begin twisting it firmly but not aggressively—the twist should feel controlled but still showcase the texture of your hair rather than completely flattening it. Continue twisting this section around the back of your head as if you’re creating a crown or halo, following the natural line where your hair grows. The twist should travel from ear to ear, crossing over the back of your head. As you twist, periodically run your fingers through the completed section to gently separate the twist strands slightly, which makes it look fuller and more textured.
Setting and Securing the Updo
- Once your twist reaches the opposite ear, use bobby pins to secure it temporarily, then comb or finger-comb the remaining hair and gather it into a low bun at the back of your head
- Position your claw clip horizontally to secure this bun, making sure it’s tight enough that the clip doesn’t slide but not so tight that you feel pressure on your scalp
- Take 3-4 small sections from around the bun and gently pull and reshape them, making the bun look deliberately textured and dimensional rather than compacted
- Tuck any loose ends from the twisted section back into the main clip to refine the look
Worth knowing: This style works particularly well on hair that’s 2-3 days into a style since the twist has something to grip and hold onto. If your hair is freshly washed, use a light mousse or curl cream to give the twist some texture to work with.
3. The Half-Up High Pony with Texture
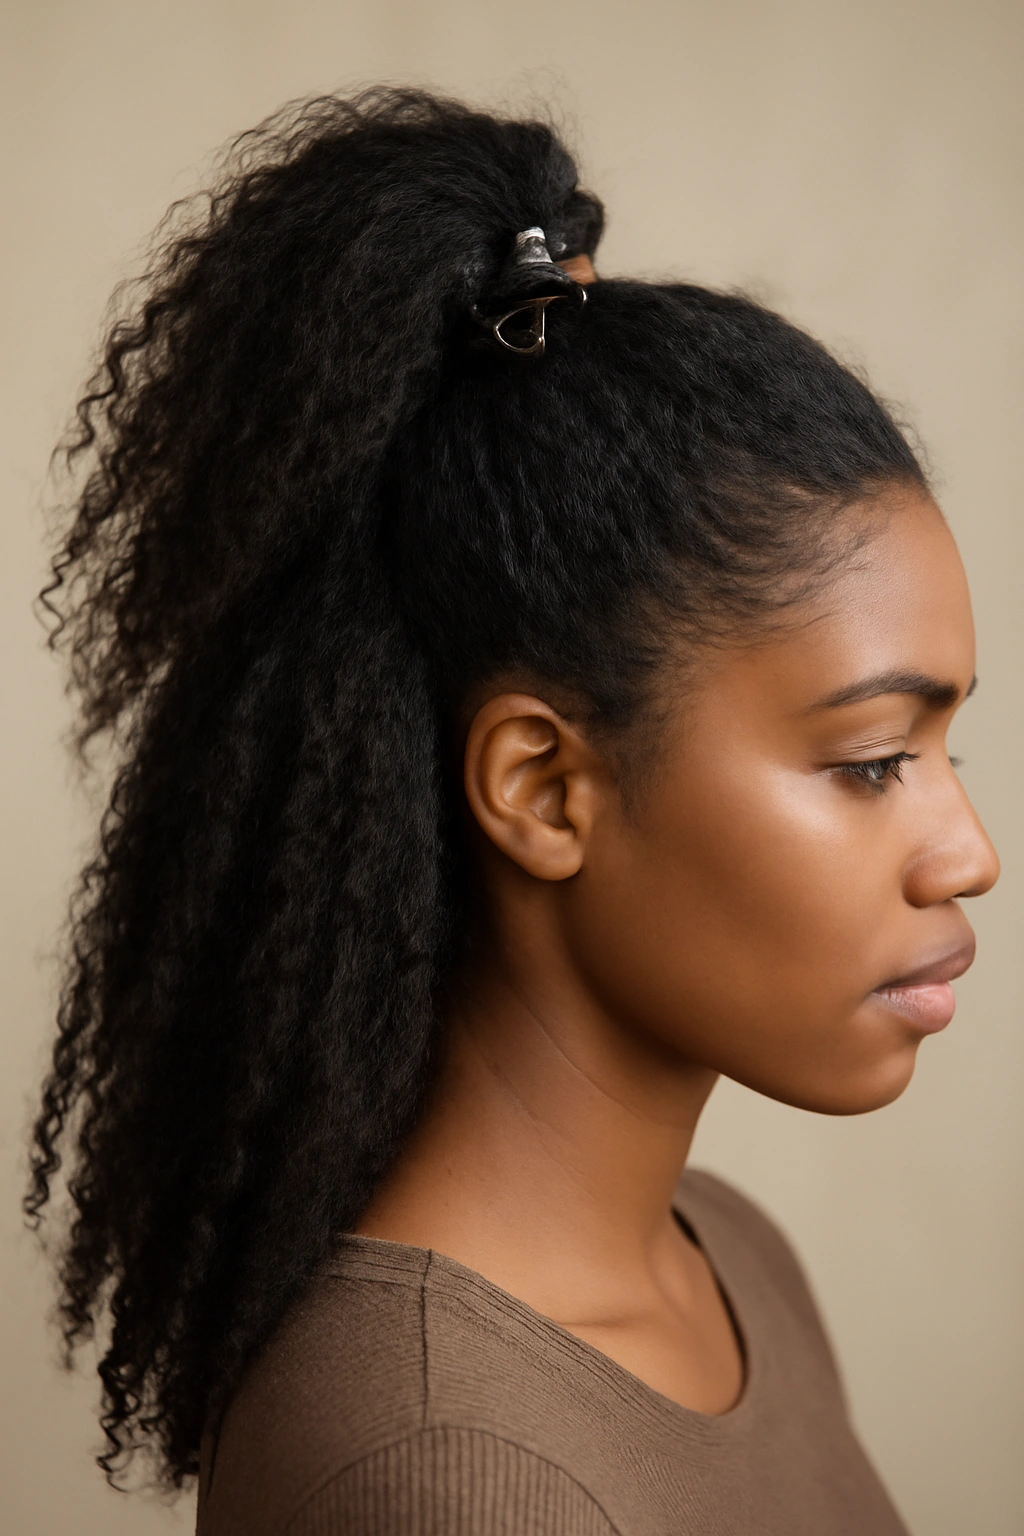
Half-up styles are one of the most flattering options for Black hair because they show off your face and neckline while keeping hair out of your way. The high pony version takes this further—it’s playful, youthful, and works for casual wear, gym days, or when you just want something quick that looks intentional.
The Two-Section Approach for Maximum Volume
Part your hair down the middle or along a deep side part—whichever feels most balanced for your face shape. From one side of your head, take a horizontal section that extends from temple to temple, roughly 3 inches down from the crown. Use a rat-tail comb to section this cleanly so you have a clear separation between the upper half (which will be pulled up) and the lower half (which will stay down). Gently backcomb or tease the section you’re about to clip to create a little grip—Black hair often doesn’t need much, but a light tease ensures your clip has something to hold onto.
Securing the High Pony for All-Day Wear
- Gather the upper half-section and pull it toward the crown, creating height and lift while keeping tension gentle so you’re not pulling on your hairline
- Position your claw clip vertically, securing it at the top and back of your head where the gathered section naturally sits
- Take the ponytail section and gently arrange it so it fans out slightly, creating more volume and width rather than hanging as a thin tail
- Use your fingers to carefully separate and shape the texture throughout both the secured section and the loose section below, so the entire look feels cohesive and intentional
Pro tip: Add a decorative clip, scarf, or hair ribbon wrapped around the ponytail section for extra visual interest. This transforms the style from workout wear into something dressy enough for a date or casual event.
4. The Layered Bubble Bun
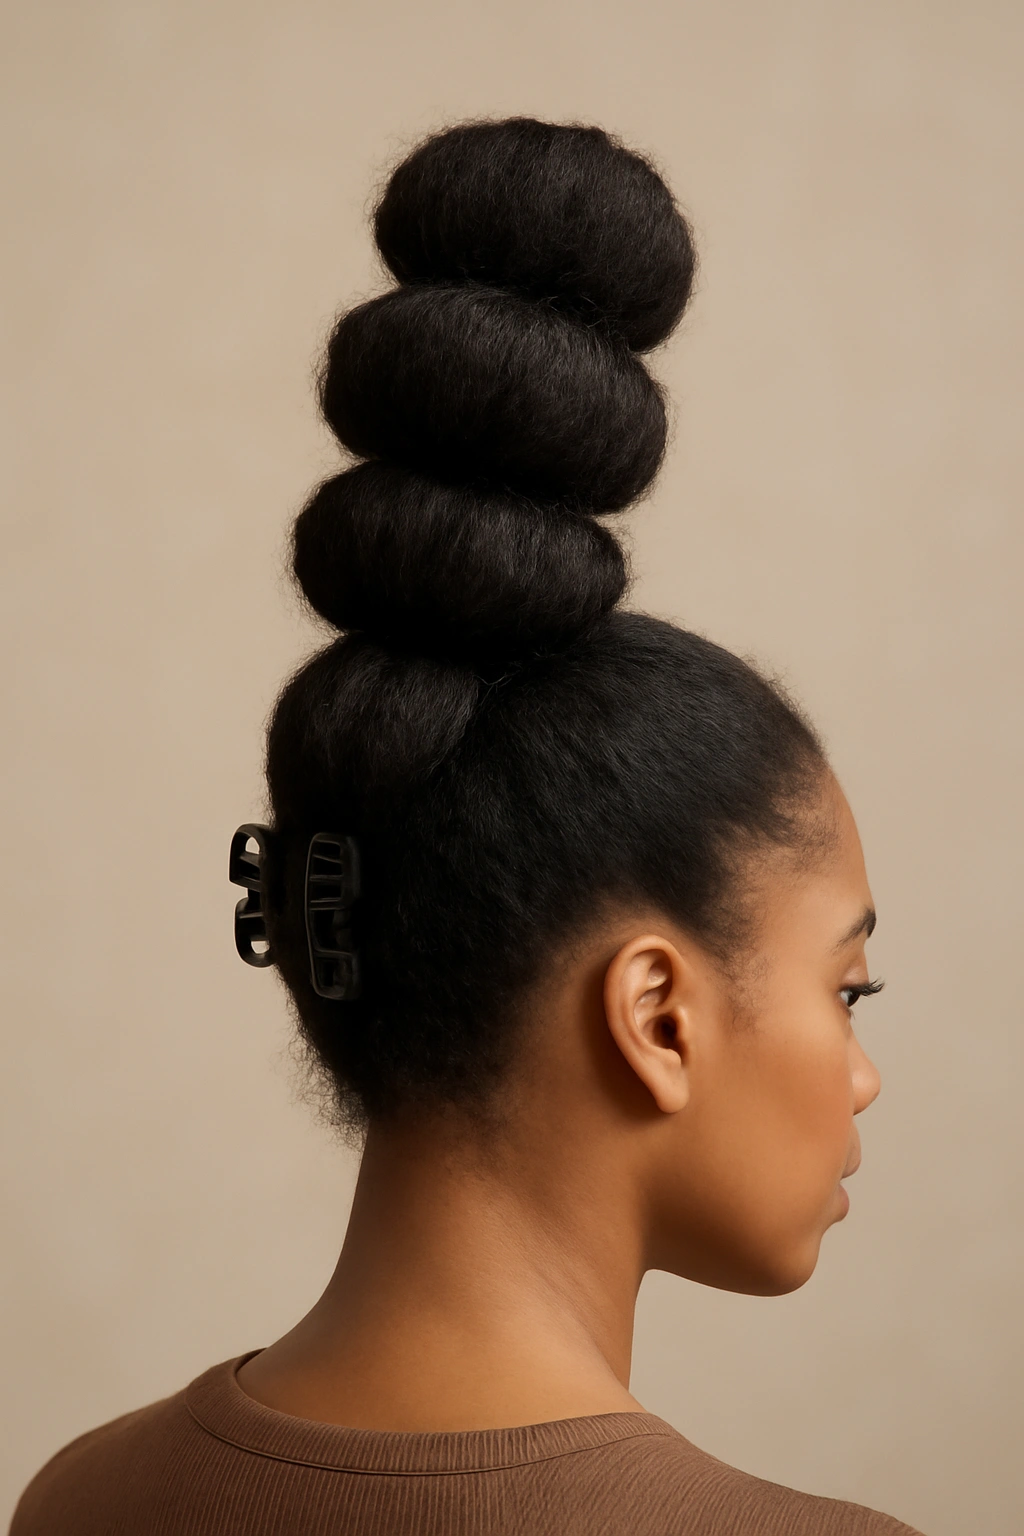
Bubble buns have absolutely taken off in the Black hair community, and for good reason—they showcase texture beautifully, they’re playful and modern-looking, and they hold incredibly well with the right technique. This version uses multiple claw clips (or a larger clip at the base) to create distinct, dimensional sections that stack on top of each other.
Creating Sections with Real Separation
Gather your hair high on your head—higher than you think you need to—and secure the base section firmly with a claw clip. The base needs to be tight enough to support what’s going to sit on top of it. Now comes the fun part: divide the hair in the ponytail into 3-4 distinct sections (you can use small hair ties or just your fingers to mark the sections). Starting from the bottom, take the lowest section and gently backcomb it to create texture, then smooth it out just slightly—you want it to have dimension and shape, not look matted.
Stacking and Shaping Each Layer
- Use your fingers or a small clip to temporarily hold each section as you work, then release it to form a bubble or puff
- Each bubble should stick out from the one below it, creating a stacked effect rather than all the hair clumping together
- Take a moment to shape each bubble by gently fluffing the hair and checking from multiple angles—what looks full from the front might look sparse from the side
- If bubbles are slipping or not holding, add a small claw clip at the base of each section, positioning it horizontally just under where you want that bubble to sit
Worth knowing: Bubble buns last longer and look better with hair that’s a few days into a style rather than freshly washed. The hair has more texture and grip, so your clips won’t slide nearly as much.
5. The Curved Front Clip with Braided Section
This style is sophisticated and intricate-looking, but honestly, it only takes about fifteen minutes. You’re essentially creating one braided section at the front and securing it with a curved claw clip, letting the rest of your hair cascade down your back. It’s the kind of style that makes people ask if you had your hair professionally done.
Starting the Braid with Intentional Placement
Create a deep side part and choose which side you want to work from. From behind the ear on your preferred side, take a 1-inch thick section of hair and begin a three-strand braid. Braid firmly enough that the braid stays intact but not so tight that you’re distorting your natural curl pattern—the goal is for the braid to look intentional, not like you’re trying to flatten your texture. As you braid, periodically run your finger along the braid to gently separate the strands, which makes it look fuller and more textured.
Moving the Braid Across and Securing It
- Continue your braid across the side of your head, traveling toward the opposite ear but not quite reaching it
- Stop the braid about 2 inches before the opposite ear, leaving some loose hair there for softness
- Gently tousle and reshape the braid sections for dimension—you can even remove the elastic at the end of the braid and let it dissolve into loose twisted texture
- Position your curved claw clip to secure the braid at the back-right or back-left of your head (depending on which direction your braid travels), making sure it’s holding the braid but not compressing it
Pro tip: The magic of this style is that it looks like you spent an hour on your hair but takes fifteen minutes because you’re only braiding one section. Pair it with some loose, wavy texture on the rest of your head and you’ve got an undone-but-intentional vibe.
6. The Zigzag Sectioned Updo
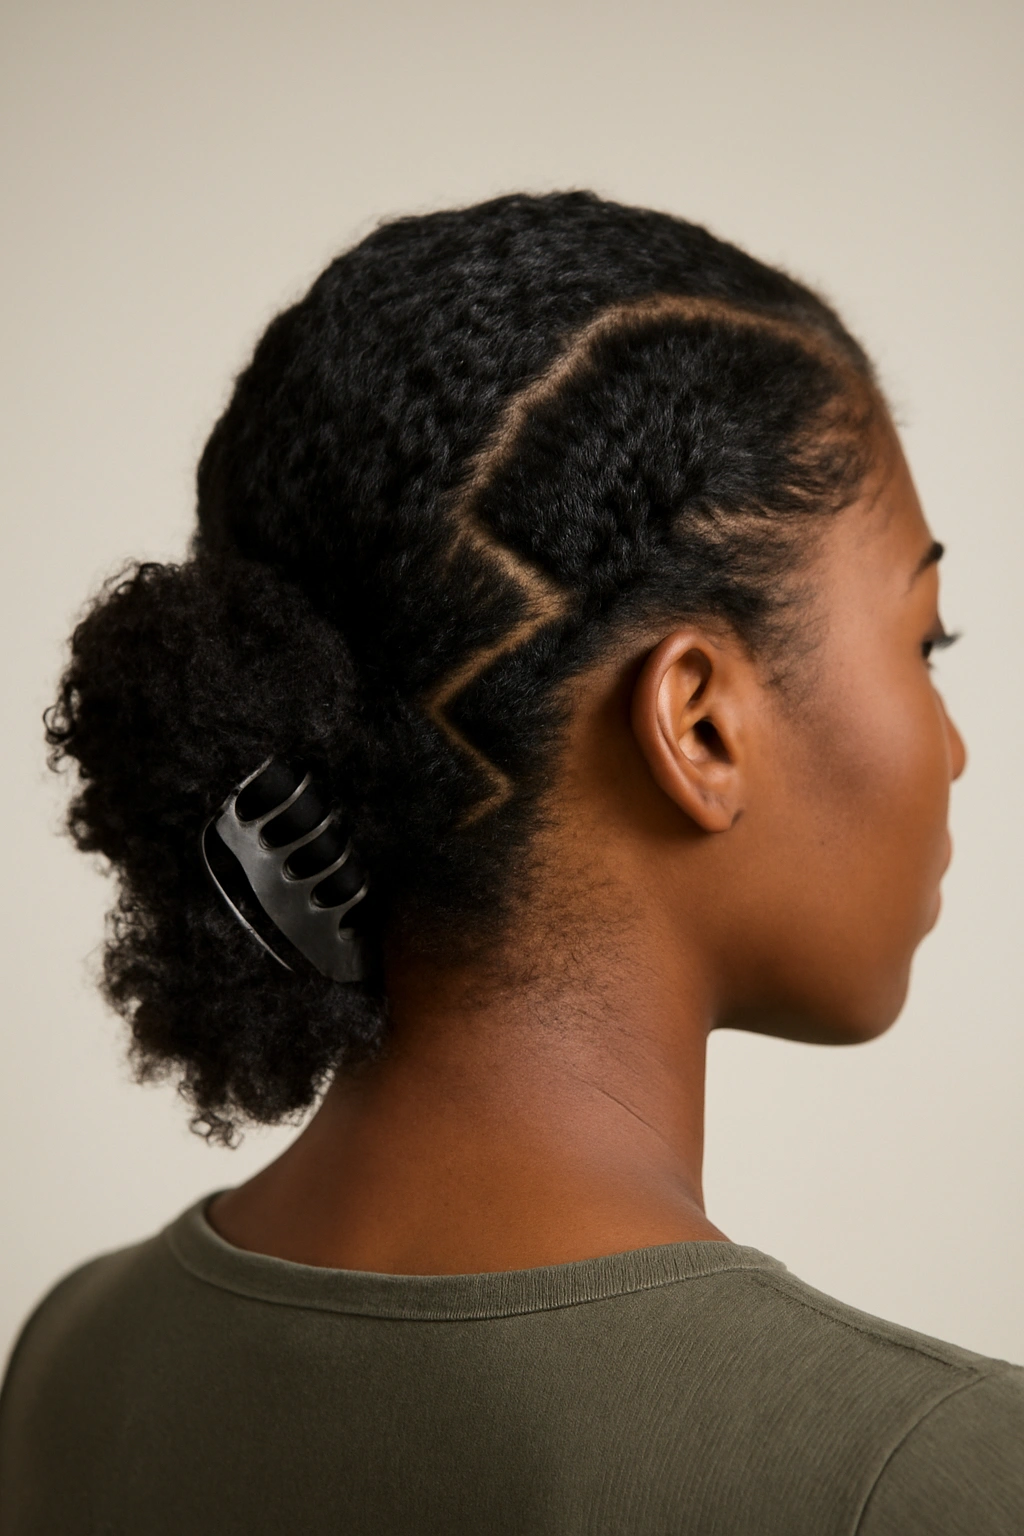
This style is pure artistry—you’re using the geometry of your parting itself to create visual interest, then securing everything with a clip. It works beautifully on Black hair because the natural contrast and texture of your hair makes the zigzag pattern visually pop.
Mapping Out Your Zigzag Pattern
Start by using a rat-tail comb to create a deliberate zigzag part down the middle of your head, from your hairline to the back of your neck. Instead of a straight line, create a zigzag by angling right for about an inch, then angling left for about an inch, continuing this pattern all the way down. This creates visual movement even before you’ve done any actual styling. Take time with this step because a clear, intentional part is what makes the whole style read as intentional rather than messy.
Gathering and Securing with Precision
- As you create your zigzag, you’re naturally creating small sections on either side of it
- Gather all of your hair into a low ponytail at the nape of your neck, keeping the zigzag part visible and crisp
- Secure the ponytail with a claw clip positioned at a slight angle to echo the zigzag of your part
- Gently tousle the ponytail section and reshape it into a soft, textured bun, making sure you can still see the clean zigzag line from your part
Worth knowing: This style is particularly striking when you have a high-contrast color or when your natural texture is really pronounced. The geometry combined with texture creates depth that’s honestly stunning.
7. The Tousled High Ponytail Clip
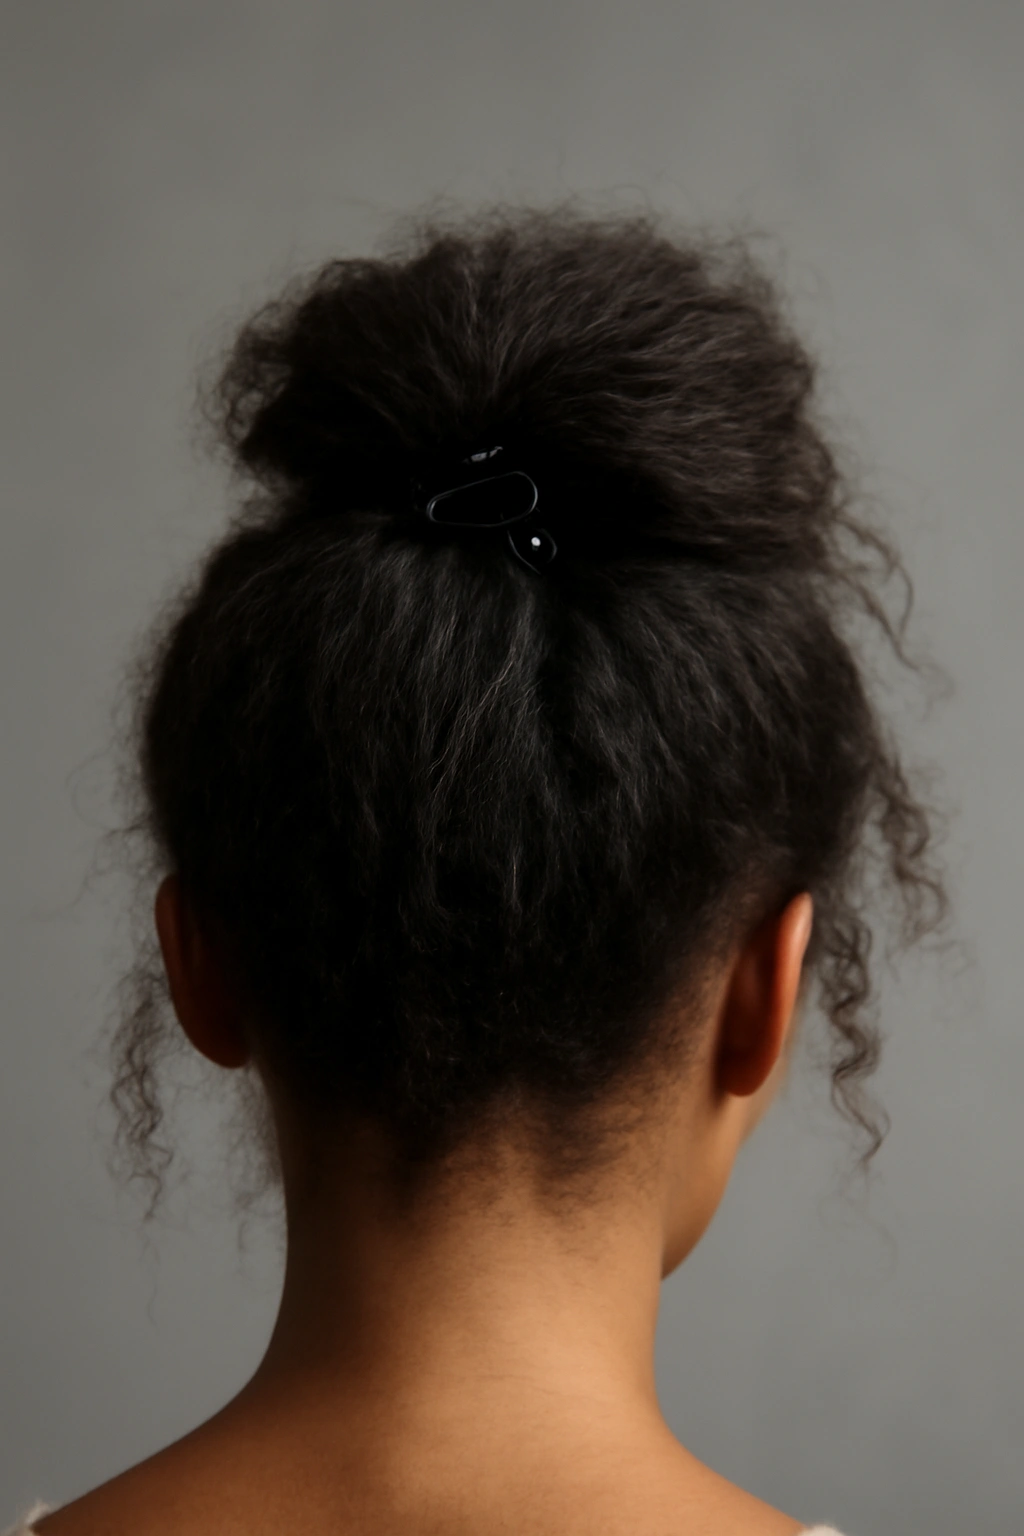
Sometimes the most effortless-looking styles take the most intention to create. This high ponytail is meant to look like you woke up this way—slightly undone, full of volume, and absolutely intentional in its casualness. It’s perfect for when you want to show your edges and face while keeping hair completely out of your way.
Building Height Without Tension
Gather your hair high at the crown, but instead of pulling it tight, pull it with a moderate tension that feels comfortable on your scalp. You’re aiming for lift and height without the stretched, painful feeling of an overly tight ponytail. Use a claw clip to secure this, positioning it vertically at the highest point of your gathered section. The clip should be tight enough that hair won’t slide, but your scalp shouldn’t feel like it’s being pulled toward your hairline.
Creating the Tousled Effect That Lasts
- Once your ponytail is secured, take sections of the ponytail hair and gently backcomb them from the ends toward the roots, then smooth them out just slightly—you’re creating texture and dimension, not a matted mess
- Flip your head forward and run your fingers through your ponytail, separating and shaking it out—this breaks up any condensed areas and creates volume
- Flip back upright and check your ponytail from all angles, gently pulling and shaping sections to create a lived-in, dimensional look
- If you want extra texture and hold, use a very light hairspray on the ponytail sections—just a quick mist, not soaking it
Pro tip: Do this style on hair that’s 2-3 days into your style, or on hair that has a little product in it already. Freshly washed, soaking wet hair is harder to make look tousled because it wants to hang straight and heavy.
8. The Side-Swept Twisted Knot
This is the style that bridges casual and polished—it’s interesting enough for a date or a night out, but it’s also completely appropriate for work or running errands. The twisted knot sits at the back of your head and is secured with a single claw clip, and the whole effect is soft, romantic, and genuinely flattering on dark skin.
Creating the Twist-Knot Structure
Create a deep side part and take a 2-inch section from behind one ear. Begin twisting this section firmly but with intention—you want the twist visible and textured, not compressed. Continue twisting this section around the back of your head as if you’re making a crown, just like in the twisted crown updo, but this time your end destination is behind the opposite ear. Once you reach that point, create a small loop with your twisted section and tuck the end back through the loop, creating a loose knot shape. Don’t make this knot tight; it should look relaxed and slightly undone.
Securing the Knot for All-Day Hold
- Use bobby pins to temporarily hold the knot in place while you gather the remaining hair
- Pull the remaining hair into a low ponytail or bun at the base of your neck
- Position your claw clip to secure this base section, making sure it’s holding the ponytail and also anchoring your twisted knot
- Gently reshape and tousle both the twisted section and the ponytail, making sure they look dimensional and intentional rather than flat
Worth knowing: The beauty of this style is that it looks complicated but is actually quite straightforward. It works on every hair texture and length, and it holds better than you’d expect because the twist and knot have natural grip.
9. The Multi-Clip Grid Pattern
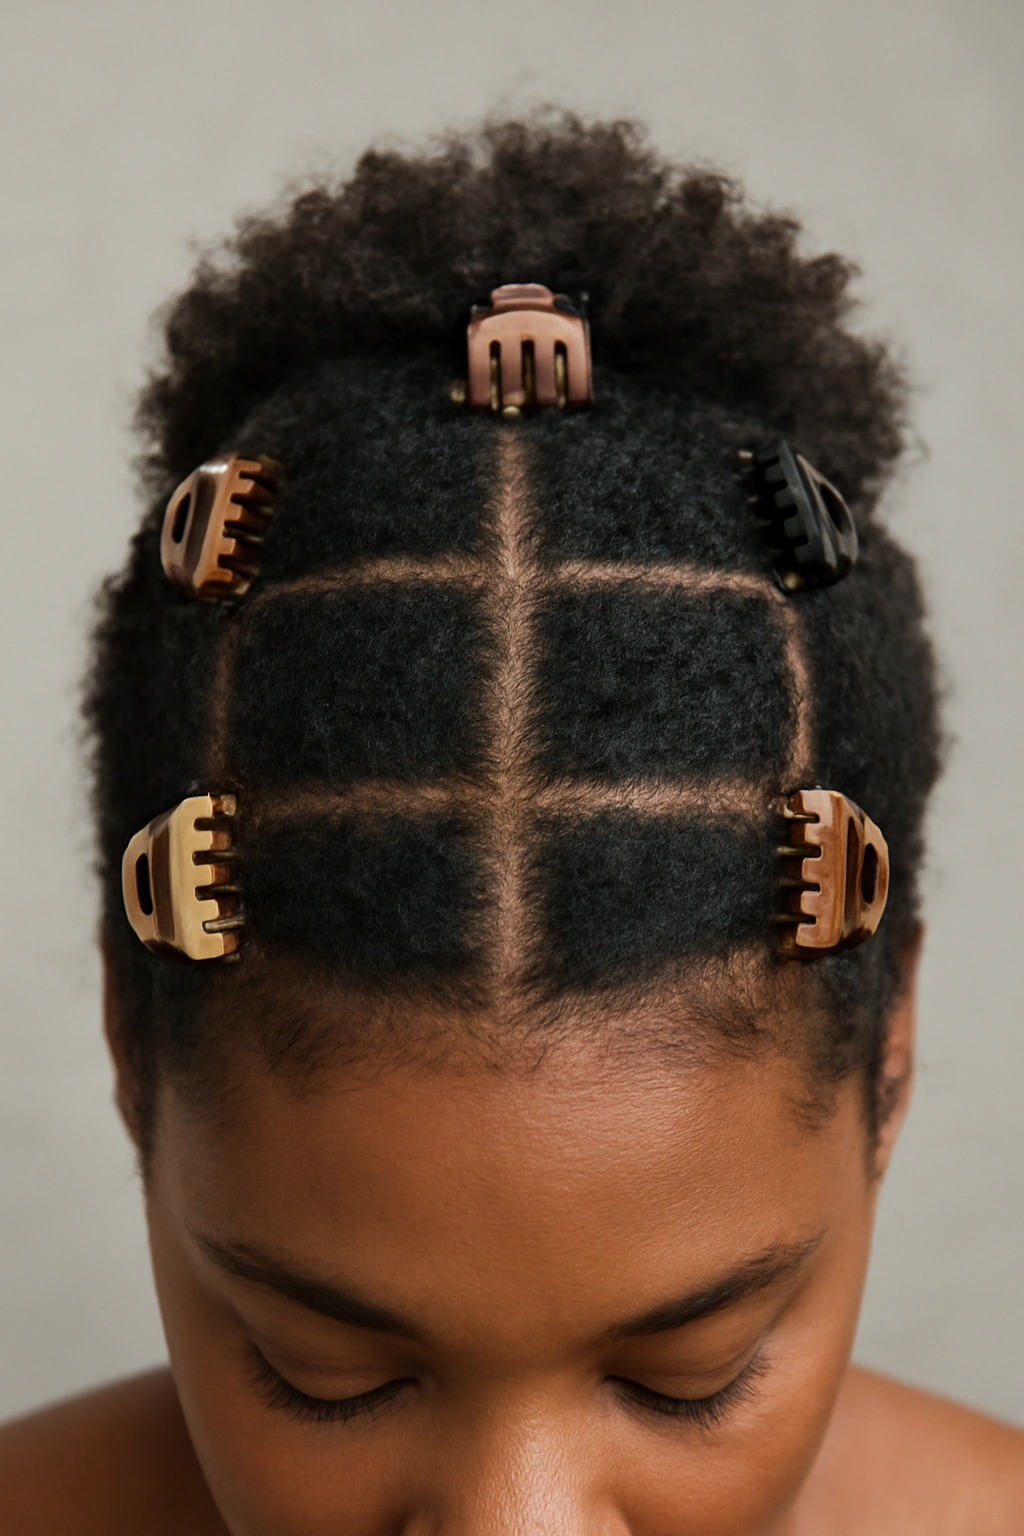
This is the style you make when you want to showcase texture and create a striking visual pattern. You’re essentially using multiple smaller claw clips to create geometric sections across your hair, which both holds everything beautifully and creates art-like visual interest.
Planning Your Grid Layout
Start with your hair down and slightly damp or moisturized. Using a rat-tail comb, create a grid pattern by drawing horizontal lines across your head (from ear to ear) about 1.5 to 2 inches apart, and vertical lines (from front to back) about 2 inches apart. This creates sections that are roughly square-shaped. The grid should be intentional and precise—take time with this because the geometry is what makes the style work visually.
Clipping and Shaping Each Section
- Within each grid square, gently backcomb the hair to create texture and height
- Smooth out each section very slightly so it maintains definition without looking matted
- Use small to medium claw clips to secure each section at the base, positioning them so they’re visible and part of the design rather than hidden
- Step back and look at your grid from different angles—each section should have its own shape and dimension while contributing to the overall geometric pattern
Pro tip: This style photographs beautifully and is incredibly striking in person. It’s best for occasions where you want to make a bold statement with your hair—it’s not an everyday look, but when you choose to do it, you’re committing to art.
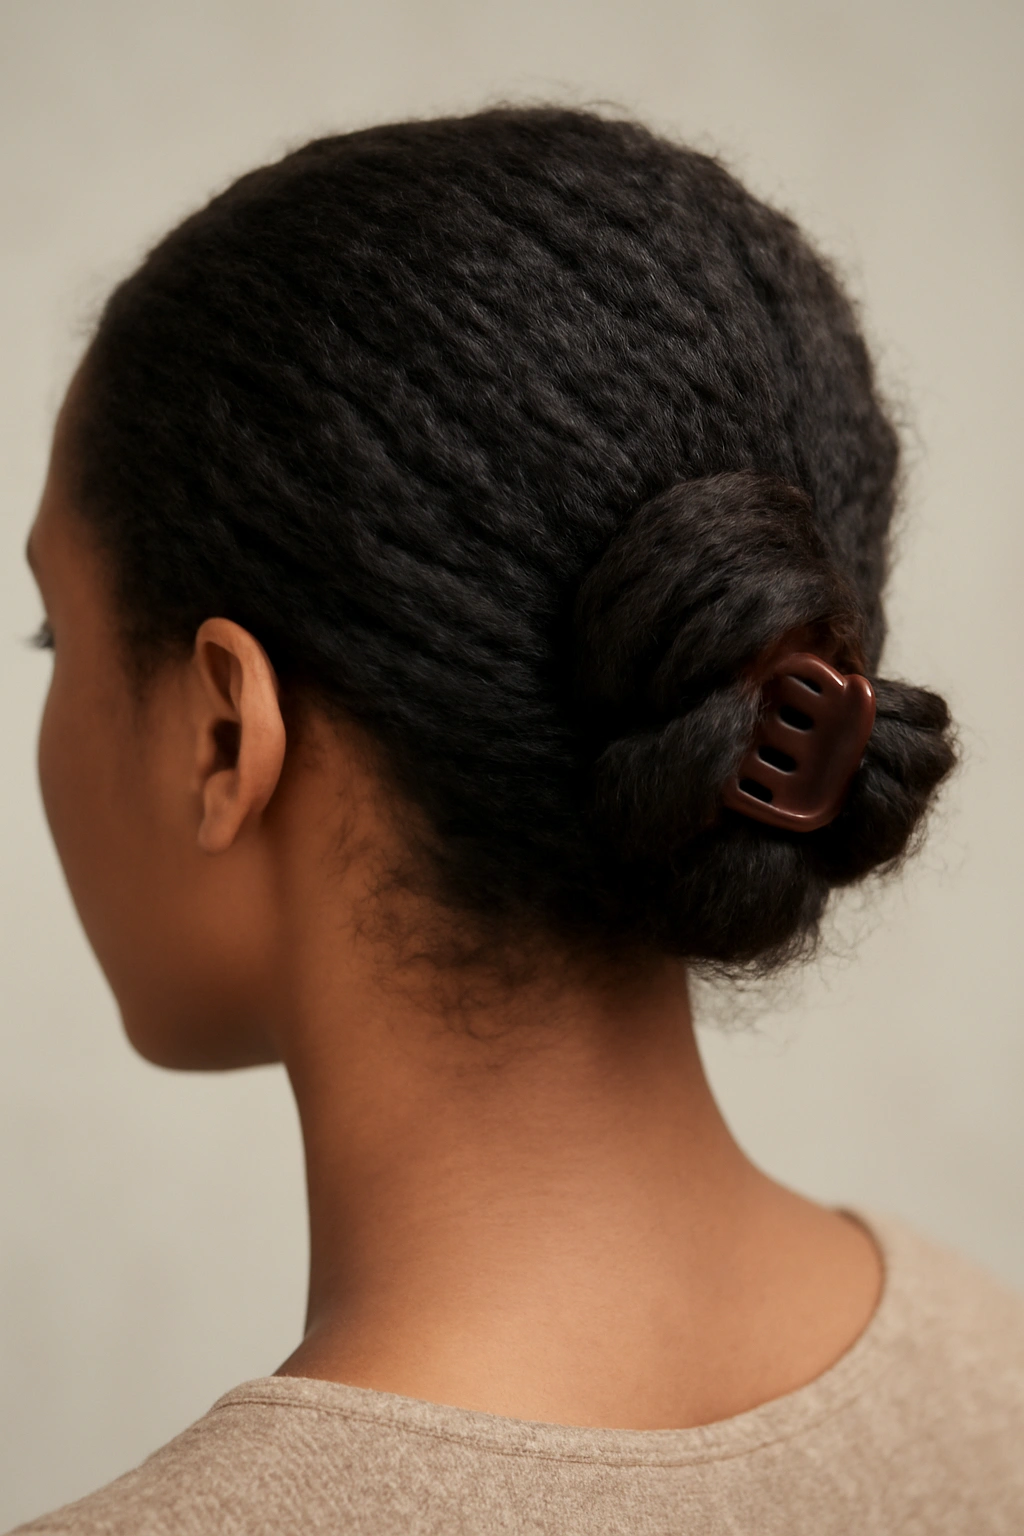
10. The Swept-Back Coil Bun

This is the style that celebrates your natural coil pattern while keeping hair completely styled and intentional. Rather than fighting your curls or trying to smooth them out, you’re embracing them, gathering them into a bun, and securing everything with a claw clip that actually showcases your texture rather than flattening it.
Working With Your Natural Coil Pattern
Start with freshly refreshed curls—you can spritz your hair with a curl refresher, add a little leave-in conditioner, and use your fingers to reactivate your curl pattern. Don’t comb or brush this through; instead, use your fingers to gently separate curls and help them spring back into shape. As your curls are refreshing, they’ll start to have more grip and hold, which is exactly what you need for this style to last.
Creating the Intentional Coil Bun
- Gently gather your hair toward the back and slightly to one side, letting some face-framing curls fall naturally around your face
- Instead of twisting your hair into a tight bun, loosely twist or coil the gathered section and wrap it around itself to create a bun shape
- Secure this coil bun with a claw clip positioned horizontally at the base, making sure your individual coils remain visible and defined rather than compressed into a blob
- Take your time reshaping and fluffing the bun so each coil has its own space and you can see the texture and definition throughout
Worth knowing: The key to making this style last is using a curl-specific product like a curl cream or gel during the refresh process. This gives your coils something to grip and helps them hold their shape throughout the day. Unlike styles that rely on slickness or compression, this one celebrates the natural texture and staying power of your curls.
Final Thoughts

Claw clips are genuinely transformative for Black hair because they work with your texture instead of against it. You’re not forced to choose between protective styling and cute styling—a claw clip gives you both. The styles here range from polished and professional to playful and creative, which means you have options for every mood, every occasion, and every season.
The most important thing to remember is that your hair doesn’t need to be slicked down or compressed to be styled intentionally. The styles that look best and last longest are the ones where your natural texture is visible and celebrated. Spend a moment positioning your clip, fluffing your sections, and shaping your style so it looks dimensional—that’s what transforms a claw clip hairstyle from “quick and convenient” into “I chose this and it looks amazing.”
Your claw clip is an accessory that works just as hard as you do, and once you find the right size and weight for your hair texture, you’ll probably end up reaching for it every single day.