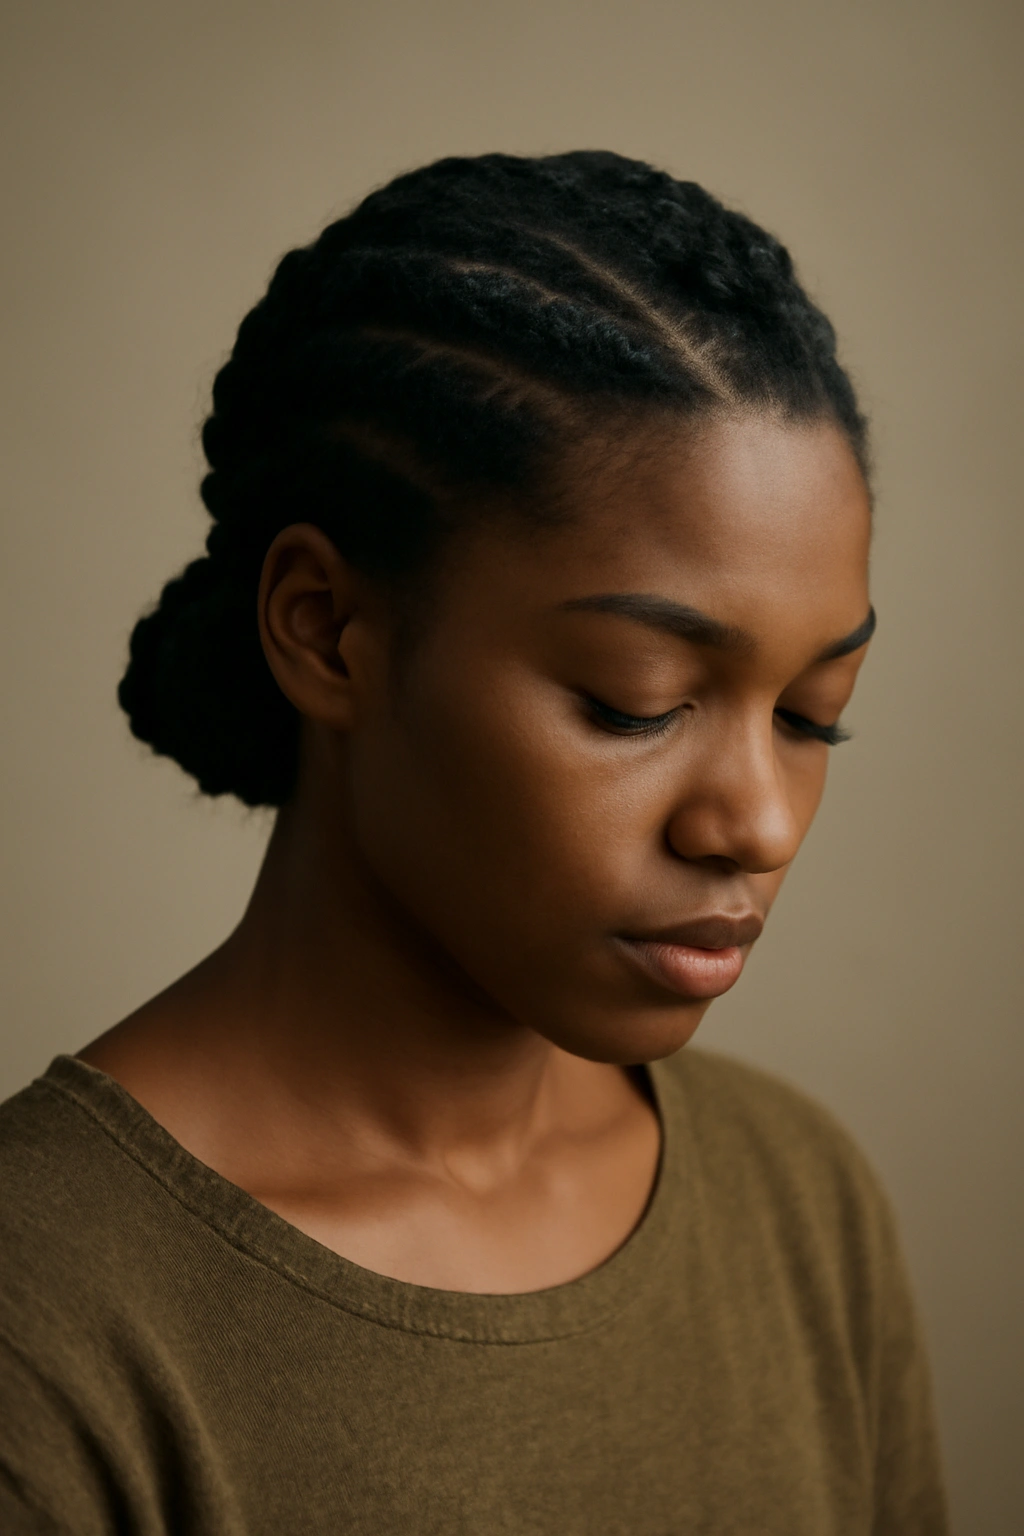
Flat twists are one of the most versatile and beautiful styling options available to natural hair women, and honestly, if you haven’t mastered them yet, you’re missing out on some seriously gorgeous possibilities. Whether you’re looking for a protective style that safeguards your hair while looking intentional and polished, or you want a low-manipulation option that keeps you from constantly fussing with your curls, flat twists deliver on both fronts. They work across different hair textures, porosity levels, and curl patterns—from coily 4C hair to looser 3A waves—and they can transform your look from casual and fresh to elegant and date-night ready within an hour or two.
The beauty of flat twists lies in their flexibility. You can wear them loose for a soft, romantic vibe, pile them into buns for an updo, pin them into intricate patterns that look almost sculptural, or even tuck the ends up and secure them into twisted crowns. They’re protective because they keep the ends of your hair tucked safely away from friction and environmental stressors, they’re low-manipulation since you’re not constantly detangling or combing through your hair, and they can last anywhere from a few days to a week or longer depending on how well you maintain them. Plus, they’re genuinely fun to create once you get the technique down—there’s something deeply satisfying about sectioning your hair, twisting it with intention, and watching a defined, textured style come together.
If you’re new to flat twists or looking to expand beyond the same three styles you’ve been doing, this guide will walk you through ten stunning flat twist styles that range from beginner-friendly to more intricate designs. Each one has its own vibe, its own best-use scenario, and its own maintenance secrets. Let’s dive in.
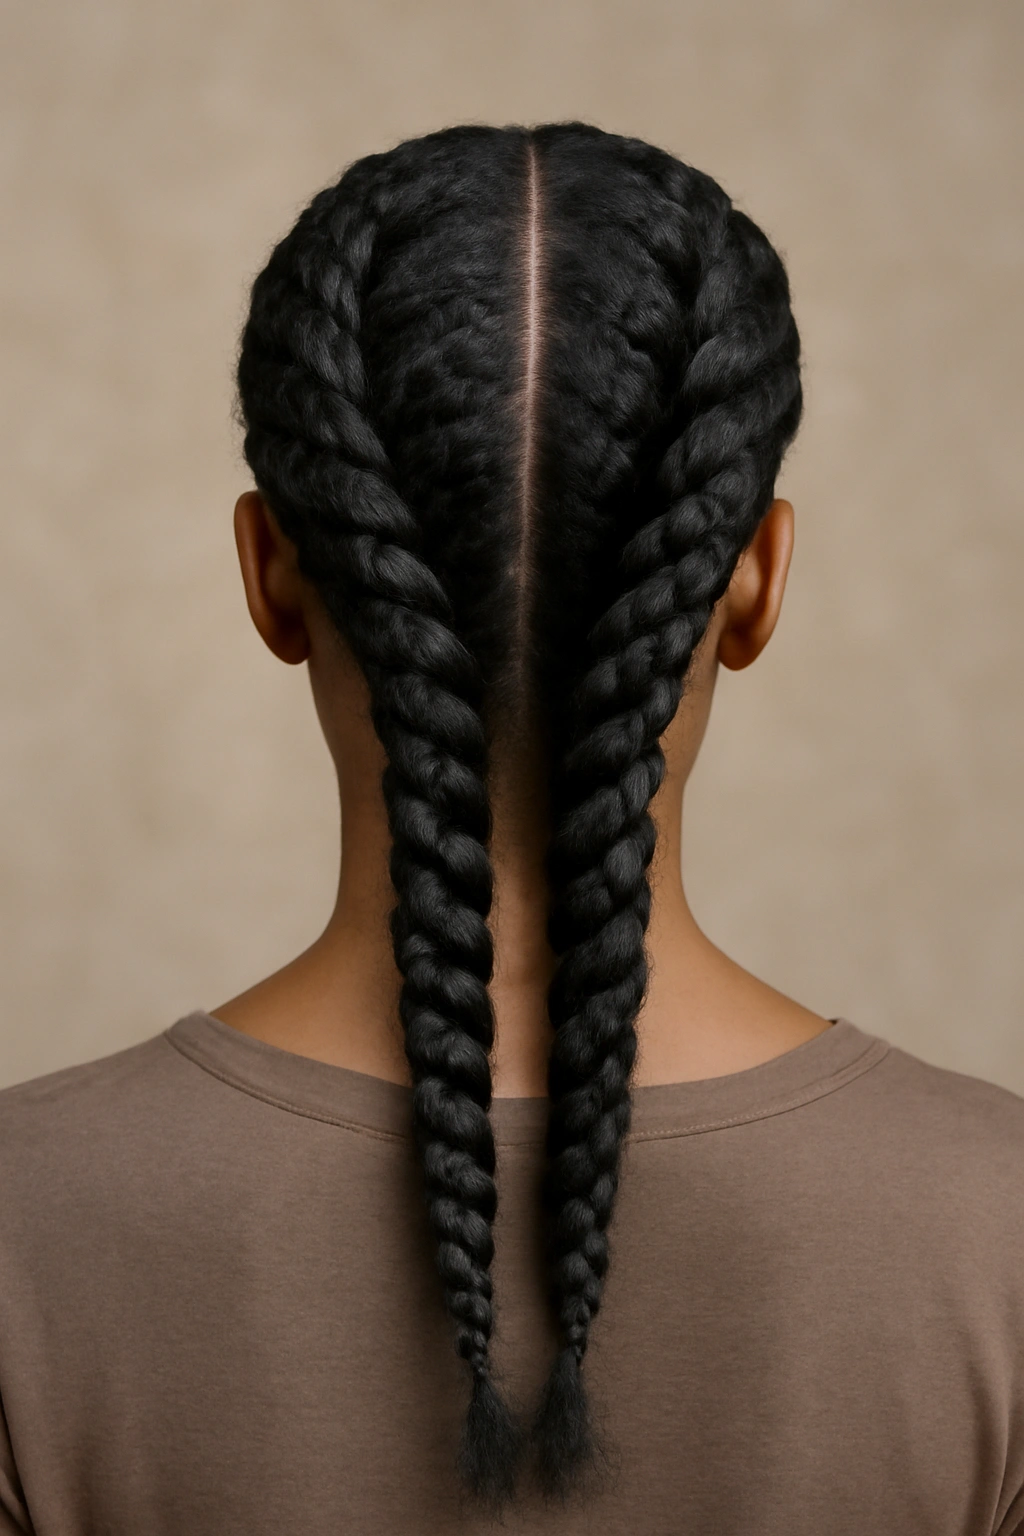
1. Classic Side Flat Twists with Loose Curls
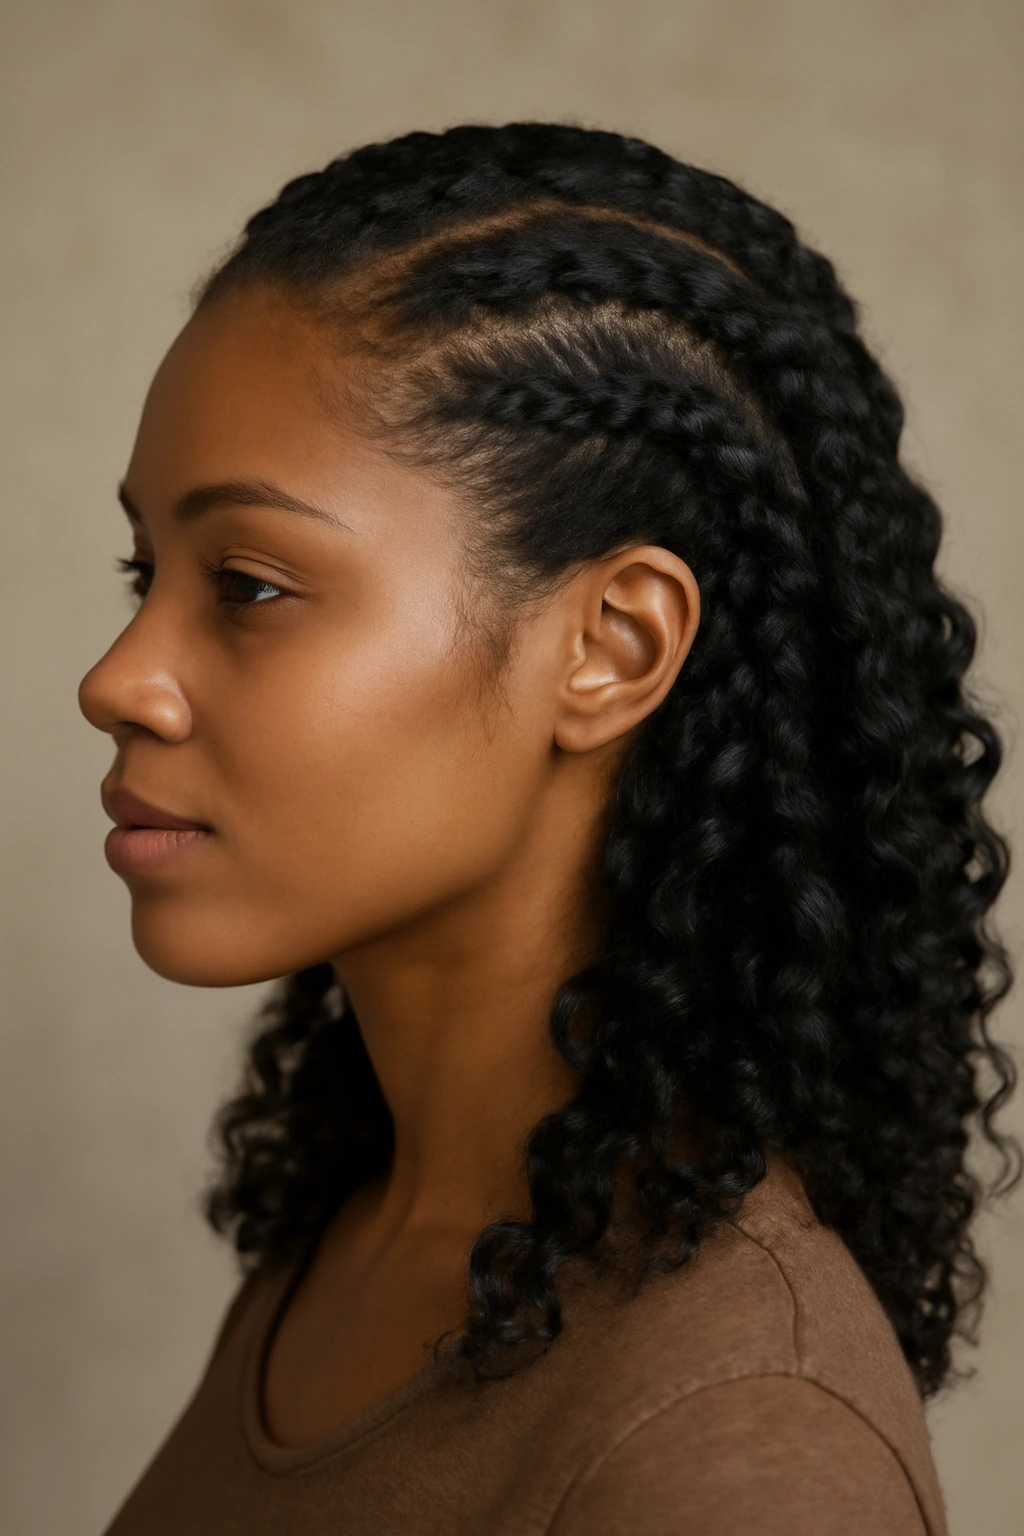
The classic side flat twist is the gateway flat twist—it’s the style that often convinces natural hair women that flat twists are genuinely worth the time investment. You create two or three thick flat twists that begin at the crown or temple and travel down toward the nape of the neck, then you leave the rest of your hair loose and curly. The result is polished without feeling overdone, and it works for literally any occasion from work to weekend errands to dinner with friends.
Why This Style Is a Game-Changer
The genius of this style is that it pulls just enough hair away from your face to feel intentional and put-together, while the loose curls beneath still give you that coveted “I didn’t spend three hours on my hair” vibe that natural hair lovers cherish. You get the benefits of a protective element because the twists seal the ends of those specific sections, while the loose hair doesn’t experience any tension or pulling. It’s low-stress styling that photographs beautifully.
How to Create the Look
Start with clean, moisturized hair that’s been refreshed with a spray bottle of water or a lightweight leave-in conditioner. Section off a piece of hair about half an inch wide from your temple, then divide that section into two equal parts. Cross one part over the other as you would for a regular two-strand twist, but keep it flat and close to your scalp by pressing it down firmly as you twist. Add small sections of hair from the side of your head as you go, incorporating them into the twist as you move downward. Once you reach the nape, you can either continue twisting all the way to the ends or stop and secure the twist with a small rubber band or bobby pin. Repeat on the other side for balance, or create one statement twist on just the side you’re comfortable styling.
Styling Tips and Variations
For a fresher look the next day or the day after, you can redo just the loose curls by finger-coiling them or using a curling method you prefer, while leaving the twists completely undisturbed. If you want more drama, create three or four flat twists instead of two, spacing them evenly across your head. You can also pull the loose hair into a high or low ponytail to keep it secured for busier days, creating an elevated version that reads as more formal. Some women pin the loose curls up into a bun at the back of their head, effectively turning this into a twisted updo.
Maintenance and Longevity
These twists typically stay intact for five to seven days depending on how much your loose hair moves around. Before bed, pineapple your loose curls (gather them on top of your head into a high puff) to prevent flattening and frizz from pillow friction. The twists themselves rarely need refreshing because they’re not taking on movement the way the loose hair is. When you’re ready to take them down, gently untwist from the bottom up to minimize breakage, and be patient—rushing this step can cause unnecessary stress to your hair.
2. Flat Twist Crown with Gathered Bun
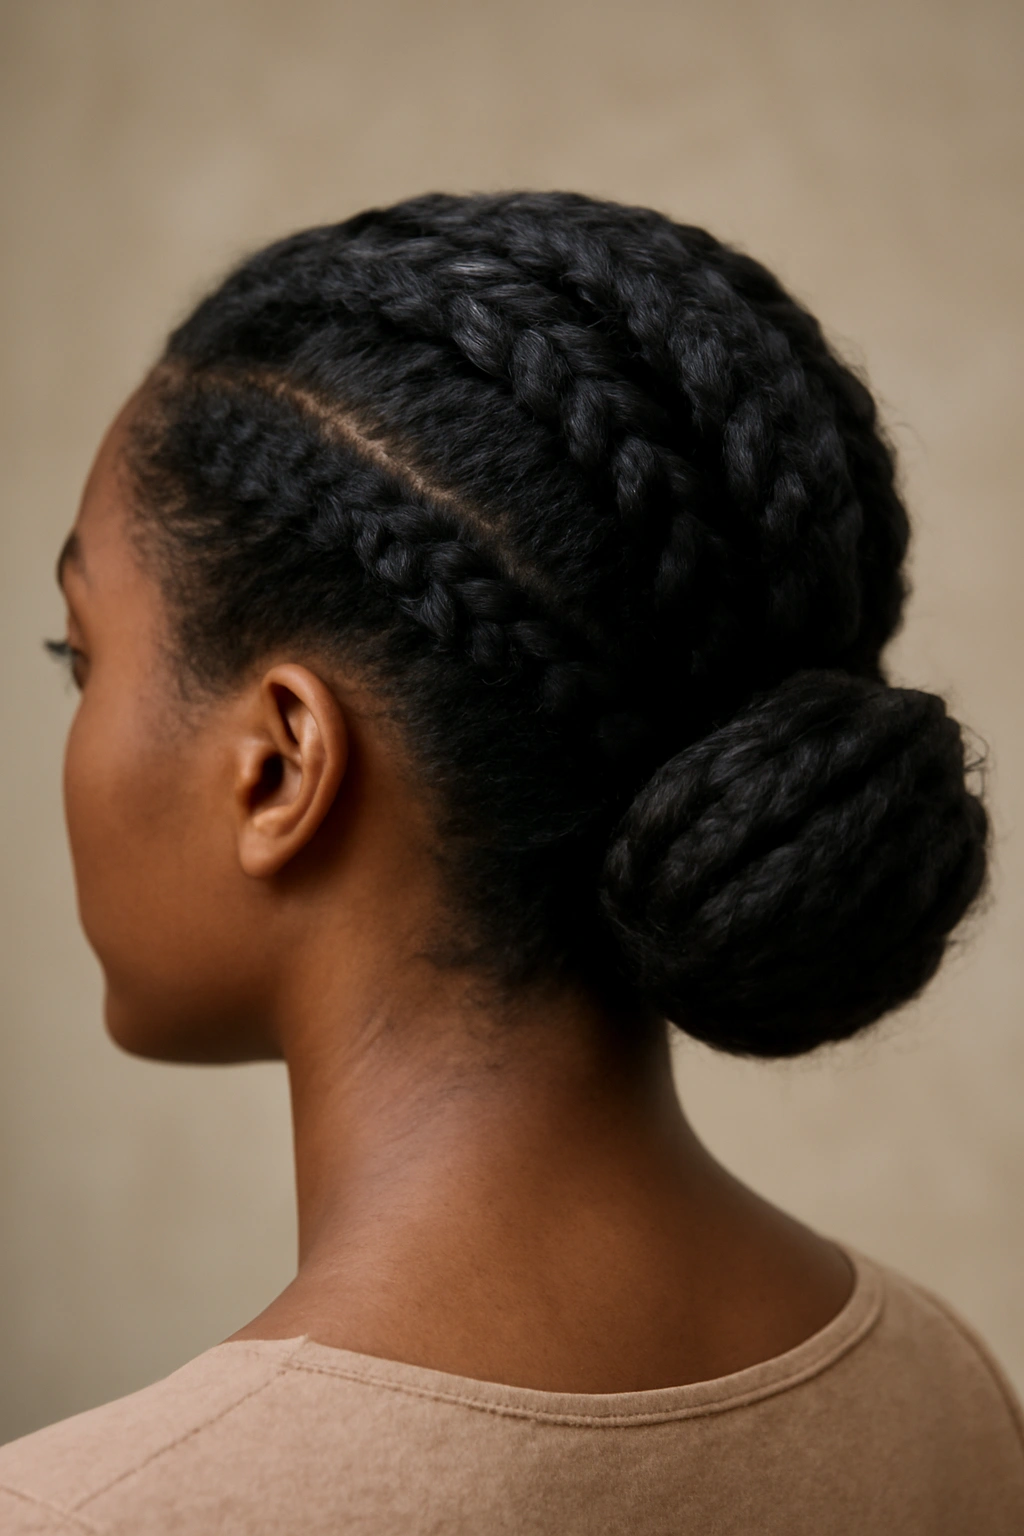
If you’re looking for something that feels special and a little more intricate than everyday styling, the flat twist crown with gathered bun is absolutely your move. This style involves creating flat twists that start at one ear, sweep across the back of your head like a crown, and end at the opposite ear. The remaining hair is then gathered into a bun at the back or top of your head, creating a regal, almost romantic silhouette. It’s genuinely one of the most stunning protective styles because the crown is clearly visible and beautifully textured, while all the length of your hair is safely tucked into the bun.
Why This Style Works for Every Occasion
This is the kind of style that’s elegant enough for a special event—think weddings, date nights, holiday parties—but also practical enough for regular wear when you want your hair completely off your neck and face. The twisted crown draws attention upward and creates a lovely frame for your face, especially if you have facial features you like to highlight. Structurally, it’s incredibly protective because your hair is secured without any pulling at the roots, the ends are tucked safely away in the bun, and the twists themselves add interest that keeps people from immediately noticing you’re wearing a protective style.
How to Create the Look
Begin with hair that’s been washed, deep conditioned, and left damp or at least very moist. On one side of your head, create a flat twist that starts at about ear level. Instead of incorporating side hair as you go, keep this twist independent and move it diagonally upward and across the back of your head, securing it as you go with bobby pins. Once you reach the opposite side, secure the end of the twist with a bobby pin. If you want symmetry, create a matching twist on the other side that mirrors the first one, meeting it somewhere in the middle of the back of your head. All the remaining hair gets gathered into a bun at the base of the crown where the twists end, and you secure the bun with bobby pins or a hair elastic. You can make the bun neat and tight or loose and romantic—both read beautifully.
Styling Tips and Variations
Smooth your twists with a light pomade or edge control for a polished finish, especially if you’re wearing this for a fancy event. For a looser, more bohemian feel, gently pull at the flat twists after securing everything to create texture and fluffiness. You can also add decorative hair pins or small gold clips along the twisted crown for extra elegance. Some women create three small flat twists instead of two, spacing them evenly around the crown area for a more intricate look.
Maintenance and Longevity
Because everything is secured and contained, this style can last seven to ten days with proper care. Refresh any loose twists by tightening them gently with your fingers. The bun can be remade or adjusted if it starts to feel loose. Sleep on a silk or satin pillowcase or bonnet to preserve the integrity of the twists, and avoid excessive touching or manipulation. When removing, carefully unpin the bun first, then gently untwist from the secured end, working your way back to the starting point.
3. Feed-In Flat Twists for Length and Fullness
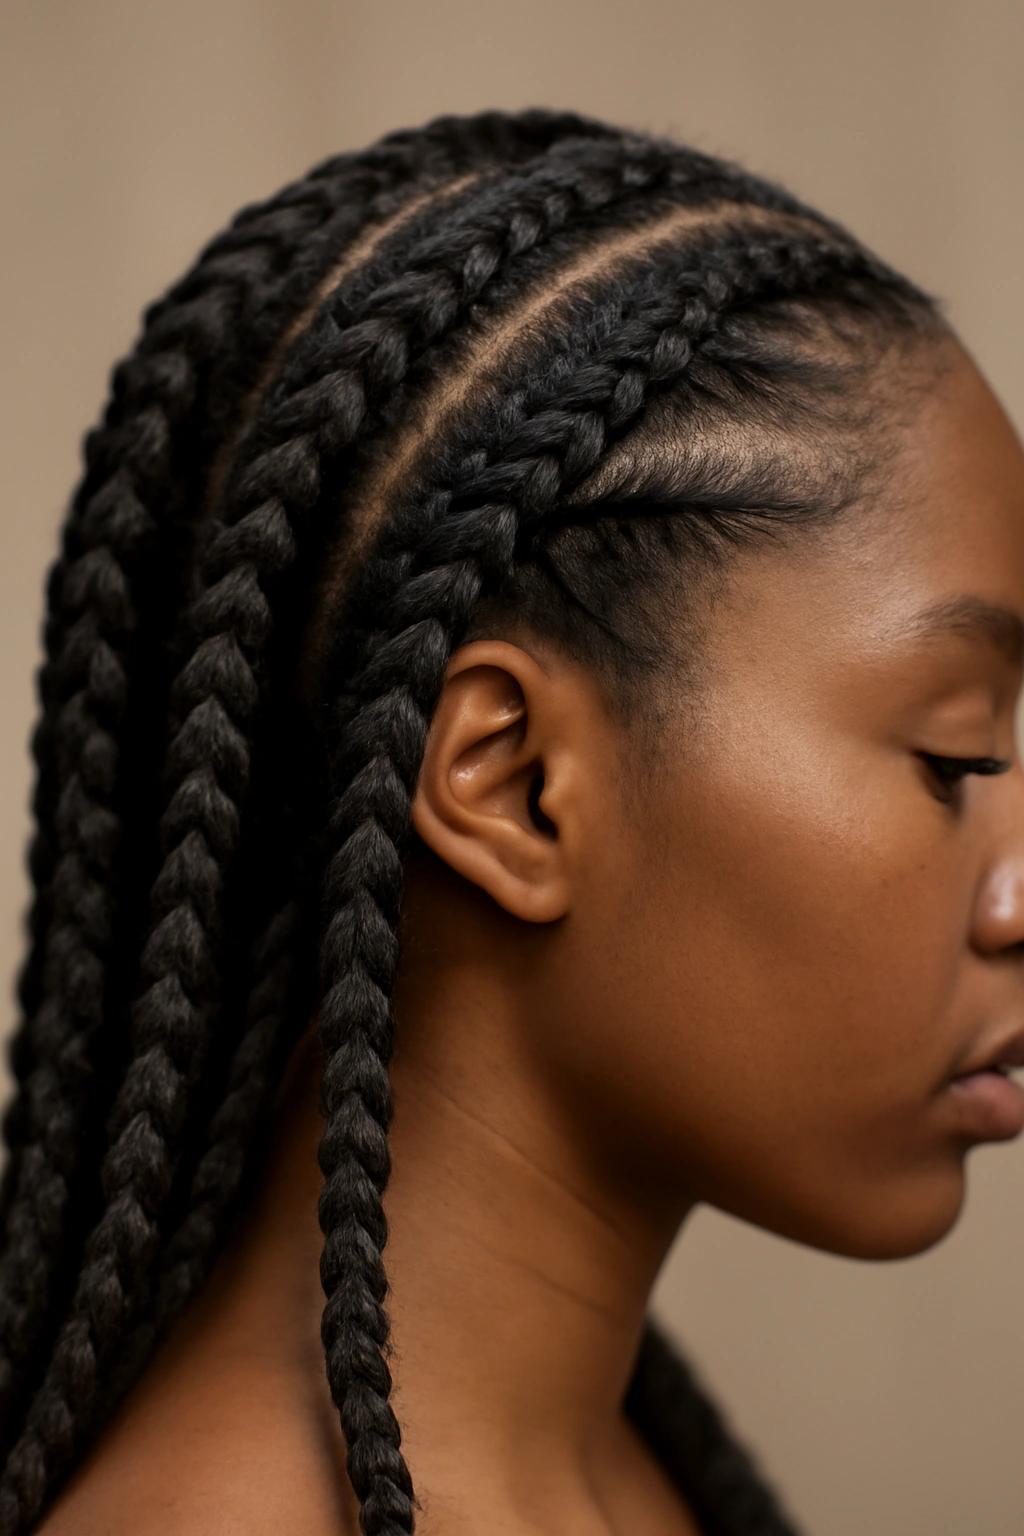
Feed-in flat twists are a specific technique that creates the illusion of longer, fuller twists because you’re adding hair gradually throughout the twist rather than dividing a single section. This method works beautifully for natural hair because it distributes tension more evenly and actually tends to feel less tight at the roots than traditional flat twists. The result is thick, defined twists that look almost like you used hair extensions even though you’re using only your own hair.
Why Feed-In Twists Make a Difference
The magic of feed-in twists is that they look incredibly full and impressive because you’re constantly adding hair throughout the length of the twist, so the dimensions keep growing as you go down. They’re also significantly more comfortable because the tension is distributed along the entire length of the twist rather than concentrated at the roots. For women with fine hair, thinner hair, or shorter natural hair, feed-ins create the look of abundance and thickness that feels luxurious. They’re also technically protective because the added volume means less stress on individual strands.
How to Create the Look
Start with a clean, moisturized head of hair that’s been detangled. Create a thin horizontal section at the crown—about the width of a pencil. Divide this section into two parts. Begin twisting these two parts together, but don’t incorporate additional hair immediately. Instead, twist maybe half an inch with just the original two parts. Then, as you make your next twist motion, take a small section of hair from the line of demarcation above your twist and add it to one side. Continue twisting, and on the next twist motion, add more hair from above to the other side. Keep alternating which side you add hair to as you move down your head. This continuous feeding creates that full, thick appearance. Continue this pattern all the way down to the ends of your hair, securing with a small elastic or bobby pin at the end.
Styling Tips and Variations
You can create two, three, or more feed-in flat twists depending on your preference and hair volume. For extra fullness, gently pull on the twists after completing them to make them fluffier. You can wear them down, tuck them into a ponytail, or gather them into a twisted crown like the previous style. Feed-in twists also blend beautifully with other feed-in twists and with loose hair, so you can create patterns or combine them with other styles.
Maintenance and Longevity
Feed-in twists are incredibly durable and often last eight to ten days or even longer because they’re securely twisted throughout their entire length. Check the roots and secure any loose twists with bobby pins as needed. The ends can be retwisted if they start to fray. Sleep protection is important—use a bonnet or silk pillowcase to maintain the definition and prevent frizz. When taking them down, start from the end and untwist slowly, section by section, to avoid breakage.
4. Twisted Bangs with a High Puff
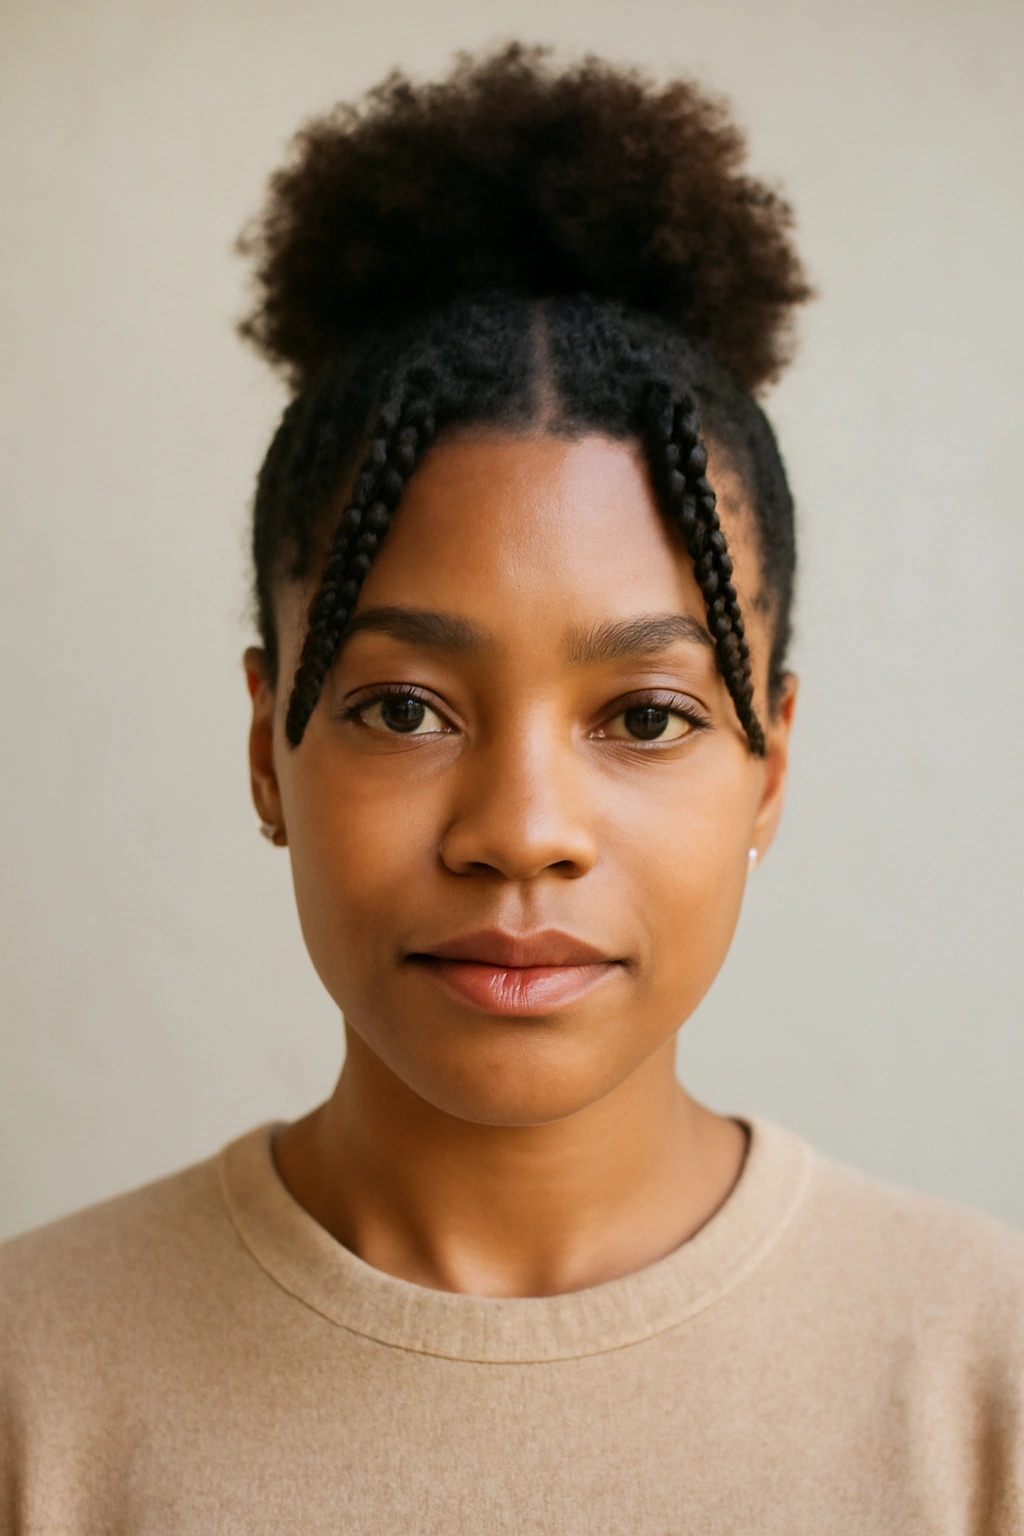
This style is playful, youthful, and perfect for anyone who wants to feel like they styled their hair without actually committing to an elaborate updo. You create a few flat twists at the hairline or temple, pull the rest of your hair into a high puff at the crown, and boom—you’ve got a style that’s absolutely showstopping and took maybe thirty minutes tops. The twisted bangs frame your face beautifully while keeping your hair off your neck and secured.
Why This Style Has Serious Appeal
The twisted bangs section creates a defined, intentional frame for your face that’s way more interesting than just pulling everything back into a plain puff. It reads as put-together and creative without being overly complicated, and it works for any hair texture or density. This is also a fantastic style if you’re at the point where your hair is getting a little fuzzy from refresh styling but isn’t dirty enough to wash yet—the twists keep everything looking intentional and fresh, buying you extra days before wash day.
How to Create the Look
Section off a piece of hair that spans from one temple across your forehead to the other temple—essentially the front hairline section. Divide this section down the middle to create symmetrical pieces on each side. Create a flat twist on each side, incorporating hair as you go and twisting toward the back of your head. Once both twists reach the back, secure them with bobby pins. Gather all remaining hair into a ponytail holder at the crown of your head, creating a high puff. You can leave the puff full and fluffy or tighten it into something neater, depending on your mood.
Styling Tips and Variations
Use edge control on the twists to keep everything smooth and polished. If you want a softer look, intentionally make the twists slightly loose and less structured. Add a colorful scrunchie or hair cuff to make the puff a statement piece. You can also weave a fun scarf or ribbon through the twists for extra personality. Some women create a Dutch braid (reverse flat twist) for the bang section instead, which gives a totally different visual.
Maintenance and Longevity
Because the twists and puff are all connected, this style stays together beautifully for about five to seven days. Refresh the puff at night by loosening the elastic slightly so you’re not creating unwanted creases. The twists themselves rarely need attention unless they start to fray at the hairline, in which case you can smooth them with a little pomade. When taking down, release the puff first, then gently untwist the bangs from the back forward.
5. Flat Twist Braided Crown with Cascading Ends

This style combines the intricate appeal of a braided crown with the texture and dimension of flat twists, and it’s honestly one of the most beautiful protective styles you can create. You make several flat twists that meet in the center of your head or in the back, creating a crown pattern, but then you braid those completed twists together or separately down your back, leaving the ends loose to cascade. It’s ornate enough to feel special but not so complicated that it requires three hours or a professional.
Why This Style Stands Out
This is legitimately stunning and gets compliments constantly—it looks way more complex than it actually is, which is always satisfying. The combination of flat twists and braiding creates multiple layers of texture and depth that are incredibly visually interesting. You get both the protective benefits of the twists and braids (everything’s secured and ends are protected) plus the visual impact of a style that looks like you really thought it through. It photographs beautifully for social media.
How to Create the Look
Start by creating two thick flat twists on each side of your head, moving from the temple toward the back. Depending on your hair volume, you might create two to four twists total. Once the twists are complete and secured, gather them together in the middle or at the back and braid them together as a group, or braid them in pairs. Leave the ends of the braided twists loose and curly, and secure the braid itself with bobby pins where it meets at the back. You’ll have a lovely twisted crown effect with braided elements and cascading curly ends beneath.
Styling Tips and Variations
For added dimension, use a curl defining cream or light gel on the loose ends to enhance definition and curl pattern. You can tuck the cascading ends into a low puff if you want something more formal, or leave them completely loose for a romantic, ethereal vibe. Add a silk ribbon or decorative clip where the twists meet for extra polish. You can also create this style with three or four twists instead of two, depending on your hair volume and the intricacy you’re going for.
Maintenance and Longevity
This style holds up beautifully for eight to ten days because everything is thoroughly secured. Check the connection point in the back occasionally and re-pin if needed. The cascading ends might need light refreshing around day five or six—you can re-coil or redefine the curl pattern on those sections without touching the twists. Sleep on a silk pillowcase and consider pineappling the loose ends to protect them at night.
6. Mohawk Flat Twists
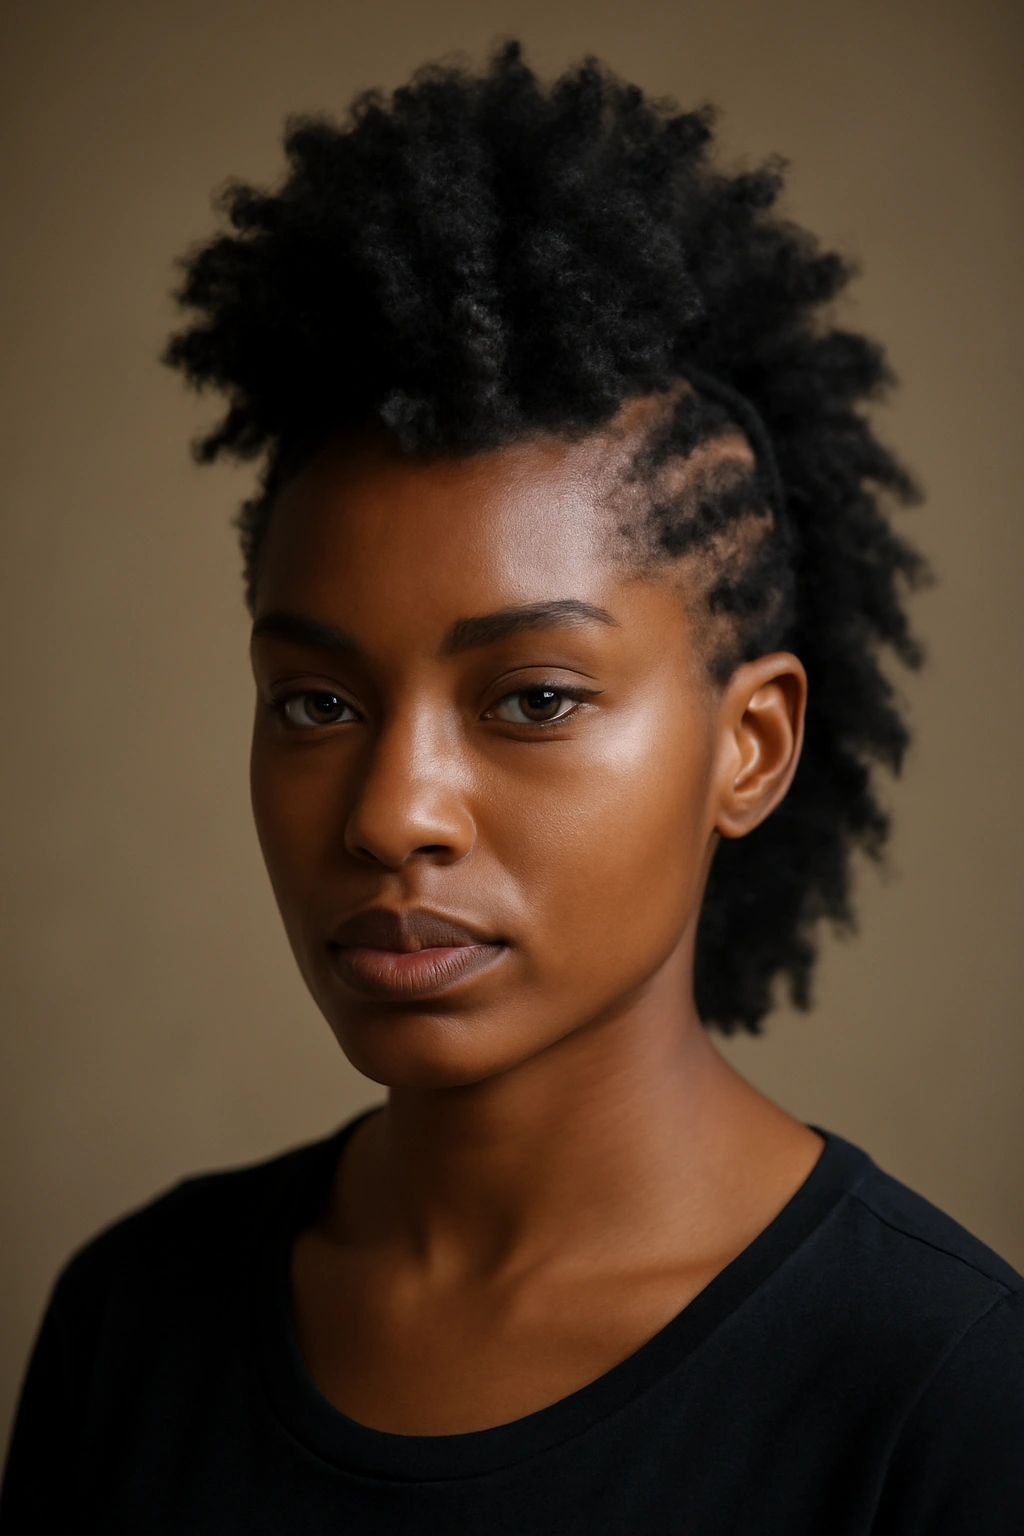
If you want a flat twist style with major attitude and visual impact, the mohawk flat twist is for you. You create flat twists on each side of your head, but instead of having them connect or meet in the middle, you leave a stripe of loose, voluminous curly hair running down the center of your head—creating the appearance of a mohawk. It’s sculptural, it’s bold, and it’s incredibly protective because the twists keep side hair secure while the center section can be as full and fluffy as you want it to be.
Why This Style Makes a Statement
The Mohawk flat twist is unapologetically bold, and there’s something really empowering about a style that announces your confidence. It’s also incredibly practical—the twists keep your side hair neat and protected, while the center section gives you the freedom to have volume and presence. This is the style choice for women who want to feel like their hair is part of their presence, part of their statement. It photographs extraordinarily well because the contrast between the textured twists and the voluminous center is so visually striking.
How to Create the Look
Imagine a vertical line running from the middle of your forehead all the way down to your nape. Everything to the left of that line will be twisted, and everything to the right will be twisted. Create a flat twist on the left side starting from your temple, weaving in hair as you move toward the back of your head. Do the same on the right side. Secure both twists at the nape with bobby pins. The hair down the center remains loose and curly—you can define those curls with gel or cream, pineapple them, or just let them be naturally voluminous. The more volume the center section has, the more dramatic the mohawk effect.
Styling Tips and Variations
Use a lightweight gel on the twists to keep them sleek and enhance their definition. If you want the center section to be even fuller, apply a curl cream or mousse to enhance curl pattern and volume. You can also create a Dutch braid (reverse flat twist) on each side instead of regular flat twists for a slightly different look. Some women add colorful beads or rings to the twists for extra personality, or weave a bright scarf through the center section for contrast.
Maintenance and Longevity
This style holds for seven to ten days with great structure. The center hair might need refreshing after a few days—you can finger coil it, re-curl it, or apply fresh product to freshen the curls. The side twists remain relatively stable. Sleep with the center section pineappled if you want to maintain the volume, or protect it lightly with a bonnet. When taking down, simply untwist each side, starting from the back and working forward.
7. Flat Twist Updo with Wrapped Bun
The flat twist updo with wrapped bun is sophisticated, polished, and perfect for fancy occasions where you want to look absolutely flawless. You create several flat twists throughout your head, gather all of them together at the back or top, and then wrap those twists around a gathered bun section, creating an elegant updo that shows off both the twisted texture and the security of a traditional updo. It’s protective, it’s elegant, and it keeps your hair completely secured against your head.
Why This Is a Go-To Fancy-Occasion Choice
This style checks every single box: it’s protective (your ends are tucked away, everything is secured), it’s elegant (it reads as formal and intentional), it’s actually quite secure (you won’t have pieces falling during the event), and it showcases the beautiful texture of flat twists in a way that feels sophisticated rather than casual. It’s the protective style equivalent of a formal hairstyle, and it absolutely works for weddings, galas, formal events, or any time you want to feel genuinely polished. Plus, it holds beautifully all day and night.
How to Create the Look
Create flat twists throughout your entire head—this could be four, five, or even six twists depending on your hair volume and how intricate you want the final result. You can create a symmetrical pattern with twists on each side, or do a more organic distribution. Secure each twist as you go with bobby pins. Once all twists are complete, gather them together at the back or crown of your head and gather any loose hair into this same point. Wrap the twists around the gathered bun, weaving them in and out and around the bun itself, securing everything with bobby pins. The final effect is an updo where the twists are clearly visible and create texture and dimension.
Styling Tips and Variations
Use a lightweight hairspray to smooth the twists and add hold without making your hair feel crunchy. For a sleeker look, apply edge control to any front hairline twists. You can finish with a decorative comb or clip at the base of the bun for extra elegance. If you want more texture and volume in the updo, gently pull on each twist before wrapping to create fluffiness.
Maintenance and Longevity
This updo holds beautifully for a full day of events. If you’re wearing it overnight (like at a wedding where you might sleep before pictures), you can carefully sleep in it on your back without moving around too much, or you can gently dismantle it to sleep and recreate it in the morning (this only takes about twenty minutes if you’re familiar with the style). When taking down, remove the bobby pins and carefully unwrap and untwist, being gentle with any sections that feel tight.
8. Twisted Halo with Center Part
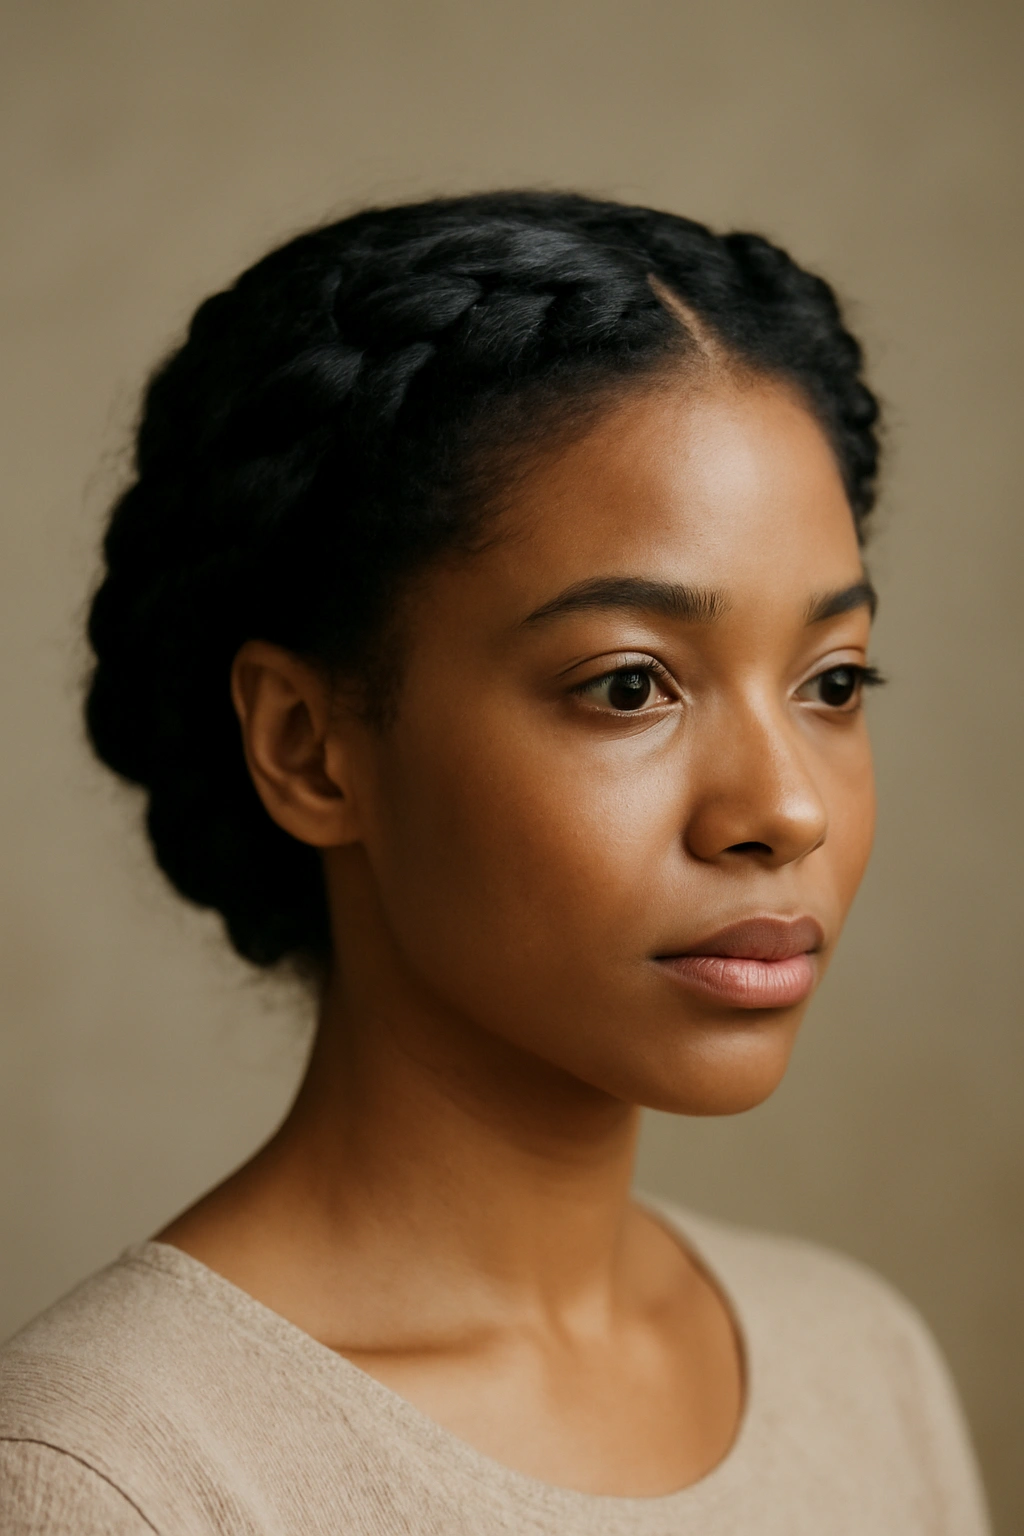
The twisted halo with center part is ethereal and romantic, and it’s perfect if you want a style that feels special and a little bit fairy-tale-ish. You create two flat twists that start at the center part on each side of your head and travel around the back, meeting in the middle and creating a halo effect. It’s actually not that complicated to execute, but it looks intricate and thoughtful. The center-parted hair can be left loose and curly or pulled into a low ponytail or bun.
Why This Style Feels So Special
There’s something genuinely romantic about this style—the halo creates a softness around your face while keeping your hair controlled and neat. It works for any occasion from brunch to wedding attendance to creative professional events. The center part is universally flattering because it balances the face, and the halo of twisted hair draws attention upward and creates a gentle, intentional frame. It’s protective in the sense that the twists safeguard those sections while the center hair gets the freedom to move and be curly.
How to Create the Look
Create a clean center part from your forehead to your nape. Starting at the center part on one side of your head, create a flat twist that travels horizontally around the back of your head. As you move around, incorporate hair from the back and sides, creating a nice thick twisted line. Once you reach the opposite side where you started on the center part, secure the twist. Repeat on the other side, creating a mirror-image twist that meets the first one in the middle of the back. You should now have a halo of twisted hair with center-parted loose hair in front. You can wear the loose hair down, curly, and flowing, or gather it into a low ponytail or bun behind the halo.
Styling Tips and Variations
For a really polished look, smooth the twists with a light pomade and define your center part with edge control. If you want the loose center hair to look especially beautiful, apply a curl cream and finger-coil or style it to enhance your natural curl pattern. You can add a thin silk ribbon woven through the twists for extra elegance, or keep it simple and let the twists speak for themselves. Some women add small flowers or delicate clips along the twisted halo for a truly romantic vibe.
Maintenance and Longevity
This style typically holds for five to eight days. The twists remain pretty stable, but the center-parted loose hair might need refreshing after a few days. You can remove the loose hair section and restyle it while keeping the halo twists intact. Sleep with your head on a silk pillowcase to protect both the twists and the loose hair. When taking down, gently untwist starting from where they meet in the back.
9. Flat Twist Out for Maximum Texture and Definition
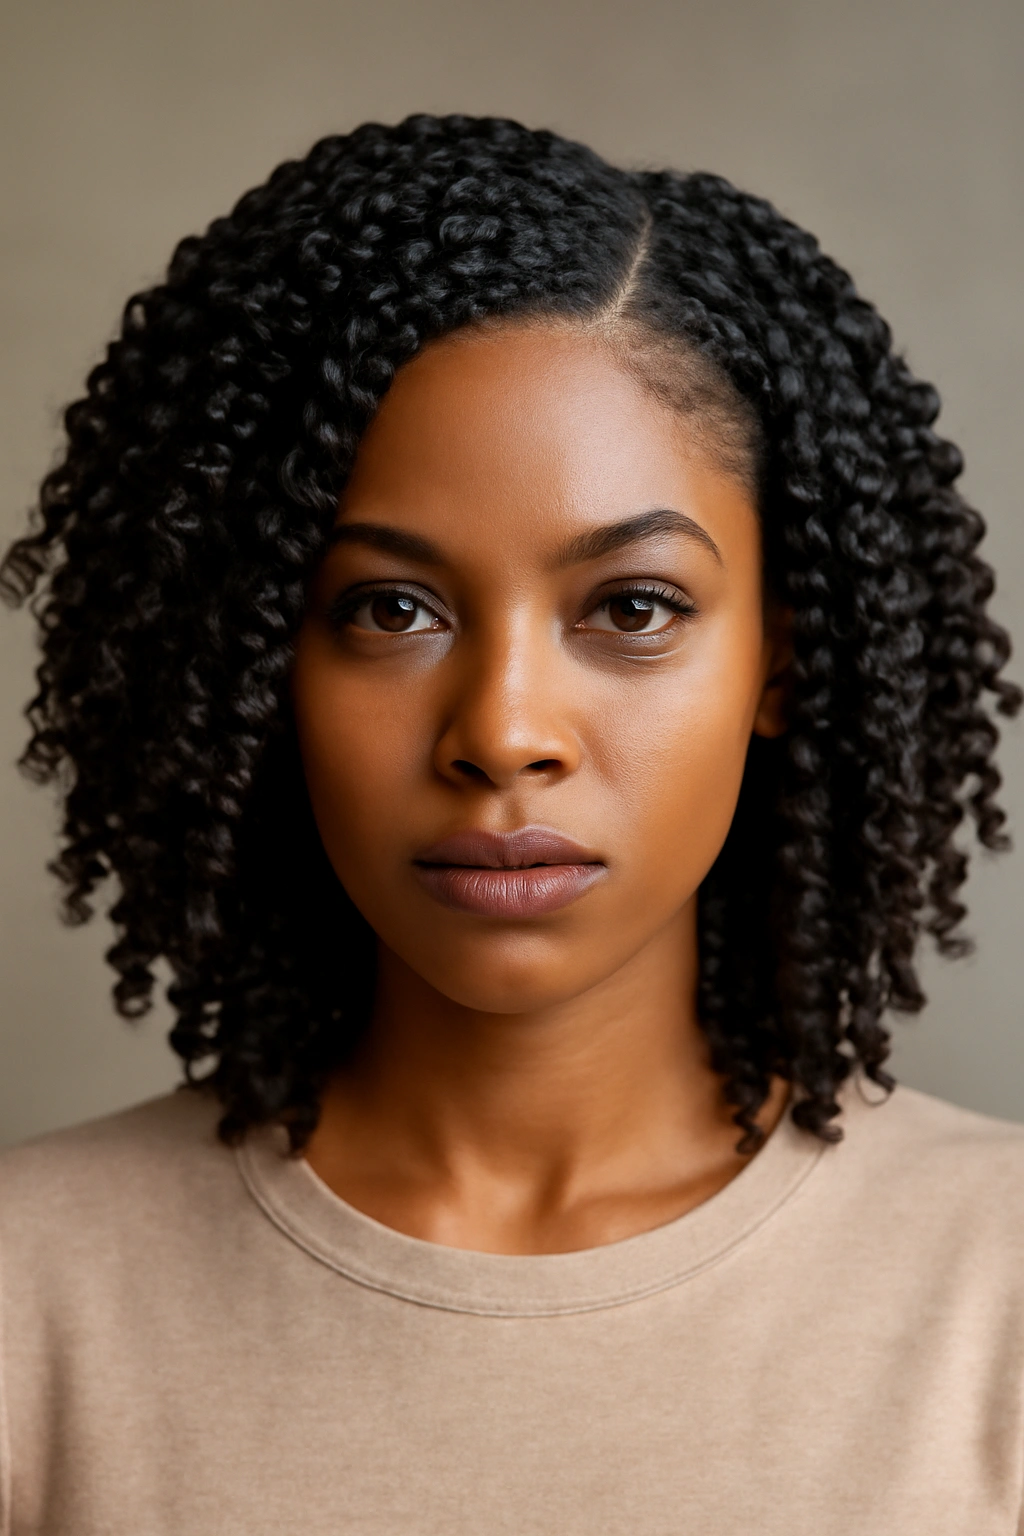
A flat twist out is technically a styling method rather than an updo style—you create flat twists while your hair is damp, leave them in for a few hours or overnight, then untwist them when your hair is completely dry. The result is gorgeous, defined, textured waves and curls throughout your entire head with a dimensional, almost braided appearance. If you love the look of twist-outs but haven’t tried them with flat twists yet, you’re genuinely missing out—the results are even more dramatic and defined than regular twist-outs.
Why Flat Twist Outs Create Stunning Texture
The flat-twist-out method creates the most beautiful, well-defined curl pattern because you’re working with a flatter, more structured base than a regular twist. When you untwist, the waves that form are incredibly clean and distinct. This is especially gorgeous if you have looser curl patterns because the flat twist out helps clump and define curls in a way that creates shape and movement. The result is bouncy, voluminous, dimensional hair that absolutely screams healthy natural hair. It’s not protective in the traditional sense (your hair is down and loose), but it’s low-manipulation because you’re not combing or working through your hair frequently—the twists do the styling work while you wait.
How to Create the Look
Start with freshly washed hair that’s been deep conditioned and is still slightly damp (not soaking wet, but definitely moist). Apply a curl cream, gel, or mousse to enhance your curl pattern. Create flat twists throughout your entire head—the number and size depend on the look you want, but anywhere from eight to fifteen twists will give you beautiful results. Make the twists tight enough that they’ll create definition but not so tight that they’re uncomfortable or will damage your hair. Once all twists are in, leave them in for at least six to eight hours (overnight is ideal). Make sure your hair is completely dry before untwisting—even slightly damp hair will lose the definition. Gently untwist each twist slowly, starting from the end and working upward. Separate and fluff the twists to create dimension and volume.
Styling Tips and Variations
Use a lightweight gel for hold without crunch, or a cream for a more natural-looking finish. For a spicier hold and more defined results, use a stronger gel. You can create two-strand twists and then flat-twist out, or just stick with flat twists for a slightly different texture. On day two or three, spritz with a light water spray and refresh your curls by finger-coiling or scrunching—the twist-out will have relaxed slightly, giving you a different (but still gorgeous) texture.
Maintenance and Longevity
Twist-outs look best on day one and two, then gradually relax and loosen as your curl pattern relaxes and settles. Most look good for four to six days before needing a refresh. Sleep on a silk pillowcase or bonnet to protect definition. You can refresh a twist-out by applying product and finger-coiling, or by sleeping in twists again and re-twisting out. Twist-outs create one of the most beautiful looks available to natural hair women—the definition is truly stunning.
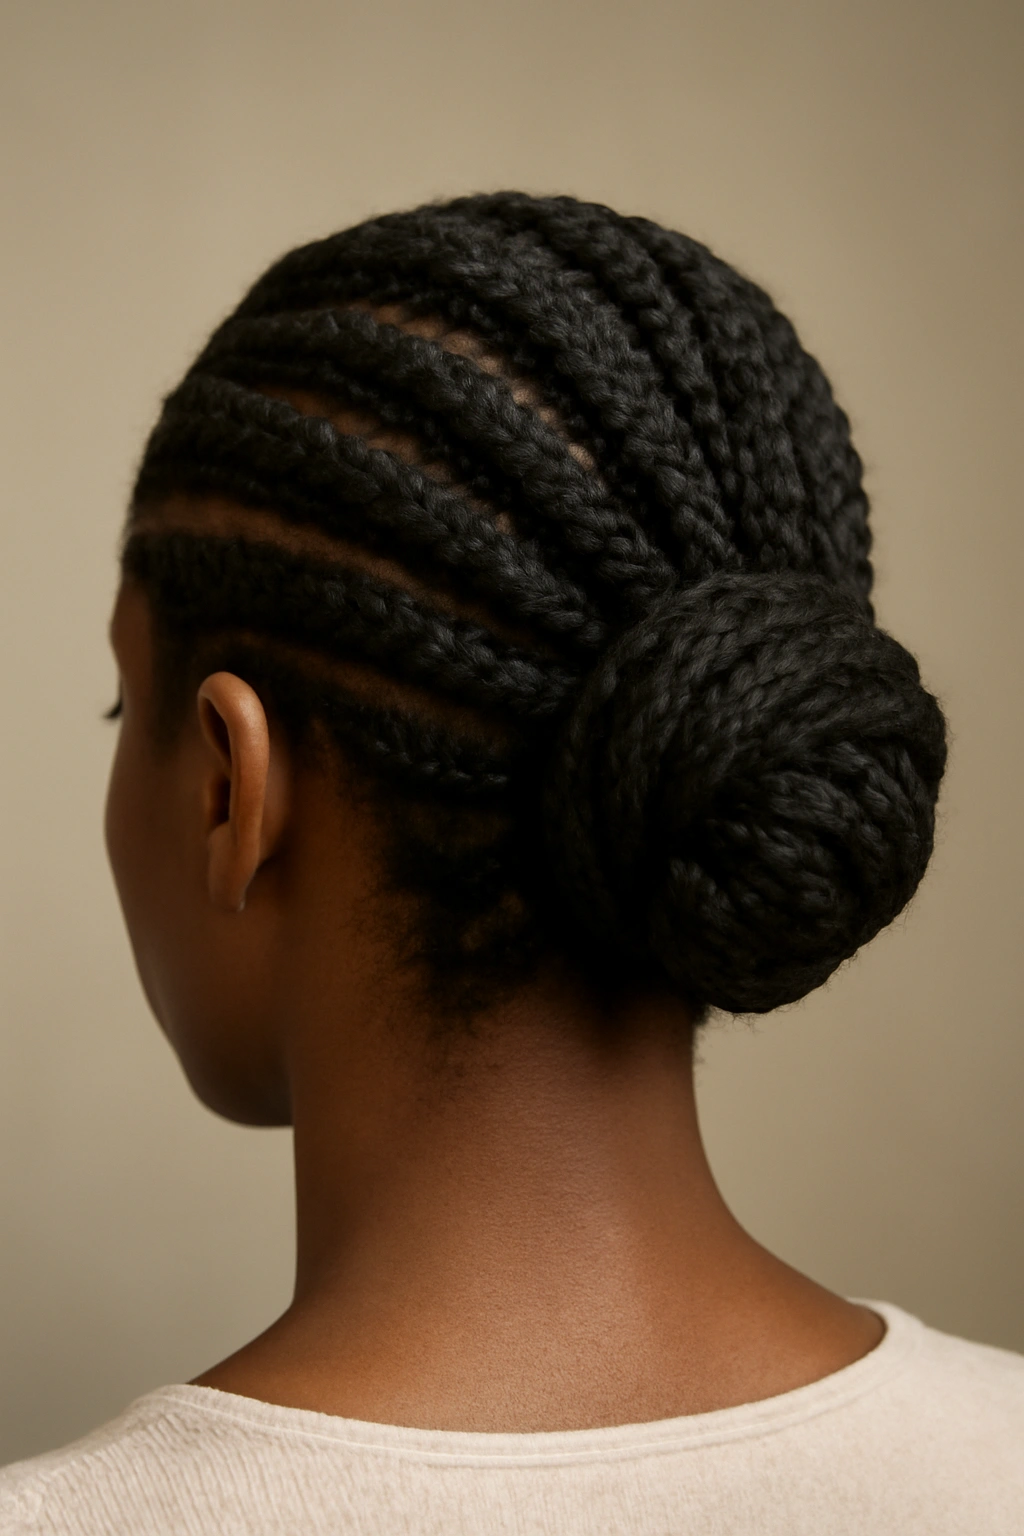
10. Double Flat Twist Braids Down the Back
Double flat twist braids down the back is the style you choose when you want something braided and protective but tired of traditional box braids or cornrows. You create two thick flat twists on each side of your head that travel down toward the back, and instead of leaving them separate, you braid them together, creating one substantial braided element running down the center-back of your head. It’s striking, it’s different, and it absolutely qualifies as protective styling.
Why This Variation Deserves Its Own Spotlight
Double flat twist braids are actually more interesting to look at than flat twists alone because the braiding element adds another layer of texture and dimension. They’re also slightly more secure because everything is braided together rather than just twisted, so they hold up beautifully for longer periods. This style works for any hair texture and actually tends to work better on thinner or finer hair because the braiding adds the illusion of thickness and fullness. It’s the kind of style that gets “where did you get this done?” questions, even though you created it yourself.
How to Create the Look
Create a flat twist on the left side of your head starting from your temple and traveling toward the back and center of your head. Create a matching flat twist on the right side that mirrors the first one. Both twists should travel toward the center-back. Once both twists are complete and secured, take them together and braid them as one unit, creating a single braid running down the back of your head and potentially down your back (depending on hair length). Secure the braid with a small elastic at the end. You can leave the remaining hair loose below the braid or gather it into a puff or ponytail.
Styling Tips and Variations
For maximum impact, use a styling cream on the flat twists to enhance definition and smoothness. Braid slightly loosely to avoid excess tension on your scalp. You can add beads to the final braid, wrap the braid with a yarn or thread for color, or keep it simple and let the natural texture speak for itself. Some women create four twists (two on each side) and braid them together in pairs for a chunkier effect.
Maintenance and Longevity
Double flat twist braids typically hold for eight to ten days or even two weeks because they’re thoroughly braided and secured. Check the connection point periodically and re-secure if needed. The ends might need light refreshing after a week. Sleep protection is helpful but less critical than with looser styles since everything is so well-secured. When taking down, start from the bottom and carefully unbraid, then untwist each section.
Final Thoughts
Flat twists are genuinely one of the most rewarding styling skills to master, and these ten styles represent different moods, occasions, and levels of complexity—but every single one of them is absolutely achievable with a little practice and patience. You don’t need to be a professional stylist to create stunning flat twists; you just need decent lighting, a willingness to spend time on your hair, and the understanding that your first attempts might not be perfect, and that’s completely fine. Every woman who creates beautiful styles started with imperfect twists—the skill develops with repetition.
The best part about flat twists is how protective they are while still looking intentional and beautiful. You’re not sacrificing aesthetics for health or vice versa; you’re getting both simultaneously. Your hair is safeguarded from daily friction and environmental stressors, your ends are secured away from breakage, you’re not constantly manipulating your curl pattern, and you’re walking around looking like you absolutely have your life together.
Start with whichever style speaks to you most strongly, and don’t worry if it takes a few tries to get the tension right or to figure out how to incorporate the hair smoothly. Every natural hair woman who wears flat twists regularly has gone through the “my twists look kind of messy” phase—that’s not a failure, that’s just part of the learning curve. With each attempt, you’ll get faster, your twists will get neater, and your ability to see possibilities will expand. Before long, you’ll have a collection of flat twist styles that you can execute in various ways, and you’ll have the confidence to experiment and create variations that work specifically for your hair, your face shape, and your personal style.