A short curly pixie cut might sound like a bold move, but for anyone with natural curls, this style can be absolutely transformative. You get the low-maintenance appeal of a pixie paired with the gorgeous texture and movement that comes naturally with curls—it’s a win-win that stops you from fighting your hair and starts celebrating it instead.
The challenge, though, is knowing which pixie variation will actually work with your curl pattern, face shape, and styling goals. A pixie that looks stunning on someone with tight coils might fall completely flat on loose waves, and vice versa. That’s why finding the right cut matters so much—it’s the difference between a cut that requires constant styling to look intentional and one that works with your texture to look effortlessly put-together.
What makes short curly pixies so exciting is the creative freedom they offer. You’re not locked into one specific look. Whether you want something that leans more into structured elegance, playful androgyny, or soft femininity, there’s a pixie variation designed to highlight your best features while honoring your natural texture. The key is understanding the mechanics of each style—how the layers work, where the fade sits, and which cuts enhance curl definition versus ones that work better with voluminous texture.
Let’s walk through 10 pixie variations that genuinely work for natural curls, with specific details about who each cut suits best and how to style it for maximum impact.
1. The Textured Top Fade
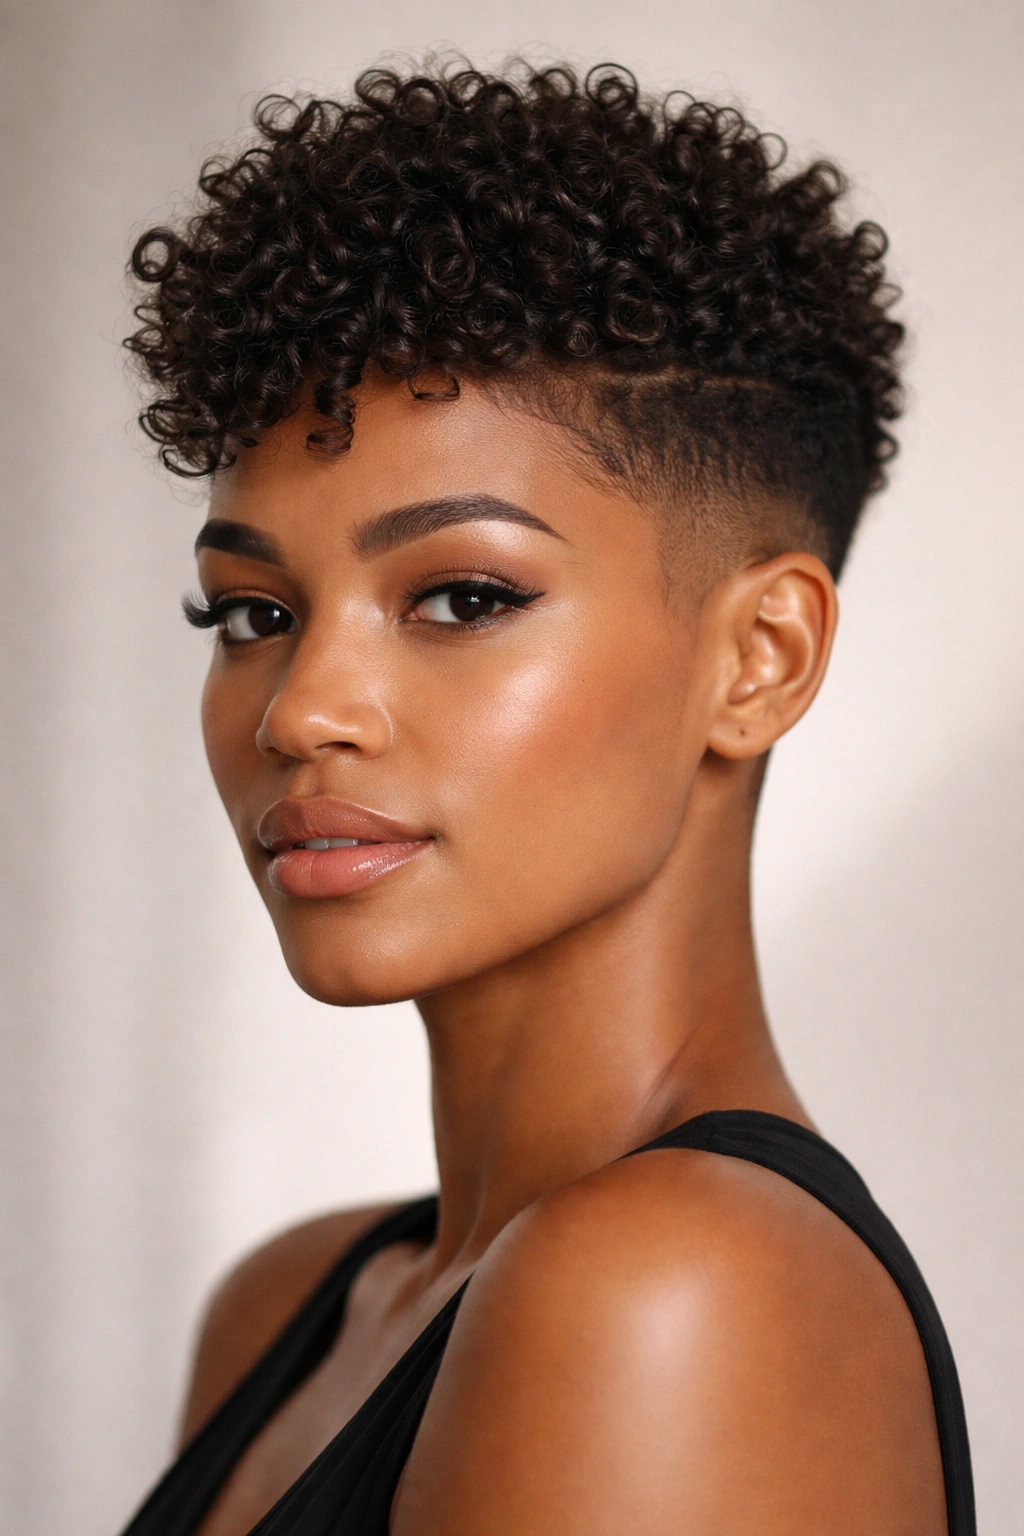
This modern take on a classic pixie combines a clean fade on the sides and back with intentional texture and length on top. The fade is typically cut anywhere from a half-inch to an inch and a half, creating a sharp contrast that makes your curls on top really stand out. The top stays long enough—usually 2 to 3 inches—to let your natural curl pattern do the talking without needing excessive product or styling time.
Why This Works for Curly Hair
The beauty of this cut is how it uses the fade to frame curls rather than fight them. By keeping the sides and back short and tidy, you create a visual anchor that makes even wild, undefined curls on top look intentional and chic. The fade doesn’t interfere with your curl pattern; instead, it lets your coils or waves take center stage without the bulk that comes from longer sides.
Key Details to Know
- The fade should be cut dry or damp, never soaking wet, so your barber or stylist can see exactly how your curls will sit when they’re at normal moisture levels
- Ask for texturizing on top rather than a blunt cut—this lets individual curls define themselves instead of creating a heavy, helmet-like appearance
- The transition from fade to longer top hair should be gradual and blended, not a harsh line
- Plan to get this cut every 3 to 4 weeks to keep the fade crisp, though your curls on top can go longer between trims
- This style works beautifully with both tight coils and loose waves, making it one of the most versatile pixie options
Pro tip: When you’re getting this cut, ask your stylist to leave slightly more length in the crown area than directly above your ears—this creates natural volume that flatters most face shapes and works with how curls naturally distribute.
2. The Tapered Curl Stack
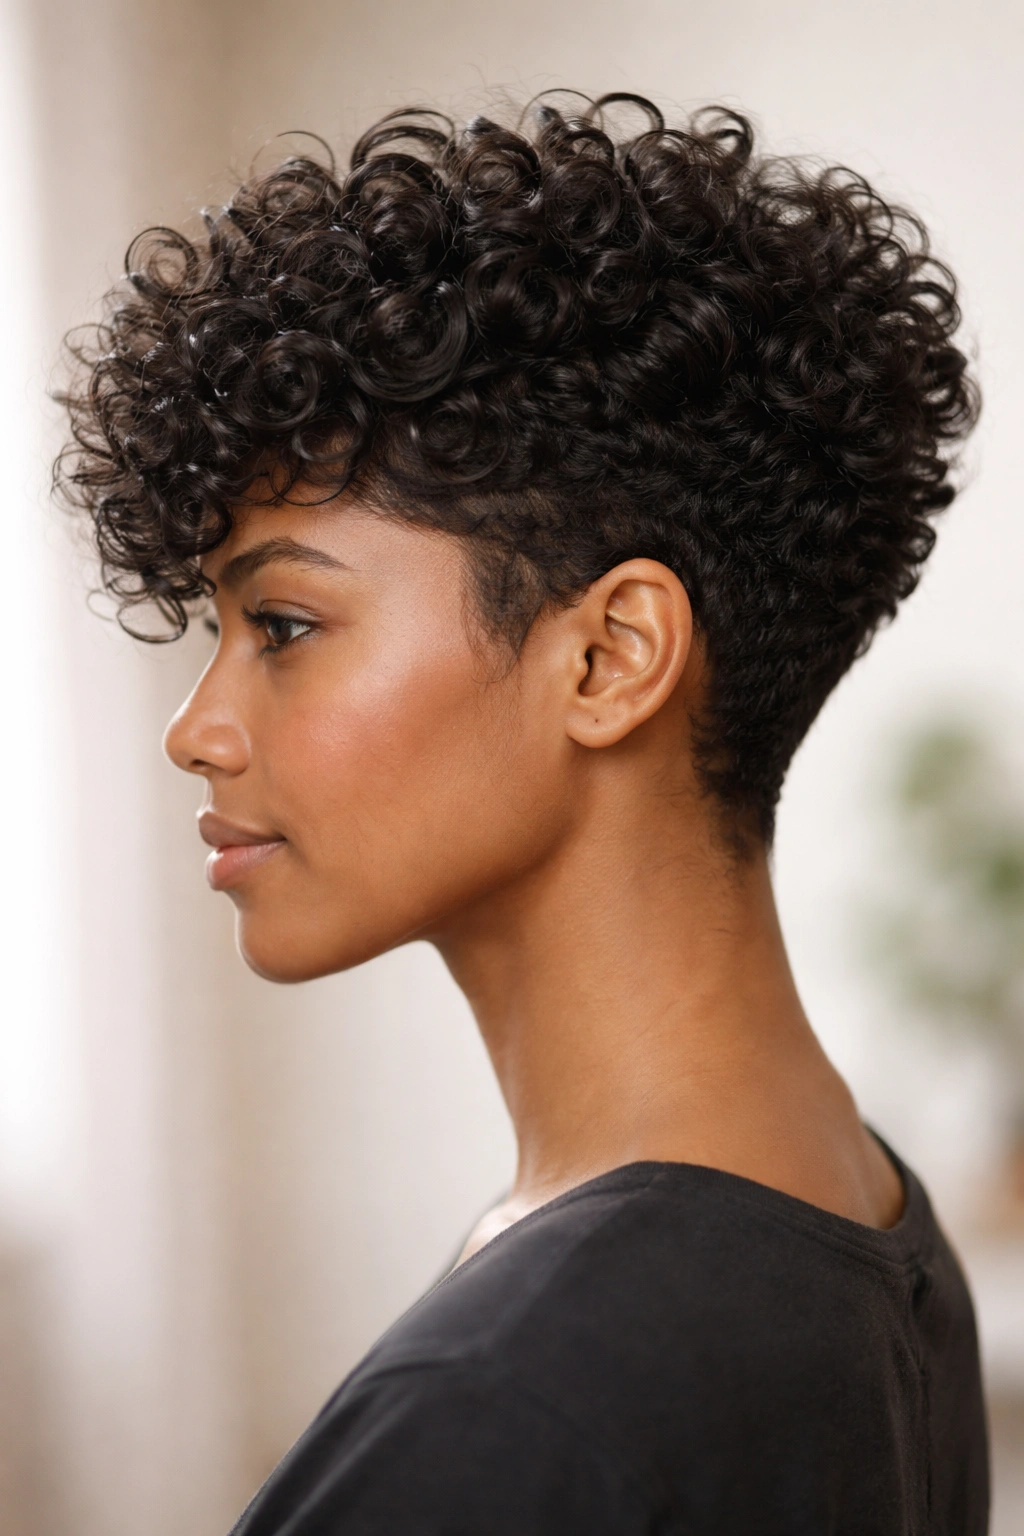
This cut takes advantage of the natural spring in curls by creating graduated layers that stack on top of each other. Instead of fading the sides completely short, this style tapers down gradually, and the back of the head is cut short but with enough length to create a stacked, dimensional look. The result feels fuller and more sculptural than a traditional fade pixie.
What Makes It Stand Out
The stacked layers work with curl shrinkage rather than against it. When you cut curls dry or slightly dampened, you account for how much they’ll spring up as they dry. This cut leans into that natural movement, creating a style that looks full and textured without needing to blow-dry or manipulate your curls into shape. It’s particularly stunning on tight coils and smaller curl patterns.
Best For
-
Tighter, more textured curl patterns (Type 3C, 4A, 4B, 4C hair)
-
People who love the androgynous, statement-making aesthetic
-
Anyone who wants serious curl definition and wants their natural texture to be the focal point
-
Folks with smaller head proportions or narrower faces, as the stacked crown creates vertical volume
-
Those committed to regular trims—this style needs refreshing every 3 to 5 weeks to maintain its shape
-
The stacking technique requires a stylist experienced with curly hair—this isn’t a cut a general stylist should attempt
-
This style shines brightest on hair cut while dry or very damp, so the stylist can see your actual curl pattern
-
Keeping definition product on hand (curl cream or gel) helps the layers pop, though you can also wear it with minimal product
-
This cut responds beautifully to the praying hands method of applying product, which emphasizes individual curl stacks
-
The back should always be shaped while your head is in a normal, upright position to ensure the stack sits correctly
Insider note: After you get home from the salon, don’t wash this cut for at least 2-3 days. The manipulation from shampooing can disturb the layers and make the shape less defined than intended.
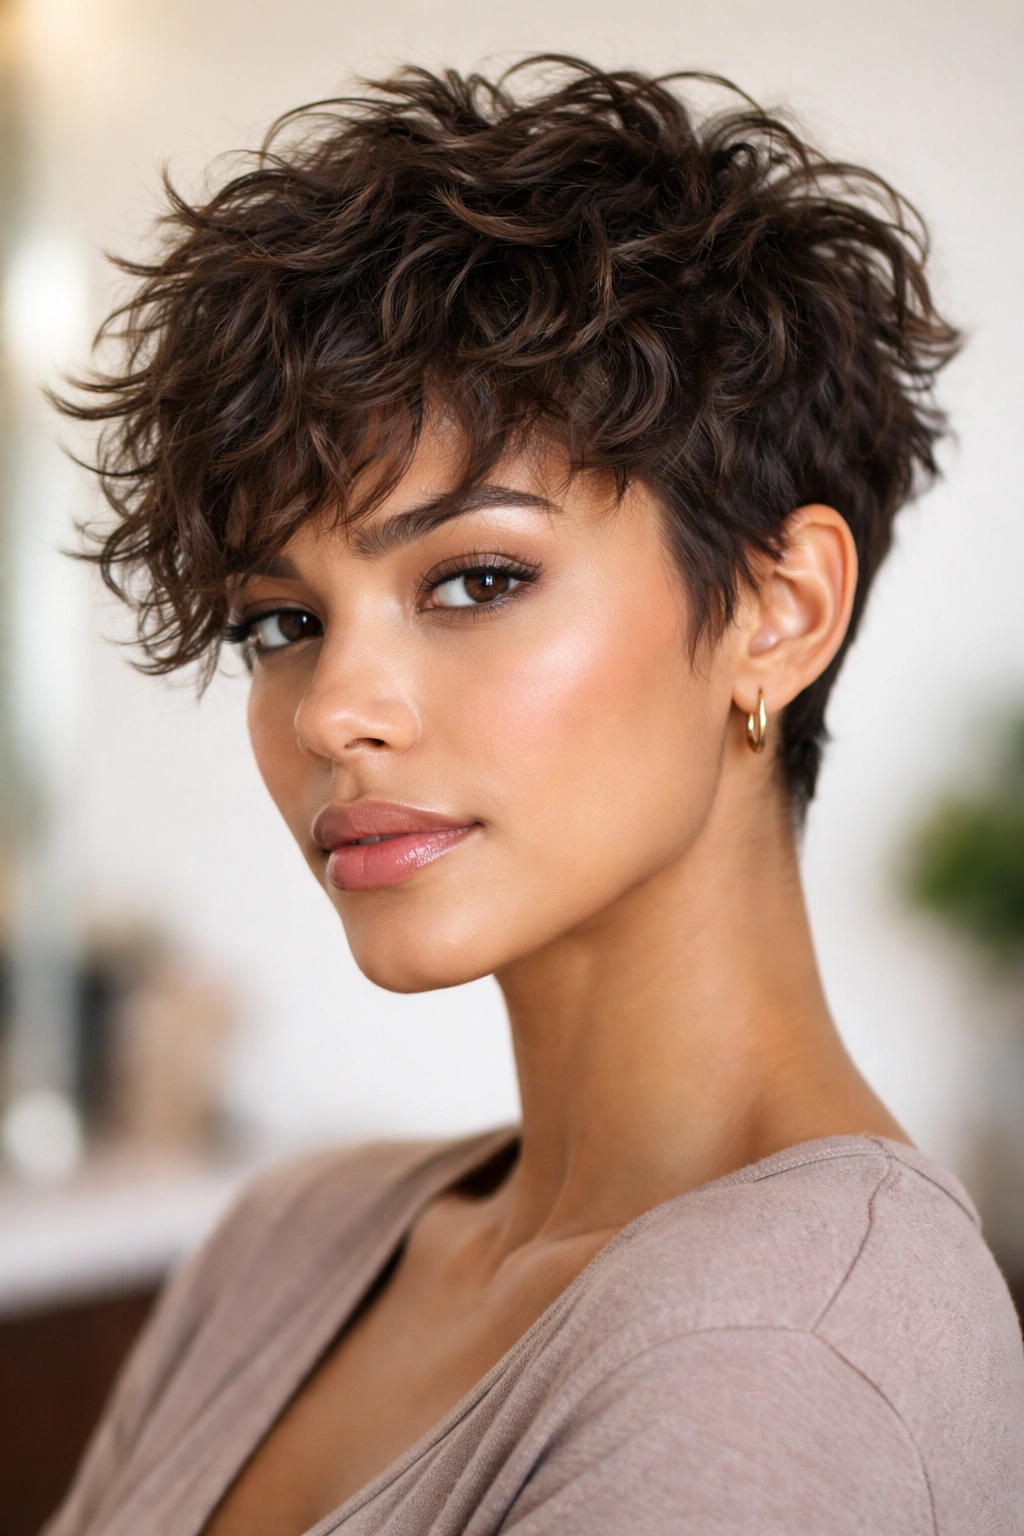
3. The Messy Shag Pixie

For anyone who loves that effortlessly undone, lived-in aesthetic, the shag pixie delivers. This style layers throughout, with longer pieces in the front (usually falling to cheek-length or just below) and shorter, choppy texture in the back and crown. The deliberate messiness is actually the result of very intentional layering and point-cutting that creates movement and texture from every angle.
What Makes It Different
Unlike more structured pixies, this cut celebrates controlled chaos. The layers are cut at different angles and depths to create a piece-y, separable texture that moves independently. On curly hair, this means each section of curls can shift and move on its own, creating a dynamic, playful look that changes slightly depending on how you style it or even how you slept on it.
How to Wear It
-
With minimal product, this cut looks bohemian and relaxed—perfect for embracing your natural curl definition
-
Add a curl-defining cream or lightweight gel for more separation and a sharper, more deliberate shag look
-
Finger-coil or rake your curls as they dry to enhance the separate, piece-y quality
-
This style works wonderfully with twist-outs or braid-outs for extra texture and definition
-
The longer front pieces frame the face beautifully and can be tucked behind your ear or left to frame your cheeks depending on your mood
-
This is one of the higher-maintenance pixies in terms of styling—it rarely looks “wash and go” without some intentional manipulation
-
The longer front pieces can get tangly more easily, especially in humid weather, so keeping a leave-in conditioner handy is essential
-
This cut requires some styling skill or product knowledge to look intentionally messy rather than just, well, messy
-
Regular trims every 4-6 weeks help keep the layers sharp and the overall shape defined
Pro tip: This is the perfect pixie cut if you love wearing your curls in braid-outs or twist-outs. The layers actually enhance the texture from protective styling, creating even more dimension than you’d get with a solid-length cut.
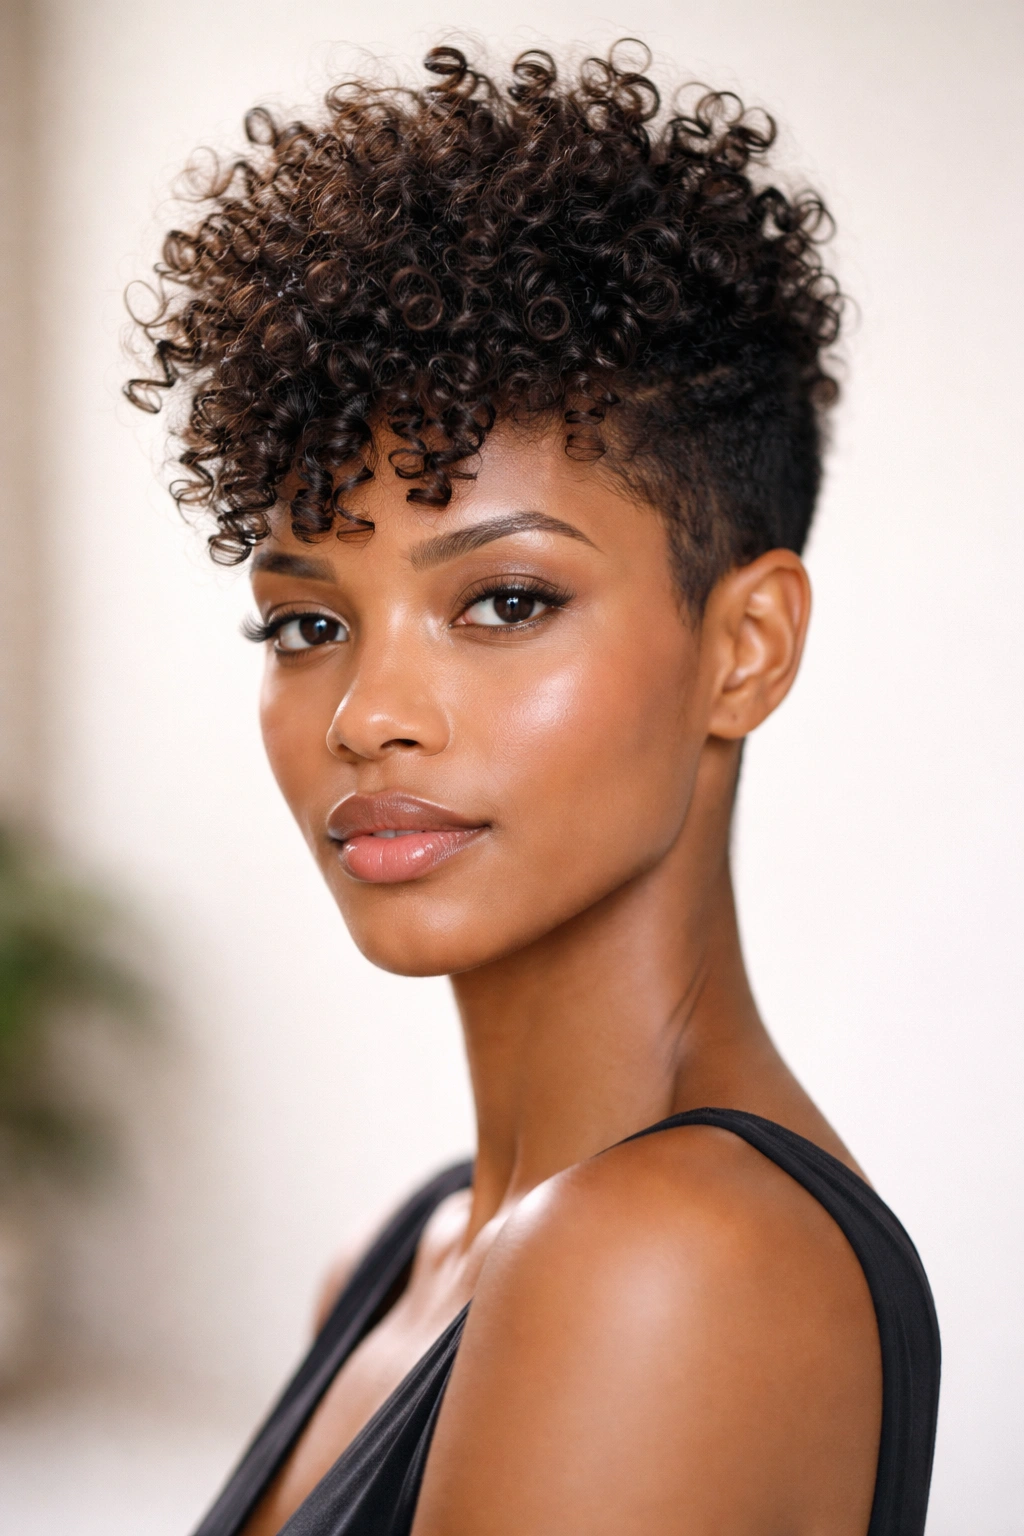
4. The Undercut Curl Pop
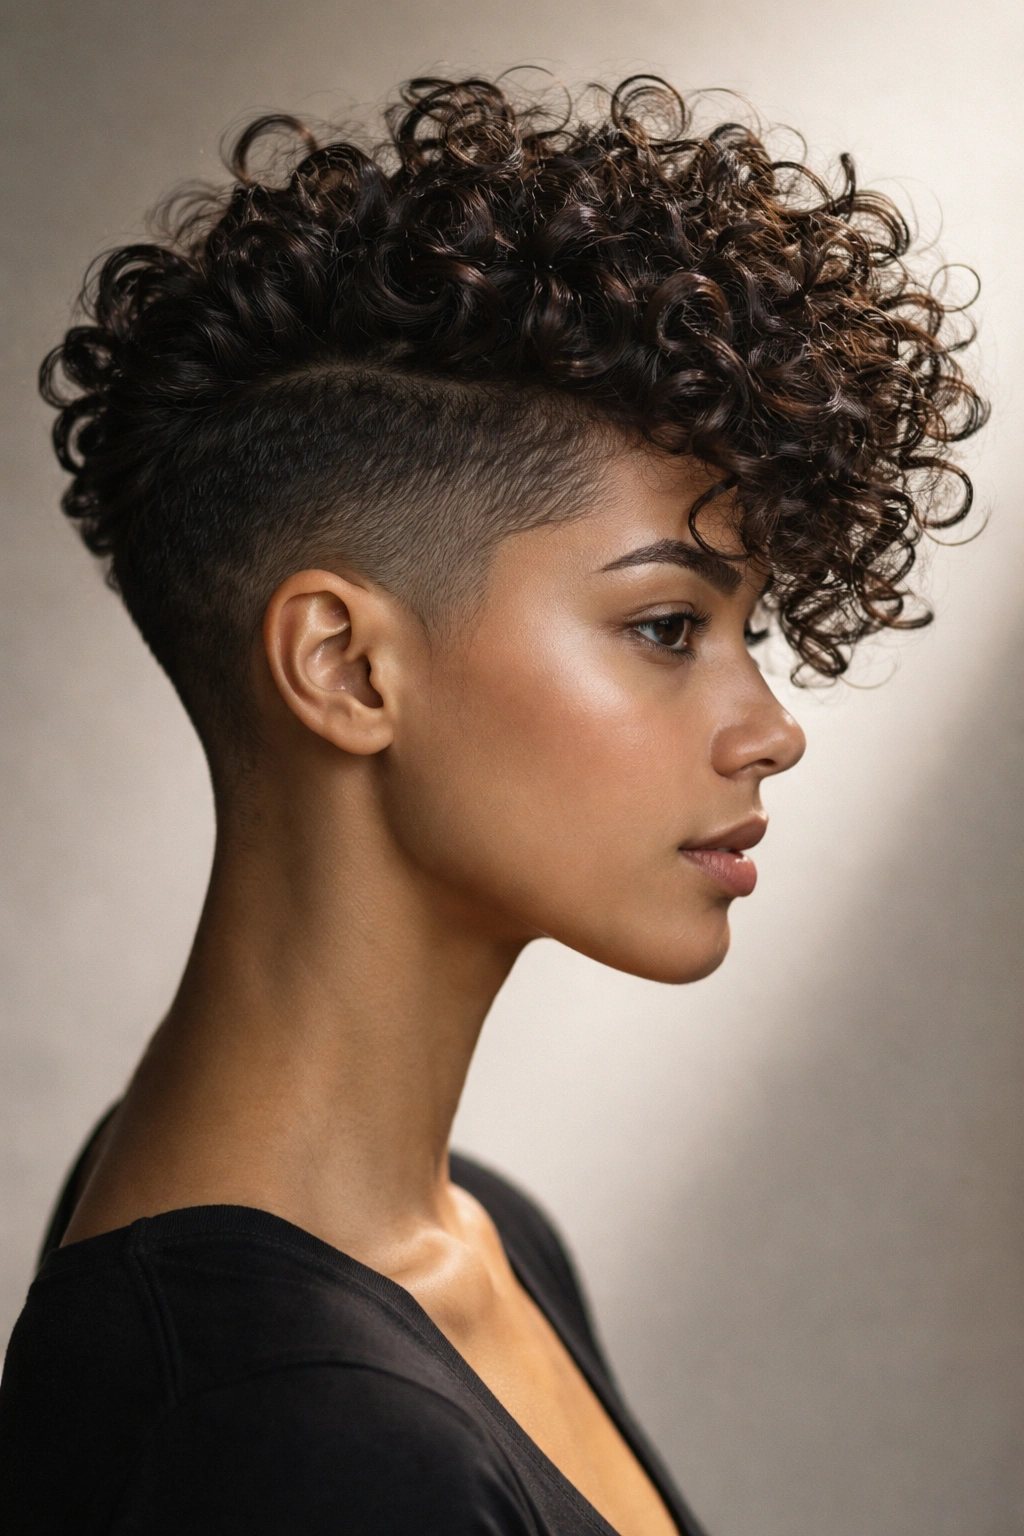
This architectural cut features an undercut on the sides and back—meaning the hair is cut extremely close to the scalp, sometimes with clippers—while leaving significant length and volume on top. The contrast is dramatic and fashion-forward. The longer curls on top fall over the undercut, creating an almost sculptural effect where your curl pattern becomes the art piece.
Why It’s So Striking
An undercut creates an illusion of even more volume on top because it removes visual weight from the sides. For curly hair, this means your coils and waves appear fuller, more defined, and more prominent. It’s a cut that makes a statement and works especially well for people who want their curls to be absolutely undeniable.
Best For
-
People with bold personal style who aren’t afraid to be noticed
-
Anyone with denser, tighter curl patterns that benefit from volume contrast
-
Individuals with face shapes that are complemented by visible ears and exposed sides (oval, heart, and square faces often look stunning with this cut)
-
Those who love sharp, geometric aesthetics
-
Anyone who wants a cut that photographs beautifully and reads as intentional and editorial
-
This cut requires maintenance—you’ll need a barber or stylist with clipper skills who can refresh the undercut every 2-3 weeks
-
The contrast is best maintained on clean lines, so scheduling regular touch-ups is non-negotiable
-
You need to be comfortable with being noticed and standing out
-
This style pairs better with styled curls than with completely natural, undefined texture
-
The longer top pieces need regular trims to maintain the shape, so you’re committing to visits every 5-6 weeks
Worth knowing: If you’re someone who likes to change up your styling (wearing it slicked back sometimes, down other times), the undercut works beautifully for both approaches, giving you styling flexibility that shorter pixies don’t always offer.
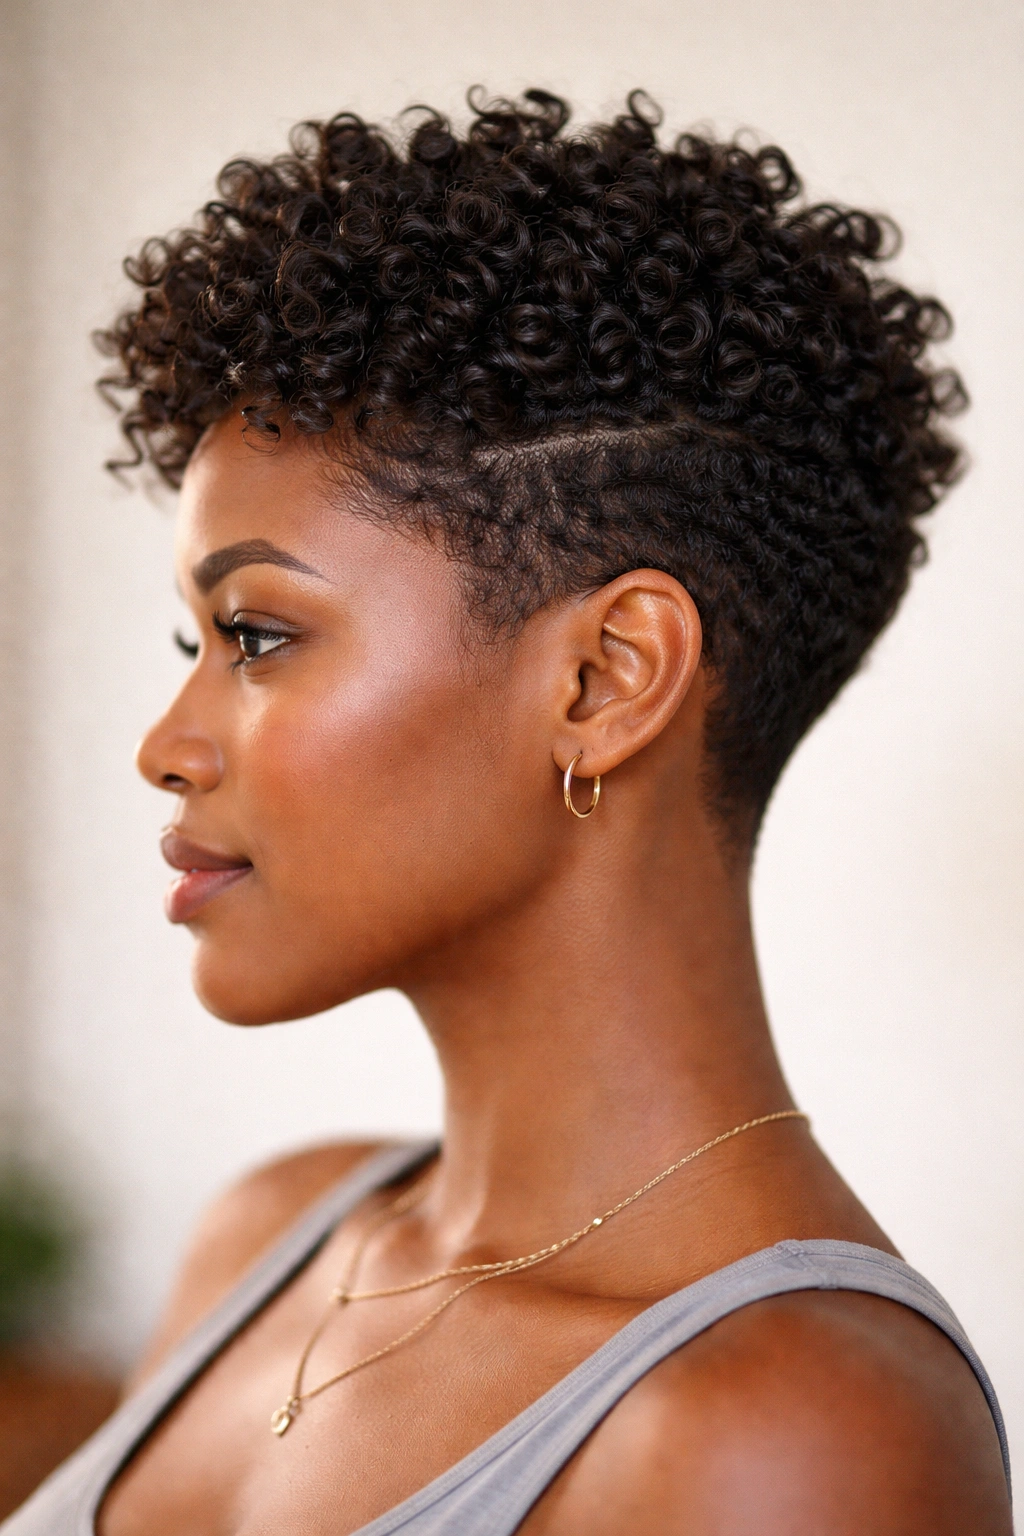
5. The Defined Curl Coil
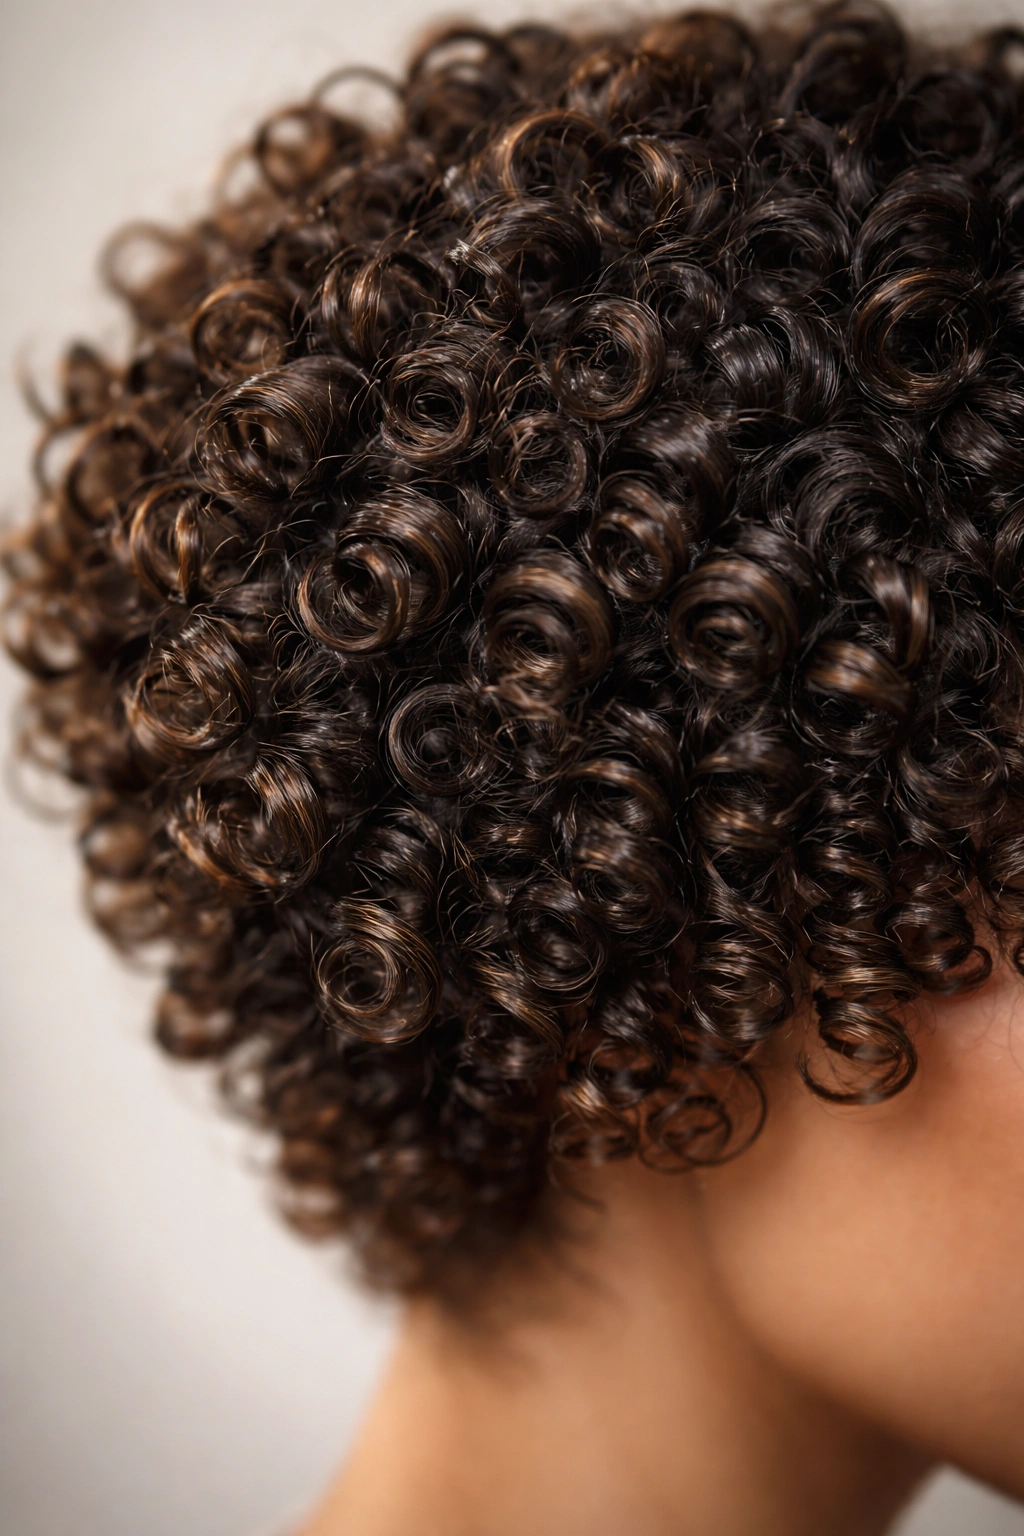
This cut is designed specifically for tight curl patterns and emphasizes individual coil definition. It’s typically cut very dry, with the stylist cutting each curl according to how it actually sits on your head. The result is a cut that works with your curl pattern rather than against it, creating a shape that holds its form through natural shrinkage and curl texture.
What Makes It Special
Rather than trying to get all your curls to behave uniformly, this cut honors the fact that different sections of your head have different curl patterns and orientations. The crown might have tighter coils, while the sides are slightly looser; this cut accounts for that. The layers are cut at varied depths specifically to enhance coil separation, making your curls look more defined and individual.
How to Cut and Style It
-
This cut must be done on dry or nearly-dry hair—wet cutting completely changes how curls sit and ruins the intended shape
-
Your stylist should be comfortable with the “twist and cut” or “coil-by-coil” technique, where each section is twisted and cut according to its individual pattern
-
Once cut, this style requires minimal manipulation—a good leave-in conditioner and maybe a lightweight gel is usually all you need
-
This is genuinely one of the closest you’ll get to a true wash-and-go pixie if your curl pattern is tight
-
The cut itself emphasizes your curls, so you don’t need heavy product to make the style work
-
You absolutely need a stylist experienced with coily/textured hair—general stylists often don’t understand the technique
-
This cut requires a longer appointment than a standard pixie, so budget extra time and often extra cost
-
Refresh trims every 4-6 weeks keep the definition crisp and prevent the coils from blending back together
-
While this cut is lower-maintenance for daily styling, the salon care is more specialized and specific
Pro tip: When you get this cut, ask your stylist for a detailed breakdown of their product recommendations specifically for your curl pattern. What works for 4A coils might not work the same way for 4B or 4C, and your stylist’s knowledge of your specific hair will be invaluable.
6. The Choppy Layers Pixie
This cut is all about creating texture through intentional choppiness. Rather than smooth blending, layers are cut at angles that create visible lines and separations throughout the cut. It’s edgy, modern, and works beautifully on curly hair because the choppiness amplifies the natural texture and creates a piecey, deliberate look.
What Makes It Work on Curls
Straight hair sometimes looks too blunt or harsh with choppy layers, but curls naturally soften and blend choppy edges. The result is a cut that looks intentional and styled without needing to blow-dry or straighten your hair. The layers catch light differently, creating dimension and movement that reads as intentional and high-fashion.
Key Details
-
The layering should be done on dry or damp curls, not soaking wet, so the stylist can see how the chop actually sits when your hair is at its normal moisture
-
Choppy layers work best when combined with some texturizing or point-cutting to avoid a blocky, helmet-like appearance
-
This cut pairs beautifully with curl-defining products that emphasize the piece-y texture
-
Wearing your curls with some separation (rather than blended together) showcases the choppy layers best
-
This style reads as effortlessly cool and works for basically any face shape, though it’s particularly flattering on round or fuller faces where the layers create definition
-
Maintaining the sharp, choppy lines requires trims every 4-5 weeks
-
This cut needs some styling intention—it rarely looks as good without at least a curl cream or light gel applied
-
If you prefer a more cohesive, blended look, this might feel too broken-up for your taste
-
This style shows root growth and new growth more visibly, so you’ll want to stay on top of color refresh if you’re coloring your hair
Insider note: The best styling hack for choppy layers is to apply your product using the “rake and shake” method—rake your fingers through while your curls are still wet, then let them air-dry or diffuse. This emphasizes the separated, piece-y quality and makes the choppy cut shine.
7. The Curved Fringe Pixie
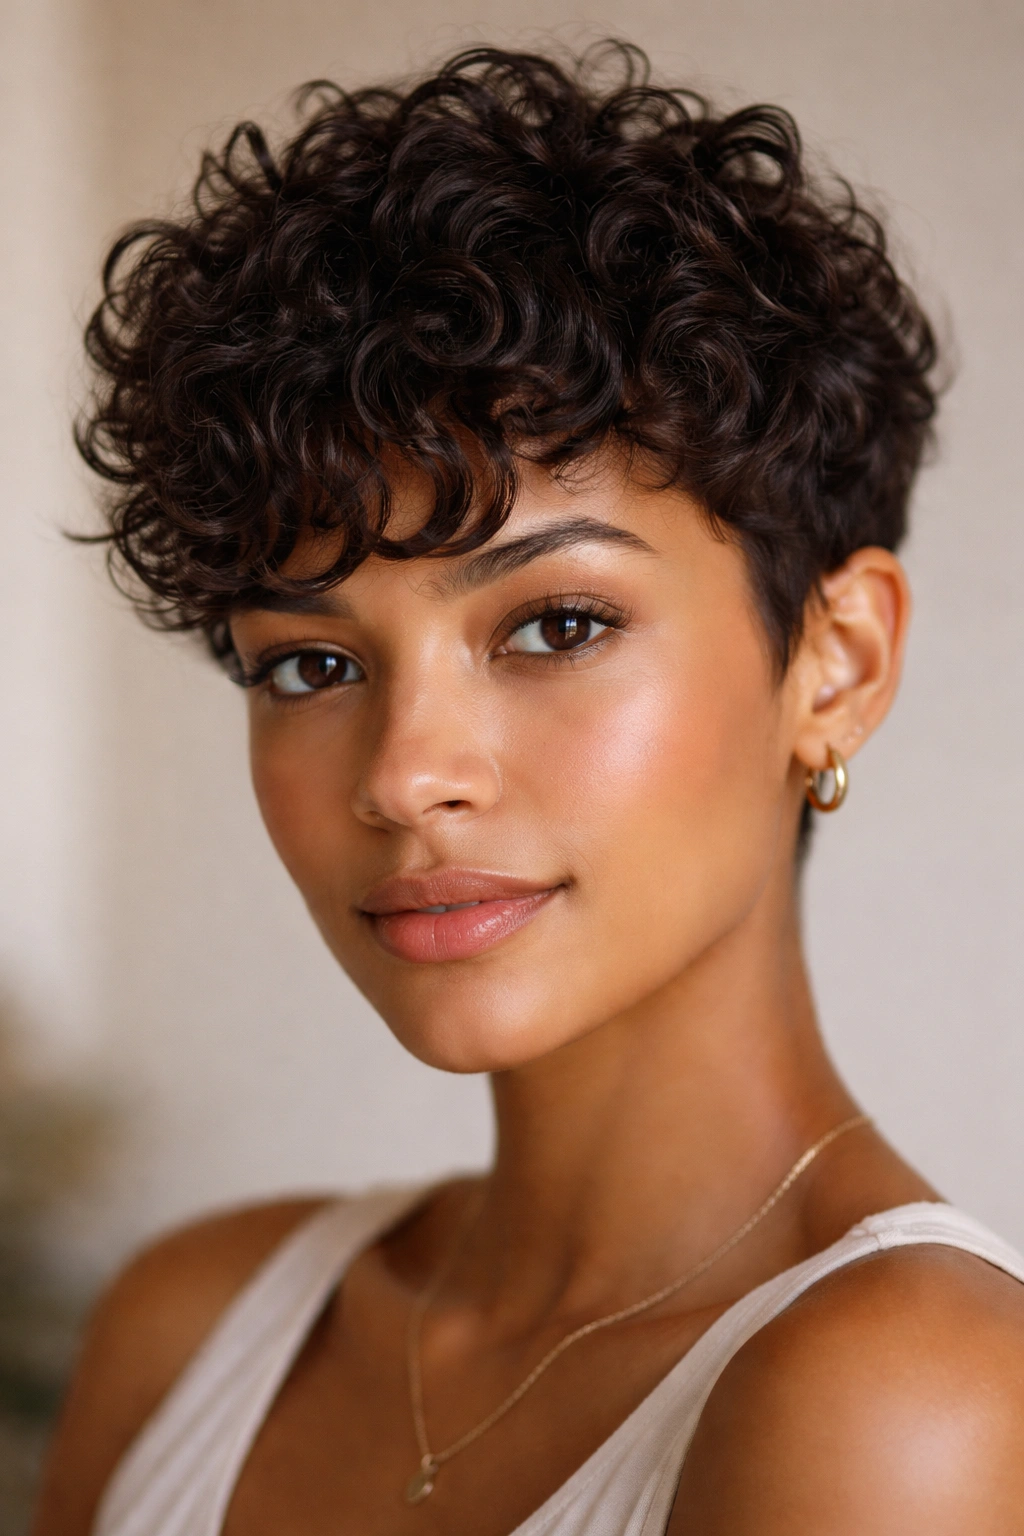
This style takes a classic pixie and adds a curved, curved-outward fringe that frames the face. Rather than a traditional blunt fringe that hangs straight down, this fringe curves gently away from the face, following the natural curve of the forehead. It’s feminine, softening, and particularly flattering for people who want a pixie but are nervous about the cut looking too severe.
Why the Curved Fringe Changes Everything
A curved fringe creates softness and movement that a straight fringe doesn’t. It frames the eyes and cheekbones beautifully and works with curly hair’s natural texture rather than fighting it. The curve means your curls can sit naturally without needing to be styled into a specific shape, and it still reads as intentional and polished.
Best For
-
Anyone who loves the pixie silhouette but worries a straight fringe would be too harsh or masculine-leaning
-
People with round, square, or heart-shaped faces where a curved line is particularly flattering
-
Those who want a pixie that still feels soft and feminine
-
Anyone with a shorter forehead or larger forehead who wants to create visual balance
-
People with looser to medium curl patterns who want their curls to frame the face
-
The curved fringe requires regular trims—every 2-3 weeks—to maintain its shape and curve
-
You need a stylist who understands how to cut a curved fringe on curly hair; it’s trickier than it sounds
-
If you ever want to style your hair back or slicked, a prominent fringe limits those options
-
The curved fringe can get in your eyes as it grows out between trims, which some people find annoying
-
This fringe shows new growth and texture changes more visibly than a longer pixie would
Worth knowing: If you love this style but are nervous about commitment, ask your stylist to cut the fringe slightly longer initially—you can always go shorter once you see how it feels and how your specific curl pattern interacts with the fringe placement.
8. The Twist-Out Ready Cut
Designed specifically to work beautifully with twist-outs and braid-outs, this cut features strategic layering and tapering that enhances the texture you get from protective styling. The sides and back are cut shorter and tapered, while the crown and top have slightly more length and layers to really showcase the twist-out texture. It’s for someone who loves versatility and wants their pixie to work with their protective styling routine.
What Makes It Special
This cut bridges the gap between a shaped pixie and the ability to wear protective styles. You get the low-maintenance benefit of a short cut without sacrificing the styling versatility that comes from longer protective styles. After you take down your twists, the cut has enough dimension and length to let each twisted section show beautifully.
How It Works
-
The cut is done on natural, unmanipulated hair—not stretched or wet—so the stylist can see your actual texture and curl pattern
-
Layers are positioned to enhance rather than disrupt the definition you get from twist-outs
-
The sides stay shorter than the crown, creating a shape that works whether you’re wearing it as a pixie or as a styled-out twist-out
-
This style is genuinely versatile—you can wear it as a short pixie one week and undo twists for a fuller, more dramatic look the next
-
The cut usually requires minimal product styling when you’re wearing it as a pixie, but adds nice dimension when you’ve styled it with twists
-
You need a stylist who understands protective styling and how different styles interact with layering
-
Regular trims every 5-6 weeks keep the layers defined and prevent the cut from getting too full
-
This requires some styling knowledge and comfort with protective styling techniques to look its best
-
The transition between “pixie mode” and “twisted mode” takes some practice to get looking intentional rather than between-styles
Pro tip: Before you get this cut, wear your favorite protective style (twists, braids, coils) and take a photo of how it looks a week in when it’s fully settled. Show this to your stylist so they understand the specific texture and definition you’re going for.
9. The Elongated Crown Pixie
If you love the pixie silhouette but worry it might make your face or head look shorter, the elongated crown pixie is the answer. This style keeps the sides and back quite short while leaving noticeably more length in the crown area—sometimes 3-4 inches compared to a half-inch on the sides. The longer crown creates a vertical line that elongates the face and head, creating a more dramatic, fashion-forward statement.
Why the Elongation Works
The longer crown creates a visual column that’s flattering for round face shapes and anyone concerned about a pixie making them look broader or shorter. It maintains the low-maintenance appeal of a pixie while adding height and proportion that a standard pixie doesn’t always offer. It’s also incredibly striking and editorial-looking.
Best For
-
Anyone with a round or wider face shape who wants a pixie but needs more vertical proportion
-
People who like making fashion statements and don’t mind standing out
-
Those with denser curl patterns that benefit from concentrated volume in one area
-
Anyone who wants a pixie with more styling versatility—the longer crown gives you styling options
-
People who like the idea of a pixie but are hesitant about how short a standard version might feel
-
This is a more dramatic, noticeable cut—you’ll definitely get attention and compliments
-
The longer crown means more layers and more styling attention to look its best
-
Regular trims every 5-6 weeks keep the shape defined and prevent it from looking overgrown
-
You need confidence in your personal style to carry off this bolder version
-
The contrast between the short sides and longer crown is very specific and requires a skilled stylist
Insider note: This cut pairs beautifully with some styling intention. A curl cream that gives some shine and definition, or a lightweight gel applied with the rake method, makes the crown curls really pop against the shorter sides.
10. The Sculpted Curl Pattern Pixie
This is the “all about your curls” cut—designed to make your specific, individual curl pattern the absolute star. Rather than forcing your curls into a specific shape, this cut works with your hair’s natural tendencies, enhancing curl definition and making each curl feel seen and valued. It’s deeply personalized and requires a stylist who truly understands curly-hair cutting technique.
What Makes It Unique
Instead of creating a specific silhouette and fitting your curls into it, this approach does the opposite. The stylist studies your curl pattern, sees where curls naturally fall, and cuts in a way that enhances that natural geography. The result is a cut that looks like it was made just for you—because it was.
Key Details
-
This cut requires a stylist with advanced curly-hair training, often someone who specializes in curly cuts exclusively
-
The cut is done on natural, dry (or nearly-dry) hair so the stylist can see your real curl pattern without any manipulation
-
Expect a longer appointment—this type of personalized cutting takes time and attention
-
The cut should be discussed extensively before any cutting happens; your stylist should ask about your daily routine, styling preferences, and climate you live in
-
This cut is truly one of the closest to a wash-and-go for many people because it’s designed around your hair’s natural behavior
-
This level of customization usually costs more than a standard pixie cut
-
Finding a stylist trained in this specific approach takes research and sometimes traveling to find the right person
-
While the maintenance is lower than more heavily styled pixies, regular trims every 6-8 weeks keep it looking fresh
-
Results depend heavily on the stylist’s experience and skill level—this isn’t a cut that works well if your stylist doesn’t have proper training
Worth knowing: After getting this cut, pay attention to how your curls behave over the next week or two. Your stylist should follow up with you and be willing to make minor adjustments if the cut isn’t quite right once you’ve styled it at home a few times. This is true partnership cutting.
Final Thoughts
Choosing the right short curly pixie cut comes down to matching the cut to your curl pattern, your lifestyle, and your styling comfort level. A style that looks incredible on someone with tight coils might need serious adaptation for looser waves, and vice versa. That’s not a limitation—it’s just the reality of working with natural texture, and it’s actually one of the beautiful things about curly pixies. They’re deeply personal.
The common thread through all these styles is that the best short curly pixie cuts work with your curls, not against them. They’re designed by stylists who understand that your hair’s natural texture is an asset, not a problem to solve. When you find that approach—and find a stylist who genuinely understands your curl pattern—you get a cut that looks effortlessly put-together, celebrates who you are, and actually fits into your real life instead of demanding hours of daily styling.
Start by identifying which cuts resonate with you aesthetically. Then research stylists in your area who specialize in curly cutting, look at their portfolios for similar curl patterns to yours, and don’t hesitate to ask questions about their technique and experience. Your pixie cut is an investment in your confidence and your daily routine—it’s worth taking time to get it right.