Finding the perfect hairstyle for an event is harder than it looks. You want to feel polished and put-together, but you don’t want to look like you’ve spent three hours perfecting your look or need a hairspray shield to survive a breeze. The sweet spot is that effortless-yet-elevated aesthetic — a hairstyle that reads as intentional and special without feeling stiff, fussy, or overdone. These are the looks that make you feel confident and beautiful while still letting you move, talk, and actually enjoy the event without constantly checking your reflection.
The best part? Almost all of these hairstyles work across different hair types, lengths, and textures. Whether you have naturally straight hair, waves, curls, or coils, there’s genuine flexibility in how you can interpret and customize these styles. They’re also forgiving — if a piece comes loose mid-event, it actually adds to the relaxed, just-stepped-out-of-a-salon vibe rather than ruining the look. You’re not going for perfect. You’re going for intentionally imperfect.
What separates a fancy-but-relaxed hairstyle from either an overly casual mess or a stiff, formal style is understanding the balance between texture and control. A little bit of controlled texture, a strategic tucking or pinning in just the right places, and intentionally undone elements create the magic. The hairstyles below all share this quality — they look like you could have just thrown them together, even though they’re actually a thoughtful composition. Let’s walk through twelve foolproof options that work for everything from casual dinner parties to more formal celebrations.
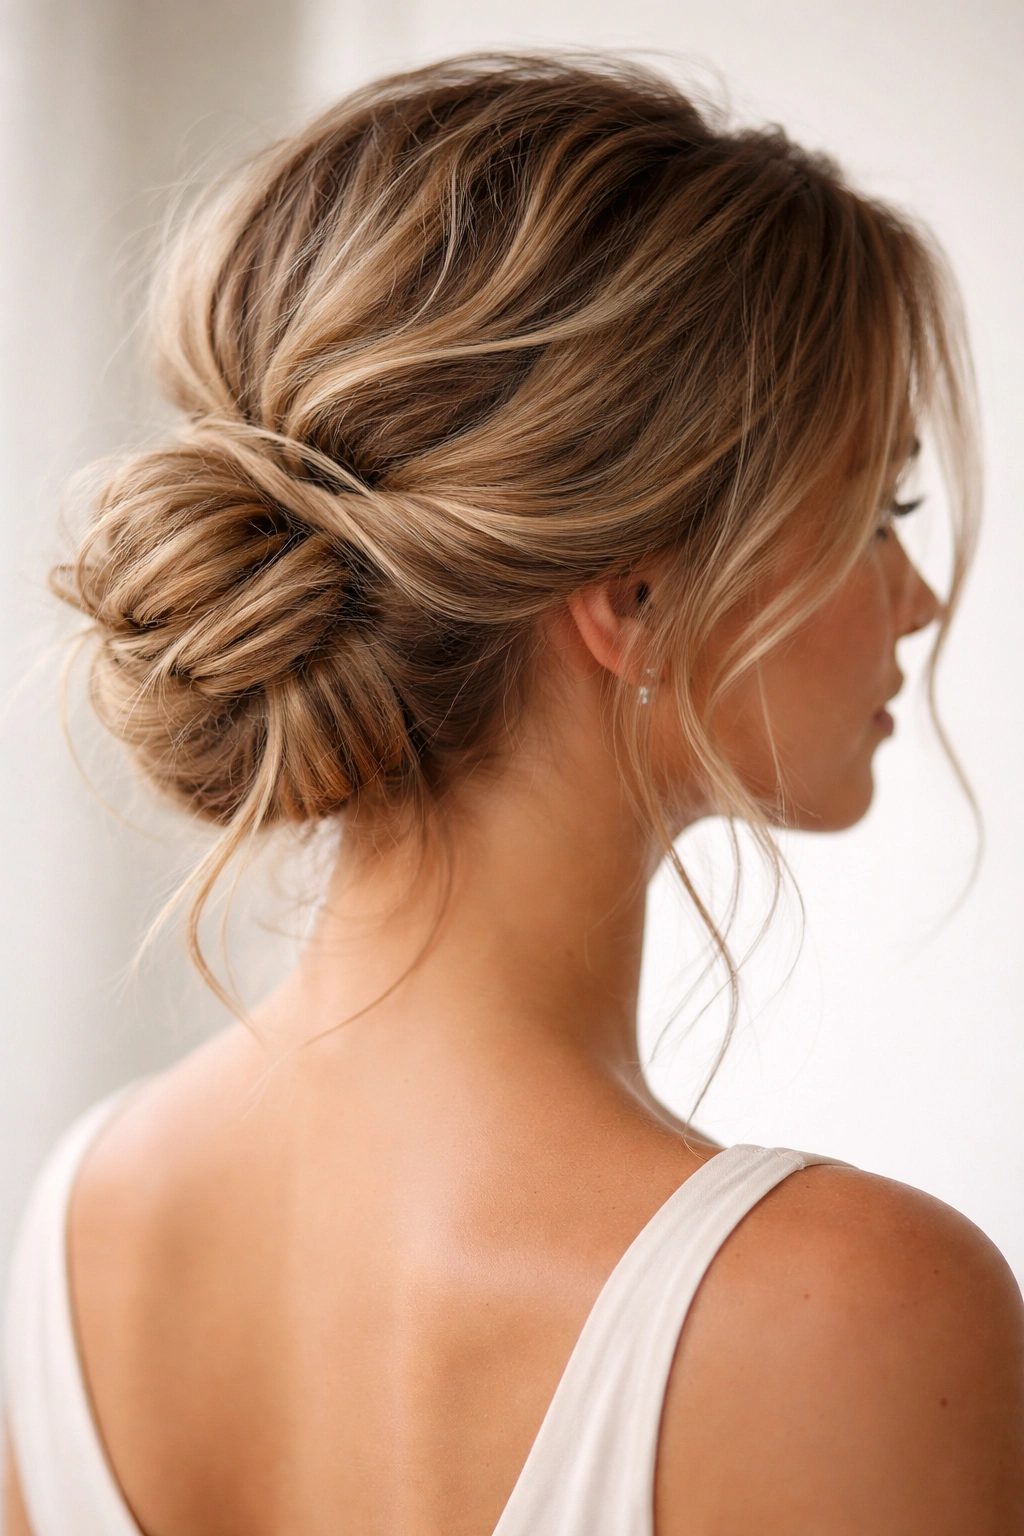
1. The Textured Low Bun
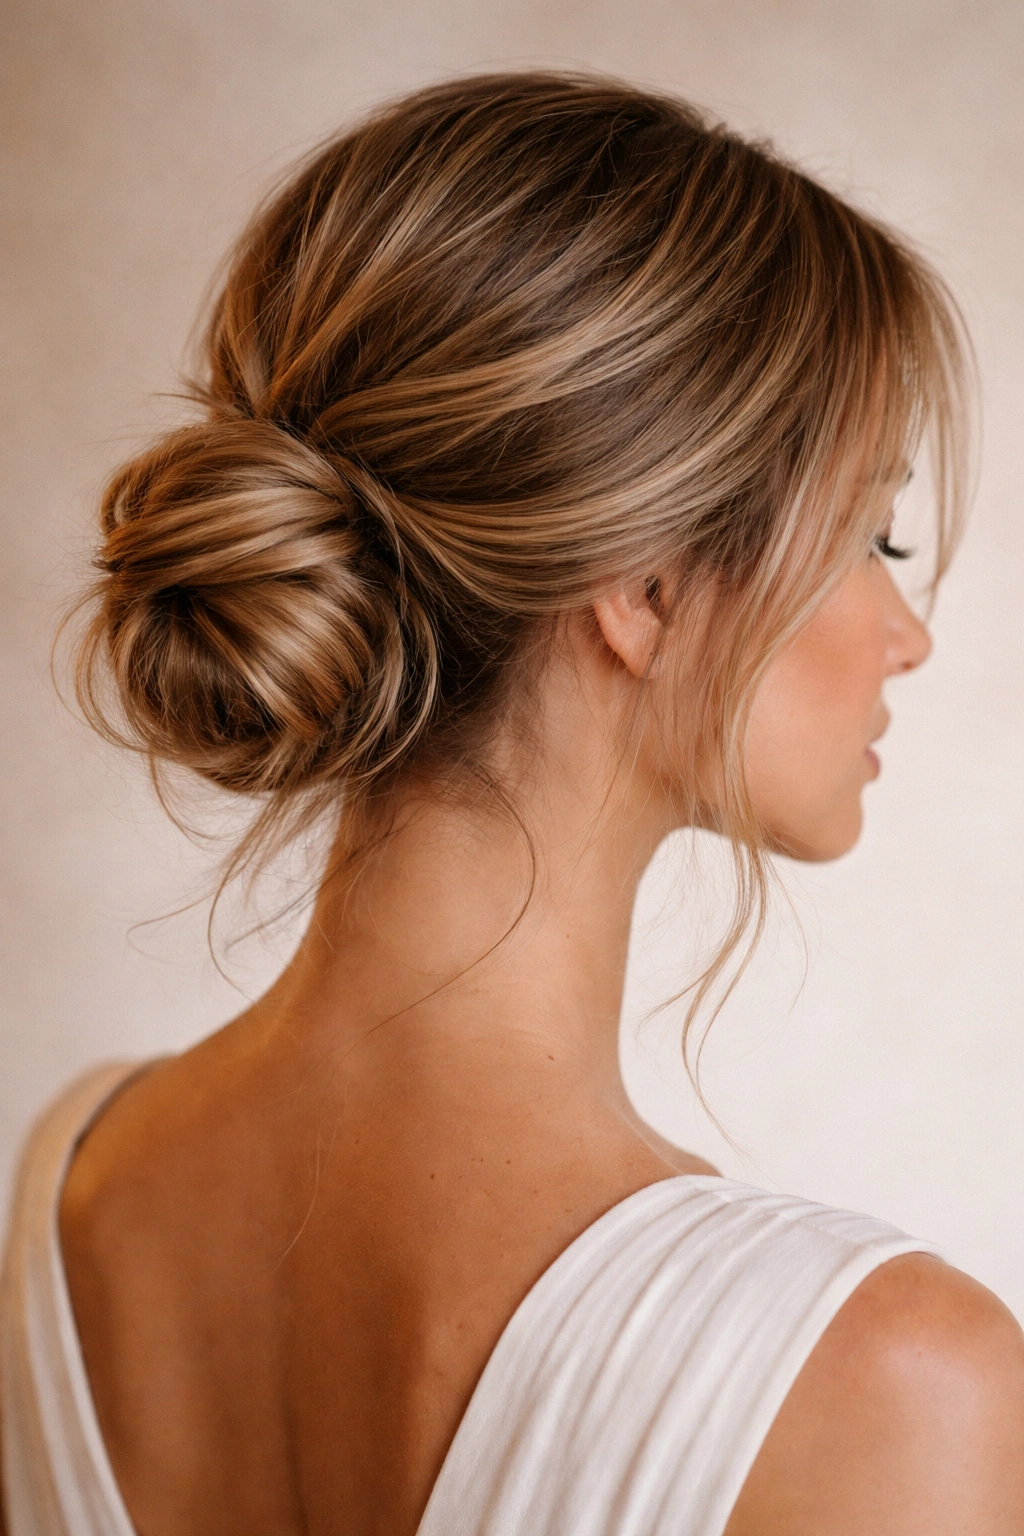
This is the most reliably elegant hairstyle you can create with minimal effort. The key to making a low bun feel fancy instead of like you just rolled out of bed is adding intentional texture and leaving a few pieces loose around the face and nape. You’re not creating a tight, rigid bun — you’re creating one that looks like your hair naturally fell into this shape.
Why It Works for Events
A low bun automatically reads as more formal than wearing your hair down, which makes it feel dressy for any occasion. At the same time, the texture and loose pieces keep it from looking overly polished or severe. This hairstyle is especially forgiving because any small imperfections actually enhance the relaxed vibe. If a few pieces escape, you’ve just made it look even more intentional.
How to Create It
- Start with hair that has texture — either naturally wavy, waved with a curling iron, or crimped subtly for grip
- Create a low ponytail at the nape of your neck (not super tight; you want it to feel relaxed)
- Twist or loosely braid the ponytail, then coil it and pin it at the base
- Gently pull a few face-framing pieces from your hairline and leave them loose
- Use bobby pins that match your hair color and tuck them in so they’re invisible
- Finish with a light hairspray — just enough to keep everything in place, not so much that it looks stiff
Pro tip: If your hair is slippery or fine, tease the base of your low ponytail very lightly before coiling it. This creates grip and prevents slipping throughout the event.
2. The Undone Half-Up Knot
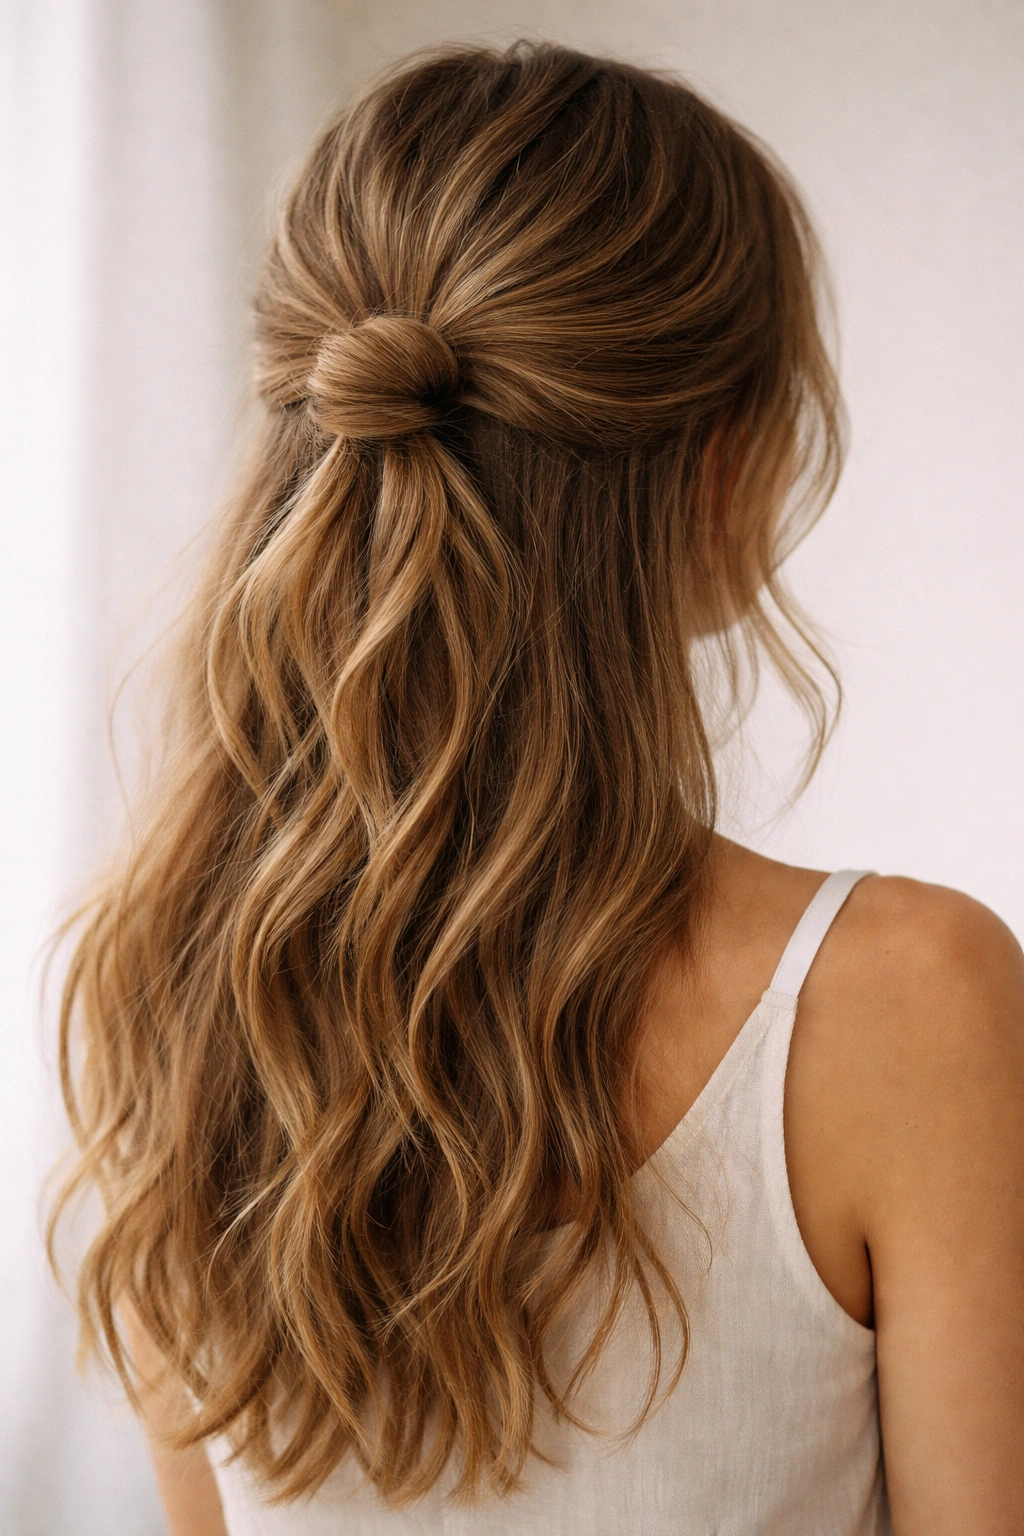
This style is essentially the bridge between casual and formal — it’s casual in construction, but elevated in how it looks. The half-up knot works beautifully because it shows off your hair while still pulling back just enough to feel intentional. It’s the hairstyle equivalent of wearing a blazer with jeans.
Why It Feels Both Polished and Easy
The magic of the half-up knot is that it can accommodate literally any hair texture and length (from shoulder-length to long), and it comes across as fashion-forward rather than basic. There’s something about a simple knot that reads as more modern and editorial than a traditional half-up style. It also keeps hair out of your face without requiring bobby pins to be visible, which feels more refined than a standard hair clip.
Steps to Get It Right
- Section off a half-up portion from ear to ear across the crown
- Twist or gently gather this section toward the back of your head — don’t make it too tight
- Tie it into a loose knot (just like you’d tie a standard knot with a rope)
- Pin the knot in place with bobby pins at the base
- Leave some face-framing layers out from your front hairline
- Gently tousle the knot so it looks soft and undone, not structured
- Let the lower half of your hair flow down with whatever natural texture it has
Worth knowing: This style actually looks better when you don’t blow-dry and style the top portion to perfection first. A little texture and movement in your half-up section reads as more contemporary than a sleek, polished version.
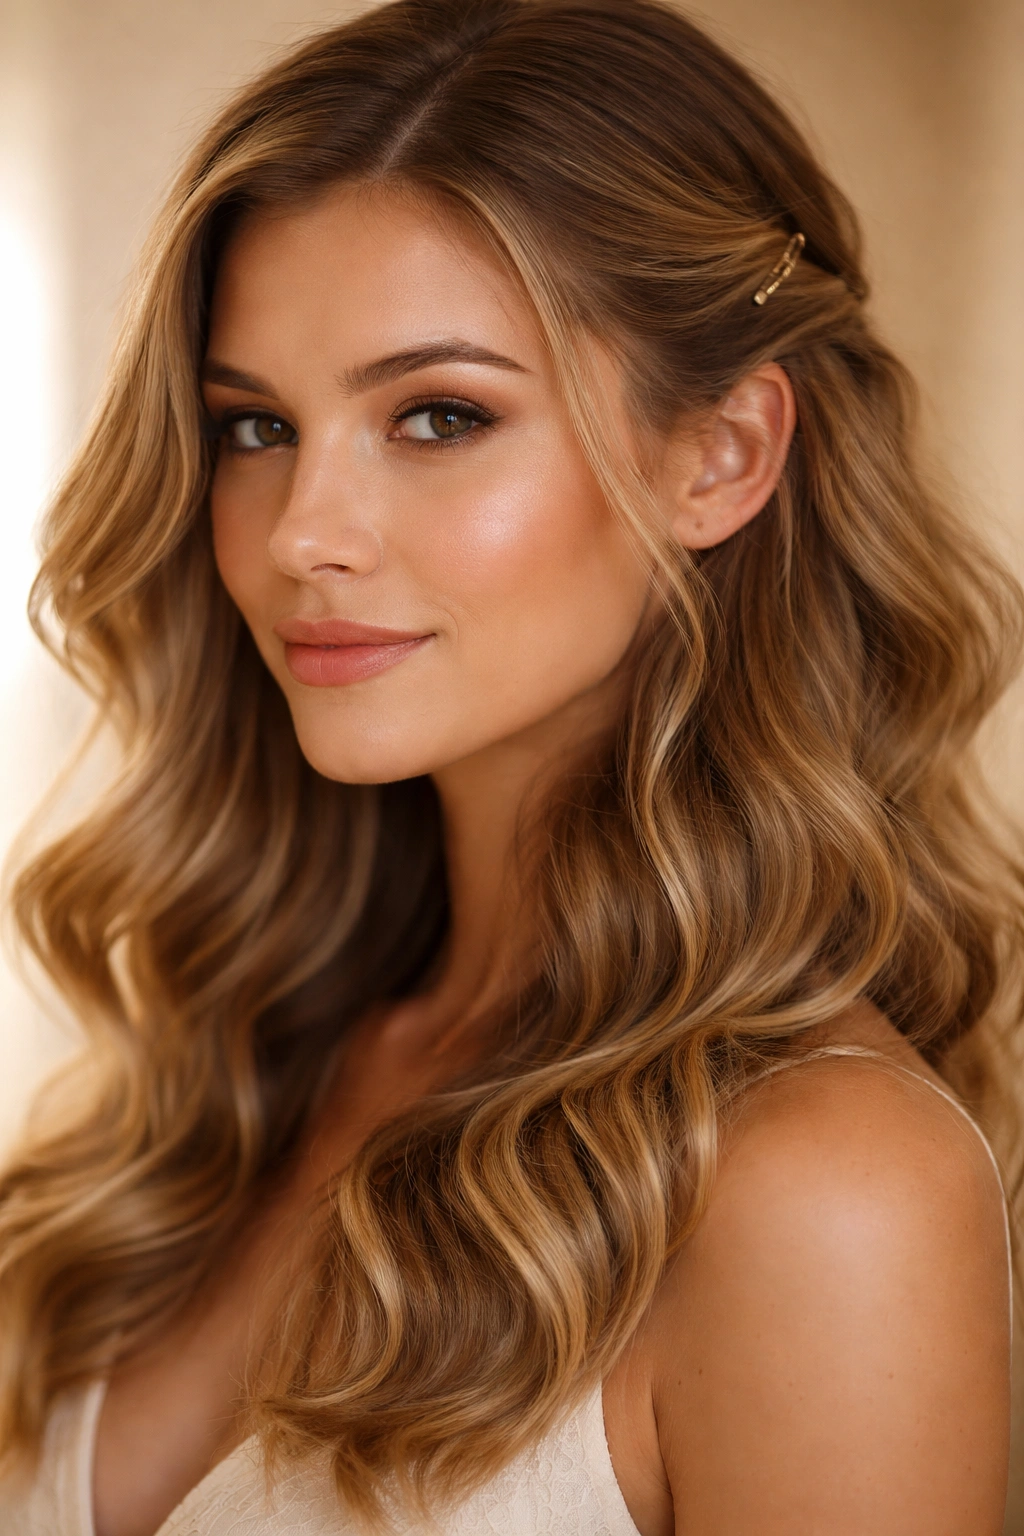
3. The Soft Waves with Face-Framing Pieces
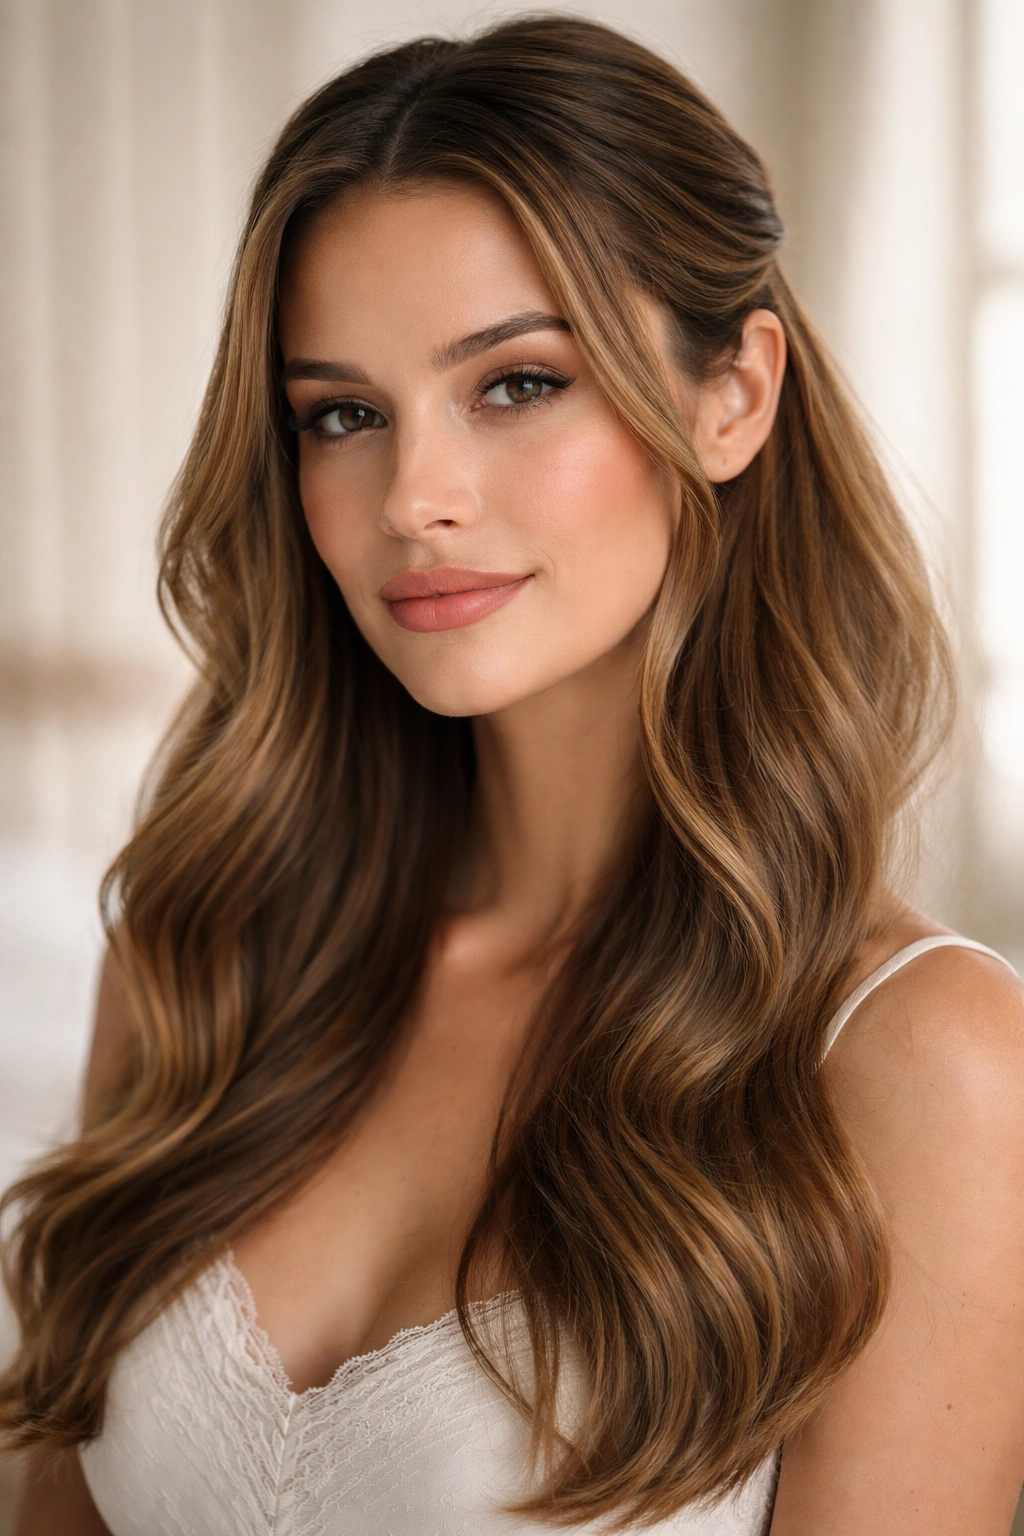
Sometimes the fanciest thing you can do is keep your hair down but add intention through waves, strategic face-framing, and subtle pins. This style works for people who want to showcase longer hair or naturally textured hair while still signaling that this is a special-occasion look.
What Makes It Feel Elevated
The difference between everyday waves and event-ready waves is in the placement and symmetry of face-framing pieces and the depth of the waves themselves. When you add one or two subtle pins behind the ears or at the crown and pull back the tiniest sections, you’re creating visual interest without actually putting your hair up. It’s the difference between walking out of the shower with natural waves and intentionally styling them for an event.
How to Build the Look
- Create soft waves throughout your hair using a curling iron, curling wand, or braiding method
- On both sides of your face, take a small section of hair (about an inch wide) and pin it back behind your ear
- This creates a subtle face-frame without looking like a full half-up style
- If your hair is very long, consider one more pin at the back of your crown on each side — this adds structure without changing the overall silhouette
- Finish with hairspray that provides hold without crunch, so your waves stay soft and moveable
Pro tip: The best waves for events are ones that were created the night before or a few hours ahead of time. They settle into a softer, more natural shape than waves you create right before the event.
4. The Deep Side Part with Volume
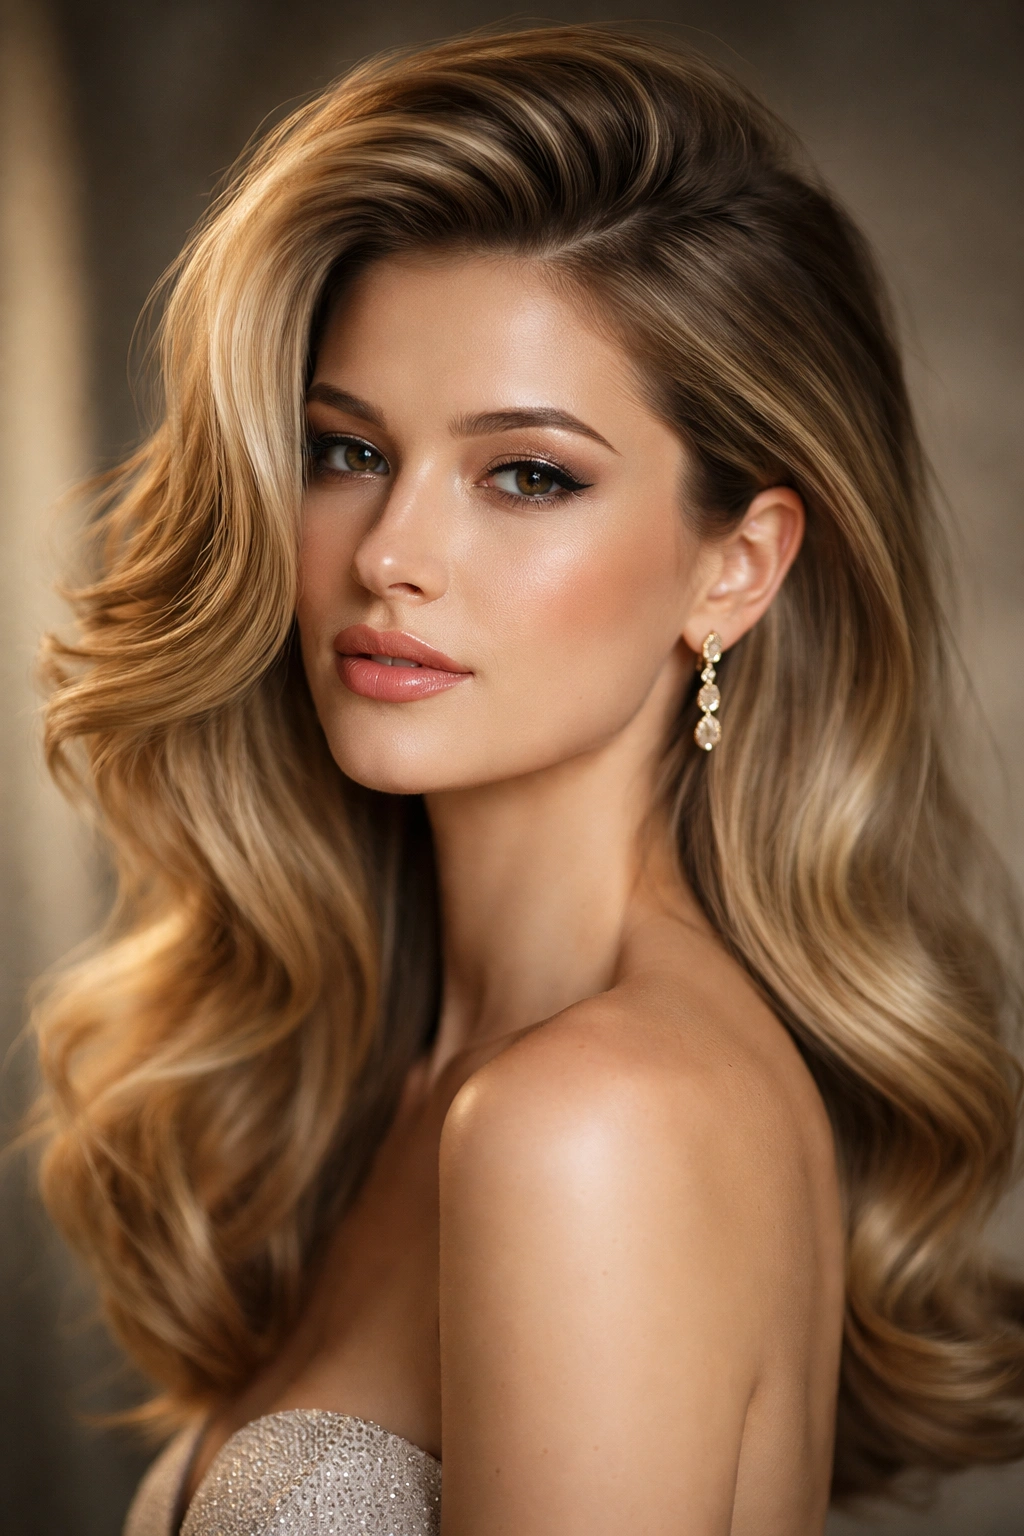
A deep side part is a tiny change that reads as surprisingly sophisticated, especially when paired with intentional volume at the crown. This is the hairstyle for someone who wants to feel fancy without actually doing much — it relies almost entirely on how you style your hair at the roots and how dramatically you shift your part from its everyday position.
Why a Side Part Changes Everything
The part of your hair you choose affects how you’re perceived, and a deep side part (much deeper than your usual) automatically reads as more deliberate and editorial. It’s a styling choice rather than just how your hair naturally falls, which signals that you’ve put thought into your look. Combined with volume at the crown, this becomes a genuinely elegant hairstyle for any event.
Creating Volume and the Perfect Part
- Blow-dry your roots at an angle, working from the side where you want your larger volume section
- Use a teasing brush to gently backcomb the crown and first few inches of your part line
- Smooth the top layer back down over the teased section — this creates volume without the look of too much texture
- Create your deep side part, starting much further to one side than you normally would (roughly from your temple or even further back)
- Let your longer side sweep across the top of your head, creating a swooping silhouette
- Pin the smaller side gently behind your ear if you want to add extra polish, or let it frame your face for a softer look
Worth knowing: This style works best when you blow-dry your hair before the event rather than trying to create the volume right before you leave. Volume created fresh lasts longer and looks more intentional.
5. The Braided Crown
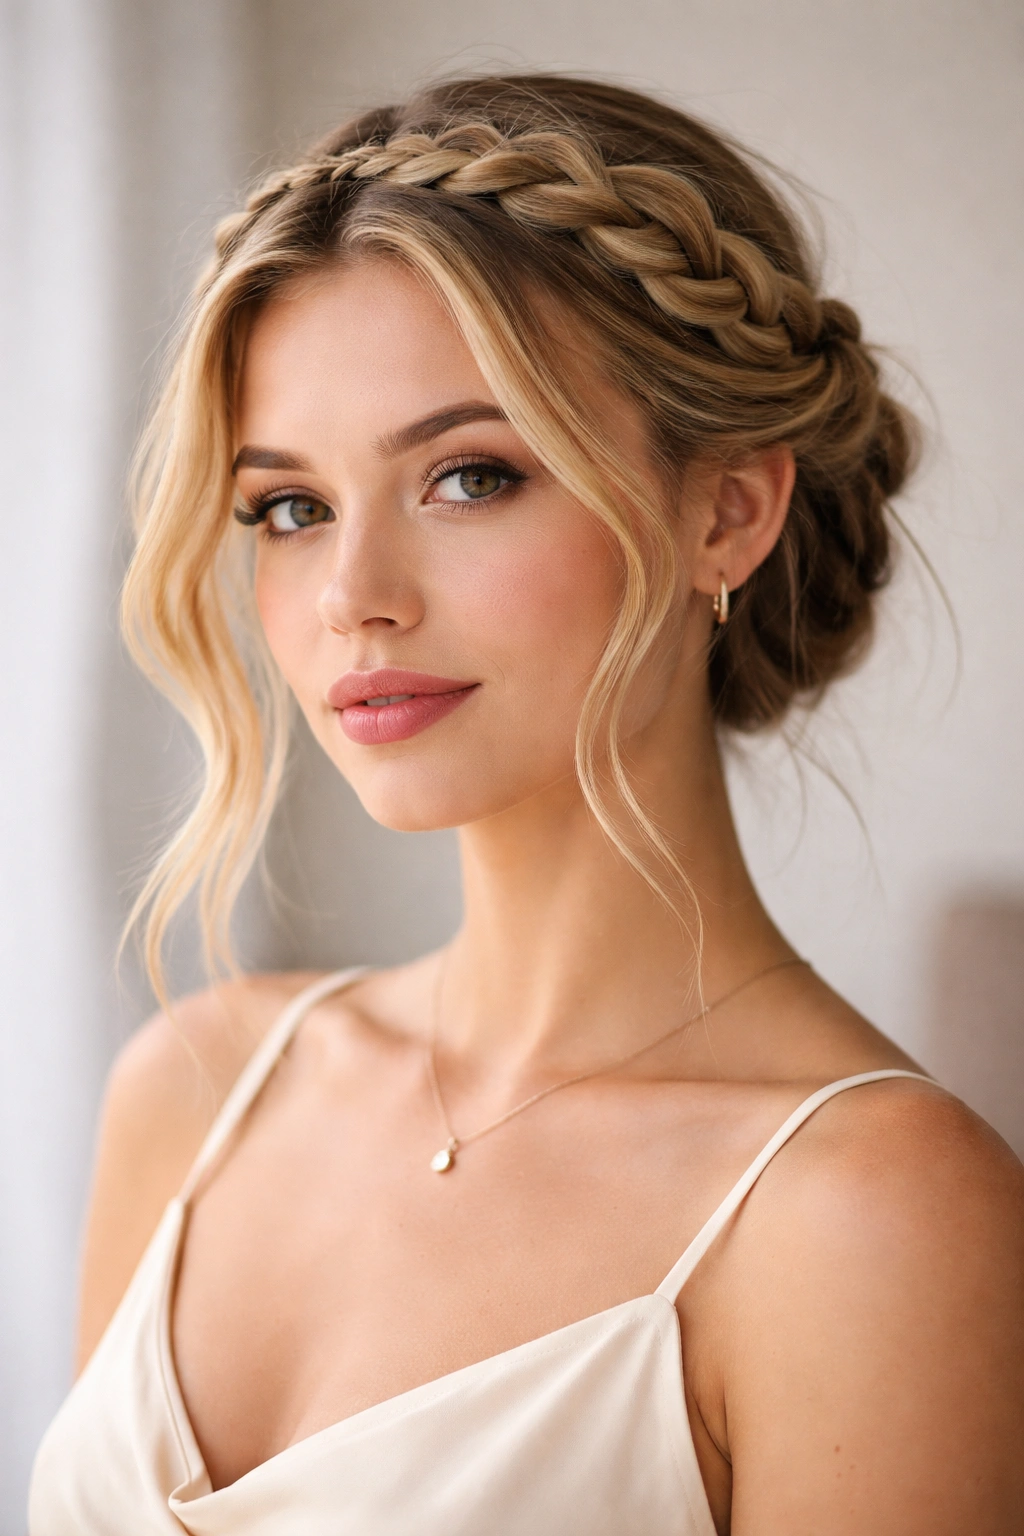
A braided crown is one of those hairstyles that looks like it took genuine skill to create, even though the construction is actually straightforward. The magic of a braided crown is that it works as a complete replacement for a tiara or headpiece — it feels formal and special without requiring any accessories.
Why Braids Feel Fancy
Braids read as more intentional and formal than loose hair, and a crown braid is literally a visual statement that frames your face and adds dimension to your overall look. It’s also forgiving — small imperfections in a braid actually add texture and visual interest. A slightly loose or undone braid feels contemporary and fresh rather than sloppy.
How to Execute It
- Start by sectioning a braid from one side of your head (just above and behind your ear)
- Braid across the back of your head in a crown shape, incorporating hair as you go
- Finish the braid on the opposite side (above and behind the opposite ear)
- Secure the end with a bobby pin and tuck it behind your ear so it’s not visible
- Leave a few small face-framing pieces loose around your hairline — this softens the overall look
- Gently pull sections of the braid slightly outward to create width and texture
- If your braid feels too neat, this is one of the few situations where you want a little undone quality
Pro tip: Dutch braids (where you braid under instead of over) read as slightly more modern and dimensional than traditional braids, and they work beautifully for events.
6. The Effortless High Pony
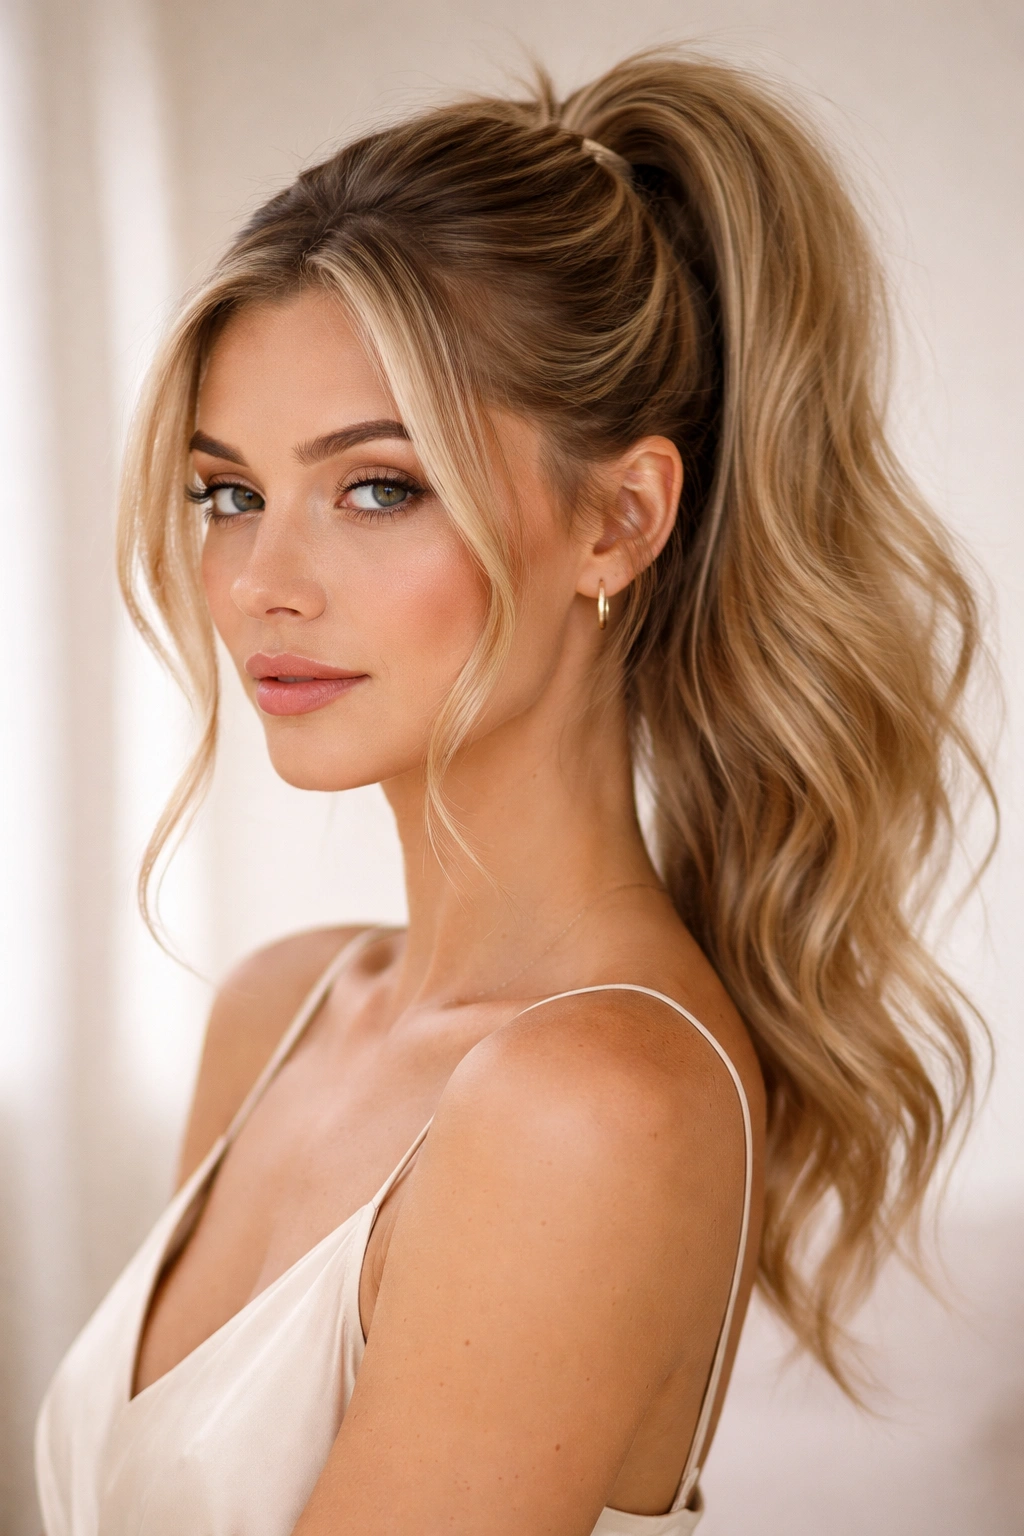
A high ponytail can feel either sporty and casual or formal and chic, depending entirely on how you construct it and what texture you build into it. The key to making a high pony feel like an event hairstyle rather than a yoga-class hairstyle is strategic looseness and intentional pieces.
What Transforms a Ponytail
The difference between a casual high pony and an elegant one is subtle but crucial. You’re not pulling hair tight to your scalp — you’re leaving it relaxed enough that you can see the shape of your head, and you’re creating intentional dimension by leaving pieces loose. This style feels modern because it’s not trying to look perfect; it’s the opposite of that slicked-back pony that reads as outdated.
Building the Look
- Gather your hair into a high ponytail, but don’t pull it extremely tight — leave about an inch of give at the scalp
- Secure it with an elastic that matches your hair color
- Take a small section from the ponytail itself and wrap it around the base of the elastic to cover it
- Pin that wrapping section underneath so it’s not visible
- Leave one or two small pieces of hair loose on each side of your face — this is essential for the relaxed vibe
- Curl or wave the ponytail itself so it has texture rather than hanging stick-straight
- You can even tease the base of your ponytail lightly to add volume and dimension
Worth knowing: The most elegant high ponies sit just slightly lower than the very top of your head — closer to where a crown would sit. This reads as more refined than a tight, pulled-straight-up placement.
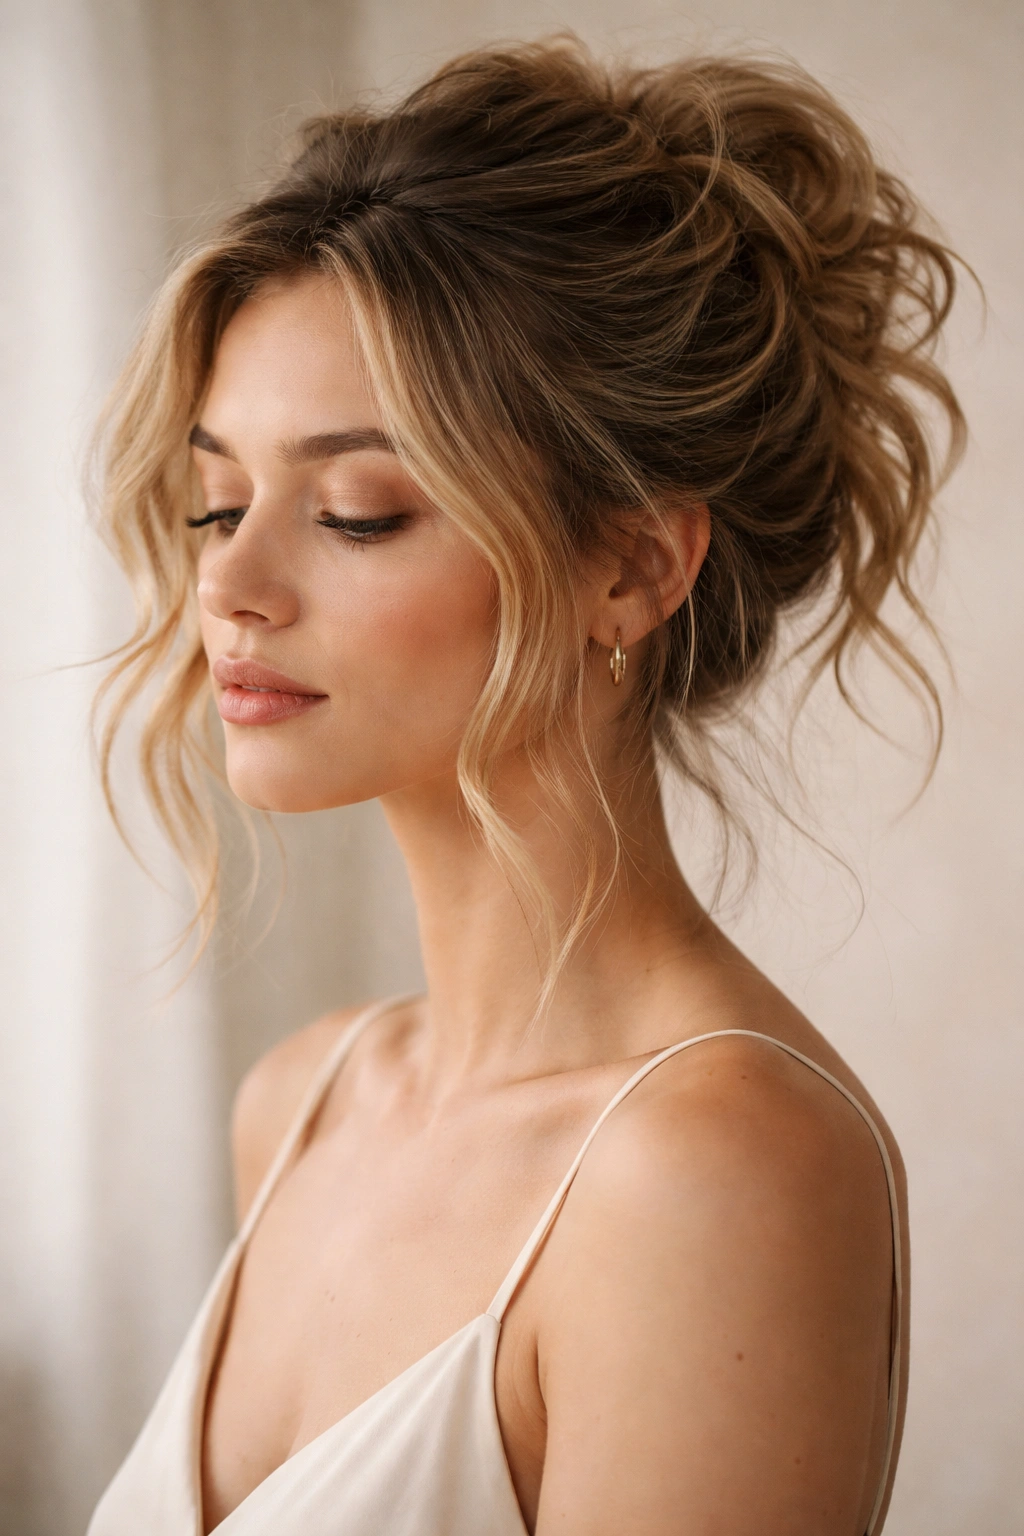
7. The Tousled Updo
An updo doesn’t have to be slicked back, structured, or formal. A tousled, lived-in updo actually reads as more contemporary and fashion-forward than a perfectly smooth one. This is the updo for someone who wants height and drama without looking overdone.
Why Texture Is Your Secret Weapon
A tousled updo works because it has visual interest and movement. Your hair isn’t all pulled back smoothly — there are pieces and texture happening throughout. This style also has the advantage of being very forgiving; if pieces come down during the event, it doesn’t ruin the look. You’re aiming for the vibe of “I did this on purpose” rather than “everything is held in place by force.”
Creating a Tousled Updo
- Start with textured hair — either from natural waves, curls, braids, or by waving your hair with a tool
- Create a low ponytail at the nape of your neck (lower than a typical updo base)
- Twist or braid the ponytail loosely
- Wrap it around itself to create a shape at the base of your neck
- Pin it in place, but don’t worry about making it completely secure and tight
- Pull out and tease sections strategically so you see strands and texture
- Leave at least two or three face-framing pieces completely loose
- Mist with light hairspray so it has hold but remains soft and moveable
Pro tip: This is one of the only hairstyles where slightly messy construction actually serves the final look. Don’t spend time making every pin invisible or every section perfectly smooth.
8. The Twisted Half-Back Style
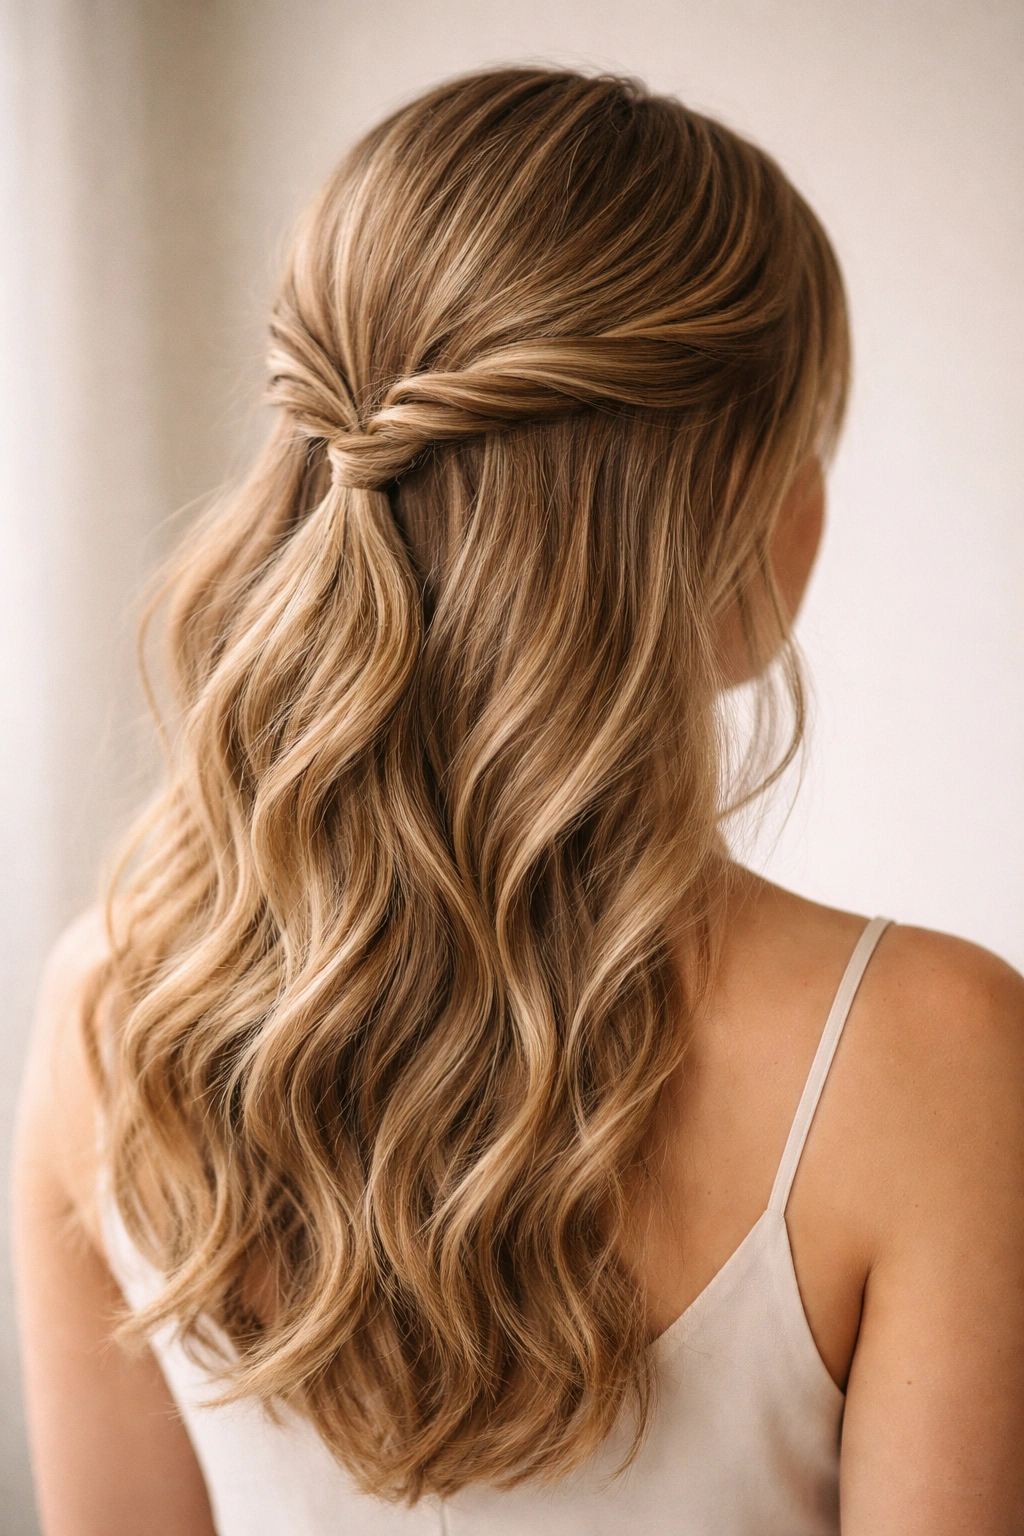
A twisted half-back is somewhere between a full updo and wearing your hair down — it’s the Goldilocks of event hairstyles. You get the elegance of pulling hair back without the commitment of a full updo, and the twists add visual interest and sophistication.
Why Twists Feel More Refined Than Clips
Rather than using a visible clip or barrette to hold back a half-up section, twists look more deliberately styled. This hairstyle works beautifully because it accommodates any hair type and length, and twists work with both straight and textured hair. The act of twisting hair itself is also more forgiving than sectioning and pinning — you can adjust the tightness and texture as you go.
How to Build It
- Take a section from one side of your head, starting near your temple
- Twist it firmly toward the back of your head (not loosely — you want the twist to hold its shape)
- As you twist, you can incorporate additional hair into the twist for a fuller look
- When you reach the back of your head, secure the twist with bobby pins that match your hair color
- Repeat on the opposite side, creating a second twist
- These two twists should meet at the back of your head or cross slightly
- Leave your face-framing pieces entirely loose, and let the rest of your hair flow down
Worth knowing: Slightly damp hair actually holds twists better than completely dry hair. If your hair is slippery, lightly mist it with water before twisting.
9. The Loose Waves with a Low Ponytail
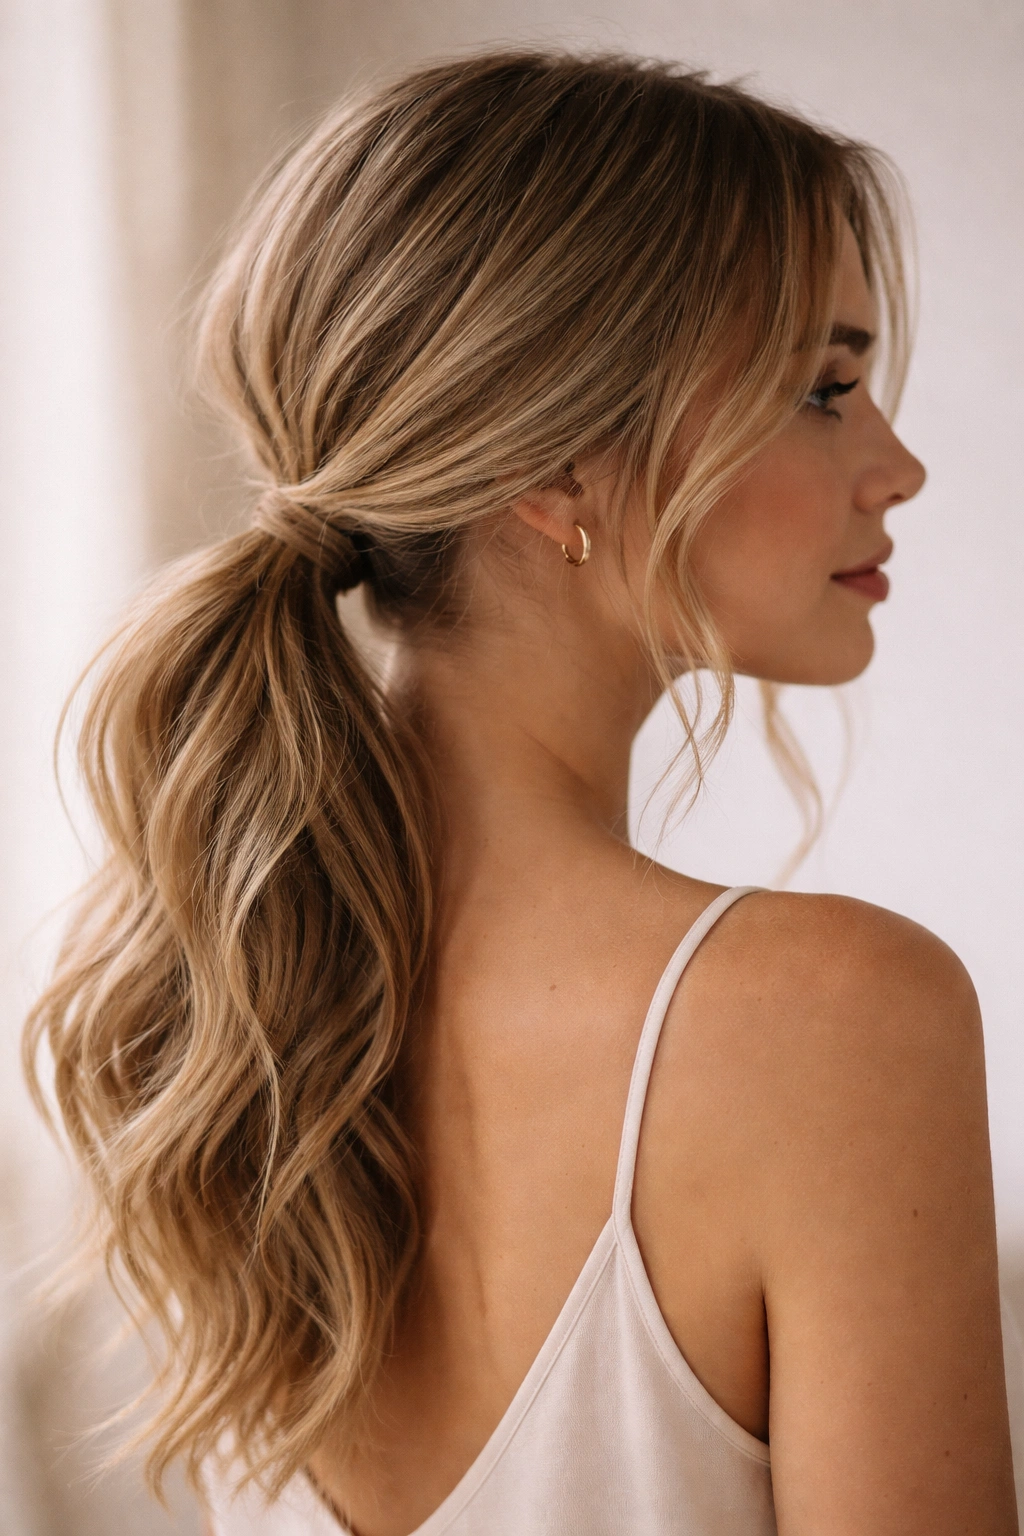
This is the intersection of “I’m ready for an event” and “I want to feel completely comfortable.” A low ponytail is practical and elegant, and when the ponytail itself has waves and movement, the whole look feels more sophisticated than a standard, straight ponytail.
Why This Works for Almost Everyone
This hairstyle is genuinely inclusive — it flatters different face shapes, works with various hair textures, and doesn’t require intense styling skills. The waves are what make it feel special and event-appropriate, while the low placement keeps it feeling relaxed. It’s the perfect choice for someone who wants to feel dressed up without anxiety about their hairstyle.
How to Create It
- Create soft waves throughout your entire head using a curling iron, wand, or heat-free method
- Let the waves settle for a bit (they’ll look better after 20 minutes or so)
- Create a low ponytail at the nape of your neck, leaving some shorter pieces at your temples completely loose
- Don’t pull the ponytail extremely tight — leave it relaxed with some give
- Gently rearrange the waves in your ponytail so they’re visible and create movement
- You can wrap a small section of the ponytail around the elastic to hide it, or leave it exposed depending on your preference
- Finish with light hairspray for hold without the stiff feeling
Pro tip: If you have layers in your hair, this hairstyle is especially flattering because the shorter pieces fall naturally into face-framing positions without you having to intentionally create them.
10. The Sleek Low Topknot
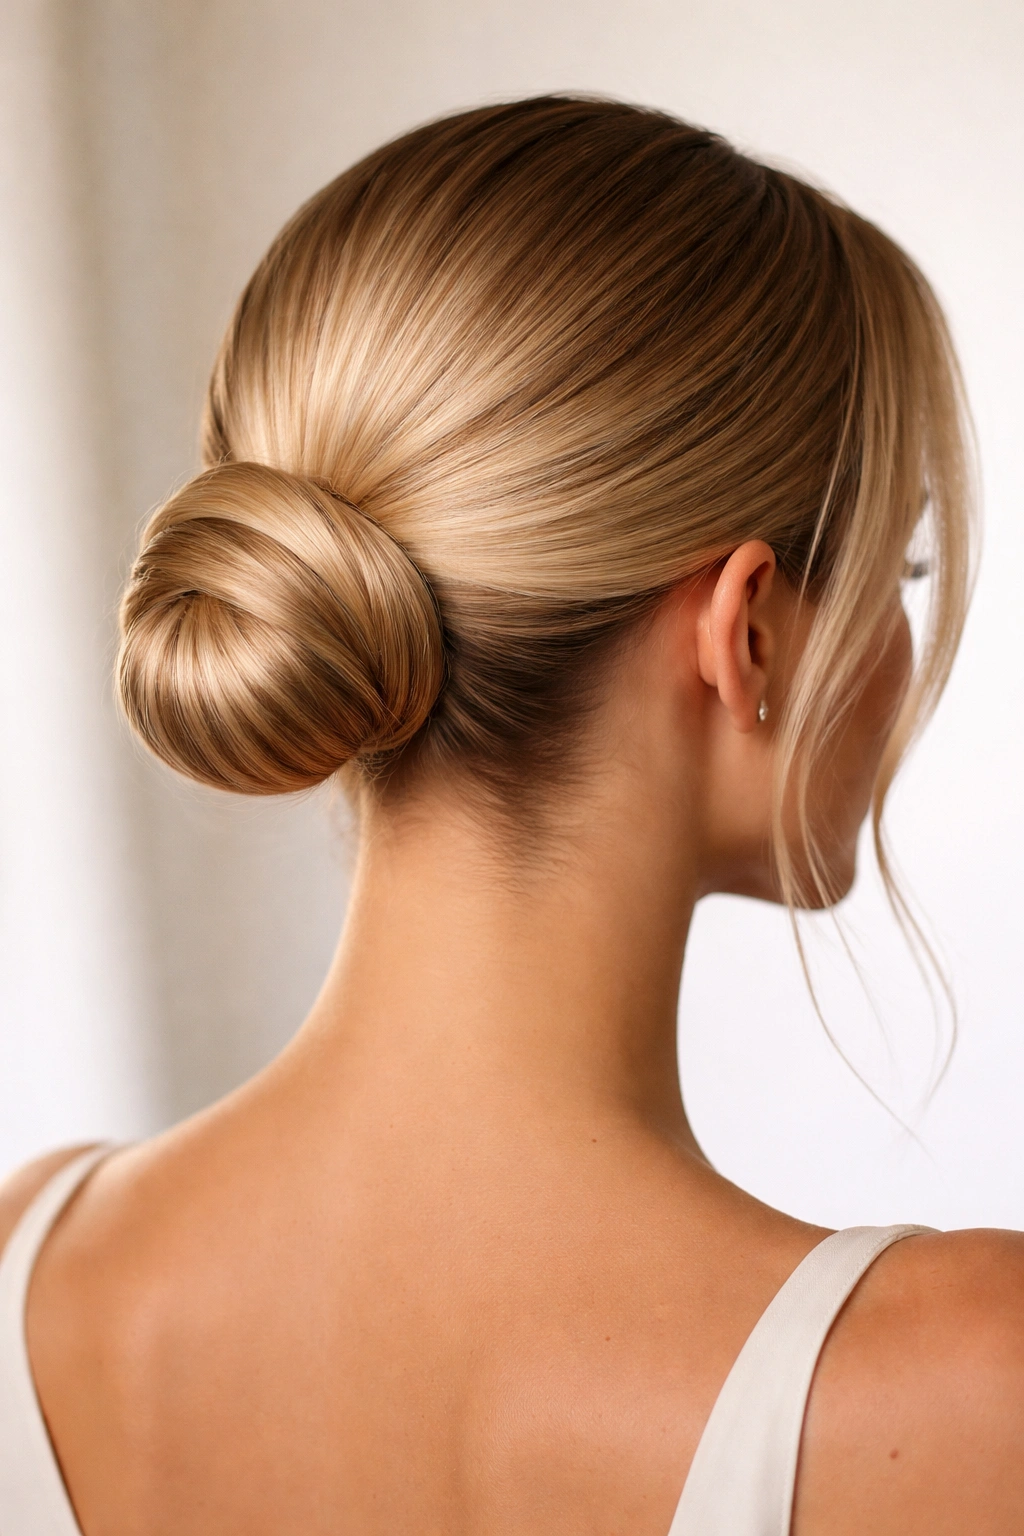
A topknot is sometimes written off as too casual, but a sleek, polished version is surprisingly elegant and modern. The key is using a clean base, smooth hair, and a thoughtful knot placement that doesn’t feel dumpy or oversized.
What Distinguishes a Formal Topknot
A sleek topknot works for events when you create it with intentionality and texture control. This isn’t a messy bun — it’s a controlled knot created from smooth hair. The placement is also crucial: you want it sitting at the very back of your crown, not directly on top. This placement is more flattering and reads as more intentionally styled.
Steps to Get a Sleek Knot
- Blow-dry your hair completely straight, or use a flat iron to smooth it
- Create a low-to-mid ponytail at the back of your crown, pulling hair back firmly but not painfully
- Twist the ponytail and coil it around the base, creating a knot shape
- Secure it thoroughly with multiple bobby pins
- Smooth any flyaways using a smoothing serum and a fine-tooth comb
- The knot itself should look sleek and controlled, not textured or undone
- Consider adding a small decorative pin or clip if you want to elevate it further
Worth knowing: This style works best when you have at least shoulder-length hair. With shorter hair, it can look too bulky. However, if you have thick hair, a sleek topknot is actually one of the most elegant options because it showcases the volume beautifully.
11. The Curled and Pinned Sides
This is a style for someone with naturally curly or coily hair, or for someone who’s willing to spend a few minutes creating curls. Rather than controlling your curls or straightening them, you’re enhancing them and strategically pinning sections back to create dimension and intentionality.
Why This Works for Textured Hair
Textured hair has natural volume and movement that straight hair requires heat tools to achieve. By enhancing your natural curl pattern and adding strategic pins, you’re creating an elegant, dimensional look that celebrates your hair’s texture rather than fighting it. This style feels modern and fashion-forward because it’s not trying to make your hair look like something it’s not.
How to Create It
- Enhance your natural curls with curl cream, curl mousse, or curl gel, scrunching the products upward into your hair
- Allow your curls to dry completely (air-dry or with a diffuser on low heat)
- Once dry, take small sections from around your temples and pin them back behind your ears
- You can also take a small section from the top of your head and pin it back at the crown
- These pinned sections create the visual of intentionality and style without changing your overall silhouette
- Leave the majority of your curls loose and flowing down and around your shoulders
- Use pins that match your hair color so they blend in
Pro tip: The pins work best when they’re actually gripping your curl pattern, so position them to follow the natural movement of your hair rather than fighting against it.
12. The Textured Lob with Tucked Back

If you have a lob (long bob) length or similar medium-length hair, you have a unique styling opportunity. You can create volume and movement through your entire length, then tuck back just a small section to signal intentionality. This style reads as both casual and put-together.
Why This Length Is Versatile for Events
A lob is long enough to create texture and waves but short enough that styling doesn’t feel like a massive production. By adding intentional texture throughout and tucking back just one or two small sections, you’re creating an elegant look that doesn’t require you to put your hair fully up. It’s modern, it’s flattering, and it feels effortless.
Building the Look
- Create waves or curls throughout your entire lob using a curling iron or wand
- For the most natural-looking waves, alternate the direction you curl each section (toward your face, away from your face)
- Once your waves are set, take a small section from one or both sides of your head
- Tuck these sections behind your ears and secure them with a single bobby pin on each side — you want them almost invisible
- The back of your lob should fall in textured, wavy layers around your shoulders
- You can enhance the texture further by gently scrunching your waves or using a texturizing spray
- Leave your face-framing pieces loose and flowing
Worth knowing: A textured lob actually looks better when it’s not perfectly symmetrical. If your waves curl differently on one side than the other, that’s intentional and modern-looking, not something you need to fix.
Final Thoughts
The common thread through all of these hairstyles is that they prioritize movement and texture over rigid control. They read as intentional and special while still allowing you to feel like yourself. None of them require an hour of preparation or a styling arsenal that rivals a professional salon. Most can be accomplished with basic tools — a curling iron, bobby pins, and a light hairspray.
The real secret to nailing a fancy-but-relaxed hairstyle is understanding that imperfection is actually your aesthetic goal. You’re not trying to create something that looks like it took zero effort (that comes across as genuinely unprepared), but you’re also not trying to create something so controlled that it looks stiff and uncomfortable. That sweet spot in the middle — where your hairstyle feels intentional but moveable, polished but not overdone — is where the actual magic happens.
When you’re choosing a style, think about what feels natural to your hair type and what you’ll feel confident wearing for an entire event. A braided crown might be perfect for one person while twisted half-backs feel more authentically “you” for another. The goal isn’t to pick the objectively most elegant option — it’s to pick the style that makes you feel both beautiful and like yourself, which is actually the most elegant thing you can do.